
Fine line eye motifs are everywhere on saved boards right now, and the gap between what trends and what lasts is wider than most people realize. Fine detail looks incredible fresh but can soften fast in high-friction spots. These 17 takes focus on design choices and placements that keep the eye readable over years, plus what to tell your artist so the symbol still reads like an intentional mark, not a blur.
1. Tiny Fine-Line Eye on the Inner Wrist
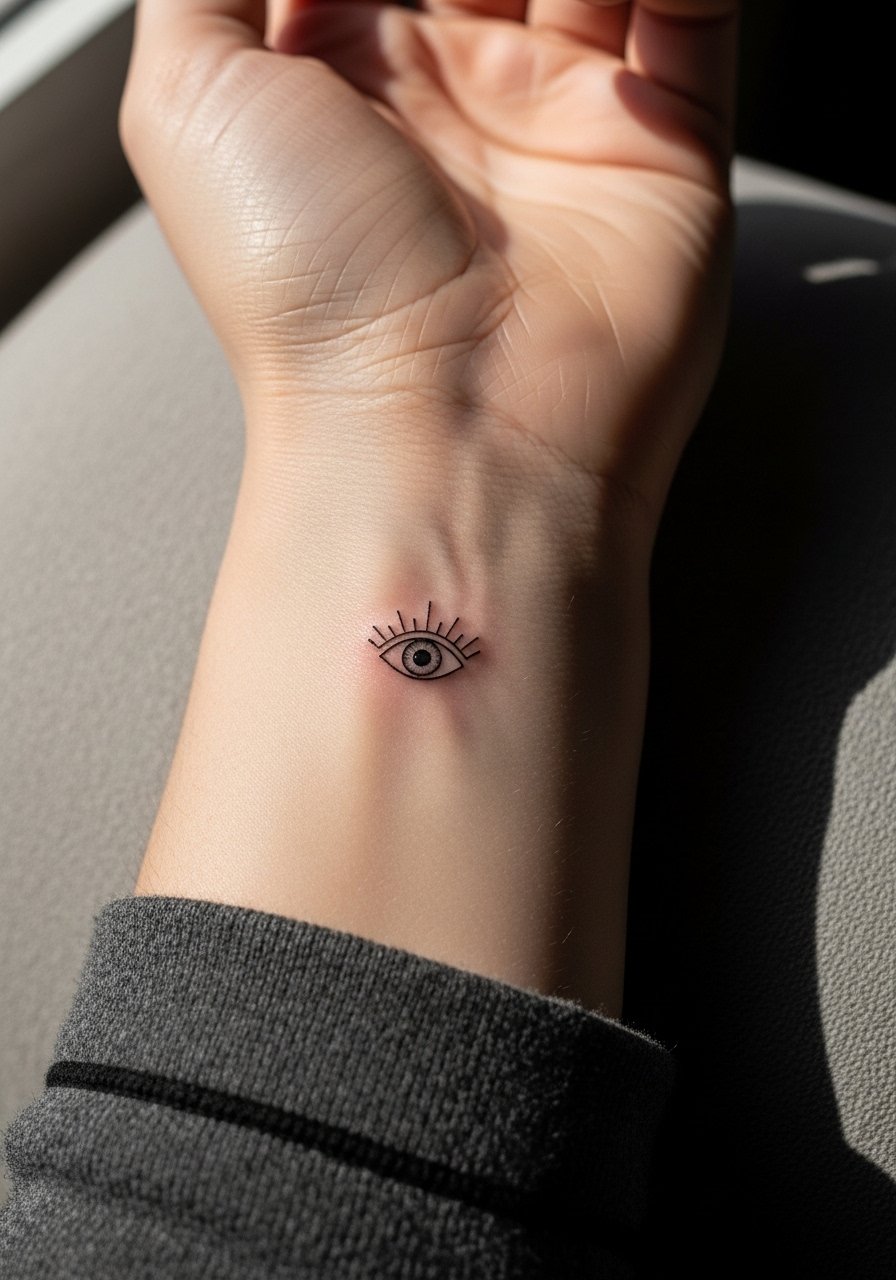
I recommend this for someone who wants a discreet charm that still shows when you reach for a coffee. Fair warning, the inner wrist sees constant washing and bracelets, so expect touch-ups sooner than on the forearm. Tell your artist you want slightly bolder linework than the smallest flash so the pupil keeps definition at year two. The session is short and tolerable, but the skin there is thin so it can sting. For showing it off, pair with a thin chain bracelet or a minimalist watch that frames the piece without rubbing the area.
2. Micro-Realism Eye With Lashes on the Inner Forearm
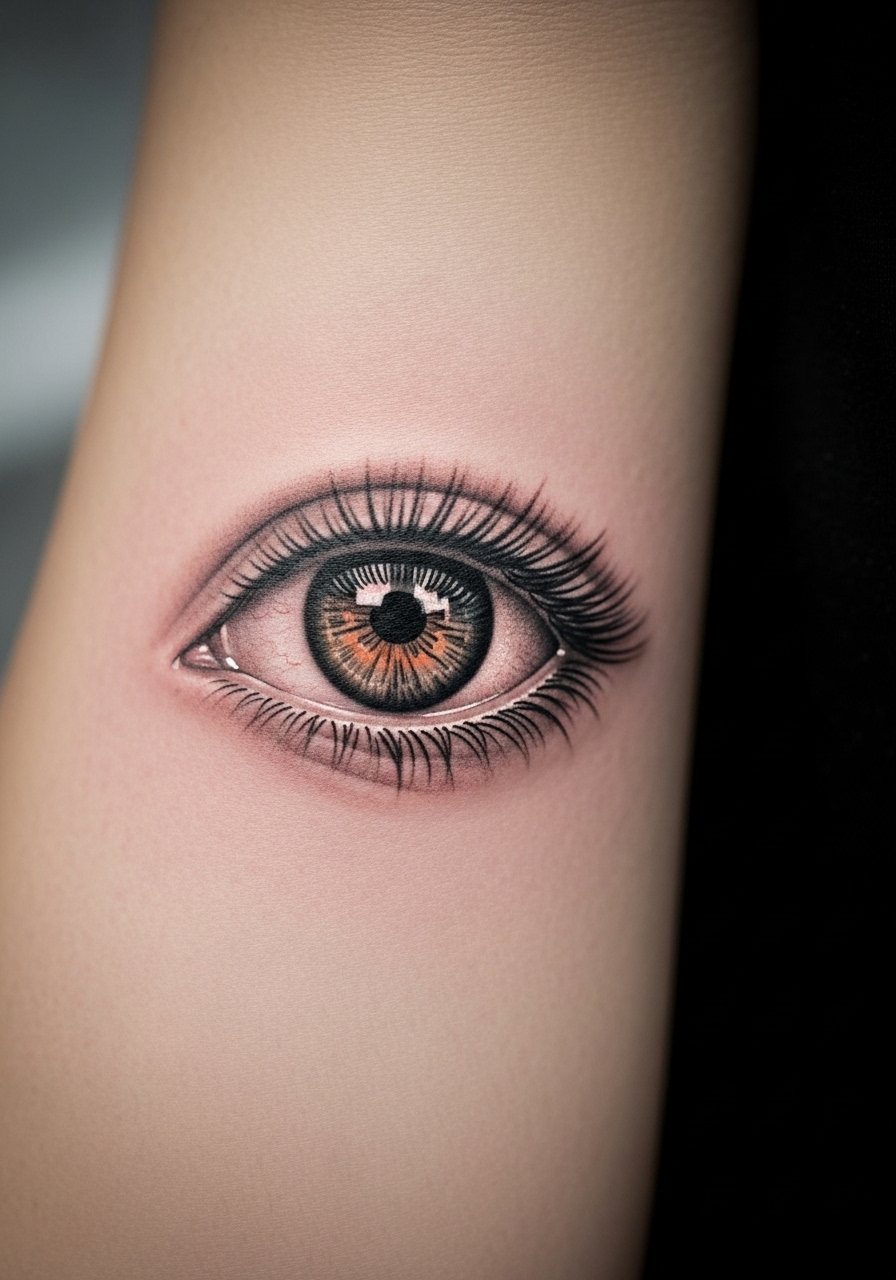
I suggest this when you want a readable, slightly larger eye that still reads delicate. The inner forearm gives space for micro details and lets stipple shading breathe. Say in consultation you want the lashes rendered with stipple shading, not solid black, so the texture ages softer. Most people see the detail crisp at six months, softer by two years, and ready for a small touch-up by four or five. Blowout risk is low here compared with fingers, but ask for shallower passes near the thin veins. Session time runs around one hour depending on size.
3. Mandala Halo Eye on the Upper Chest
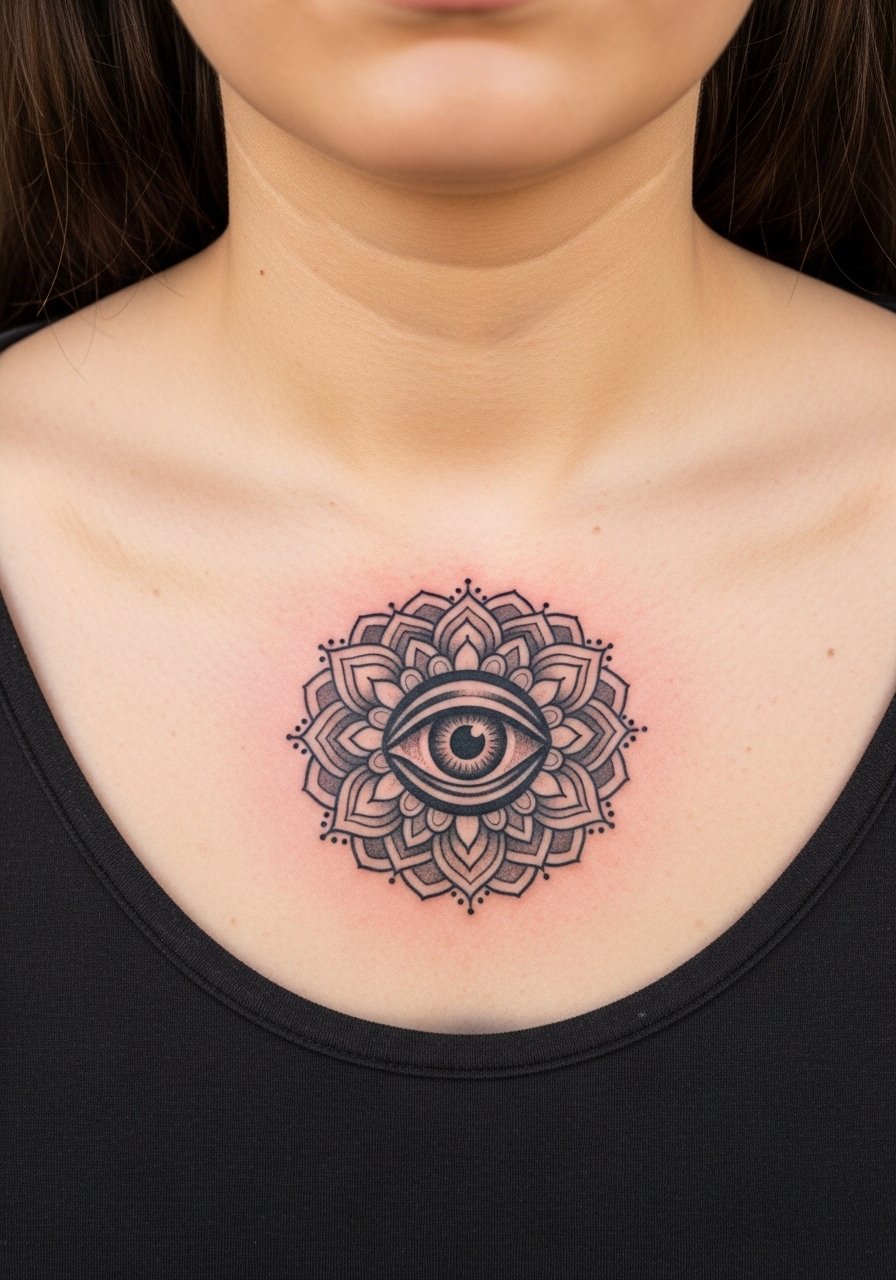
Pairing an eye with mandala geometry makes the symbol feel like a central talisman. The upper chest has movement from breathing and clothing friction, so ask for moderate spacing in the mandala lines to avoid dense areas merging over time. Artists split on the best approach for chest detail. One camp favors tight fine line for crispness. The other camp recommends slightly bolder spokes to account for stretching. I advise discussing both options and checking healed photos from the artist. For the session wear, slip into a wide-neck shirt so the artist can access the collarbone cleanly.
4. Traditional Bold Eye on the Outer Upper Arm
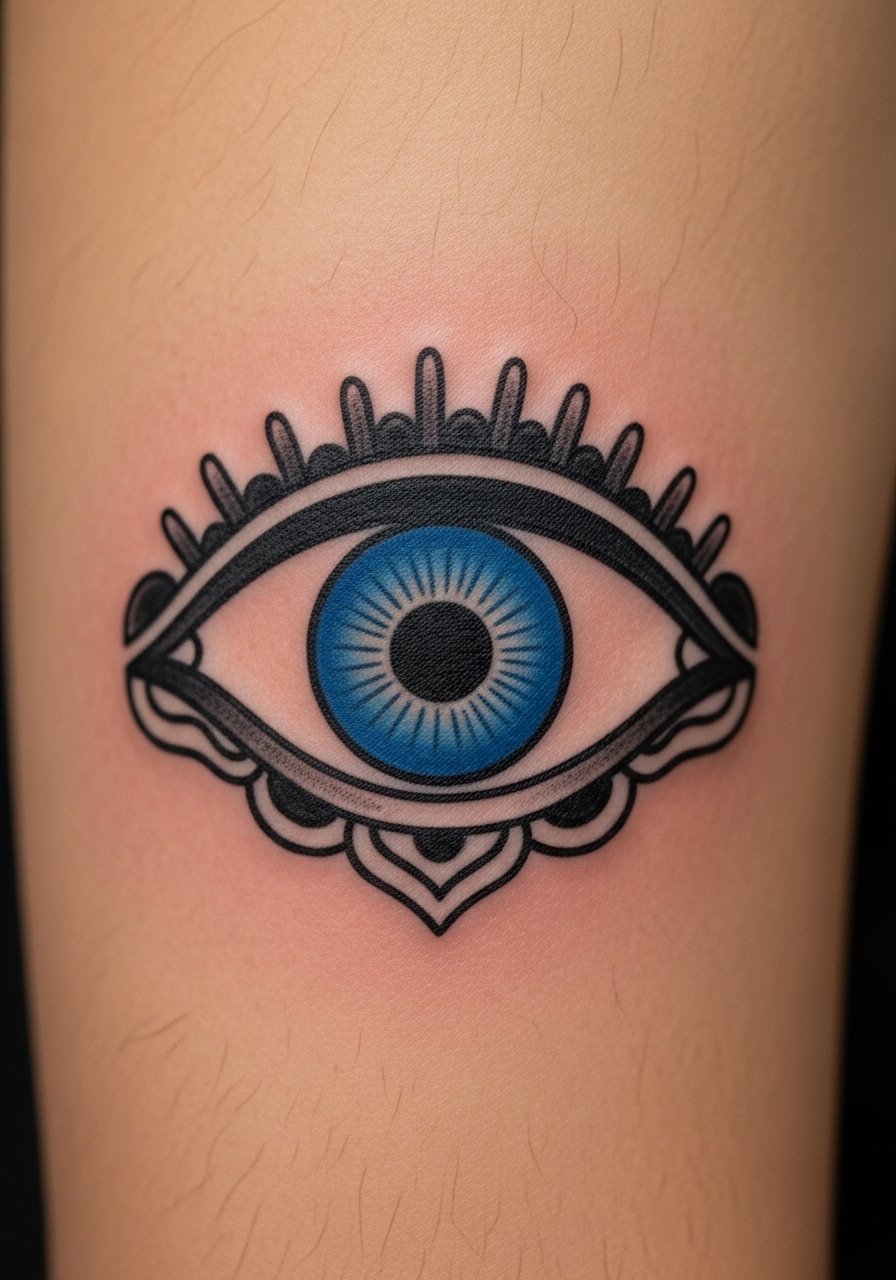
This is a low-maintenance choice if you like saturated color that holds up. Bold black outlines and heavy saturation age into a graphic mark, so it often looks stronger after years than a micro piece. Tell your artist to prioritize saturation and slightly thicker outlines for longevity. The outer upper arm is a forgiving placement for touch-ups and a good pick if you want something visible but not in the way. Session feel is moderate and usually finishes in one longer sitting. Common mistake is asking for tiny traditional details that read as clutter when scaled down.
5. Watercolor Drip Eye on the Ribcage

Fair warning, the ribcage is a higher pain zone and a tricky aging spot for washes. Watercolor bleeds can blur faster where skin stretches. One camp says watercolor on ribs rarely holds clean longer than two years. The other camp argues for a hybrid approach that mixes defined linework for the eye and freer washes around it. I lean toward the hybrid for ribs. If you want this piece, request a sharp anchor for the pupil and looser color that intentionally fades into skin tones. Wear a cropped top to the session for easy access. Expect one long session and a likely touch-up window around year three.
6. Geometric Dot-Work Eye on the Back of the Neck
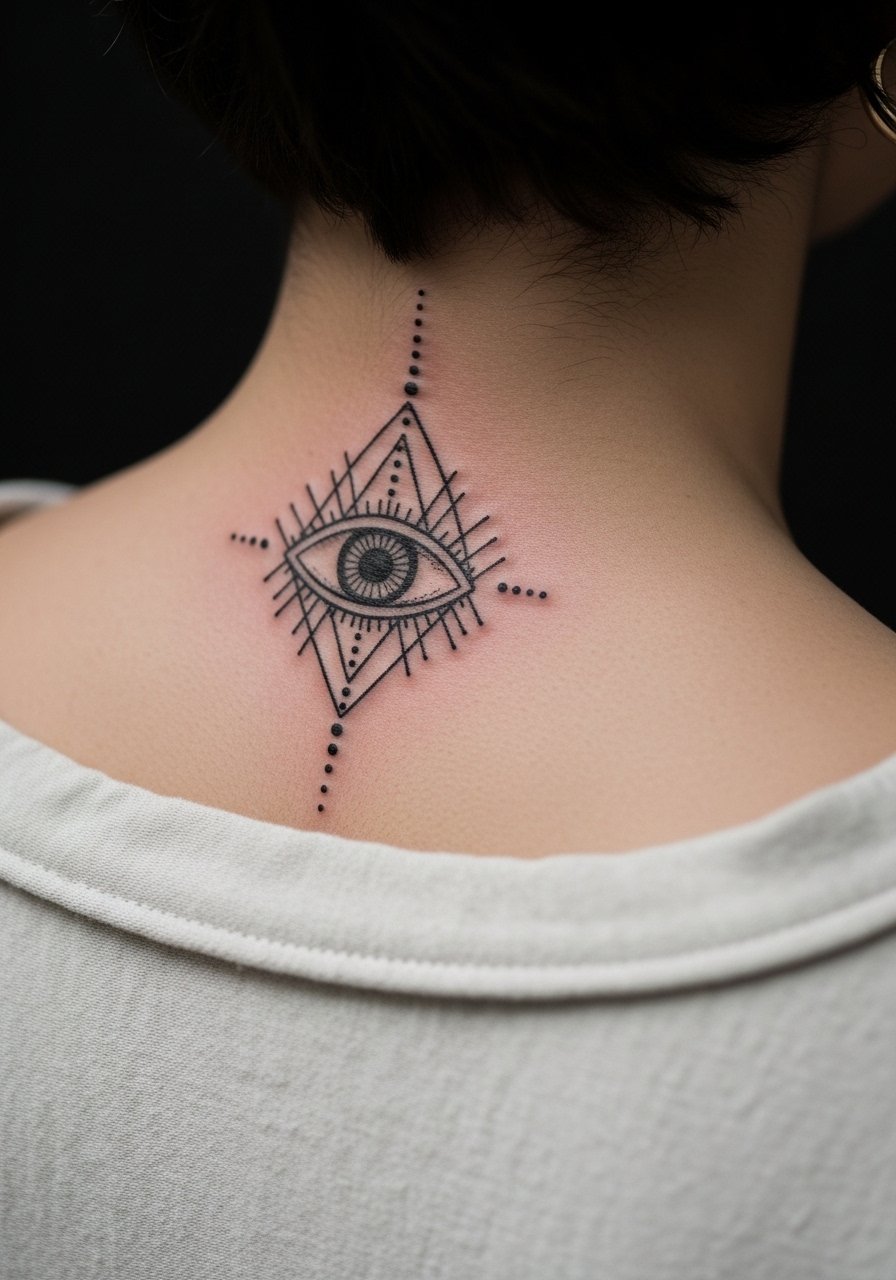
The back of the neck reads as a discreet statement when your hair is up. Dot work or stipple shading looks excellent here because the skin is thicker than the wrist and the geometry holds. Tell the artist to space dots to avoid dense clusters that can merge after a couple of years. Sessions are short but expect the area to be sensitive when getting shaved or styled during the healing window. If your workplace requires covered hair, think about how often the piece will be visible. A clean line pupil and spaced stippling makes the design age more predictably.
Pack Smart
Those wrist, forearm, chest, upper arm, ribcage, and neck pieces above ask for slightly different prep and first-week care.
-
Stencil transfer paper kit. Lets you preview line placement on skin before the needle goes down, especially useful for the chest and forearm designs above.
-
Topical numbing cream. Applied 30 to 60 minutes ahead it smooths out rib and neck sessions so you can sit through longer outlines.
-
Thin protective film roll. Useful for wrist and hand pieces that face friction from watches and bracelets during the first days.
-
Fragrance-free body wash. Gentle cleansing keeps delicate linework clean without irritating fresh ink on chest or arm areas.
-
Aquaphor healing ointment. A thin layer in the first 48 hours helps lock in moisture for fine-line work without suffocating the skin.
7. Single Eye With Floral Frame on the Shoulder Blade
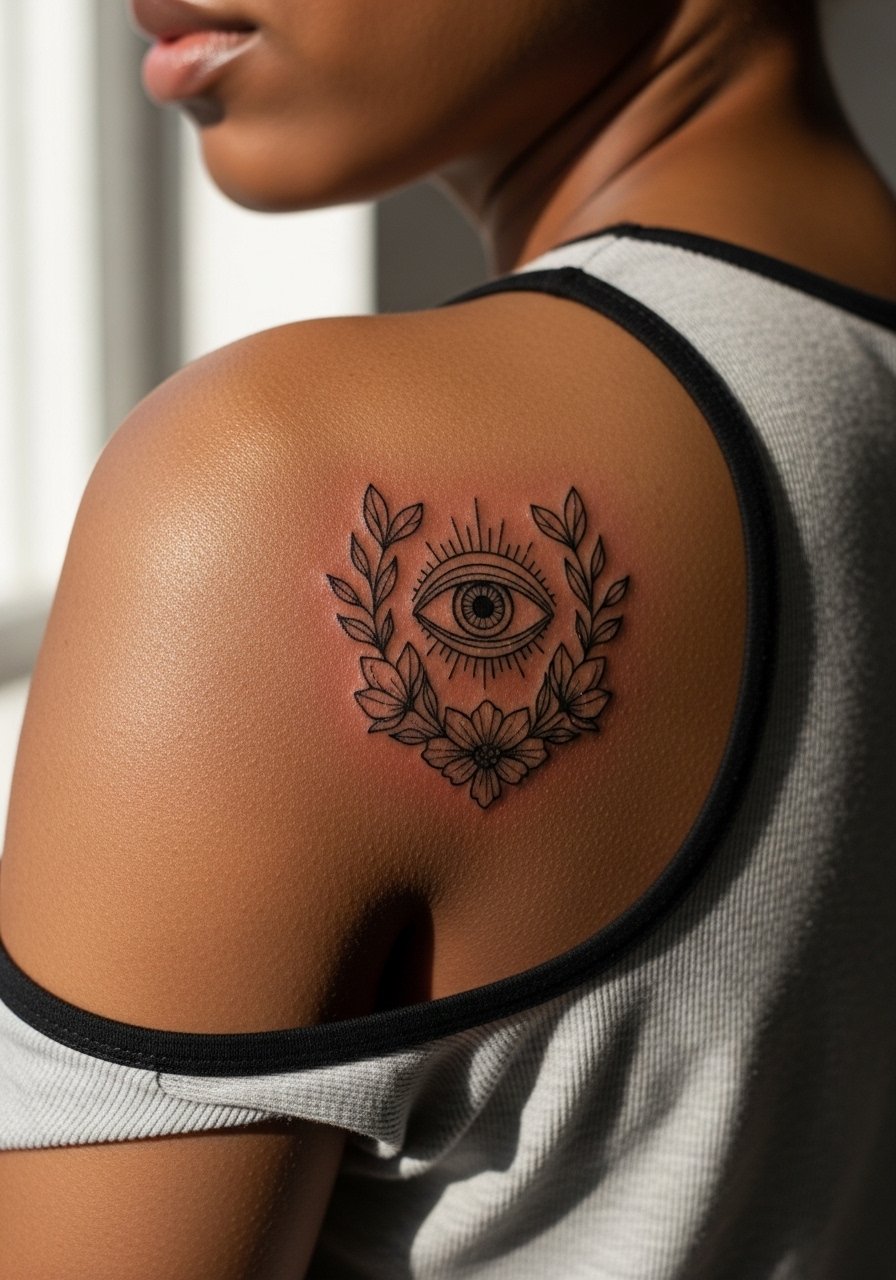
The shoulder blade gives room for a framed composition that moves with clothing. I recommend this when you want the design visible in open-back tops but hidden otherwise. Ask for slightly heavier outerline on the eye to prevent the pupil losing definition under the florals. Sessions can be hourly and feel brisk because the area is a mid-range pain. For showing it off, an open-back dress or a halter tank highlights the frame without covering it. If you plan heavy backpack use, mention that to your artist so they can place the piece away from straps.
8. Tiny Stack of Eyes Along the Collarbone
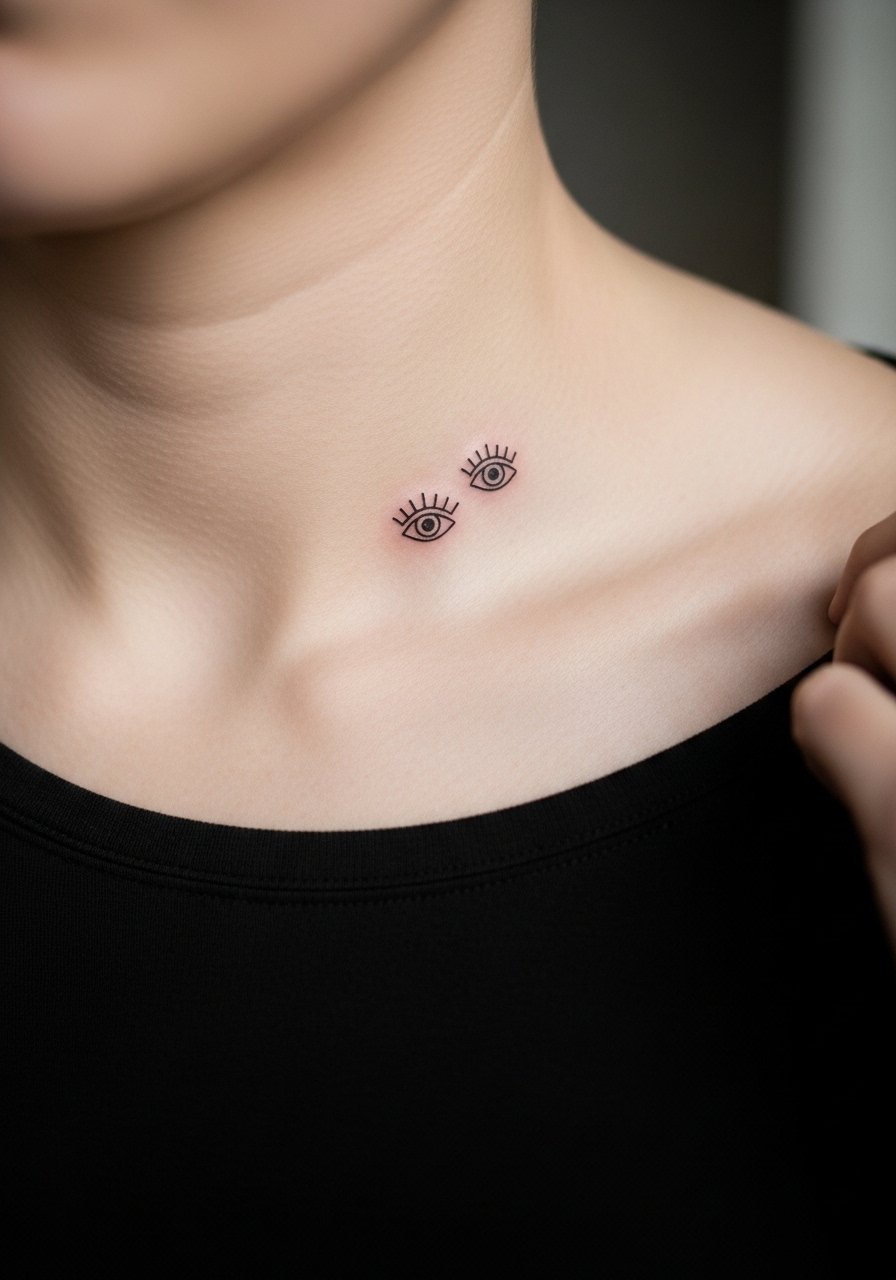
Stacking small eyes along the collarbone reads as a repeated motif that plays with symmetry. The collarbone skin is thin and sees a lot of movement, so micro sizes should not be too tiny. Common mistake is asking for pinhead-size details that lose clarity. Tell the artist you want consistent spacing and slightly thicker pupils than the thinnest flash to retain contrast at year two. Session time is short, but touch-ups every few years are likely. For session wear, choose a wide-neck top that you can pull aside without tugging.
9. Eye Inside a Triangle on the Hand
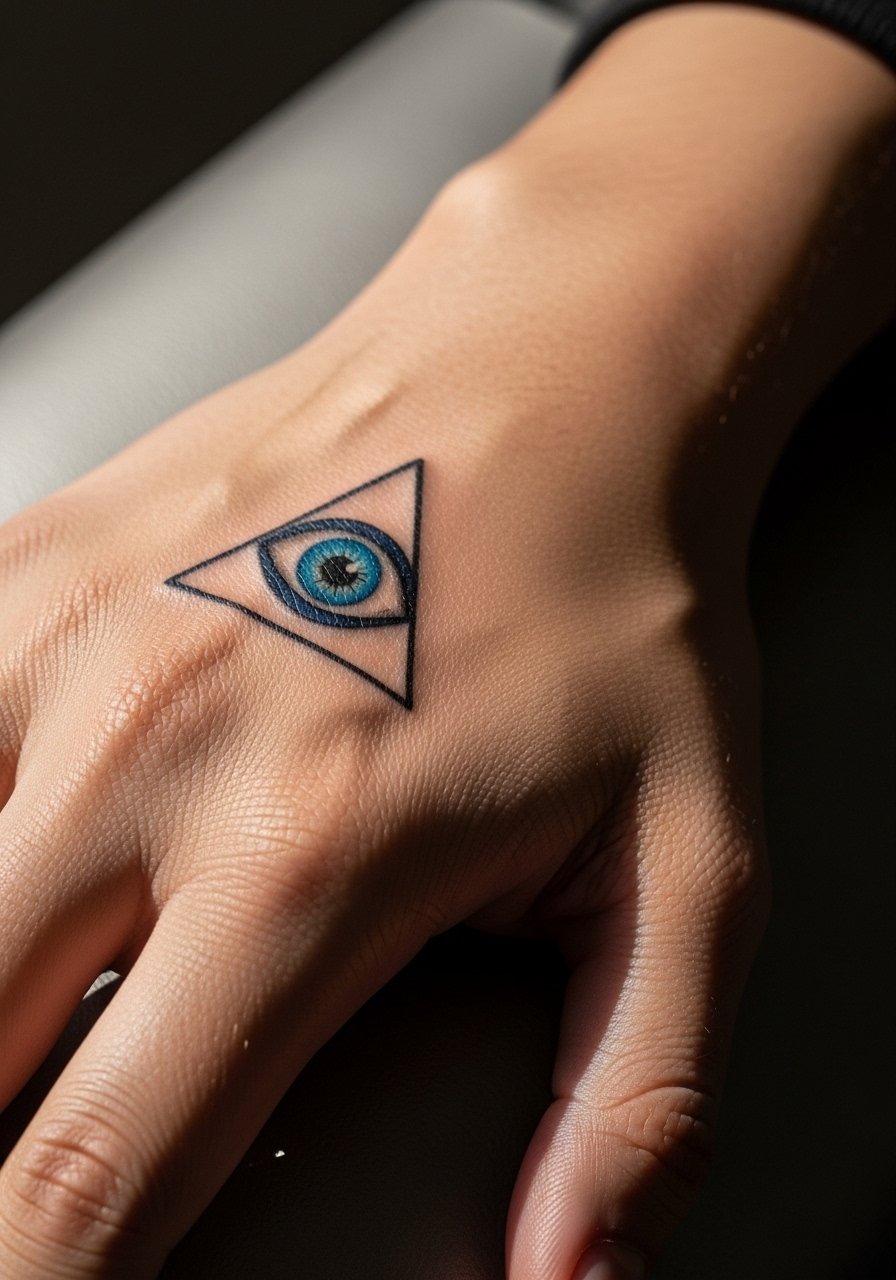
Hand tattoos remain controversial. One camp says hand and finger ink fades fast and risks professional consequences. The other camp points out that careful placement and regular touch-ups keep the design legible and wearable. If you choose a hand piece, accept that touch-ups are part of ownership. Triangle framing with bold outlines helps the eye survive daily washes and sunlight. The skin is thin and friction heavy, so expect faster fading and plan touch-ups at year one or two. This placement feels bitey during the session, but many people are happy with the immediate impact.
10. Constellation of Micro Eyes on the Ankle
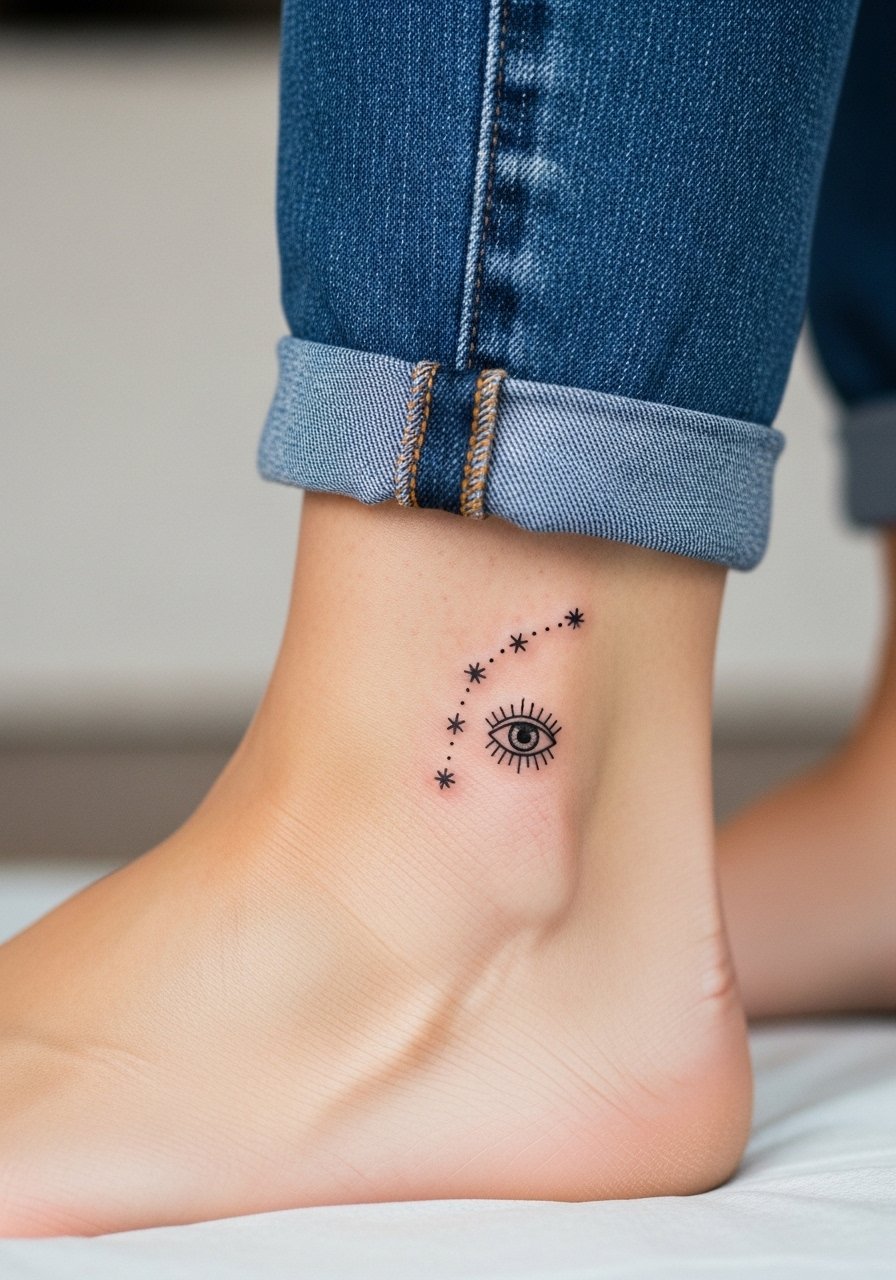
An ankle constellation reads delicate and pairs well with sandals. The ankle faces friction from socks and shoes, so keep each eye slightly bolder than you might on the wrist. Common mistake is spacing them too tightly so they merge as swelling settles. Ask your artist for small but solid pupils and brief sessions to avoid excess swelling. For the session wear, roll up jeans or wear low-cut sneakers that you can slip off easily so the artist can access the area cleanly.
11. Mirror Eyes Across the Collarbones
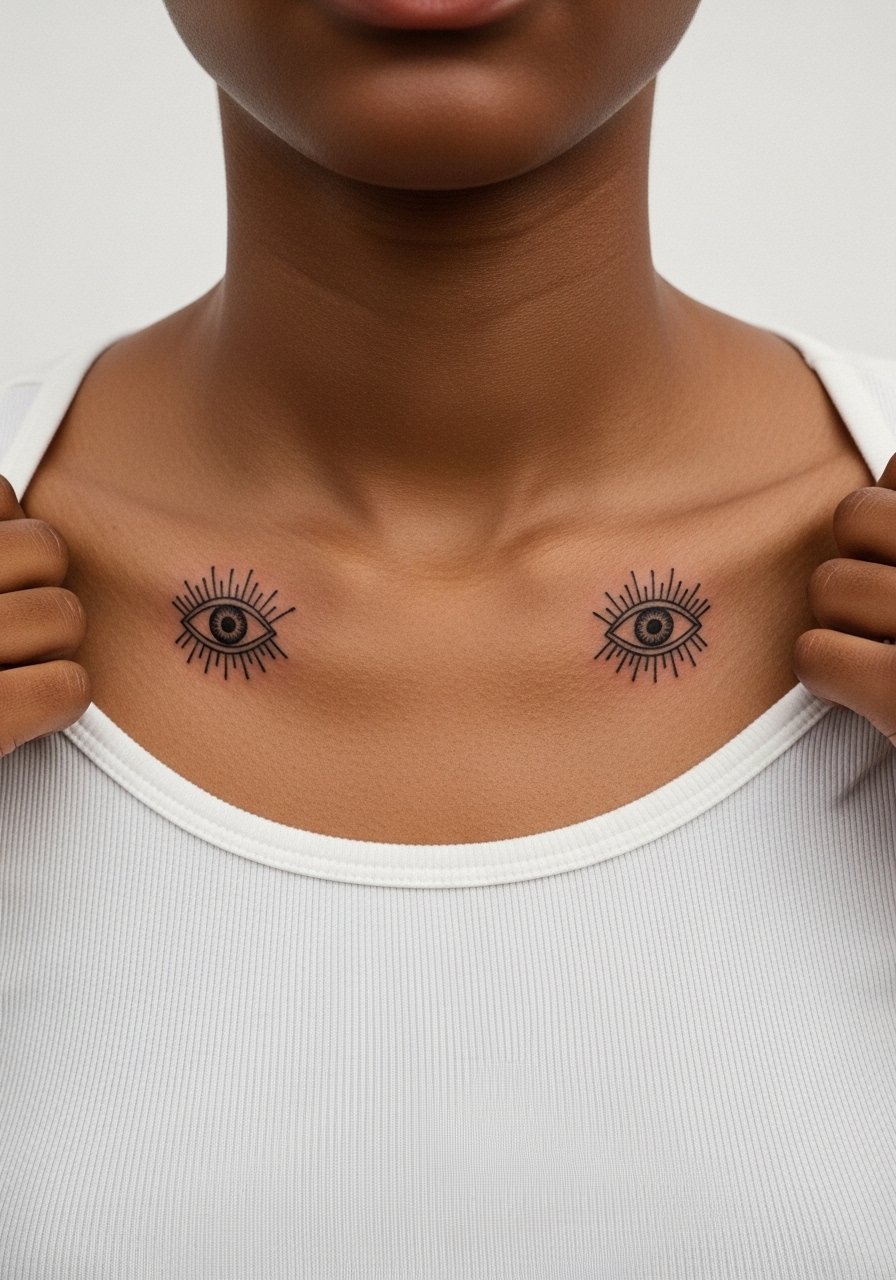
Symmetry across the collarbones gives a balanced, classic feel. The collarbone moves a lot, so the biggest mistake is choosing super fine spokes for radial details. I recommend a slightly bolder mainline with stipple shading in the iris so the texture reads over time. During consultation show photos of healed collarbone work so the artist matches line weight. A scoop-neck top or a delicate pendant necklace frames the pieces nicely when worn, but avoid heavy chains that rub the area while healing.
12. Minimal Crescent Eye Behind the Ear
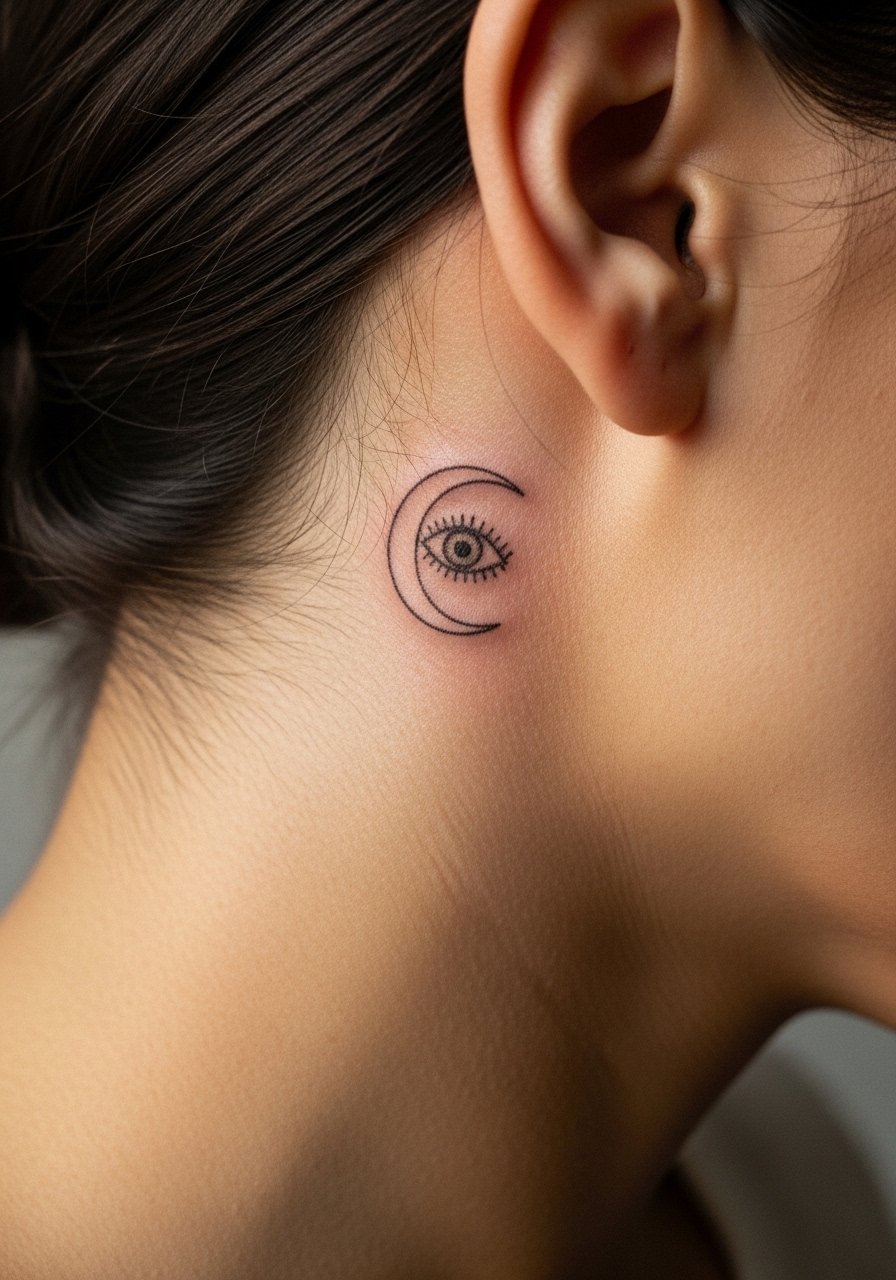
Behind the ear is intimate and easy to hide under hair. The skin there is thin and close to cartilage, so ask for shallow passes and expect sharp sensitivity. One sentence of professional note, some artists prefer not to tattoo too close to cartilage without special experience. If you pick this, expect a short session and a high likelihood of minor feathering over years. For aftercare discuss specialized follow-up with your artist because the area does not breathe the same way flat skin does.
13. Bold Sunburst Eye on the Calf
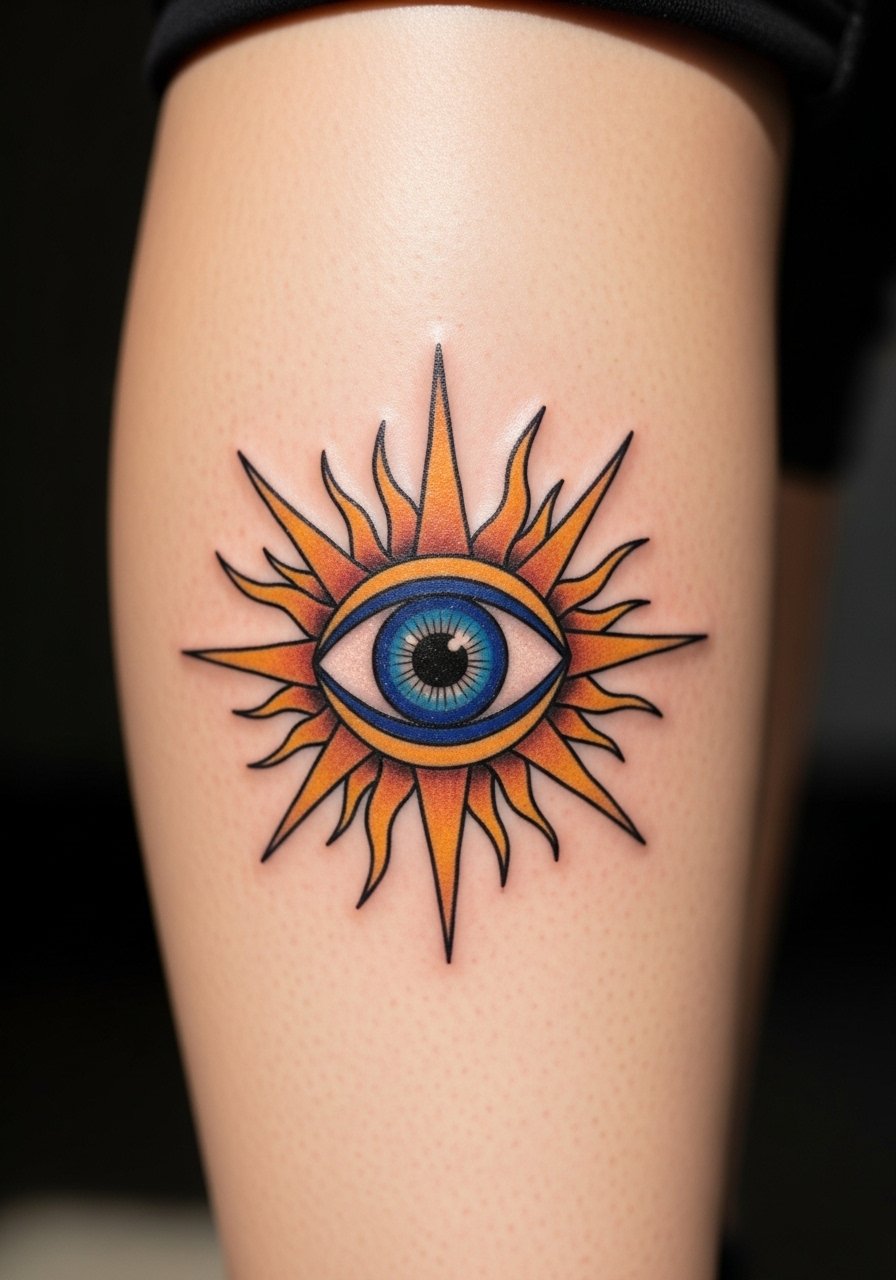
Calf placements are forgiving and let you go larger with saturated color or blackwork. The skin tolerates saturation well so a sunburst effect with solid fills keeps the eye readable for years. Tell your artist you want strong contrast between the pupil and the burst rays so the eye reads from a distance. Sessions are comfortable and can often be completed in one sitting. For showing this off, wear rolled-up linen pants or a mid-length skirt that stops above the calf to frame the piece.
14. Script Ribbon With an Eye on the Sternum
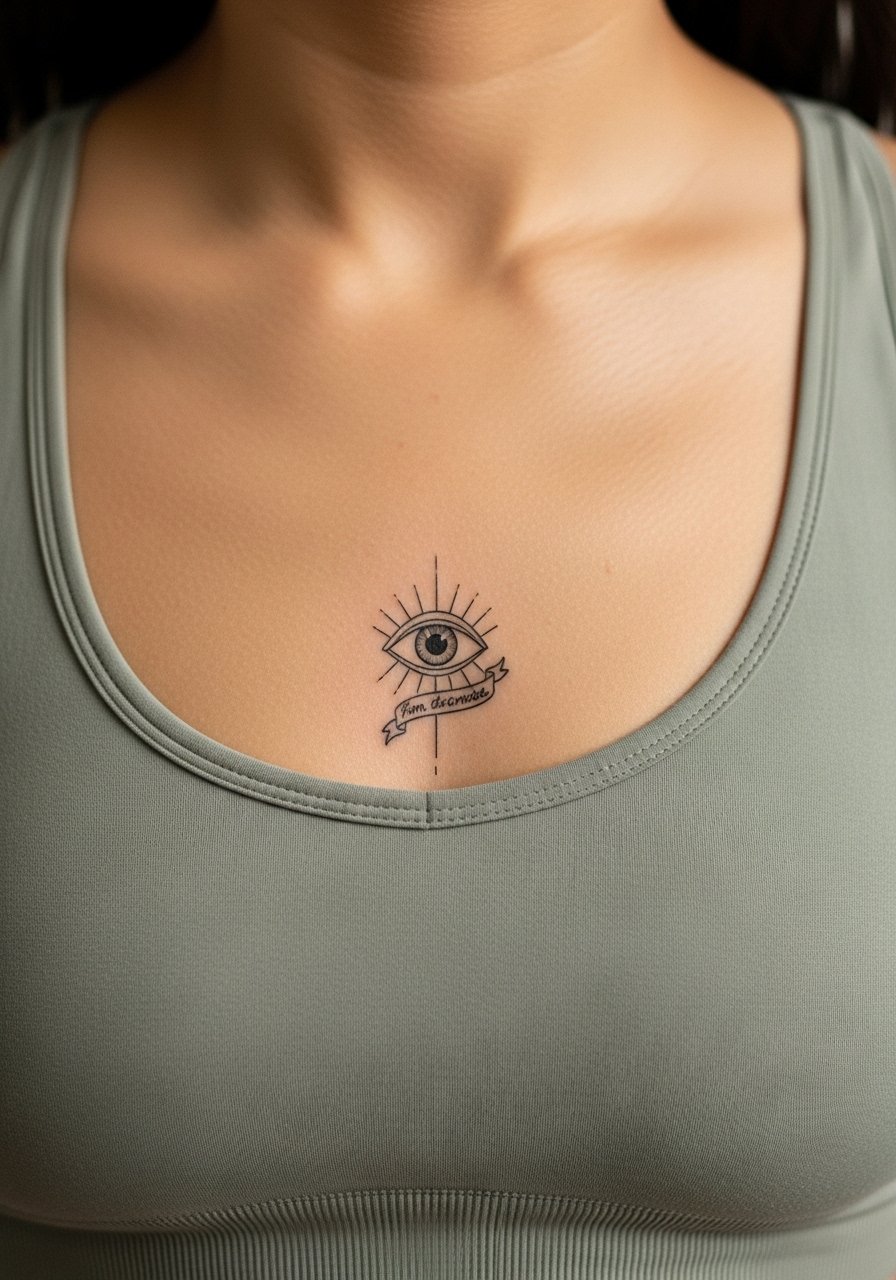
Sternum placements read intimate and can be striking centered under a camisole. The sternum moves with breathing and can be sensitive, so many artists advise slightly bolder script strokes than flirtatious micro letters. Controversy exists about fine line on sternum. One camp insists the area cannot hold ultra-fine script. The other camp says with correct depth and spacing you can get clean lines. My advice is to view healed examples from the artist and agree on letter size that balances elegance and longevity. Wear a fitted sports bra to the appointment for access.
15. Surreal Eye With Tiny Planets on the Thigh
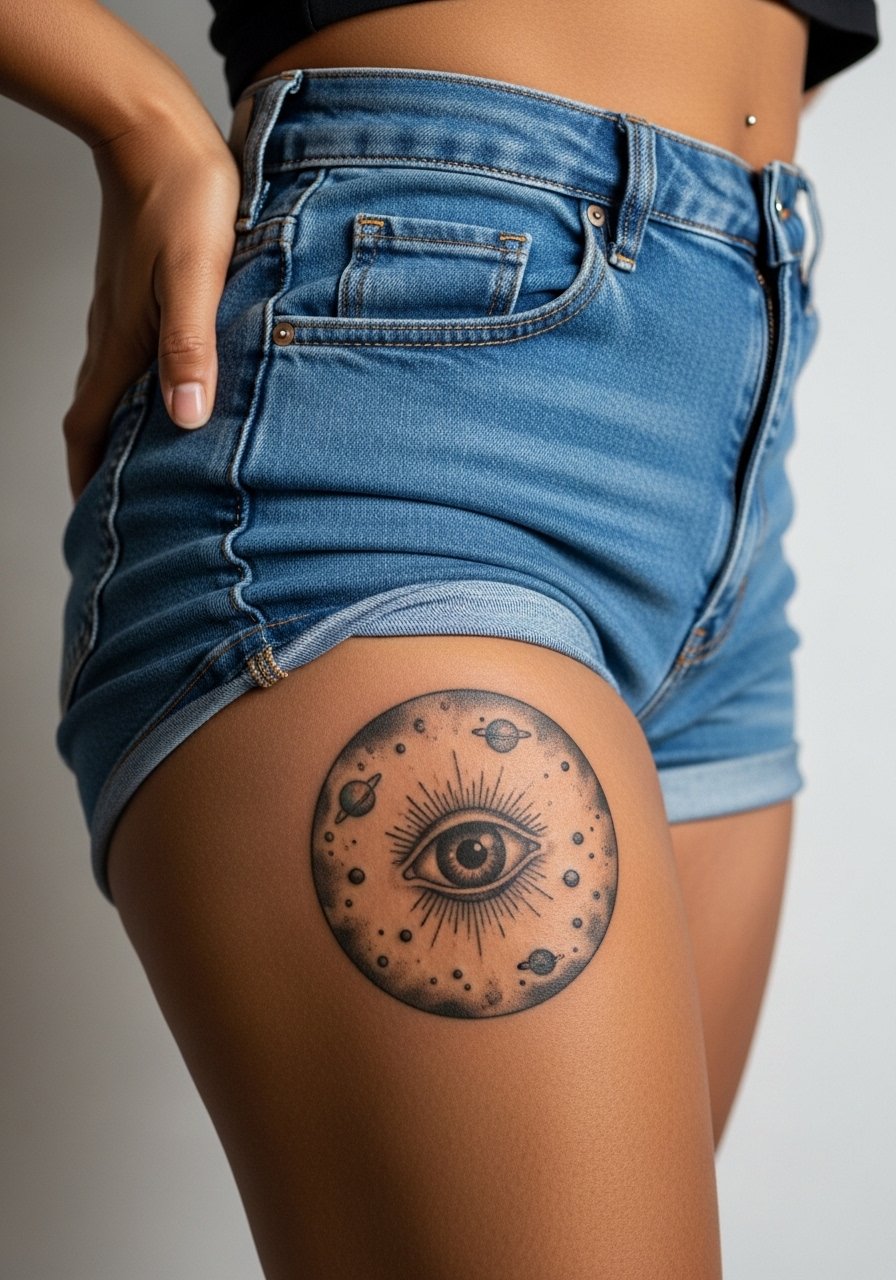
The thigh gives space for narrative and dreamy additions like orbiting planets. I recommend this when you want an art-piece sized design that stays private or shows in shorts. Thigh sessions are moderate in pain and can take longer if you go large. Tell your artist whether you want saturated color or muted tones so they plan shading and saturation accordingly. For the session wear, pull jeans down slightly or bring high-waisted shorts so the artist can work comfortably. Expect touch-ups less often than on hands or ribs.
16. Nautical Compass Eye on the Lower Leg
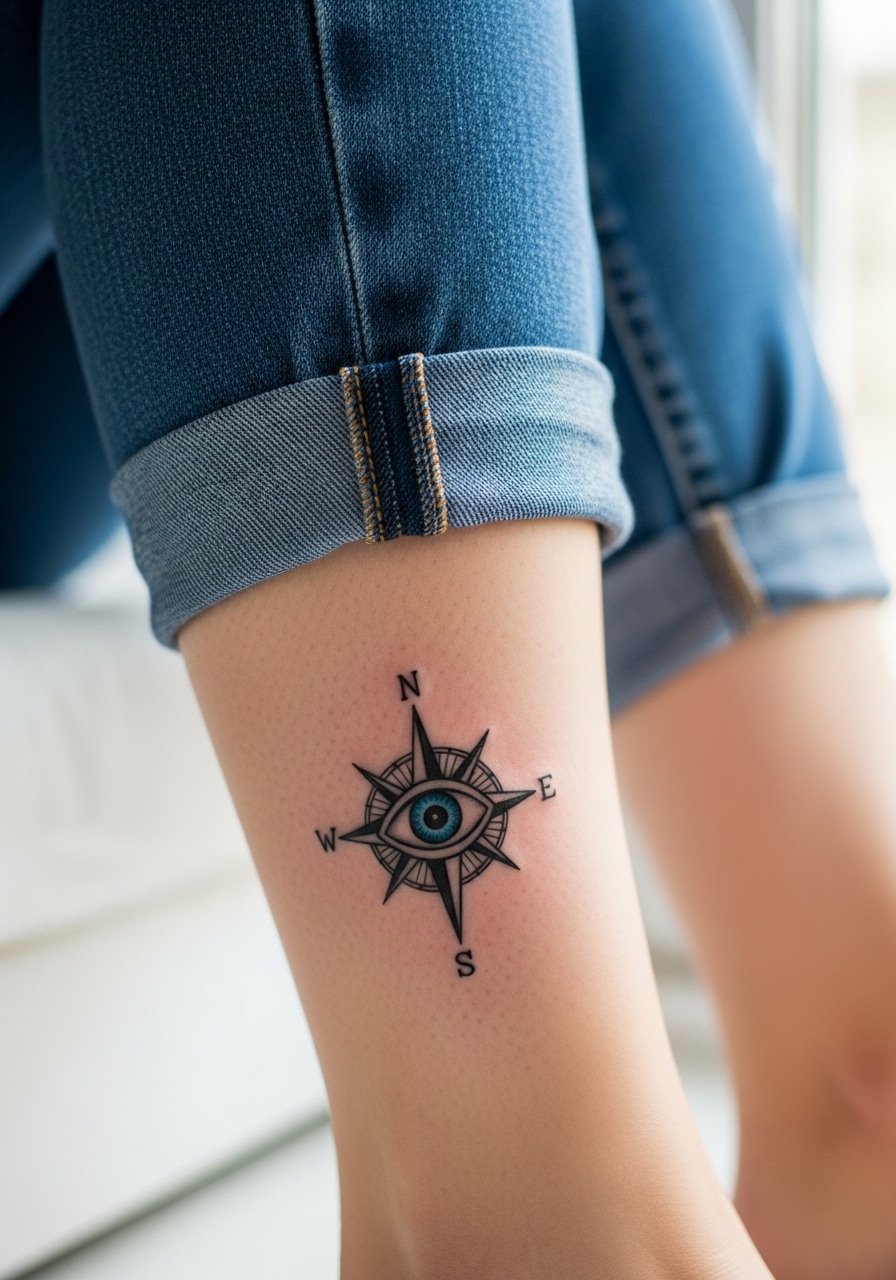
Combining an eye with a compass makes for a symbolic travel piece that reads well on the shin or outer lower leg. The lower leg tolerates linework and saturated fills well, but thin geometric spokes need breathing room to avoid merging. In consultation specify spacing for the compass points and a solid pupil so the eye remains the focal point. Session pain is low to moderate. For footwear during healing, opt for open shoes or sandals that do not rub the area.
17. Hidden Hip Eye With Floral Accent
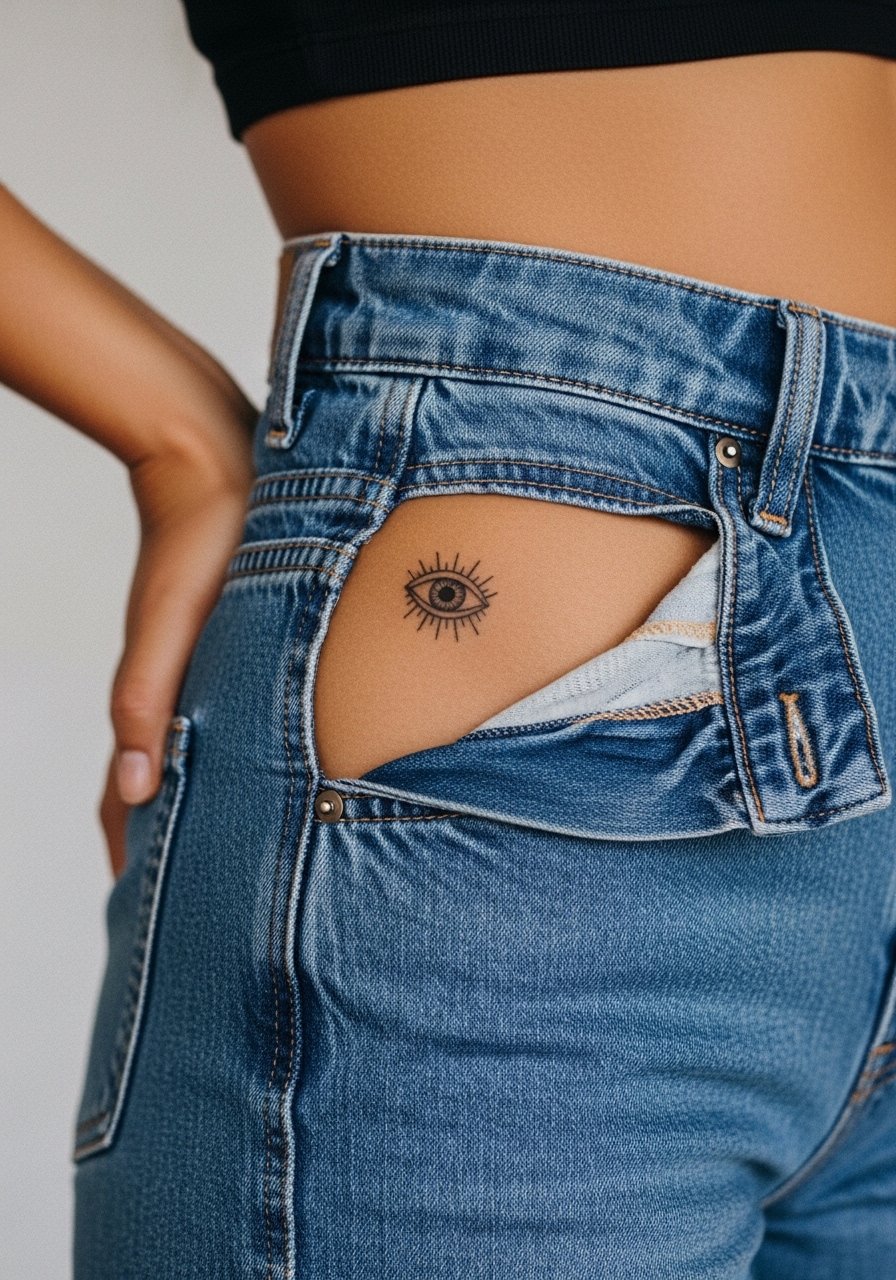
A hip placement keeps the eye personal and lets you scale the florals to taste. Because the area is often against high-waisted clothing, mention friction to your artist so they place the piece where jeans sit less. Inner-hip versions require different session wear so bring loose shorts. The most common mistake is placing the design under the waistband where friction causes premature fading. If you want to show the work selectively, pair it with low-cut swimwear or high-waisted bottoms that reveal the top of the piece. Wear loose bottoms to the session so the artist can access the area without fabric pressure.
Frequently Asked Questions
Q: Will a tiny fine-line evil eye on the wrist hold up for more than two years?
A: It depends on how bold you go and how often the area is exposed to friction and sunlight. Slightly thicker pupils and modest line weight increase longevity. Expect a touch-up window around year two to four for most people who wear bracelets and wash hands frequently.
Q: How should I describe the stipple shading I want for a geometric eye to my artist?
A: Ask for stipple or dot work in the reference images and specify spacing between dot clusters. Saying "dot work with visible skin gaps" helps the artist avoid dense fills that can merge over time. Show healed photos if possible so you and the artist agree on texture.
Q: Are ribcage watercolor eyes a bad idea because of how they age?
A: Artists are split. One camp says watercolor on ribs rarely holds crispness for more than a couple of years. The other camp recommends a hybrid with defined anchors to extend readability. If you want watercolor there, ask for a sharp central eye and looser washes that are meant to fade gracefully.
Q: What should I wear to a sternum or hip session for comfort and access?
A: Wear a fitted sports bra or cropped top for sternum work so the artist can work without you being exposed. For hip sessions bring high-waisted shorts or loose jeans you can lower slightly so only the tattoo zone is revealed. These choices keep the session efficient and comfortable.
Q: Any advice for keeping hand or finger evil eyes looking good while working a desk job?
A: Accept that hands fade faster because of washing and typing. Choose slightly bolder pupils and plan a touch-up at year one or two. Consider styling choices like thin rings that do not sit on the tattoo while it heals, and protect the area from excessive sun with clothing when possible.
