
Fine line henna on the forearm looks effortless in photos, but the reality is placement, skin texture, and daily friction decide whether the design still reads well in a few months. Longevity, visibility during everyday activities, and how the piece pairs with your wardrobe are the three things I tell people to think about before booking. Read on for concrete henna-forward forearm ideas, what to ask at the stencil stage, and how each choice will age so you get the result you actually want.
1. Delicate Vine Along the Inner Forearm
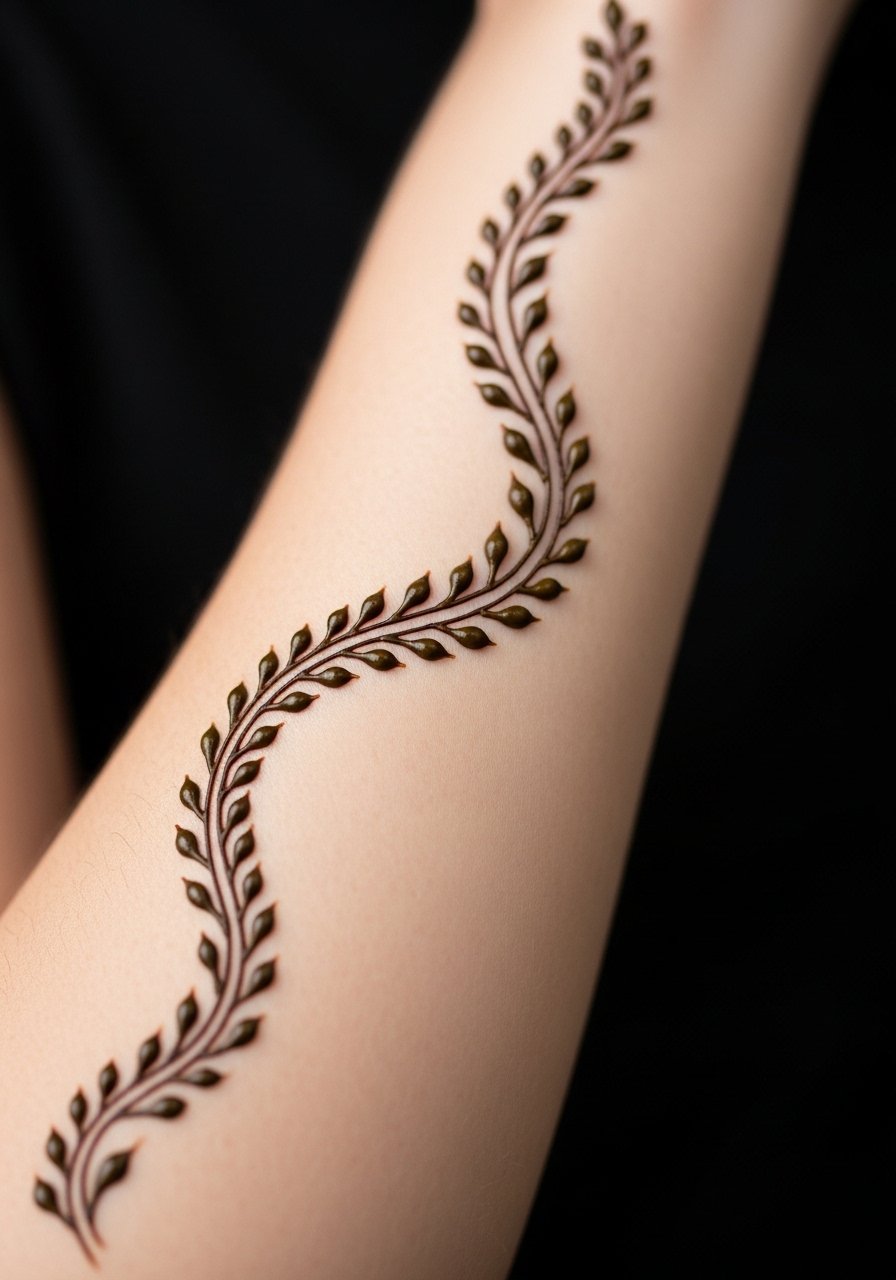
I recommend the delicate vine when you want something that reads private but shows when you move your arm. Fair warning, inner forearm is one of the easiest spots to smudge from sleeves at first. Tell your artist you want slightly spaced linework and light stipple shading so the dots do not merge over time. Session feel is low to moderate pain and often fits into a single short appointment. Expect crisp edges at six months, softening into a gentle patina by year two, with a touch-up if you want the original contrast back. Pair with rolled-up sleeves and a thin chain bracelet to show the vine without crowding it.
2. Stacked Mandala Band on the Outer Forearm

This stacked mandala band uses dot work and fine line to create texture without heavy saturation. Artists split on cultural borrowing for mandalas. One camp cautions against copying sacred patterns wholesale. The other camp supports respectful adaptation with permission and context. If you choose this, ask for simplified geometry and negative space to avoid dense areas that blur. Outer forearm placement keeps the piece visible and less prone to rubbing than inner wrist designs. Pain is mild and a single session can complete a narrow band. Show-off pairing works well with short-sleeve linen shirts and a rolled sleeve blazer for evenings out.
3. Tiny Constellation Cluster Near the Wrist
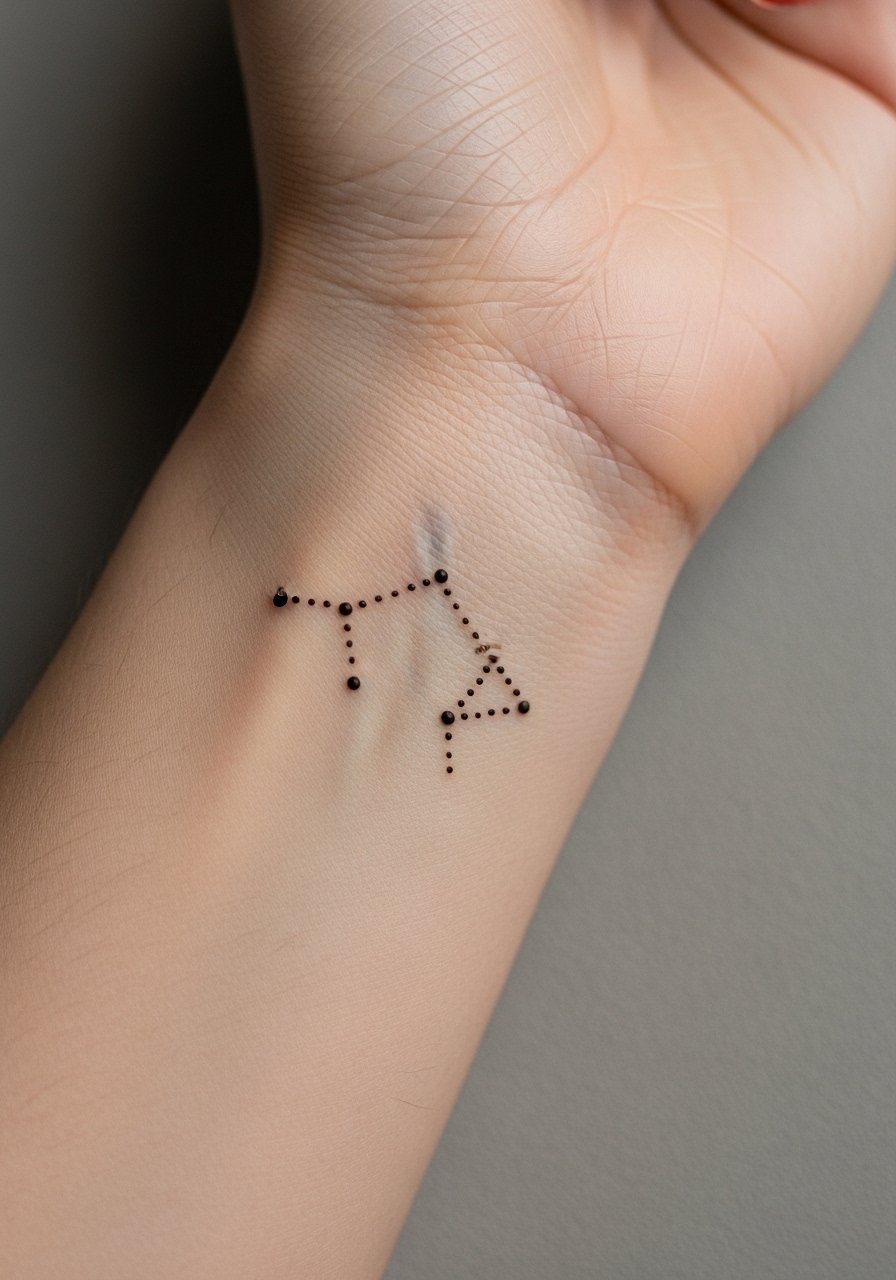
Constellation clusters are low commitment and move well with the wrist. Common mistake is asking for too many tiny stars in too small an area. The lines need room or they melt together. For this placement, blowout risk is low but the constant washing and friction from watches can fade detail faster. I tell clients to expect six-month crispness and possible softening by year two. Session discomfort is minimal. For showing it off, a minimalist watch or a dainty leather strap bracelet frames the cluster without competing.
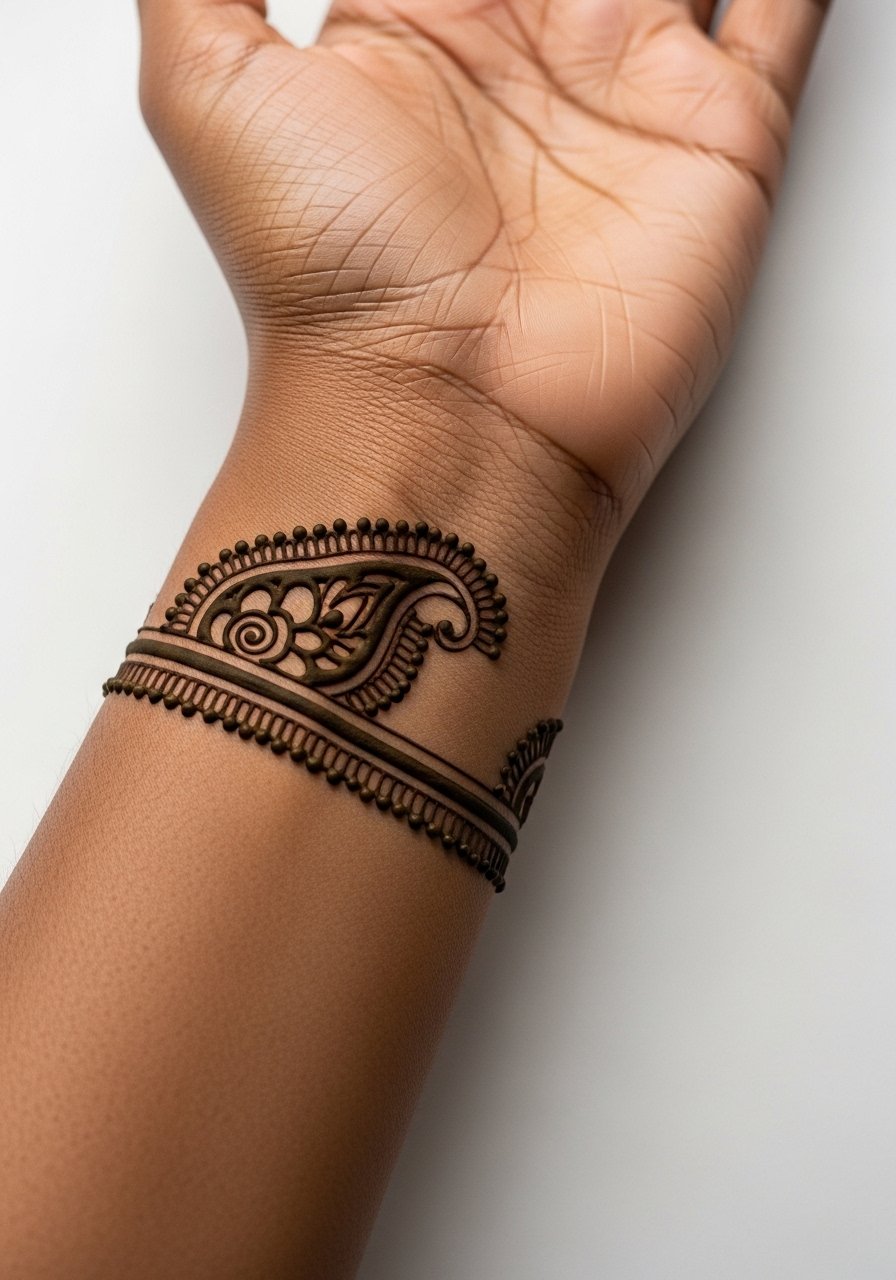
4. Lace-Inspired Cuff That Wraps the Forearm
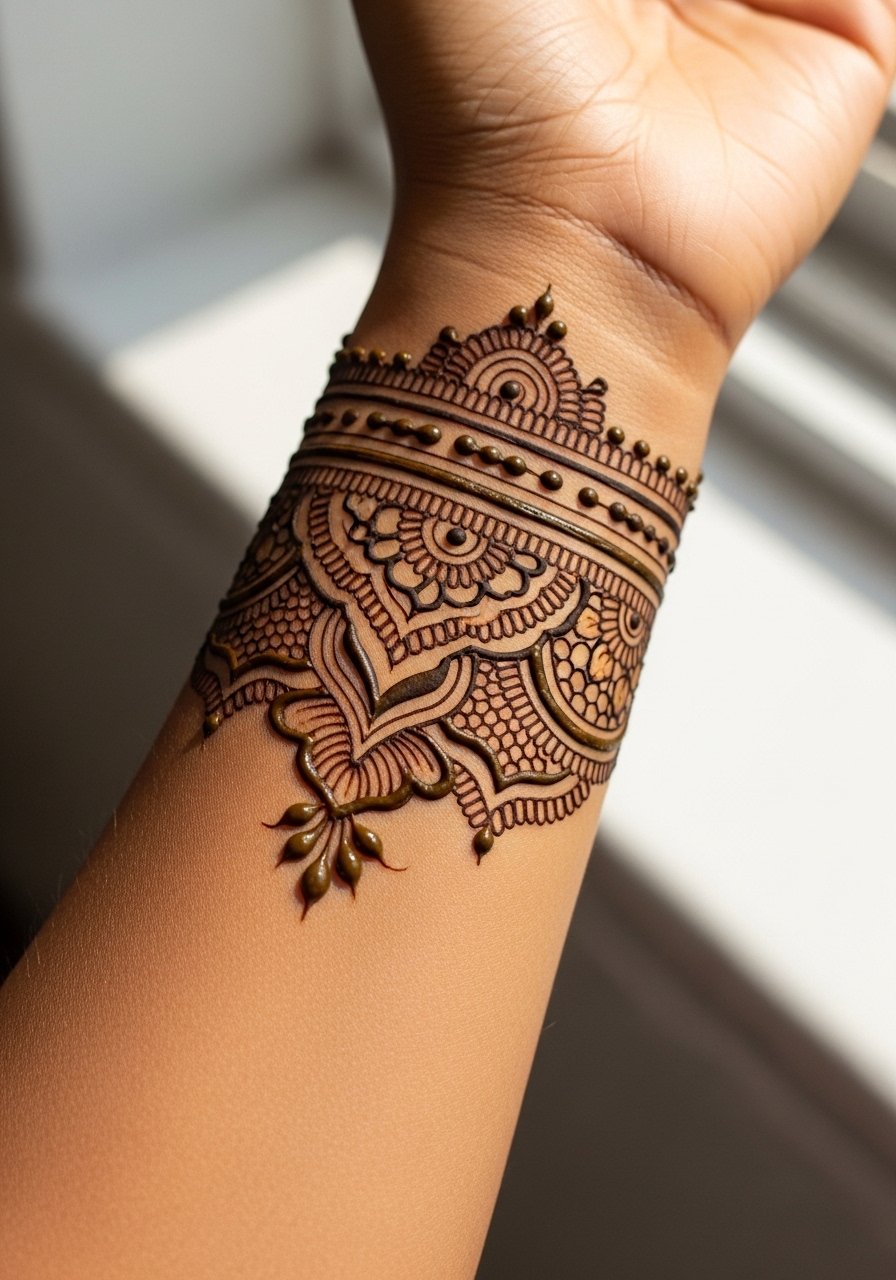
The lace cuff is all about rhythm between linework and open skin. A visual impact lead fits this piece because the pattern reads from afar and delights up close. Big mistake is over-detailing in tight bands. Ask your artist for slightly bolder outer lines and airy inner stippling so the lace keeps definition as it heals. Expect the outer outlines to hold longer while tiny stipple fills will soften at year two. Session time is moderate and may require a short break. Pair the cuff with rolled-up shirt sleeves and a lightweight linen shirt to keep the focus on the pattern.
5. Single Script Line Along the Forearm
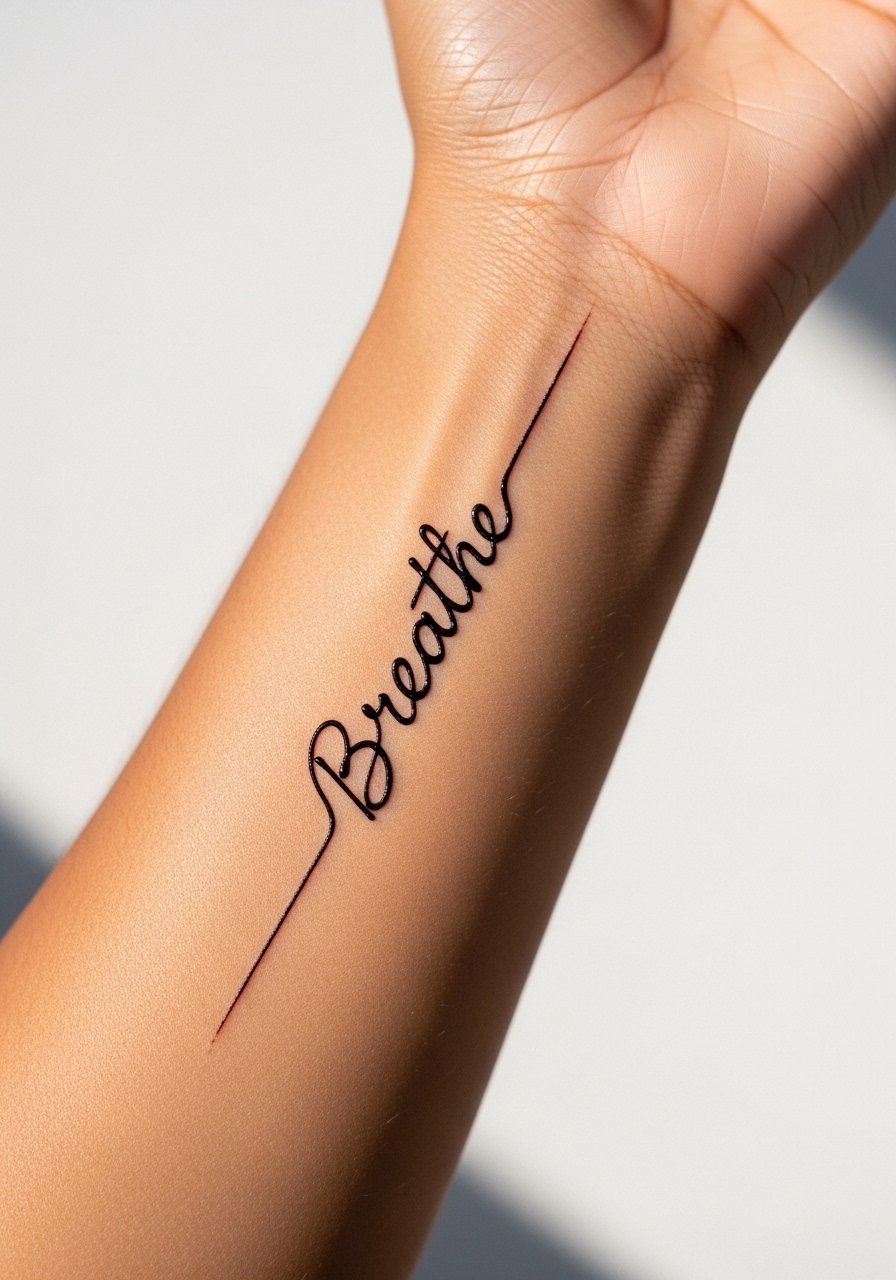
Script needs careful sizing and font choice. The biggest mistake is choosing a font that looks great on screen but has hairline strokes that vanish in real skin. Ask for slightly thicker main strokes and generous spacing between letters. Pain is low and this usually fits a short session. Over time the thin strokes lighten first, so plan a touch-up around year two if you want crispness. For the appointment, wear a loose button-down shirt you can pull aside without tugging the area.
6. Geometric Chevron Stack Toward the Wrist
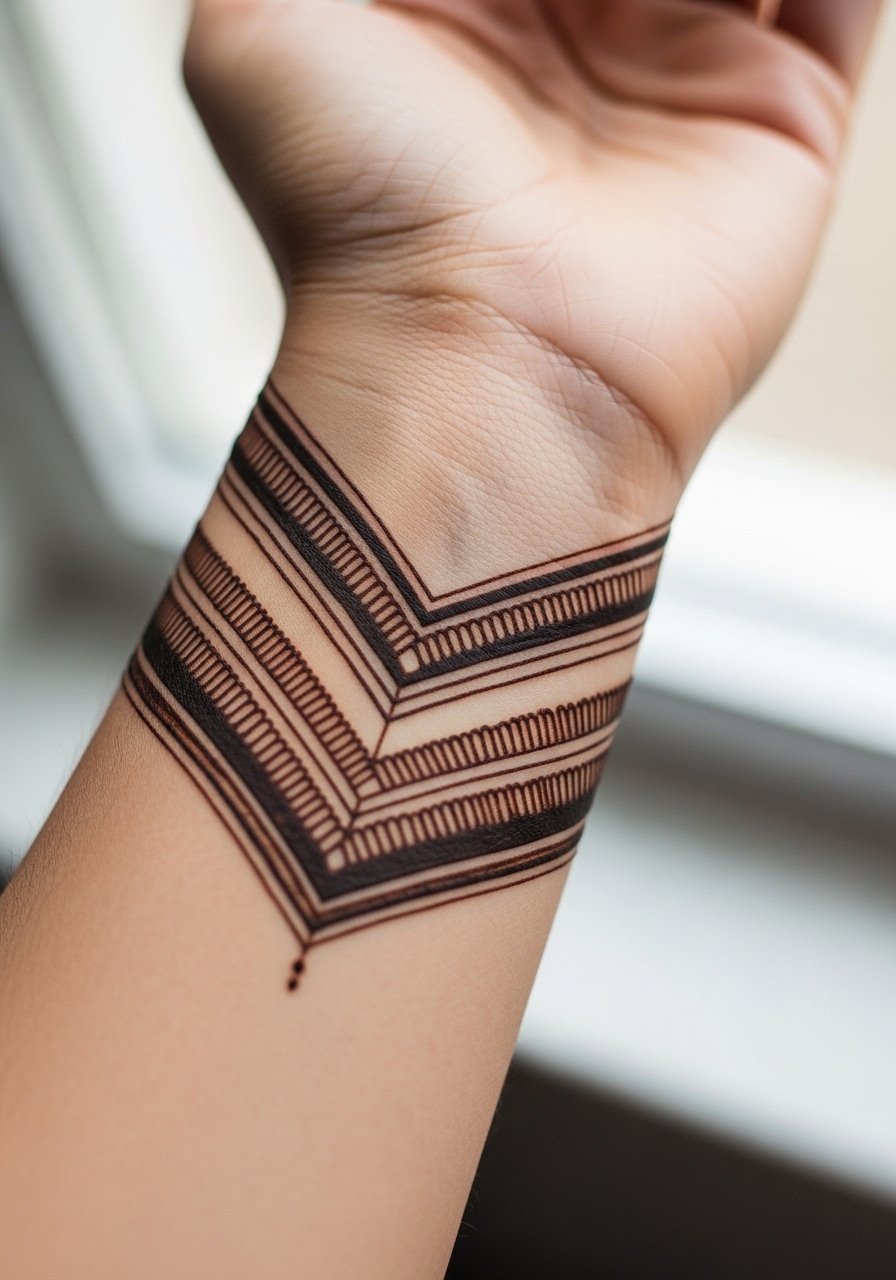
Geometric chevrons are great when you want structure. Mistake lead applies here because going too small kills the negative space that keeps geometry readable. Ask your artist to scale the chevrons so each peak has breathing room. Wrist proximity increases friction and hand movement speeds fading in the lowest chevrons. Expect clear contrast at six months and gradual softening by year two. The session feels moderate near the wrist, and a quick touch-up at year two is common. This placement shows best with short-sleeve tops and a simple minimalist watch band.
Pack Smart
The first forearm designs above include wrist, inner forearm, and outer placements that age differently, so a few small items smooth the appointment and the first week.
- Stencil transfer paper kit. Lets you check exact placement and line weight on skin before committing, especially useful for the script and vine styles above.
- Topical numbing cream. Applied per instructions eases sensitivity around the wrist and inner forearm during longer sessions.
- Thin protective film roll. Helps protect the wrist and chevron areas from early friction from daily washing and accessories.
- Fragrance-free gentle body wash. Cleans the healing zone without stripping pigment, important for delicate linework.
- Aquaphor healing ointment. Thin applications in the first days lock in moisture for fine detailing without suffocating the skin.
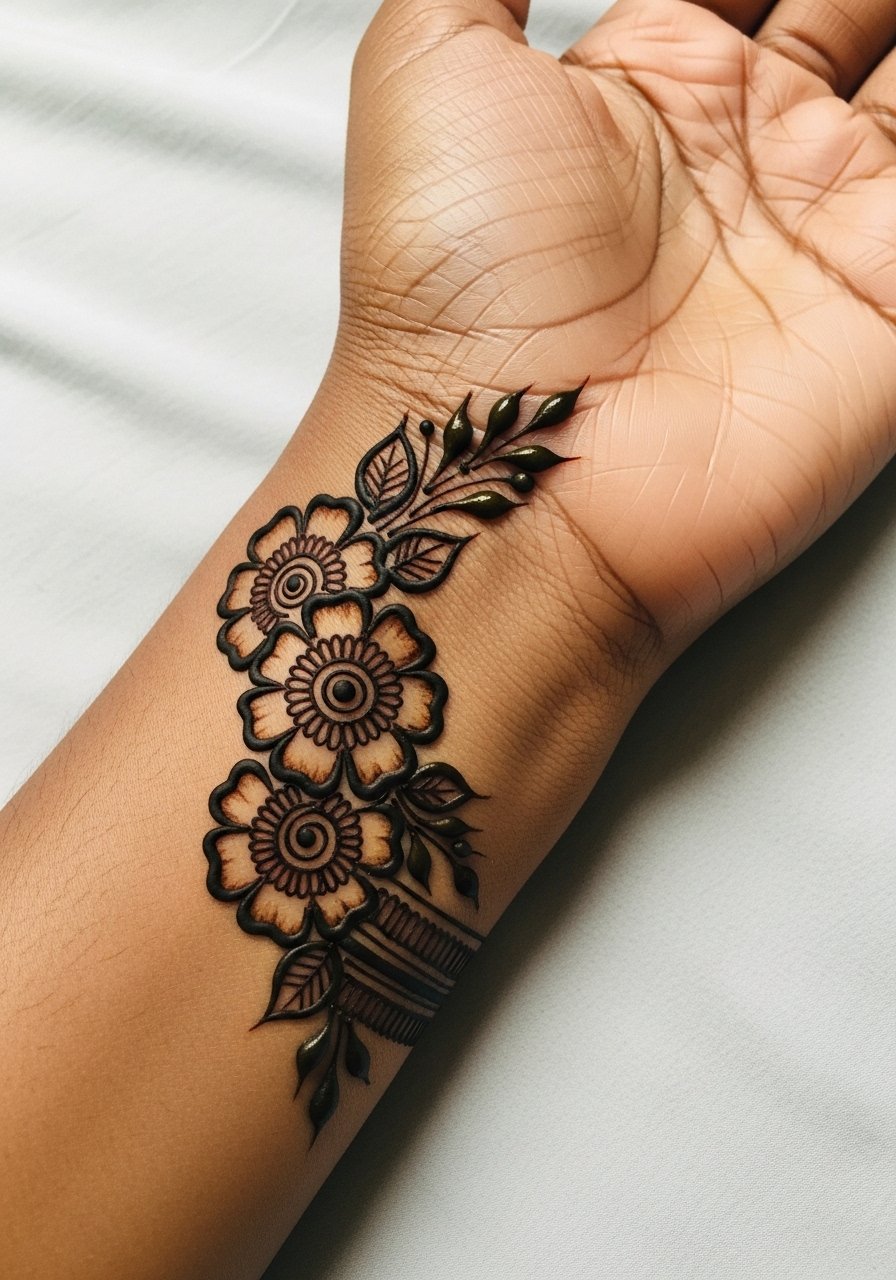
7. Floral Sprig Trail Along the Outer Forearm
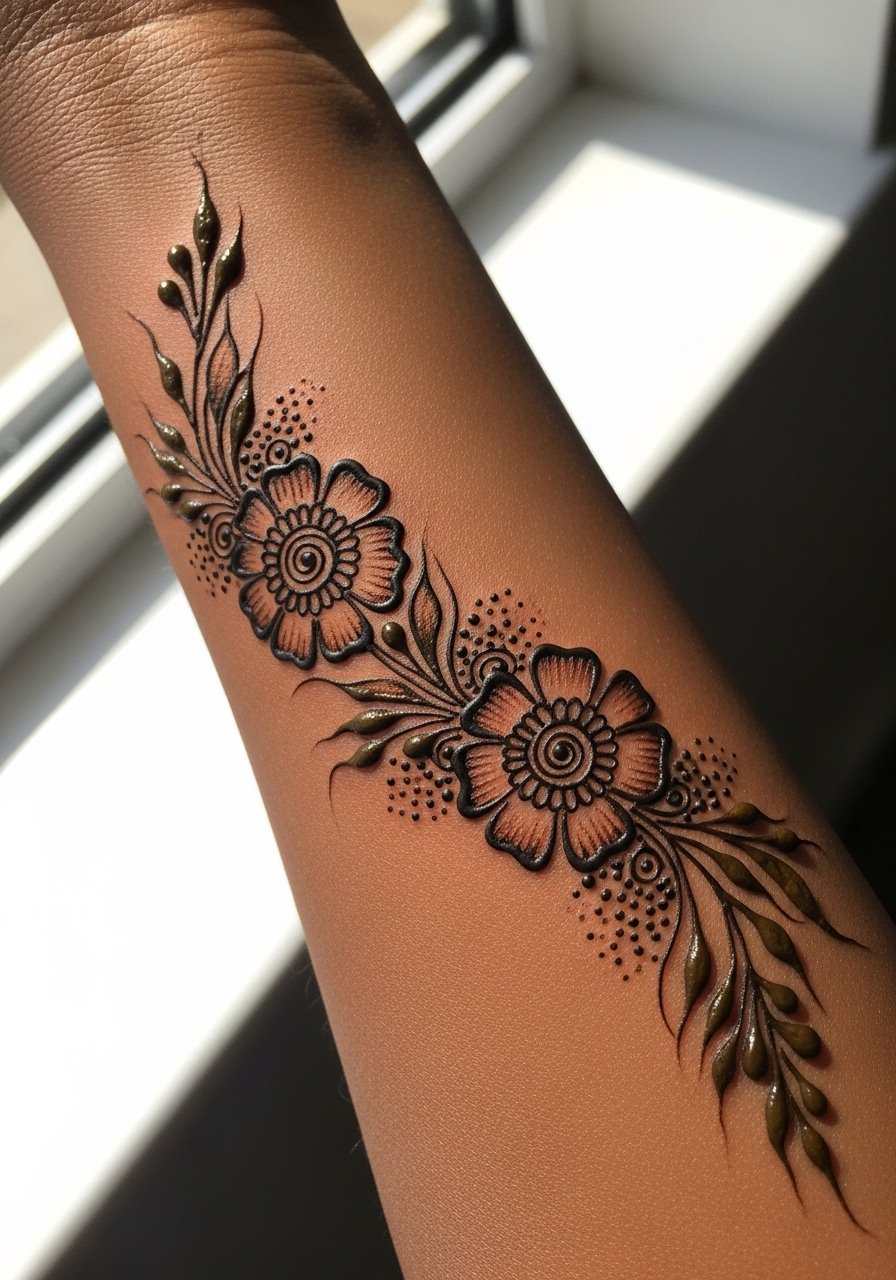
A floral sprig reads classic and personal. Personal observation lead: I have seen sprigs keep their form when artists use alternating line weights. Tell your artist you want thicker stems with delicate petal outlines and light stipple for texture. Outer forearm placement reduces early rubbing compared with wrist work. Pain is mild and sessions are short. Watch for a common mistake where petals are too detailed in a small space, which leads to muddying in 18 months. For evenings, pair this with a three-quarter sleeve shirt that frames the sprig without covering it.
8. Bold Paisley Panel Mid-Forearm
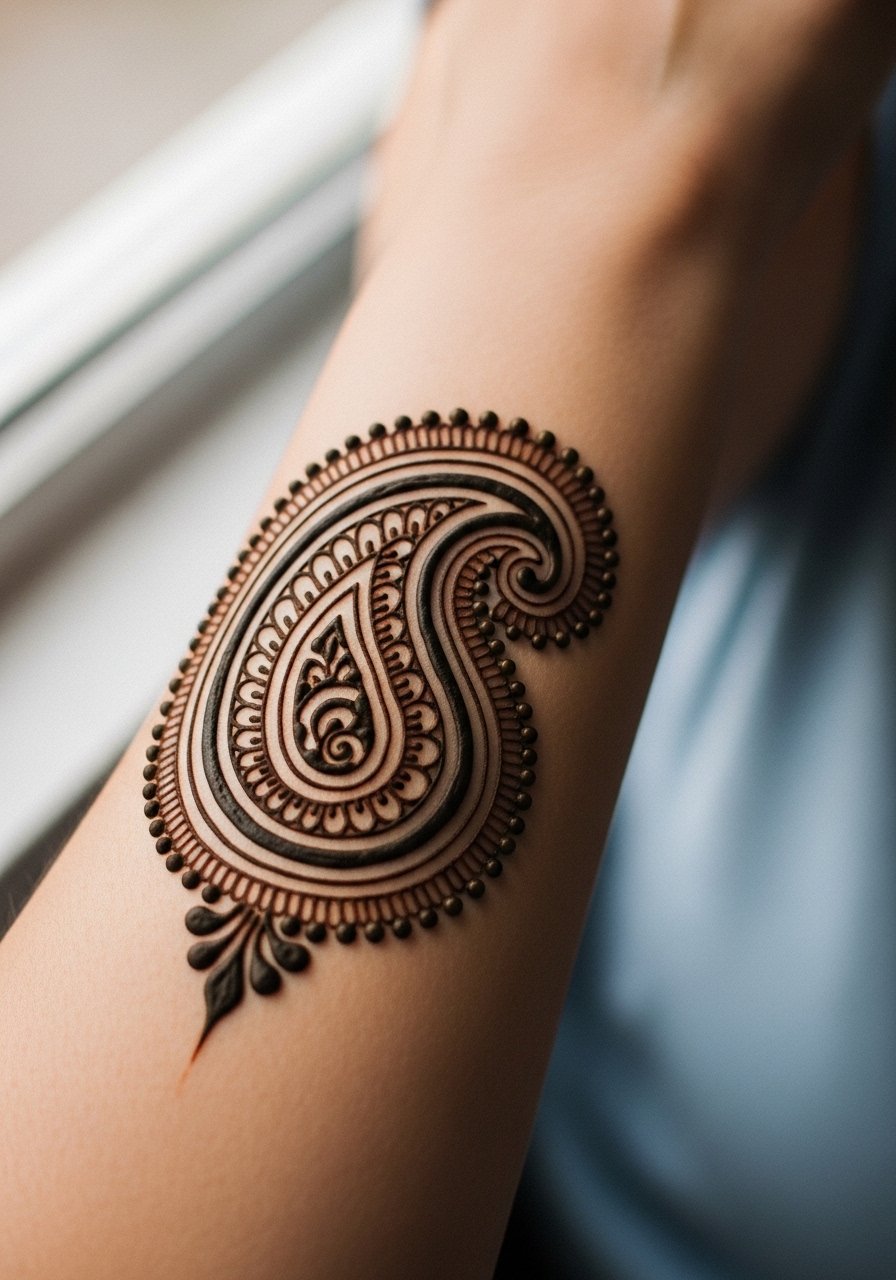
The paisley panel leans toward higher visual contrast. Visual impact lead explains why it works from across a room. Ask for saturated outer lines and lighter inner dot work so the paisley keeps structure as details soften. Mid-forearm placement avoids wrist abrasion and usually holds longer than inner forearm edges. Expect bold outlines to persist past two years while fine interior dots fade sooner. Session time is moderate. Wear a loose short-sleeve tee on appointment day so the artist can access the mid-forearm easily.
9. Minimalist Arrow Along the Top Forearm
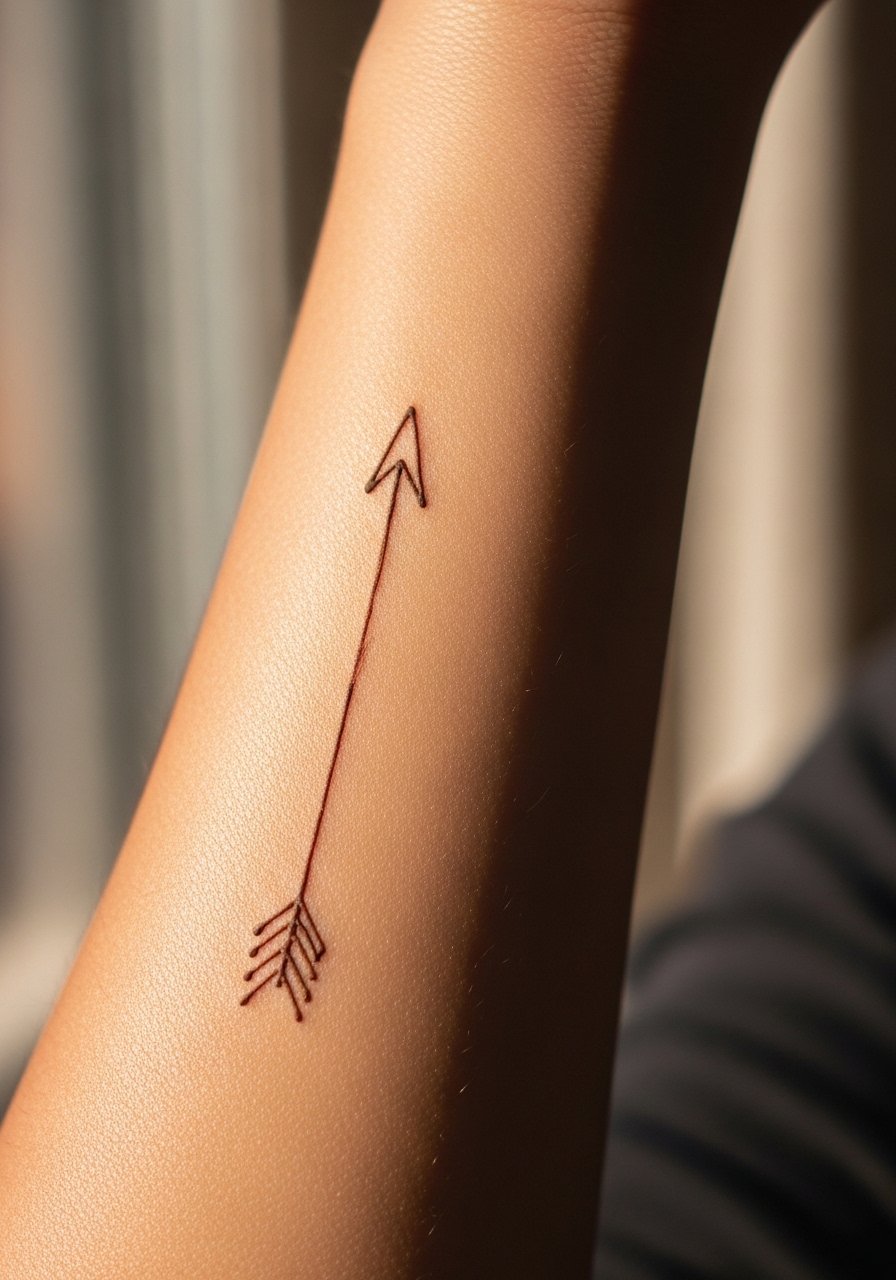
Minimalist arrows are deceptively tricky because single lines must be perfectly straight. Consultation lead: bring photos that show exact line weight and angle. The top forearm usually heals well and has low blowout risk, but small shakes in the line appear quickly if the stencil is off. Pain is low. At 6 months you will see crispness, and at 2 years expect gentle fading. This style works casually with rolled sleeves or a sleeve-cuff sweater for cooler months.
10. Interlaced Chain Pattern Near the Elbow
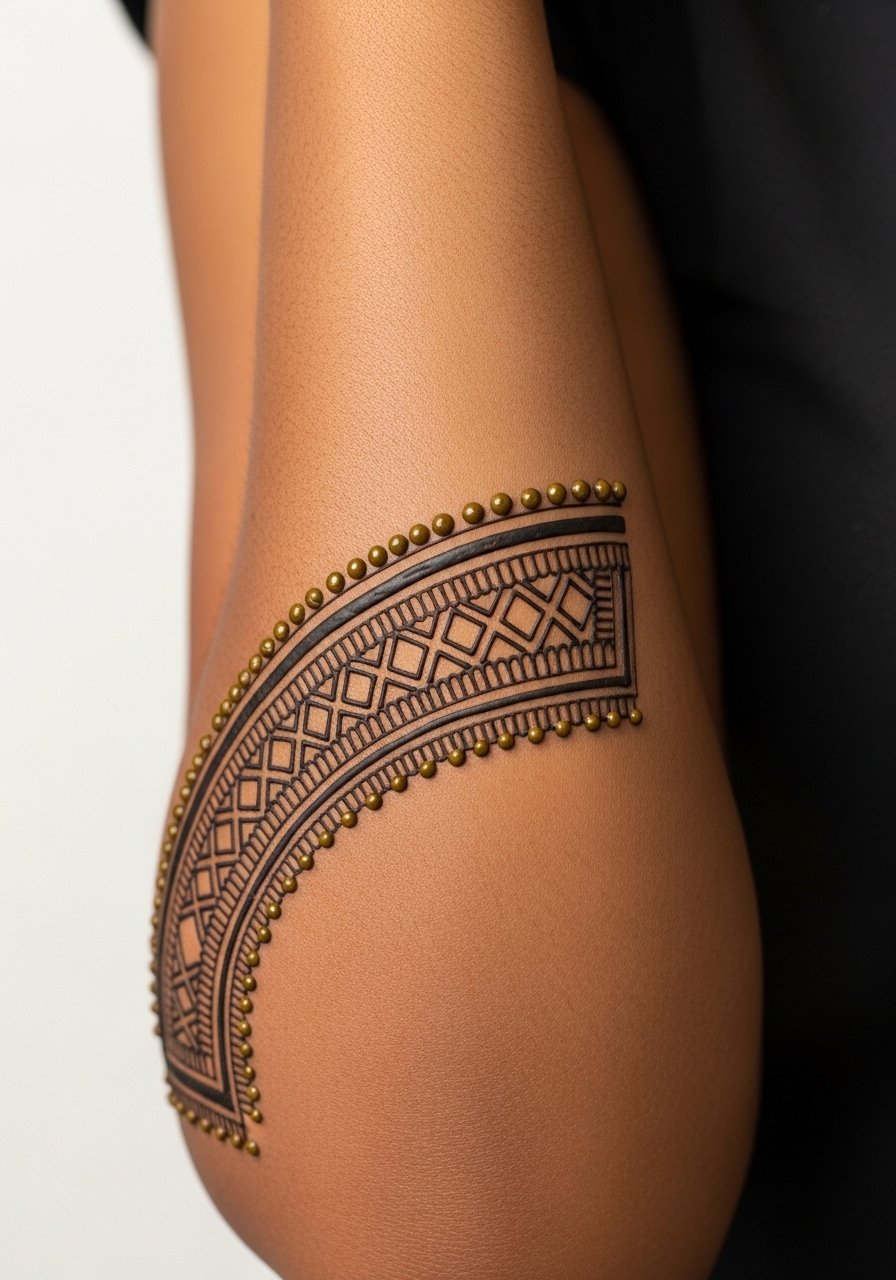
Elbow-adjacent patterns face more movement and stretch. Mistake lead: putting dense detail right over the crease. Instead, position the heaviest lines slightly off the joint and let negative space cross the crease. Expect more movement-related softening here by year two than on the mid-forearm. Sessions may be slightly more uncomfortable when the arm angle is awkward but still manageable. For session wear, choose a short-sleeve top with roomy armholes so you can bend without pulling fabric across the area.
11. Micro-Realism Bee Along the Inner Forearm
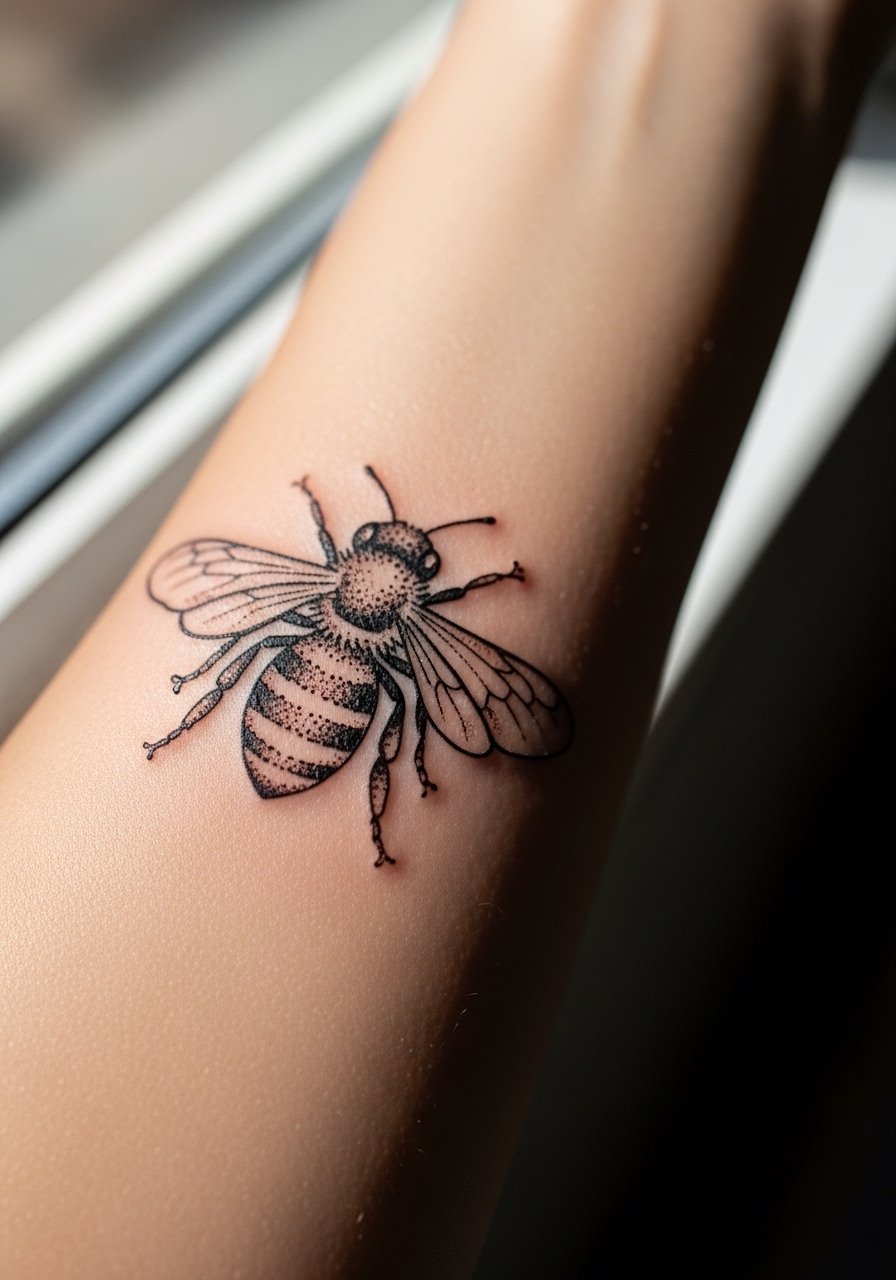
Micro-realism demands careful depth and spacing to hold. Aging/healing lead matters here because tiny shaded areas lose texture faster than linear work. Ask for slightly more contrast in the wings and minimal dot shading under the abdomen so the silhouette survives years of wear. Inner forearm placement gives visibility but invites light abrasion from clothing. Expect the micro details to need a touch-up by year two if you want the original level of contrast. Pain is low to moderate. Pair with a simple pendant necklace if you like layered focal points on your arms and chest.
12. Floral Arrow Wrap Pointing Upward
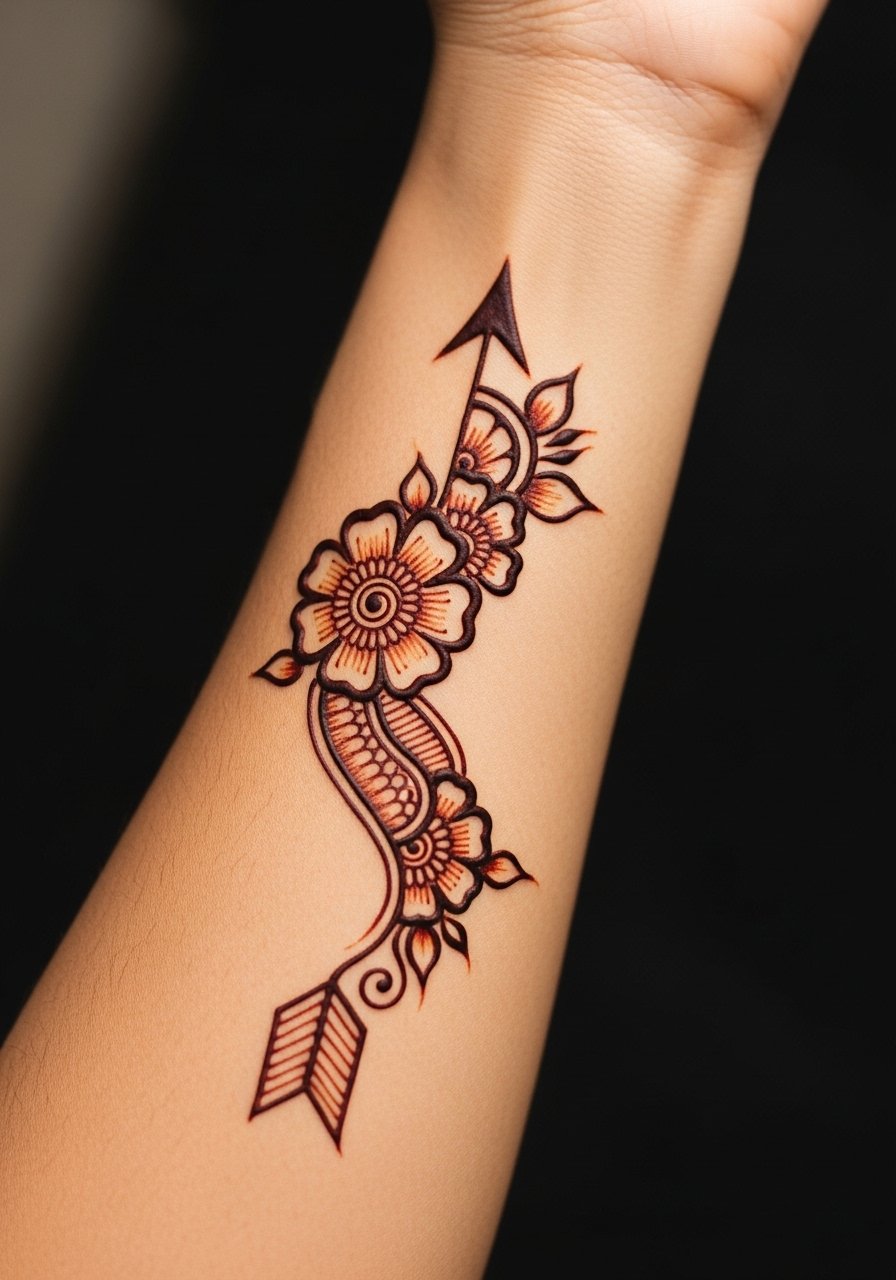
Consultation lead: show exactly how you want the arrow to wrap across muscle curves. The combo of arrow and florals needs scaled petals so they do not drown the shaft. Expect the wrapped section near the wrist to fade faster than the mid-forearm. Session time is moderate. A common mistake is too many tiny leaves that merge; ask for fewer, larger elements. This design pairs well with sleeveless dresses or a tank top when you want to display the full wrap.
13. Henna-Inspired Compass Near the Wrist
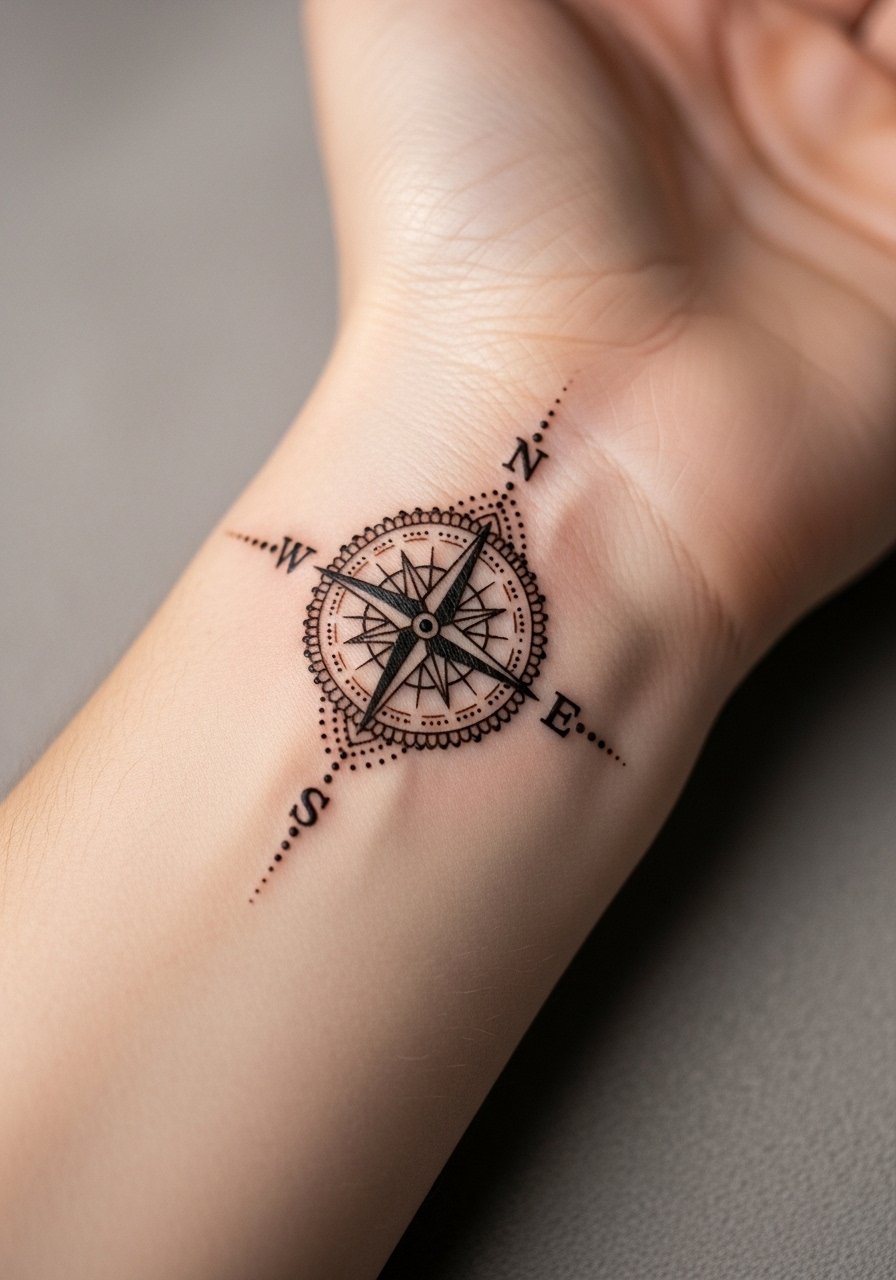
The compass is symbolic and works best with strong main points and restrained secondary detail. Mistake lead: overfilling the spaces inside the compass, which causes blur after healing. Wrist placement increases wash-related fading, so expect sharper edges early and softer detail by year two. Pain is low. For session comfort, a slip-on cotton tee eases access to the wrist without tugging.
14. Delicate Paisley Wristband Right at the Wrist
Wristbands require balanced spacing because the wrist is a high-friction zone. Pain warning lead: the area is bony and can feel sharper, though sessions are short. Ask for slightly bolder outer edges to protect inner detail from early wear. Expect the band to need refreshes sooner than inner forearm pieces. This design looks great with stacked bracelets or a minimal leather wrap bracelet that sits just below the band without crowding it.
15. Spiral Dot Work Running Up the Forearm
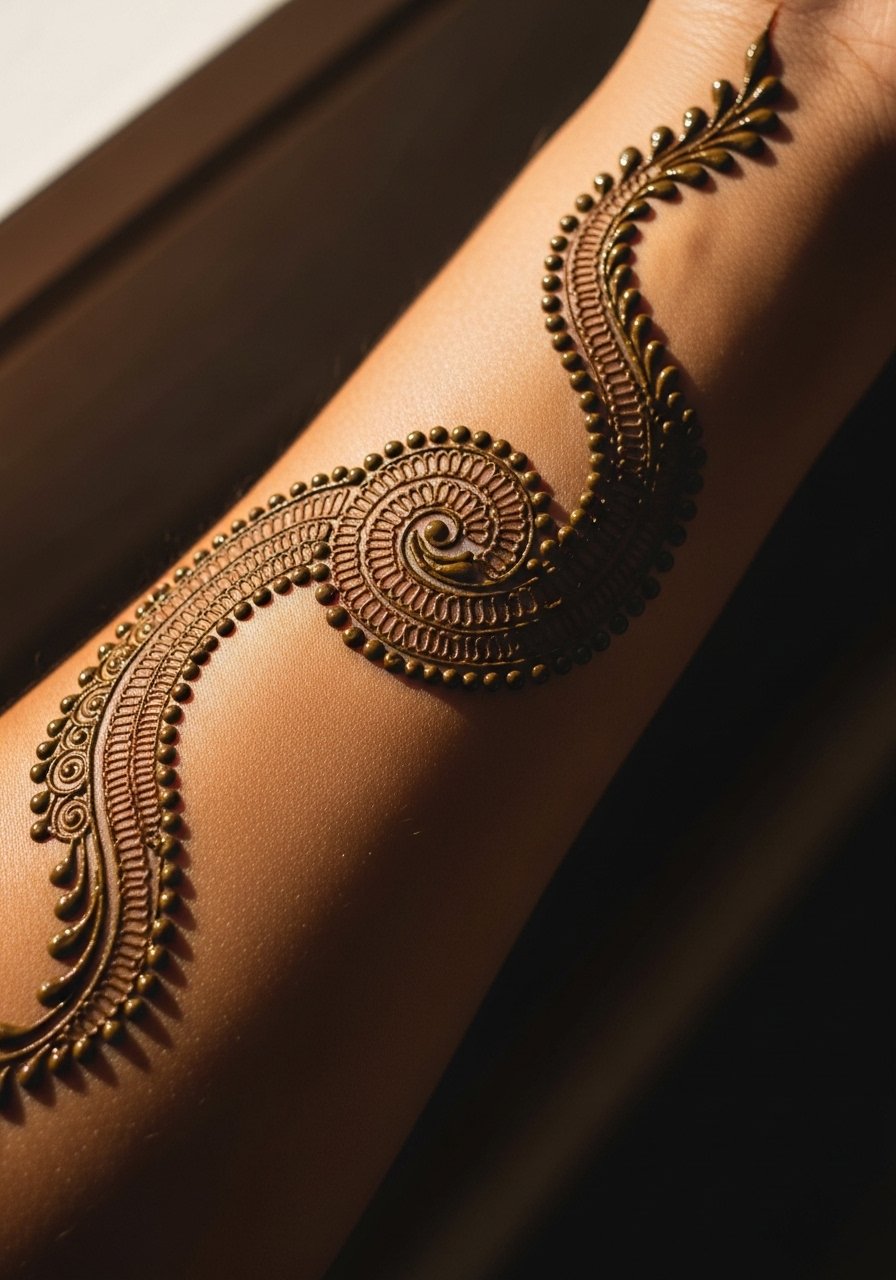
Dot work relies on consistent spacing so spirals keep their shape. Mistake lead: cramming dots too close near the center, which creates a muddy focal point later. When consulting, ask for progressive spacing and a clear negative space ring to preserve the spiral. Aging looks like a softened center and retained outer rings. Sessions are meditative and low in pain. For showing it off, a rolled-up denim jacket sleeve frames the ascending spiral nicely.
16. Scripted Coordinates Along the Forearm
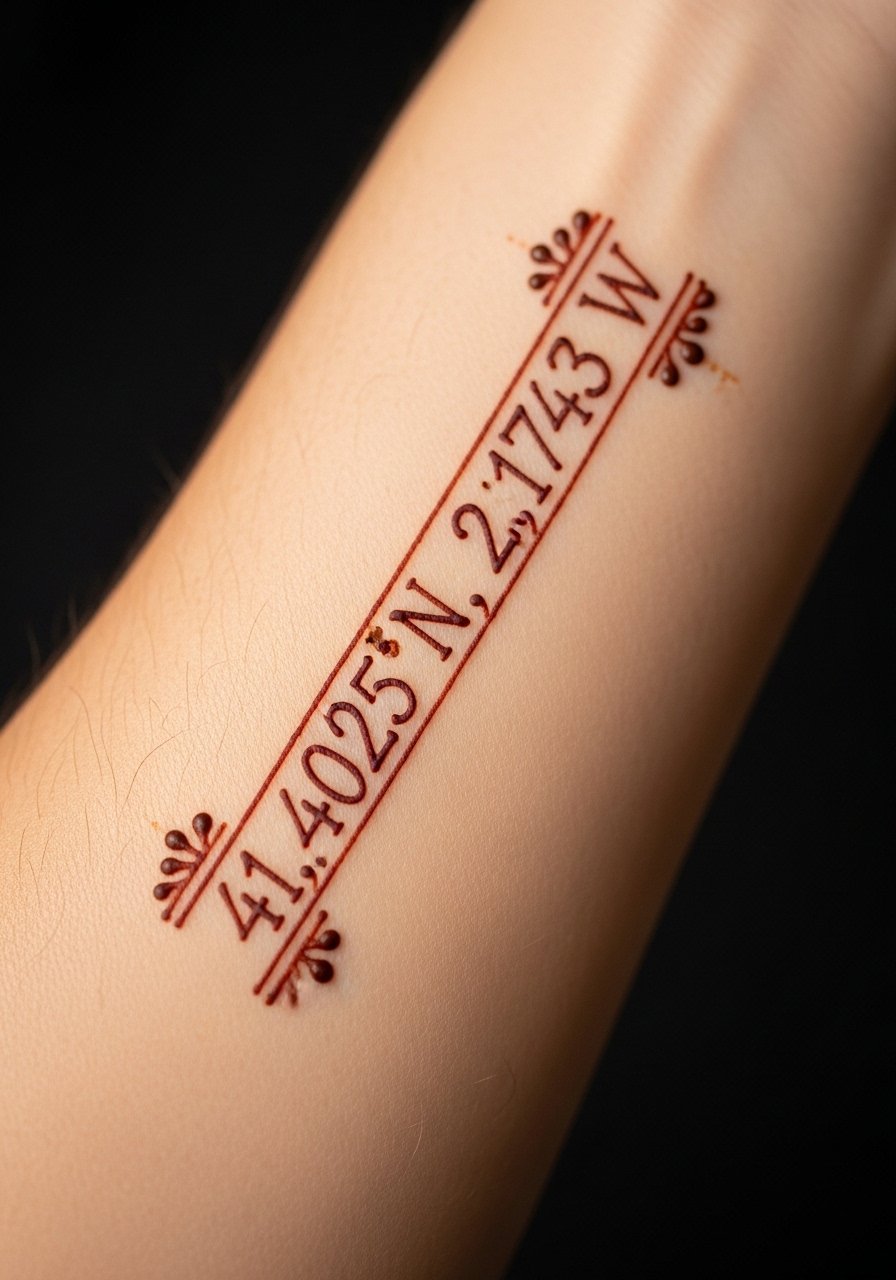
Text accuracy matters for coordinates. Visual lead: the thin serif style reads intimate and clean when spaced properly. Common mistake is compressing numerals too tightly. Ask for slight letter spacing and thicker numerals so the digits remain legible. Inner forearm placement keeps it private but accessible to view. Expect minimal pain and possible softening of thin serifs by year two. This piece pairs with a simple cuff bracelet that sits above the script.
17. Asymmetrical Floral Cluster Near the Wrist Edge
Controversy lead applies here because floral clusters can echo motifs from multiple cultures. One camp calls for strict cultural credit and restraint. Another camp accepts hybrid designs when created with respect. If you choose an asymmetrical cluster, ask the artist for simplified petals and intentional negative space so the cluster ages into a readable silhouette rather than a blot. Wrist-edge placement brings more friction, so plan for a touch-up if you want crisp outlines after a year. Pain is brief and tolerable. This one shows well with cropped sleeves and a delicate stack bracelet.
Frequently Asked Questions
Q: How long do henna-style forearm designs usually last before needing a touch-up?
A: It depends on placement and daily wear. Outer and mid-forearm pieces tend to keep detail longer than wrist-edge work. Expect clear edges at six months and noticeable softening by year two for fine stipple or micro details. Plan a touch-up around year two if you want the original contrast back.
Q: Are there specific things to tell the artist during the consultation to improve longevity?
A: Yes. Ask for slightly bolder primary outlines, generous spacing in dot work, and a test stencil placement while you move your arm. Tell them where you wear watches or bracelets so they can position the piece away from constant friction. That level of specificity beats a vague "make it last."
Q: Do forearm henna designs hurt more than other placements?
A: Forearm pain is generally low to moderate. The wrist edge and areas over thin skin feel sharper. If you are nervous, topical numbing applied by a pro before the session can help but check with your artist first. Short breaks during longer sessions also keep discomfort manageable.
Q: Can I get henna-style work if I have darker skin tones and still keep contrast?
A: Yes. From what I've seen, deliberate line weight and negative space are the keys. Ask the artist for slightly thicker main strokes and careful dot spacing so the design retains contrast without needing heavy saturation.
Q: How should I dress for a forearm session to give the artist the best access?
A: Wear something with sleeves you can roll easily or a loose short-sleeve top. For wrist or elbow-adjacent work, a short-sleeve top with roomy armholes is ideal. Comfortable, non-restrictive clothing helps you hold positions without tugging at the area.
Q: Are there any cultural considerations I should respect when choosing mandala or paisley henna designs?
A: Yes. Artists and clients are split into two camps. One group urges against direct copies of sacred or ceremonial patterns. The other accepts thoughtful adaptations that acknowledge origins. If cultural sensitivity matters to you, ask your artist how they adapt motifs respectfully and whether they can suggest alternate elements that honor the source.
Q: Will frequent washing or gym use ruin delicate henna-style linework faster?
A: Frequent friction and water exposure speed softening of fine lines. Wrist and hand-adjacent pieces feel the effect sooner because of constant movement and washing. Small lifestyle adjustments during the first healing months reduce early fading and keep the lines readable longer.

