
Fine line wrap around pieces look delicate in photos, but they live in the real world where sun, friction, and skin movement decide their fate. Fading, blowout, and unexpected visibility are the three things people worry about most, and the placement choices you make now determine whether the design looks crisp at year two or needs touch-ups. Below are practical, wearable wrap around ideas and what to ask for in consultation to make them age better.
1. Fine Line Vine on the Inner Forearm
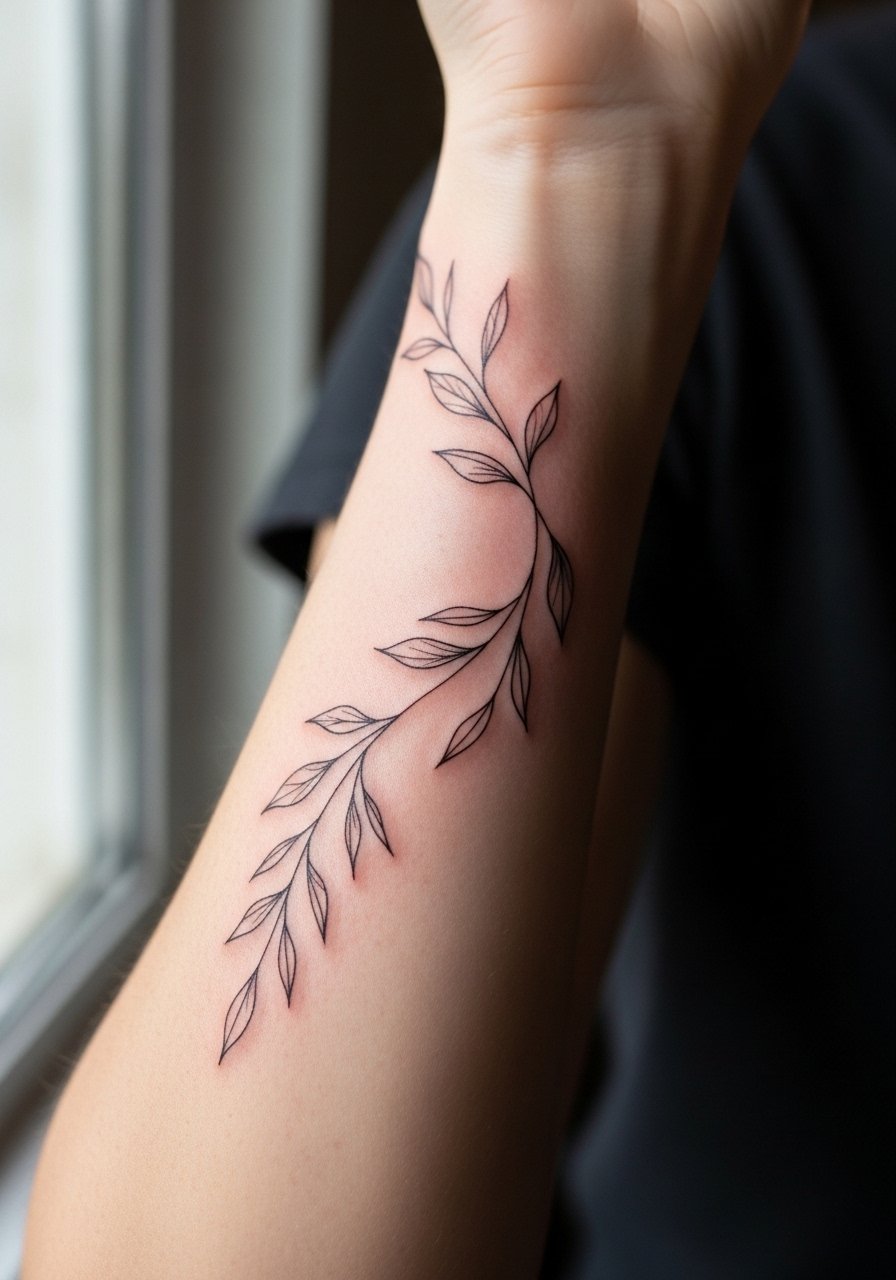
I've seen this version last nicely when the vine is given breathing room between stems. Fair warning: the inner forearm gets a lot of sun and sleeves rubbing, so ask your artist for slightly heavier linework than ultra-micro hairlines to avoid early blur. The session feels like steady tapping rather than deep buzzing, and pain is usually a 3 out of 10. Common mistakes are packing too much detail into a narrow band and asking for tiny stipple shading that will merge over time. For showing it off, roll sleeves and try a rolled sleeve linen shirt that keeps attention on the vine without competing with the pattern.
2. Constellation Band Around the Wrist
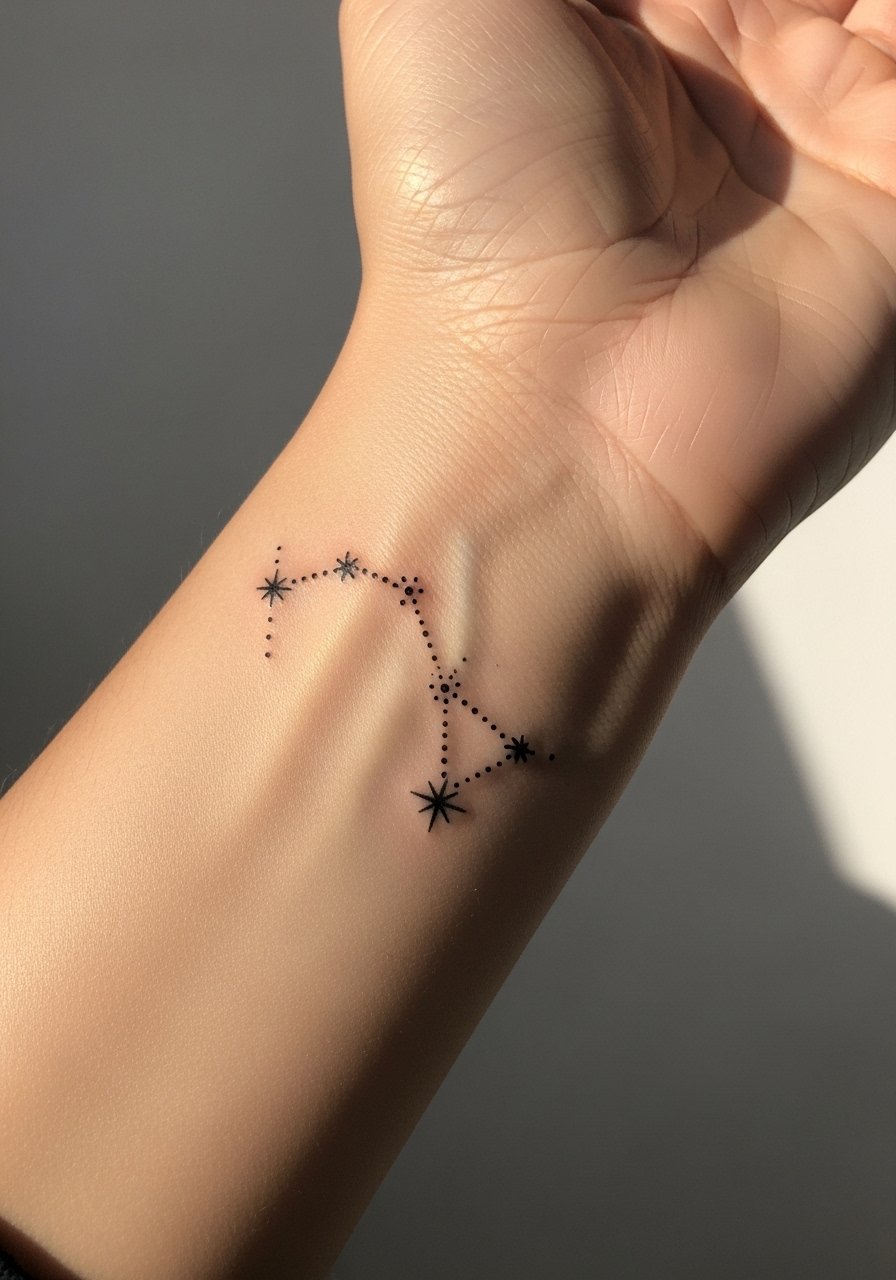
When the constellation wraps fully around the wrist, the trick is negative space between stars. My consultation tip is to ask for spacing that lets each dot breathe. The wrist sees soap, typing, and watches, so expect touch-ups sooner than on the inner arm. If you pick lines too thin, blowout risk increases because the skin there is thin and moves constantly. The session is quick, often under 45 minutes, and pain is low to moderate. Pair this with a thin chain bracelet or swap a watch for alternating stacks so the tattoo remains visible without constant friction.
3. Subtle Arrow Wrap Behind the Ankle

Most ankle wrap pieces show their personality in movement. The biggest mistake is placing the arrow too low where shoes rub. In consultation, mark the exact spot while standing and walking so the artist can place it above common friction points. Pain on the ankle is moderate, commonly a 5 out of 10, and sessions are short. Over time you may notice faint softening from socks and shoes, so expect touch-ups around year three if you want crisp edges. For summer looks, pair it with sandals that reveal the ankle so the wrap reads like an accessory.
4. Micro-Realism Leaf Band on the Ribcage
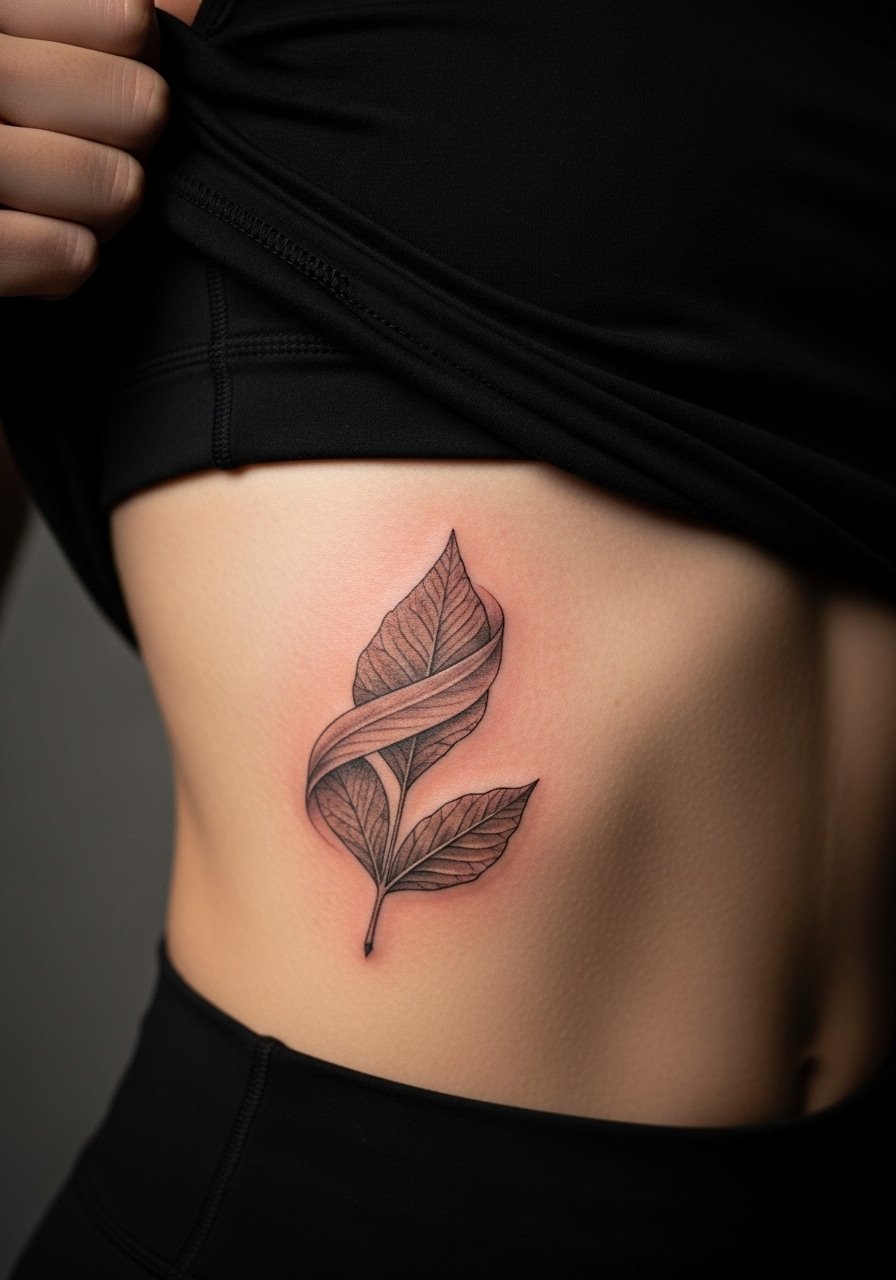
Fair warning: the ribcage is a high-movement, high-pain zone. Pain can reach 7 or 8 out of 10 depending on depth. Artists split on fine detail here. One camp says the stretch and thin skin blur micro-realism within two years. The other camp argues that with proper spacing and slightly bolder micro-lines it settles fine. Ask your artist where they stand before booking. A common aging issue is placing too many tiny veins or shadows into a narrow band, which blurs into a grey patch over time. Wear a zip-up hoodie to the session so you can lift it just enough for the artist without cold chills.
5. Chain-Link Around the Upper Arm
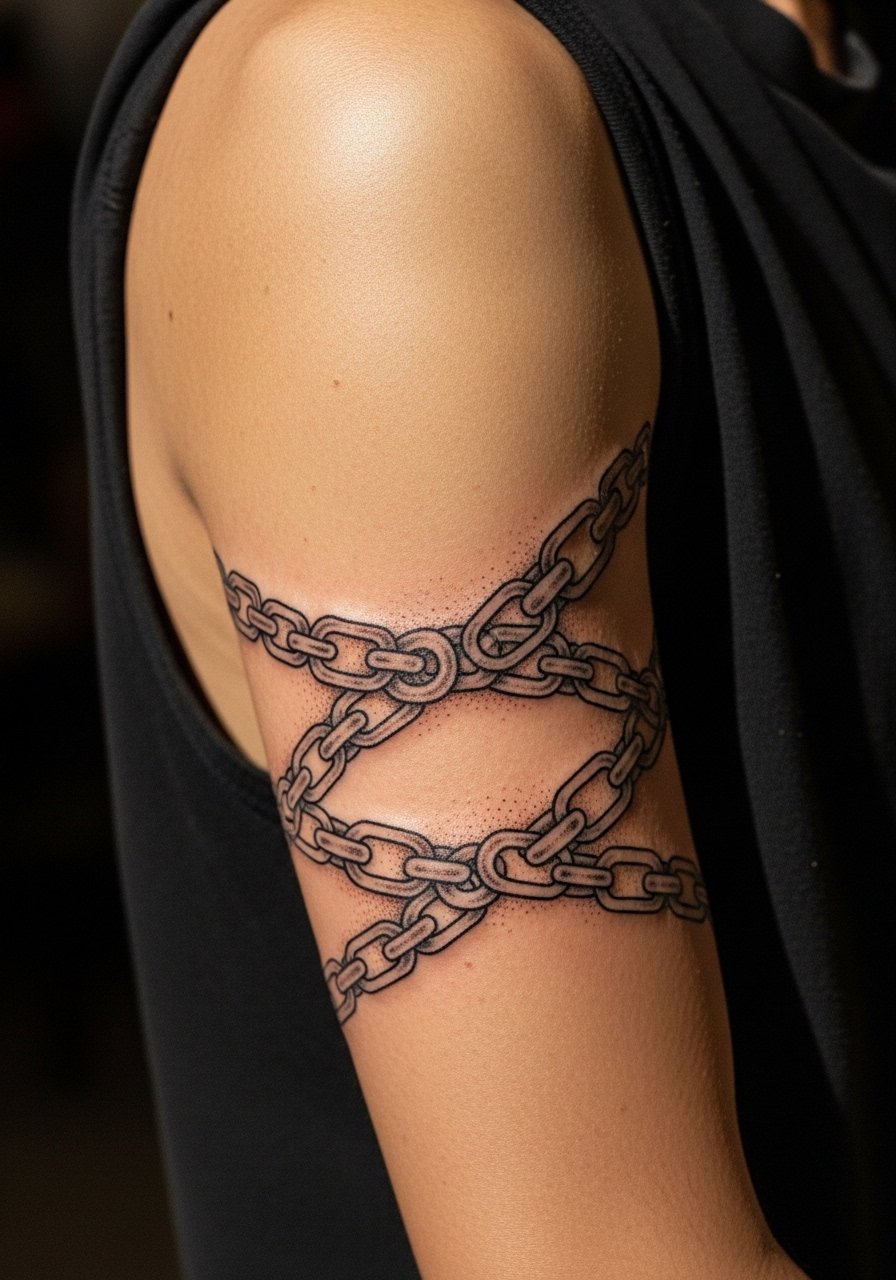
This is a great choice if you want simple geometry that reads from a distance. When you sit with an artist, show exactly how many links you want visible when wearing short sleeves. Common mistakes include asking for tiny links that merge into one another with age. Expect a 4 out of 10 pain level and a session under 90 minutes for a clean band. For a look that works with warm-weather outfits, try a loose tank top so the tattoo sits nicely when your arm is relaxed.
6. Delicate Script That Wraps the Collarbone
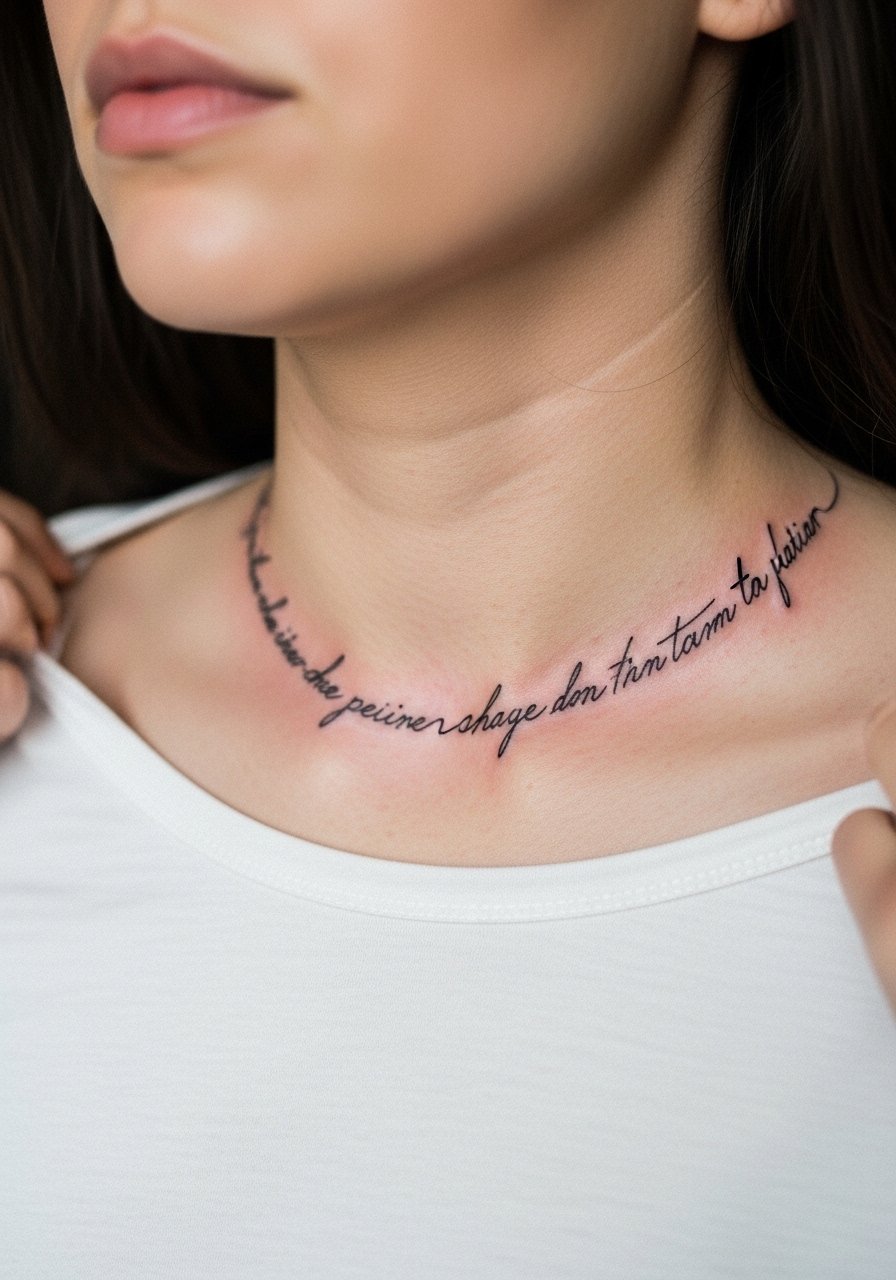
When script wraps the collarbone, placement is everything. The skin moves with shoulders and breath, so ask for slightly wider letter spacing and medium line weight so letters remain legible at year two. Expect moderate discomfort during the session near the bone. A mistake I see often is requesting tiny cursive that looks beautiful fresh and becomes unreadable later. For showing this off, a wide-neck top that slides just enough to frame the script keeps attention on the lettering without exposing the chest.
Pre-Session Essentials
The collarbone and rib ideas above ask for clothing that makes access easy while keeping you warm. A few targeted items smooth the session and reduce fuss afterward.
-
Stencil transfer paper kit. Lets you preview placement on skin so collarbone script and chain-link bands sit where you expect.
-
Topical numbing cream. Applied before high-pain sessions like ribs this takes the edge off without affecting linework.
-
Thin protective film roll. Useful for ankle and wrist wraps where friction from shoes and watches can irritate the first few days.
-
Fragrance-free gentle body wash. Cleanses healing areas without stripping moisture from delicate fine line work.
-
Aquaphor healing ointment. Thin layer during the first days keeps fine lines from drying into flakes, which helps maintain saturation.
7. Minimalist Wave on the Outer Bicep
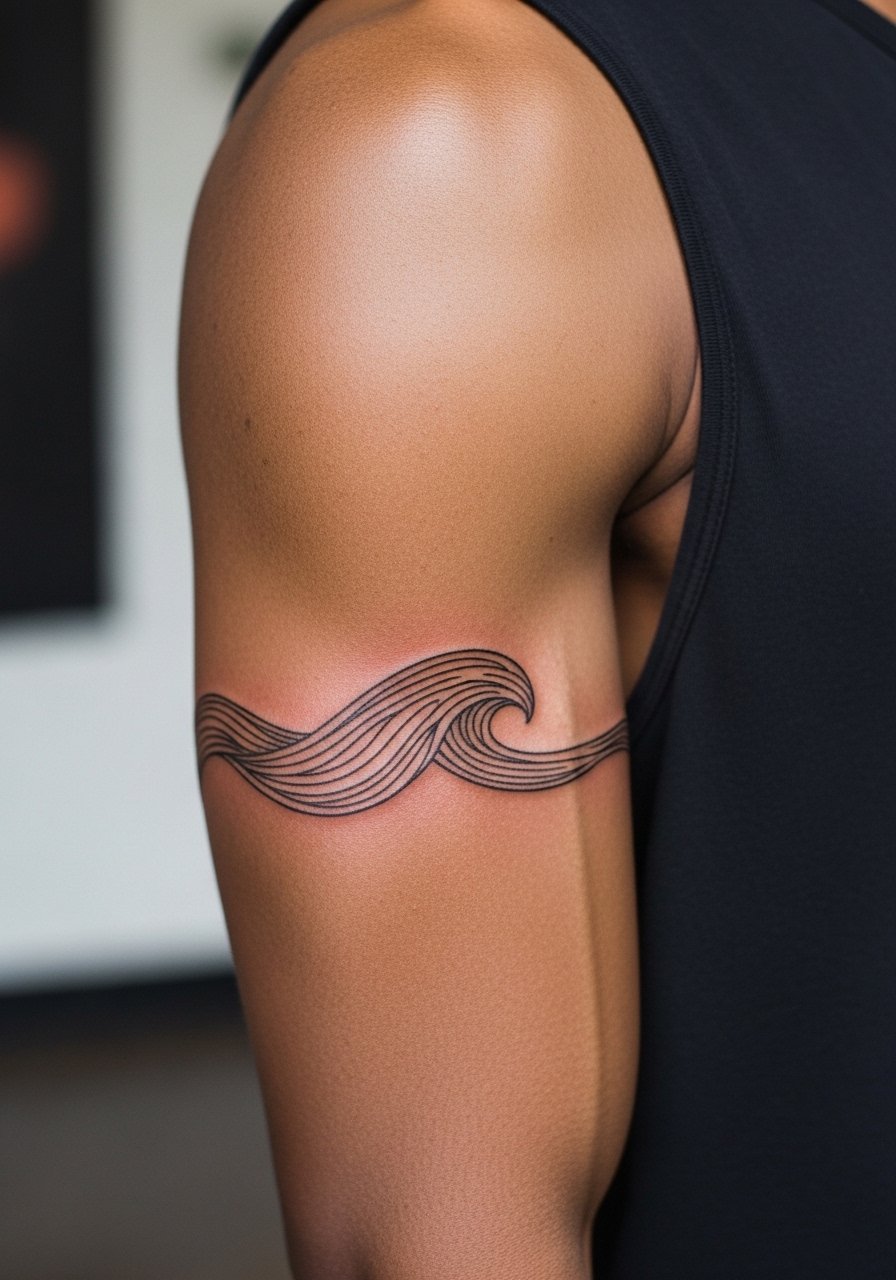
There's something about a simple wave that moves with the arm. In consultation, ask the artist to map the wave so peaks align with muscle contours when your arm is relaxed. Mistakes include centering the design on an area that bulges when you flex, which distorts the wrap. Pain is low to moderate and sessions are usually under an hour. Over time the outer bicep is forgiving as long as the lines are not ultra-fine. For casual wear, a sleeveless linen top frames the bicep without cutting into the design.
8. Thin Botanical Around the Ankle and Foot Join
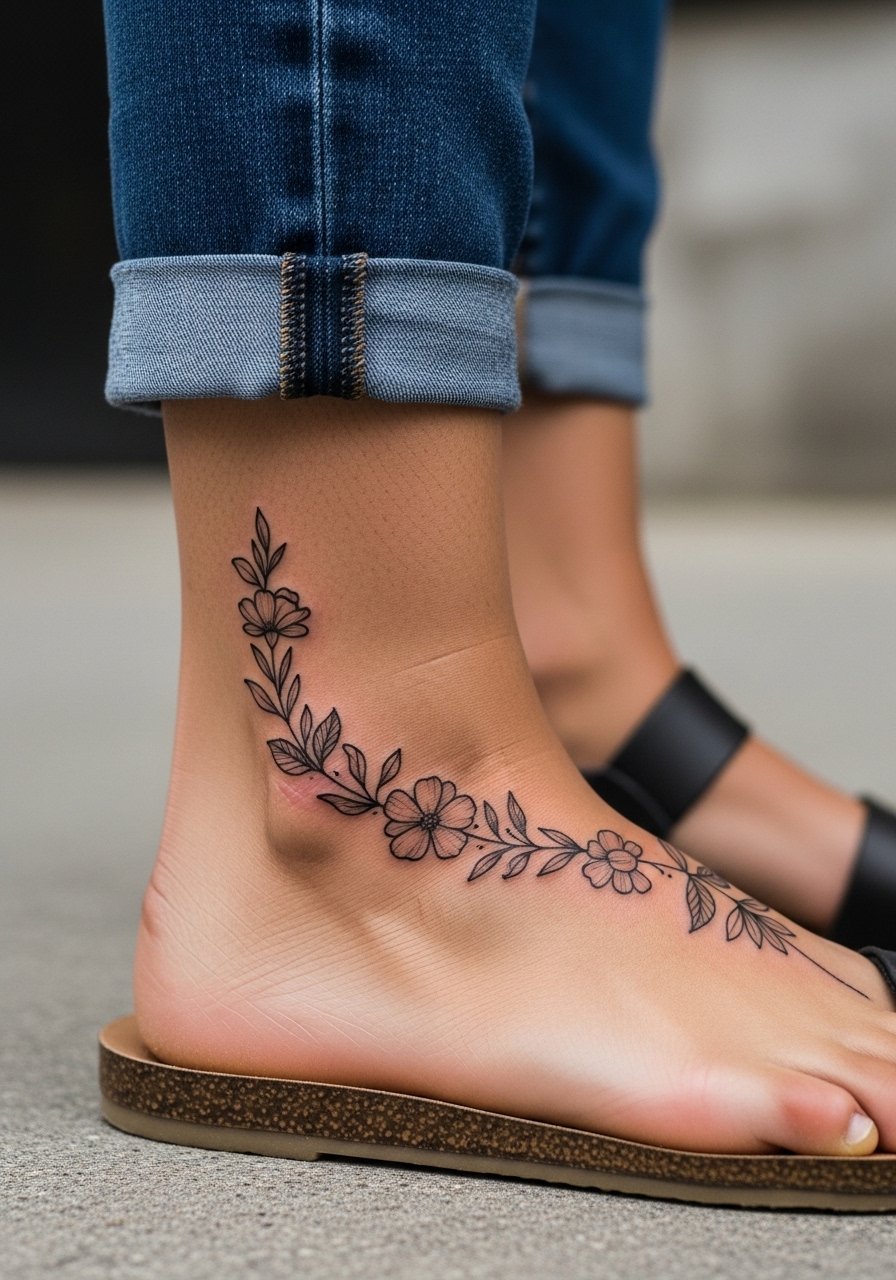
This placement lives where shoes and socks meet, so planning is key. The most common mistake is wrapping too far onto the foot where shoes abrade the ink. Ask for placement that sits clear of the shoe seam and for slightly bolder outlines at the edges. Pain ranges 4 to 6 depending on how far onto the foot the design goes. Expect touch-ups sooner than on arm work. Show it off with open sandals and pair the wrap with a minimalist ankle bracelet when you want the design front and center.
9. Micro-Dot Mandala That Encircles the Upper Arm
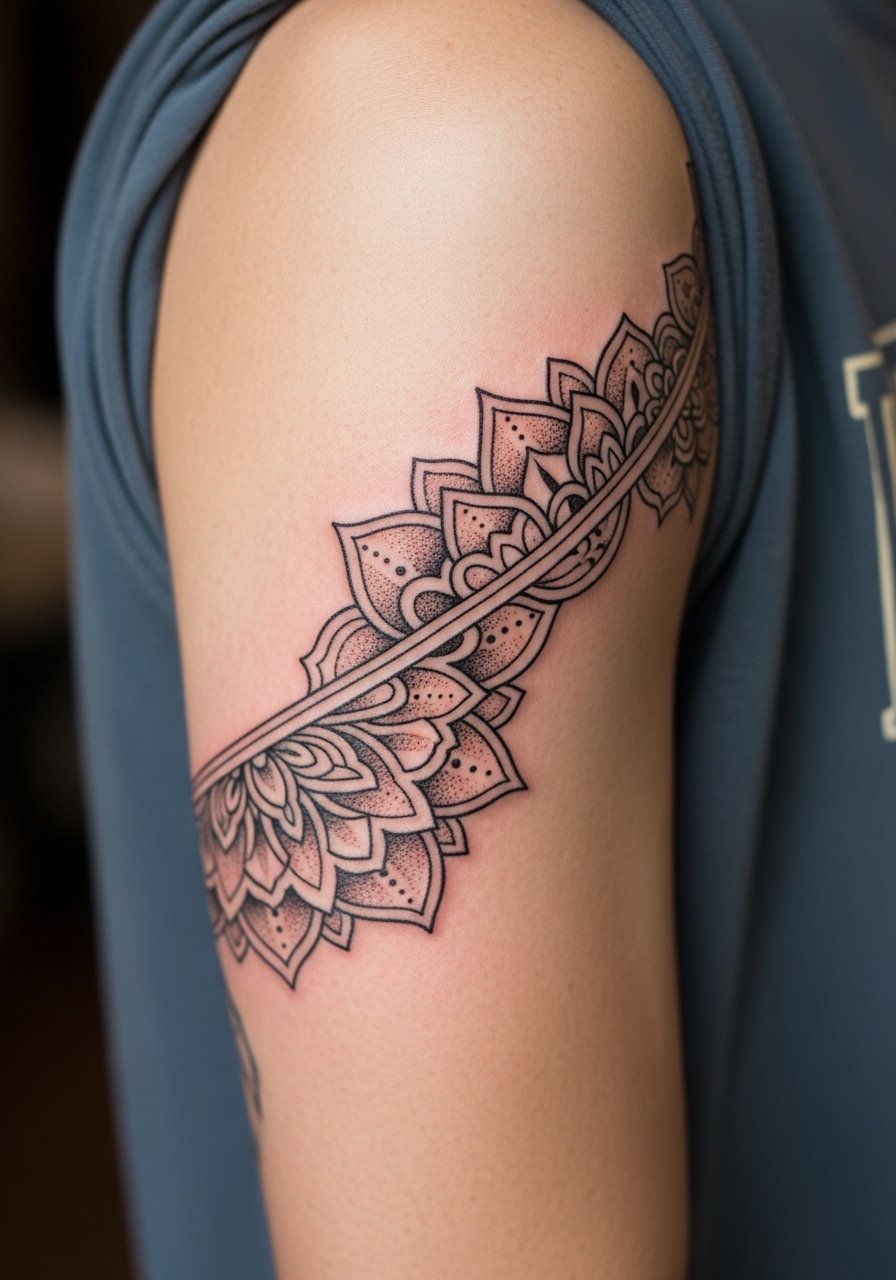
Dot work ages differently than continuous lines. When the stippling is too dense in a narrow band, the dots can merge into a grey wash. Ask your artist to space the dots and leave negative space, which keeps the mandala readable at two and five years. The session can be longer because dot work takes time, and the arm tolerates it well. A mistake is shrinking a mandala to fit a slim band. For evenings out, let a short-sleeve silk blouse slide up over the band so the mandala peeks when you move.
10. Thin Rope Motif Around the Thumb and Wrist
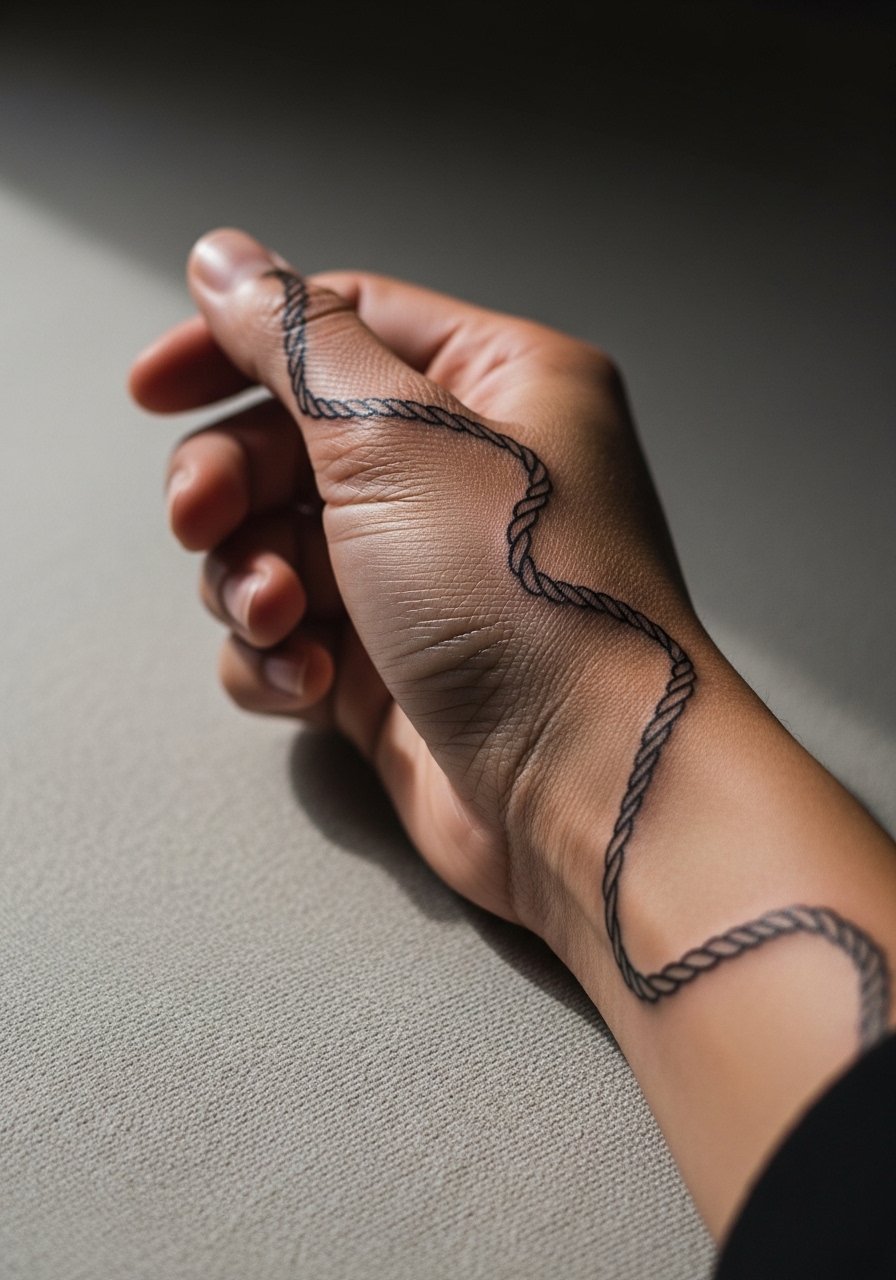
Hand and thumb tattoos are higher maintenance and carry social considerations in some workplaces. The controversy here is practical: one side says hand wraps are a modern norm, while another cautions about professional visibility and faster fading. Name both camps to yourself and ask your artist for smaller test pieces. Skin on the hand shifts and is exposed to water and soaps, so expect touch-ups at year two. Sessions are short but can sting more due to thin skin. For showing it off without compromising longevity, wear a minimalist ring that frames but does not rub the rope motif.
11. Tiny Floral Band Around the Thigh

Thigh wrap tattoos are forgiving because the skin moves less and is usually covered, which helps longevity. The mistake is asking for excessive tiny petals in a narrow band, which compress into a smudge after a few years. For session wear, show up in breathable shorts so the artist can work comfortably. Pain is moderate and sessions can run longer for continuous wraps. If you want to show the piece, high-waisted shorts paired with a crop top let the band sit naturally along the leg.
12. Subtle Geometric Around the Calf
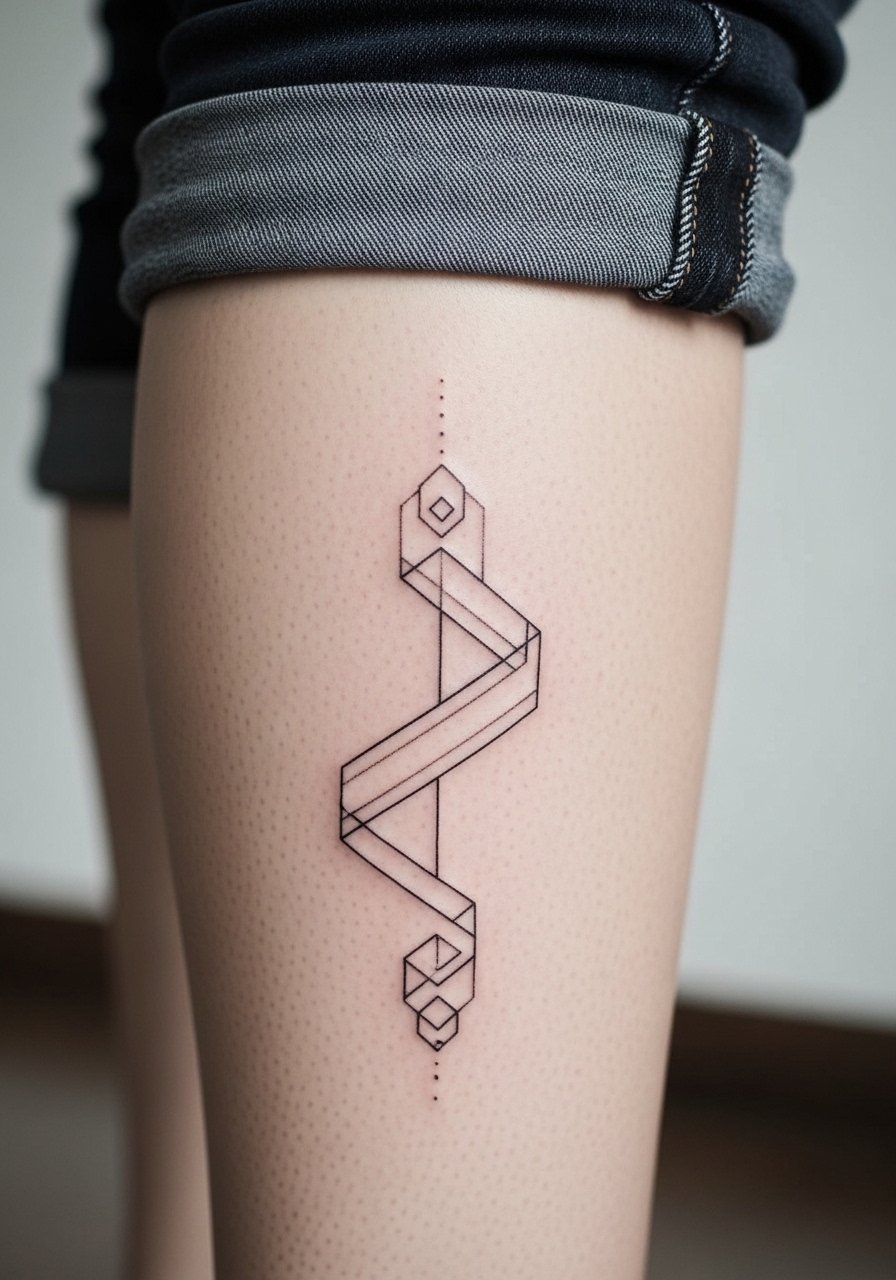
Calf wraps hold up well because they sit on muscular tissue with fewer repeated creases. The important consultation detail is symmetry around the muscle when standing and when the foot is flexed. Common errors include forcing mirror symmetry without considering how the calf changes between relaxed and flexed states. Pain is usually low and sessions moderate in length. For balance between showing and covering, pair the calf wrap with jeans rolled up at the hem so it appears intentionally cropped.
13. Scripted Phrase That Circles the Wrist and Inner Arm

Script wraps require legible letter spacing and a test stencil that moves with the arm. One mistake is choosing a font that depends on tiny serifs or flourishes. Ask for cleaner letterforms and slightly wider spacing. The inner arm sees sunscreen and roll, which affects longevity, so expect a touch-up at year three if you want crisp letters. Sessions are smooth and the pain is mild. For low-effort presentation, pair the script with a thin chain pendant necklace that sits above the phrase for layered visual interest.
14. Wrap Around Dotwork Band at the Wrist

Dotwork around the wrist can feel like jewelry on skin when done with space. Avoid cramming too many dot gradients into narrow widths. The aging issue is dot merging from constant washing. Ask your artist to keep contrast readable and to avoid micro-dots near the inner wrist crease. Sessions are short and pain is low to moderate. For everyday styling that highlights the dotwork, stack a minimal leather cuff intermittently so the band peeks without constant friction.
15. Continuous Crescent Moon Band Across the Rib Side

Sternum and side rib designs bring the controversy about fine detail on moving skin back into play. One camp warns that dense fine work here blurs with normal movement and breathing. The other camp contends that slightly bolder edges and clear spacing keep lunar motifs readable for years. Ask the artist which approach they recommend for your skin. Expect higher pain and a slightly longer session. If you plan to reveal the piece, a crop top that lifts slightly lets you show the moons without fully exposing the torso.
16. Thin Wave and Mountain Combo Wrap for the Upper Arm
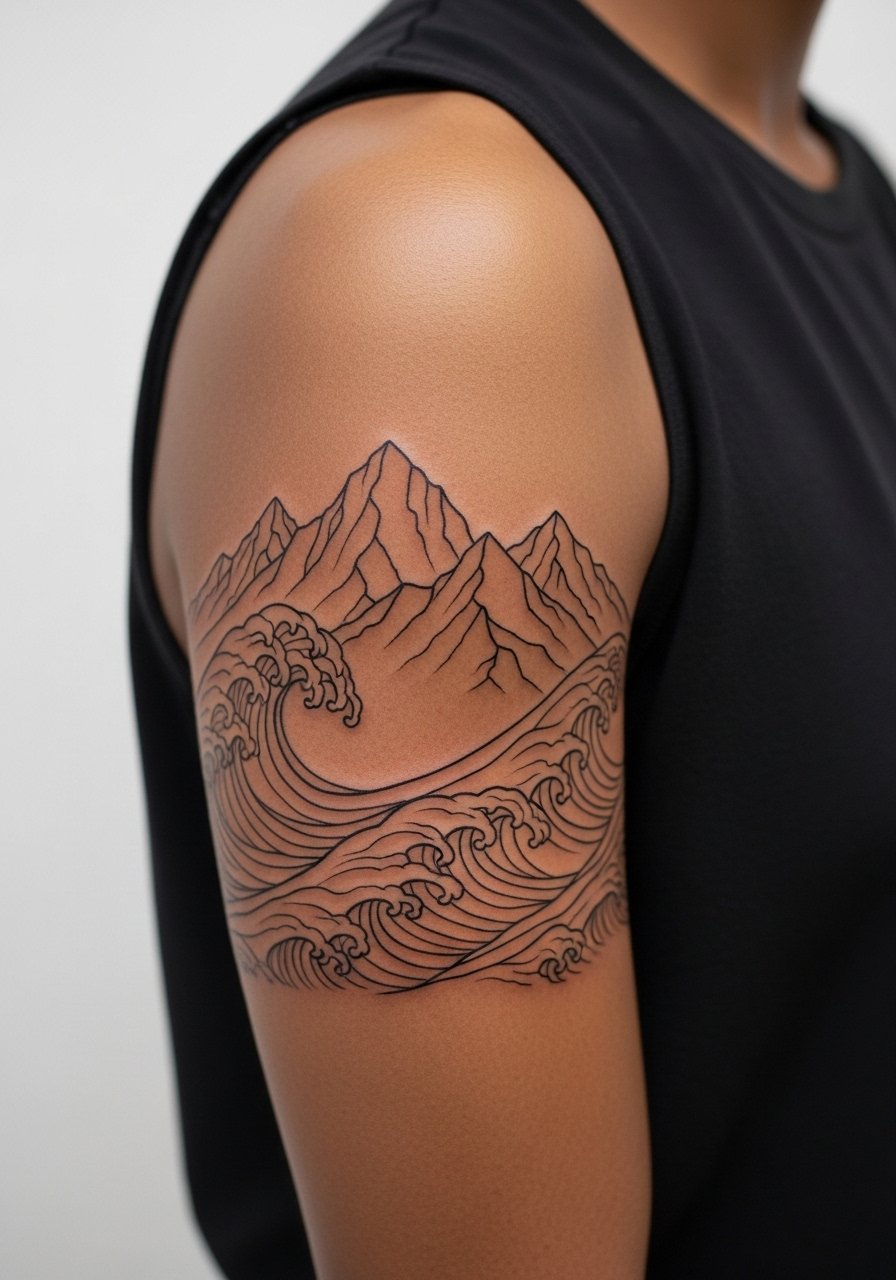
This hybrid design uses negative space to separate the two motifs, which helps prevent merging over time. A common mistake is compressing detail into one narrow band where mountains and waves fight for space. The session feels steady and tolerable, usually under 90 minutes. For a natural pairing with summer clothes, wear a sleeveless button-down that lets the wrap show when your arms move.
17. Thin Botanical Chain That Crosses the Back of the Neck
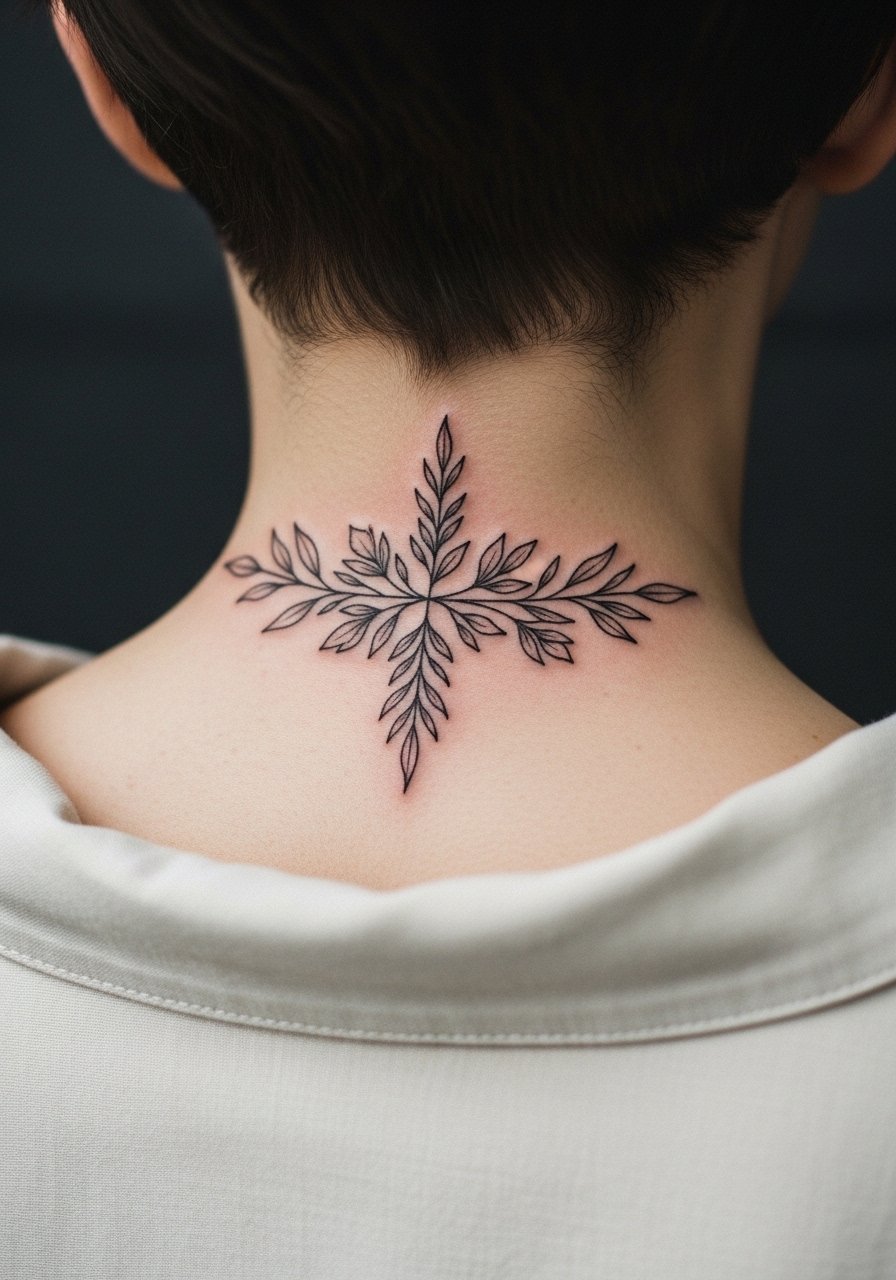
Neck wraps are subtle and visible with certain hairstyles. The biggest mistake is underestimating how visible the piece will be in slicked-back hair. Pain is moderate and healing requires being mindful of shampoo and collars. If you work in a conservative environment consider visibility impact. In consultation, ask about slightly heavier line weight so the piece reads well from a short distance. For easy show-off, a wide-neck shirt that can be shifted frames the botanical without exposing the shoulders.
18. Broken Line Band Around the Tricep
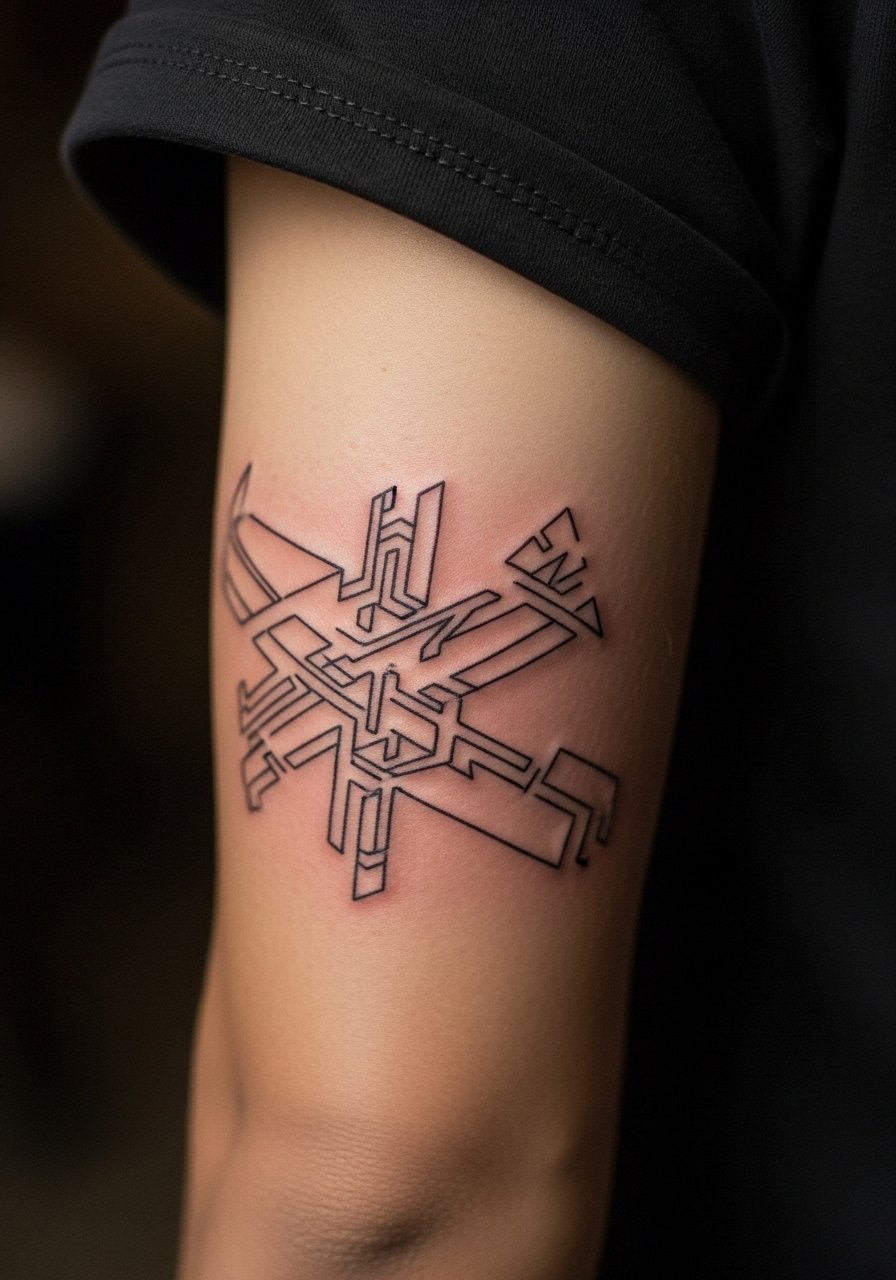
The back of the arm sees less sun but more stretching when you reach overhead. The most frequent error is placing a continuous geometric chain right where the skin folds when the arm is bent. Ask the artist to check the design while you move your arm through common positions. Pain is low to moderate and sessions are short. If you like layering, pair the tricep design with a short-sleeve linen shirt that hits above the band so it shows when you move.
19. Minimalist Anchor That Wraps the Wrist and Lower Forearm
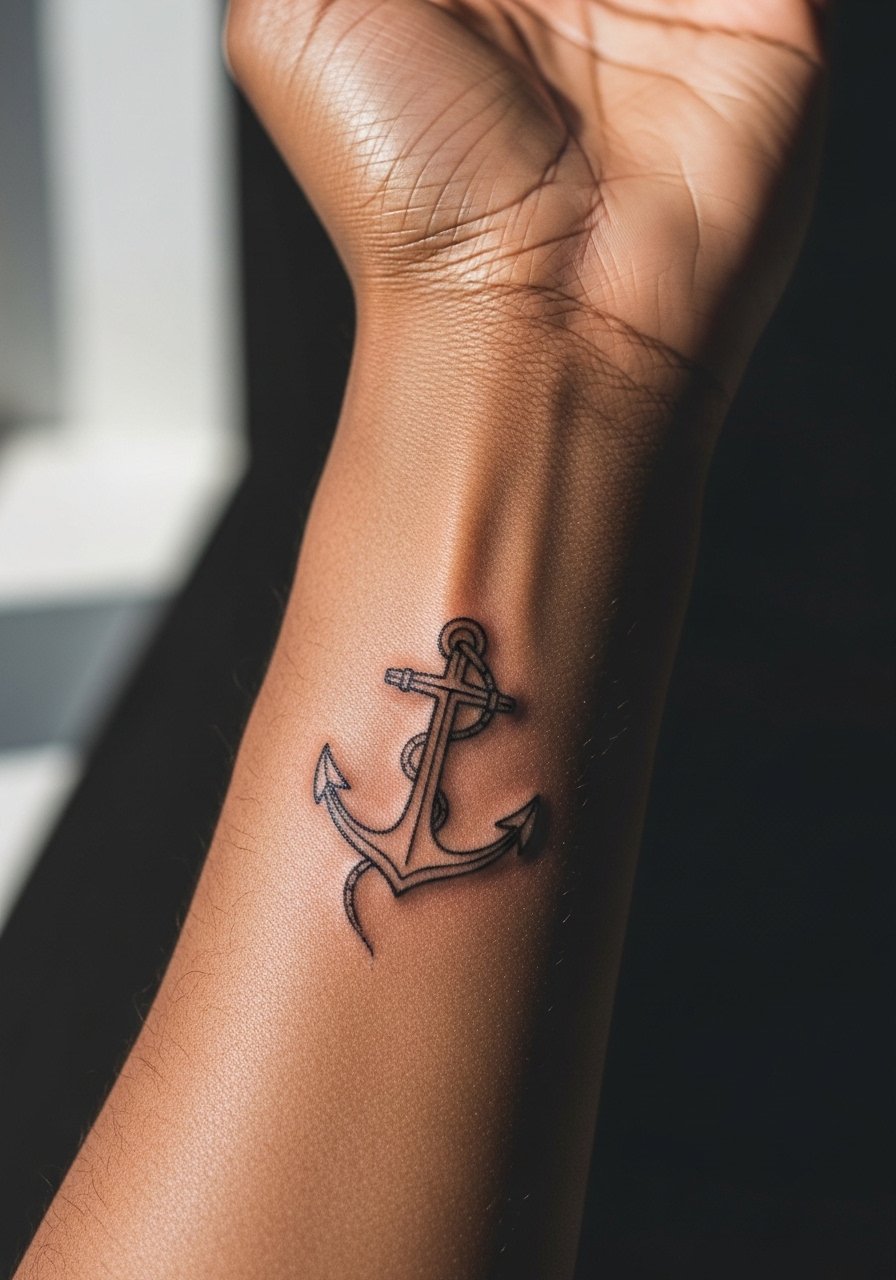
Anchor wraps are small statements that age predictably if executed with moderate line weight. The problem is asking for ultra-fine anchor details that disappear under friction from watch bands. Ask for simple, bold contours where the anchor meets the wrist. Sessions are brief and pain is typically low. For nautical vibes without excess rubbing, wear a canvas strap watch intermittently and remove it while the piece heals.
20. Stippled Crescent That Encircles the Thigh Just Below the Hip
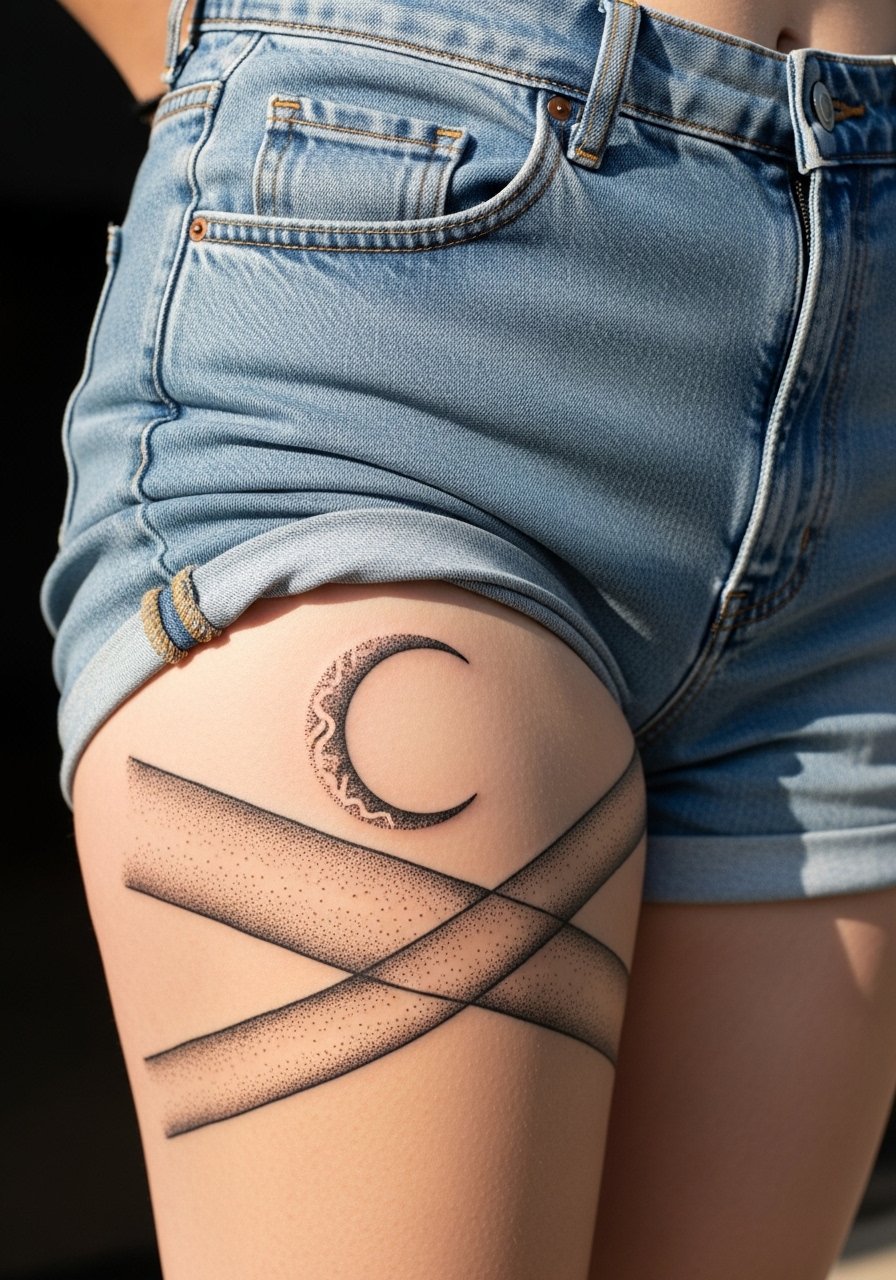
Upper thigh placements are private and age well because they are usually covered. The main mistake is placing too much detail in a narrow band that then flattens when the skin relaxes. For sessions, pick clothing that allows easy access without pinching the area. Pain is moderate and sessions can be medium-length. For occasional reveal, pair the piece with high-waisted shorts that sit right at the crescent so it peeks naturally.
21. Continuous Thin Line That Wraps the Sternum Edge
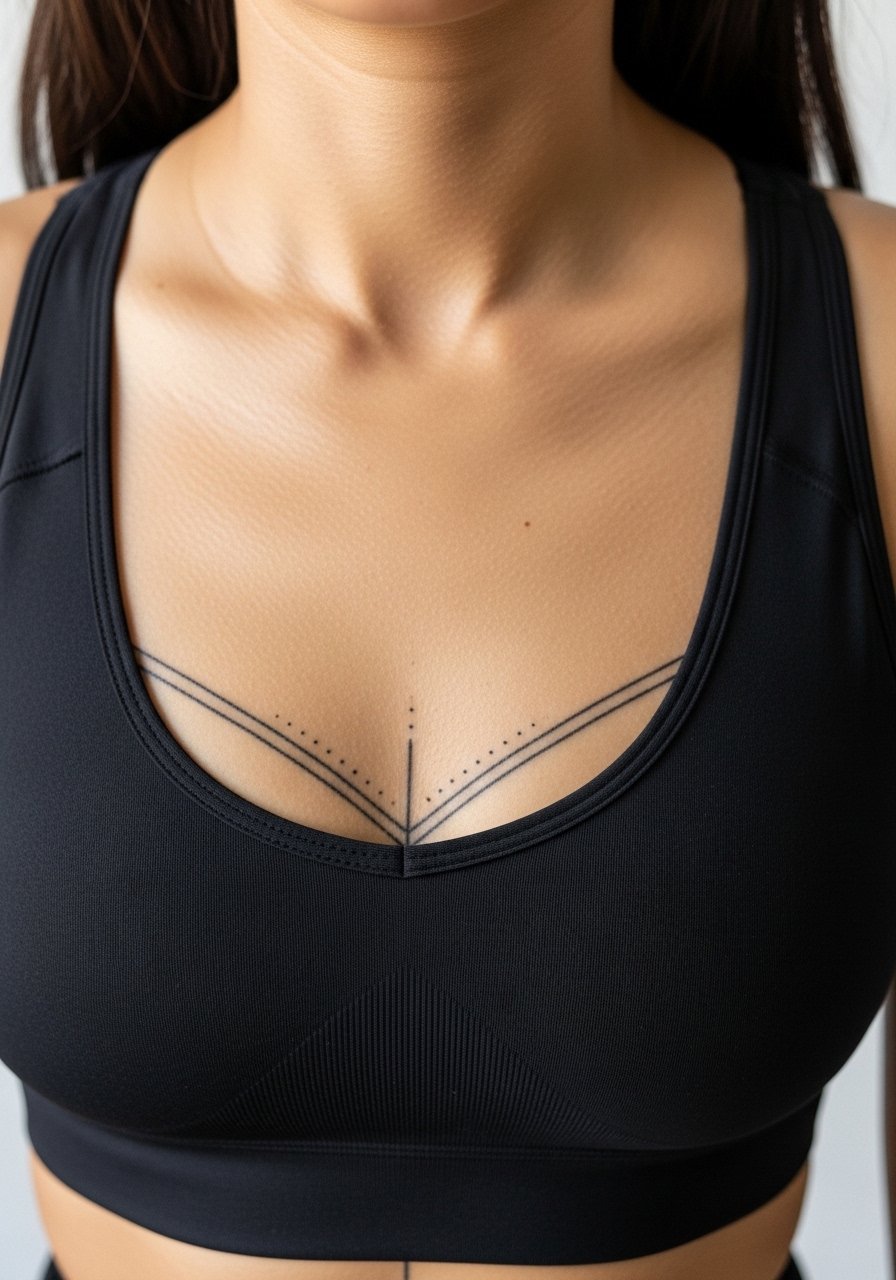
Sternum edge work is intimate and demands an artist who understands how breathing and clothing will affect aging. The controversy here mirrors other chest placements. One camp advises bolder spacing because the sternum and underbust area move and can blur fine detail. The other camp believes careful depth and spacing keep fine lines readable. Ask your artist for examples of healed sternum-edge work in their portfolio. Expect higher pain and plan for session-day clothing like a fitted sports bra. If you need to show the area, a fitted sports bra that sits just above the ink lets you control exposure.
Frequently Asked Questions
Q: Will a fine line wrap around the ribcage blur faster than on the forearm?
A: It often depends on skin movement and how close the lines are. Ribs see constant expansion and contraction with breath, so finer, dense work can soften sooner. Ask for slightly wider spacing and medium line weight in the consultation to help longevity.
Q: How should I pick placement if I want a wrap tattoo that is discreet at work?
A: Choose areas that are covered by typical work clothes, like the upper thigh or inner bicep, and ask for placement tests with the stencil while standing and sitting. For pieces near the collarbone, a wide-neck blouse can make it easy to hide or reveal the design.
Q: Do hand or finger wrap tattoos require more frequent touch-ups?
A: Yes, hands and fingers are high-friction and exposed to water and soaps, which accelerate fading. Expect touch-ups sooner than arm or thigh pieces, and plan your design with slightly bolder edges where the ink meets moving skin.
Q: What should I wear to a rib or sternum session for easy access and comfort?
A: Wear a fitted sports bra or a cropped top you can lift slightly so the artist has a steady surface. Loose shirts that slide up without stretching are ideal and keep you comfortable during longer sessions.
Q: How do I talk to an artist about preventing blowout on wrap designs?
A: Ask about needle depth, line weight, and spacing, and request healed photos in the artist's portfolio for similar placements. Saying you want "slightly thicker fine lines and clear negative space" gives the artist a practical brief rather than vague language.
