
Fine line and saturated red meet old-school framing in ways that surprise people who only know the spider lily from bouquets. Trends push micro-detail and watercolor washes, but the pieces that hold character over years usually balance crisp linework with breathing room and thoughtful placement. Below are 21 vintage red spider lily tattoo designs that show different ways to pair the bloom with body shape, wardrobe, and realistic aging so you book the right reference with confidence.
1. Fine Line Sprig on Inner Forearm
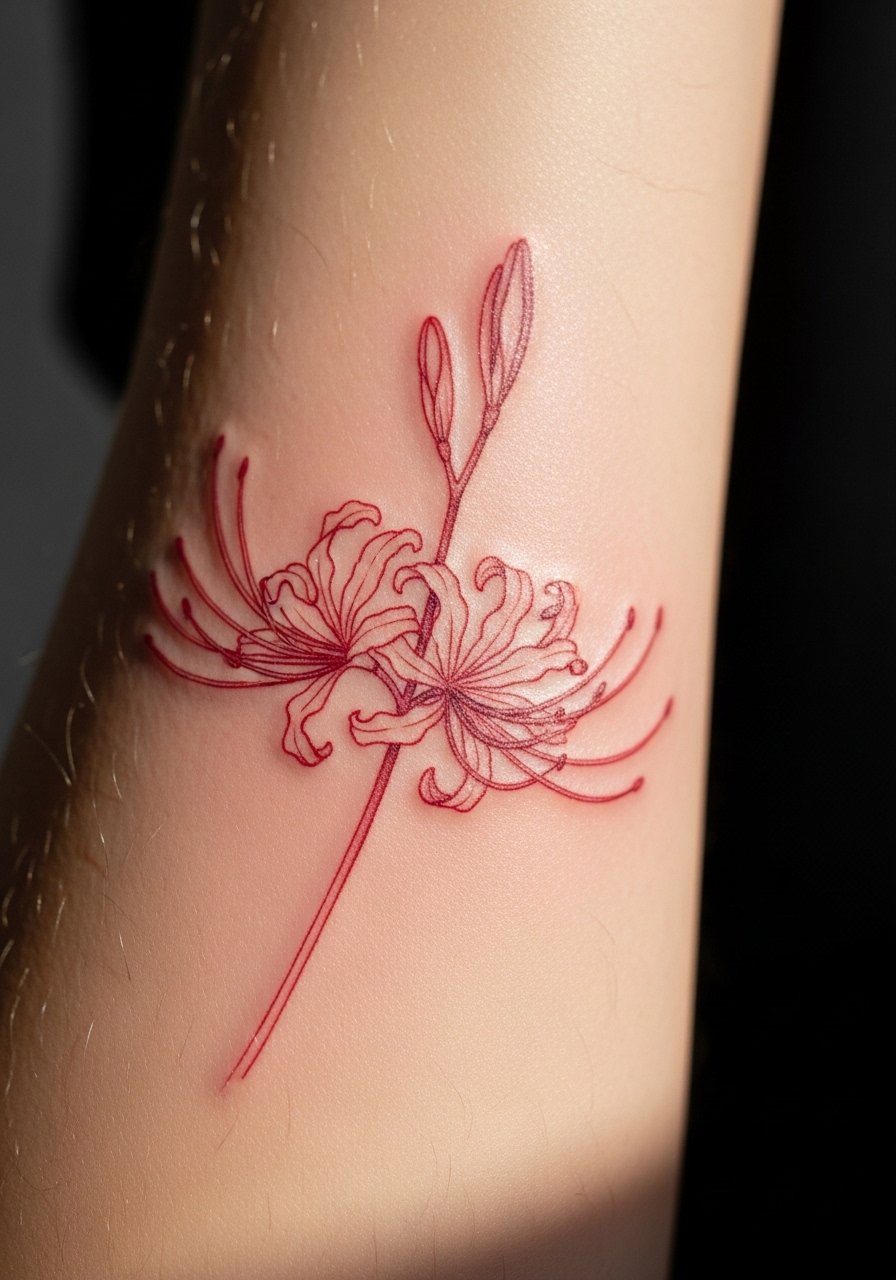
I recommend a thin fine line sprig here for someone who wants a readable, vintage-inspired motif without a full sleeve. Tell your artist you want visible spacing between filaments so the linework does not crowd as it heals. Expect a low to moderate pain level and a one-hour session for a small piece. Common mistakes are going too tiny or asking for hairline weight that sits too shallow, which speeds blurring. This placement pairs easily with rolled-up sleeves and a minimalist watch that frames the forearm without competing with the bloom.
2. Micro-Realism Ankle Cluster
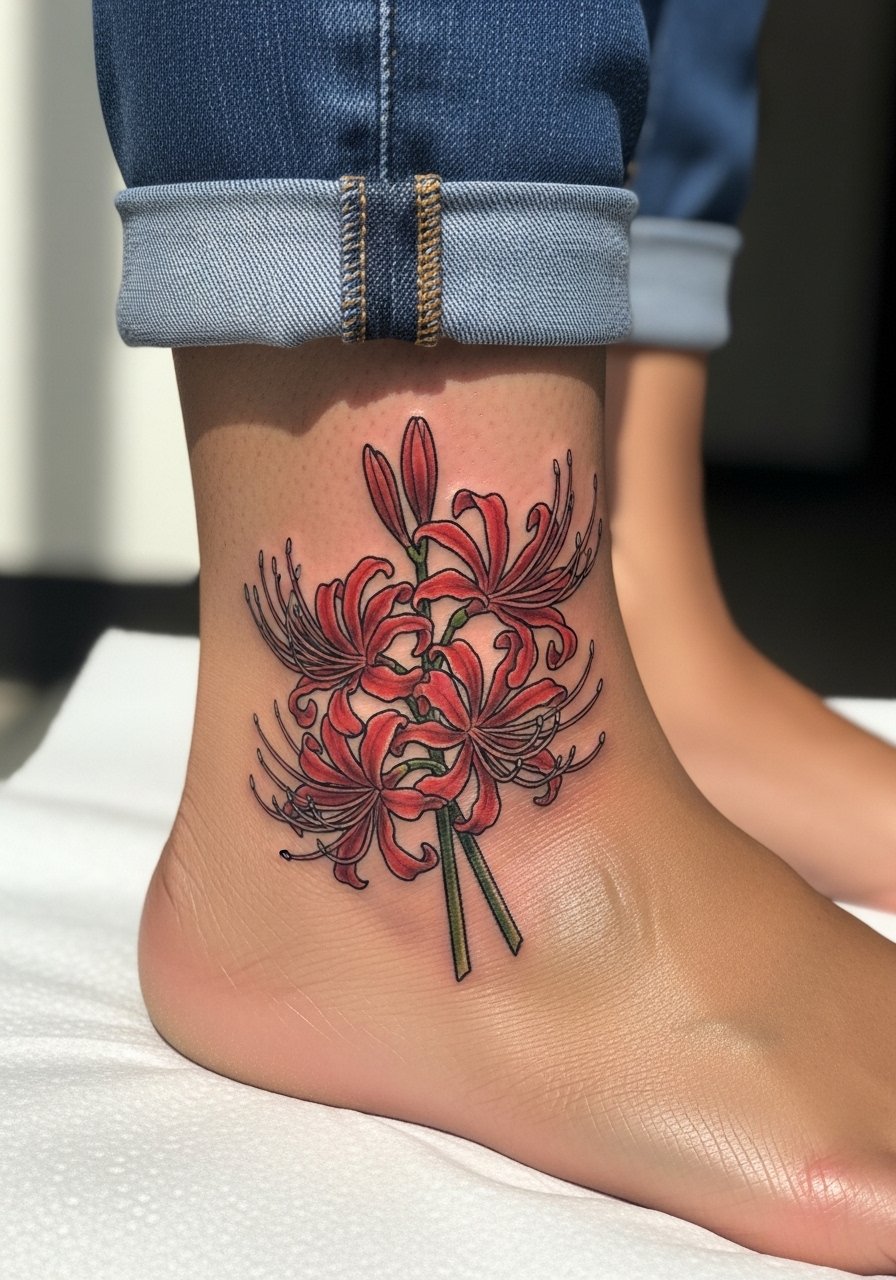
A micro-realism cluster reads like a vintage botanical study at ankle height. The risk here is blowout from shallow needles if the artist tries to cram too much shading into a tiny footprint. Ask for tiny stipple shading and controlled saturation rather than heavy packing. Sessions are short but sensitive because the ankle has thin skin and bones close to the surface. The piece looks delicate with sandals or cropped jeans, so consider how often you wear footwear that rubs the area during healing.
3. Watercolor Back-Shoulder Panel
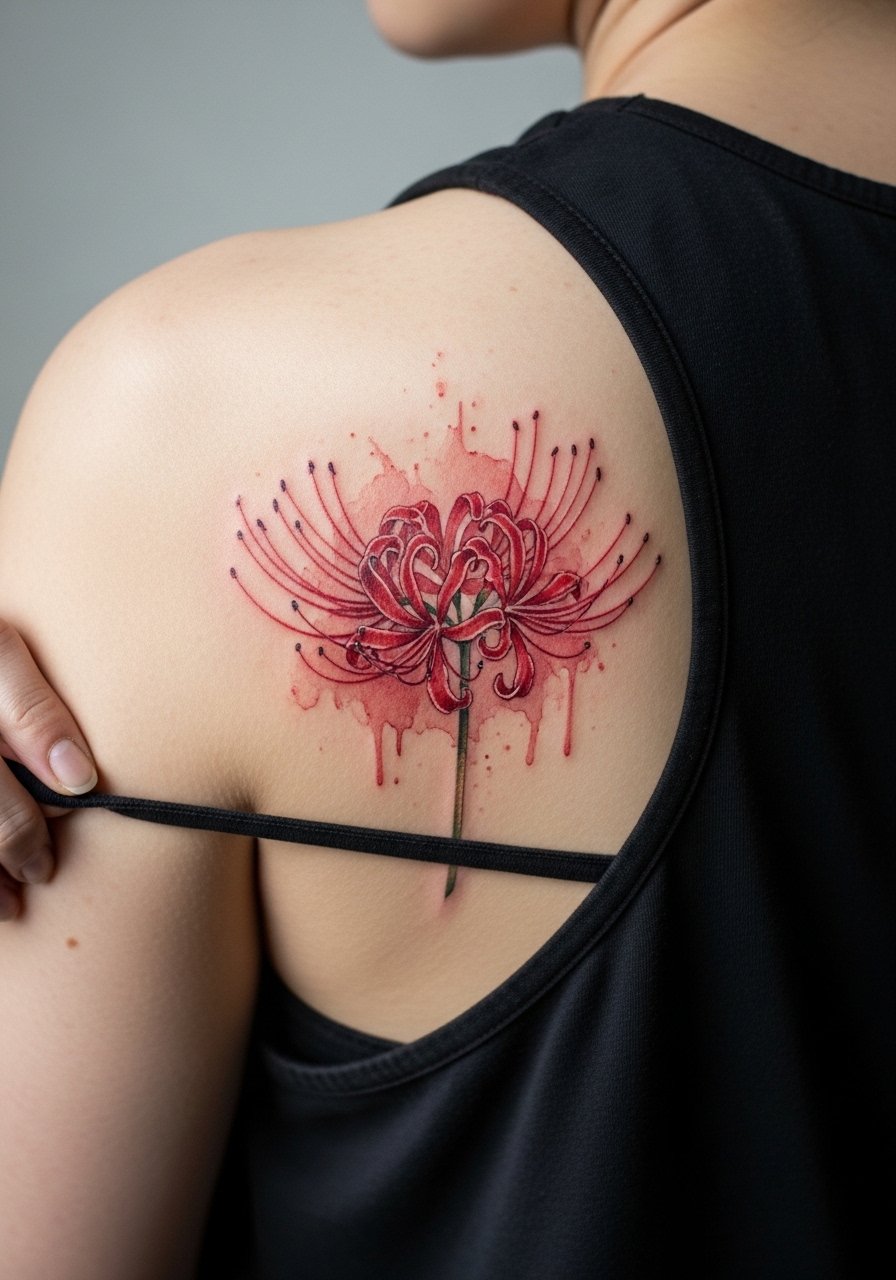
Watercolor gives a vintage bloom a painterly edge, but the style can fade into a bruise-like haze when saturation is too light. To avoid that, ask your artist for a stronger red anchor and softer outer wash. This design feels great with tank tops or open-back dresses for evenings out. Healing on the shoulder is straightforward and touch-ups usually happen around year two to refresh color saturation and re-define filaments.
4. Traditional Sailor Chest Cluster

This vintage take borrows solid black outlines and saturated red fills from sailor flash. Fair warning, collarbone linework is unforgiving on shallow needles. One camp argues bold outlines are essential because they age predictably. The other camp favors lighter lineweight for a more wearable look. Ask your artist which approach they prefer and why before committing. For showing it off, wide-neck tops and thin chain necklaces keep attention on the cluster without overcrowding the collar area.
5. Single Stem on Side Rib

Rib placements are known for high sensitivity but strong visual payoff. Most mistakes come from scaling the piece too fine. When the design sits too small, the filaments blur into a single shaded mass over a few years. This version holds up because it gives the filaments room and modest saturation. Bring a loose top for the session so you can adjust without tugging at the area. Touch-ups at year three are common for rib work that sees a lot of movement.
6. Vintage Botanical Spine Strip

A spine strip reads very vintage when composed as a column of blooms and buds with stipple shading between stems. The main mistake is compressing too many tiny details into a long, narrow piece. Ask for balanced spacing so linework breathes. This placement can sting more than the forearm, but session time is usually under two hours for a simple strip. Pair it with open-back clothing to show the vertical flow, and expect a touch-up request around year three for the finer filaments.
Studio Day Picks
The first six designs above include a range of small, sensitive placements. A few targeted items smooth the session and the first week of healing.
-
Stencil transfer paper kit. Useful for testing placement on forearm and ankle pieces so you see how the sprig or cluster reads in motion.
-
Topical numbing cream. Helps with rib and spine sensitivity when applied as recommended before the appointment.
-
Thin protective film roll. Keeps small wrist and ankle pieces clean during the first days when friction is highest.
-
Fragrance free gentle body wash. Good for cleansing delicate vintage-style lines without irritating healing skin.
-
Aquaphor healing ointment. Thin layers in the early window lock in moisture for fine line work without clogging.
7. Collarbone Garland with Script Accent
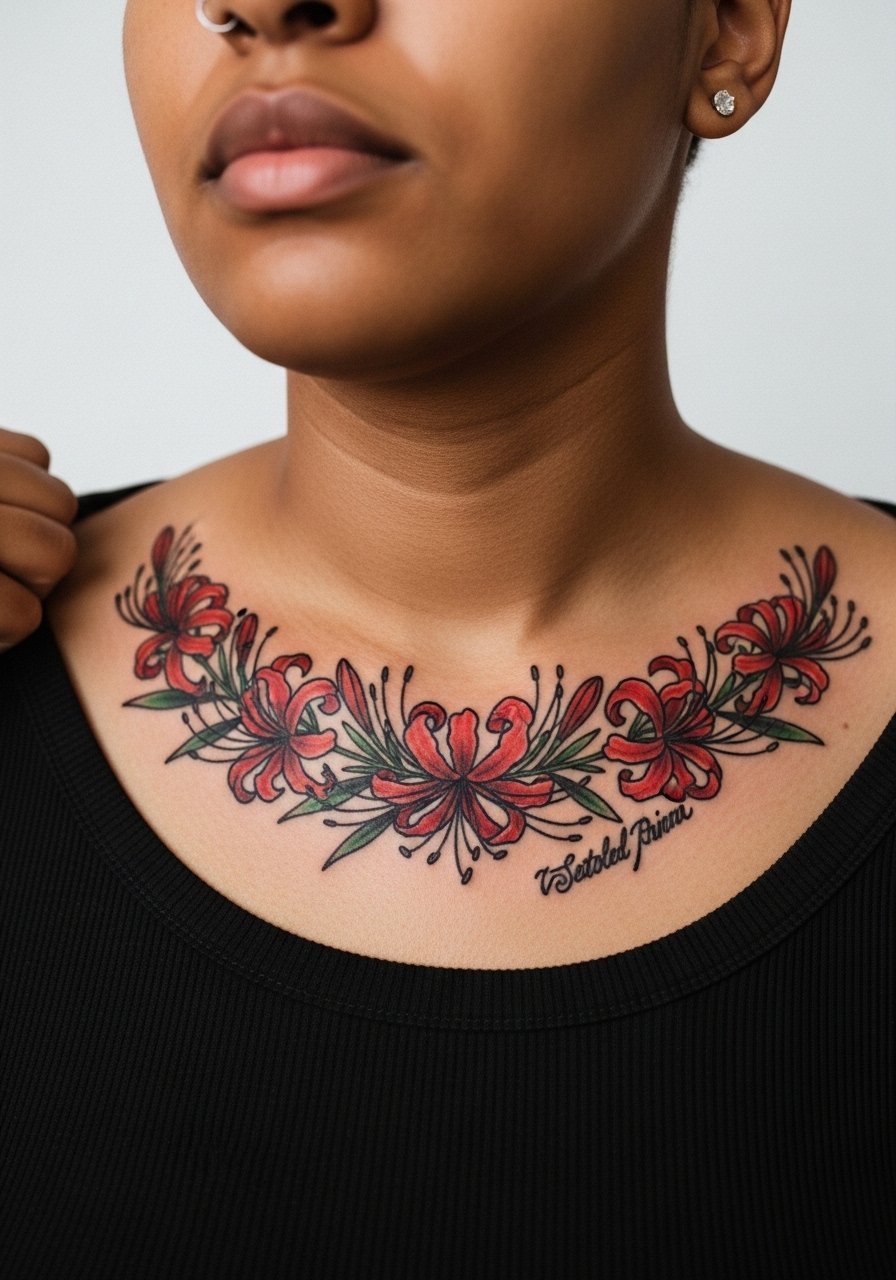
A garland across the collarbone reads like old photographic studio work when paired with small script. Ask for heavier spacing around the letters so the script does not merge with filaments over time. This placement takes short sessions but the skin there can be unforgiving for micro-detail. Pair the look with thin chain necklaces or a delicate pendant that sits above the design. Expect a touch-up for the script sooner than for the florals.
8. Thigh Panel with Art Nouveau Frame
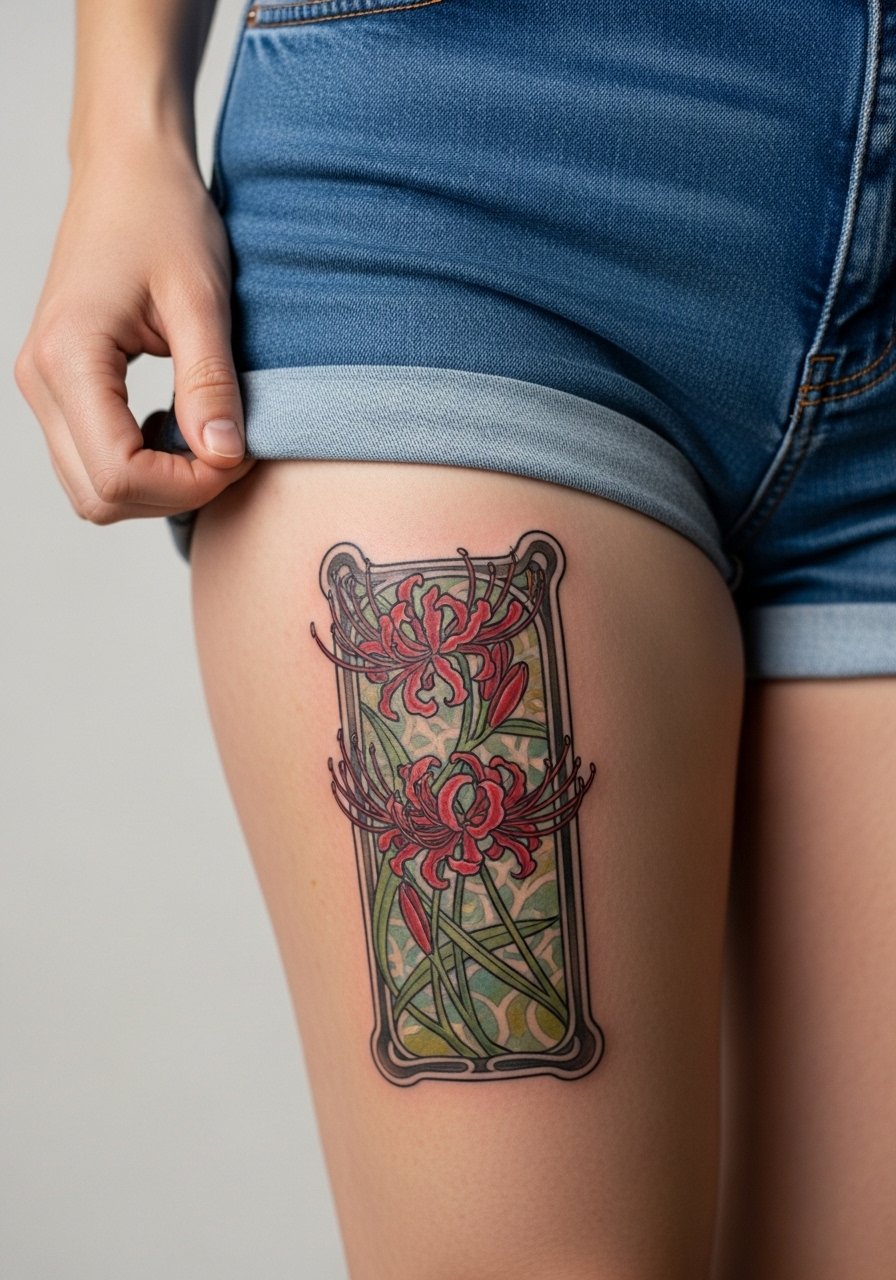
The thigh gives room for a vintage frame and ornate linework. Tell your artist you want heavier outlines in the frame and softer stipple shading inside so the lilies remain the focal point as saturation fades. Sessions can run longer, often two to three hours for a medium panel, and pain is moderate because of more tissue. For the appointment, wear loose shorts or a skirt so the artist has clear access. For showing it off, high-waisted skirts or slits let the panel peek out.
9. Mini Finger Petal

Hand and finger tattoos still affect hiring in some industries, so think about career implications before committing.
A finger petal is a whisper of vintage flare, but the finger is high risk for early fading and ink migration. The biggest mistake is demanding full saturation in a one-needle line. Instead, request a concise outline with very slight saturation and plan for touch-ups every 1-2 years. Sessions are very short but the aftercare period needs extra attention because hands see constant washing and friction.
10. Calf Vintage Banner

A calf banner combines old-school lettering with floral elements for a mid-length piece that ages well if you avoid tiny text. The calf tolerates saturation and holds color for longer than wrists. Sessions are comfortable and often one or two sittings depending on size. Pair it with mid-length skirts or cropped pants for showing off the banner, and plan for a touch-up in years five to seven to refresh saturation if you wear a lot of sun-exposed footwear.
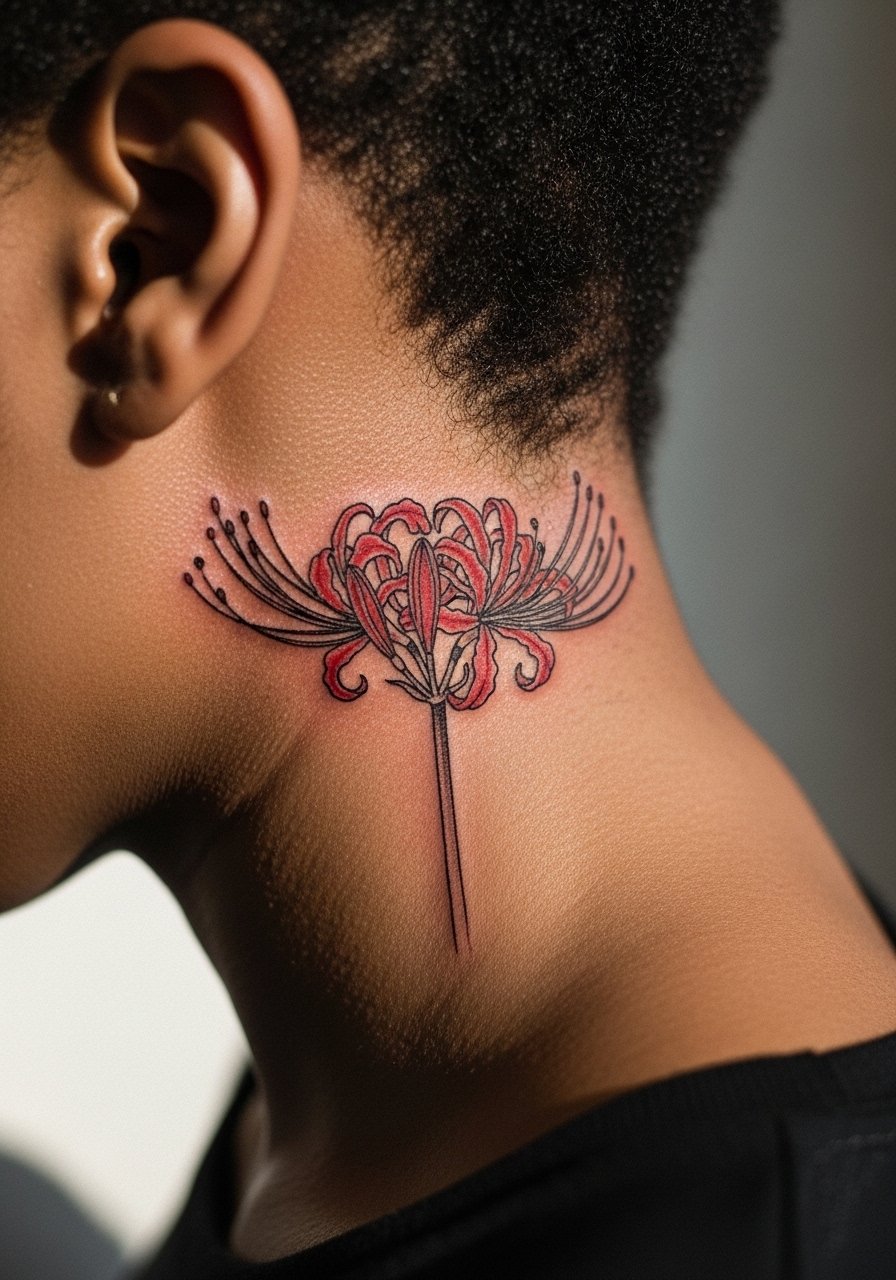
11. Nape Single Bloom

A nape bloom reads subtle with short hair or updos. The placement heals predictably but is visible when hair is gathered. If you want longevity, avoid extremely thin hairline weights and ask for slightly firmer lines with gentle shading. The session is quick and the pain is mild to moderate. Consider how often you wear collared shirts that might rub the area during healing.
12. Vintage Sleeve Accent Near Elbow

An elbow-adjacent accent benefits from bolder outlines because the skin there moves and flexes. Many people ask for micro-detail that does not hold. Tell your artist you prefer slightly thicker linework with stipple shading behind the bloom so it keeps its silhouette. Sessions can sting around the elbow. Roll up sleeves or wear a loose button-down shirt to the appointment so the artist can work without fabric interference.
13. Hip Crescent with Vintage Motif
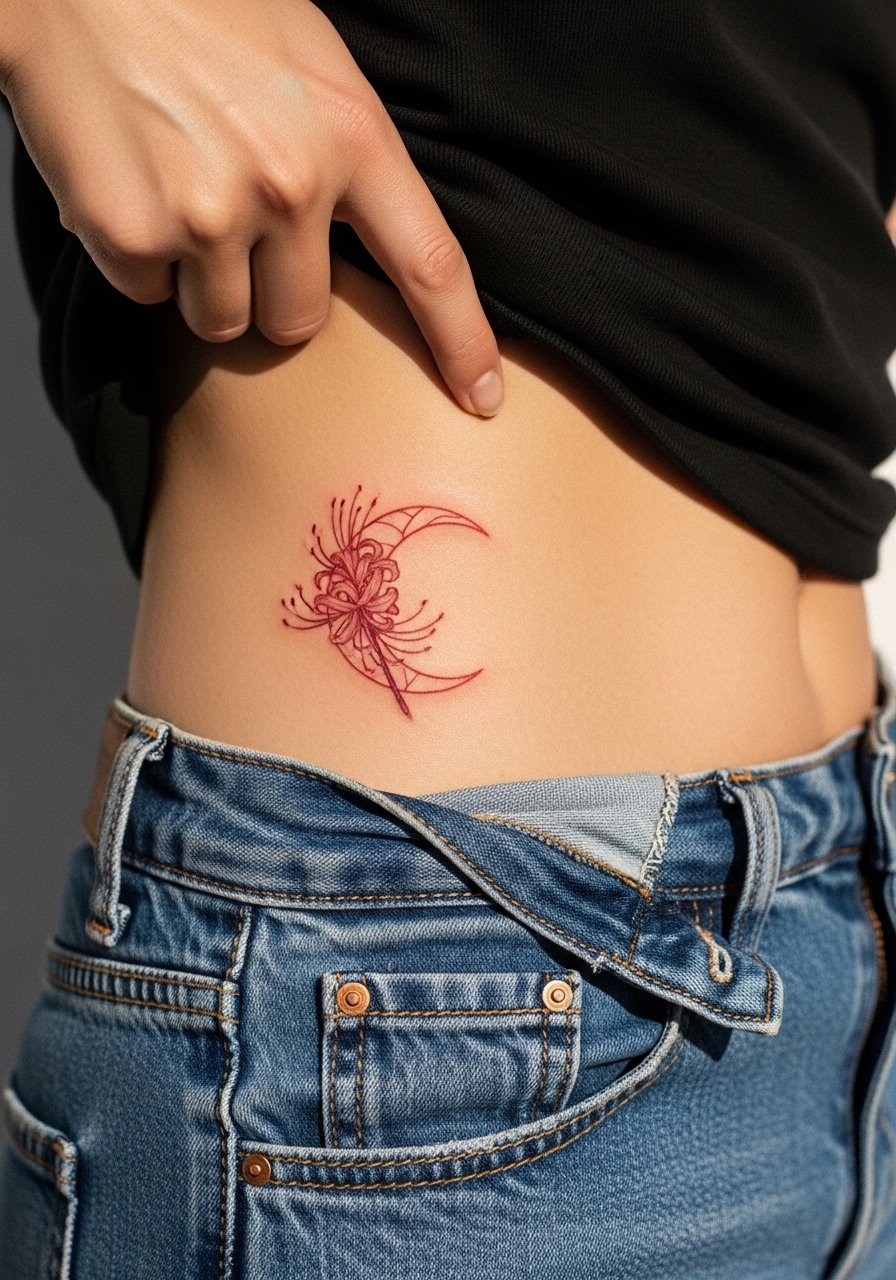
The hip is a great canvas for a crescent of blooms that reads intimate and vintage. The common mistake is laying the filaments too densely in a curved shape, which causes the center to darken faster. Ask for open spacing and lighter saturation on the tips. The session is moderate in pain and healing is aided by high-waisted clothing that avoids friction. Consider how often your wardrobe will cover the piece during the first month.
14. Inner Bicep Micro Cluster

The inner bicep is forgiving for micro clusters if the artist spaces the filaments. There is a debate among artists about fine line here. One camp says the skin stretches and blurs lines within two years. The other camp says that with proper needle depth and spacing fine line settles fine on the inner bicep. Ask your artist which side they take and request a small test area if they recommend very thin linework. For the session, wear a loose tank top you can pull aside.
15. Vintage Pocket-Sized Back Piece
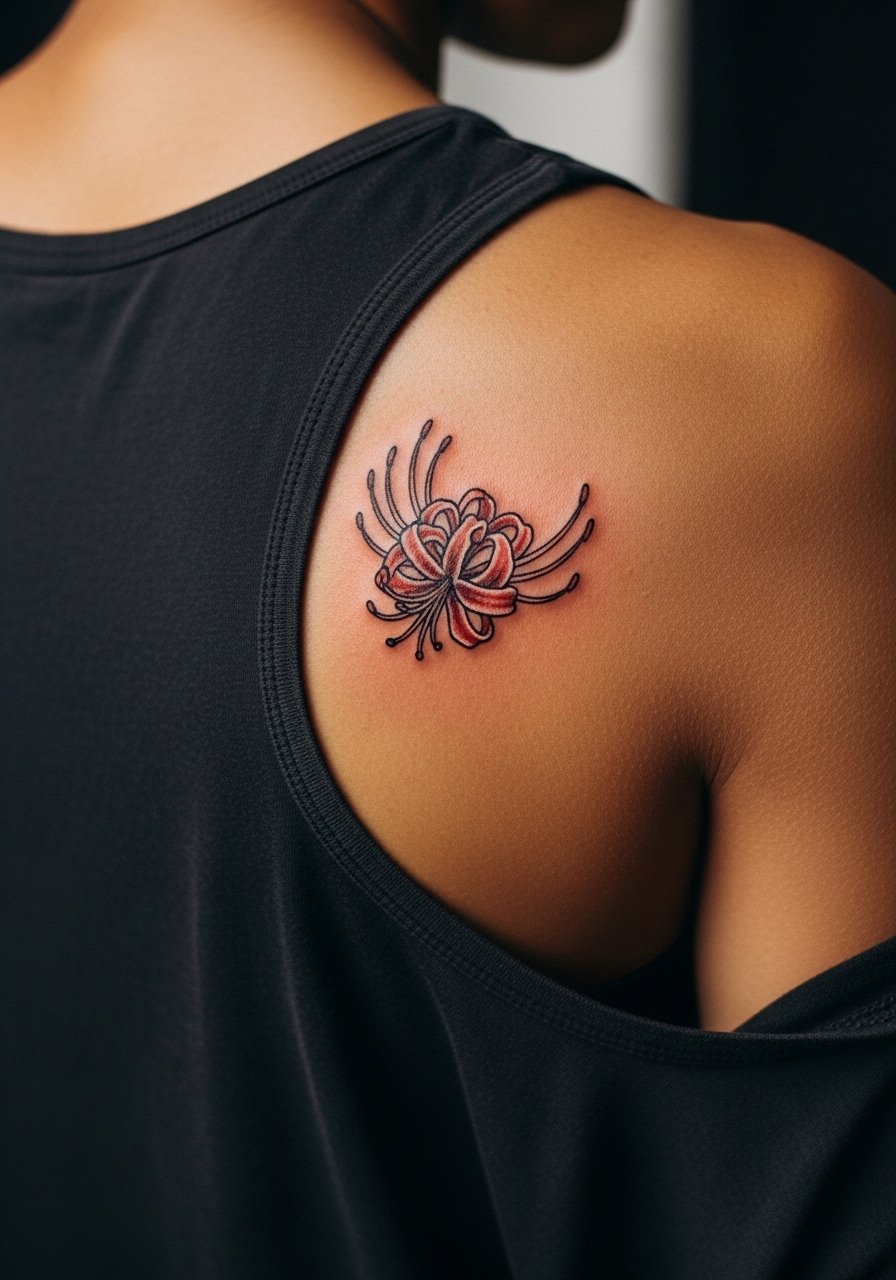
A compact back piece gives a discreet vintage nod that still reads as a composed study. The pitfall is over-detailing for a small footprint. Ask for clear focal petals and simplified supporting stems so the design remains legible at distance. Sessions are short and the pain is moderate. For showing it off, a loose tank or an open-back top keeps the piece visible without exposing large areas of skin.
16. Sternum Ledger with Fine Script

Sternum work reads vintage and delicate but needs cautious planning. The skin there moves with breathing and can blur tight lettering. Tell your artist you want the lilies slightly above the script and wider spacing around letters so both elements age separately. This is a sensitive area and sessions are more painful. For the appointment, wearing a fitted sports bra helps the artist access the zone without exposing more skin than needed.
17. Lower Back Vintage Spray
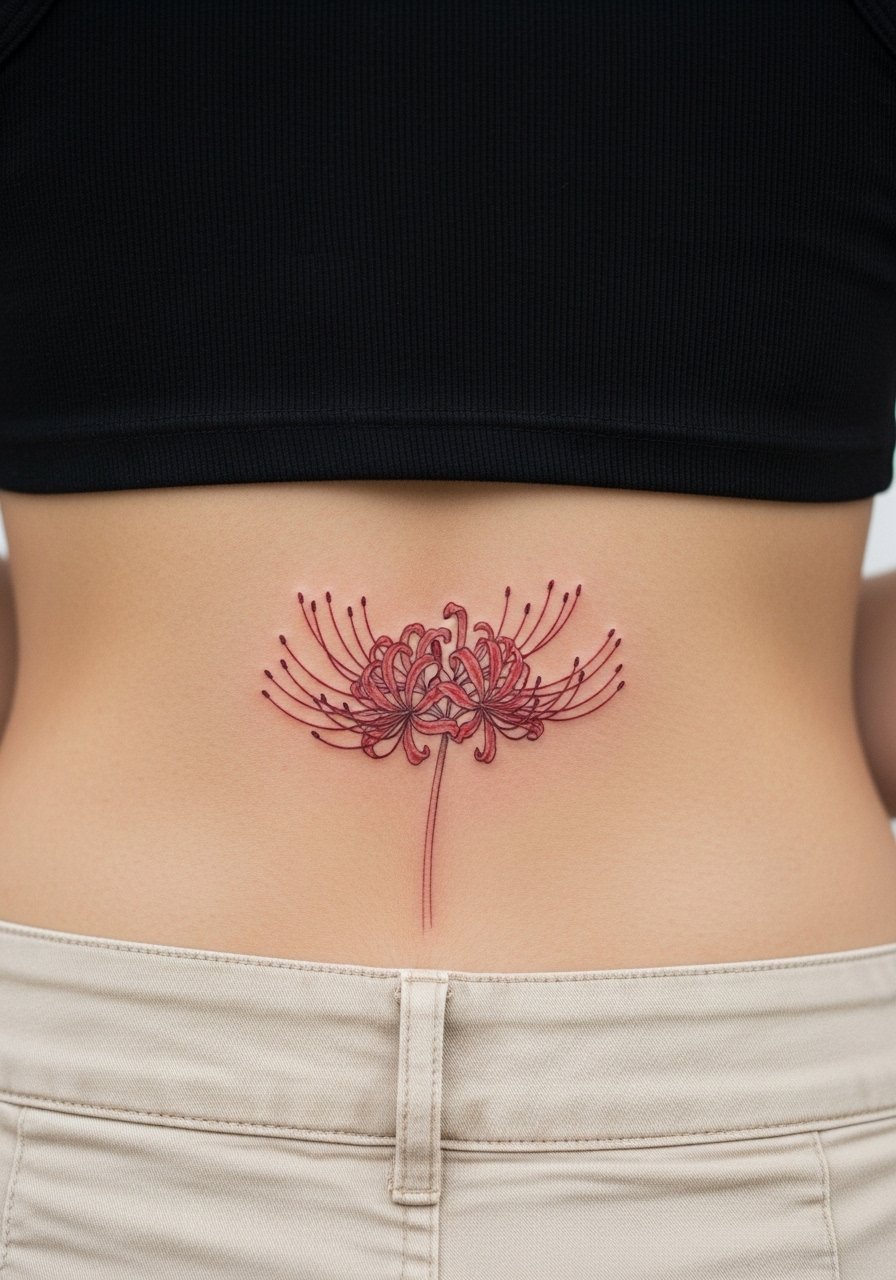
A lower back spray reads like a vintage postcard when composed as a loose arrangement. Avoid overcompacting petals into a horizontal block. When designers compress elements, the inside becomes a shaded mass in a few years. Ask for airy placement and moderate saturation. The lower back tolerates saturation well, and sessions are typically comfortable. Pick clothing that will not rub the area heavily during the first two weeks.
18. Inner Thigh Vertical Cluster

Inner thigh pieces age unpredictably if the petals sit too close. Friction from clothes and weight changes can blur tight filaments. Request slightly larger petal separation and gentle stipple shading for longevity. The session is often moderate to high on the pain scale, and you should wear loose bottoms for the ride home, like loose drawstring linen pants so the area avoids pressure.
19. Behind-the-Ear Accent Bud
Behind-the-ear accents are subtle and vintage in feel. Follow the safety framing and describe placement relative to the hairline. The main mistake is asking for heavy saturation in such a small, mobile spot. Sessions are quick and pain is mild. Consider how often you wear hairstyles that cover the area during healing.
20. Vintage Forearm Band

A forearm band reads bold and classic when composed with rhythm and repeat spacing. The error people make is packing too many tiny filaments without breathing room, which causes muddiness after a few years. Ask for negative space between repeats so each bloom keeps definition. Sessions are comfortable and often finish in one sitting. For show-off outfits, rolled-up sleeves or short sleeves frame the band nicely and keep attention on the linework.
21. Petite Vintage Single Petal on Wrist
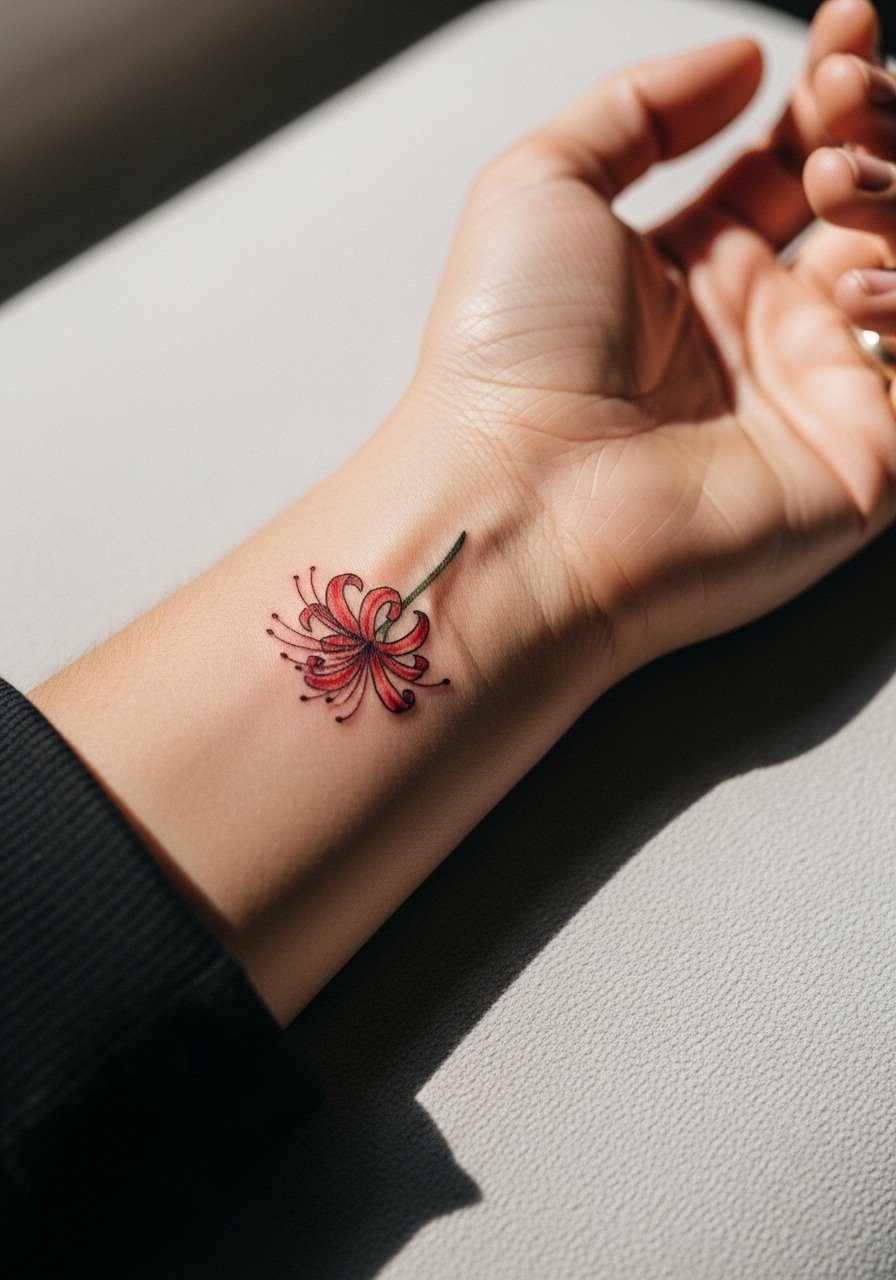
A tiny wrist petal is an elegant nod to vintage motifs but the wrist sees a lot of friction from watches and bracelets. The typical mistake is expecting a hairline weight to last without touch-ups. I suggest asking for slightly firmer linework and minimal saturation so the petal keeps shape while still reading delicate. For the session wear a loose sleeve or a racerback tank you can roll up without snagging the area.
Frequently Asked Questions
Q: Will a fine line red spider lily blur faster on ribs than on forearms?
A: In my experience ribs move and stretch more with breathing and body changes, so very fine hairline work there blurs sooner than the same lines on forearms. One solution is slightly thicker lineweight and more spacing on ribs. It depends on your skin and the artist technique.
Q: How does watercolor-style red hold up compared with saturated traditional fills?
A: Watercolor effects can look beautiful at first but they tend to lose crisp edges faster because the wash relies on soft transitions. Saturated traditional fills anchor color longer. If you love watercolor, request a stronger core color under the wash so it can be refreshed less often.
Q: Are finger and hand spider lily pieces a bad idea for longevity?
A: Fingers and hands are high-friction zones and often need touch-ups every one to two years. That does not mean avoid them, it means plan for maintenance and accept that those spots are more of a living, changeable choice than a once-and-for-all piece.
Q: How should I dress to the studio for a sternum or rib spider lily session?
A: Wear a fitted sports bra or a cropped top for sternum work and a cropped athletic top or loose tank for ribs. Those choices let the artist access the area without you having to undress more than necessary. A loose button-down is also handy for shoulder or back pieces.
Q: If I want a vintage look but worry about aging, what should I ask an artist during consultation?
A: Ask how they plan to balance lineweight and spacing so the filaments do not merge, and request examples of their healed work at two to five years. Also discuss touch-up timelines and how they would simplify details for longer legibility.
Q: Does skin tone affect how red spider lily saturation looks over time?
A: Yes, saturation and contrast read differently across skin tones. Some darker skin tones show red differently than lighter tones, and touch-ups may be recommended on a different schedule. Ask to see healed examples on skin tones similar to yours so you can set realistic expectations.
