
Fine line floral trends look gorgeous on feeds, but the spine is a different animal. It hurts more over bone, sessions can get canceled for setup time, and fine line on an active sweaty back often softens faster than people expect. Read through these vintage-flower spine tattoo ideas, note the placement and session tips, and take the wardrobe notes into your consultation so the result holds for years.
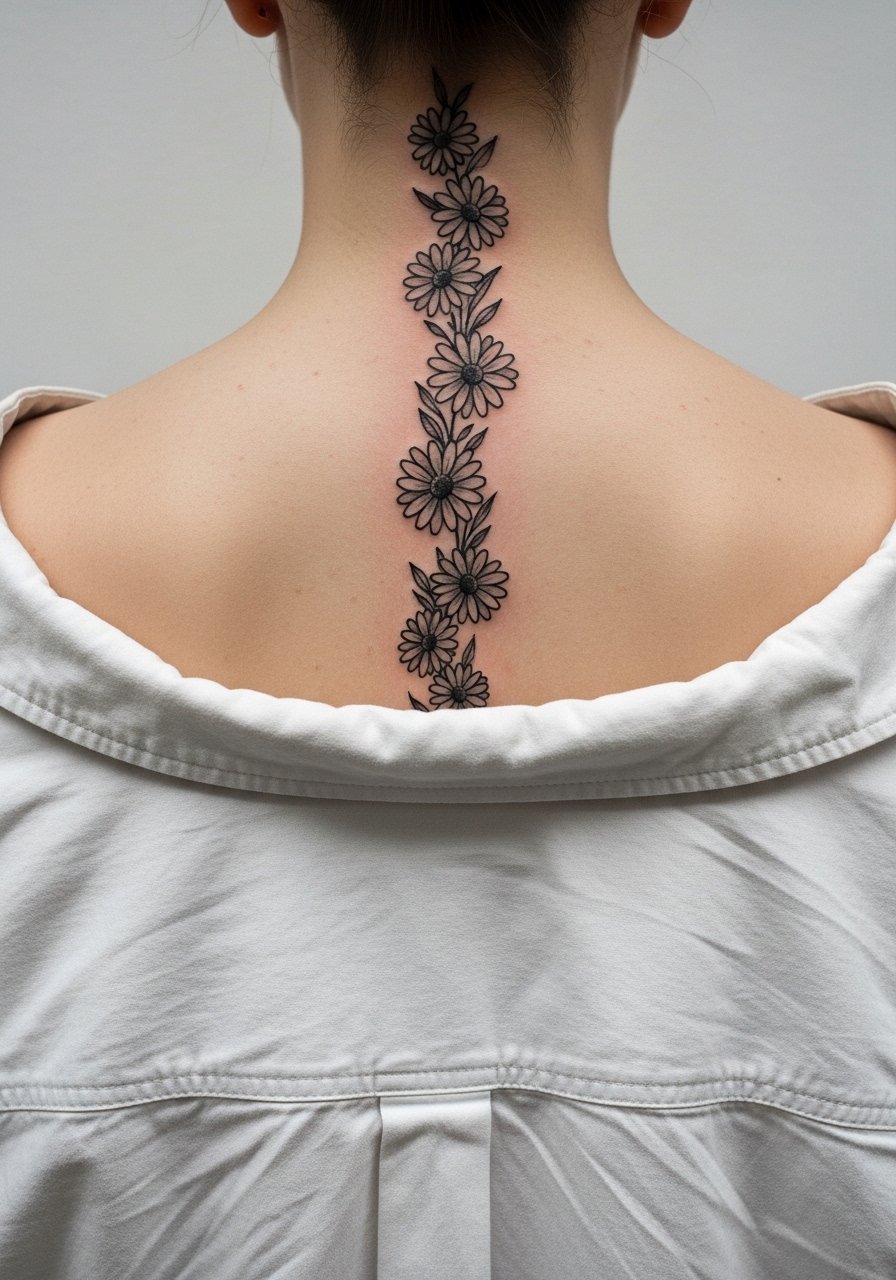
1. Vintage Rose Spine Cascade
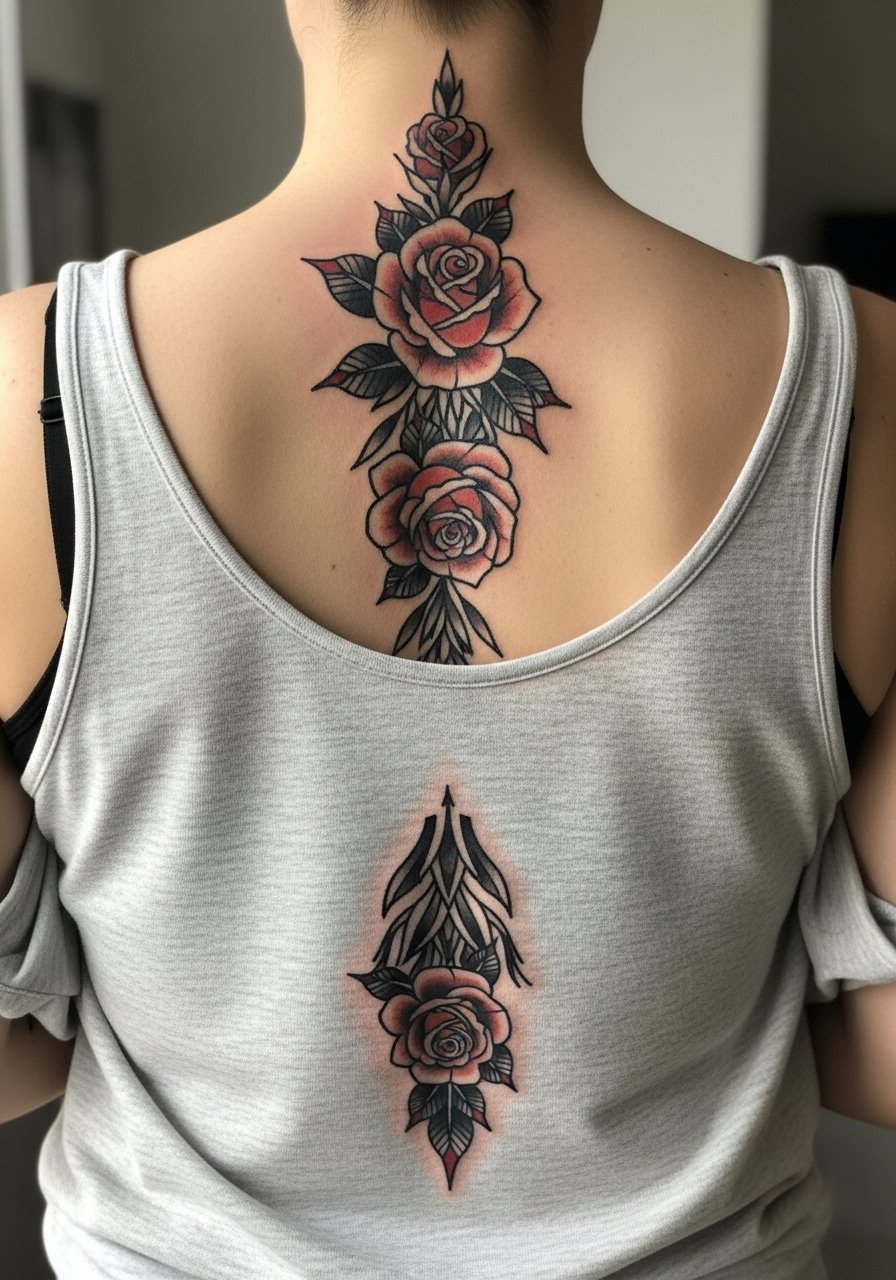
This classic neo-traditional cascade reads like an old botanical plate stacked along the vertebrae. I recommend 6 to 10 inches so the roses sit with the natural curve instead of crowding a single vertebra. Tell your artist you want heavier outlines at the bone and softer interior shading so the piece keeps contrast as it heals. Expect a strong arching pain on the vertebrae, and plan two shorter sessions rather than one long marathon. For showing it off, pair the piece with a backless linen maxi dress in neutral tones to echo the vintage palette on nights out.
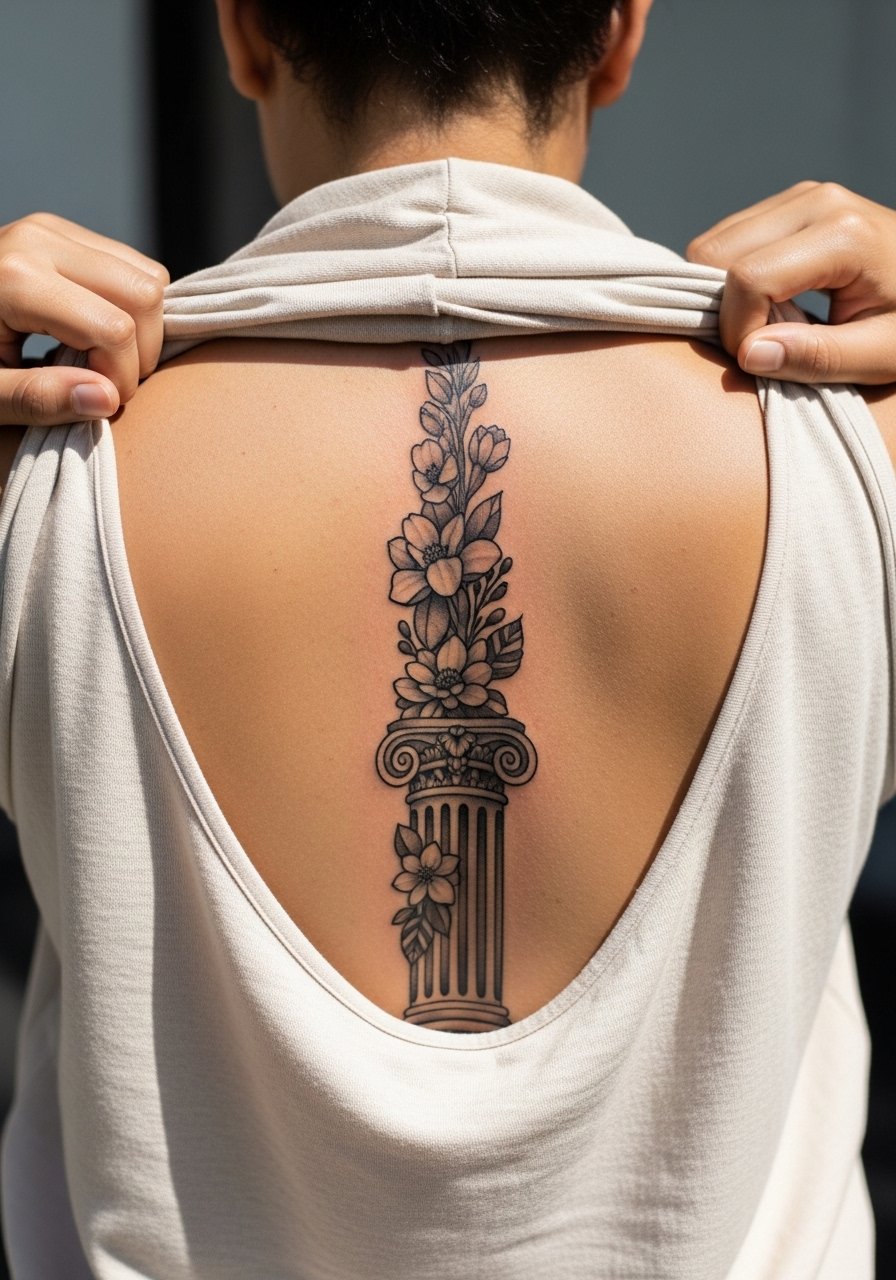
2. Ornamental Flower Spine Column
This ornamental column uses vertical filigree and fine dot shading to accent posture and vertebrae alignment. It works well when centered from lower to upper spine, about eight inches long, and benefits from stipple shading rather than heavy color. In consultation ask for vertebrae-specific spacing so the motifs sit between bones and resist distortion when you arch. The session feels sharp over bone but smoother at muscle-covered sections. For a night look try a loose button up tank you can slip on and off for appointments without dragging fabric over fresh ink.
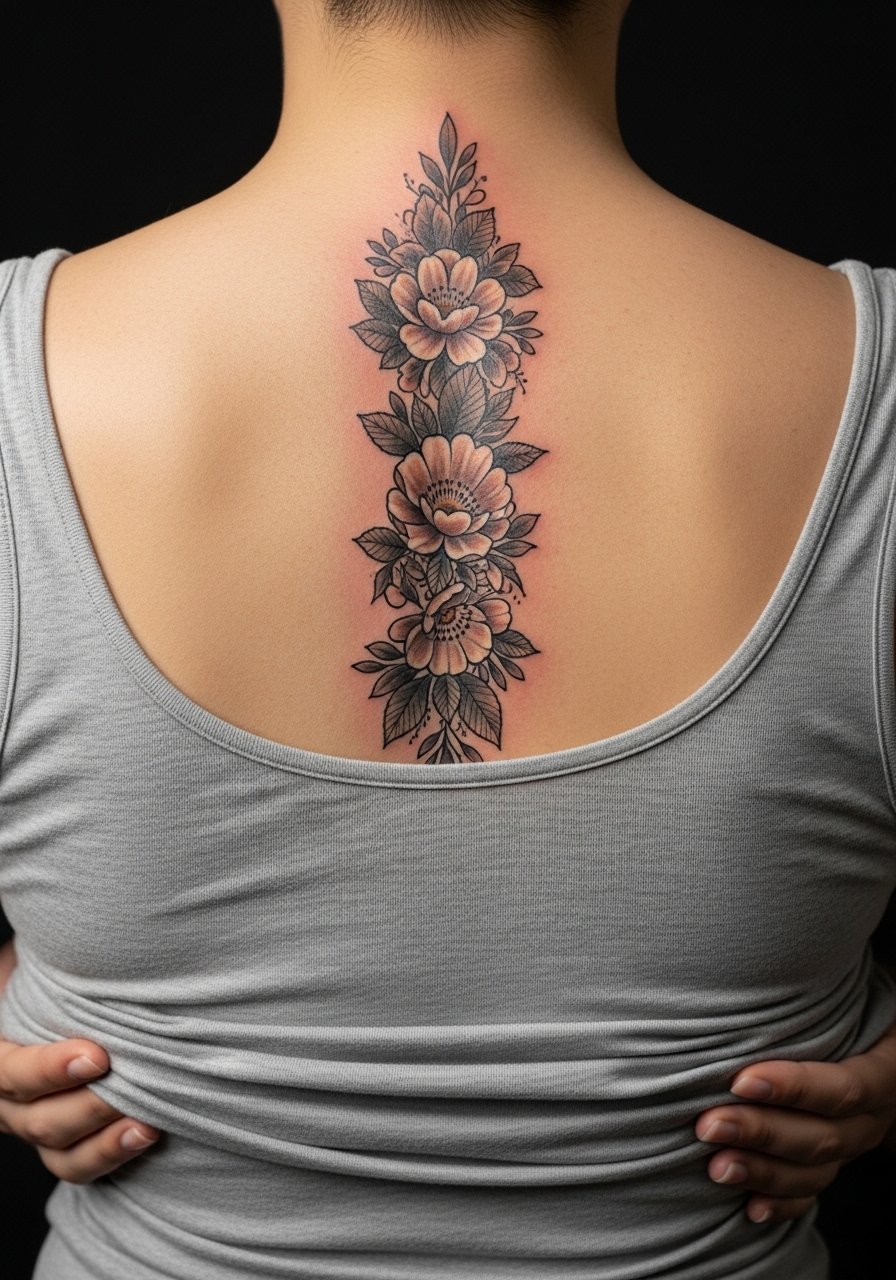
3. Delicate Peony Spine Piece
Fine line peony spines look soft and vintage, but they expose the fine-line versus bold debate in a clear way. One camp says fine line is worth the look and touch-ups, the other says thicker lines age better on curved backs. If you love the peony but sweat a lot or work out, ask for slightly heavier linework at the edges and a touch-up plan at six months. Expect a single short session for a five-inch piece, with sharp sensation over the bone. Wear a sleeveless button shirt to the appointment so the artist has clean access without fabric bunching.
4. Birth Flower Spine Arrangement
Stacking birth flowers creates a personal vintage engraving effect that reads like a family column. Tell your artist the order you want and provide clear references for each flower so the shapes scale consistently from base to neck. This illustrative style tolerates soft color washes if you plan touch-ups, and it heals better when spacing avoids tight clusters over vertebrae. For showing it off, an off shoulder blouse in sand tones frames the upper portion without distracting from the stack. Be explicit about which flowers stay black and which get muted color washes during the consult.
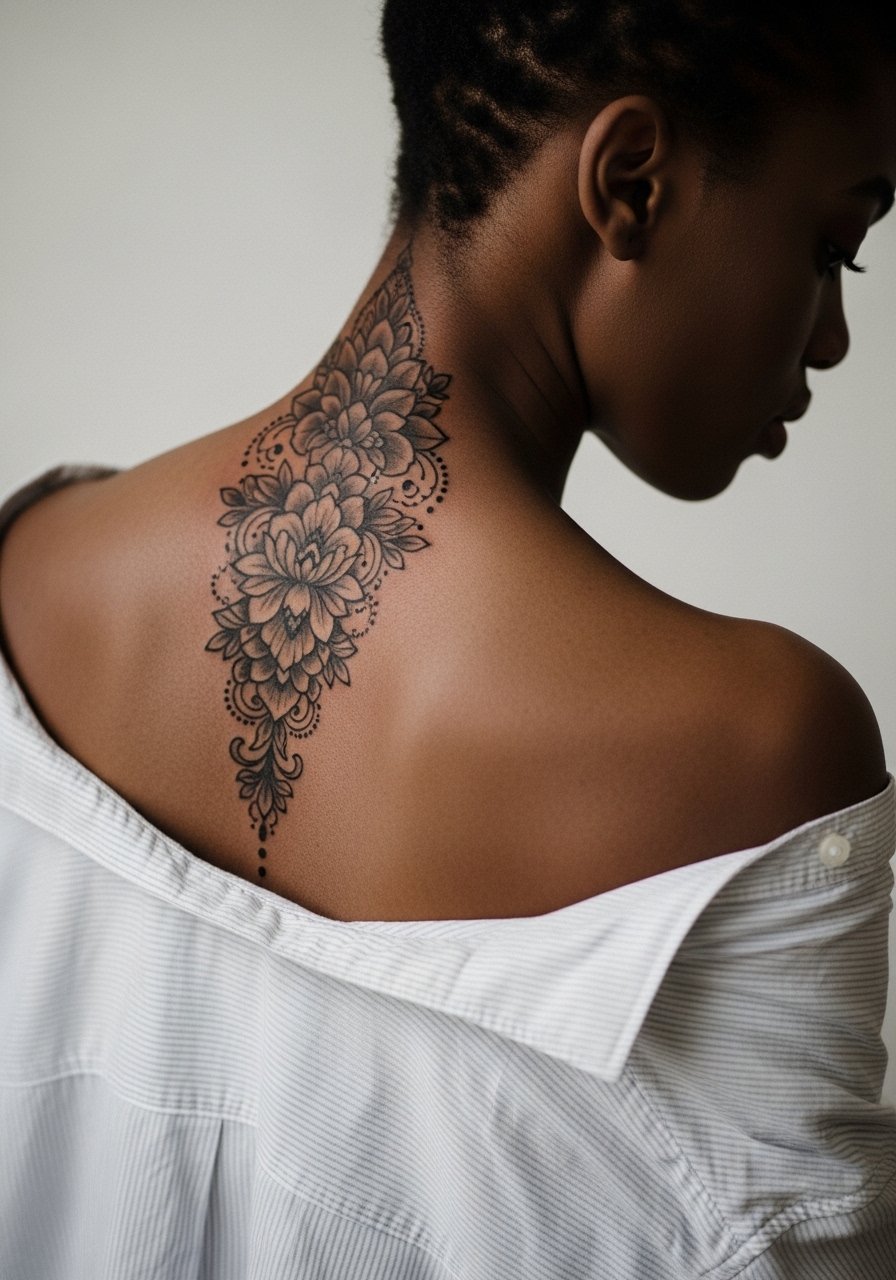
5. Mandala Flower Spine Fusion

Mandala flowers that follow vertebrae symmetry look meditative and precise, but they demand spacing discipline. Ask for vertebrae alignment so the mandalas center on the spine and the negative space breathes. Pain is variable, with denser dot work feeling abrasive over bone. This design benefits from multiple sessions so saturation and symmetry can be corrected between sittings. For a contrasty outfit try a sheer mesh bodysuit under a jacket to let the blackwork peek without overwhelming the pattern.
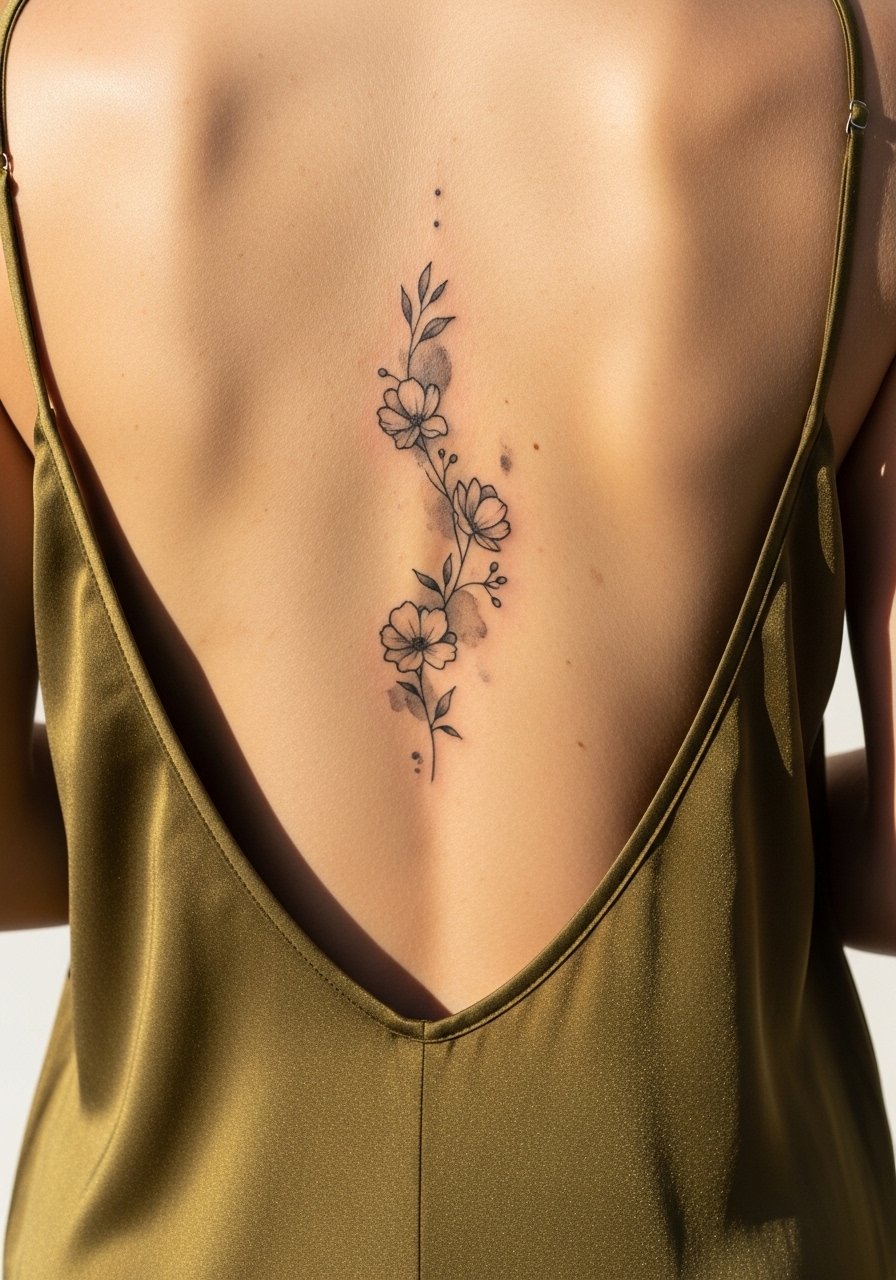
6. Watercolor Vintage Lily Spine

A watercolor vintage lily mimics antique botanical prints with painterly washes and feathered edges. It looks stunning fresh but can fade unevenly if you sweat or get heavy sun exposure. I suggest asking for a black outline or subtle anchors behind the color to keep the shape legible after a year. Sessions usually take two to three sittings for good layering. For summer wear, a wrap dress linen with a side slit complements the lily flow and keeps the skin cool while showing the mid-spine.
Studio Day Picks
The six designs above range from fine line to watercolor, and prepping for different spine work changes what you bring and wear to the session.
- Ink-Ichiban balm. Lightweight, non-greasy balm that people mention helps hot, sweaty spine areas avoid clogged pores during the crucial early healing days.
- Aussie Tattoo Goo alternative balm. Hydrating without a shiny residue, useful for mid-spine washes when you want moisture without heavy shine.
- H2Ocean saline spray. A gentle spray that cleans curved spine zones without rubbing, handy after sweaty sessions.
- Indie lotion bar. Solid form makes single-hand application easier when you cannot reach parts of your back during the healing window.
- Hustle Butter Deluxe. Thinner than ointments yet moisturizing, often chosen for backs that sweat a lot to reduce pore clogging while the pieces settle.
7. Blackwork Daisy Spine Trail
Blackwork daisies deliver bold contrast and low-maintenance aging for a full 10-inch trail. This style holds up well over two to three years because saturation resists fade. The session feels intense over the vertebrae where the needle meets bone, so split time into multiple sittings to manage pain. A common mistake is tiny petal details that blur; ask the artist to emphasize silhouette and negative space instead. For evenings, a black leather jacket crop or an open back shirt makes the trail pop against solids.
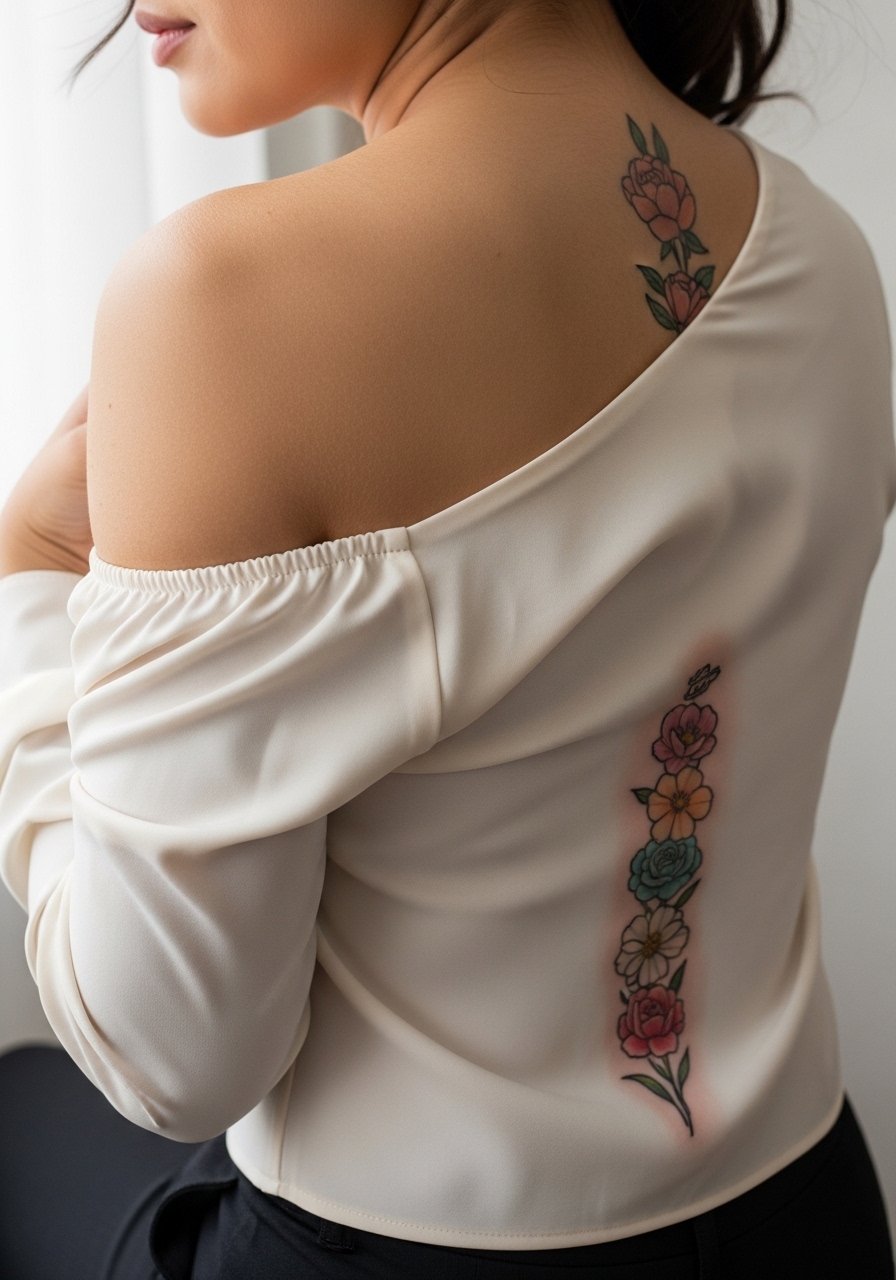
8. Neo-Traditional Sunflower Spine
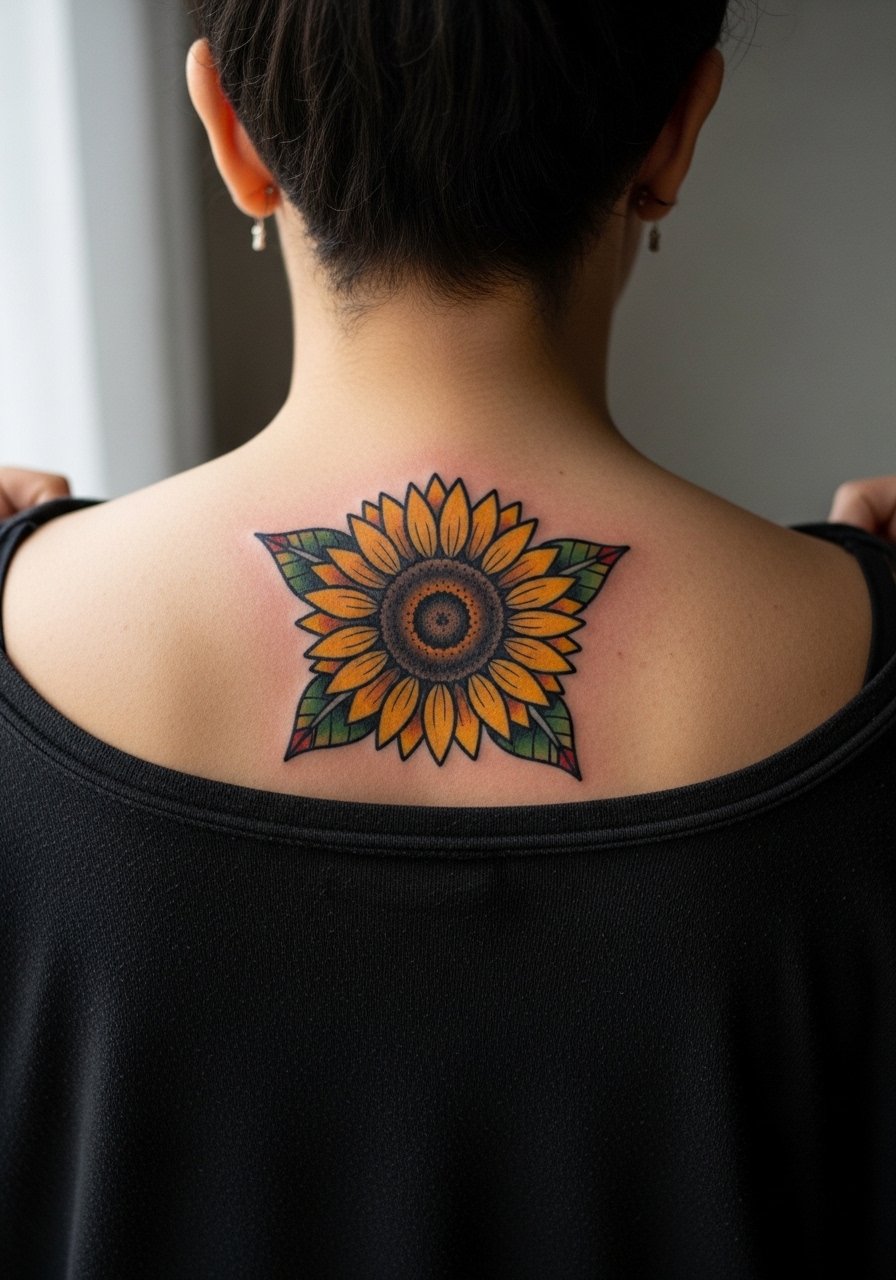
A sunflower on the upper spine brings vintage brightness with retro shading and saturated petals. It reads well beneath clothing and at arm reach during touch-ups. Ask for heavier petal outlines to keep the form as pigments settle. Upper spine sessions are shorter than full-length pieces, but the base of the neck can sting. For post-session styling, off-shoulder blouses in sand or taupe frame the top petals, and you can test the look with an off shoulder blouse.
9. Minimalist Vintage Tulip Lower Spine
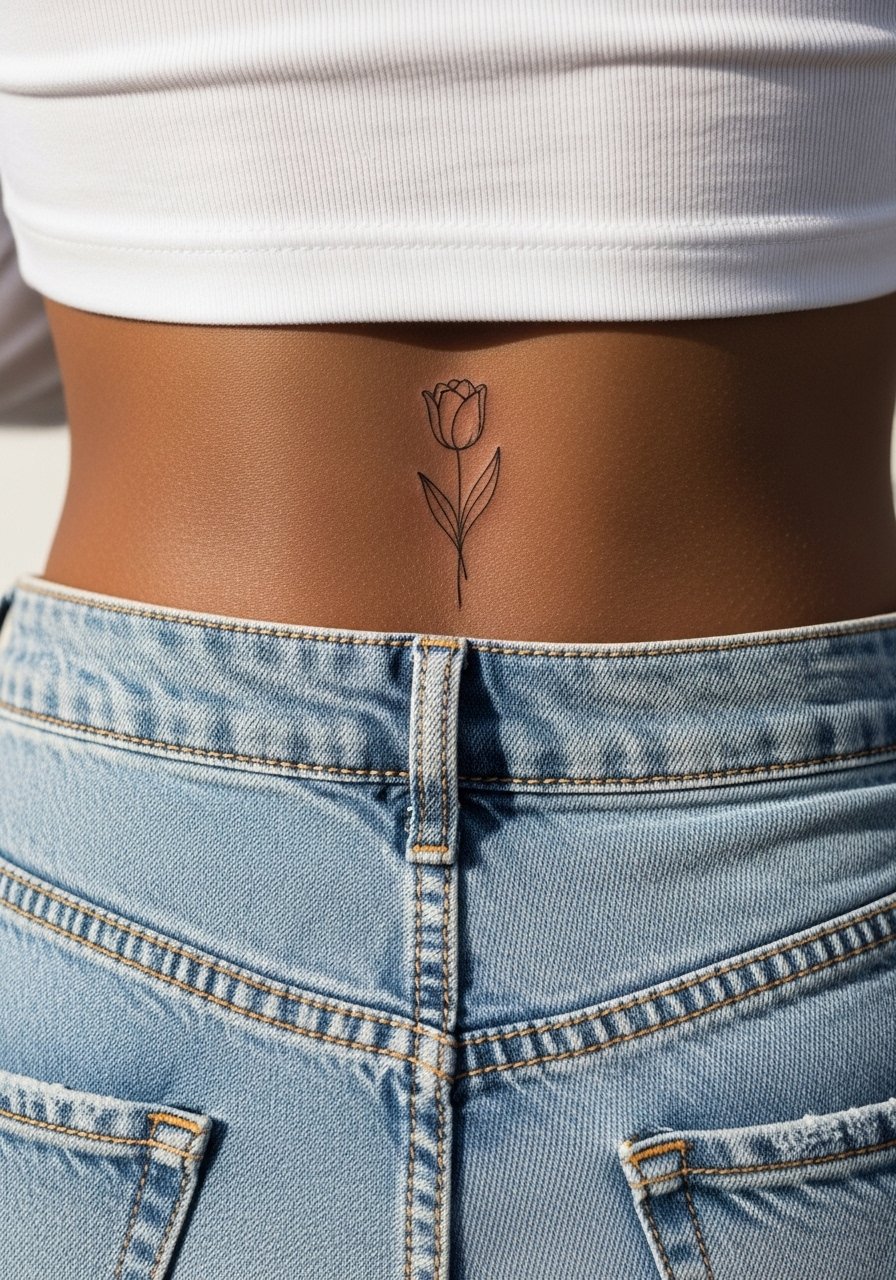
Tiny tulips on the lower spine are an intro-friendly choice that still nods to vintage motifs. Keep it around four inches and insist on a single continuous line and consistent needle depth to avoid early blur. Lower back ink risks stretching with body changes and pregnancy, so consider placement a finger width higher if you want long-term stability. For summer showing, a low back bikini bottom highlights the area while keeping the tattoo out of constant waistband friction.
10. Illustrative Poppy Spine Stack
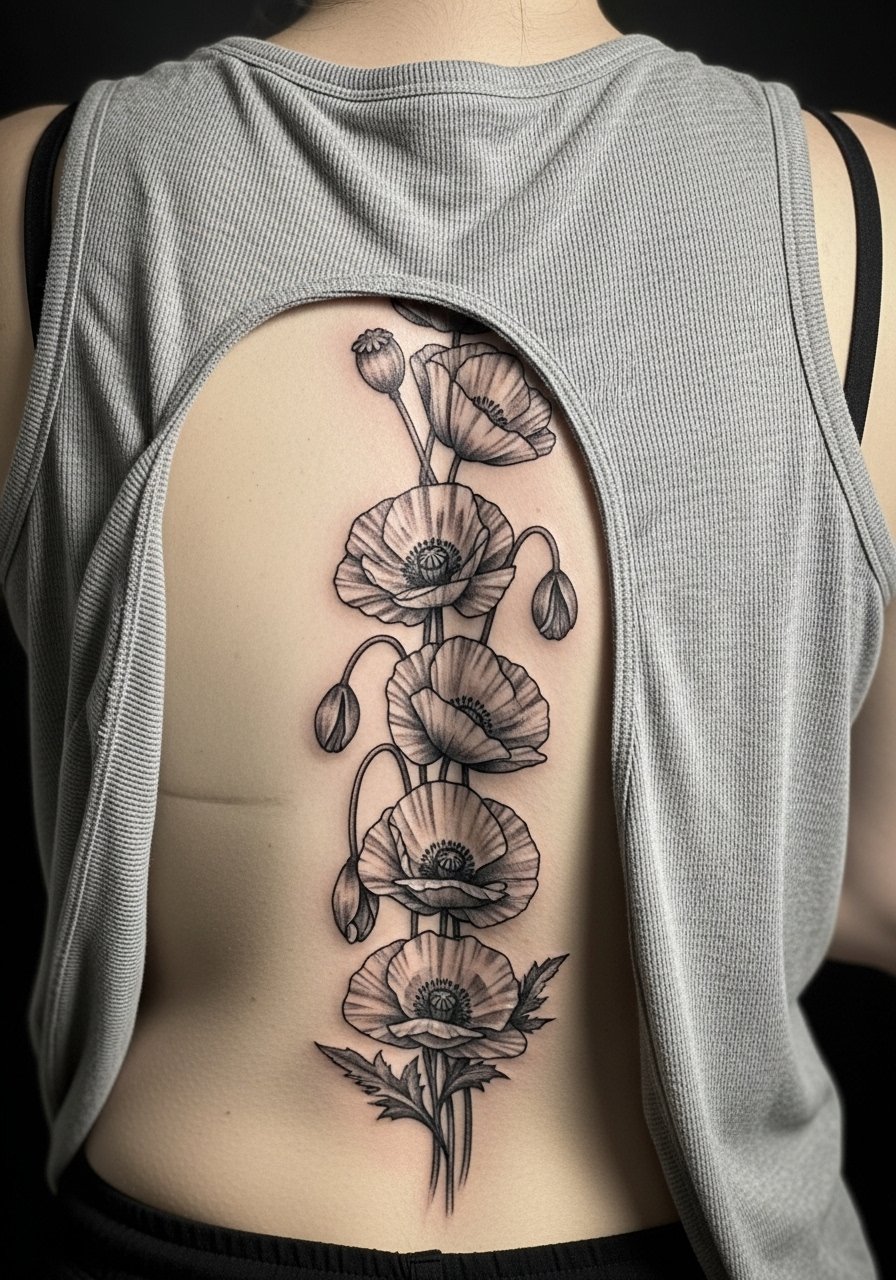
Stacked poppies create a narrative rise from lower back to neck and work well with realistic black and gray. For longevity ask your artist to balance mid-tone shading with clear dark anchors to avoid wash-out in a few years. This design will likely need three sessions for depth and texture. A practical mistake is over-detailing buds that sit directly over vertebrae; keep those simpler. For the session wear drawstring lounge pants so the artist can access the lower portion without pressure from waistbands.
11. Shaded Lavender Spine Vine
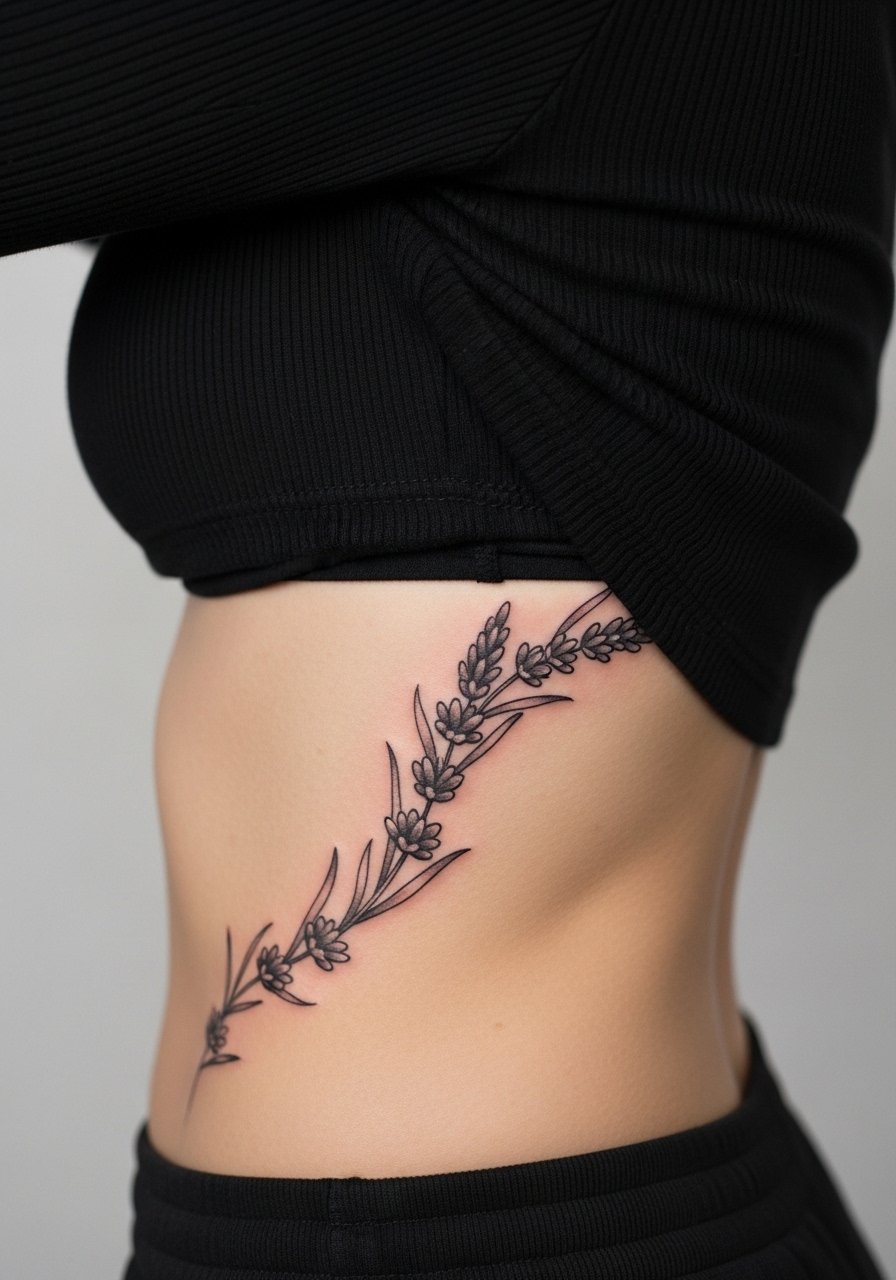
A lavender vine that grazes the spine sides gives a herbarium vibe that moves with the body. Because the design wraps, tell the artist where you want the vine to appear when you bend forward and when you stand straight. The wrap increases blowout risk at tight curves so request softer needle angles in those zones. Two sessions usually nail the depth. Pair this with a wrap dress linen for summer looks that show side slits and the vine flow.
12. Custom Daisy Chain Spine
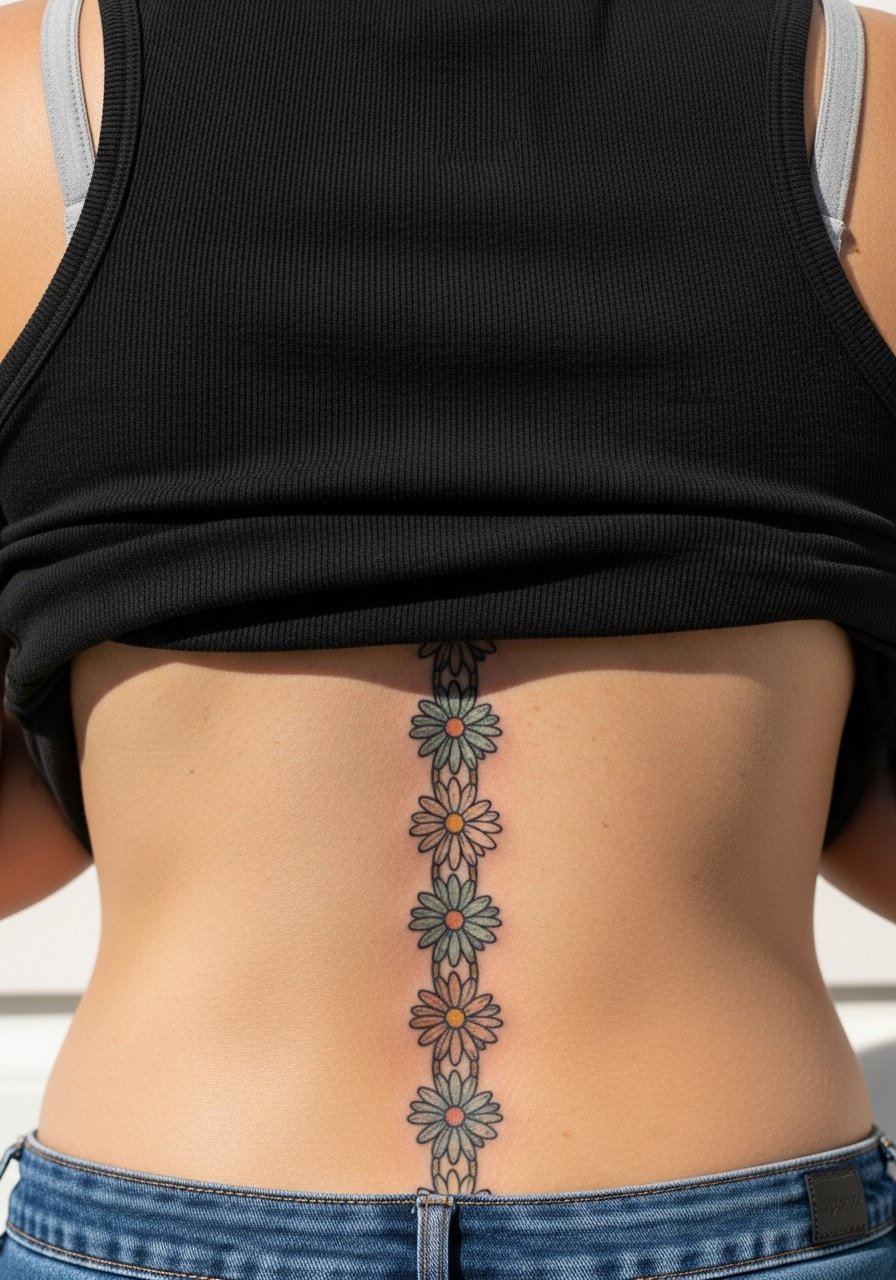
A daisy chain gives you modular customization and easy future additions. Ask for consistent spacing so added blooms later will match the original scale. Fine color outlines can pale on darker skin, so request darker anchors or bolder center dots to keep contrast. This piece usually fits in one to two sessions and tolerates touch-ups at six months. For session comfort choose a front zip sports bra that lets you drop coverage without fighting straps.
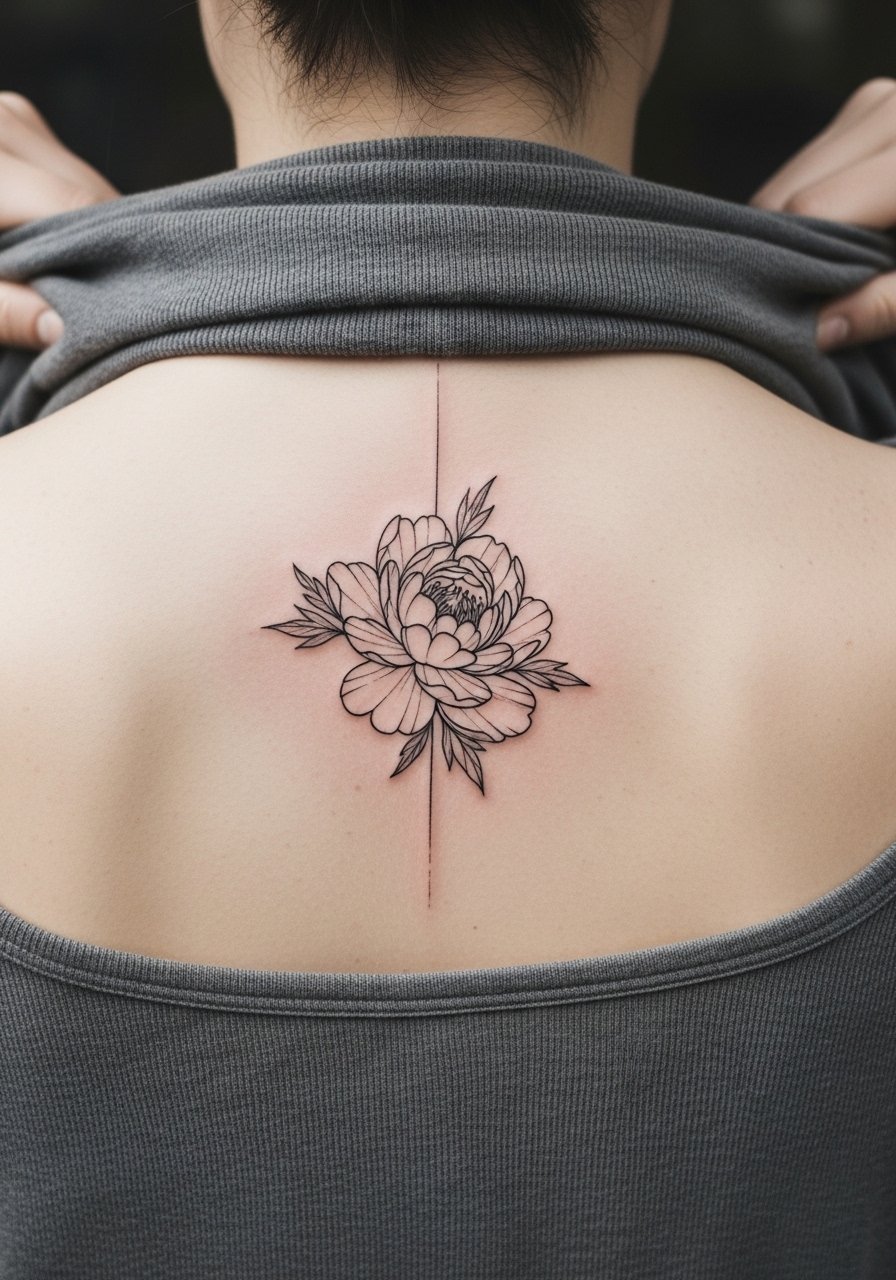
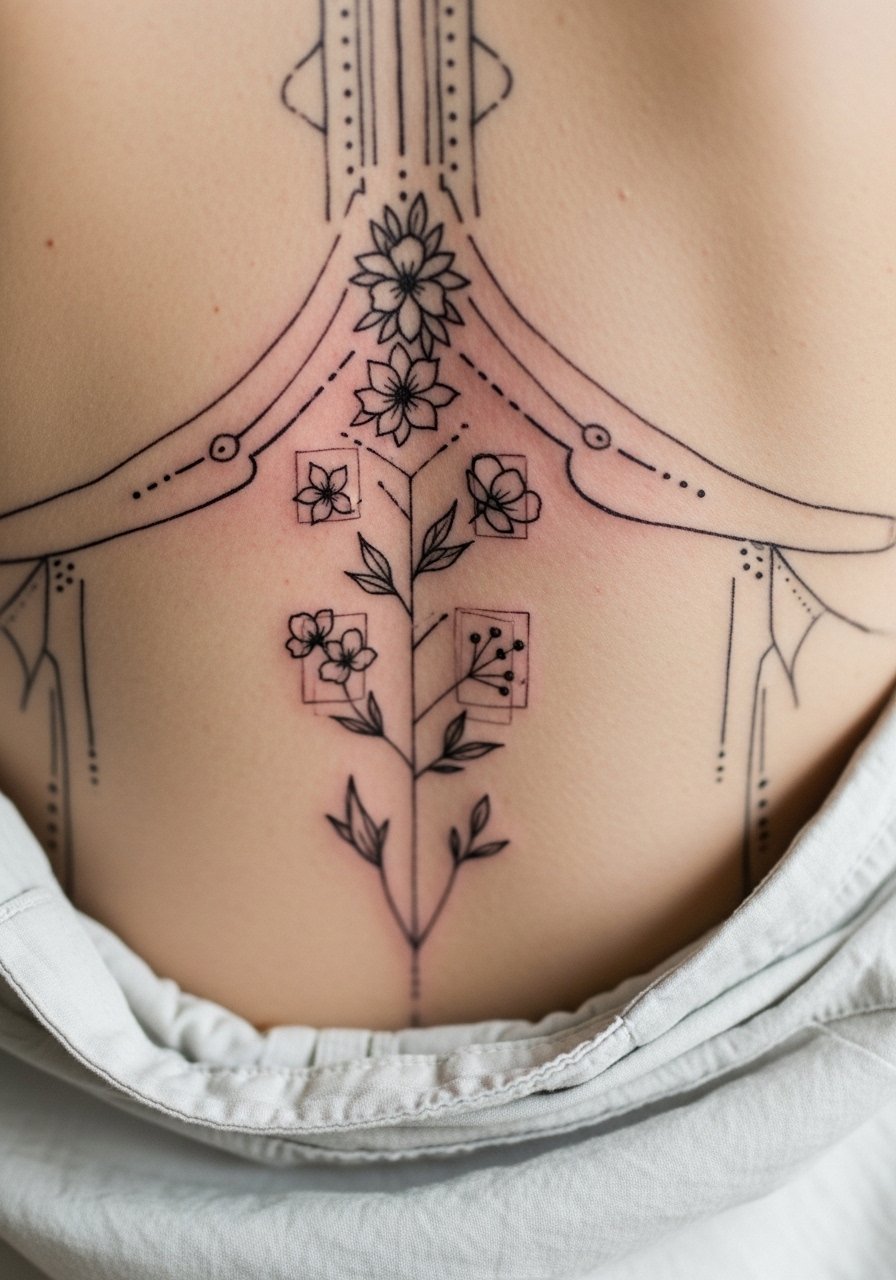
13. Vertebrae-Spaced Botanical Column
This idea focuses on placement science, explicitly spacing blossoms so they sit in soft tissue between bones. Ask your artist for a mockup over a standing and a bent pose to see how the motifs shift. That pre-session mobility check predicts pain mapping and long-term drift. The result heals cleaner because the design avoids direct bone contact on most elements. If you want a low-distortion piece, this planning step is the single most important conversation to have during consultation.
14. Hidden Flex Sheer-Back Flower Trail
Design this trail to be a "hidden flex" under sheer or backless garments so it looks private until you choose to reveal it. For longevity pick black anchors behind watercolor washes so the motif keeps shape in photos and low light. Summer heat and friction under fabric can aggravate early scabbing so plan for dry-healing strategies for the first week. Try the look with an olive silk slip dress for evenings, the muted fabric colors complement vintage florals without competing.
15. Pre-Session Mobility Map with Floral Markers
This concept is about planning rather than a single finished design. You and your artist map pain and stretch zones, then place small floral markers before finalizing the stencil. That mobility test predicts where lines will shift and where to avoid tiny details. It helps prevent the common mistake of cramming detail over a vertebra that stretches significantly when you move. Bring range-of-motion photos or do an in-studio bend test so the artist can adjust spacing on the spot.
16. Vintage Engraving Anemone Stack
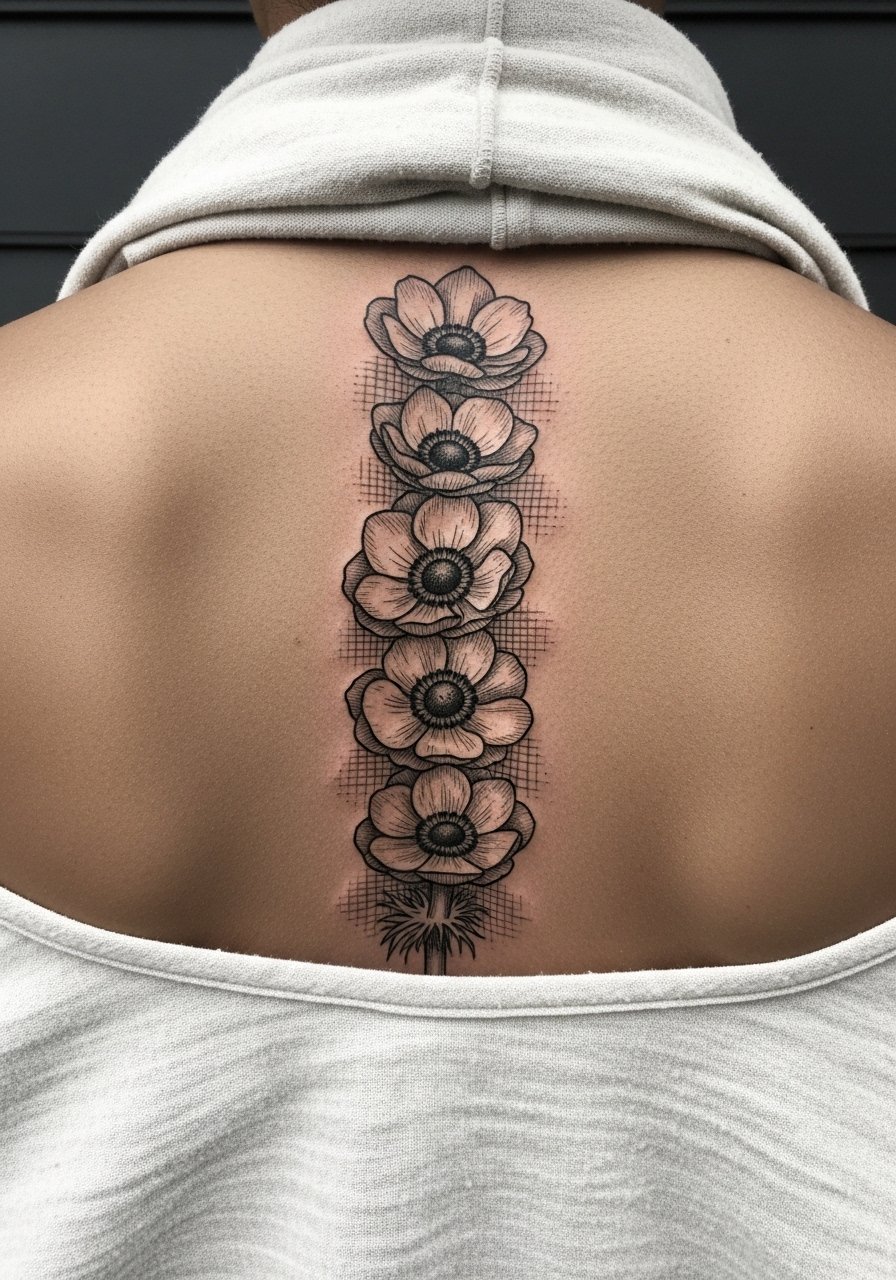
Anemones rendered like 19th-century engravings tap the vintage vibe while using shading techniques that age into texture rather than blur. Ask for stipple and fine cross-hatch to create depth so the look softens gracefully instead of merging. This style often needs a touch-up at year two if you choose very fine cross-hatching. For appointments wear a taupe halter top so the artist can reach the upper spine without obstruction.
17. Aging Simulation Etching Spine
This approach brings an aging simulation to the consult so you can see how a design will soften at years two and five. Request the artist or designer provide a faded mockup that reduces contrast and blends edges to reveal the long-term silhouette. It exposes whether small details will survive or if bolder anchors are needed. Use this as a final decision tool to avoid regret and to plan realistic touch-up windows. It also helps settle the fine-line versus bold debate by showing trade-offs visually.
Frequently Asked Questions
Q: How much will a vintage flower spine tattoo hurt compared with other placements?
A: Spine pain averages high because the needle crosses bone in the vertebrae. Expect sharp stings where the spine is close to skin and softer sensations on fleshy sections. Break large work into two-hour sessions to manage arching pain and reduce the chance an artist cancels a long slot for setup reasons.
Q: Will fine line flower work blur on active or sweaty backs and what should I ask for?
A: Fine line can blur faster on sweaty, frequently rubbed skin. Ask your artist for slightly heavier outlines or darker anchors behind washes so shapes remain clear, and plan a touch-up around six months if you want the ultra-fine look without losing legibility.
Q: Saniderm or dry healing for spine tattoos, which camp should I follow?
A: Artists split on this. One camp favors barrier films for cleanliness and less mess, the other worries about trapped moisture on curved spines causing bubbles. If you live in a hot, humid place consider a short film period followed by dry healing or discuss a thinner barrier like Second Skin with your artist.
Q: How do I pick clothing for the session and for showing off my spine tattoo afterward?
A: For session wear pick items that give the artist easy access without rubbing the fresh ink, like a loose button up tank or a front zip sports bra. For showing pieces off choose backless or wide-neck tops that frame the vertical flow without pressing into the healed area.
Q: What are smart placement choices to avoid distortion from weight changes or pregnancy?
A: Lower spine and waistline areas shift more with body changes. Placing motifs slightly higher on the mid-spine and using spacing that follows vertebrae reduces visible distortion. If future weight or pregnancy is likely, plan for touch-ups and consider modular chains you can expand later.
Q: How often will I need touch-ups for watercolor versus blackwork spine florals?
A: Watercolor styles typically need touch-ups sooner, often within one to three years depending on sun exposure. Dense blackwork holds longer and can remain readable for several years without intervention. Plan touch-ups proactively if you prefer the softer watercolor look to stay vivid.
Q: Can dark skin support colored vintage flowers or should I go black and gray?
A: Colored washes can work but may appear subtler on darker skin in photographs. Many clients choose black and gray or stronger contrast anchors with color accents to maintain clarity. Ask your artist to show healed examples on similar skin tones when deciding.
