
The trend feeds the scroll, and the long-term view tells a different story. Fine line Harleys look spectacular on first share, while bold neo-traditional pieces hold color and form longer. Pick a design that matches how you move, dress, and live, and you will spend less time scheduling touch-ups and more time wearing the look with confidence. Below are 27 fresh directions for Harley Quinn ink, from tiny diamonds to cinematic portraits.
1. Neo-Traditional Diamond Forearm Piece
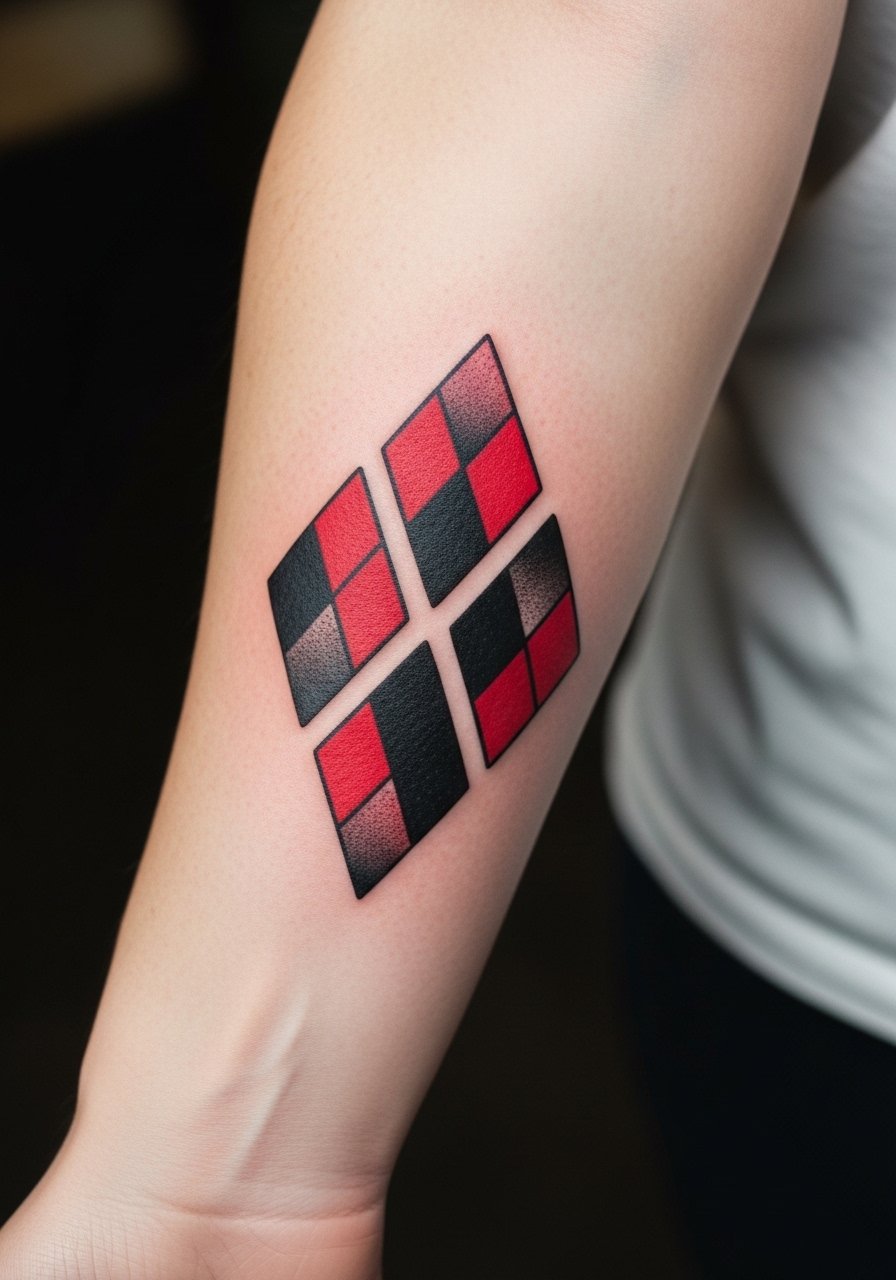
I see this one on repeat because it nods to the jester kit without committing to a full portrait. Ask your artist for thicker outer linework and slightly larger negative spaces so the small diamonds do not blur together over time. Fair warning: wrist-to-forearm wraps face constant friction, so expect a touch-up at year two for saturation. For the session wear something easy to roll like a rolled sleeve black tee and bring a short sleeve button shirt to pull aside if the piece moves toward the elbow. Pain sits around a 3 to 4 on most scales, and sessions usually finish in one block.
2. Raw Comic Draft Thigh Portrait

This direction channels the look of a penciled comic page with visible hatch marks and purposeful imperfections. It works best on the outer thigh because the surface holds stipple and whip shading without unexpected stretch when you move. Tell the artist you want visible stroke edges and leave space around the face so the darks do not pool. Session time runs about two to three hours and you want loose bottoms like high waisted plaid shorts or loose jogger pants women for easy access. Expect the piece to soften in contrast by year two, but touch-ups bring back crispness.
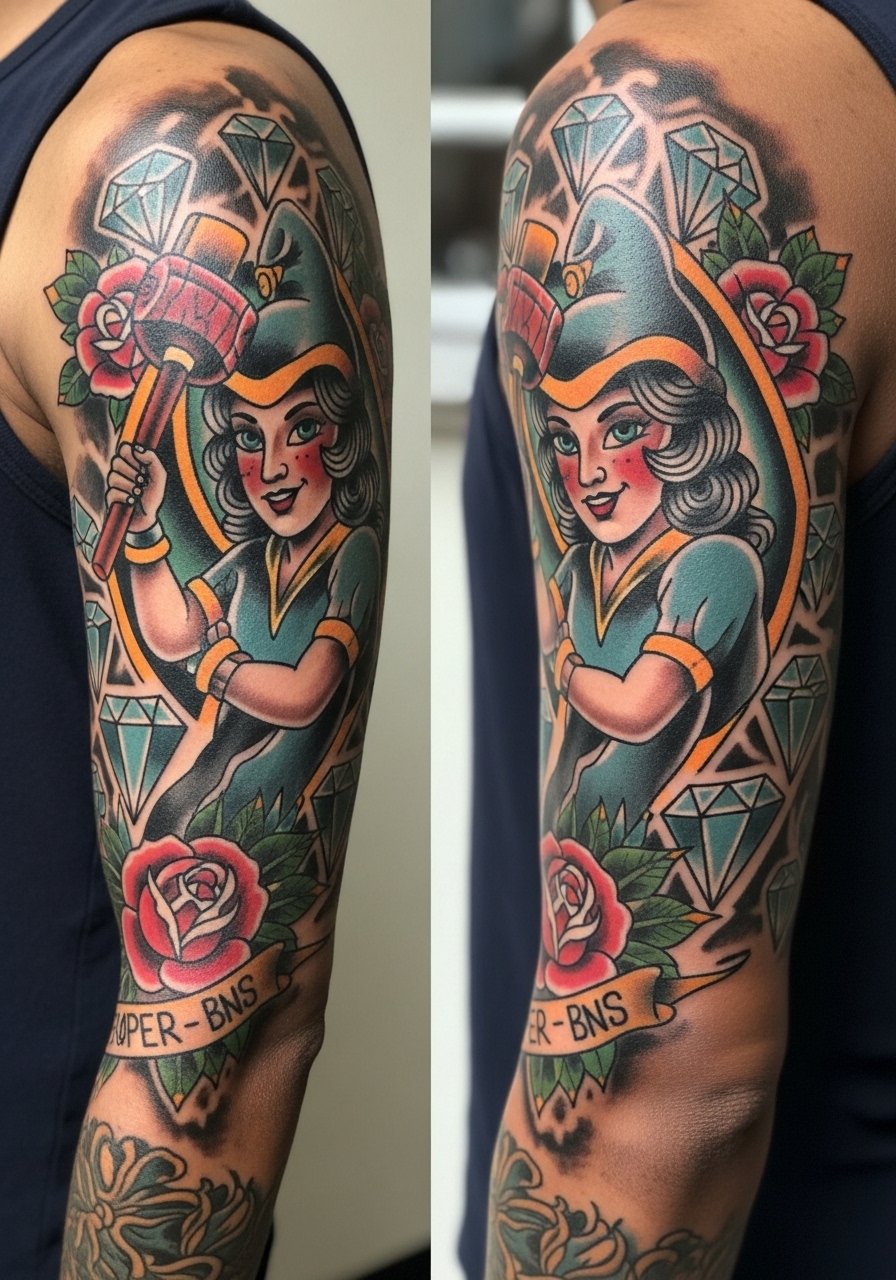
3. Upper Arm Mallet Sleeve Starter
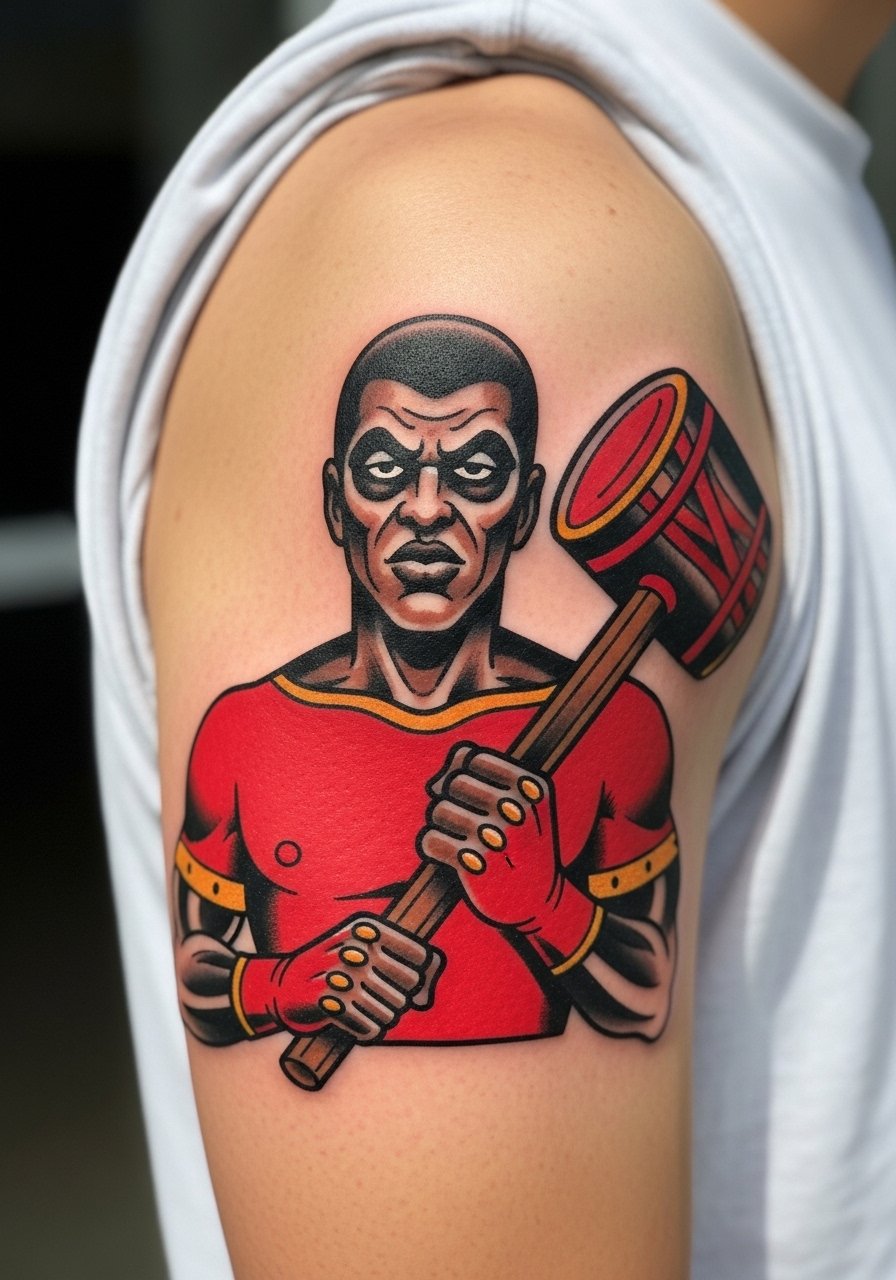
There's a reason the mallet motif is a go-to for fans. It reads from distance and scales into a half or full sleeve if you want to expand later. Ask for strong linework and saturated red-black blocks so the silhouette still pops after a few years. Pain is moderate and sessions range from one to three hours depending on size. For showing it off, pop on a cropped leather jacket women over a tank. For the chair wear, a loose short-sleeve button-up makes access easy and keeps the skin comfortable.
4. Ribcage Bat and Roses Neo-Trad

Ribcage work hurts more than most placements, often an 8 out of 10. The vertical bat with roses reads theatrical on the side torso and fits the curve when the artist aligns the handle with your waistline. Controversy crops up for this placement about numbing and healing. One camp recommends topical numbing to get through the session. The other camp says heavy numbing can affect line depth and lead some artists to refuse application. Ask the shop about their policy and plan on two sessions for color saturation. For show-off styling, a side slit crop top or black red bodycon dress reveals the piece without full exposure.
5. Pinup-Style Shoulder Blade Harley
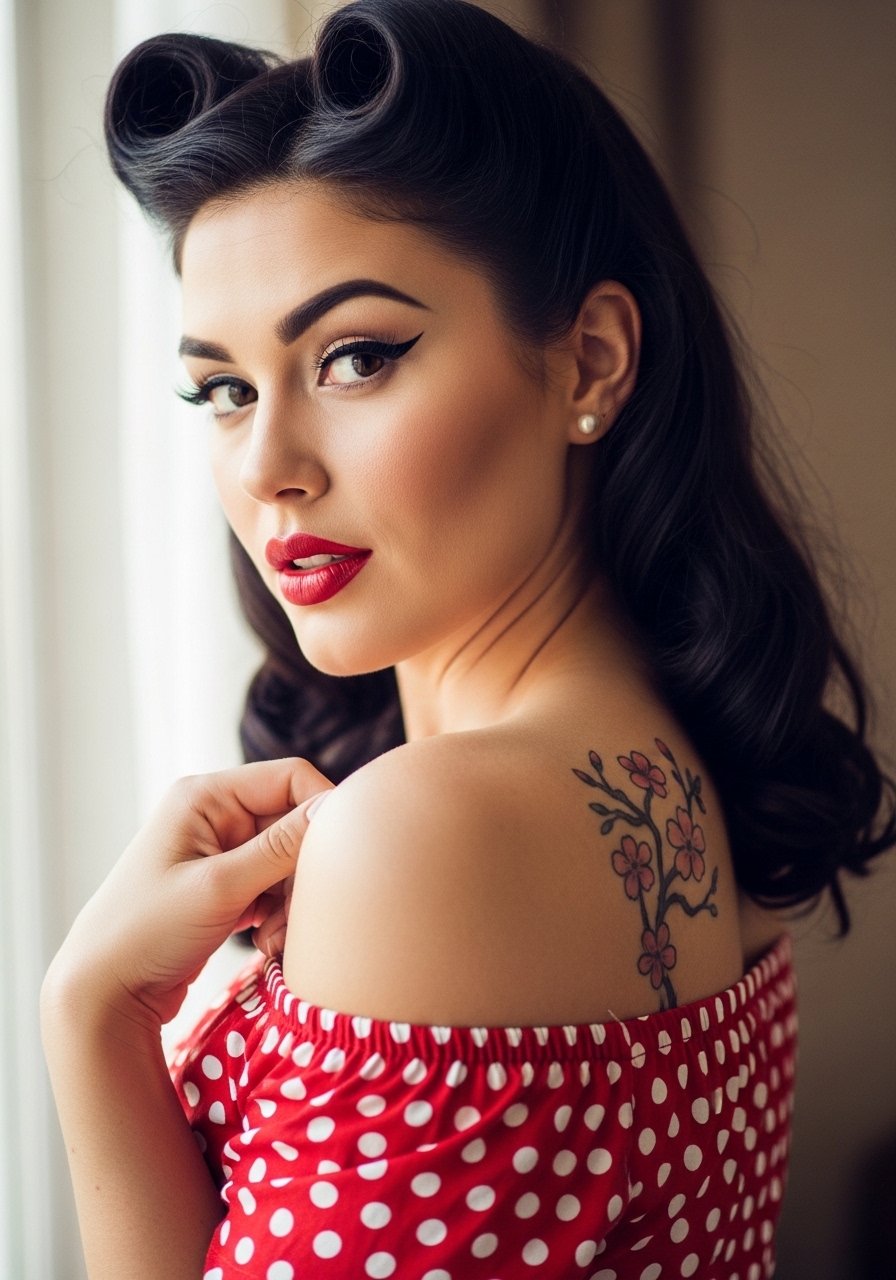
If you love vintage flair, this pinup take balances retro curves with Harley's mischief. The shoulder blade gives a forgiving canvas for color and curve. Tell the artist you want slightly larger shapes and classic dot shading to avoid tiny fills that can muddle. Sessions usually finish in one to two sittings. For outings wear an off shoulder polka dot top or a vintage strapless dress to show the roundness of the placement. During the session a loose tank or button-down keeps access tidy.
6. Cinematic Margot Robbie Calf Portrait
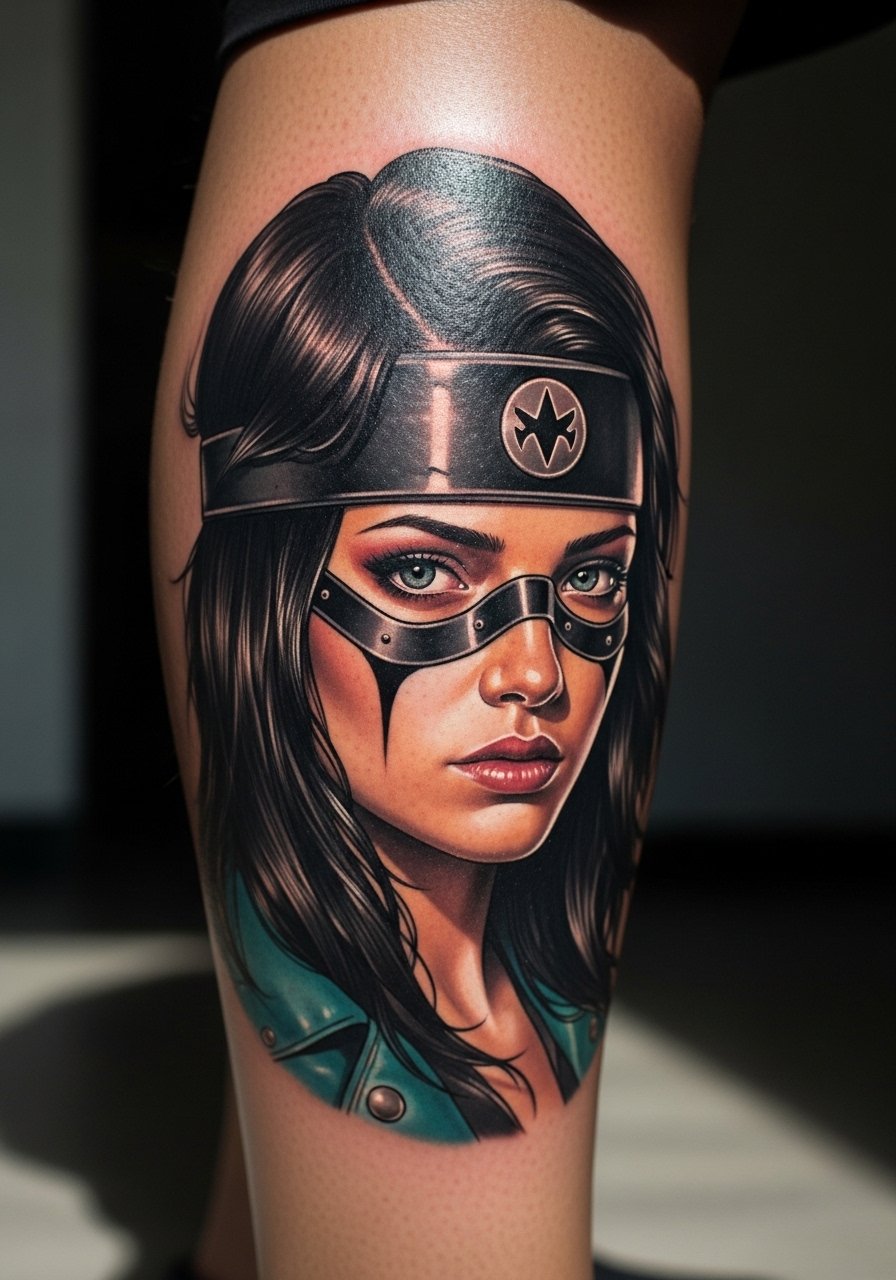
Realistic film portraits demand time and patience. Expect multiple sessions and a longer healing window for saturation to settle. The payoff is a piece that reads like a photograph when healed. Artists vary wildly in portrait skill so examine healed photos in portfolios for contrast retention and skin tone representation. For the session, wear loose pants so you can roll the leg up easily and bring athletic shorts as a backup. Pain is mild to moderate on the calf, and touch-ups are common at year two for color realism. For evening looks, rolled cuffs on rolled ankle skinny jeans frame the portrait nicely.
Studio Day Picks
The forearm diamonds, shoulder pinup, and calf portrait above need different prep than a ribcage or inner thigh session, so these items smooth chair day and the first week of healing.
-
Stencil transfer paper kit. Lets you preview placement and linework on skin before the needle hits, especially useful for precise forearm patterns.
-
Topical numbing cream. Apply as advised by the shop for ribcage or sternum sessions where the pain spike can affect your breathing and movement.
-
Thin protective film roll. Useful for lower-body work like calf and ankle areas that rub against clothing during the first days.
-
Fragrance-free gentle body wash. Cleanses healing zones without stripping color or irritating fresh linework on shoulder and forearm pieces.
-
Aquaphor healing ointment. Thin application during the initial days helps keep fine line areas moisturized while they form a clean scab.
7. Watercolor Jester Mask on Inner Wrist
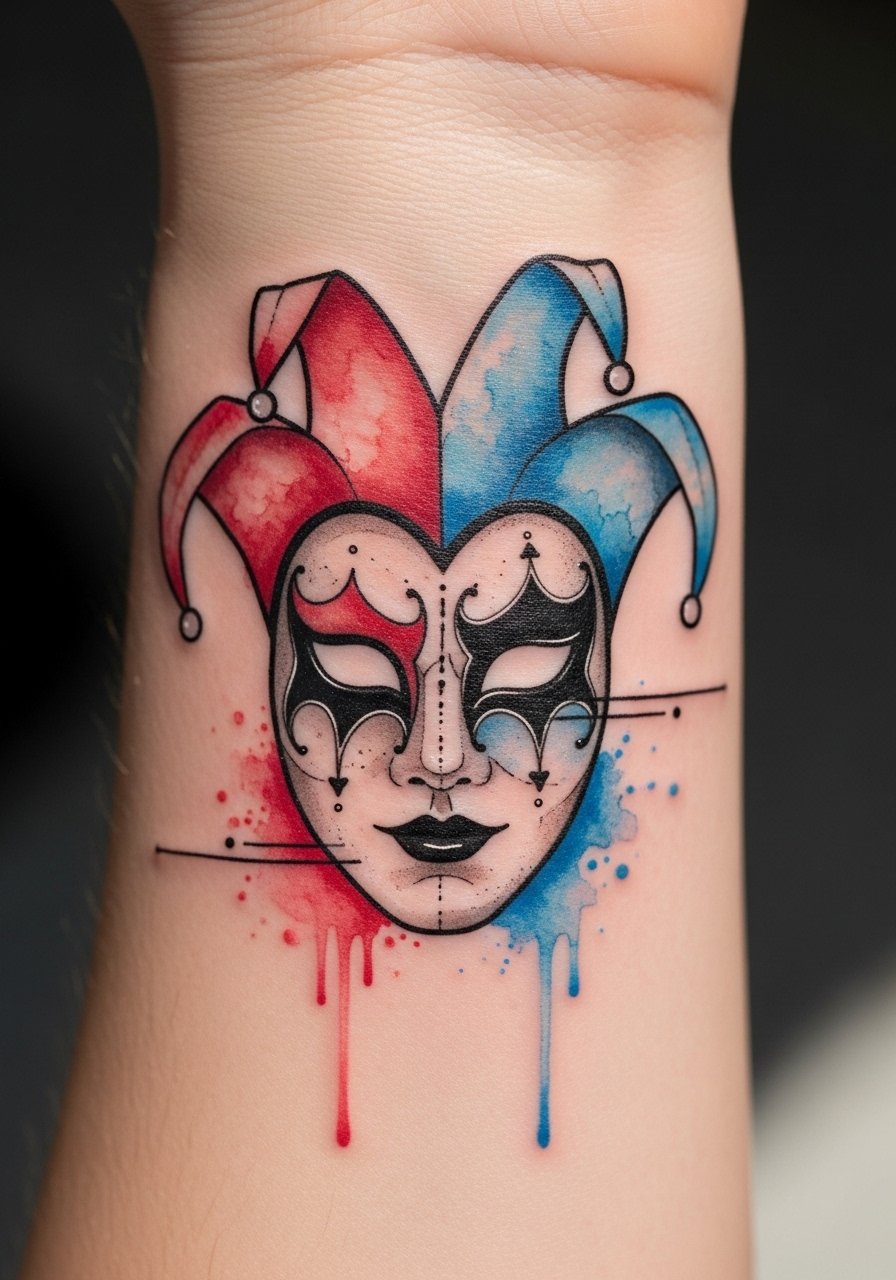
Watercolor reads soft but can fade unevenly, especially on exposed places like the wrist. If you want the painterly bleed, ask for a darker outline anchor to keep the design readable over time. Inner wrist pieces heal faster but face more sun and washing abrasion, so plan a touch-up window at 6 to 12 months. For subtle wrist styling, pair the piece with a thin silver cuff bracelet. Pain is low for this area and sessions are short.
8. Comic Book Action Thigh with Hyena
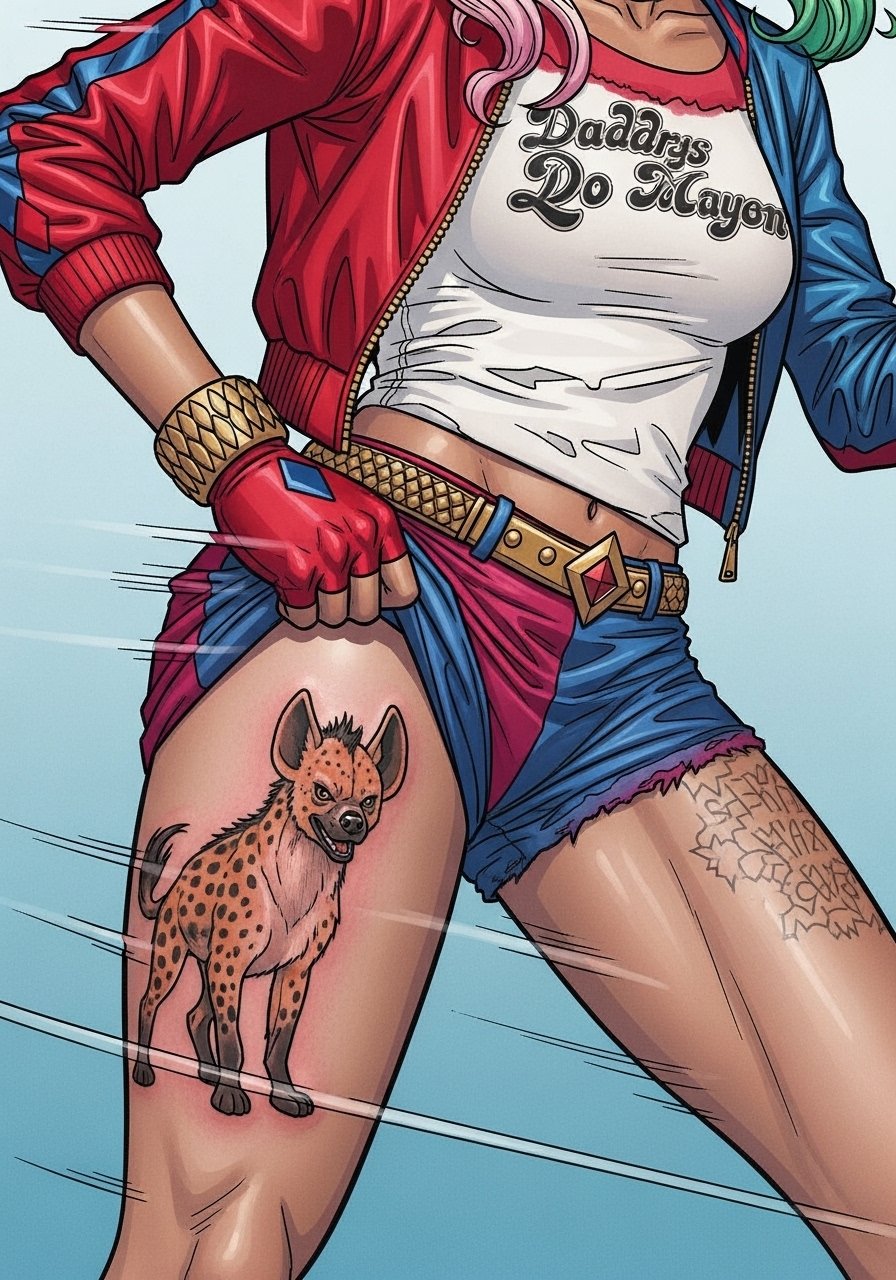
Putting a hyena companion makes the piece personal and keeps it from feeling like a mass market portrait. Inner thigh work has moderate pain and needs a few days of rest from tight clothing. Ask the artist for clear skin gaps around key shapes so the composition holds if your body changes with weight gain. This style loves saturated pops, so expect two to four sessions depending on size. For session comfort, bring loose jogger pants women to pull aside without cutting circulation.
9. Collarbone Mallet and Diamonds

Collarbone pieces are showy and heal visibly. The skin there is thin so ask for slightly thicker linework to prevent early blowout. Pain is moderate because of the proximity to bone and tendon. Sessions can be short if you keep the composition tidy. Pair the design with a v neck black top or a simple diamond pattern choker to frame the geometry without crowding the area. Keep the neckline accessible for the artist by wearing a strapless bra or top.
10. Blackwork Silhouette on Upper Back
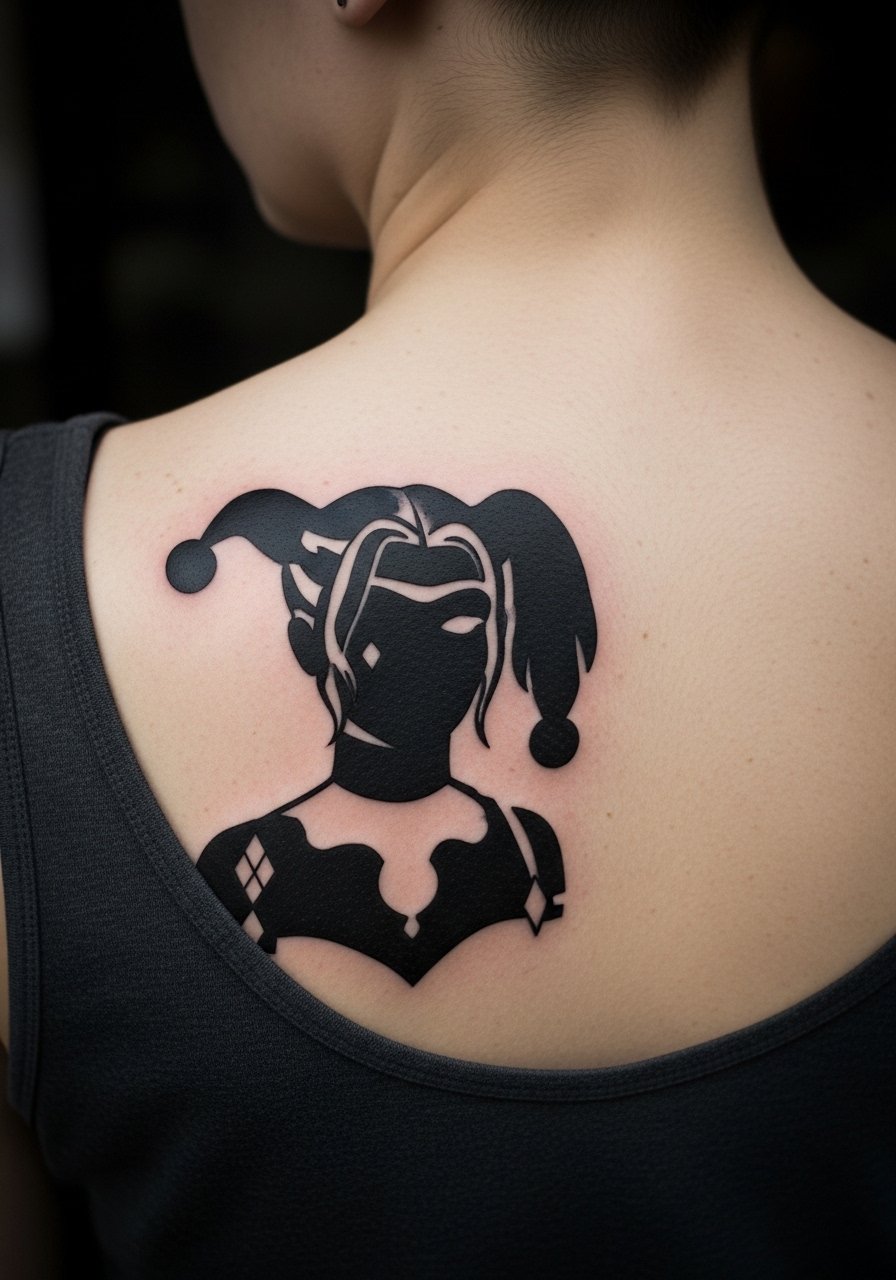
Blackwork reads strong and ages predictably because saturation is heavy and contrast holds. Upper back allows larger scale without daily friction. The main risk here is uneven edges from inconsistent needle depth. During consultation ask about healed portfolio shots of solid black pieces. Session length varies from two to four hours if you add texture. For revealing back looks choose off-shoulder dresses or tops. Pain is low for most people on the fleshy upper back.
11. Ankle Wrap Traditional Face
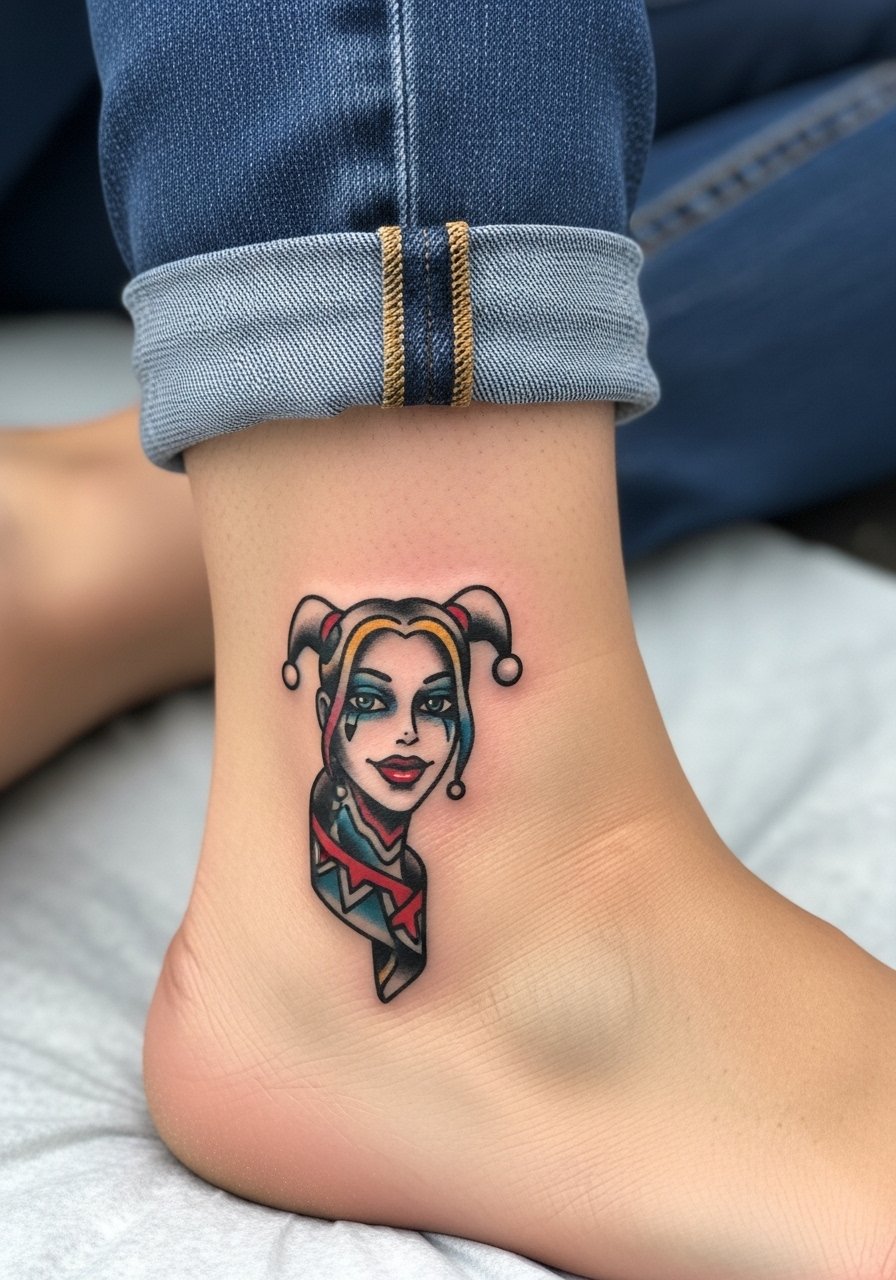
Small ankle faces are a compact way to wear character art without a lot of time in the chair. The ankle sees a lot of walking friction so expect slower settling and the possibility of earlier fade. When you consult, ask the artist for bold outlines and slightly enlarged negative gaps inside the design. For footwear that shows the work, try ankle boot cutout looks or go barefoot with low socks. Session pain can spike over bone but the overall session is usually under an hour.
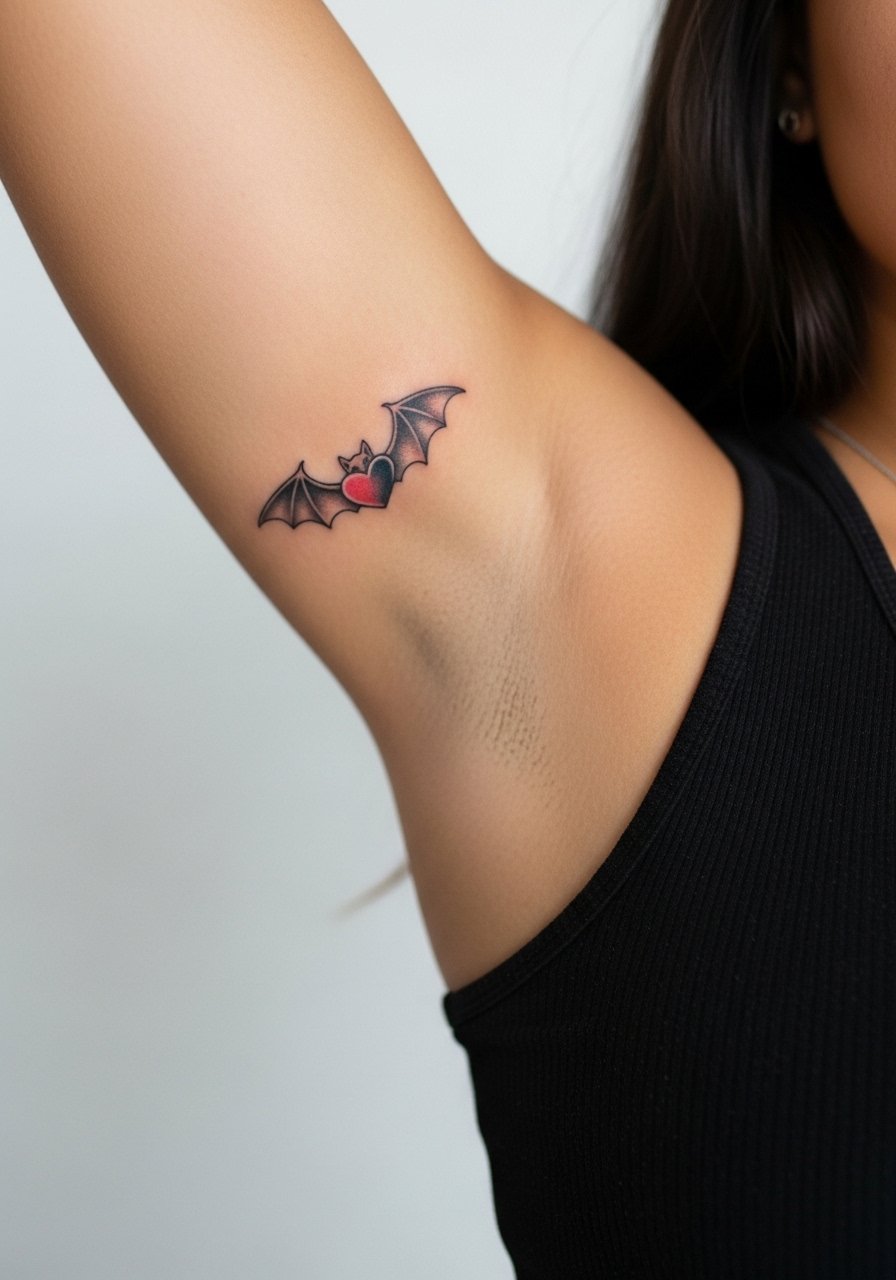
12. Inner Forearm Bat-and-Heart Illustrative
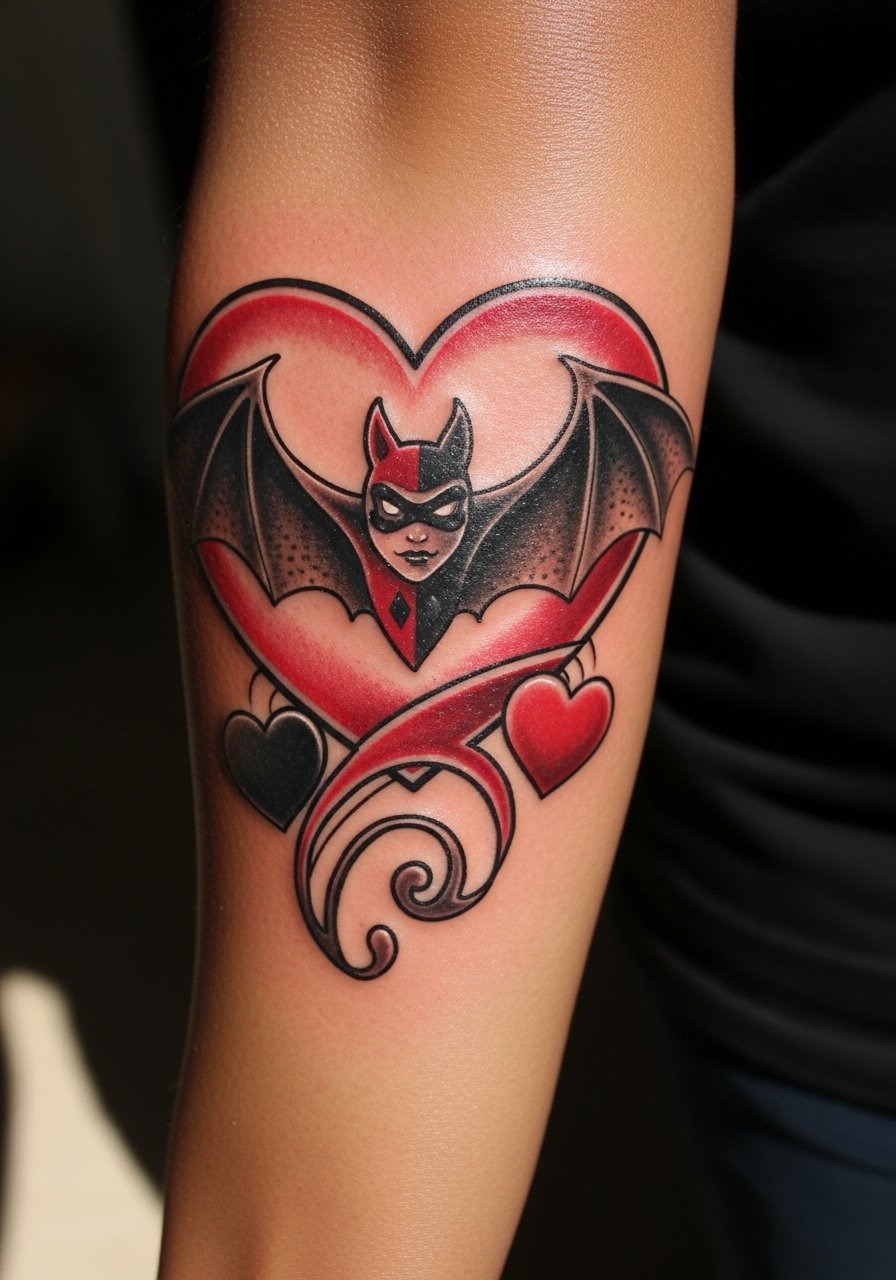
Inner forearm is one of the most forgiving places for linework, and it shows detail. This illustrative bat-and-heart variant lets you combine story with clarity. Make sure the red accent spots are not too tiny to avoid early mudding. Session time sits around two hours depending on shading. For showing it off wear rolled sleeves or a rolled sleeve black tee. Expect low pain and good long-term readability, with touch-ups likely after a few years if you spend lots of time outdoors.
13. Minimalist Diamond Wrist Stack

Minimal diamonds are stealthy and versatile. The mistake here is making them too small and too close together. Ask for slightly larger spacing and a small anchor diamond to maintain geometry over time. Healed fine line on wrists will need touch-ups more often than bold pieces. For accessories that complement the tiny diamonds try a thin silver cuff bracelet. Sessions are quick and pain is low.
14. Half-Sleeve Mallet Collage
A half-sleeve gives room for layered storytelling. Start with a strong focal point like the mallet and let the artist fit diamonds and roses around muscle flow. Common mistakes include cramming too many small motifs. Tell your artist to prioritize three large elements and use negative space to let the design breathe. Sessions usually require two to four visits and pain varies by area. For showing it off, a cropped leather jacket women frames the upper arm perfectly.
15. Micro-Realism Eye or Mask Behind Ear
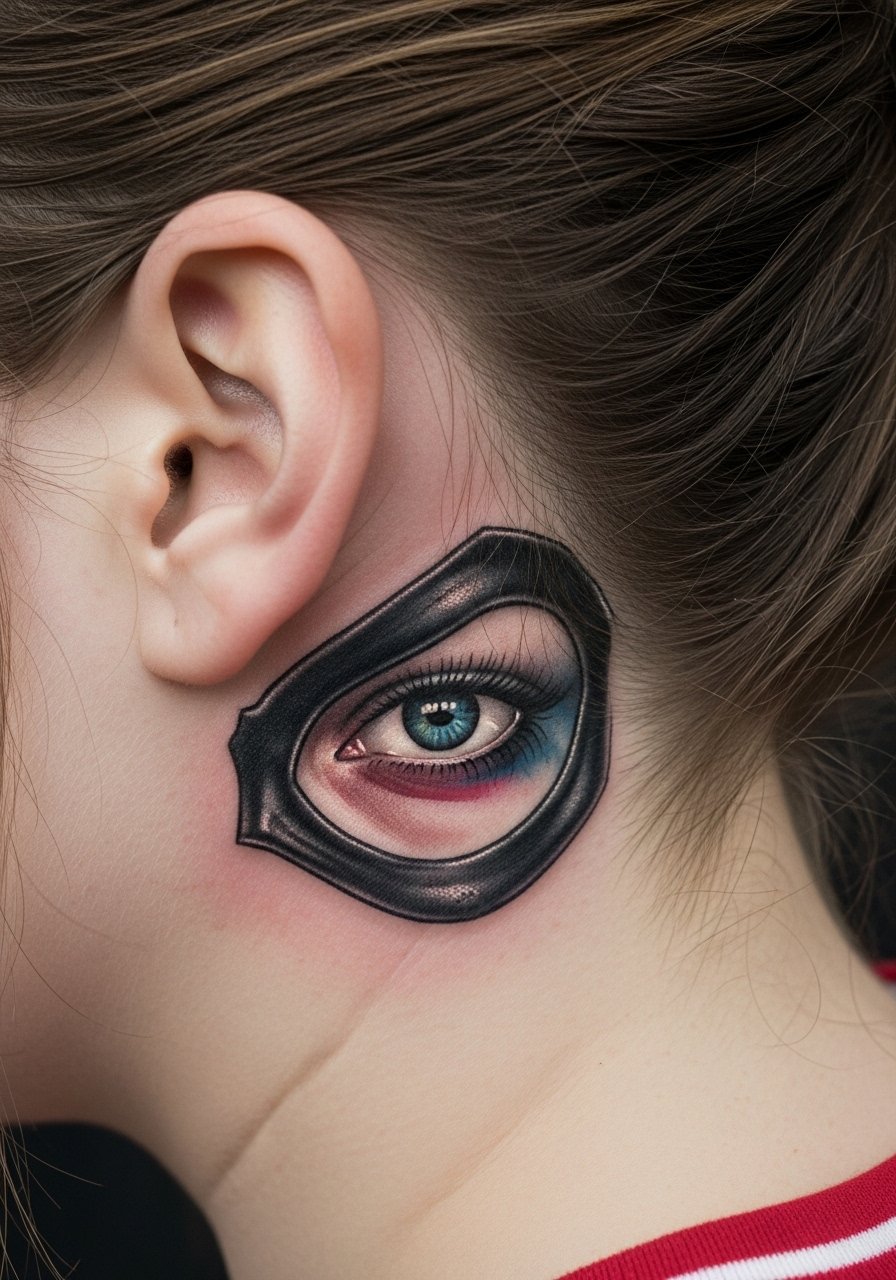
Behind-the-ear placements are discreet and delicate. Artists must work small with precise depth so you avoid blowout. This area can be sensitive and visibility is limited. For placement decisions, ask to preview the stencil on your skin below the hairline so you see how it reads when you move your head. Sessions are short but expect tenderness for a few days. Keep in mind this is a niche spot that reads best with minimalist linework.
16. Stipple Shaded Sternum Jester Motif

Sternum work demands careful planning and a steady hand for stipple shading. Pain ranges high for many people but the center chest can hold detail beautifully when spaced correctly. A frequent error is packing dots too densely, which can age into muddied tone. If you pick stipple, ask for graduated density and clear negative margins. For the session wear a fitted sports bra so the artist can work to the fabric edge without exposing more than needed.
17. Forearm Script with Diamond Accent
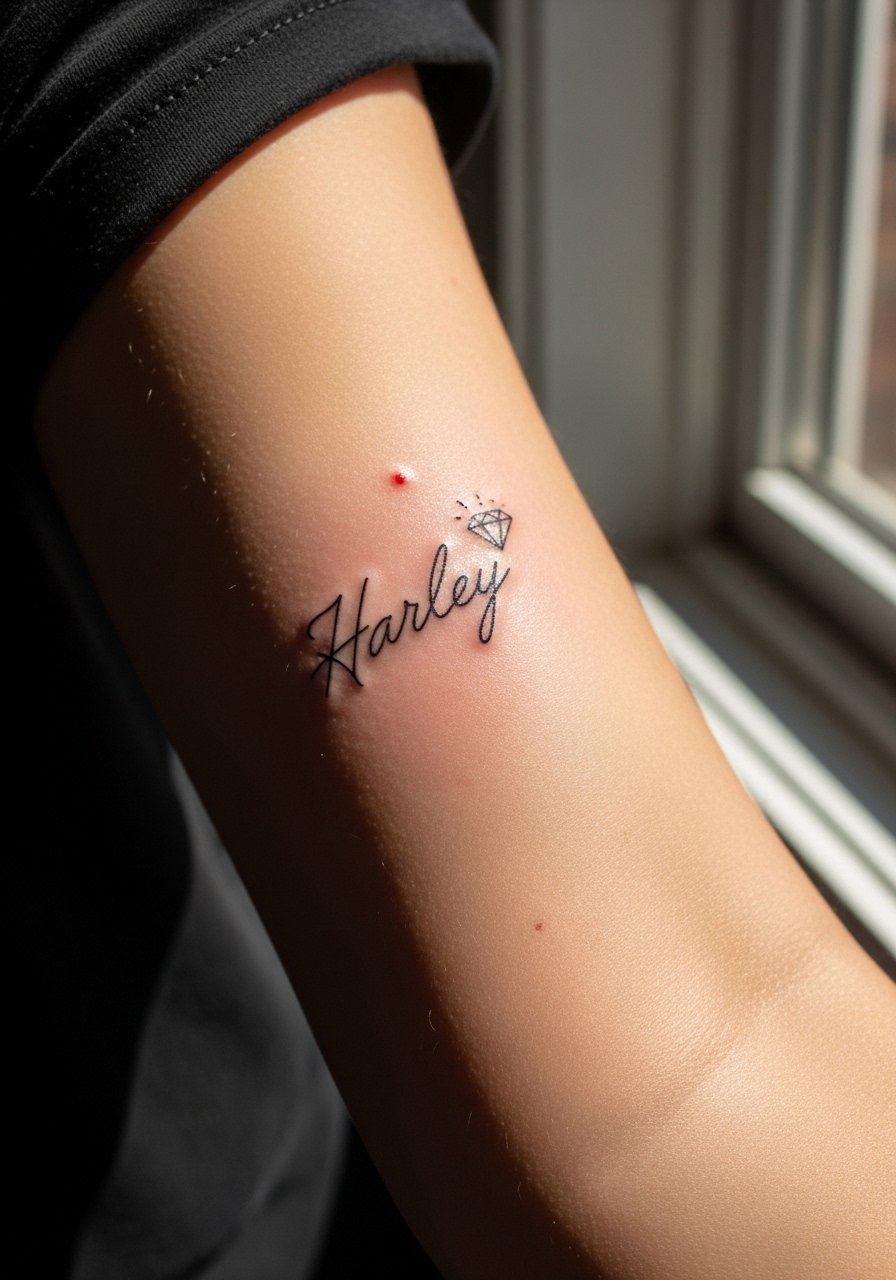
Script pieces read personal and scale well on the forearm. The diamond accent keeps it on-theme. The most common mistake is choosing lettering that is too ornate at tiny scale. Request a clean, readable hand lettering sample and ask the artist to show your name resized to the intended dimensions. For casual looks, rolled sleeves and a short sleeve button shirt keep the piece visible when you want it to be.
18. Comic Panel Sleeve Starter
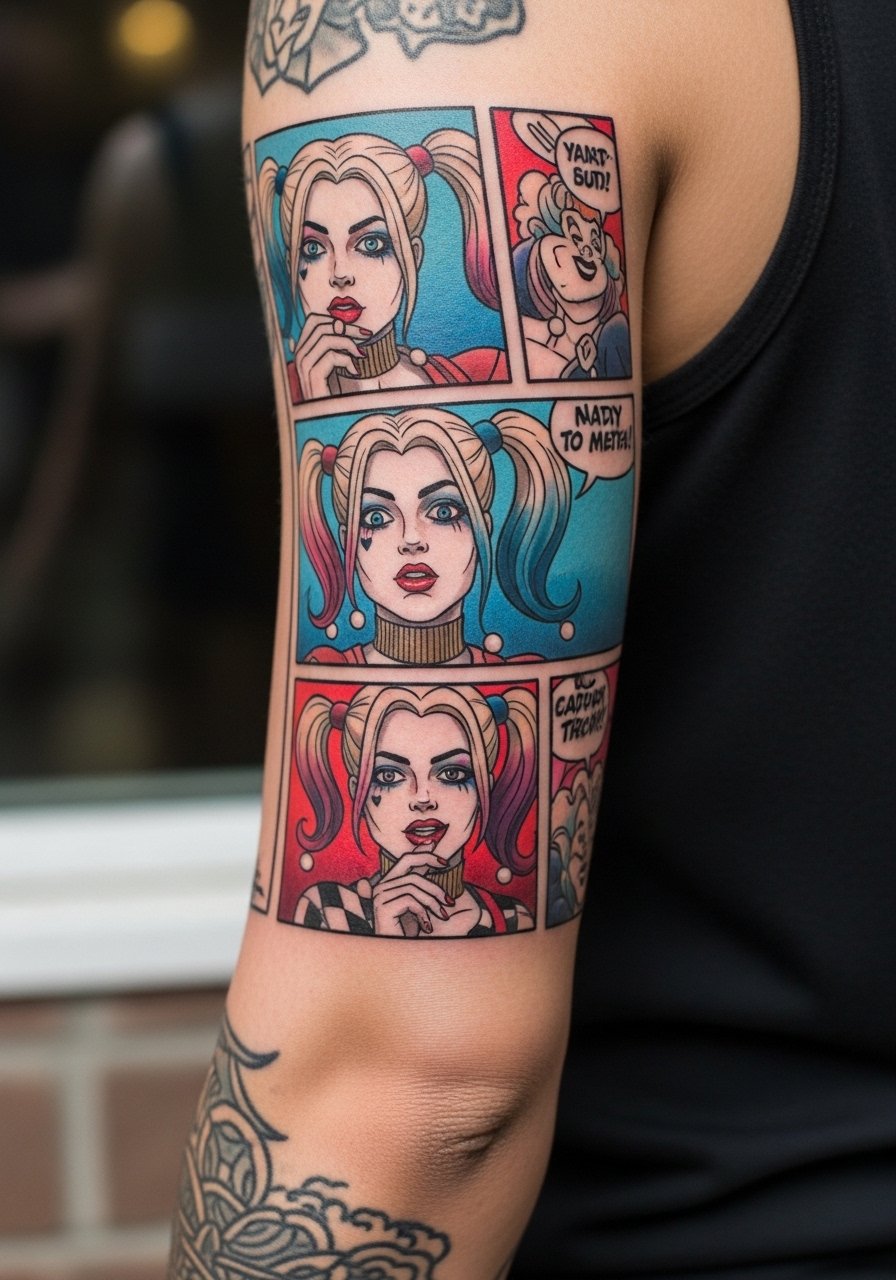
If you like sequential storytelling, panel work lets you add scenes over multiple sessions. Plan the negative gutters between panels intentionally so each frame reads separately as the piece ages. Sessions will be longer because each panel needs distinct finishing. For chair day wear, bring a loose short-sleeve shirt so the outer arm stays accessible. Expect the piece to retain graphic clarity well if linework remains bold and panel spacing stays generous.
19. Black-and-Gray Thigh Portrait with Texture

Black-and-gray portraits age differently than color work. They can hold contrast longer when artists focus on texture and contrast rather than tiny high-detail highlights. The thigh is ideal for this approach because it avoids daily abrasion. Discuss touch-up expectations and whether the artist layers grayscale washes for longevity. Session time ranges two to four hours. For session comfort wear high waisted plaid shorts or loose bottoms you can shift easily.
20. Minimalist Clown Mask Behind Ear Accent
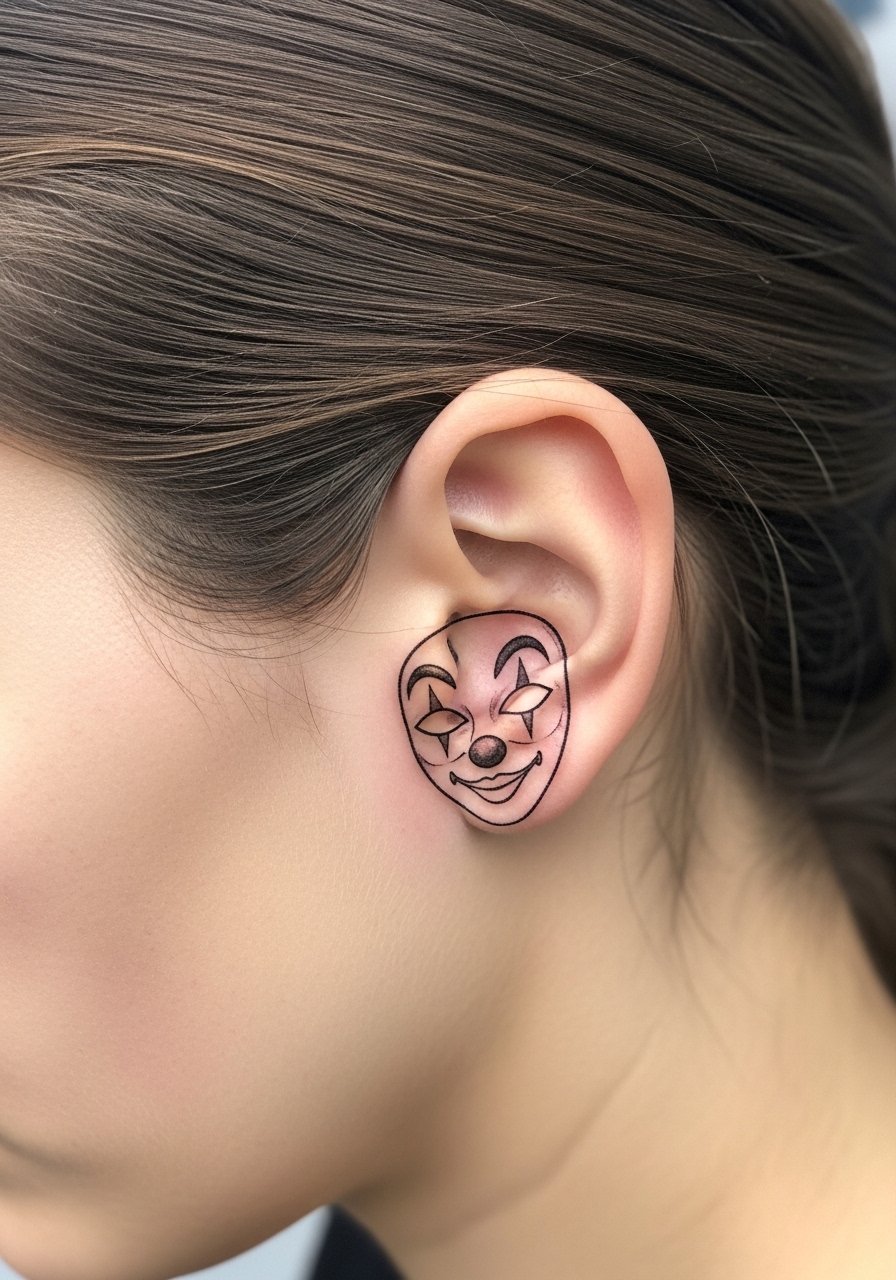
Small behind-ear accents make unexpected statements. Keep the size conservative and ask for a simple silhouette rather than micro detail. The area heals quickly but is best left to artists experienced with very small linework. Because of limited surface, this is not the time for complicated shading. Expect some tenderness while sleeping for a week.
21. Ankle Constellation with Diamond Dot Accents
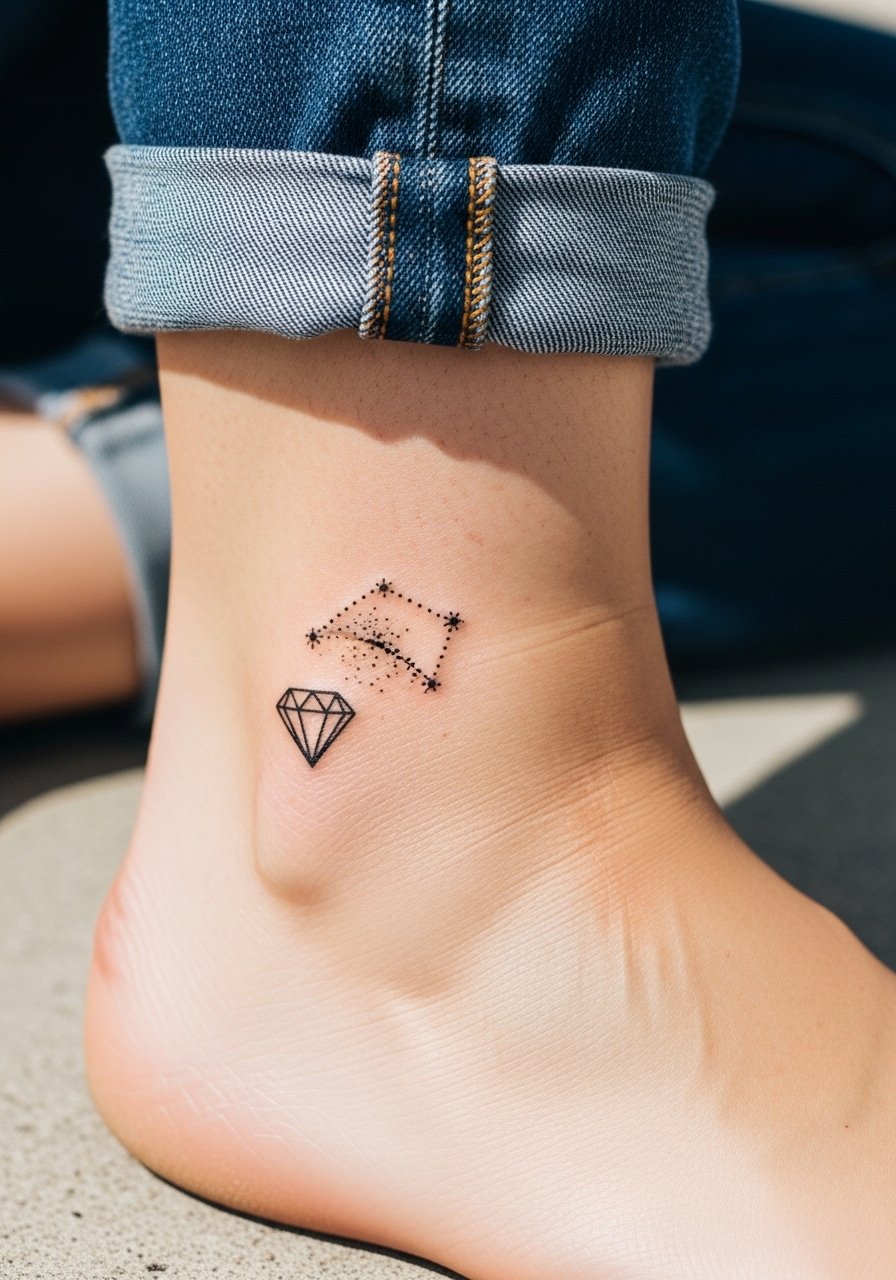
Ankle constellations pair well with subtle diamonds for fans who want seasonal visibility. The ankle faces friction and water exposure so thicker outlines help. For summer-ready footwear try no show socks and sandals that do not rub the area. Sessions are short and pain spikes over bone but overall heal is manageable.
22. Upper Thigh Comic Duo with Hyena Companion

Upper thigh placements give you privacy and scale. Duo scenes let you stage action without crowding details. Ask for bold separations between subject and background so the hyena silhouette stays legible if colors shift slightly with time. For session comfort choose loose jogger pants women or shorts you can shift. Expect medium pain and multi-session time for complex scenes.
23. Collarbone Minimalist Mask with Choker Accent

Subtle collarbone pieces pair well with jewelry and layer nicely under open necklines. The skin there is thin so thicker main lines prevent early blurring. For framing choose a diamond pattern choker or a thin pendant. Sessions are brief and visible in most casual tops.
24. Back-of-Arm Traditional Pinup
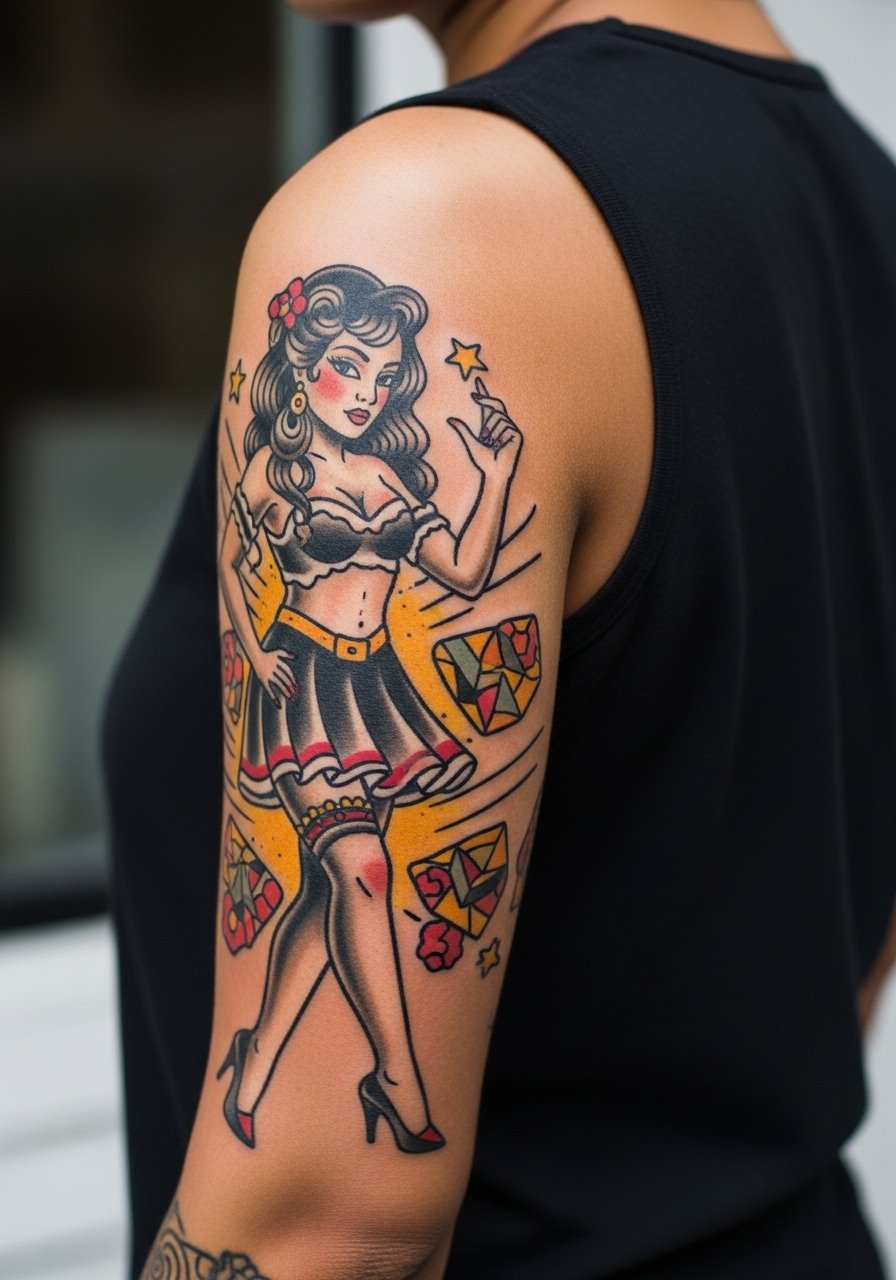
The back of the arm offers an unexpected place for pinup art that peeks out with certain sleeves. It sees less constant exposure than forearms which helps saturation. Ask for pronounced color blocks and avoid tiny gradient fills in shadow zones that can age into muddied tones. Sessions are moderate in length and pain is mild.
25. Inner Bicep Illustrative Heart-and-Bat
Inner bicep tattoos need an artist comfortable working in tighter angles. Pain can spike when the arm is lifted and held. The inner bicep is a good place for medium detail because it avoids constant direct sunlight. For chair day pick a tank top you can lift without pinching like a loose tank top. Expect touch-ups if shading is subtle.
26. Tiny Finger Diamonds in a Row
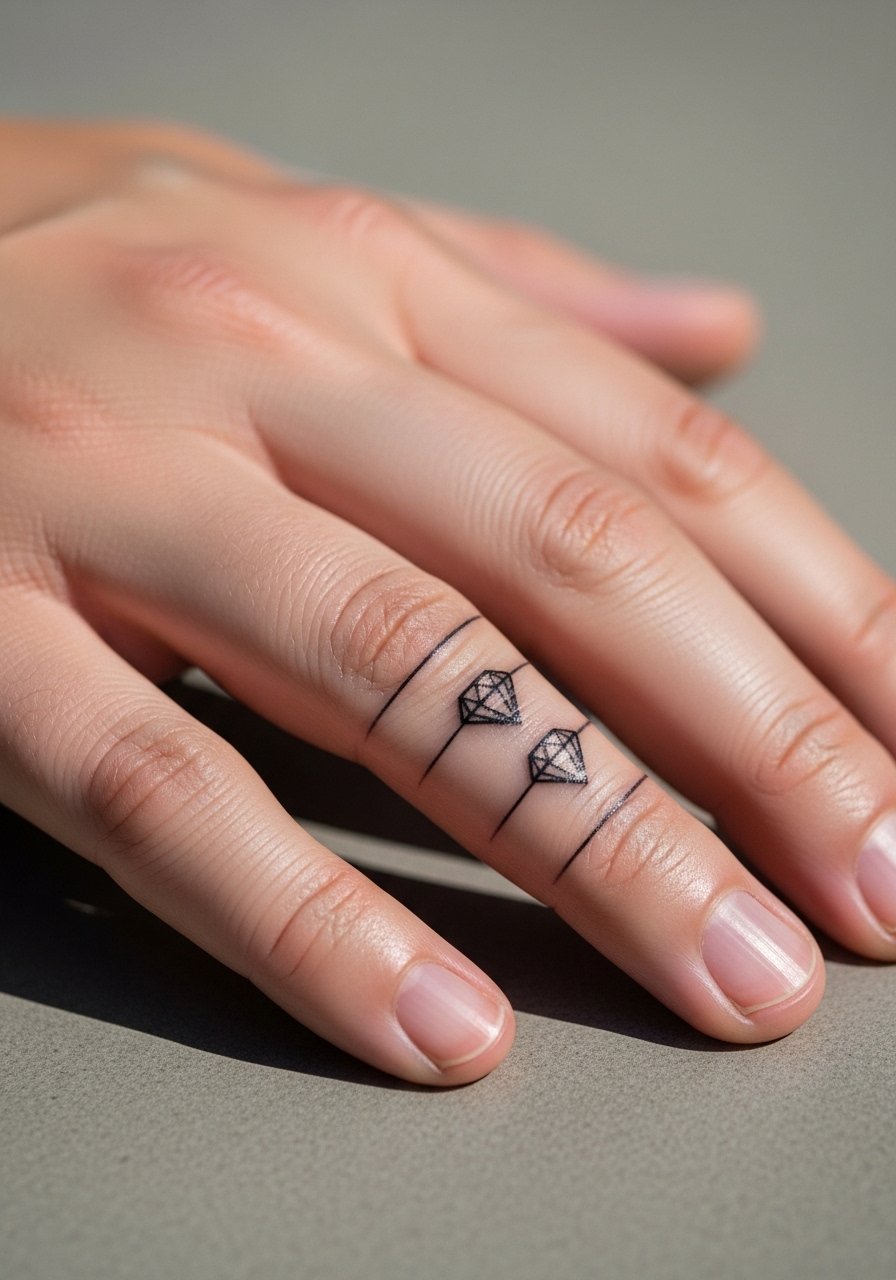
Finger tattoos are impulsive but visible. The skin on fingers regenerates quickly which means faster fade. Avoid ultra-thin script alongside diamonds because small letters will vanish. When you ask for finger diamonds request bolder internal shapes and a slightly larger scale to preserve geometry. Keep post-session care mindful because frequent hand washing affects healing.
27. Ankle-to-Calf Comic Panel Band
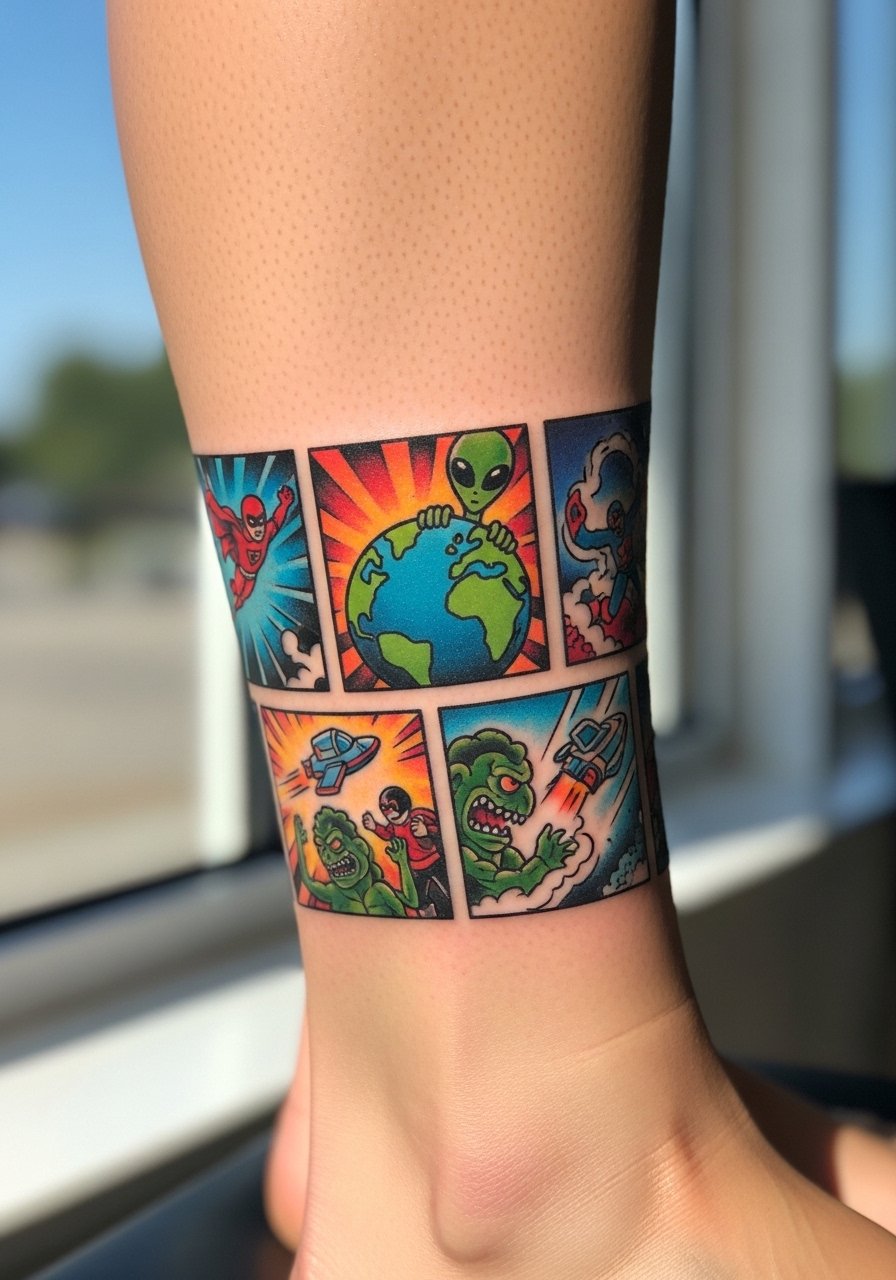
A comic band around the lower leg reads like a storyboard when you walk. This wrap sees movement and clothing friction so prioritize bold outlines and moderate negative space between panels. Sessions will be split and you should expect touch-ups as the pieces settle. For daily wear consider rolled cuff shorts to show the band in summer.
Frequently Asked Questions
Q: Will fine line Harley Quinn diamonds blur faster on wrists and fingers than on forearms and why?
A: Yes, wrists and fingers age differently because they get more sun exposure, washing, and friction. Fine line can look delicate and graceful at first but the thin channels under the skin in those zones are prone to softening. If you want longevity, ask for slightly bolder linework and larger spacing, and expect touch-ups within a few years depending on lifestyle.
Q: Do watercolor-style Harleys need special healing plans compared with neo-traditional pieces?
A: Watercolor finishes rely on soft blends and less black anchoring so they can fade unevenly if you get too much sun or skip touch-ups. Neo-traditional pieces with strong black outlines hold pigment longer. If you choose watercolor, plan for a tighter sunscreen routine and a touch-up window around 6 to 12 months to refresh color pockets.
Q: How do I handle the Saniderm versus dry healing debate for color Harley tattoos on the ribcage?
A: Artists split into two camps on this. One camp recommends transparent film for the first 24 to 72 hours to keep the area clean in hot weather. The other camp says film can trap fluids on color pieces and prefers short wet-sleep cycles with a thin balm. Ask your artist which method they use and follow their specific timing for film removal or ointment application.
Q: What should I wear to a ribcage or sternum Harley session to make the artist's job easier?
A: For those placements wear a fitted sports bra, bandeau, or a cropped top you can lift slightly. You want access to the area without full exposure. A zip-up hoodie or a button-down shirt also works if you need to remain modest while allowing the artist clear workspace.
Q: Are portrait-style Harley Quinn tattoos worth the extended session time for realistic color?
A: Portrait realism takes longer and often needs multiple sessions, but if accurate likeness and fine color transitions matter to you, the extra time buys a level of detail you cannot shortcut. Be realistic about touch-up schedules and choose an artist with a proven track record on healed portraits.
Q: How often should I expect touch-ups for neo-traditional Harley work on the upper arm versus watercolor wrist pieces?
A: Neo-traditional with solid black anchors and saturated fills on the upper arm can hold well for several years before needing a refresh. Watercolor on the wrist tends to need attention earlier. Your lifestyle and sun exposure drive the exact timeline, but a check-in at year one is common to assess where touch-ups help.
Q: Where can I find artists who do neo-traditional Harley work if my city has few specialists?
A: Use hashtags like #HarleyQuinnTattoo and #NeoTraditionalHarley on Instagram to find portfolios, check Tattoodo for guest spots, scan r/tattoos on Reddit for recs, and set alerts on booking apps. Booking a guest spot three months ahead is a practical habit for in-demand neo-traditional artists.
