
Fine line is trending on every feed, but it is not the whole story. Tiny geometric tattoo patterns can last beautifully if you match size, line weight, placement, and spacing to how skin moves. Expect talk of touch-ups, fine-line fading, and placement trade-offs early on. Read these compact ideas with practical notes on aging, what to say in consults, and which wardrobe choices make each piece look intentional.
1. Single Black Triangle Outline on the Wrist
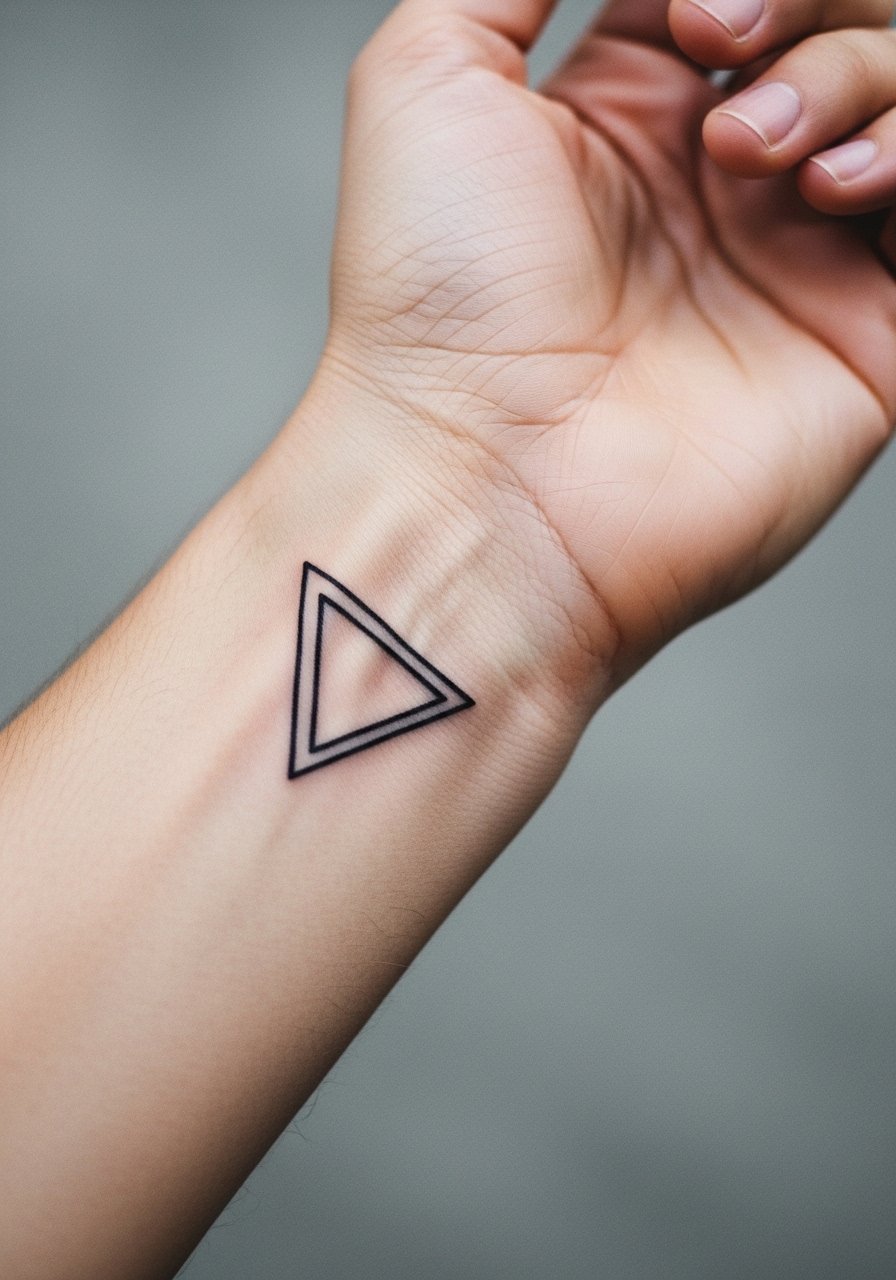
I recommend this when you want a minimalist marker that reads clean every day. Tell your artist you want one to two millimeter line weight and a slightly larger scale if you type a lot, because tiny single-needle work can blur faster on high-friction wrists. Pain is low for most people and a session is usually under thirty minutes. Expect touch-up around year three if you keep it tiny. For showing it off, stack it with a thin silver chain bracelet on the opposite wrist, and wear short sleeves to frame the piece during the first week.
2. Interconnected Line Grid Forming a Cube on Inner Forearm
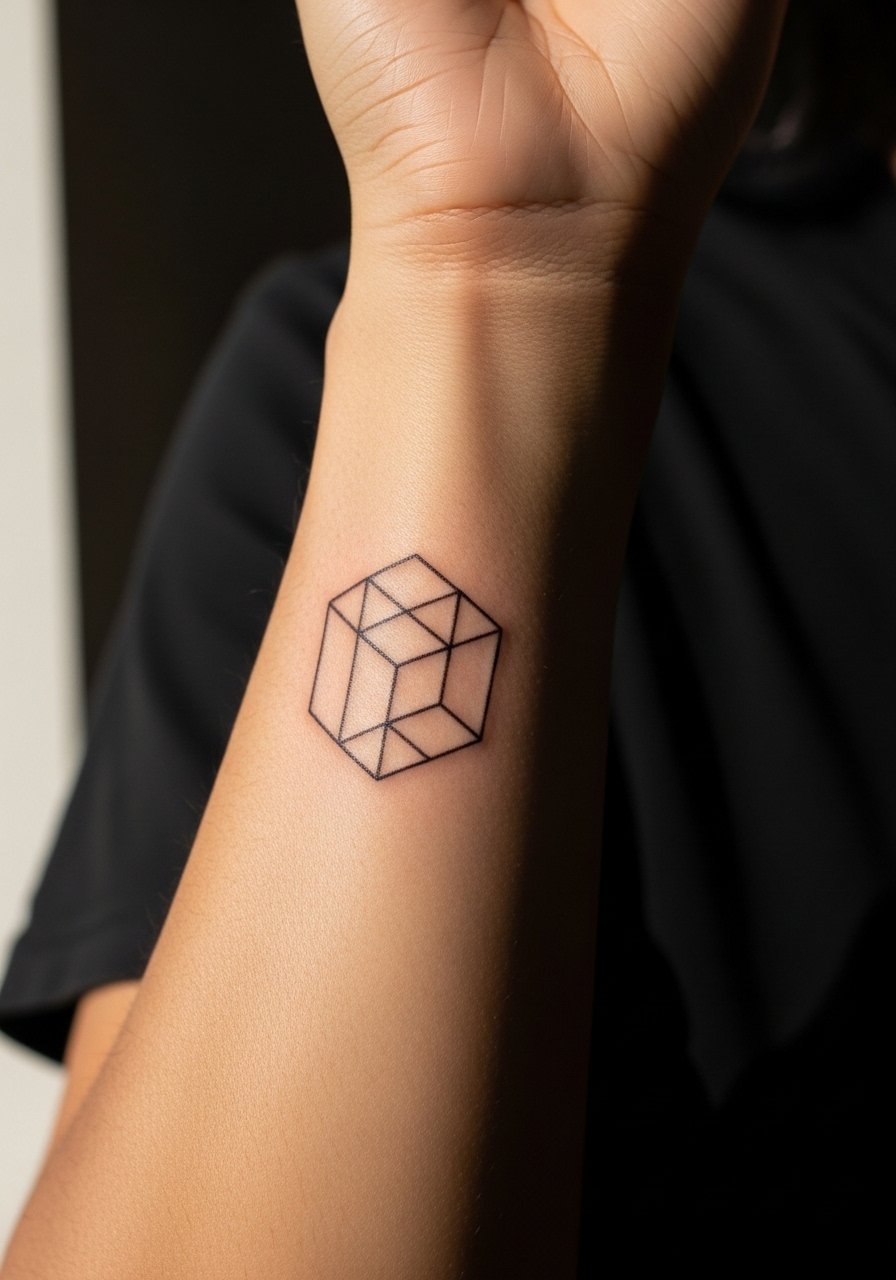
This one is about precise perspective and steady linework. In consultations ask for distinct corner points and slightly more spacing between parallel lines than you think you need, because tight grids can wash into each other as they age. The inner forearm is forgiving for fine line and the session is usually under an hour. Expect a small touch-up after a year if you want razor-sharp intersections. For outfits, try a linen button up shirt with rolled sleeves to show the grid without crowding it.
3. Perfect Circle with Negative Space Interior at the Collarbone
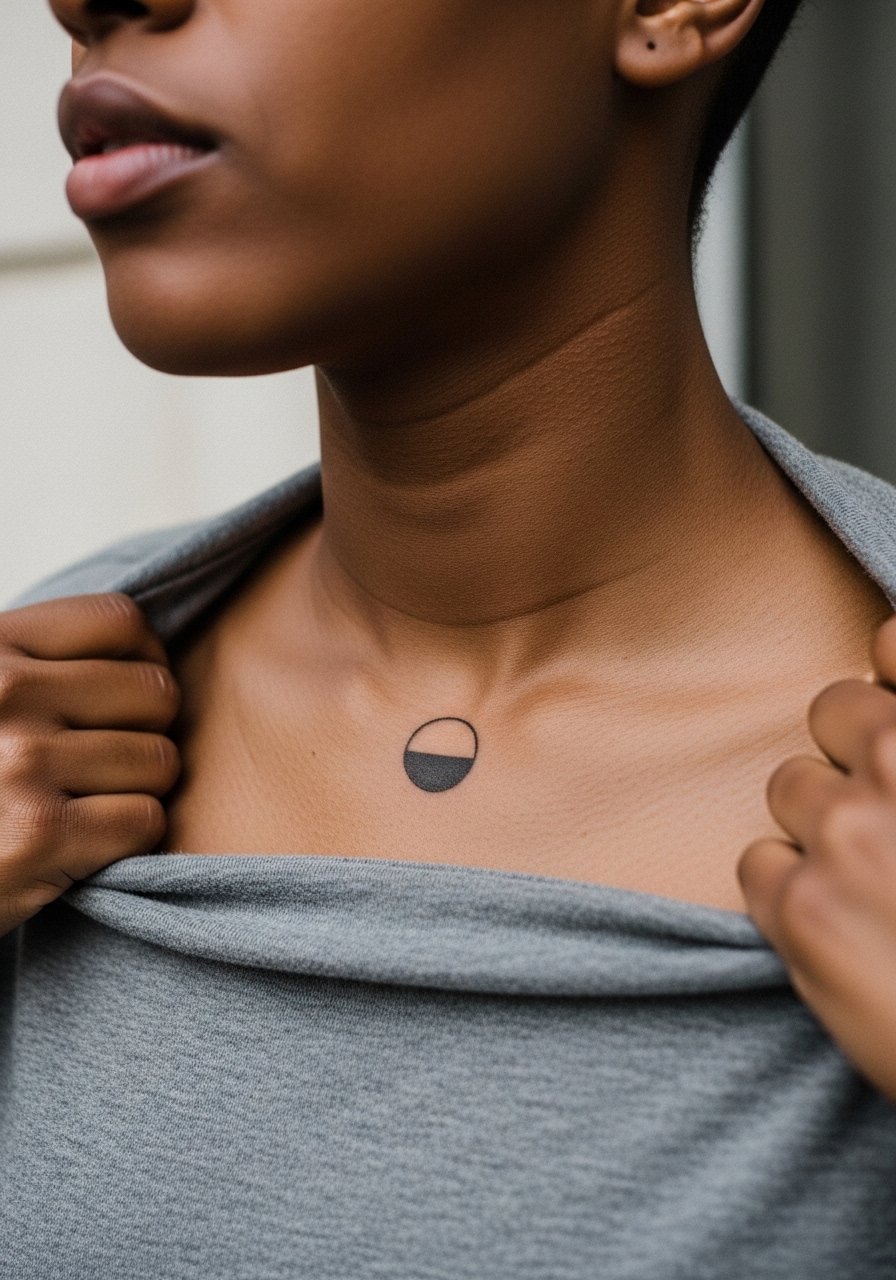
The collarbone can make simple geometry sing because negative space uses the skin as an element. Tell the artist you want the interior untouched rather than shaded so the skin reads as part of the shape. Session time is short and pain is moderate near bone. A common mistake is making the circle too small, which forces heavier linework that looks heavy as it settles. This placement pairs well with an off shoulder blouse for evenings and a thin pendant for daytime balance.
4. Tiny Flower of Life Extract on the Shoulder Blade

Scaling sacred patterns down is possible if you keep spacing generous and use dotwork rather than solid micro lines. For the shoulder blade ask for slightly bolder anchor lines around the outer petals so the core pattern keeps its geometry as it heals. Pain is mild and session time can run forty to sixty minutes depending on dotwork. There is debate among artists about shrinking sacred motifs. One camp says micro scaling preserves meaning if spacing is adjusted. The other camp argues very small sacred repeats simply lose their structure. Ask your artist which side they favor before booking. Show it off with a backless tank top when the weather allows.
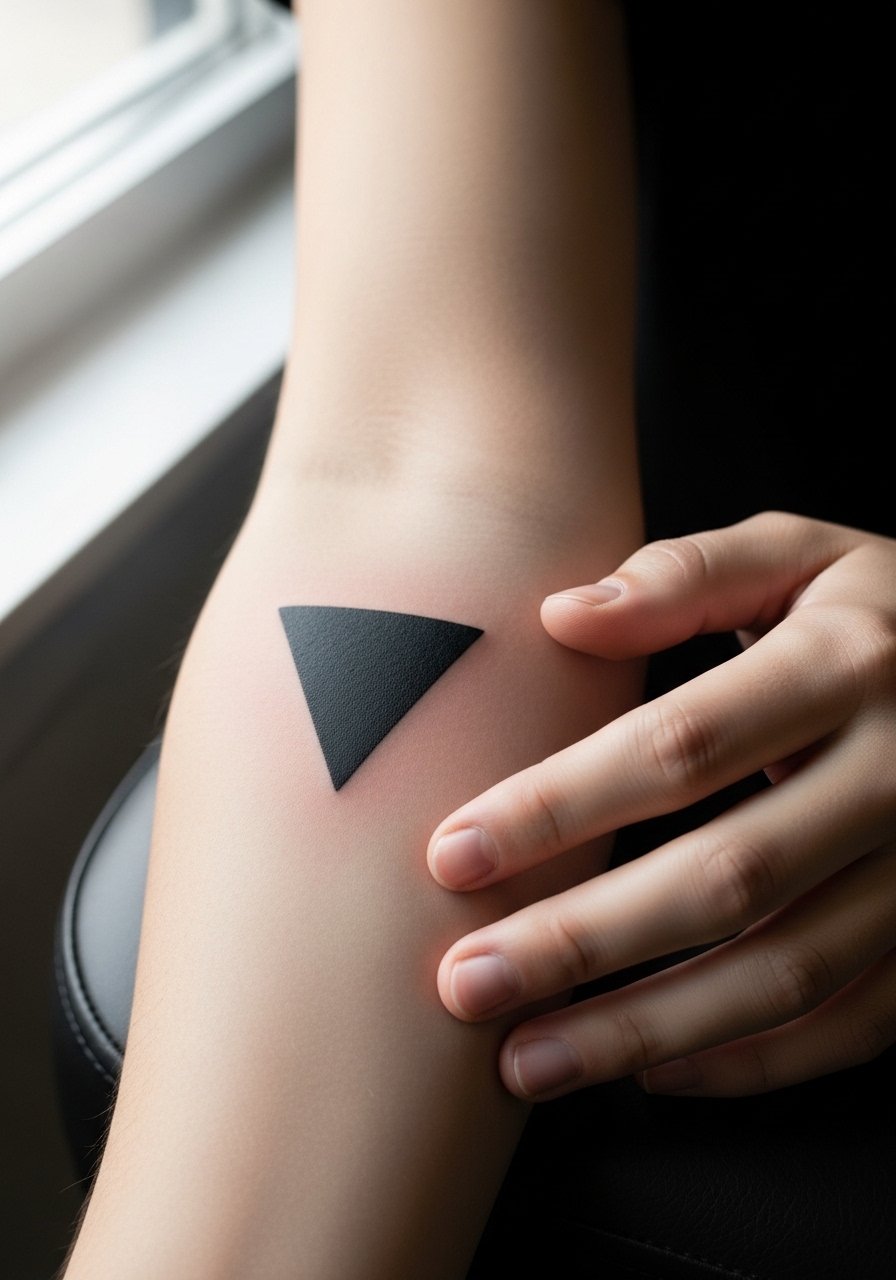
5. Dotwork Triangle Gradient on the Ankle

Dotwork gives depth without heavy shading, which is helpful on a small ankle triangle. Mention dot separation during your consult so the gradient keeps texture instead of becoming a grey wash in two years. The ankle has higher blowout risk if lines angle into softer tissue, but dotwork disperses that risk. Session time is brief and pain varies with bone proximity. For summer looks pair the piece with strappy flat sandals or cropped pants for subtle framing.
6. Minimalist Line Mandala Core on the Inner Bicep
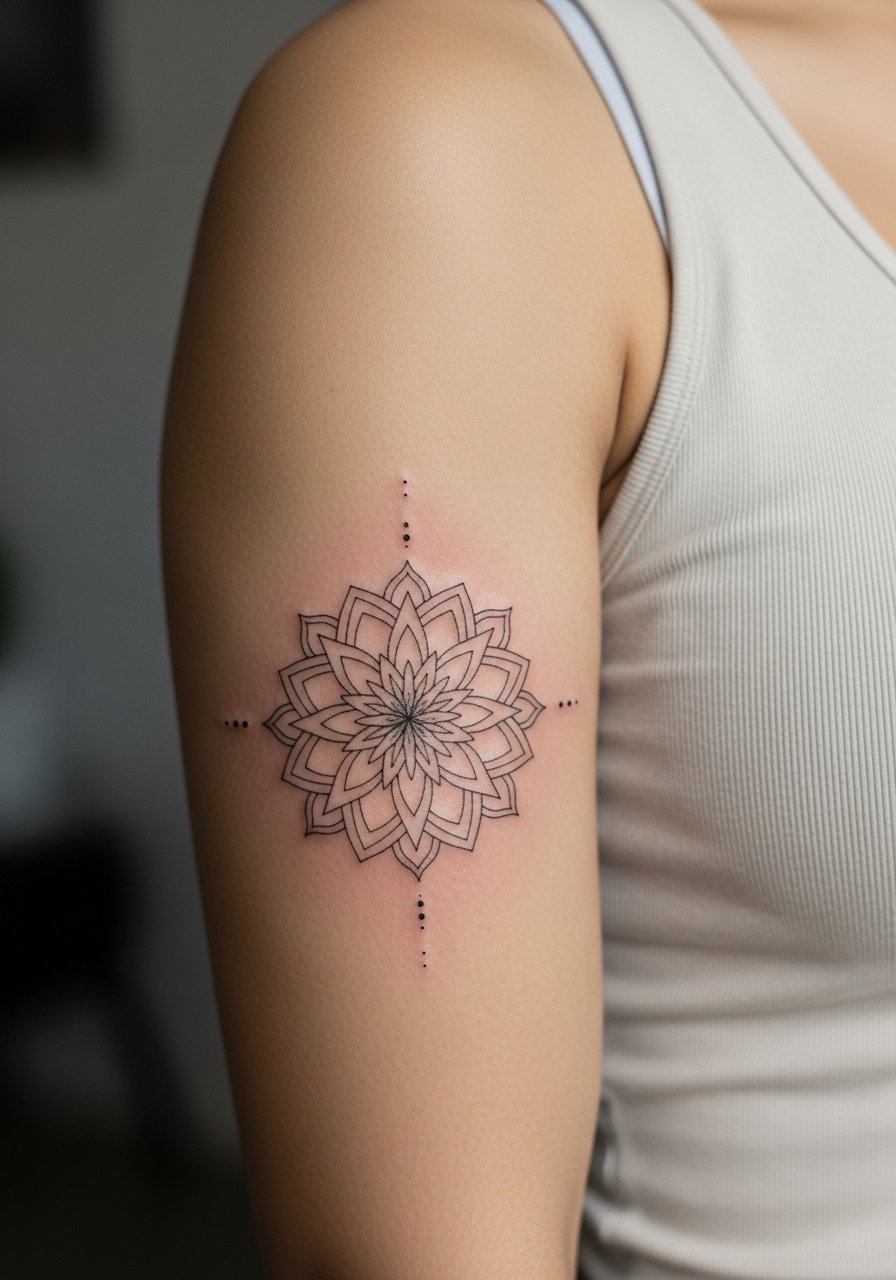
Inner biceps show symmetry well, but the area is softer and moves with the arm. Ask for slightly wider spacing between mandala rings to avoid dense clusters that merge over time. The session feels ticklish as the arm shifts and the pain is moderate. Plan for a touch-up at year two in many cases. For the session wear a sleeveless muscle tank you can lift without tugging the skin.
Studio Day Picks
The small wrist, ankle, and inner bicep pieces above each demand different prep. A few targeted items make the chair time and first week smoother.
-
stencil transfer paper kit. Lets you preview placement on skin, useful for the cube and mandala options above.
-
topical numbing cream. Applied as instructed before wrist or ankle sessions it can ease initial sensitivity without altering linework.
-
thin protective film roll. Helps protect finger and wrist tattoos from daily friction during the first days.
-
fragrance free gentle body wash. Cleans delicate areas like inner bicep and shoulder blade without irritating fine lines.
-
Aquaphor healing ointment. A thin layer in the first two days keeps micro-line channels from drying out while you let the dotwork set.
7. Abstract Polygon Cluster Behind the Ear and Nape
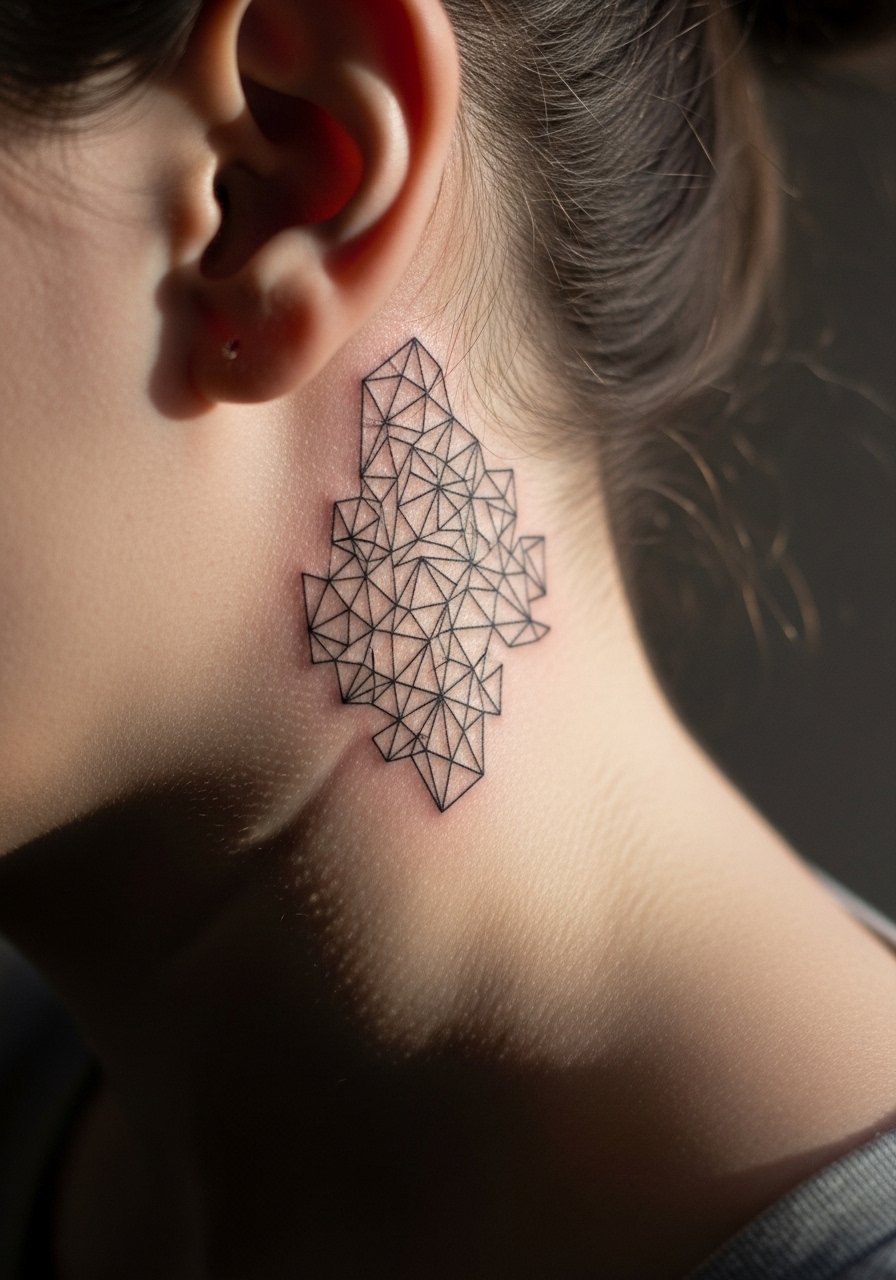
Behind-the-ear placements need careful framing during the consult because hair can obscure detail. Ask for slightly bolder outer polygons so the core clusters remain readable once hair grows back. Pain is low and session time is short. Note the safety rule for this area and describe placement precisely. A common mistake is asking for too many tiny polygons in a tiny zone which then lose definition. If you want it peekable, consider wearing hair up the first week.
8. Fibonacci Spiral Snippet on the Forearm
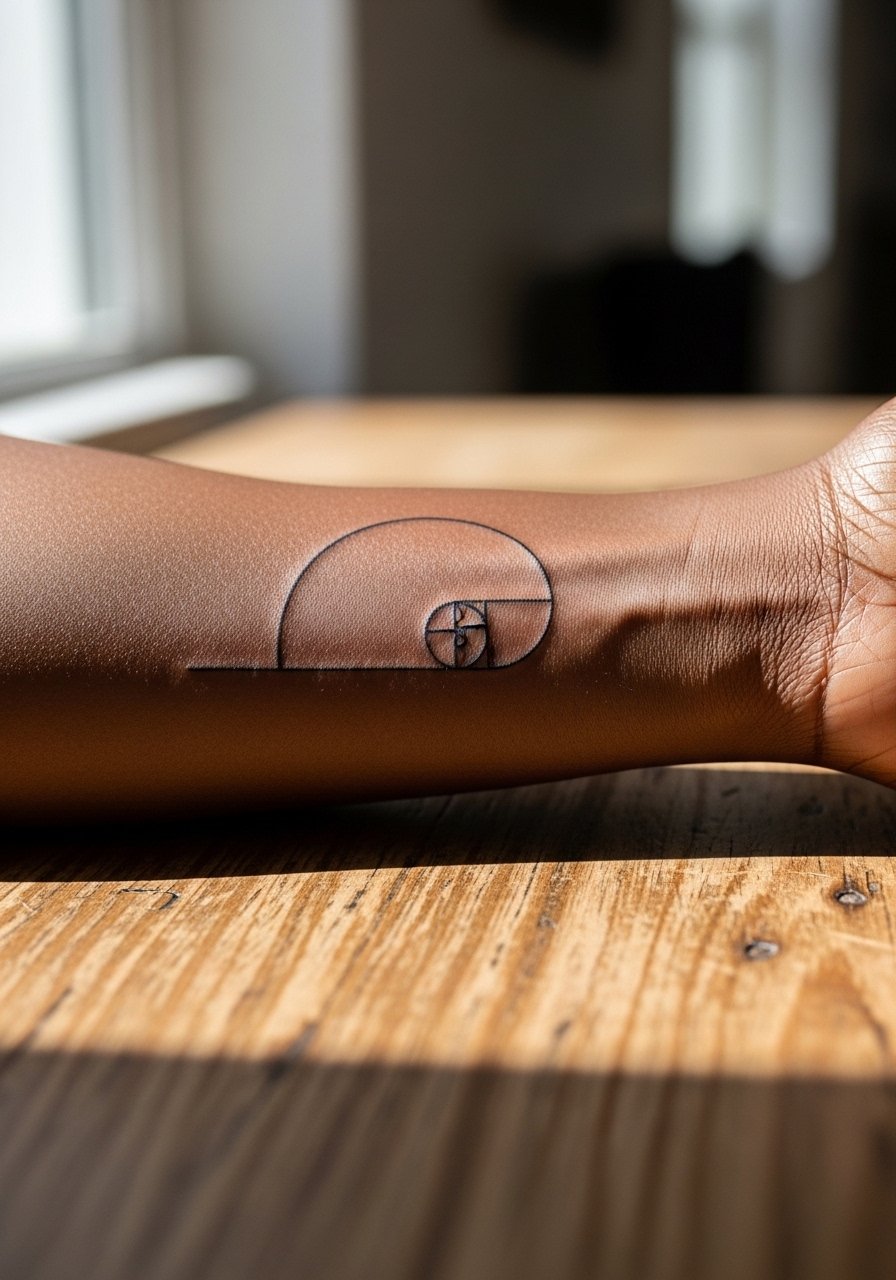
The spiral looks clean when it follows the arm’s natural curve. Tell your artist you want the spiral to sit parallel to forearm length so intersections do not crowd muscle folds. Expect a one-hour session and low pain. Over-tight spirals are the usual mistake and cause early merging of lines. For daily wear roll sleeves up or choose a linen button up shirt to show the spiral without competing prints.
9. Negative Space Square Frame on the Finger
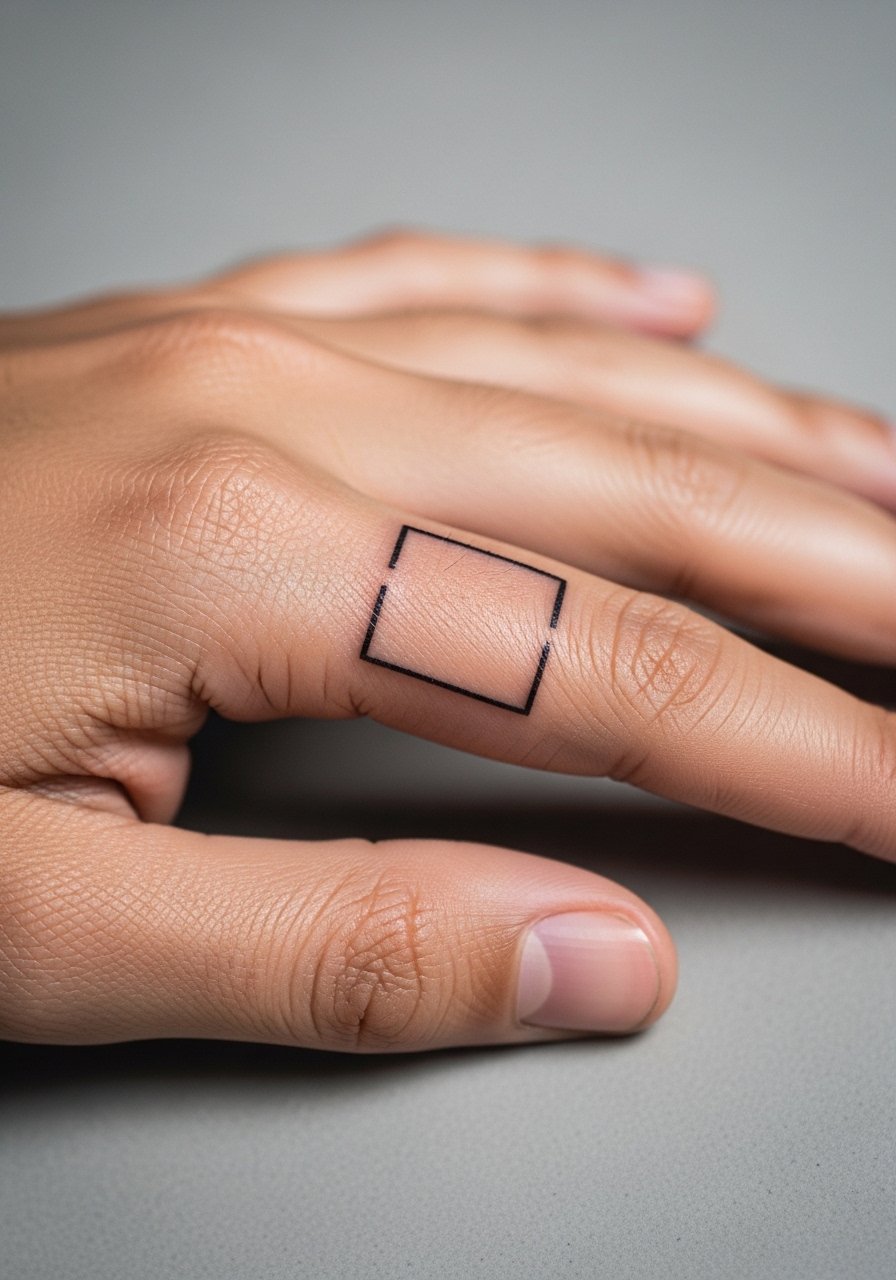
Finger work is high-friction and will fade faster than arm pieces. The trick is to do slightly thicker outer lines and allow a minimal negative interior. Pain is higher and touch-ups are common, often yearly. A frequent mistake is asking for complex interiors on a fingertip scale. If you want the look without the upkeep consider a ring-adjacent wrist frame instead. For the session keep jewelry off and hands clean.
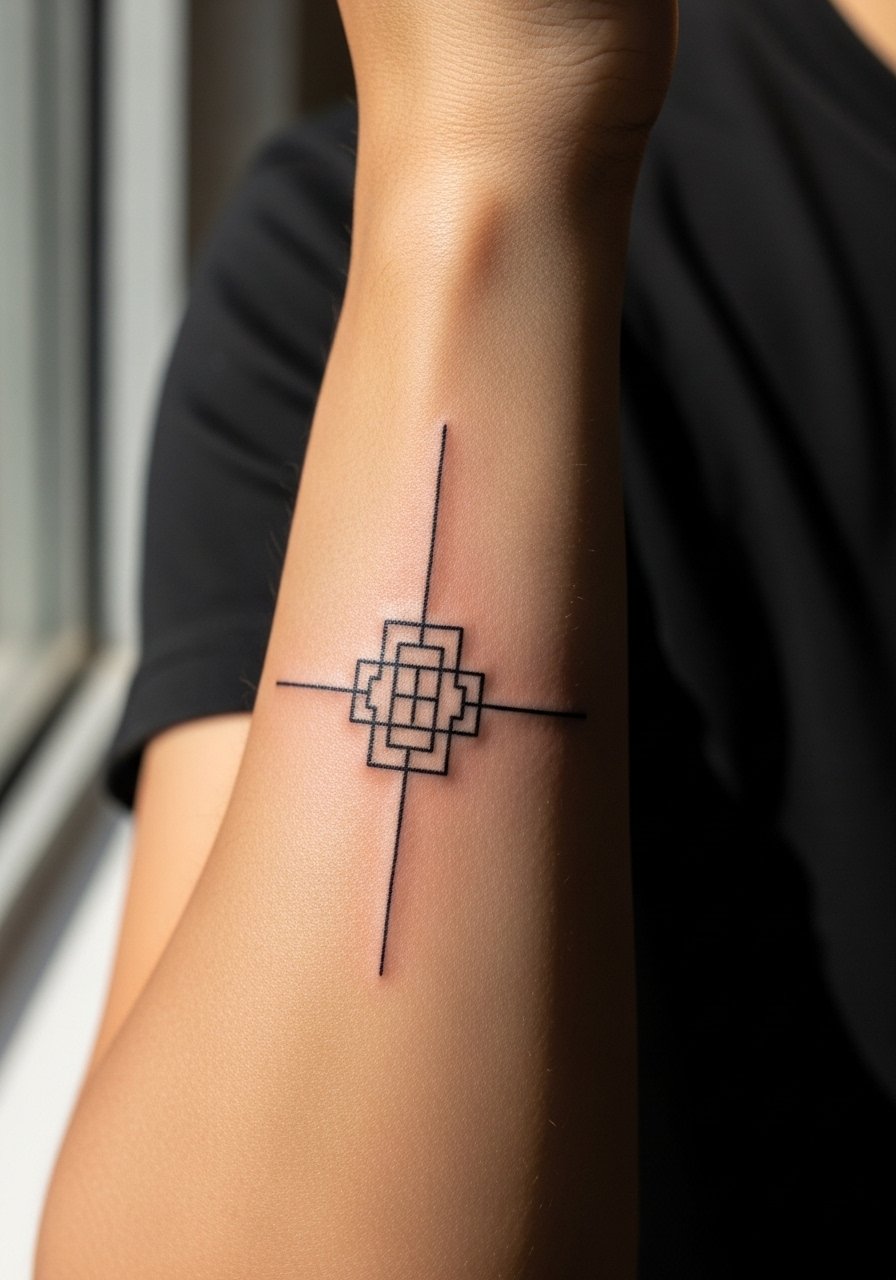
10. Tiny Metatron’s Cube Extract at the Spine Base
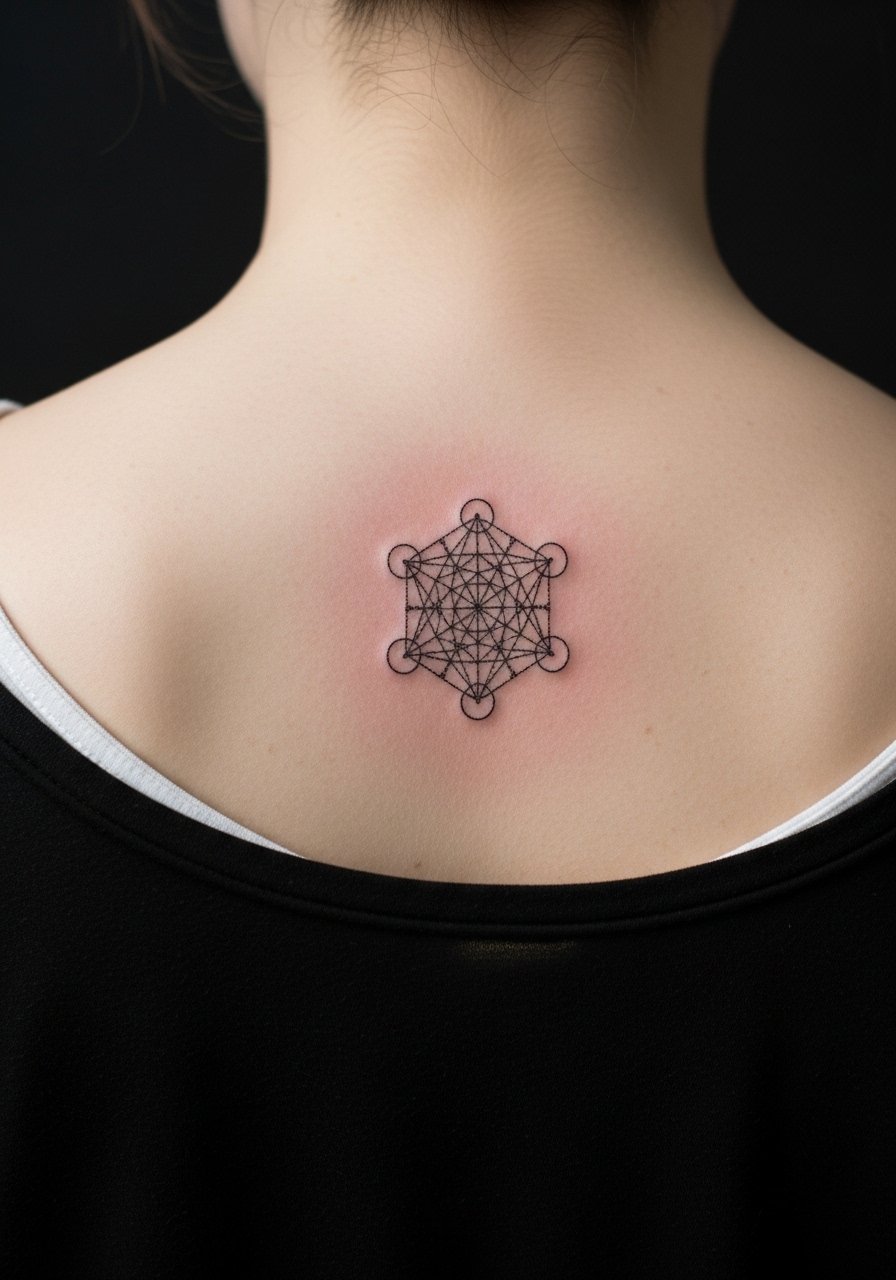
Sacred extracts like this rely on dotwork anchors to retain geometry. On the spine base there is more movement in daily posture so spacing matters. Sessions are moderate in length and pain is higher near bone. Artists are split on micro sacred pieces. One camp says precise dot spacing secures longevity. The other camp warns micro sacred motifs often muddle as skin shifts. Ask where your artist lands and request a mockup on the exact curve of your body.
11. Balanced Line Crosshatch on the Inner Arm
Crosshatch creates optical rhythm, but density is the risk point. Request airy spacing and slightly stronger outer boundaries so the pattern reads as intended after two years. The inner arm is forgiving for linework and the session runs under an hour. People sometimes pick crosshatch too small which leads to muddiness. For the session wear a loose button-down shirt you can roll back to keep access clean.
12. Micro Hexagon Honeycomb on the Calf

Calf skin shows pattern work well and ages predictably. Ask for consistent hexagon sizing and slightly bolder border rows to prevent outer cells from fading unevenly. Sessions can be brief or longer depending on cluster size. A common error is uneven cell sizing that becomes obvious healed. For showing it off wear high water pants or mid-length skirts that reveal the pattern.
13. Single Bold Line Arrowhead Triangle on the Forearm
If you want longevity over dainty detail choose a single bold line version. The thicker black line resists early fading and keeps silhouette clarity, especially if you use the forearm which gets less friction. Session is brief and pain low. People often ask for a tiny arrowhead that loses its triangular shape as it blurs. Be explicit you prefer a bolder stroke and ask about touch-up timeline.
14. Nested Rings or Concentric Minimalist Circles on the Finger or Thumb

On digits concentric work needs spacing proportional to the digit size. Ask the artist for slightly increased outer ring thickness to preserve the visual hierarchy. Expect faster fading and yearly touch-ups compared to arm pieces. The main mistake is squeezing too many rings into a small canvas. For low upkeep consider the same motif on a wrist band.
15. Abstract Isometric Cube on the Neck Side
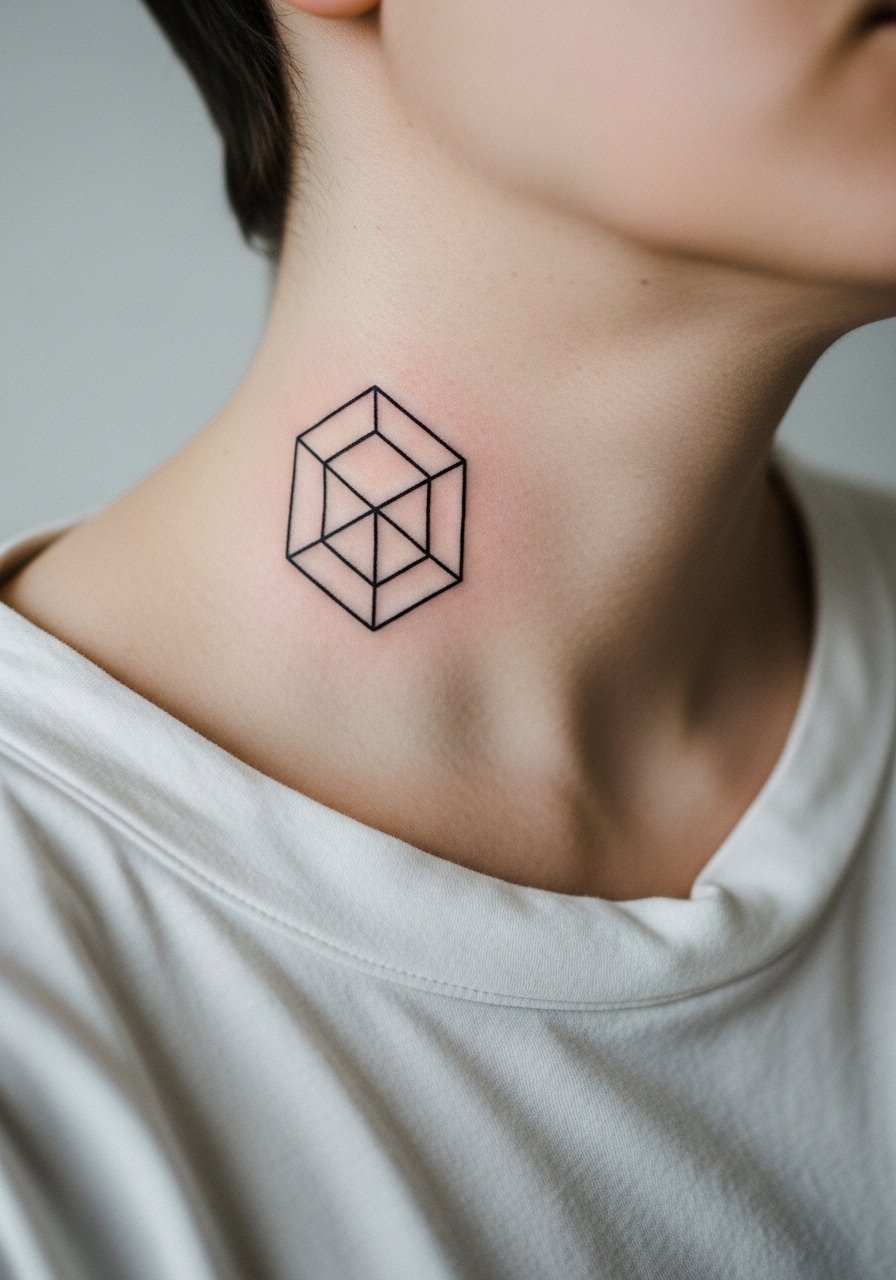
Neck placements need explicit discussion about visibility and career implications. The side neck is bold but can hold fine geometry if spacing is generous. Pain is moderate and session time is short. Ask the artist to show how the cube aligns with your collar line. Keep hair up during the first week to avoid rubbing. A tidy way to wear it is with an open collar shirt.
16. Tiny Polygonal Mountain Range on the Ankle
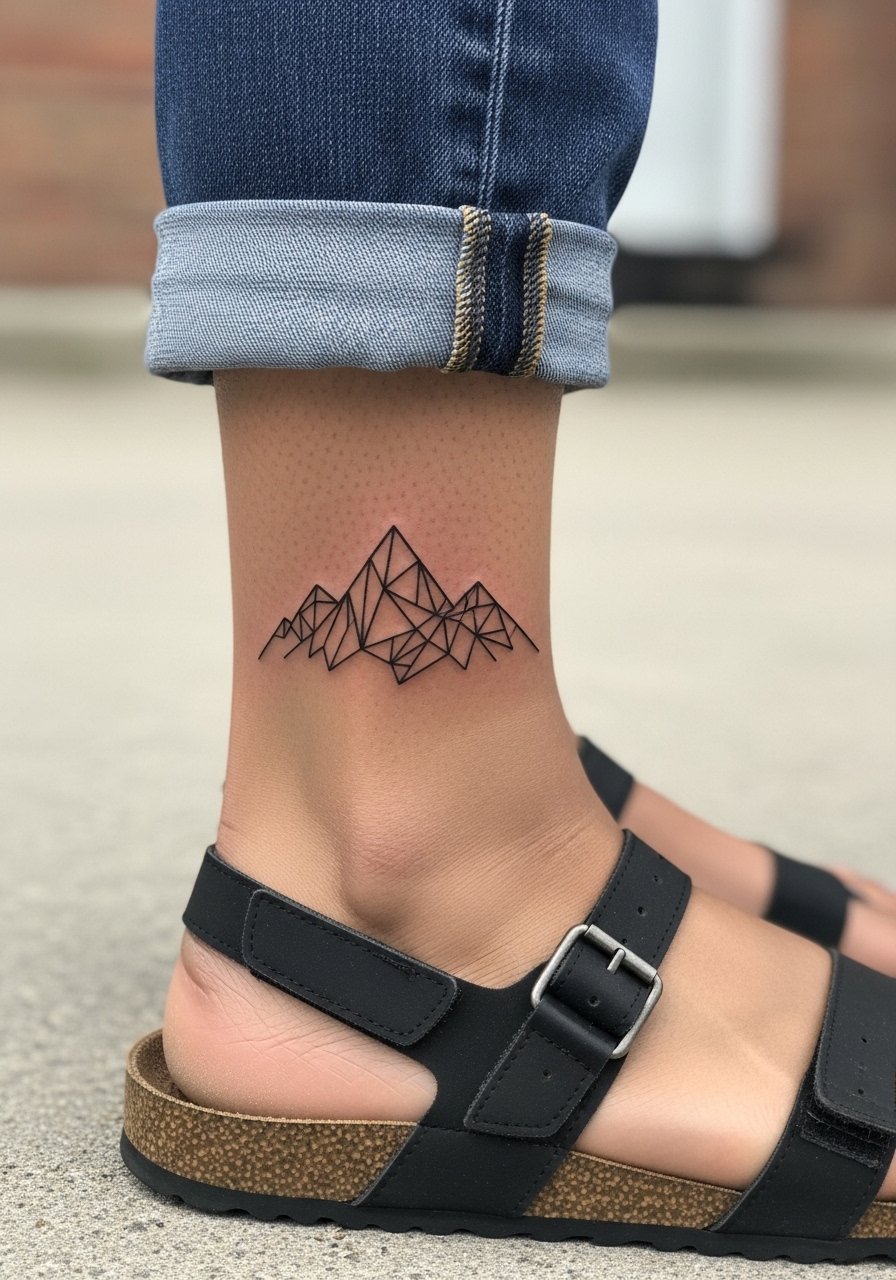
Geometric mountains are forgiving because you can increase negative space between peaks. On the ankle expect friction but low blowout if outlines are slightly bold. Sessions are brief and discomfort varies. Common mistakes include tight, jagged peaks that blur into one shape. Wear strappy flat sandals for easy showing once healed.
17. Tiny Tessellated Strip Along the Collarbone
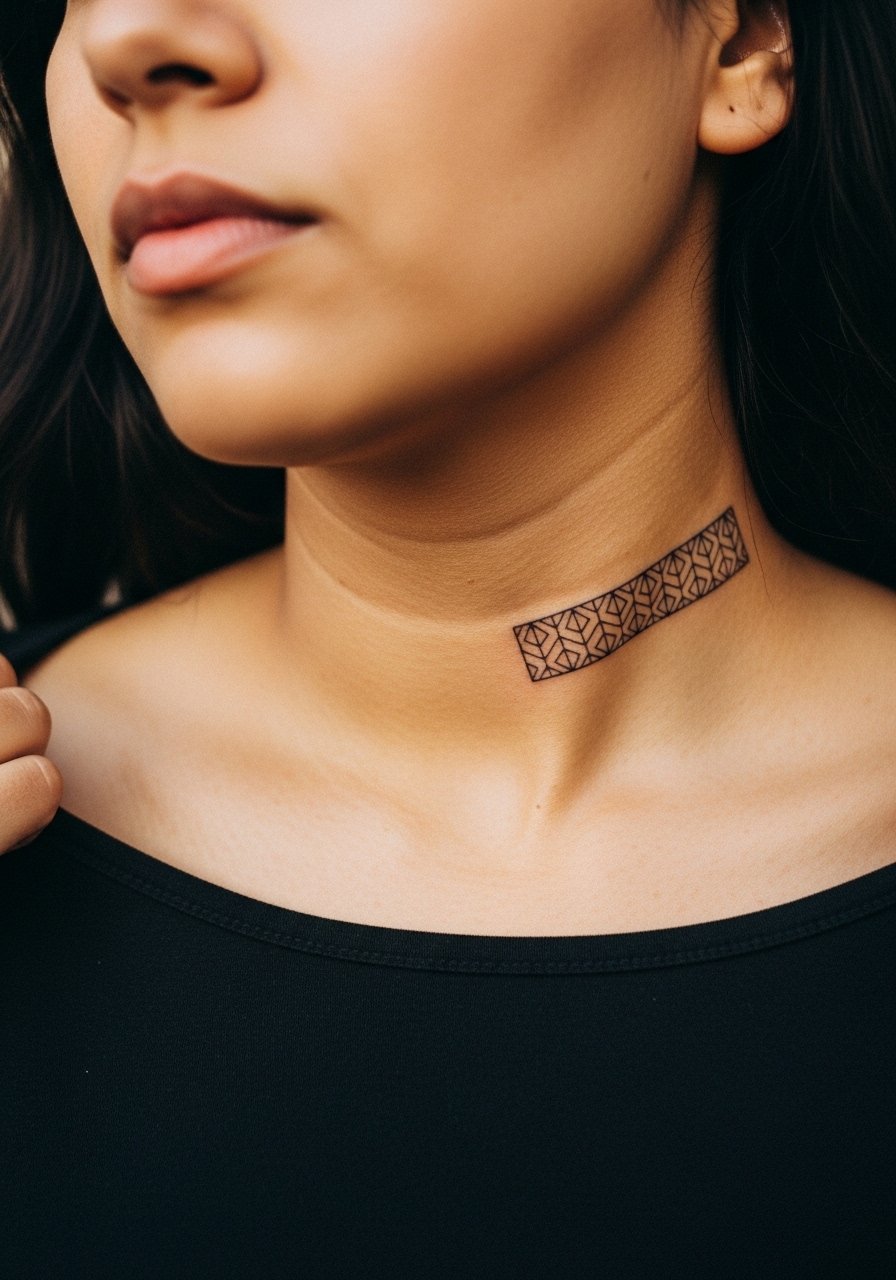
A collarbone strip reads like jewelry and benefits from clear negative space. Ask for consistent repeat units and slightly heavier outer edge so the strip keeps its shape over time. Pain is moderate and session time is short. A mistake is compressing the repeat too tightly which loses rhythm as lines soften. Pair it with a thin chain pendant necklace that sits above the strip.
18. Micro Compass Rose on the Wrist
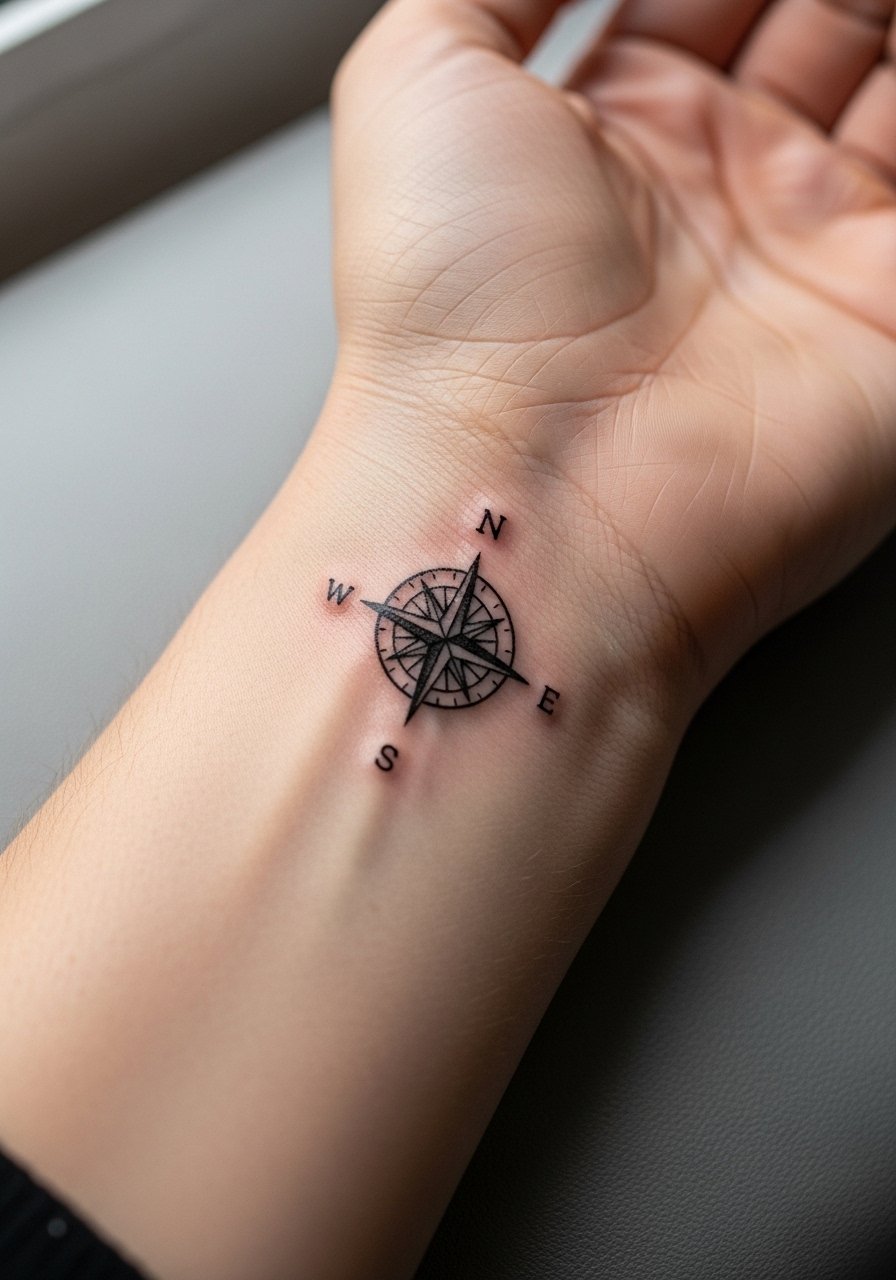
This reads like a tiny emblem and does best with slightly exaggerated points rather than ultra-fine needlework. The wrist sees constant movement so request modest line weight. Expect touch-ups earlier than forearm pieces. The common error is intricate interiors that the wrist cannot hold long term. Keep bracelets on the opposite wrist to avoid rubbing during the first month.
19. Isolated Stippled Triangle on the Ribcage
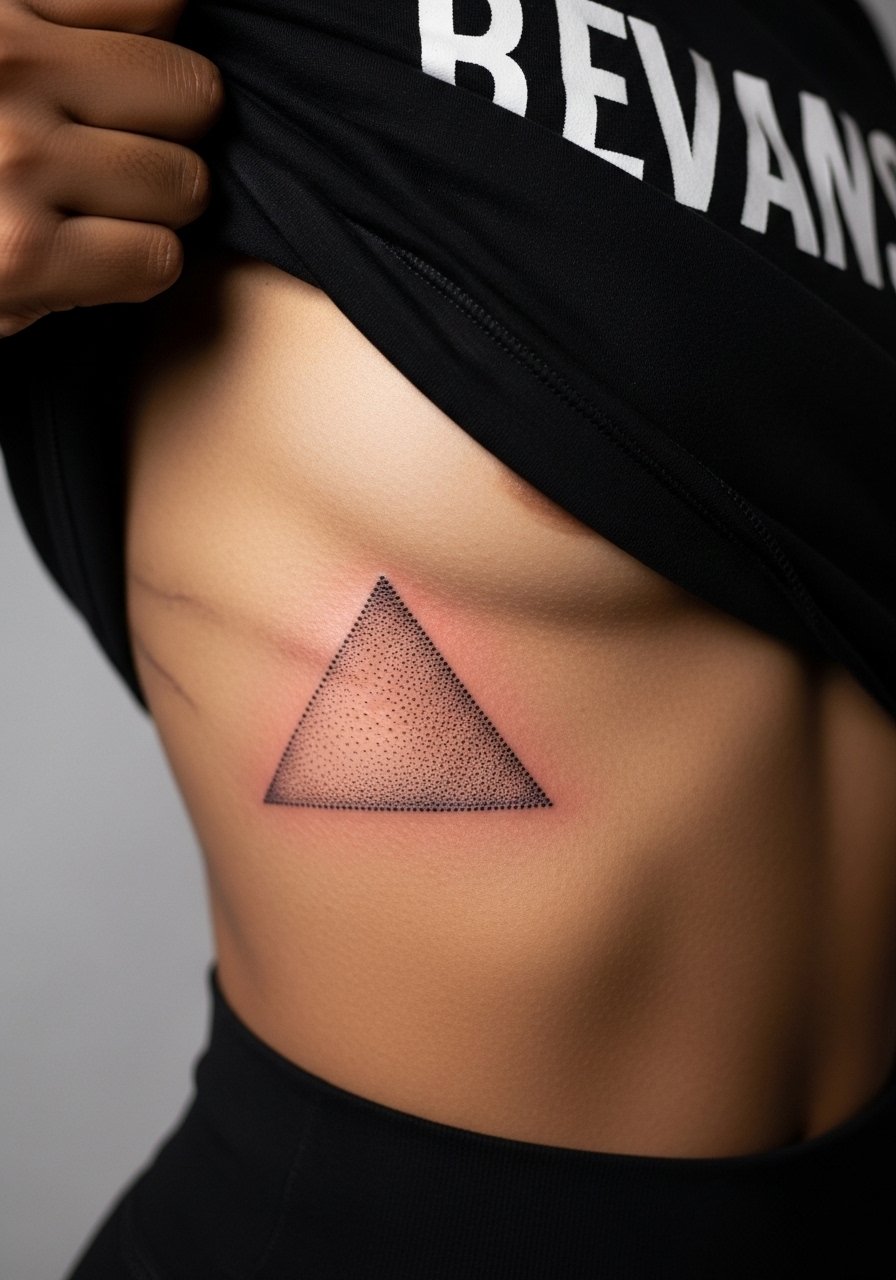
Ribcage dotwork can look exquisite but the area is a higher pain zone. Artists split on micro fine line on ribs. One camp says the skin stretches and thin lines blur quickly. The other camp says dotwork with intentional spacing holds if placed on firmer rib angles. If you go for ribs, plan on a longer session and a likely touch-up at year two. For your appointment wear a cropped top that the artist can lift easily.
20. Tiny Chevron Stack on the Finger or Wrist
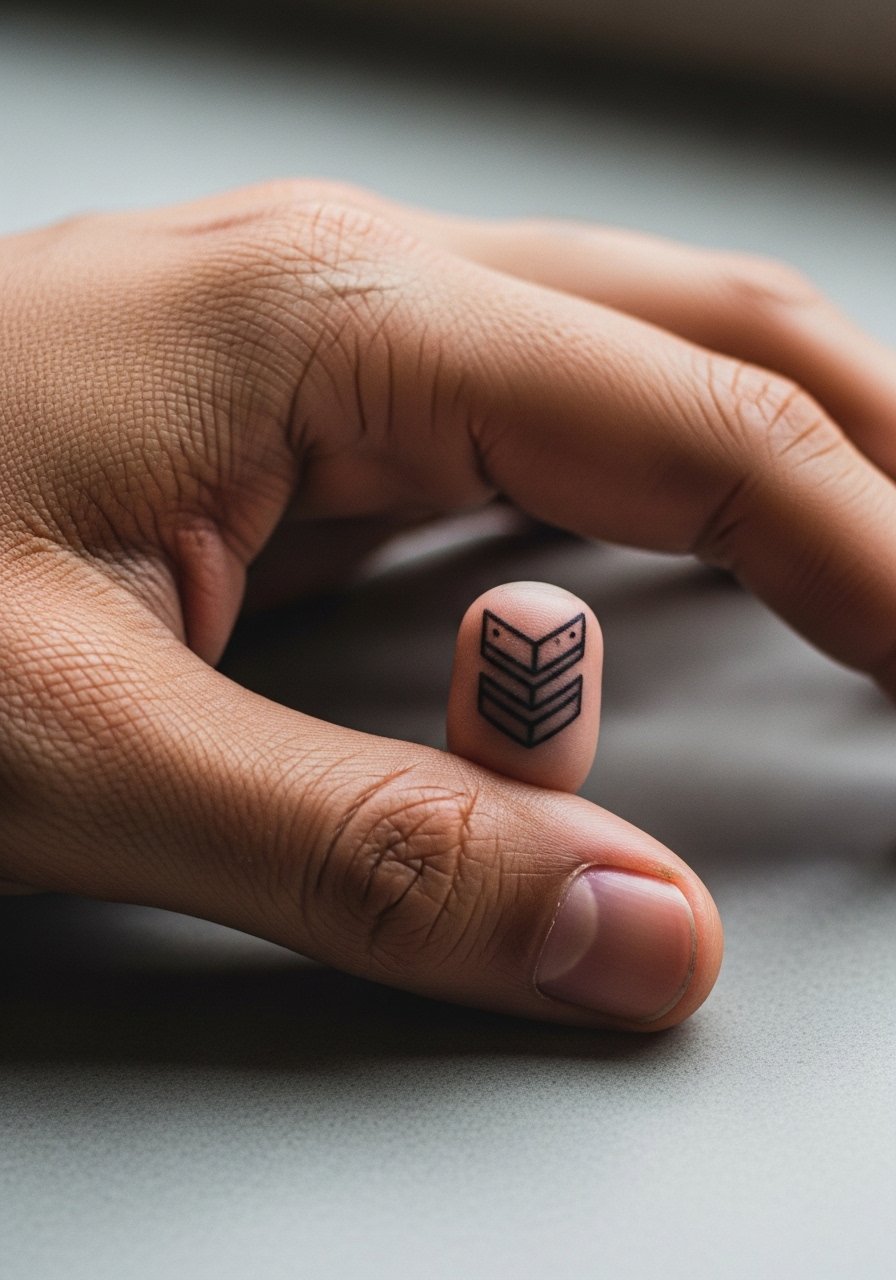
Chevron stacks are simple but timing with finger anatomy matters. On fingers they fade faster and demand annual touch-ups. On wrists you can go slightly larger and expect longer retention. A typical mistake is asking for three or more tiny chevrons on a fingertip space. For sessions remove rings and keep the hand clean.
21. Micro Nested Hexagon on the Thigh Hip Curve

The hip/thigh curve is forgiving for micro geometry because skin there moves less in daily activity. Ask for slightly larger spacing to keep the nested shapes crisp over years. Sessions are comfortable and pain is low to moderate. Mistakes include compressing nested shapes too tightly which forces early touch-ups. For the session wear high-waisted bottoms that you can lower a bit without undressing.
22. Micro Geometric Wave on the Calf Outer Edge
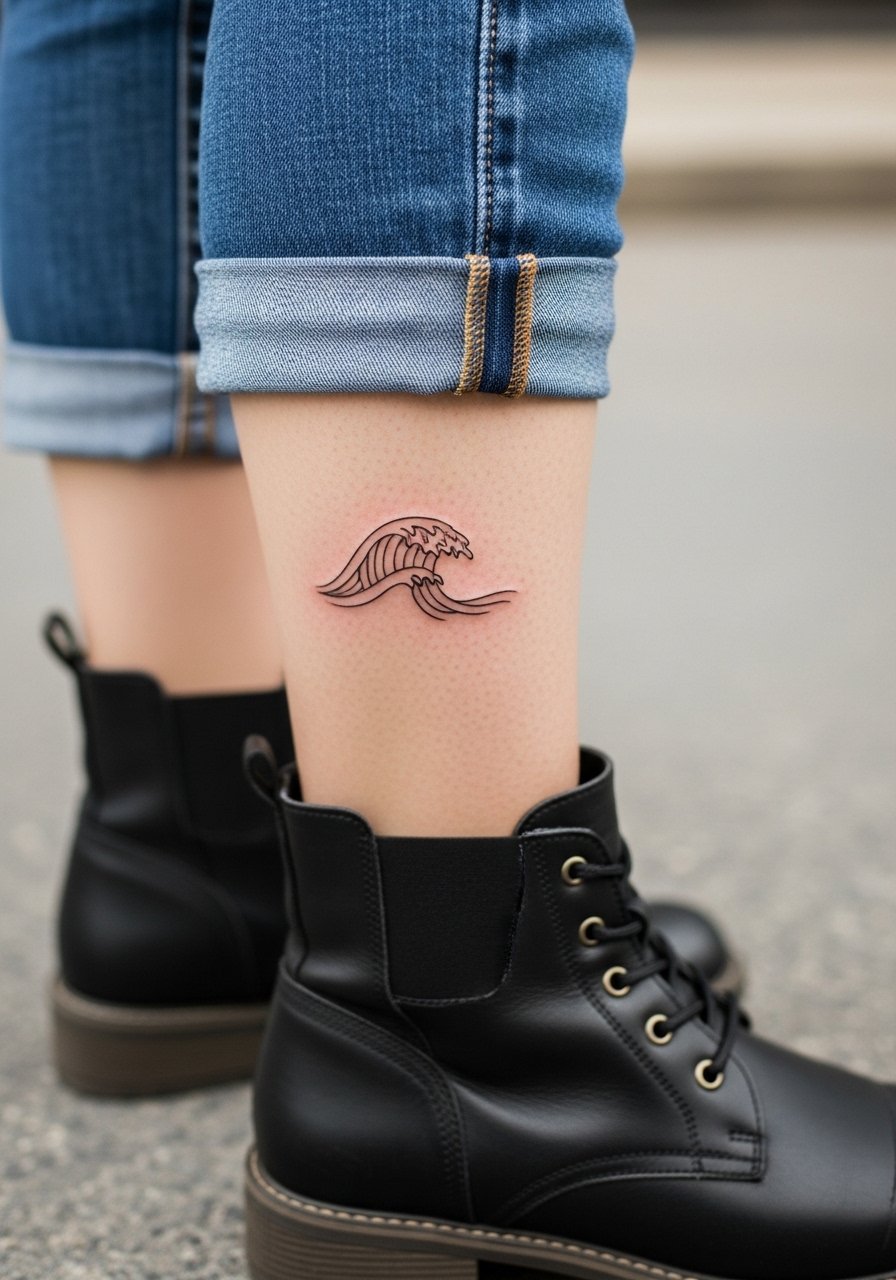
Waves made of polygons play well with calf muscle lines. Ask for orientation that follows the muscle so the pattern does not distort when you walk. Sessions are short and discomfort is low. People sometimes request overly dense waves that blur into grey patches. For showing it off pick shoes or skirts that reveal the calf intentionally.
23. Tiny Stellated Polygon at the Ear Lobe Base

This spot is delicate and benefits from slightly heavier outer points to keep the star visible against movement and hair. Sessions are brief. Be sure to explain exact placement relative to the ear and hairline. The common error is assuming ear-area work behaves like face skin; it does not. Keep hair tucked up for the first week.
24. Minimal Geometric Wave Band Around the Wrist

Bands need consistent repetition and slight spacing to read as a pattern. For the wrist choose modest width and ask about break points so the band does not overlap jewelry. Expect faster fading if you wear watches tightly. A session is short and pain is low. Mistakes include making the band too thin which accelerates blur. Swap tight watches for a minimalist cuff watch during healing.
25. Micro Isometric Staircase on the Side of the Hand
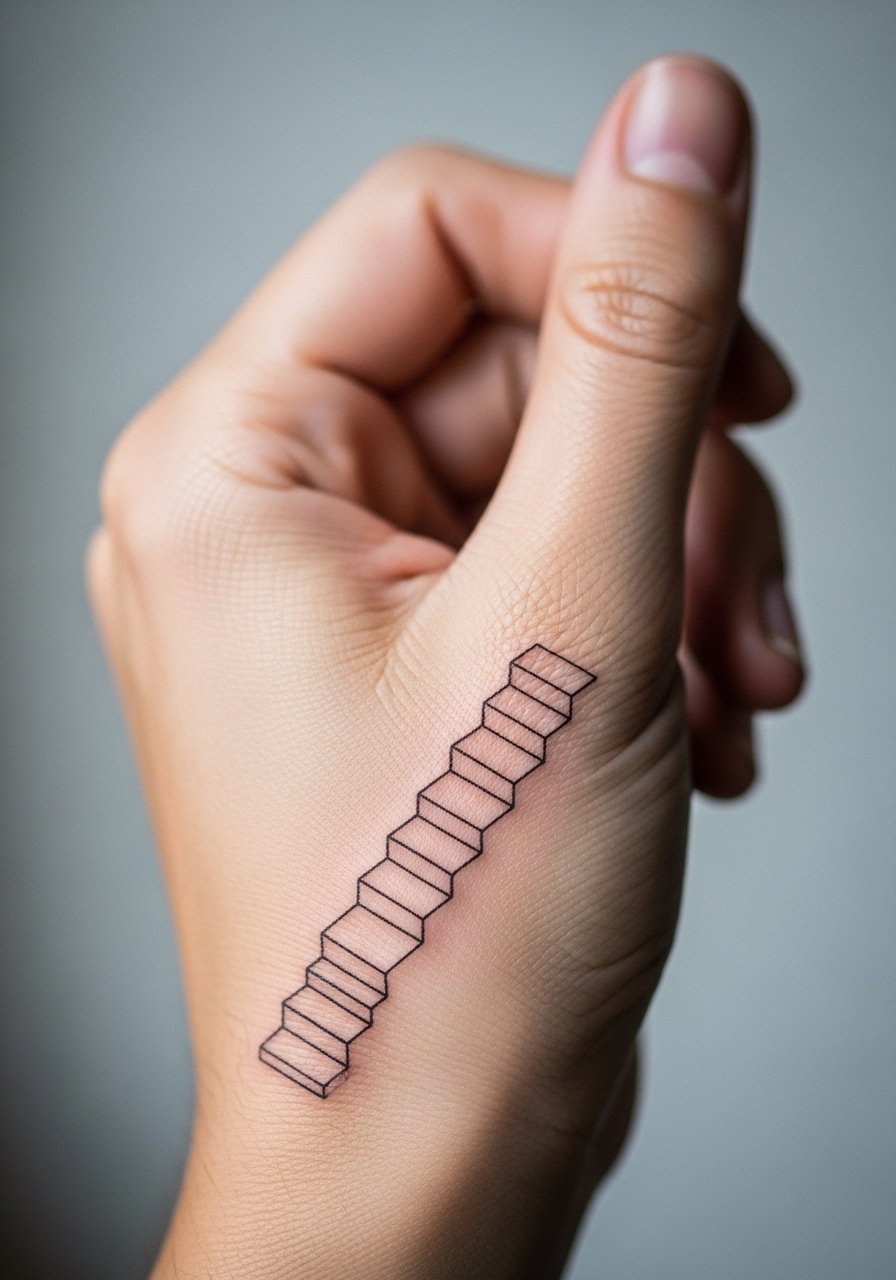
Hand placements are high-maintenance and visible. If you choose this, ask for slightly thicker anchor lines and expect touch-ups every one to three years. The typical mistake is underestimating the amount of daily washing and rubbing the area sees. For the session remove all hand jewelry and consider a protective bandage that does not stick to the ink.
26. Tiny Radial Dot Burst on the Collarbone Side
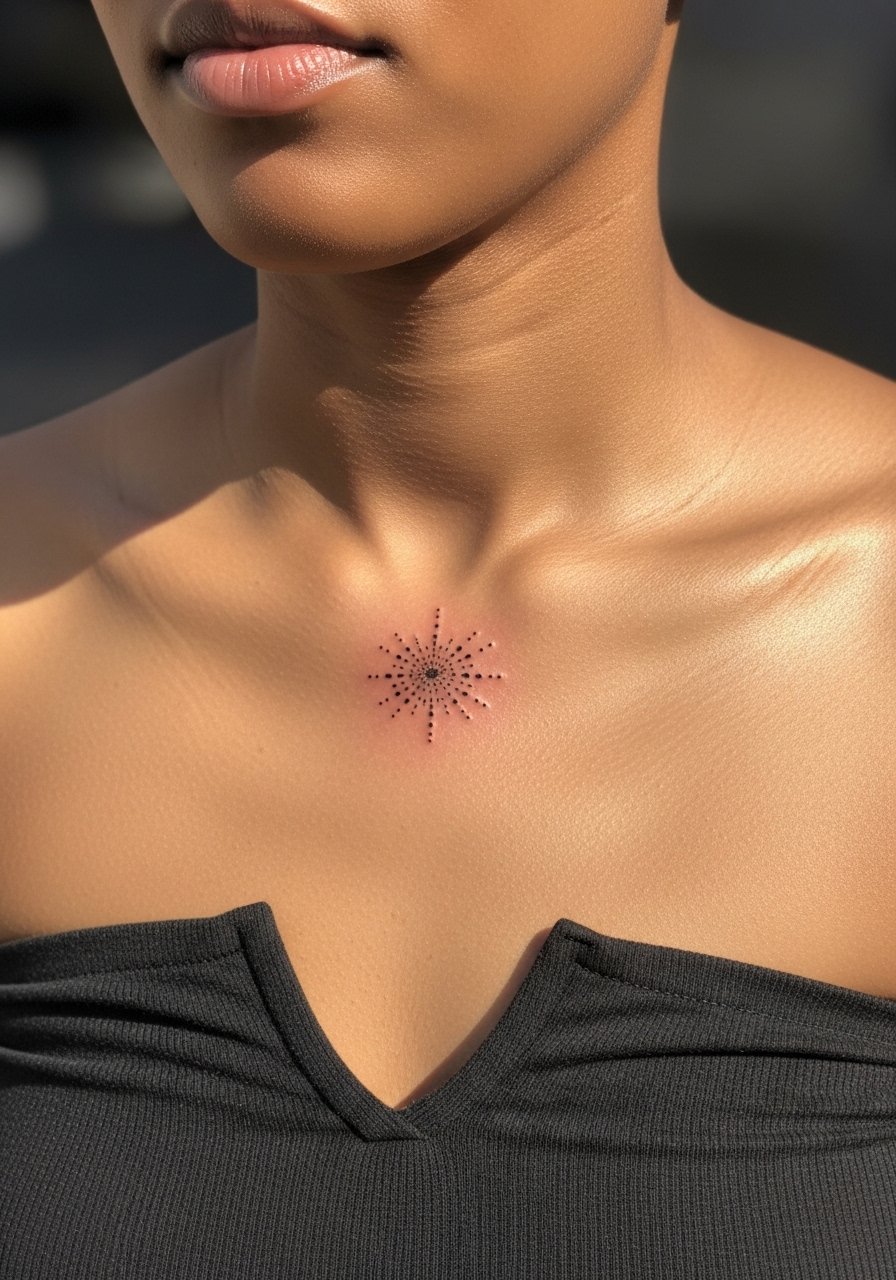
Radial dot bursts use negative space as much as dots. Request a singular focal dot slightly larger than the rest so the burst keeps a center point. Pain is moderate. A frequent error is placing the burst too close to clothing seams which irritates healing. For show-off wear a v neck strapless top when you want it visible.
27. Tiny Three-Point Alignment on the Spine Base

Spine-base alignments look discreet and read like a vertical rhythm. The area can be tender and session times vary. Ask for slightly larger negative gaps so the three points do not become a line as the skin settles. Artists note this area moves with posture which affects long-term clarity. For the appointment wear a wide-neck shirt you can pull down slightly without full exposure.
Frequently Asked Questions
Q: Will tiny geometric pieces like fine-line triangles and grids need touch-ups more often than bolder blackwork?
A: Yes, fine-line tiny geometry generally needs touch-ups sooner than bold blackwork. The thinner the needle and the closer the lines, the more likely they are to soften as skin naturally changes. Placement matters a lot. Wrists, fingers, and hands commonly need touch-ups at year one to three. Talk with your artist about planned touch-up windows and how the design could be adapted to extend clarity.
Q: Are there placements I should avoid for detailed micro sacred patterns?
A: Avoid areas with high movement and thin skin for dense sacred repeats. Ribs, inner thighs, and fingers can be problematic for very dense micro patterns. Artists are split on ribs and sacred micro work. One camp recommends larger spacing and dotwork. The other cautions that skin stretch will blur detail regardless. If you love the pattern, consider a slightly larger scale or choose a firmer plane like the shoulder blade.
Q: How do I prep clothing-wise for different placements to make the session easier?
A: Wear session-appropriate clothing that the artist can move aside without tugging the tattoo zone. For collarbone pick a wide-neck top you can slip slightly. For shoulders bring a loose tank or a button-down that you can pull to the side. For inner forearm and wrist, a short-sleeve linen shirt is easy to roll. Bringing an extra loose layer helps you stay comfortable through longer dotwork sessions.
Q: What are the realistic aging expectations for dotwork gradients versus single-line outlines?
A: Dotwork gradients tend to hold texture longer because the negative space between dots reduces the chance of continuous blur. Single-line outlines look crisp early but thin single-needle lines can fade or feather faster in high-friction zones. For longevity choose dot spacing that gives breathing room or opt for slightly bolder single lines in areas that see a lot of contact.
Q: Can I still wear jewelry with tiny wrist or collarbone pieces while they heal?
A: Avoid tight jewelry directly over a new tattoo until the initial scabbing phase ends. For wrist pieces wear accessories on the opposite wrist, or choose loose bracelets that do not rub. For collarbone designs keep necklaces minimal and avoid pendants that rest on the fresh work. A dainty option like a thin chain pendant necklace can sit above healed pieces without crowding them.
Q: How should I approach design consultations to reduce the chance of early blurring?
A: Ask about line weight, spacing, and how the artist images the piece on your exact body curve. Request a mockup on skin when possible and be explicit about the lifespan you expect. If you want micro detail, talk about dotwork or slightly larger negative space. Trust matters but be specific in questions rather than saying "trust your artist" as the whole plan.
Q: Are there any small geometric motifs that generally age better across skin tones?
A: Motifs that use negative space and moderate line weight age more predictably across skin tones because they rely less on ultra-fine contrast. Dotwork anchor points and slightly bolder outer lines help readability on darker tones. Always review healed examples on a range of skin tones through hashtags and studio locations rather than assuming a single reference will translate.
