
Fine line pieces and splashy color both look incredible in saved boards, but what holds up on skin is often the opposite of the trend. Lighter scripts and washy watercolor get the most likes at first and then need touch-ups sooner. If you want a motivational line that still reads clearly in a few years, think placement, line weight, and how your skin moves. Below are 27 concrete takes on how to ink the phrase you care about, where to wear it, and what to pack for the chair.
1. Fine Line Script with Mountain Outline on Inner Forearm
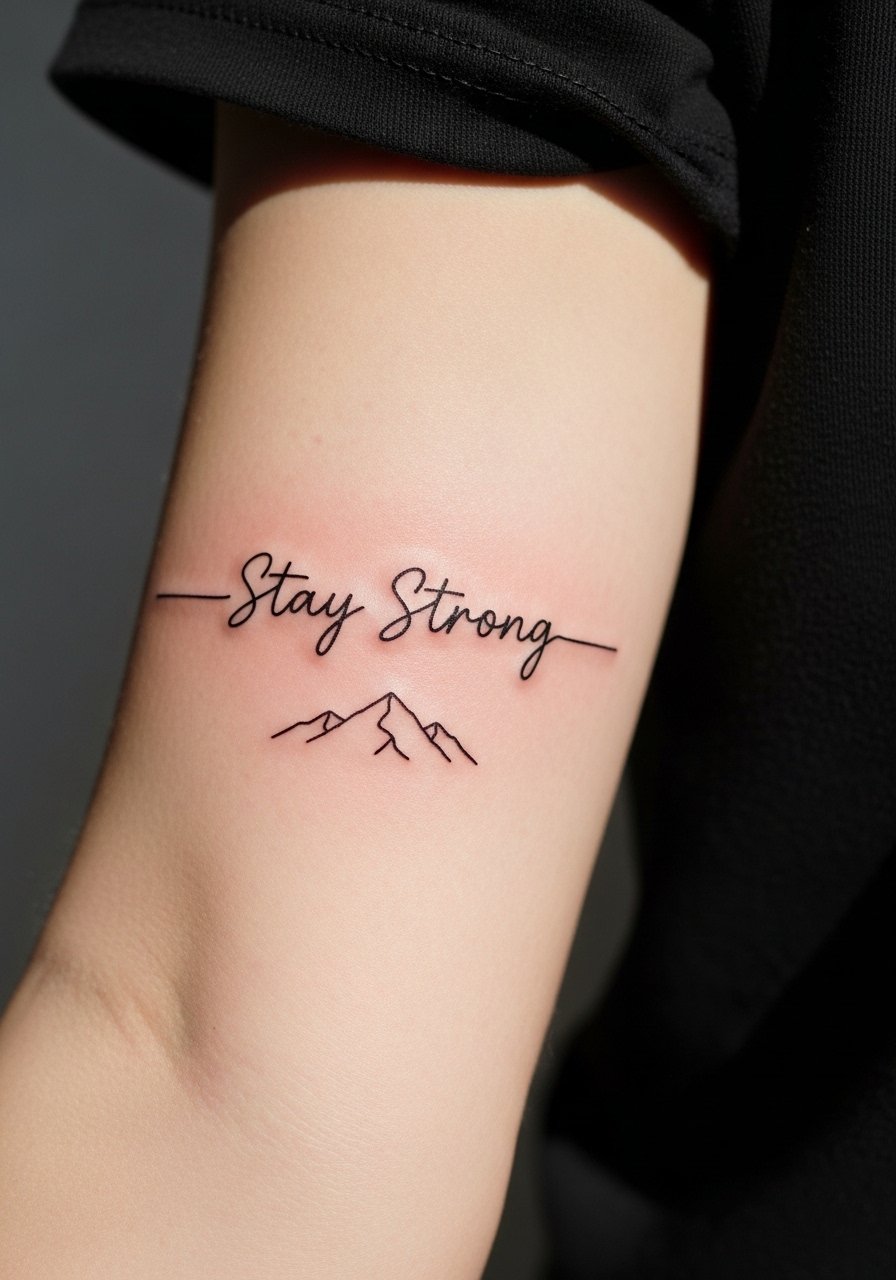
I see this on forearms a lot because it reads like a private note that still shows when you roll sleeves. The forearm takes linework well but avoid a feather-light script. Ask your artist for slightly heavier single-needle strokes so the script keeps its shape after one year. Expect moderate discomfort and a session under an hour for a 1-2 inch piece. For showing it off, roll the cuff of a rolled cuff chambray shirt and balance with a thin leather cuff bracelet. The biggest mistake is asking for microscopic cursive. Give the letters room and plan a touch-up at year two.
2. Bold Traditional Anchor with Banner on Outer Forearm
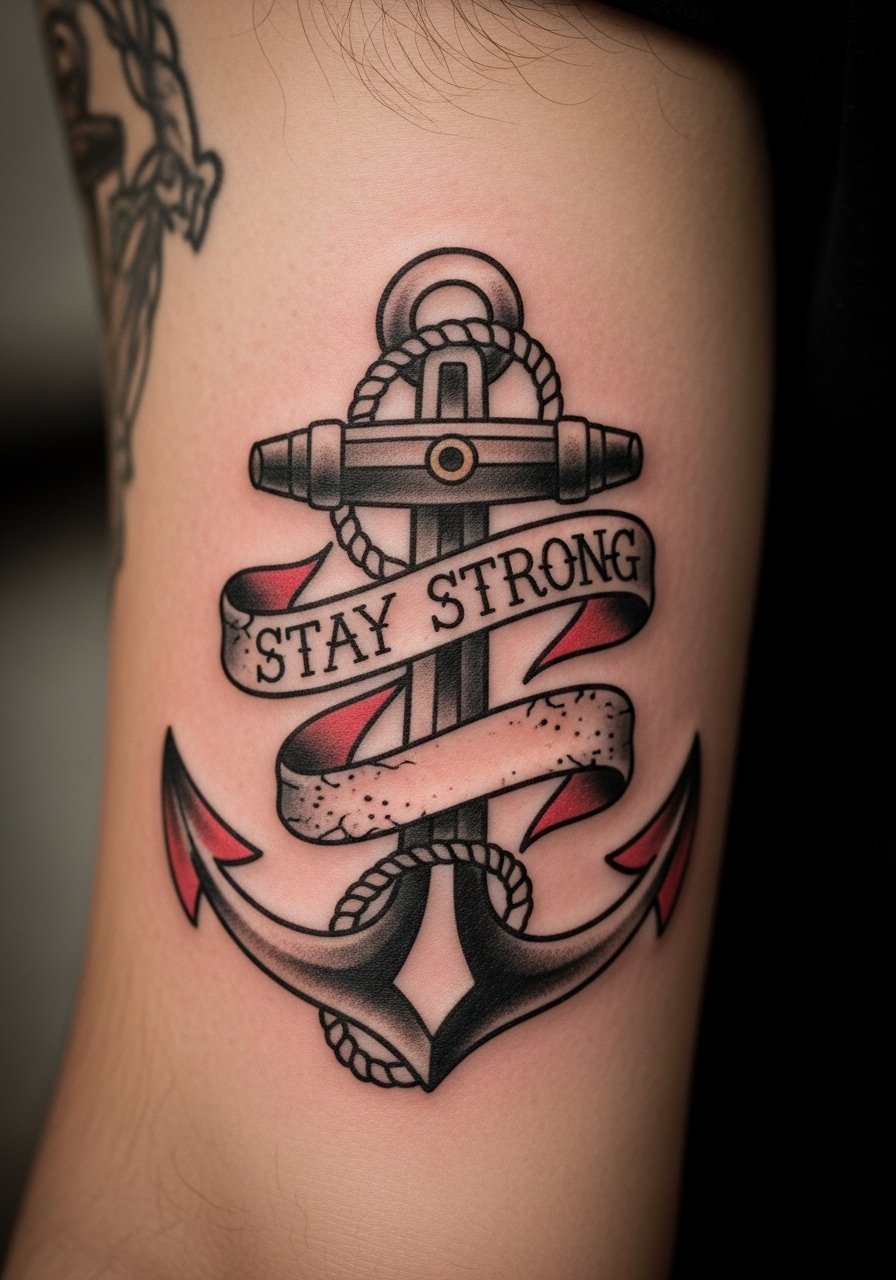
Traditional work wins where longevity matters. Bold outlines and saturated fills keep the banner text legible for years. Outer forearm sessions run two to three hours for a 3-4 inch layout and the pain is mild to moderate. Tell your artist you want solid black outlines and dense color pockets rather than soft shading. For session wear, a loose fit tank top keeps the arm accessible. A common error is requesting tiny banners that collapse when the ink settles. Aim for proportion so the ribbon and anchor breathe on the skin.
3. Minimalist Heartbeat Line Ending in the Words "Stay Strong" on the Inner Wrist
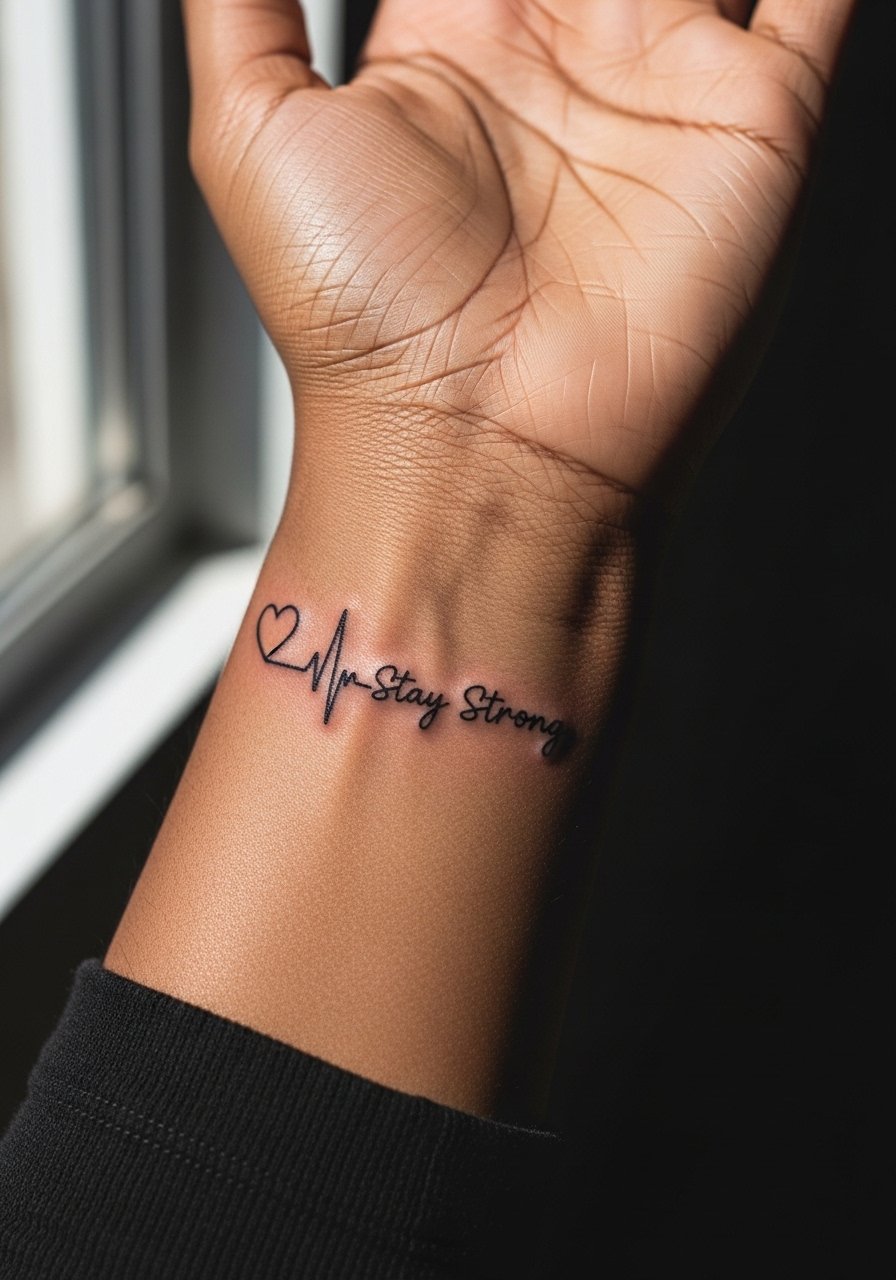
Wrist pieces are great for first-timers because the session is short and the message is visible. The inner wrist needs bold enough linework to survive frequent washing and sun exposure. I advise a slightly heavier single-needle or two-needle script and a single-session appointment under 45 minutes for a 1.5 inch design. For showing it off and keeping jewelry simple, pair with a slim leather watch on the opposite wrist only. The usual mistake is stacking bracelets that rub the fresh ink. Plan one delicate accessory and schedule a touch-up if the heartbeat softens after six months.
4. Blackwork Geometric Arrow Piercing "Stay Strong" on the Collarbone
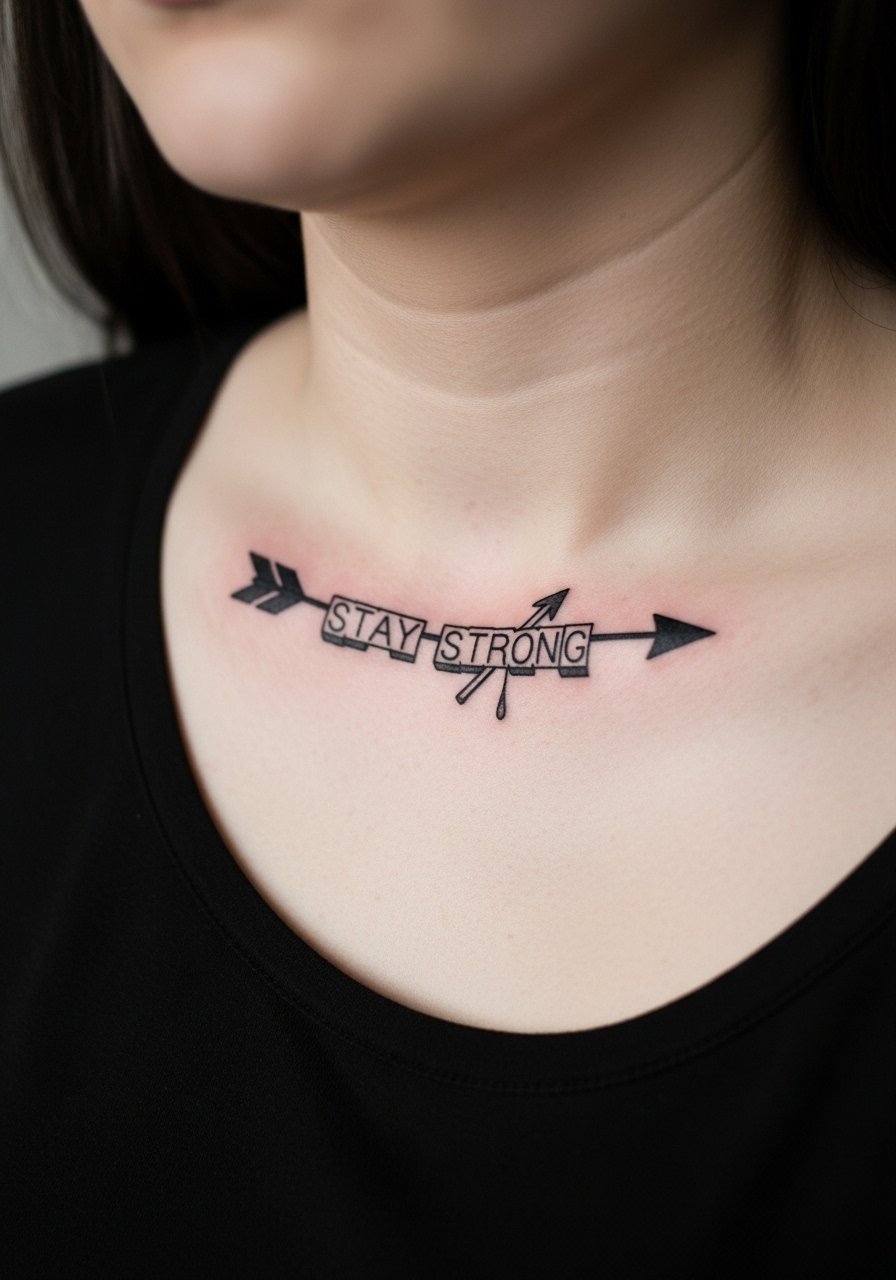
Collarbone placements show off blackwork well. The area takes solid fills and crisp negative space. Expect two sessions for a 2-3 inch piece if the arrow integrates dot work or stipple shading. During consult, bring references that show the exact line weight and negative space you want. For evening looks the design pairs perfectly with an off shoulder blouse or layered chains. A common error is packing too many tiny geometric details into a narrow collarbone canvas. Leave breathing room or the lines can merge as the skin moves.
5. Watercolor Heart Cracked then Mended with "Stay Strong" on the Upper Arm
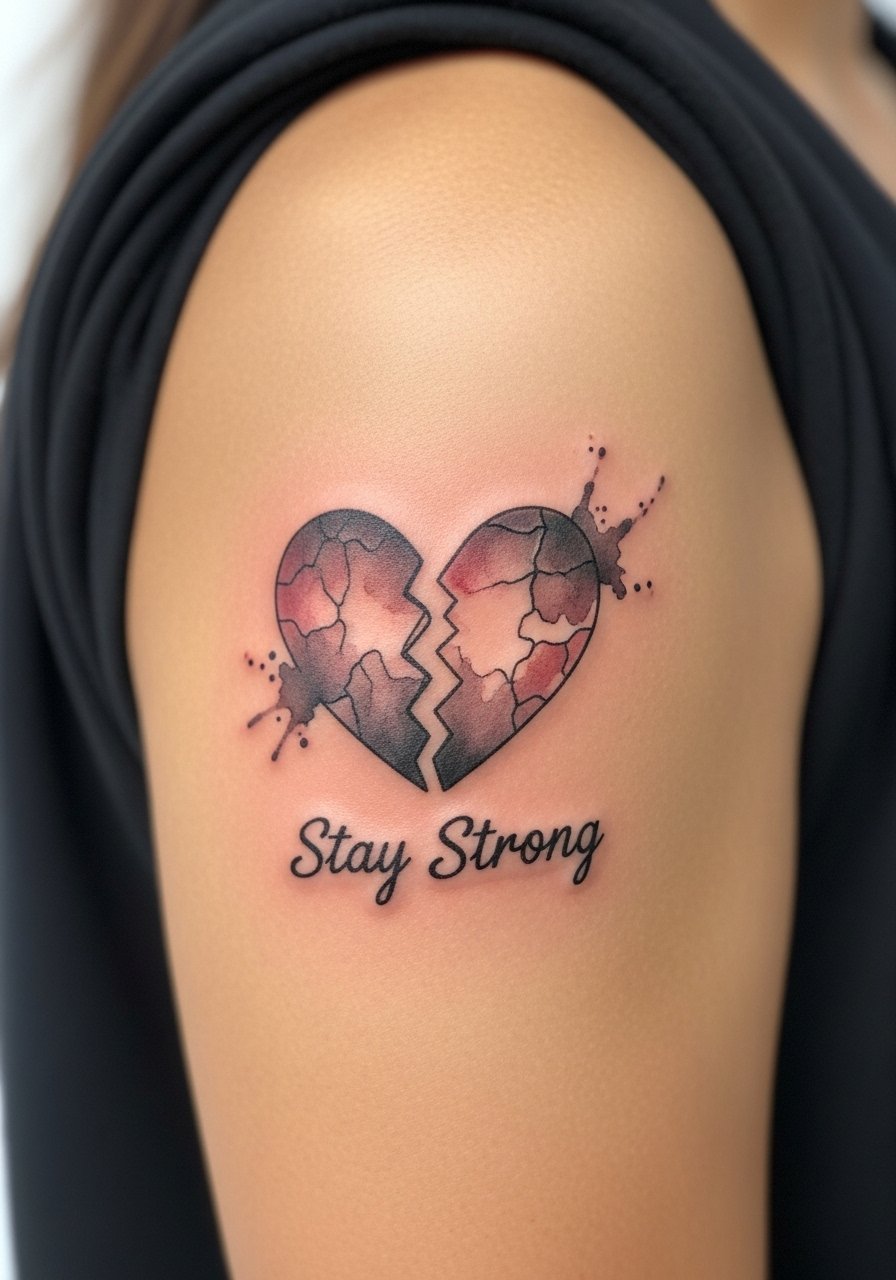
Watercolor styles are emotional and painterly. They photograph beautifully early on but color diffusion is real on high-motion spots. Upper arm placements are forgiving, and a 3 inch watercolor heart usually finishes in one to two sessions. During consultation, ask your artist for stronger surrounding outlines or small anchor points of saturation so the color has structure as it heals. For casual show-off wear a sleeveless muscle tank to keep patterns visible. If you want this to last, accept that vibrant washes may need yearly refreshes if you spend time in the sun.
6. Neo-Traditional Lion Roaring with a "Stay Strong" Ribbon on the Shoulder
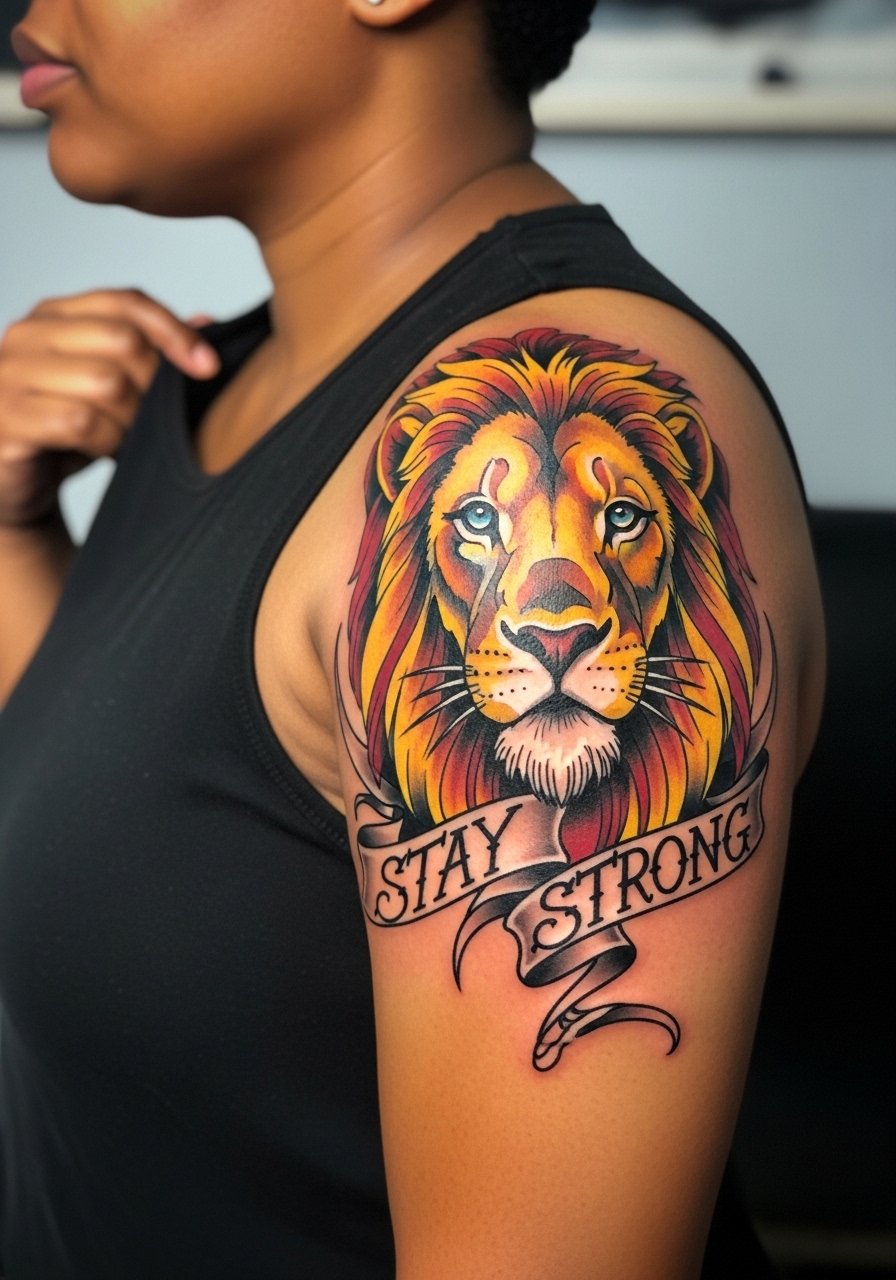
There is something about a shoulder piece that reads fierce from across a room. Neo-traditional saturation holds long and the shoulder is forgiving for 2-3 session builds. Tell your artist you want bold outlines and rich saturation instead of delicate stipple shading. For session comfort wear a loose button-down shirt you can pull aside. A mistake I see is cramming text too close to the mane. Keep the ribbon large enough so the script survives touch-ups and years of sun exposure.
Studio Day Picks
The first six ideas above include wrists, forearms, shoulders and upper arms, so these items smooth the session and the first week of healing.
-
Hustle Butter Deluxe tattoo balm. Non-greasy moisture that many people prefer for fine line work because it keeps skin supple without clogging needle channels.
-
Indie tattoo aftercare balm. Thinner formulations suit darker skin when you want a low-shine finish and gentle hydration during early healing.
-
Australian tea tree salve. Helps control itching without steroid ingredients for lower-risk irritation on colorful upper arm pieces.
-
Thin protective film roll. Useful for wrist and forearm work to reduce friction during the busiest first days.
-
Aquaphor Healing Ointment. A thin layer during the first 48 hours helps fine line areas keep moisture without overly sealing them.
7. Micro-Realism Clenched Fist Holding a Sign that Reads "Stay Strong" on the Inner Bicep
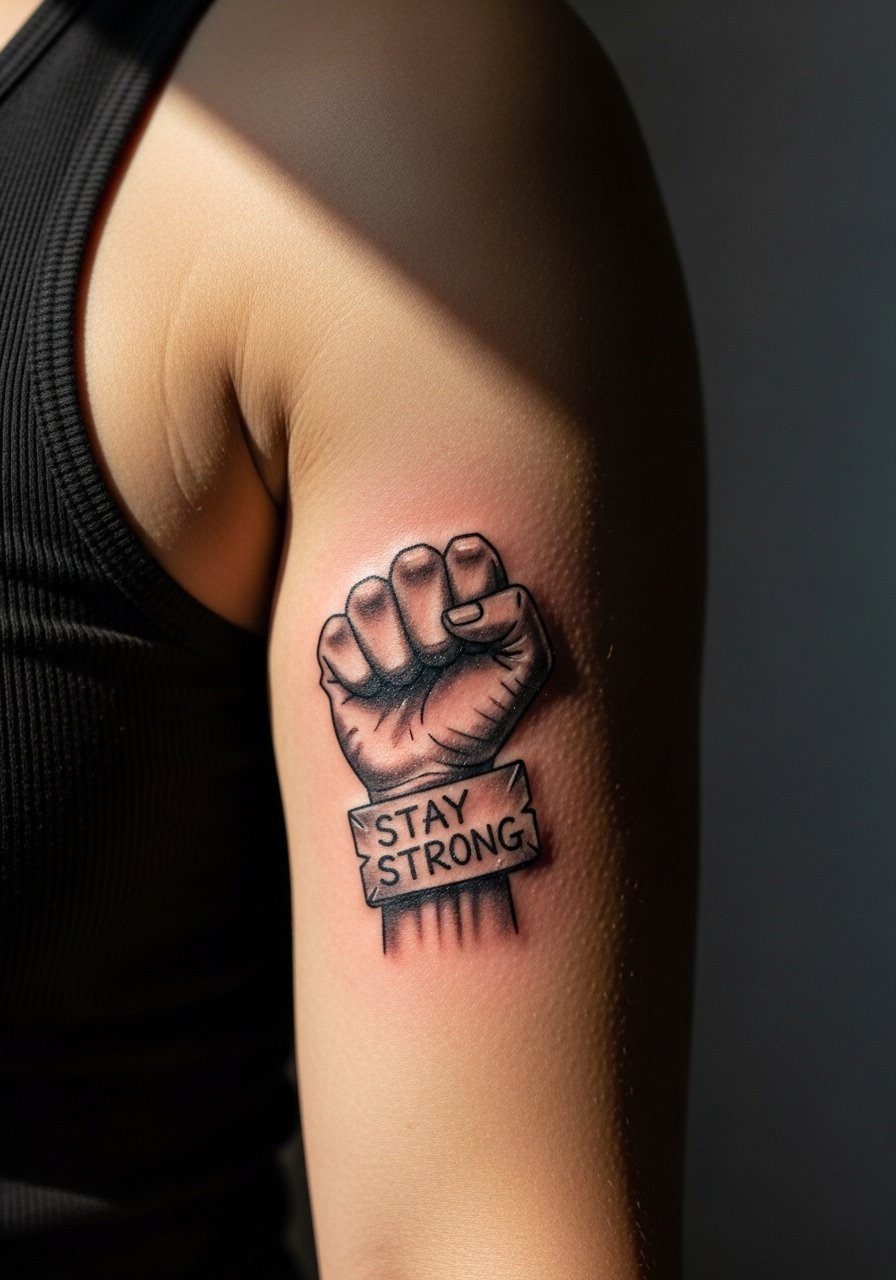
Micro-realism needs exacting depth and contrast to read well in photos. The inner bicep takes shading nicely but is more sensitive. Plan two short sessions for a 2 inch realistic fist and expect higher pain in that zone. Tell your artist you want high-contrast darks and clear edges so the tiny sign keeps legibility at arm's length. For session wear a loose tank top that lets the arm lift. Avoid asking for hyper-fine grayscale without bold anchors because those soft gradients can fade into a gray wash over time.
8. Ornamental Mandala with Embedded Script Behind the Neck
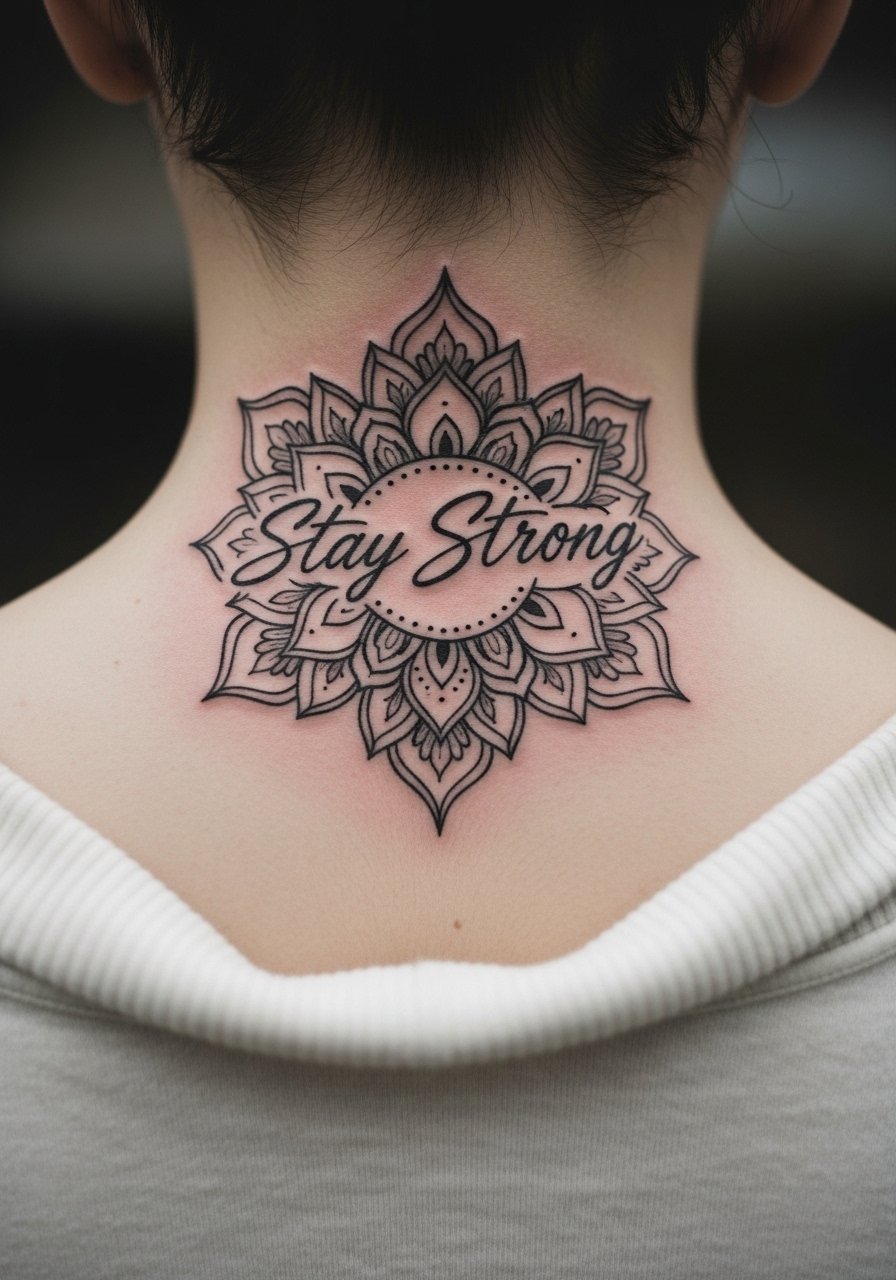
Back-of-neck mandalas look meditative and scale well as a compact piece. The area heals predictably when the design uses bold enough linework and clear negative space. One to two sessions usually covers a 3 inch ornamental piece. For wearing it out, a button-front blouse with the collar shifted shows the top of the mandala without baring the rest of the neck. If you want fine dot work, ask about needle spacing because dense stippling close to the hairline can blur over time.
9. Ignorant Style Wavy Text with Wave Motifs on the Ankle
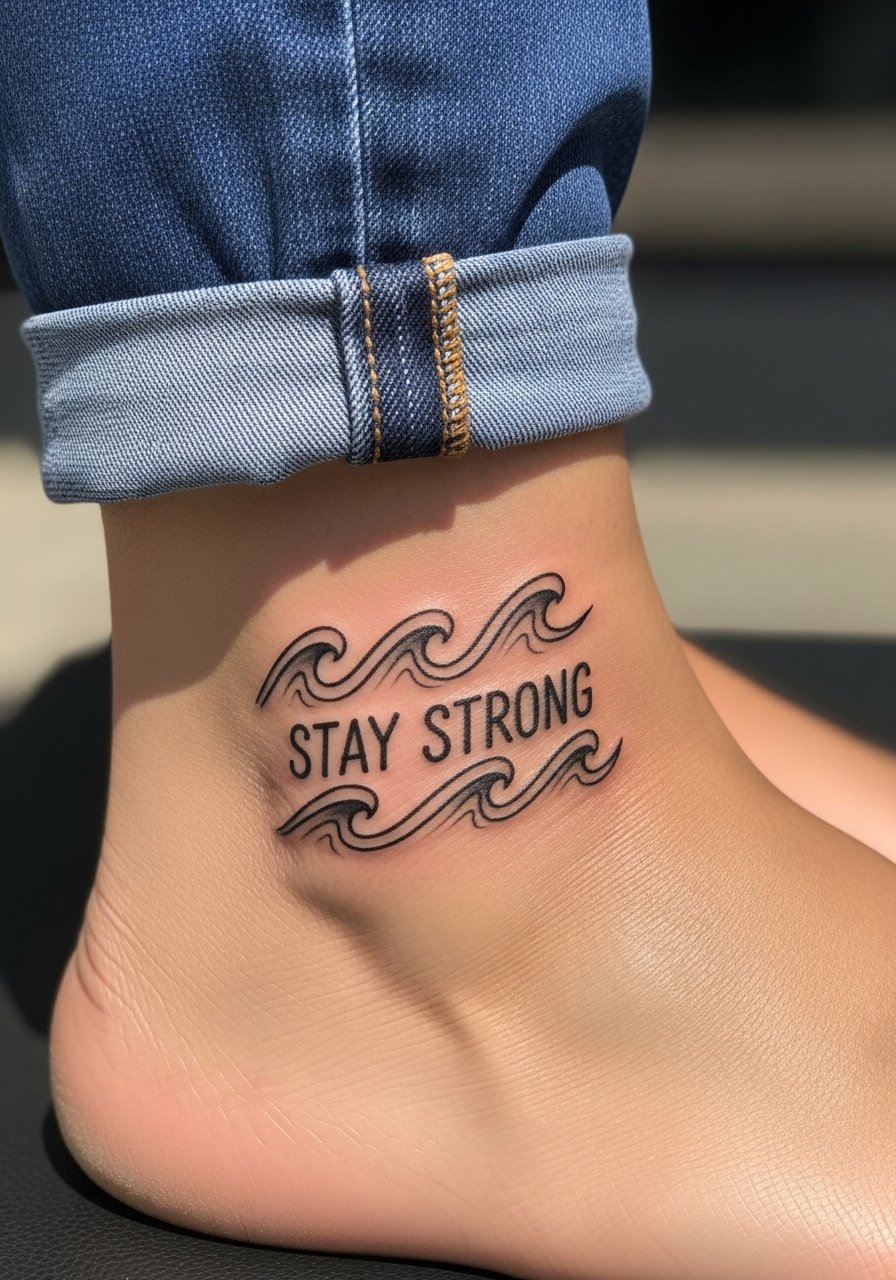
Ankle tattoos get playful with imperfect lines and wavy text. The area is thin skinned and sees shoe friction. Keep the design simple and slightly bolder than the sketch so the waves do not dissolve into fuzz. Session time is short and pain is mild to moderate. For showing it off, cuff straight-leg jeans or a midi skirt so the ankle peeks out. A frequent mistake is tiny illegible letters that disappear after a year because the ankle moves and rubs against footwear.
10. Fine Line Phoenix Rising Above the Words "Stay Strong" on the Ribcage
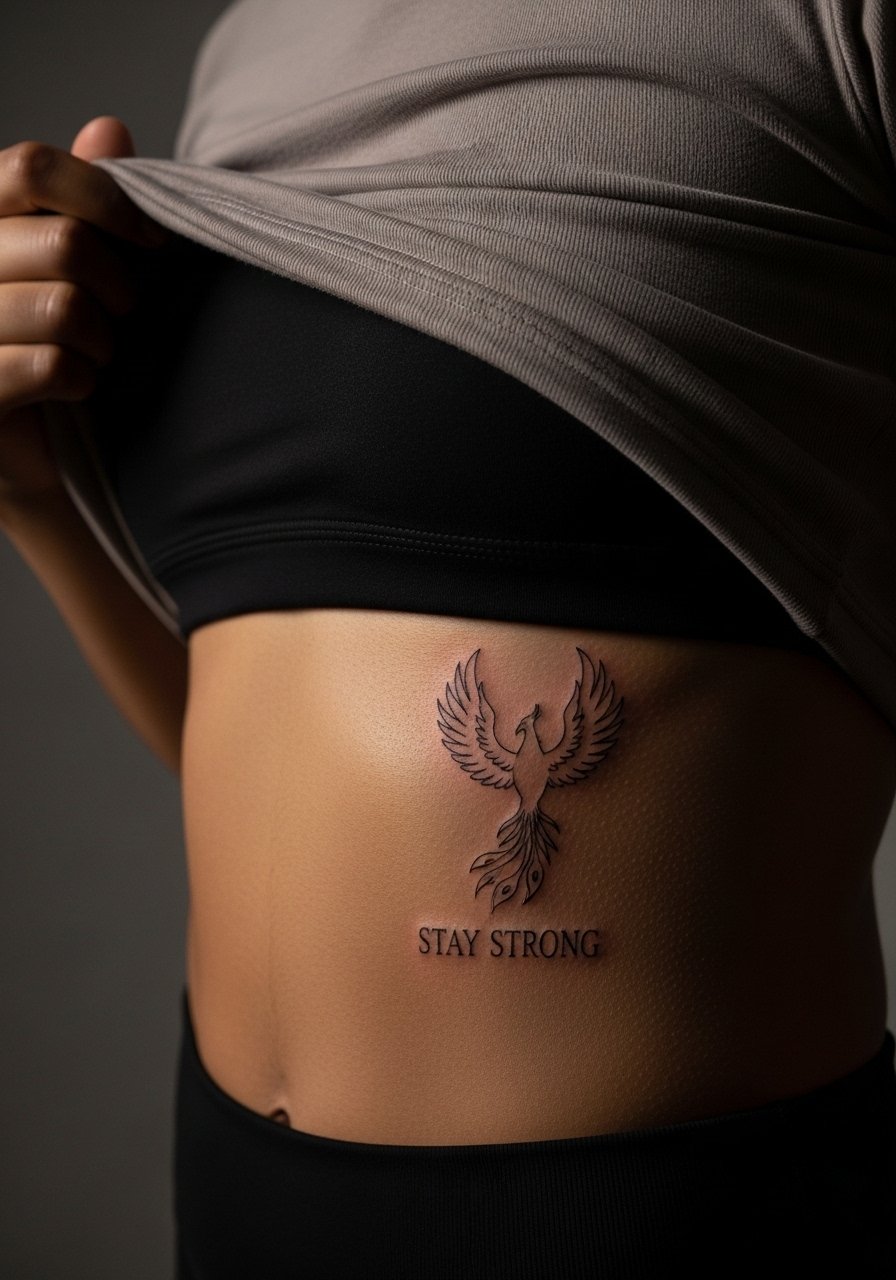
Fair warning: the ribcage is one of the more painful spots and the skin stretches with movement. Fine line fans split on whether ribs hold ultra-fine detail. One group says the skin there blurs lines in two years. The other group says with correct depth and spacing the linework can settle fine. I recommend slightly bolder single-needle work and planning a touch-up after healing. Wear a loose sports bra so the artist can lift fabric without exposing more than the side. Expect two sessions and be realistic about touch-ups.
11. EKG Line with Survivor Date and Tiny Ribbon for Medical Stories on the Upper Inner Arm
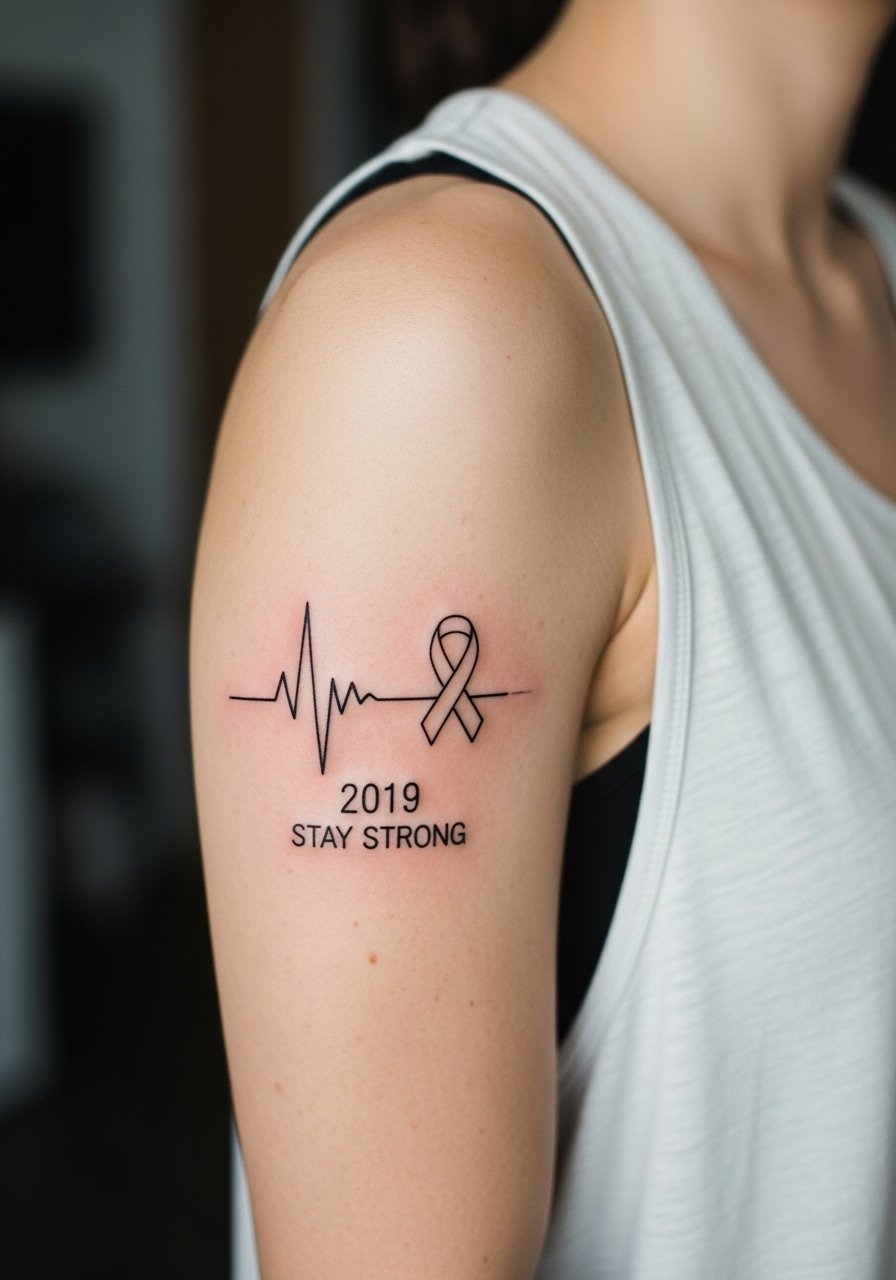
This is a thoughtful option for medical survivors who want their story on skin without large imagery. The inner upper arm is forgiving and less likely to sun fade. Keep lettering small but bold enough to remain legible, and specify exact numerals if you want a year included. For the session wear a loose fit tank top that you can lift easily. People often underestimate how distinct EKG lines need to be to read well at small sizes, so aim for clear negative space around the ribbon and numbers.
12. Knuckle Letters That Spell a Short Version of "Stay Strong"
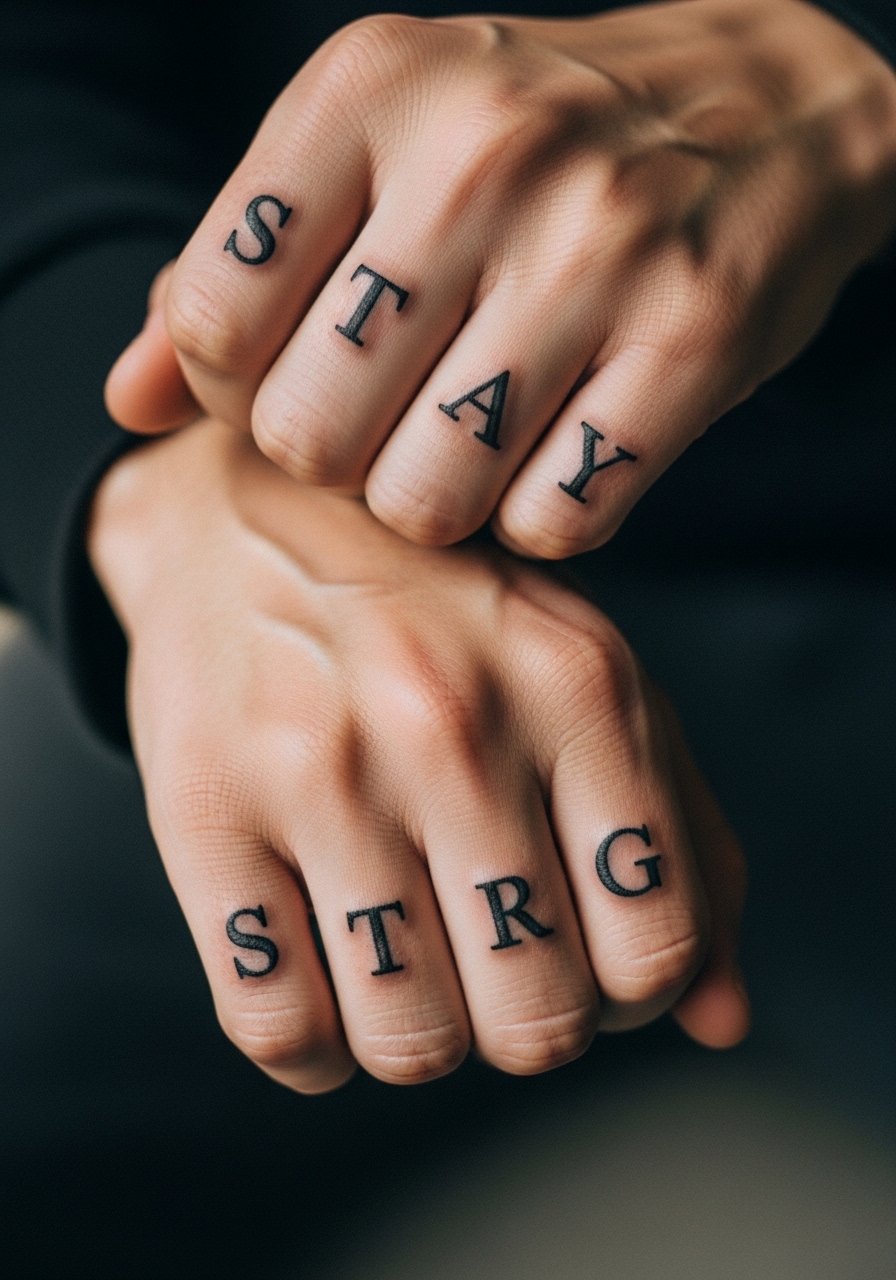
Knuckle work is intentionally visible and carries different social signals. The skin on knuckles sits over joints so letters can warp if sized too small. Use blocky serif letters rather than cursive so the characters stay legible when you make a fist. Sessions are quick but healing is stiffer and needs protection from washing. For session comfort wear a shirt with sleeves you can roll up easily and keep workwear minimal that day. One mistake is trying to cram long phrases. Keep it short and bold for durability.
13. Hybrid Ignorant-Fine Line Script That Mimics Handwritten Scars on the Wrist
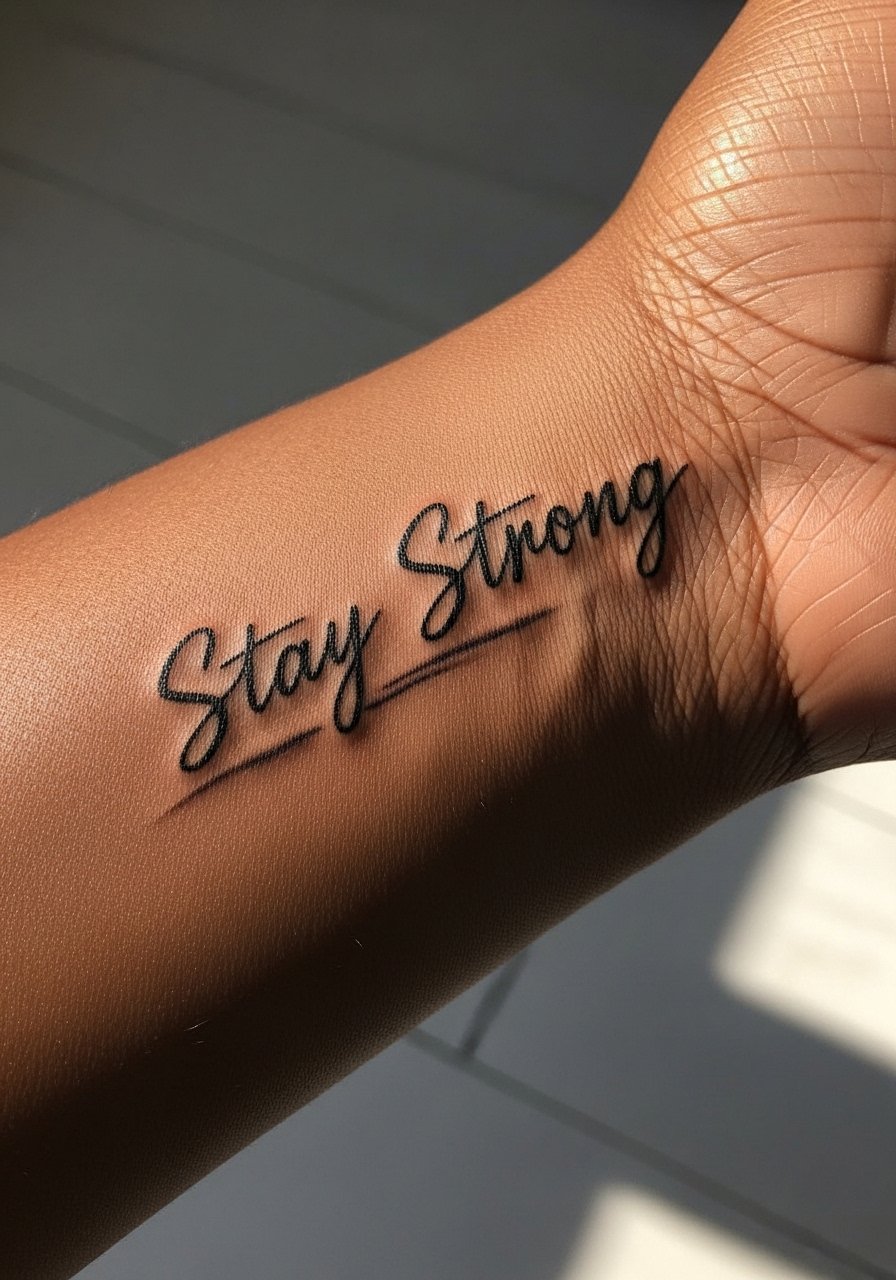
This hybrid adopts textured, imperfect strokes that look like handwriting healed into skin. It reads personal and raw while still using intentional line weight to avoid early blur. The wrist is a small canvas, so request slightly irregular line widths from the start. For the session wear a sleeveless crop top so the artist can access your arm. The common pitfall is asking for ultra-thin faux-scar lines which disappear; the hybrid approach keeps some boldness to preserve the effect.
14. Thigh Script Hidden with Growth-Friendly Spacing
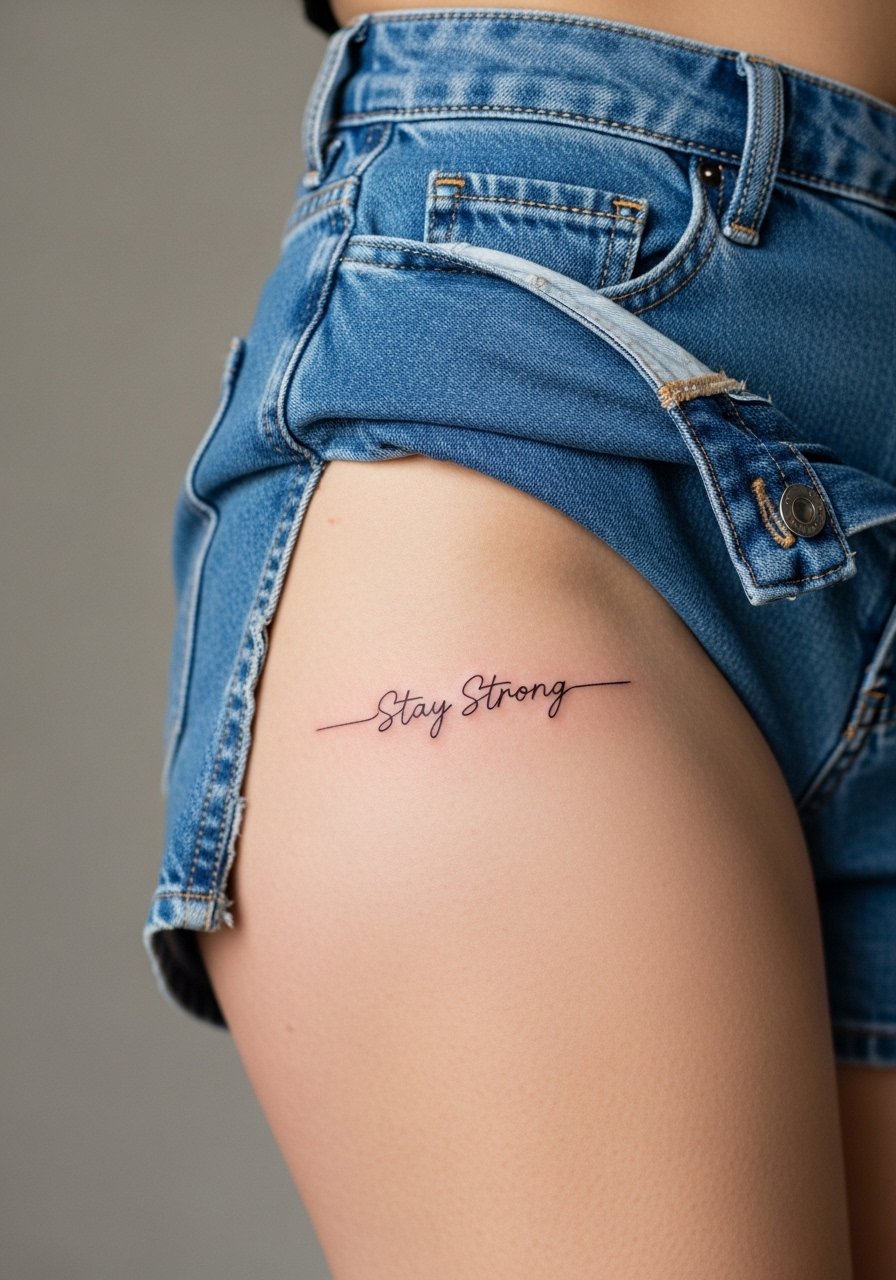
Thigh placements are private and handle body changes better than forearms. I recommend slightly wider letter spacing for the script so the phrase ages through weight changes and pregnancy without distortion. Sessions are comfortable and the size can be larger than wrist pieces. For session wear high-waisted shorts or a wrap skirt so the artist can shift fabric without full exposure. People expect thigh work to be immune to stretch but narrow script loses shape when skin stretches, so plan spacing accordingly.
15. Bold Serif Block Letters Across the Upper Chest Near the Sternum
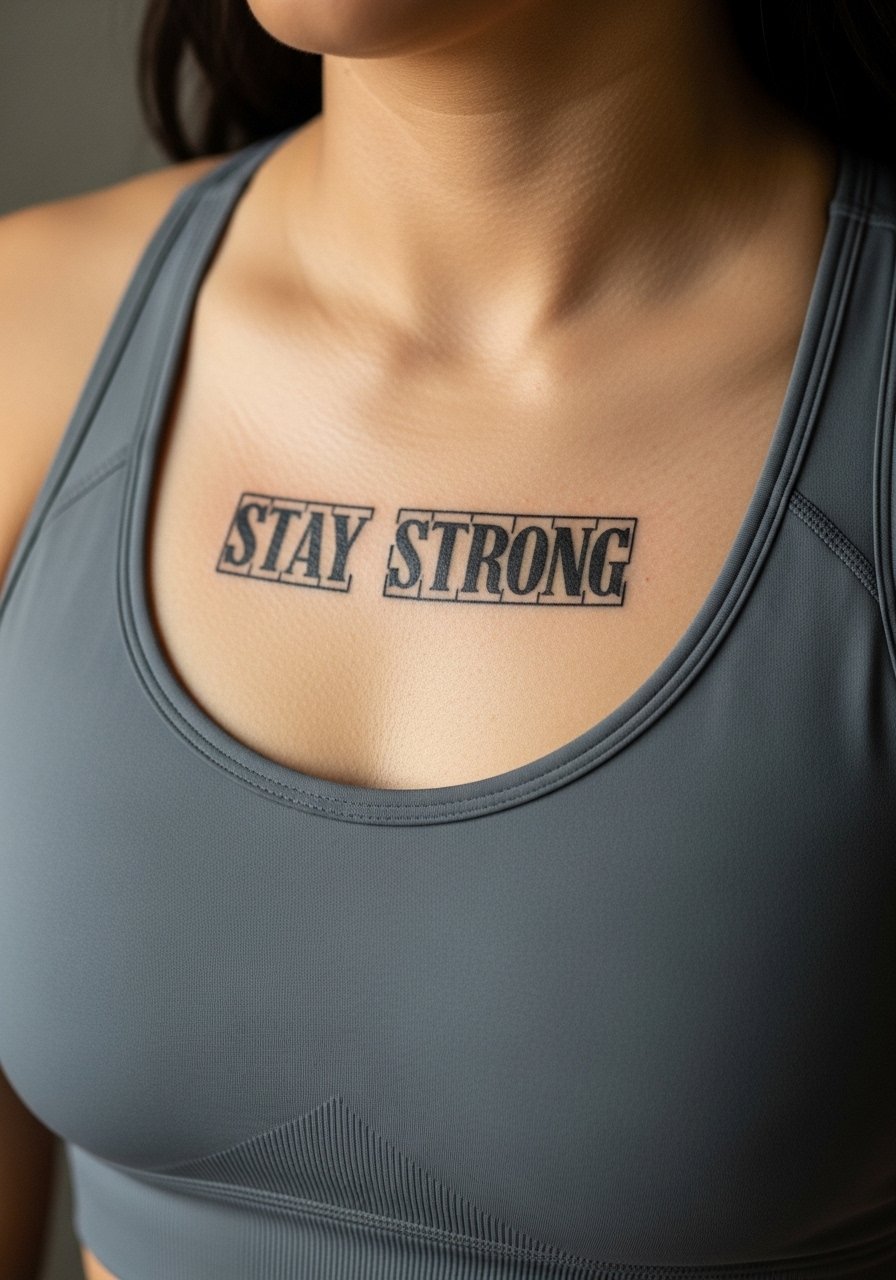
Upper chest lets block lettering read as a statement without busy decoration. Solid black ink and thicker strokes keep serif letters crisp. Because the sternum area moves with breathing, keep letters tall rather than very wide so they do not distort. For the session wear a fitted sports bra you can lower slightly, and bring a loose shirt for aftercare. A mistake is forcing ornate scripts in this zone. If you want the lettering to age cleanly, go slightly larger and bolder.
16. Tiny Script Just Behind the Ear, Below the Hairline
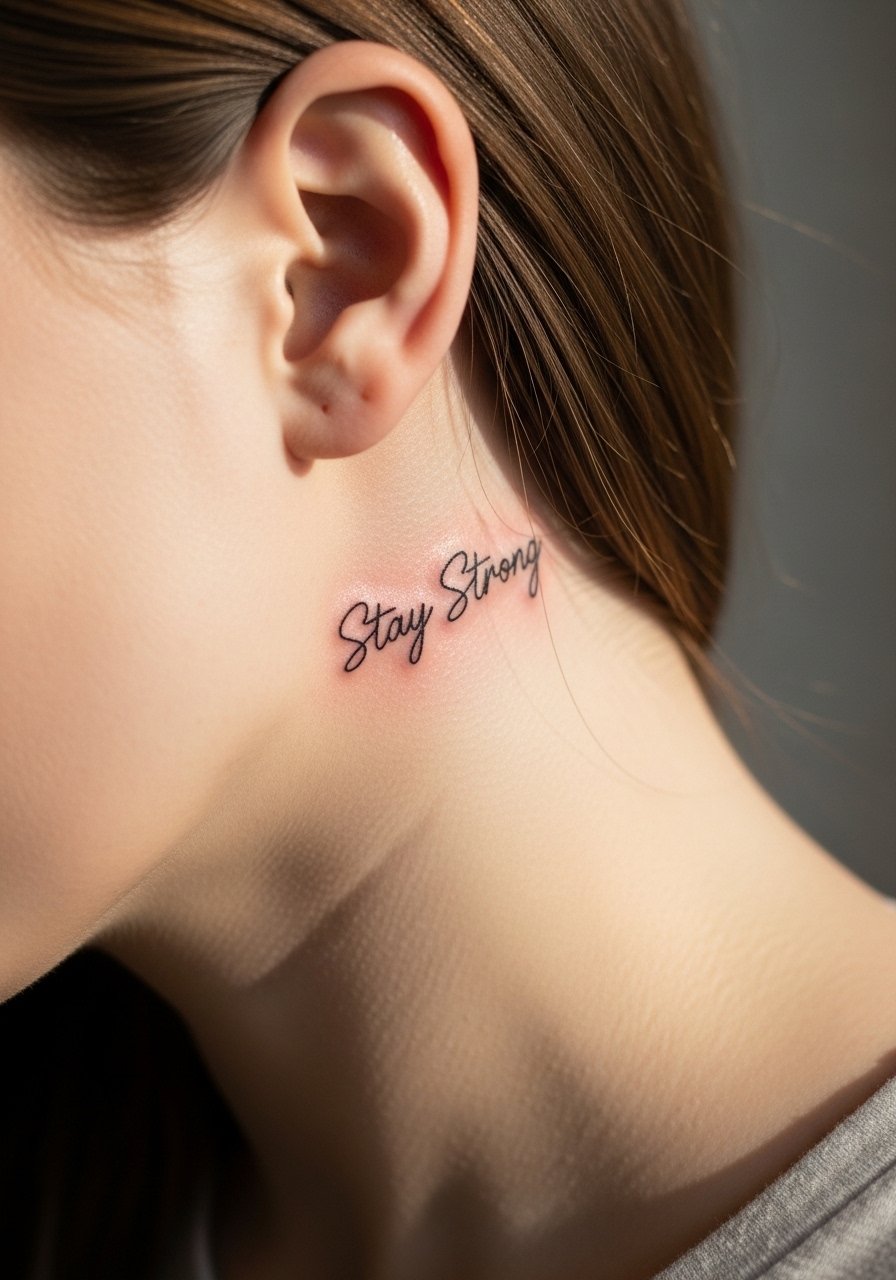
Behind-ear placements are intimate and peek out depending on hairstyle. Use a tiny, deliberate script and expect lower pain. The location requires subtle line weight to remain visible without harshness. For appointment style keep hair up and wear a wide-neck shirt so the artist can access the area. Consider potential workplace visibility because even small neck pieces can catch attention. Many people forget to discuss how the hairline will partially cover the piece as it grows out.
17. Arrow Band Wrapped Along the Collarbone Curve
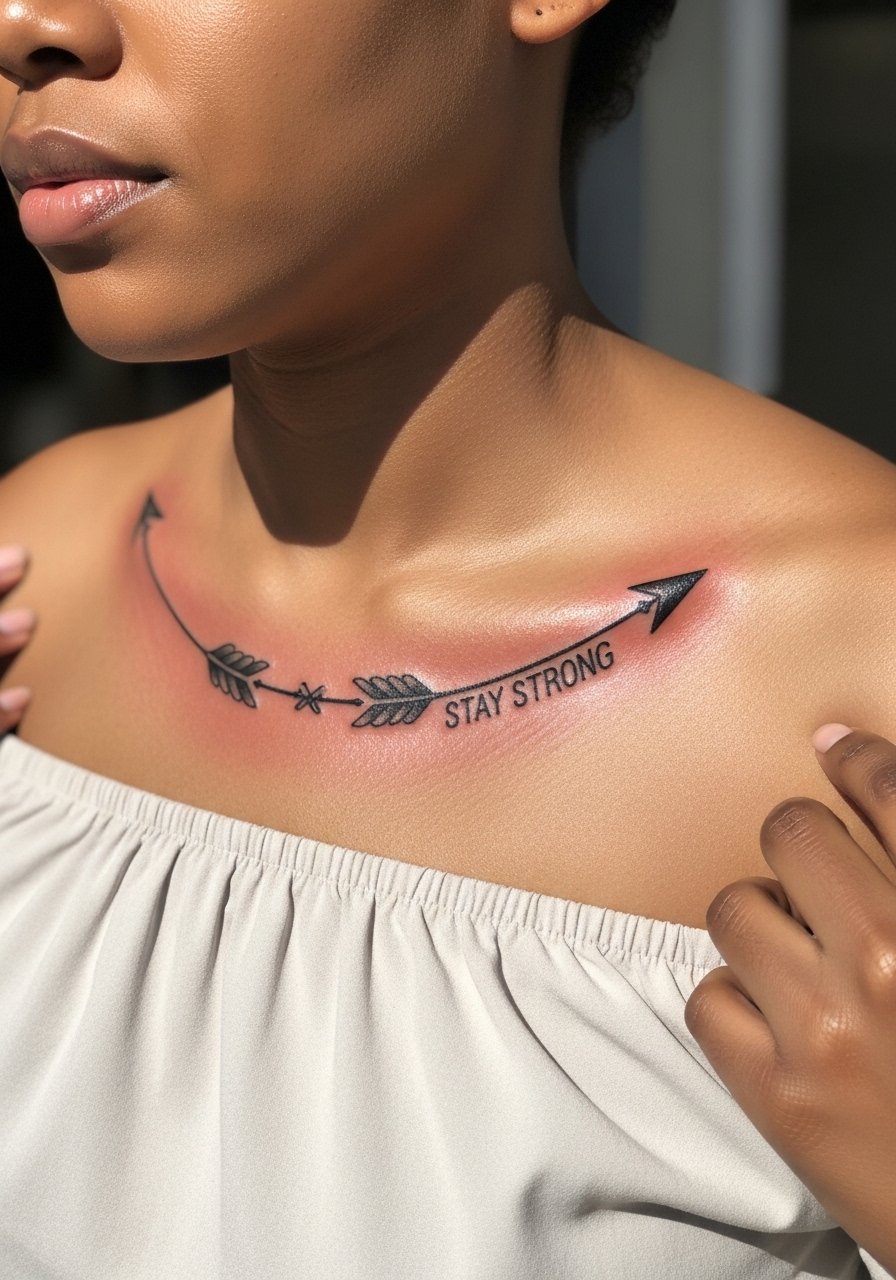
A collarbone wrap reads elegant and linear. The curve of the bone gives a natural flow for an arrow motif. Blackwork stands up to rubbing and sun better than watercolor in this spot. Sessions take under two hours for a 2-3 inch curved band. For showing it off, an off shoulder blouse frames the line without distraction. Avoid over-detailing the band with tiny text that might blur when the area flexes.
18. Small Serif Script on the Side of the Thumb
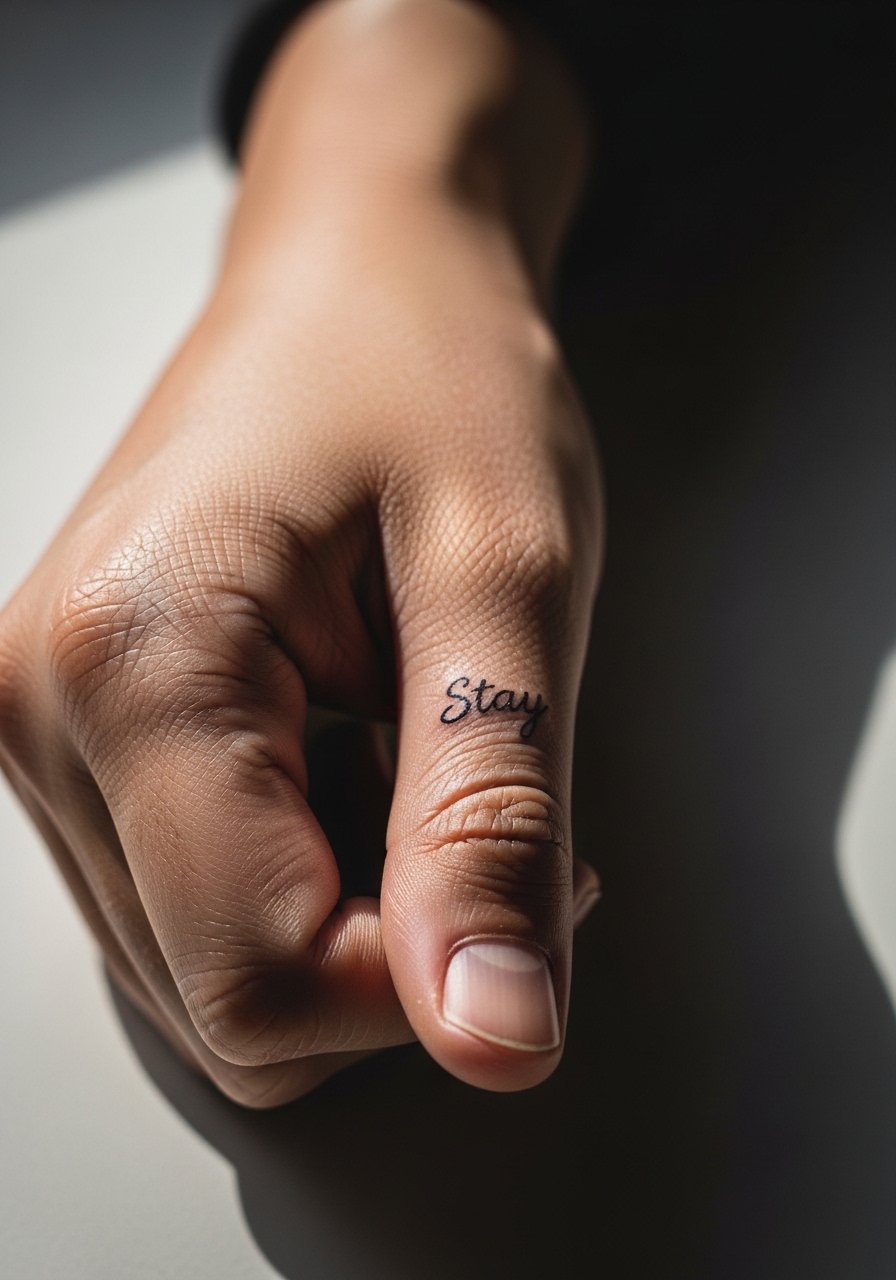
Thumb-side tattoos see a lot of hand use and contact. Keep lettering compact and choose strong serif shapes for resilience. The downside is faster fade due to constant washing and friction. Sessions are brief but consider touch-up scheduling. For practical session wear, keep your hands clean and avoid jewelry that might scratch the fresh ink. People sometimes underestimate how fast thumb work softens, so plan for possible refreshes.
19. Stipple-Shaded Floral with Small Embedded Message on the Lower Back
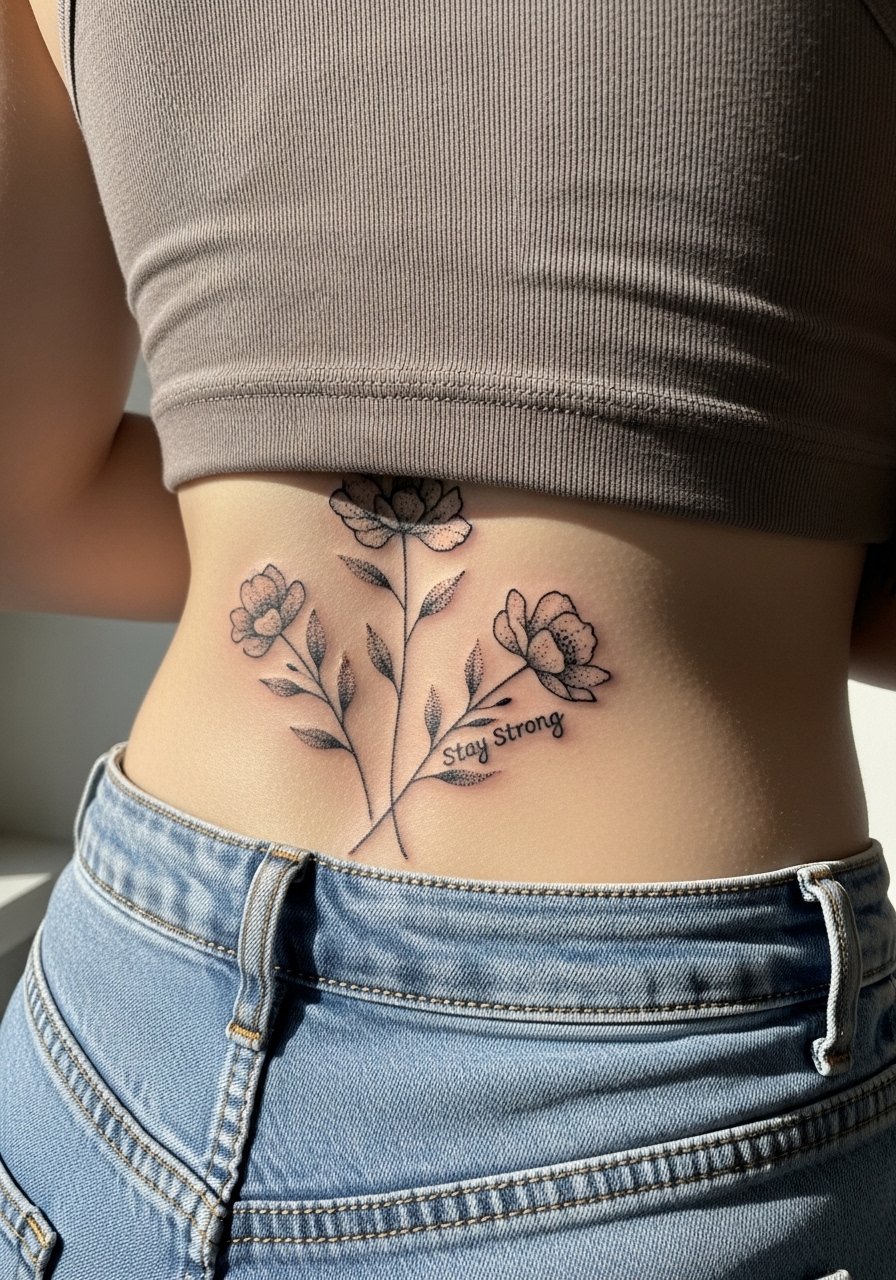
Lower back pieces allow for ornate dot work and graceful curves. Stipple shading gives texture without heavy fills that can look muddy over time. One session can cover a 3-4 inch ornamental cluster. For session comfort, wear a tank top with high-waisted pants you can lower slightly. Note the social perception of lower back tattoos in some circles and consider placement accordingly. The main mistake is packing stippling too tightly in a small area which can heal into a dense patch.
20. Neo-Traditional Rose with a Banner on the Outer Shoulder
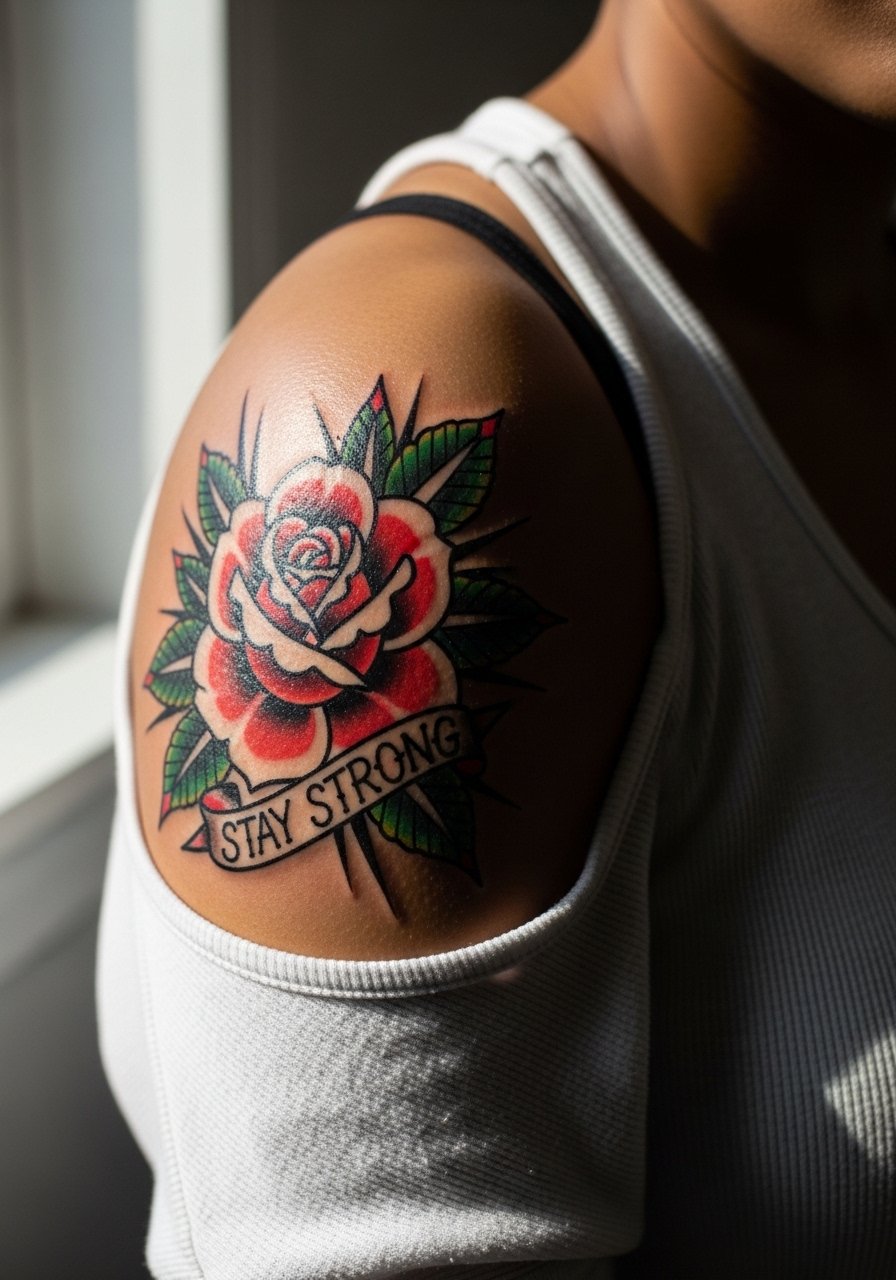
Outer shoulder neo-traditional pieces sit nicely under sleeveless looks and take color well. The area tolerates bolder saturation which keeps script readable inside a banner. Sessions are comfortable and can finish in one sitting for medium pieces. For showing it off pick a sleeveless muscle tank in an earth tone. Avoid tiny banner text that becomes illegible as the color softens; go for medium-sized lettering to age better.
21. Minimalist Script Along the Side of the Foot
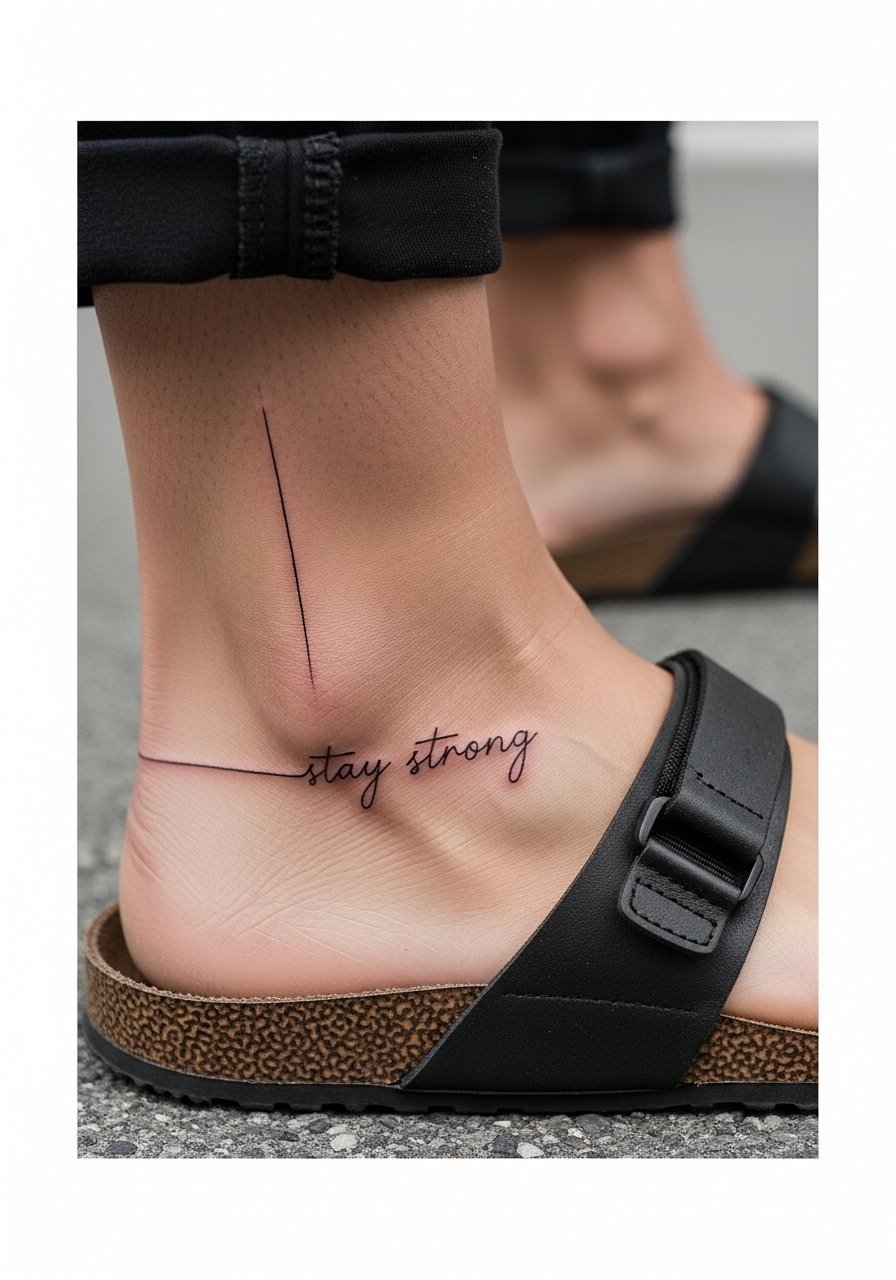
Foot tattoos face heavy friction from shoes and ground contact. Keep scripts small, slightly bolder, and consider a protected placement close to the ankle rather than the sole. Expect a tougher healing window and plan for fewer long walks in the first week. For session wear, slip on sandals or loose shoes you can remove easily. Many people underestimate how quickly foot ink fades from shoe rub, so a sturdier script helps longevity.
22. Micro-Realism Portrait with a Small "Stay Strong" Banner for a Memorial Piece on the Upper Arm
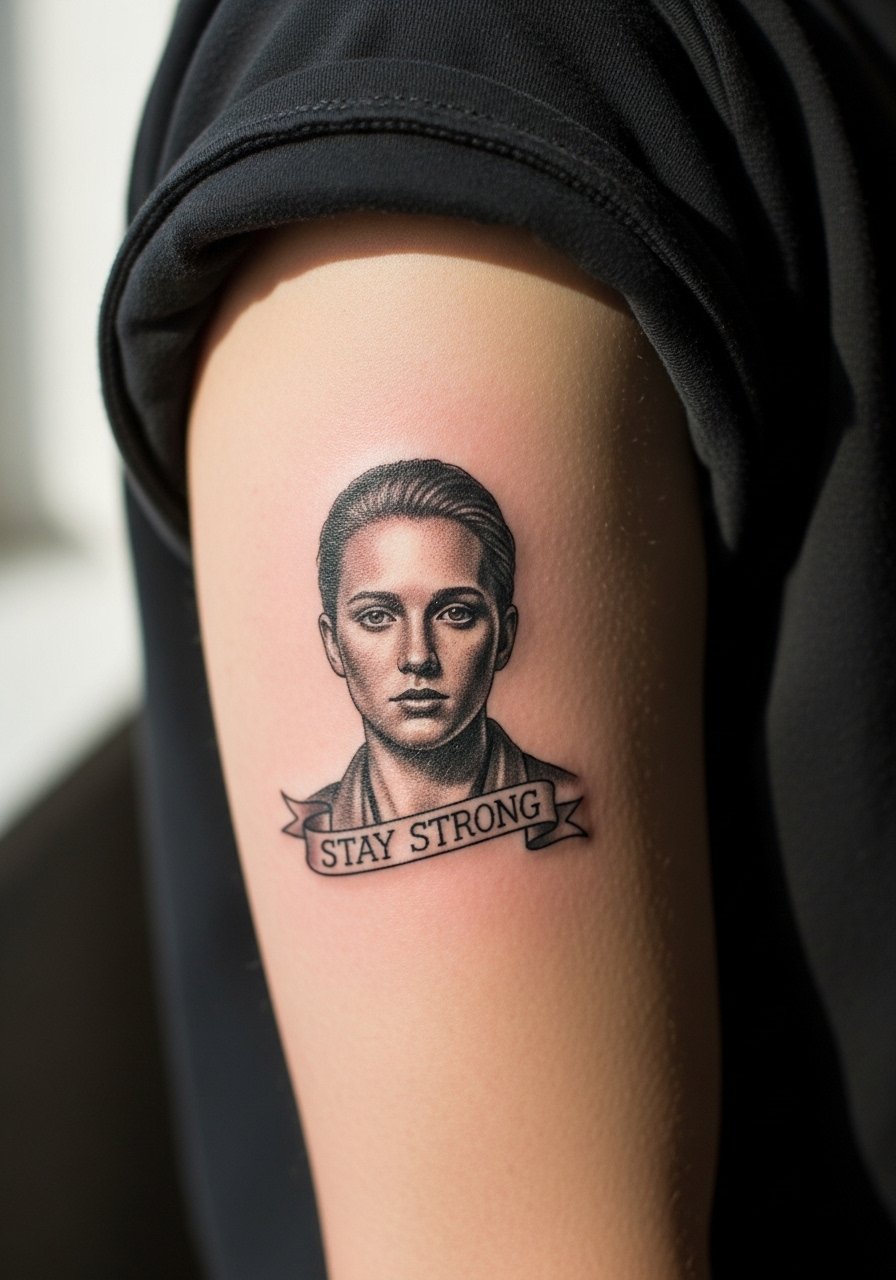
Micro-realism memorials need tonal contrast and a crisp tiny banner to read alongside the portrait. Upper arm placement is forgiving and photographs well. These pieces typically require two sessions for detail and touch-up. Wear a loose fit tank top so the artist can manage the area comfortably. The error I see is shrinking the banner so small it becomes a gray smudge; reserve enough space for clear lettering.
23. Script Curving Around the Wrist Like a Bracelet
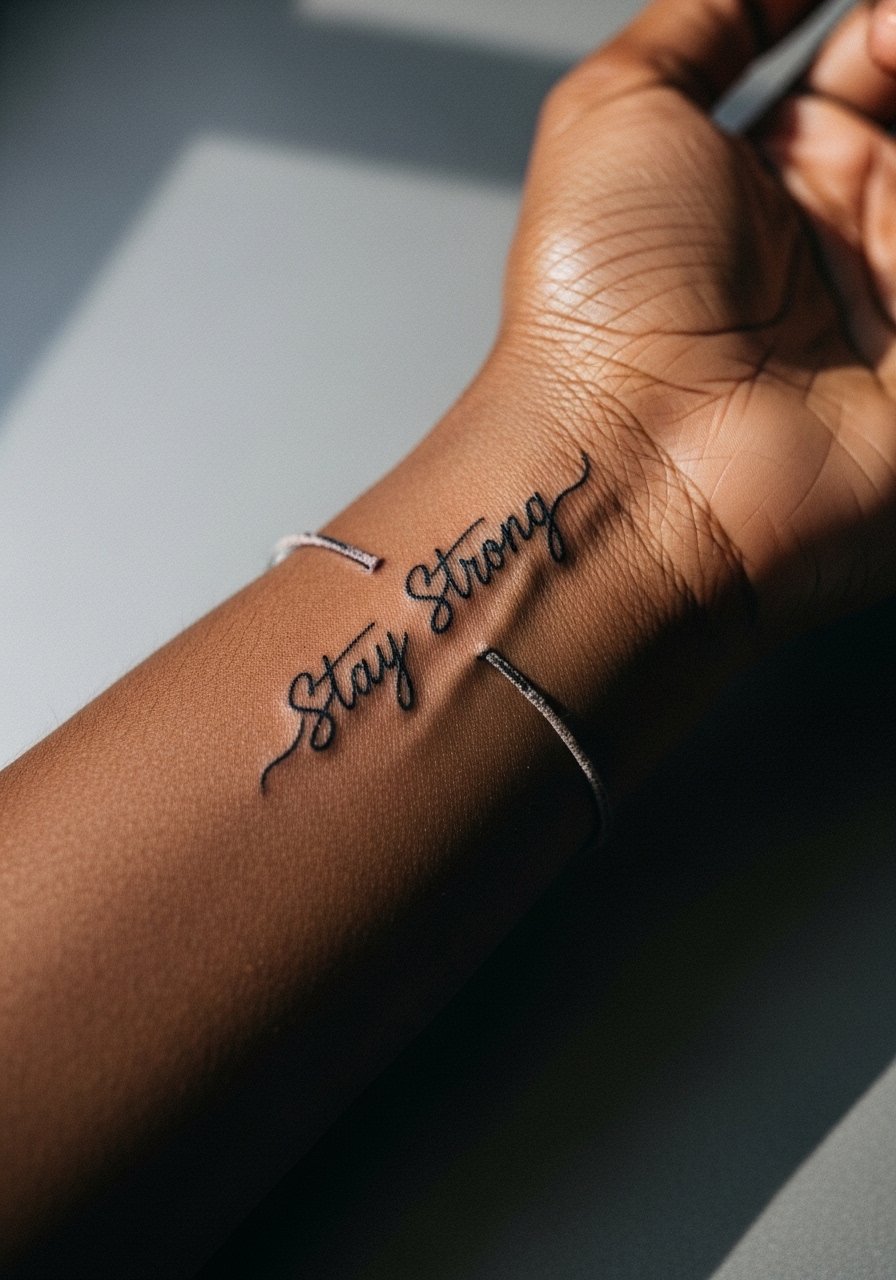
Wrist bracelet scripts look elegant and can replace jewelry. The curved script must maintain readable letter shapes, so ask the artist to mock the exact arc with stencil placement. Sessions are short and pain is tolerable. For show-off looks, wear a thin chain pendant necklace on the opposite side to keep attention balanced. A common mistake is asking for letters too small to read when wrapped; make the script slightly larger to remain legible.
24. Blackwork Block Arrow with Stipple Fill on the Calf
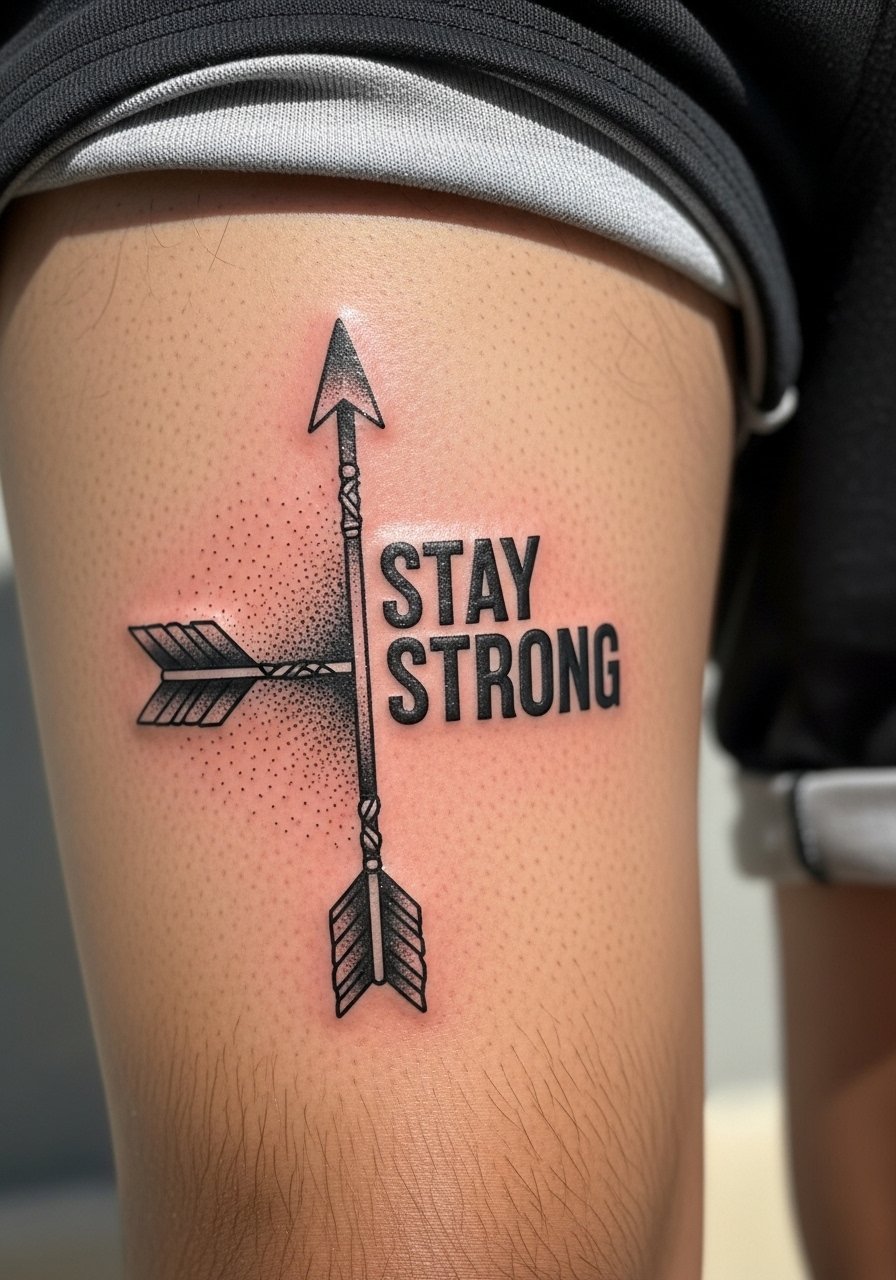
Calf tattoos have a great canvas for bold blackwork and stipple. The shape reads from distance and survives everyday wear. One session often covers a medium calf piece and the area tolerates denser work. For session ease wear shorts you can shift without pressure. Avoid packing tiny script next to heavy stippling or the letters can disappear into the texture. Request clear separation between fill and text.
25. Fine Line Constellation with a Micro "Stay Strong" Under the Sternum Edge
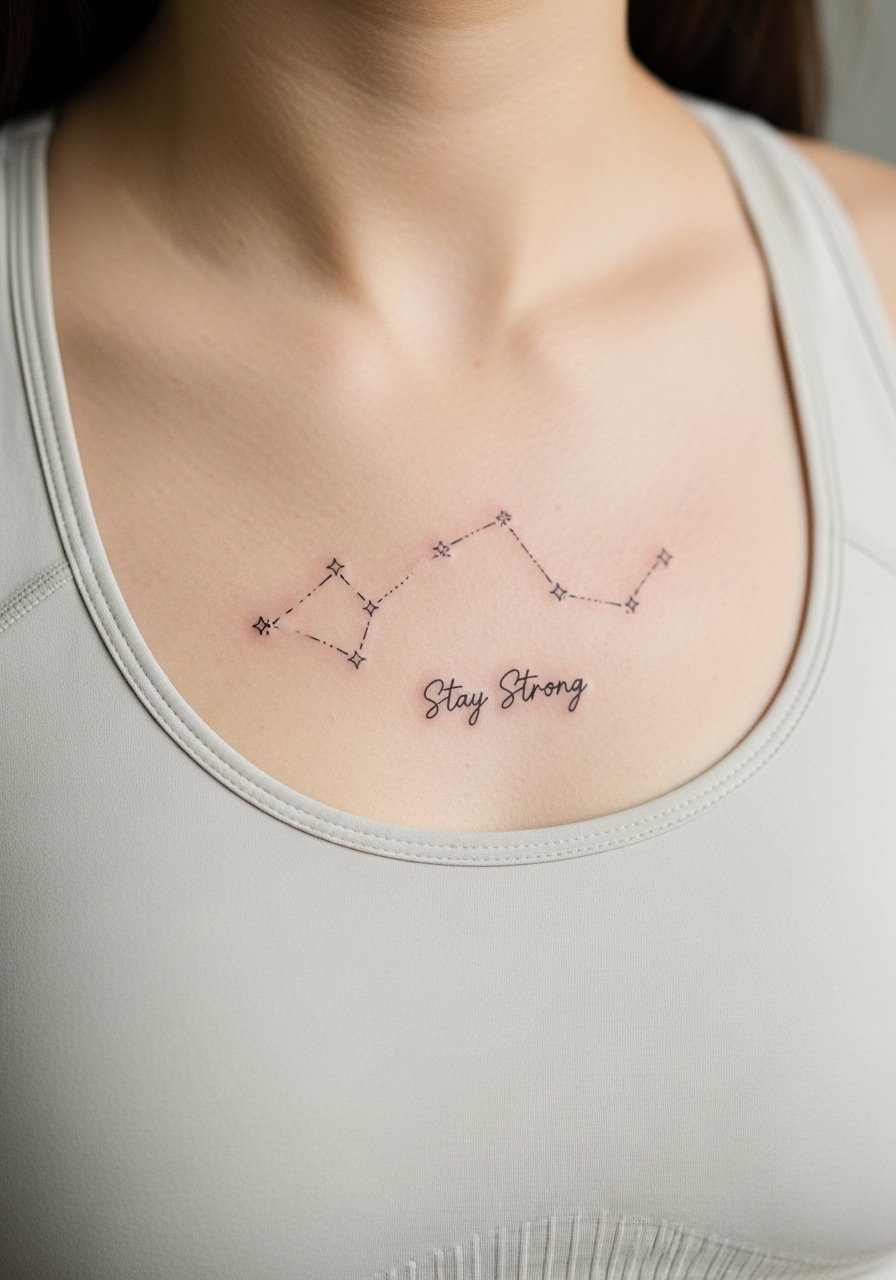
Sternum-adjacent micro scripts are intimate and peek out under low-cut tops. This location needs precise depth because the chest moves with breathing. Keep lettering tiny but bold enough to avoid feathering. For the session wear a fitted sports bra to give clean access and modest coverage. Some artists prefer slightly more spacing in chest scripts to prevent merging, so ask how your chosen size will age before booking.
26. Chain of Tiny Arrows Along the Side Ribcage with a Small "Stay" Tag
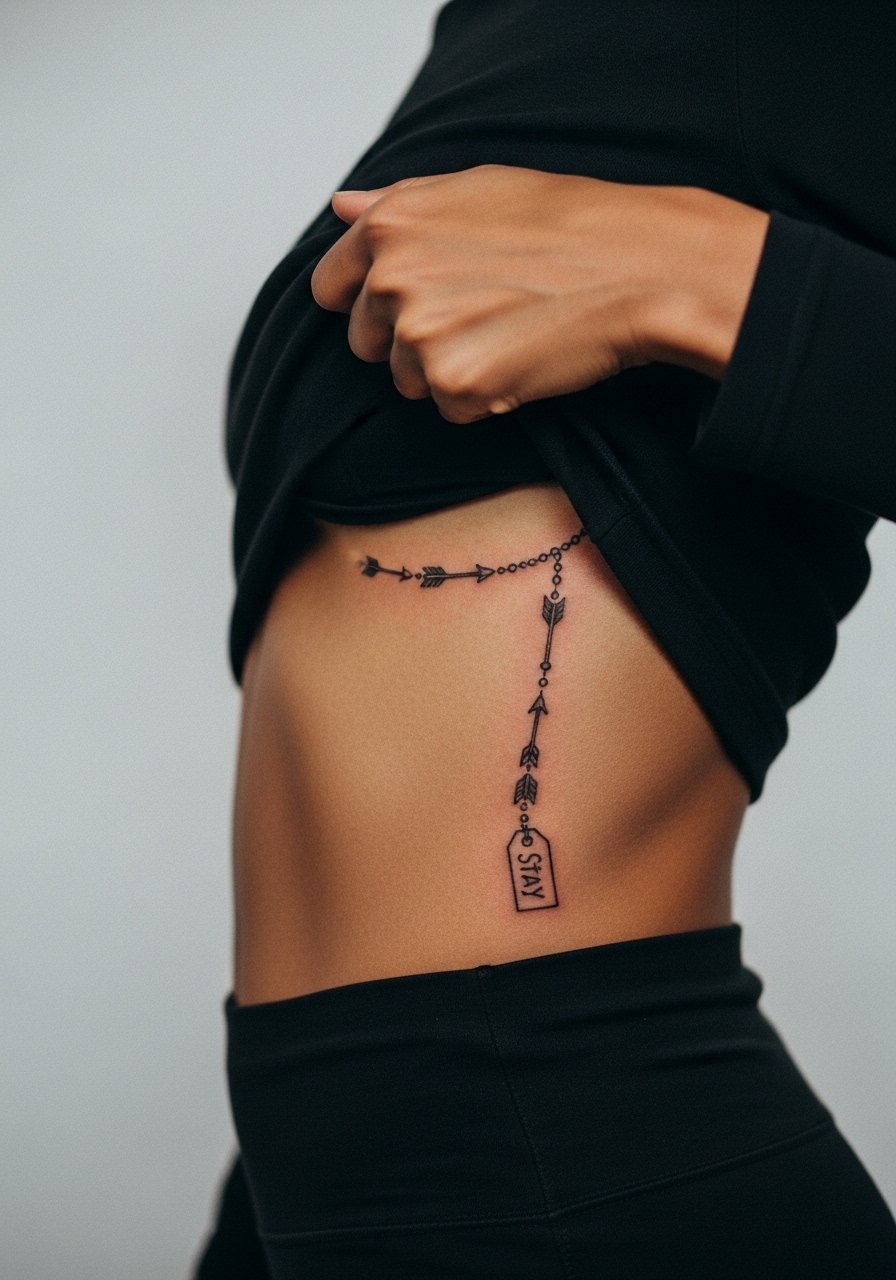
A string of arrows along the ribs reads delicate but directional. Because the area stretches and breathes, keep arrow spacing wider than you think. Sessions may be two short passes to adjust spacing as the stencil sits. For the session wear a loose crop or sports bra to lift. The common error is packing arrows too close, which leads to the shapes bleeding into each other as the skin moves and ages.
27. Bold Script Across the Top of the Hand for a Daily Reminder
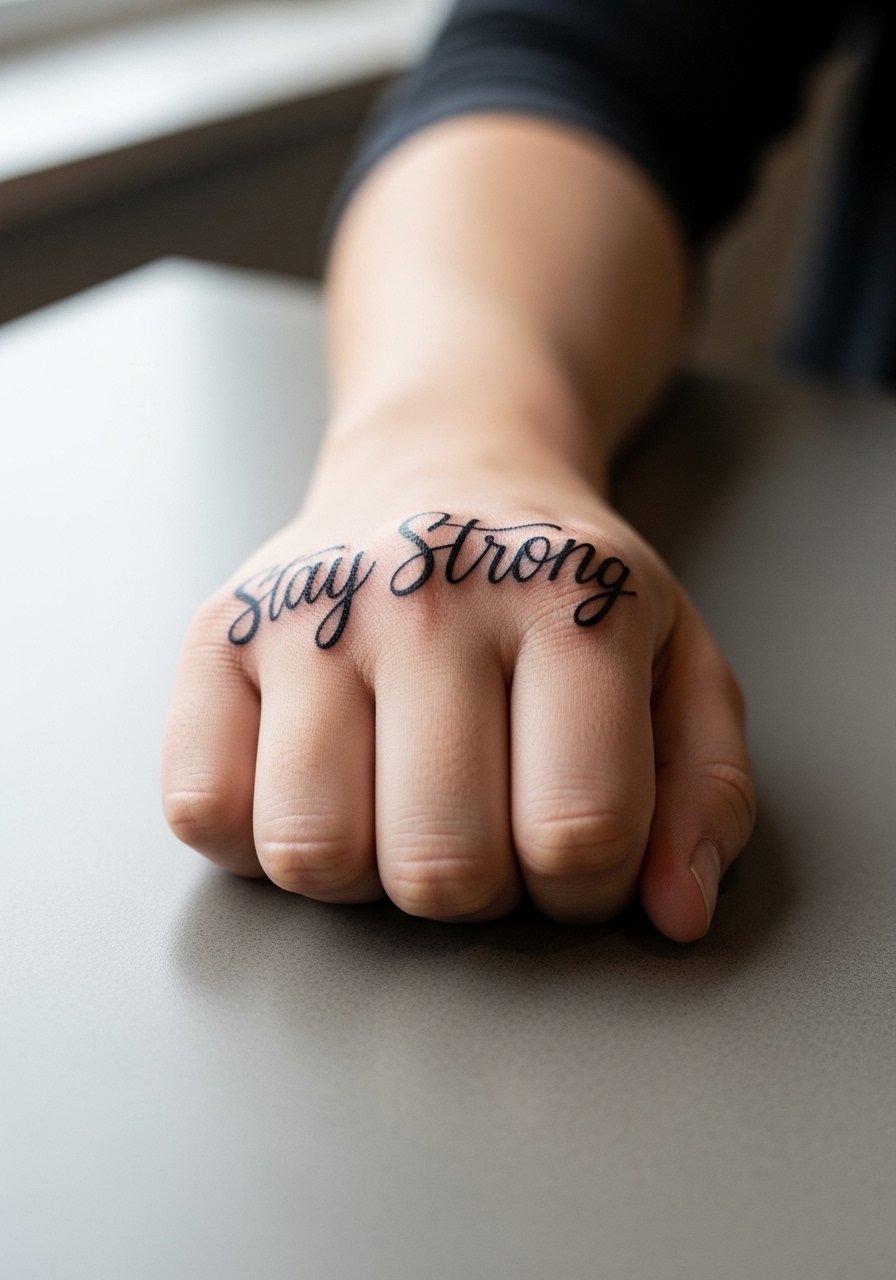
Top-of-hand pieces are highly visible and can be a daily reminder you see in mirrors. The skin there is thin and exposed, so choose thicker, blocky script to withstand washing and sun. Expect frequent touch-ups over the years. For the session keep your hands clean and free of rings, and bring a small bandage-ready shirt. Remember that hand tattoos can affect professional first impressions in some fields, so think about visibility before booking.
Frequently Asked Questions
Q: Do fine line "Stay Strong" scripts really blur faster than bold lettering on wrists and ribs?
A: From what I have seen, ultra-fine scripts tend to soften sooner especially on areas that see friction or stretch. Some artists argue that correct needle depth and spacing can keep fine line work readable on ribs and wrists. Ask your artist where they fall in that debate and plan a realistic touch-up timeline.
Q: How should I choose between watercolor and blackwork for a memorial "Stay Strong" piece?
A: Blackwork is the safer longevity bet if you want the words to remain crisp. Watercolor offers emotional color but loses saturation faster. If you want color and durability, ask for color anchors or thin outlines around washes so the message stays legible as the art ages.
Q: Where can I find artists who specialize in the exact style I want without naming people?
A: Search hashtags like #StayStrongTattoo and #FineLineStayStrong on Instagram and check Tattoodo filters for "script" plus your city. Reddit threads and Booksy listings can show guest spots and availability. Always review healed photos rather than only fresh shots.
Q: Will hidden placements like thigh or ribcage require different session wear than forearm work?
A: Yes. For thigh pieces wear high-waisted shorts or a wrap skirt. For ribs bring a loose sports bra you can lift. Forearm sessions are easiest with a short-sleeve tee or tank. Dressing for access keeps the artist from tugging fabric and makes the session smoother.
Q: Are hand, knuckle, and foot tattoos worth the frequent touch-ups?
A: They are worth it if you want daily visibility and accept upkeep. Hands and feet see more friction and washing. Pick bolder letterforms or accept a maintenance plan every 1-3 years depending on how the ink settles.
