
Fine line tattoos are everywhere online right now, and the trend looks incredible in photos. The problem is that not all placements wear the style the same way. From what I have seen in five shops across Brooklyn, small Phantom Troupe spiders on hands and wrists are the ones that ask for different line weight and touch-up plans. Below are 21 small troupe ideas that balance fandom accuracy, longevity, and everyday style so you can pick the version that actually holds up.
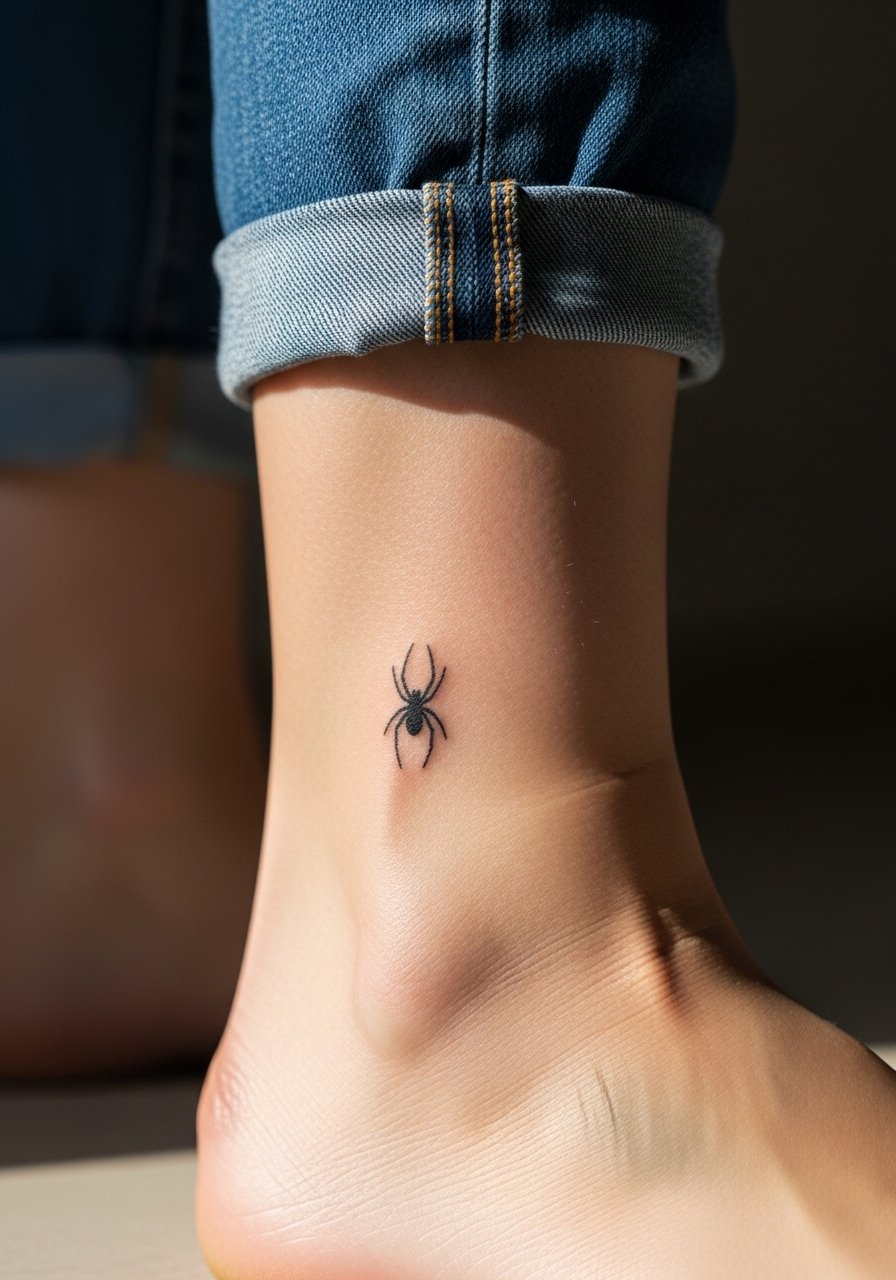
1. Minimalist Spider Outline on the Inner Wrist

This tiny outline reads like a secret nod to the series while staying clean in everyday life. I recommend this for first-timers who want a subtle piece that moves with the wrist. Tell your artist you want slightly thicker contour lines than typical fine line work so the spider does not feather into a blur at year two. Expect moderate wrist pain and a single session under an hour. A common mistake is asking for hair-thin lines and then being surprised when movement and sun make the design lose definition. For the session wear, avoid bracelets on the tattooed arm and plan touch-ups if you get heavy sun exposure.
2. Number 4 Spider for the Outer Forearm
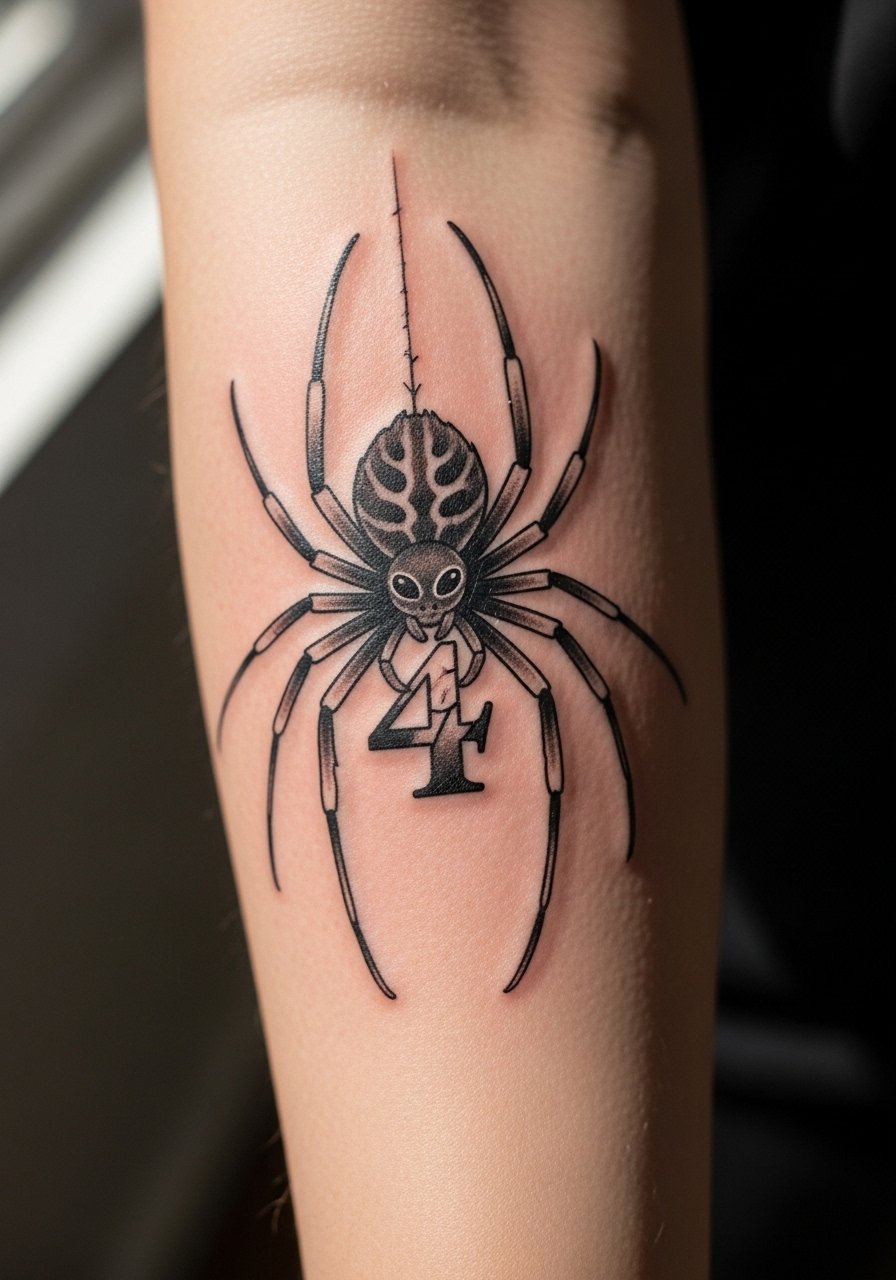
This version nods to Chrollo without being literal. I favor outer forearm placement because it lets artists use solid blackwork and contrast to age well. Tell your artist you want clear negative space around the number so it remains legible as saturation softens. Expect a 1 to 1.5 hour session with low to moderate pain. The most common mistake is trying to cram tiny numerals into a compact spider. If you plan to show it off, roll up a chambray shirt to frame the forearm without covering the ink.
3. Dotwork Phantom Troupe Web with a Central Number on the Calf

Dotwork brings texture rather than harsh lines, and the calf gives enough real estate for delicate stippling that ages into a meditative field. Ask for slightly wider spacing between dots so the web breathes instead of merging over time. This piece typically takes 1 to 2 sessions depending on complexity. Pain on the calf is generally low to moderate. A mistake I see is packing too much tiny dotwork into a 1.5-inch circle. For showing it off, cuffed slim chinos or cropped joggers keep the area visible without rubbing the fresh tattoo during the first week.
4. Micro Spider on the Back of the Hand, Number Variant
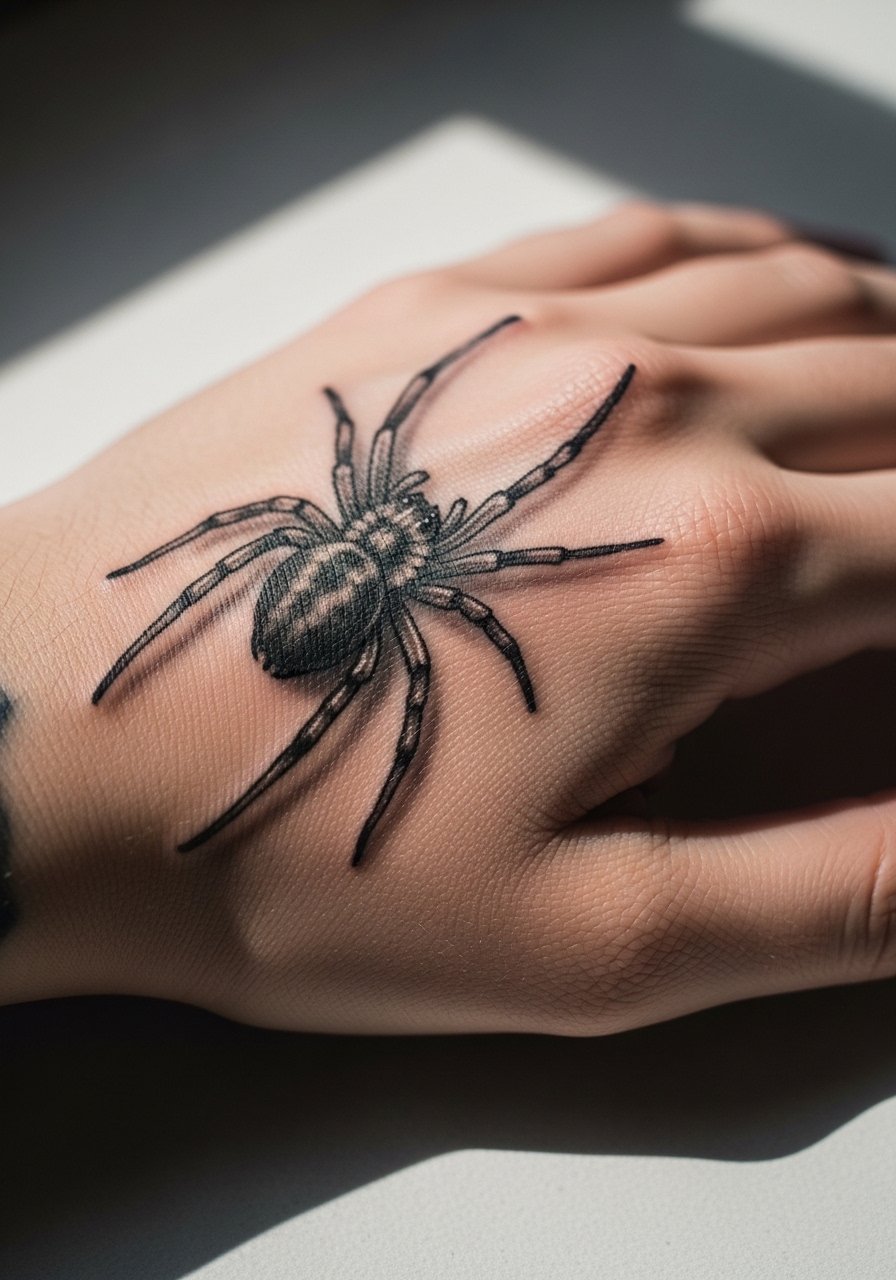
Hand tattoos are gritty and honest. They look authentic for troupe collectors but demand bold decisions. Hands move a lot and the skin there is thin, so I tell people to choose solid linework or blackwork versions rather than fragile fine lines. Expect high pain and likely a touch-up at 12 to 18 months. Artists are split about techniques for hand work. One camp prefers bold blackwork because it retains opacity. The other camp believes a precise shallow fine line can settle nicely if done correctly. Ask your artist which approach they use and why before booking. Keep in mind that hands can affect job interviews in some industries, so consider long-term visibility.
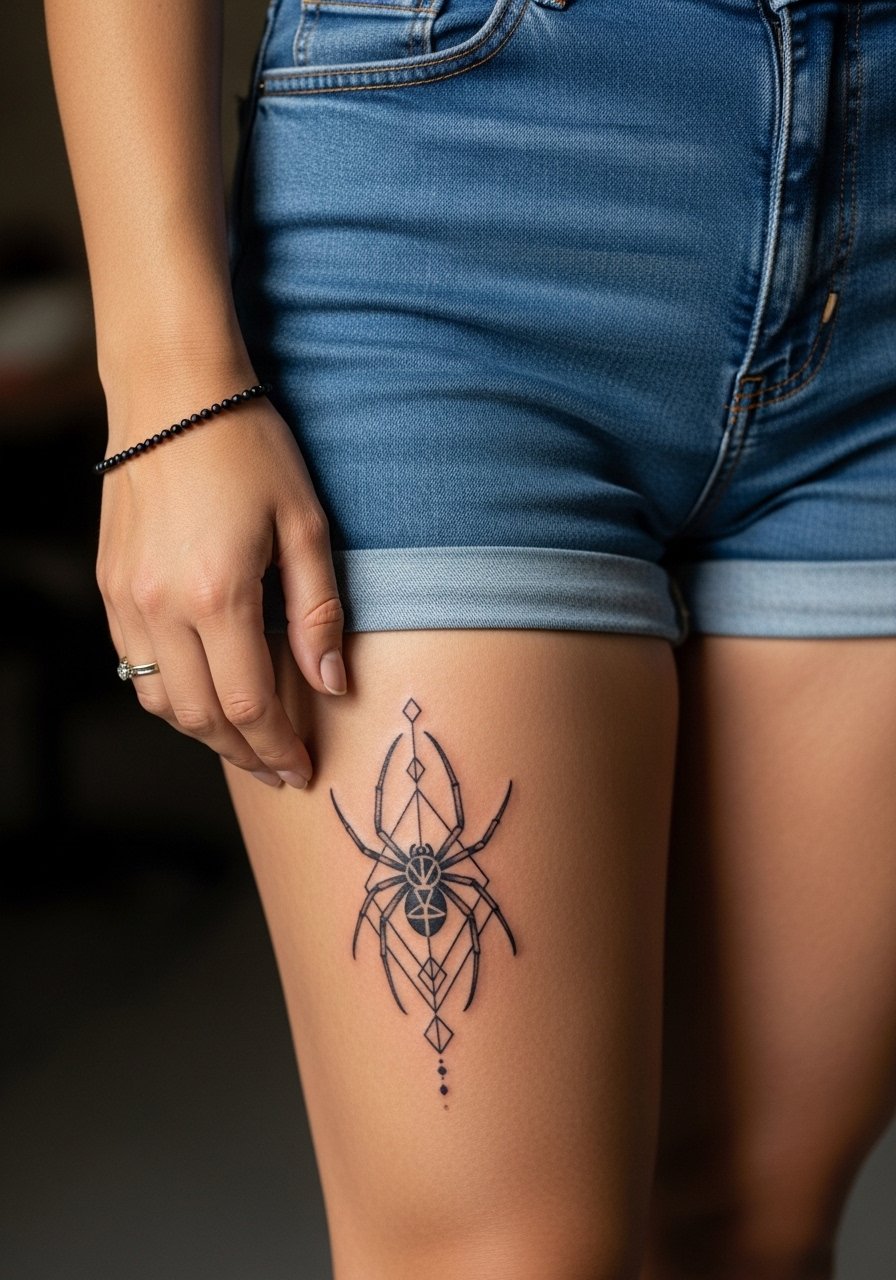
5. Neo-Traditional Spider with Anime Color Accents on the Thigh
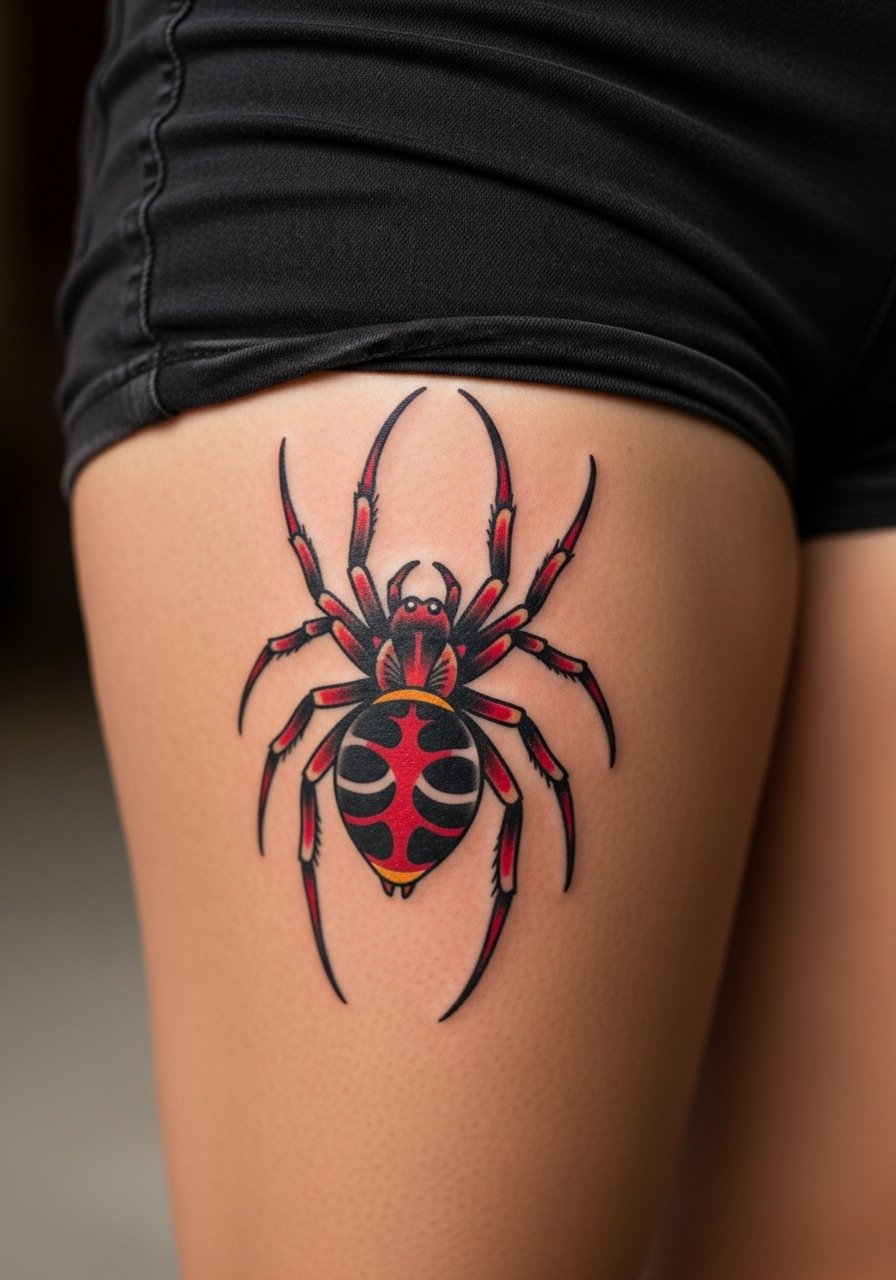
Thigh pieces let you experiment with color without risking fast fading from sun. The neo-traditional approach uses saturated fills and bold outlines that hold up well on fleshier areas. Tell the artist you want the red as an accent layer on top of a black base so the color reads against the blackwork. Sessions are typically two sittings for color saturation, with moderate pain and long breaks. A common mistake is choosing too small a color patch which then looks muddy after healing. Show it off with high waist swim shorts and sheer socks for a summer-forward reveal.
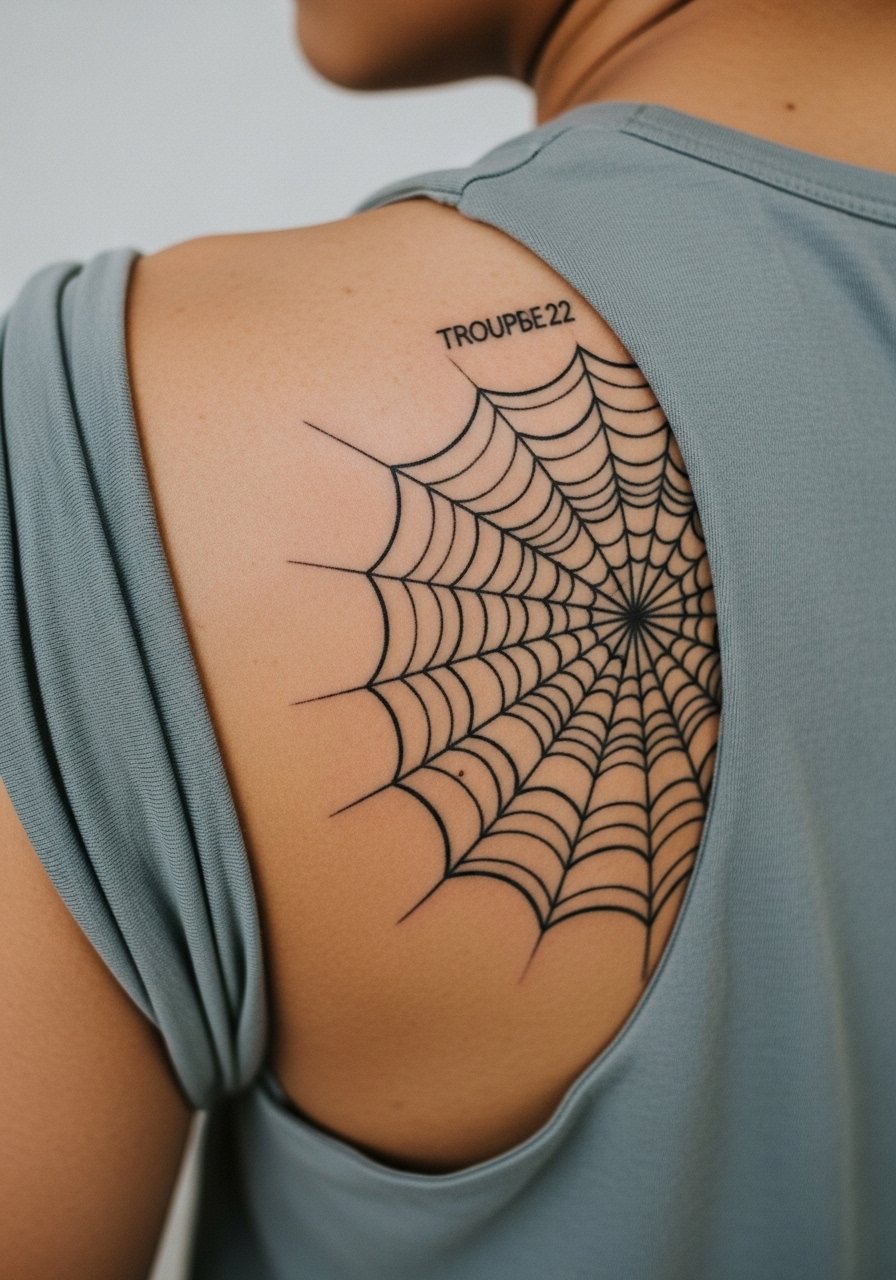
6. Fine Line Numbered Spider on the Collarbone
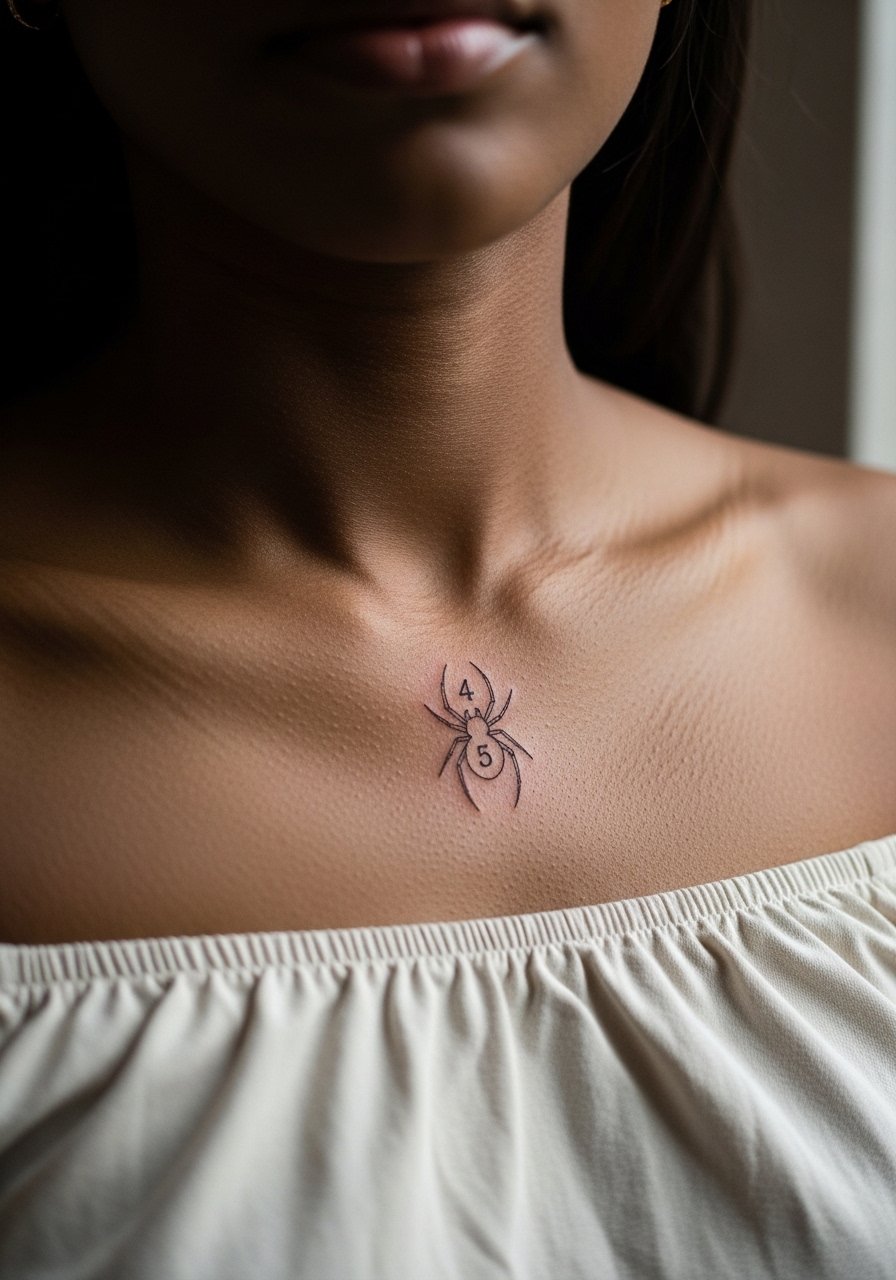
Collarbones can be beautiful for micro numbered spiders but they ask for mindful spacing. Fine line lovers argue the look is elegant and ages gracefully on low-movement spots. Skeptics say dense fine lines on the collarbone can blur if placed too close to bone. Both camps have valid points. My advice is to ask for slightly heavier line weight for numerals and for the artist to map the piece on you in different postures. Pain is moderate. For evenings out, a delicate chain sits well above a micro collarbone spider. Avoid layered chokers that rub against fresh ink.
Studio Day Picks
The inner wrist, forearm, thigh, and collarbone pieces above each have different session needs, so a small kit tailored to placement choices makes session day smoother.
-
Tea tree balm alternative. Lighter texture than heavier ointments, which is handy for wrist and hand pieces that need quick absorption without clogging fine lines.
-
Fast-dry aftercare spray. Useful for larger thigh or calf sessions when you want a low-mess option during warm months.
-
Rice bran salve style balm. Locks in moisture without heavy greasiness, helping delicate collarbone lines keep edge during the first week.
-
Blackwork maintenance oil. Thinner oils designed for saturated black areas support even settling on bold forearm fills.
-
Hustle Butter alternative. A widely used option for initial moisture that many artists recommend for solid black areas and color work.
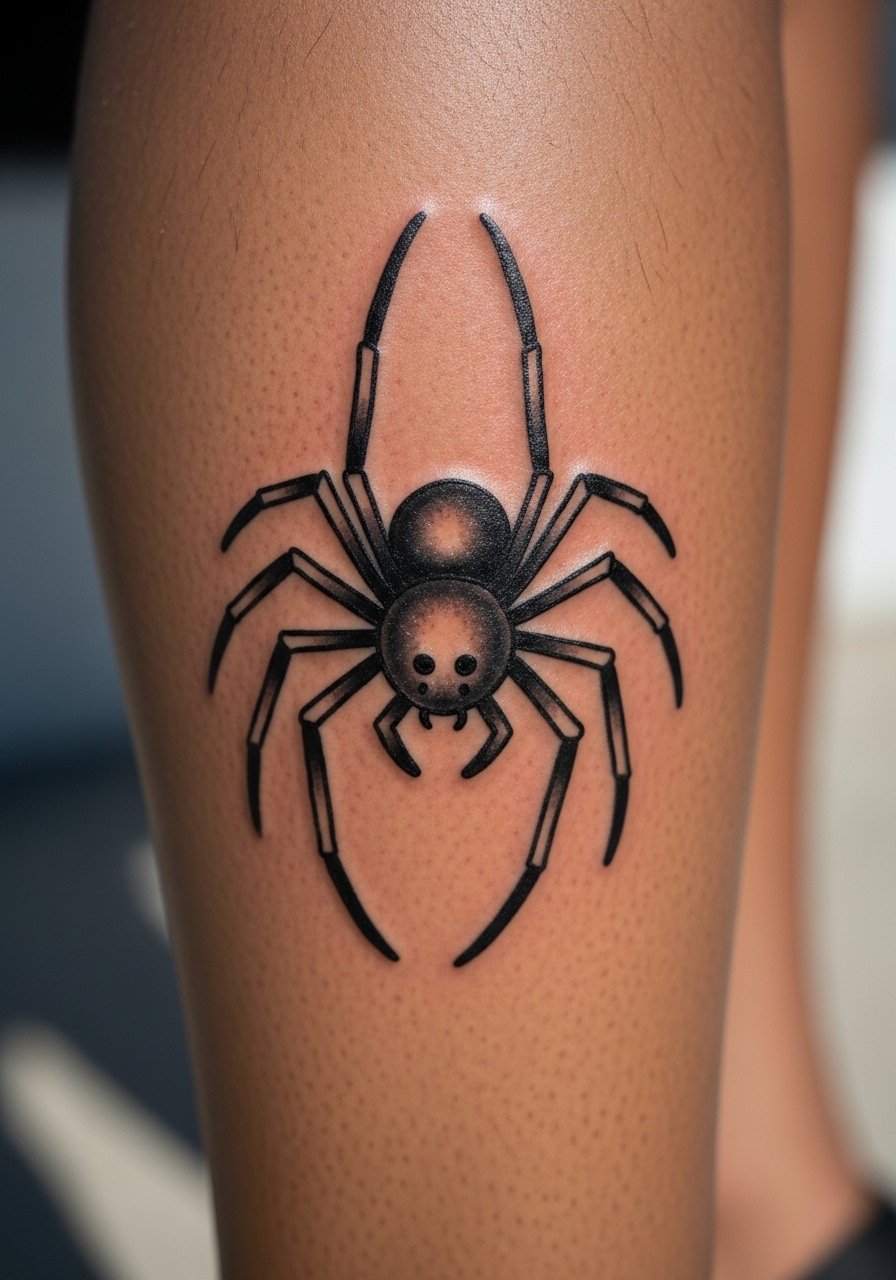
7. Blackwork Solid Spider Fill with Crossed Legs on Outer Forearm

Blackwork is the most reliable choice for high-movement areas because saturation holds up on darker skin tones and under constant flexing. This style suits outer forearm placement where you can go 3 to 4 inches and keep crisp edges. Ask for a deep, even fill without overworking the skin so saturation heals without scabbing out. Sessions can be 1 to 2 hours depending on size. A common mistake is requesting small blackwork that ends up looking like a smudge once healed. For session comfort, wear a loose button down shirt you can roll to give clean access while staying comfortable.
8. Ornamental Spider Web Incorporating Troupe Number on the Upper Back
Upper-back placements let you scale ornament and geometry without sacrificing clarity. The ornamental web elevates the spider into near-jewel patterns that frame shoulder lines. Tell your artist you want geometric fills with negative space around the number so the numeral never disappears. This often needs 2 to 3 sessions for crisp geometry. Pain is low to moderate for most people. Avoid the mistake of over-detailing a small area. Pair it with a sleeveless muscle tank to show the lines without stretching the skin.
9. Ignorant Style Chunky Spider on the Calf
The ignorant style embraces imperfection and punk energy. It works well on the calf where the thicker, chunky lines read as intentional roughness rather than poor technique. Session time is usually short, under an hour. The main mistake is asking for naive proportions without agreeing on scale first. Tell your artist whether you want obvious unevenness or controlled chunky strokes. Healing on the calf is forgiving. Keep the area aired and avoid tight socks for the first week to preserve edge.
10. Micro Spider Between Knuckles
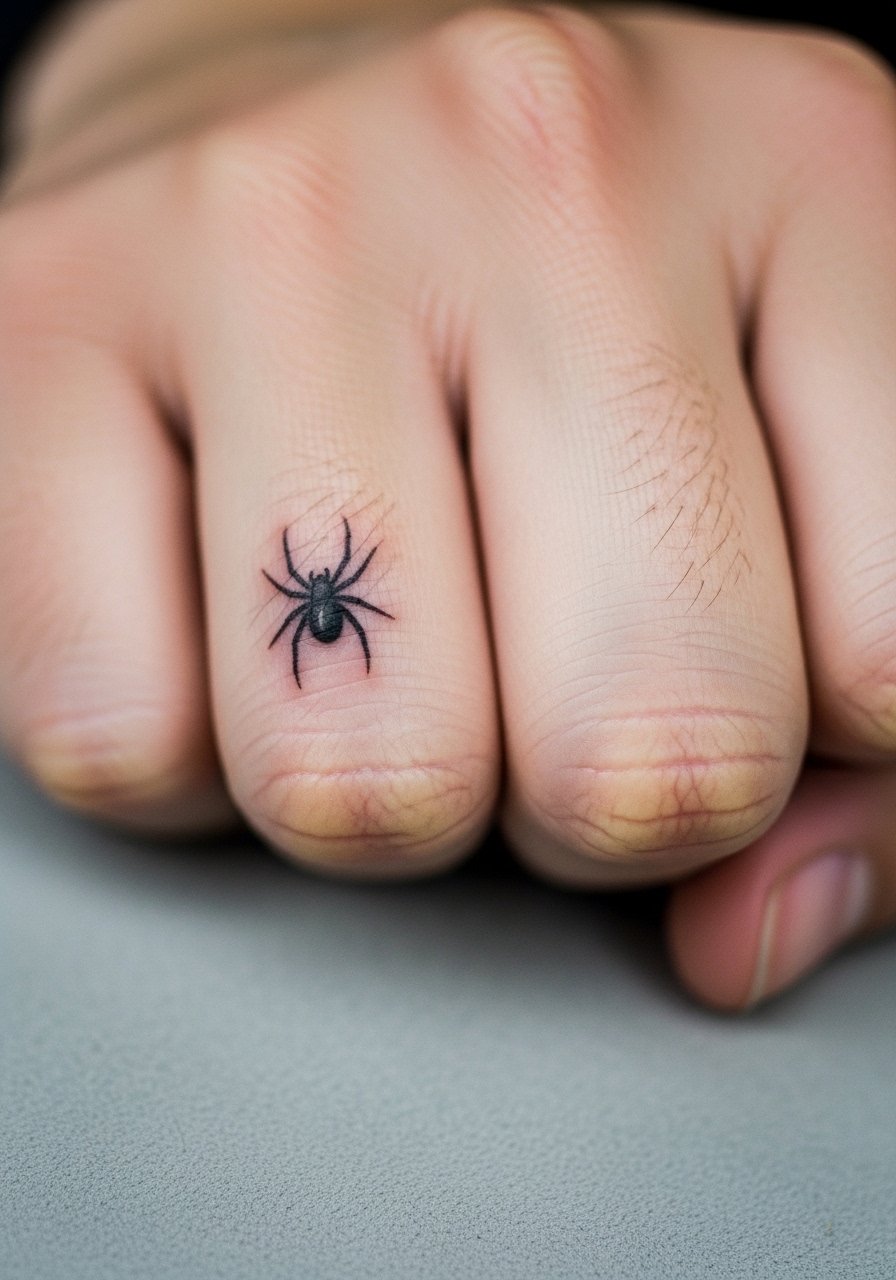
Knuckle placements are distinctive but high maintenance. Expect rapid fading because of constant motion and washing. I advise going slightly larger than you think and asking for bold contour lines rather than ultra-fine detail. The session is quick and the pain is high because you are close to bone. A typical mistake is treating knuckle work like regular hand work. This piece will almost always need touch-ups and occasional re-inking to stay crisp. If you do choose it, plan for ongoing maintenance rather than a one-and-done solution.
11. UV-Reactive Hidden Spider on the Inner Wrist
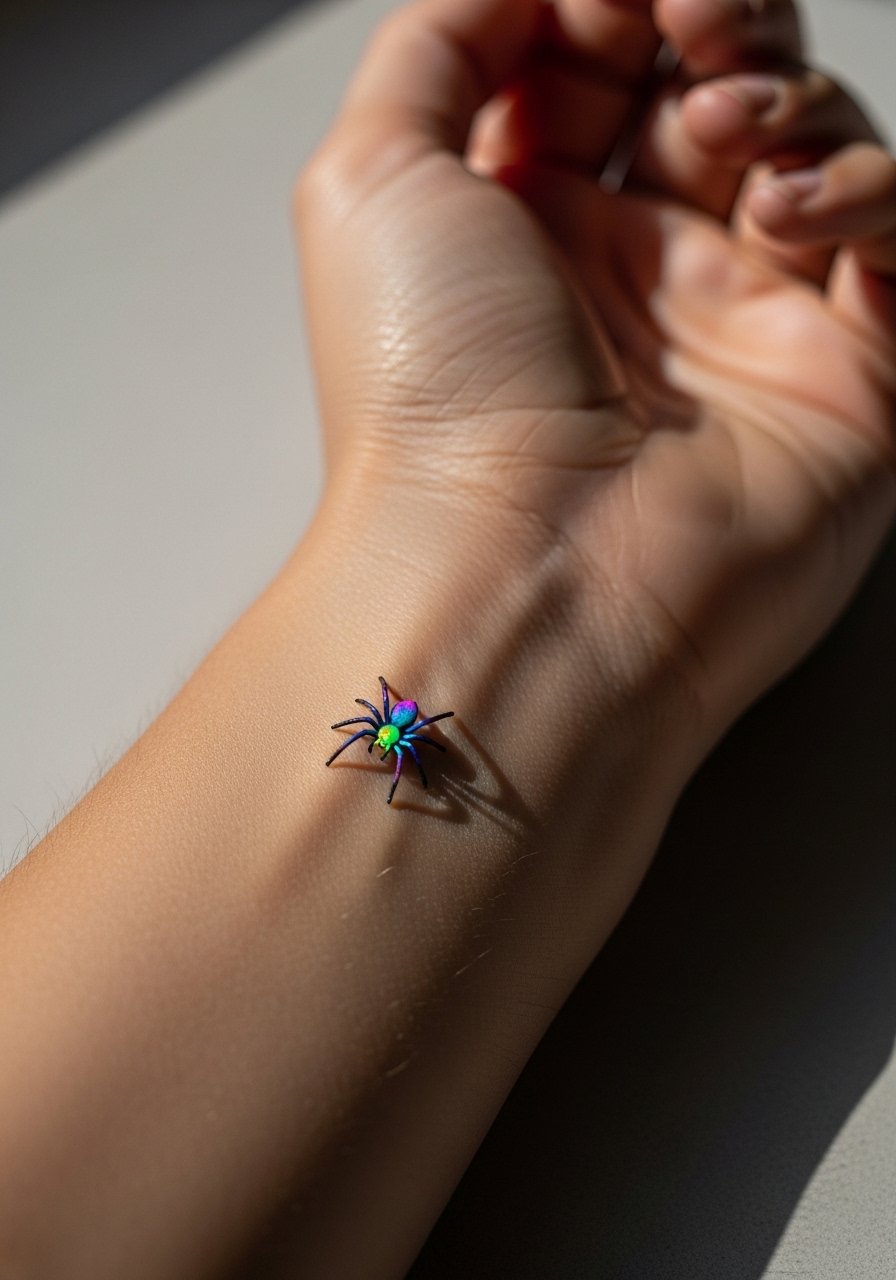
UV-reactive ink can hide in daylight and reveal under blacklight, which makes it perfect for a hidden troupe nod. This requires a conversation about placement and long-term visibility because UV pigments age differently. Ask your artist about their experience with UV and request a patch test if possible. The inner wrist gives discreet exposure and is a moderate pain area. A common mistake is assuming UV will behave like standard color. Expect different touch-up needs and be mindful of outdoor sun exposure because UV pigments can fade faster. For casual showing, a slim black tee frames the wrist without competing with the hidden effect.
12. Patchwork of Numbered Spiders Connected by Tiny Web Fillers on the Upper Arm
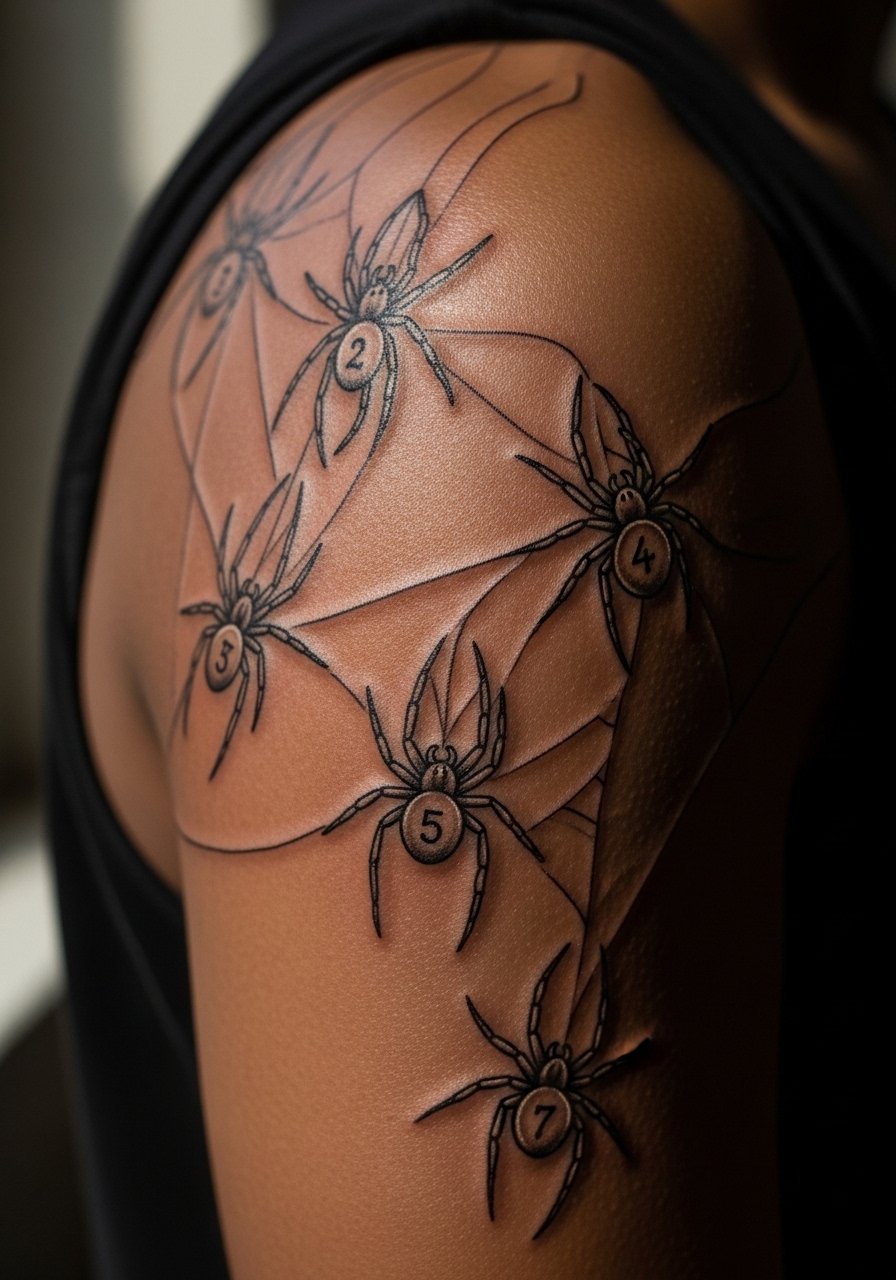
Patchwork lets collectors mark multiple troupe members without full sleeves. I prefer spacing each micro spider with minimal web links so each number keeps integrity over time. Tell your artist you want variation in scale so the eye reads the patch as a set, not a single blob. Expect a longer single session or two shorter sessions depending on count. A common mistake is clustering numbers too tightly which leads to merging. For session comfort and access, a rolled sleeve or charcoal chambray button down makes the area easy to work and photograph.
13. Apple Watch Gap Scaled Spider on the Wrist Band Area
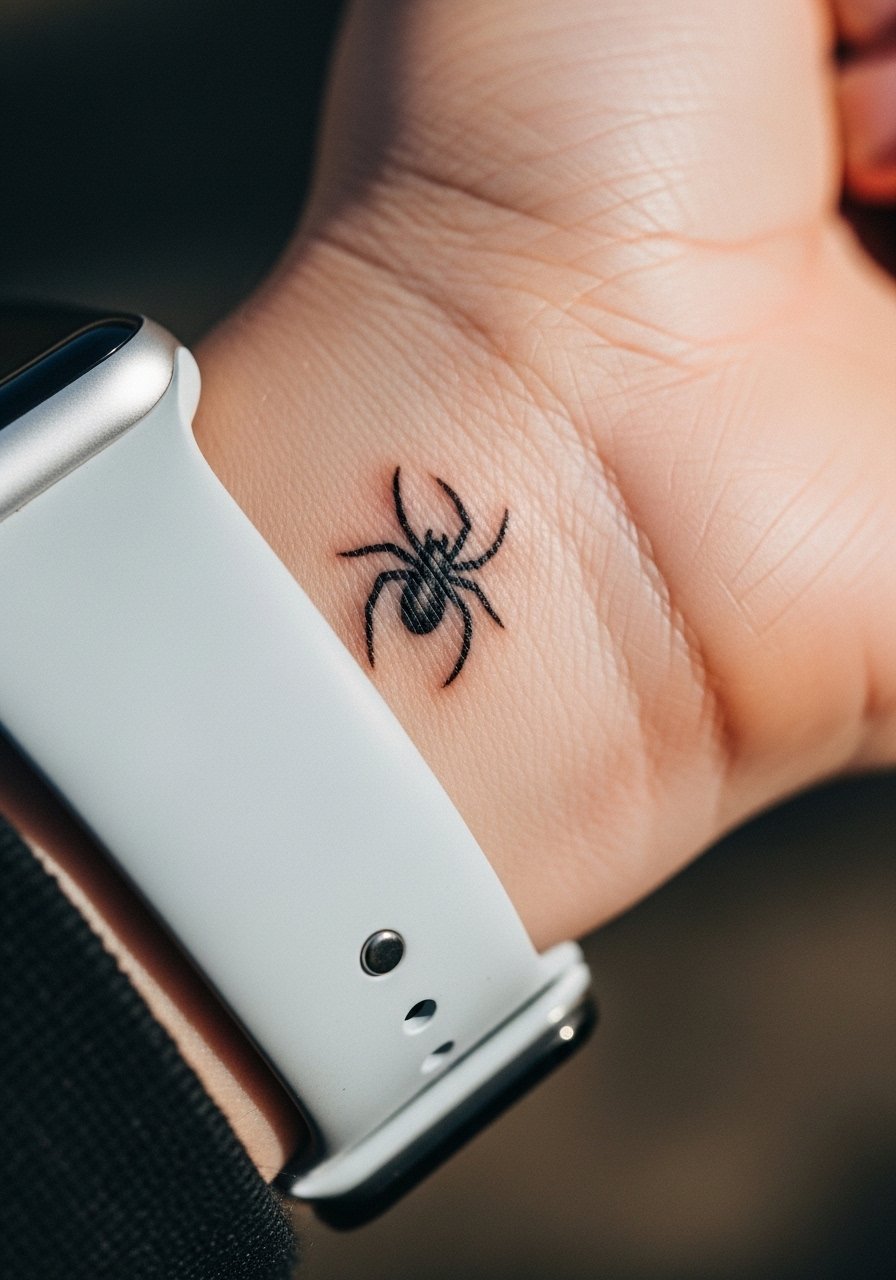
If you wear a watch daily, plan the spider where the band frames it. Scaling to the watch gap creates a tech-friendly placement that avoids friction. Tell the artist the exact diameter of your watch gap and get a stencil mock-up with the band on. Pain is moderate. A common mistake is not testing the stencil with the watch on, which leads to misplacement when you return to wearing the device. This placement benefits from slightly thicker lines than a typical micro so the spider does not get lost under daily wear.
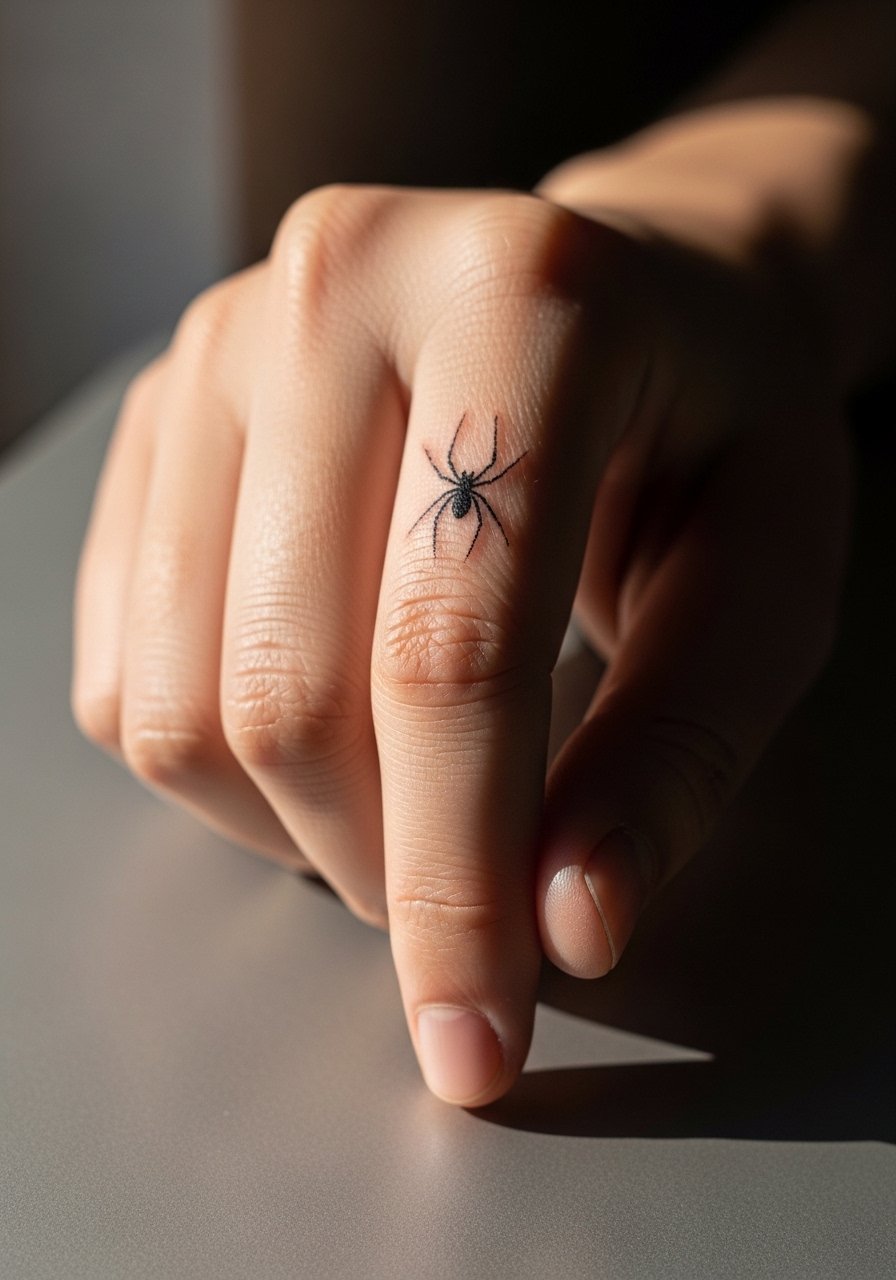
14. Micro Realism Spider on the Side of the Index Finger
Side-of-finger placements look incredibly detailed up close but face fast wear from friction. For realism at this scale, ask for high-contrast black and gray shading rather than subtle gradients. Expect high pain and a short session. The most common mistake is asking for tiny photorealism with thin shading that disappears quickly. Plan on a touch-up at the one-year mark. Keep lotions off the area during healing and be ready for maintenance if you use your hands heavily.
15. Jewel-like Ornamental Spider on the Upper Thigh
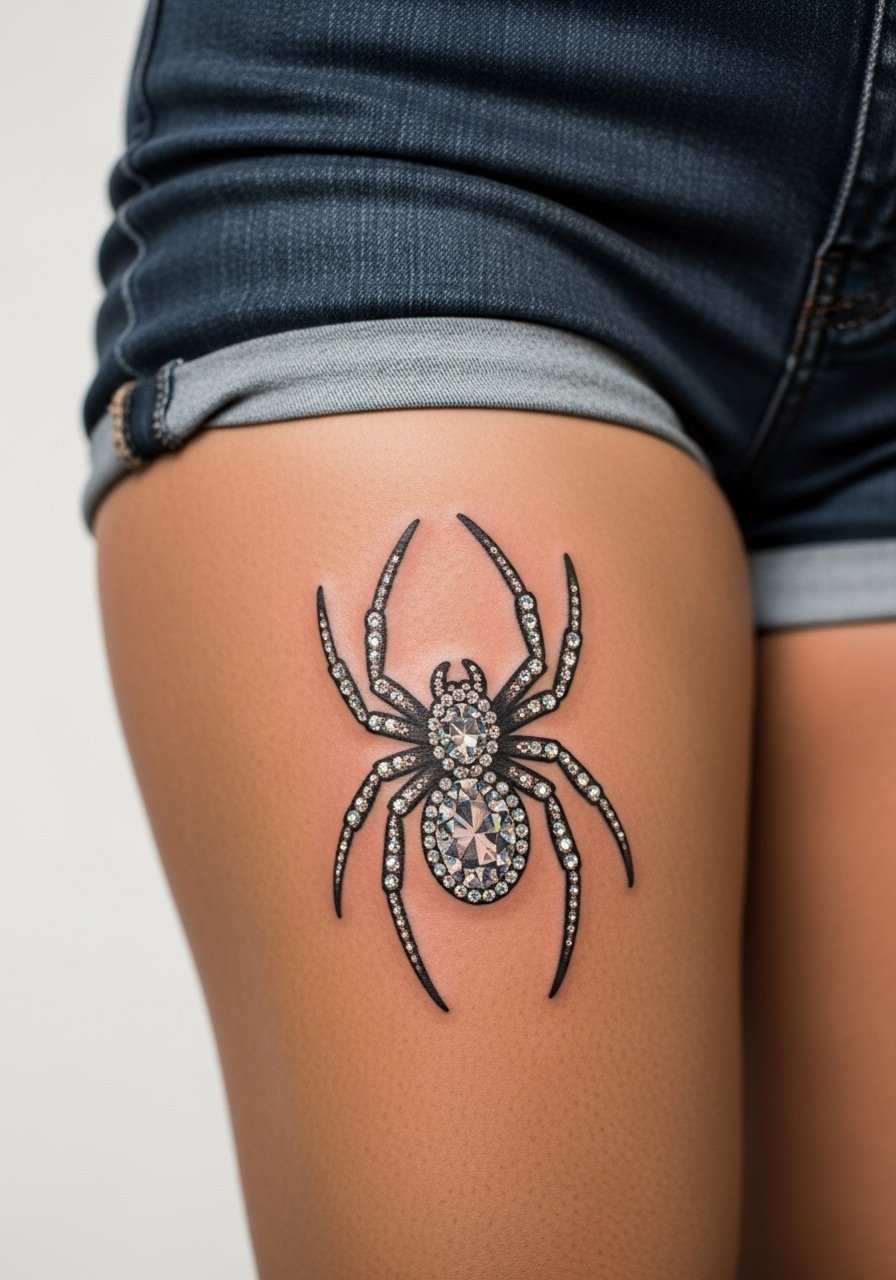
Thighs are forgiving for jewel-like ornamentation because they avoid sun exposure and repetitive abrasion. I suggest combining geometric fills with clear negative space around central numerals to preserve the number's legibility. Sessions take longer for symmetry and color, often in two sittings. A mistake is compressing too many tiny gems into a small area. For summer showing, pair with sheer athletic socks or high-waisted shorts to give glimpses without overstretching the skin.
16. Minimal Ankle Spider That Tucks Behind the Shoe Line
Ankle pieces are low-key and easy to hide, but they face shoe friction and socks. Scale this one for placement behind the shoe line to minimize chronic rubbing. Tell the artist you want a compact composition with slightly reinforced outlines. The session is short with low to moderate pain. A common mistake is placing too low where shoes scuff the pigment. For first shows after healing, cuffed slim chinos or leather boat shoes display the tattoo without letting footwear destroy the edges.
17. Stipple-Shaded Vintage Spider on the Ribcage
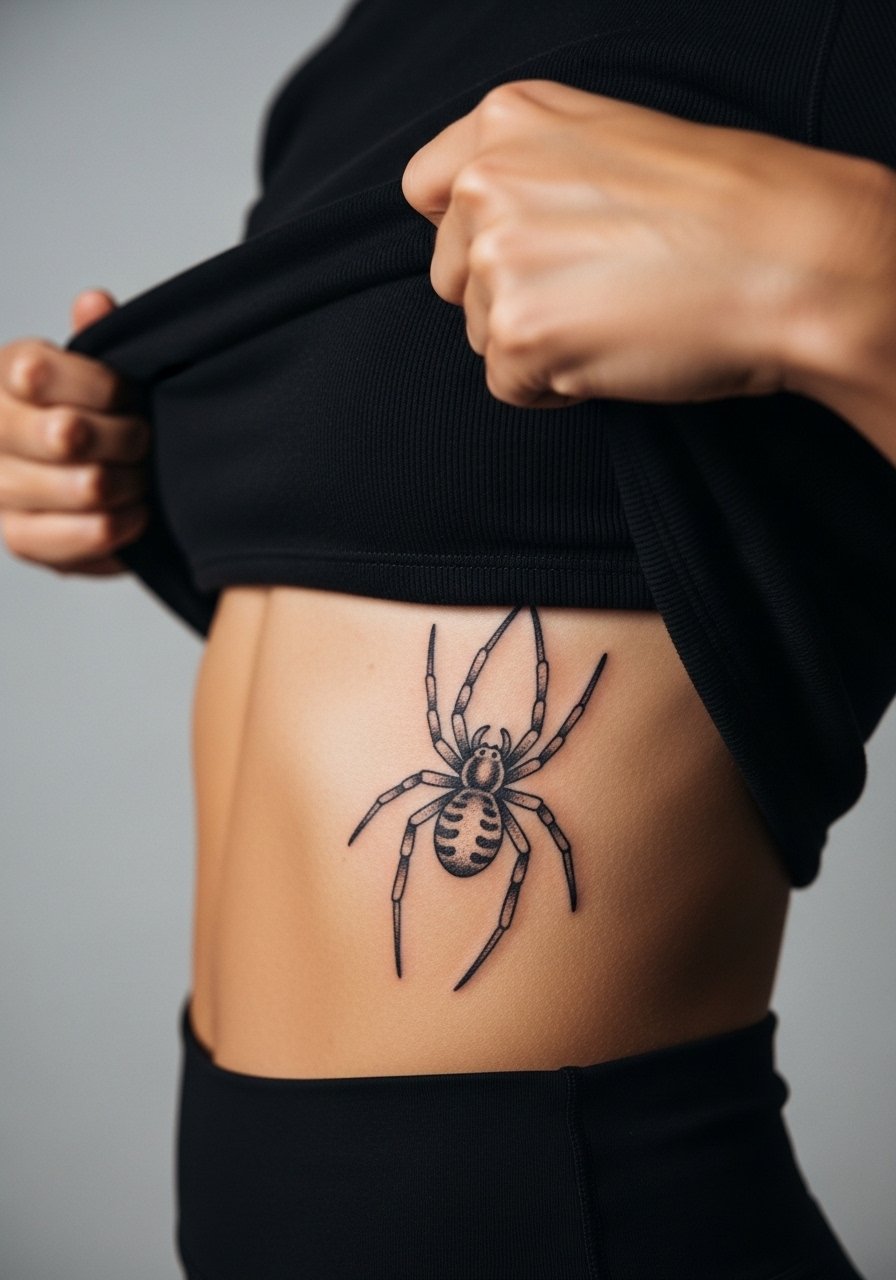
Ribcage placements age unpredictably because of skin stretch and motion. Stipple shading gives a soft, textured look that can tolerate the area better than dense line clusters. Fair warning, ribs are a 7 out of 10 on most pain scales. The piece often heals with some softening of dots by year two. Artists disagree on fine line on ribs. One camp says the stretch blurs lines within two years. The other says with proper depth and spacing, fine line can settle fine. Ask your artist where they stand and see healed rib photos from their book.
18. Ornamental Shoulder Cap Spider with Geometric Fills
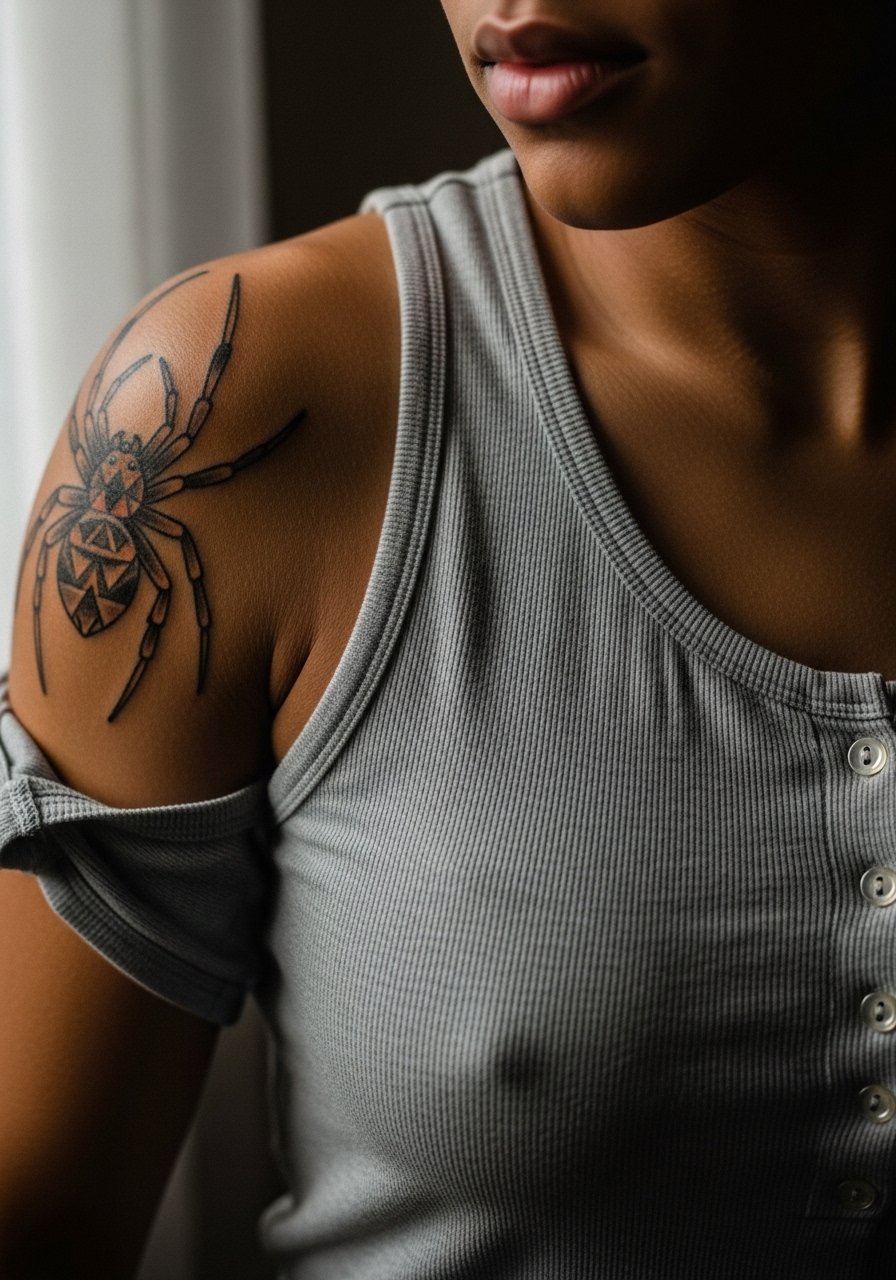
The shoulder cap is a low-friction zone that keeps ornamented geometry crisp for years. I recommend clear spacing between shapes and a slightly heavier outer line to protect geometry density. Sessions are typically under two hours. The typical mistake is trying to compress a full ornamental pattern into too small an area. For easy showing, wear a button front tank top so the shoulder sits open without stretching the skin.
19. Micro Spider Near the Thumb Web
The thumb web area is tactile and sees a lot of hand movement. Small spiders here look striking but require thicker outlines to survive washing and grip motion. Sessions are quick and pain is moderate to high depending on proximity to bone. A common mistake is asking for ultra-detailed legs that simply do not hold. If you want longevity, pick a compact silhouette rather than fine filigree.
20. Neo-Ornamental Thigh Spider with Geometric Negative Space
Negative space in ornamental pieces prevents the design from becoming a flat black mass as it ages. On the thigh you can balance color accents with large negative fields. Ask the artist to map how the negative shapes will look at reduced saturation so you avoid dense black blobs later. Sessions are multi-stage for symmetry. Avoid packing too many details into a small patch. For session ease, loose basketball shorts or swim trunks help access the thigh without constriction.
21. Micro Spider Web That Connects a Series of Tiny Numbers Along the Spine
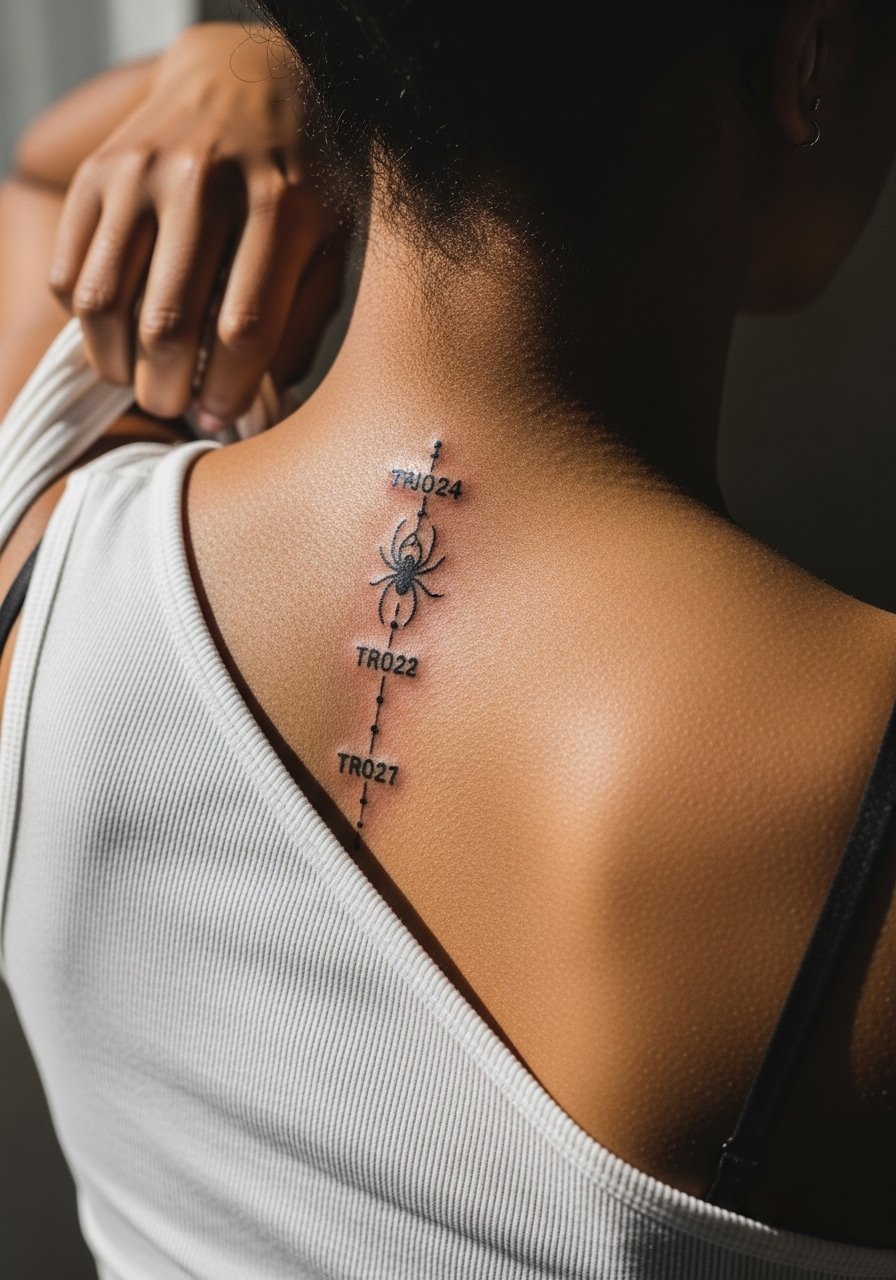
A vertical spine run reads like a subtle timeline. Spacing is key here. Ask your artist to test the stencil in standing posture and while bending so the numbers do not sit over spinal curves that distort when you move. Pain varies but spine-adjacent work can be more sensitive. A common mistake is failing to consider clothing seams that rub the area. Go for slightly bolder numerals than you might otherwise pick so they stay legible over time.
Frequently Asked Questions
Q: Will a small fine line troupe spider on my wrist blur faster than a blackwork version?
A: From what I have seen, fine line on high-movement spots like the wrist tends to lose crispness sooner. Blackwork keeps contrast and often looks cleaner after one to three years. If you want a fine line look with better longevity, ask your artist for a slightly heavier line weight and plan a touch-up at year two.
Q: How do I find a guest spot or convention artist who does Phantom Troupe pieces?
A: Search hashtags like #PhantomTroupeTattoo and #HunterxHunterInk on Instagram, check Tattoodo filters for "anime blackwork" in your city, and watch TikTok for guest spots during convention season. Booksy and local subreddit threads are good for spotting guest spots with day rates.
Q: Are UV-reactive inks safe and do they require different healing?
A: UV inks need an experienced artist and a patch test. They can fade differently from standard pigments and sometimes need more frequent touch-ups. The healing routine is similar but pay extra attention to sun protection because UV pigments are more sensitive to outdoor exposure.
Q: Should I test placement with henna or a stencil before committing to a numbered spider?
A: Yes. A henna test or a stencil photograph helps you judge scale and legibility, especially for tiny numerals. Bring reference images and ask the artist to position the stencil while you move your arm so you see how it behaves in real life. A simple in-studio mock-up can prevent common placement regrets.
Q: Does skin tone change which style I should choose for a troupe spider?
A: It does influence line weight and fill choices. Darker skin tones generally benefit from stronger outlines and larger negative space so numerals read well. I have seen bold blackwork age better across a range of tones. Ask an artist experienced with diverse skin for healed photos to match to your tone.
Q: What should I wear to the appointment for the collarbone or upper chest pieces?
A: For collarbone or upper chest sessions wear an off shoulder blouse or a wide-neck shirt you can shift aside. That gives the artist access while keeping you comfortable and modest during the session.
