
Fine line and sketch-style wrap pieces are everywhere on saved boards, but the ones that still read clearly after a few years follow a quiet rule: spacing matters more than tiny detail. The sketch approach lets linework breathe while tracking motion around the limb, so a design that looks loose on the stencil can still read sharp long term. Below are 27 wrap-around ideas with what to ask for in consults and how they age.
1. Loose Botanical Wrap on Inner Forearm
I've seen this one hold up better than denser floral sleeves when artists give each stem room to breathe. Ask your artist for slightly varied line weight and subtle stipple shading for depth, not heavy saturation. Expect a 3 to 4 out of 10 on pain, quick session time for a single pass, and a likely touch-up at year three for thinner stems. Common mistake is packing tiny petals into a narrow band, which blurs. For showing it off, rolled-up sleeves and a thin chain pendant necklace keep attention on the forearm without covering the wrap.

2. Scribbled Wave Cuff Around Wrist
Fair warning, the wrist is high-motion and friction-heavy, so finer sketch lines fade faster there. This cuff works best as a bold sketch with occasional bolder anchors to preserve the silhouette as it heals. Tell your artist to keep negative space between swirls and to avoid ultra-fine parallel lines. Session feels short but stinging near the bone. A thin watch or minimalist leather strap watch complements the cuff without overcrowding the wrist.

3. Pencil-Sketched Chain Link Around Upper Arm
Most people pick chain links because they like the movement around the bicep. The biggest mistake is making the links too small. Links need scale to avoid merging as the skin moves. Expect moderate pain on the outer upper arm and a session that can be completed in one to two hours. For the session, wear a loose button-down shirt so the artist can roll the sleeve without pulling fabric. This placement ages predictably well if spacing is prioritized.

4. Continuous Mountain Range Around Forearm
There is a visual impact to a wrap that reads from every side of the arm, and mountains in sketch style do that without heavy shading. When you consult, show references that emphasize silhouette, not tiny rock details. The inner and outer forearm differ; inner forearm retains fine lines slightly better. Expect a low to medium pain level and a one-session completion for a simple band. Pair with a rolled-up linen shirt when you want to show the piece off.

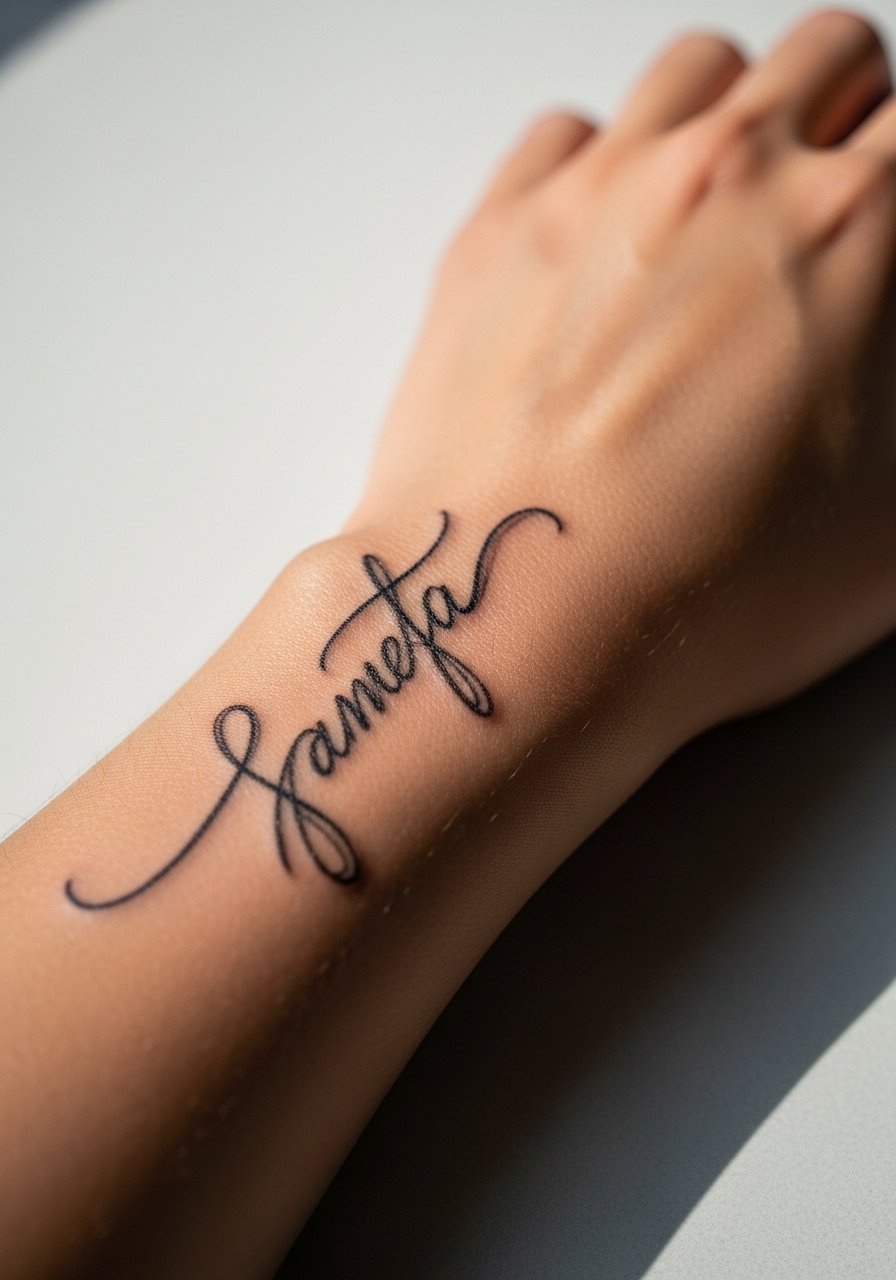
5. Sketchy Script Band That Wraps the Wrist
Consultation lead, bring exact wording and font examples so the artist renders readable text on a curve. Lettering on a wrap needs slight spacing adjustments compared with flat placements. Hands-on risk is that tiny lettering loses clarity with motion and repeated washing. Most artists recommend slightly bolder strokes than you might like at first. For showing off, delicate stacked bracelets pair well, or try a racerback tank when you want the wrist visible.
6. Ribcage Sketch Band with Sparse Florals
Artists split on fine line on ribs. One camp says the skin stretch and breathing blur thin lines within two years. The other camp argues that with measured needle depth and extra spacing, fine line settles fine on the ribcage. Ask where your artist stands and request test stencils with spacing adjustments. The ribcage rates high on pain, usually a 7 out of 10, and sessions can run long if you want wrap continuity. For the appointment, wear a cropped athletic top you can lift, and plan for slower breathing.

Pack Smart
The pieces above include high-motion zones and sensitive areas, so these items smooth the session and first-week healing.
- Stencil transfer paper kit. Helps preview line placement on curved areas like forearms and ribs so you can tweak spacing before the needle hits skin.
- Low-residue numbing cream. Applied per artist guidance it can ease ribcage or wrist discomfort without leaving a film that interferes with linework.
- Thin protective film roll. Useful for finger and wrist wraps exposed to frequent washing and friction.
- Fragrance-free gentle body wash. Cleanses healing wrap areas without stripping moisture that keeps fine lines crisp.
- Aquaphor healing ointment. Thin application for the initial days helps protect delicate sketch lines while they form scabs.
7. Continuous Doodle Skyline Around the Bicep
Personal observation: people who want urban energy pick skyline wraps for the bicep because motion adds life to the sketch. Keep the skyline minimal with a few landmark shapes rather than packed detail. The upper arm tolerates medium pressure, so linework can be slightly denser than wrists. Ask for stitch-like stipple to suggest windows instead of tiny filled rectangles. For showing it off, short-sleeve tees or a loose button-down shirt pulled aside frames the wrap.

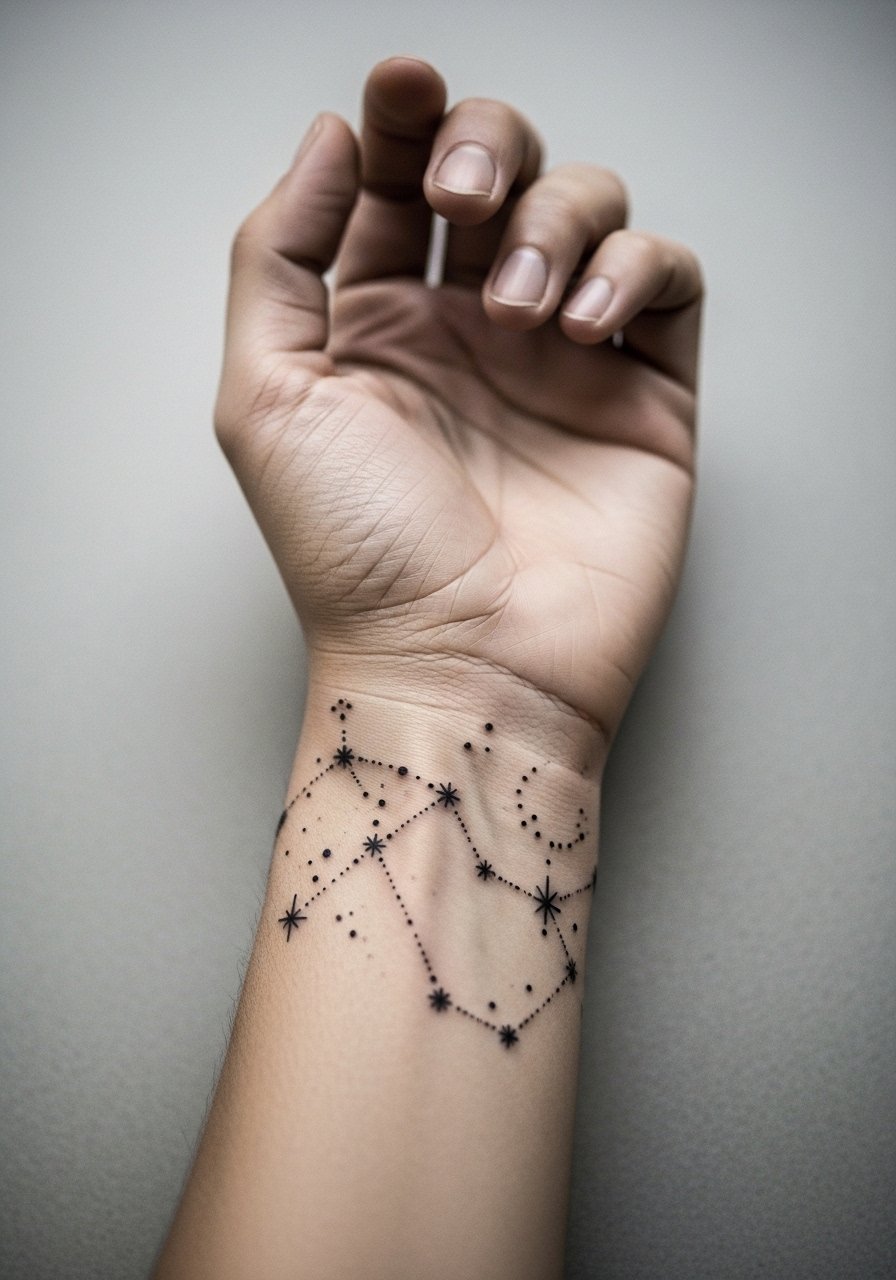
8. Minimalist Constellation Ring That Encircles the Wrist
Mistake lead, the common error is plotting tiny dots too close. Constellations need breathing room or the stars blur into a smudge. The wrist placement means frequent handwashing will speed fade in tiny dots. A single session with a conservative dot scale delivers years of readable pattern. Pair with dainty bracelets or a thin chain pendant necklace when the piece sits higher on the wrist.
9. Ribboned Geometric Band That Winds the Calf
Pain warning lead, the calf is often moderate in pain and takes ink well across multiple sessions. This wrap benefits from slightly heavier anchor lines with sketchy internal geometry that is intentionally imperfect. The visual impact holds at a distance and still reads close up. Wear a loose drawstring linen pant during the session so the artist can easily access and roll the pant leg. Expect touch-ups at year four for lighter internal strokes.

10. Continuous Sketch Fox Tail Around Thigh
Consultation lead, bring reference photos that show scale on curved anatomy. The thigh can handle fine detail, but tight repeated curls will merge over time if placed too small. Inner thigh is sensitive so expect higher pain there than the outer thigh. For the session wear high-cut shorts you can shift slightly, and for evenings wear an open-back midi dress to show the wrap without tugging fabric. This placement benefits from a slower, two-pass session for line consistency.

11. Spiral Vine That Wraps the Ankle and Foot
Visual impact lead, a wrap moving from ankle to the upper foot reads delicate and intentional when lines stay airy. Foot placement involves friction from shoes, so sparse linework near toe joints helps avoid early blurring. Sessions can be tingly and finish in one short sitting. For the session wear sandals or shoes that slip off easily, and for showing it off try rolled jeans or a long skirt lifted slightly.

12. Sketchy Arrow Band Encircling the Upper Wrist
Mistake lead, the arrow motif fails when the shaft is drawn too thin relative to the tail and head. Ask your artist to keep a slightly heavier marker for the shaft so the directional moment holds up. This area fares better with one clean pass rather than multiple overworking passes. The session is quick, and touch-ups may be needed around year three for the arrow tail. Pair with a minimalist leather strap watch to balance the directional focus.

13. Continuous Floral Vine That Spirals the Collarbone
Styling lead, the collarbone wrap benefits from wardrobe choices because it sits near outfits that either reveal or hide it. Ask your artist to use slightly bolder stems near the bone so the silhouette survives sun exposure. The collarbone is medium pain and needs careful session positioning. Pair the piece with an open-back midi dress or a thin chain pendant necklace that sits above without crowding the floral.

14. Wrapped Stippled Crescent That Encircles the Arm
Aging/healing lead, stipple shading reads soft at six months and can diffuse into cloudiness by year five if dots sit too close on a wrap. Request dot spacing that creates shadow without merging, especially around high-motion zones like the elbow crease. The session may be longer if you want a consistent wrap that crosses joints. For casual showing, a rolled sleeve or a loose button-down shirt frames the crescent without compressing it.

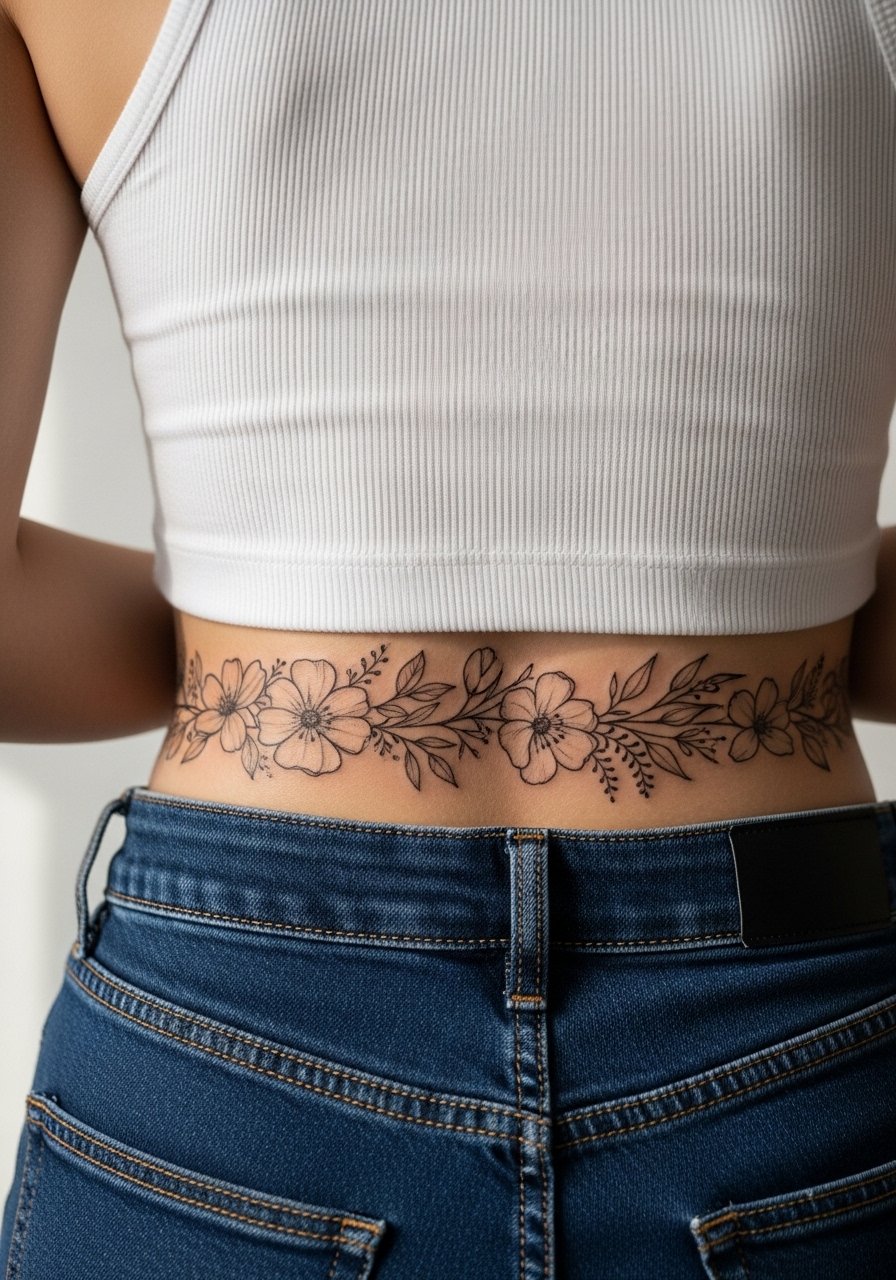
15. Scribble-Style Floral Belt Around the Lower Back
Personal observation, lower back wraps age dependably because the skin is less exposed to sun, but tight floral details can still merge if overworked. Subject should wear a tank top with high-waisted bottoms during the session so the artist has clean access. This placement is discreet for careers that ask for covered tattoos. For showing off at the beach try a high-waisted bikini bottom to expose only the band.
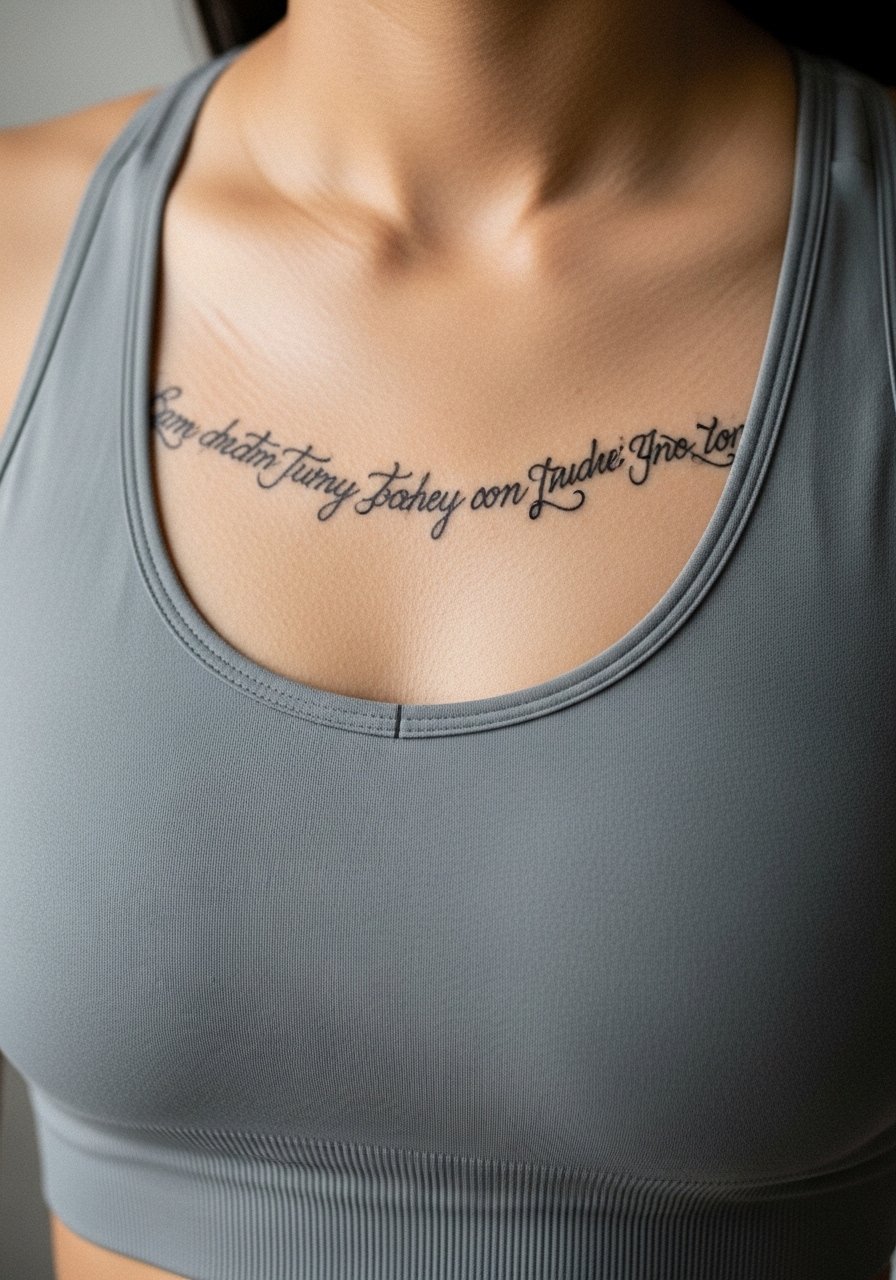
16. Continuous Script That Winds Across the Sternum
Controversy lead, chest script divides some artists. One camp worries about the sternum's movement and says thin scripts lose shape fast. The other camp maintains that with correct spacing and slightly heavier downstrokes, script can last. For this placement wear a fitted sports bra to the session so only the sternum area is exposed. Expect a moderate to high pain level and plan for a touch-up if you prefer very thin lettering.
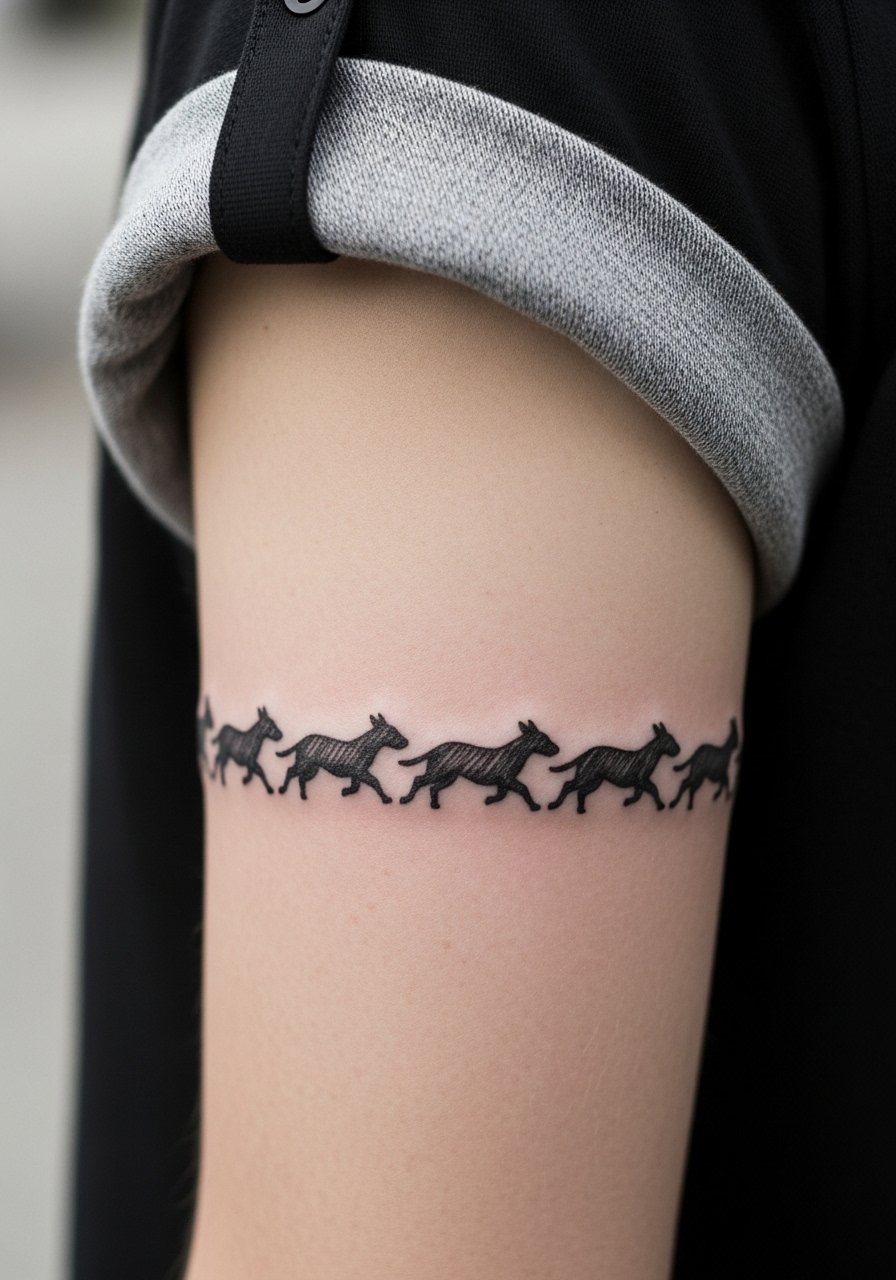
17. Continuous Animal Silhouette That Wraps the Upper Arm
Visual impact lead, a single silhouette that repeats around the arm reads like motion study when rendered in sketch strokes. The outer upper arm tolerates denser anchor lines, but minute interior detail will fade faster. Ask for consistent spacing so the silhouette remains legible at a glance. A casual tee rolled at the sleeve edge is perfect for showing it off, and a minimalist leather strap watch balances the composition when the wrap sits higher.
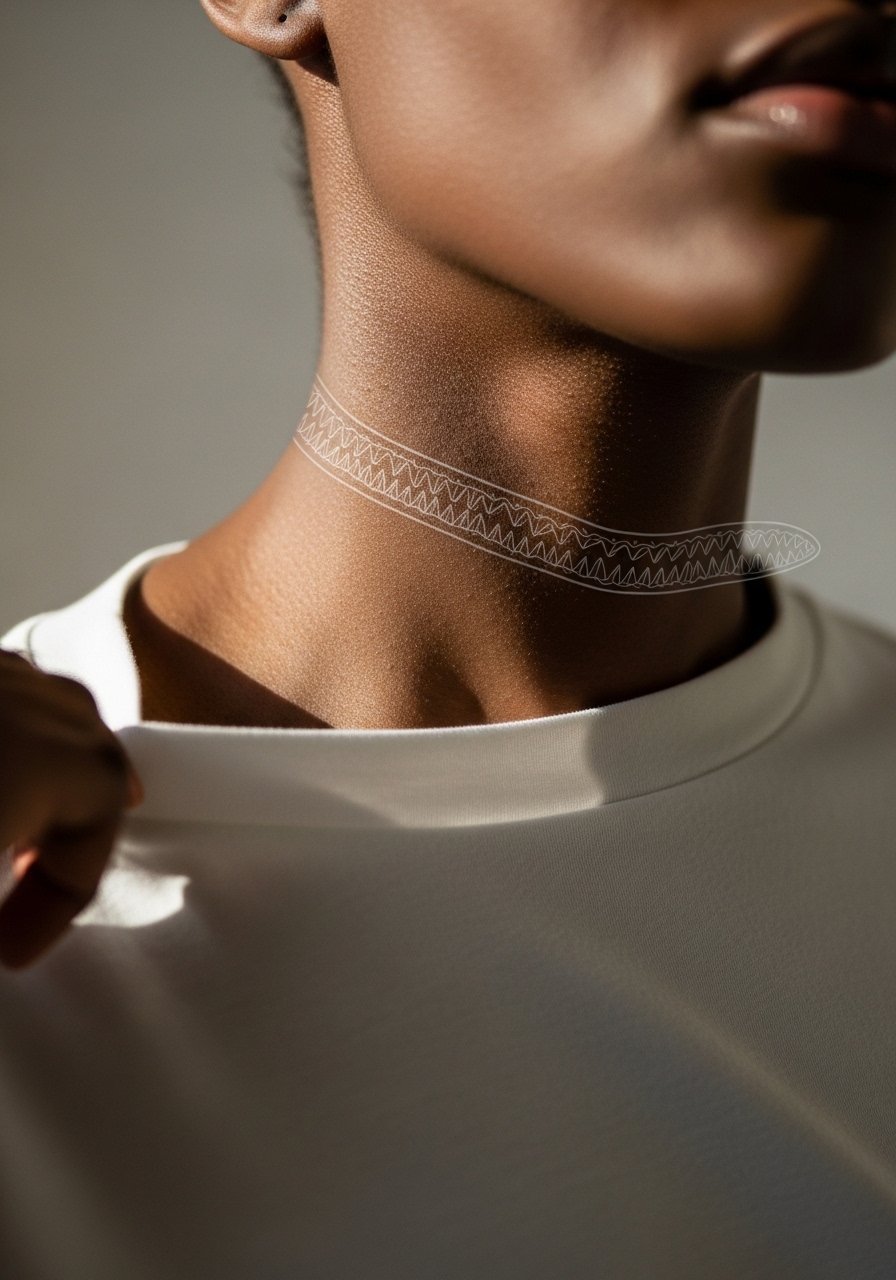
18. Floating Linework Band That Circles the Throat
Pain warning lead, neck wraps are sensitive and more visible in certain professions, so consider placement carefully. Artists often keep neck sketch lines bolder than expected to survive daily sun and friction from collars. For the session wear a wide-neck shirt with the collar pulled to one side so the artist can work without tugging. If you need discretion for work, discuss cover options before booking.
19. Wrap-Around Map Band on the Upper Forearm
Consultation lead, a map band needs scale adjustments for curves and joints. Small country outlines that look elegant on paper can blur on skin if placed too close together. The forearm handles linework well, making this a durable sketch choice. A thin sunscreen on exposed forearm days matters for preservation, and when you want to show it off try rolled sleeves with a thin chain pendant necklace that sits above the wrap.

20. Overlapping Wave Lines That Coil the Calf
Personal observation, overlapping waves retain a sense of motion and rarely feel dated because they mimic natural line flow. The calf allows slightly denser anchor lines, but overlapping strokes should have deliberate space to keep the design readable. For the session wear pants that can be rolled or drawstring linen so the artist can access the area without pressure on the skin. Expect one to two hours depending on wrap length.

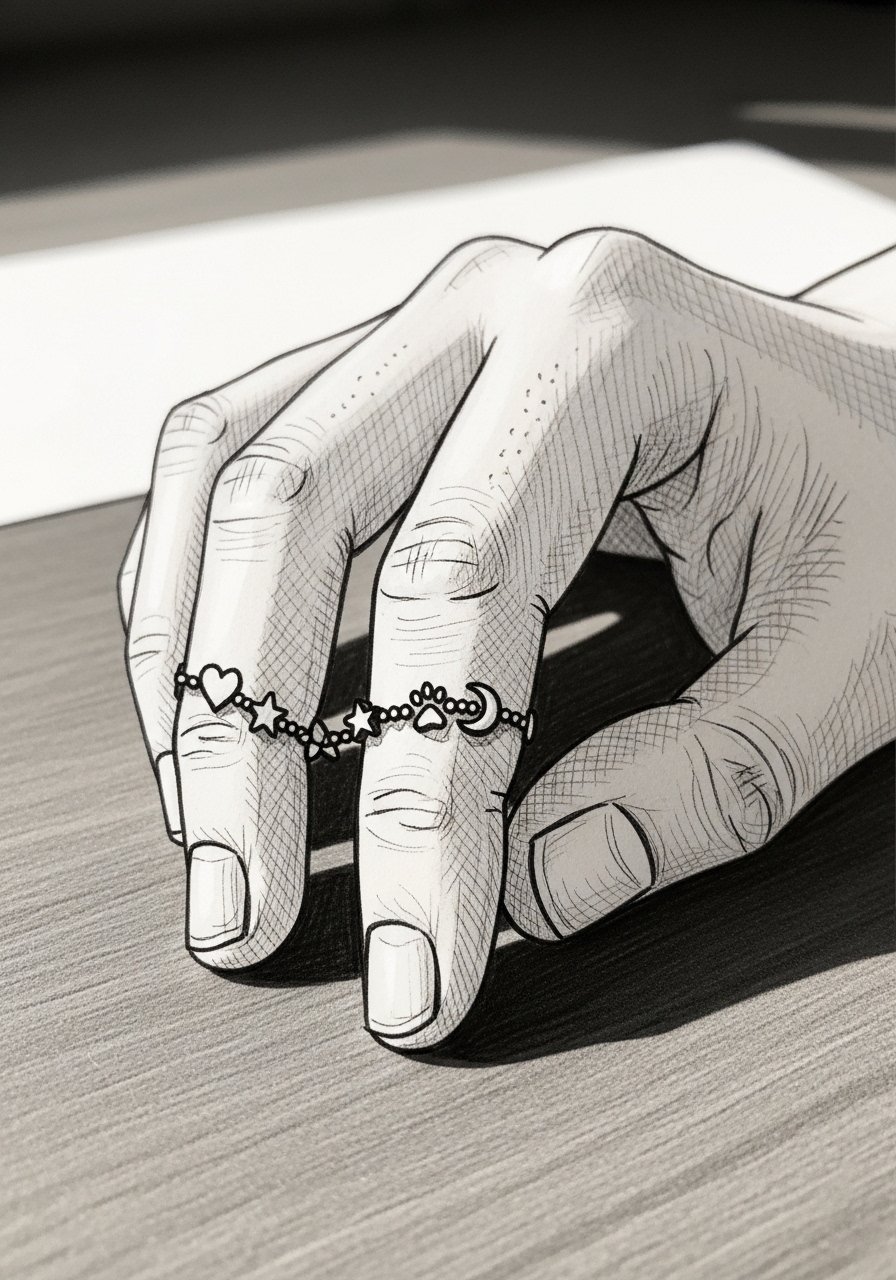
21. Chain of Tiny Icons Wrapping the Finger Bases
Mistake lead, the biggest error with finger wraps is packing icons too close to knuckles and cuticles. The skin on fingers moves and sheds, so slightly larger icons with space around them last longer. Pain is sharp and sessions are brief. For the healing week avoid tight rings. For showing the work, delicate stacked rings that sit above the icons help the wrap read as intentional jewelry.
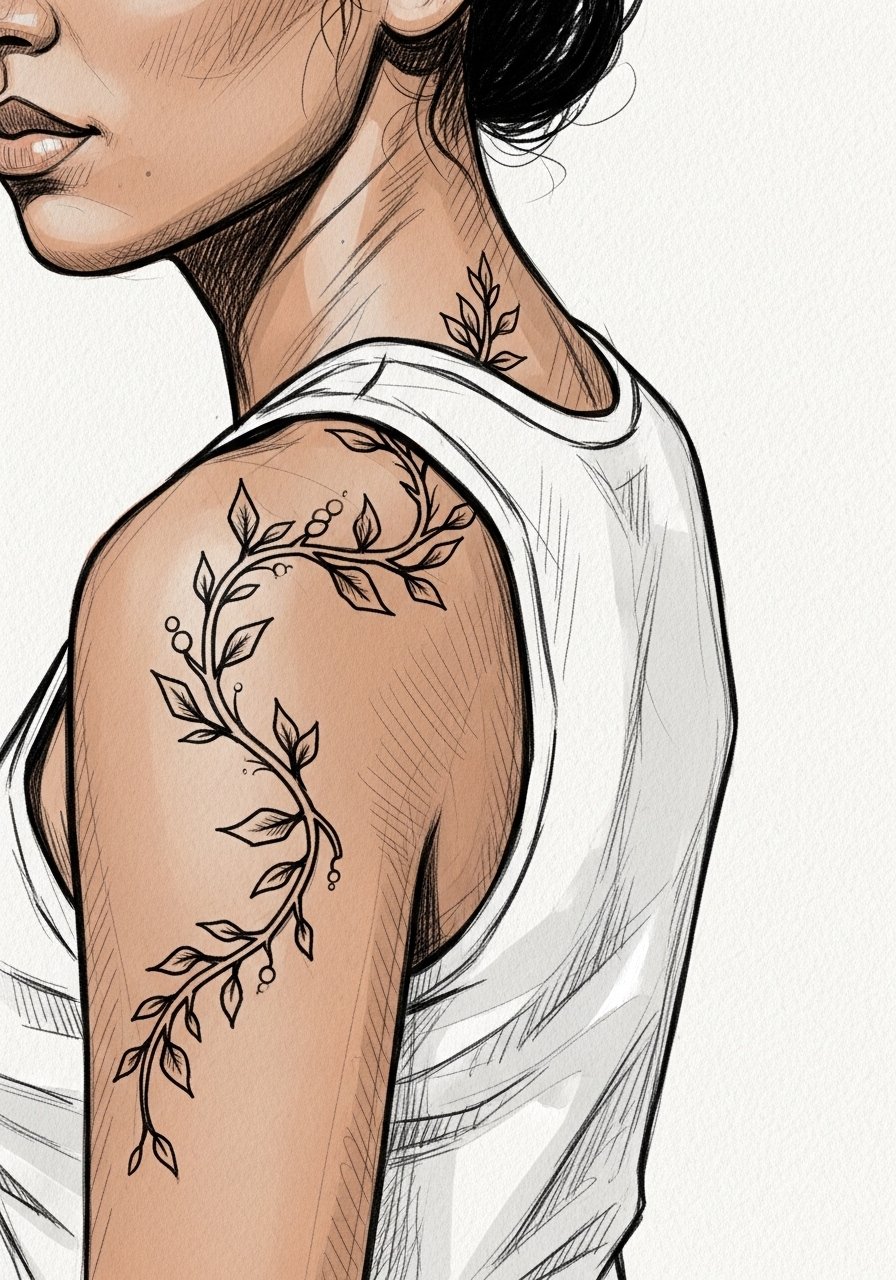
22. Freehand Vine That Encircles the Shoulder Blade
Aging/healing lead, shoulder blade skin tolerates sun but not sharp repeated rubbing from straps. Vines that circle the shoulder blade benefit from slightly bolder anchor lines near strap-prone zones. The session requires positioning on a table and can be more awkward because of posture. For the session wear a loose tank top you can shift, and for evenings wear open-back tops to let the vine show.
23. Continuous Minimalist Arrow Row Along the Spine
Visual impact lead, spine wraps read dramatically when anchors are slightly stronger than the interior sketchwork. The spinal column has more nerve endings for some people, so expect a higher pain threshold for long wraps. A thin open-back dress or a zip-up hoodie you can pull aside makes positioning for the session easier. For nighttime comfort, soft high-waisted pants keep pressure off the fresh lines.

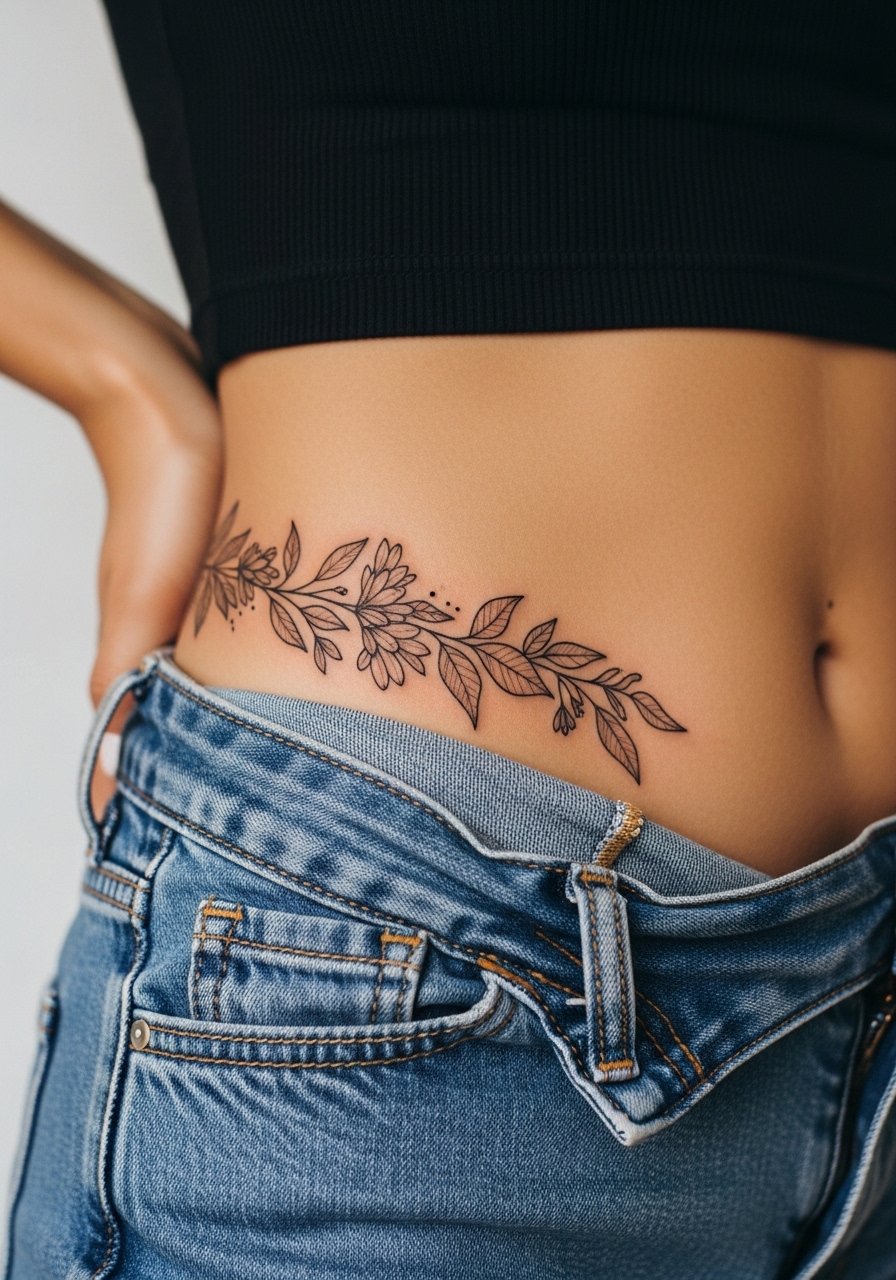
24. Continuous Botanical Band That Wraps the Hip
Consultation lead, hip anatomy requires images that show hips in motion so the artist can plan how leaves align when you sit. The hip moves with clothing and belts, so place the main motif where fabric won't rub frequently. For the session wear high-waisted denim you can shift down slightly to expose only the hip zone. This placement ages well when the main stems avoid direct waistband lines.
25. Continuous Feather Wrap Around the Upper Arm
Personal observation, feather wraps that keep a loose ink texture rather than packed shading hold a soft, airy life over time. The outer upper arm tolerates repeated sessions, which helps if you want a multi-pass build. During the consult ask for a primary anchor feather and lighter secondary strokes. For showing it off, short sleeves or a loose button-down shirt work well.

26. Continuous Crescent and Star Band Around the Throat of the Foot
Pain warning lead, the top of the foot is sensitive and sees a lot of friction from shoes. Keep lines sparse near the toe joints and slightly bolder around the central arc that wraps the foot. For the session wear slip-on sandals so the artist can work without shoe pressure. Expect quicker fading at high-friction points and plan for touch-ups if you want the stars to remain crisp.

27. Continuous Abstract Line That Spirals the Upper Thigh
Consultation lead, abstract wraps on thigh let artists play with negative space and motion. The thigh accepts fine detail but avoid area near the groin where friction and movement will soften lines fastest. For the appointment wear shorts you can shift and for show-off moments try a open-back midi dress that reveals the spiral without tugging fabric. Expect long single sessions if the wrap is extensive.

Frequently Asked Questions
Q: Will sketch-style wrap lines blur faster than bolder bands on areas like the wrist and fingers?
A: Yes, very fine sketch lines on wrists and fingers are more prone to blur because of constant motion and washing. Choosing slightly bolder anchors and asking the artist to space details preserves the silhouette. If you want ultra-fine dots or hairline strokes, accept that touch-ups might be part of the plan.
Q: How should I prepare clothing-wise for a ribcage or sternum wrap session?
A: Wear easy-to-shift items that expose only the tattoo zone, like a cropped athletic top or a zip-up hoodie pulled aside. That keeps the artist's access clean and minimizes fabric contact with fresh ink. Bring layers to manage temperature between passes.
Q: For a full forearm sketch wrap, what touch-up timeline is realistic?
A: From what I've seen, forearm wraps keep their structure longer than wrists, but expect a possible touch-up around year three to four for the lightest strokes. UV exposure and sun protection habits play a big role in how quickly sketch lines soften.
Q: Are there workplace risks with neck, hand, or face wrap placements?
A: Yes, hand and neck wraps can affect visible-profession opportunities. The neck and face remain controversial in some industries, while hand tattoos still carry hiring implications in certain fields. Think about long-term visibility and how it fits your career before committing.
Q: How do sketch-style wraps behave on darker skin tones, and are there styling tips to help them read visually?
A: Fine black linework can read well on darker skin when anchor lines are slightly stronger and contrast is considered. For showing off choose clothing that frames the band, like rolled sleeves, open-neck tops, or thin chain pendant necklaces that sit above collarbone wraps without crowding the design.
Q: What should I ask during the consultation to ensure a wrap flows correctly around joints and curves?
A: Ask to see previous wrap work that travels across joints, request a test stencil, and ask how they plan to space elements where the skin folds. Also ask their preferred touch-up timeline for fine strokes so you can plan accordingly.
