
Fine line wraps are all over saved boards right now, and the gap between that fresh look and how a piece actually lives on skin is wider than most people expect. The trend favors delicate, continuous bands that follow muscle and bone, but longevity depends on placement, spacing, and needle depth more than on the reference photo. Read on for 27 modern arm wrap tattoo ideas that balance how they look today with how they heal and age.
1. Fine Line Floral Vine on Inner Forearm

I recommend this for someone who wants a subtle piece that elongates the arm visually. Say to your artist that you want slightly increased spacing between blooms and consistent linework, and ask for light stipple shading rather than dense fill so the vine does not merge over time. Fair warning, fine line on the inner forearm sits where friction and sun hit it, so expect a touch-up around year two to three if you spend a lot of time outdoors. For showing it off pair the piece with a rolled cuff chambray shirt so the sleeve frames the design.
2. Neo-Traditional Snake From Shoulder to Elbow

There is a reason snakes are classic for arm wraps. The body of the serpent follows contours and can hide around the elbow so the flow reads as one continuous motion. Tell your artist you want bold outlines and selective saturation, not full color floods, so the scales retain texture after years of wear. Expect two sessions for saturation and blending. The shoulder area tolerates saturation well so the piece ages into solid contrast rather than soft blur. For casual show-off, layer an open flannel shirt over a tank so the shoulder peek reads intentional.
3. Blackwork Geometric Band at Bicep

Blackwork bands anchor a sleeve and work as a visual break between styles. The biggest mistake is making the pattern too tight for the bicep circumference. Ask for slightly larger negative spaces so lines do not merge as tissue moves. Pain is moderate here, and one to two sessions usually does it. This placement is a low-blowout risk if the artist uses appropriate depth and spacing. For daytime wear opt for a sleeveless muscle tank that keeps the band visible without competing details.
4. Ornamental Mandala Half-Sleeve Wrap

Mandala wraps read meditative and make a smart base for expansion into a full sleeve. When consulting, ask the artist to increase spacing in dense sections and use stipple shading to preserve texture as it heals. A common aging issue is over-dense mandalas that liquefy into shaded blobs. With proper spacing the piece keeps its symmetry for years. This style is best for someone who wants a melding of ornamental work and geometry, and it usually takes three sessions. Respect the mandala's cultural ties by discussing original patterns rather than copying sacred symbols directly.
5. Micro-Realism Portrait Cuff at the Wrist

A portrait cuff lets you keep a meaningful face in a compact, wearable format. Tell the artist to keep contrast high and to avoid tiny hairline details that can fade into blur once healed. Wrist skin moves a lot and endures frequent washing, so plan on a touch-up at year two. Session-wise this is two short sessions rather than one long marathons. For showing it off without covering, consider stacking with a beaded bracelet stack on the opposite wrist to balance attention.
6. Traditional Rose and Dagger Forearm Wrap
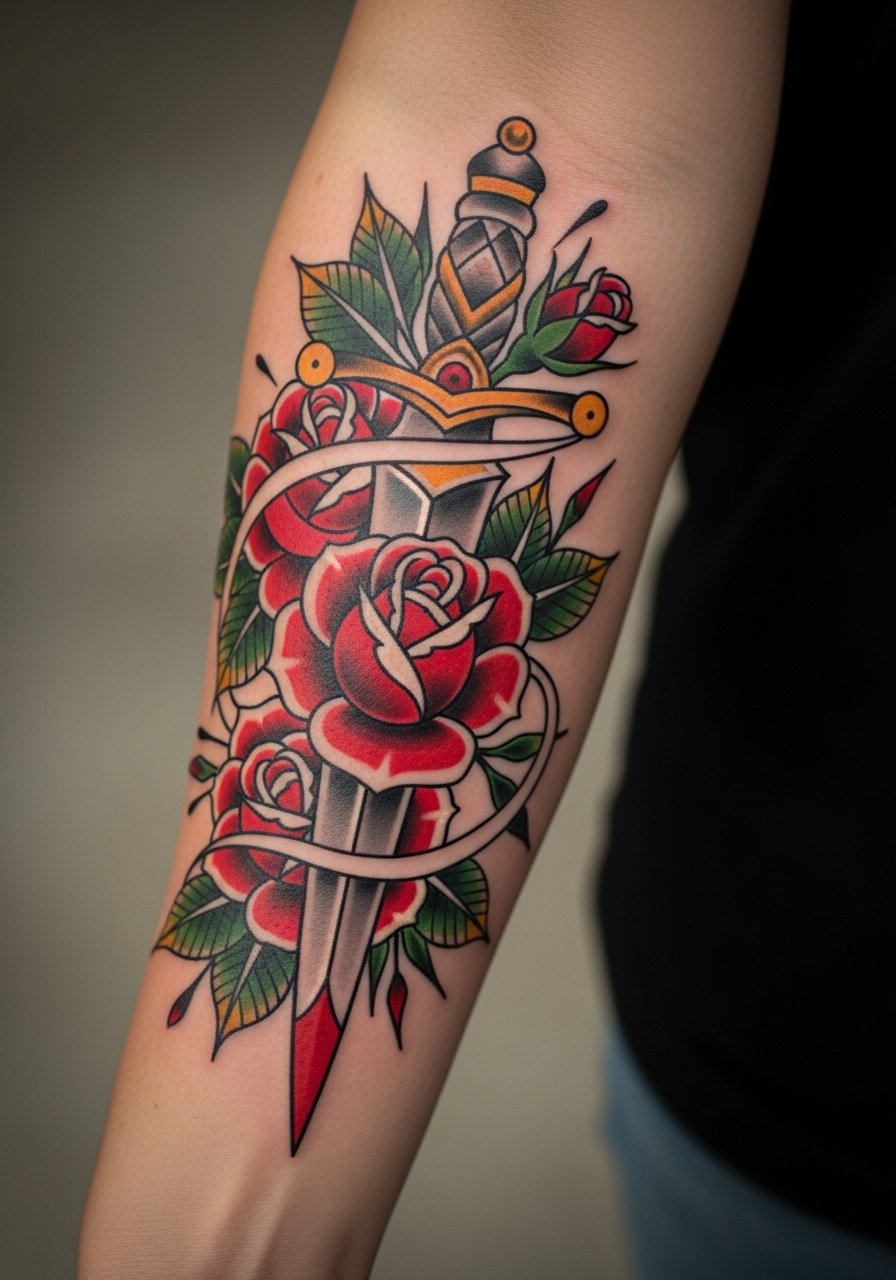
Traditional linework and saturated fills tend to hold up well over time, which explains this design's longevity. Ask for bold outlines and conservative color saturation so the reds and greens read as intended after a few years. The outer forearm is a forgiving canvas with moderate pain and solid touch-up timelines at around year three to five. Avoid overly fussy detail in tiny petals because that is where the piece can blur. For easy showing, pair it with a fitted crewneck tee men so the arm reads clean against simple fabric.
Studio Day Picks
The wrist, forearm, and bicep pieces above each ask for different prep and first-week protection, so a few targeted items make the session and early healing smoother.
-
Stencil transfer paper kit. Lets you check placement and size on skin before the needle starts, which is especially helpful for tight forearm vines and portrait cuffs.
-
Topical numbing cream. Applied per product directions about 45 minutes before the appointment softens wrist and inner-arm sensitivity without obscuring important linework.
-
Thin protective film roll. Works well on wrist and forearm wraps that face constant friction from clothing and watches during the first week.
-
Fragrance-free gentle body wash. Mild cleansers reduce irritation when showering small or detailed arm pieces.
-
Aquaphor healing ointment. A thin layer in the first few days helps retain moisture for fine line and micro-realism work without smothering the needle channels.
7. Watercolor Abstract Wave Arm Band

Watercolor wraps are painterly and fluid, but they age differently than saturated traditional work. The controversy around watercolor is clear to see. One camp says that washes need constant touch-ups because pigments diffuse in the dermis. The other camp argues that careful saturation and strategic outlines keep the effect intact. For this design pick areas with less daily abrasion and ask for occasional micro-outlines to keep the waves readable as the color softens. Expect two to three sessions for layering, and plan on lower contrast after two years.
8. Ignorant-Style Script Curling Around the Tricep
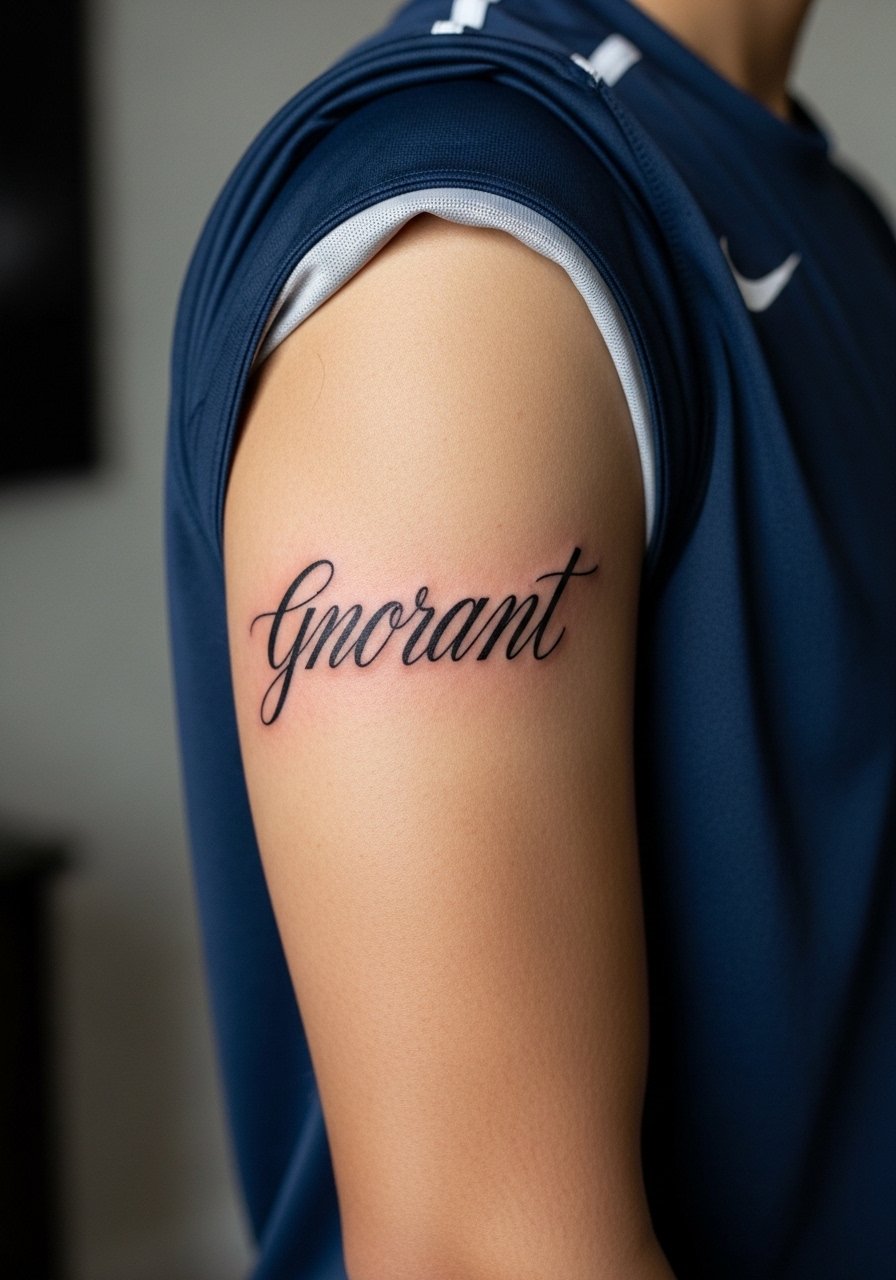
Raw, hand-drawn lettering works on the tricep because the curve helps the words flow. Tell the artist the exact line weight you want and bring multiple references of handwriting styles. The tricep is a forgiving place for script since it expands and contracts with movement, but beware of tiny, dense lettering. Keep characters larger and lighter so spacing holds. For the session wear a short sleeve athletic shirt so the artist can rotate your arm easily without fabric bunching.
9. Patchwork Mythical Creature Collage From Elbow to Wrist
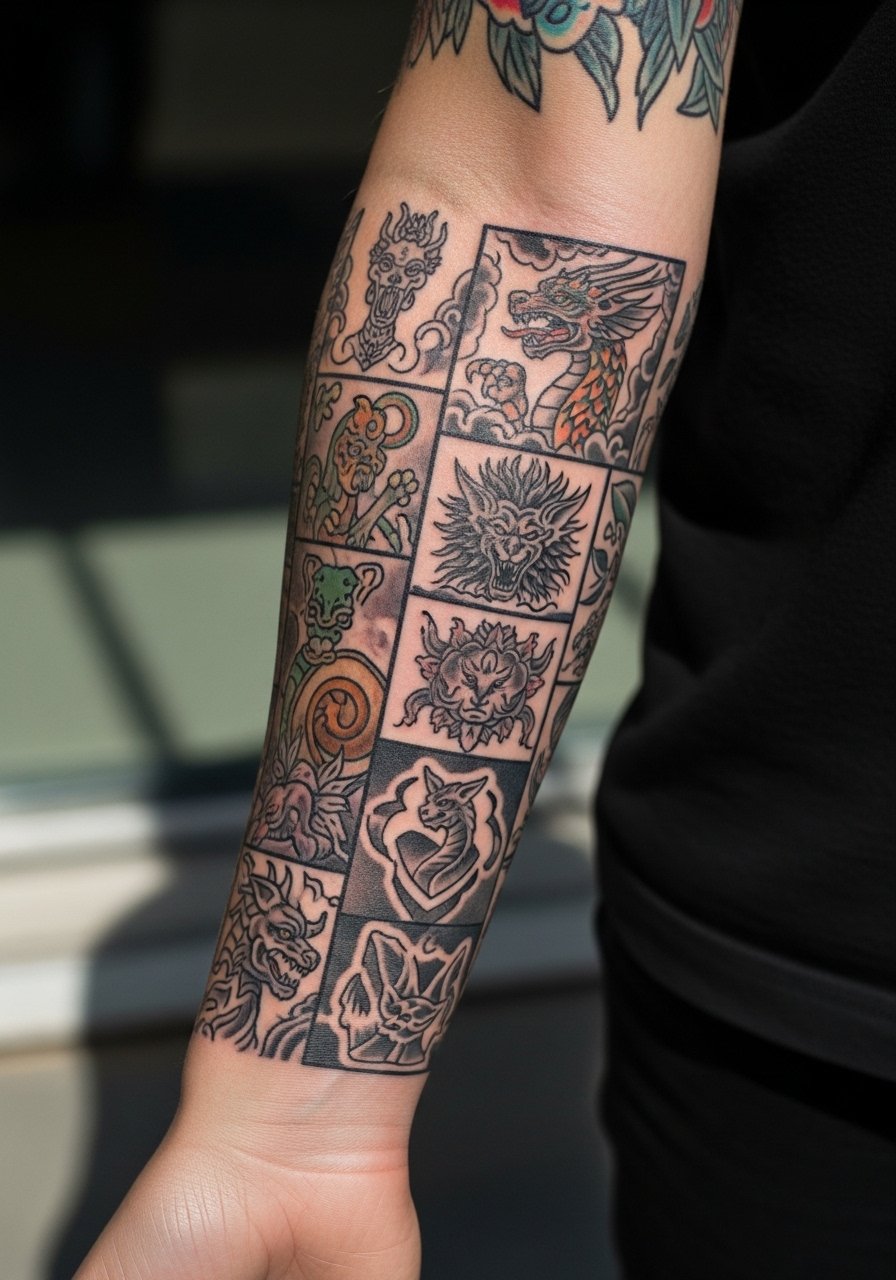
Patchwork wraps let you build a narrative over years without committing to a single theme. The key is to plan negative spaces so later pieces sit with the originals. Ask for consistent linework family and similar saturation levels across flash choices to avoid a jarring patchwork. This approach takes multiple sessions and is ideal for someone who wants a collected look built over time. For everyday balance, wear a three quarter sleeve henley that reveals the forearm composition when rolled.
10. Minimalist Arrow Band at the Elbow
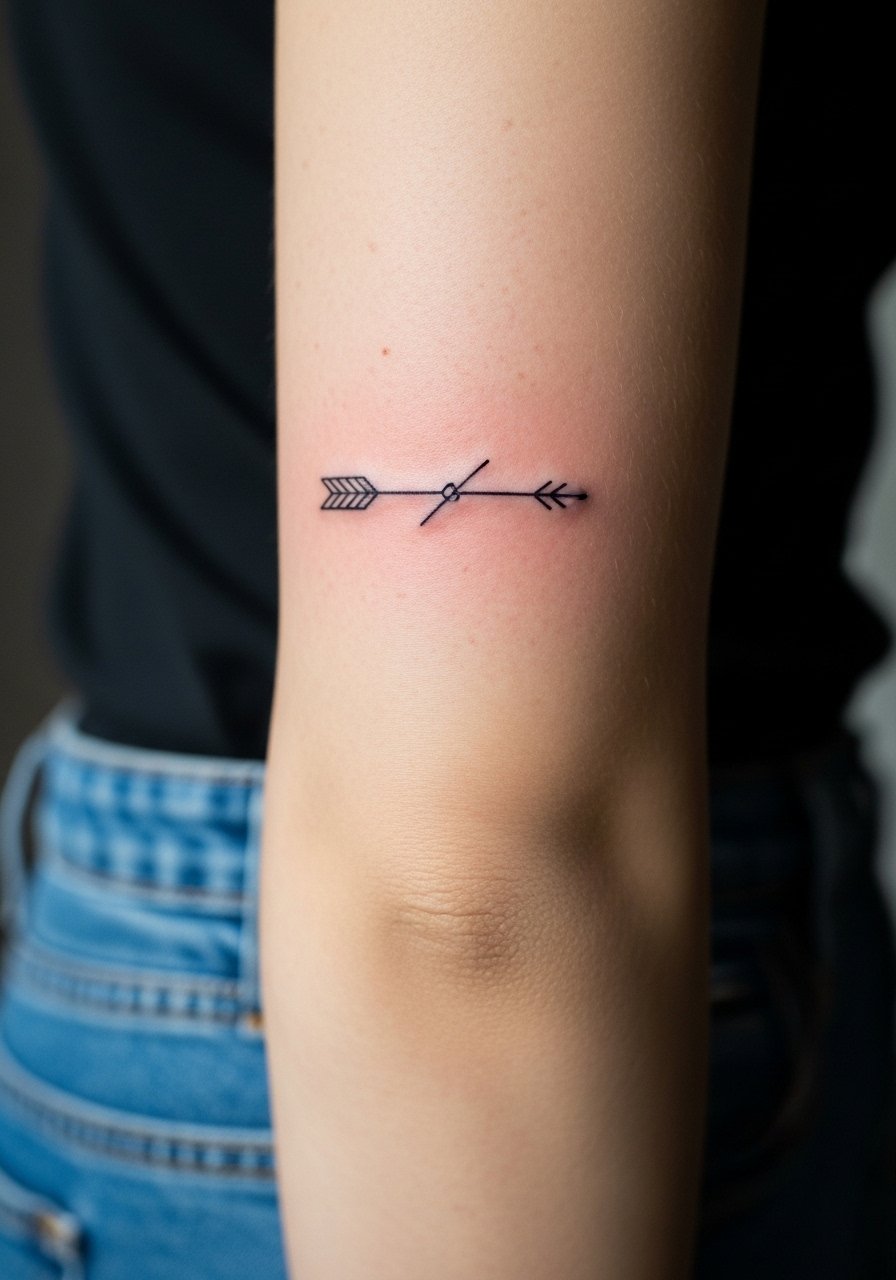
Elbow wraps are forgiving stylistically, but they must move with the joint. The common mistake is putting tight, continuous lines directly over the crease with no accommodation for stretch. Ask for small breaks and softer line transitions to keep the arrow readable when you bend your arm. Pain at the elbow tends to spike, so expect a short, sharp sensation. This one-session piece is easy to cover and easy to age if planned with movement in mind.
11. Tribal Pattern Wrap Updated for Modern Lines
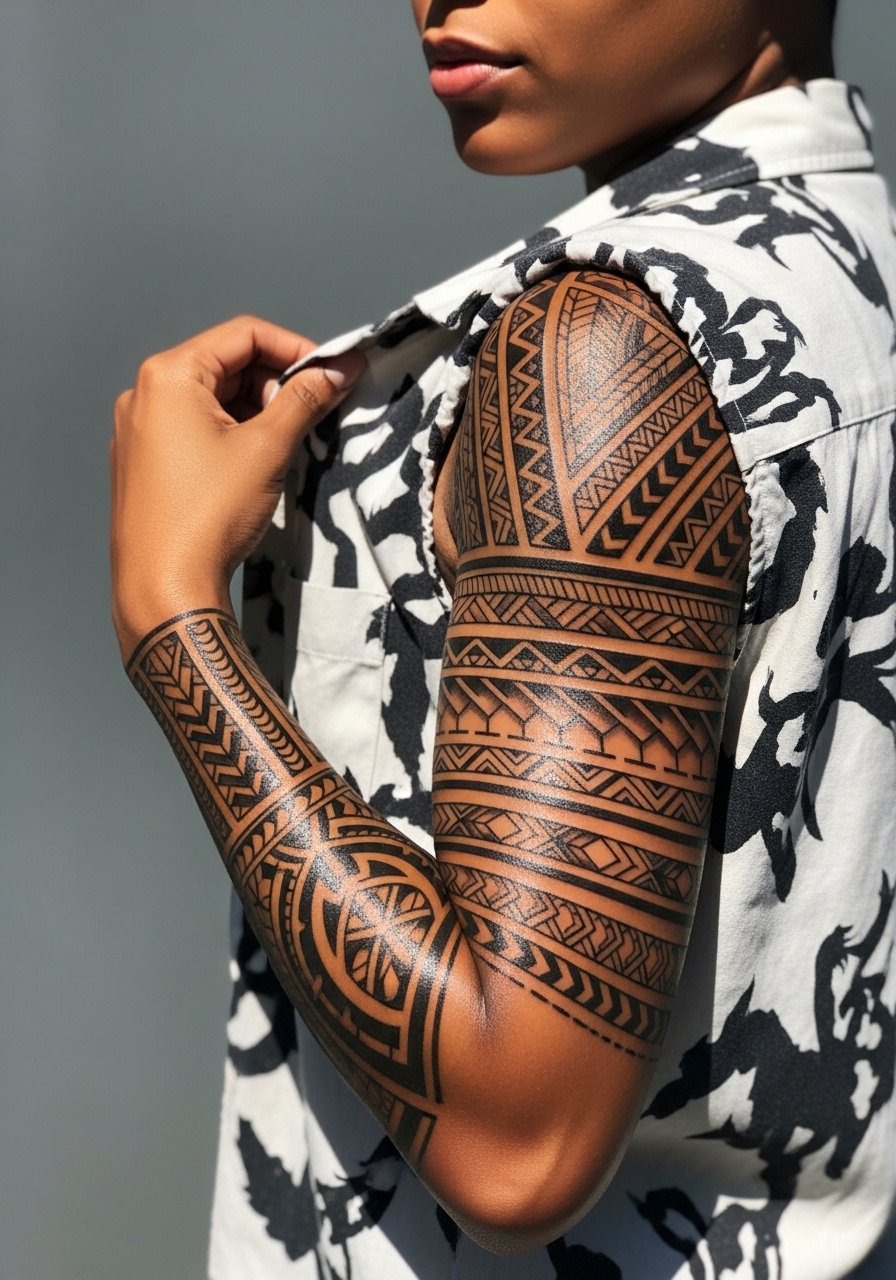
Tribal motifs can be modernized by combining bold black shapes with delicate internal linework. Respect origin and avoid direct replication of sacred motifs. Instead ask the artist for contemporary reinterpretation that nods to traditional forms while keeping unique elements. This wrap works well as a shoulder-to-forearm piece and usually completes in two sessions. For a casual look try an open flannel shirt layered over a neutral tank.
12. Continuous Skyline Line That Wraps the Outer Forearm
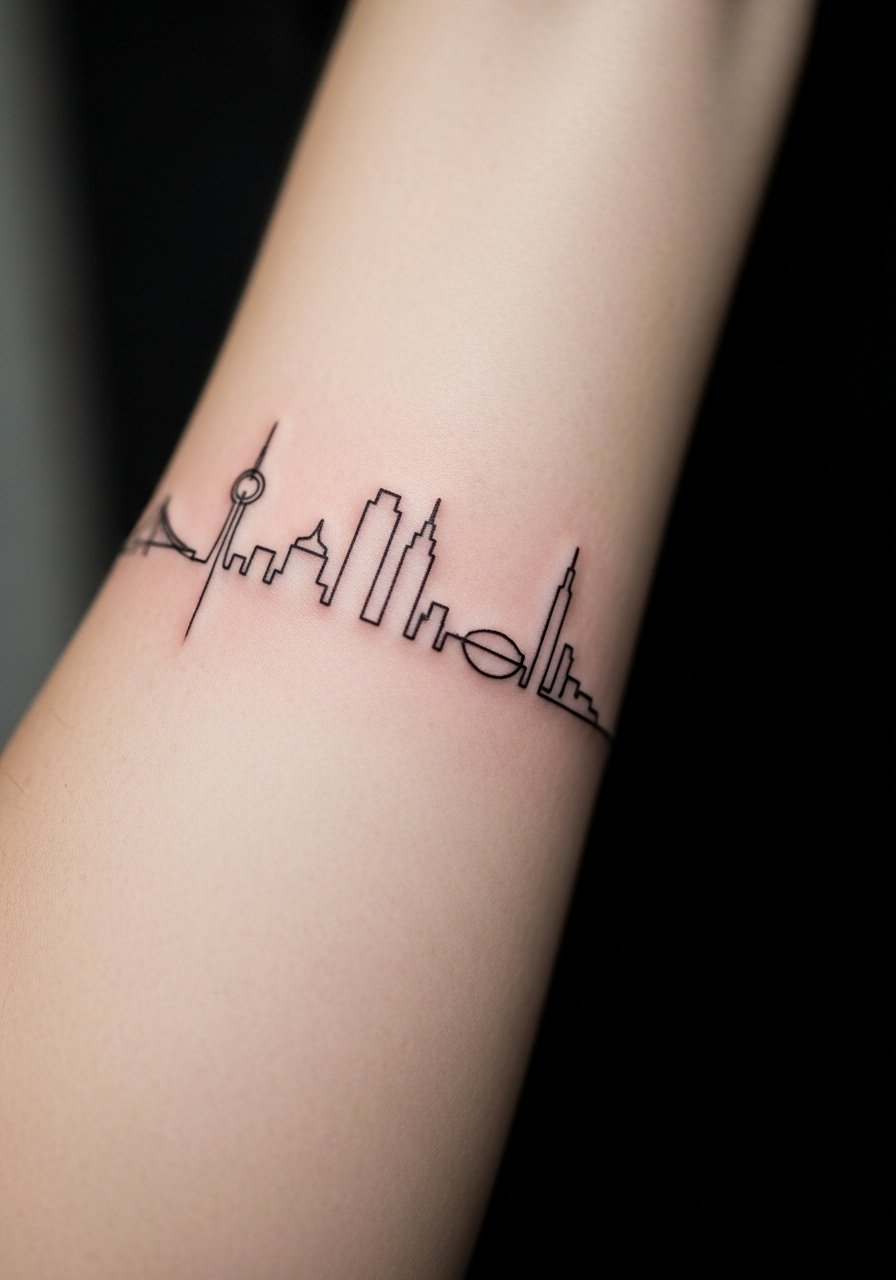
A one-line skyline is minimalist but deceptively technical. The common error is asking for too many tiny building details. Ask the artist to prioritize silhouette and rhythm rather than micro detail. Outer forearm placement makes this highly visible so UV protection matters for longevity. Expect a single session that focuses on perfect linework and alignment. Pair the piece with clean casual tees when showing off to let the silhouette read across the arm.
13. Stipple-Shaded Compass Cuff at the Wrist
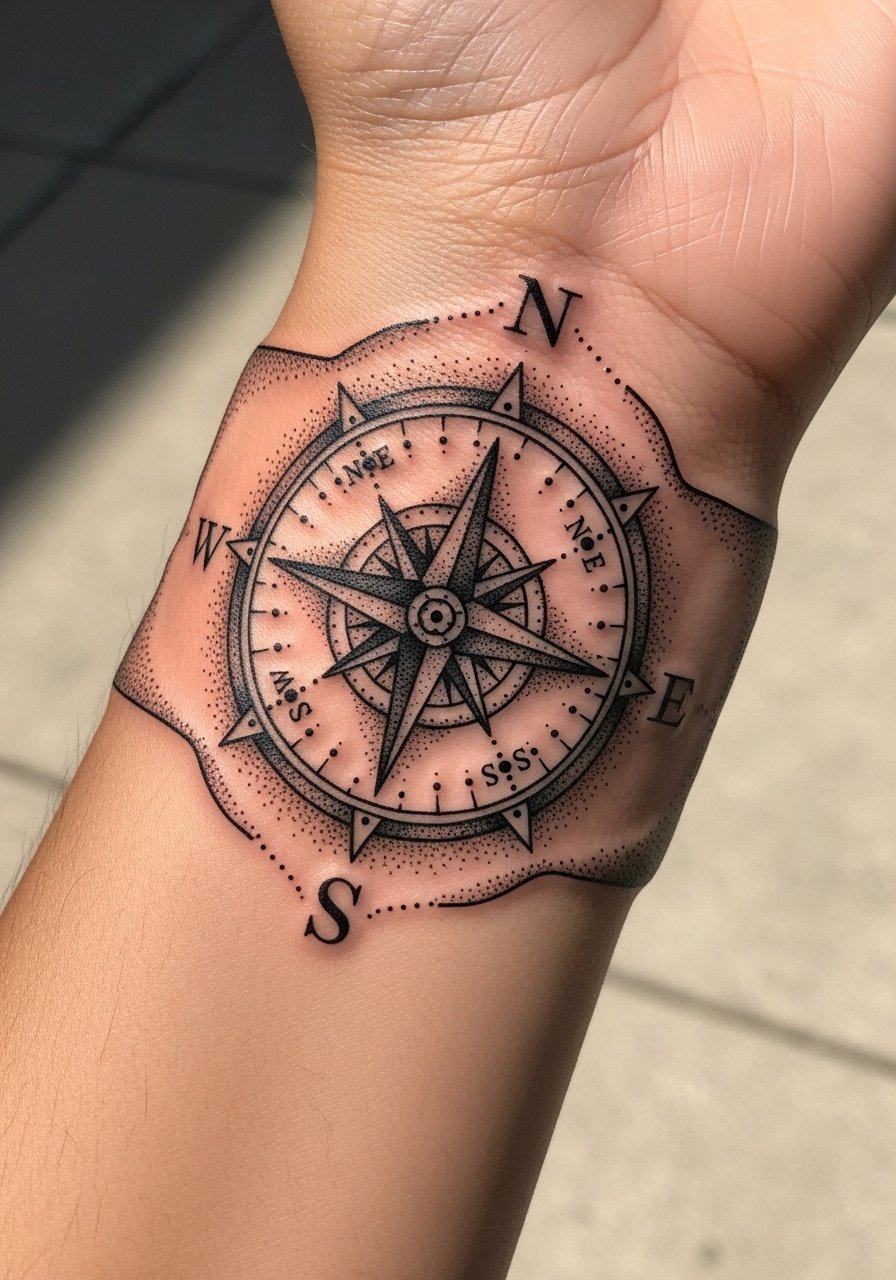
Dot work compasses age gracefully when density is measured. The mistake is heavy dot clusters that merge into solid patches after a few years. Ask for measured stippling and moderate contrast. The wrist needs protection from constant washing, so plan a touch-up at year two if your job involves heavy hand use. Session comfort is moderate and brief. This is a good choice if you want symbolism in a compact format.
14. Patchwork Botanical and Script Mid-Forearm
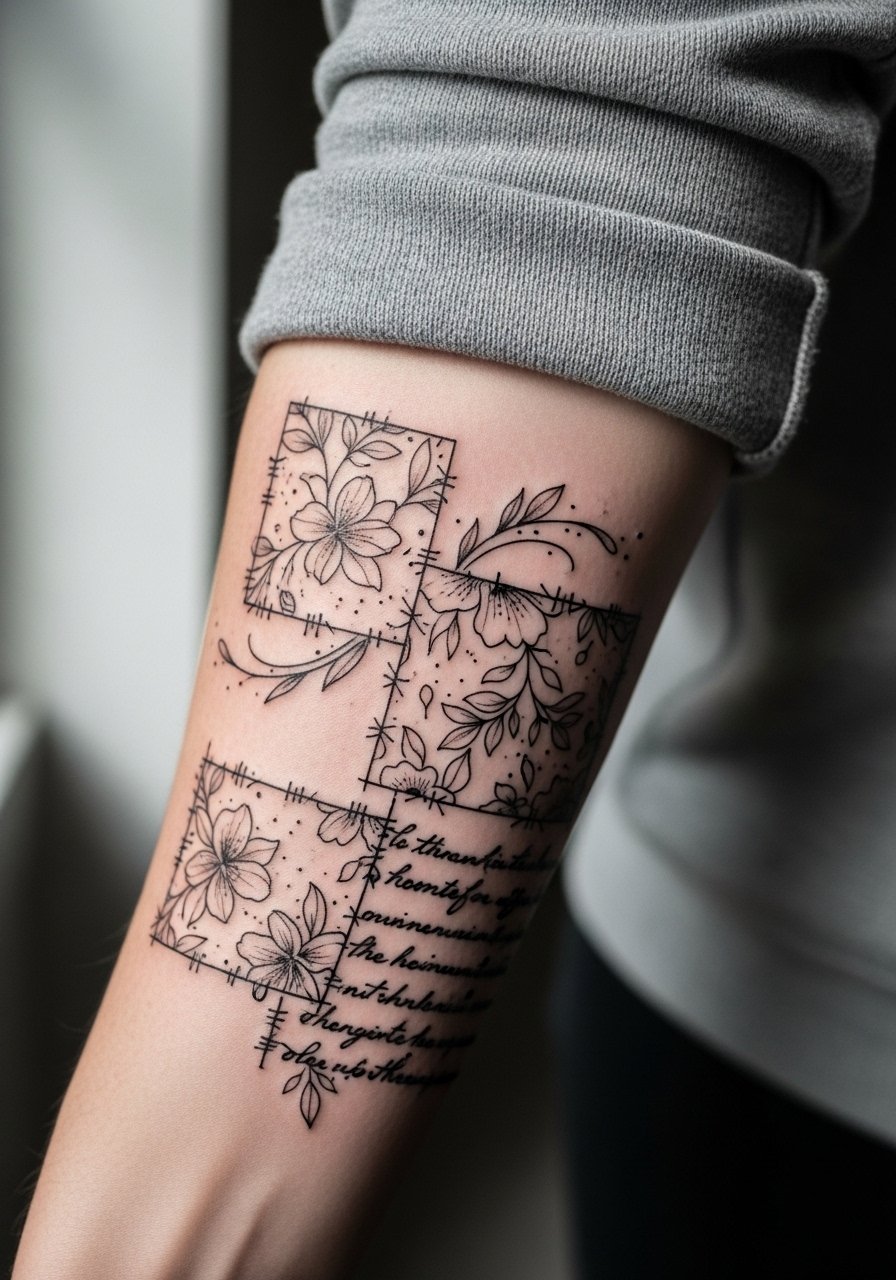
Combining florals with small script makes for an intimate narrative wrap that can expand sideways over time. Tell the artist to leave breathing room around each motif and to keep script slightly bolder than you might normally request. That prevents merging as the ink relaxes. This style is forgiving for touch-ups because individual elements can be reworked independently. For a soft, styled look pair it with a rolled cuff chambray shirt that frames the mid-forearm.
15. Minimalist Constellation Dot-Work Around Inner Forearm
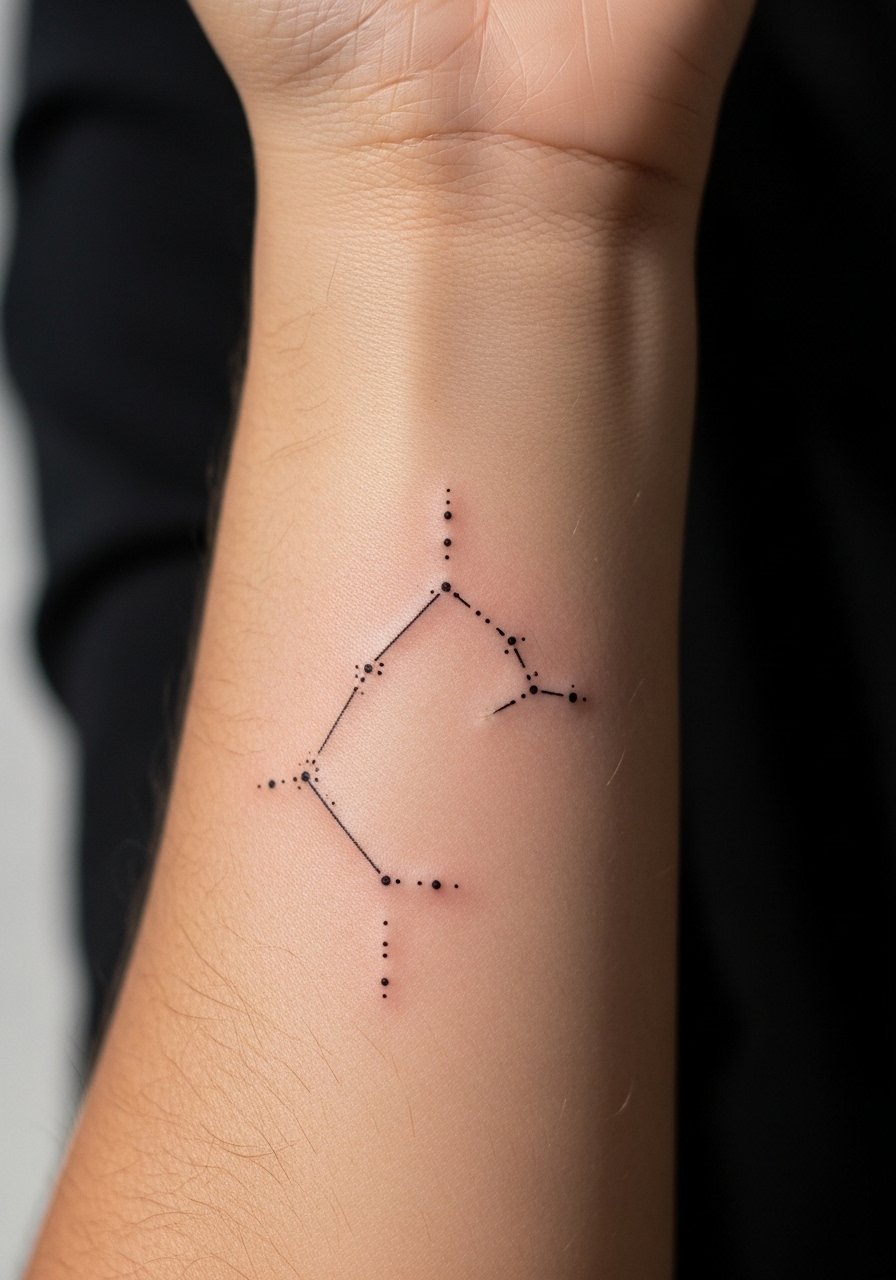
Tiny constellation motifs are delicate and read like jewelry. The pitfall is requesting dots too close together. Ask for a slightly larger scale and consistent spacing to avoid dot clusters melting into a blur. Inner forearm placement sees friction and sun exposure, so expect touch-ups sooner than with outer placements. Session time is short, and aftercare is straightforward. Pairing with thin rings helps draw attention downward if you want the hand and forearm to read as a single composition.
16. Micro-Realism Animal Silhouette Snaking From Elbow to Forearm
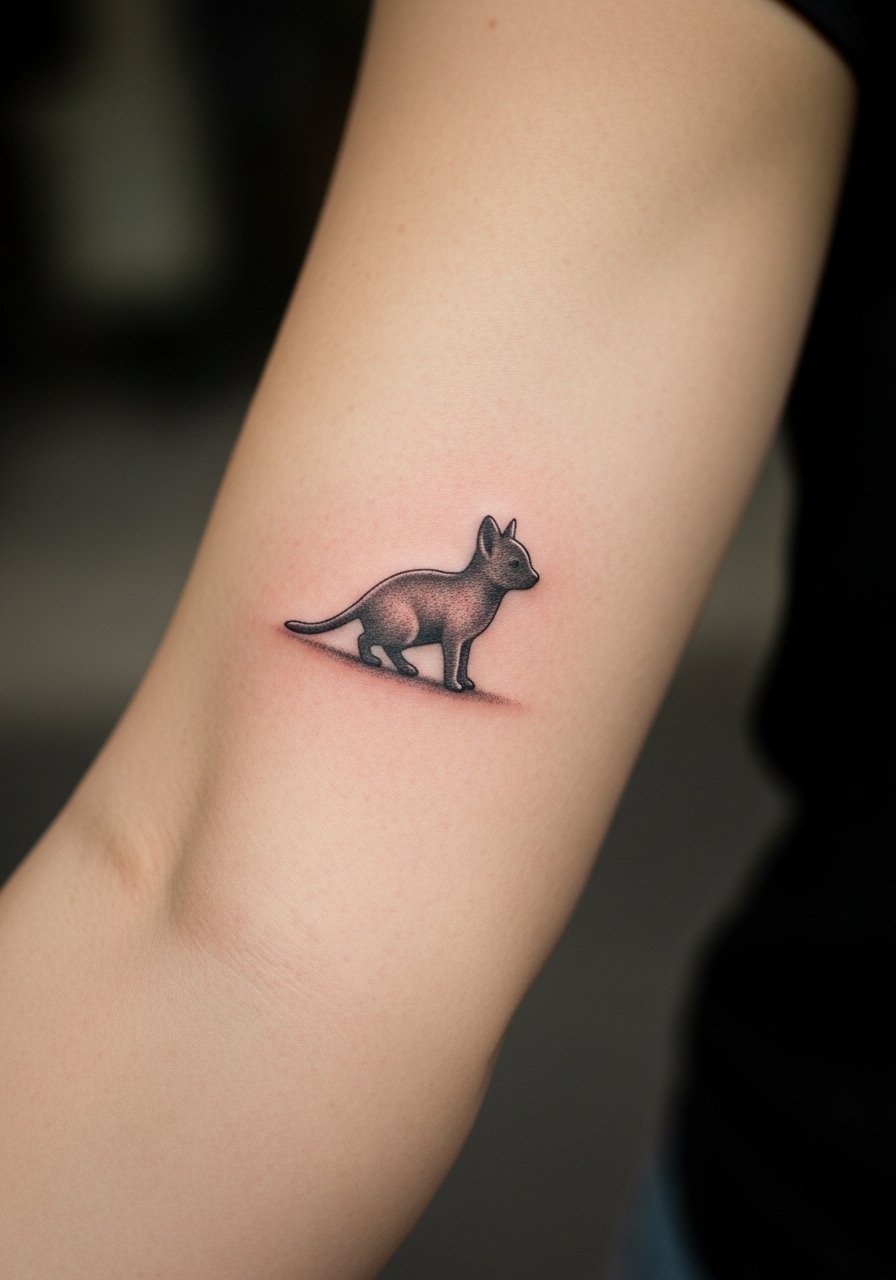
A silhouette that travels from elbow to forearm works if contrast is preserved. Micro-realism demands that small tonal changes are planned for long-term readability. The mistake is over-detail in very small areas. Ask for slightly heavier contrast points and expect two sessions. This design is a great personal emblem and sits where touch-ups are manageable.
17. Optical Illusion Band That Shifts With Arm Rotation

Optical bands play with rotation and muscle shape, and they look best when there is breathing room between repeating elements. Tell your artist you want clear negative space and consistent linework to maintain the shifting effect as skin settles. Biceps tolerate bold black well so blowout risk is low with proper depth. For showing it off choose a sleeveless muscle tank so the movement reads without interruption.
18. Ornamental Lace Cuff at the Wrist With Negative Space

Lace cuffs look delicate, but negative space is the tool that keeps them readable. A typical error is overfilling the lace with tiny stipple that later looks muddy. Ask the artist for crisp edges and deliberate gaps that will age with clarity. Wrist movement and washing mean touch-ups are common, so plan for one at the two-year mark. This is a refined option for someone who wants the look of a bracelet without wearing metal.
19. Neo-Traditional Koi Fish Wrapping Forearm to Wrist
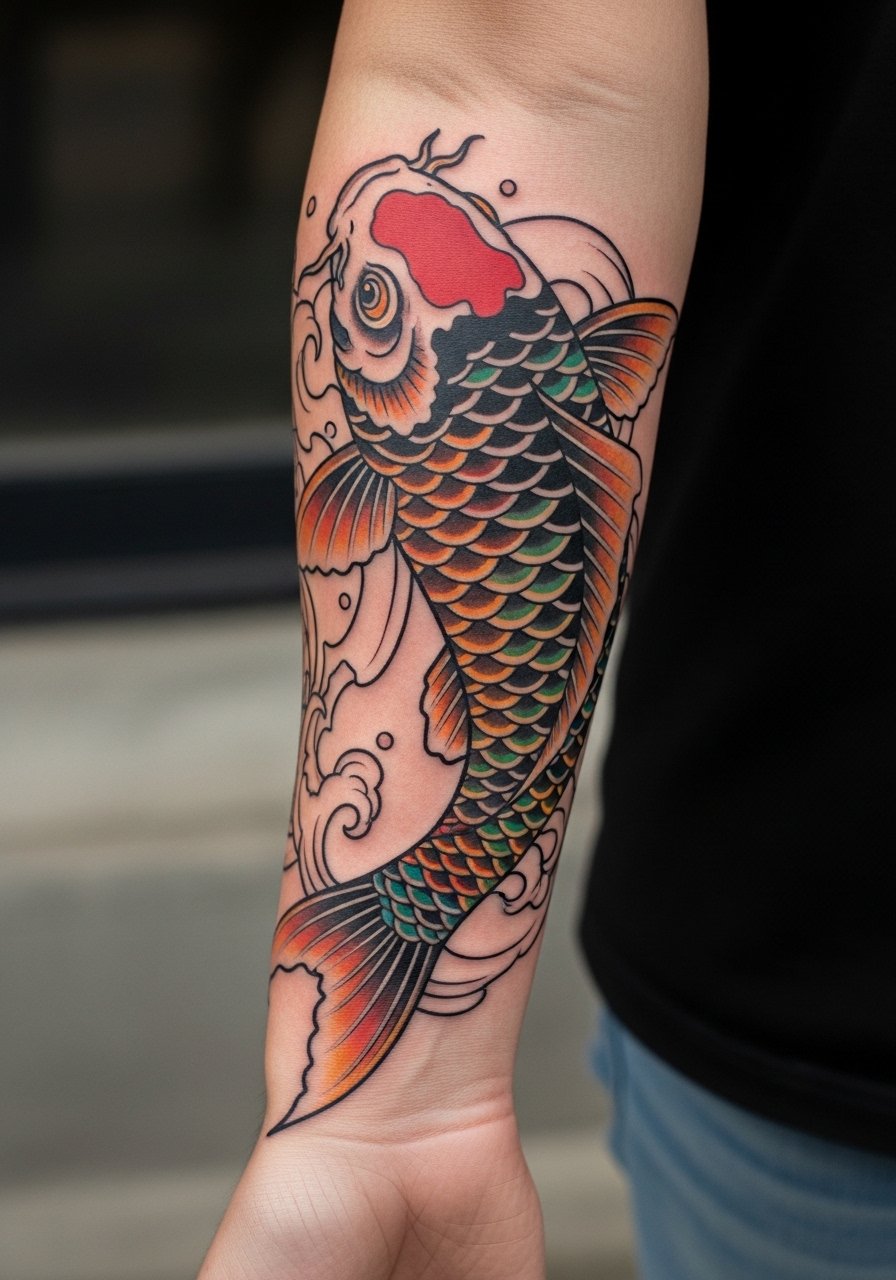
Koi designs provide flow and can be adjusted to follow muscle lines for motion. Ask for strategic dark accents so the body reads after pigment softens. Forearm-to-wrist transitions can be detailed with scales in larger shapes to avoid dense micro work that fades quickly. This design is ideal for someone who wants color but avoids full saturation across every inch. Session load usually two sessions for layering and highlights.
20. Minimalist Script Ribbon Curling Around Upper Arm
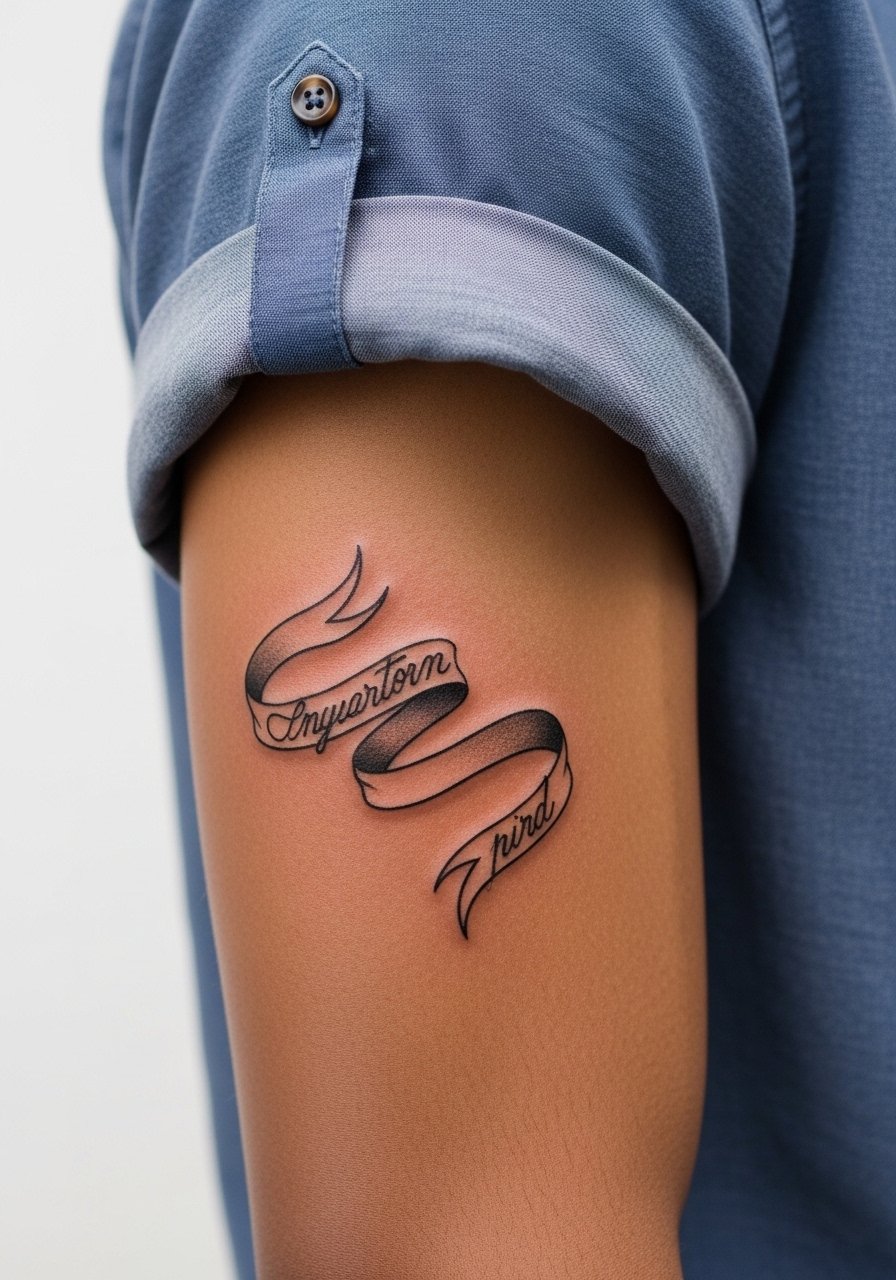
A ribbon script around the upper arm reads elegantly when letters are spaced and slightly weighted. Tiny, hairline letters are the most common mistake because they blur into one line over time. Request a medium weight for each character and a subtle curvature that follows the bicep. For the appointment wear a button up shirt men you can roll so the artist has full shoulder rotation.
21. Sailor Stars and Rope Half-Sleeve
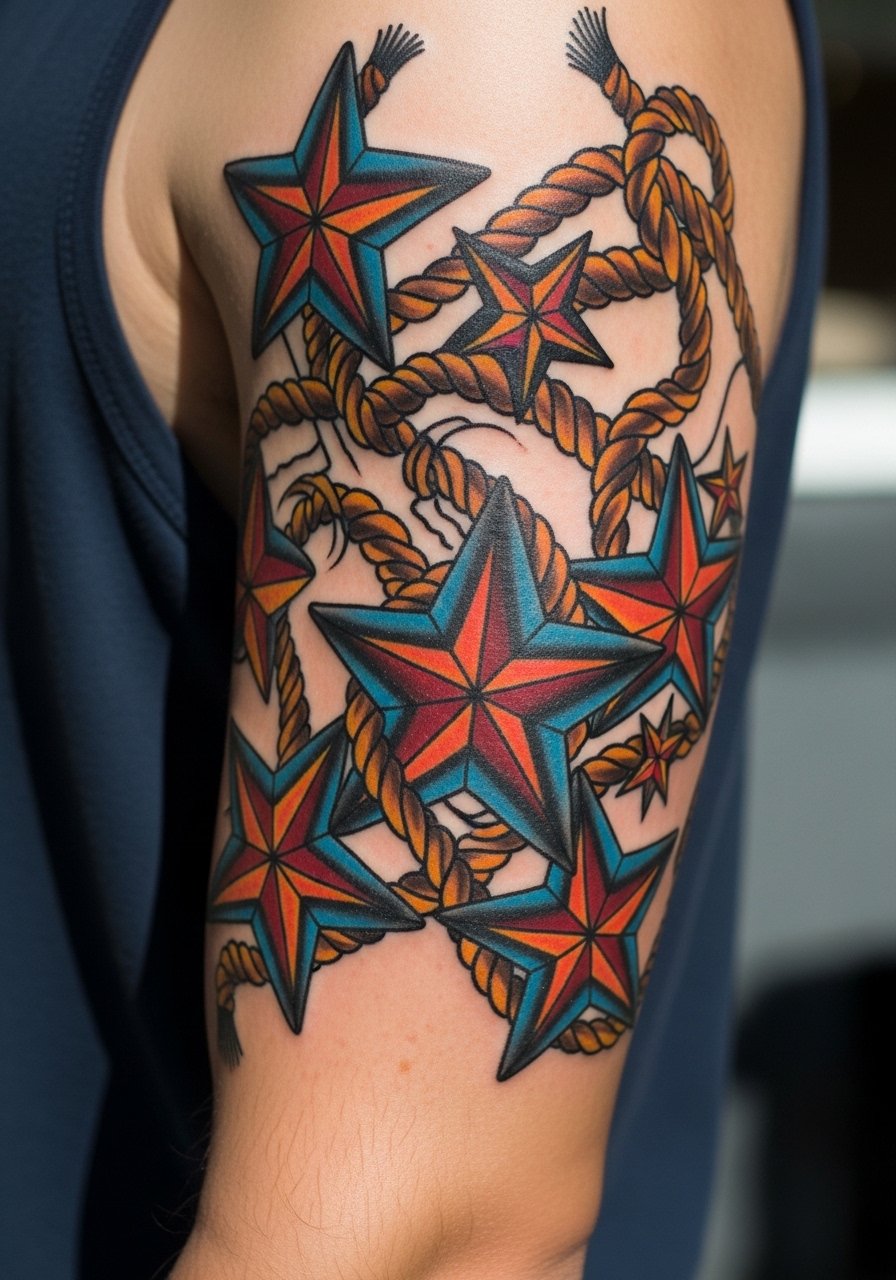
Classic maritime motifs are bold and straightforward, which helps them age. The main mistake is packing too many small emblems within a tight area. Keep stars and rope elements larger for lasting crispness. This half-sleeve is a good candidate for strong outlines and conservative color fills. Touch-ups tend to be later than fine line work, often three to five years depending on sun exposure.
22. Geometric Arrow Lattice Over the Elbow Joint

Elbow joints require design breaks so geometry does not collapse with movement. Ask for segmented lines and small gaps where the crease folds to preserve the lattice effect when you bend your arm. The elbow will be more sensitive during the session, so expect sharp bursts of discomfort. For showing and comfort, a sleeveless tee reduces fabric friction and keeps the area visible.
23. Abstract Watercolor Splash Cuff Near Bicep

Loose watercolor bands depend on saturation placement to survive the first years without turning into a muted wash. Ask the artist to anchor the splash with a few thin outlines or micro-contrasts to retain shape. This style often needs touch-ups sooner than traditional fills because pigments can diffuse. Plan on two sessions and consider choosing skin areas with less sun exposure for longer life.
24. Mandala Sun and Moon Wrap Near Shoulder
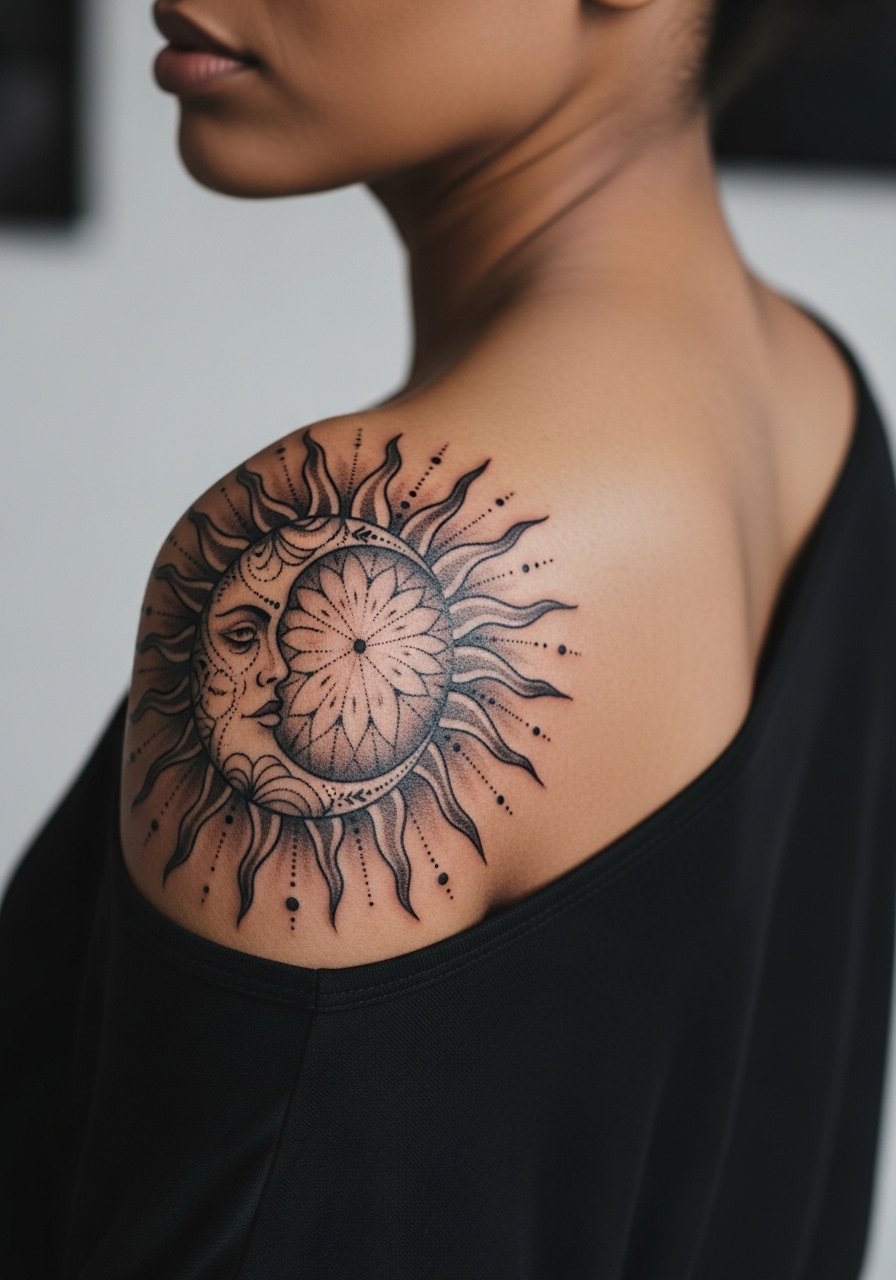
A sun and moon mandala near the shoulder works as both symbolism and geometry. Request broader spaces in dense zones and stipple shading to maintain contrast. Shoulders handle contrast well so the piece often settles nicely. For show-off layering, an open flannel shirt or a wide-neck top keeps the shoulder reveal tasteful and intentional.
25. Fine Line Chain That Traces the Inner Arm

Chains look delicate but require spacing to prevent link fusion over time. The inner arm sees friction from clothing, so ask for slightly larger link widths and lighter shading. Expect a touch-up in a couple of years for those who wear long sleeves frequently. Session pain is moderate and a loose tank top is ideal for the artist to access the inner arm without fabric interference.
26. Biomechanical Fragment Sleeve Wrapping Forearm
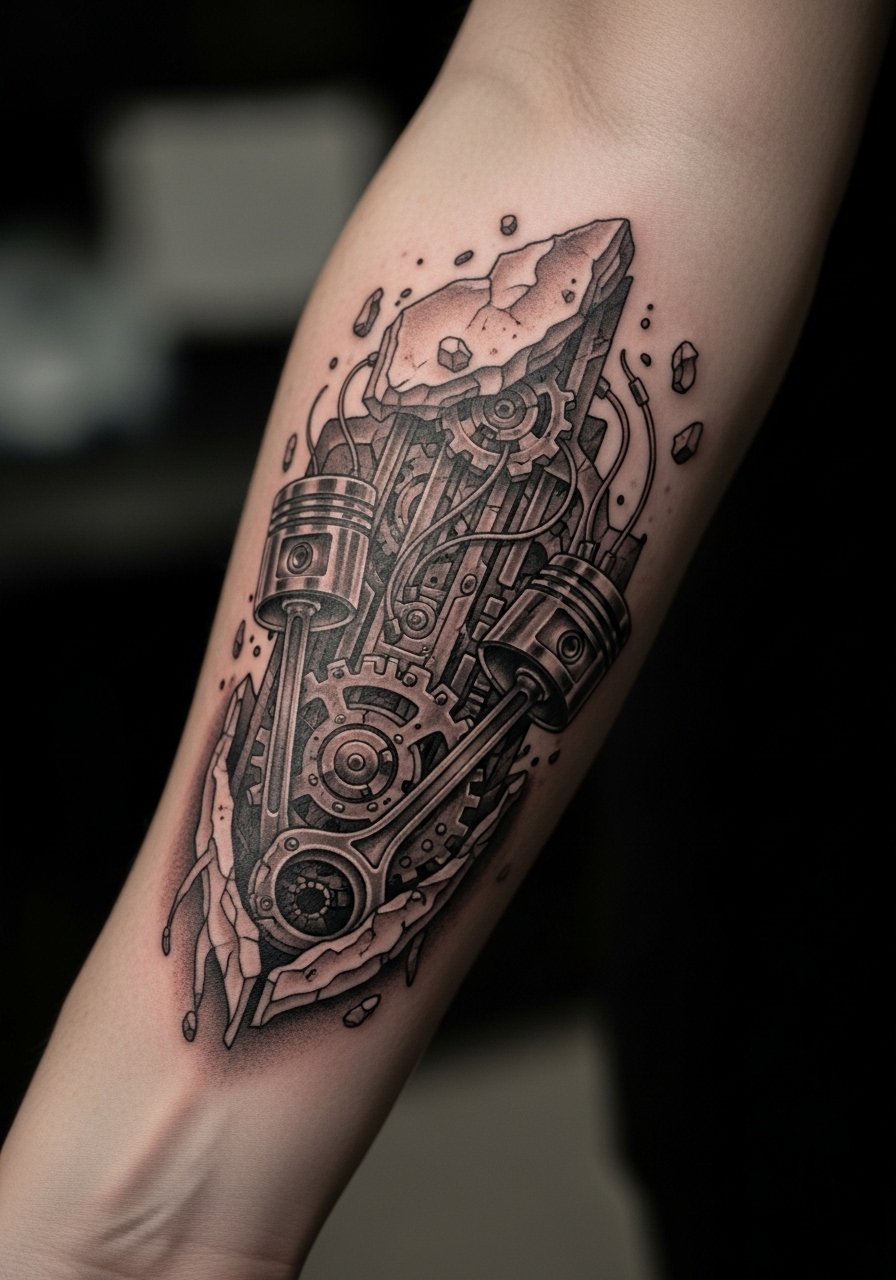
Biomechanical wraps are bold and detailed. The error to avoid is overworking tiny mechanical parts that turn into ambiguous shading when healed. Request larger, readable components and clear contrast edges. This is heavier work often done across multiple sessions. It ages well if the core shapes remain dominant and the micro texture is used sparingly.
27. Minimalist Thin Band Trio at Mid-Forearm That Ages Well
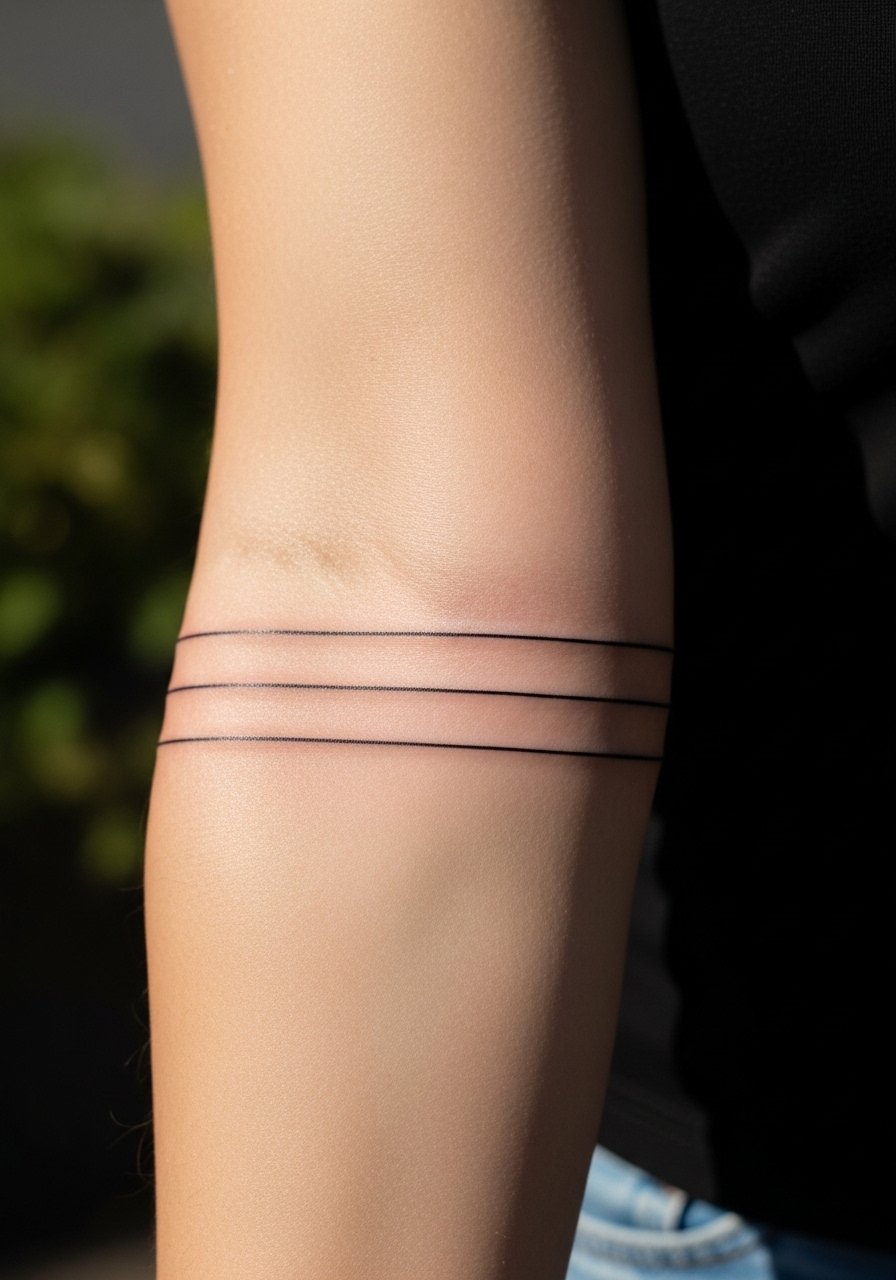
Three thin bands read like a bracelet and are simple to plan. The common mistake is putting the bands too close together so they merge as the ink settles. Ask for modest spacing and slightly varied line weight across the three so they retain definition over time. This one-session piece is low pain and easy to hide or show. For a clean everyday look try a fitted crewneck tee men that keeps the arm silhouette visible.
Frequently Asked Questions
Q: Will fine line wraps on the inner forearm blur faster than outer forearm pieces?
A: From what I have seen, inner forearm pieces face more friction and sunlight, which can speed blurring. The fix is slightly larger spacing, conservative line weight, and planning for a touch-up around year two to three depending on your lifestyle.
Q: How should I prepare clothing-wise for a shoulder-to-elbow session?
A: Wear something the artist can move aside easily, like a loose short-sleeve button-down or a tank. That lets the artist access the shoulder without you feeling exposed and prevents fabric from rubbing the fresh ink during the session.
Q: Are watercolor wraps more likely to require touch-ups than traditional saturated pieces?
A: Generally yes. Watercolor pigments can soften and spread more noticeably. Choosing areas with less sun exposure and asking your artist for micro-outlines or anchor points helps the effect last longer, but expect more frequent color refreshes than with bold traditional fills.
Q: For elbow-joint wraps, what do artists disagree about and what should I decide on?
A: Artists split into two camps. One camp prefers breaking lines and adding gaps so the design moves with the joint. The other camp uses continuous lines trusting technique and skin memory. Ask your artist which approach they favor and request test segments in your consultation so you know how the design will fold when you bend your arm.
Q: How often do bicep blackwork bands need touch-ups compared to wrist micro-realism cuffs?
A: Bicep blackwork tends to hold longer because the skin is thicker and less exposed to continuous abrasion. Wrist micro-realism usually needs touch-ups sooner due to washing and movement. Expect bicep bold bands to go longer between sessions, and plan a wrist refresh earlier if you want crisp detail maintained.
