
Fine single-needle snakes rule feeds right now, and the pieces that look paper-thin fresh often need touch-ups sooner than people expect. Back placements also surprise clients on pain because you cannot see the artist working, and finding a minimalist specialist who visits smaller cities takes time. Below are 17 back-focused snake ideas that factor in what holds up, what to wear to the session, and wardrobe choices that actually frame the finished piece.
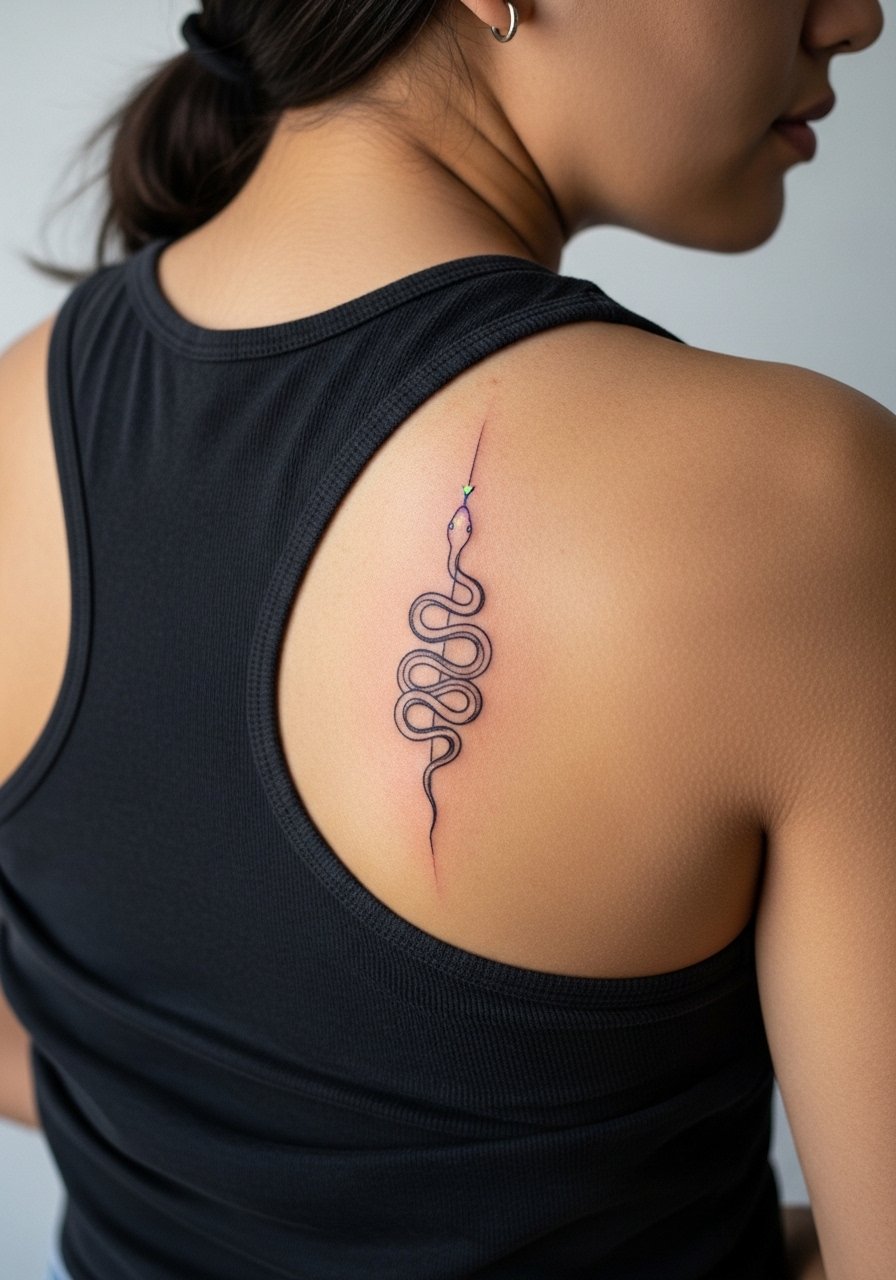
1. Coiled spine snake, single-needle minimal
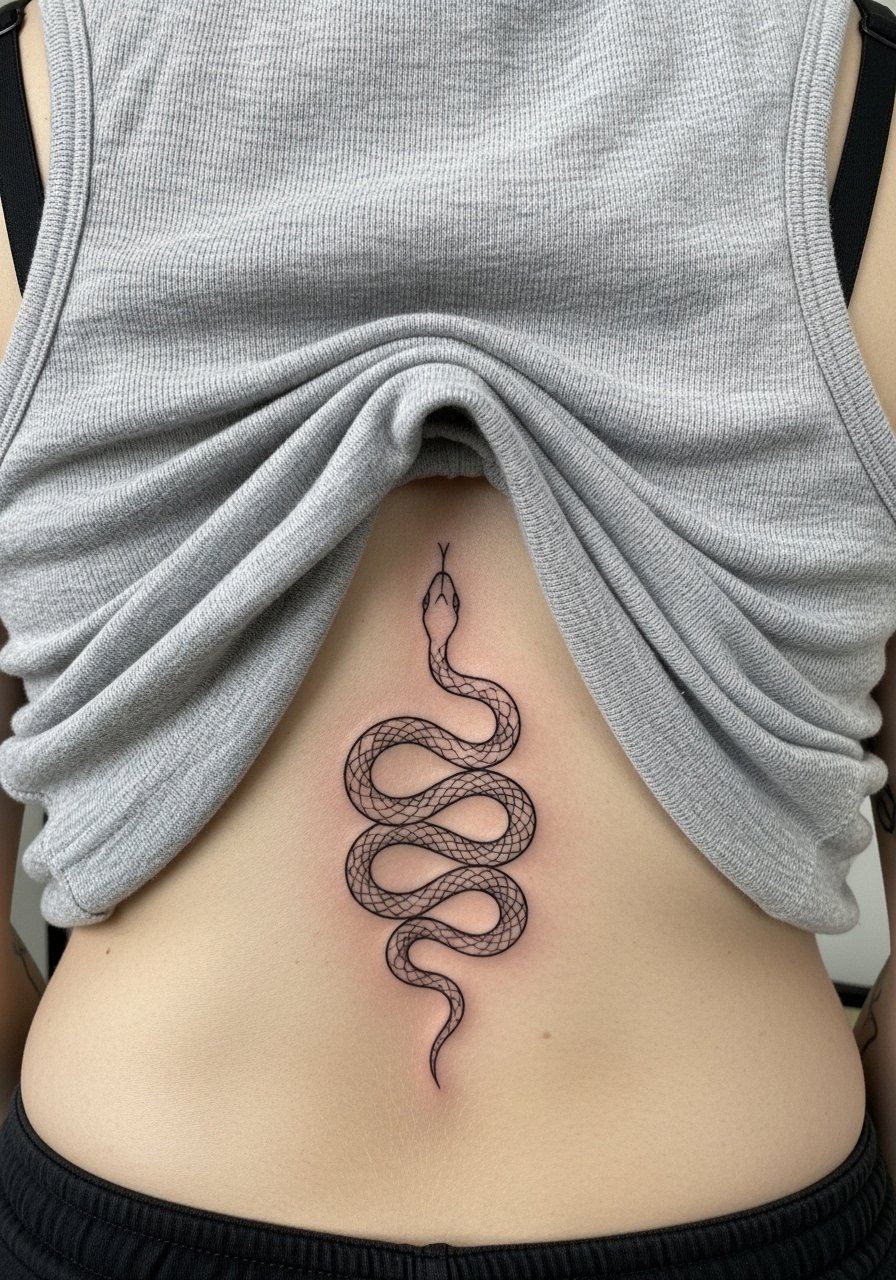
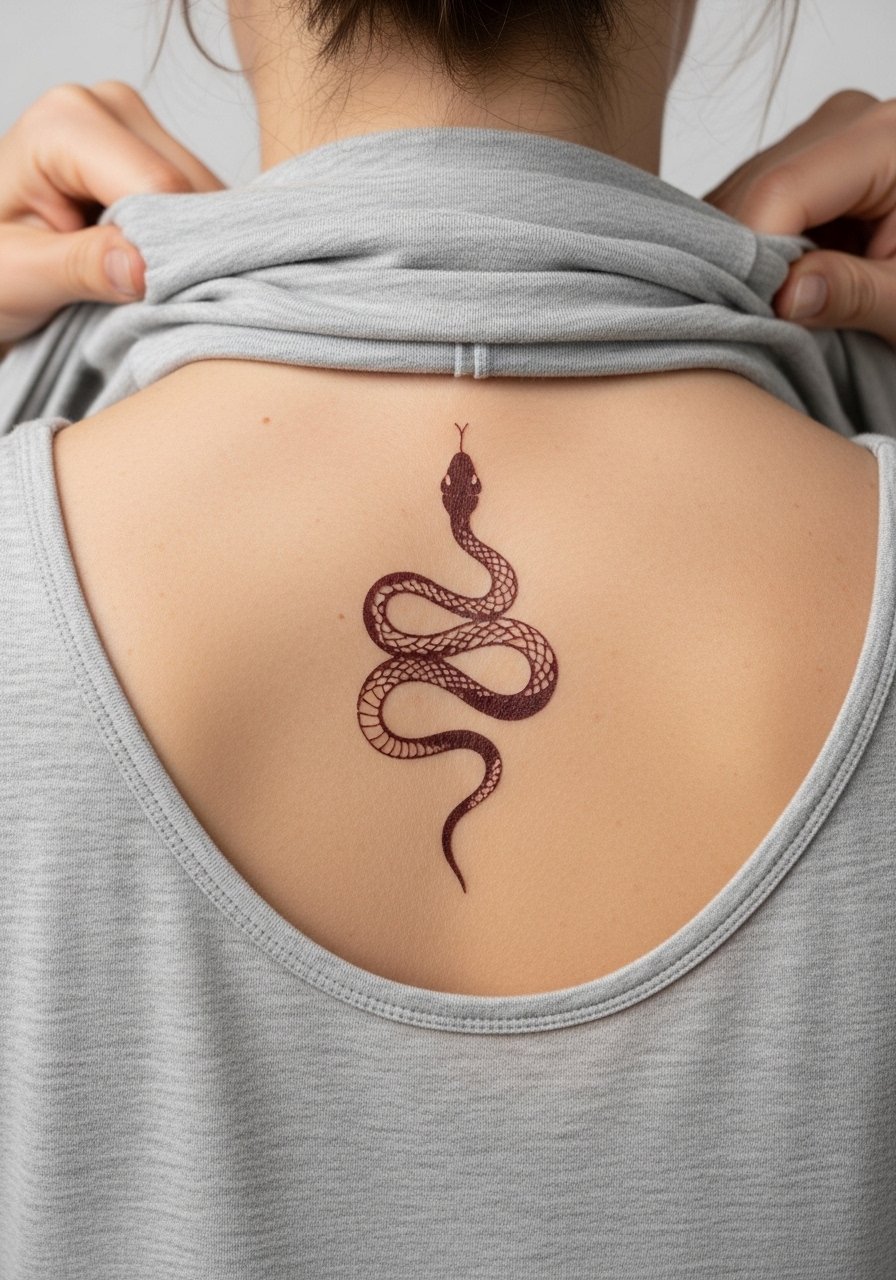
This coiled spine piece works when you want vertical flow without heavy saturation. Tell your artist you want a 2mm+ line weight around the coil so the curves keep separation as the years pass. Common mistake is asking for ultra-thin one-stroke lines that blur into a grey thread after a couple of years. Expect a medium pain level across the spine, a session of 45 to 90 minutes depending on size, and a likely touch-up window at 12 to 24 months. For the session wear, choose a loose tank top you can pull aside so the artist has full spine access and you stay comfortable while prone.
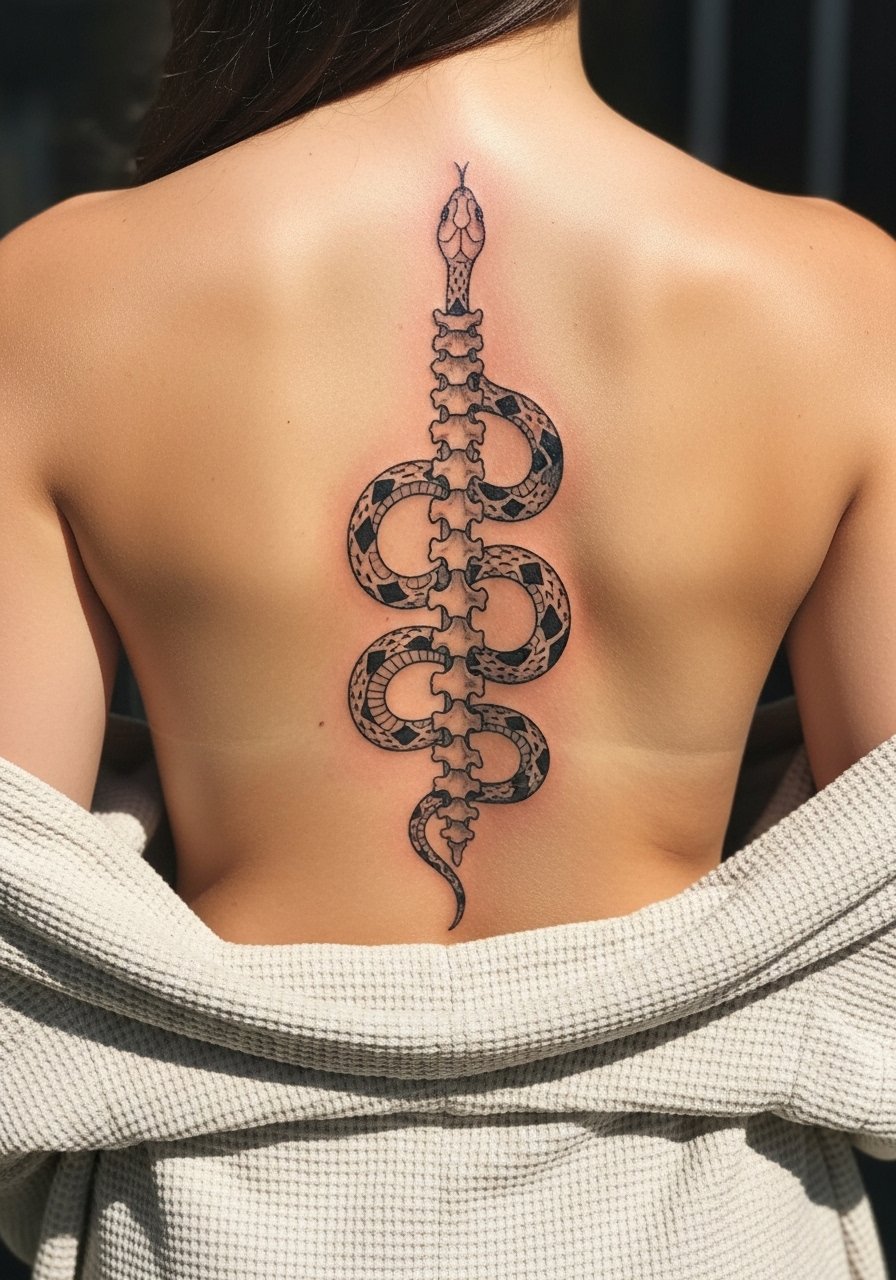
2. Vertebrae-wrap snake, single-needle details
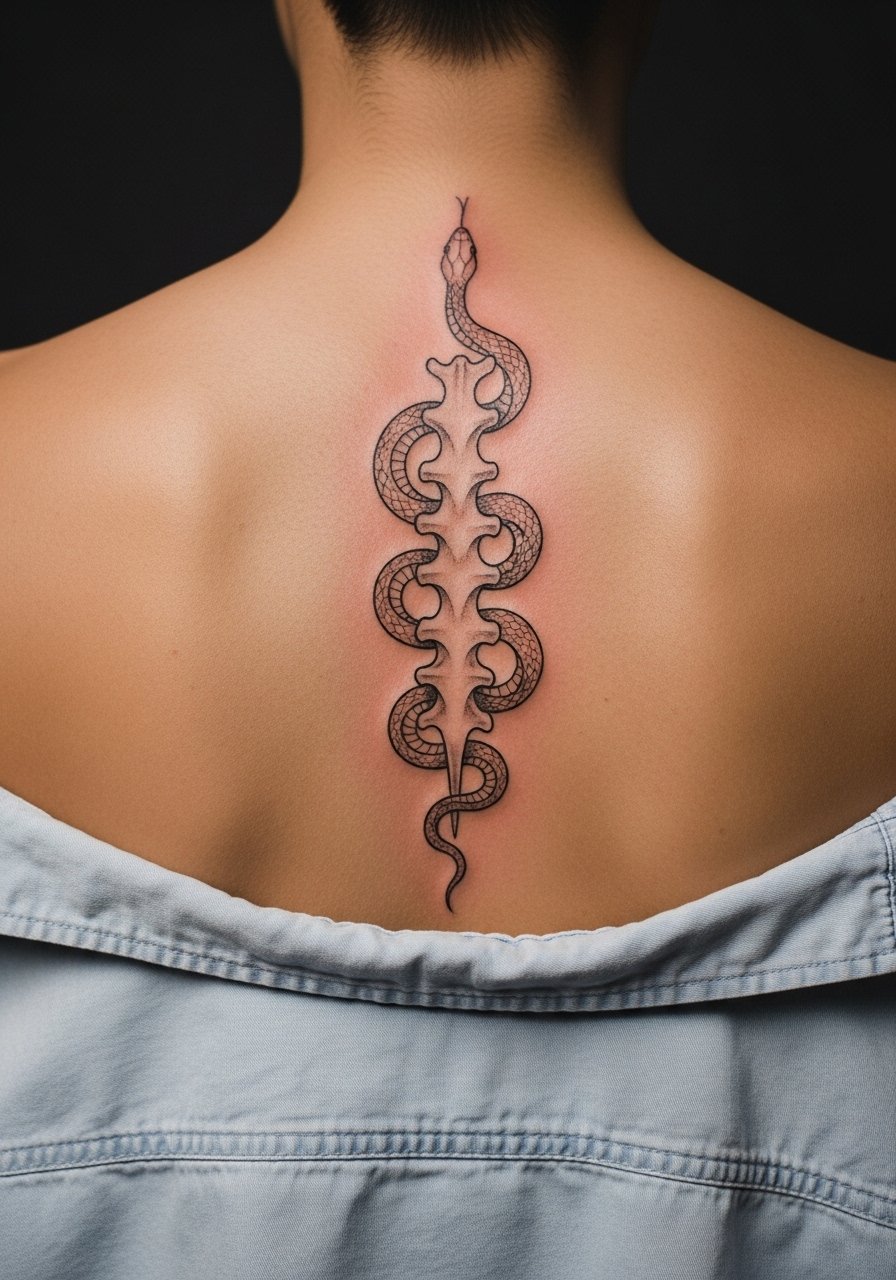
This design mimics vertebrae alignment to create a subtle optical effect that reads like a contour study. When consulting, ask for slightly thicker anchor lines where the snake crosses bone to prevent blowout on mobile skin. Artists are split on whether single-needle work on the spine holds better than bolder lines. One camp says ultra-thin needlework blurs quickly. The other camp says spacing and proper depth make single-needle settle fine. The piece hurts more than an arm tattoo because of proximity to bone, expect one session and a realistic touch-up at year two if you want a razor-sharp look.
3. Micro lower-back silhouette, clean fill
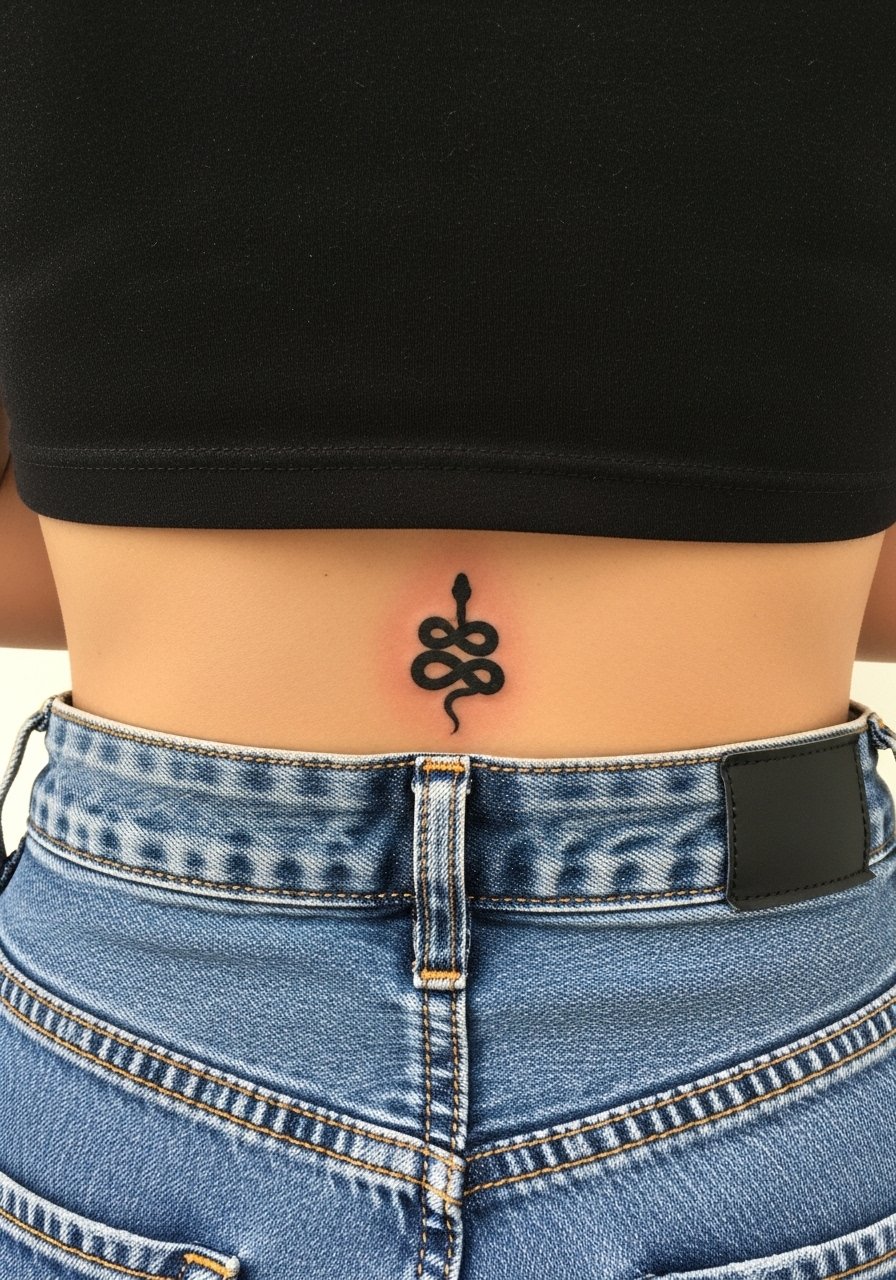
A 1–2 inch micro silhouette is fast to tattoo and easy to conceal for work settings. The key is a crisp, even fill so the dark block reads clearly on all skin tones. A frequent error is shrinking the shape too much, which makes the silhouette disappear under clothing friction. Session time is short, around 20 to 40 minutes, and the area can rub from waistbands while healing. When showing it off, try high-waisted jeans and a cropped neutral tee so the peek is intentional. For the appointment, pull low a comfortable waistband so the artist can access the lower back without pinching.
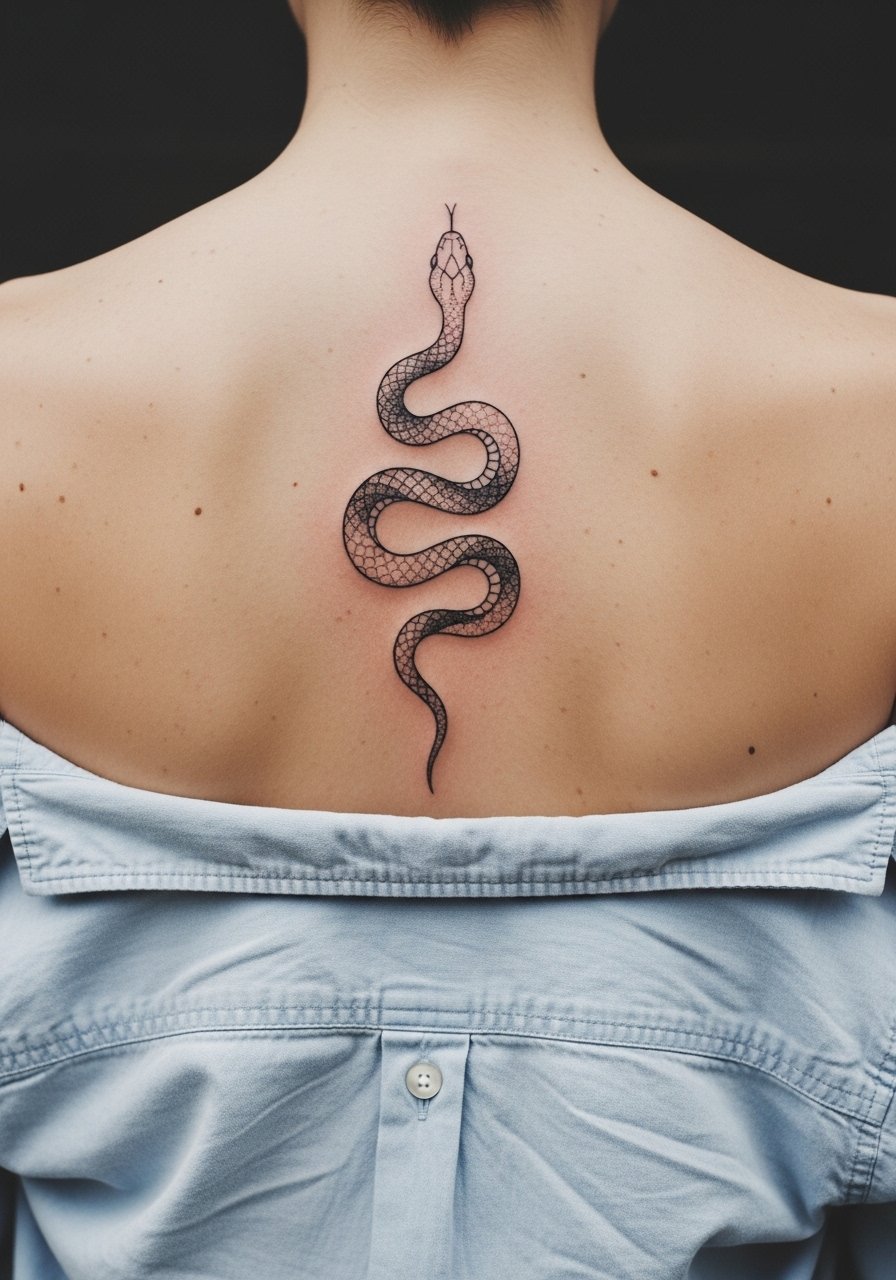
4. Ornamental full-spine snake with subtle scales
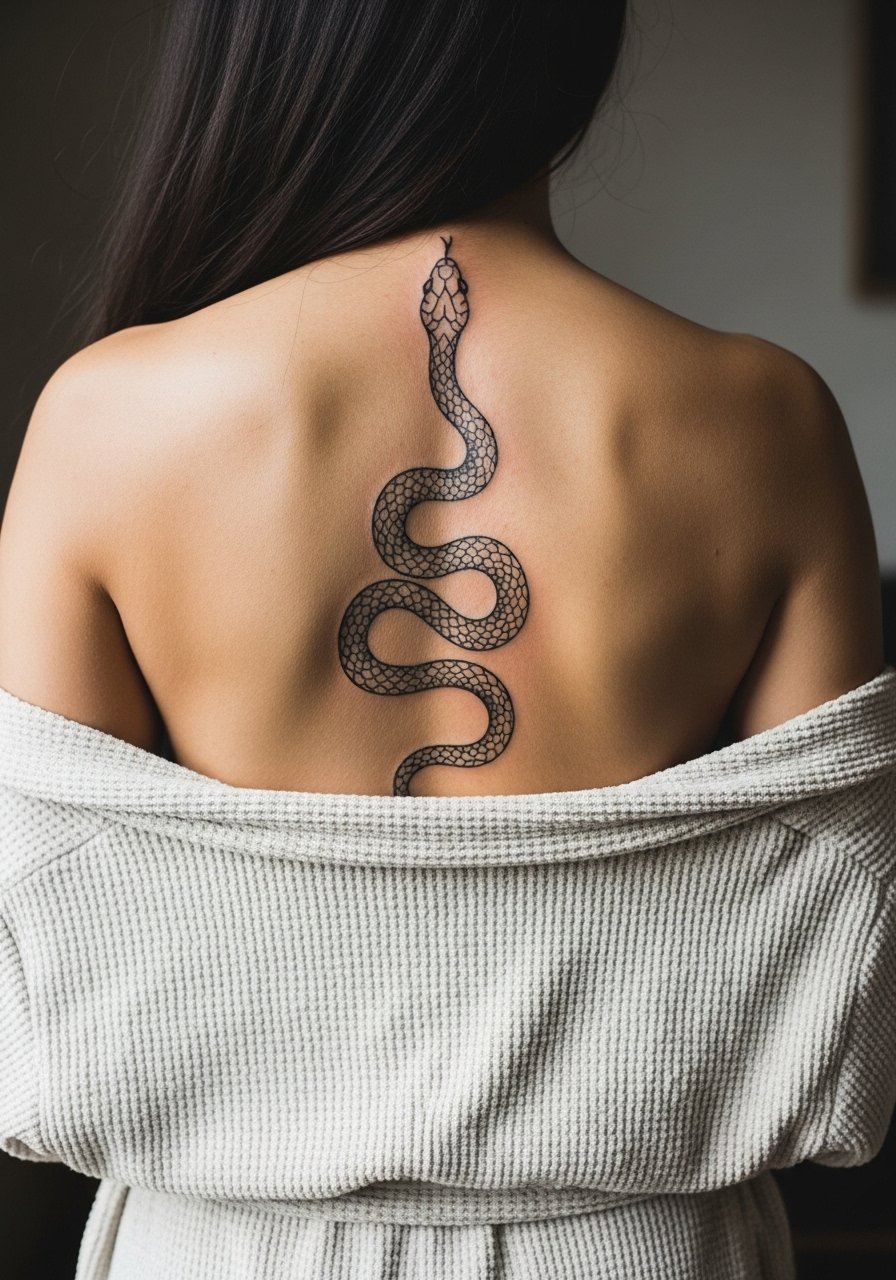
This ornamental take adds thin, repeating scale marks to give texture without heavy shading. Ask for spacing between scale rows so the pattern breathes as the skin moves. The common version that ages poorly uses dense stipple in a tight column, which ends up muddy. Expect two sessions for a full-spine ornamental piece and a longer first appointment for stencil adjustments. For summer events, pair this with a backless halter dress or layer with a sheer kimono robe when you want it visible without crowding the pattern.
5. Geometric snake head at the shoulder blade
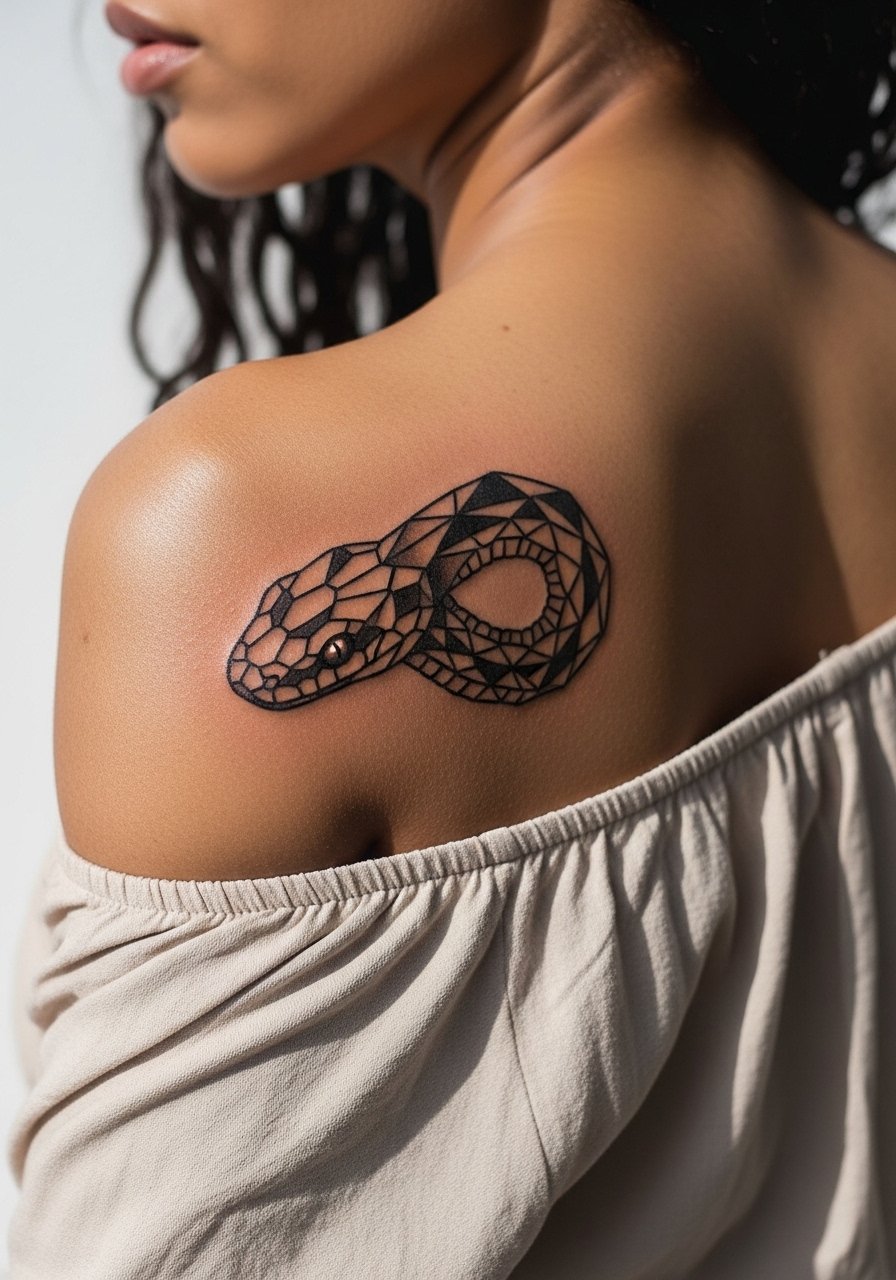
A geometric head reads modern from across the room because the angles create a bold silhouette without heavy saturation. The biggest mistake is shrinking the angles too small, which leads to blurring in dense intersections. For consultation bring clear references showing the exact line thickness you like. Session time tends to be 30 to 60 minutes, pain is moderate because the shoulder blade sits over bone, and touch-ups are often needed where lines meet. Wear a off shoulder blouse to show it off and pull a strap aside for the appointment so the artist has clean access.
6. Stipple-scale spine snake, dot-work texture
This version uses stipple shading to add depth without heavy solid fills. Ask for stipple spacing that favors lighter dots near edges so the scales read without filling the negative space. A typical mistake is requesting dense stippling too close together, which can fade into a grey mass over time. Sessions run longer when stipple is involved because artists place many small dots carefully. For comfort in the chair wear a loose button-down shirt you can lift or untuck so the artist can work the full length without fabric rubbing.
Studio Day Picks
The first six ideas above lean toward spine and shoulder placements, so these small items help with session access, fine-needle healing, and friction from straps.
- InkSafe healing balm. A matte-feeling balm that keeps fine-needle work from looking shiny while it heals, which helps delicate linework stay visible.
- Australian tea tree salve. Lightweight and thin, useful when summer sweat makes heavier balms feel occlusive on lower-back pieces.
- Recover non-comedogenic balm. Good for folks who experience follicle irritation on larger back panels during healing.
- Japanese rice bran ointment. A rare pick that users report preserves crisp edges on single-needle lines during the first months.
- H2Ocean aftercare spray. A thin spray option that cleanses without heavy rubbing, handy for spines and areas that are hard to reach.
7. UV-reactive accent snake for nightlife
Adding a tiny stripe or dot in UV-reactive ink gives a hidden glow in clubs without changing daytime appearance. Be aware not all studios offer UV ink and longevity varies. A realistic mistake is asking for broad areas of UV instead of small accents, which risk patchy loss over time. The session feels similar to a regular single-needle piece, but plan a follow-up to check how the UV sits once healed. For evenings choose a low-back or racerback top so the glow is discoverable under blacklight.
8. Birthstone-accented snake for darker skin tones
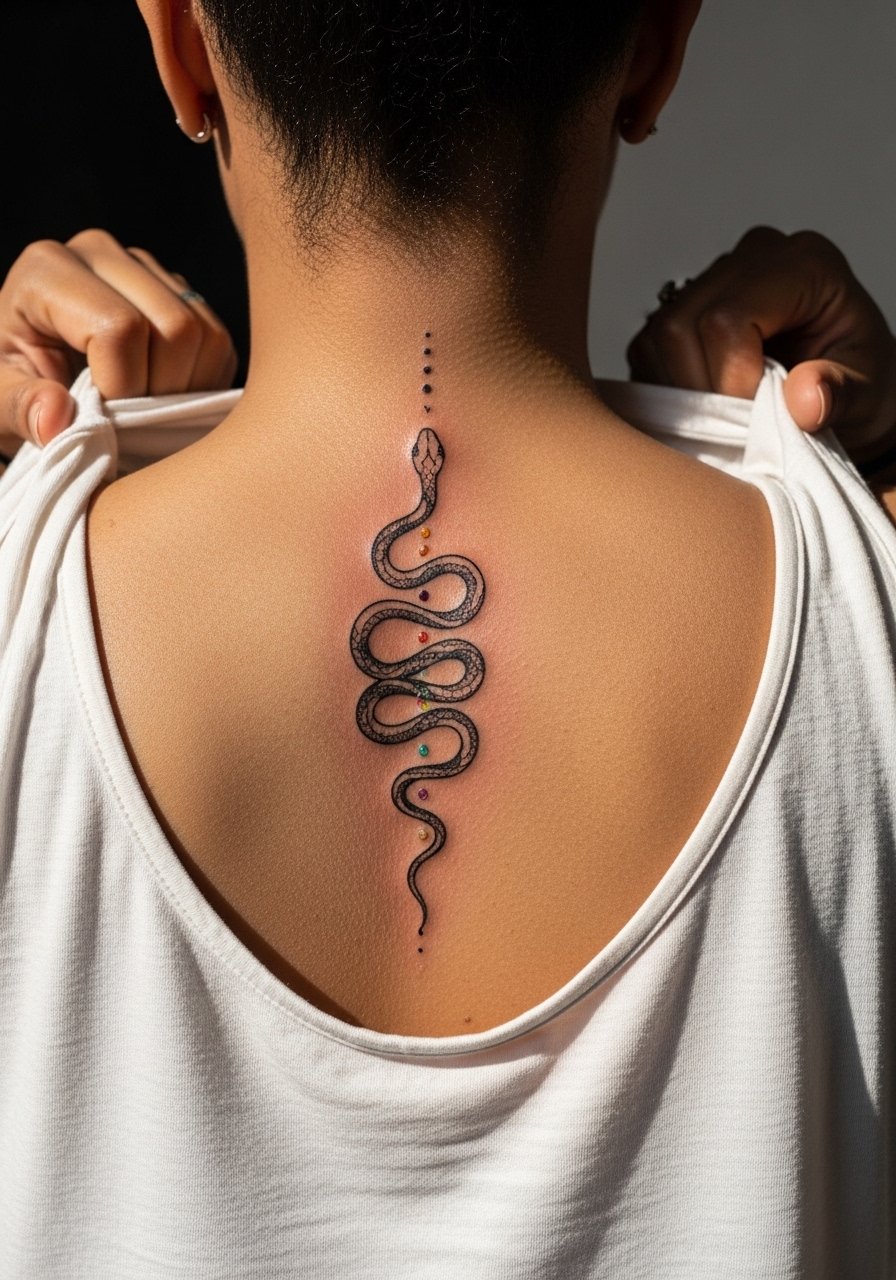
Tiny color accents can make blackwork pop on darker skin when placed as small birthstone dots rather than filling areas. Test temporary mockups on your skin tone so you can see contrast before committing. A common error is using pastel shades that vanish against richer skin tones. Session time increases slightly for precise spot color work, and you may need a color-specific touch-up later. For showing it off try a black fitted tank that frames the central spine without distracting from the dots.
9. Vertebrae optical illusion snake
This design intentionally follows back contours to create a subtle 3D effect. Tell your artist you want the snake to pause slightly at each vertebra so the alignment reads like anatomy instead of a single ribbon. Weight fluctuation can distort horizontal pieces, so the vertical optical approach resists visible stretching. Sessions are moderately painful over bony landmarks and may need a follow-up if the skin shifts after weight changes. A mirror check in the chair helps you confirm placement because you cannot see the back easily otherwise.
10. Micro head at the upper central back

A micro head on the upper back reads like a secret detail that can peek from collars. The main mistake is compressing too many tiny features into a 1 cm area. Ask for simplified shapes and clearer negative space so the features remain legible at six months and two years. Pain is low to moderate, and sessions are short. For wear try a mesh back tank that lets the detail show through work-friendly outfits.
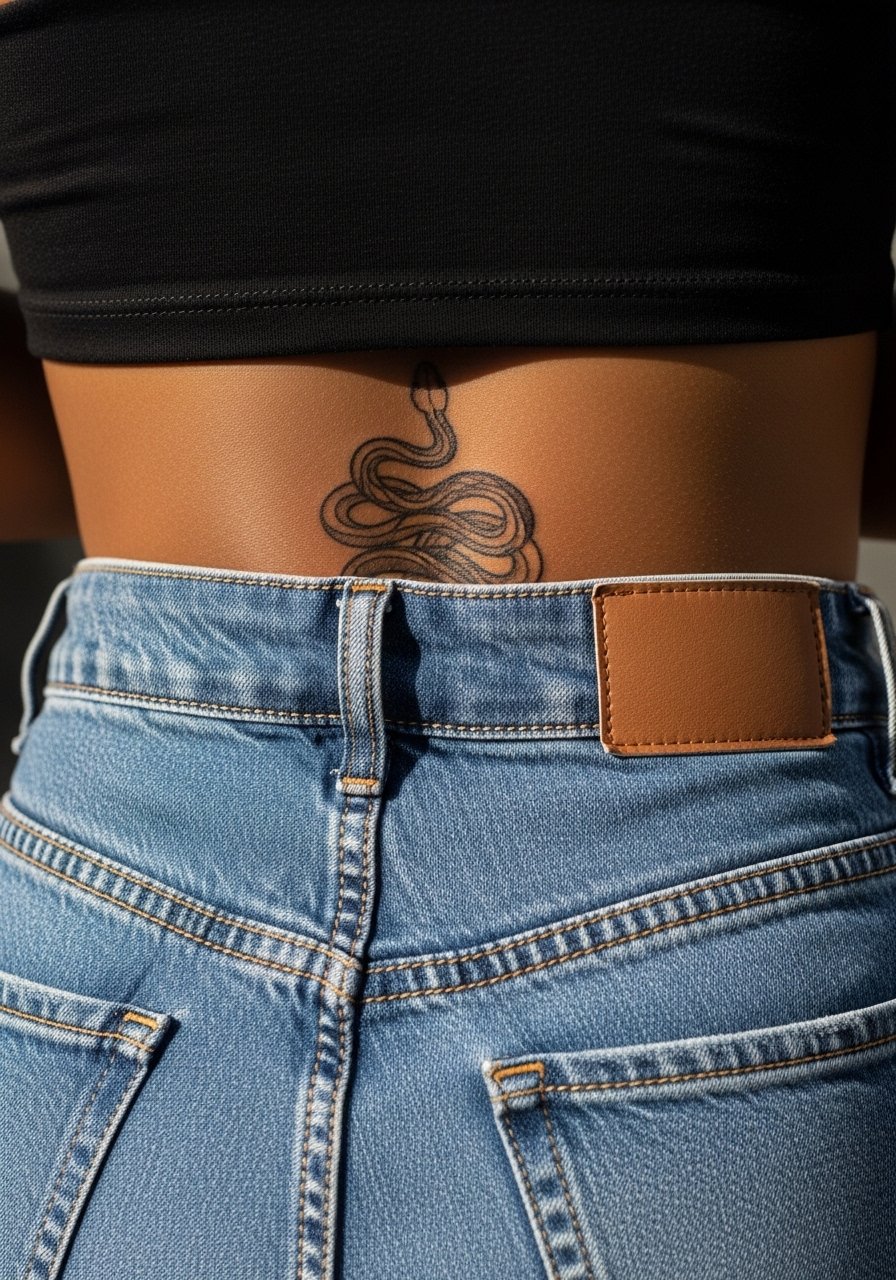
11. Tail-peek lower back snake

A small tail that peeks beneath clothing is playful and discreet. The usual misstep is placing it too close to waistband stitching, which rubs while healing. For the session put on drawstring or low-rise bottoms so the artist can work without fabric pressure. Pain is lower on the fleshy lower back, and healing is straightforward if you avoid tight bands. For nights out lean into a low back crop top that reveals the tail in deliberate glimpses.
12. Ornamental scale band across the mid-back

A horizontal ornamental band reads like jewelry across the mid-back when spaced correctly. Avoid dense, tiny stipple that will merge as the skin moves. This placement can feel tender during longer sessions because you lie prone for extended periods, so split into two sessions if your tolerance is low. For showing it off, layer with a sheer kimono robe or a cropped top that keeps attention on the band. Expect touch-ups at the one- to three-year mark for crisp edges.
13. Y-shaped blackwork over shoulder blades
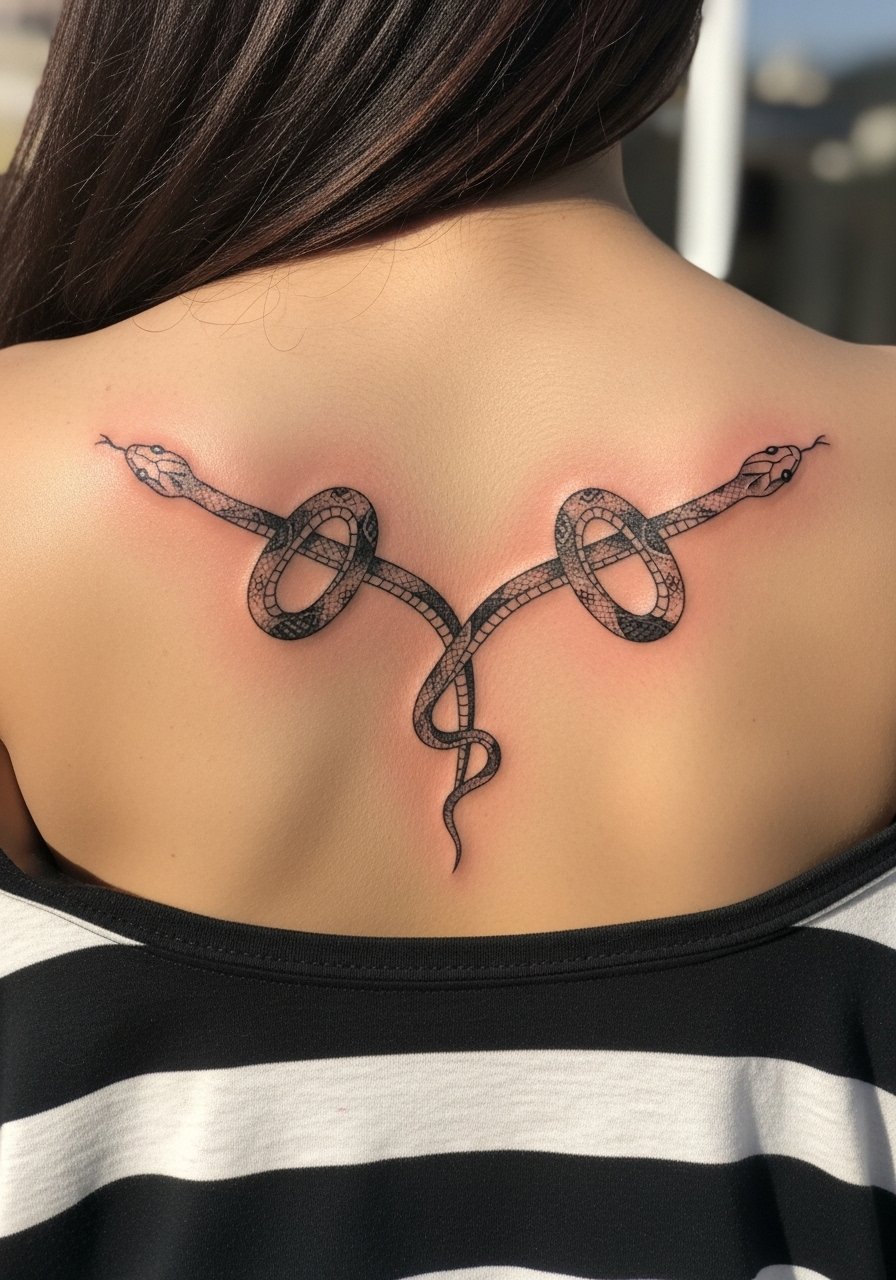
This composition uses the shoulder blades as natural anchors, so the design feels integrated with movement. The mistake is forcing too much detail into the junction where the Y meets, which often softens. In consultation ask for clear, open negative space at intersections so the shape holds as the skin settles. Pain is moderate across the shoulder blades and sessions can range from 45 minutes to two hours depending on scale. Off-shoulder tops frame this shape well, so try an off shoulder blouse to make it part of the outfit.
14. Tiny central spine glyph near the nape

A glyph near the nape is subtle and intimate while still being visible when hair is up. The most common error is requesting textural detail that vanishes at small scale, so favor bold, simple curves. Sessions are brief and the area is mildly sensitive. For the appointment wear a button-down you can lower in the back and later pair with a simple dainty chain necklace that sits just above the glyph without covering it.
15. Coiled lower-back negative-space design
Negative space allows the skin to read as part of the design, which can increase legibility on darker tones if planned well. A mistake is overusing tiny gaps that later blend during healing. This placement handles weight fluctuation better when the coil is vertical and centered. Session time is moderate and you should avoid tight waistbands for a week. For showing it off, pair with high waisted mom jeans and a cropped tee that keeps the curve visible.
16. Floral-accent spine snake in single-needle
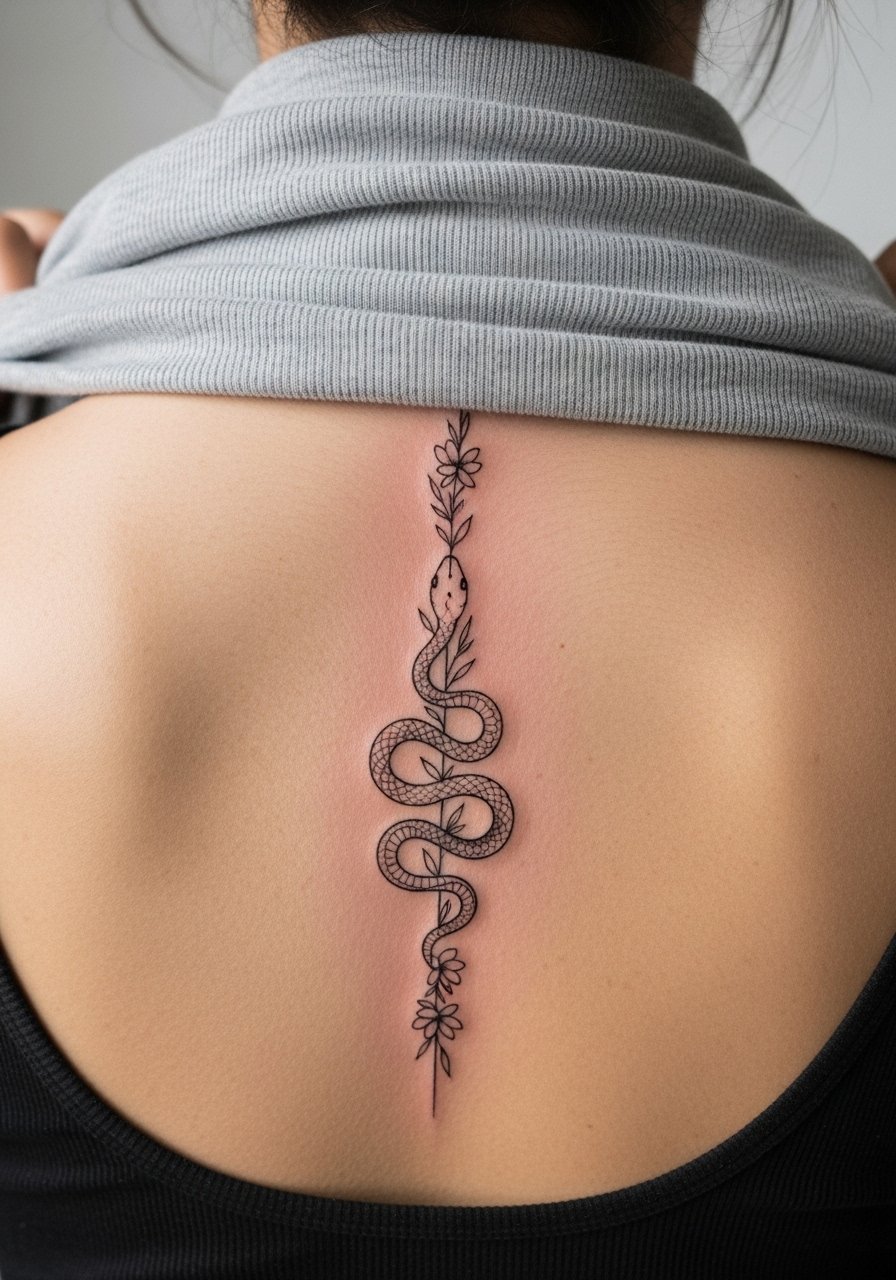
Tiny floral accents soften a minimalist snake while keeping the focus on linework. Avoid asking for dense floral clusters; light single-needle florals maintain clarity longer. The piece needs space between motifs so petals do not merge as the skin moves. Sessions can be longer if many small flowers are added, and expect to book a touch-up if color or edge crispness fades. A backless or low-back outfit makes these accents visible, and a backless halter dress pairs especially well.
17. Temporary-stencil spine test before committing
Testing a spine design with a temporary stencil lets you check curvature, how it peeks from clothing, and whether the scale placement suits your body. One under-covered tactic is to wear the stencil during a few normal days so you notice rubbing or visibility from certain outfits. This avoids committing to a session that feels wrong after healing. For the mockup wear the tank you plan to use at the appointment so you can see how straps interact with the design. If the test reads well, book a consultation and bring notes on what you want adjusted.
Frequently Asked Questions
Q: Will single-needle spine snakes blur faster than bolder work?
A: In my experience, single-needle pieces can soften sooner than saturated blackwork, but they also read cleaner when spaced correctly. Some artists argue ultra-thin work will blur within two years. Other artists say proper needle depth and spacing makes single-needle settle fine. Ask your artist where they stand, and plan a touch-up at the 12 to 24 month mark if you want crisp edges.
Q: How should I dress for a full-spine session to make the process easier?
A: Wear a loose tank or a front-button shirt you can pull aside so the artist can access the full spine without straps. Avoid tight waistbands and back-support bras for lower-back pieces. Bringing a robe or an oversized button-down keeps you comfortable while still giving the artist room to work.
Q: Is Saniderm better than dry healing for back tattoos?
A: The community is split. One camp prefers Saniderm because it protects hard-to-see areas and keeps contaminants off during the first days. The other camp favors dry healing, saying it reduces maceration risks on large back panels. The best choice depends on your skin type, the artist's preference, and how much you move or sweat during the first week.
Q: How visible will a micro silhouette be on darker skin tones?
A: Micro silhouettes can read well on darker tones if the shape is bold and not overly detailed. Tiny thin strokes tend to disappear, so ask for a slightly thicker silhouette or small negative space accents to increase contrast.
Q: Do back tattoos hurt more because you cannot see the artist work?
A: Not being able to watch does make some people report higher discomfort, partly because you cannot anticipate the needle. Bring a mirror for progress checks and communicate pain levels early. Small breaks and controlled breathing also help during longer spine sessions.
Q: Where do I look for minimalist spine specialists if my city is small?
A: Use tags like #minimalistsnakespine and #finelinespine on social platforms and filter by location. Apps with guest-spot calendars and community forums are good places to spot traveling minimalists. Booking early for guest spots helps because these artists often fill fast.
