
Fine line cuffs rule feeds and saved boards, but the reality is messy. The pieces that look best in snapshots often need touch-ups sooner than people expect. Placement, line weight, and how your skin heals matter more than the reference photo. Read these mini arm cuff ideas with an eye for what holds up, what hurts, and what to wear to show it off after the stencil comes off.
1. Fine Line Floral Armband on Inner Forearm

I recommend this for anyone who wants jewelry that never needs to be taken off. Ask your artist to space petals and leaves so the design reads at one inch width, and request slightly stronger line weight than the drawer sample so the work does not vanish in a year. Common mistake is asking for ultra-fine single-needle lines with zero spacing, which can bleed together by year two. Expect low to moderate pain on the inner forearm and a single session under an hour for a true mini cuff. For showing it off, roll up a rolled cuff chambray shirt in white or light gray so the petals peek where fabric ends.
2. Minimalist Geometric Band at Mid-Forearm
There is a reason geometric cuffs read so modern. They frame muscle without shouting, and they scale well when given breathing room. Tell your artist you want negative space deliberately built into the pattern, not just thin lines crowding each other. The biggest error is shrinking a complex grid to wrist size. This design holds better when kept mid-forearm at 1.5 to 2 inches wide. Pain is mild, session time about 45 minutes. For a night look, push your sleeve up and pair with a chunky leather wrist cuff on the opposite arm to balance the geometry.
3. Blackwork Tribal Band on Outer Bicep
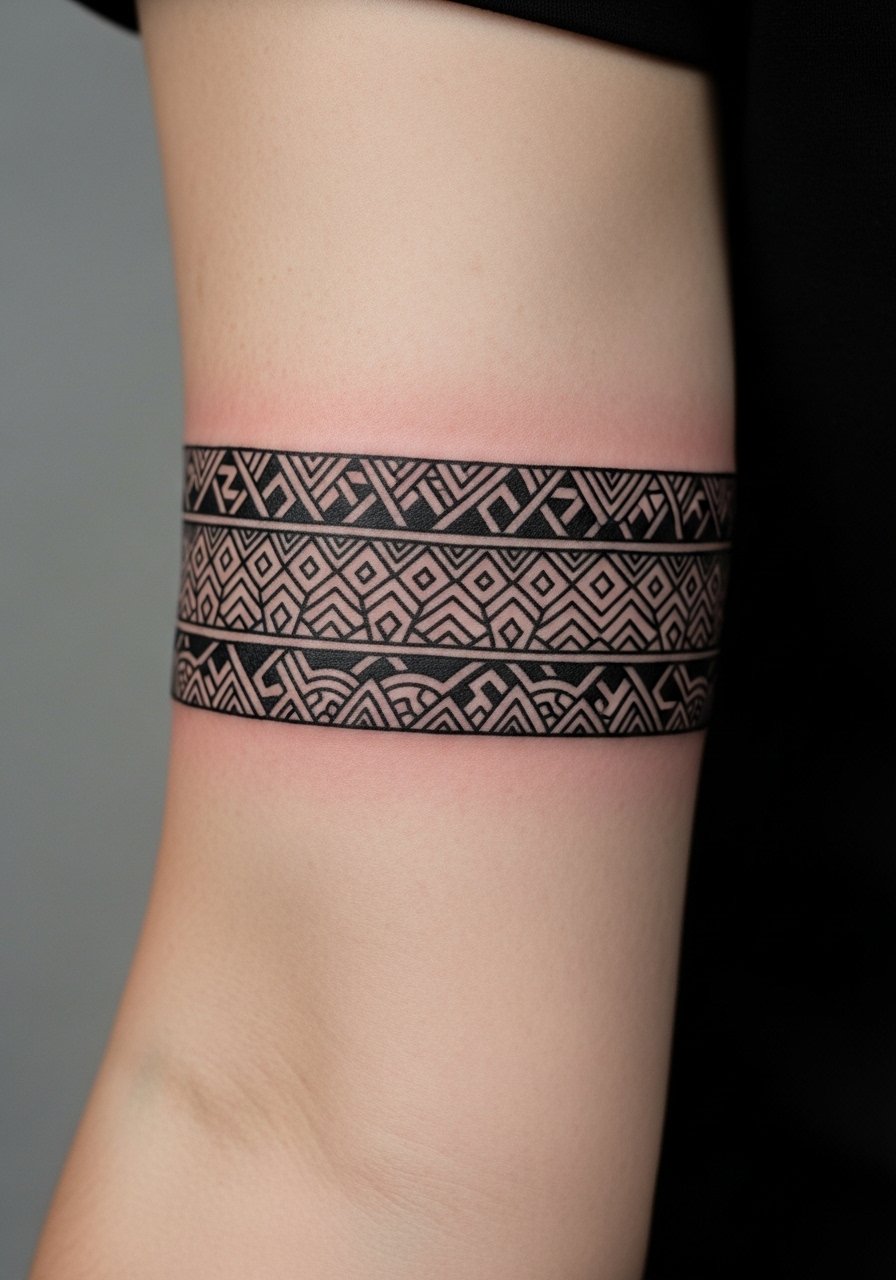
This is the pick when you want contrast that reads from across a room. Ask for clear breaks in the pattern so negative space prevents the design from blending into a single dark mass over time. One common mistake is requesting a full wrap with zero spacing, which can become a muddy silhouette on darker skin tones. Outer bicep placement is forgiving with body changes and tattoos here stretch less than on the forearm. Expect moderate pain and a single session of under two hours. Show it off with a fitted black tee or an olive cargo jacket with sleeves pushed up.
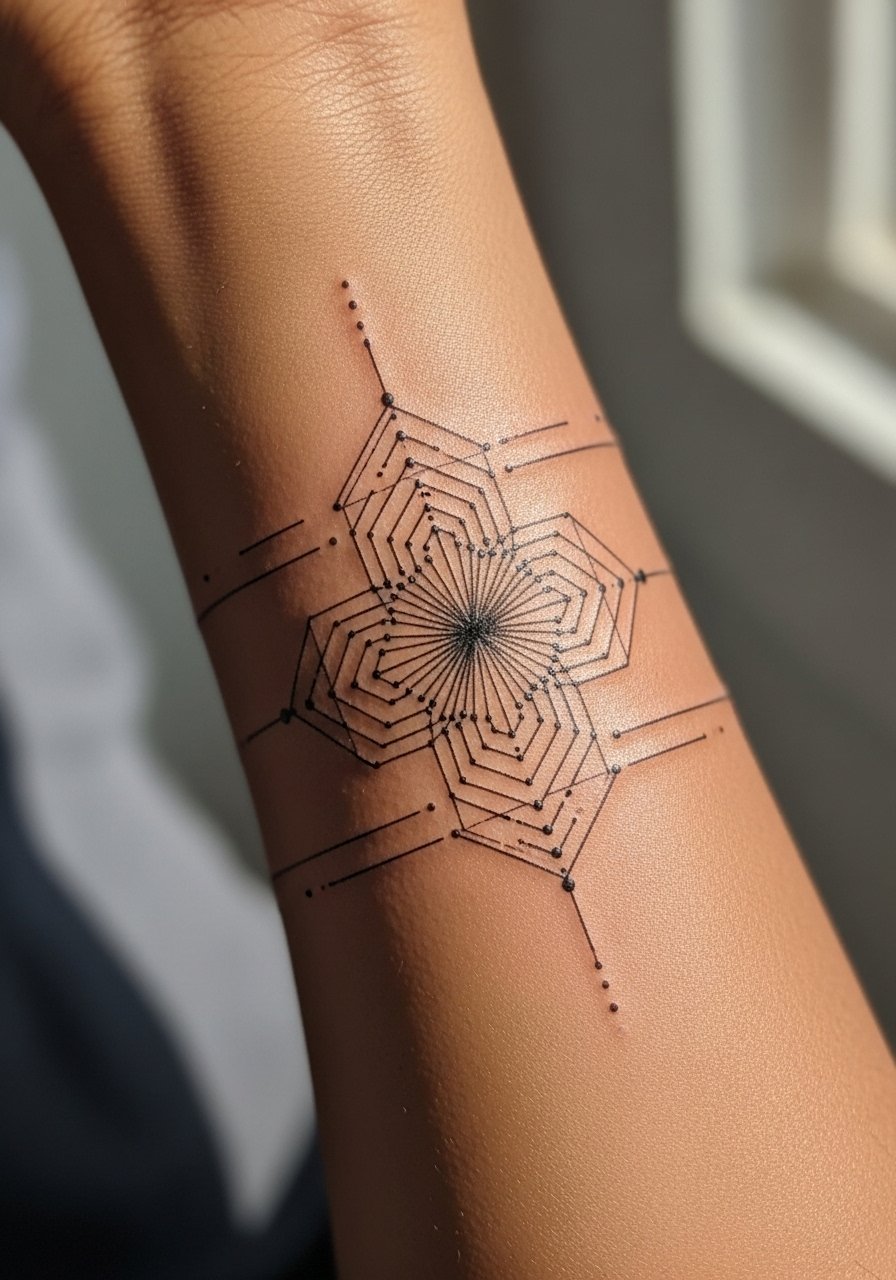
4. Dotted Line Cuff that Wraps Wrist to Elbow
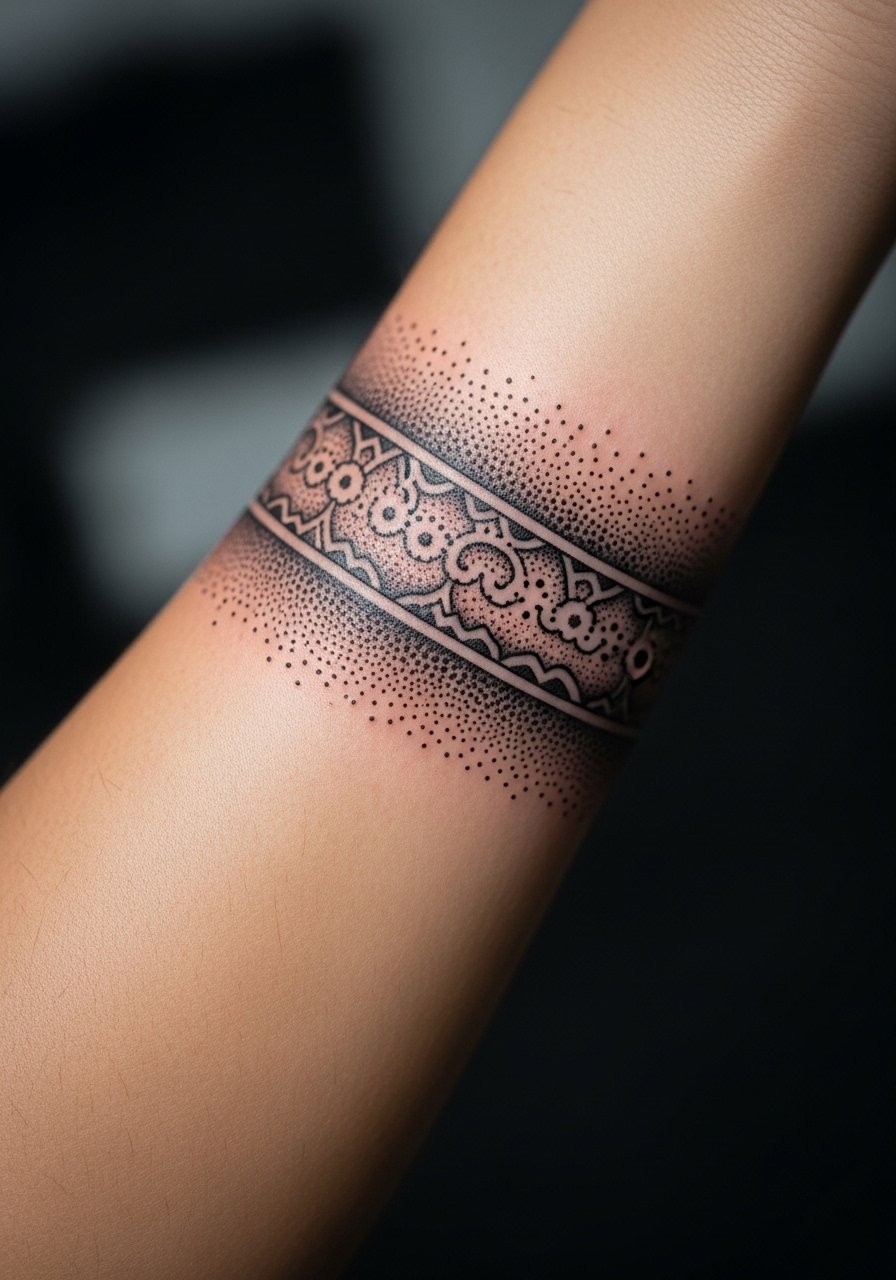
Dot work is forgiving because it creates texture rather than relying on a single continuous line. For a cuff that wraps a long stretch, plan dot density ahead with the artist so dots thin toward the wrist and dense at the mid-arm. A mistake I see often is asking for uniform micro-dots across a curved surface, which flattens the illusion. Pain will climb as you approach the wrist bone. Session time can be a single long sit or two shorter ones depending on dot density. For casual showing, roll sleeves and keep accessories minimal with a slim gold chain necklace to avoid wrist crowding.
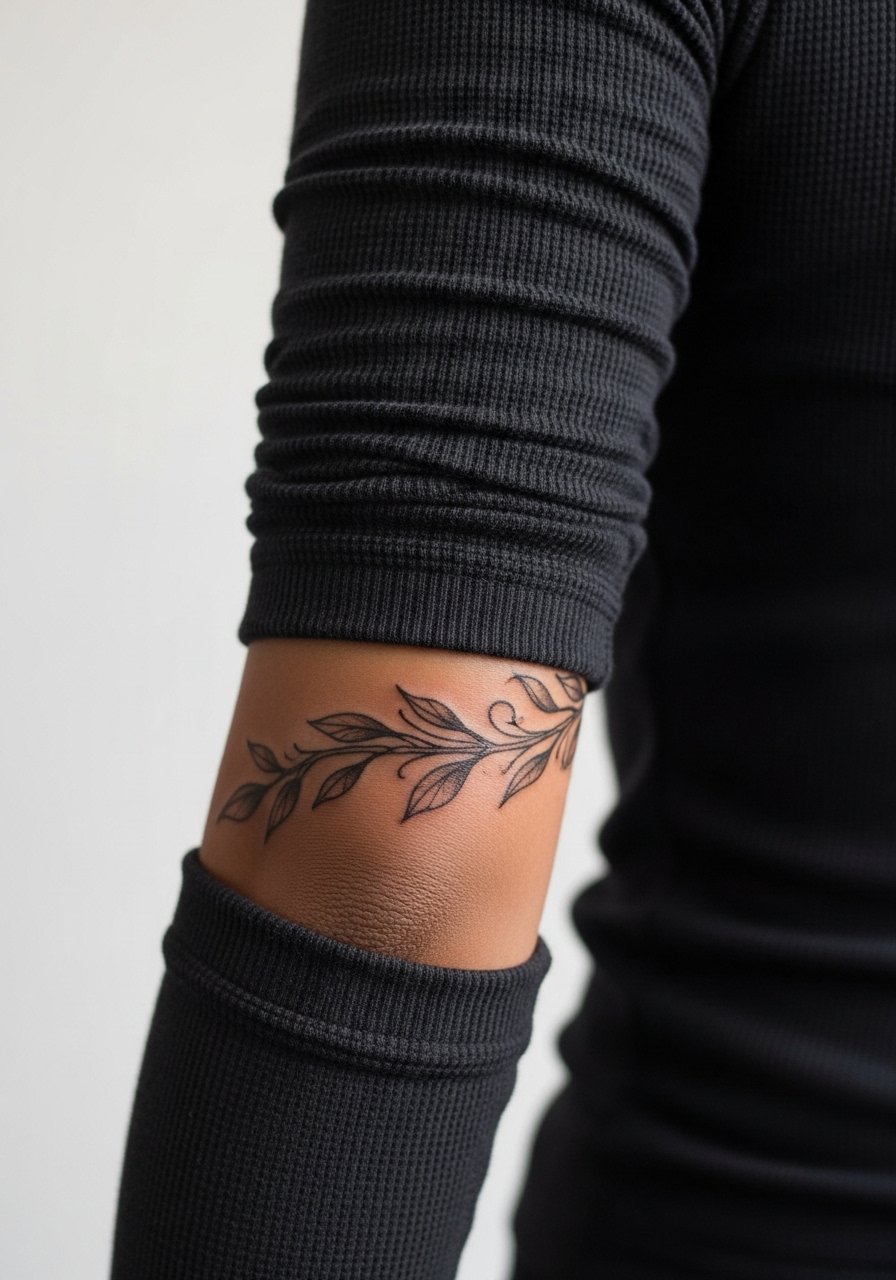
5. Ornamental Vine Cuff on Inner Forearm

This style follows muscle and breathes with motion, which is why I suggest inner forearm placement when growth symbolism matters. Tell the artist you want leaves oriented to the natural arm curve and ask for slightly thicker stems so they hold at year two. The common error is making vines too tight so they blur into one dark string. Expect mild pain and a one to two session plan if shading is included. During the appointment wear a light gray short sleeve button up so your artist can access the area without the fabric tugging.
6. Micro-Realism Wave Band on Upper Arm
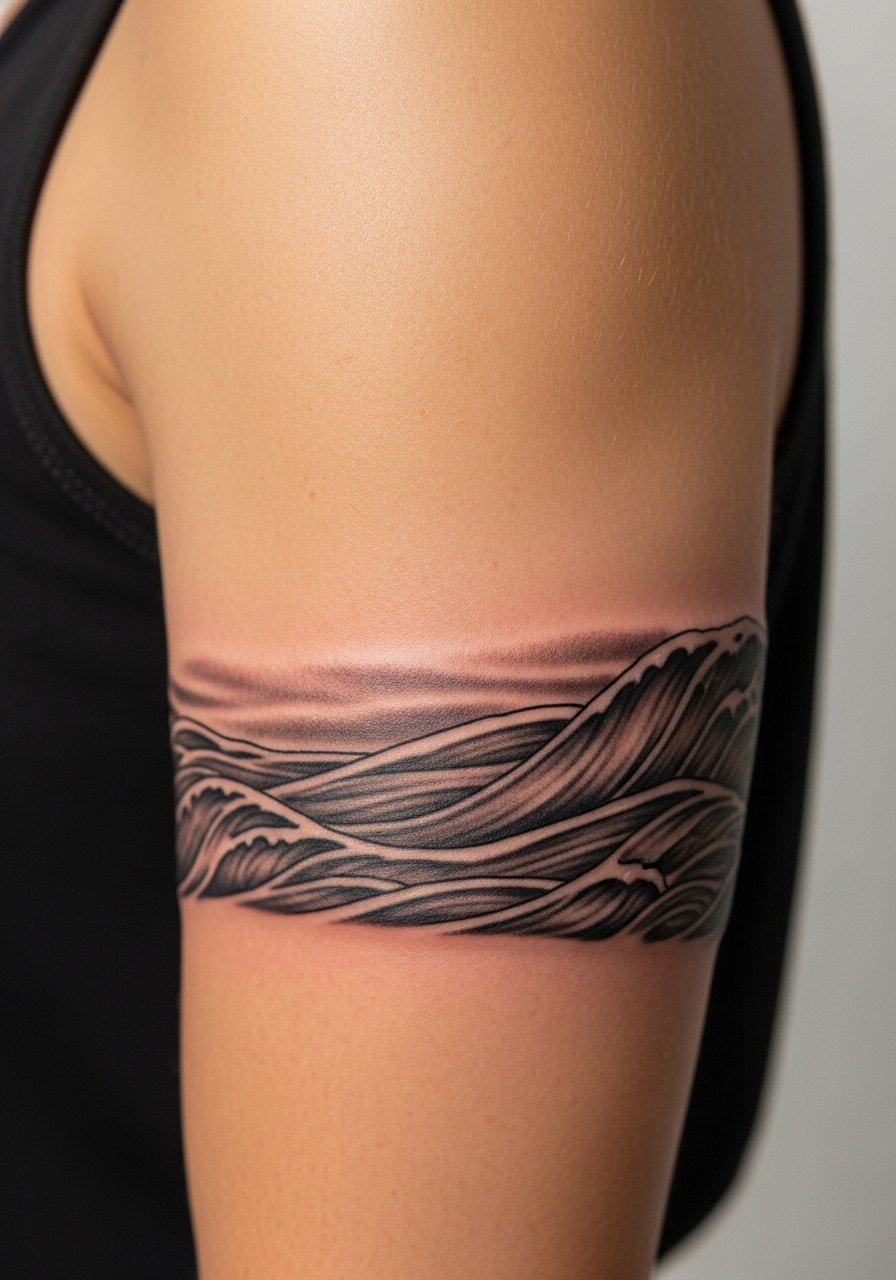
If you want motion rather than pattern, a tiny realistic wave band gives that ocean feel without full sleeve commitment. Ask for soft shading instead of hard outlines and a slightly larger scale so ripples keep definition after healing. A mistake is compressing fine realism into less than an inch width, which loses the texture. Upper arm placement handles shading well and is low risk for stretch from weight changes. This will likely take two shorter sessions for depth. Pair it for evenings with an off-shoulder top or keep it casual under a denim jacket.
Pack Smart
The inner forearm pieces and wrist cuffs above need different prep than upper arm work, so a few small items make session day and the first week easier.
-
Beeslike Tattoo Goo. Lightweight, non-greasy balm that users report performs well in summer for fine line cuffs that are prone to scabbing.
-
Australian Tea Tree Salve. Gentle antiseptic quality for those who sweat during chair time, helps prevent irritation around delicate wrist work.
-
Japanese Hada Labo Lotion. Ultra-light moisturizer for fine line pieces that need hydration without clogging pores.
-
Indie Black Lotus Balm. Thinner consistency recommended by some artists for blackwork cuffs to avoid thick residue.
-
Fragile Tattoo Balm. A thinner alternative to heavier ointments that can help fine line forearm pieces breathe during the first few days.
7. Neo-Traditional Rose Cuff on Upper Bicep
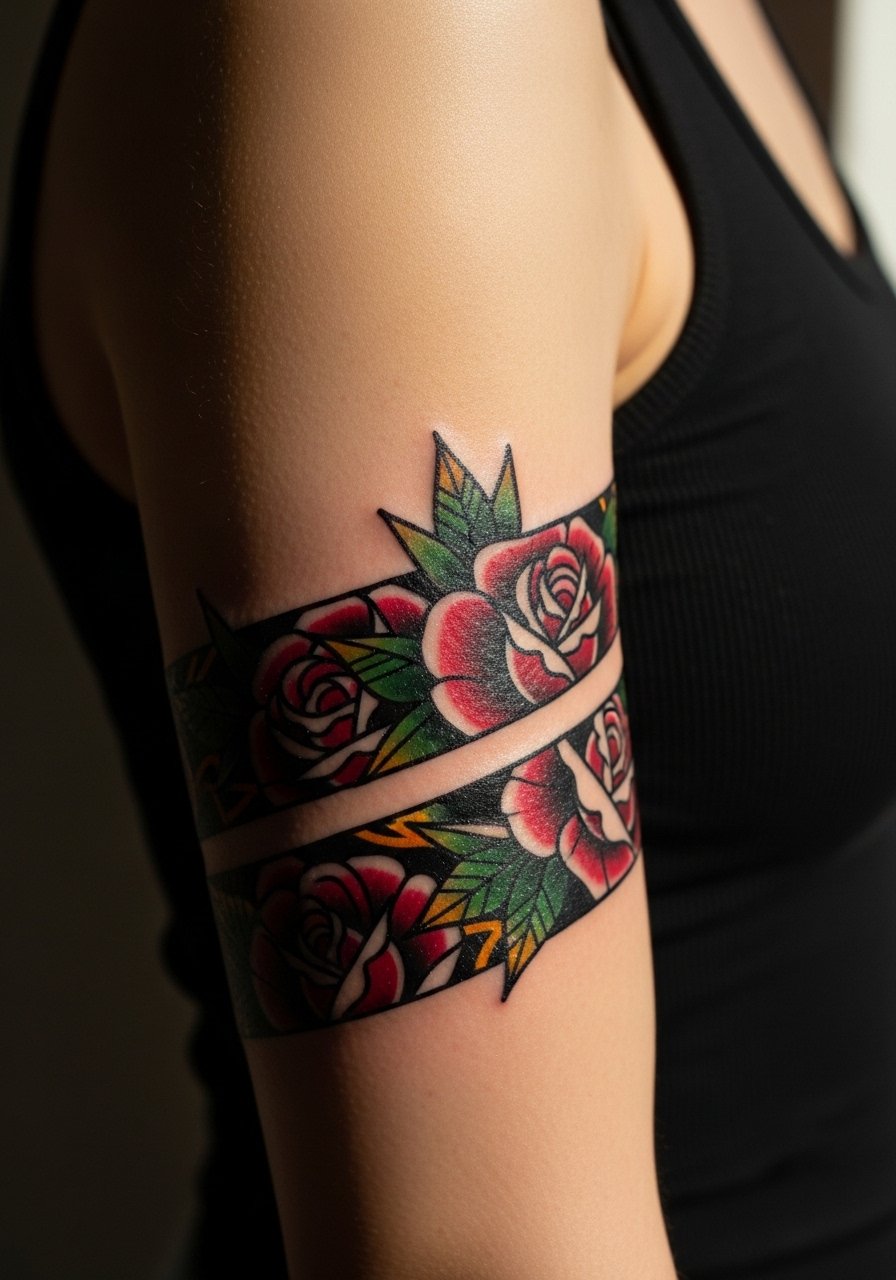
Color changes require a different talk at consultation. Ask for bold outlines with mid-tone color fills to avoid a muddy photo on darker skin. The mistake people make is asking for pastel washes only, which fade faster on arms exposed to sun. Placement on the upper bicep keeps the floral visible with less stretch risk and the pain is usually mild. Sessions can run up to two hours with color layering. For showing off, a strapless tank or open denim jacket frames the roses and lets the color pop during warm-weather months.
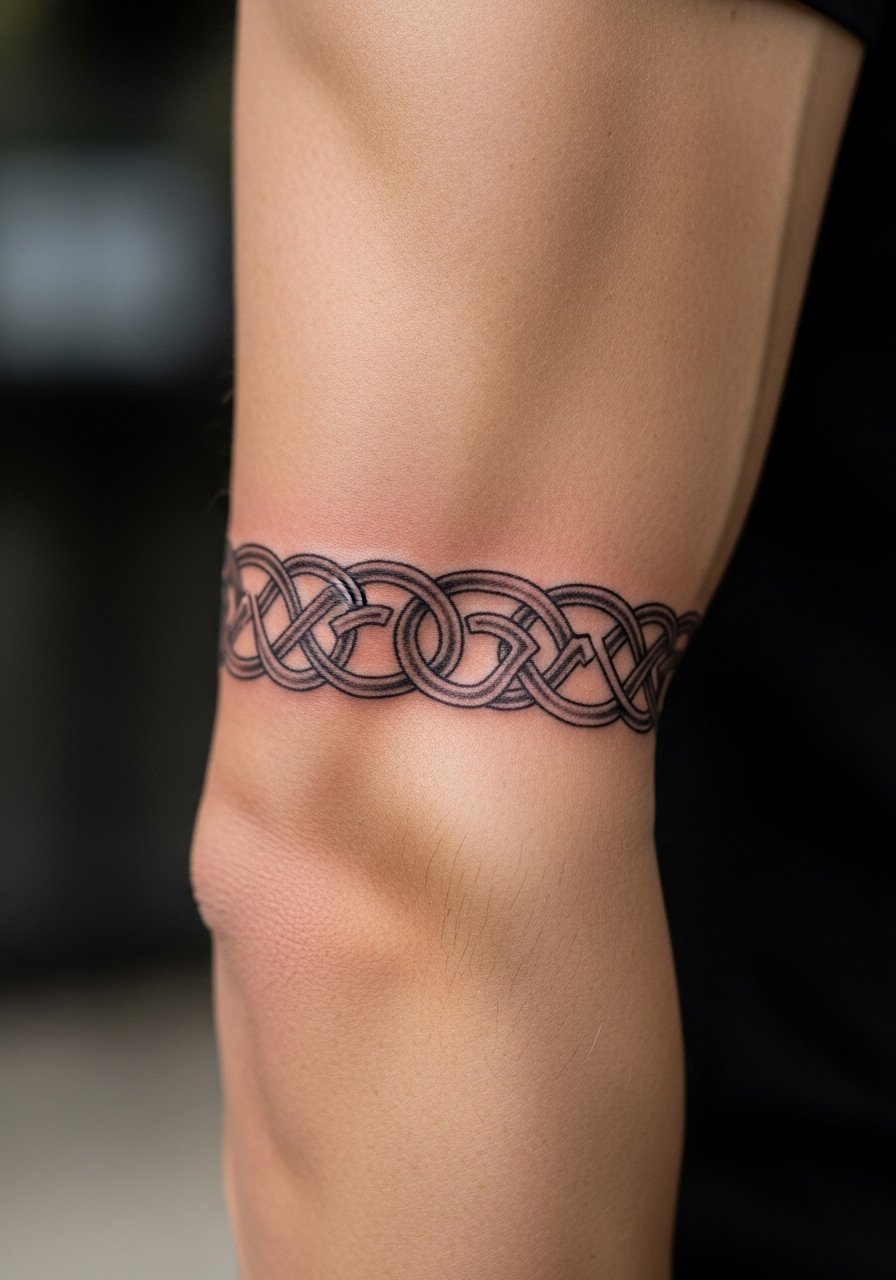
8. Ignorant Style Knotwork Band on Forearm
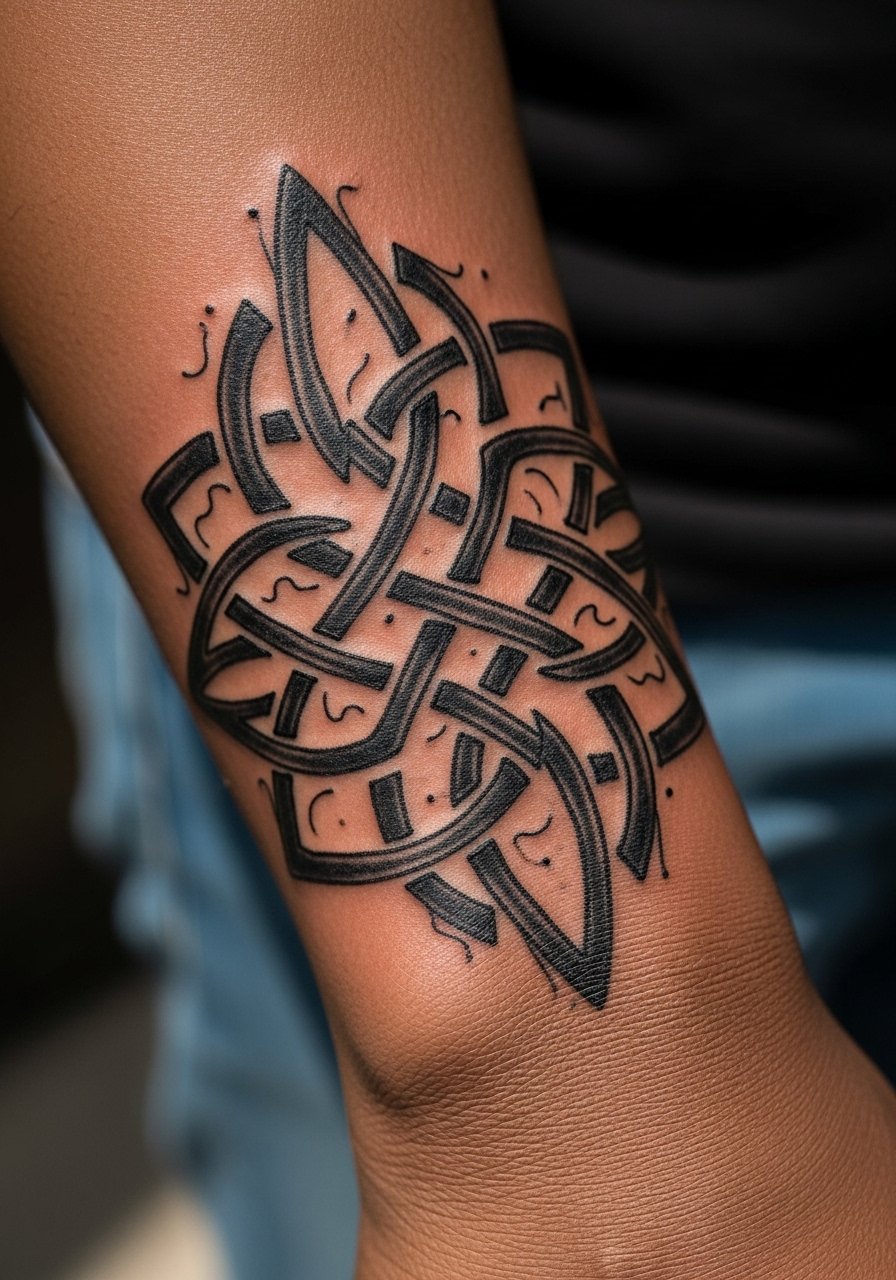
Raw, hand-sketched knotwork is great when you want a handcrafted feel. Tell your artist you want deliberately uneven line weight and visible hand texture so the style reads as authentic rather than sloppy. The common error is smoothing the knot too much during transfer and losing the intended roughness. Forearm placement has higher movement so expect a slightly longer touch-up window around year one if lines settle unevenly. Pain is low to moderate and a single session usually does the trick. Wear a sleeveless tank to the appointment and style with a chunky leather wrist cuff for contrast when it heals.
9. Watercolor Feather Cuff at the Wrist
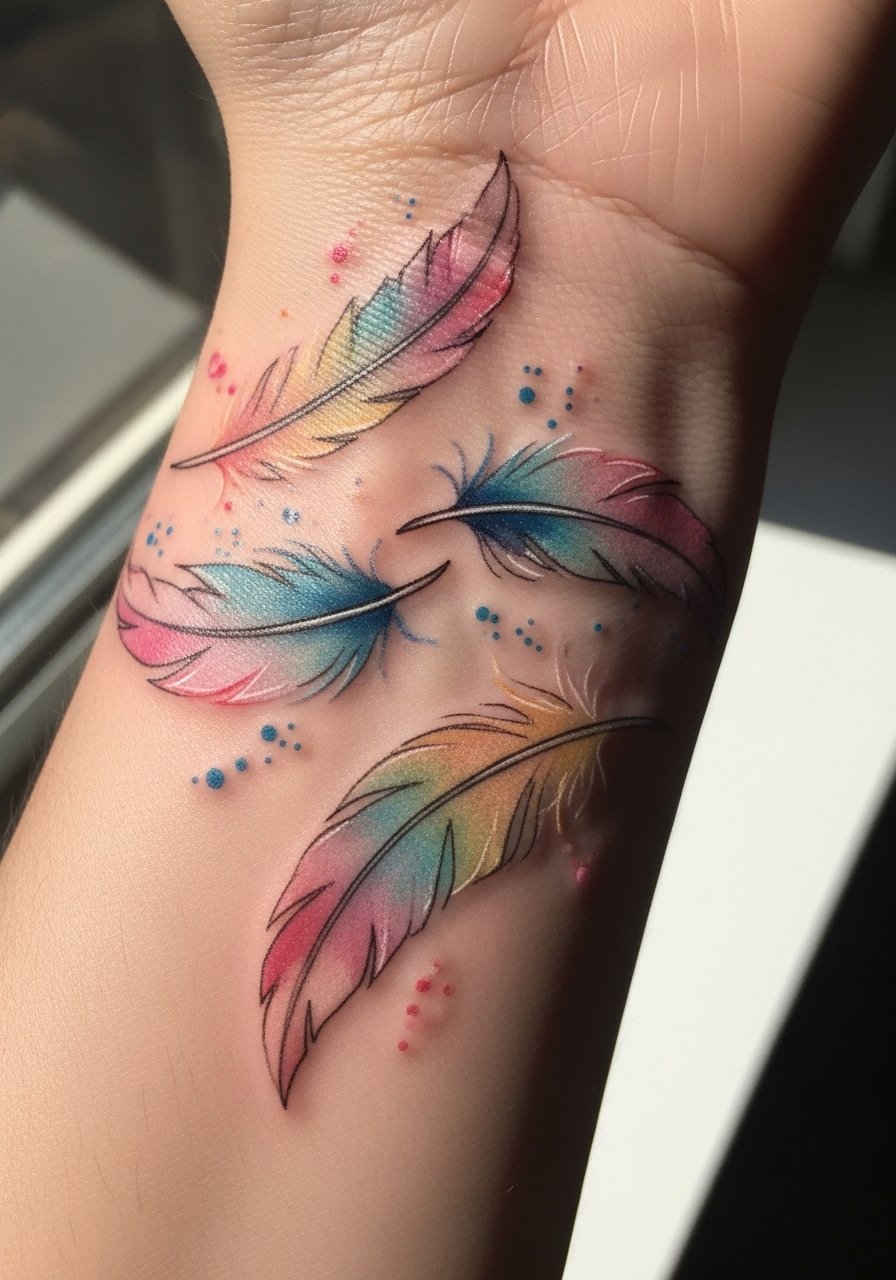
Watercolor effects give a soft, airy look but they need larger margins to avoid looking like a bruise over time. Ask for a defined feather outline with watercolor fills sitting just outside the line so color does not creep into the core linework. The controversy here is obvious to fans: watercolor lovers accept faster fading and touch-ups, while durability-focused clients prefer black outlines. Name the trade during your consult so expectations match. Wrist work is painful near the bone and sees more friction, so expect a touch-up sooner than on the bicep. Style it with rolled sleeves and avoid bracelets during the first month.
10. Traditional Anchor Band on Outer Forearm
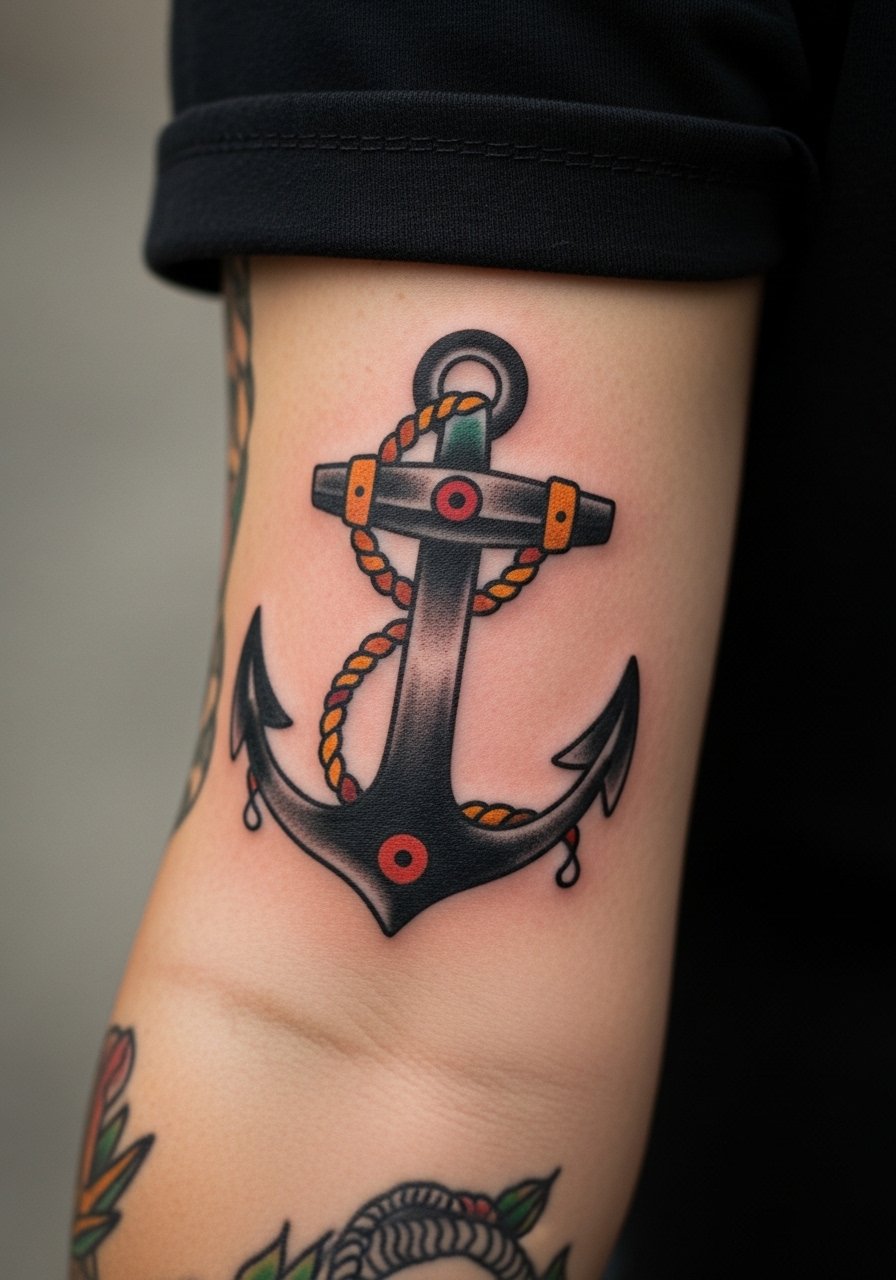
Traditional pieces age into strong silhouettes when ink saturation is solid from the start. Tell your artist you want saturated fills and clear borders around the anchor so the negative areas remain crisp. The common mistake is relying on thin outlines which can spread under the skin over time. Outer forearm placement is low stretch and ideal for visibility. Pain is mild and a single session usually covers it. Pair this with a fitted black v-neck tee or an olive cargo jacket with sleeves pushed for an on-duty nautical look.
11. Fine Line Script Cuff on Inner Bicep
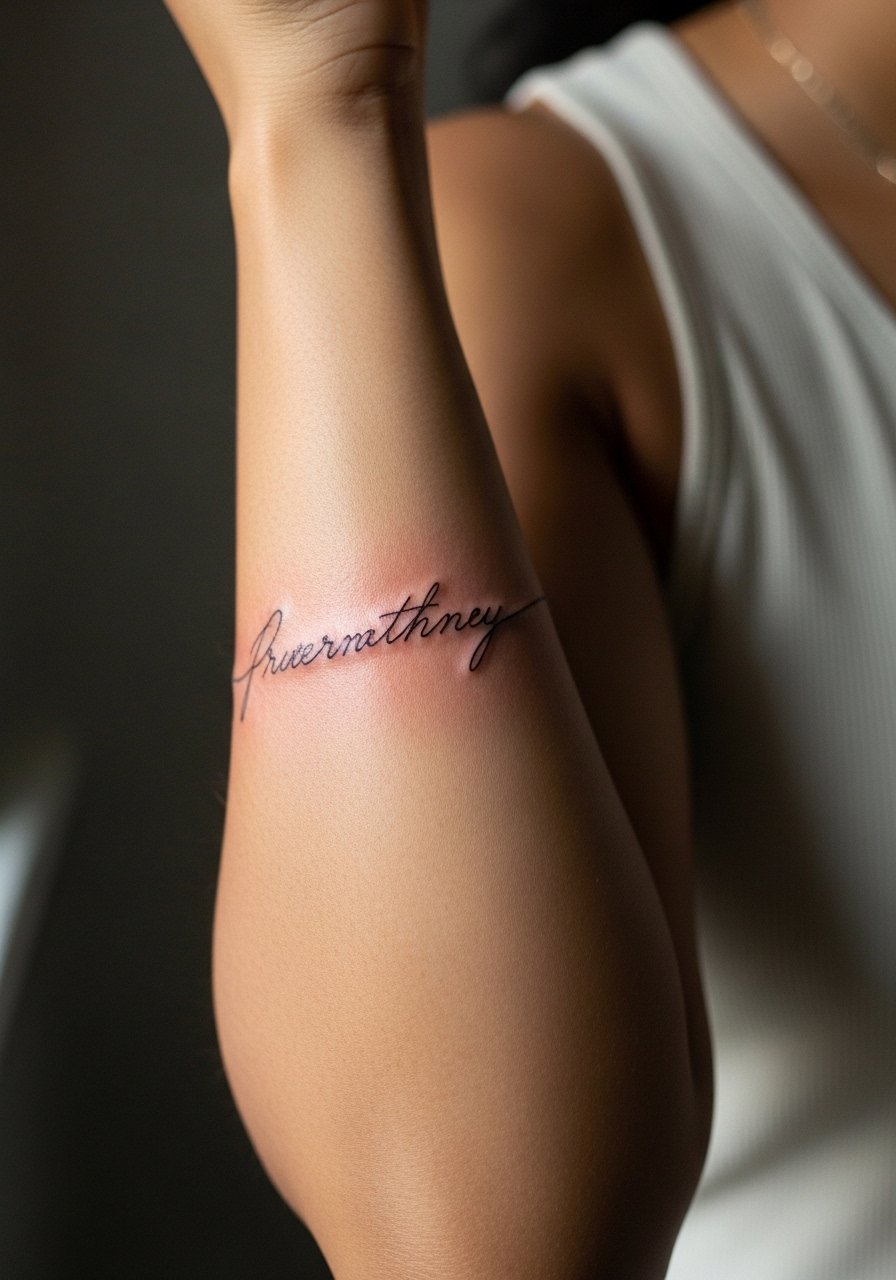
Script on the inner bicep is intimate and readable when placed correctly. Tell the artist the exact quote, font size, and spacing because tight cursive at small scale blurs faster than block letters. A mistake is compressing long text into a tiny cuff. Inner bicep pain is higher when the arm must be held awkwardly, so plan a quick sit with breaks. Expect a touch-up window around 8 to 12 months for ultra-thin scripts. For the session wear a loose tank to let the artist raise your arm easily.
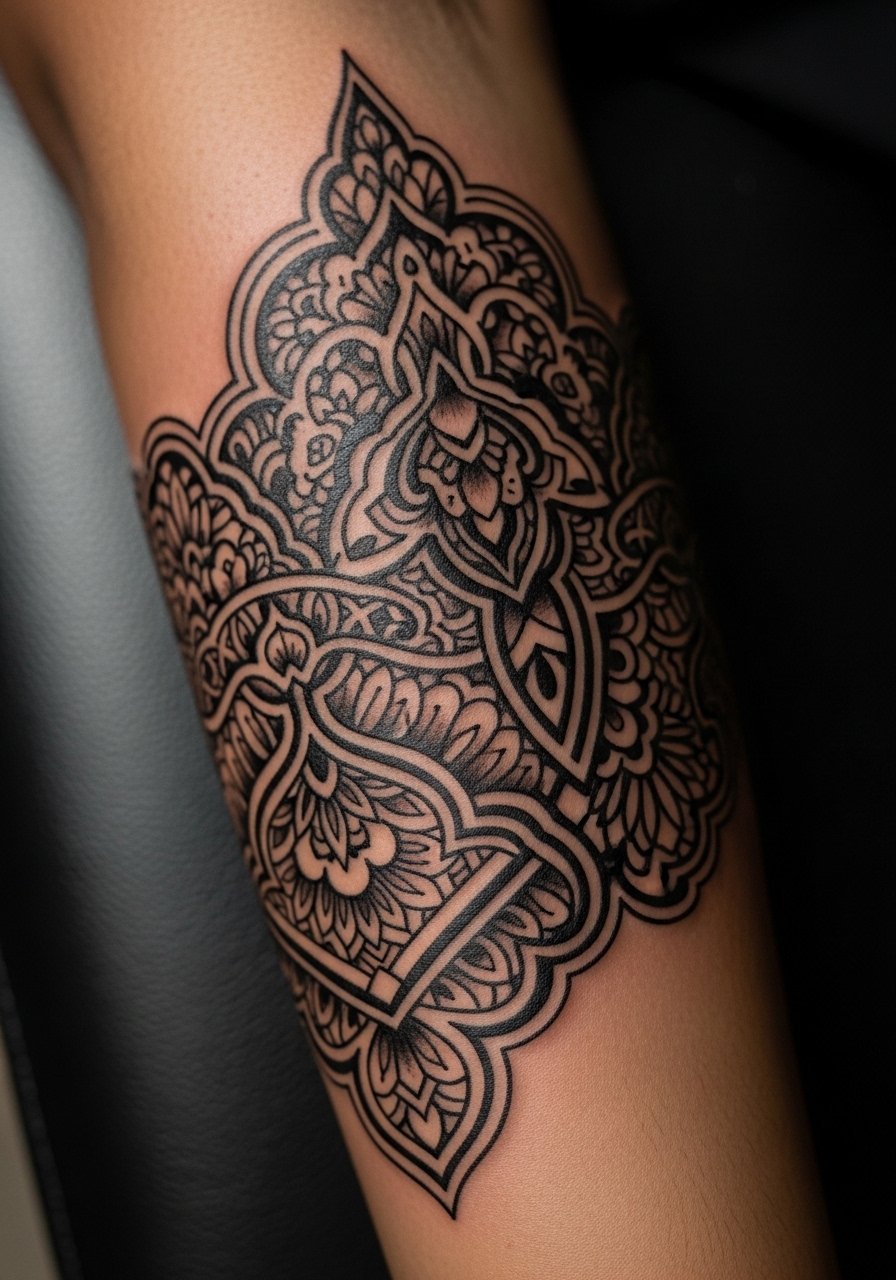
12. Blackwork Mandala Mid-Upper Arm Band
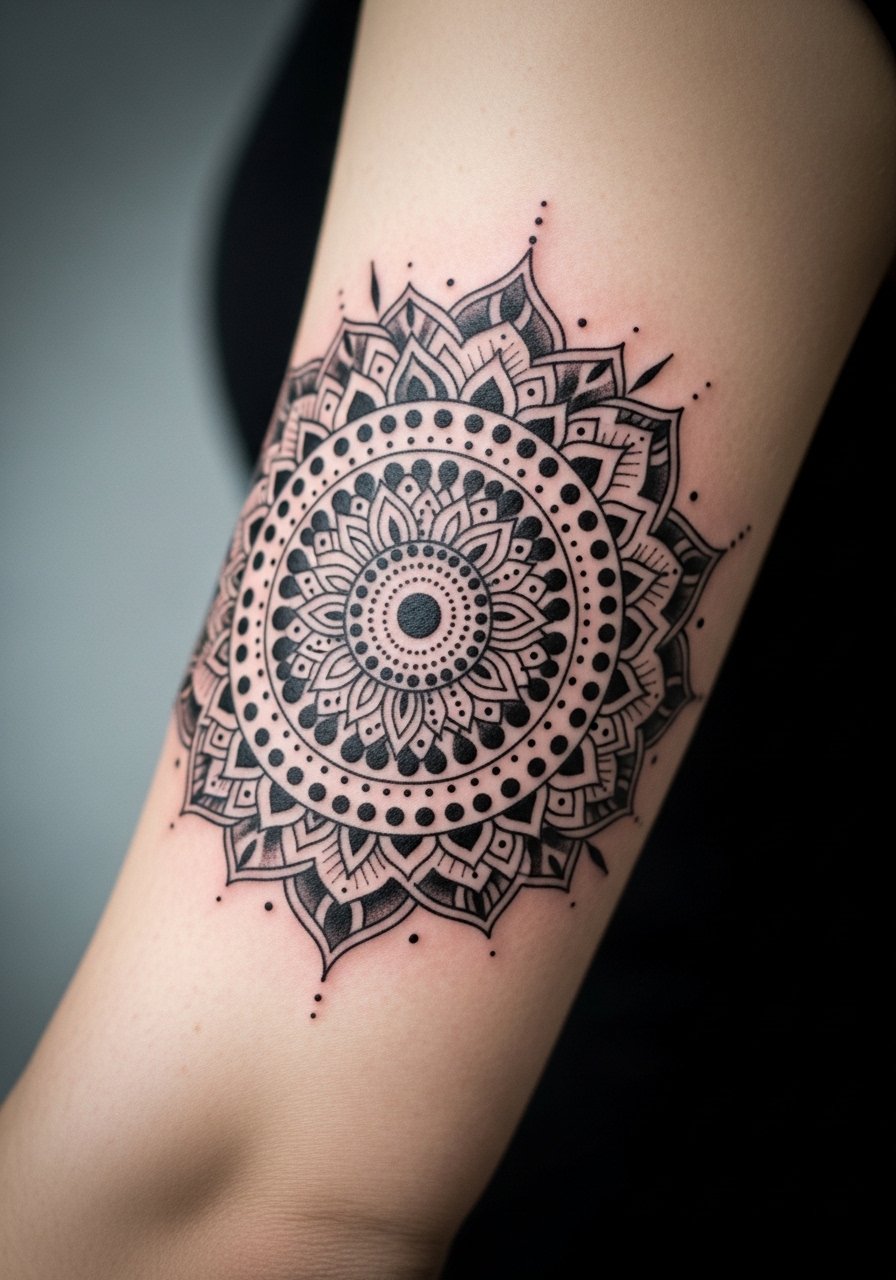
Mandala bands need breathing room between spokes or the intricate dots will merge into shade. Ask for spacing plans and negative space chunks to keep the geometry readable at two years. The main error is packing too much detail into a one-inch height. Mid-upper arm placement balances visibility and longevity, and blowout risk is lower than near the wrist. Sessions often run two hours depending on density. For a casual look pair it with a khaki short sleeve polo with the sleeve rolled up for a peek of the symmetry.
13. Minimalist Arrow Cuff at the Wrist
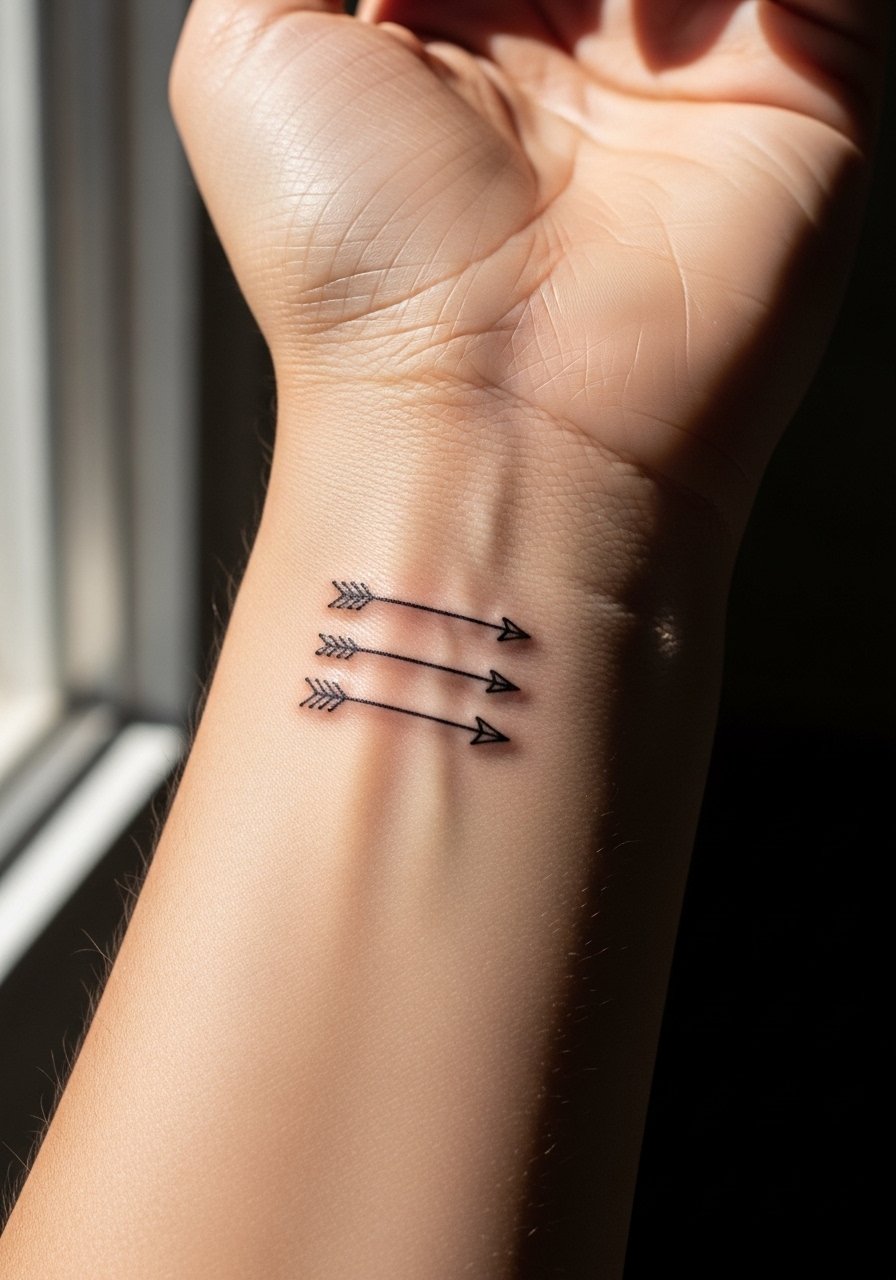
An arrow cuff reads as direction and momentum with minimal ink, but small arrows near the wrist demand crispness. Tell your artist you want simple arrowheads with spacing and slight negative gaps to prevent merging. A common mistake is crowding stacked arrows into an inch of space. Wrist bone sensitivity is real so plan short breaks and expect touch-up at around two years for ultra-fine lines. Style this with an oversized linen button-down half-rolled so the arrows peek without bracelets.
14. Knotwork Cuff That Follows Arm Hair Texture
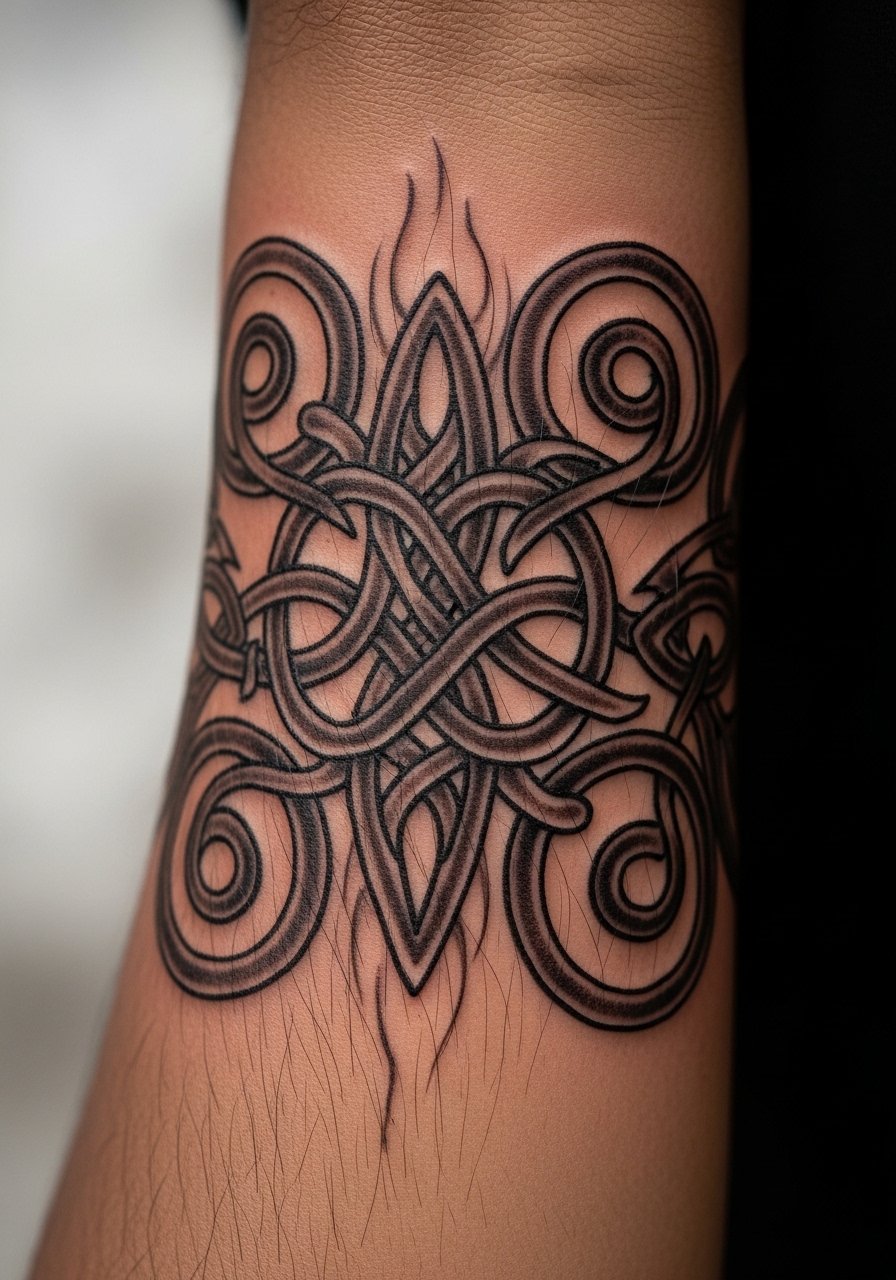
This is one of the under-covered ideas that adapts line placement to hair growth for a textured illusion. During consult, ask the artist to map the design over the natural hair direction so lines complement, not fight, the hair. The mistake is ignoring hair and placing repetitive lines that disappear under shadow. Forearm placement is visible but may require touch-up as hair sheds or grows. Pain is low and session time depends on complexity. No accessory needed to show off this subtle effect.
15. Hybrid Cuff with Patchwork Ready Edges
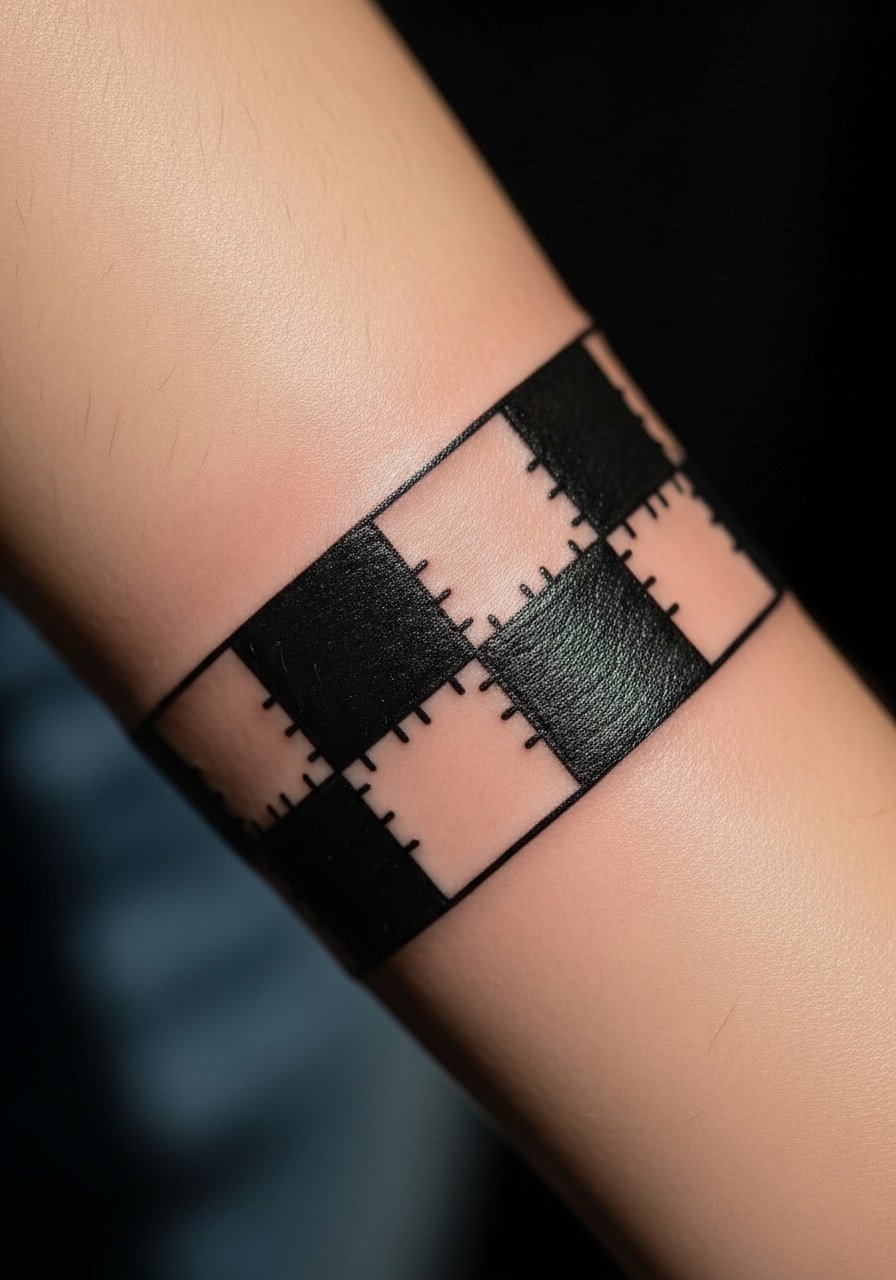
If you plan future pieces, a hybrid cuff that leaves deliberate gaps makes expansion seamless. Tell your artist you want anchor points for future flash or custom work integrated into the band. The common regret is getting a closed ring that blocks later additions. Placement above the forearm or on the bicep gives room for growth and avoids distortion from weight changes. Pain level is mild to moderate depending on wrap area. Sessions are usually one to two hours. For session wear bring a loose short sleeve tee so the artist can access and mark expansion zones.
16. UV Ink Party Cuff for Under-Blacklight
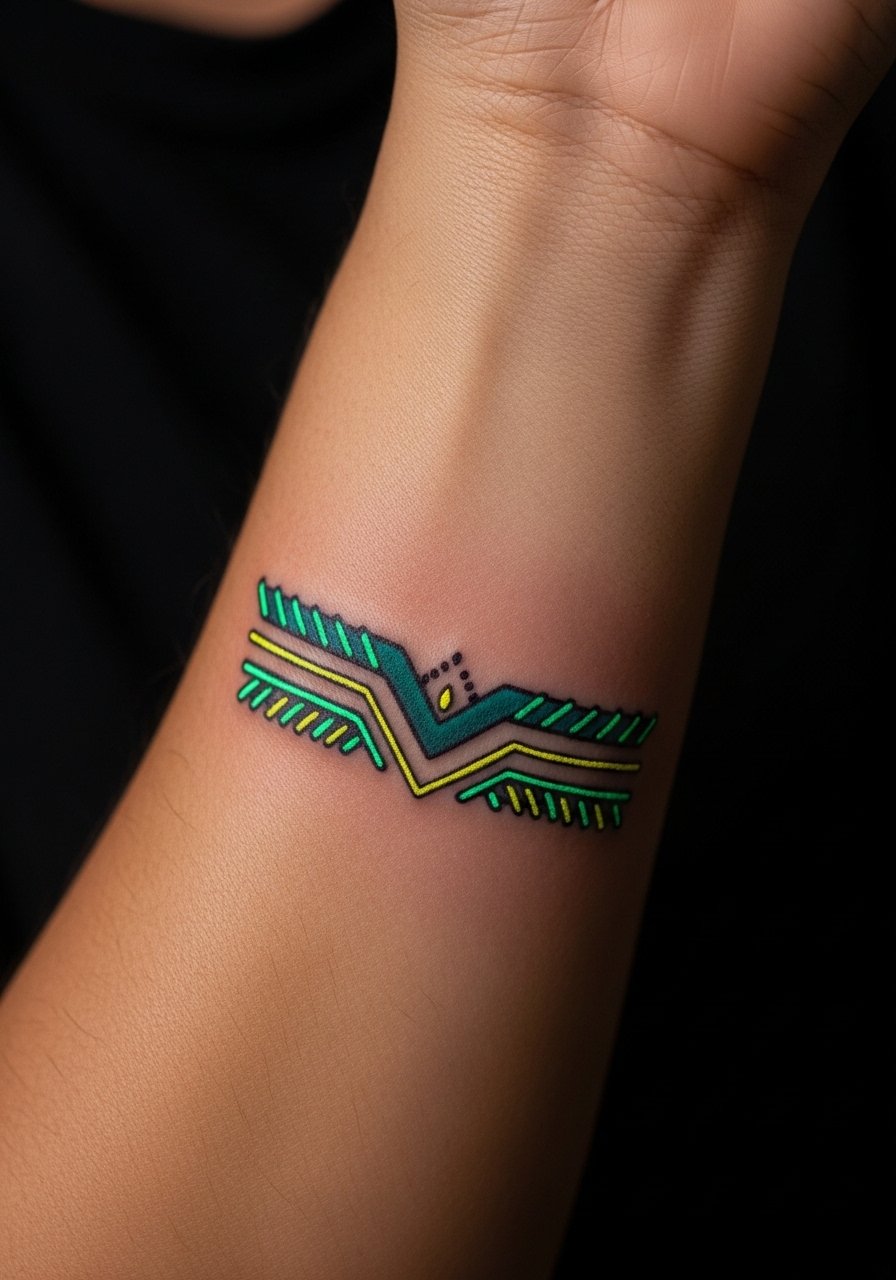
UV ink gives a night-only reveal but it comes with trade-offs you should accept up front. Ask the artist where the UV accents will sit in relation to your black ink so day visibility is balanced. The mistake is relying on UV alone for definition; combine it with small black anchors. Upper forearm or outer forearm placement keeps UV art from frequent sun exposure which breaks it down faster. Pain is comparable to a regular cuff and session time depends on how many UV accents are used. Expect touch-ups as pigment in UV formulas can shift over time.
17. Elbow Wrap Ornamental Vine for Movement
Elbow wraps show dynamic movement when designed to follow the joint, but they need special spacing so the bend does not collapse the pattern. Tell your artist you want clear breaks at the crease and flow lines that elongate when the arm bends. Artists split on elbow and joint work for fine line, with one camp saying skin stretch blurs lines fast and the other saying correct spacing fixes it. Name the debate in your consult and see which side the artist practices. Pain is higher near the elbow and sessions may be split. For styling, push a fitted thermal to the elbow to highlight bend movement.
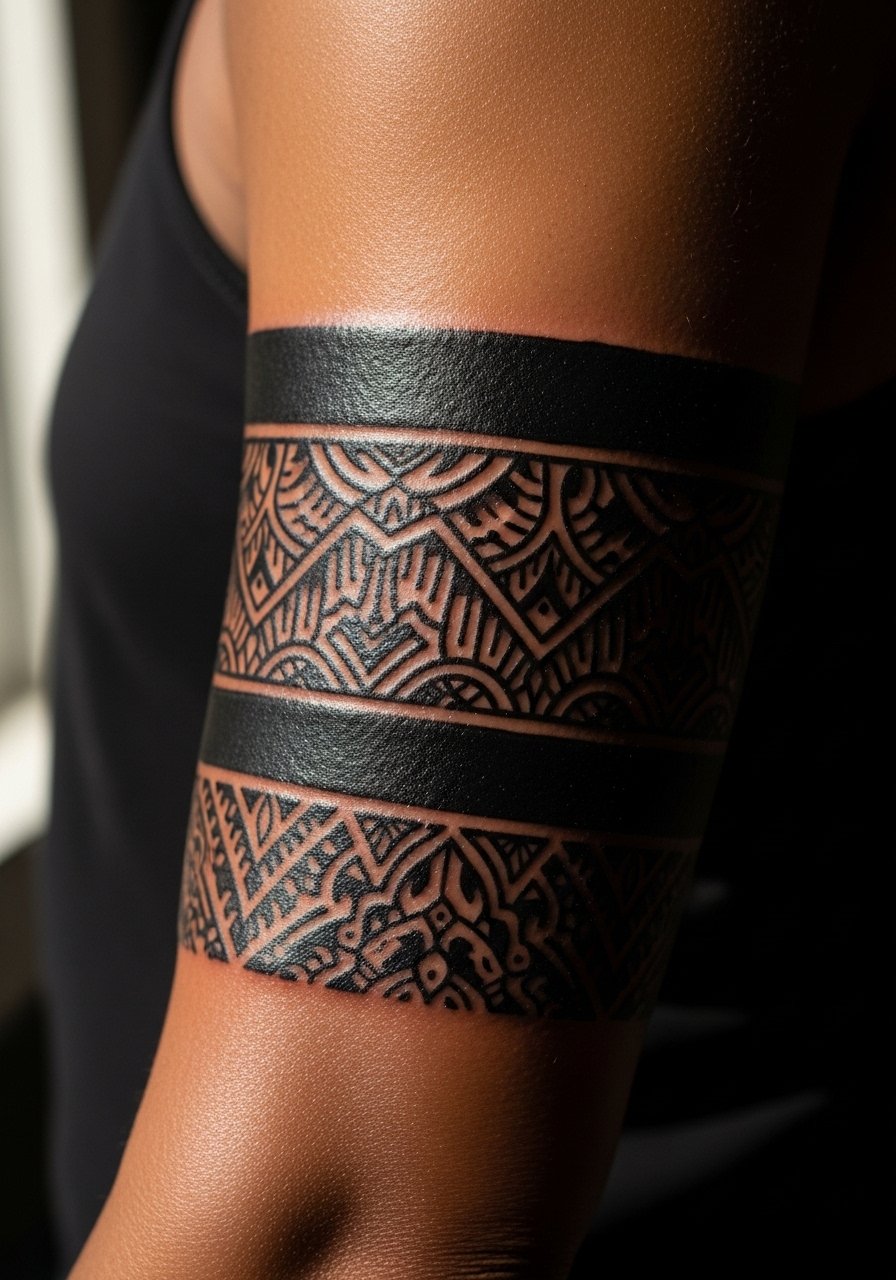
18. Skin Tone Scaled Blackwork for Medium to Dark Skin
Dark and medium skin needs contrast adjustments to avoid a muddy look in photos. Ask for thicker outlines and deliberate negative space so the design reads in natural and filtered light. A common mistake is applying the same tiny line weights used on light skin, which can make the cuff appear washed out. Placement on the outer forearm or bicep helps with visibility. Touch-up timelines may be similar but initial saturation needs attention. Sessions are moderate in time. No accessory advice needed beyond choosing contrasting sleeve colors.
19. Elbow-Adjacent Knotwork for Athletic Arms
For people who lift or gain muscle, placing cuffs just above the elbow reduces distortion from gym-driven growth. Tell your artist you want the band higher on the arm so future size fluctuations change the look less. The error is placing tight bands directly on the forearm where muscle gains pull and stretch. Pain around this area is moderate and sessions are usually under two hours. For a finished look pair it with a fitted black v-neck tee with sleeves pushed to reveal the knotwork.
20. Mini Cuff with Script Coordinates on Inner Forearm
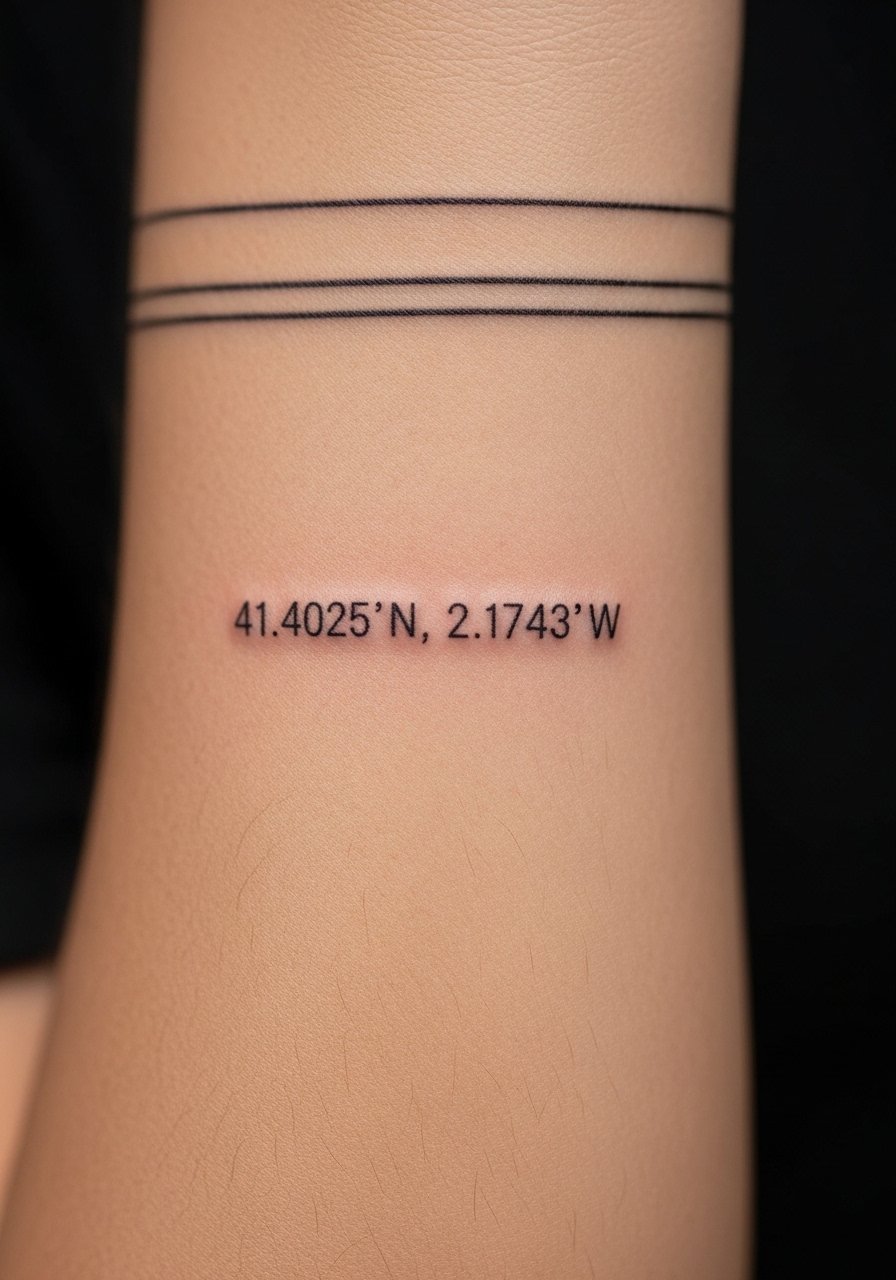
Coordinate cuffs read as private markers that still wrap like jewelry. Specify the exact text you want so the artist stencils precise characters and spacing. A mistake I see is vague requests like "coordinates" without verifying font and spacing, which leads to legibility problems later. Inner forearm placement keeps the text readable and low pain compared with wrist bone. Single session under an hour is common. For session wear pick a loose short sleeve tee so the artist can rotate your arm comfortably.
21. Hybrid Blackwork and Negative Space Band for Darker Skin
This hybrid approach balances saturated fills with carved-out shapes that keep the design legible on darker tones. During consultation ask for test flashes on the inner arm to confirm contrast and adjust line thickness accordingly. The common error is assuming identical linework from light-skin references will translate directly. Mid-upper arm placement avoids frequent sun exposure and lowers blowout risk. Sessions may be split for saturation and detailing. For display, an open denim jacket works well for layered looks.
Frequently Asked Questions
Q: How noticeable is fading for fine line floral cuffs after a year?
A: In my experience fine line florals often soften noticeably by year one, especially on exposed forearms. Expect touch-ups around 8 to 18 months depending on sun exposure and skin type. Ask your artist to add spacing and slightly heavier single strokes during the consult if you want less frequent work.
Q: Should I pick blackwork over watercolor for a wrist cuff if I want longevity?
A: Blackwork typically holds up better on wrists because saturation and negative space fight the natural friction there. Watercolor can look ethereal fresh but usually needs touch-ups sooner. If you love color, combine a defined black anchor with watercolor accents to balance wear.
Q: What is the pain like for an elbow-adjacent ornamental wrap compared with wrist cuffs?
A: Elbow-adjacent work tends to be more uncomfortable than forearm flesh because of proximity to the joint and thin skin. Wrist cuffs hit the bone and can be sharp. Plan for short breaks and consider topical numbing if you have low tolerance, but discuss numbing with your artist first.
Q: How do I find an artist who understands skin tone scaling and contrast tweaks?
A: Search hashtags and local directory filters for "dot work" or "blackwork" plus your city and check portfolios for healed photos on varied skin tones. Reddit threads and booking apps show peer feedback. Ask the artist to test a small flash on your skin during consultation.
Q: Can I wear jewelry or accessories with a new wrist cuff right away?
A: Keep jewelry off the fresh area for at least two weeks to avoid rubbing and trapping moisture. After initial healing you can reintroduce slim pieces that do not sit directly over the tattoo. For showing off later, an oversized linen shirt half-rolled pairs cleanly with wrist cuffs.
Q: Is Saniderm or dry healing better for arm cuffs in summer sweat?
A: Artists and healers split into two camps. Some prefer Saniderm because it keeps the area clean and can speed initial healing, while others warn it traps sweat and bacteria on active arms and recommend dry healing. I suggest discussing your typical sweat level and the artist's track record with both approaches before picking one.
