
Fine line is trending on every feed right now, but the pieces that still read clean after a few years are often the ones with a little more spacing, bold contrast, or a smart placement choice. Micro realism can blur on wrists and hands if the scale is too small, pricing for tiny custom work can surprise you, and darker skin tones sometimes need higher contrast to photograph reliably. Read on for pocket-sized ideas that account for longevity, placement, and what to ask at your consult.
1. Micro Wolf Head, Inner Forearm or Wrist
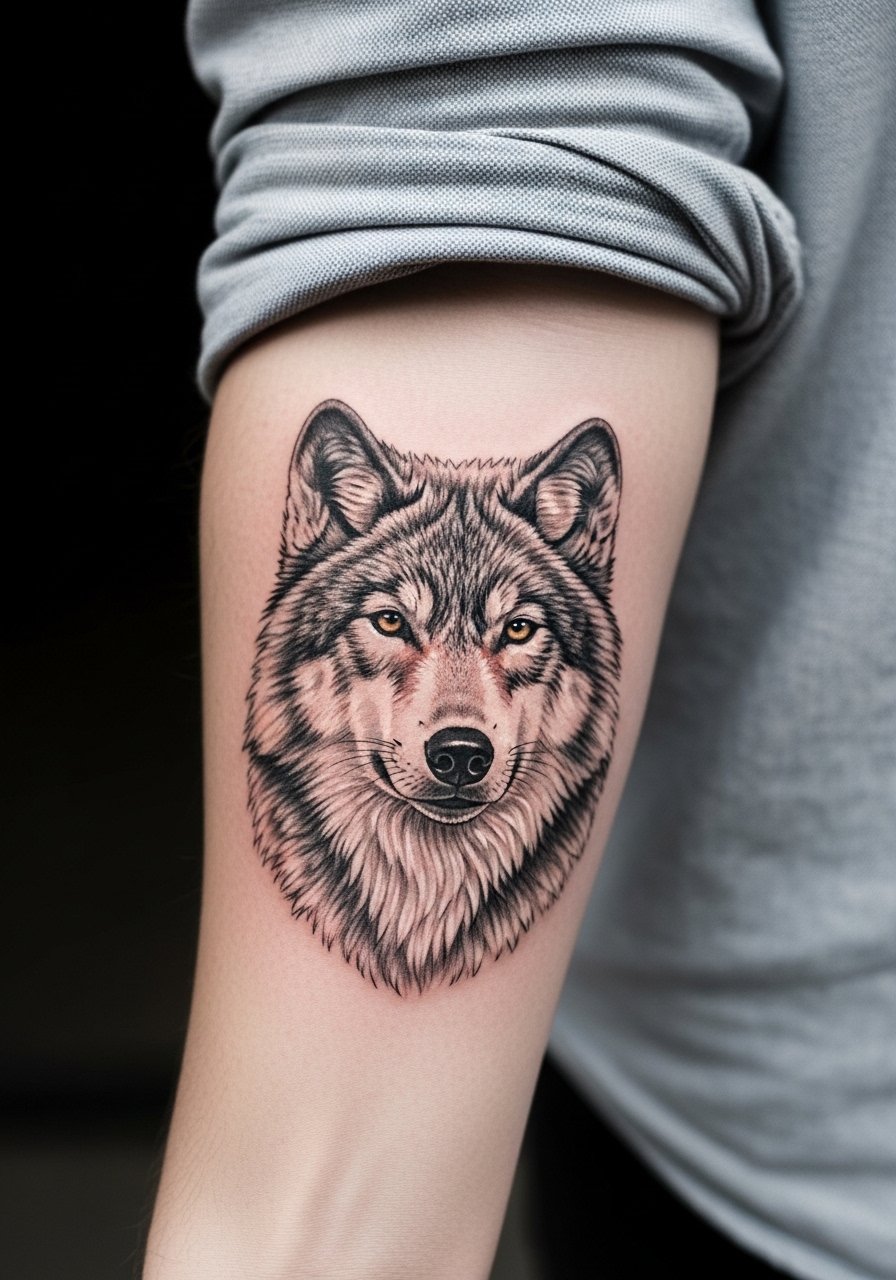
A tiny wolf face reads as intensity rather than detail when you give the eyes room to breathe. I recommend sizing this at least 1.5 inches and choosing the inner forearm if you want longevity, because the wrist gets constant rubbing. Tell your artist you want slightly heavier contrast in the eye and subtle stipple shading for the fur. Common mistake is packing too many whisker lines into one square inch which softens as it heals. Expect a one-session appointment around 45 to 90 minutes and a possible touch-up at year two if you wear a watch or bracelet on that side. For showing this off, pair it with a light blue oxford shirt rolled at the cuff and a thin leather watch men on the opposite wrist so the face has visual balance.
2. Tiny Hummingbird Mid-Flight, Inner Arm
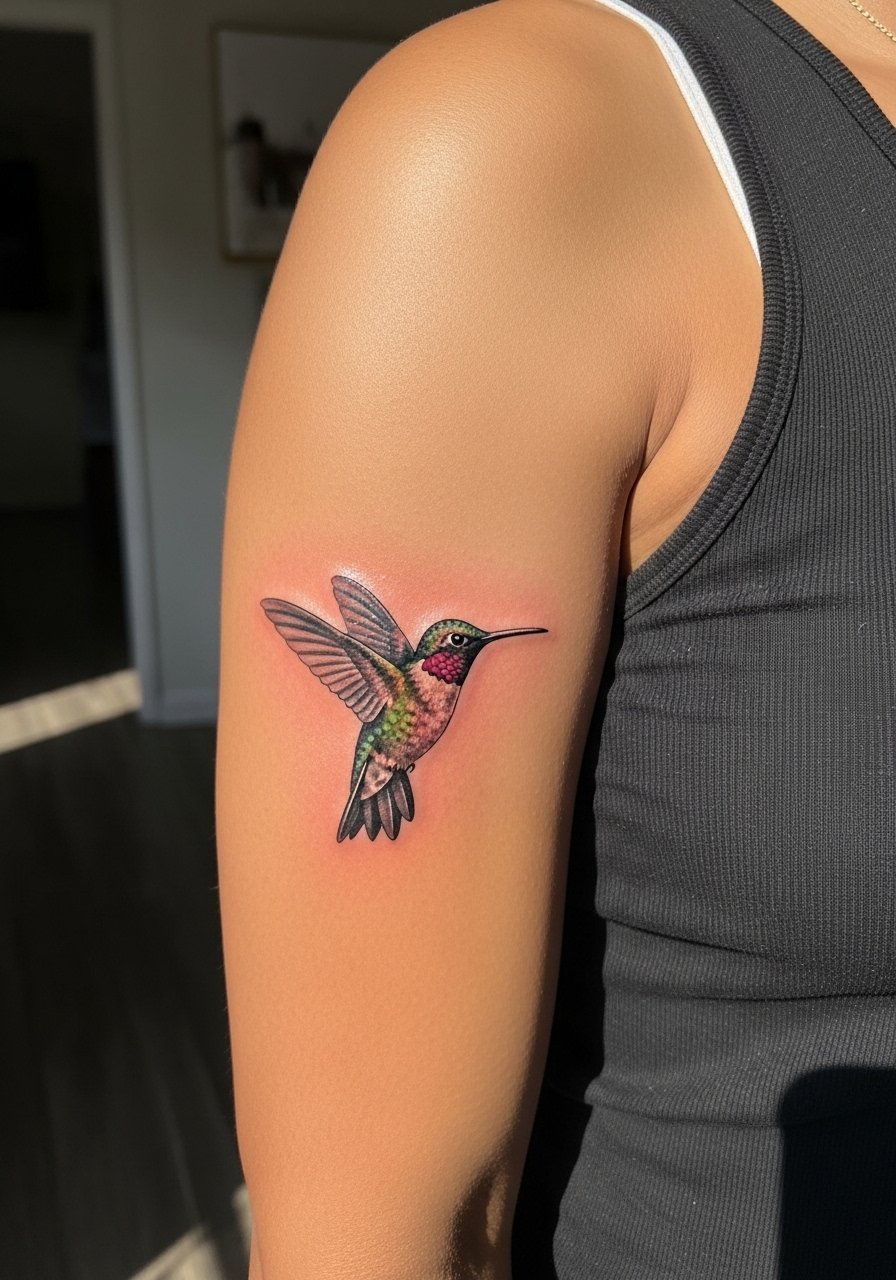
This one works as a small portrait of motion. Go for 1.5 inches so the feather highlights and slight color accents register after a year. In consultation ask for subtle color accents only in the wing tips and for whip shading to imply movement. The inner arm is a forgiving flat plane which helps detail last longer than the outer wrist. A real mistake is asking for saturated color across the whole body at this scale because saturation can fade unevenly. Session time is usually under an hour and pain is moderate. If you plan to build an inner arm collection later, position the bird so its flight path leaves room for neighbors.
3. Realistic Bee with Transparent Wings, Wrist
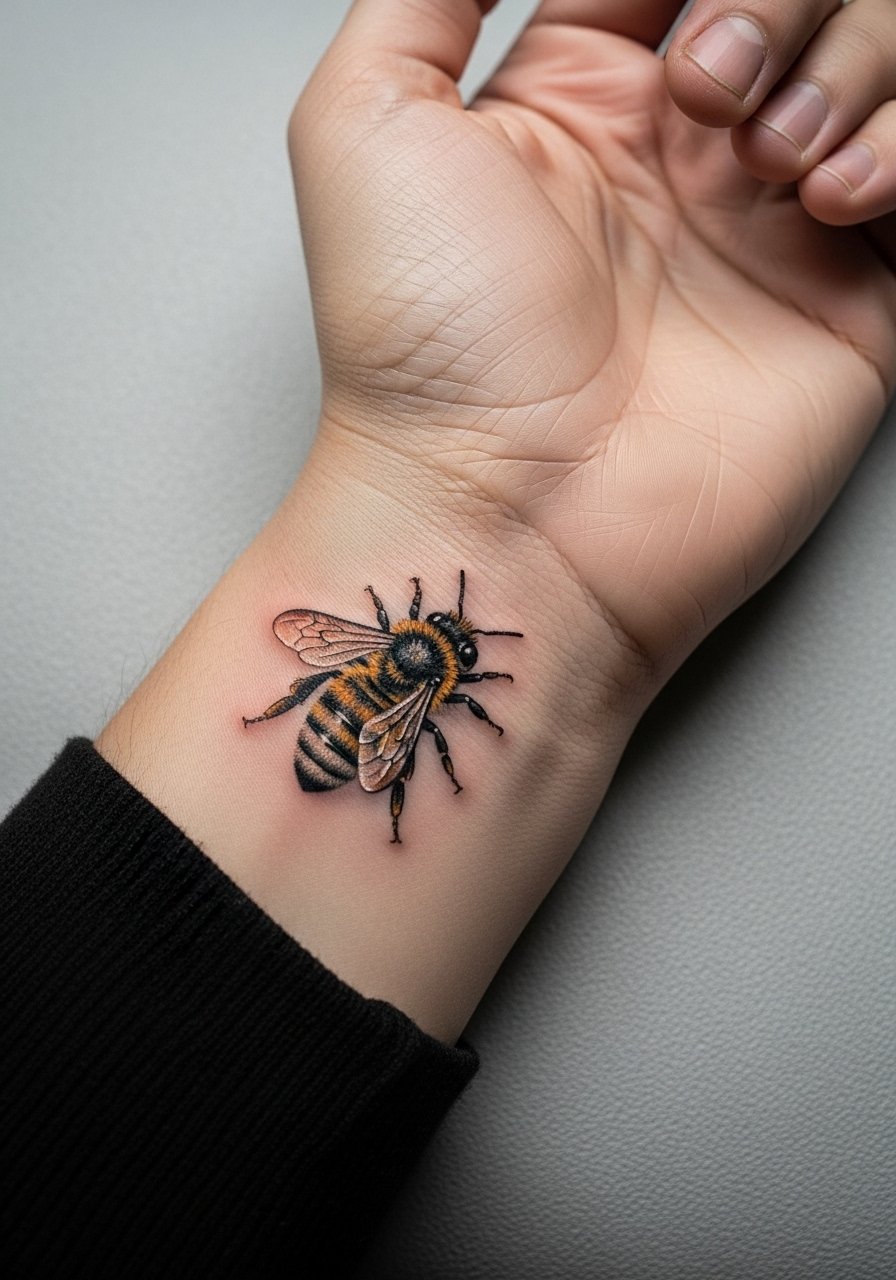
A one-inch bee is deceptively tricky. The wings need thin vein work and a suggestion of translucency, but too many veins at this size turn into gray smudges. Ask for a single thin highlight line on each wing and dense stipple on the fuzzy thorax. Fair warning about controversy in healing methods. One camp prefers protective film for fast healing. The other camp favors dry healing and warns that trapped moisture can invite problems. Decide what your artist practices and ask them about their aftercare record. For the session, remove wrist jewelry and wear a crewneck tee white so the artist can move the sleeve freely.
4. Miniature Koi Fish, Forearm Flow
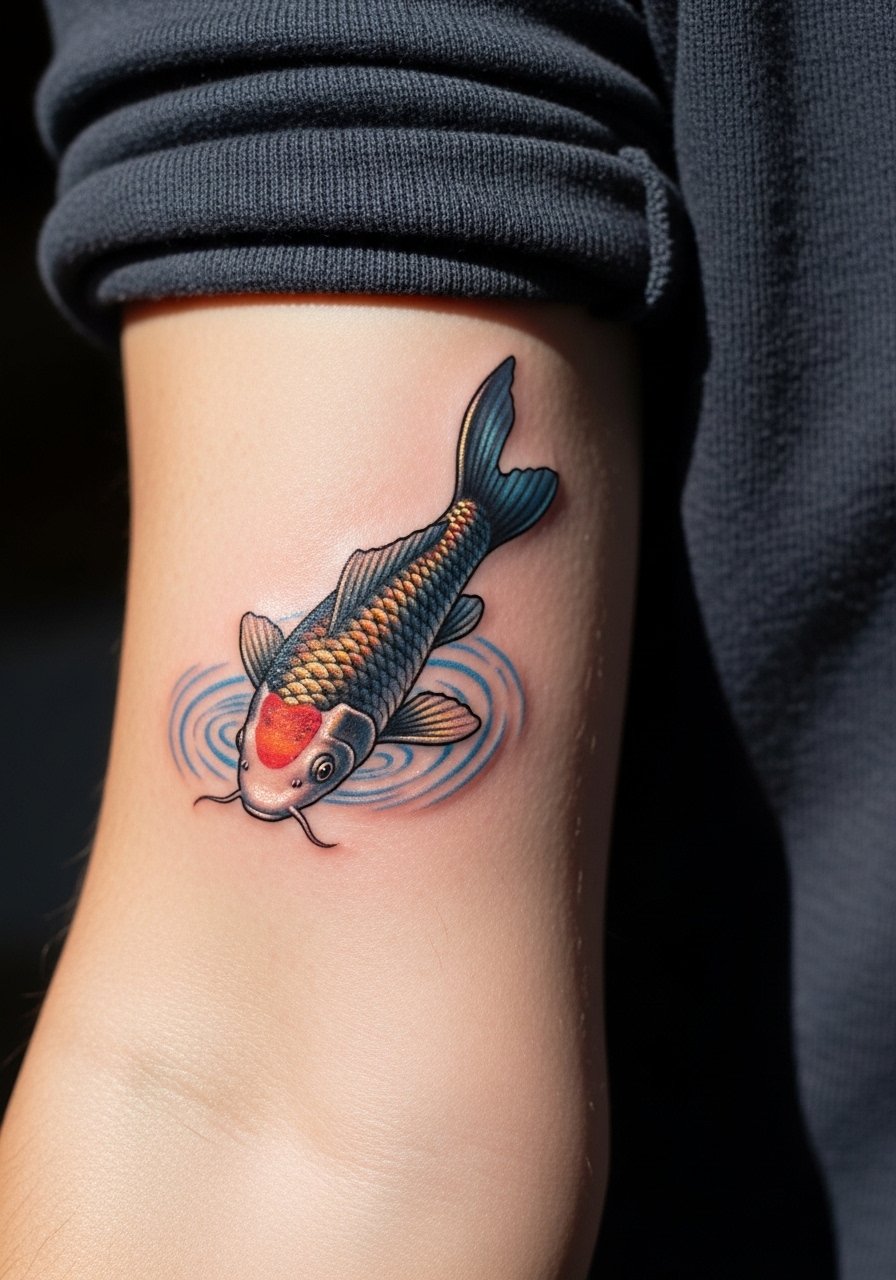
Koi translate surprisingly well into two-inch micro pieces because the scale allows smooth gradients across scales. Ask the artist for soft gradients rather than tiny individual scale outlines. The mistake I see is insisting on every scale being defined which adds clutter and ages into a muddle. Forearm placement gives a long canvas so the fish can curve with muscle movement which helps it read as motion at six months and still read as shape at five years. Session time usually around 60 to 90 minutes. Wear a fitted henley shirt the day of so sleeves can roll without tugging.
5. Micro Black Cat Silhouette with Eye Highlight, Inner Wrist
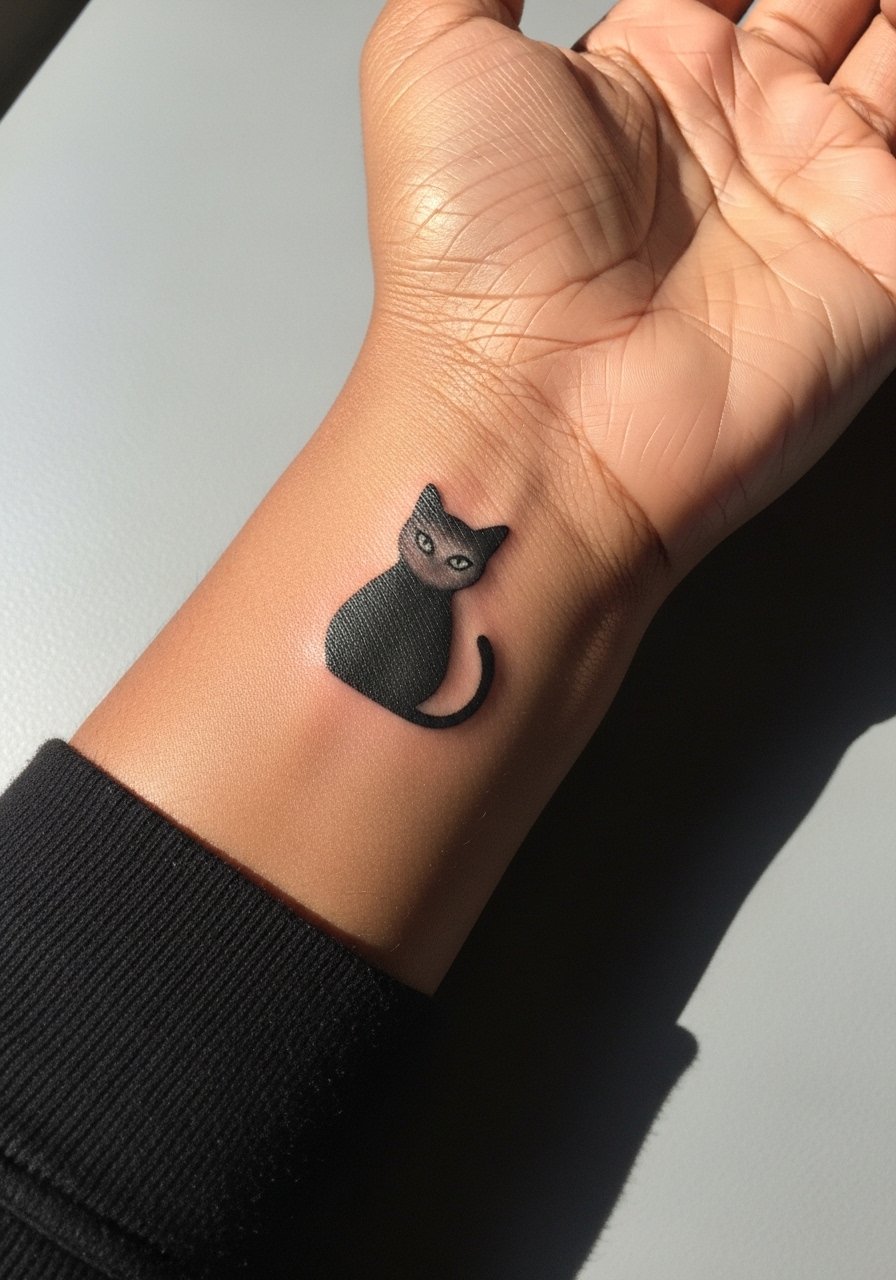
A compact silhouette with a tiny rendered eye is a smart compromise between bold and realistic. Size it around one inch so the silhouette stays crisp and the eye remains a focal point. Tell your artist you want the eye to be the only area of gray shading, and to keep the silhouette edge clean instead of adding fur texture. Common mistake is engraving fur detail that blurs near the joint. Pain on the inner wrist can be sharp for some people. For office-friendly display, balance this with a slim bracelet on the other wrist rather than crowding the inked side.
6. Tiny Sea Turtle with Shell Detail, Ankle or Collarbone
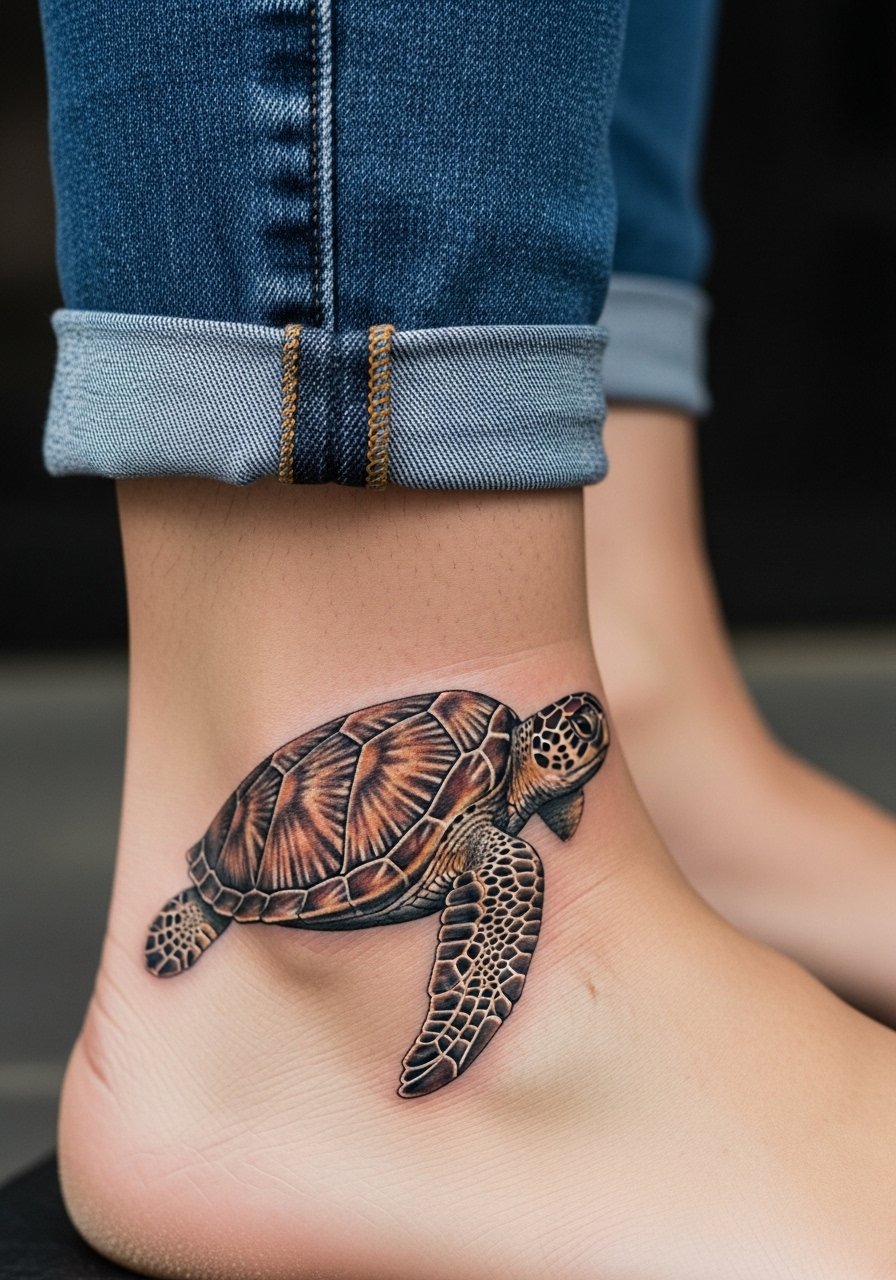
A one to 1.5 inch sea turtle carries texture without need for heavy contrast. Ankle placement suffers more friction from socks and shoes so expect touch-ups sooner than collarbone placements. If you choose the ankle, ask for compact shell patterning and denser black outlines at the edge to resist fading. For showing this off in summer, cuffed straight-leg chinos or canvas boat shoes frame the ankle and let the shell read against bare skin. Session wear should be loose pants or shorts you can roll up easily.
Pre-Session Essentials
The wrist, ankle, and inner forearm pieces above each have different prep needs so a few targeted items make the session and first week smoother.
-
Stencil transfer paper kit. Lets you preview placement on the skin before the needle work, which matters for tiny pieces that need exact spacing.
-
Topical numbing cream. Applied before the appointment eases wrist and ankle sensitivity without changing how the artist layers shading.
-
Thin protective film roll. Useful for low-profile spots like the wrist and ankle where friction is constant during the first few days.
-
Fragrance-free body wash. Gentle cleansing helps keep tiny linework clear while the scab phase passes.
-
Aquaphor healing ointment. Thin layers for the initial 48 hours help protect fine line work without heavy residue that traps moisture.
7. Micro Fox Face with Warm Shading, Shoulder or Inner Arm
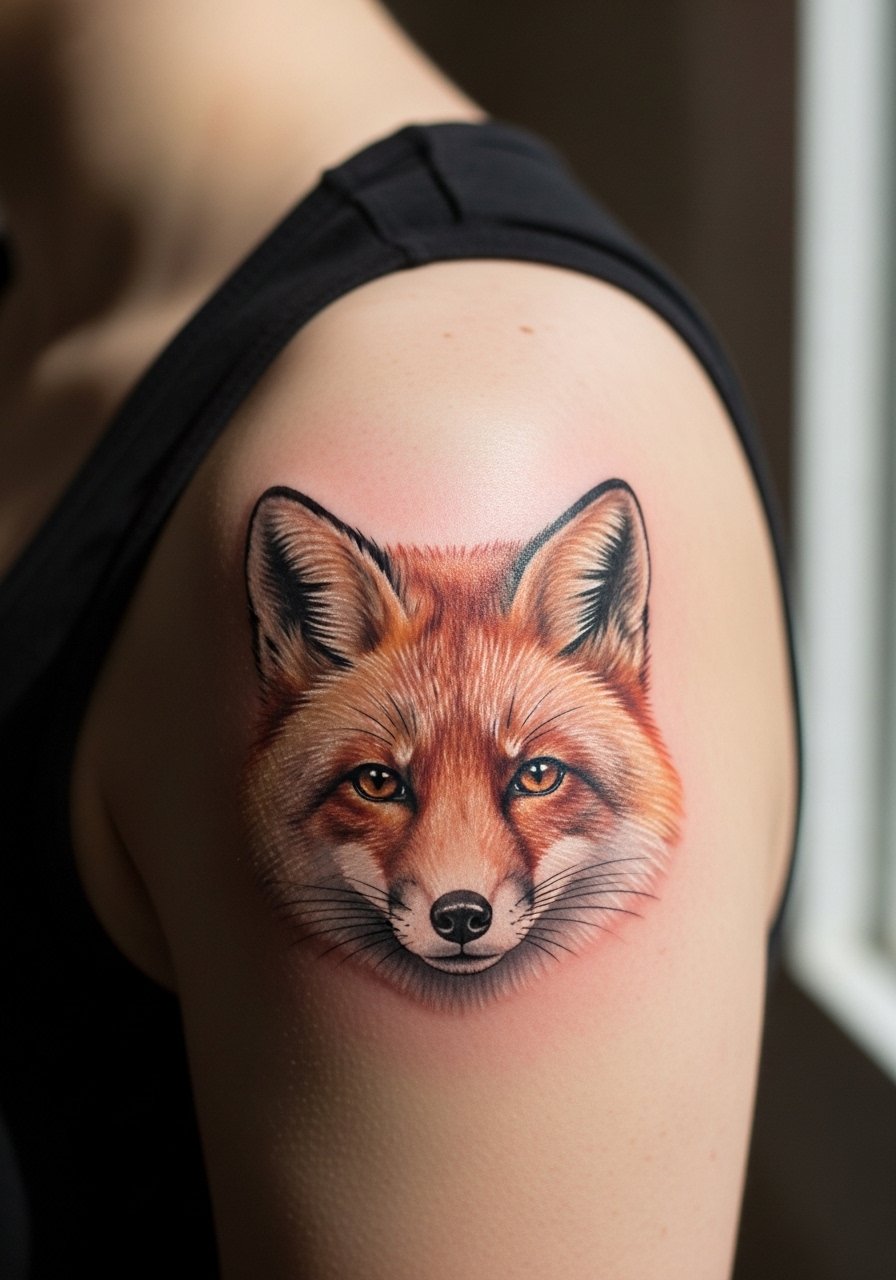
Fox faces benefit from warm gray gradients that suggest fur without overworking individual hairs. Shoulder placement lets artists use slightly looser linework so the expression reads longer as the skin moves. When you consult, request stipple shading for the cheeks and a warmer gray in the midtones so the face keeps shape. Avoid asking for every whisker painted in because small whiskers disappear first. Session time is usually under an hour. For the appointment wear a sleeveless muscle tank so the artist has clear access and you stay comfortable.
8. Realistic Butterfly with Vein Detail, Forearm
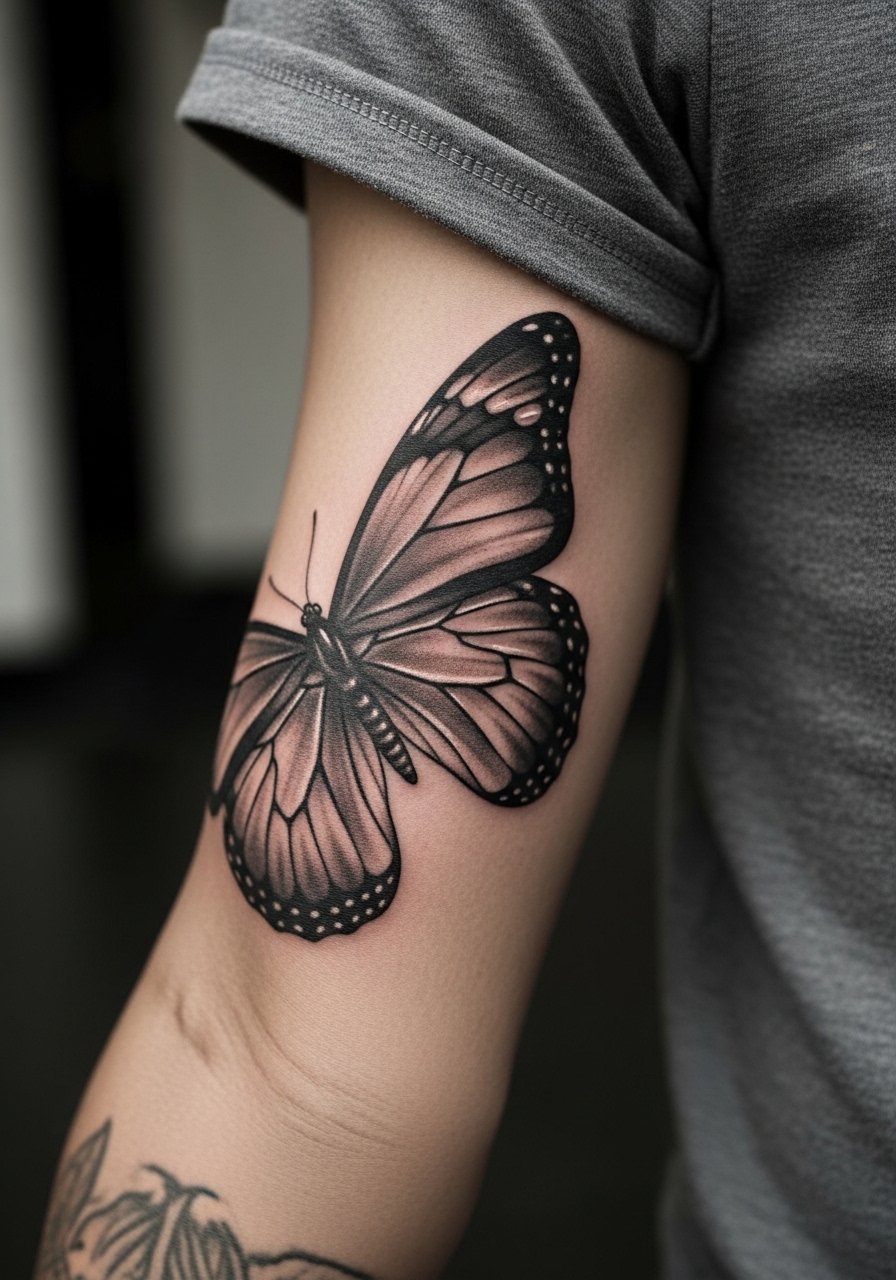
Wings need slightly more space than other micro subjects to hold vein lines. For a two-inch version ask for simplified primary veins and soft gradient fills between them. The common error is asking for overly ornate vein networks which create gray zones as the tattoo settles. Forearm placement is forgiving for motion and photographs well at six months. Expect a single session under 90 minutes. If you plan to stack other pieces, orient the wings to leave negative space above and below for future additions.
9. Micro Rose with Layered Petals, Wrist or Collarbone
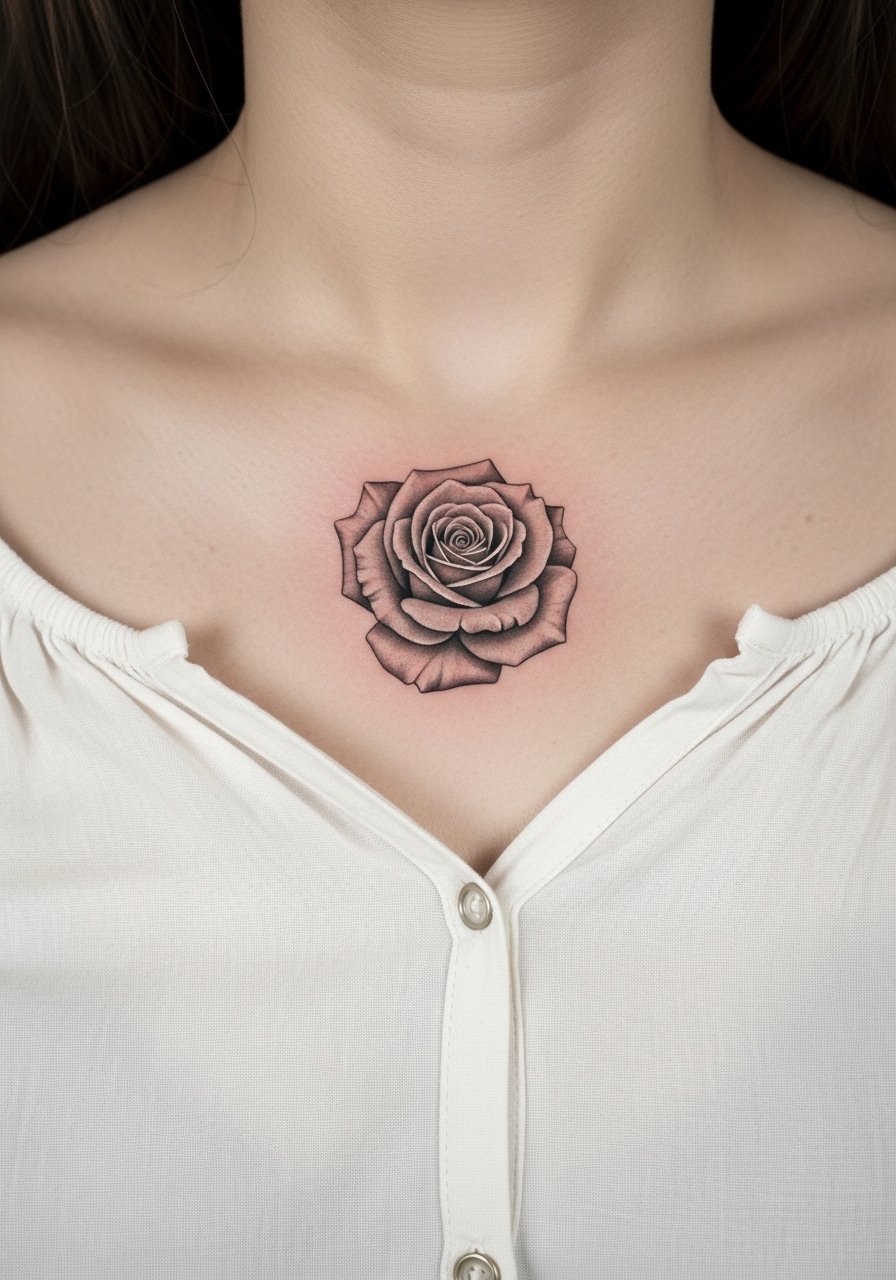
A pocket-sized rose reads best when petals are suggested with tone rather than ornate linework. Tell your artist to map three to four petal layers and use subtle shadow between them so the depth survives a couple of years. The collarbone placement keeps the petals away from friction and lets the shading hold. Common mistake is demanding tiny serrated edges on every petal which blurs. For evening wear pair it with an off shoulder blouse or a delicate chain necklace that drops light attention to the shaded area.
10. Micro Planet with Ring Shadow, Inner Forearm
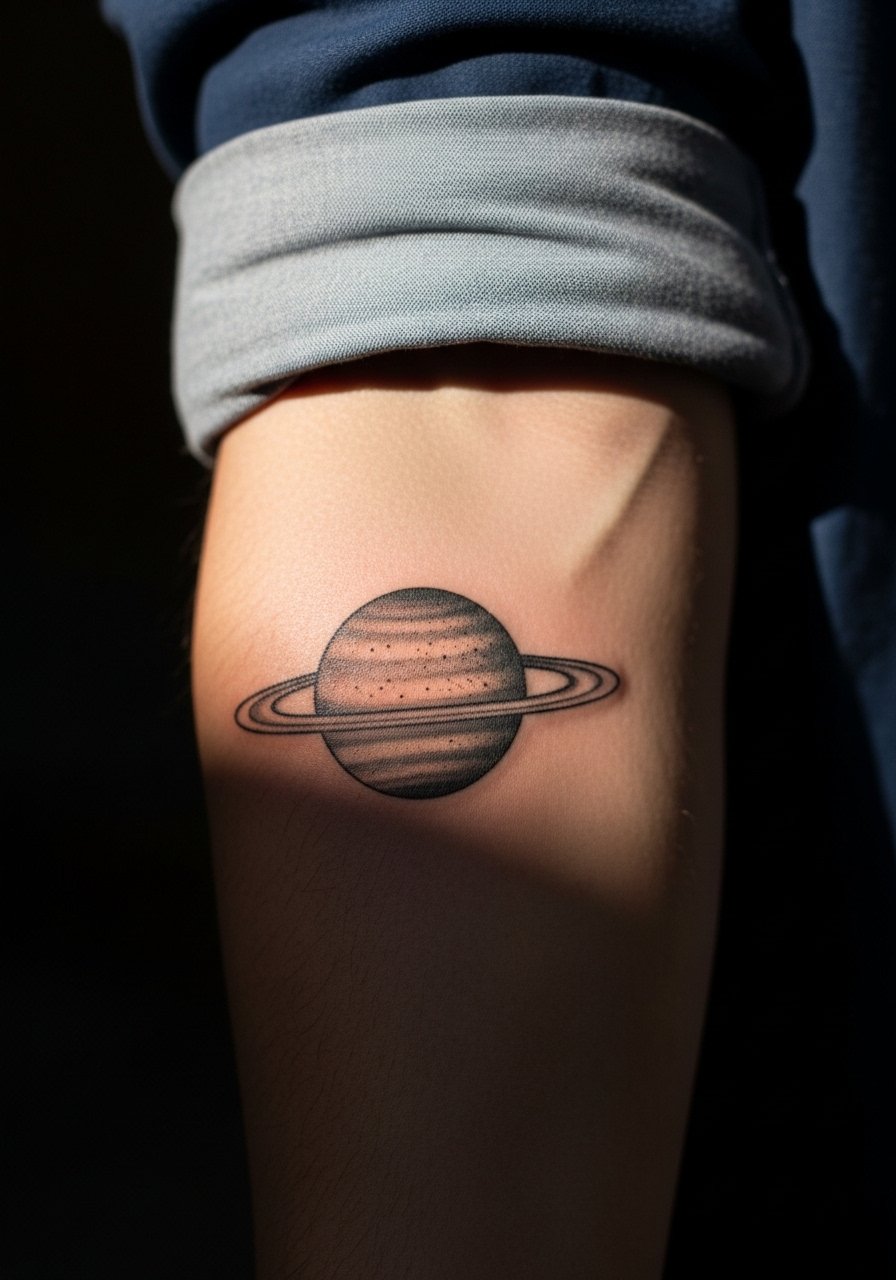
Cosmic micro pieces are perfect for subtle shading tricks. Ask for a small disc with a soft ring shadow rather than a hard-lined ring because a shadow reads better over time. Inner forearm placement keeps the circle consistent as skin moves. A common mistake is wanting tiny star fields around the planet which can wash out. Expect a 30 to 60 minute session. If you plan to photograph this at night, ask the artist to push one small highlight so the planet still reads in low light.
11. Small Grayscale Portrait, Inner Arm or Collarbone
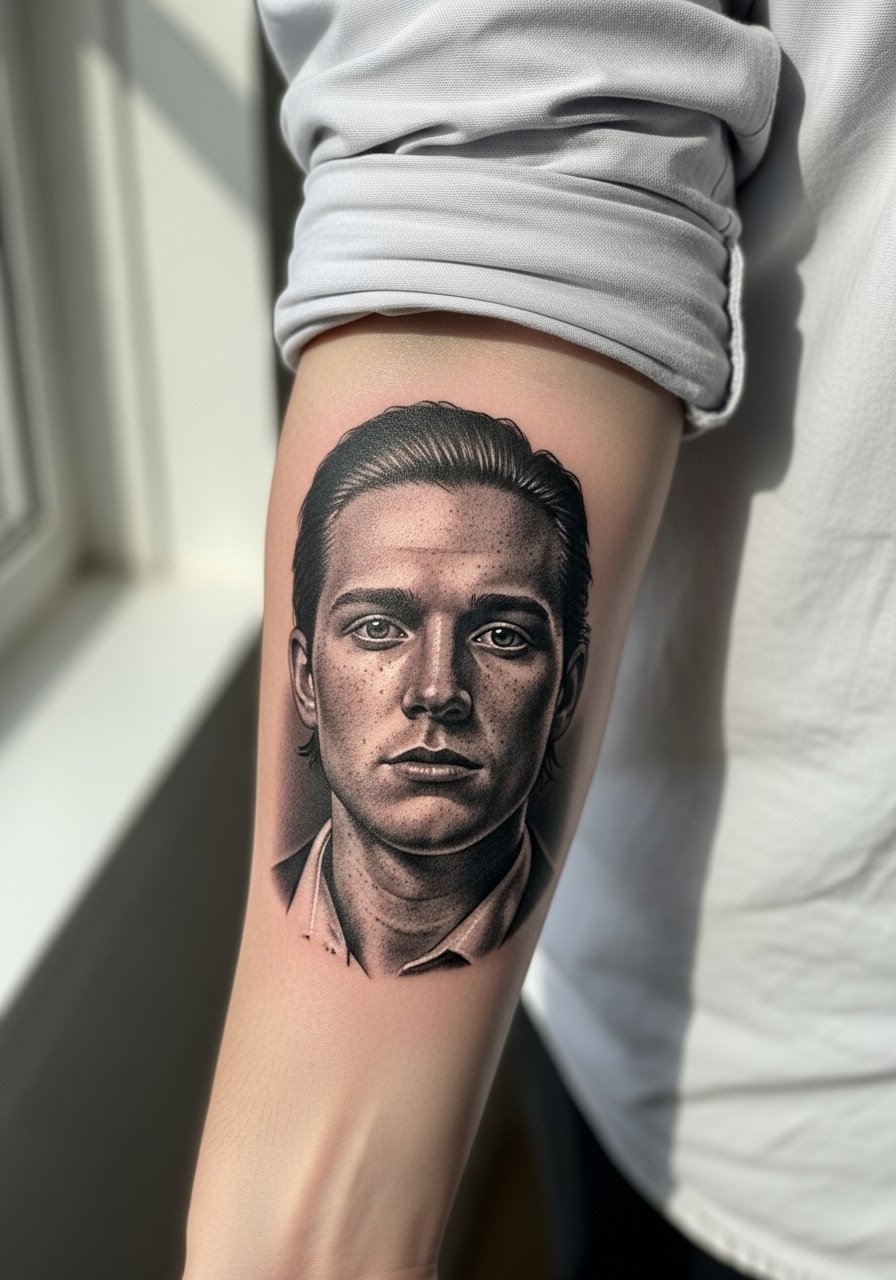
Portrait micro realism demands scale discipline. For a meaningful loved one piece, go at least two inches and bring high-contrast reference photos. Tell your artist which facial feature is most important to preserve, the eyes or a smile line, because those anchor recognition. Portraits often need a second short session for refining. A common error is expecting a one-inch photo-style piece to capture all details. For dress pairing choose a rolled button-down like a light blue oxford shirt so the portrait sits within a clean frame.
12. Micro Eye with Detailed Iris Texture, Wrist or Neck
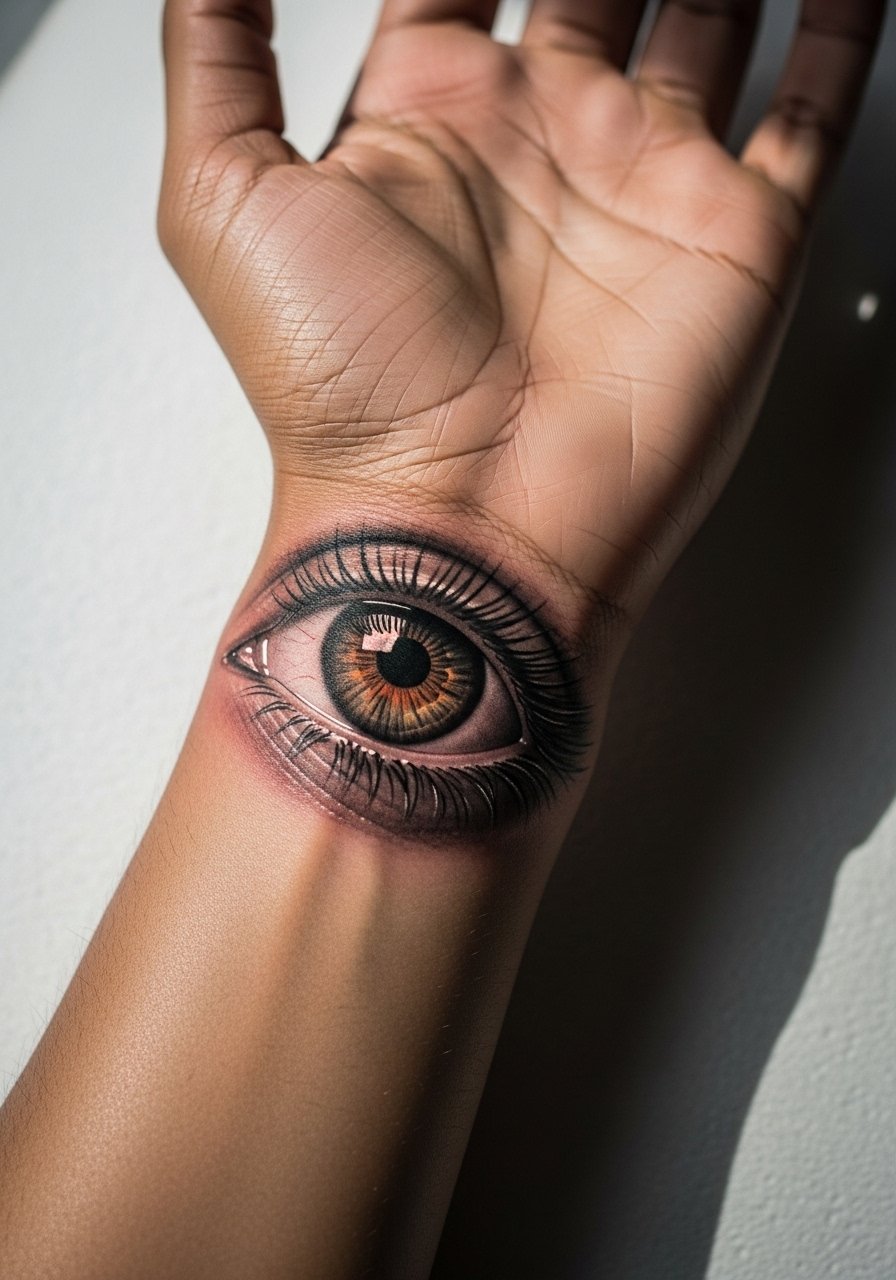
An eye is a strong focal point at micro scale. Ask for a dense dark pupil and a limited amount of radial iris lines so the texture survives. There is a known split among artists about fine line micro realism. One camp says the thin radial lines blur quickly. The other camp argues that with correct depth and spacing the iris texture holds. Ask your artist which side they come down on and request a proof stencil to check the spacing. The wrist can be sensitive so numbing cream helps if you are anxious. Expect touch-ups at year two to restore crispness if your hands see a lot of sun and friction.
13. Tiny Owl Face, Forearm
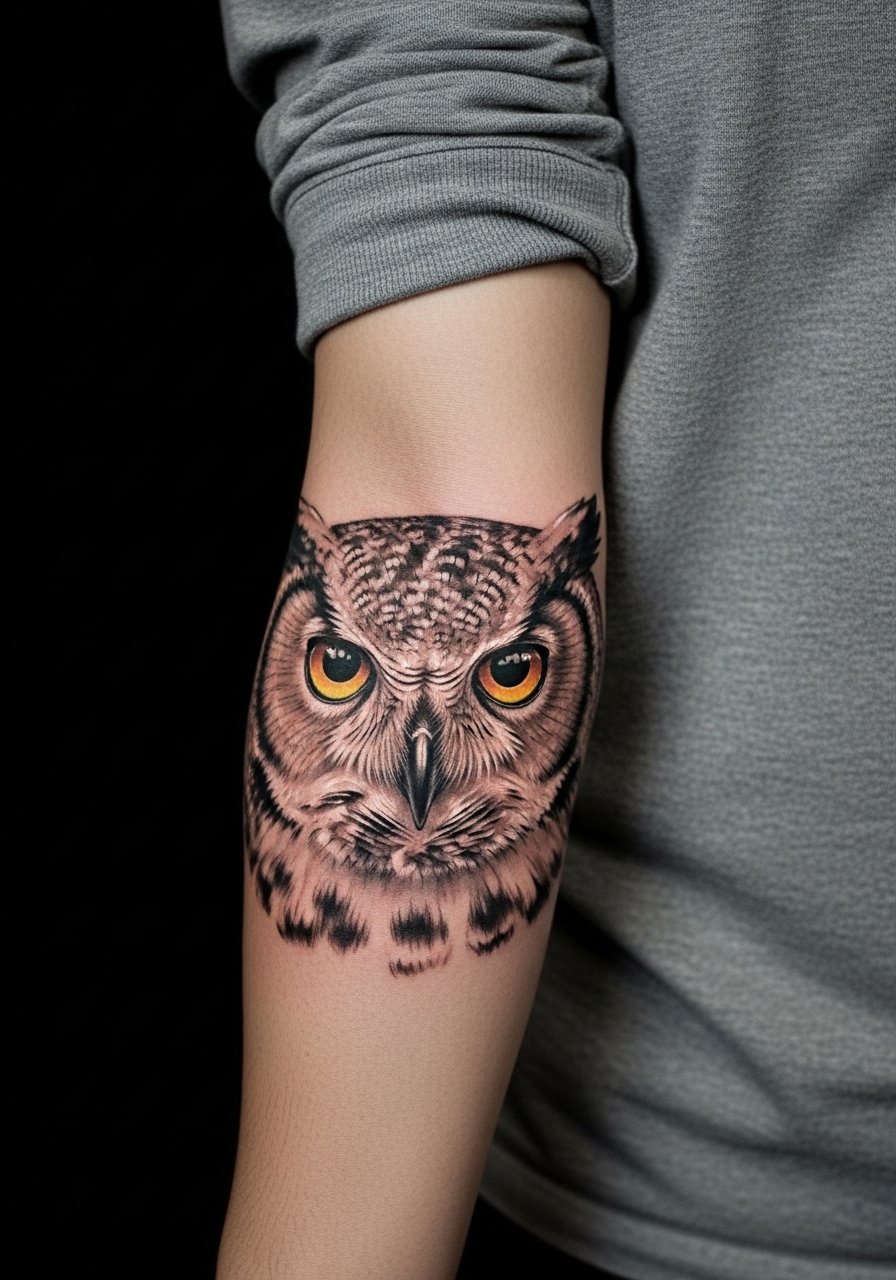
Owls are all about eye contrast and feather texture. For a 1.5 inch owl, ask for bold dark irises and light stippling on the facial disc to preserve structure. A common mistake is detailing every feather which can wash into gray patches. Forearm placement lets you use longer brush strokes in shading technique which keeps the face readable at two and five years. The session is typically under an hour. For a casual look pair this with a fitted henley shirt and stacked rings that echo the owl's rounded shape.
14. Micro Fern with Gentle Contrast, Ankle
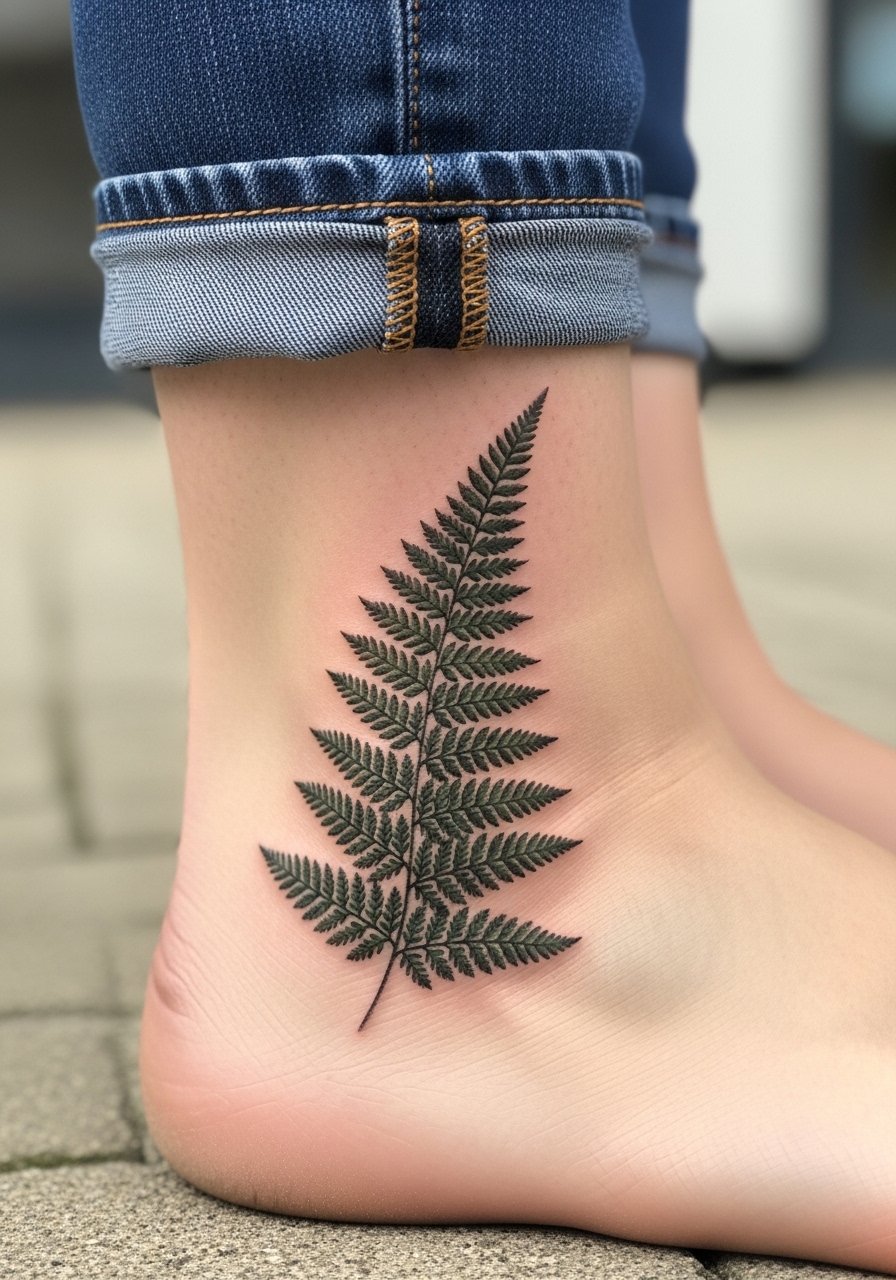
Fern fronds work as narrow linear pieces so they are ideal when you want subtlety. At one inch ask for a clear central stem and simplified leaflet shapes. The ankle takes a lot of wash friction so expect touch-ups sooner than flat arm placements. A common error is asking for very thin veins in each leaflet. Those vanish first. Session time is often 30 minutes. If you want seasonal visibility, plan footwear that exposes the ankle in summer.
15. Meteor Streak or Tiny Rocket with Motion Blur, Forearm
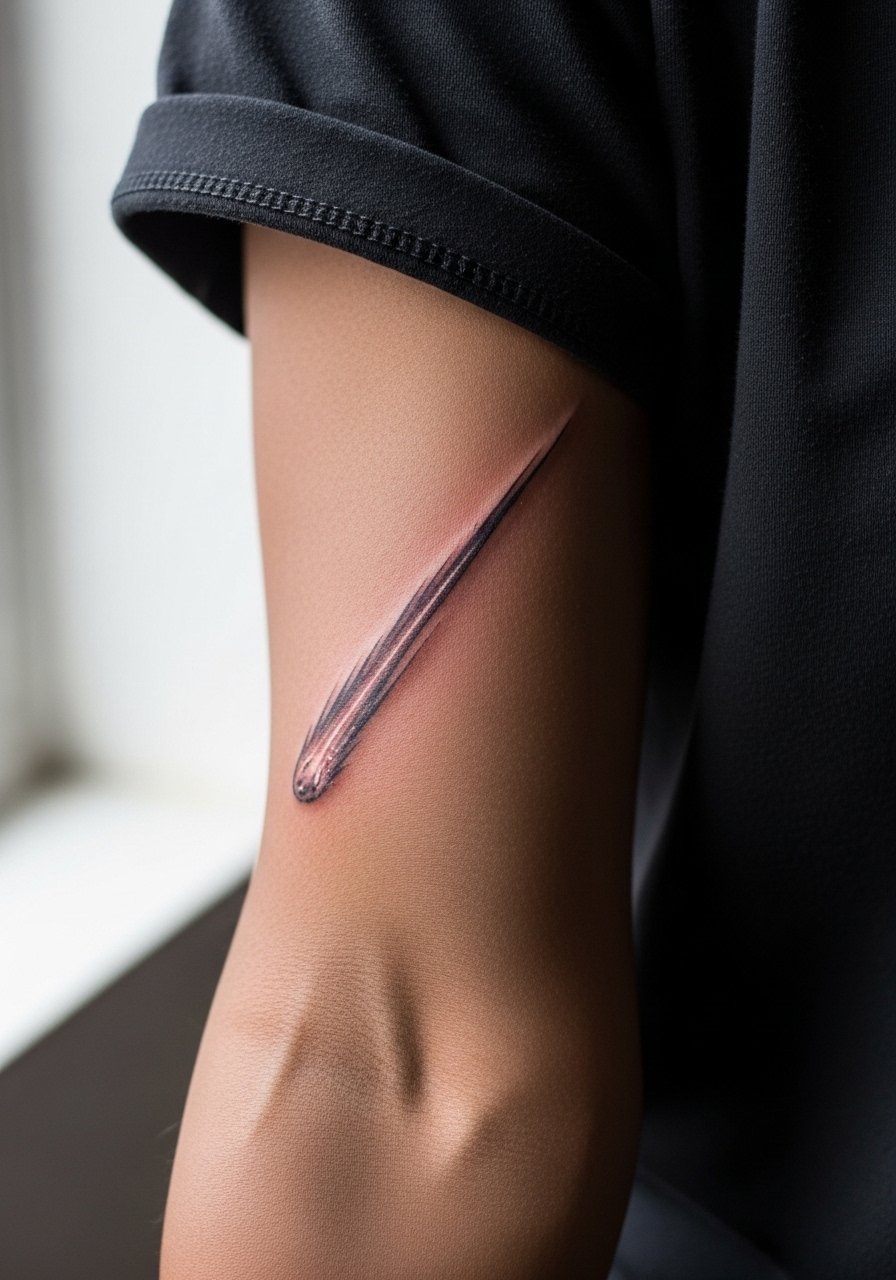
Space motion elements read well when the blur is implied rather than detailed. Ask for a small bright nucleus and three soft trailing strokes. The mistake is asking for literal flames which become indistinct at micro scale. Forearm placement allows the streak to follow arm movement and still read as motion at two years. Session usually under 45 minutes. For showing this off casually, wear a short-sleeve shirt or thin stackable rings on your fingers to add a glint that complements the streak.
16. Greek Bust Fragment or Medusa Face, Collarbone
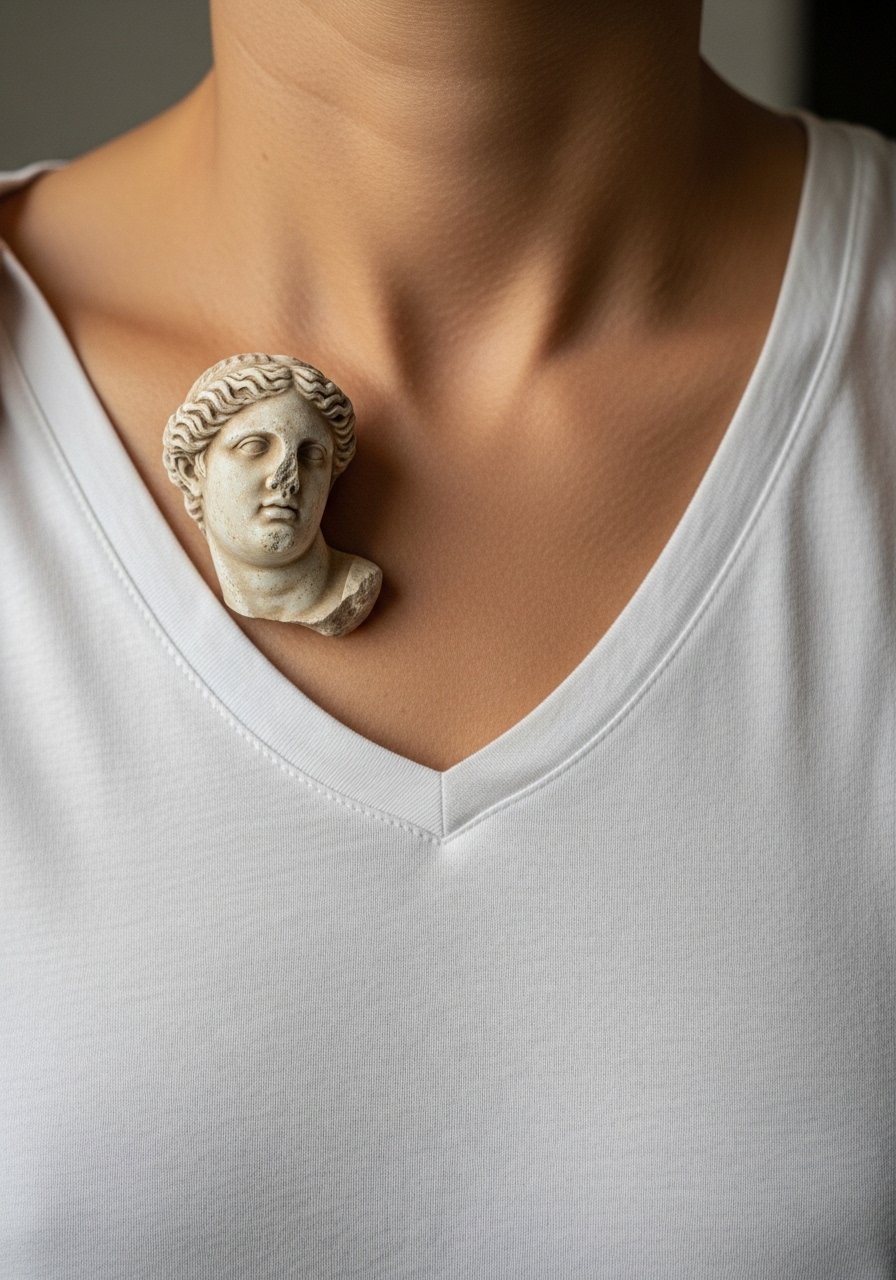
Classical bust fragments translate into tiny study pieces when you reduce contrast and keep shadows soft. Before booking say you want sculptural blocks of tone rather than etched linework. There is cultural sensitivity when referencing mythological figures so many collectors opt for a stylized fragment rather than an exact historical replica. Collarbone placement prevents constant friction and helps the shading read longer. Common mistake is demanding marble-like texture at too small a scale which becomes muddled. Session time is often 45 to 75 minutes.
17. Inner Forearm Row of Micro Pieces, Progressive Collection
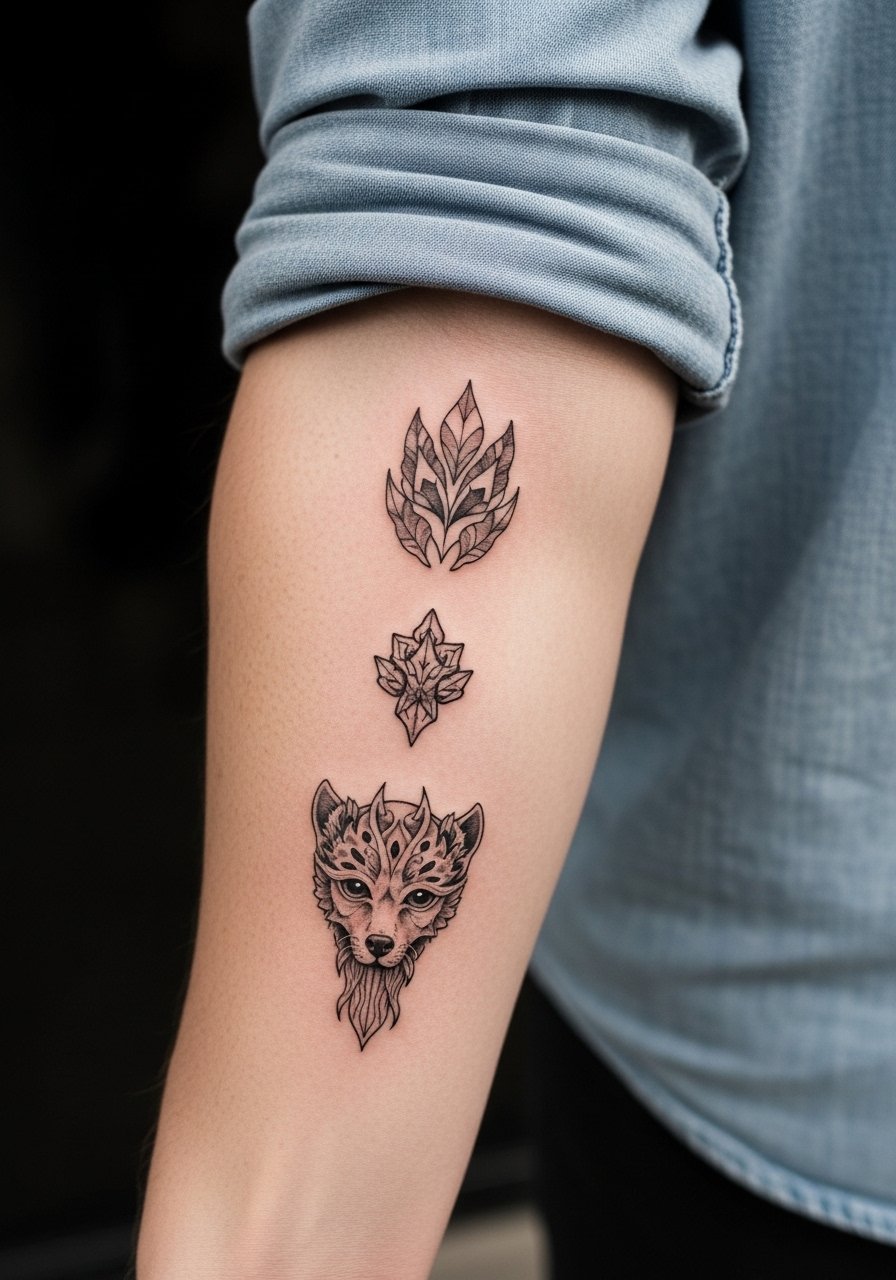
Building a row of micro realism pieces over time is a strong strategy for collectors who want variety without a full sleeve. Plan each piece with consistent scale and spacing so future additions slot in cleanly. Tell your artist you want consistent line weight across the set and leave 1 to 1.5 inches between pieces so each one ages independently. A typical session for each piece runs 30 to 60 minutes. The biggest mistake is treating each piece as a standalone without a layout plan which leads to crowding. For showing off a coherent collection, roll a loose button-down shirt sleeve to frame the inner forearm cleanly.
Frequently Asked Questions
Q: How small can a micro realism wolf head be without losing the eyes?
A: Aim for at least 1.5 inches for a wolf head so the eye remains distinct. If you squeeze it smaller you risk the eye fading into a gray patch. Ask your artist for increased contrast in the eye and stipple shading around the muzzle to preserve structure.
Q: I have dark skin. Will micro realism detail show up in photos?
A: Darker tones can photograph differently so choose high-contrast black and gray and ask for stronger shadow anchors. Bring a photo of how you want it to look on similar skin if possible. Many collectors test a temporary marker placement to see how the shape reads before committing.
Q: Do tiny portrait tattoos need a second session for touch-ups?
A: Often yes. Small grayscale portraits benefit from a short refinement session at six to twelve weeks to restore any softened shadow. Be realistic with scale. If the portrait matters for recognition, size it at two inches or more.
Q: How do I find a micro realism artist who travels for guest spots?
A: Search tags like #microrealismtattoo on Instagram and TikTok and check platforms that list guest spots. Tattoodo, booking apps, and convention schedules are good places to spot traveling specialists. Message artists with clear references and ask about their recent micro realism work to confirm they can manage tiny scale.
Q: Will fine line micro realism blur faster on my wrist than on my inner forearm?
A: Generally yes. Wrists see more friction and sun exposure which accelerates softening. Inner forearm is flatter and sheltered so lines tend to hold longer. If you want a wrist piece, start slightly larger and ask for heavier contrast to compensate.
Q: Is numbing cream okay for small detailed work on sensitive spots?
A: Many artists accept topical numbing for wrists and ankles. There is a debate where one side worries it masks feedback during long sessions and the other side welcomes the comfort it provides. Ask your artist what they prefer and follow their timing instructions for application.
Q: What should I wear to a collarbone portrait appointment so the artist has clear access?
A: Choose a wide-neck shirt or a strapless top you can pull slightly aside to expose only the collarbone area. A v neck tank cream layered beneath keeps you comfortable and gives the artist clean access without overexposure.
