
Fine line back-of-arm tattoos look effortless in photos, but what holds up and what falls apart are rarely the same thing. Trends push tiny script and micro florals into every saved board, and then people are surprised when the ink merges or fades sooner than expected. This list leans practical. Each micro back arm idea explains how it ages, what to say in consultation, and how to show it off so the piece still reads at year three.
1. Tiny Floral Sprig on the Upper Back of Arm

I recommend this when you want a small, organic accent that reads from short distance without overpowering the sleeve. Tell your artist you want single-needle linework with slightly increased spacing between petals so the florets do not merge as the piece heals. A common mistake is asking for ultra-dense detail in a 1.5 inch motif. Expect light fading by year two if you spend a lot of time in sun, and plan a touch-up around year three. For showing it off wear a sleeveless linen top that frames the tricep, or bring a loose button-down shirt to the session so the artist can work without you being uncomfortable.
2. Micro Script Name Along the Tricep Ridge

Fine script here reads intimate and deliberate when the letterforms have breathing room. Ask for slightly bolder line weight than the thinnest needle your reference shows so letters hold for longer. The controversy is clear with micro script. One group says ultra-fine single-needle script is artful and will remain crisp when done perfectly. The other group warns that this placement will cause letters to blur within a few years. The best path is to discuss exact line weight in consultation and accept a touch-up plan. For session comfort wear a racerback tank so the artist has full access without you feeling exposed.
3. Minimalist Arrow Curving Behind the Elbow
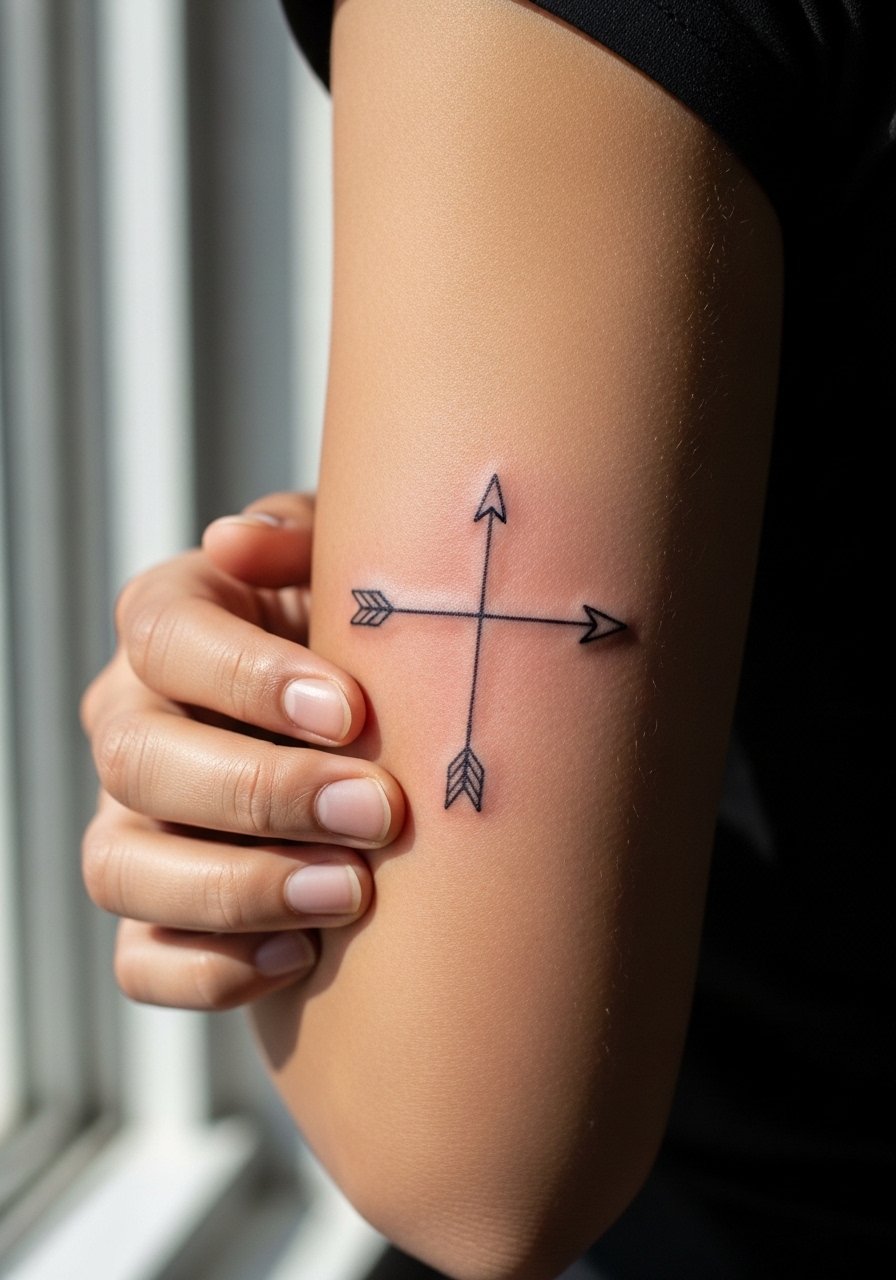
This placement feels dynamic because the design follows the arm's movement. The back of elbow is a higher pain spot, expect a sharp sting when the needle crosses the crease. Mention to your artist you want the shaft slightly thicker than the tip to reduce early feathering. A common mistake is putting the arrow too small directly in the crease which invites blowout as the area flexes. At six months the line reads crisp, at two years the tip may soften. For sessions wear a short sleeve top with a loose cuff so the artist can expose the elbow cleanly.
4. Tiny Geometric Triangle Cluster on the Tricep
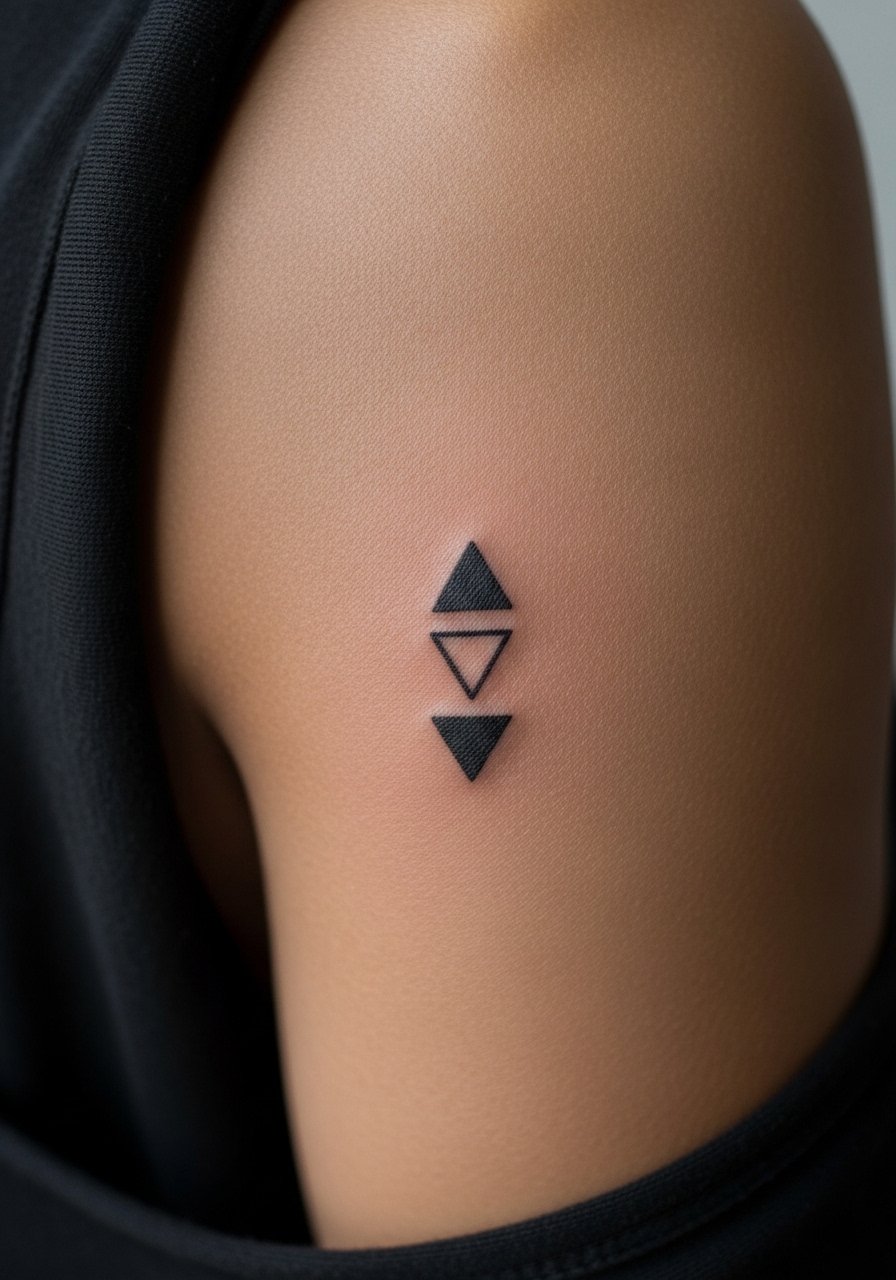
Geometric shapes depend on crisp angles and consistent linework. Tell the artist you want the shapes scaled so each triangle has at least a millimeter of space around it. The usual error is packing the cluster too tight which becomes indistinct as the skin settles. Blowout risk is lower on the tricep than on softer areas, but heavy saturation still needs careful needle depth. Expect touch-up at year three if you want the black to stay solid. Pair this with a rolled-sleeve tee for everyday looks that reveal just enough of the pattern.
5. Micro Realism Eye Facing Outward

Micro realism packs detail into a tiny space which makes depth and contrast critical. In consultation ask for strong contrast around the pupil so the eye keeps definition as the skin softens. The mistake is expecting portrait-level detail at a very small scale. Sessions take longer than linework only because of careful shading. At six months the shading should look smooth, at two years faint softening is normal. For session wear a loose tank top so the artist can angle the arm comfortably while working.
6. Tiny Wave Motif Near the Back Elbow Crease

This small motif reads very clean when the line weight is consistent. Tell your artist you want the crest slightly open so the wave does not become a dark spot over time. People often ask for an ultra-thin line that disappears faster than expected. The back elbow flex increases risk of early softening, so expect a touch-up around year two to three. For showing this off pair it with a short sleeve cotton tee that keeps the arm visible without looking staged.
Studio Day Picks
Those first six back-of-arm micro ideas include placements that flex or sit close to clothing edges, so a few small items make the appointment smoother and the first week easier.
-
Stencil transfer paper kit. Lets you preview scale and angle on your arm before the session starts, which matters for small script and geometric pieces.
-
Topical numbing cream. Applied properly it can ease the sting behind the elbow and on the tricep without impacting linework.
-
Thin protective film roll. Useful for small back-of-arm pieces that rub against sleeves in the first days.
-
Fragrance-free body wash. Gentle cleansing keeps fine linework from flaking in the early healing window.
-
Aquaphor healing ointment. A thin layer helps lock in moisture for tiny blackwork without suffocating the skin.
7. Micro Constellation That Follows the Arm Curve

Dot work and tiny stars age well if spacing is generous. For this ask the artist to space the dots so each star stands alone at a glance. The common mistake is compressing the constellation into a line under two inches. Dot work stands up to motion better than continuous thin lines on this placement. Expect low pain and a short session time, but plan on a small touch-up if dots fade unevenly. For show-off styling try a rolled cuff blouse that reveals the upper arm in movement.
8. Micro Anchor Embedded High on the Back Arm

A tiny anchor benefits from bold, simplified shapes rather than tiny interior details. Tell the artist you want solid saturation with minimal inner flourishes so the silhouette stays legible. The error is overworking details inside a piece this small. Healed at six months it should read as a crisp silhouette, at two years edges may soften slightly. This placement is low-blowout but sometimes friction from straps can affect the lower tricep, so plan clothing accordingly.
9. Micro Bee with Tiny Stipple Wings

Stipple shading gives texture that holds surprisingly well on the back of the arm. Ask for stipple rather than wash shading to retain structure as the piece settles. A frequent mistake is asking for smooth gray wash at micro scale which can smudge into a blob. The session feels faster than expected because stippling is applied in short passes. Pair this design with a flowy short-sleeve dress that lets the arm show in motion.
10. Tiny Crescent Moon Nestled Near the Tricep

Moon motifs read as subtle statements when left uncluttered. In consultation specify the interior curve width so the crescent keeps form across years. A mistake is making the crescent hairline thin which can vanish under normal sun exposure. This spot is low pain and quick to tattoo. To show it off wear a sleeveless knit top that draws attention to the arm silhouette.
11. Micro Keyhole or Lock on the Posterior Arm
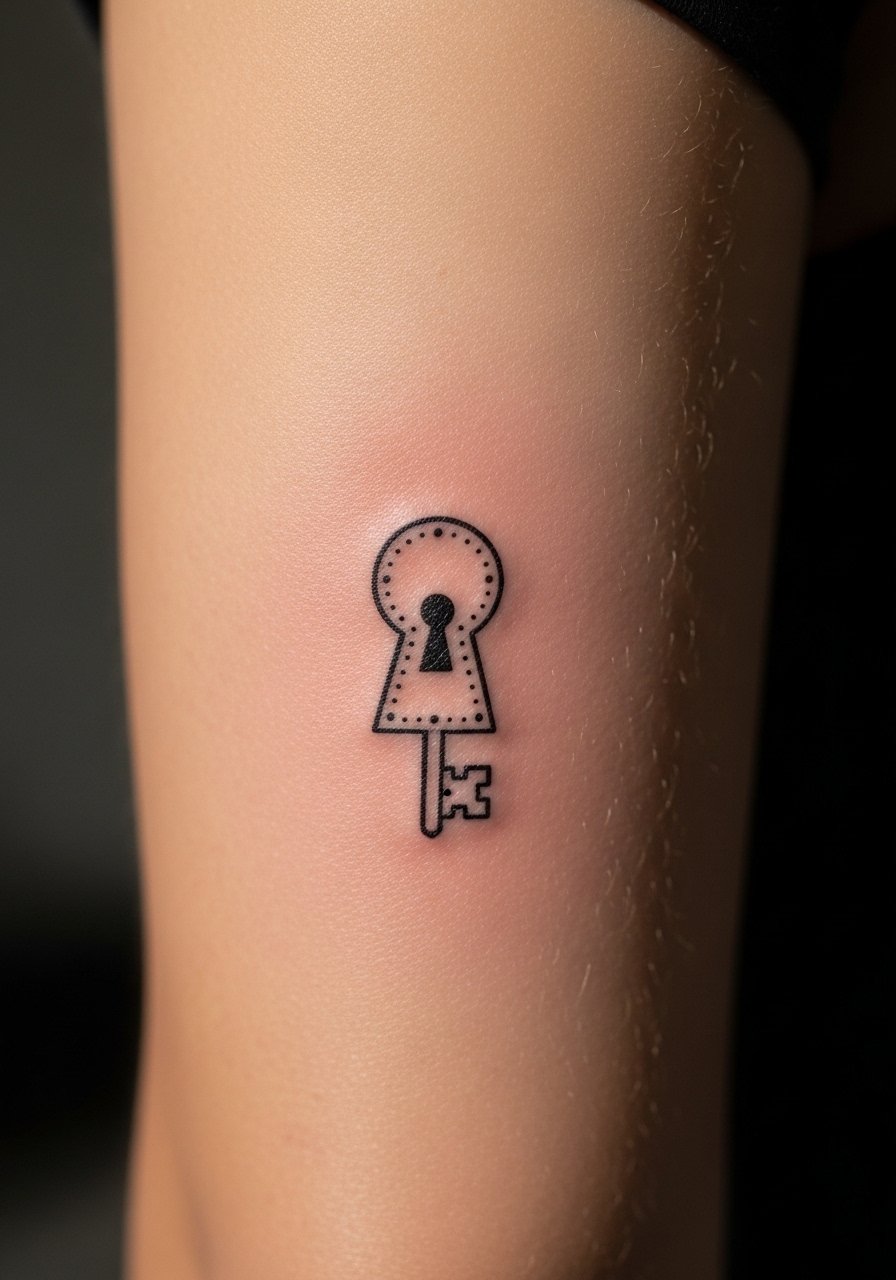
This tiny object reads best as a silhouette rather than a detailed object. Ask for slightly thicker outer line and reduce inner detail. The typical error is expecting ornate motifs to hold in under two centimeters. The placement is stable but can rub under backpack straps, so think about daily habits. If you anticipate high friction mention this in the consultation. Touch-ups at year three are common for outline work here.
12. Micro Botanical Vine Tucking into the Back Arm

A tiny vine is elegant when leaves are spaced to avoid merging. Tell your artist you want negative space between leaf tips and the stem to prevent early softening. A common mistake is cramming multiple leaves in a short span. The back of arm gives enough canvas to curve the vine with muscle contours. For session day wear a sleeveless wrap top so you can lower or lift fabric for access without shifting the whole garment.
13. Micro Compass Point Facing Down the Arm

Compass points need clear negative space to keep direction obvious. Ask for slightly heavier cardinal points and reduced inner decoration. The mistake is trying to include full compass details at this scale. This sits well on the back of arm because orientation follows limb direction. Expect mild discomfort and a quick session. For showing off choose a cap sleeve tee that frames the upper arm.
14. Micro Lightning Bolt Behind the Tricep

Bold single-stroke shapes like a lightning bolt age well if the stroke is not paper-thin. Tell the artist you want the bolt slightly thickened at the center so it keeps its jagged silhouette. The common error is requesting a needle-fine bolt that fades into a hairline. This placement sees occasional rubbing from bag straps so think about placement relative to where you carry things. Pair with a tank dress to show the arm off at events.
15. Micro Paw Print Near the Back of Arm
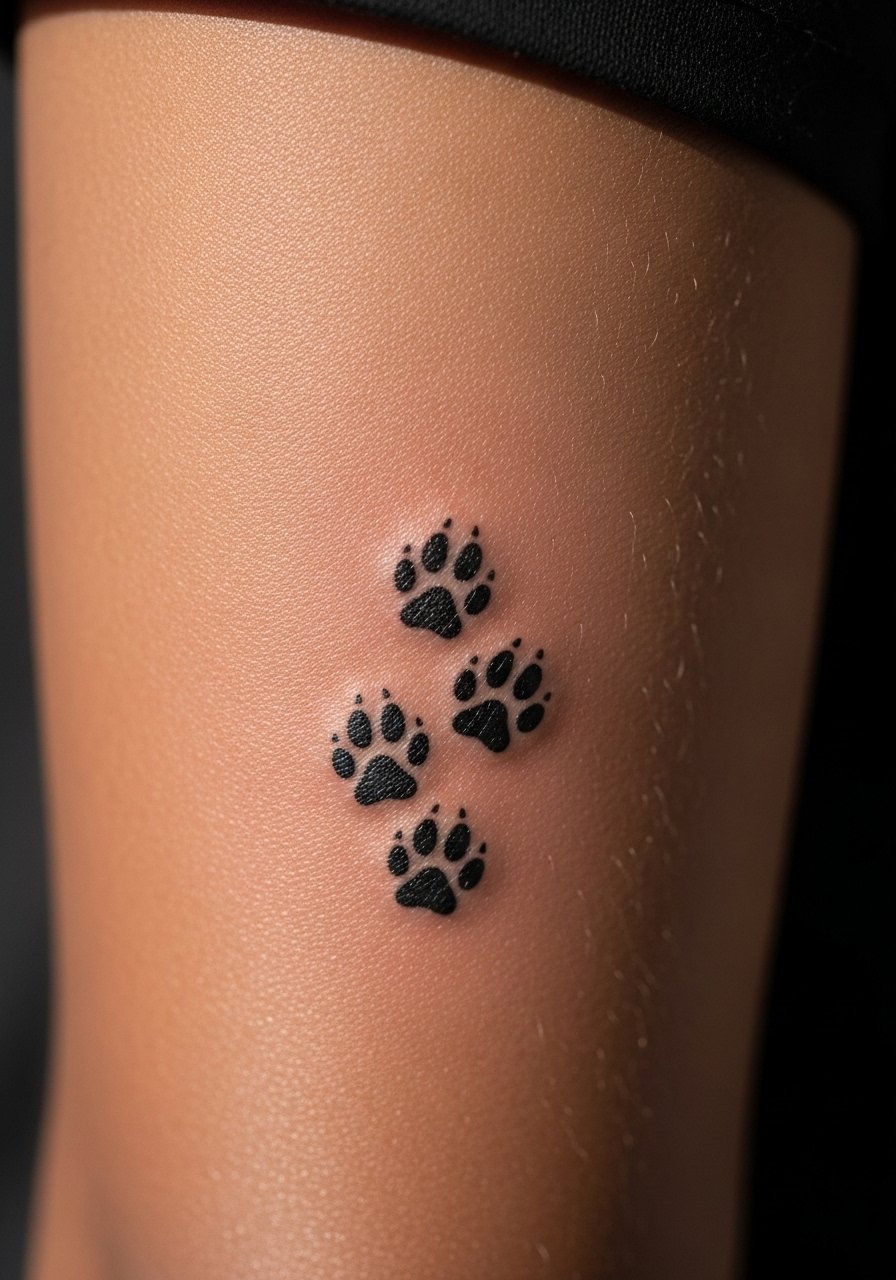
Paw prints are sentimental and read best as simplified shapes. Ask for solid pads rather than line art to avoid losing detail. The error is squeezing several prints into a narrow band which becomes indistinct. This spot is low risk for blowout and easy to hide under long sleeves. Sessions are quick and healing is straightforward. Consider a touch-up if you want the pads to stay jet black.
16. Tiny Paper Plane in Flight
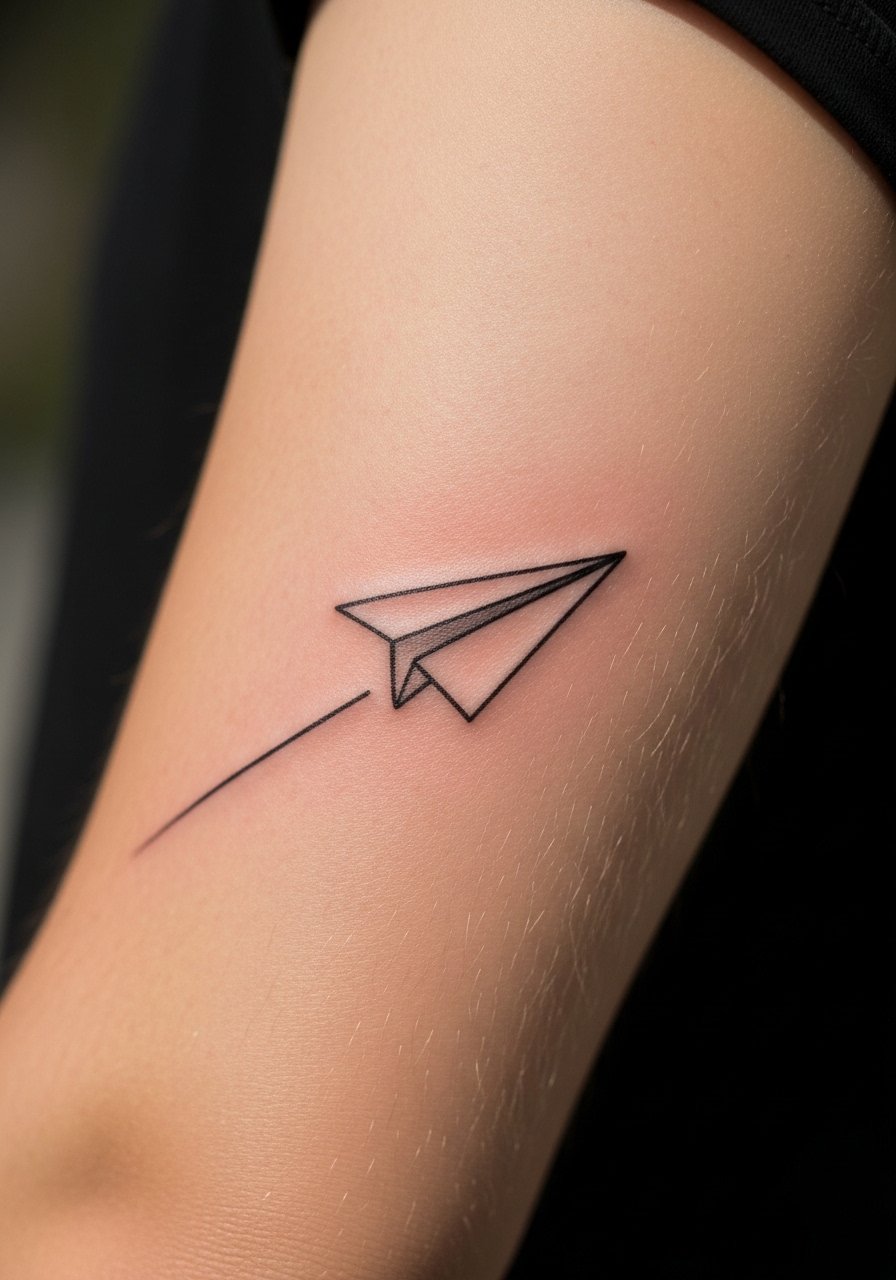
Directional motifs should follow the arm's natural line to read well. In the consult ask the artist to angle the plane so it complements your limb length. Mistakes happen when people center tiny motifs without regard for movement. Expect light fading in the sun over time. For showing it off try a rolled sleeve button-up that reveals the back of the arm when you move.
17. Micro Floral Mandala Petal Cluster

Mandala motifs tempt dense detail but at micro scale you want simplified arcs and fewer points. Tell your artist to prioritize negative space and symmetry rather than micro filigree. One camp says mandala detail is fine as long as the artist uses tight spacing and precise depth. The other camp warns that dense mandalas at tiny scale will bleed into a dark bruise over time. Discuss which approach your artist prefers and plan for touch-ups. This motif pairs nicely with a sleeveless knit sweater for a casual layered look.
18. Micro Anchor Chain Link That Wraps Slightly

Linked designs need consistent spacing to avoid merging. Ask for slightly elongated ovals and deliberate gaps. The common error is using tiny closed loops that merge into a thicker band. This placement contours nicely and can peek from under short sleeves. For session day wear a muscle tee so the artist can work without you feeling overheated.
19. Micro Soundwave or Waveform Accent
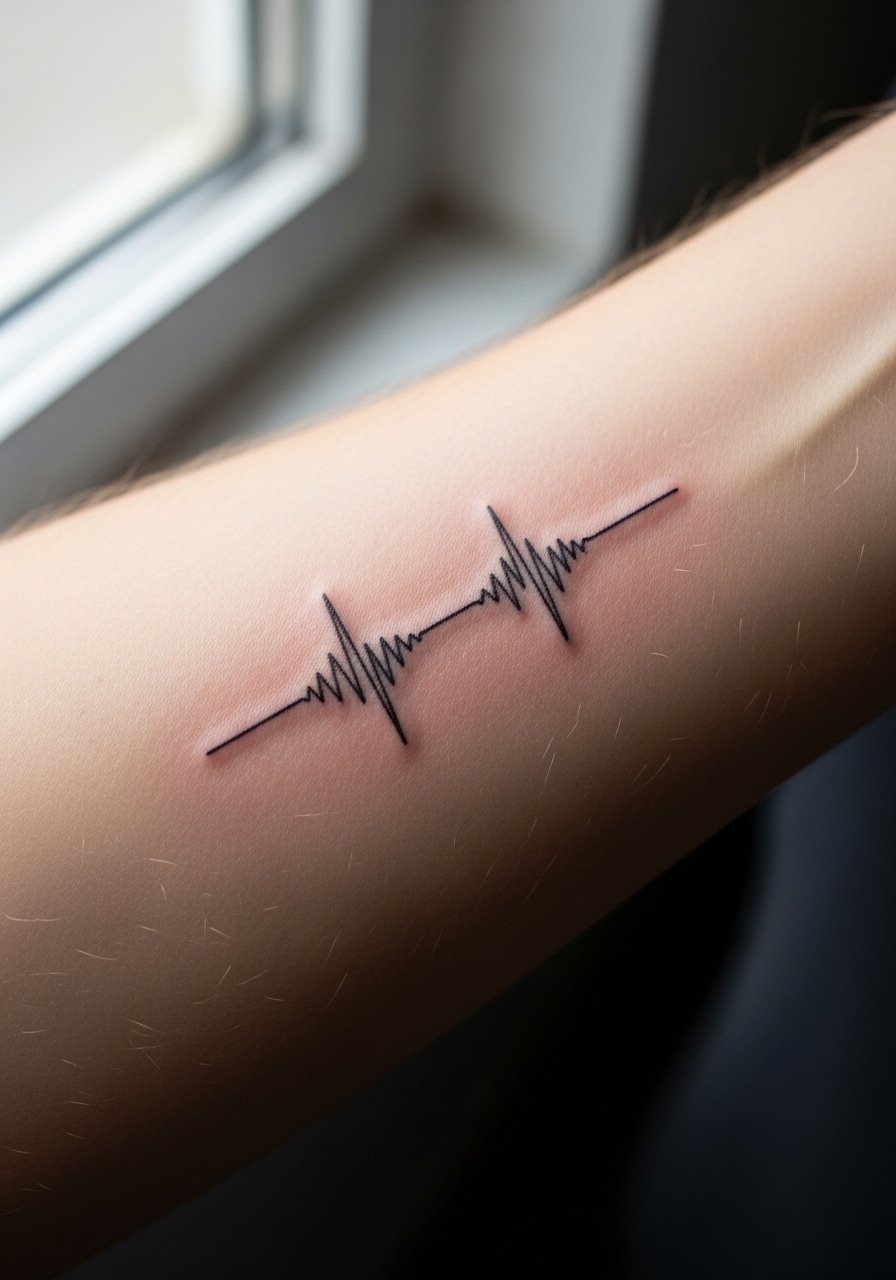
Waveform tattoos can be meaningful because they translate audio into a visual. When you bring a waveform, provide a simplified export so the artist redraws it for clarity. A frequent mistake is using raw audio with unnecessary micro detail. This is a low-pain spot and quick to do. For showing off, a short sleeve henley frames the arm without covering the piece.
20. Micro Compass Rose Petal Accent
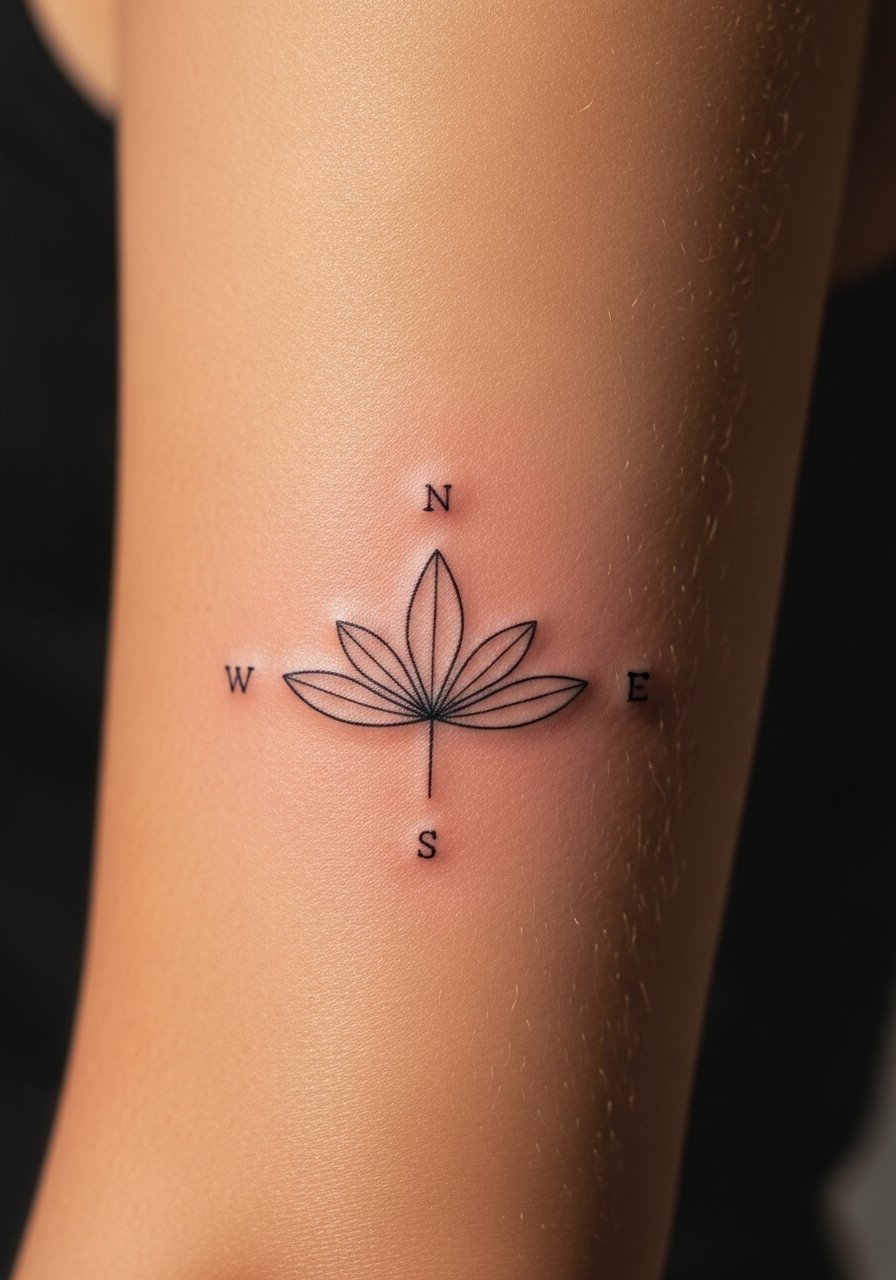
Keep compass elements minimal so the motif reads easily. Ask for the four primary petals only and avoid small inner filigree. The usual mistake is cramming cardinal details that blur. This spot is forgiving and works with a layered sleeve look. For evening wear try an off-shoulder top that draws attention to the upper arm and shoulder line.
21. Micro Mountain Silhouette Along the Arm Curve
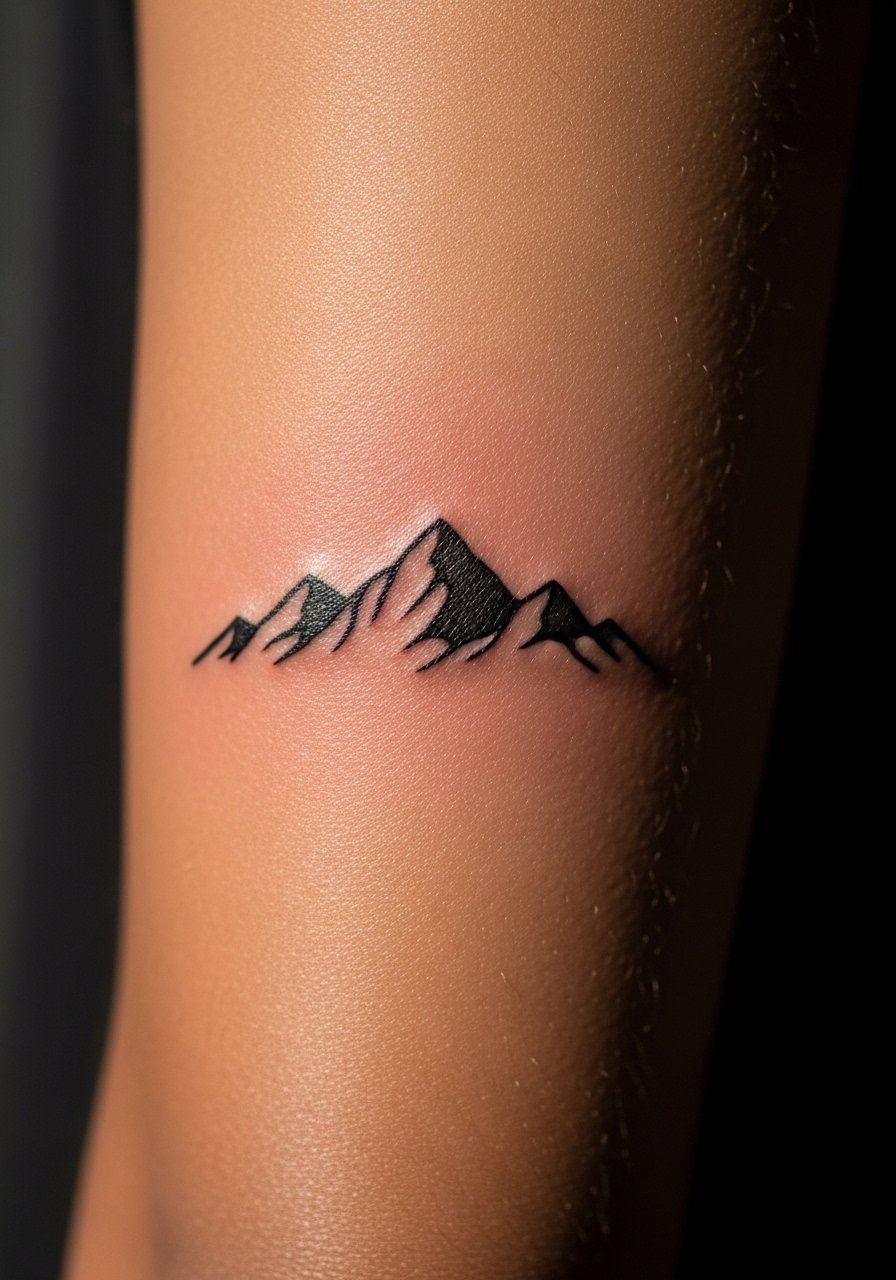
Silhouettes like mountains rely on clean outer edges. Tell the artist you want the peaks simplified so the negative space reads as sky. The mistake is too many tiny peaks at this scale. This placement allows the silhouette to follow natural muscle lines which helps it stay defined. Pair with a rolled sleeve flannel when you want a rugged casual look.
22. Micro Zodiac Glyph Subtly Placed
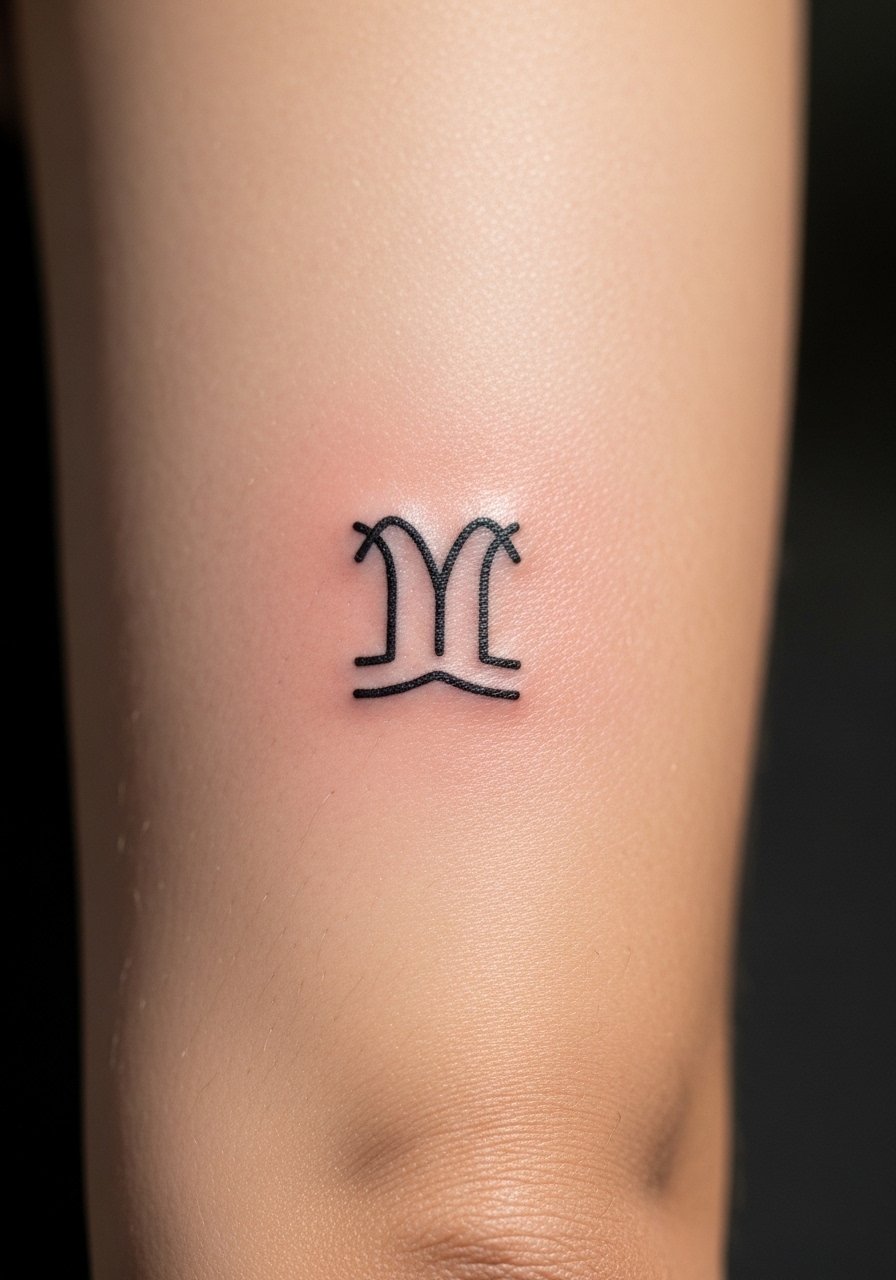
Glyphs do well when recreated in a single clear stroke rather than ornamented. Ask your artist to render the symbol in a single, confident pass so it keeps integrity as it heals. The common mistake is adding decorative elements that obscure the glyph at small sizes. For show-off style add a thin chain bracelet that draws the eye to the arm without overcrowding the glyph.
23. Micro Camera Icon for the Photo Lover
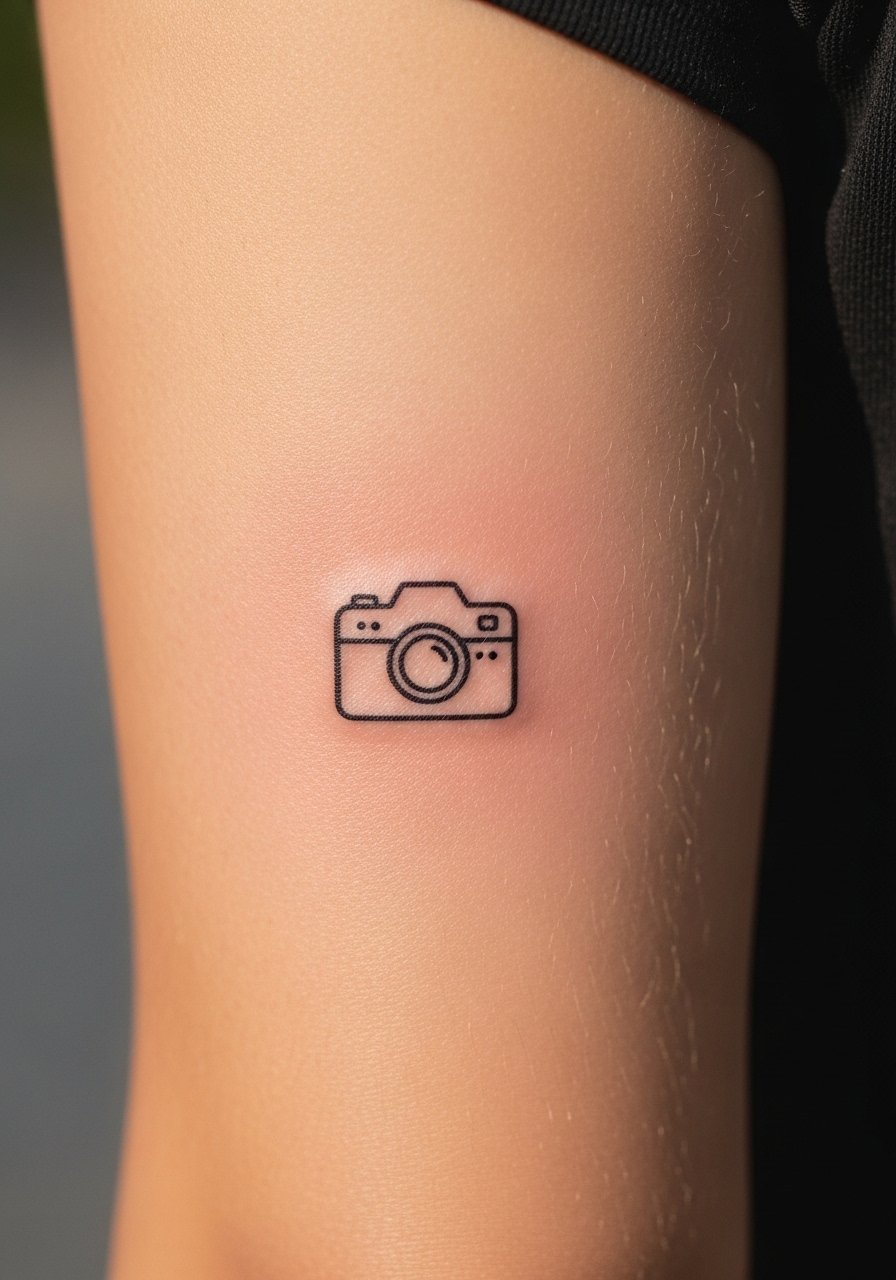
Tiny icons are most successful when simplified into bold silhouettes. Ask for a solid lens circle and minimal outer detail. Clients often overcomplicate icon designs which end up blurred. This placement is easy to hide if you need discretion. Plan a quick touch-up if you want the icon to stay matte black.
24. Micro Lightning Constellation Mix
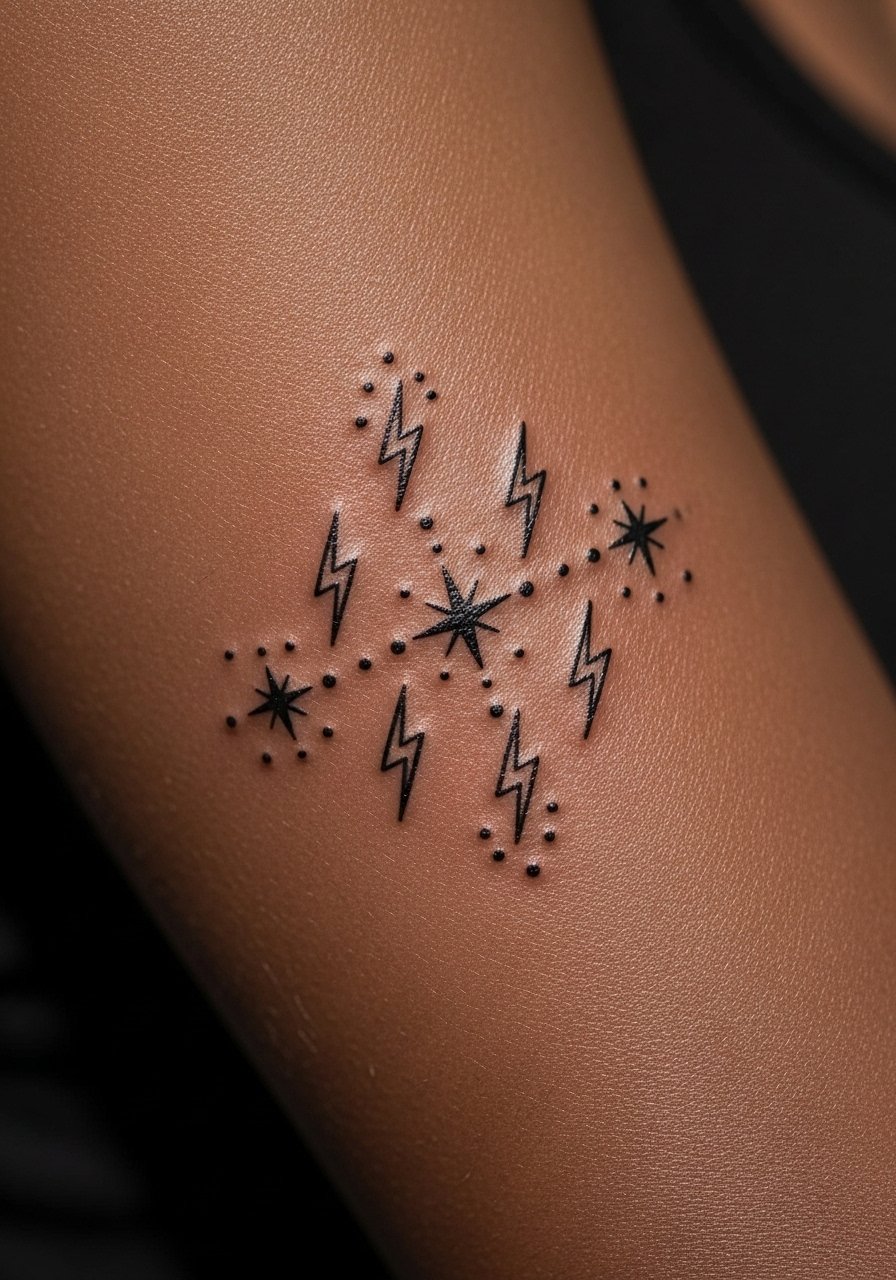
Combining small glyphs and stars needs breathing room so each symbol reads. Ask your artist to place symbols with deliberate negative space. The mistake is clustering many tiny marks in a space under two inches. This arrangement looks great with short sleeves. Wear a cap sleeve dress to let the cluster peek out in motion.
25. Micro Skull Outline Tucked into the Arm Fold

Skull motifs at this scale work when kept minimal. Ask for an outline without internal shading to avoid a blocky look later. The common error is including shading that becomes muddled. The fold area moves but is not high risk for blowout. If you want it to stay crisp expect a small touch-up in a few years.
26. Micro Leaf Cluster Along the Tricep Edge

Clusters of leaves should favor negative space and varied leaf sizes for longevity. Tell your artist to space leaves so each has room to breathe. A typical mistake is symmetry that collapses into a solid shape over time. This spot pairs well with sleeveless garments. For the appointment wear a button-up shirt you can pull to the side so the artist has unobstructed access.
27. Micro Heart Outline Resting Near the Tricep
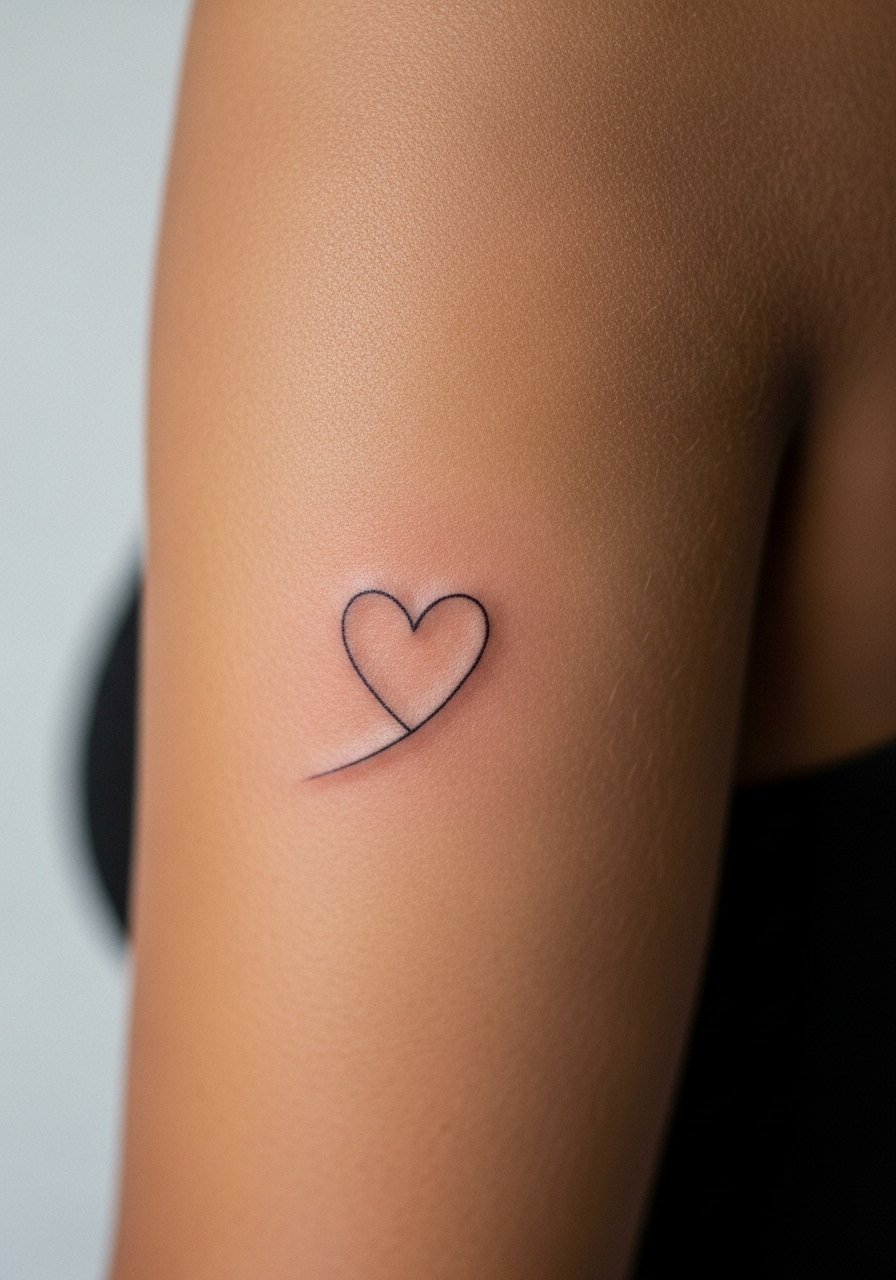
A heart outline is classic and powerful when proportioned for the arm curve. Ask for a slightly thicker outline than your page sketch so it keeps form. The common mistake is a near-hairline outline that vanishes over time. This placement is easy to hide and quick to tattoo. For show-off wear a short sleeve crop top that reveals the piece when you want it visible.
Frequently Asked Questions
Q: Will a fine line micro tattoo on the back of the arm blur faster than bold blackwork?
A: In my experience fine line generally softens sooner because the lines are closer together and sit nearer the skin surface. Bold blackwork can age into a strong silhouette that still reads at a distance, while micro linework often needs touch-ups around year three.
Q: How should I prepare clothing for a back-of-arm tattoo session?
A: Wear something that gives the artist clear access without exposing more than necessary. A racerback tank or a button-down you can pull aside usually works best. Loose sleeves that can be rolled up help you stay comfortable during the session.
Q: Are there differences in healing between single-needle stipple work and tiny filled black shapes on this placement?
A: Yes. Stipple or dot work tends to heal into texture that often looks intentional even as it fades. Tiny filled black shapes rely on solid saturation and may need touch-ups if they sit near friction zones like bag straps. Tell your artist where you typically wear straps so they can adjust placement.
Q: If I want text, how small can script be on the back of the arm and still last?
A: Keep individual words at least two centimeters long with moderate line weight. Tiny script under one centimeter or hairline script will likely merge within a couple of years. Ask your artist to show scaled mockups on your arm so you can see legibility before inking.
Q: Do micro back-of-arm tattoos affect job prospects or professionalism in visible industries?
A: It depends on your workplace and the piece visibility. Back-of-arm tattoos are easier to cover with long sleeves, so they are a reasonable compromise if you want something discreet that can be shown off outside of work. If you need complete discretion consider lower placements that stay hidden under a short sleeve.
Q: How often do these micro pieces need touch-ups?
A: Expect a realistic schedule of one touch-up anywhere between two and five years depending on sun exposure, skin type, and friction. Fine line pieces tend toward the shorter end of that range.
Q: Can I combine a micro back arm piece into a larger sleeve later without losing the detail?
A: Yes, but plan spacing intentionally. If you think you may expand into a larger composition, tell your artist during the consult so they can place and scale the micro piece to integrate into future elements.
