
Fine line manta ray sketches saturate saved boards, but the reality most people miss is how placement and skin tone decide whether a piece still reads clearly after two years. Expect to schedule touch-ups, compare shop minimums before booking, and check healed photos on skin tones like yours. Below are 21 sketch-forward ideas with placement notes, session tips, and wardrobe cues that help these designs last.
1. Tribal Manta Ray Outline on the Outer Forearm

I recommend this when you want a design that stays legible for years. Ask your artist for slightly thicker outer contours and clean negative space in the wing tips during the consultation. The common mistake is crowding too many internal swirls in a small forearm piece, which merges as it heals. Expect mild pain and a one-session appointment under two hours. For showing it off, roll the sleeve of a rolled sleeve chambray shirt and wear a thin leather cuff bracelet on the opposite arm so the silhouette reads against neutral fabric.
2. Fine Line Manta Ray Silhouette on the Inner Wrist

Fair warning: fine line here ages faster than on low-friction areas. I tell clients to ask for slightly bolder single-stroke contours so the silhouette survives daily washing. The usual regret is asking for the very thinnest line possible and then needing a touch-up in year two. Session time is short and pain is low. Pair this micro piece with a minimalist leather watch on the opposite wrist to balance the visible space when you gesture.
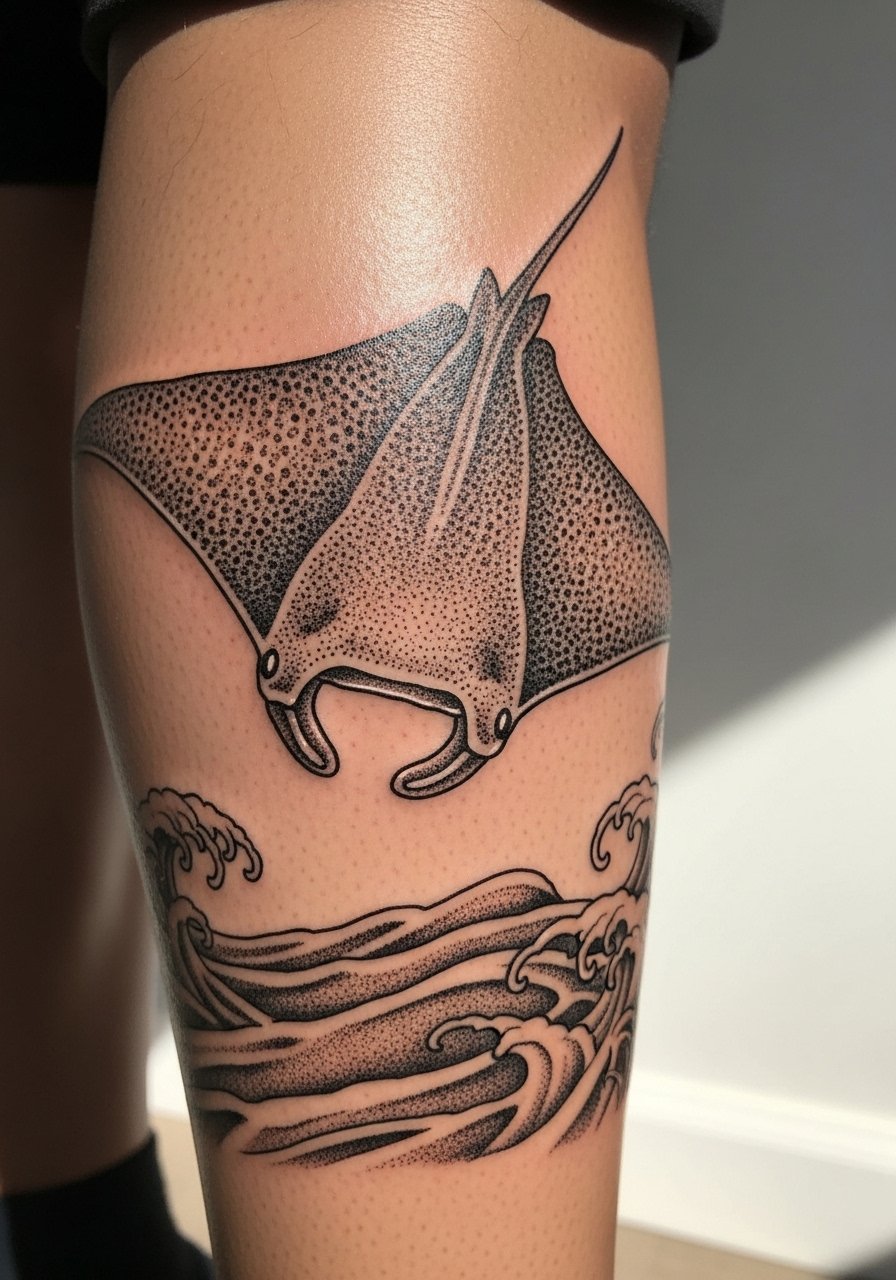
3. Realistic Manta Ray with Waves on the Calf
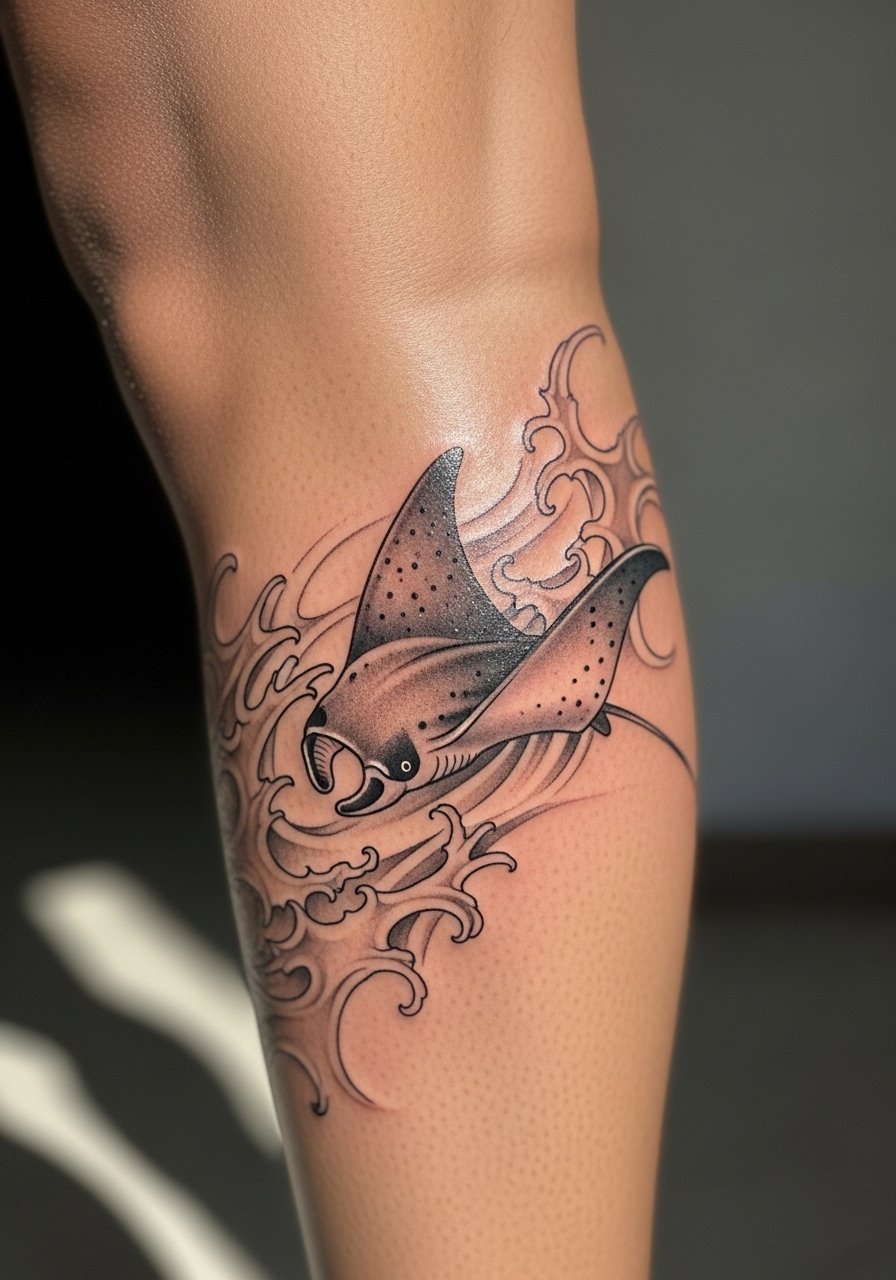
This is the pick for people who want motion and depth. Tell your artist you want soft stipple transitions around the fins and strong contrast in the underside shading. Most realistic attempts that look great day one lose definition if the shading is too flat, so ask for layered saturation. Calf work is moderate on the pain scale and usually spans two sessions for mid-size pieces. For summer visibility, roll joggers or shorts and keep the lines framed by neutral tones like earth or navy. A slim jogger pant that can be rolled at the ankle helps show the piece without rubbing.
4. Neo-Traditional Manta Ray on the Shoulder Blade
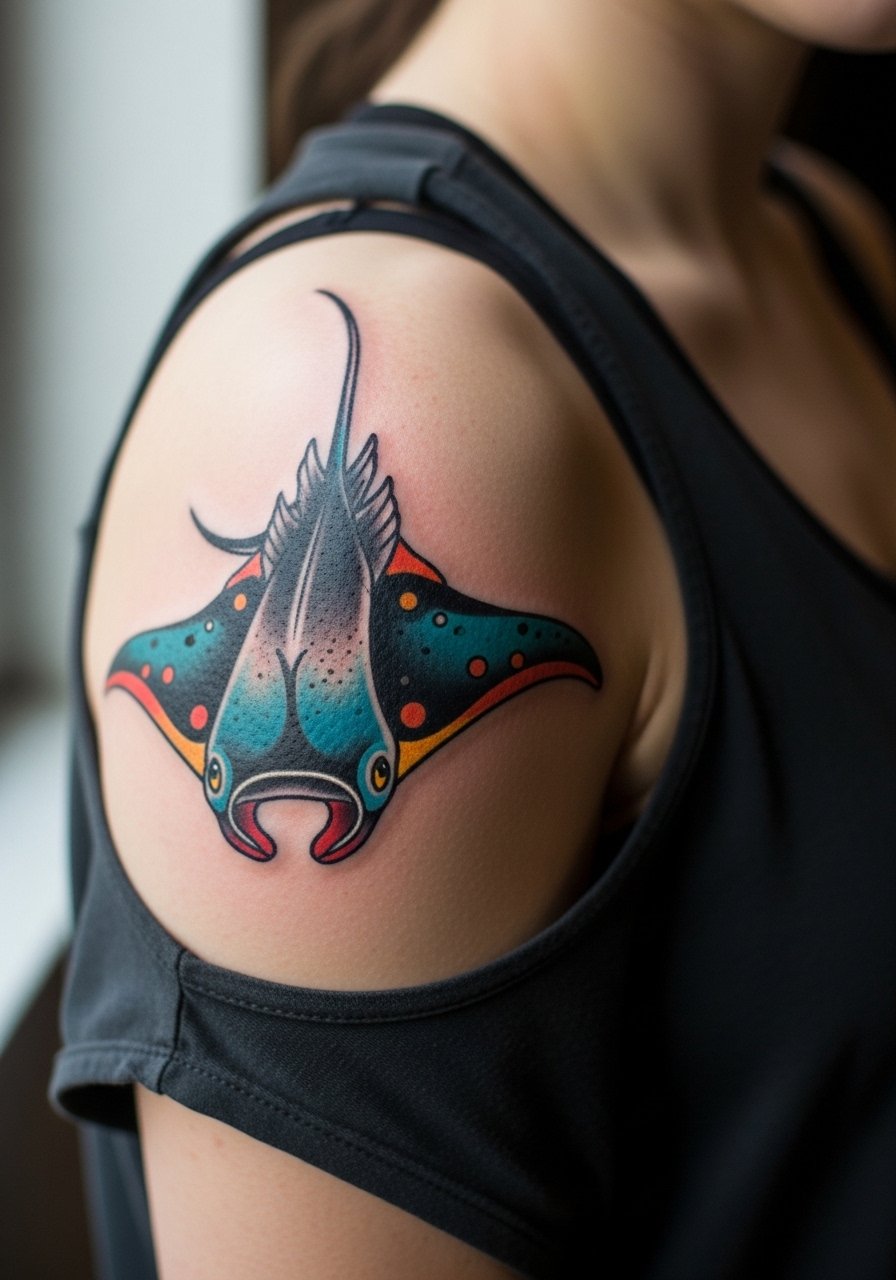
This design reads like a badge when placed on the shoulder blade. During the consult, specify color accents and a clear separation between the main form and background motifs so color saturation does not muddy the linework. A common mistake is asking for overly tiny color details that need too much needle density; those tend to soften unevenly. Shoulder sessions are comfortable with short breaks and usually finish in one to two sessions depending on size. Wear a loose tank top you can shift for the session so the artist has full access without fabric drag.
5. Blackwork Geometric Manta Ray on the Upper Arm

Blackwork is rewarding for longevity when the solid fills are consistent. Ask for slightly larger geometric gaps so the negative space breathes as it settles. The controversy around blackwork and darker skin tones comes up often. One camp says heavy saturation and large scale are essential for contrast. The other camp recommends high-contrast shading and careful line spacing instead of raw fills. Both approaches can work but talk through healed portfolio examples with your artist first. Expect one to two sessions and moderate discomfort where the needle rides over muscle. For the session, a loose button down shirt you can pull aside works well.
6. Watercolor Manta Ray Splash on the Ribcage

Ribcage placement is a known aging test for delicate work. Artists split into two camps about fine line and watercolor here. One side warns that respiration and skin stretch blur detail fast. The other argues that with correct needle depth and strategic spacing, delicate pieces can hold. Be explicit in consultation about how much negative space you want and ask to see healed rib examples. This area rates high on pain and usually takes a single focused session for small-medium watercolor pieces. Wear a cropped top you can lift so the artist can work without digging fabric into the area.
Studio Day Picks
These items help with the small but important session and early healing concerns raised by the forearm, wrist, calf, shoulder, upper arm, and ribcage pieces above.
-
Stencil transfer paper kit. Useful when you want to preview exact placement and scale on skin before the needles start, especially for the forearm and collarbone mockups.
-
Topical numbing cream. Applied as directed about 45 minutes before a sensitive ribcage or inner bicep session to reduce the initial sting without affecting the artist's linework.
-
Thin protective film roll. A lightweight film helps finger and wrist pieces avoid constant rubbing in the first days, which is a common cause of scabbing and early ink loss.
-
Fragrance free gentle body wash. Mild cleansing in the shower keeps delicate calf and shoulder shading clean without irritating fresh ink.
-
Aquaphor healing ointment. A thin layer for the first 48 hours helps lock in moisture for fine line and watercolor areas without suffocating the skin.
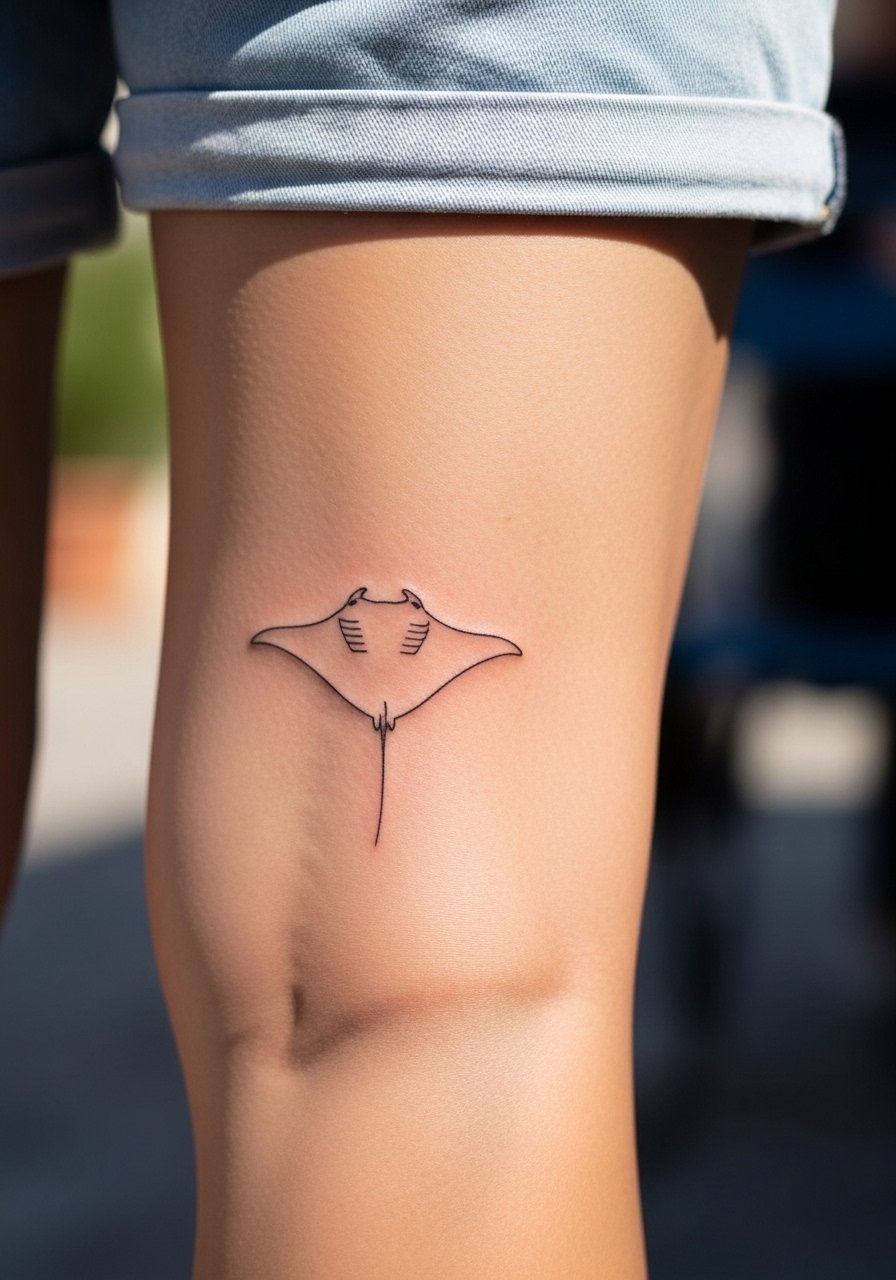
7. Minimalist Single Line Manta Ray on the Outer Ankle

This micro option is ideal for first-timers who want low commitment. I advise asking the artist to scale up the single stroke slightly from a flash design so the curve does not disappear in a year. The ankle sees constant friction from socks and shoes, so expect possible early touch-ups at year two. Pain is low to moderate depending on bone proximity. For summer dressing, roll the hem of a pant or wear ankle-length sandals so the tiny silhouette gets framed. Try ankle roll shorts men style cuts or cropped trousers that sit above the piece.
8. Ornamental Manta Ray Mandala on the Upper Back

Large back symmetry makes an ornamental mandala sing. During the consult, ask for clear spacing in the mandala rings so stipple shading does not merge as it heals. A common misstep is compressing too many repeating elements into a small back area, which reads muddy at six months. Back pieces take multiple sessions and are lower on the pain scale when lying prone properly. For evenings out, a low back crop top or open-back dress shows the central symmetry without competing straps.
9. Ignorant Style Manta Ray Sketch on the Upper Thigh
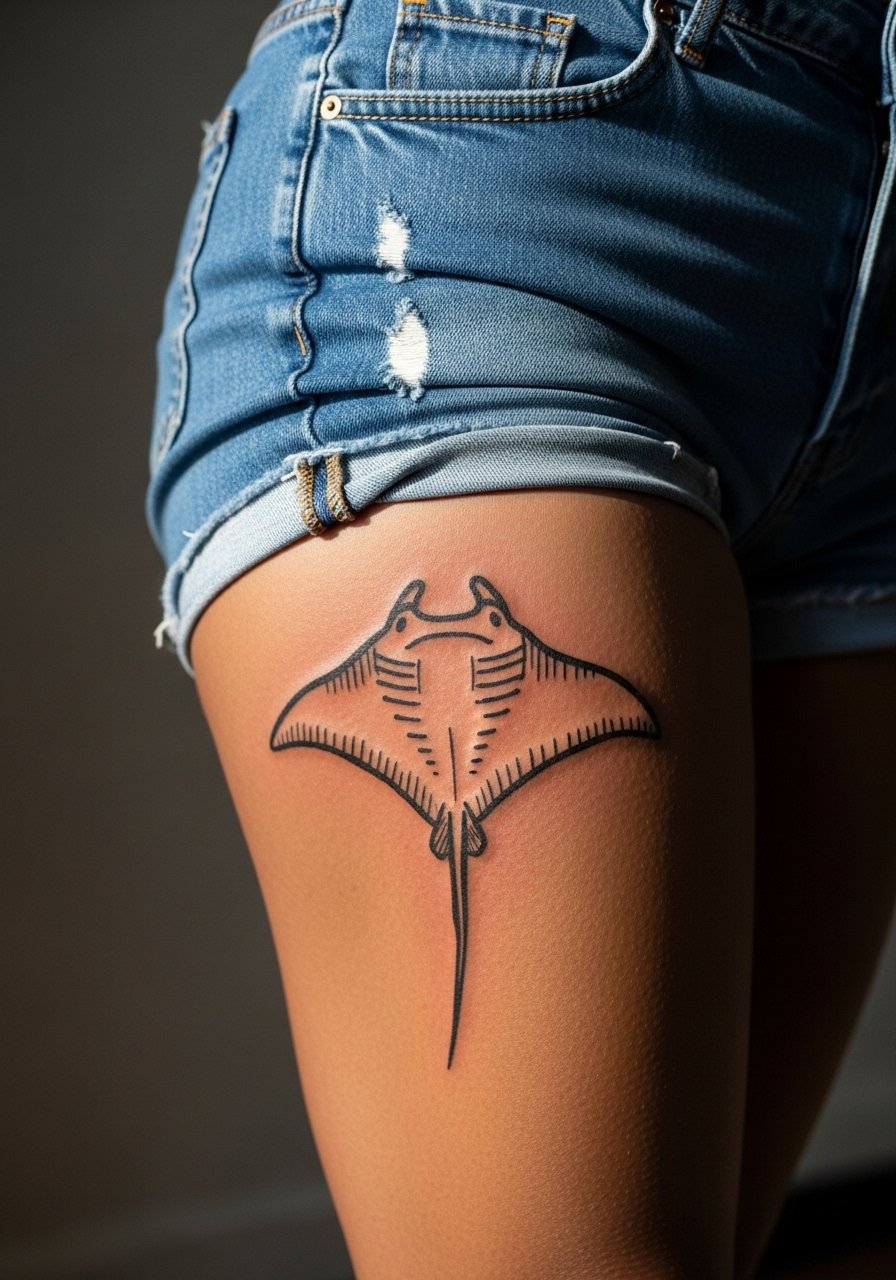
The ignorant style embraces imperfect strokes and visible pen marks. If you want that raw look, tell your artist to preserve stray anchor strokes instead of over-cleaning them. The usual mistake is asking for tiny ignorant details that lose their character when scaled down. Thighs handle medium-sized pieces well and have forgiving skin for shading and touch-ups. Pain is moderate. For a session, pull on high waist shorts or loose drawstring bottoms so the artist can move and access the area without pressure.
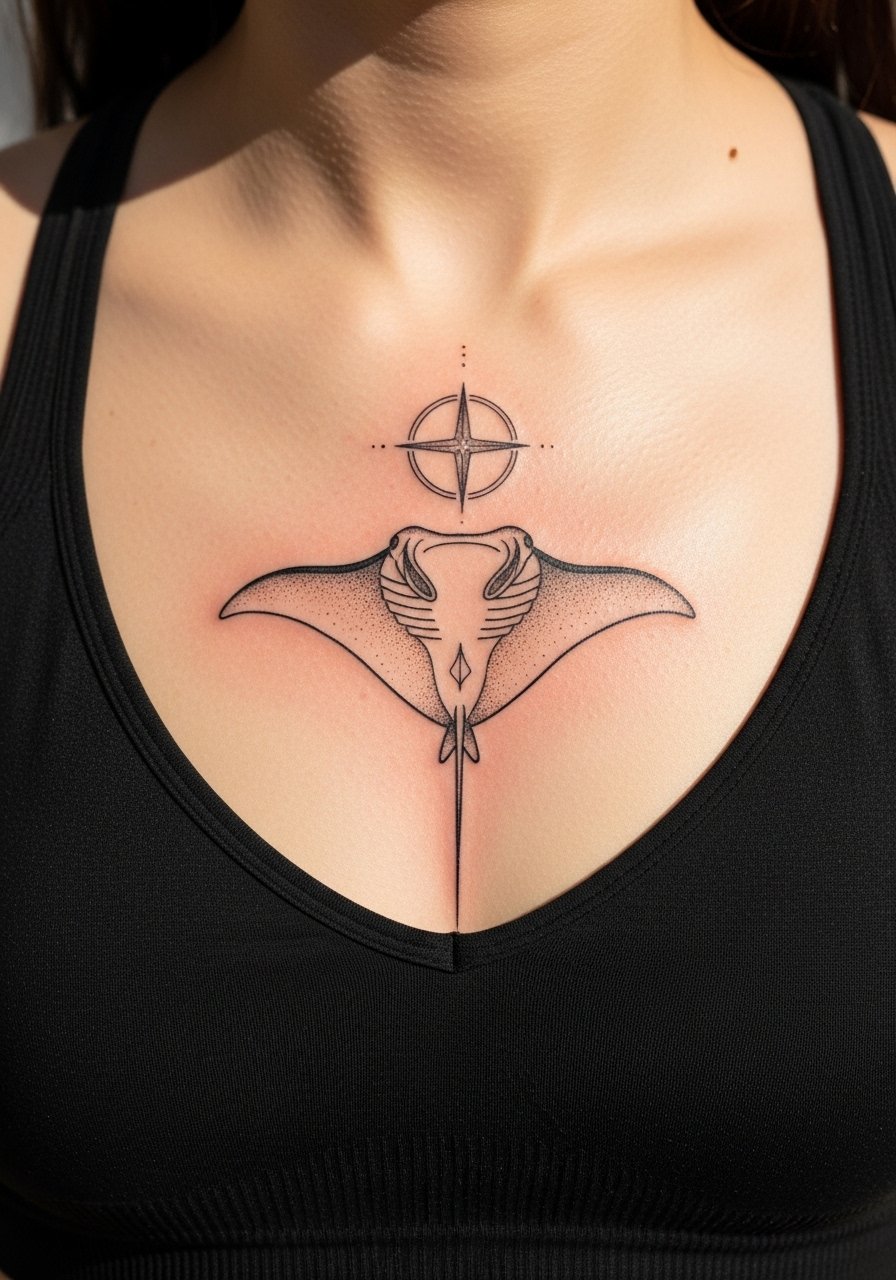
10. Traditional Anchor Manta Ray on the Sternum

Classic traditional work is forgiving because the thicker outlines age into a clear silhouette. For sternum placement, ask for balanced negative space to avoid the center collapsing with movement. This area is painful and requires a steady hand and short breaks. A common error is overcrowding the chest with tiny ornamental details that fight respiration-based skin movement. Expect two sessions for medium-size colored pieces. For the session, a fitted sports bra or bandeau top that reveals only the immediate area makes positioning and healing easier.
11. Micro-Realism Manta Ray Detail Just Behind the Ear
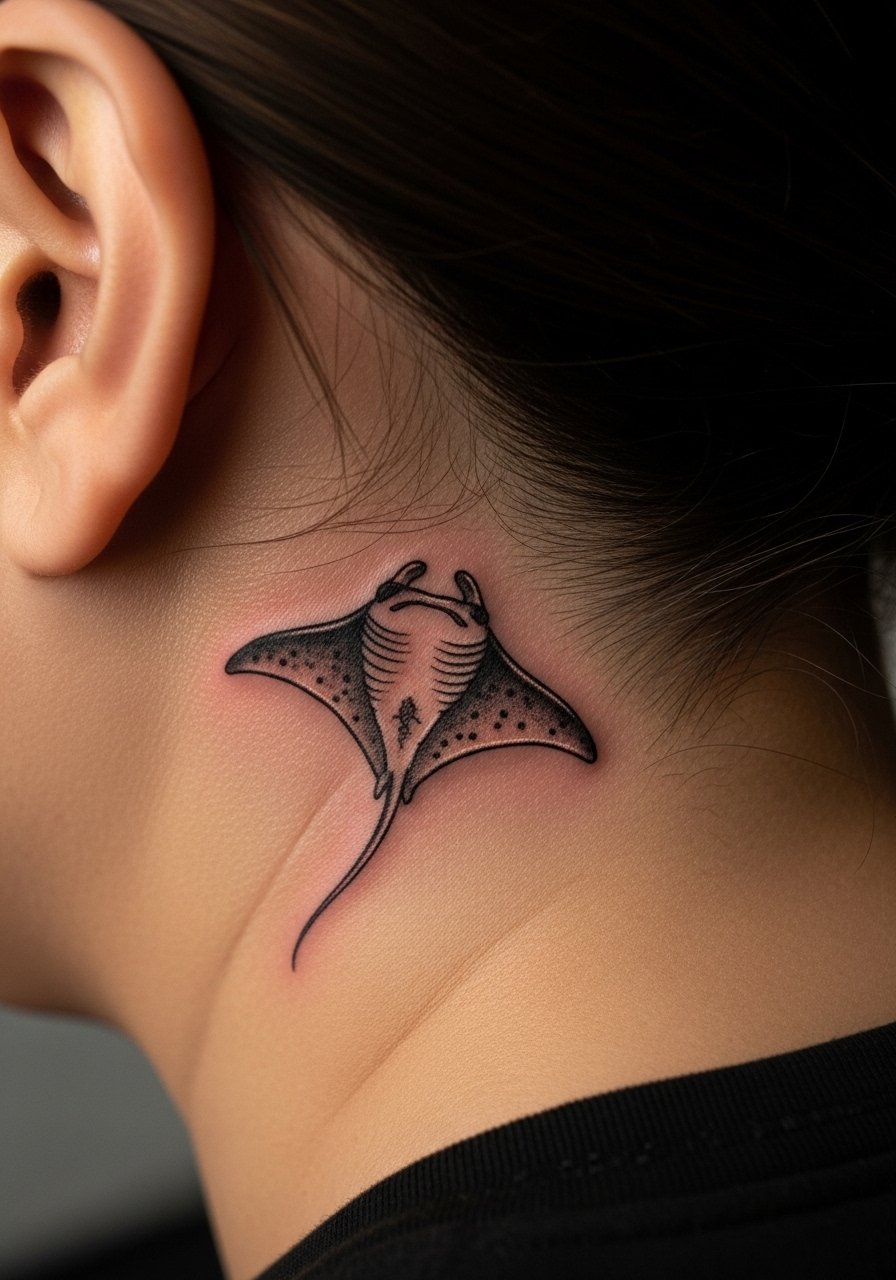
Behind-the-ear placements need exact positioning because hair and collars can rub the area. Specify the exact hairline point and small scale so texture reads in real life. The bumpiness of the skin there can cause ink to spread if dense shading is attempted. Pain is low but the area is delicate, and touch-ups are common. Wear your hair slightly lifted for the session to give the artist a clear field and to keep the area dry while it settles.
12. Hybrid Constellation Manta Ray on the Inner Bicep
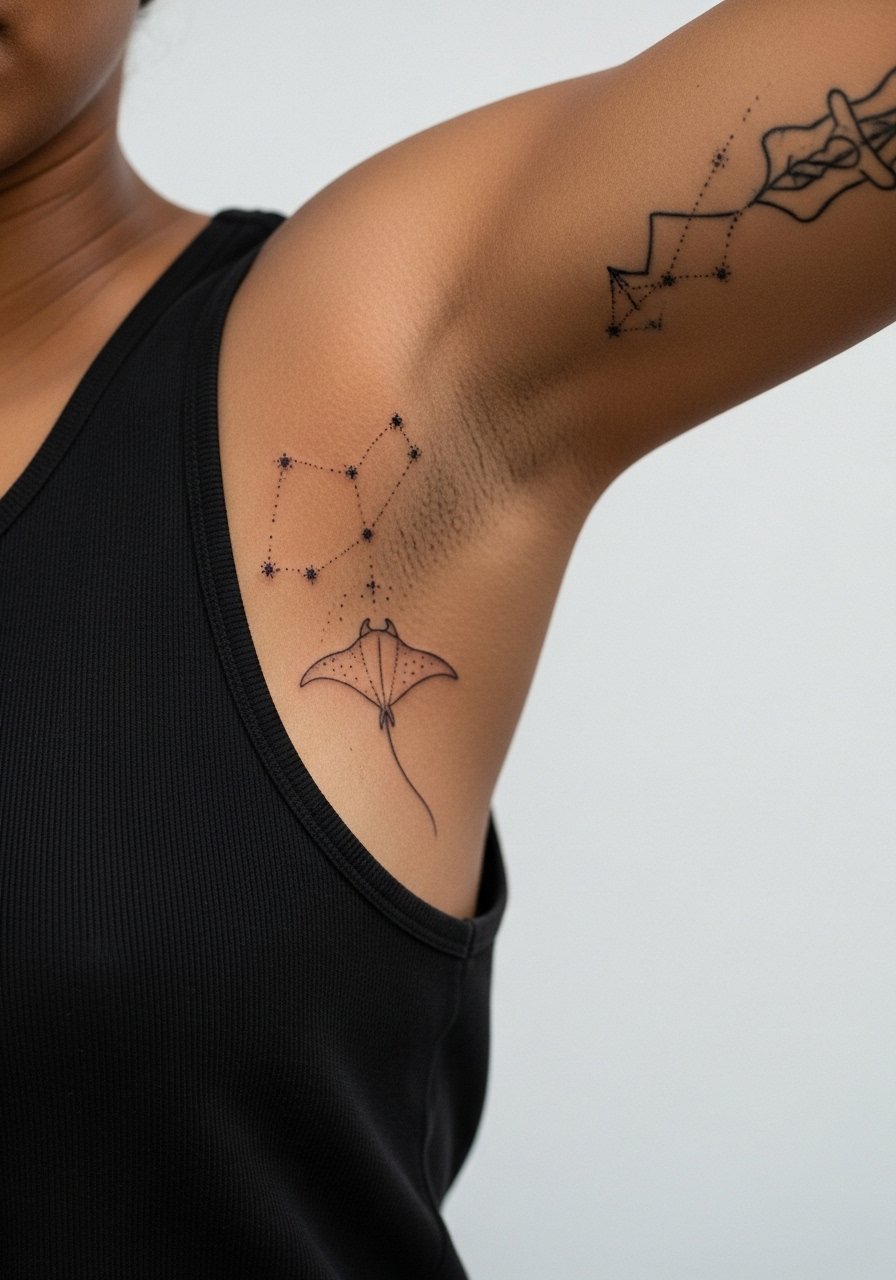
Inner bicep work looks intimate and moves with the arm. When pursuing constellated detail, ask your artist for spaced dots rather than clustered micro-dots so the pattern does not blend after healing. The inner bicep can be tender during sessions, and appointments often include short stretch breaks. For the session, a sleeveless tank top gives full access while keeping the rest of your torso covered.
13. Micro-Tribal Manta Wave on a Finger

Finger tattoos are trendy but fickle. The skin here renews quickly and constant washing speeds fading. If you choose a finger micro-tribal wave, request bolder anchor points at the base of the design and accept touch-ups as part of the plan. The typical error is expecting a finger flash to look like a forearm design scaled down. Pain is sharp and brief. Keep in mind workplace visibility and the higher chance of early touch-up when you decide the placement.
14. Wraparound Manta Ray That Flows Over the Elbow

Designs that cross joints need deliberate breaks in the linework so the image reads in both flexed and relaxed positions. Ask for slightly thicker anchors at motion points and avoid dense detail directly over the crease. The mistake is insisting on tight internal detail that warps quickly with joint movement. Expect a longer session because the elbow area is fussy and demands repositioning. For wearing and showing it off, a loose fit short sleeve tee lets the wrap sit visible without rubbing.
15. Stipple-Shaded Manta Ray with Wave Texture on the Lower Calf
Stipple shading ages gracefully when dots are spaced intentionally. Tell your artist you prefer visible dot spacing rather than continuous gray washes. A common error is pressing too many dots into a small area, which looks muddy once healed. Sessions on the lower calf are comfortable but can need two sittings for larger textures. Blowout risk is low on calves compared with wrists and fingers, but maintain sun protection when showing the piece.
16. Geometric Negative Space Manta Ray on the Upper Back Near Shoulder
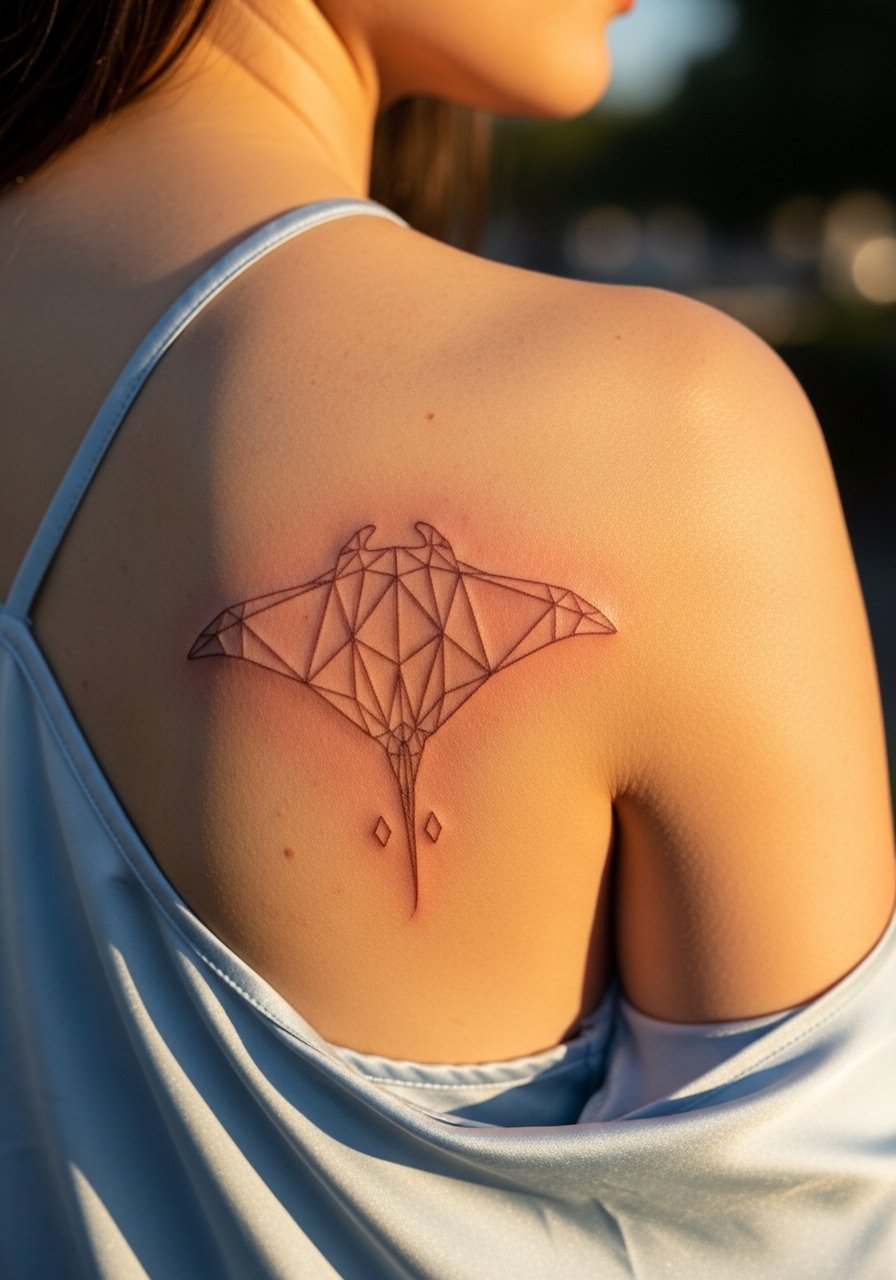
Negative space geometry reads clean when the gaps are generous enough to survive compression. During consultation, request test stencils on skin to see how the negative shapes read at real scale. The upper back handles larger, more intricate framing and is low on pain when you can lie face down. For events where symmetry is the focus, an open back dress displays the composition without competing straps.
17. Minimal Manta Ray Behind the Knee
Behind-knee placements are rarely shown but they move a lot with walking and sitting. If you pick this spot, ask for slightly more spacing in the curves to avoid the tattoo folding into itself as the skin creases. Pain varies but expect sharp sensations where the skin is thinner. The main error is small scale without test stencils. For session wear, loose shorts let the artist access the area without bending into awkward positions.
18. Single Needle Script Manta Ray Coordinates Along the Collarbone
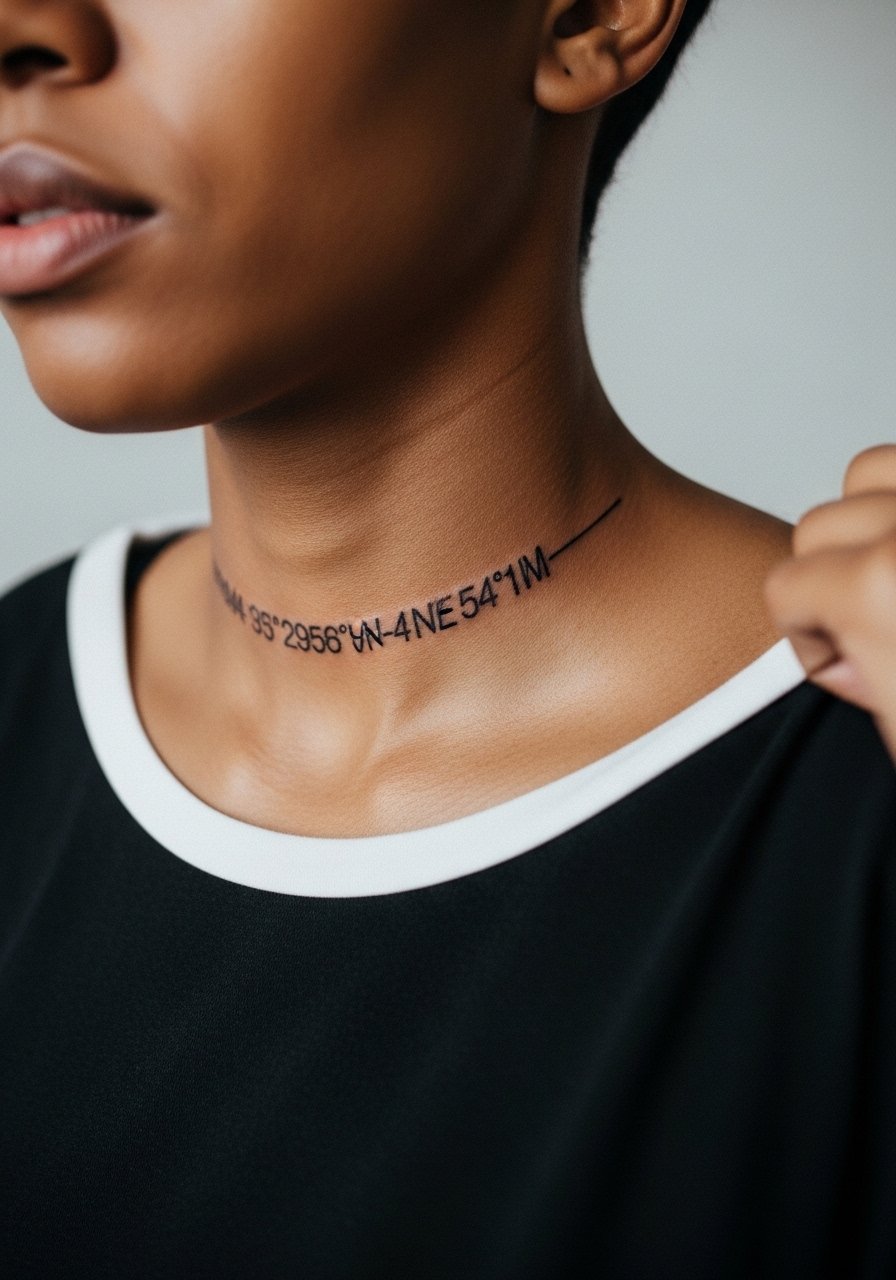
Collarbone script and tiny marks require precise depth control so the needle does not catch on the thin skin. Ask for stronger spacing between letters or coordinates and slightly bolder initial strokes so the text stays legible over time. This area is sensitive and can be painful for some. For the appointment, a wide neck shirt you can shift gives the artist clean access while keeping you covered.
19. Manta Ray with Mandorla Halo on the Sternum Apex
Sternum central pieces reward clear spacing and a calm session plan. Tell your artist you want the mandorla rings spaced to allow for respiration, which prevents the pattern from compressing as it heals. The sternum is a high-pain area for many, and short, deliberate sessions are better than long marathons. The usual mistake is packing concentric halo details too closely, which flatten over time.
20. Swim-Ready Ignorant Splash on the Outer Upper Thigh

Thighs are forgiving for raw, expressive work and make great seasonal showpieces. If you want a swim-era look, ask for intentional, rolling strokes and avoid tiny incidental marks that get lost in shorts. Thigh sessions are moderate on pain and can be done in one appointment for medium sizes. After healing, fitted swimwear or high-waisted shorts frame the piece nicely. Consider swim trunks fitted for pool or beach days so the lines remain visible without chafing.
21. Abstract Blackwork Manta Ray Sleeve Starter on the Forearm and Elbow

This starter piece sets a sleeve direction without committing to full coverage. Ask for intentional anchor points and breathing space so future additions can layer without clutter. The common mistake is accepting too dense a black field at the outset, which limits later contrast options. Expect two sessions for a solid starter. For the session, roll up a short sleeve tee so the artist can access the forearm and elbow without fabric interference. A rolled sleeve also shows how the piece will sit under clothing.
Frequently Asked Questions
Q: How much does a fine line manta ray tattoo cost?
A: Prices vary by shop and region, but expect a range around 100-300 for a small fine line wrist or ankle piece, and higher ranges for larger or color work. Shop minimums and hourly rates explain most of the difference, so compare a few studios and ask about expected session time before booking.
Q: Will a watercolor manta ray on the ribcage need touch-ups more often than a blackwork piece?
A: Generally yes, watercolor fades faster than saturated blackwork in high-motion or sun-exposed areas. Expect an earlier touch-up window for delicate color work, often within two to three years, depending on sun exposure and how well you follow early healing guidance.
Q: I have dark skin. How can I make sure a blackwork or geometric manta ray really pops?
A: From what I've seen, high-contrast decisions help most. Ask the artist for stronger negative space and bold anchors rather than tiny internal details. Viewing healed photos on similar skin tones is the best way to judge how a particular approach will read.
Q: Does weight fluctuation ruin wraparound manta ray designs across joints?
A: It can change how a design sits, especially for pieces that cross hips or the abdomen. For forearm-to-elbow wraps the effect is usually minor, but on areas that gain or lose significant volume the image can distort. Tell your artist about anticipated body changes so they can advise on placement and scale.
Q: Are there wardrobe tips for showing a shoulder neo-traditional manta ray without damaging it?
A: Yes. For sessions and early healing wear a loose tank top you can shift to give the artist access while keeping fabric off the area. For showing it off choose strap styles that avoid rubbing the pigment, such as off-shoulder or tank straps.
Q: What should I ask during a consultation to avoid needing early touch-ups on a fine line wrist piece?
A: Ask the artist about healed examples of wrist work they have done, how they space lines for longevity, and their recommended touch-up timeline. Request a slightly heavier initial line rather than the absolute thinnest option and confirm aftercare steps so you and the artist share expectations.
