
Fine line tattoos are everywhere on moodboards, and the glossy images do not show the part that matters most: how they look after sunlight, handshakes, and a year of commuting. The trend is gorgeous fresh, but longevity depends heavily on placement, line weight, and realistic touch-up planning. Read the first idea below for a placement that tends to hold up, and then pick the style that matches how you live.
1. Micro-Geometric Mountain on the Wrist
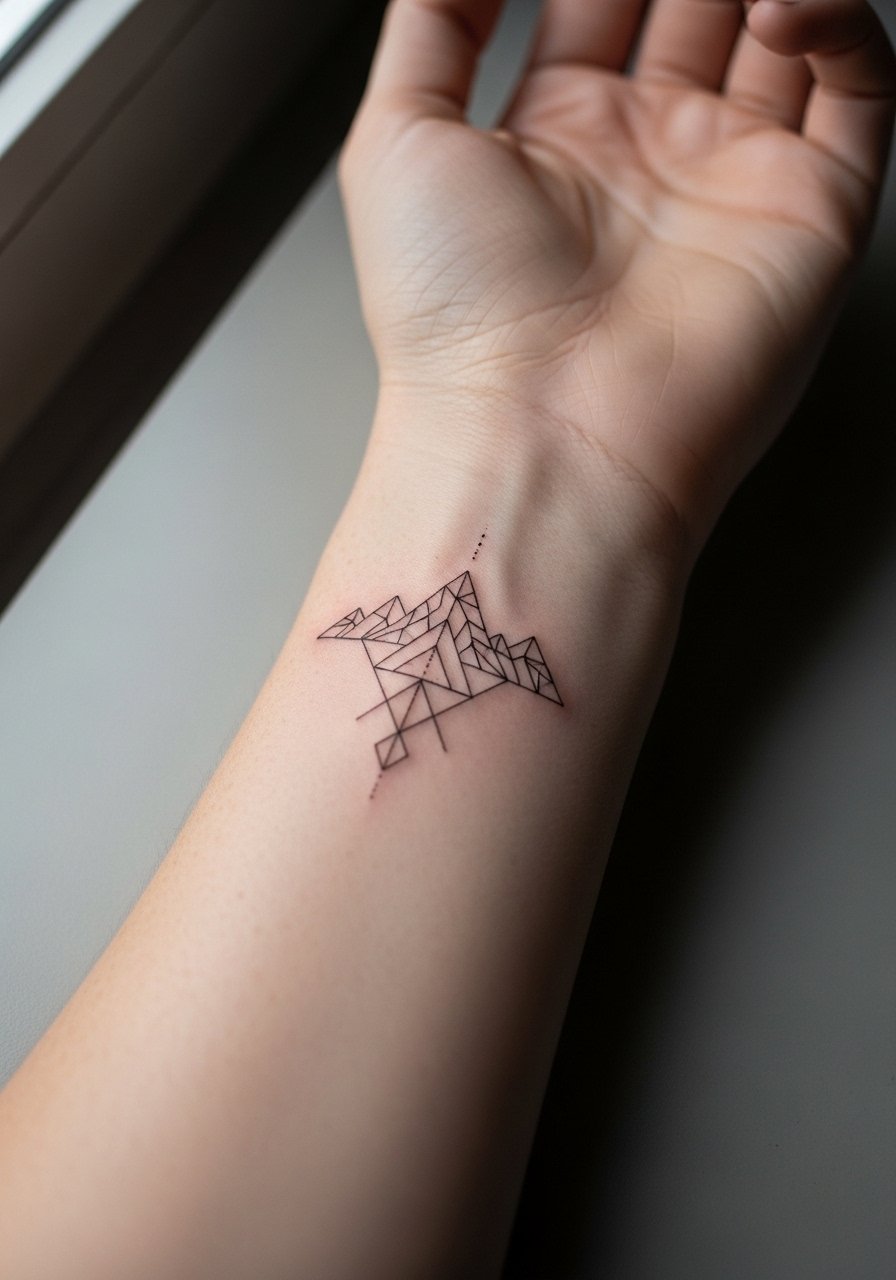
Most adventurers pick this one because it reads like a compact badge you can glance at daily. Tell your artist you want 1mm of spacing between peaks and slightly heavier contour lines so the peaks do not merge after a year. Fair warning on pain: the wrist is a sensitive spot but sessions are short, usually under an hour. Common mistake is asking for ultra-fine 0.1mm lines that melt into a blur on the distal wrist. Expect a touch-up within 12 to 24 months for bright contour retention. For showing it off, pair with a thin chain bracelet stack on the opposite wrist so the linework remains the focal point.
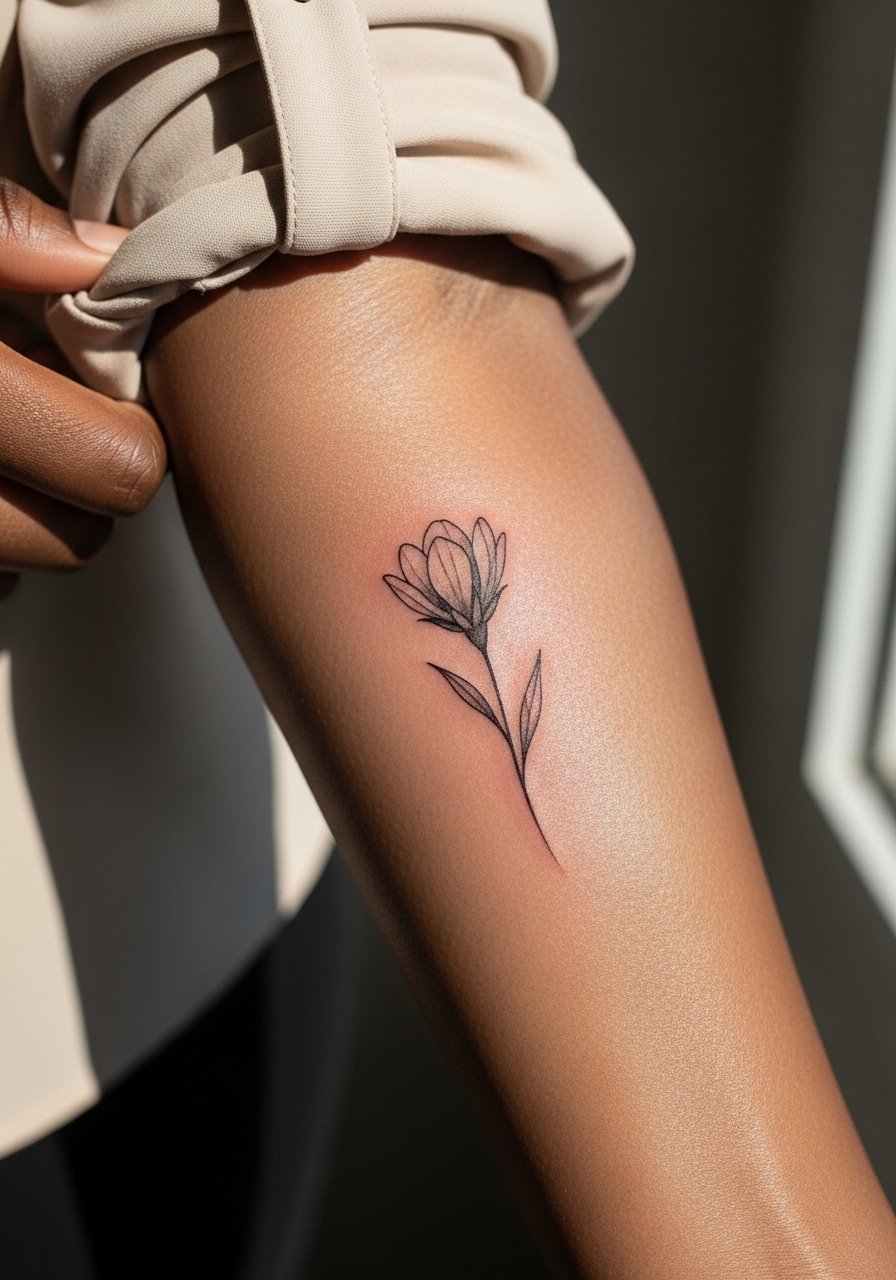
2. Minimalist Constellation on the Inner Forearm

I’ve seen this one age well when artists use slightly bolder dots for star points. Ask for single-needle star points with tiny stipple shading rather than thin continuous lines across the arm. The inner forearm heals nicely because it is low friction, and sessions take around 45 to 90 minutes. A common mistake is packing too many stars into a small area, which leads to merging at year two. Expect minimal blowout risk here. For wardrobe, roll up a cream linen shirt to reveal the map without distracting from the linework.
3. Tiny Script Along the Collarbone
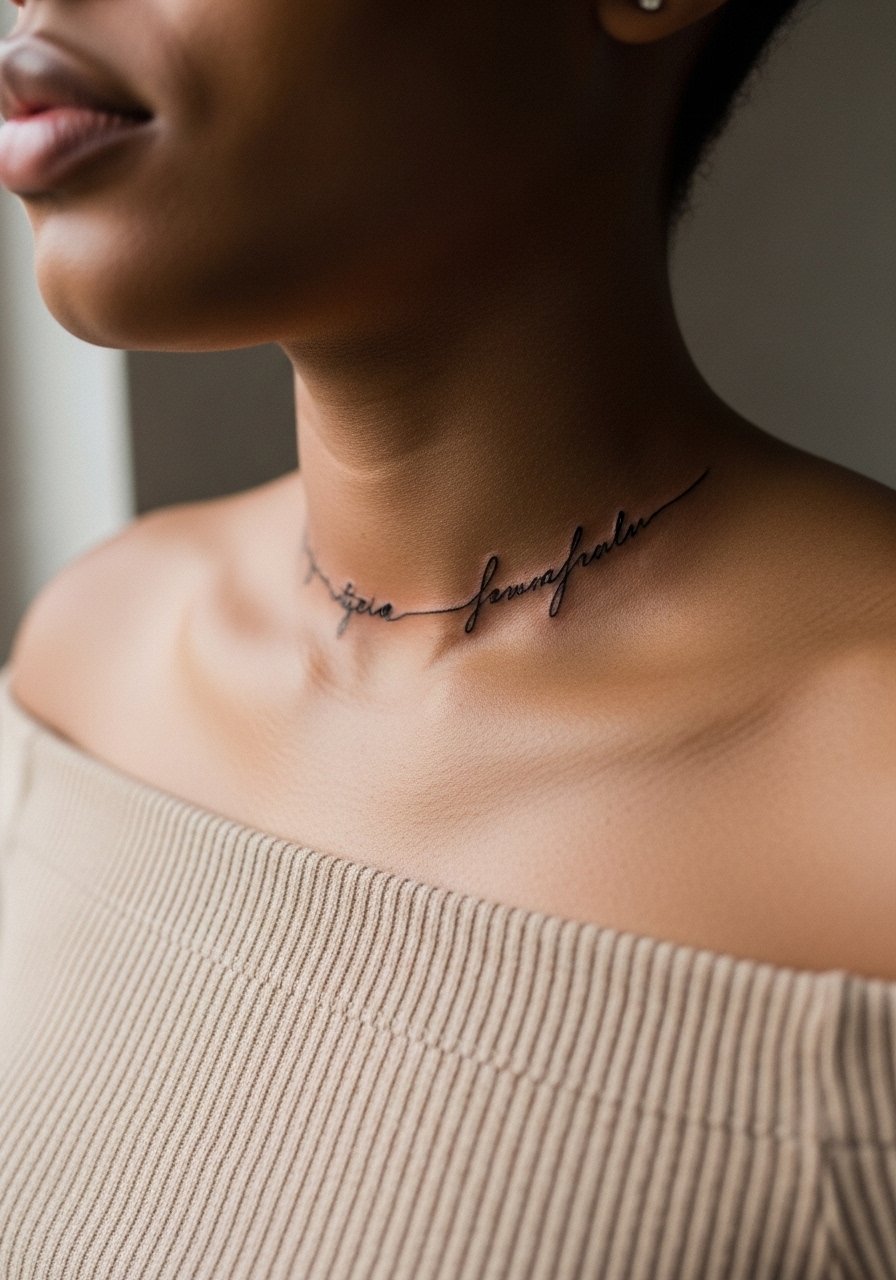
Collarbone script reads intimate and is visible with most summer tops. In consultation, specify exact font size and request a stencil placed over the shirt so you can check fall and spacing. Pain is moderate and the session is often under an hour for 1-2 inch script. A frequent error is choosing a font that looks great on paper but compresses when tattooed at small size. Ask for letters with slightly thicker downstrokes to preserve legibility on melanin-rich skin. Pair this with a layered delicate necklace that sits just above the ink for an editorial look.
4. Fine Line Chicano-Style Portrait Outline on Forearm
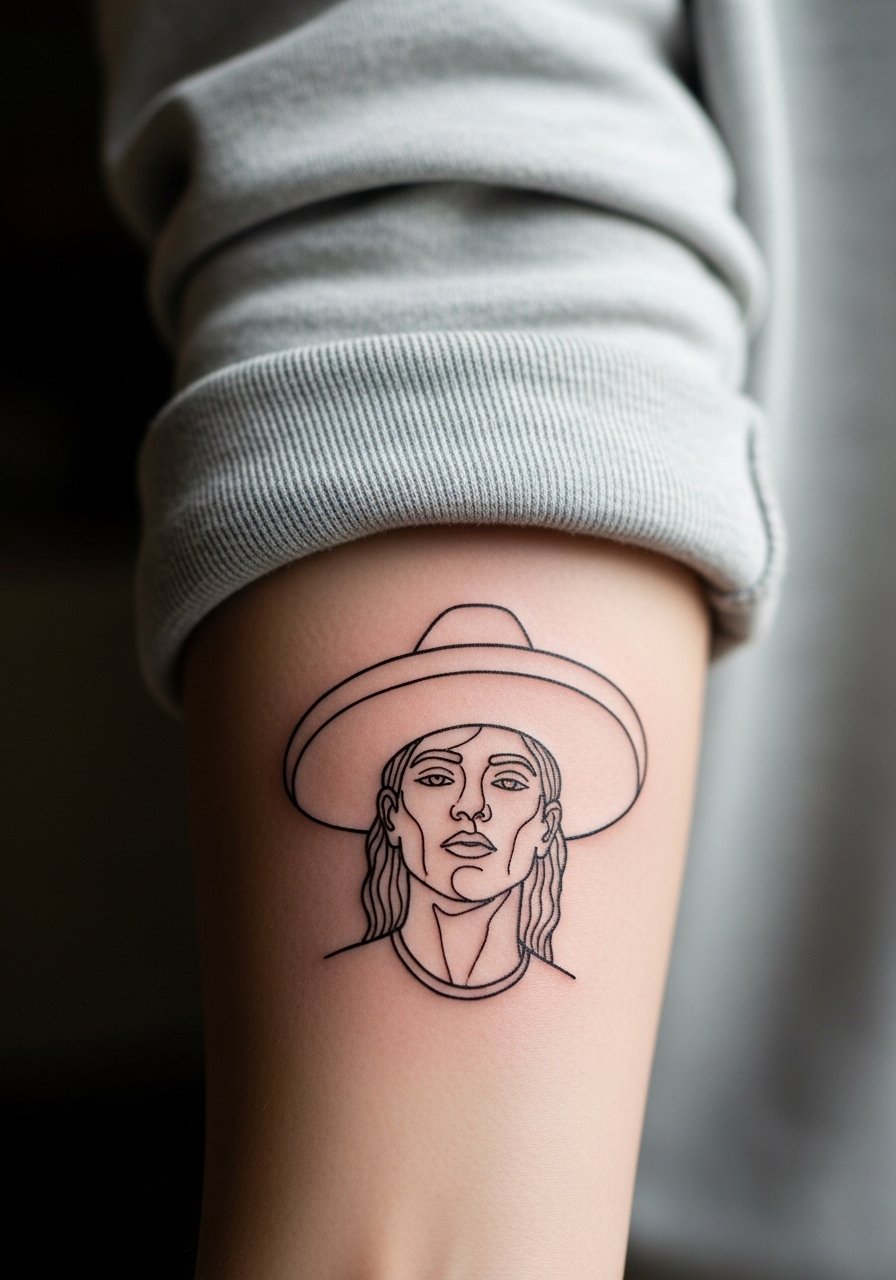
This adaptation keeps cultural portraiture in a refined, illustrative register. Tell your artist you want the portrait reduced to essential contours and stipple shading rather than full saturation. Sessions often run 90 to 180 minutes depending on size. A common mistake is asking for too much micro-detail at a 2-inch scale, which loses definition after healing. Expect a touch-up opportunity at the six- to twelve-month mark. Be explicit in the consult about cultural elements so the final design respects lineage while fitting the fine line aesthetic.
5. Illustrative Animal Silhouette on the Ankle
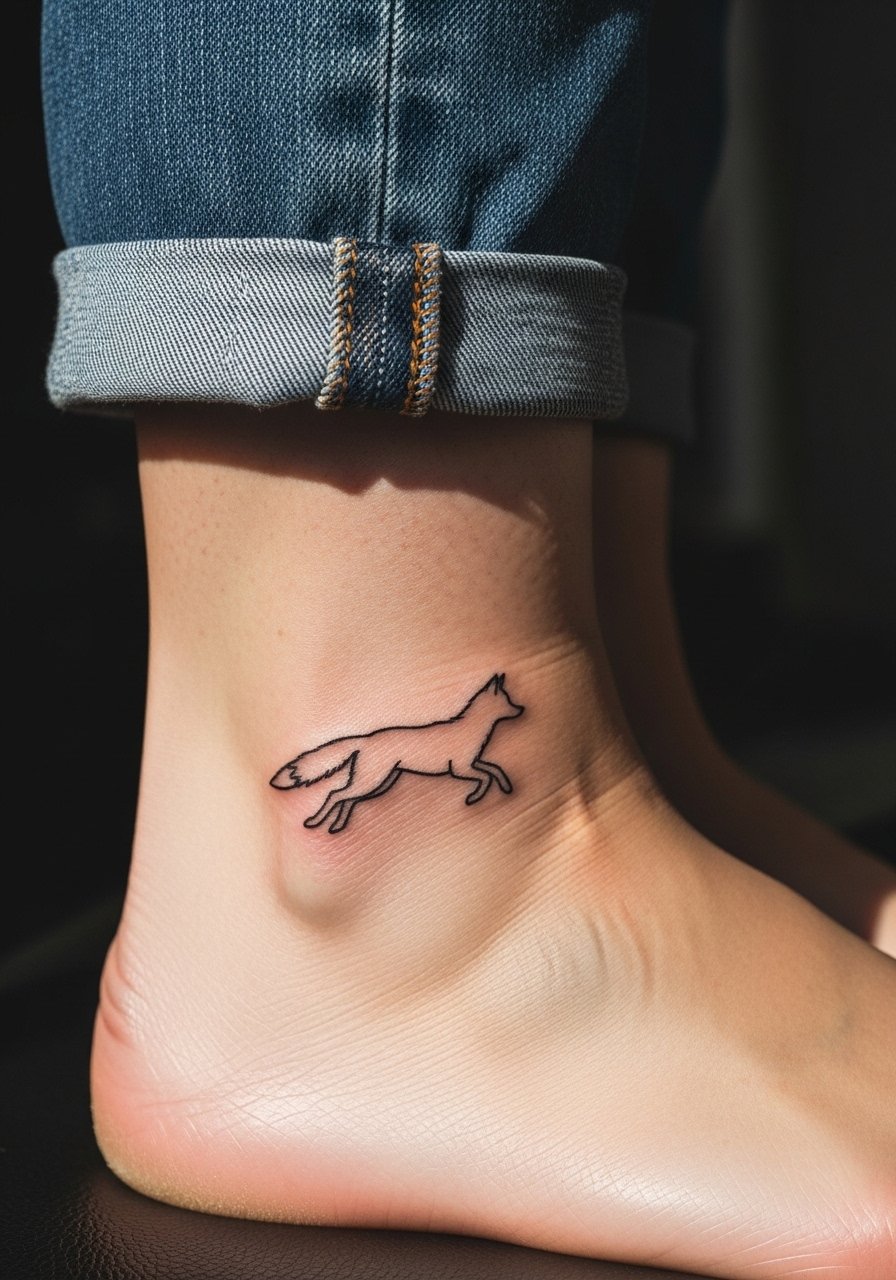
Pet tributes and fauna silhouettes work well on ankles because they can be hidden under socks when needed. Request a slight outline weight increase to compensate for the friction ankle tattoos face from shoes. Session times are short, often 30 to 60 minutes, but expect a recommended touch-up sooner than for arm work. A mistake people make is choosing very dense shading next to shoe seams, which fades quickly. For summer wear, show off the design with cropped linen pants and strappy sandals.
6. Micro-Realism Flower Bud on the Inner Forearm
Micro-realism at small scale depends on precise stipple and feathered shading. In consult, ask for a reference with visible healed examples and request the artist show how the shading will age at 6 months and 2 years. Inner forearm is forgiving for micro-realism and pain is low. A common error is compressing too much contrast into tiny veins, which becomes muddy once healed. Plan for a potential touch-up at year two if the bud sits close to active skin. For the session, wear a roll-up sleeve blouse so the artist can work without fabric pressure.
Pre-Session Essentials
The first six ideas include wrists, ankles, forearms, and collarbones, which each ask for different prep and first-week care.
- Stencil transfer paper kit. Lets you preview placement on skin before the needle touches down, especially useful for collarbone script and forearm micro-realism.
- Topical numbing cream. Apply as directed about 45 minutes before the session for extra comfort on sensitive wrist and ankle spots.
- Thin protective film roll. Helps finger and ankle tattoos survive the first few days of friction from daily activities.
- Fragrance-free body wash. Cleanses healing areas gently without irritating delicate linework on forearm and ankle pieces.
- Aquaphor healing ointment. A thin layer in the first 48 hours locks moisture and supports fine line channels without heavy occlusion.
7. Minimalist Arrow Linework on the Inner Wrist

This is a classic for direction symbolism and it slots into daily visibility. Tell your artist you want a slightly thicker shaft and simplified feathering so the arrow survives frequent washing. Pain is noticeable but brief, and sessions are under 30 minutes for a 1-inch piece. The mistake is picking a filigree arrow too small for the wrist geometry. Expect touch-ups in the first 18 months if you wear watches or bracelets that rub the area. For showing it off, layer with a linen cuff bracelet on the opposite wrist to balance attention.
8. Tiny Abstract Geometric Symbol Behind the Ear
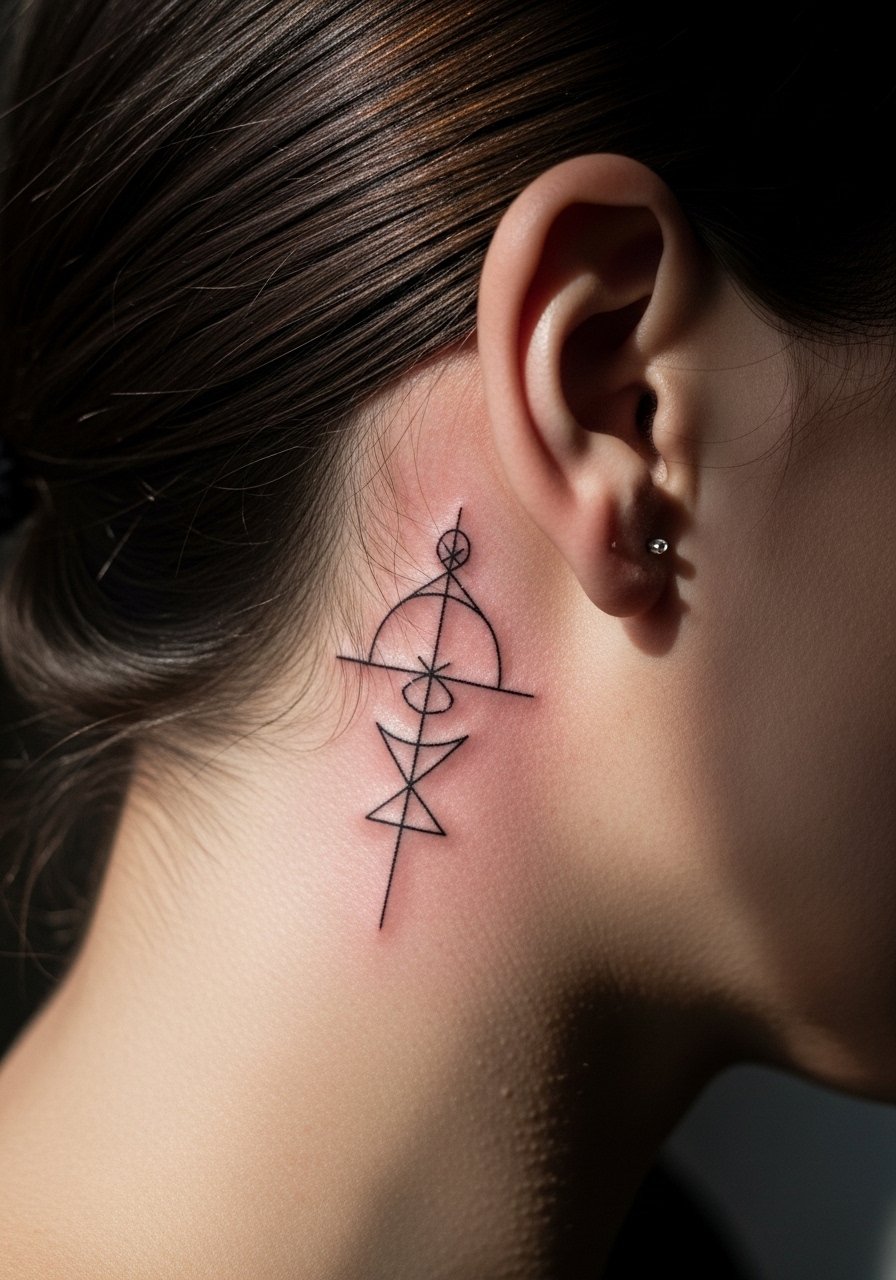
This hidden placement is ideal as a first-timer piece if you want something private. When you consult, clarify exact scale and ask the artist to show the stencil with hair down and hair tucked to check visibility. The session is quick and pain is low, but note that this area is prone to scab tightness during healing. A common error is choosing shapes with tight concentric lines that merge after a year. For workplace considerations, remember styling options like hair-down coverings keep it discreet.
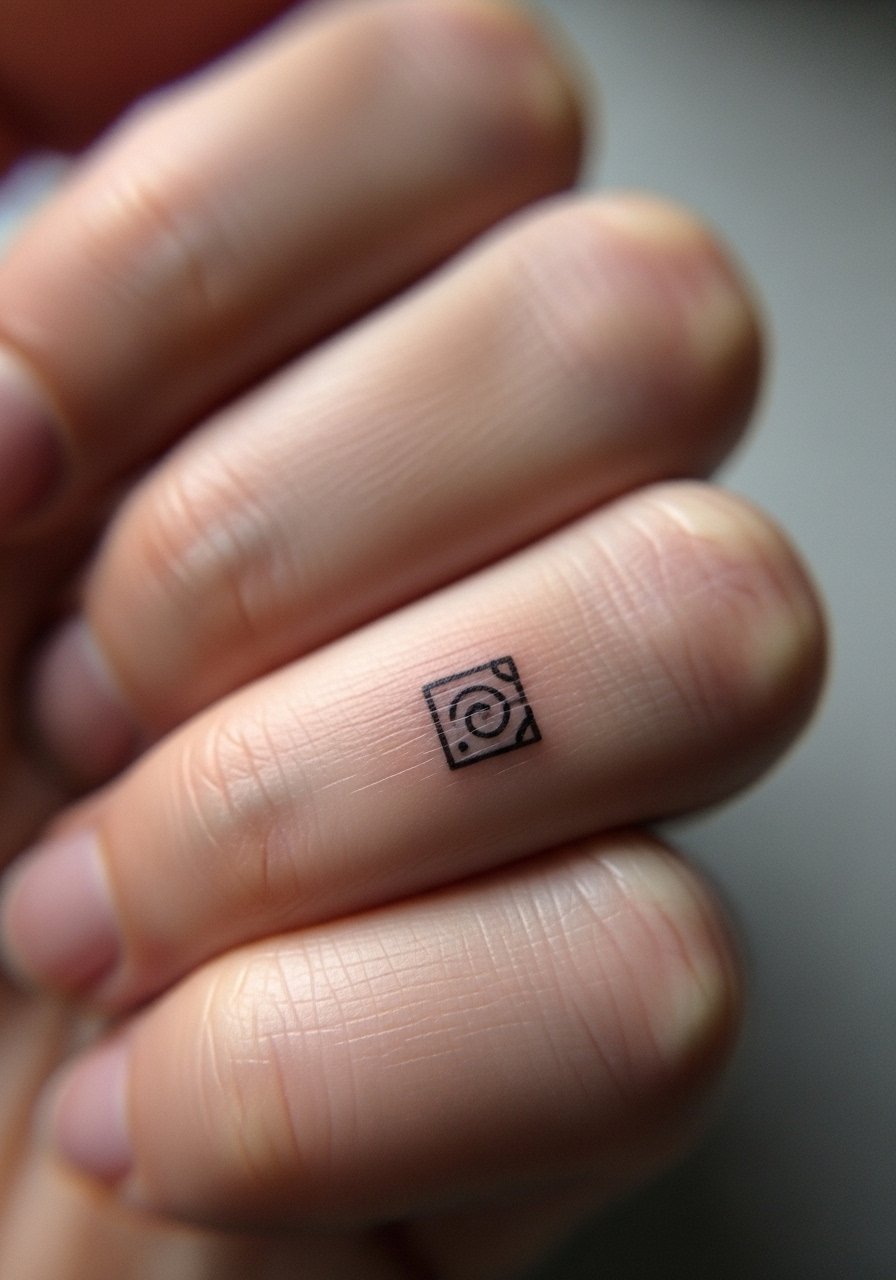
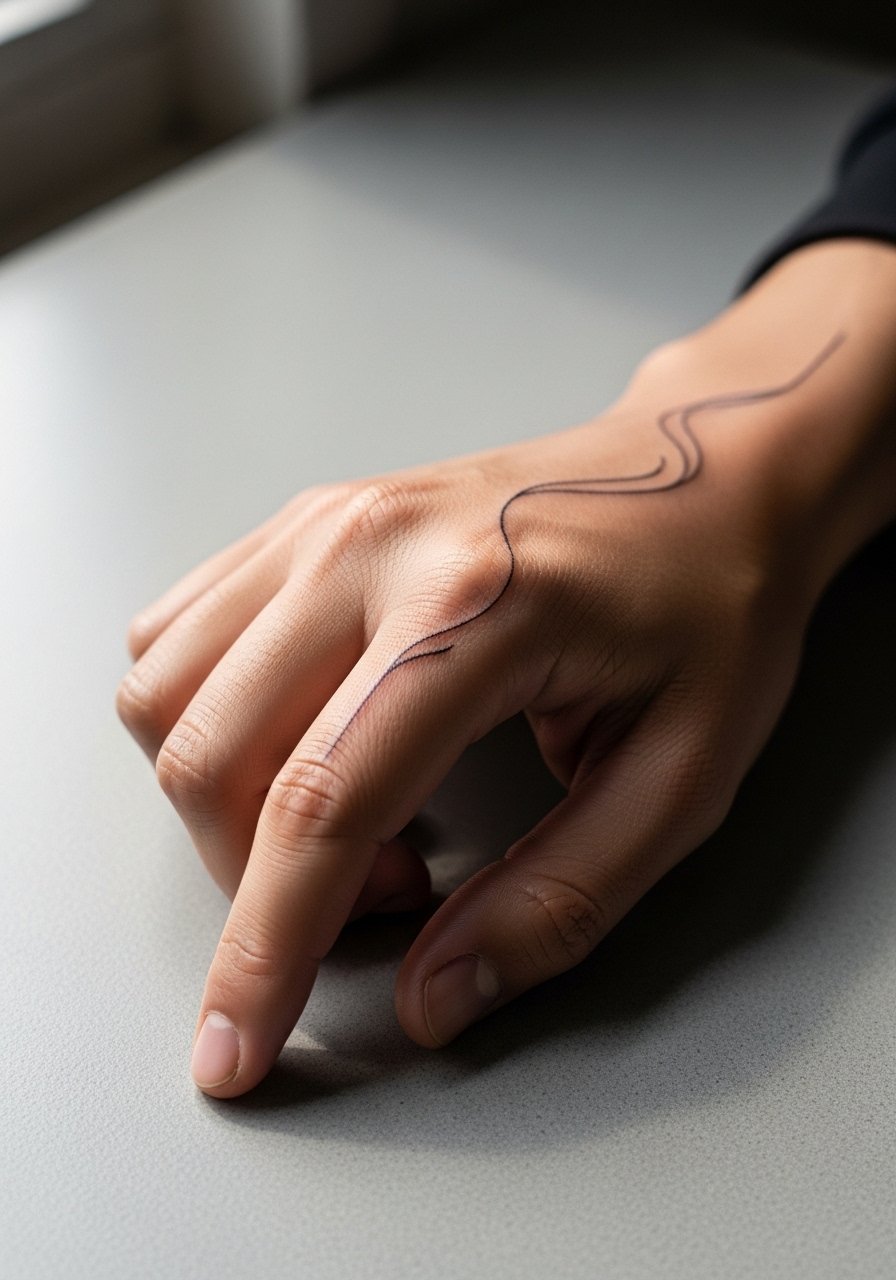
9. Fine Line Planetary Shading on the Finger
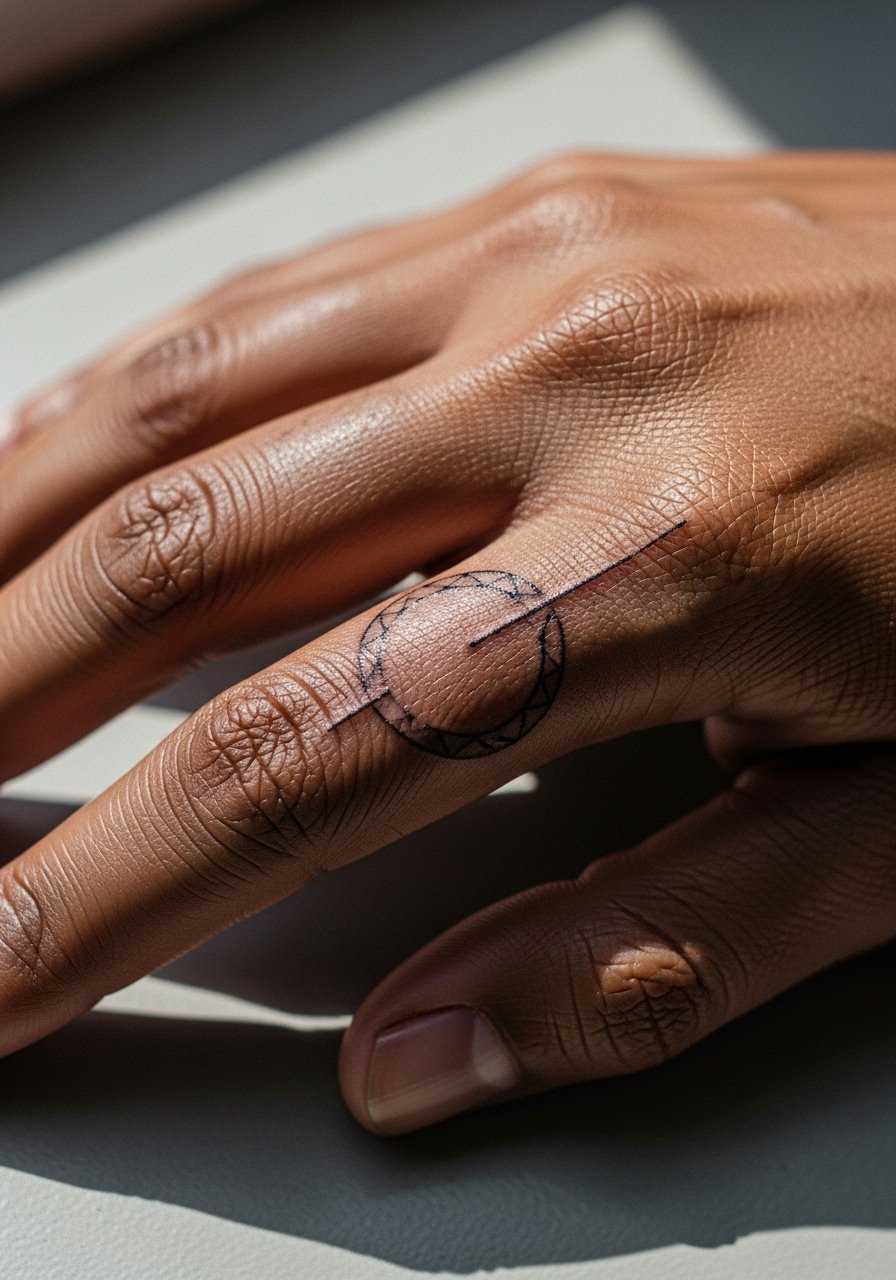
Finger tattoos are trend-forward but friction-heavy. For planetary shading, ask for light stipple and slightly bolder ring outlines to retain contrast. Expect the session to be short but the first-year touch-up rate is high, often within 6 to 12 months. Artists disagree openly on fingers. One camp says fingers blur no matter what because of constant washing and movement. The other camp argues that with proper depth and simplified design, small finger work can last. Name both positions in consultation and get the artist’s touch-up policy in writing.
10. Small Celestial Moon Outline on the Shoulder
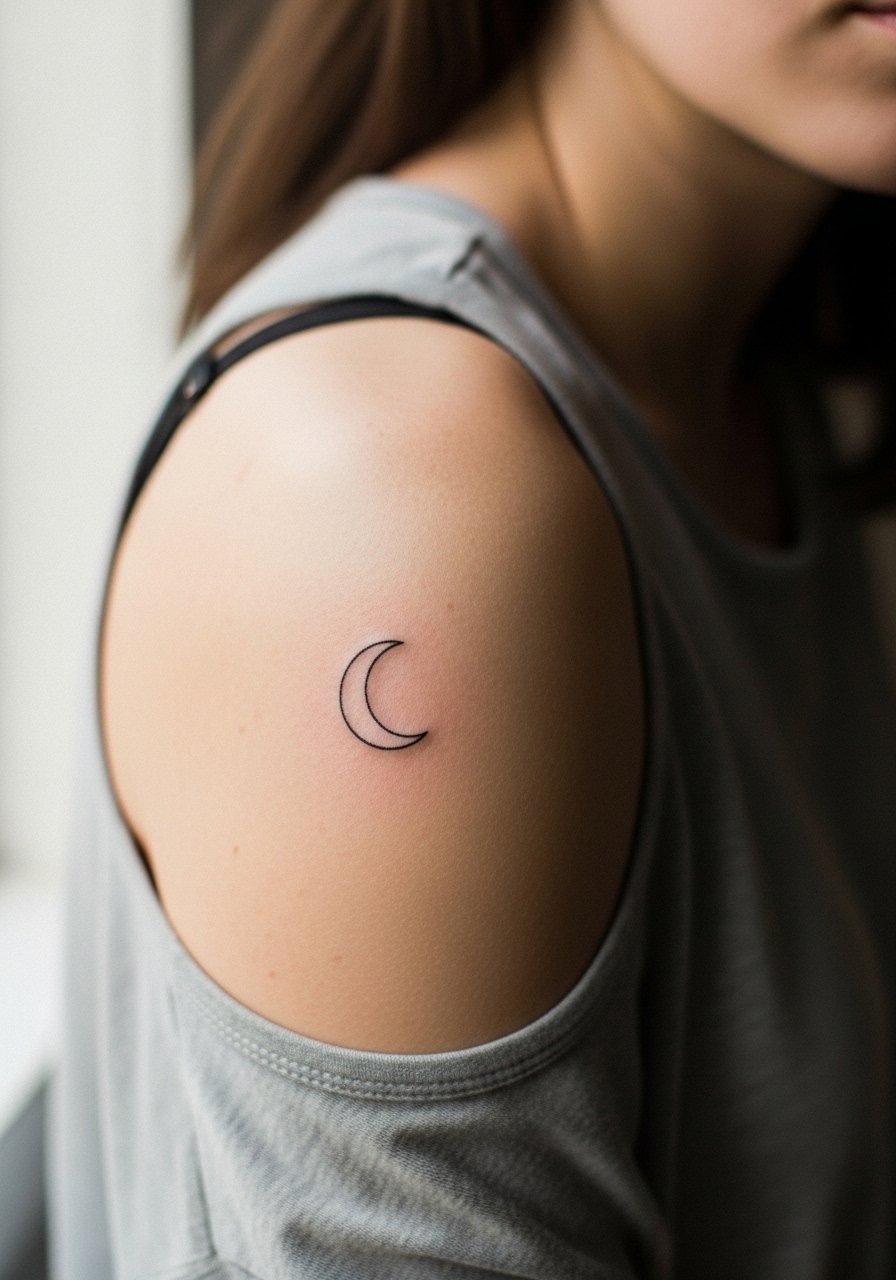
Shoulder placements balance visibility and longevity. Ask for a 2-inch outline with gentle negative-space shading so the moon keeps its form from year one to year five. Sessions are comfortable and commonly finish within an hour. A mistake is packing micro-dot constellations too close to the outline, creating visual noise later. For show-off options, wear a sleeveless linen dress or a loose tank top on the day of the session so the artist has clear access and you leave with the area uncovered for photos.
11. Micro-Realism Leaf Cluster on the Inner Bicep
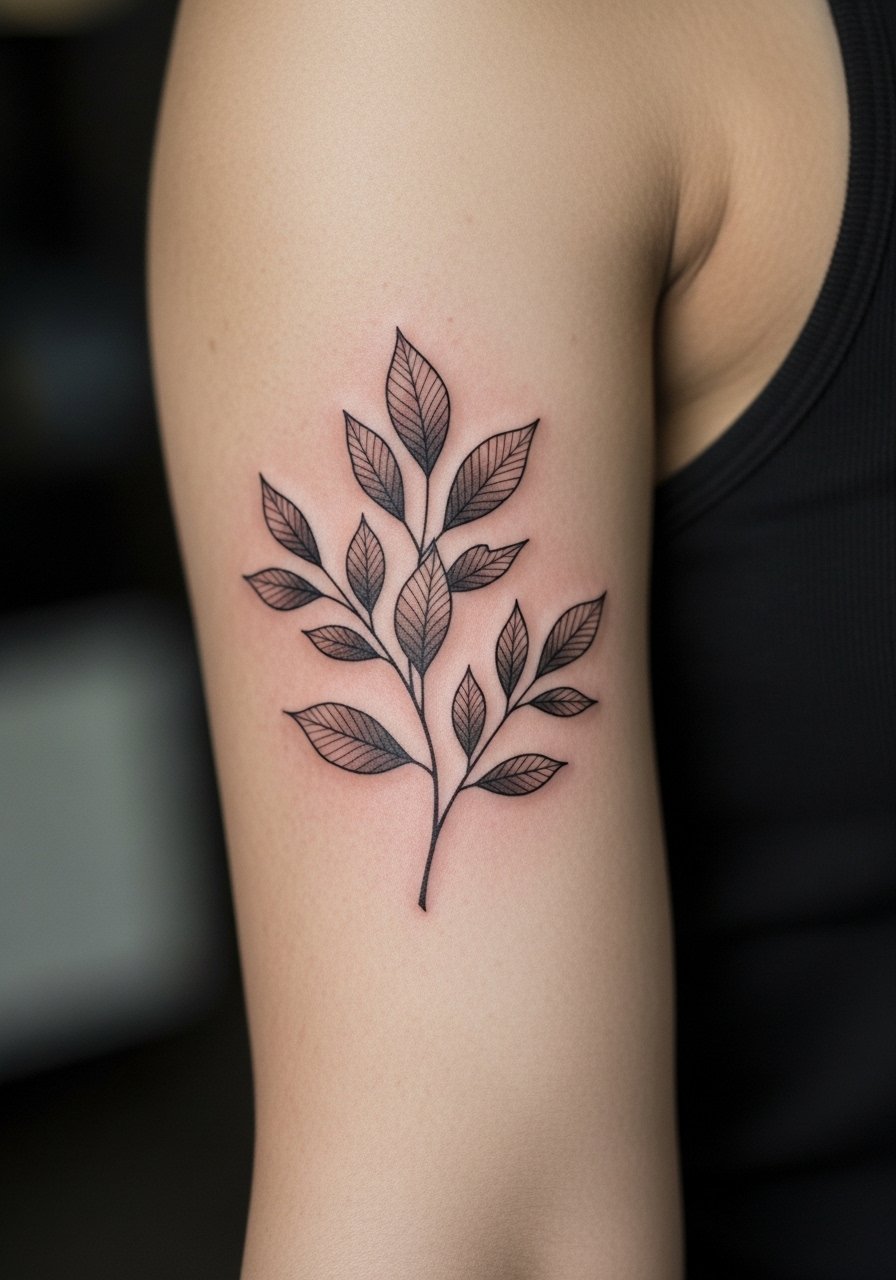
Inner bicep skin tolerates fine shading and often keeps detail well because it sees less abrasion. In consultation, request a mix of stipple shading and subtle whip shading for vein detail. Pain is moderate when the arm is raised, and sessions can run 60 to 120 minutes. A common error is compressing too much tiny vein work into a small patch, which softens over time. Touch-ups are usually only needed if the client is active with weight changes in the area.
12. Illustrative Fauna Outline on the Thigh
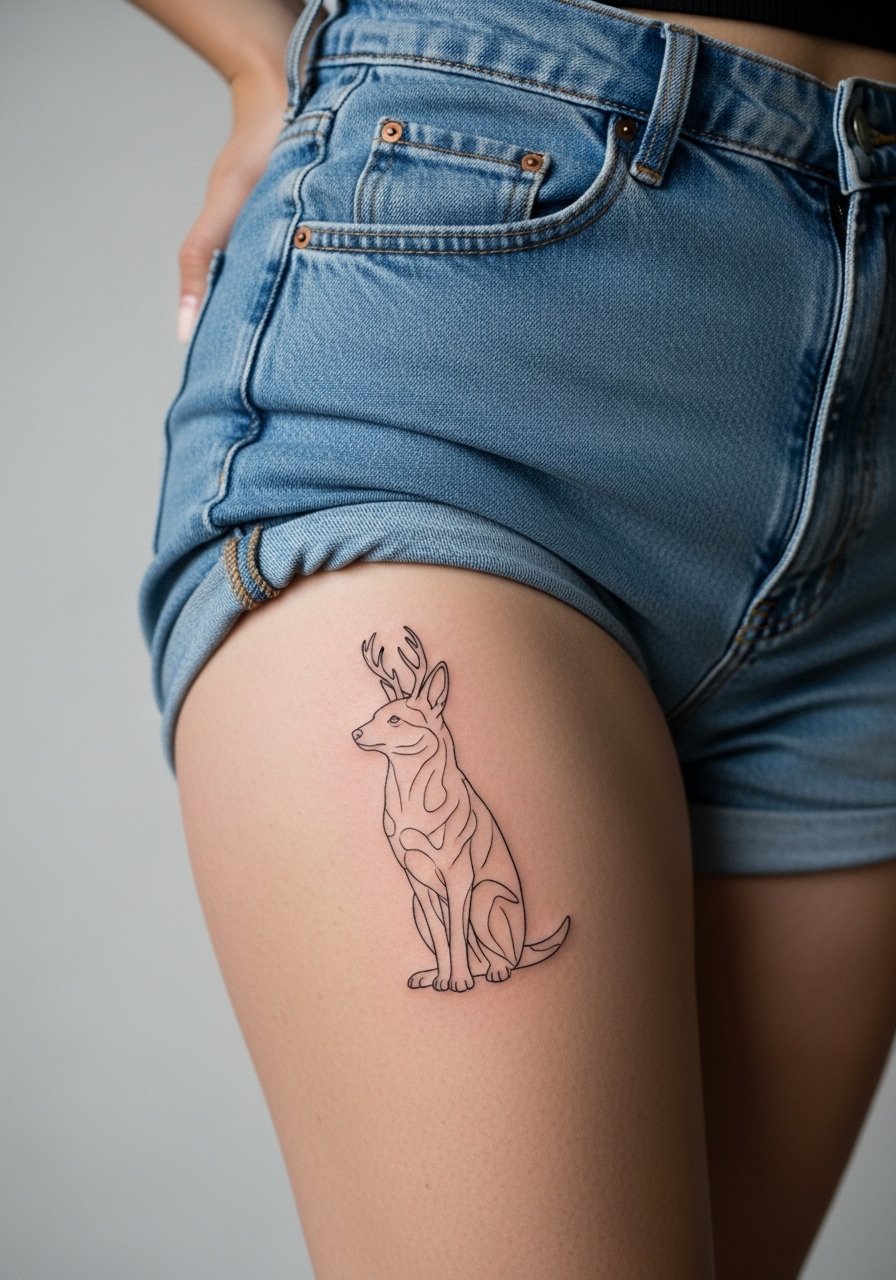
Thigh placements are private and travel well with body changes. Tell your artist you want the outline to follow muscle flow and to avoid tiny internal details that will stretch with weight shifts. Sessions are comfortable and can take 60 to 120 minutes for a 3-inch piece. A common mistake is starting with extremely high detail that looks crowded after healing. Pick a silhouette that leaves breathing room and plan for touch-ups only if your body composition changes.
13. Minimal Sun Outline on the Collarbone
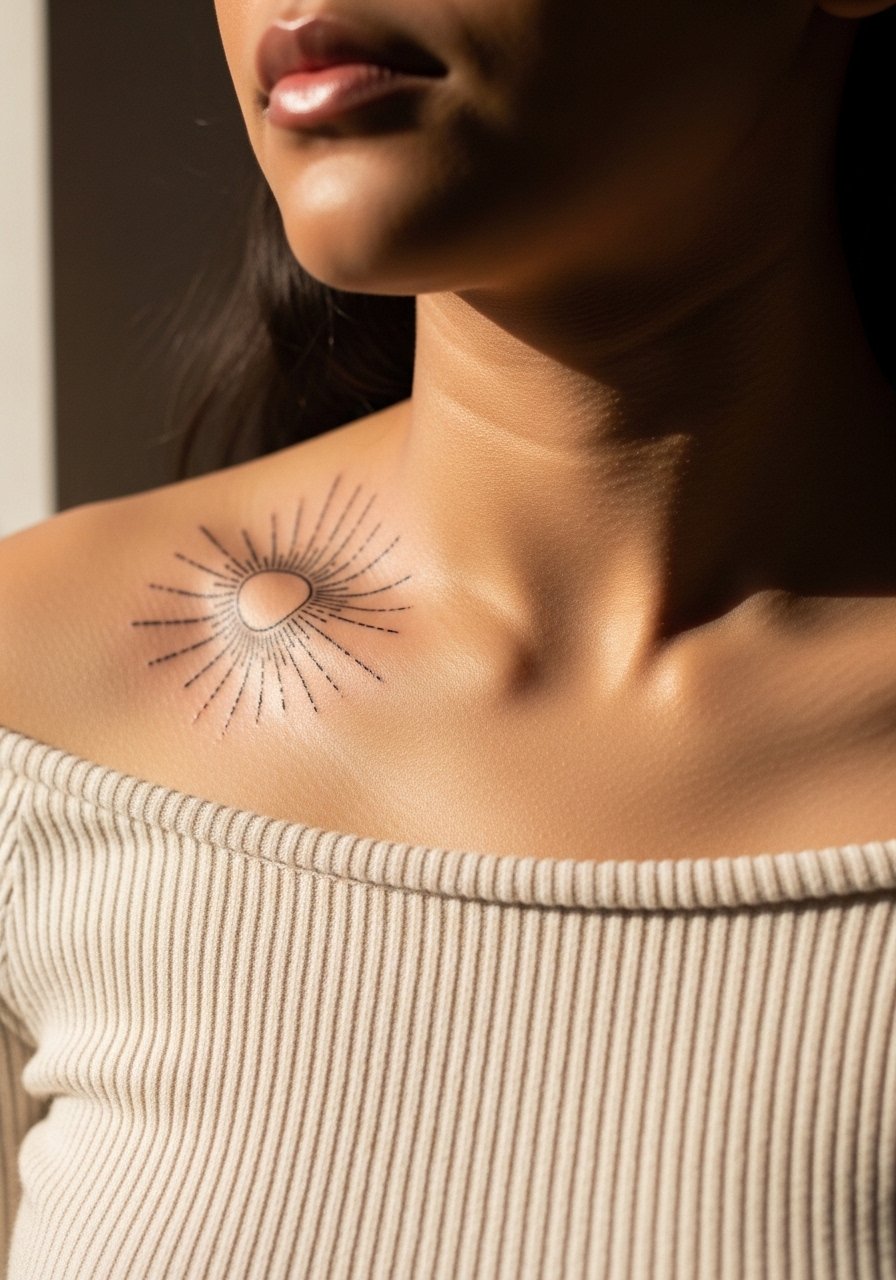
Sun motifs carry uplifting symbolism and pair nicely with summer tops. For lasting clarity, ask for a slightly thicker outer ring and simplified rays. Sessions are short, usually under an hour. A frequent error is placing dense dot shading too close to the ring, which can soften by year two. To show it off, choose an off shoulder top that frames the ink without competing necklace layers.
14. Geometric Forearm Cluster for All Skin Tones

Geometric clusters read differently across skin tones. For melanin-rich skin, ask the artist to use 0.2mm contours rather than the feather-light 0.1mm so shapes remain crisp in photos. Session time depends on complexity but typically stays under two hours. The common mistake is compressing too many intersecting lines into a palm-sized area. Plan for a touch-up window at year two if contrast drops. During the consult, ask to see healed examples on a range of skin tones.
15. Fine Line Botanical Sleeve Accent on the Outer Forearm
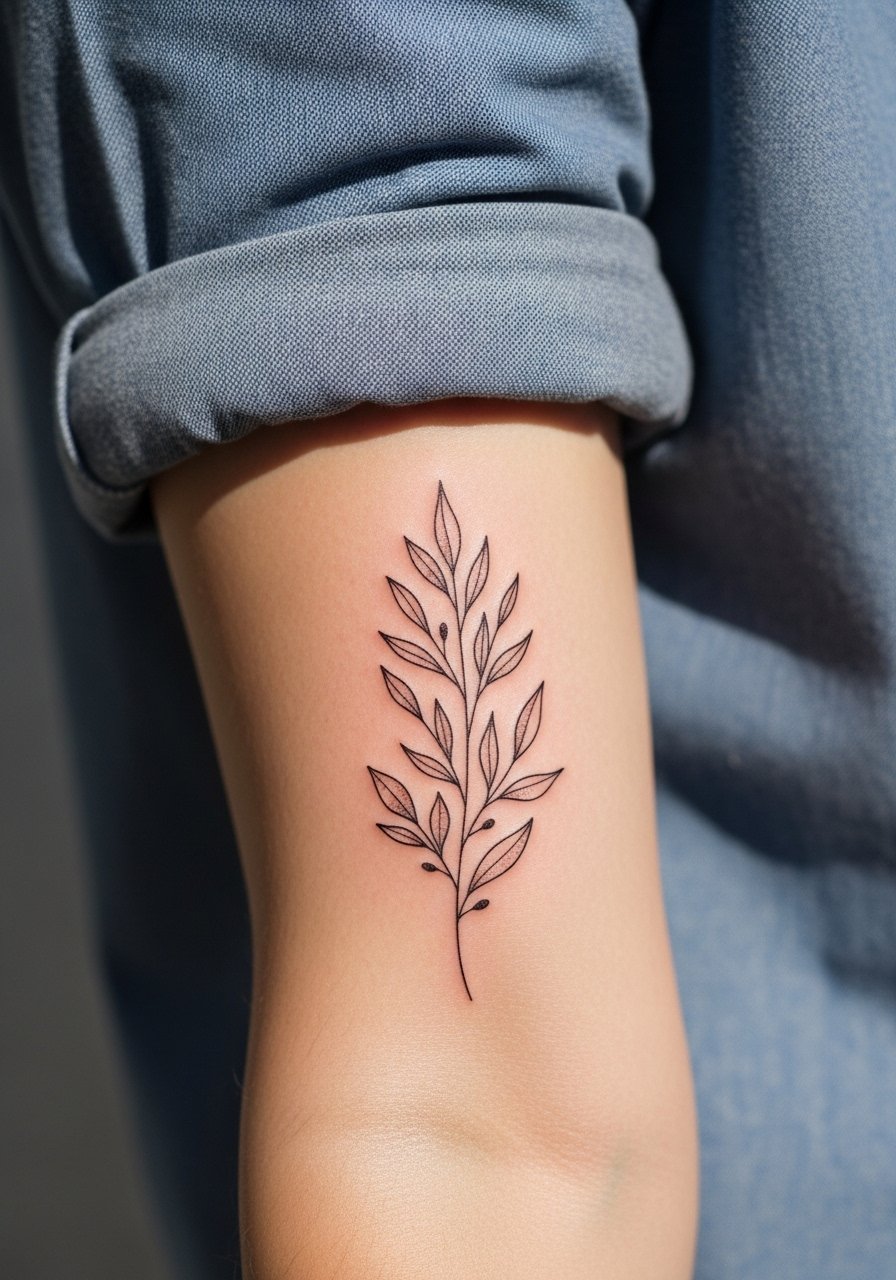
Rather than a full sleeve, an accent cluster gives the same editorial look with less commitment. Tell your artist you want the motif to sit around veins and scars so the composition reads flat across the arm. Sessions can be split into two 90-minute visits. A mistake is matching sleeve density to a full-arm scale at a small size. For showing off, roll the sleeve of a roll-up sleeve blouse to balance casual framing with precise linework.
16. Single-Needle Chicano Portrait on the Shoulder Blade

Shoulder blade space lets the portrait breathe at 3 to 4 inches. Specify single-needle contouring with sparse stipple for tonal depth rather than full saturation. Sessions are longer, likely two to three hours across appointments. A mistake is compressing portrait detail into too small an area, which results in loss of facial cues after healing. For cultural sensitivity, discuss symbolic elements and opt for respectful stylization rather than direct copies.
17. Tiny Abstract Icon on the Finger Base
Icons at the finger base face heavy wear from rings and keyboards. Ask for an icon with bold negative-space shapes and a solid border to resist daily abrasion. Sessions are quick but expect higher early touch-up rates, often within 6 to 12 months. Artists split on finger longevity. One camp says no fine line lasts there without frequent touch-ups. The other camp says simplified, slightly thicker motifs can be serviceable. If you wear rings, plan placement so metal does not sit directly over the ink.
18. Planetary Trio on the Side Ribcage
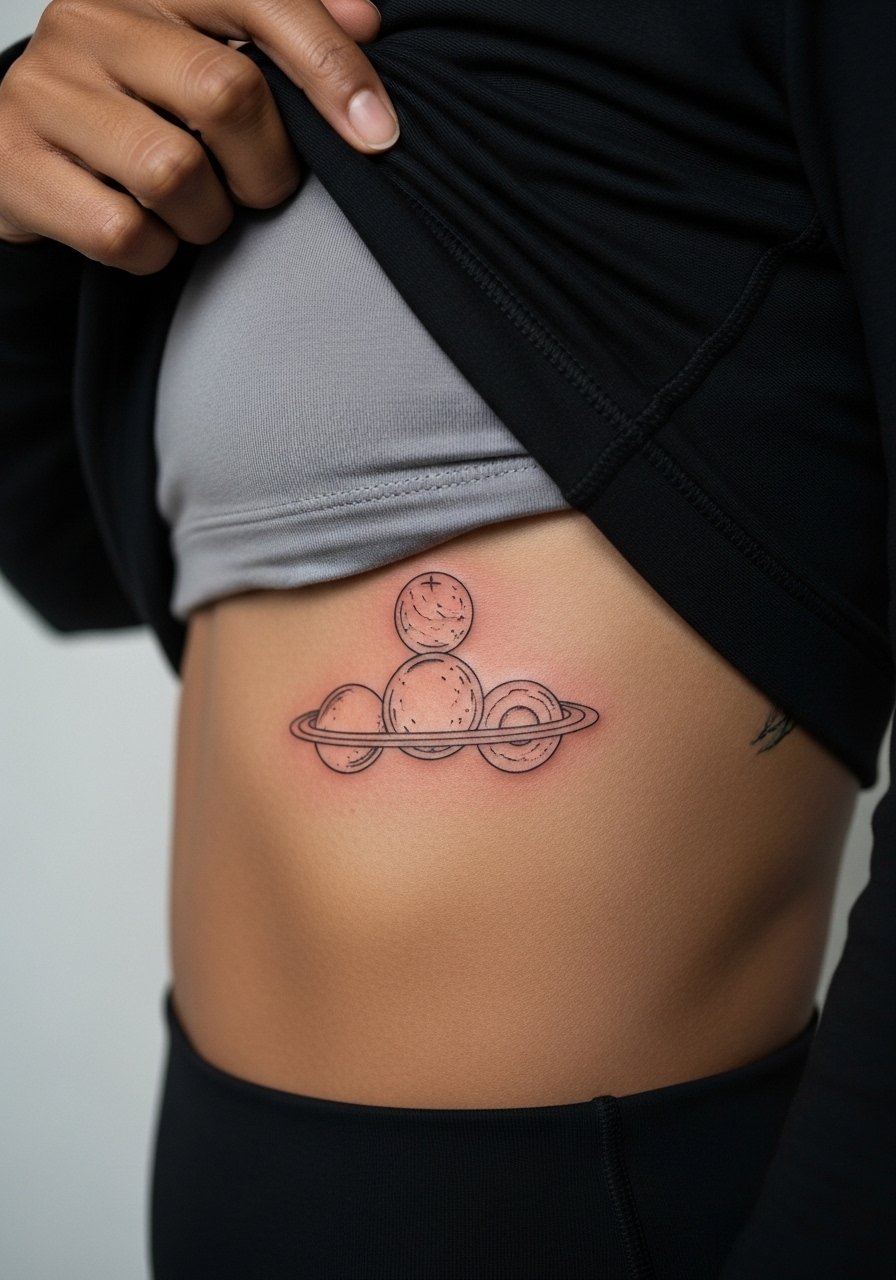
Ribcage pieces look beautiful but are sensitive and challenging to age. If you want planetary shading, request simplified orbit lines and single-needle stipple for depth without tight concentric rings. Pain is high and sessions can stretch over two hours. Artists disagree about fine line on ribs. One group argues the stretch and movement blur thin lines within two years. The other group says proper spacing and depth keep lines intact. Ask where your artist stands and whether they plan spacing for long-term stability.
19. Botanical Hip Accent
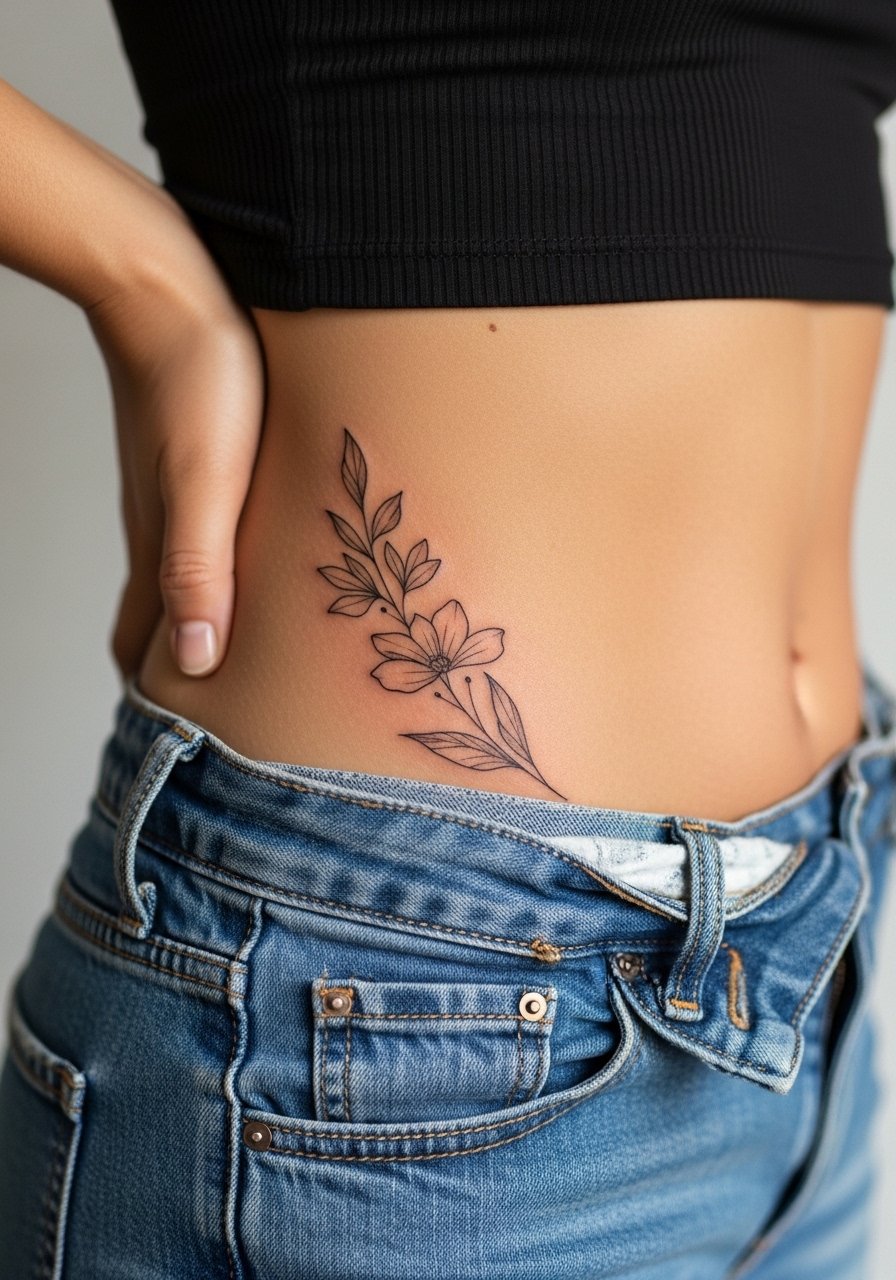
Hip tattoos are private and age predictably when placed on stable skin. Tell your artist to follow the hip curve and avoid tiny veins or lettering that can stretch. Sessions are comfortable and typically under 90 minutes for a 2 to 3 inch accent. A common mistake is underestimating how clothing rubs can affect early healing. For appointment day, wear high-waisted pants so the artist can access the spot without you getting fully undressed.
20. Lower Back Minimal Line Floral
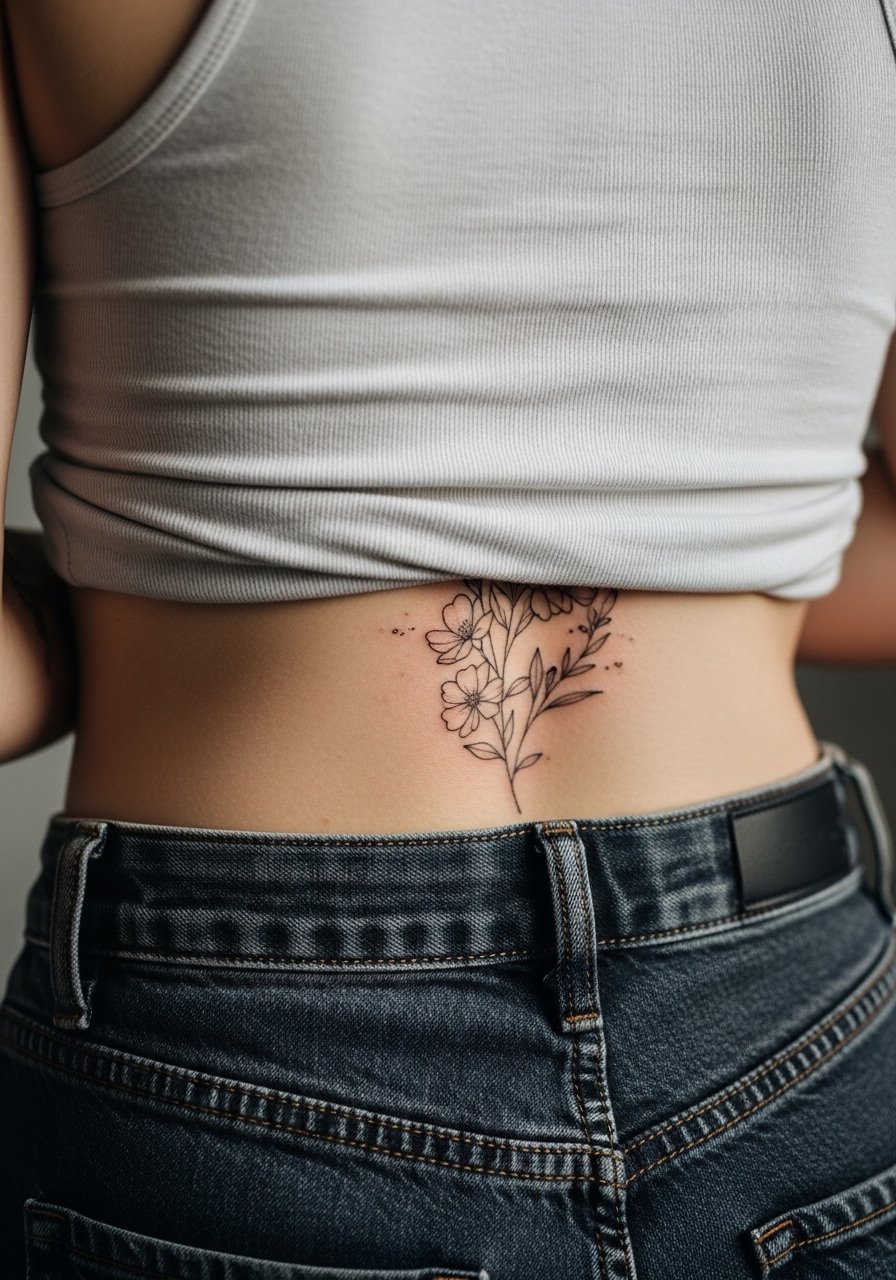
Lower back floral pieces sit well under summer wardrobes and tend to age steadily. In consult, request slightly wider negative space inside petals so the form stays distinct over time. Sessions are moderate in duration. A mistake is packing too much dot shading into tight petal centers which can appear muddy after healing. Plan one check-in at six months because friction from waistbands can alter edge crispness.
21. Hip Compass for Travelers
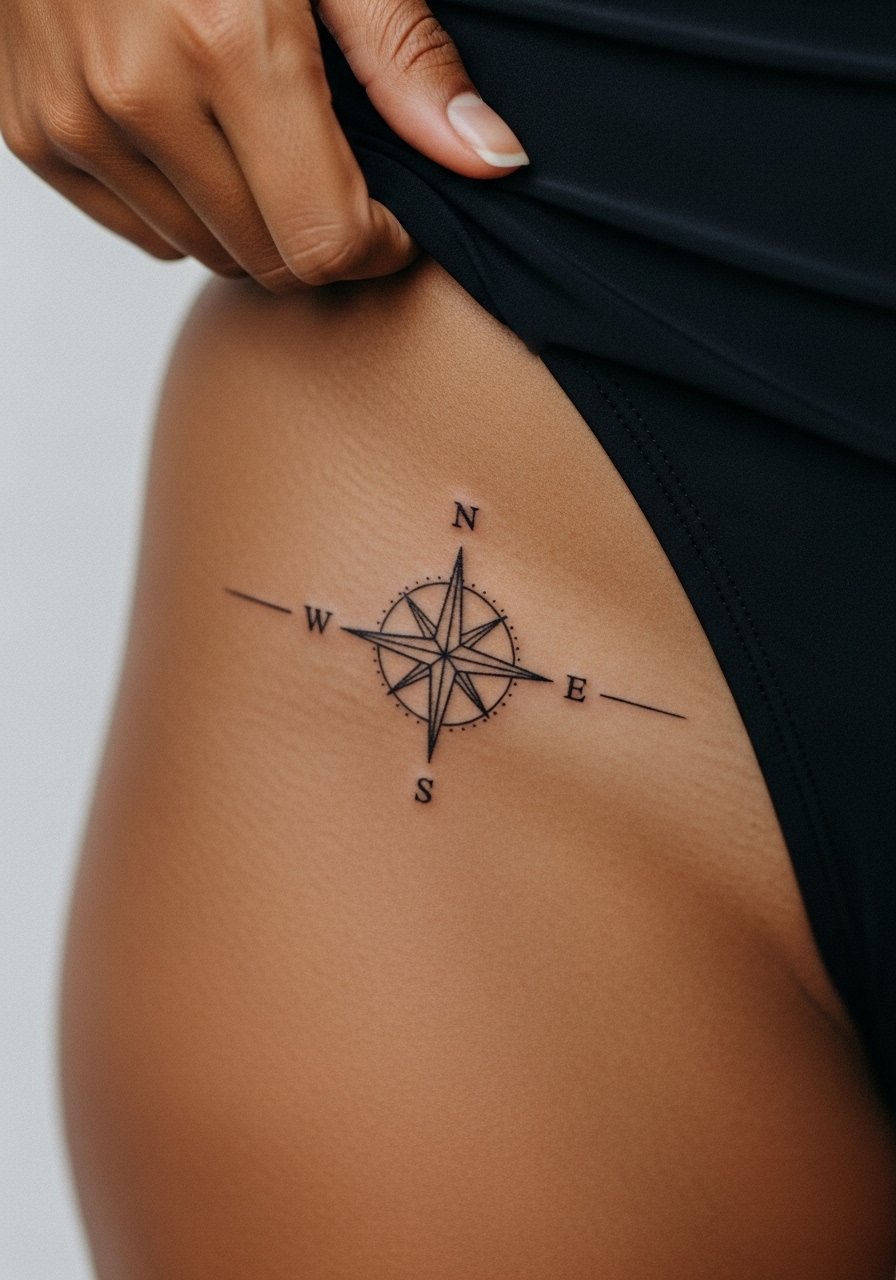
Compass motifs make natural travel markers. Ask for simplified cardinal points and slightly bolder outer rings so the symbol stays legible. Sessions are short. A frequent error is over-detailing the interior dial which loses clarity when scaled to hip size. If you expect body shifts, keep the compass centered on a bony landmark for consistent placement through changes.
22. Illustrative Whale on the Rib Side

Large illustrative motifs on the side pair well with organic body movement but demand spacing. Ask the artist for a 3-4 inch scale and to avoid packed micro-detail over the curved surface. Sessions are longer and you may want to split into two visits. The usual mistake is cramming tiny texture into a curved site, creating indistinct patches after healing. For sensitive consult notes, ask about breathing guidance during the session to keep lines steady.
23. Geometric Mandala at the Nape of the Neck
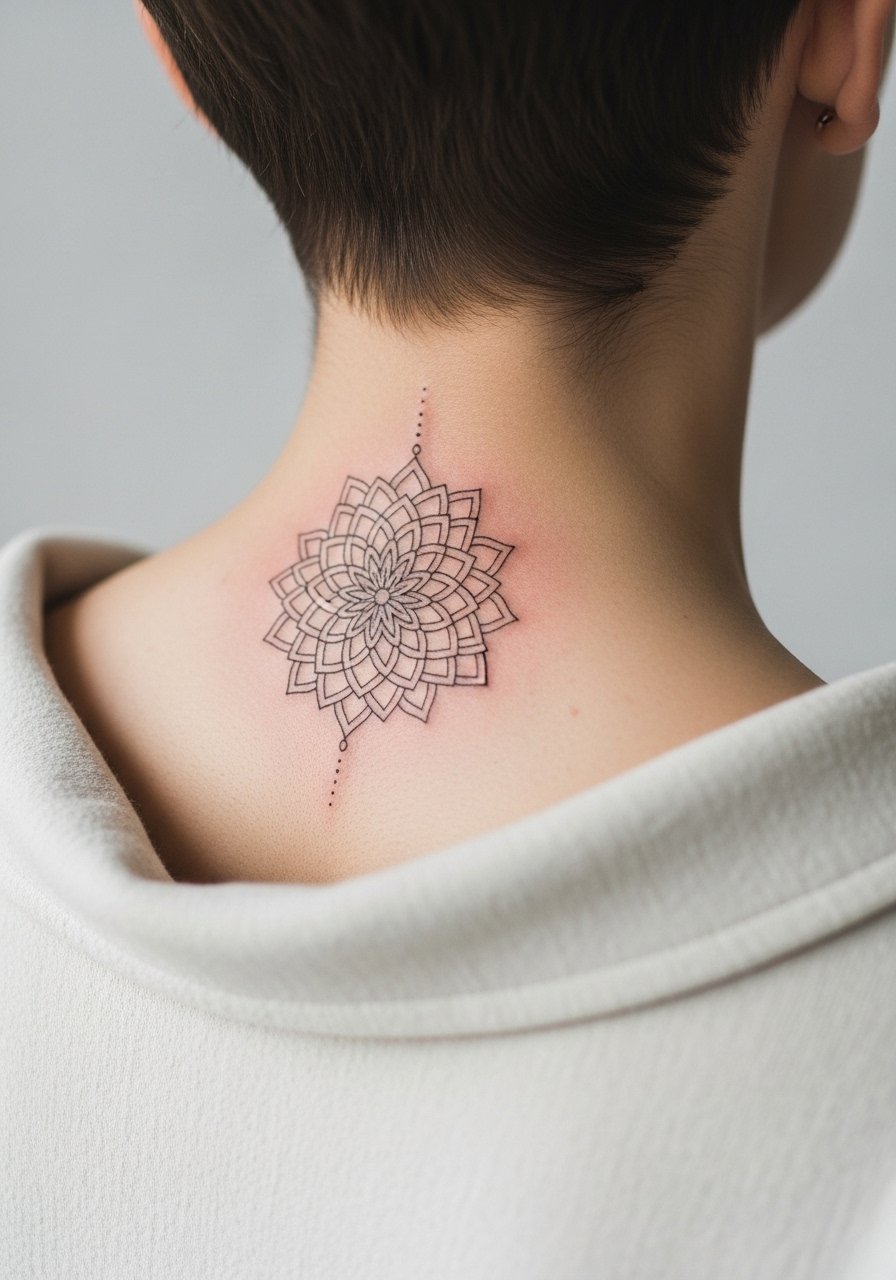
The nape is a discreet canvas that works with high-contrast geometry. Request spacing between petals so the dense center does not fill in within a few years. Sessions are brief for small mandalas. A common error is compressing too many radial lines which merge in photos over time. If you want it visible only sometimes, choose a mandala diameter that sits under collars when needed.
24. Tiny Script Behind the Ear with Hairline Conceal
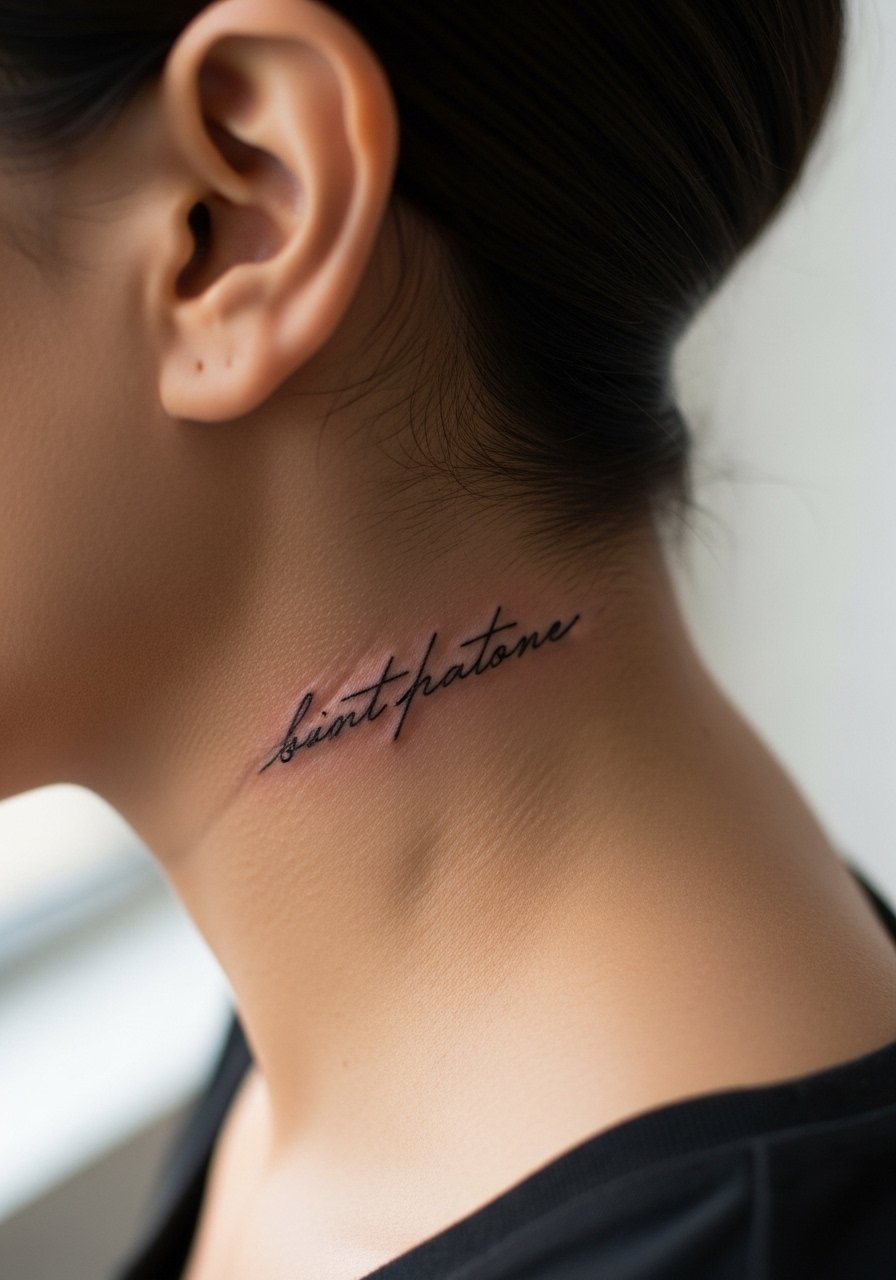
Behind-the-ear script benefits from precise spacing and careful font choice. Demand a stencil check with hair down and hair tucked to ensure legibility. Sessions are quick and pain is low. A common mistake is choosing cursive that compresses into unreadability at small sizes. For discretion, keep the line short and plan hair styles that can cover or reveal the script as you wish.
25. Calf Fox Outline

Calf placements are durable and suit athletic silhouettes. Ask for a 3-inch silhouette with clean negative-space limbs so movement does not blur features. Sessions are comfortable and healing is quick. A mistake people make is requesting ultra-fine inner texture that fades under muscle motion. Expect little friction and reduced touch-up needs unless you are a runner who sees heavy rubbing from socks.
26. Fine Line Compass Rose on the Sternum
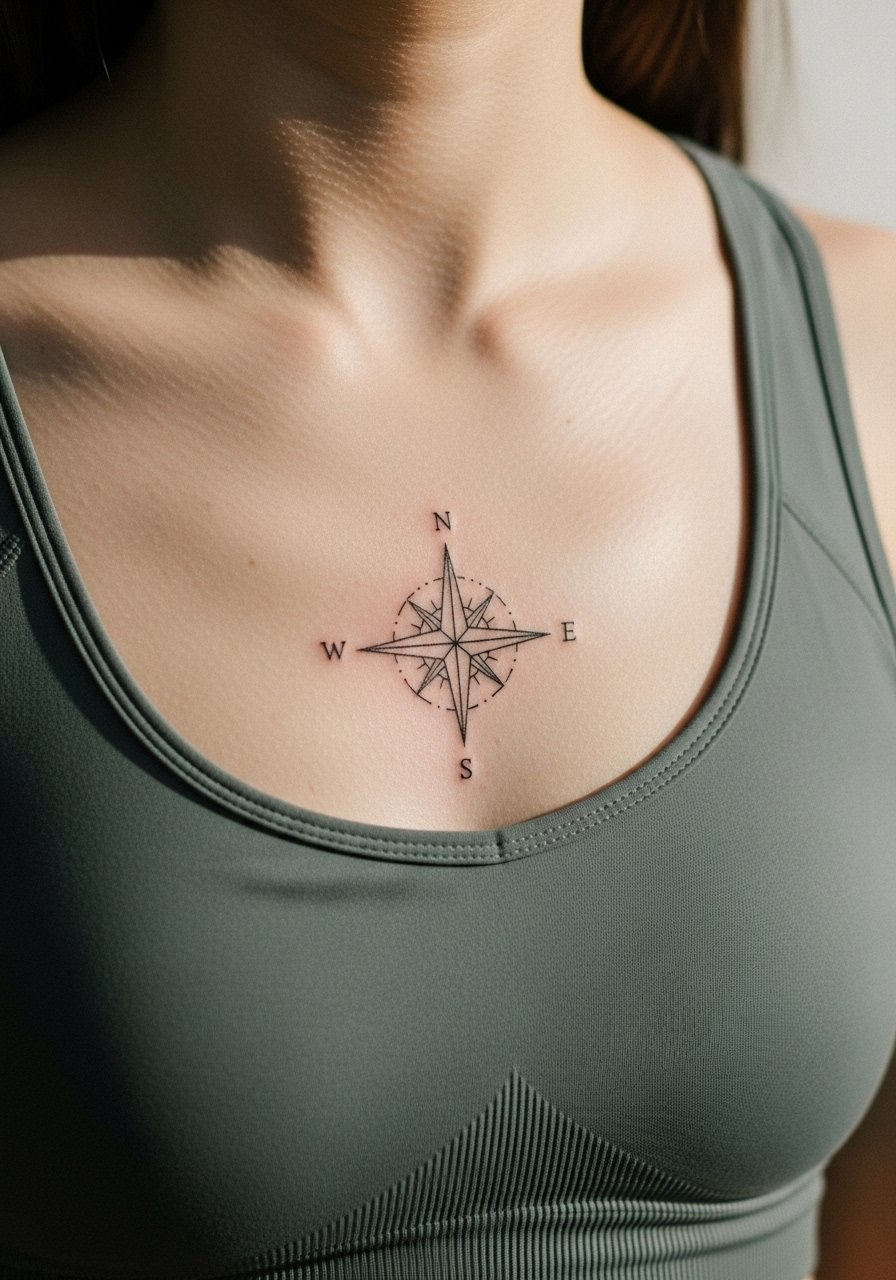
Sternum work demands careful placement and artist experience. Tell your artist you want the central point aligned with the sternum notch and ask how they handle contour changes. Pain is higher and sessions may be split. The common error is dense inner detailing that travels outward as the body moves. For discreteness during the session, wear a fitted sports bra so the artist can access the area without full exposure.
27. Small Linework Hand Accent
Hand placements are fashionable yet notoriously high-maintenance. If you want a small accent, ask for bold negative shapes and minimal internal dot work to survive washing and wear. Sessions are quick but expect the highest early touch-up frequency of any non-finger spot. A typical mistake is choosing intricate micro-patterns that simply do not hold up under daily hand use. Consider the career implications and ask the artist about their touch-up policy before booking.
Frequently Asked Questions
Q: Do fine line tattoos fade faster than bold-line work, and how should that influence my choice?
A: They often do because thinner channels carry less pigment and sit closer to the skin surface. One camp argues fine line heals with less trauma and touches up well. The other camp points out that bolder lines usually last longer without maintenance. If longevity is the priority, choose slightly thicker outlines or plan on a touch-up at year two.
Q: Which placements from this list need the most touch-ups and why?
A: Fingers, hands, and ankles consistently need more attention due to friction and washing. The skin in those zones renews faster and sees constant contact. Budget for at least one touch-up in the first year for those areas.
Q: How should I approach a consultation about single-needle Chicano portrait work at small scale?
A: Bring healed examples in similar scale and ask the artist to show stenciled placement on your body. Discuss cultural elements and agree on simplification strategies so facial cues do not compress when reduced.
Q: What should I wear to appointments for shoulder, collarbone, and ankle tattoos?
A: For shoulder work, a loose tank top gives the artist access without full undressing. For collarbone pieces, a button-front blouse or tank that can be shifted works well. For ankle sessions, cropped linen pants make it easy to roll fabric without pressuring the area.
Q: How do I find artists who specialize in illustrative fine line styles without relying on individual names?
A: Search style-specific hashtags like #finelinetattoo and #micorealismfine, check local studio location tags, filter platforms that allow style searches, and read community forum threads for recent guest-spot mentions. Look at healed work across skin tones before booking.
Q: Will weight changes or pregnancy drastically alter the way these fine line designs look?
A: Significant skin stretching can distort tight linework, especially on expandable areas like the inner thigh and stomach. Choose placements anchored to bony landmarks if you expect major changes, and discuss scalability with your artist before committing.
