
Fine line geometrics are gorgeous when fresh, but what holds up is the combination of placement, spacing, and the right technique. Lines that blur on fingers, sacred geometry that looks generic, and the anxiety about symmetry on uneven skin are the top headaches people bring into consultations. Below are 27 pattern sketches that solve those problems in practical ways, from touch-up timelines to what to wear on session day, starting with a bold forearm piece.
1. Geometric Wolf Head on Outer Forearm
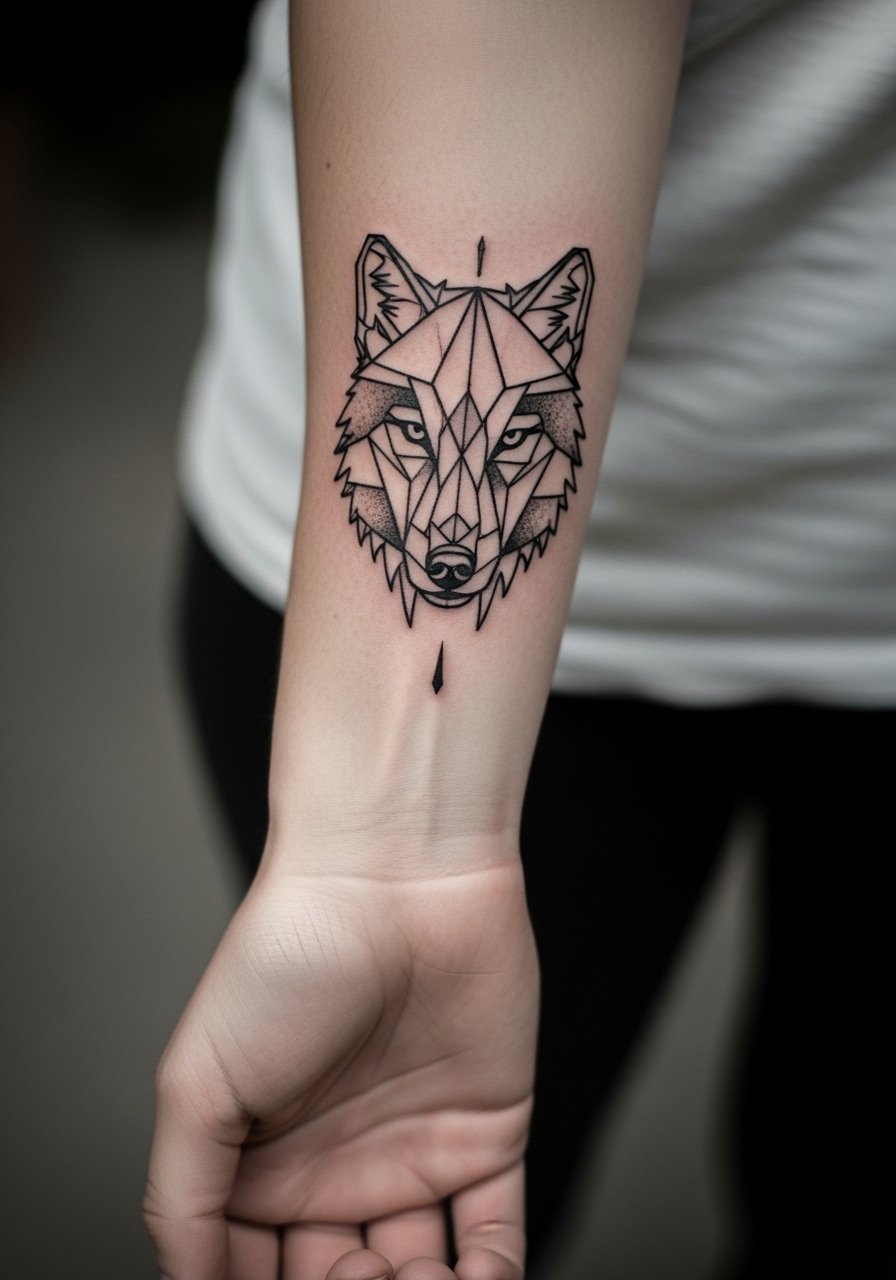
I see this wolf design on forearms a lot because it reads like strength without realism. For longevity, ask your artist for bold primary outlines with polygon overlays rather than ultra-fine fur texture. The forearm tolerates medium pain and usually finishes in one session of 60 to 120 minutes depending on size. Common mistakes are going too dense with internal detail that blurs at year three. Plan a touch-up at 2 to 4 years for saturation. For showing it off, pair with a fitted crewneck tee and a slim leather cuff so the geometry frames the sleeve.
2. Watercolor Geometric Bloom on Shoulder
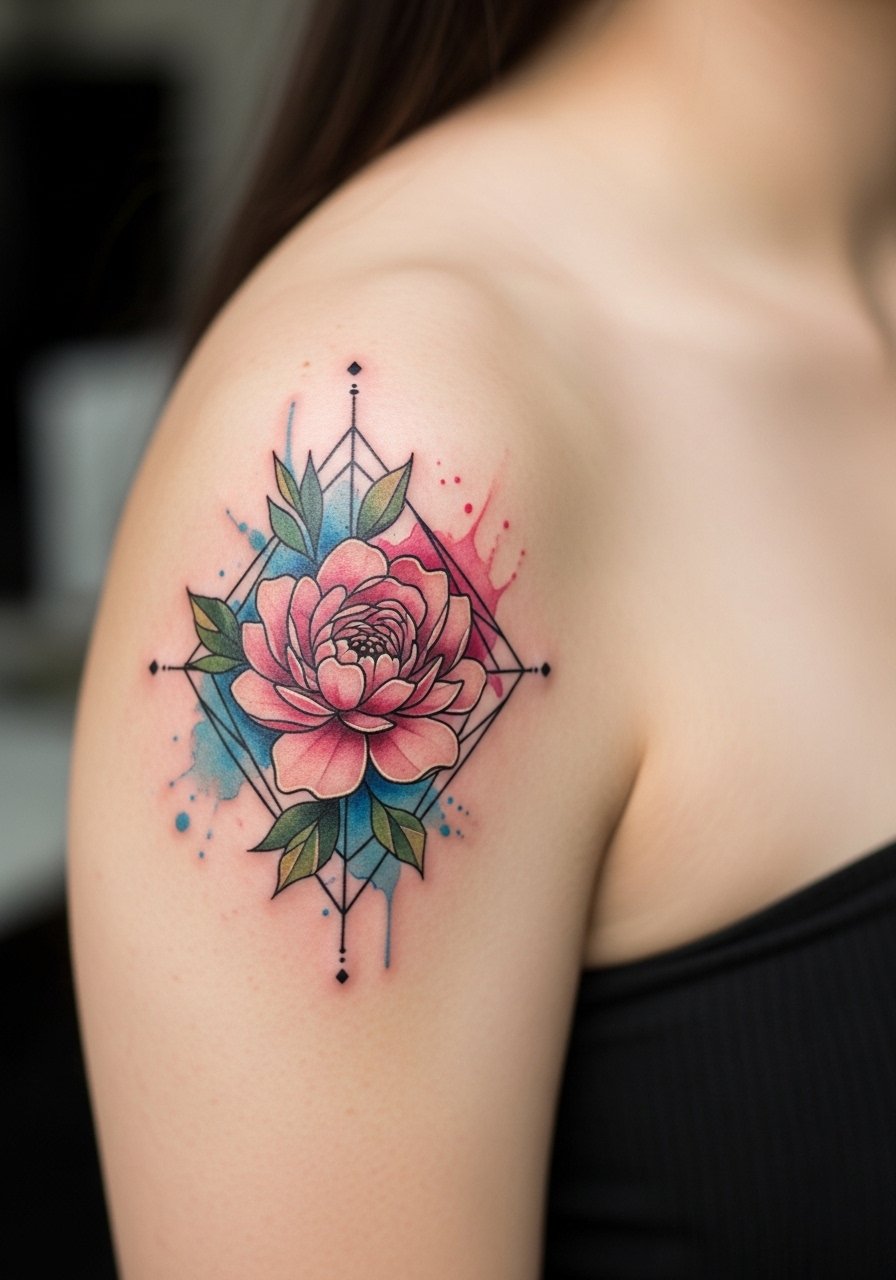
Fair warning: the shoulder is forgiving for color but it needs room to breathe. I recommend sharp black geometric outlines around broad washes of color rather than tiny color cells. Tell your artist to separate the watercolor fields with negative space so aging keeps the shapes distinct. Sessions usually run two sittings of 90 minutes each. The most common error is packing color too close to linework, which causes muddiness as pigments spread. Wear a loose sleeveless crop top to the appointment so the artist can access the area without shifting clothing.
3. Chest-Centered Sacred Geometry Mandala
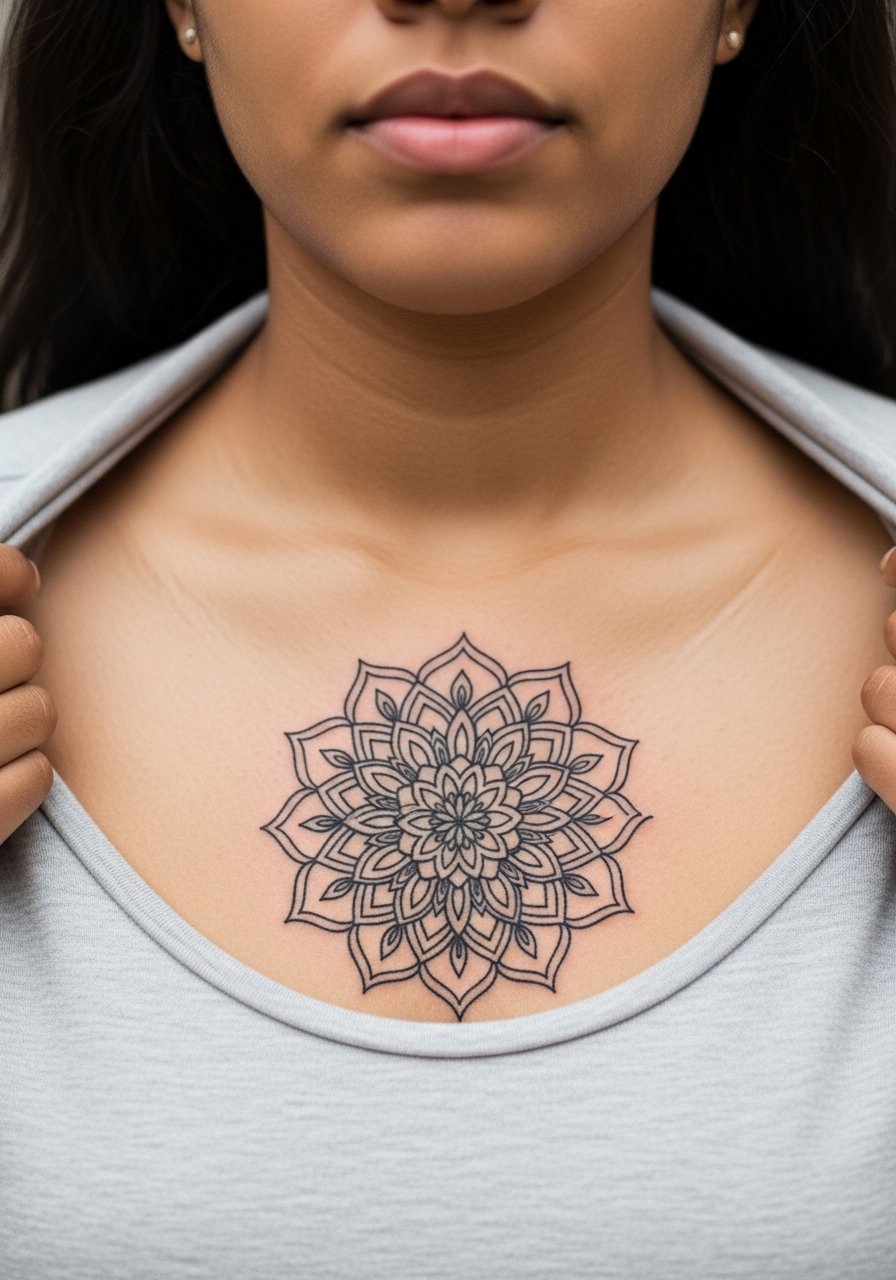
Most people underestimate how the chest reads with symmetry. This mandala benefits from bold anchor lines and detailed internal dot work. The sternum and chest can be sensitive, so expect multiple sessions adding up to 2.5 to 4 hours total. A common mistake is scaling the mandala too small. That causes dense inner work to merge within two to three years. If you want the pattern to follow muscle curves, ask the artist to draft stencils that map to your pectoral anatomy rather than cutting and pasting a circular vector. For nights out, the pattern pops under an open button-down or a deep V.
4. Dotwork Triangle Stack on Wrist

Wrist tats are notorious for early blur. Artists split on fine dot work here because skin movement and washing wear dots down faster. One camp says fine dots yield meditative texture. The other camp argues bold stippling with spacing prevents early merging. My advice is to space the dots and increase contrast so the triangles read at six months and still form at year two. Finger-adjacent designs may need touch-ups every 1 to 2 years. For a subtle show-off look, stack thin silver chains on the opposite wrist and roll a sheer long sleeve up for contrast, and bring a thin silver chain bracelet to coordinate.
5. Polygon Mountain Range on Thigh

Thigh placement lets you expand complexity without losing detail. I prefer layered polygons that create depth, not tiny hatch marks that flatten with healing. Tell your artist to stagger polygon sizes so the largest shapes anchor visually and the smaller ones recede. Expect two sessions totaling 2 to 3 hours. A frequent mistake is putting dense black patches close to the groin where stretch changes can distort geometry. For session comfort, wear loose shorts or a wrap skirt and bring a pair of high waisted shorts so the artist can expose only the area they need.
6. Flower of Life Collarbone Motif

Consultation tip: if you want this pattern to sit clean across the collarbone, have the artist show the stencil while you stand naturally. The collarbone moves with posture and breathing, so minor shifts in the stencil matter. This piece usually finishes in a single hour-long session if scaled small. A common error is compressing too many rings into a tiny area. That causes the lines to merge inside two years. For outfits, a V-neck or open button shirt frames the geometry perfectly and keeps attention on the symmetry.
Studio Day Picks
The forearm, wrist, and collarbone pieces above each have different prep and healing needs, so a small kit smooths session day and the first week.
-
Stencil transfer paper kit. Lets you preview the linework on skin before committing, which is especially helpful for collarbone and mandala placements.
-
Topical numbing cream. Applied per product directions about 30 to 45 minutes before a sensitive chest or wrist session reduces initial shock without changing long-term saturation.
-
Thin protective film roll. Useful for small wrist and finger pieces where daily washing and friction threaten fresh needle channels.
-
Fragrance free gentle body wash. Gentle cleansing supports delicate linework on the forearm and collarbone while avoiding irritation.
-
Aquaphor healing ointment. A thin layer in the first 48 hours helps keep fine line channels from drying out excessively on small geometric pieces.
7. Geometric Lotus Bloom on Inner Thigh

Mistake lead: the inner thigh is tempting for radial symmetry, but the skin here stretches and rubs with movement. If you want radial precision, go slightly larger and prioritize negative space between petals. Session feel is moderate to high on the pain scale and often requires two sittings. The design ages best when color accents sit outside the core blackwork petals. For the session, wear shorts you can shift up a touch and consider a pair of loose linen drawstring pants to get home comfortably.
8. Polygon Animal Silhouette on Shoulder Blade

Controversy lead: polygon animals split tastes. One camp prefers heavy fill for a bold silhouette that reads from a distance. The other camp wants open geometric frames that imply the animal without solid black. Both approaches work if the placement and scale match the goal. On the shoulder blade, open frames age well because the area is low friction and expands into a larger piece if you choose. During consult, ask for a negative-space mockup so you can preview both looks. For showing it off, off-shoulder tops in neutral tones highlight the silhouette.
9. Fractal Spiral Full Back Starter
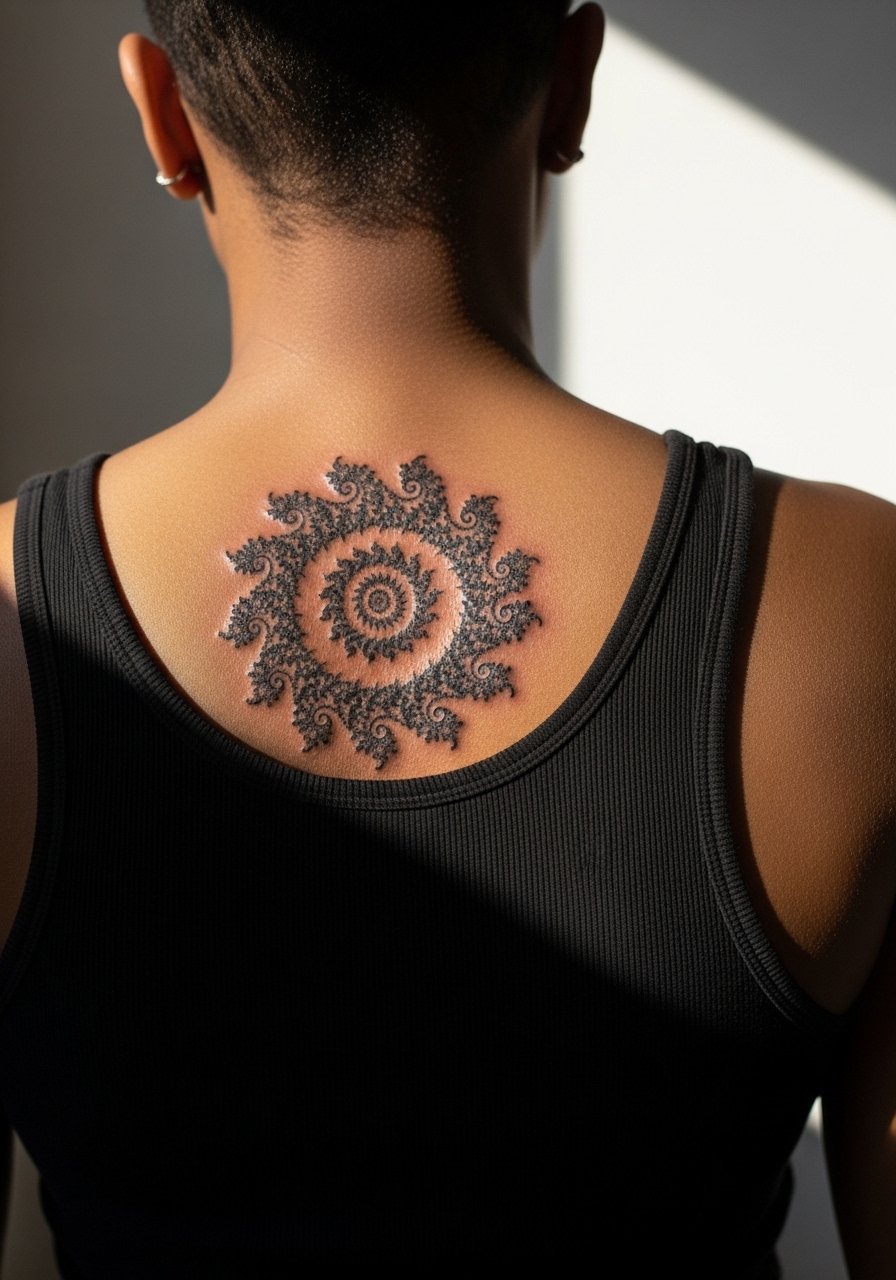
Visual impact lead: fractal spirals want space. This piece is a sleeve or back starter rather than a micro tattoo. Expect multiple sessions over months with large sessions of 2 to 4 hours. The mistake is trying to cram too much detail into a single sitting. If you plan for a multi-session build, the spiral gains optical depth and stays readable at five years. Back pieces respond well to layered dotwork and subtle gray washes. For show-off looks, backless dresses or crop tops create a strong composition.
10. Minimal Geometric Arrow on Side Neck

Pain warning: the side neck is sensitive and visible, and hand placement may affect job considerations. If you want a micro arrow, scale it to the neck curvature and keep the shaft slightly thicker than a typical fine line so it holds. Expect a quick 30 to 45 minute session, but plan for a touch-up at year two if you prefer delicate spacing. For session wear, choose a loose button-down shirt you can pull aside to protect the collar.
11. Interlocking Hexagon Grid on Upper Arm

Consultation lead: hex grids are perfect for future expansion into sleeves. Ask for a master grid that leaves consistent gaps for future elements. On the upper arm the pain is mild and sessions usually run two to three hours. Common mistakes include mismatched cell sizes that show when you expand later. For daytime wear, an off-shoulder top or rolled sleeve in olive tones plays nicely with the honeycomb aesthetic and a pair of gold hoop earrings small if the piece pairs with shoulder exposure.
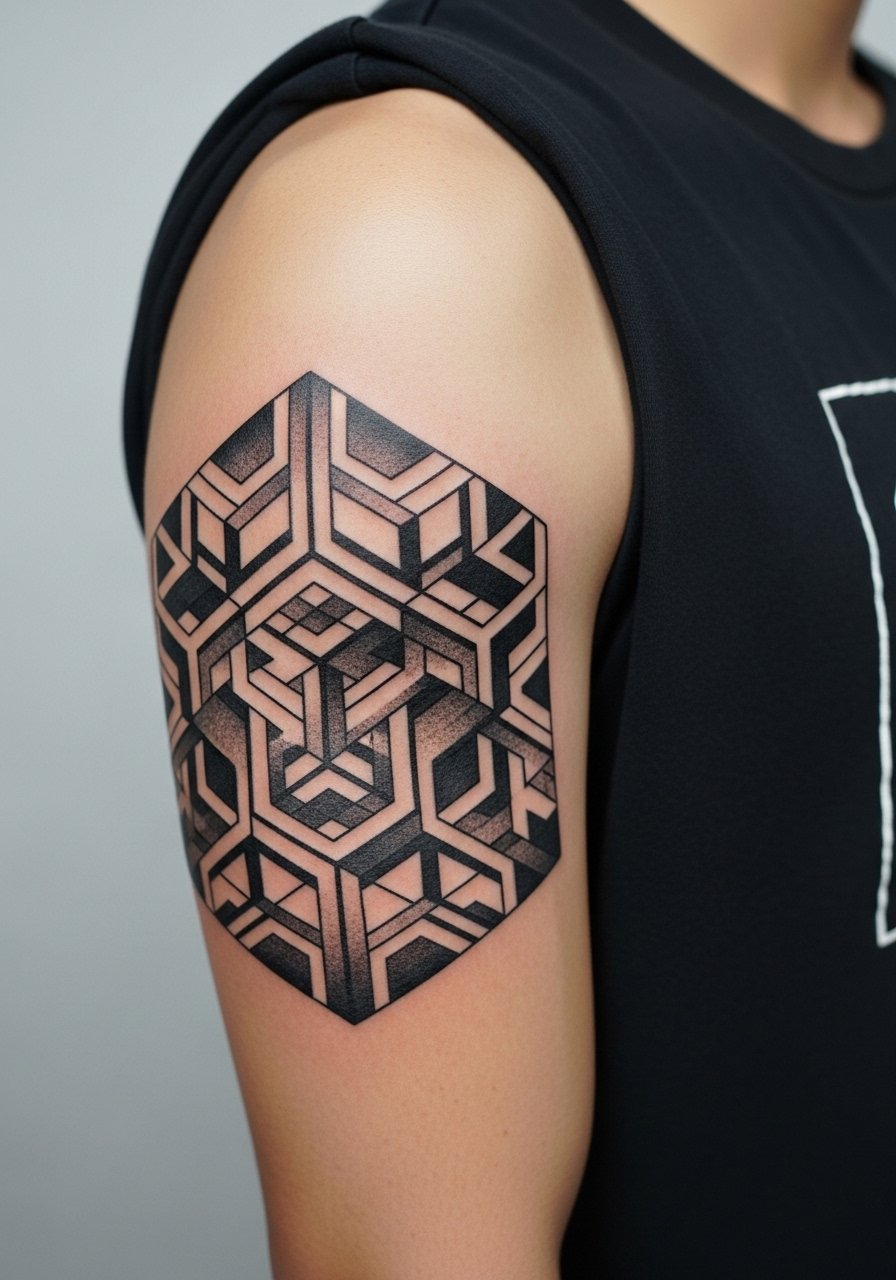
12. Sacred Geometry Cube on Forearm

Aging lead: geometric cubes rely on crisp linework to convey dimensional illusion. On the forearm, plan for slightly thicker key edges and thinner internal lines so the illusion survives mild fading. The common error is insisting on single-needle micro edges across the whole cube, which softens unevenly. Expect a single session for small to medium sizing and a predictable touch-up at three to five years. If you want custom placement, ask the artist to align the cube's perspective with your wrist angle so it reads correctly from everyday viewpoints.
13. Constellation Grid Ankle Motif

Mistake lead: ankle tattoos see a lot of friction from socks and shoes. Keep points spaced and avoid tiny connecting lines that blur under pressure. The ankle tolerates a single short session but needs careful aftercare in stockings and shoes. For showing it off in summer, rolled cuffs and minimalist sneakers make the geometry pop. Wear a pair of ankle crew socks with low shoes after the first week to reduce rubbing while still letting the piece breathe.
14. Optical Polygon Sleeve Starter
Personal observation lead: sleeves that start with an optical polygon cluster give you options later. Begin with a clear negative-space plan so future fill-ins do not fight each other. Session times vary but expect multiple long sittings. A common misstep is inconsistent line weight between panels. Ask your artist for a continuity sketch and bring photos of your arm relaxed and flexed so they can map flow. For the session, wear a short sleeve athletic shirt so the artist can roll the sleeve without stretching the area.
15. Micro Geometric Arrow on Finger

Mistake lead: finger tattoos blur fastest. If you want a geometric arrow here, accept that bold, simplified forms last longer than single-needle flourishes. Pain and touch-up frequency are high. A common mistake is placing it on the very tip or pad where touch wears it away quickly. For longer wear, put the shaft on the side of the finger and expect an annual touch-up. For showing it off, thin stacking rings keep attention on the finger without overcrowding the design.
16. Linework Compass on Calf
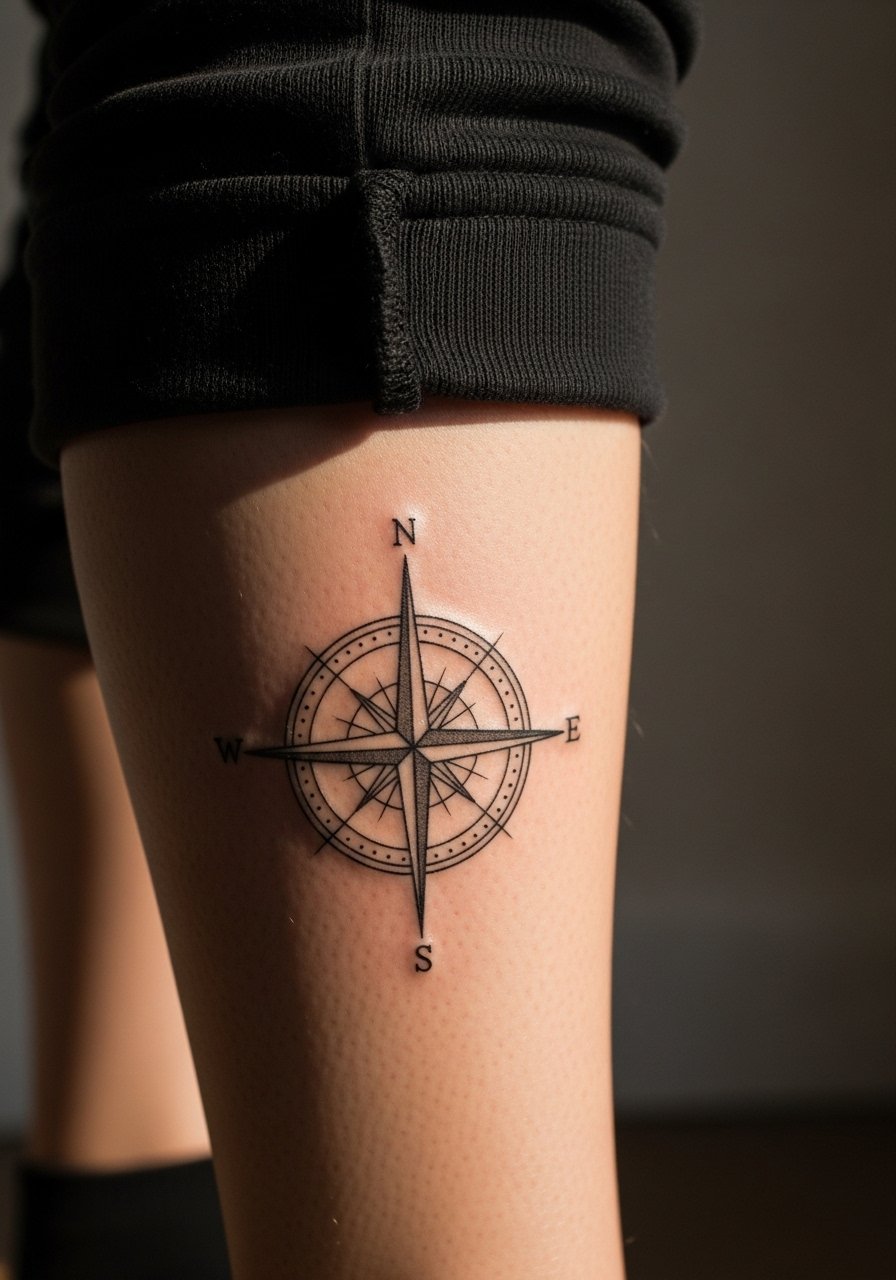
Visual impact lead: the calf gives you a vertical canvas that suits radial compasses. The area is low friction and ages predictably. One or two sessions of moderate length are common. The frequent mistake is compressing too many inward spokes, which merge later. Request a slightly bolder radius and ask the artist to show healed mockups at scale. For everyday styling, rolled joggers or short socks frame the work and balance casual looks with a pair of rolled jogger pants for seasonal layering.
17. Stipple Fractal Forearm Band

Consultation lead: stipple fractals need consistent dot density across the band. The risk is uneven stippling where sections were done on different days. Ask for a grid-based planning sketch so density matches. Expect a two-hour session or two shorter sessions depending on width. A common error is variable needle depth that causes patchy healing. For show-off pairing, a fitted crewneck tee in navy frames the band while keeping the look minimal.
18. Geometric Heartline Sternum Accent

Pain warning lead: the sternum is high on the pain scale, and placement must consider breathing. If you want a central heartline, scale it so the artist can work around chest movement. The major mistake is forcing too much micro detail near bone. Sessions are short but intense. Some people ask for symmetry so precisely that nothing accounts for posture changes; instead, ask for a small asymmetry preview so the piece reads centered when you stand and when you sit.
19. Hexagon-to-Organic Sleeve Transition

Visual impact lead: mixing strict grids with organic elements is a smart way to age-proof a sleeve. The hexes give structure and the organic flow masks small shifts over time. Plan sessions in blocks and ask the artist to leave modular boundaries for later additions. The common error is mismatched scale between geometric and organic parts. For showing off, an off-shoulder top in neutral olive keeps the transition visible and elegant.
20. Dotwork Spiral Wrist Cuff

Mistake lead: wrist cuffs need breathing room between dots. A tightly packed spiral becomes a smudge in two years. The wrist handles a short session but watch for swelling that can temporarily distort spacing during work. Expect a touch-up at year two if you prefer dense stippling. For small accessories, alternate with a minimalist watch so the cuff remains the focal point.
21. Geometric Mountain Range Over Knee

Personal observation lead: designs over the knee must consider joint movement, which alters line relationships as you bend. For the polygon range, keep major planes on the thigh and shin with a thinner connector across the joint. Sessions may be broken into two to avoid sitting for long while the leg tenses. A common mistake is wrapping dense black directly over the kneecap where cracking and movement accelerate wear. For casual wear, pair with high-cut shorts and minimalist sneakers.
22. Interlaced Triad Ribcage Panel
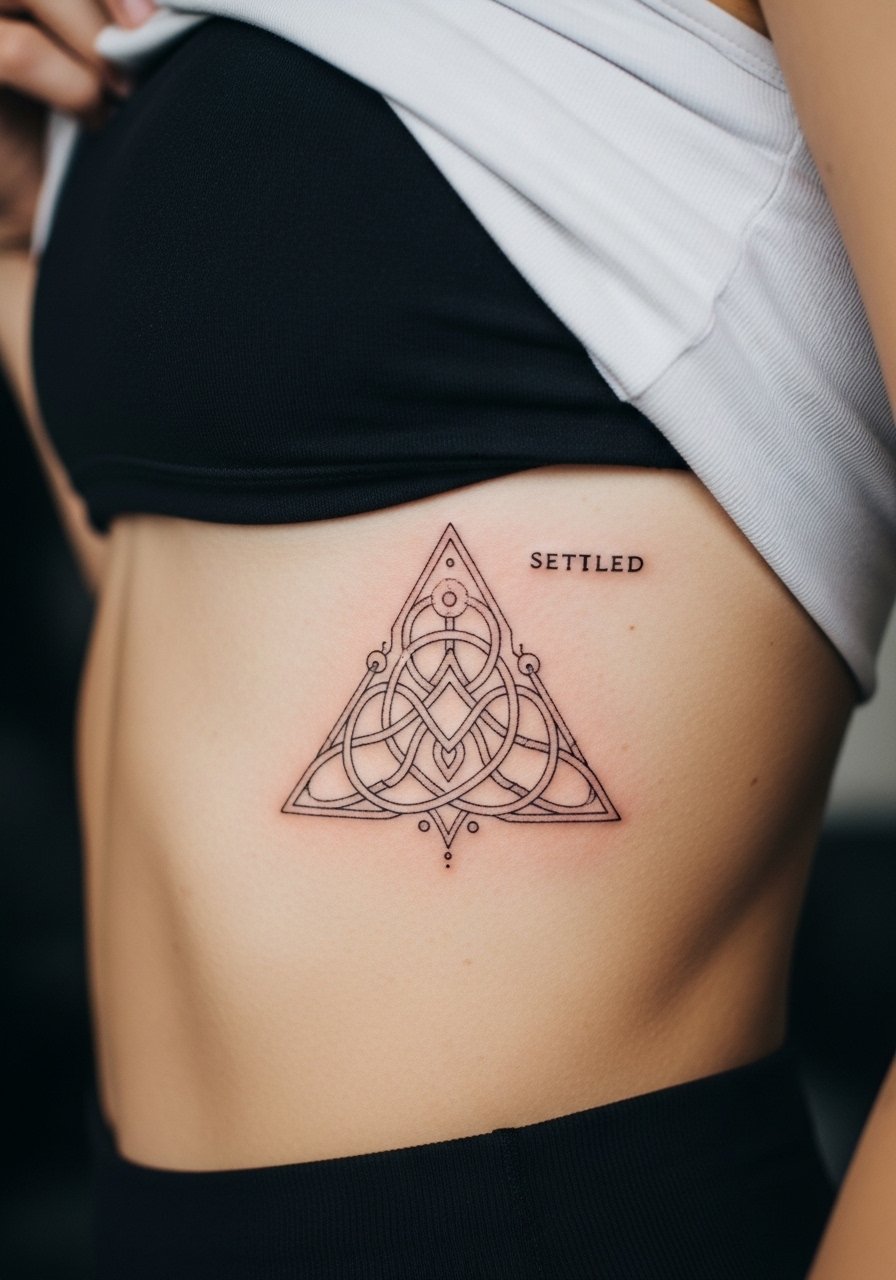
Aging lead: ribs are notorious for fine-line fading because the skin stretches and the area moves with breath. Artists split into camps on fine line here. One group says fine single-needle work on ribs blurs quickly. The other group claims careful depth and spacing make fine line survive. Honest advice is to space triangles slightly and schedule a touch-up at two to three years. The ribcage often needs a patient approach during sessions, so bring comfortable clothes and plan for breath-focused breaks.
23. Sacred Flower of Life on Upper Arm
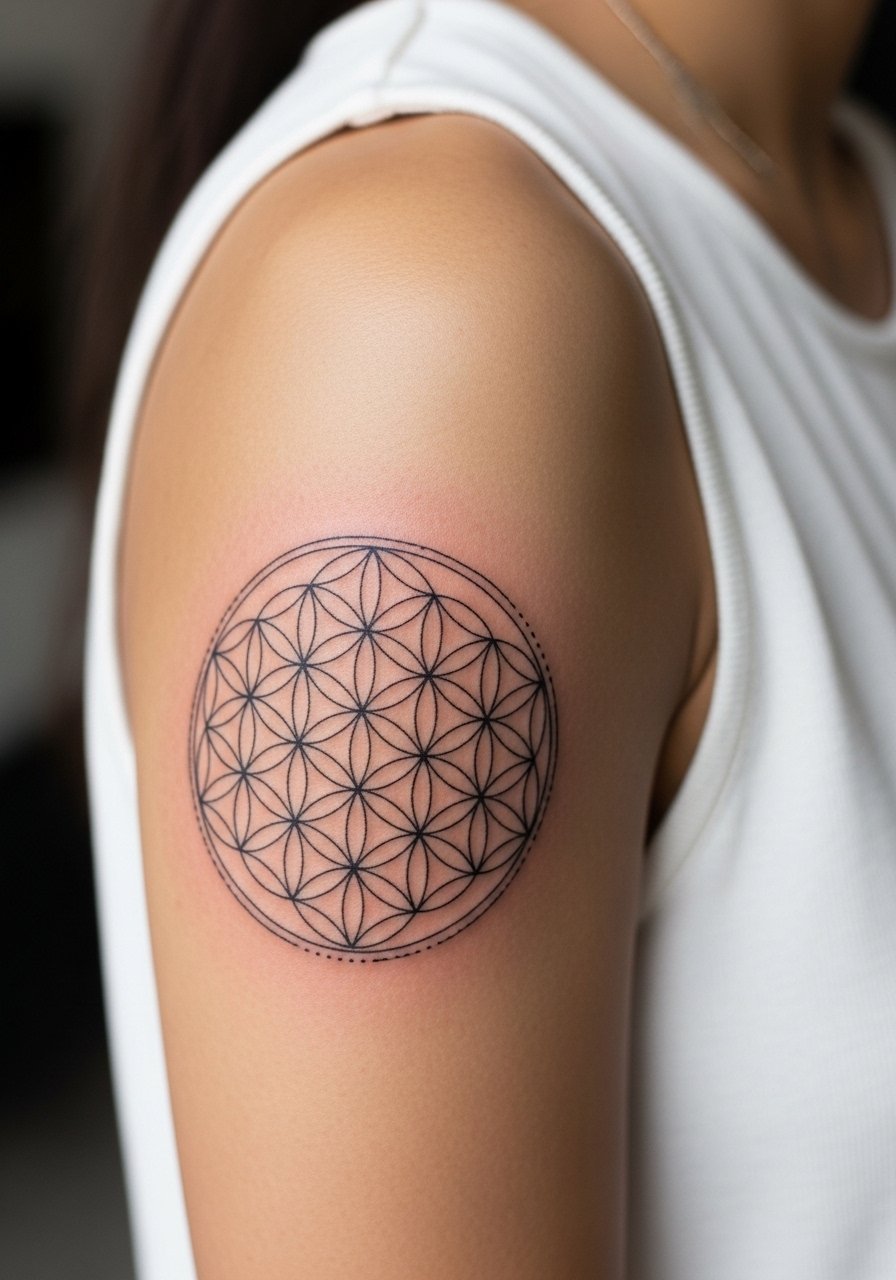
Personal observation lead: the upper arm is a reliable place for detailed sacred geometry because movement and friction are lower than wrists. If you want the interlocking circles to hold, ask for slightly heavier outer rings and delicate inner lines. Expect one to two sessions. A common mistake is exact replication of digital vectors without adjusting for natural skin texture. For showing off, a rolled sleeve or a fitted tee frames the motif elegantly and keeps the pattern readable at a glance.
24. Minimal Solar System Geometric Cluster on Hand
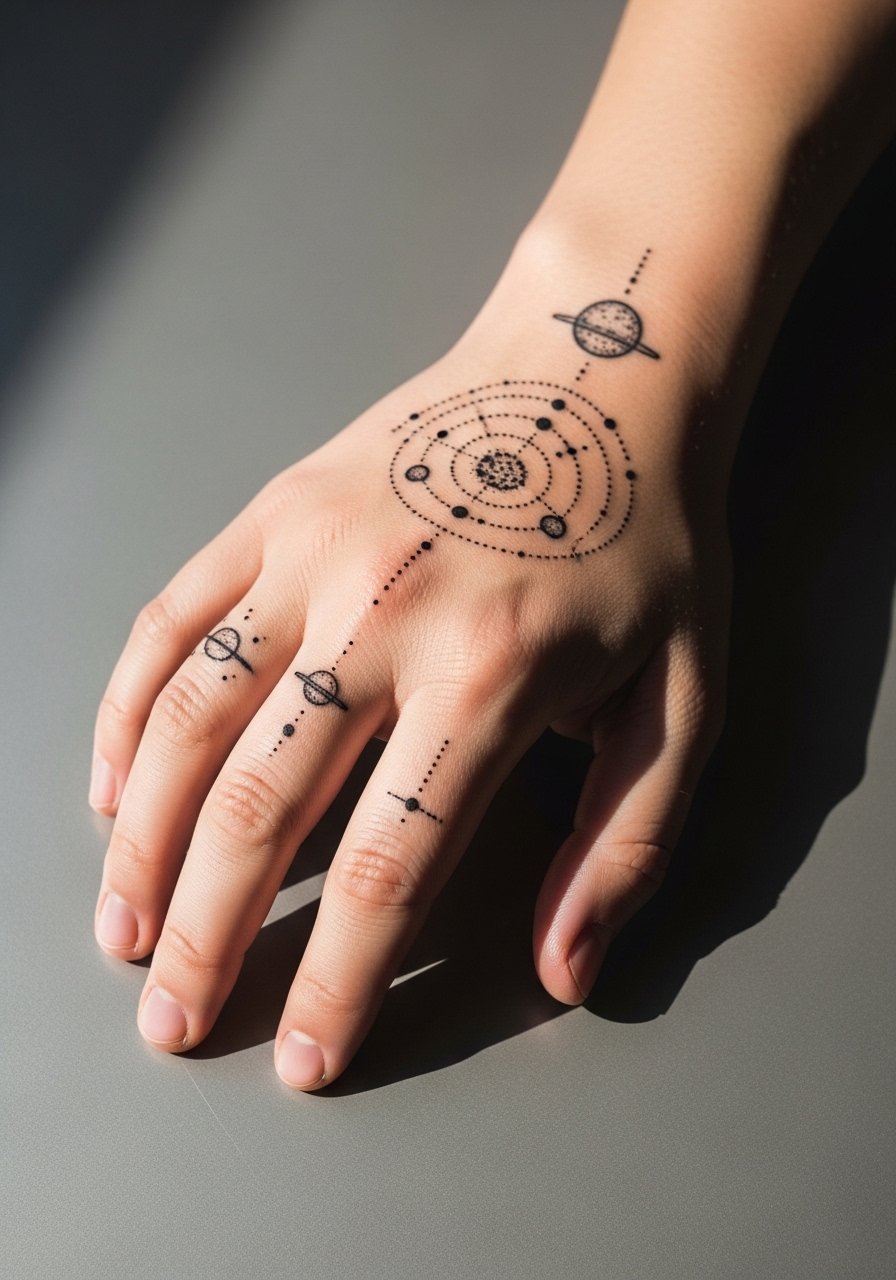
Consultation lead: hand pieces age the fastest because of constant washing and sun. If you want a cluster of planets or orbital lines, simplify to strong dots and short connecting strokes. The biggest mistake is tiny script or micro rings that disappear. Expect a high touch-up rate and consider placing the cluster slightly on the side of the hand to reduce abrasion. For casual showing, a pair of minimal sandals and a single band ring keeps the focus on the geometry, and a minimalist sneaker pairs well if the style continues to ankles.
25. Radial Lotus Sternum Connector

Mistake lead: when lotus petals meet a sternum connector, tight inner petals can blur under stress. Scale outward and let inner petals breathe. Sessions require patience because the sternum is sensitive. If you plan for color, place pigments outside the central blackwork. Many people forget to discuss breathing and posture with the artist before the first pass. For session comfort, a fitted sports bra or bandeau works best.
26. Scalable Hex Grid for Sleeve Expansion

Consultation lead: if you want a sleeve that grows over time, start with a master hex grid with consistent cell size. Ask the artist how future fills will attach so you do not end up with mismatched density. The inner forearm is a good starter spot because it shows balance between visibility and friction. A common misstep is choosing a different hex size later and forcing a seam. Wear a short sleeve athletic shirt to the session so the artist can roll the sleeve naturally and check flow.
27. Life-Event Fractal Spiral as Milestone Mark

Decision-pressure lead: some people choose a fractal spiral to mark a life event because it scales well. On the ribcage this becomes intimate and needs a clear conversation about size. Many clients ask for extreme detail in a small space and then regret the density after healing. If this is a milestone piece, plan for a larger scale and a two-session approach so the spiral breathes. For discovery, use tags like #geometrictattoo and search local directories to find artists who specialize in dotwork rather than naming anyone directly.
Frequently Asked Questions
Q: Do fine line geometric tattoos always blur faster than bold blackwork?
A: It depends on placement, skin type, and spacing. Fine line tends to show wear sooner on high-friction spots like fingers and wrists. Bold blackwork holds visibility longer in those areas. For ribs and back, fine line can survive with correct spacing and depth. Ask your artist which approach they prefer for the placement you want.
Q: How should I prepare clothing-wise for a chest or sternum geometric session?
A: Wear a wide-neck shirt, fitted sports bra, or a button-down you can pull aside so the artist has clean access. Loose bottoms help if the session runs long. Planning clothing in advance avoids unnecessary fabric shifts mid-session.
Q: What are realistic touch-up timelines for dotwork versus linework?
A: From what I've seen, dotwork and stippling often need touch-ups around year two to three on high-movement areas, while linework that is slightly bolder can go three to five years before a noticeable touch-up. Small pieces on hands and fingers commonly require yearly attention.
Q: For sacred geometry, how do I avoid looking like every other person who copied a common vector?
A: Ask for a custom stencil that maps to your anatomy and request subtle variations in ring spacing or dot density. Use discovery platforms and hashtag searches to find portfolios that show original compositions rather than replicated vectors.
Q: Are there placements you would not recommend for ultra-fine geometric detail?
A: Yes. Fingers, palms, and the very edge of the wrist are high-movement and high-friction zones that usually do not hold ultra-fine detail well. If you love micro work there, scale up slightly and expect more frequent touch-ups.
Q: How should I weigh the debate between Saniderm-style healing and traditional open-air aftercare for geometric linework?
A: Artists I know fall into two camps. Some favor second-skin products for the first 24 to 48 hours to reduce scabbing. Others worry about occlusion affecting crisp lines. The right choice often depends on your skin's healing tendencies and the artist's method. Follow the shop-specific aftercare plan and book a touch-up check if you see early spreading.
