
Fine line geometric bracelets dominate saved boards right now, but the tattoos that still look crisp after three years are rarely the ones that photographed best fresh. Spacing, line weight, and where the band sits on the limb matter more than a trendy pattern. Below are 17 clean geometric bracelet ideas for men, each with what to ask your artist, how it ages, and how to show it off without crowding the linework.
1. Minimal Chain-Link Wrist Band
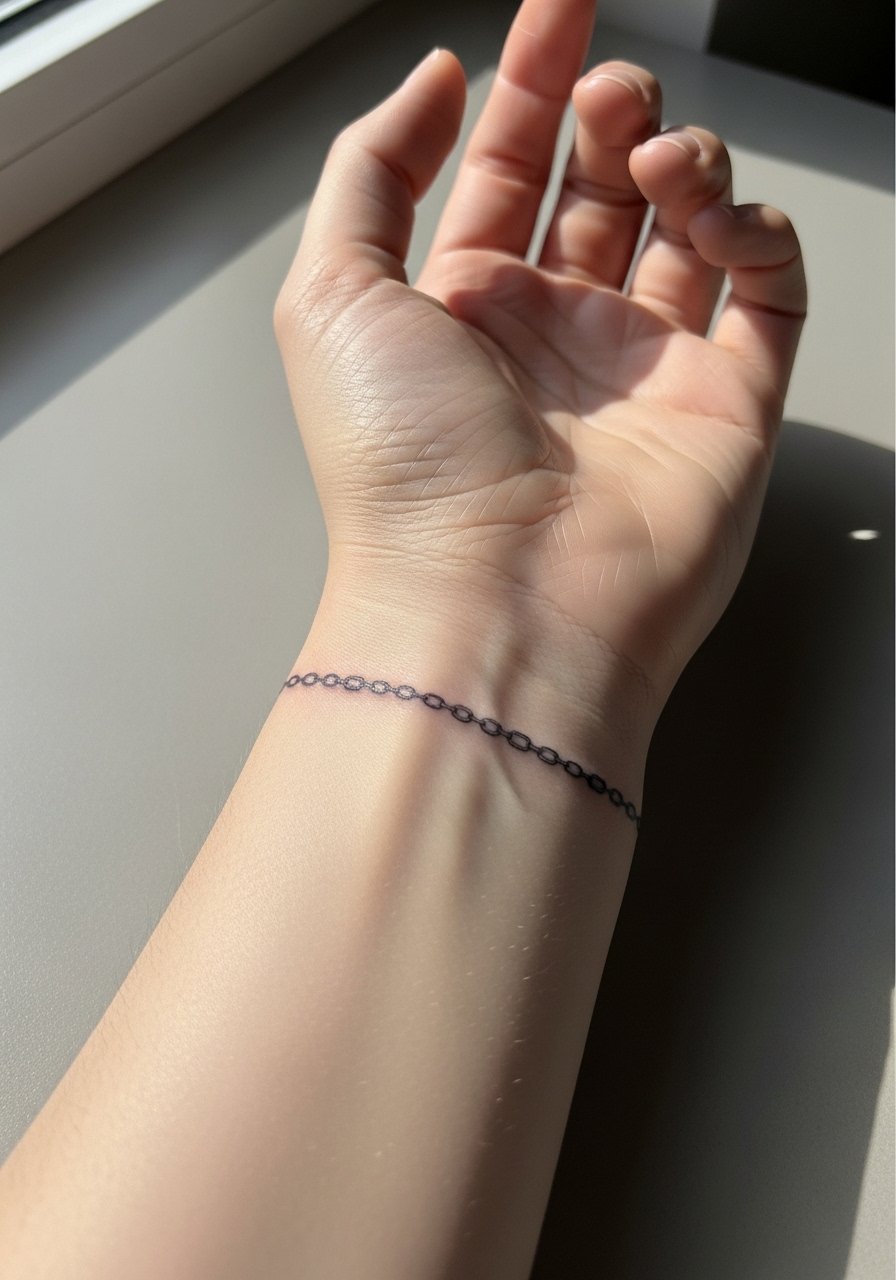
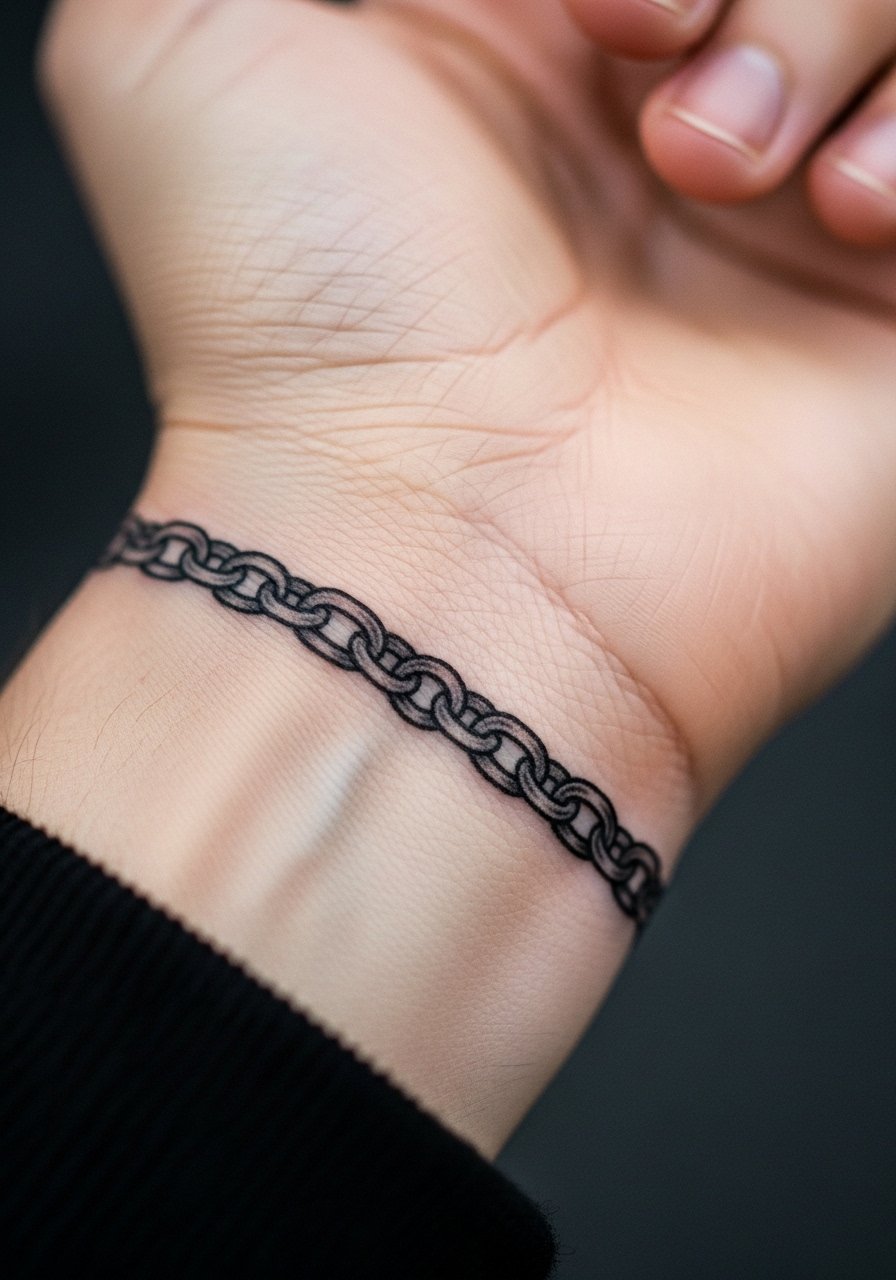
This is the archetypal geometric bracelet if you want something subtle that reads as jewelry. Tell your artist you want slightly heavier outer lines and thinner interior links so the pattern keeps its shape as it settles. Common mistake is going too skinny across the whole band, which causes the links to blur into one line after a few years. Expect a two-hour session for a clean wrap. Pain is low on the inner wrist but friction from watches and bracelets raises touch-up risk. For showing it off, rolled sleeves or a loose button-down shirt frame the wrist without hiding the cuff.
2. Stipple Dot-Work Cuff
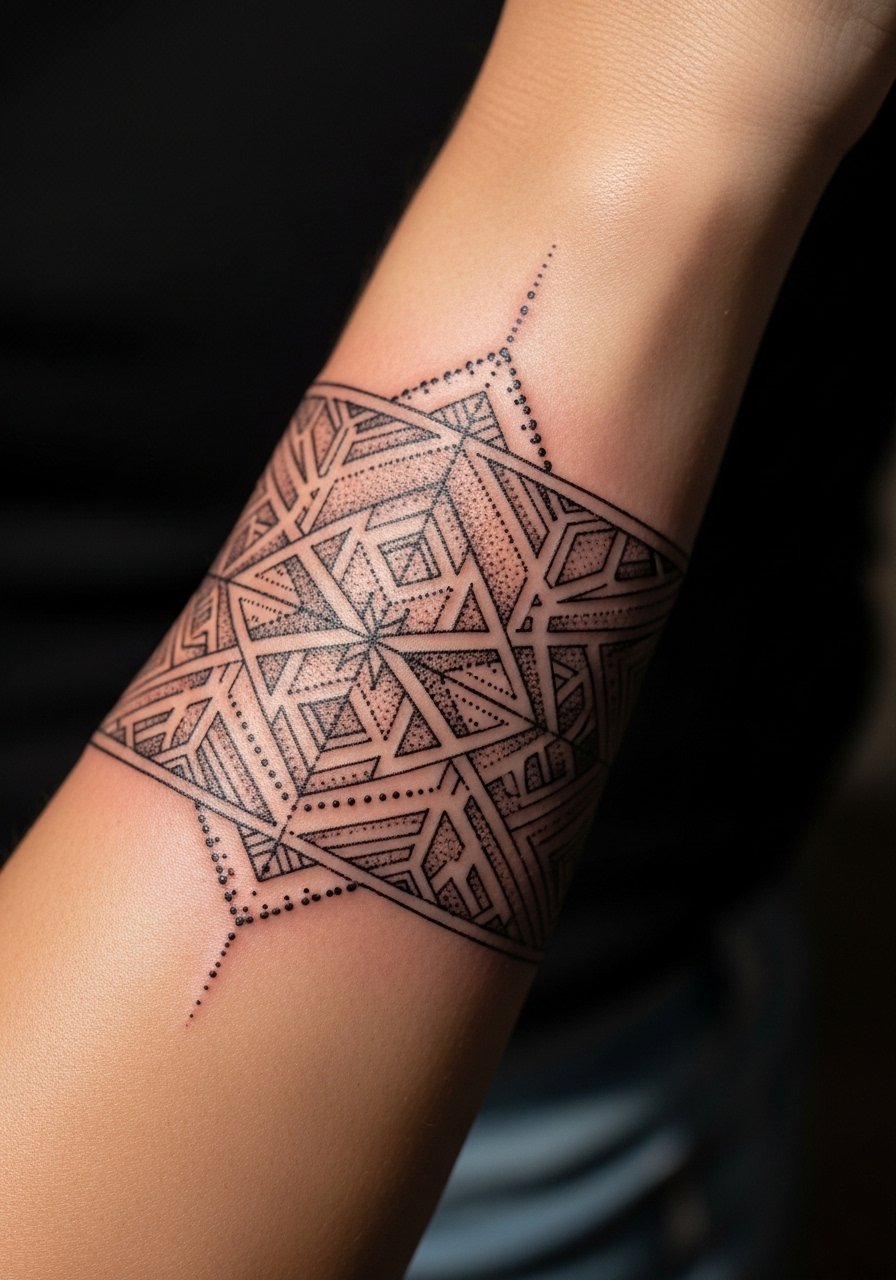
Stipple or dot work gives a bracelet depth without heavy outlines. Ask for stipple density samples during consultation so you see how tight the dots are. The main aging issue is saturation loss in the micro-dots, which can soften the pattern at about two to five years. Sessions run from one to three hours depending on circumference. Expect a dull vibration rather than sharp stinging on the forearm. Avoid the common version that packs dots too tightly, because they merge into gray blocks over time. Pair this cuff with a thin chain bracelet for contrast when you want an accessory that does not compete.
3. Negative-Space Chevron Band
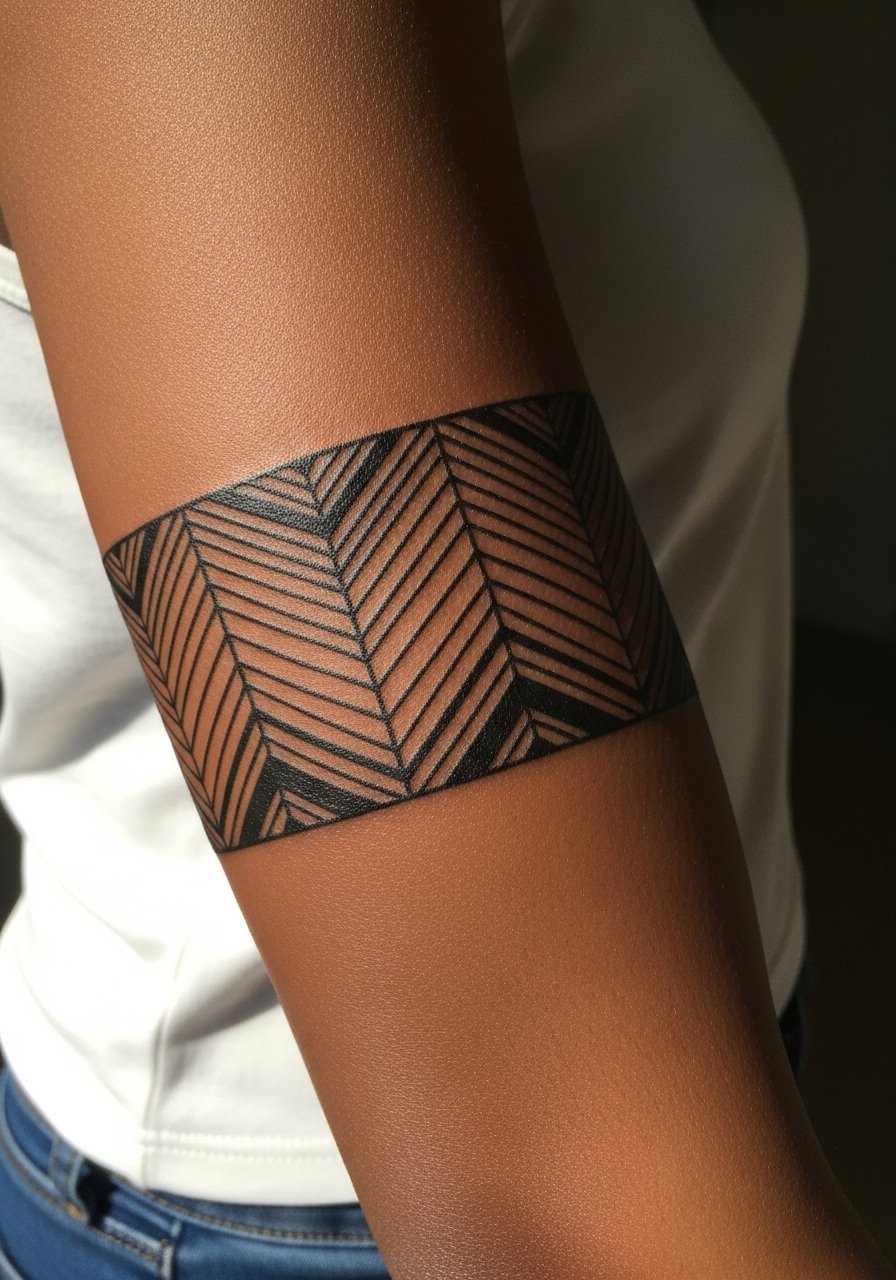
Negative-space chevrons let skin read as part of the design, which helps the tattoo hold up as lines soften. When you consult, mark how wide you want each chevron and where gaps should stay. Common mistake is cramming chevrons too close together. That reduces breathing room and increases blowout risk on softer skin. This placement is a moderate pain spot and usually completes in a single session. For the session, wear a loose tank top so the artist can access the bicep without you feeling cold.
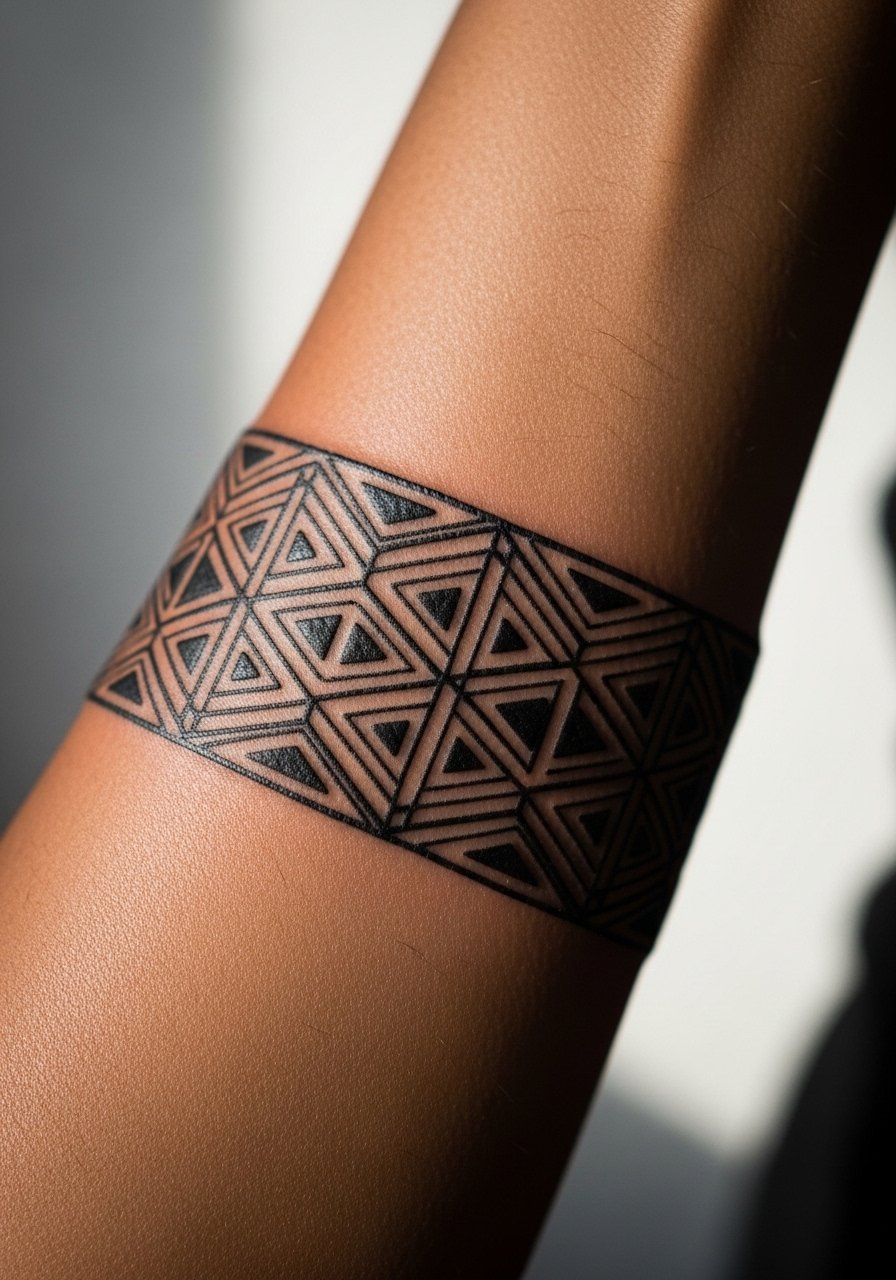
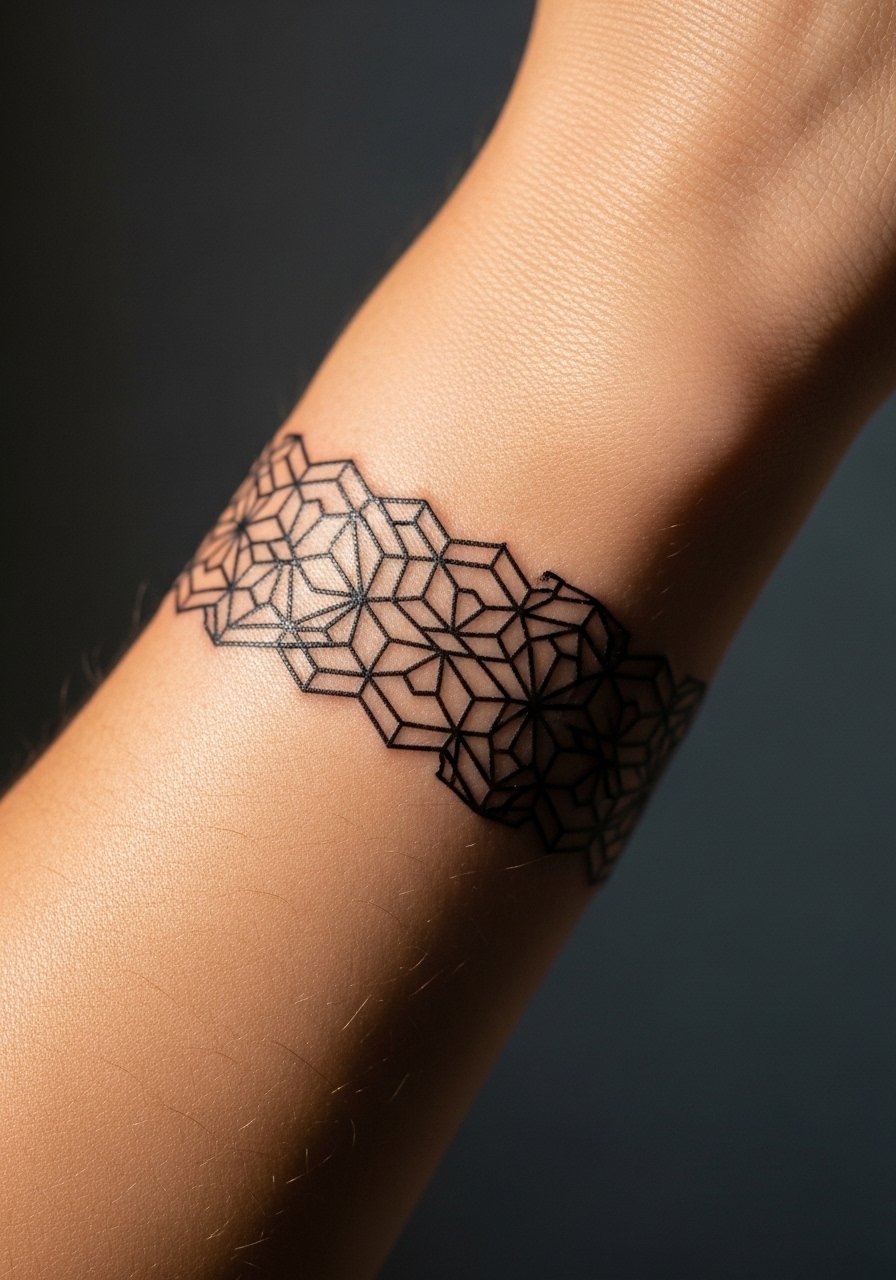
4. Interlocking Polygon Cuff
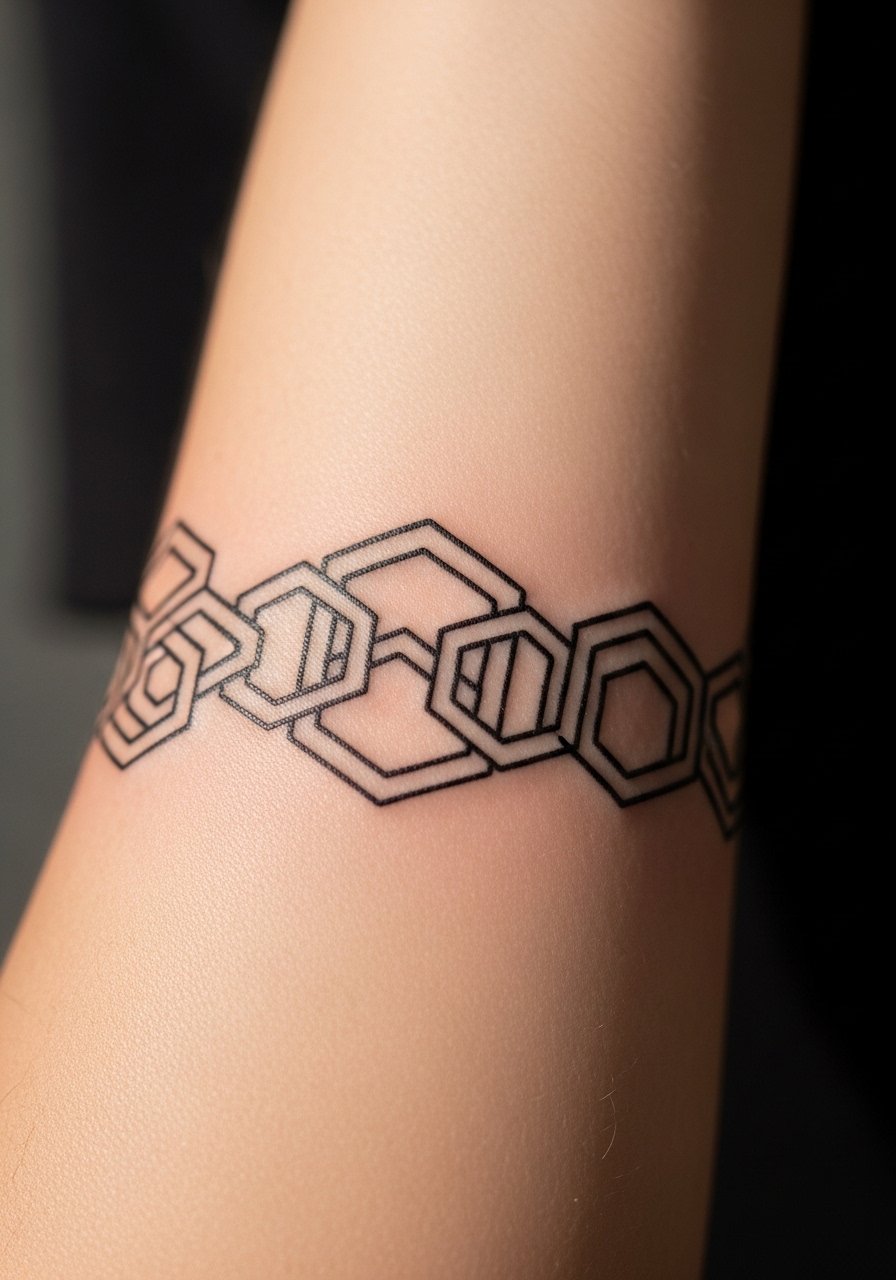
This style reads architectural because of the repeating angles. In consultations mention whether you want perfectly uniform polygons or a slightly irregular hand-drawn look. There is a controversy here that you should know about. One camp prefers bold outlines for bands because they age into a clear silhouette. The other camp argues that precise fine line polygons can settle cleanly if spaced and shaded properly. Name your preference and ask the artist where they stand before booking. Expect a touch-up at year two to keep edges crisp if you choose the fine line route.
5. Thin Circuit-Board Band
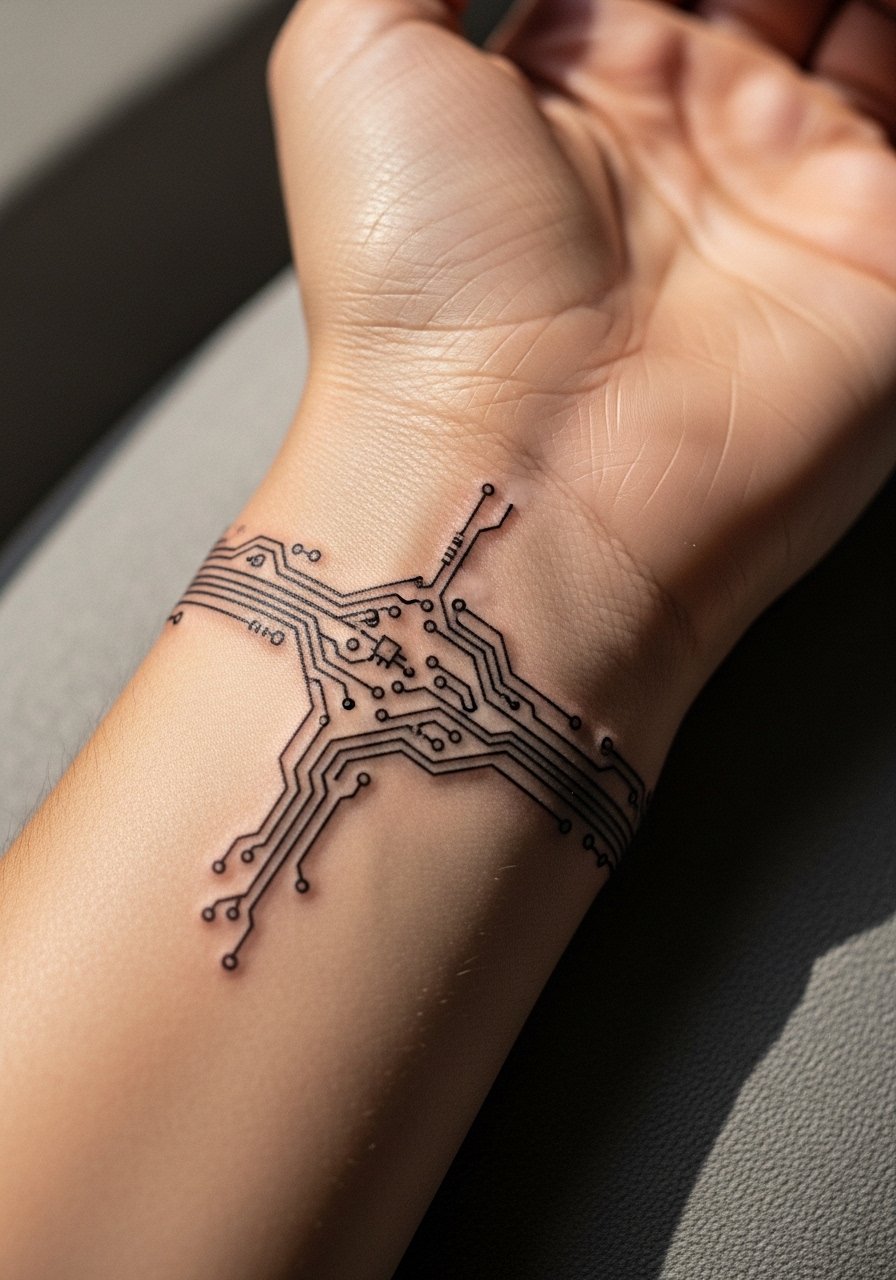
This is for anyone who likes tech geometry without heavy blackwork. Ask for slightly larger traces in the pattern so the tiny connections do not fuse over time. The biggest mistake is asking for micro-traces too narrow to withstand everyday typing and washing. Expect around 90 minutes for a band this size. Wrist friction makes the first week important, so wear a stainless steel watch with a thin strap sparingly during the first two weeks to avoid rubbing the fresh ink.
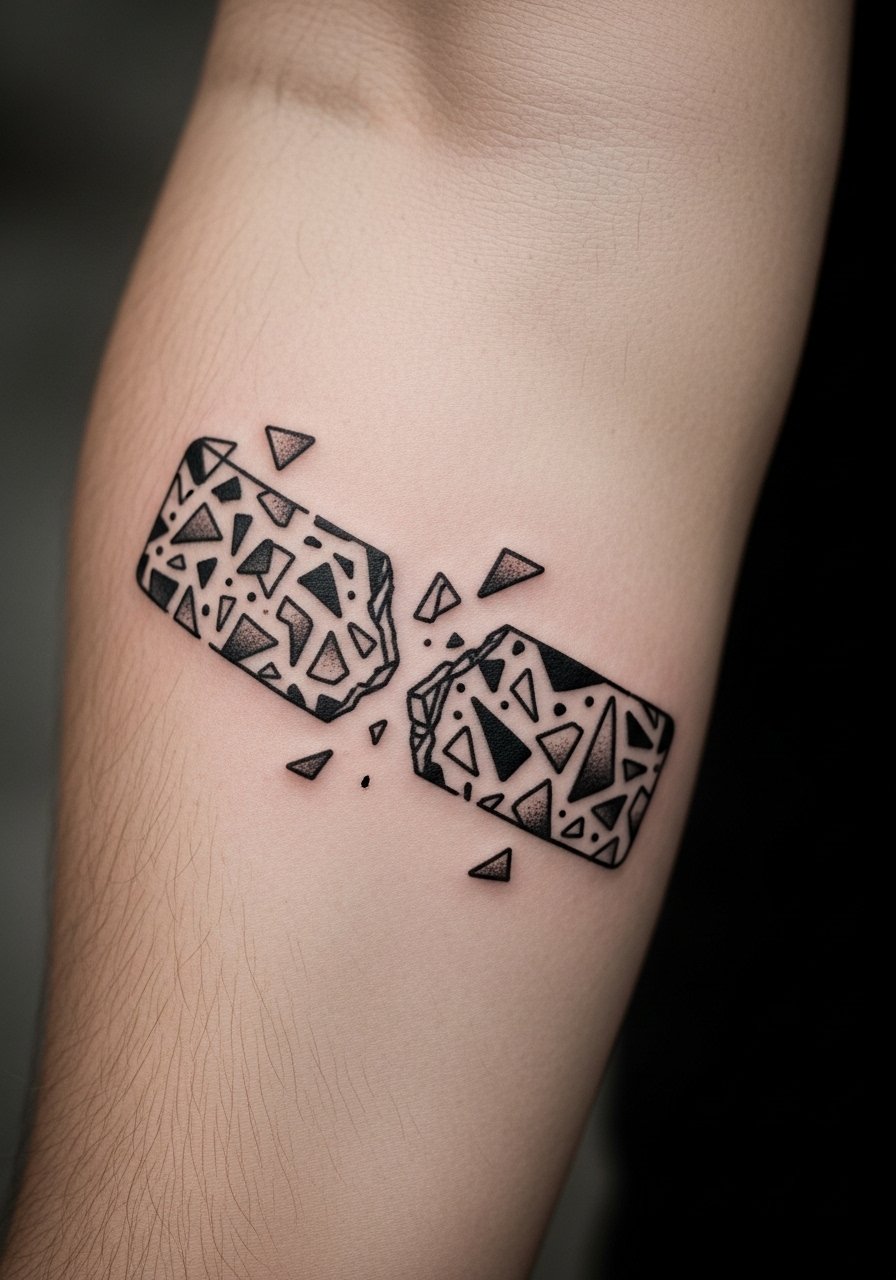
6. Broken-Mosaic Wrap
Fragmented mosaics look complex while keeping each element readable. Tell your artist you want wider negative gaps between tiles so the design does not become a gray patch. The session feels like steady needlework rather than sharp spikes. A common long-term error is packing tiles tightly for immediate visual payoff. That approach forces earlier touch-ups. For outfits, this cuff pairs with rolled sleeves and a loarse linen shirt for warm-weather wear that frames the pattern.
Before You Book
The wrist and forearm pieces above handle friction and frequent washing differently from upper-arm bands, so a few specific items make the session and first week smoother.
- Stencil transfer paper kit. Lets you preview exact line placement on skin, which helps with linked and polygonal bracelets that must sit perfectly around the limb.
- Topical numbing cream. Applied per instructions before wrist sessions eases sensitivity while leaving the artist room to work.
- Thin protective film roll. Useful for covering the wrist or ankle band through the first days of friction and frequent hand washing.
- Fragrance-free gentle body wash. Cleanses healing bands without stripping ink from fine lines.
- Aquaphor healing ointment. A thin layer for short windows helps moisturize delicate line channels without suffocating the skin.
7. Single-Line Infinity Band

A continuous single line can look deceptively simple and takes careful planning to sit evenly. Ask your artist to mock the full wrap with transfer and to check the band against your wrist bone before committing. The main mistake is failing to account for wrist anatomy so the loop lands over a tendon and distorts when you move. This piece is low to moderate pain and typically one session. For showing it off, minimal metal like a simple leather bracelet complements the line without crowding.
8. Ornamented Roman Band
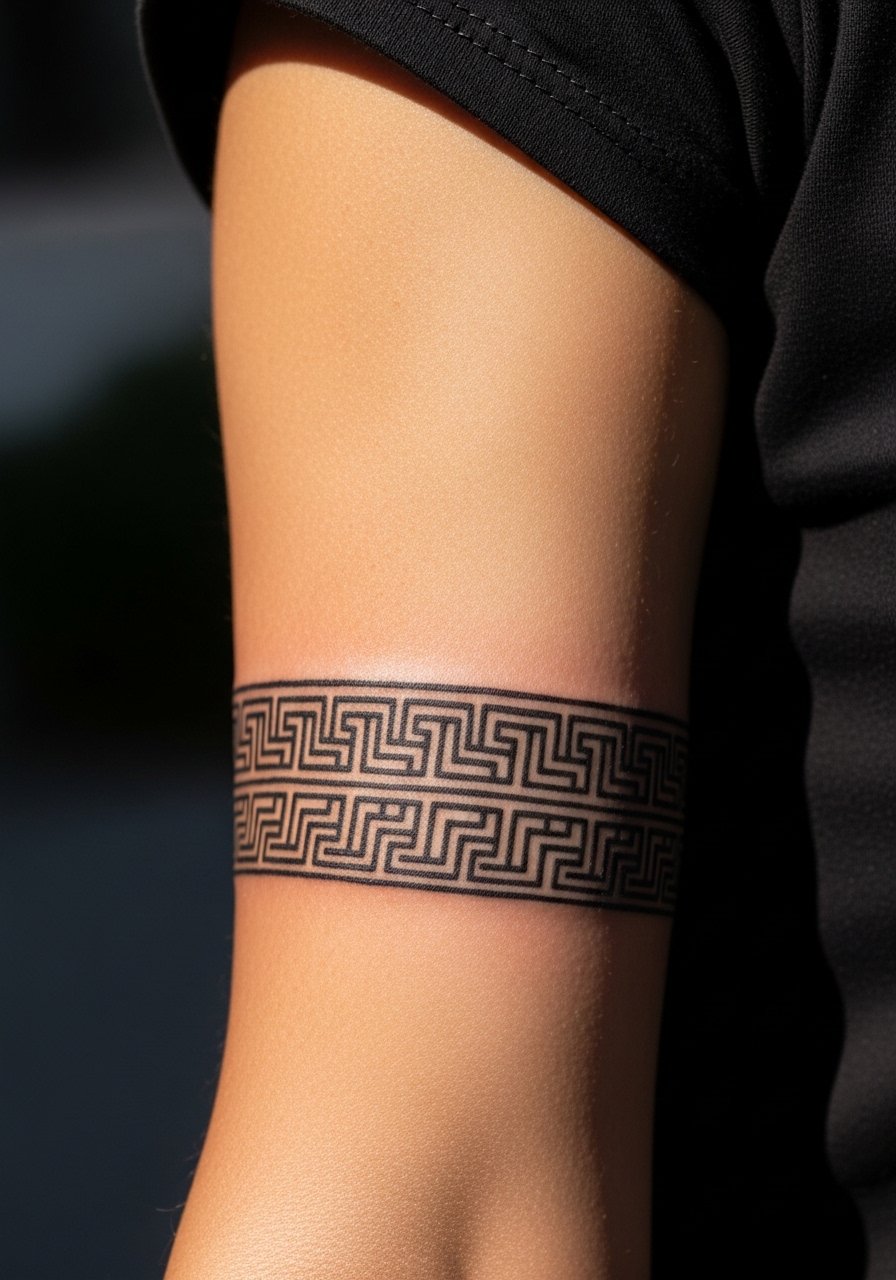
A repeating key pattern gives a classical feel while staying geometric. Ask for clearer spacing between repeating units to prevent the pattern from blending into a stripe. Pain is mild on the outer arm. Expect a one to two hour session depending on circumference. The common mistake is scaling the repeat too small for the limb. If the motifs are tight, the symmetry looks muddy after healing. Consider alternating it with negative-space bars rather than filling every unit.
9. Layered Double-Line Cuff

Two thin parallel bands linked by short verticals create a mechanical, measured look. Tell your artist you want equal spacing and sample guides so the lines stay parallel as the skin moves. The risk is slight blowout along vertical connectors if the artist goes too deep. Sessions are usually moderate in time. For attire, roll sleeves or wear a short-sleeve button shirt that stops just above the cuff to frame the double band.
10. Mandala-Edge Bracelet
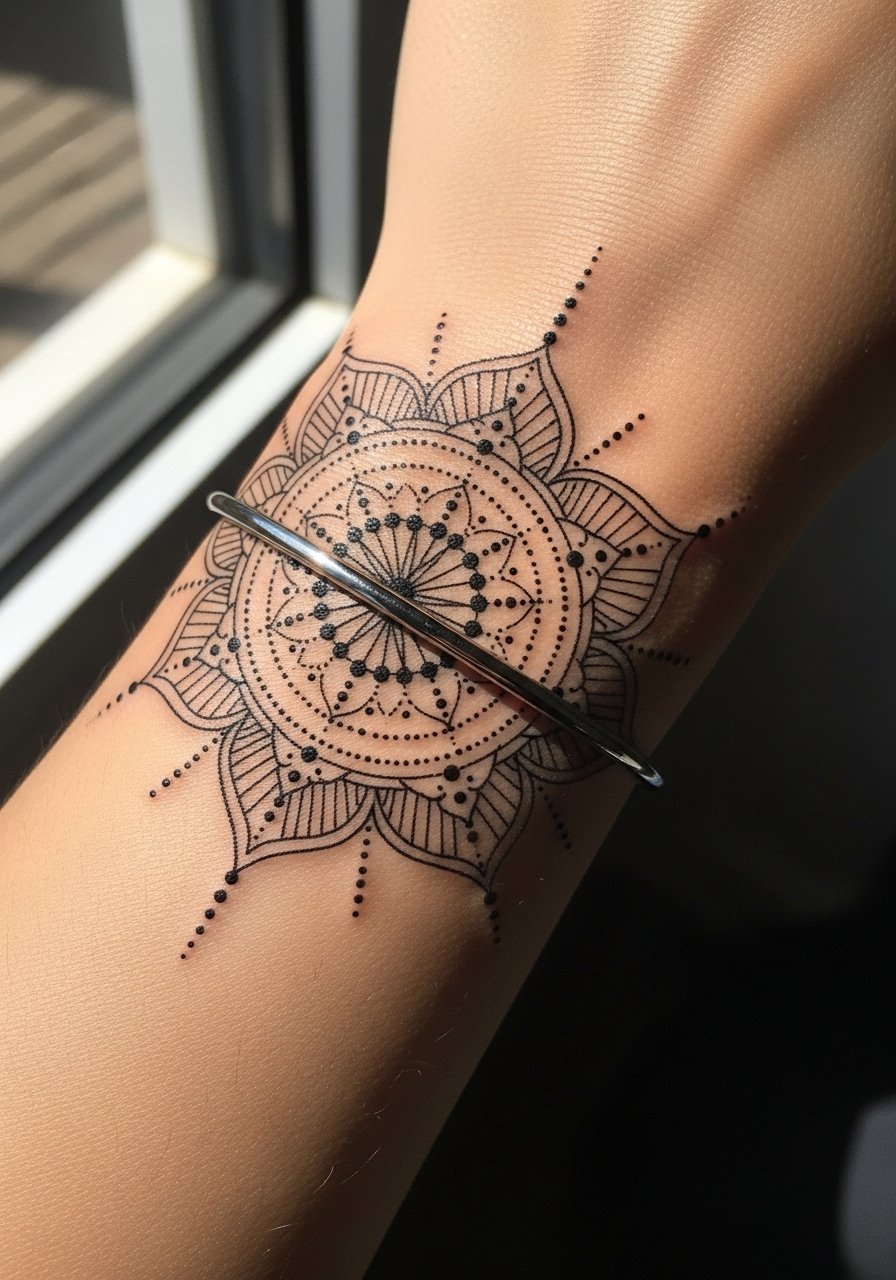
A mandala edge wraps botanical geometry into a cuff. Consult on how dense the center details should be. There is a debate in the community on mandala detail at small scale. One side says detailed mandalas should be large so the petals do not collapse. The other side argues careful spacing and dot work can preserve detail on wrists. If you want dense ornamentation, plan for a larger diameter or expect a touch-up two to three years in. This piece pairs well with a thin chain pendant when visible in layered accessory looks.
11. Braided Geometric Band
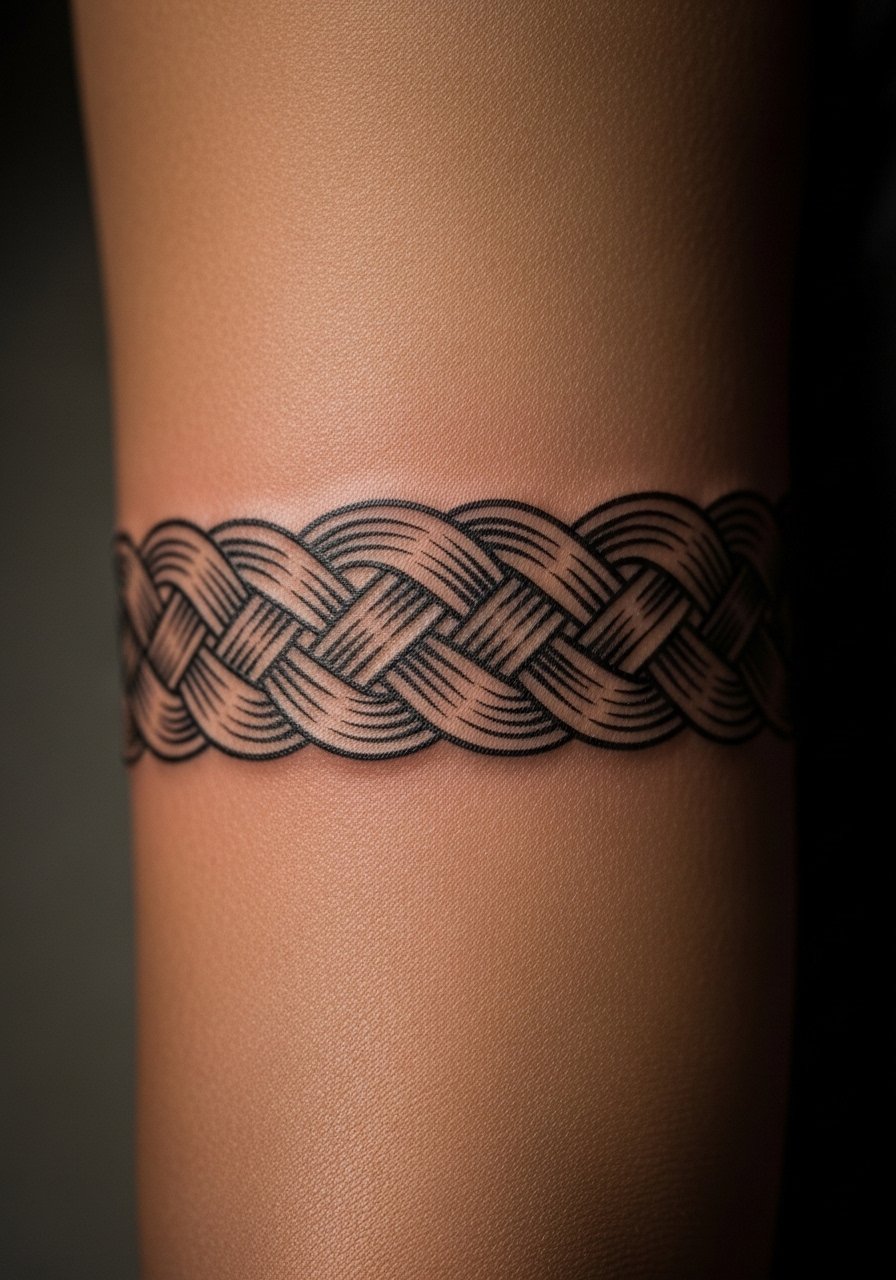
Braided geometry mimics woven bracelets but in ink. Ask your artist to show a full-wrap stencil and to mark high-tension points where the braid crosses tendons. A frequent error is under-spacing at crossings which creates early blurring. Sessions can be longer if the band is wide. This placement usually feels steady rather than sharp. For session wear, a loose tee with short sleeves gives access without fuss.
12. Micro-Realism Chain Band
Micro-realism chain bands try to read like metal on skin. Tell the artist you want subtle shadowing under links for a lifted look, but avoid heavy saturation that ages into a gray block. The common mistake is packing too much tiny shading in a confined band. Expect a two-hour session for crisp highlights and shadows. This one shows best with sleeves pushed up or with a minimalist watch strap that keeps the wrist visible.
13. Asymmetric Geo-Scatter Band
Scatter bands place geometric shapes irregularly so the band feels organic rather than forced. During consultation bring multiple references so the artist can understand your preferred randomness. A clear mistake is asking for random without scale guidance, which results in imbalance across the wrap. Session time varies with coverage. For subtle show-off styling, cuff sleeves or a rolled-up linen shirt sleeve keeps attention on the scattered elements.
14. Architectural Skyline Wrap
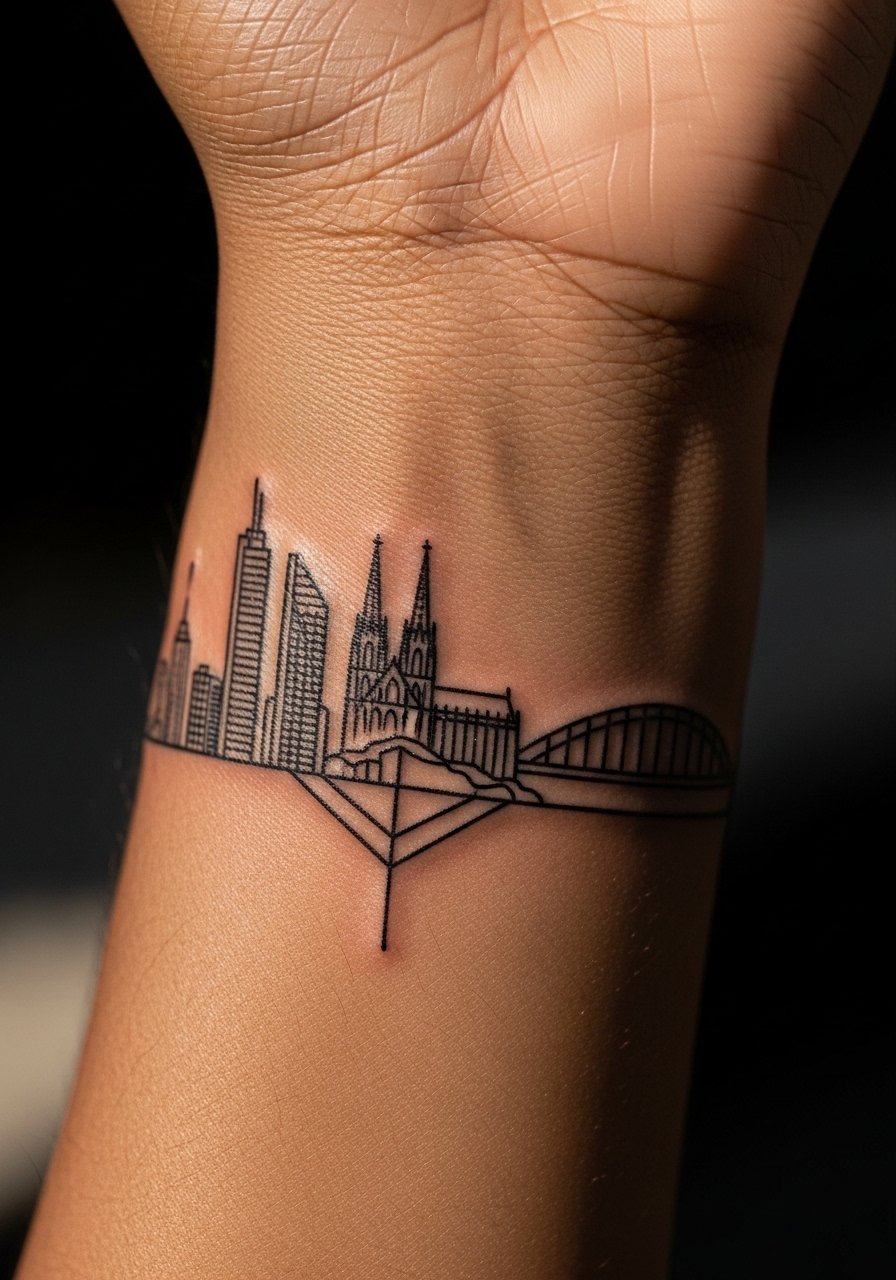
This band traces a miniature skyline in clean linework. Specify whether you want buildings to be abstract geometric shapes or identifiable silhouettes. The usual aging issue is when tiny peaks are too narrow and merge into a jagged blur. Make sure verticals have a minimum width so they stay distinct. This is low to moderate pain and a single session usually covers the wrap.
15. Morse-Code Dot Band
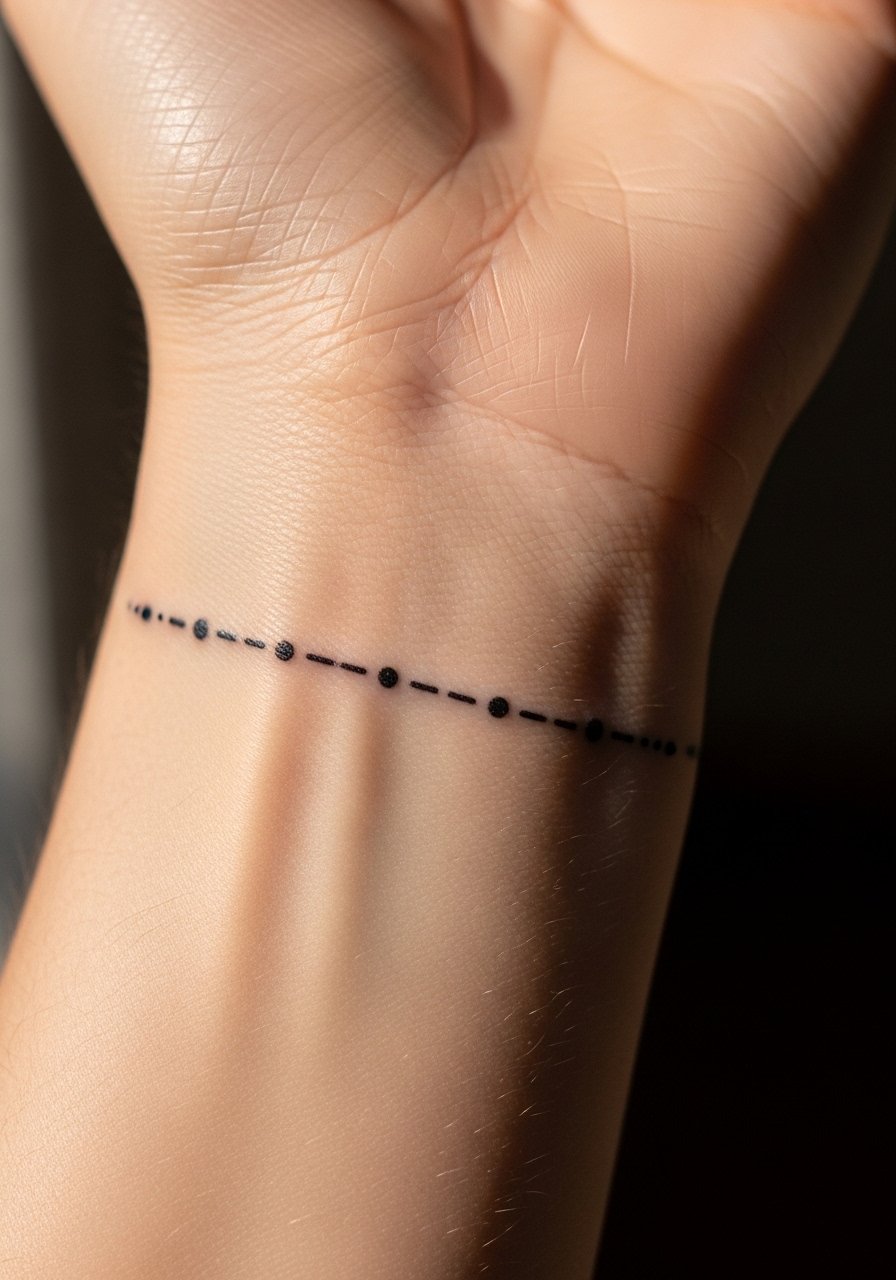
A Morse-code band converts a word or date into alternating dots and short bars. Provide the exact text you want inked to avoid ambiguity. The small dots need spacing to avoid becoming a gray line as they soften. Tell the artist you want slightly larger dots than the micro standard. This is quick to tattoo and ideal if you want meaning encoded. For a clean look, pair it with a minimal leather cuff on the opposite wrist.
16. Thin Compass Ring Band
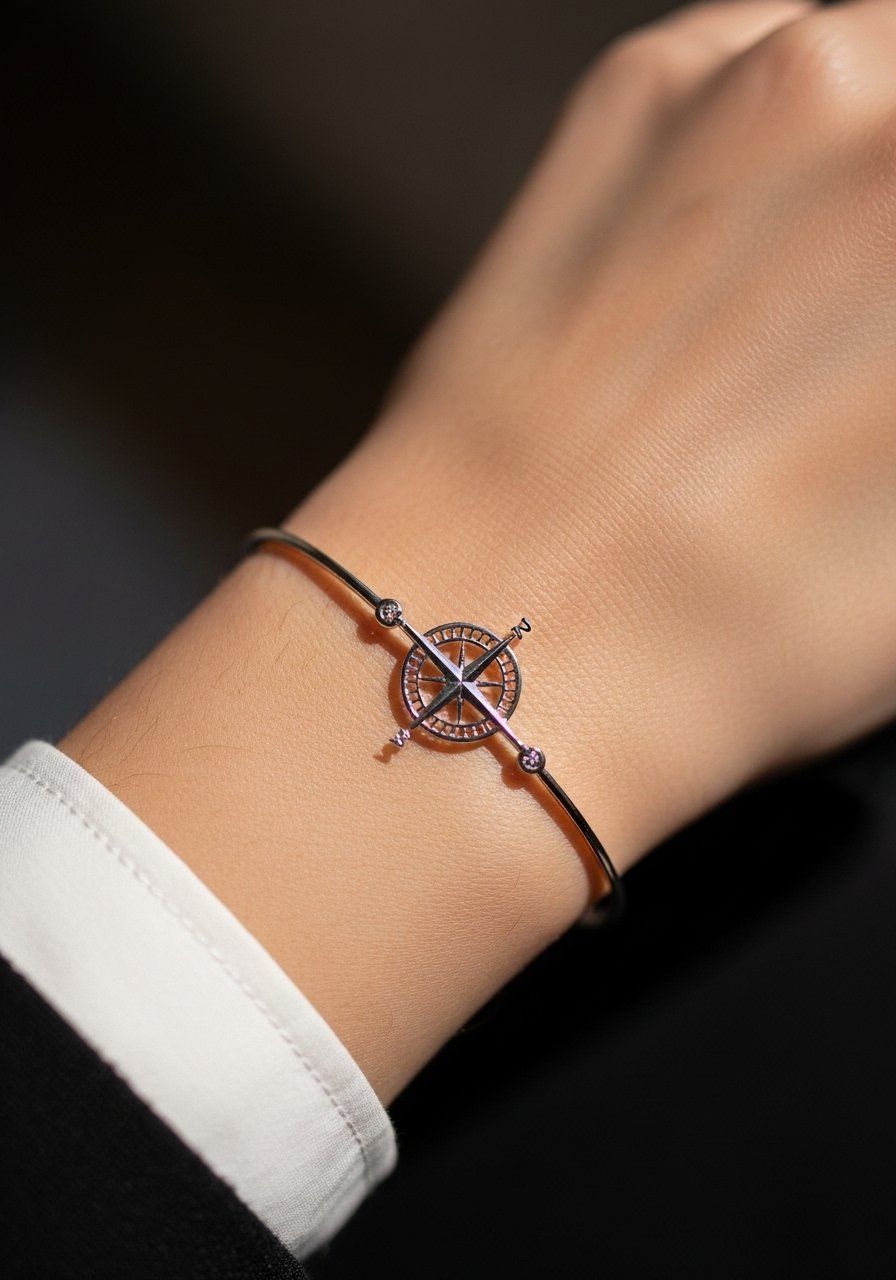
Compass elements give directional symbolism without heavy shading. Ask for the compass points to be slightly bolder so the orientation stays readable after a few years. Common mistake is centering ornate compass faces too small, which loses definition. This is a short session and the wrist's movement is the main consideration. If career visibility matters, think about placement slightly higher on the forearm to keep the outer wrist less visible.
17. Overlapping Polygon Sleeve Edge
This edge band sits at the meeting point between a bracelet and a partial sleeve. Tell your artist how far up the forearm you want the overlap so it integrates with future pieces if you plan to expand. A frequent error is making the edge too tight against other tattoos, which crowds negative space and accelerates blurring. Expect a longer session if you want clean raw edges that transition into other work. For session comfort, wear a long-sleeve button shirt you can roll easily.
Frequently Asked Questions
Q: How small can a geometric bracelet tattoo be before it starts to blur?
A: Size and spacing are the limiting factors. For most bracelet bands on wrists and forearms you want each repeat to be wide enough to survive two to three years of movement and washing. If the pattern has dots or tiny connectors, ask the artist to show a life-sized stencil. Expect touch-ups earlier when repeats fall under about three to four millimeters in visible width.
Q: Will a wrist bracelet interfere with my watch or wedding band?
A: It can if the tattoo sits directly under or under a strap. Plan placement slightly above or below hardware lines so the design avoids constant pressure and rubbing. If you need gear-friendly positioning, bring your watch to the consultation so the artist can mark a band that lives with your accessories.
Q: Do geometric bracelet tattoos hurt more than solid bands?
A: Pain varies with placement and density. Thin line bracelets usually sting less than dense black bands because the needle passes are lighter. Around the wrist and near tendons you will feel more sensitivity. Numbing creams are an option for low to moderate discomfort if your artist allows them.
Q: How often will I need touch-ups on a fine-line geometric cuff?
A: Expect a touch-up within two to five years for fine-line pieces on high-movement zones like the wrist. Thicker outlines and more negative space push that timeline further out. The artist should note whether they plan a complimentary one-time touch-up and what their typical timelines look like.
Q: Where should I look to find an artist who specializes in clean geometric wraps?
A: Search local directories, tattoo convention lineups, and community forums like geometry-focused threads on Reddit to see full healed photos. Many artists post healed images in portfolio sections. Ask about healed photos specifically so you can assess how their linework ages rather than just how it looks fresh.
