
Fine line arm cuffs are one of those trends that look effortless on a handscroll, but the reality is more complicated. Fine work blurs faster in high-friction zones, placement changes how visible a cuff reads, and some arm areas are more painful to tattoo than they look. If you want a cuff that still reads clean after a few years, the choices below pair design, placement, and wardrobe so you get a look that ages the way you want.
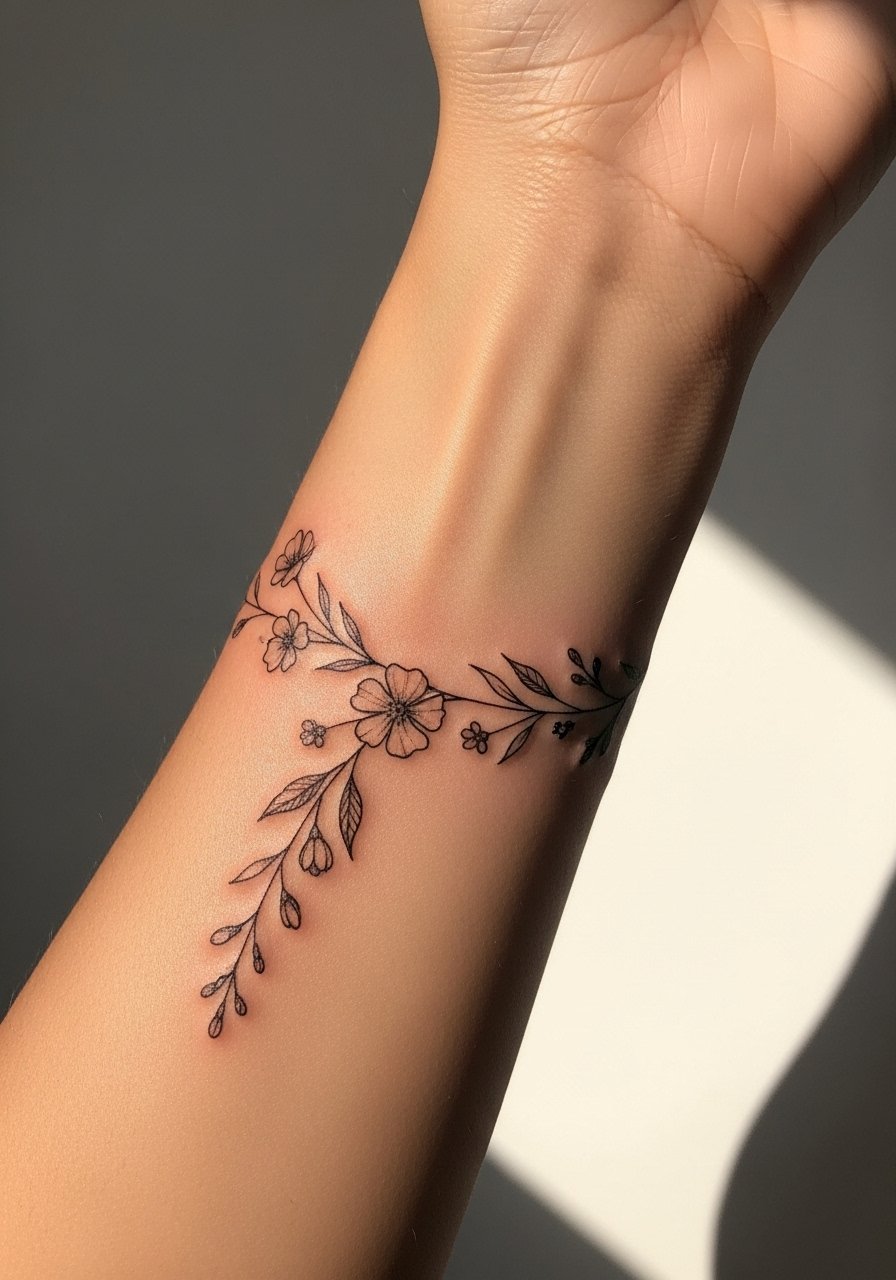
1. Delicate Vine Cuff on Inner Forearm
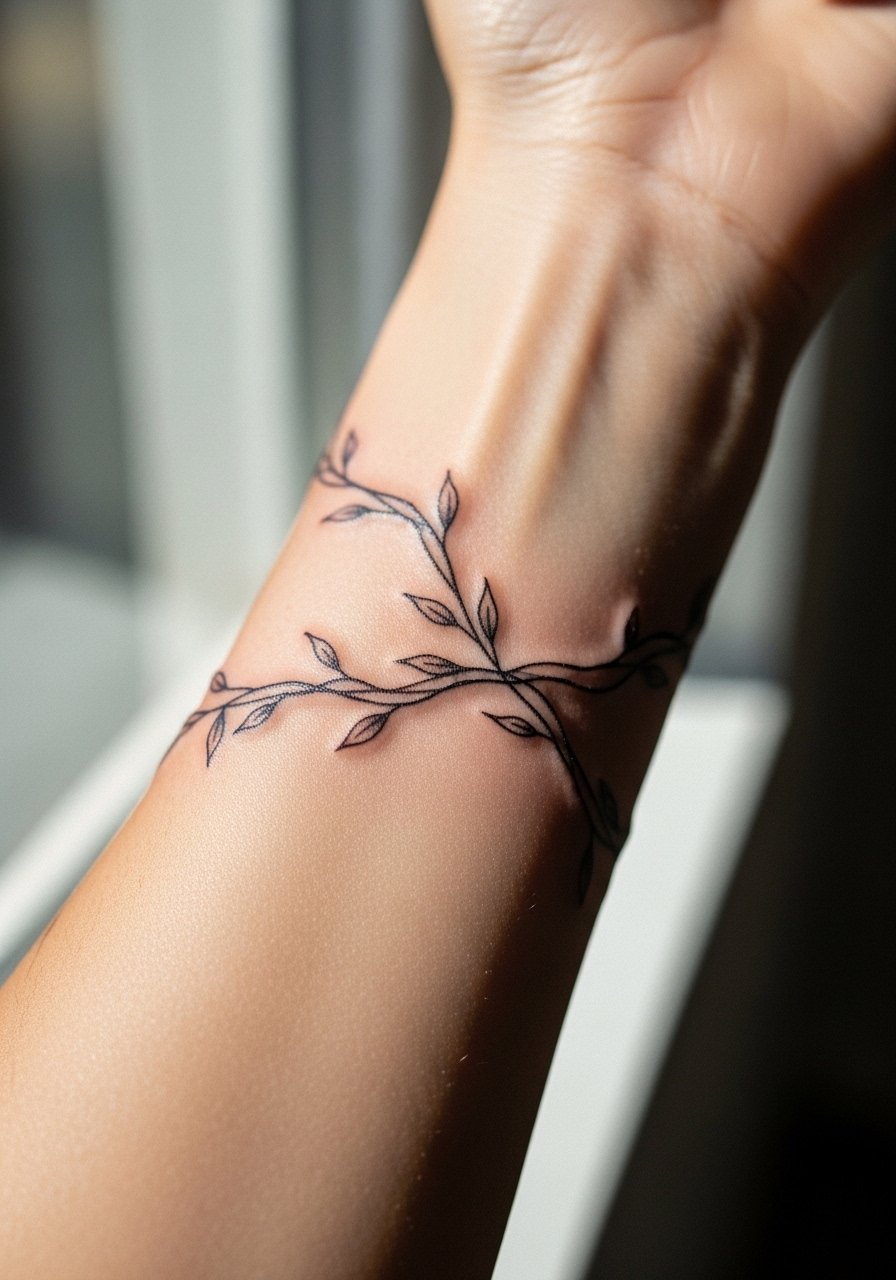
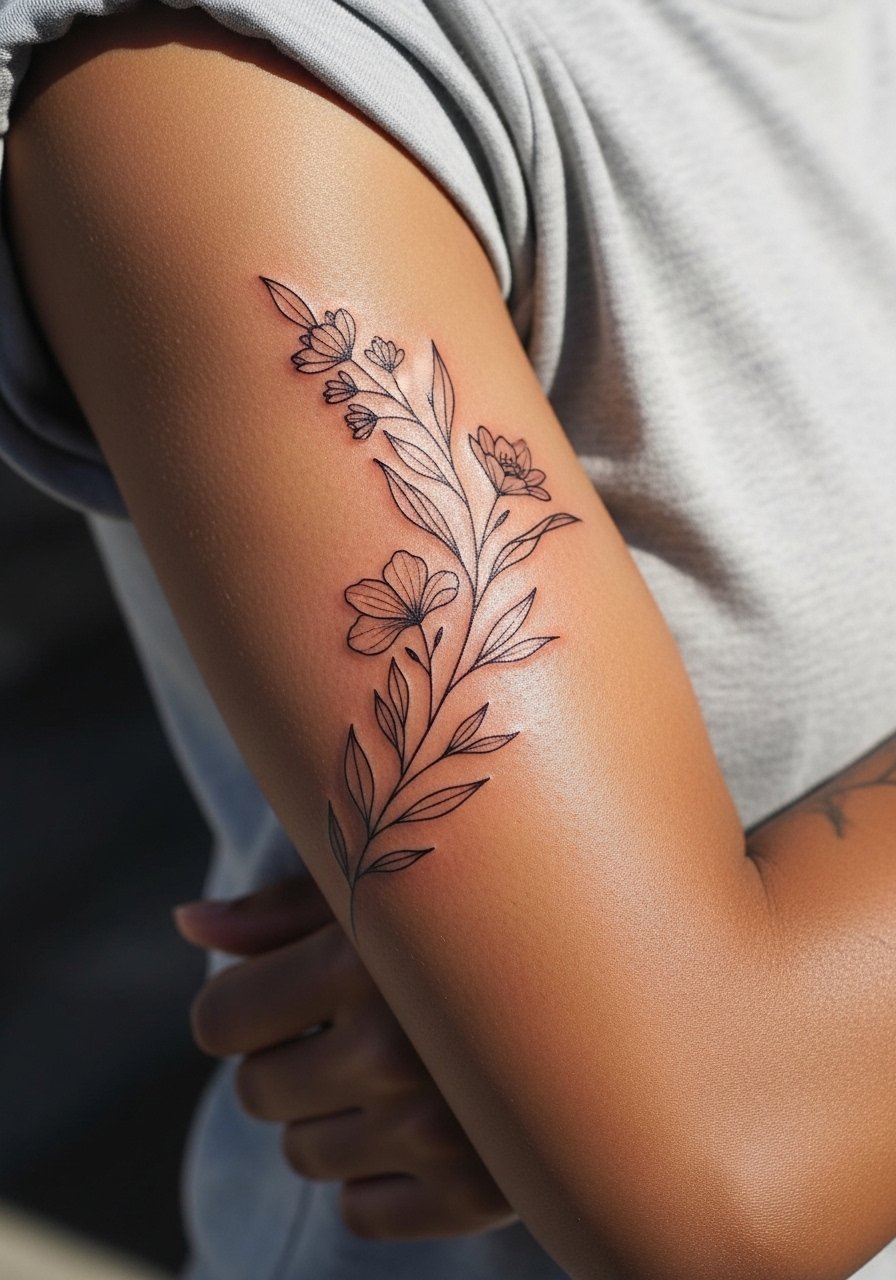
I recommend the inner forearm when you want a cuff that can be seen easily and is low risk for blowout. Tell your artist you want slightly staggered spacing between leaves so the negative space survives aging. Expect a mild pain level here and a single-session piece of under an hour. A common mistake is asking for ultra-fine leaves stacked tightly, which merges after a couple of years. For the session wear something that gives full access, like a loose button-down shirt you can pull aside without stretching the skin.
2. Minimal Geometric Band Around the Forearm
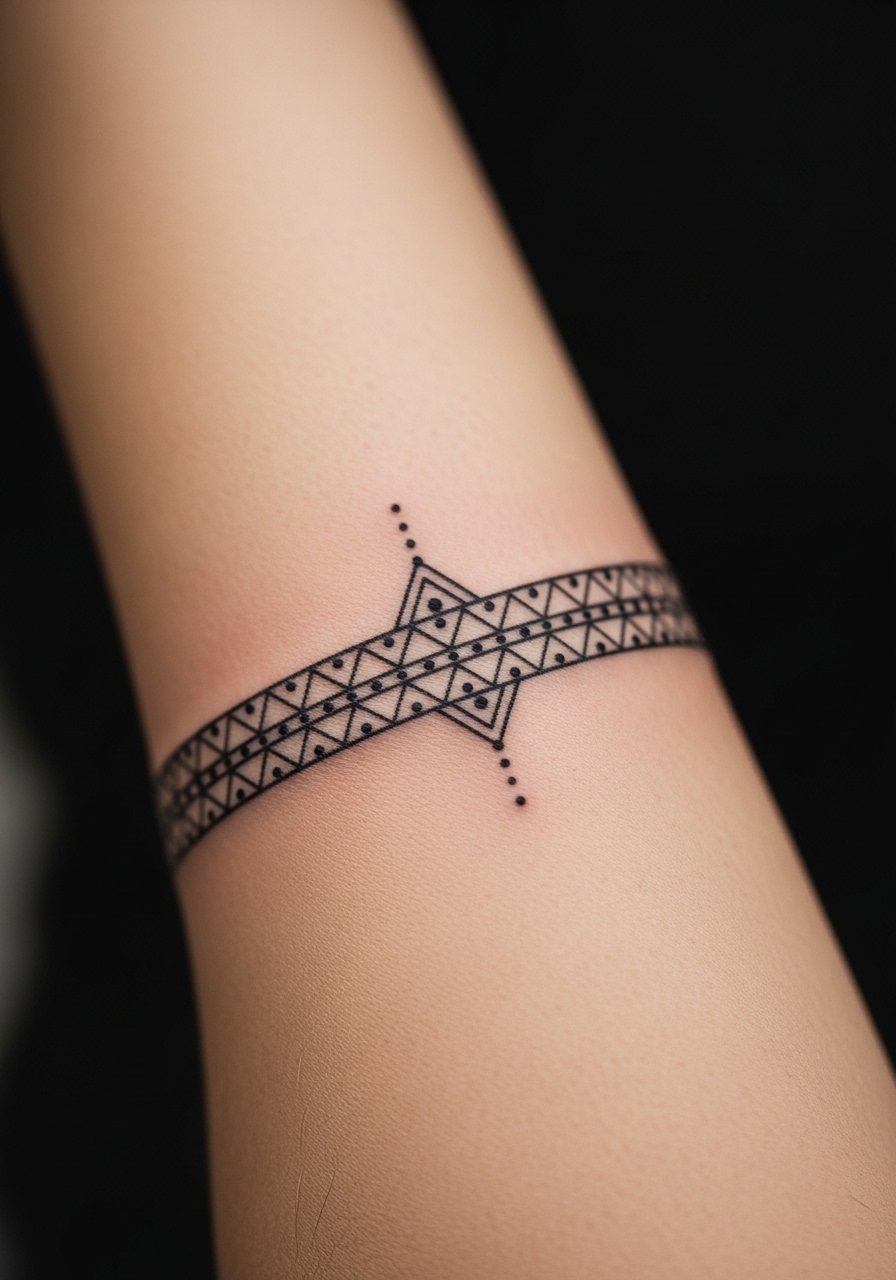
Geometric arm cuffs read very modern when lines stay crisp. The biggest mistake is making the shapes too small or too close. Ask for breathing room between elements and a slightly heavier line weight than your instinct tells you. Pain is a 3 to 4 out of 10 on the forearm and the session usually runs 45 to 75 minutes. Over time dense geometry can look muddled, so plan for spacing that ages. Pair this cuff with rolled sleeves for showing off the pattern and a simple thin chain bracelet to frame the design.
3. Single-Needle Script Wrap
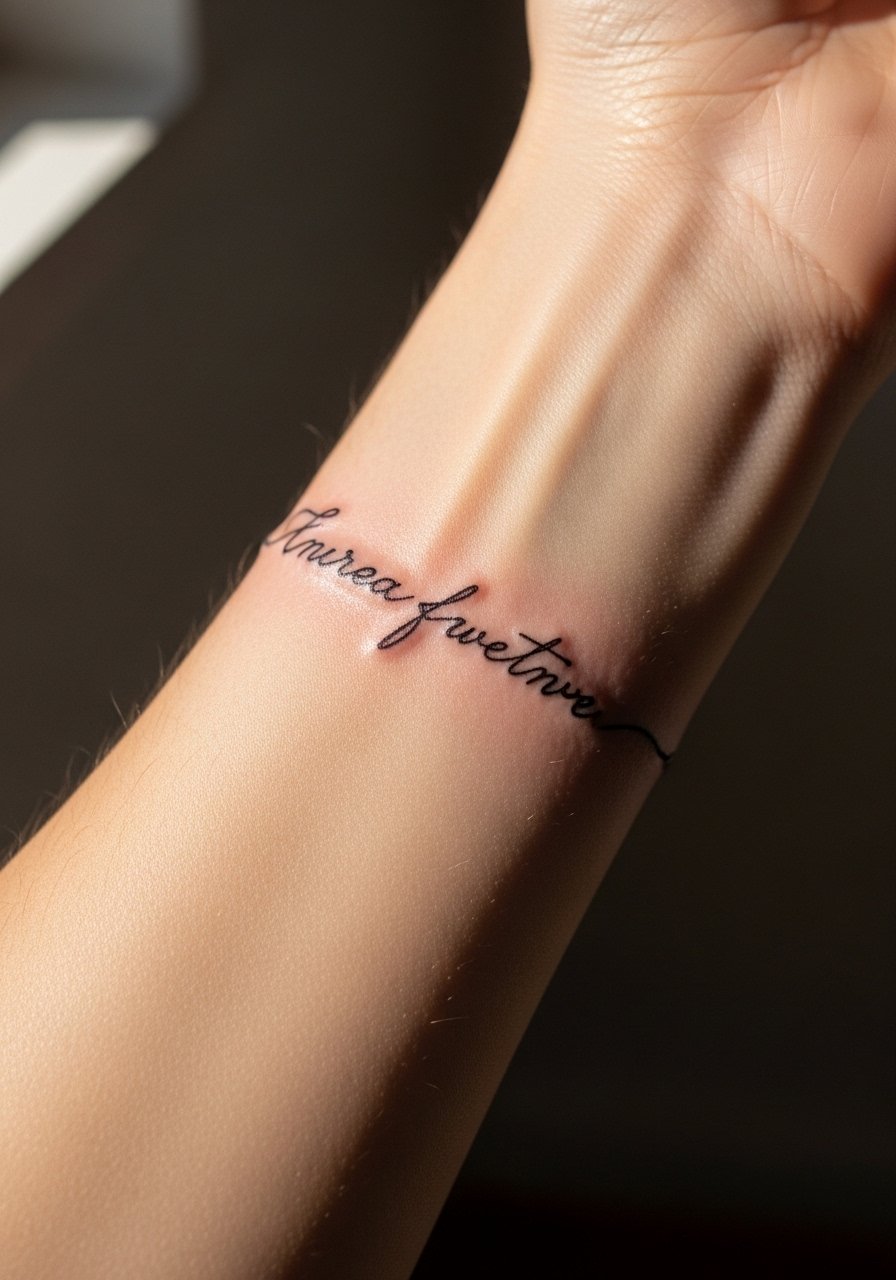
A script cuff reads personal, but tiny letters are the first to soften. Tell your artist the exact phrase and preferred spacing so they can scale letters for longevity. Expect a sharper sensation near the inner arm but nothing extreme. Sessions can be short if the phrase is concise. The common error is requesting micro-lettering without considering arm curvature, which makes letters tilt when the arm moves. For showing it off, a slim leather cuff bracelet sits alongside the script without crowding the ink.
4. Dot Work Halos Around the Wrist
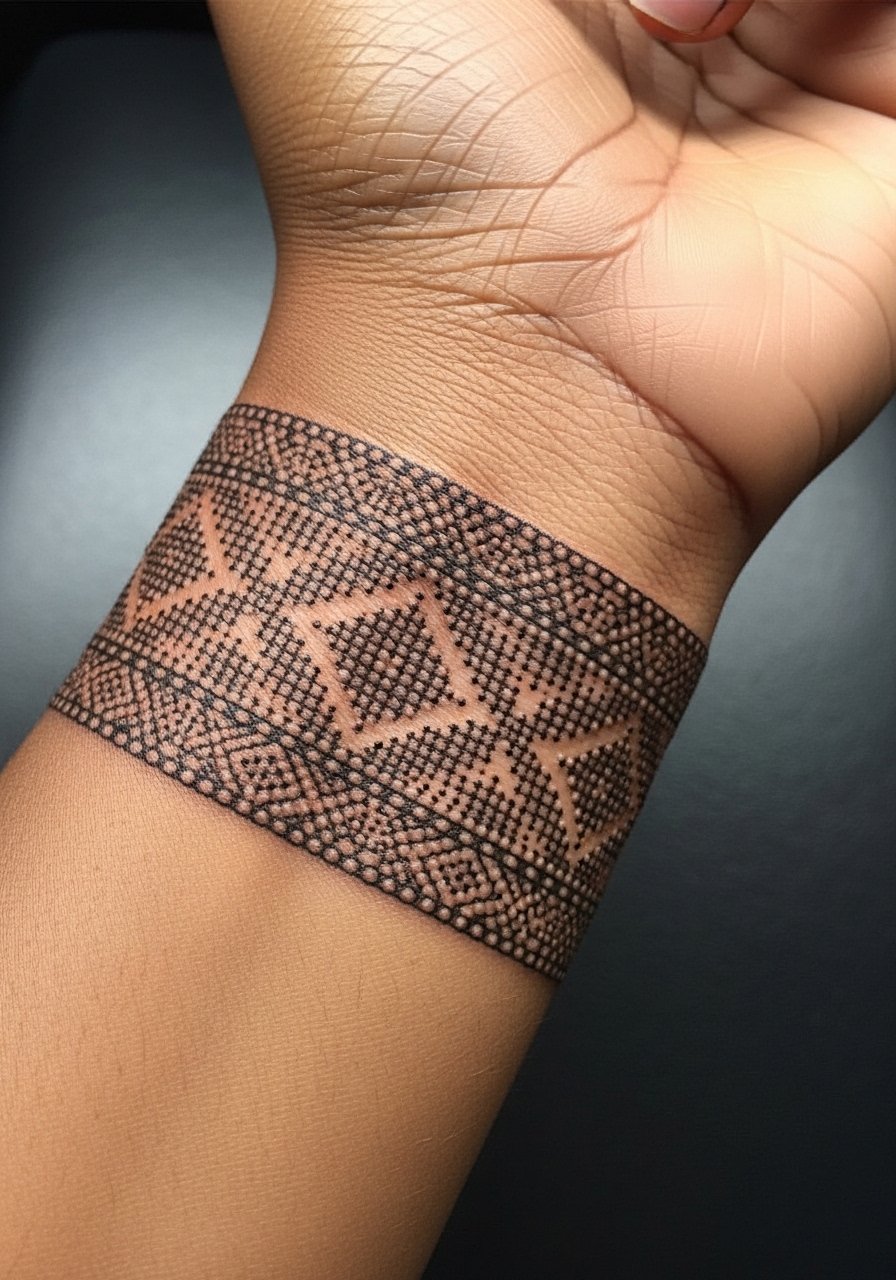
Dot work cuff pieces rely on negative space to read well over time. When the stippling is too dense, dots can fill in and age into a wash. Ask your artist for graduated dot density, lighter near the edges. The wrist is higher on the sensitivity scale and sessions feel sharper because of thin skin and bone. Expect a small touch-up at year two for dense areas. For the session wear a racerback tank top so you can roll sleeves freely and the artist has clear access.
5. Botanical Wrap with Tiny Blooms
Tiny floral cuffs look delicate, but small petals placed too close will blend. Tell the artist you want petals separated by thin stems and a few open gaps for longevity. Pain is moderate on the forearm and sessions run about an hour to ninety minutes depending on complexity. The usual mistake is over-detailing petals for a piece that sits on a curved surface. For showing this off, a rolled-up linen shirt in neutral tones keeps attention on the cuff without clashing.
6. Celestial Chain of Stars and Moon
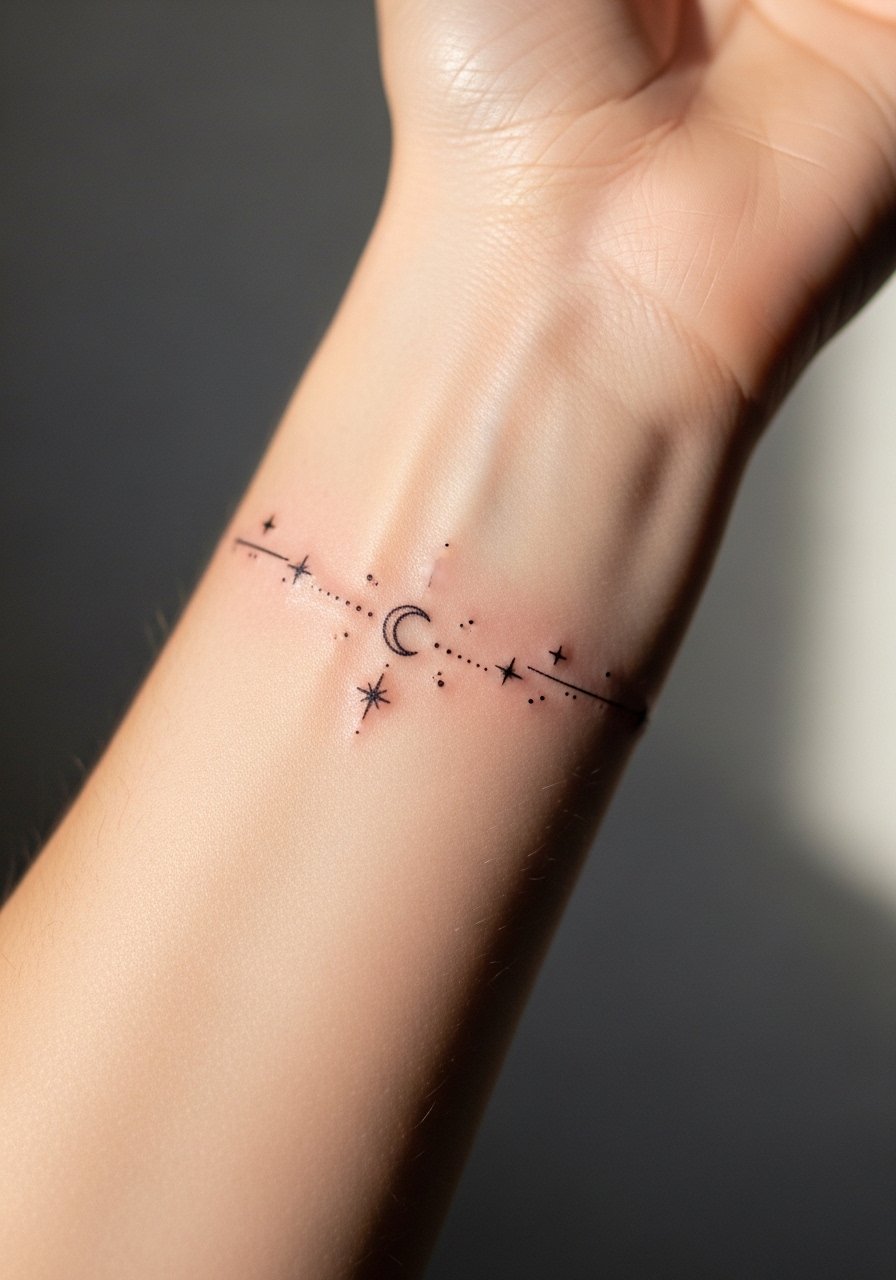
A constellation-style cuff uses small symbols spaced like a bracelet. The risk is making the elements so small they lose definition. Ask for slightly thicker primary points and thinner connecting dots. Pain is low on most parts of the arm and this can be done in one short session. People often request mirror-symmetric spacing, which reads overly mechanical when the arm moves. Pair this cuff with a thin chain pendant necklace for a delicate layered look that complements the wrist area.
Studio Day Picks
These first arm cuff ideas include wrist and inner forearm placements that need different prep than upper-arm pieces, so a few targeted items smooth the session and early healing.
-
Stencil transfer paper kit. Lets you and the artist preview exact placement for wraparound cuffs, which is vital for symmetric chain and script designs.
-
Topical numbing cream. Applied before a wrist or inner-arm session it eases sensitivity without changing how the lines lay.
-
Thin protective film roll. Useful for wrist cuffs that face constant washing and friction during the first week.
-
Fragrance-free gentle body wash. Keeps the tattooed area clean without stripping oils that help fine line retention.
-
Aquaphor Healing Ointment. A thin layer in the first days helps retain moisture for fine channels without clogging them.
7. Lace-Inspired Cuff on Outer Upper Arm

Upper-arm cuffs let you go more ornate without as much blowout risk. Lace patterns work well here because the skin is thicker and less exposed. Tell your artist you want intentional breaks in the pattern to preserve negative space. Pain is lower than inner-arm placements and the session can extend to two hours for complex lace. The common mistake is packing too many tiny filigree lines. For showing it off, wear an open-back midi dress or sleeveless tops that reveal the upper arm with minimal fuss.
8. Single-Line Continuous Wrap
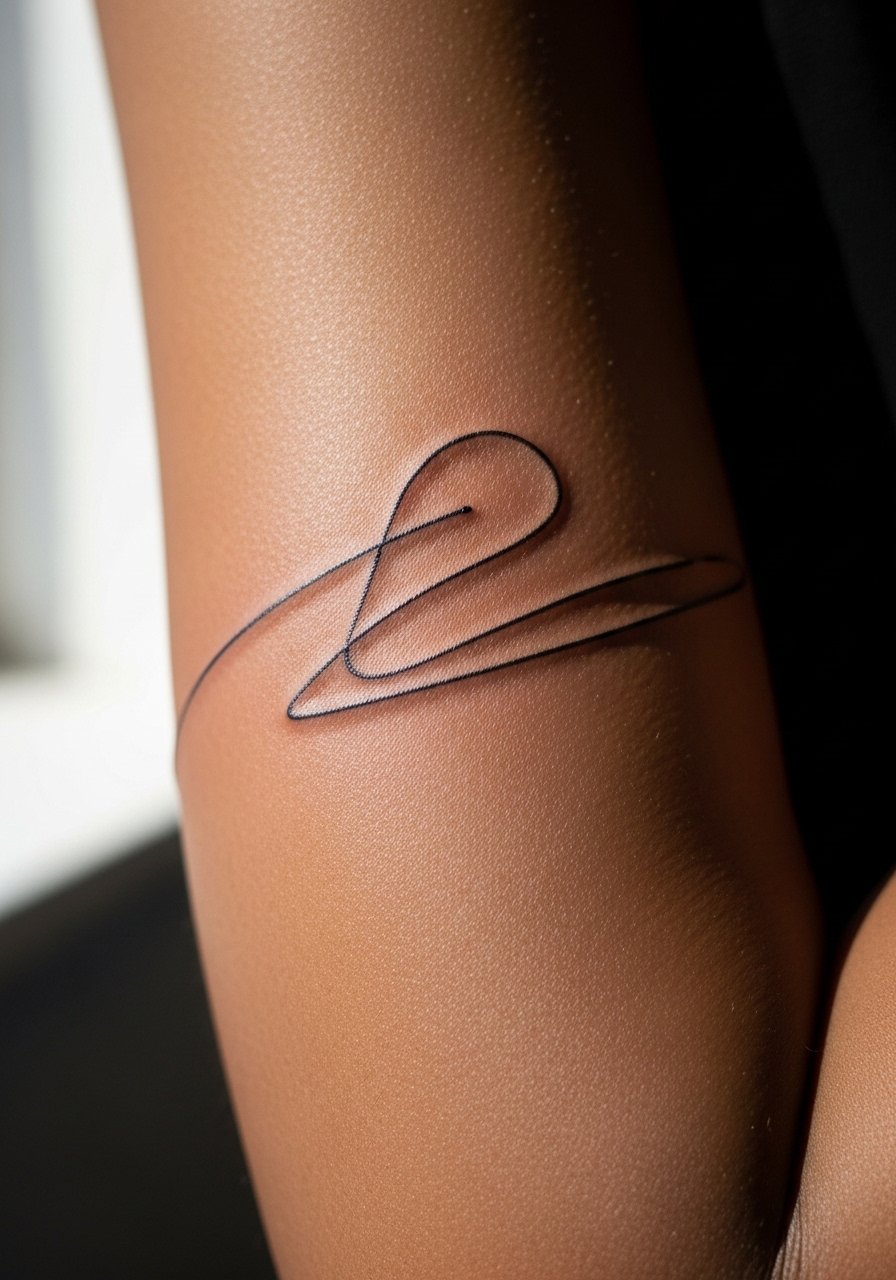
A continuous single-line cuff depends on steady linework. The key instruction is steady line weight and a single session to avoid visible joins. Pain on the bicep is mild and most people sit through it easily. A common error is asking for an ultra-thin single pass that looks perfect fresh but fades into breaks. For durability, ask for a slightly firmer line with a clean exit point. This placement pairs well with rolled sleeves and a minimalist watch that keeps the visual field uncluttered.
9. Tiny Botanicals Encircling the Elbow Crease

Elbow-adjacent cuffs are tricky because skin stretches and bends. If you want elements close to the crease, keep them simple and avoid dense detail directly over the fold. Pain spikes around the elbow and the session feels prickly compared with the forearm. Many people make the mistake of packing elements into the fold where movement will blur them. For the appointment, wear a loose button-down shirt you can slide up without tugging the skin.
10. Micro-Realism Feather Band

Feather cuffs look airy, but micro-realism is detail-heavy and may soften. Ask for simplified vane lines and avoid ultra-fine barbs packed tightly. The forearm tolerates this well and sessions usually last around an hour. A frequent mistake is asking for photoreal detail at a scale too small for the area. Over five years, dense textures can muddle, so plan spacing. For showing off, a rolled-up linen shirt or short sleeves work best.
11. Celtic Knot Thin Band

Celtic knots can sit as a continuous band around the arm, but their interlocking parts need breathing room. Ask the artist to scale each knot larger than you expect so the crossings do not merge. Biceps are forgiving on blowouts and pain is low. The mistake is copying a tiny knot from a digital image without scaling for skin. This piece shows well with rolled sleeves or a loose tank top worn under a jacket for a balanced aesthetic.
12. Botanical Negative-Space Band for Upper Arm

Negative-space cuffs rely on skin contrast as much as linework. On the upper arm this approach fares better because the skin holds detail. Be explicit that you want deliberate negative pockets rather than micro-dot filler. Pain is manageable and sessions vary with complexity. The common error is underestimating how light skin tones affect negative-space legibility. For evenings out, pair with a sleeveless top that frames the negative shapes.
13. Thin Chain-Link Cuff

Chain-link cuffs mimic jewelry and translate well to the forearm. The most frequent ask is for perfect symmetry, which can look rigid when the arm moves. Tell the artist to leave tiny variations for a natural wrap look. Pain and session time are low for this placement. A common mistake is requesting micro links that blur under daily friction. Style it with a real chain bracelet or a thin leather wrist wrap that echoes the cuff without overcrowding.
14. Wave Line Cuff for Tricep Area

Tricep placements let you go wider without sacrificing clarity. Wave patterns benefit from slight spacing between peaks and troughs so the movement of the arm does not blend them. Expect lower pain on the tricep and a session under two hours. A mistake is wrapping dense wavelets too tightly near the arm fold. For the session wear a loose tank top so the artist can ask you to raise or lower your arm without fuss.
15. Fine Line Mandala Cuff Around the Upper Arm

Mandala bands look intricate but are prone to softening when elements are too tight. On the upper arm, ask for bigger petals and deliberate spacing between concentric circles. Pain is lower near the shoulder and sessions can stretch into multiple short appointments if you want symmetry. Artists split on mandalas that wrap completely. One camp says close wraps smear over time, the other says precise spacing with a steady needle keeps them crisp. Ask the artist which approach they use before booking. For evenings wear, an open shoulder top displays the piece without distraction.
16. Minimal Bar Cuff with Tiny Accent Dots
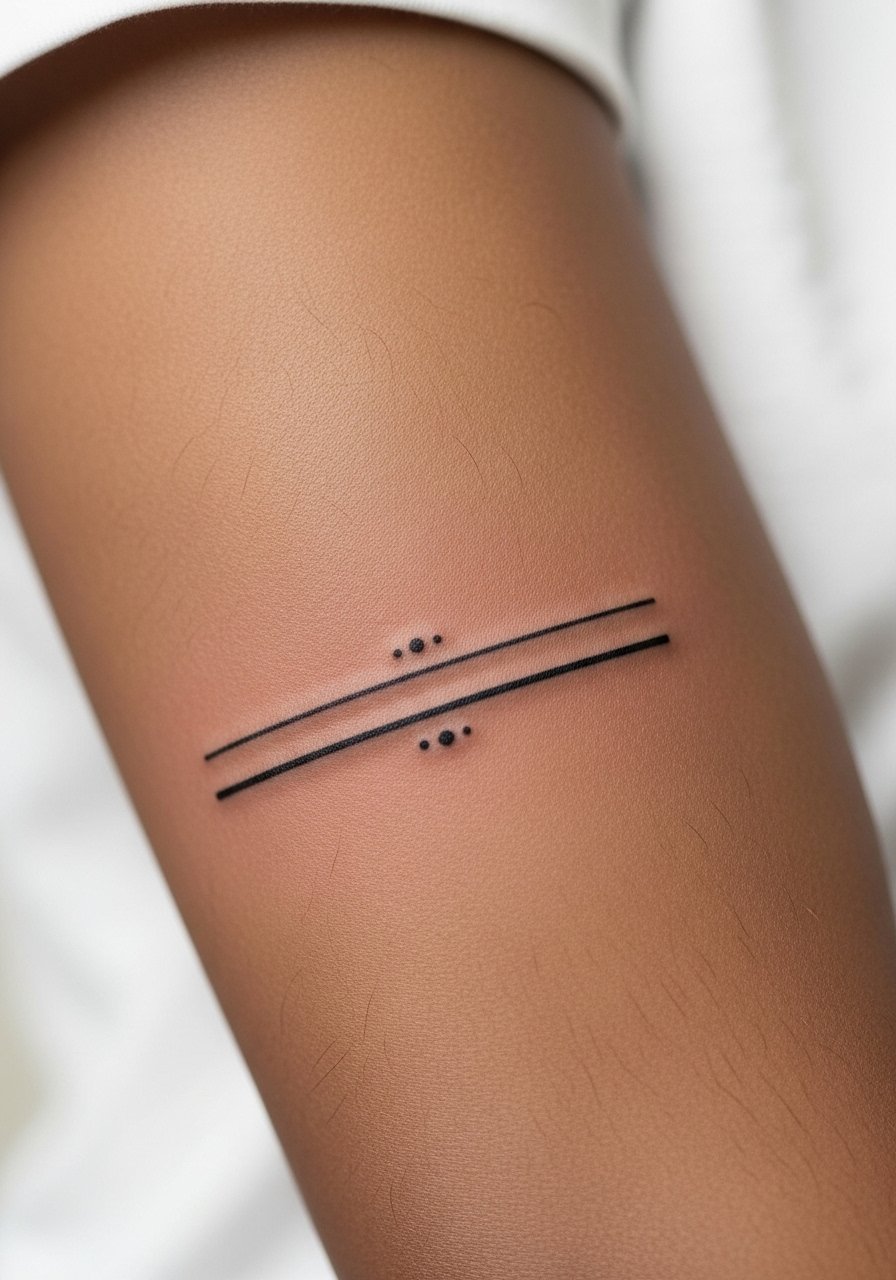
Single-bar cuffs read modern and minimal. The main question is line weight. Too thin and you lose continuity, too thick and it reads heavy. Tell your artist you want a single pass with micro accents spaced for longevity. Pain is low and session time is short. A common error is asking for shaved, hairline bars that disappear after a year. Pair this with a slim watch or stack of bracelets to keep the wrist area balanced and a simple minimalist watch works well.
17. Floral Vine That Tucks Near the Inner Bicep
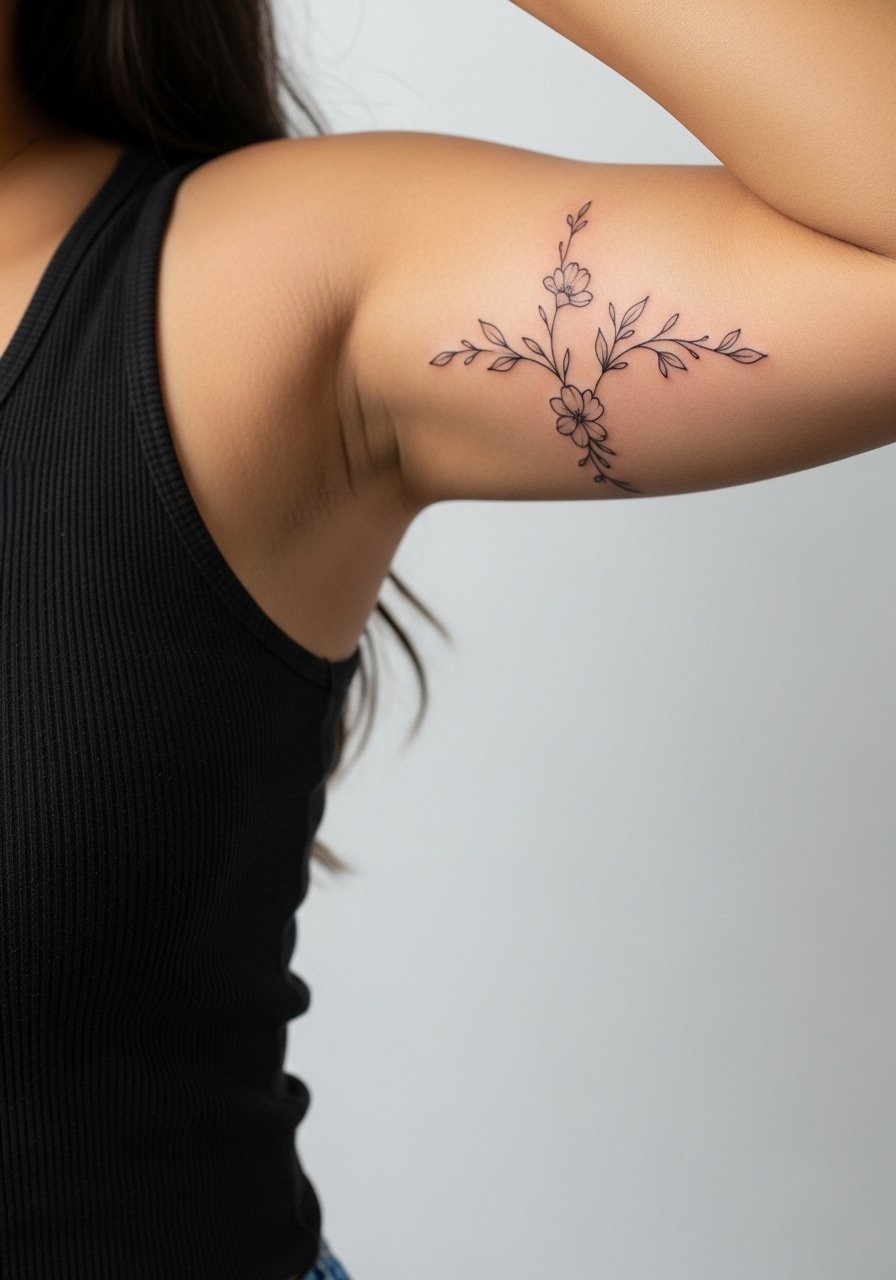
Inner bicep cuff work looks intimate but faces higher movement and moisture from sweat. Artists are split on fine line here. One camp argues the thin skin and stretching blur fine work quickly. The other camp says correct needle depth and spacing let fine line settle just fine. Ask your artist which side they are on and what touch-up schedule they recommend. Pain is more intense on the inner bicep and sessions feel sharper. For the appointment wear a loose tank top you can lift without straining the area.
18. Tiny Arrowband with Directional Lines
Arrow bands are graphic and symbolic. The trick is keeping arrowheads large enough to remain distinct. Ask for slightly broadened tips and a clear negative gap between arrows. Pain on the forearm is mild and the session is quick. A mistake is stacking tiny arrows tightly which causes the shapes to blur. For a layered look, wear a thin leather bracelet or a slim leather cuff that plays off the directional feel.
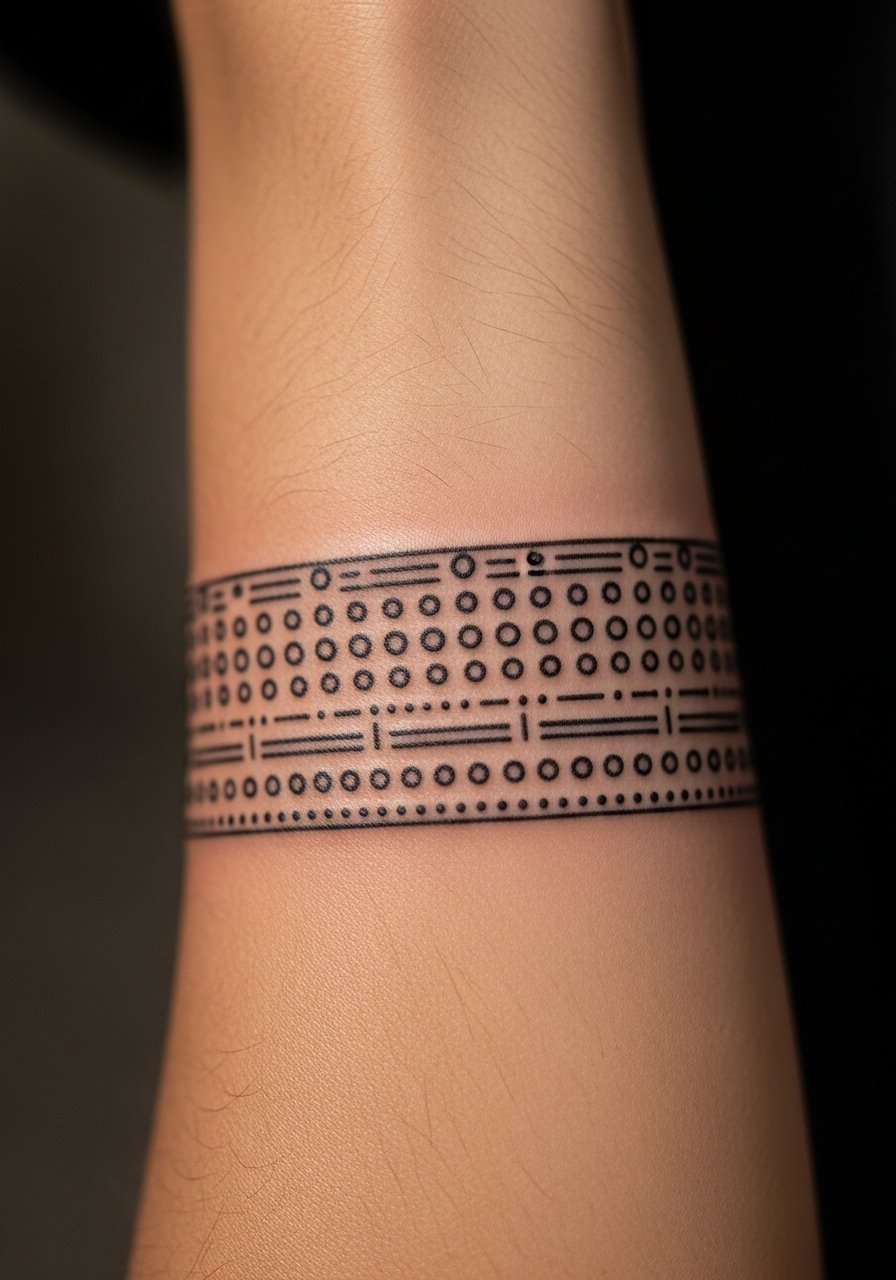
19. Morse Code Wrist Cuff

Morse code bands are personal and compact. Legibility depends on consistent spacing and dash length. Tell your artist to set exact intervals and mark the links on site before inking. The wrist is sensitive and sessions feel sharper than the outer forearm. A common error is asking for micro lengths that merge into a blob. Pair this cuff with a minimalist bracelet or a thin chain bracelet to echo the rhythm.
20. Botanical and Script Combo Band

Combining script and botanical elements makes for a storytelling cuff. The main consultation point is hierarchy so the text stays readable among leaves. Ask your artist to prioritize letter spacing and place leaves as accents not fillers. Pain is moderate on the forearm and sessions can take longer due to layout. A mistake is letting foliage crowd letters. For showing off, choose a rolled sleeve linen shirt that keeps attention on both text and motif.
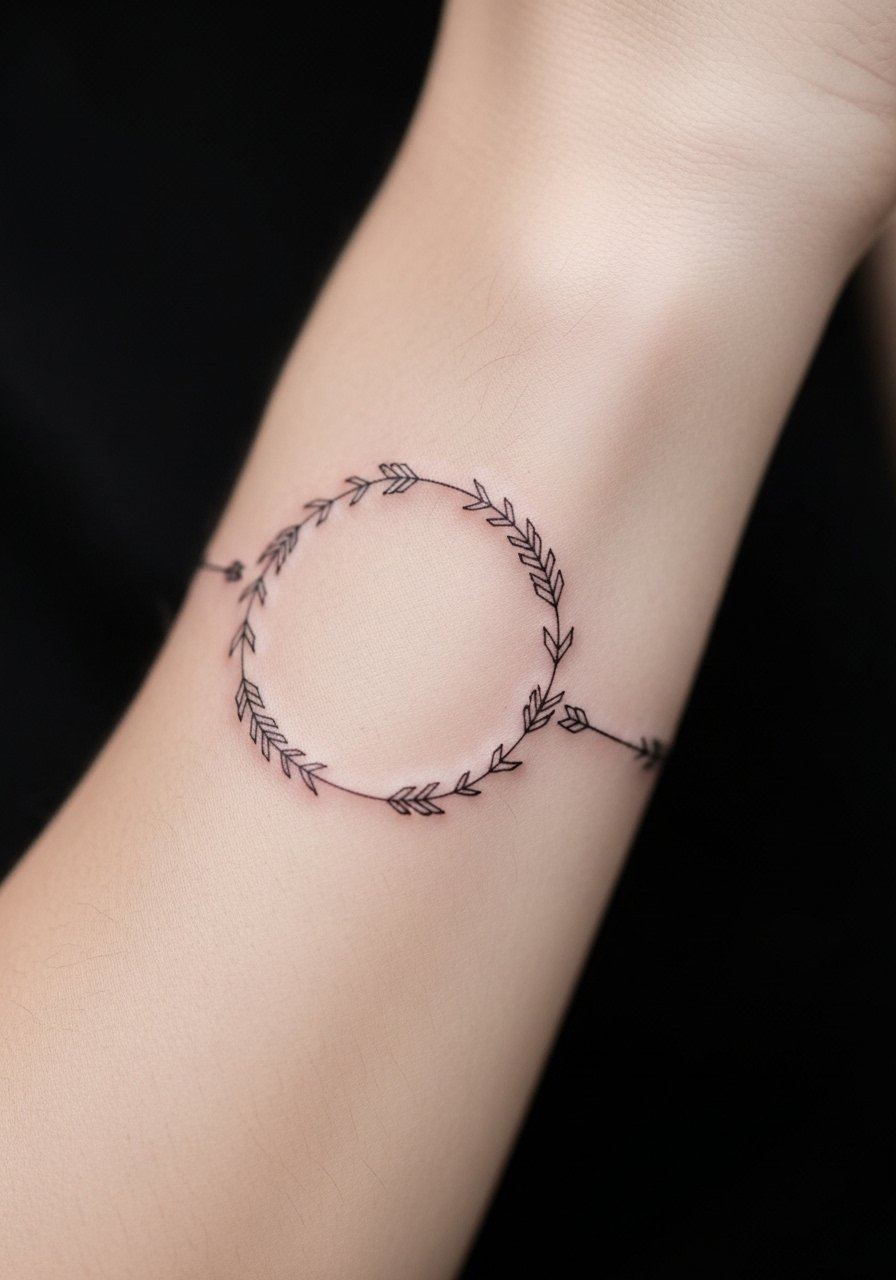
21. Thin Arrow-Feather Wrap Near the Wrist

A hybrid feather-arrow cuff needs clear definition between feather barbs and arrow shaft. Ask for simplified feather strokes and a strong shaft to prevent confusion. The wrist feels sharp and sessions are brief. The usual mistake is over-texturing the feather which softens into blur. Style with small rings and a simple thin chain bracelet so the area reads layered not crowded.
22. Fine Line Tribal-Inspired Band
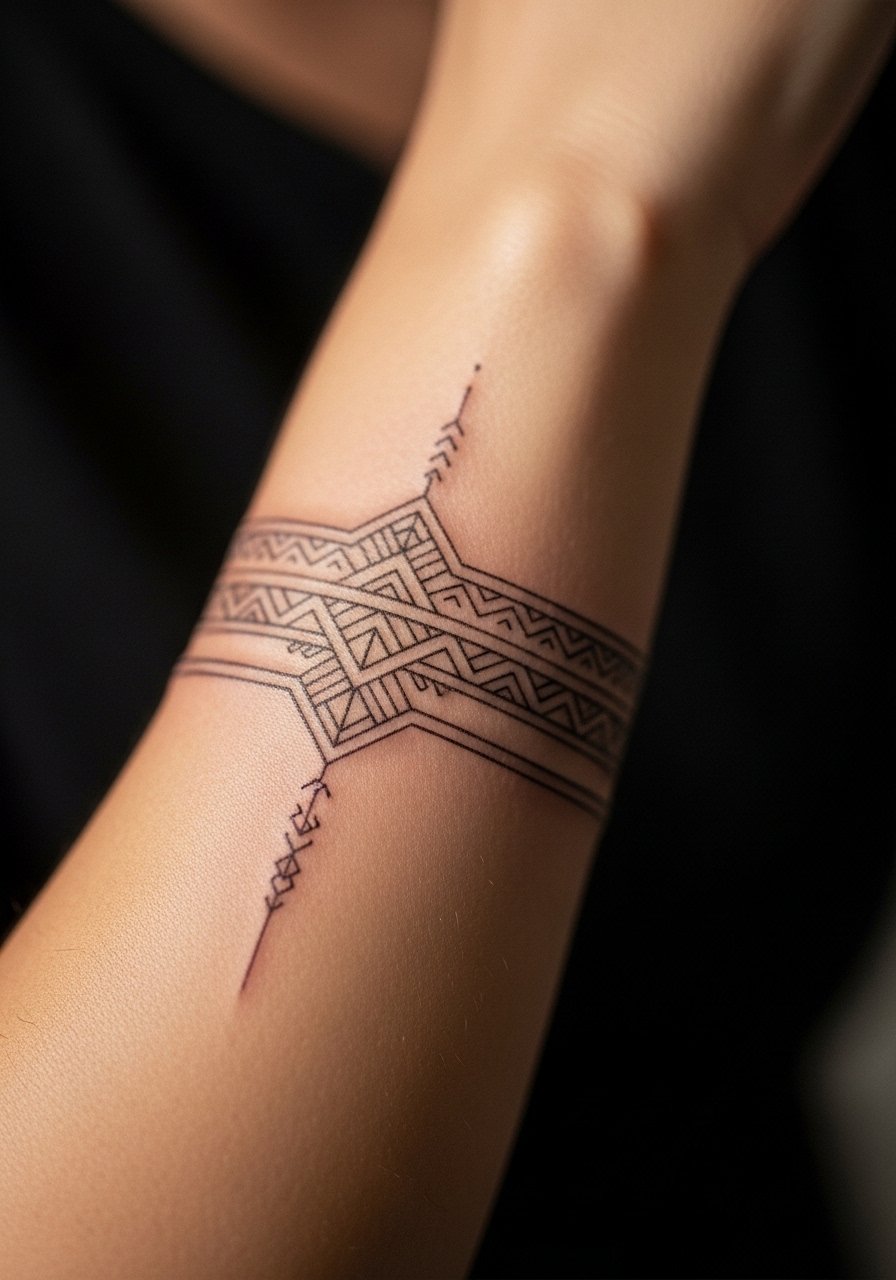
When working with designs that nod to cultural patterns, show respect and ask for a custom approach rather than a direct replica. Many tribal motifs carry significance, so consider subtle variation. On the forearm this style holds well if elements have space to read. Pain is mild and a session runs under ninety minutes. The mistake is copying dense symbolic bands without consulting origin. Pair with neutral rolled sleeves or a loose button-down to frame the work.
23. Thin Wave of Script Near the Elbow

Script near the elbow needs special consideration because bending can distort letterforms. Ask the artist to mock the phrase with your arm both straight and bent before committing. Pain increases around the elbow and sessions feel pinchier. Common mistakes include choosing cursive with tight loops that become unreadable with movement. For the appointment, wear a loose button-down shirt so the artist can check the curve while you test poses.
24. Minimal Compass Band for Travelers
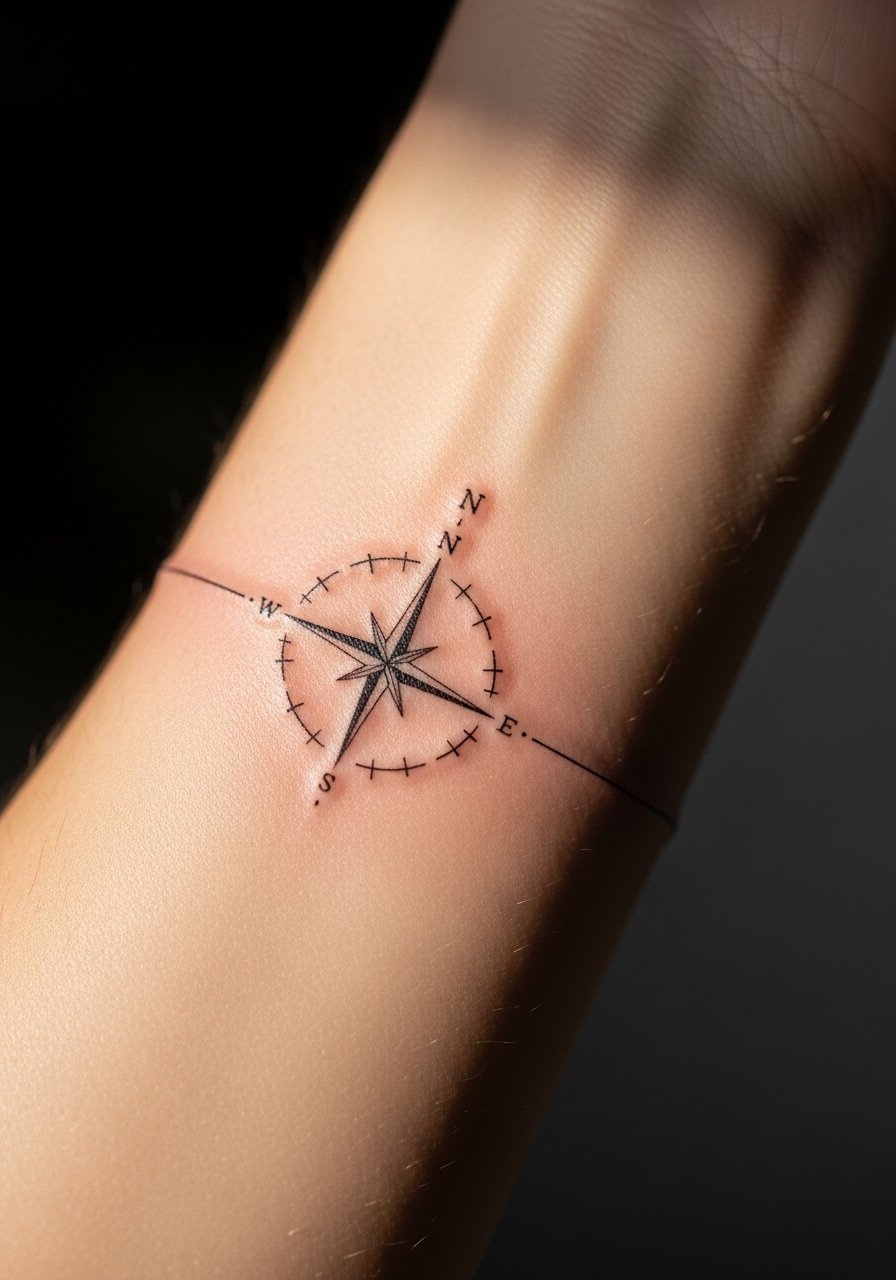
Compass cuffs are symbolic and graphic when simplified. Keep the cardinal points bold enough to hold up and avoid micro-labeling. Forearm placement keeps clarity and pain low. Sessions are short. A mistake is cramming longitude lines into the band which muddies. For a travel-ready look, layer with a slim bracelet and a minimalist watch so the cuff reads like functional jewelry.
25. Intermittent Dot and Bar Pattern Around the Arm
Simple alternating patterns can be very effective. The main guidance is to keep dot and bar sizes proportionate. Too small dots fill in quickly. Pain is moderate depending on the zone and sessions are short. Many requests forget to mark where the pattern ends which creates visible seams. For showing it off, a short-sleeve tee and a thin leather wrist wrap help balance the rhythm.
26. Botanical Band That Tapers Toward the Back of the Arm
Tapered botanical cuffs use scale to create movement. Tell your artist exactly where you want the taper and which side should read heavier. Tricep and outer-arm areas handle tapering well and pain is lower. The common error is uneven tapering that makes one side look unfinished. For the session wear a loose tank top you can adjust without pulling the skin.
27. Fine Line Ornamental Band Near the Wrist with Accent Gems

Ornamental cuffs with gem accents need those accents sized to remain distinct. Ask for slightly larger dots with spacing that holds against daily friction. The wrist is sensitive and a quick session can still feel sharp. People often request tiny gem dots that disappear after washing and wear. For wearing it out, stack a thin chain bracelet or a minimalist watch to frame the ornament without competing.
Frequently Asked Questions
Q: Do fine line arm cuffs fade faster than bolder blackwork?
A: In my experience fine line tends to soften sooner than saturated blackwork, especially in high-friction areas like the wrist. The trade-off is that fine line reads more delicate. If longevity is important, ask your artist to slightly increase line weight and plan for a touch-up around year two or three.
Q: Are wrist and inner-forearm cuffs repairable if they blur?
A: Yes, many cuffs can be touched up or subtly reworked. The repair depends on how much the ink has migrated and how dense the original work was. I recommend discussing a realistic touch-up plan with your artist during consultation so expectations match the placement.
Q: Will my job notice a visible cuff on the arm?
A: Visibility depends on workplace dress and cuff placement. A cuff high on the bicep or under a sleeve is easy to hide. For visible wrist cuffs consider neutral wardrobe options for professional settings. Wearing long sleeves or a loose button-down shirt covers most forearm work when needed.
Q: How painful are elbow-adjacent and inner-bicep cuffs compared with the outer arm?
A: Elbow-adjacent and inner-bicep areas are noticeably more sensitive than the outer arm. Expect sharper sensations and shorter breaks. Outer-arm and bicep placements feel milder and many people tolerate longer sessions there.
Q: Should I avoid cultural patterns for cuff designs?
A: You do not have to avoid them, but I suggest a respectful approach. Opt for a custom interpretation rather than copying sacred or culturally specific motifs. Ask your artist about the pattern's origins and whether a modified design is more appropriate.
