
Fine line dotwork is everywhere on feeds right now, but the butterfly designs that still read clean after a few years are the ones that respect scale and spacing. Dotwork rewards patience in the stencil stage and restraint in the needle depth. Below are 27 focused ways to take that stipple shading and butterfly motif into placements that hold up, with what to ask during consults and how they look over time.
1. Tiny Dotwork Butterfly on the Inner Wrist

I recommend this when you want delicate detail without committing to a larger piece. Ask for slightly bolder outer contour, not micro hairlines, so the wings keep definition after a year. Expect a low pain level and a 30-45 minute session. Common mistake is asking for the dots too tightly packed, which can merge into a gray patch by year two. For the session wear, pick a loose button-down shirt you can roll back so the artist has clean access. At six months the stippling softens, and at two years light touch-ups may restore the crisp wing edges.
2. Geometric Dotwork Butterfly on the Forearm
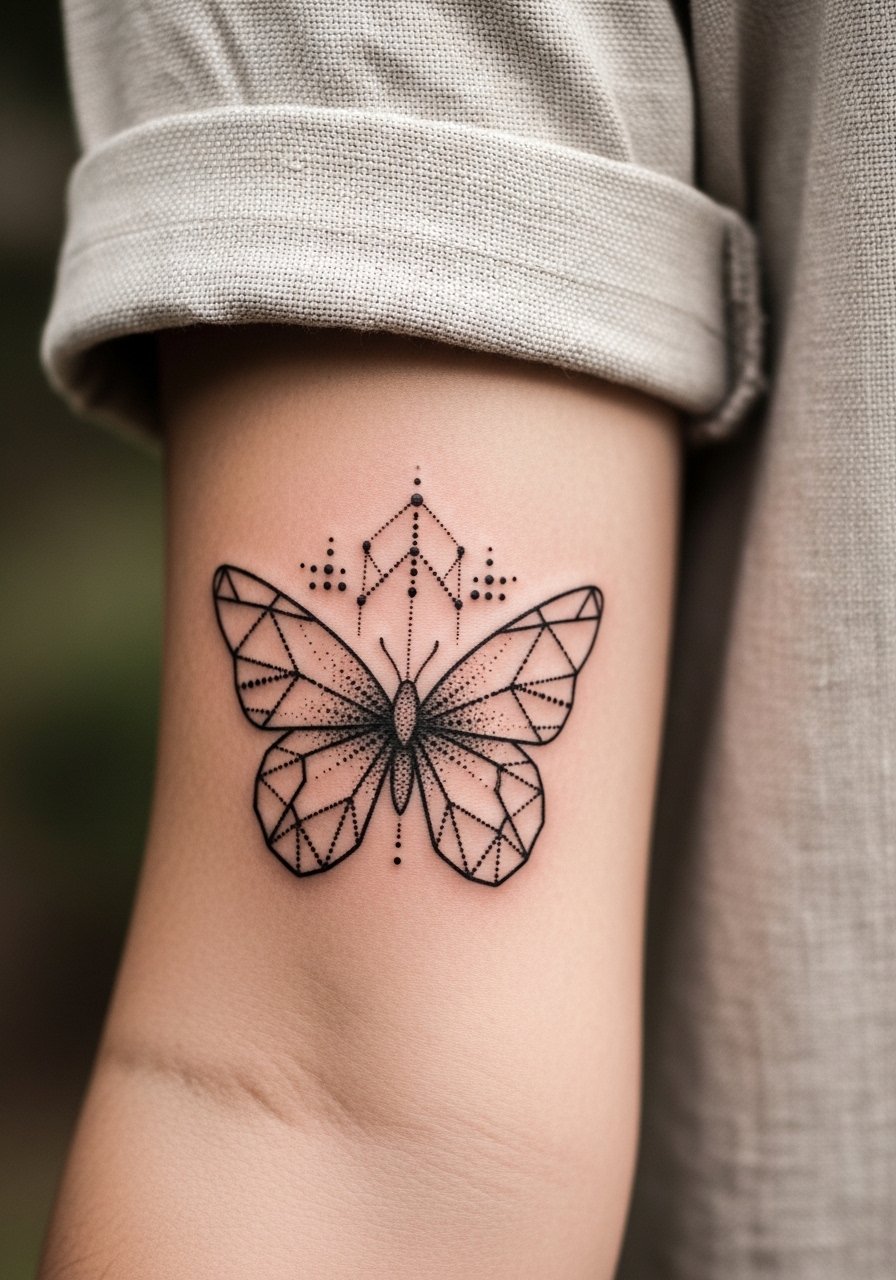
This blends geometry and stippling for a bold silhouette that reads from a distance. When you consult, bring photos showing exact spacing between dots so the artist matches the scale to your forearm width. Visual impact stays strong at one year and usually softens gently by year five if you protect it from sun. Blowout risk on the forearm is moderate if the artist works too deep. Session time is typically 1.5 to 2 hours for a medium-sized piece. Pair it with a rolled-up linen shirt to reveal the wings without crowding the design.
3. Split-Symmetry Butterfly Across the Sternum
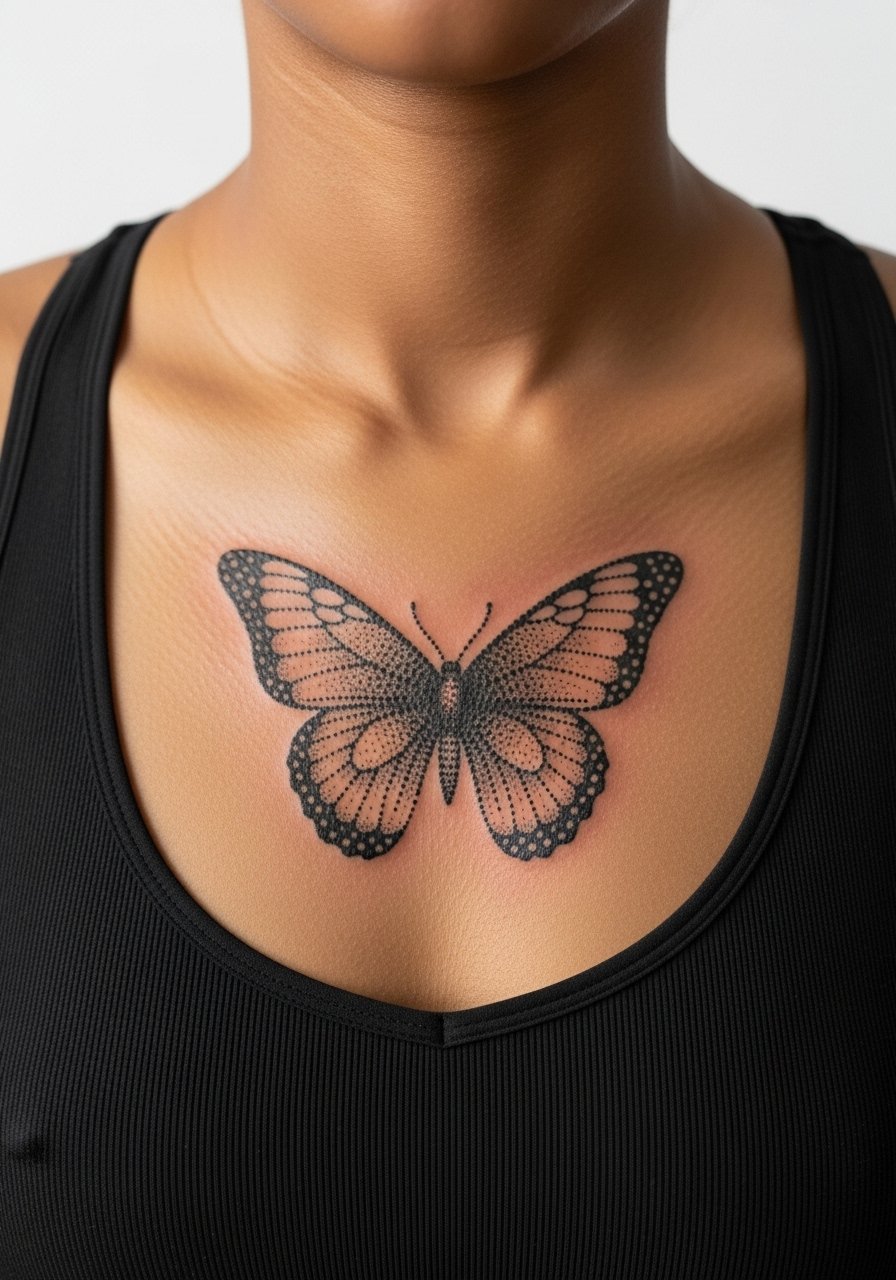
Fair warning: sternum pieces can be finicky with healing and contour. I usually tell clients the session feels sharp in short bursts because of bone proximity, and the touch-up timeline is commonly at year one. Artists split into two camps on sternum fine line. One camp says the stretch and movement make tiny dots merge over time. The other camp argues that with careful spacing and proper needle depth it stays readable. Ask your artist which side they fall on. For appointment comfort, wear a fitted sports bra you can loosen afterward.
4. Halo Butterfly With Stipple Mandala Background on Upper Arm

This one reads like a compact sleeve and is forgiving for aging because the mandala gives visual weight. Tell your artist you want negative space between the butterfly wings and the mandala so the motif remains the focal point. Session feels moderate and usually requires two sittings if the mandala is large. A mistake I see is compressing the mandala too tightly into the wings. At two years the halo helps mask slight dot diffusion, which makes this a sensible choice for someone who wants detail without fragile micro work. Try pairing it with sleeveless linen tops to show the full halo.
5. Micro Dotwork Butterfly Behind the Ear (Neck Framing)
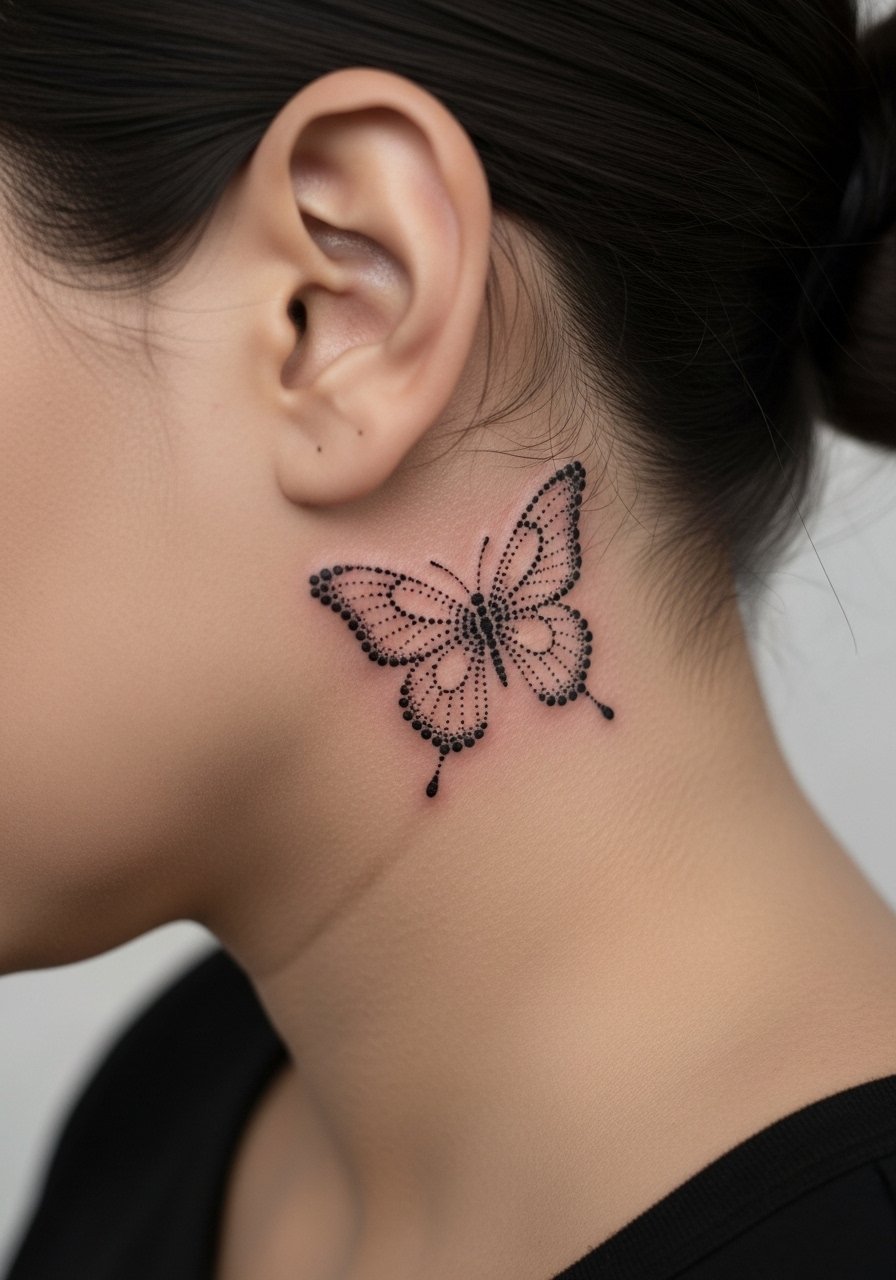
Behind-the-ear placements need a careful framing note in the consult. Ask for the wings to sit slightly below the hairline so the design is visible when hair is up. The session is quick but the area can be sensitive. Common mistake is requesting ultra-fine stippling that vanishes in months. For showing it off, a loose updo or clipped-back hair works best. This is one of those placements where you might need touch-ups sooner, around year two, depending on hair rubbing and sun exposure. Keep in mind the neck area can hide slight spreading, but the small scale still demands good spacing.
6. Ribcage Dotwork Butterfly With Floral Trim
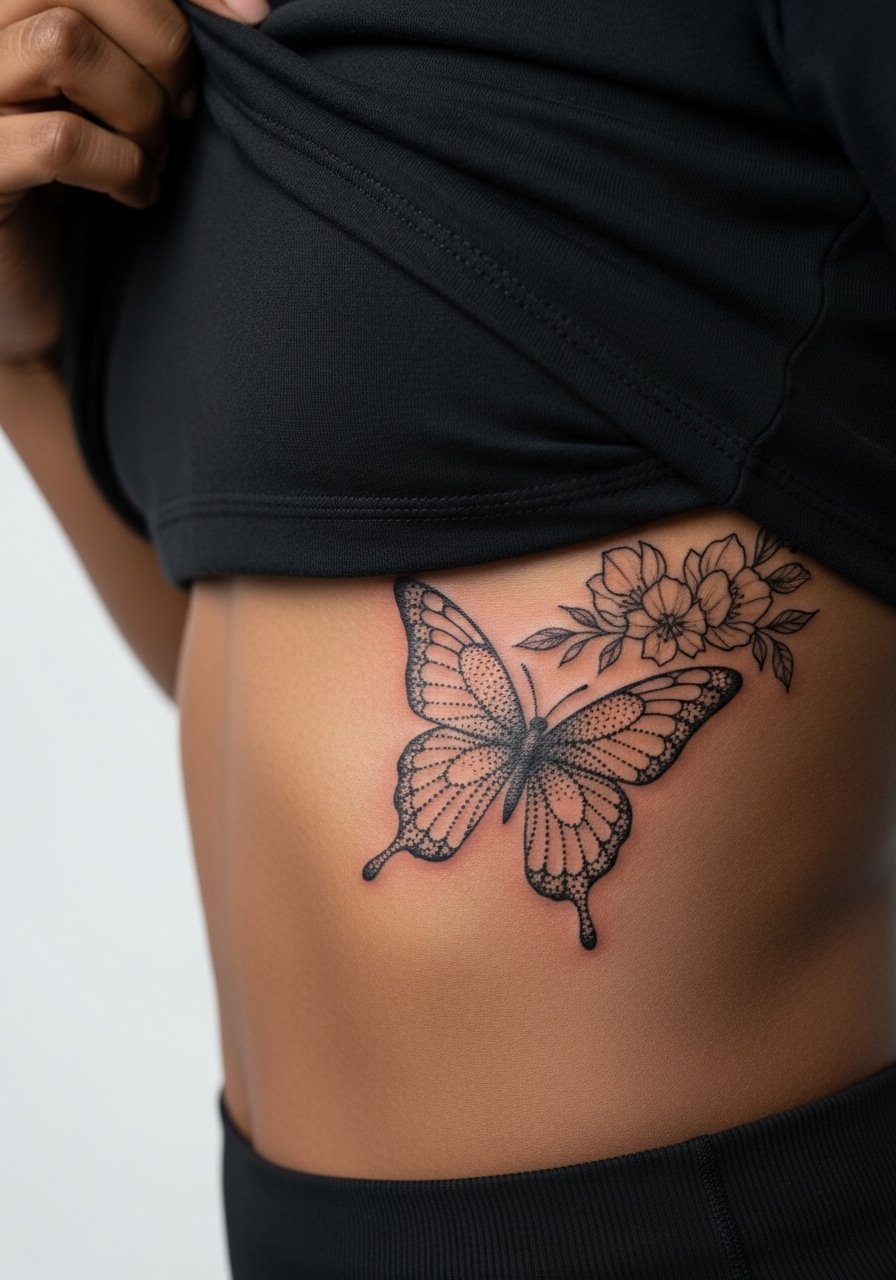
Fair warning: ribs are high on the pain scale. Expect long pauses and heavy breathing during the session. Artists are divided on fine line and dotwork here. One group says the stretch and movement blur fine dots within two years. The other group says correct depth and spaced stippling settles fine. I advise naming the debate in your consult and asking which technique your artist has repeated success with. Common mistakes include going too small visually. For session comfort wear an easy-to-adjust top. Touch-ups at year two to three are common for dense rib shading.
7. Watercolor-Adjacent Dotwork Butterfly on the Shoulder Blade

This mixes stipple texture with light color washes for a soft edge effect while preserving dot structure inside the wings. Tell your artist you want stipple as the anchor and color applied in a light wash that does not overload saturation. The session is moderate and may be split into linework and color layers. A common mistake is asking for full watercolor saturation, which can overwhelm dotwork and age poorly. For showing the piece, open-back tops or a racerback tank frame the shoulder without distracting. Expect gentle fading in the color at two years while dotwork often keeps the silhouette.
8. Large Back-Center Dotwork Monarch Spread
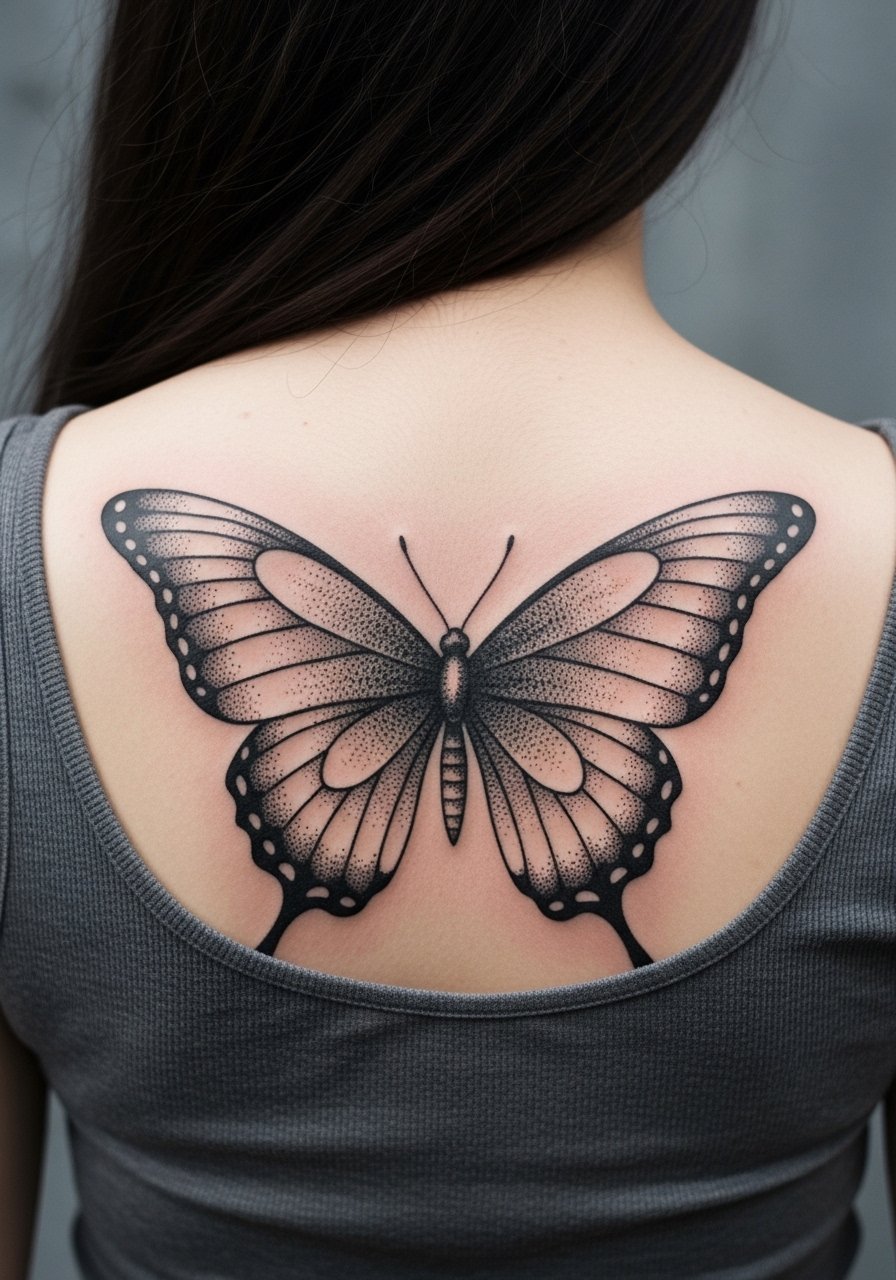
A central back piece allows larger negative space and heavier stippling that ages well. This is a multi-hour session and often two sittings. For consults, describe how much wing span you want against the spine so the artist scales the dots to the canvas. Blowout risk is low on the back if the needle depth is steady. Touch-ups are usually optional and depend on sun exposure. A mistake is compressing too much detail into a small area. The piece tends to look consistent at five years if you avoid tanning beds and use sunscreen.
9. Ankle Dotwork Butterfly With Chain Motif

Ankle tattoos live in a high-friction zone that affects healing. For the artist, specify slightly bolder dot spacing and a clean outer contour so the chain motif around the butterfly stays readable. Sessions are short but the area can scab more due to shoe and sock contact. Avoid tight footwear during the first two weeks. Pair the finished piece with sandals or strappy ankle bracelets to show it off. Expect touch-ups around year two if the chain lines blur from friction.
10. Dotwork Butterfly Sleeve Accent Near the Elbow

The elbow has unique movement and texture so plan for dotwork to sit slightly away from the joint crease. During the consult, ask the artist to leave breathing room between dense stipple and the crease to reduce early diffusion. The session can be trickier because the elbow can sting and require more frequent breaks. A mistake is placing heavy stipple directly on the crease where it can fragment with movement. After a year, expect some softening in fine details and a likely touch-up around year two to maintain crisp wing intersections.
11. Finger Butterfly Tip in Dotwork

Finger tattoos are controversial in the community. One camp says fingers fade and need constant touch-ups because of frequent washing and thin skin. The other camp says with bolder contours and strategic placement on the side of the finger, they can last longer. Be explicit in your consult which camp your artist follows and ask for a plan for touch-ups. Expect faster fading and touch-ups as often as every 12 to 18 months. For the session wear, loosen rings and avoid tight gloves afterward. Hand and finger placements still affect some hiring scenarios, so factor that into your decision.
12. Collarbone Butterfly in Stipple Silhouette

This placement benefits from negative space along the collarbone so the wings can breathe. The consultation should note whether you want the wings resting above or following the collarbone curve. The piece is visible and pairs well with delicate necklaces, so consider a thin chain pendant necklace that sits above the design. Pain is moderate and session time is usually under two hours. A common error is crowding the collarbone with tiny dots that lose contrast against the bone over time. Expect the dotwork to mellow at two to three years and plan a light touch-up if needed.
13. Inner Bicep Butterfly in Dense Dotwork

Inner bicep skin is softer and can hold dots well if the artist balances depth. Tell your artist you prefer a slightly coarser stipple in shadowed wing areas so the piece does not vanish into a flat gray. The session can be sensitive when the arm flexes, so expect breaks. A common mistake is going too tiny with stipple density. For the session wear, a loose tank makes access easy and keeps pressure off the area. At two years this location usually keeps shape well, with touch-ups optional depending on activity and sun.
14. Thigh Butterfly in Stipple Portrait Style

Thighs offer a forgiving canvas for larger dotwork wings and portrait-style detailing inside the body of the butterfly. Tell your artist you want layered stippling for depth and request a preview of how the negative space will read across the curve. Sessions are comfortable for many and often longer, so plan for hydration and snacks. Mistakes include overdense stippling that crowds the wings. Pair with high-waisted skirts or shorts to frame the piece. The thigh generally holds crispness longer than hands or ribs, so touch-ups tend to be less frequent.
15. Ankle-to-Foot Flowing Butterfly Trail
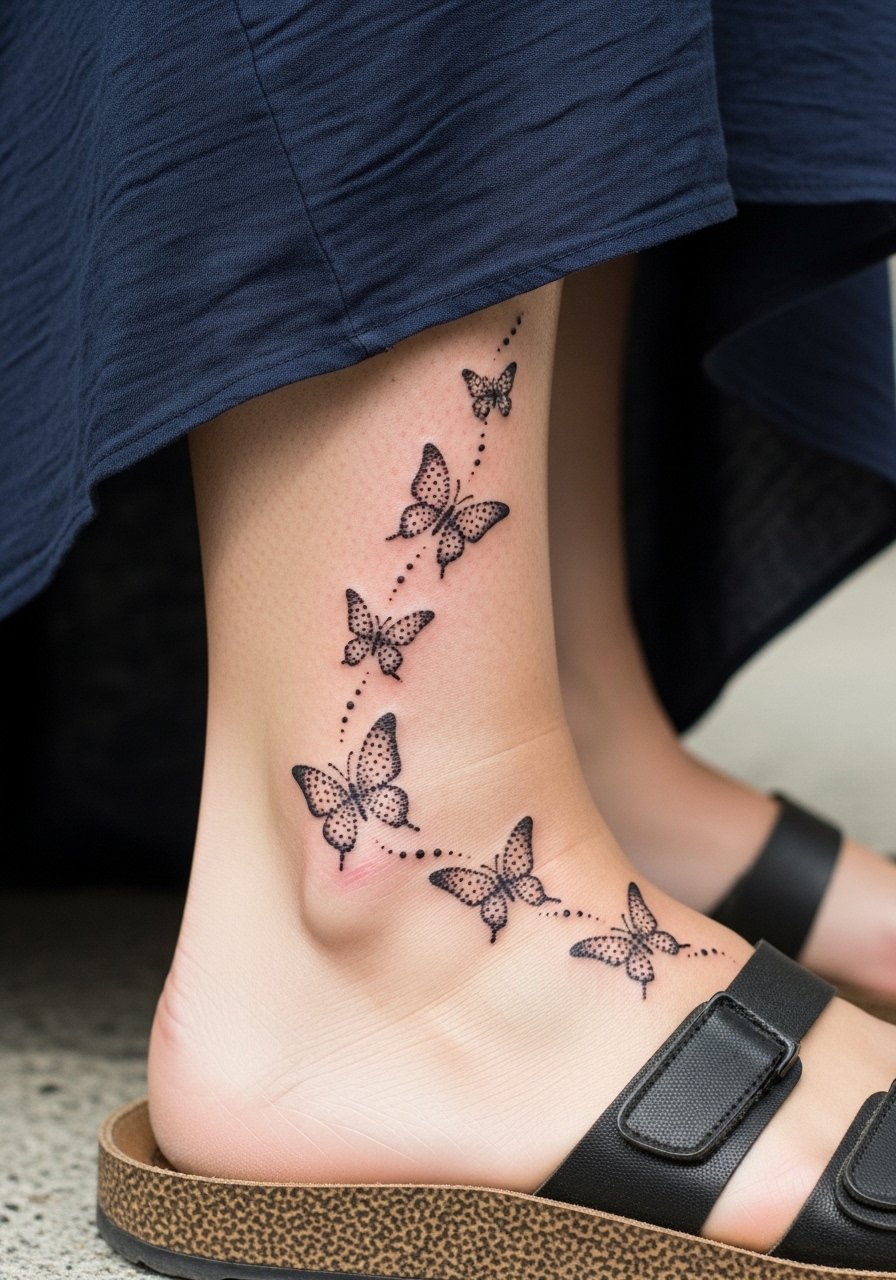
A flowing trail gives movement and helps distribute dotwork in areas prone to wear. During consult, ask the artist to plan the trail with enough gap between dots and consider shoe friction when placing the lower wing. Sessions are moderate and healing needs careful sock and shoe avoidance for the first week. Pair with open sandals or a summer skirt to show off the trail. Expect the lower foot areas to need touch-ups sooner than the ankle because of constant rubbing and exposure.
16. Throat-Side Butterfly Near the Neck

Neck placements are visible and sometimes career-sensitive, so think through exposure before booking. Ask for slightly bolder contours in the wing edges since the skin there is mobile. The session can be sensitive and quick. A common error is asking for ultra-fine stippling that looks sparse within months. For showing it off, wide-neck tops frame the piece without competing. The neck can blur faster than the back if exposed to sun, so plan for sunscreen on healed work.
17. Low Back Butterfly Anchored With Dotwork Lace

Low back pieces let you build lace-like stippling that frames the butterfly. In consults, state how low you want the wings to sit relative to clothing lines so future outfits do not cut through the design. Sessions are moderate and usually leave room for a touch-up at six to twelve months if you sit in direct sun frequently. A mistake is crowding the lace with tiny dots that flatten under pressure from clothing. Pair with low-rise jeans or high-waisted skirts to keep the design visible.
18. Calf Butterfly With Vertical Stipple Gradient
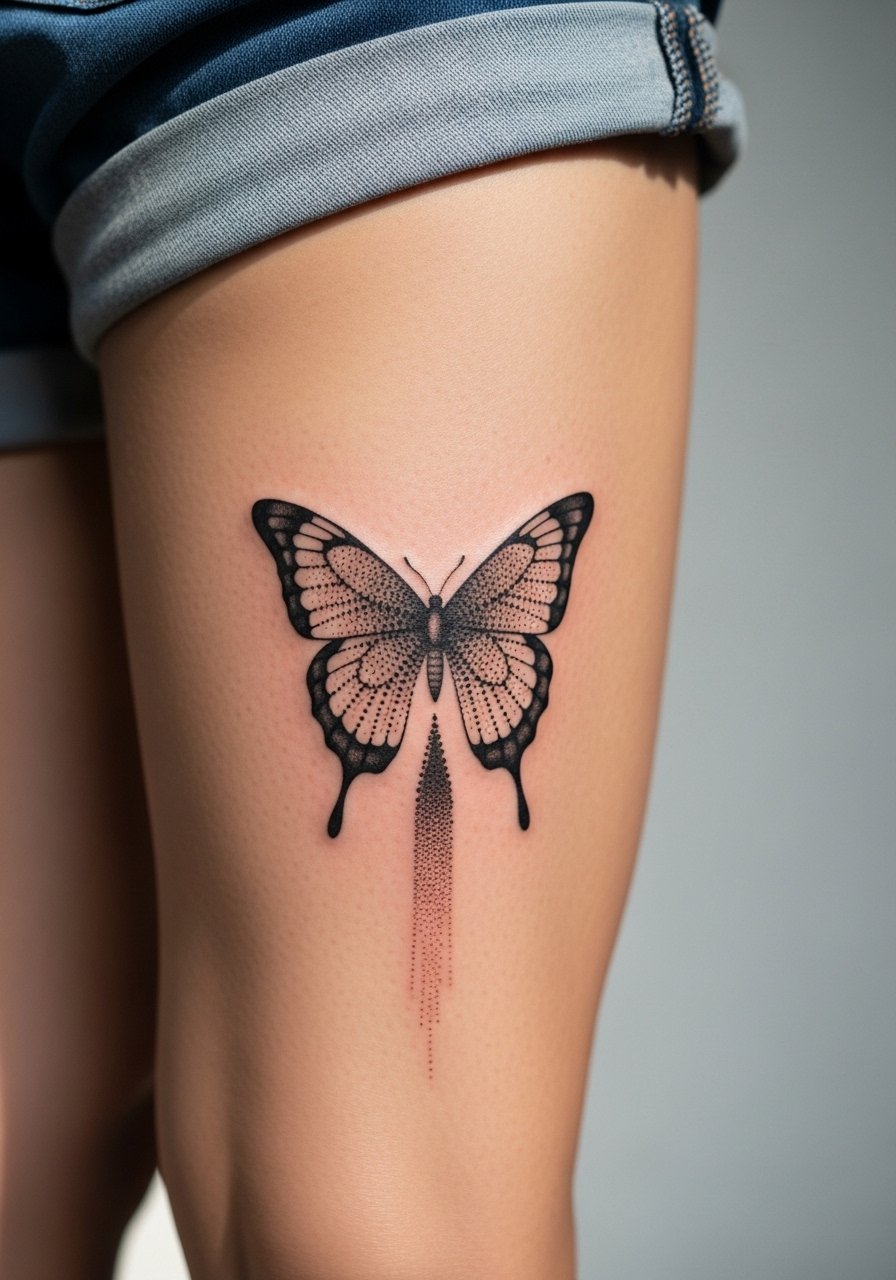
Calf placements allow vertical composition and gradient stipple that reads well while you move. Tell the artist you want heavier dot weight at the base fading upward for a gradient effect. Sessions are straightforward and usually sit in the low-moderate pain range. Common mistakes include using the same dot density across the whole piece which flattens the gradient. Pair with cropped trousers or casual shorts to reveal the vertical motion. Calf pieces usually age nicely with minimal touch-ups.
19. Shoulder Cap Butterfly in Dense Stipple

The shoulder cap takes bold stippling well and is less exposed to abrasion than forearms. For the consult ask for a firm outer contour to keep the wings defined against clothing. Session time is usually under two hours. A mistake I see is cramming too many interior dots that later flatten. For showing off, sleeveless or one-shoulder tops work well and a loose tank makes the area accessible for the artist. Expect the piece to age steadily with touch-ups optional around year three, depending on sun exposure.
20. Micro Dotwork Butterfly on the Rib-Side Hip
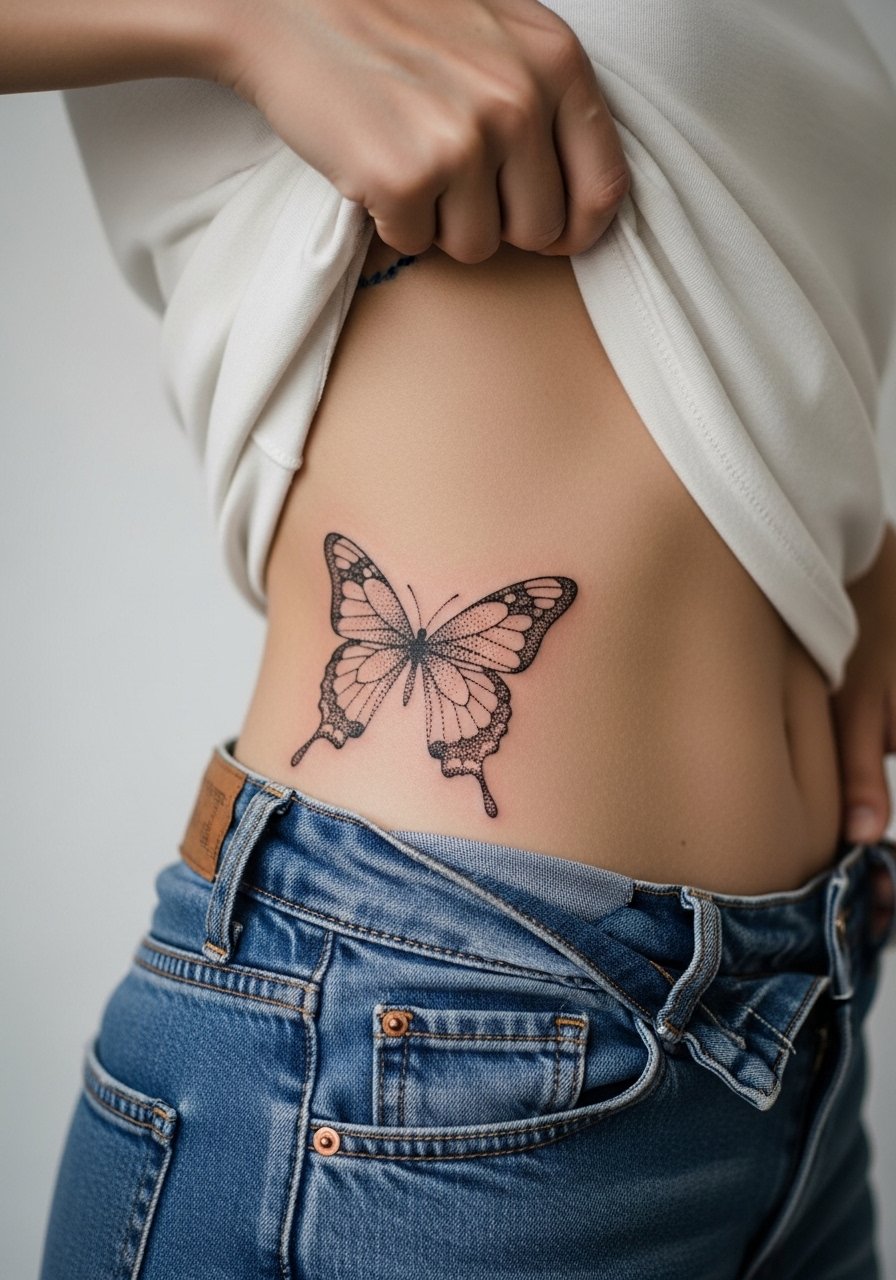
Hip placements sit between private and visible, and they handle dot density well because of the softer canvas. Tell the artist you want slightly wider dot spacing to account for stretch from sitting and clothing. Session is generally comfortable. A common mistake is putting heavy stipple too close to the pant line; this leads to persistent irritation while healing. For session wear pick easy bottoms like high-waisted leggings you can shift without pulling. Touch-ups depend on friction from waistbands.
21. Chest-Center Butterfly With Radiating Dot Rays
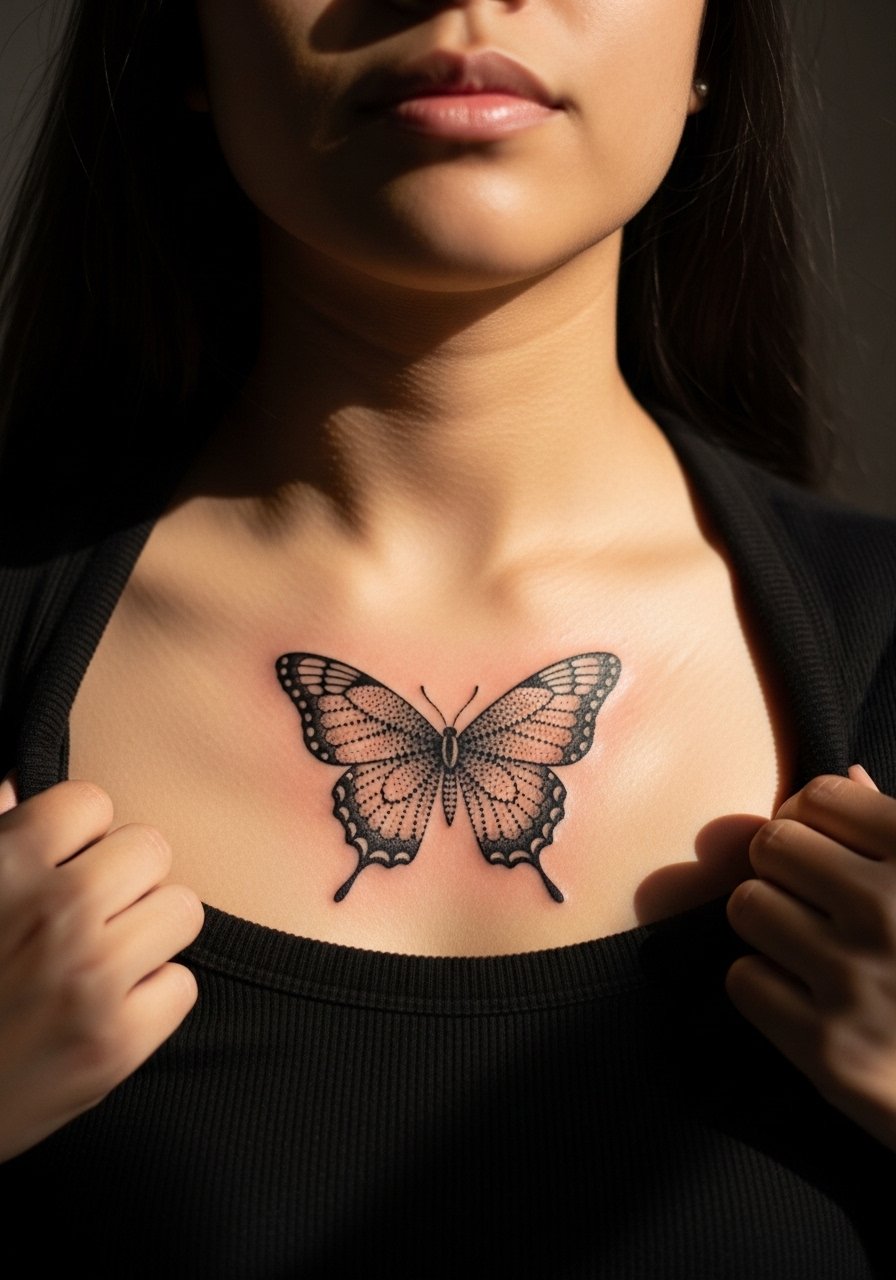
A centered chest piece reads strongly and the radiating rays help focus the eye. In consultation, specify how far the rays should extend toward the shoulders so the design balances your torso. Sessions near the chest can be more sensitive, and touch-ups may be useful at year one for dense rays. A mistake is letting rays get too thin; they can blur into the surrounding skin. For showing off, pair with open-back or scoop neck tops that keep attention on the chest without crowding.
22. Throat-Base Butterfly With Fine Dot Halo
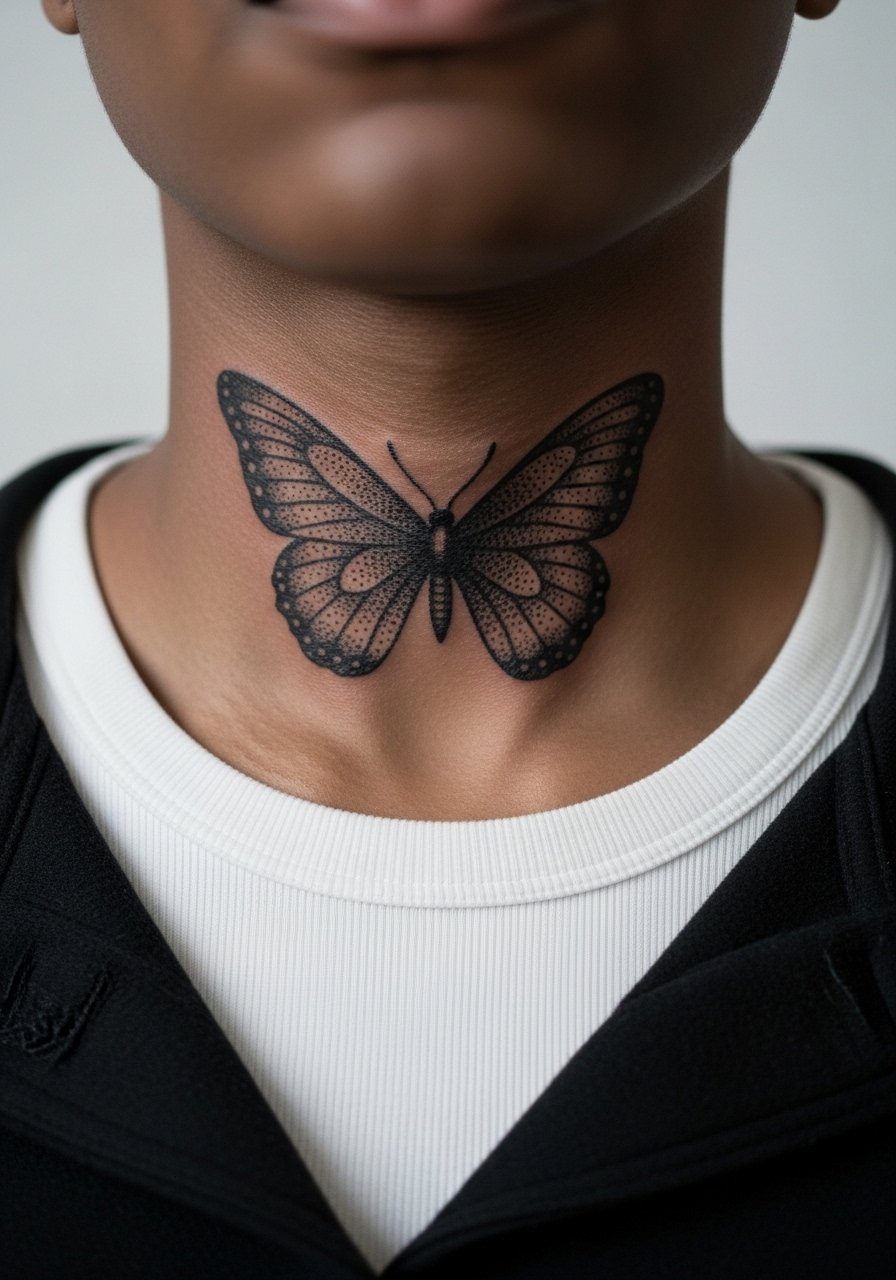
Placement near the throat is visible and sensitive. Ask your artist whether they recommend denser contouring to withstand skin movement. The session can be tingly and quick. A mistake is choosing micro stippling with no strong outer line, which can blur with neck movement and clothing. For showing it off, thin necklaces that sit above the piece work best. Expect this area to need touch-ups earlier than large back pieces because of constant motion and sun exposure.
23. Butterfly Overlapping a Script in Dotwork

Combining script and dotwork needs scale discipline so the lettering stays legible. Tell your artist which word and font weight you want and ask for a mock overlay so the butterfly does not swallow the text. Sessions vary depending on letter count. A common mistake is choosing a delicate script that competes with dense stippling. For showing, rolled-up sleeves frame the forearm and a minimalist watch keeps the wrist area styled without crowding the design. Expect the script to require touch-ups before the dotwork does.
24. Vintage-Style Dotwork Butterfly on the Upper Thigh
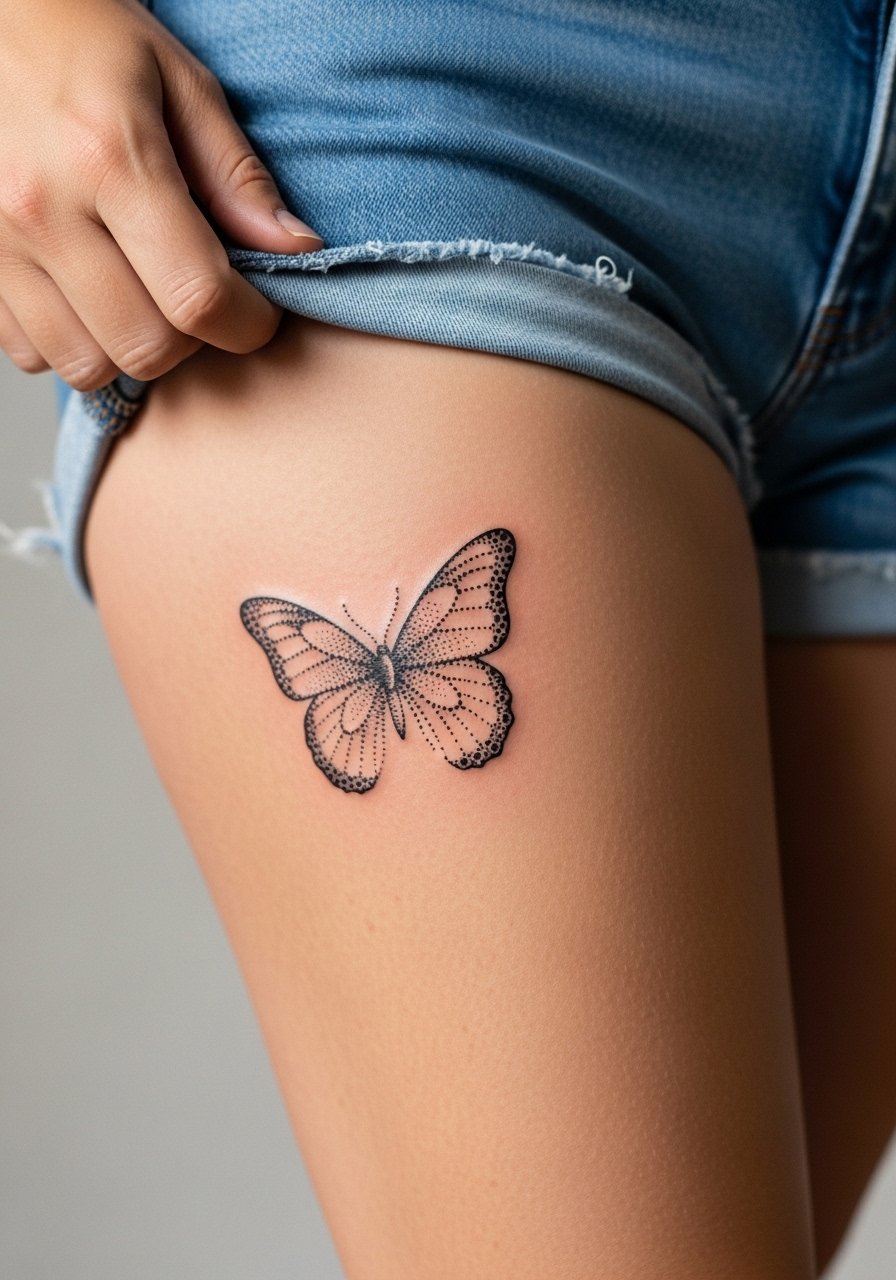
A vintage illustration approach pairs well with larger outlines and patterned stippling inside the wings. During consult, ask for reference images of classic engravings so the artist knows the line and dot balance you want. Sessions can be longer and often require sitting comfortably for extended time. Mistakes include adding too many tiny dots that read muddled on skin. For show-off outfits, high-waisted shorts or skirts display the piece well. Thigh skin can retain dot clarity for years if not overexposed to sun.
25. Negative-Space Butterfly Over Scar Work

Using negative space is a thoughtful way to incorporate scars. In a consult, be explicit about scar age and texture because healing varies. The artist should map dots to the scar topography and often recommend coarser dots to avoid ink pooling. Sessions near scars can be more tender. A mistake is treating scar tissue the same as normal skin. For session wear pick comfortable high-waisted bottoms you can shift easily. Expect initial ink uptake to differ across scarred versus unscarred areas and plan for a touch-up once the skin fully settles.
26. Double Butterfly Mirror on the Spine
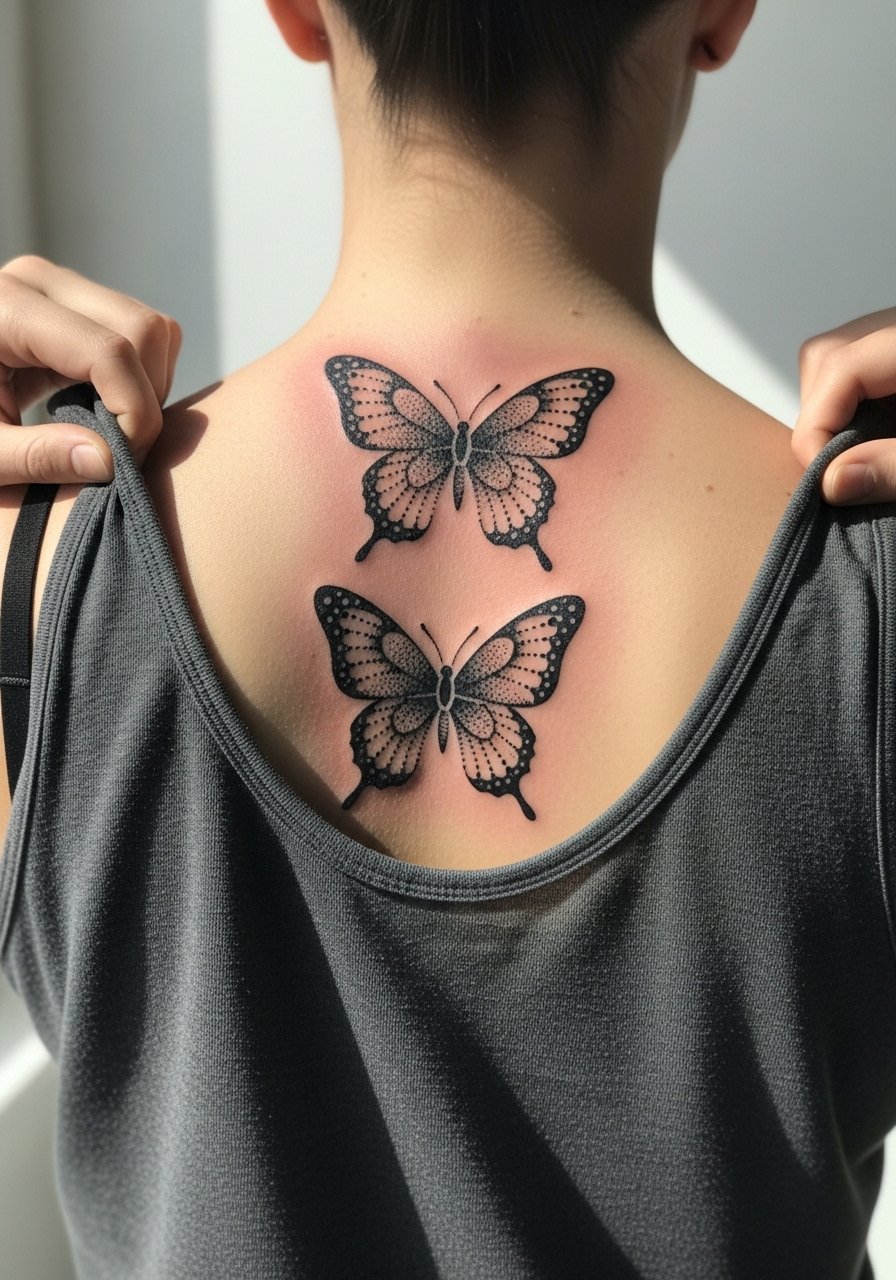
A mirrored composition along the spine demands symmetry and spacing so the axis reads clean as you move. Ask your artist for a precise stencil alignment and request a standing mock-up to see natural posture effect. Session is moderate and often split into two sittings for symmetry checks. Mistakes include misaligned stencils that look obvious once healed. For showing it off, open-back dresses or halter tops work well. Spine placements usually keep dot contrast if sun exposure is controlled.
27. Illustrated Dotwork Butterfly With Botanical Accents on the Forearm

This classic forearm placement is forgiving and versatile. During consults, describe whether you want the botanical elements to frame the wings or to sit behind them as background. Session time ranges from an hour to two depending on the amount of foliage. A common mistake is cluttering the forearm with too many small leaves that compete with the butterfly. For showing the finished piece, roll sleeves or wear short-sleeve linen and add a minimalist bracelet that does not sit over the art. Expect a touch-up at year two if you regularly expose the area to sunlight.
Studio Day Picks
The small and visible spots above a wrist, ankle, and behind-the-ear demand different prep than larger back or thigh pieces, so these essentials smooth the session and the first week.
-
Stencil transfer paper kit. Lets you test placement and symmetry on skin before the needle moves, which is crucial for split designs and mirrored spine work.
-
Topical numbing cream. Use as directed to ease sharp spots like ribs and sternum during longer sessions while still allowing the artist to work.
-
Thin protective film roll. Wraps small sites like fingers and ankles to reduce friction from socks and shoes in the first 48 hours.
-
Fragrance-free gentle body wash. Cleanses healing areas without stripping the delicate dot channels that fine stippling depends on.
-
Aquaphor healing ointment. A thin layer in the initial days keeps moisture balanced for fine dotwork without smothering the area.
Frequently Asked Questions
Q: Will a dotwork butterfly on my ribs definitely need a touch-up sooner than one on my back?
A: It depends on your skin type and how often the area moves or sees sun. Ribs usually need touch-ups earlier because of skin stretch and friction from clothing. Ask your artist about their track record with rib stippling and whether they recommend wider dot spacing for longevity.
Q: How do I style a forearm dotwork butterfly for work without hiding it entirely?
A: Choose sleeves you can roll neatly, like a loose button-down shirt that shows a controlled strip of the tattoo. Neutral tones keep attention on the linework without making the piece feel loud, and thin bracelets help frame the forearm without overlapping the art.
Q: Are finger and hand dotwork butterflies worth it if they need frequent touch-ups?
A: If you want a visible, small motif and accept routine maintenance, they can be worth it. Expect touch-ups every 12 to 24 months depending on washing and abrasion. Consider side-of-finger placement and bolder contours to extend time between visits.
Q: Can dotwork be combined with color without losing the stipple texture?
A: Yes, when color is applied as a light wash behind or between stipple clusters it can complement rather than obscure the dotwork. Ask for color in separate passes and request lower saturation so the dots remain visible as the color fades.
Q: How should I find an artist who has real experience with dotwork butterflies without naming specific shops?
A: Search portfolio tags and community pathways like hashtag galleries, convention portfolios, and directory listings. Look for recent healed photos in feeds and threads on tattoo forums. During consultations ask for healed pictures of similar placements and a walk-through of their touch-up frequency for dotwork.
