
Fine line butterfly tattoos dominate feeds right now, but trend and longevity often diverge. Tiny outlines read crisp on day one and then soften if placed on high-movement spots. The designs that age best start with intentional spacing and placement choices, not just the tiniest stencil possible. Below are 21 small butterfly ideas with styling notes, consultation prompts, and what to expect at six months, two years, and beyond, starting with a wrist piece you can book this week.
1. Fine Line Inner Wrist Butterfly
I've seen this small wrist motif hold up well when artists space the antennae and wing veins slightly wider. The inner wrist is sensitive, so expect a sharper sting and about a 20 to 40 minute session. Say in your consultation that you want single-needle linework with a little breathing room between veins to avoid early blurring. A common mistake is asking for ultra-tiny veins that merge after a year. At six months the lines look soft and delicate, at two years you may see slight feathering, and a touch-up around year two to three is common. Styling tip, pair it with a thin chain bracelet or a minimalist watch to frame the piece when you want to show it off.

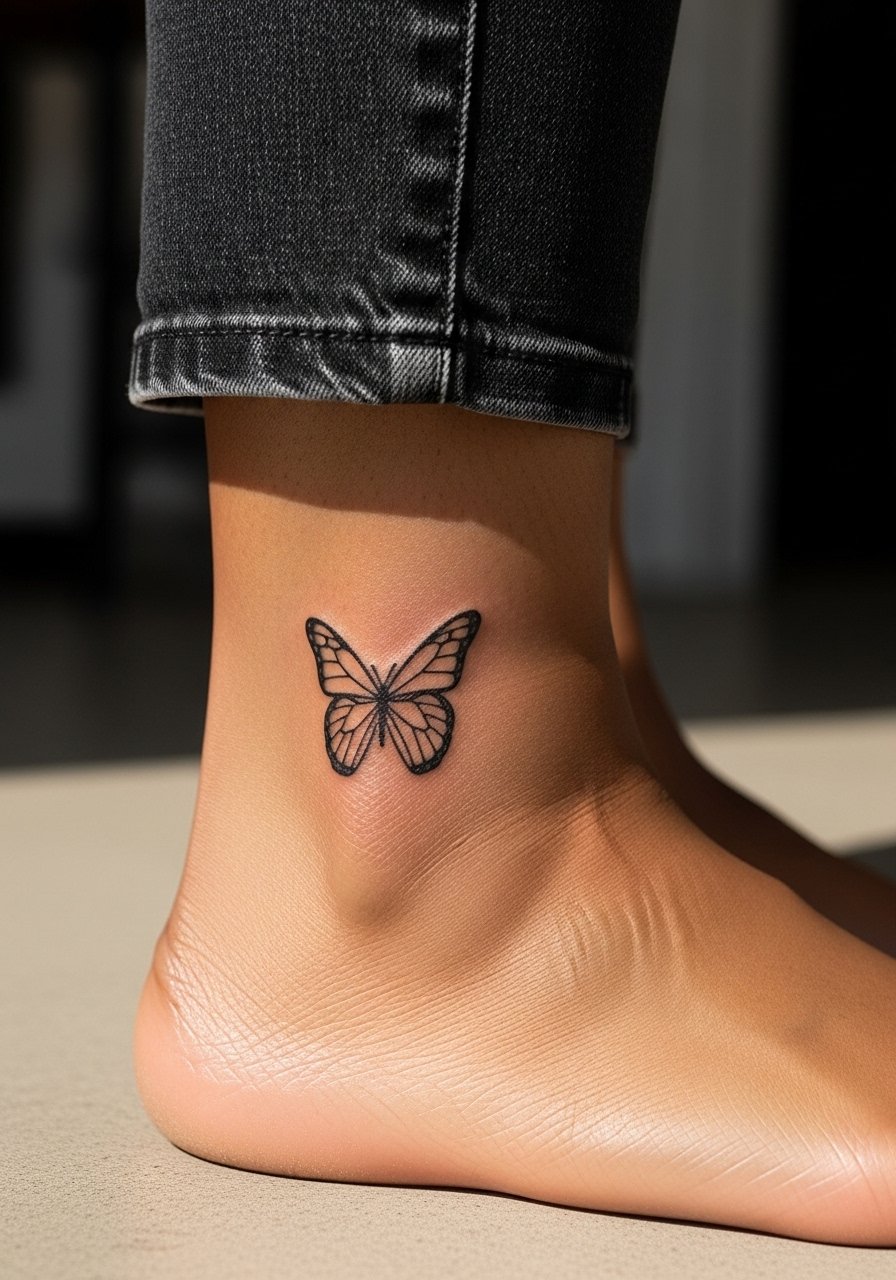
2. Minimal Outline Ankle Butterfly
Fair warning, the ankle rubs against socks and shoes during the first two weeks. That friction affects scabbing and early fading. I recommend a slightly bolder outline than you might think to keep the silhouette readable after a year. Session time is short, often under 30 minutes, but plan for extra careful aftercare during first showers. For showing this off, a pair of slide sandals or cropped linen pants elevate the look without covering it. A common mistake is asking for hairline legs on the wings. Tiny hairline work there risks losing definition from rubbing and swelling.
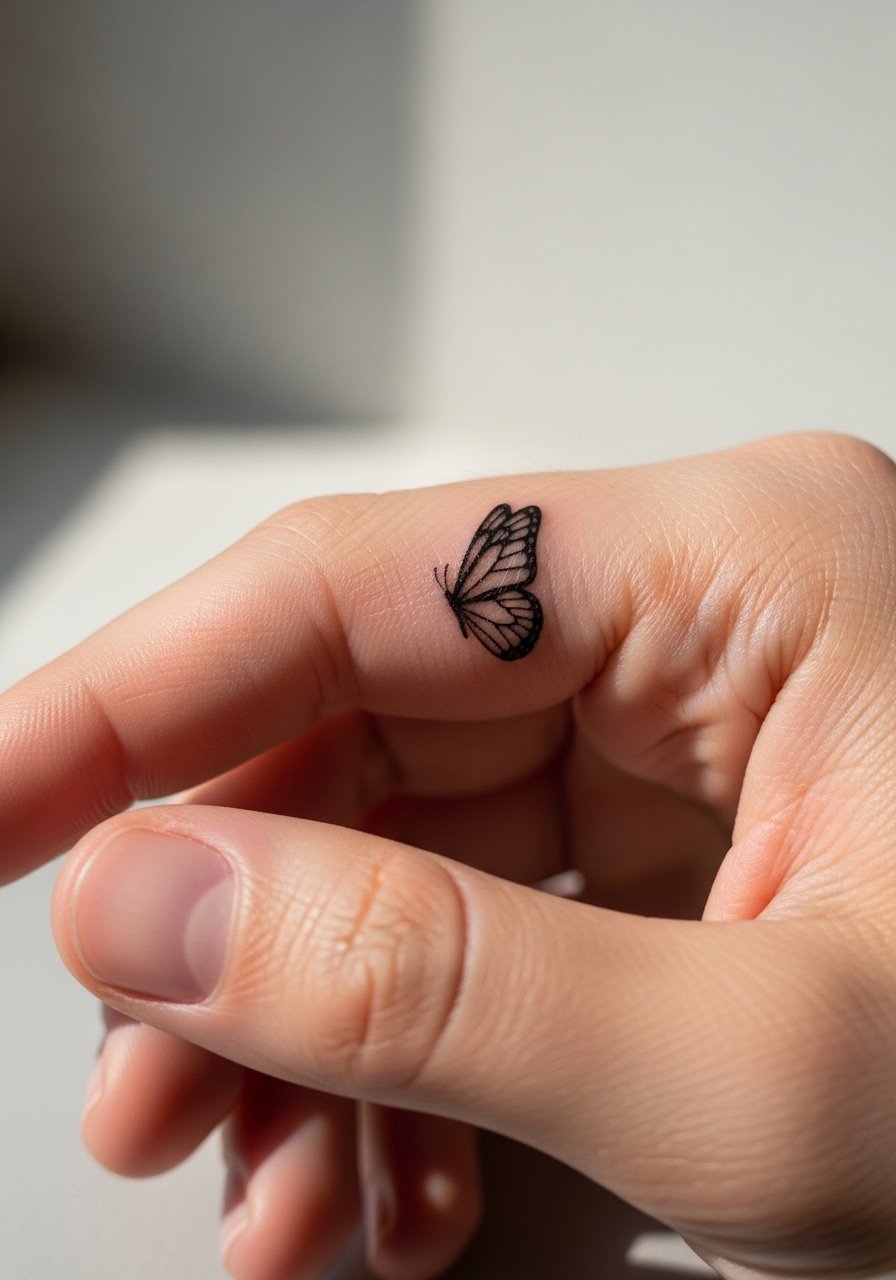
3. Single Wing Finger Tattoo
The finger is unforgiving. Expect a quick, sharp session under 20 minutes and a higher chance of fading and touch-ups. I've watched single wing motifs that read delicate for months but need a touch-up by year one because of continual hand washing and friction. During consultation, ask for slightly thicker linework in the first pass and plan a touch-up at one year. Styling for hands is simple. Stack a daisy chain midi ring set or wear a thin cowrie bracelet to direct attention without crowding the finger. Hand and finger pieces have a career implication in some fields, so think about workplace fit before booking.
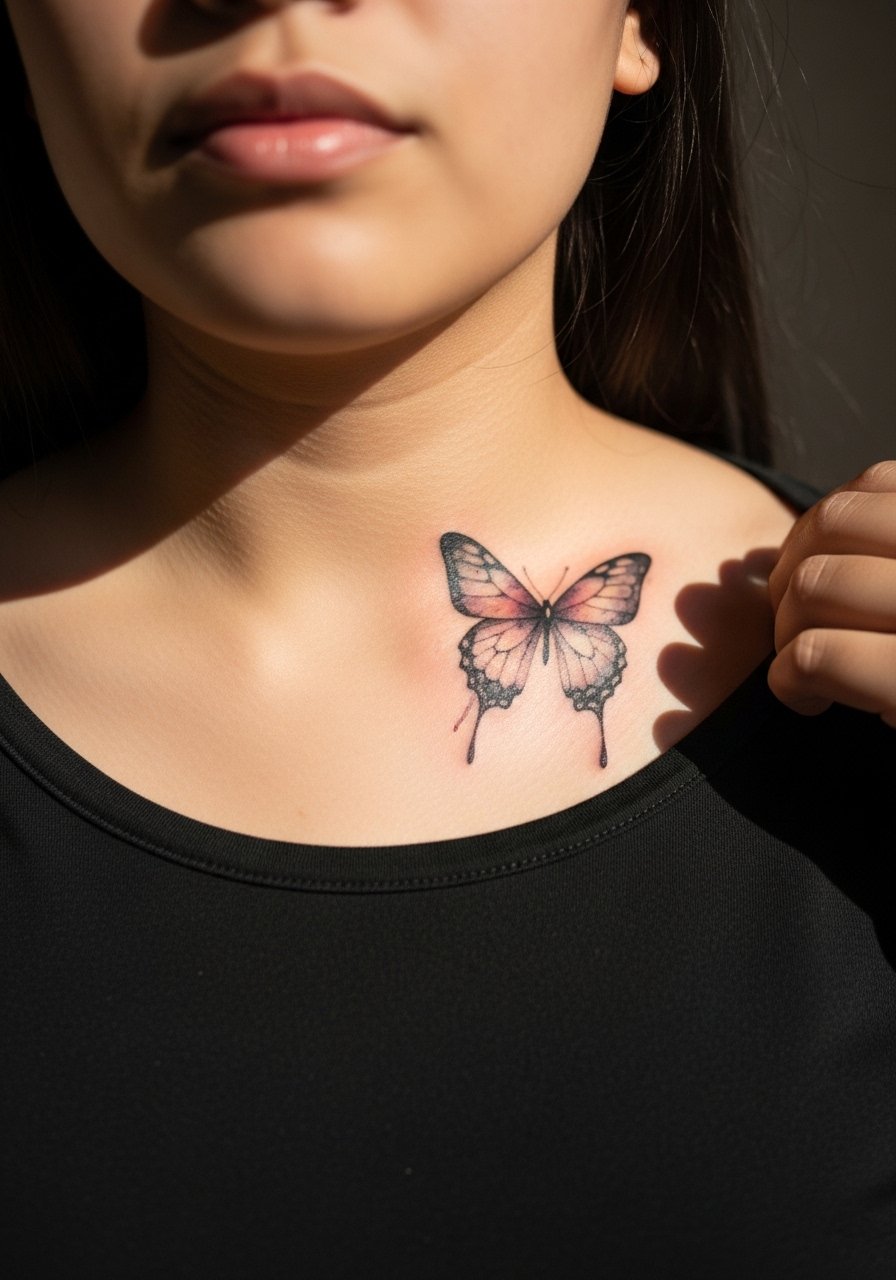
4. Watercolor Collarbone Butterfly
There is a real visual payoff to soft pastel fills over delicate linework on the collarbone. The area moves with breathing and clothing, so I suggest the color be applied with light saturation and a slightly stronger outline to protect edges. Expect a 45 to 70 minute session depending on color complexity. For the session wear, pull to the side a wide-neck shirt so the artist has clean access to the collarbone. A common mistake is asking for dense watercolor that looks muddy after a year. Lighter washes settle into a natural faded look that can remain attractive long term.
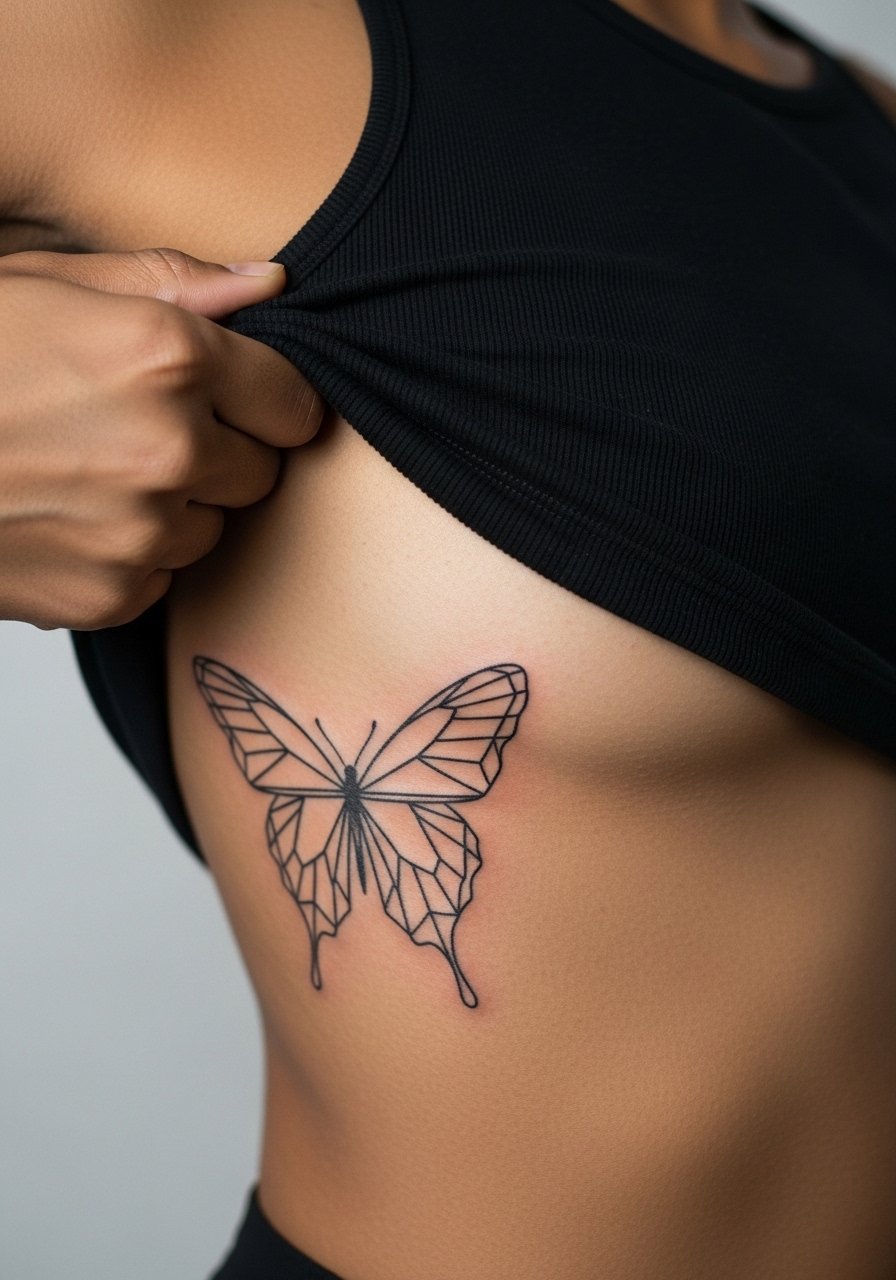
5. Geometric Ribcage Butterfly
Artists split on fine line on the ribs. One camp says the skin stretch and breathing blur lines within two years. The other camp argues that with proper needle depth and spacing it settles fine. If you side with the second group, ask your artist about spacing and expect a longer session because ribs demand steady handwork. Pain is higher here, often an eight out of ten. The geometric take uses negative space inside wings so the piece reads like architecture rather than a smudge when healed. For the session, wear a cropped tank you can lift slightly so only the ribcage is exposed.
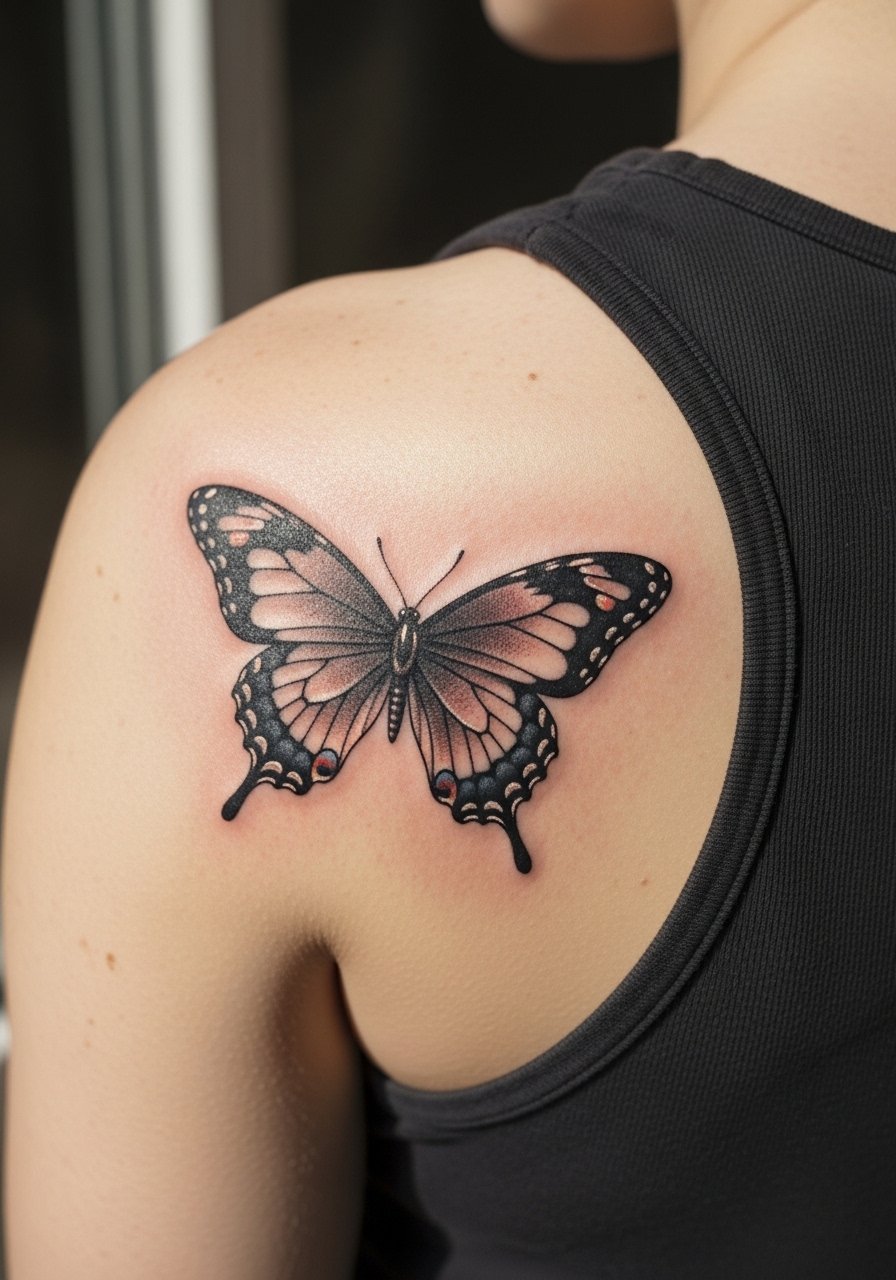
6. Micro-Realism Shoulder Blade Butterfly
This placement gives subtle movement with the shoulder blade, and micro-realistic shading holds up well if the artist uses stipple shading and careful contrast. When you consult, bring close-up references that show the wing texture you want and mention stipple rather than broad shading. Sessions can run an hour or more depending on detail. A typical mistake is overworking soft gradients so contrast disappears when healed. For outfits, an open-back dress or a tank with a low back frames the art beautifully for evenings out.
Pre-Session Essentials
The first six designs include high-movement spots and sensitive zones, and a few small supplies make those sessions smoother.
- Stencil transfer paper kit. Lets you preview exact placement and lineweight on skin before the needle starts, which is crucial for tiny wrist and finger motifs.
- Topical numbing cream. Use as directed to ease the sting for ribcage and inner wrist work without interfering with line clarity.
- Thin protective film roll. Keeps finger and ankle tattoos protected from friction in the first few days of healing.
- Fragrance-free body wash. Gentle cleansing helps fine line pieces avoid early irritation during showers.
- Aquaphor healing ointment. Thin application during the first days helps retain moisture for delicate linework without clogging needle channels.
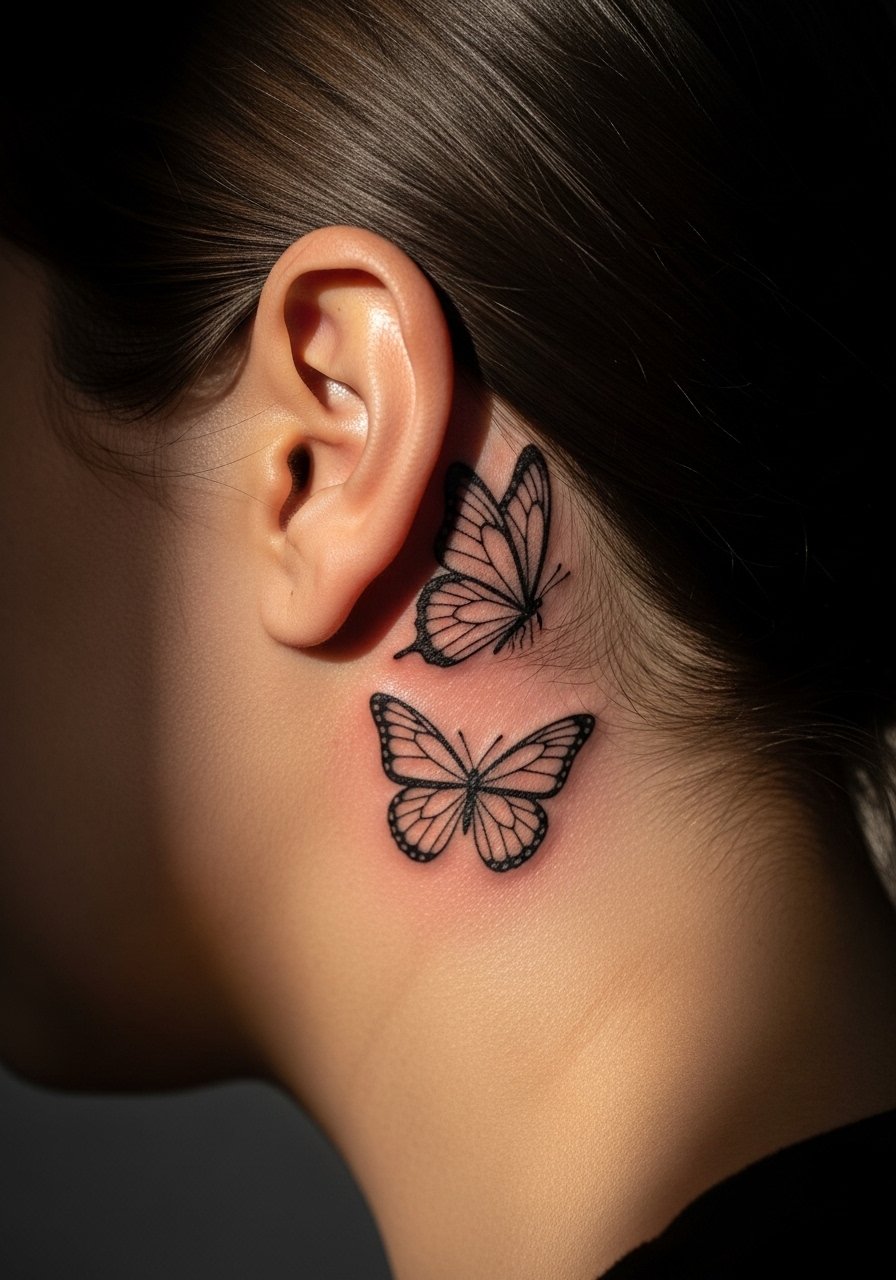
7. Tiny Double Butterfly Behind the Ear
This area looks discreet and romantic when done just behind the hairline on the neck. The session is quick, often 15 to 25 minutes, but placement needs careful stenciling because hair pressure can distort edges. For images, describe it as on the skin behind the ear below the hairline on the neck so the artist frames it correctly. A typical error is asking for mirrored tiny details that vanish under hairline movement. The style pairs well with short hair or an updo. For showing off, try a lightweight hair claw for days you want the tattoo visible.
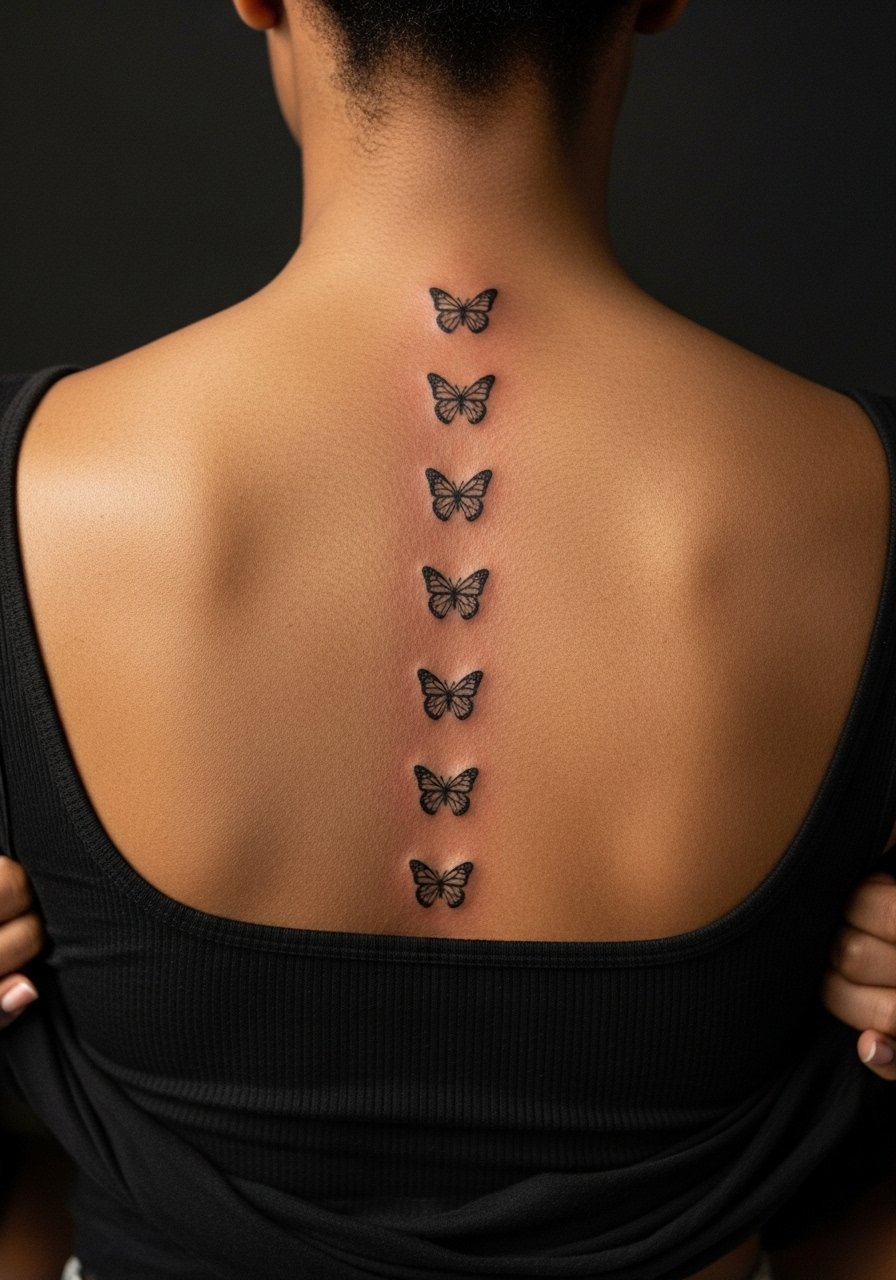
8. Stacked Mini Butterflies Along the Spine
There is something about a small vertical series that complements the spine without demanding a full back piece. Pain ranges from moderate to high depending on proximity to the vertebrae. Tell your artist you want even spacing and consistent scale to avoid the common mistake of uneven sizes that read cluttered. Expect an hour for a string of five minis. For showing this look in summer, open-back tops work well. Pair with an open-back bodysuit to let the series show without revealing too much skin.
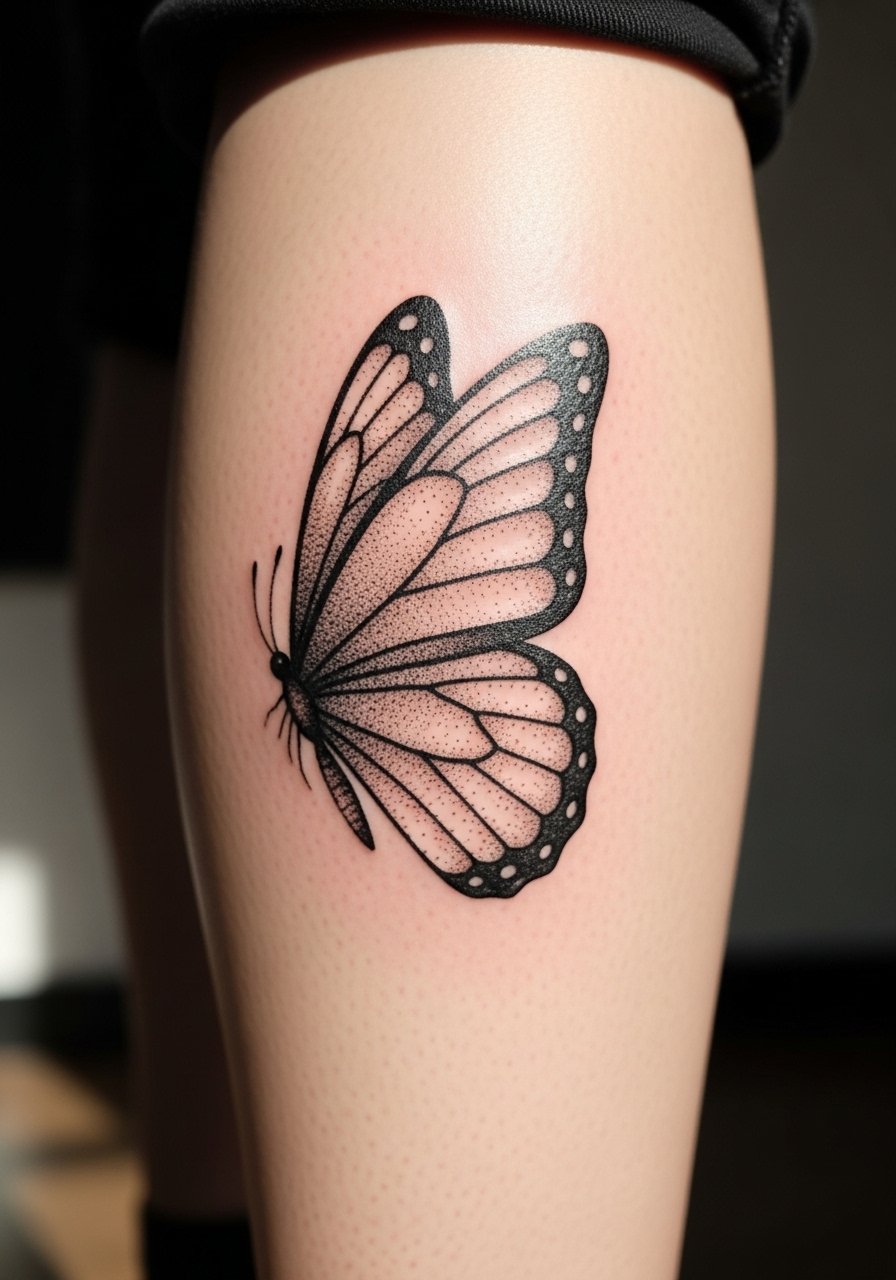
9. Dot Work Butterfly on the Calf
Dot work or stipple shading gives a tactile, textured look at small scale and it tends to age predictably because the artist uses density rather than continuous gradients. The calf is lower pain and has room for mid-level detail. In consultation, ask for stipple shading to keep contrast without saturation. A common mistake is compressing too much detail into a tiny space. Expect a 45 to 75 minute session. For footwear season, ankle boots or cropped dresses frame the calf. Try pairing with cropped denim skirts to show the art.
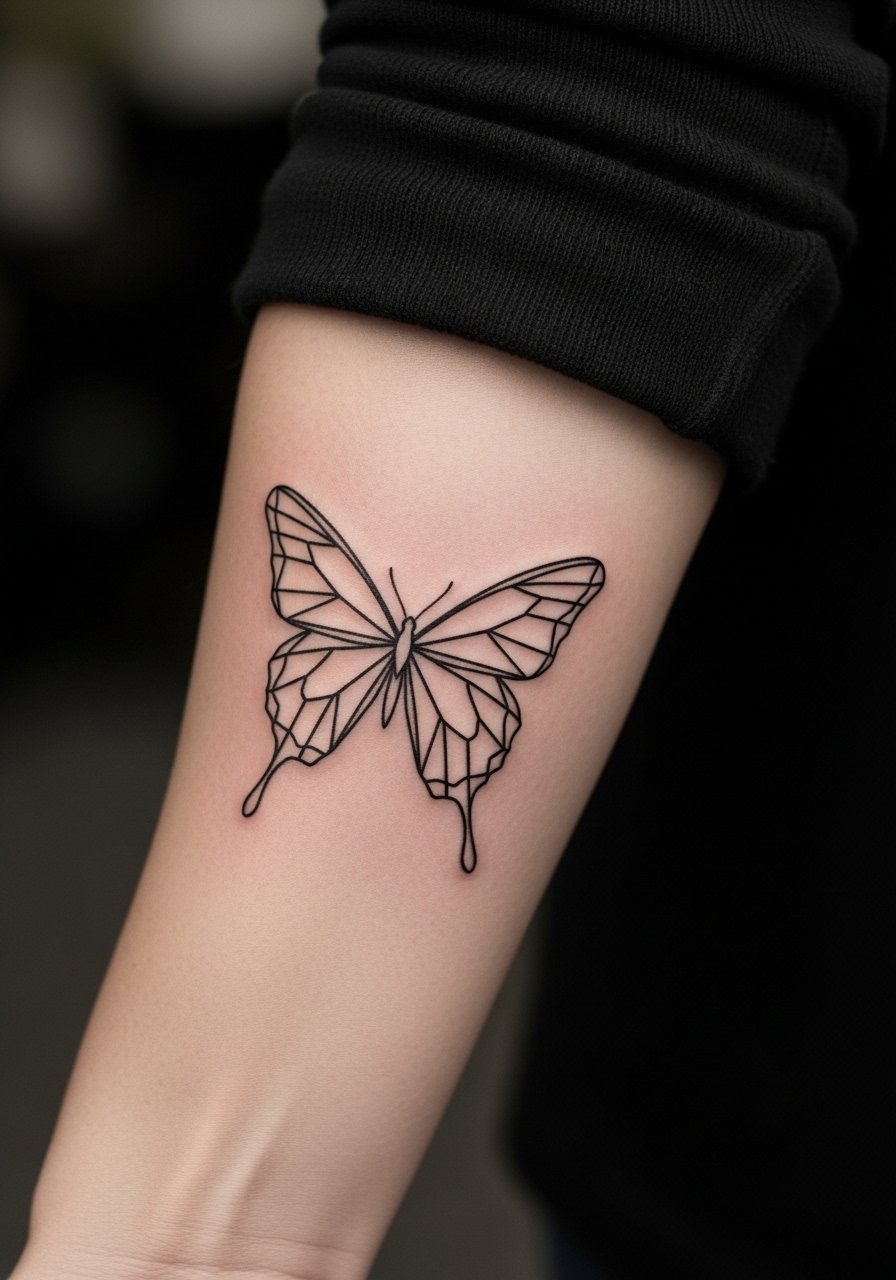
10. Negative Space Geometric Butterfly on the Forearm
There is visual clarity to negative space designs that helps them read longer than overly detailed fills. For forearm placement, ask for clear spacing between shapes and slightly bolder outer linework so the negative shapes stay distinct as the ink settles. Expect a one to two hour session depending on complexity. A typical mistake is overcrowding the negative areas with tiny dots that blur into solid grey. This forearm piece pairs with rolled-up sleeves and linen shirts for casual days. Wear a loose button-down shirt to frame the design without covering it.
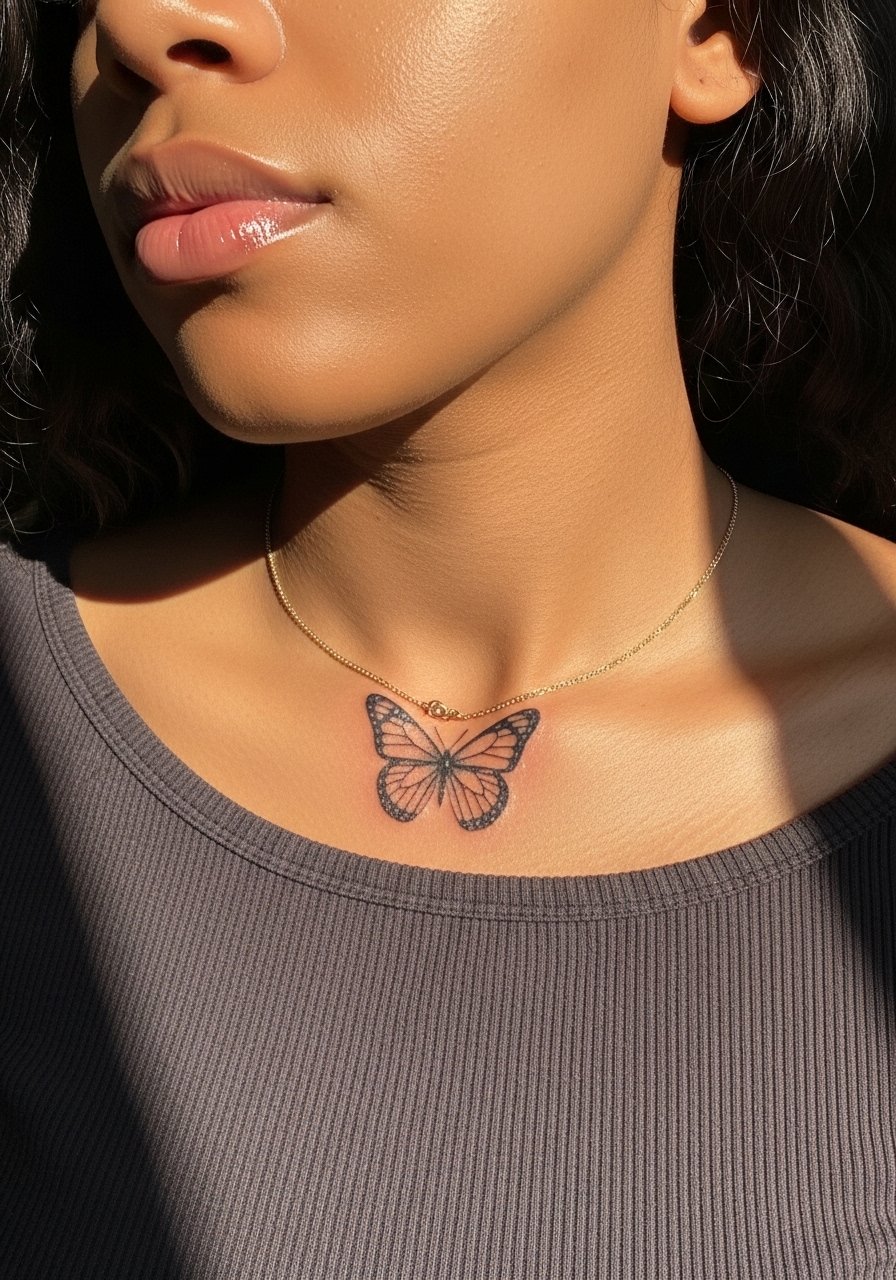
11. Tiny Perched Butterfly on the Collarbone Edge
A perched butterfly right at the collarbone edge reads delicate when placed with an intentional angle that follows bone shape. The collarbone moves with breath and shoulders, so tell your artist you want the wings following that curve to avoid awkward distortion. Sessions are short. The main mistake is centering the design, which fights the natural contour. For date nights, a thin chain pendant necklace sits above the design without competing for attention.
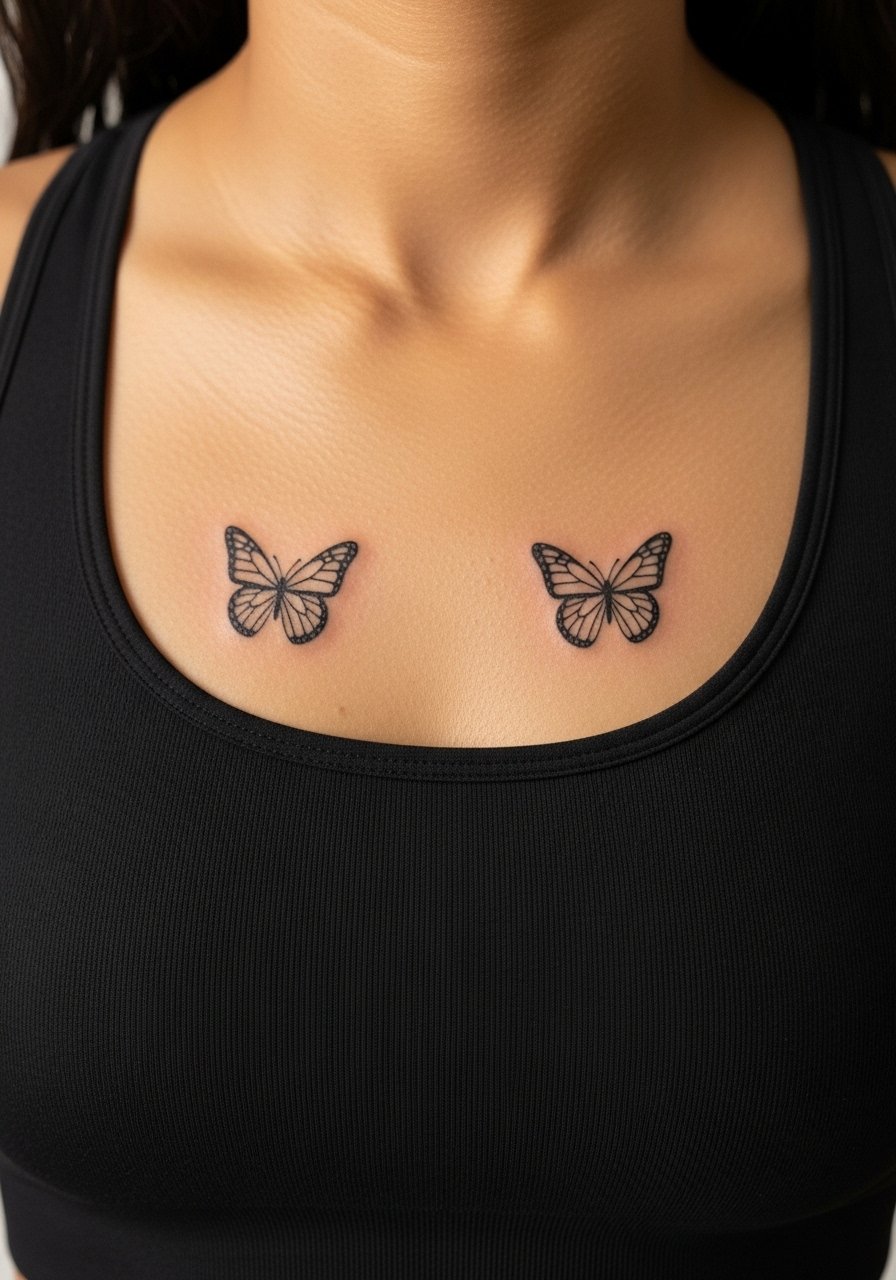
12. Mirrored Butterflies on Either Side of the Sternum
Sternum work requires a steady hand and a studio experienced with chest tattoos. The session can be longer and pain higher than average. Artists debate fine line on the sternum because of movement and stretch. If you choose mirrored pieces, ask for symmetry checks and to see the stencil standing. For the session, a fitted sports bra or bandeau helps the artist access the area while keeping you comfortable. This placement suits people who enjoy off-shoulder and plunge necklines.
13. Mandala-Inspired Butterfly on the Upper Arm
This design blends butterfly wings with mandala elements. Because mandalas have cultural roots, consider a slight variation rather than a direct replica if you want to respect origins. The upper arm gives muscle and skin tone that helps stipple and whip shading pop. Tell your artist you want mandala motifs integrated subtly so the butterfly silhouette remains primary. Sessions often run one to two hours. A frequent mistake is cramming too many radial lines into a small wing. For showing it off, roll up a linen sleeve shirt to the elbow.

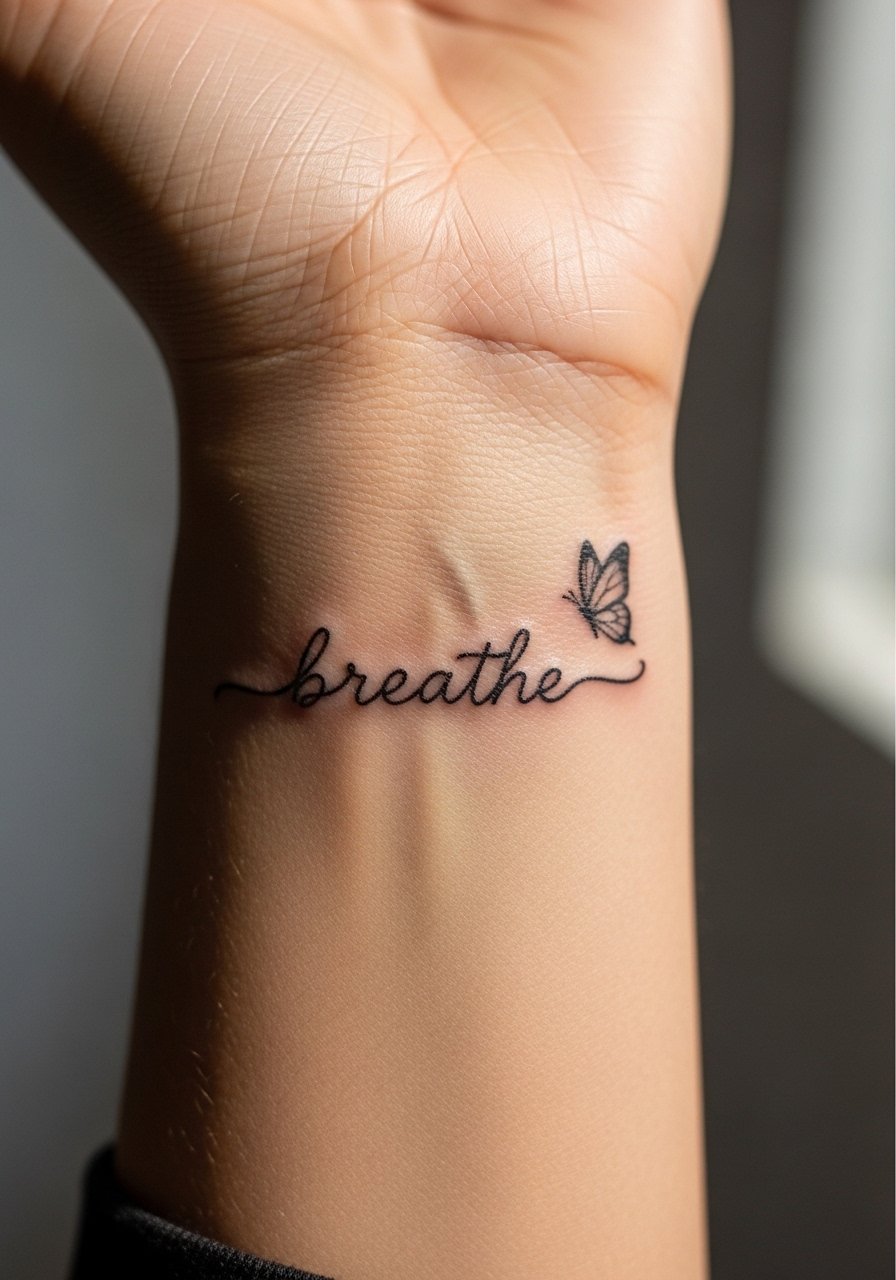
14. Minimal Script with Tiny Butterfly Accent on the Wrist
Pairing a short script with a micro butterfly draws the eye without overpowering the phrase. Ask for slightly bolder script spacing and tiny negative space around the butterfly so both elements remain legible over years. The wrist is visible and social, so expect touch-ups earlier than larger pieces. A common mistake is merging the script tail into the wing edge. For the session, wear a loose drawstring pant if you're traveling to a shop and want comfort post-needle.
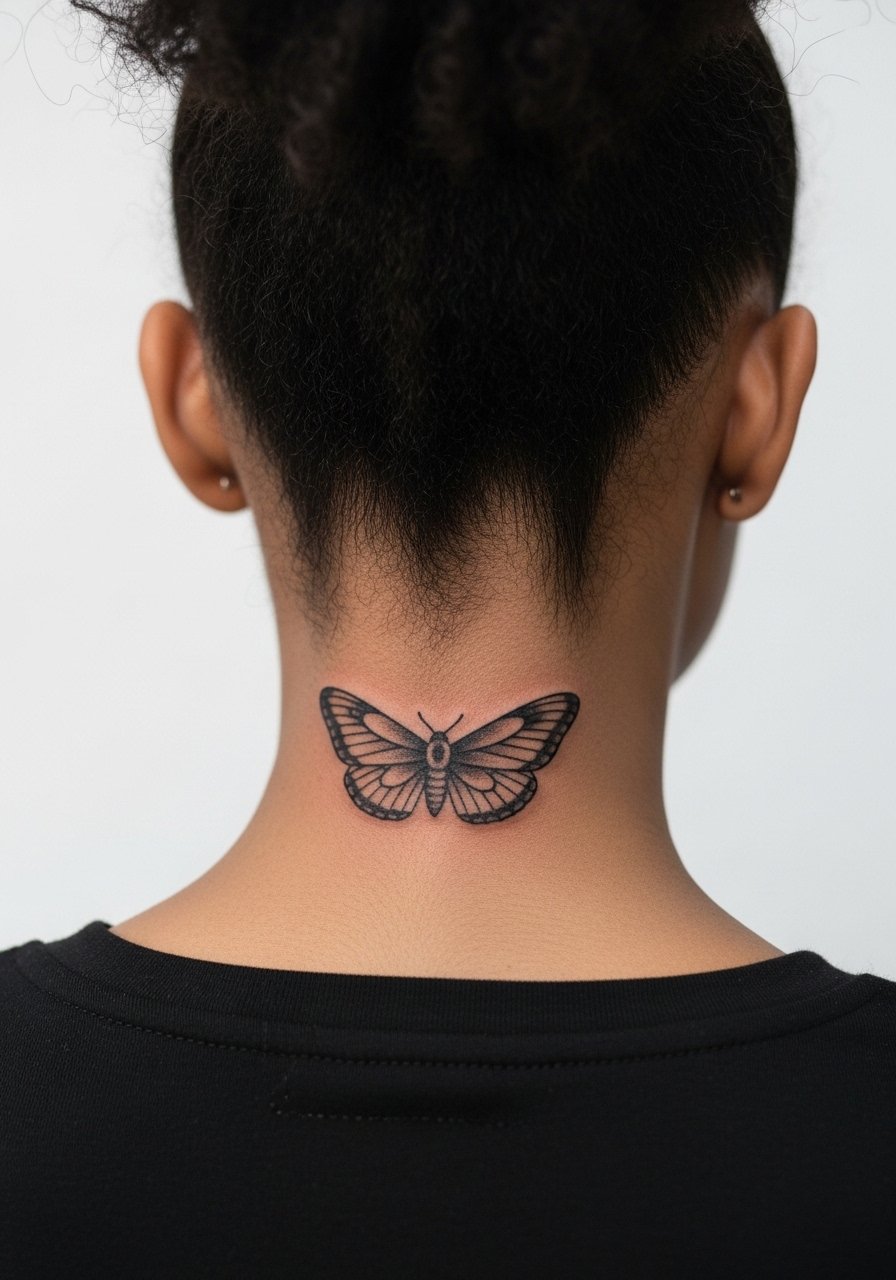
15. Tiny Moth-Style Butterfly on the Nape
A moth aesthetic uses muted tones and textured shading to evoke nocturnal energy. The nape is visible with hair up, so think about how often you will wear your hair that way. The session is moderate in time and discomfort. Ask your artist for hairline antennae that do not sit too close to the neckline to avoid early blurring. For showing off, a high ponytail hair tie makes the area visible for photos without being permanent. This placement needs a tidy stencil and a steady hand because small shifts show.
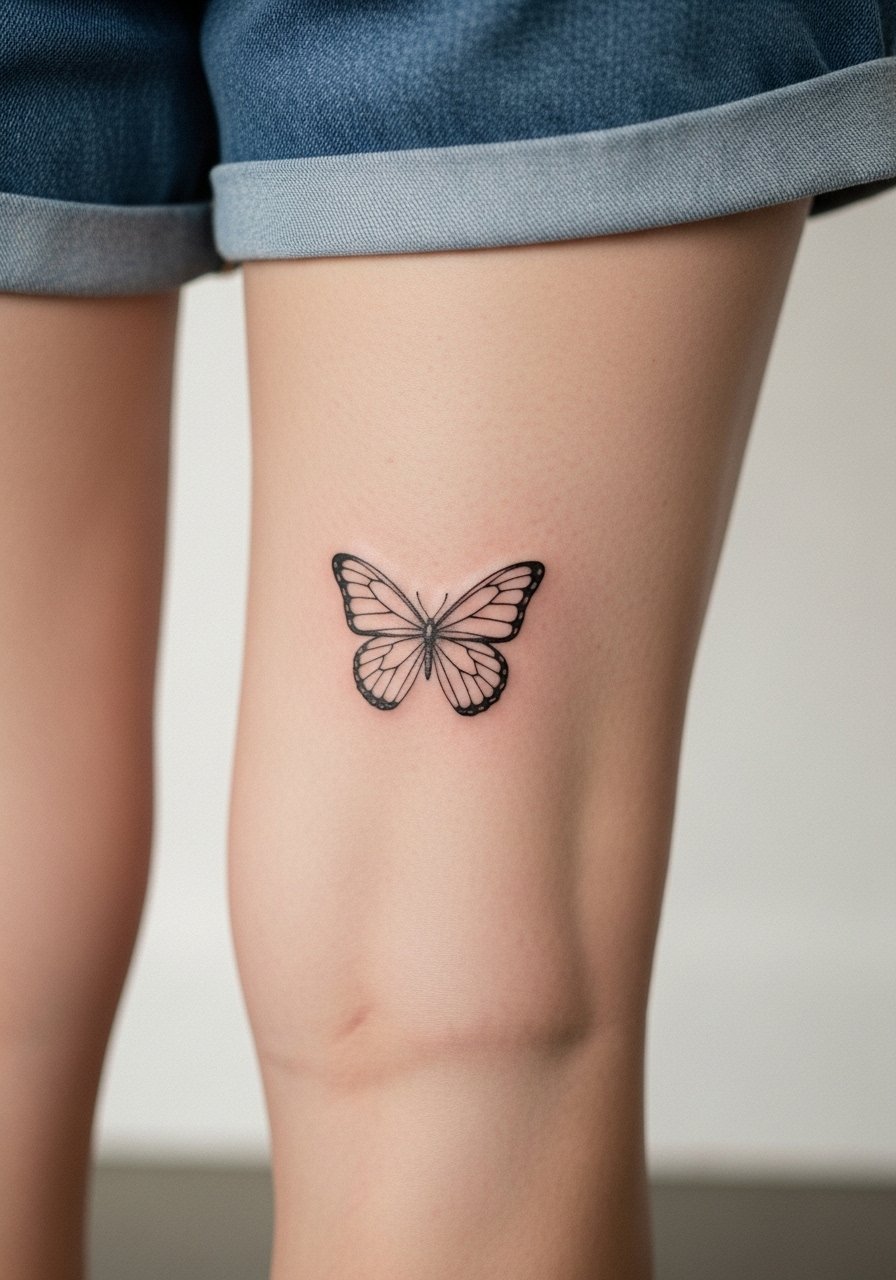
16. Tiny Butterfly Behind the Knee
The bend of the knee is a dynamic spot. Expect higher movement and a need for flexible stencil placement. Pain varies but is often moderate. Ask for slightly bolder outlines to handle the folding action. A frequent mistake is asking for dense interior detail that breaks up when the skin folds. For session wear, shorts that you can pull up a little or a wrap skirt make the area easy to access without fuss.
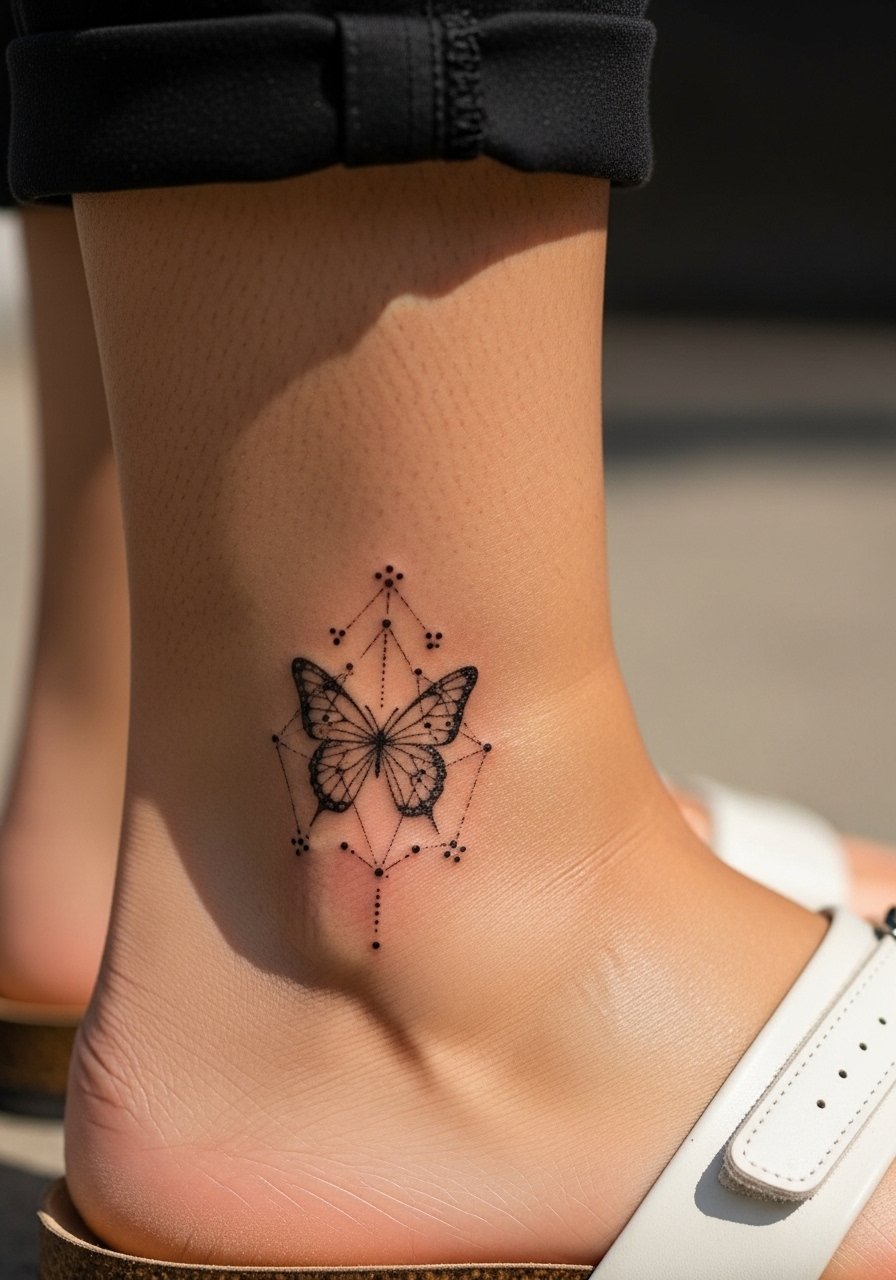
17. Tiny Constellation Butterfly on the Ankle Bone
This idea merges star dot work with wing shapes so the piece reads like a constellation from a distance. The ankle bone is a bony area that can sting more and scab differently than fleshy spots. Keep linework balanced and dots spaced to avoid early merging. A common mistake is packing too many tiny dots near the bone. Pair with sandals or cropped trousers. For showing off, try strappy sandals to keep the focus on the ankle line.
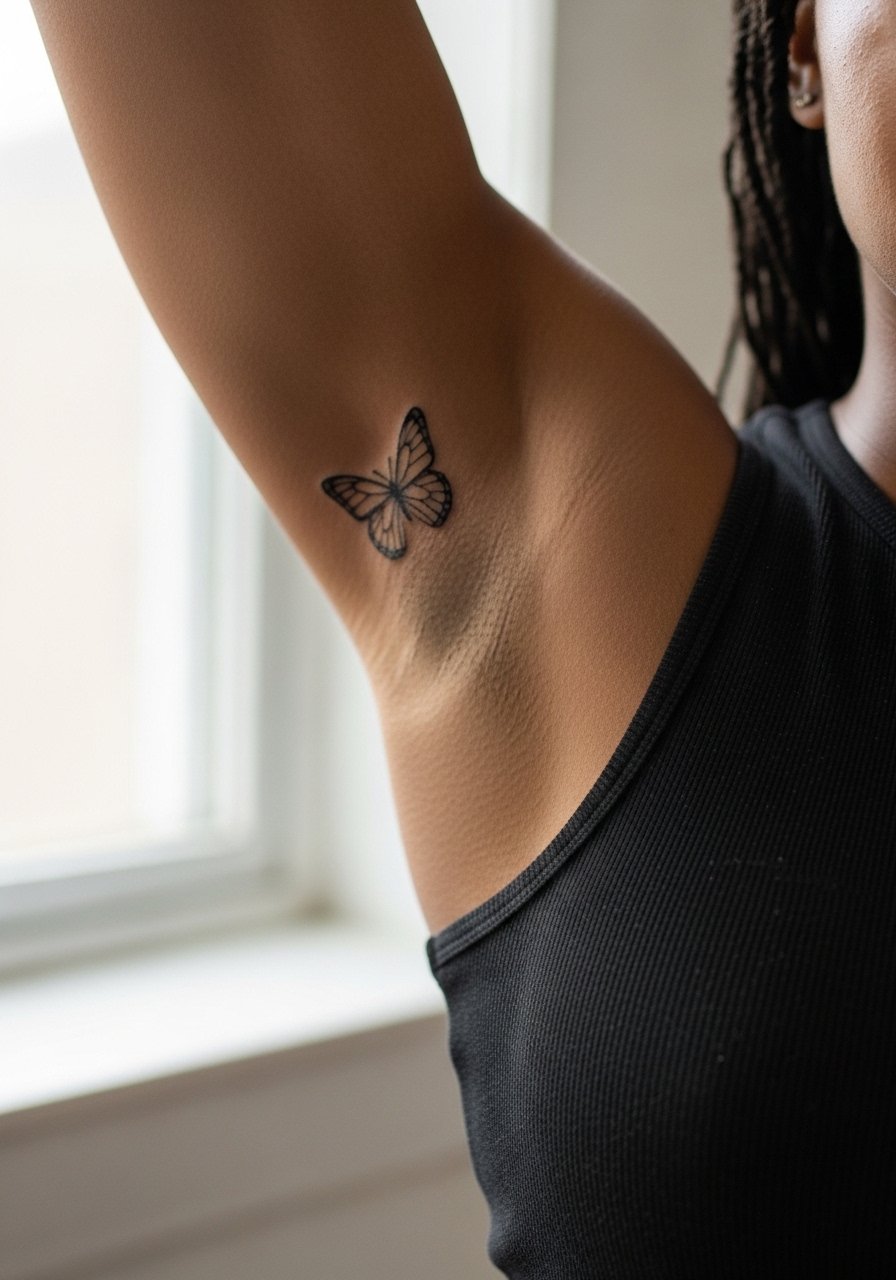
18. Tiny Butterfly on the Inner Bicep
The inner bicep is protected from sun and ages well when the linework is done with reliable depth. Expect moderate pain since the skin is softer there. Tell your artist you want the wings oriented so they look upright when your arm rests naturally. A common mistake is placing wings that read upside down at rest. For session comfort, wear a tank top so the artist has full access while you stay covered.
19. Tiny Butterfly with Floral Pairing on the Hip
Hip tattoos need careful framing because curves change with movement and weight shifts. The hip gives room for a small blossom pairing that supports the butterfly silhouette. The right consultation includes a discussion about how your clothing will sit over the spot. Sessions are moderate in length and often require a positioning check with you lying down and standing. For the shoot or beach days, high-waisted swim bottoms or denim pulled slightly down at the hip show the art without full exposure.
20. Minimal Negative Space Butterfly on the Side Thigh
Side thigh pieces sit in a less abrasive spot and can hold fine detail longer than the knee or ankle. Ask for negative space inside the wings to increase longevity instead of tiny shaded textures. The session is comfortable for most people and allows more scale if you want a slightly larger dainty piece. A common mistake is placing too much tiny shading close to the edges. For session wear, loose shorts you can shift are ideal. Consider pairing with a loose drawstring linen pant for the trip home.
21. Tiny Single-Winged Butterfly Near the Collar of a Shirt
A single-wing motif just at the shirt collar hits as a tiny peek of ink for people who prefer subtlety. Placement must respect fabric lines so the wings do not look odd under clothing. The session is short and the pain is low. Tell your artist you plan to wear collared shirts and want the wing to peek when unbuttoned. A common mistake is placing the wing too low so shirts always cover it. For showing off, a button-down shirt you can open one or two buttons frames the piece without revealing too much.
Frequently Asked Questions
Q: Do watercolor butterfly tattoos need different aftercare than fine line ones?
A: They do in practice because watercolor relies on softer saturation. Aftercare basics are the same, but expect to be gentler with drying and avoid heavy exfoliation longer. Plan on monitoring color fade and schedule a color touch-up earlier than you would for bold black linework.
Q: Will tiny butterfly linework blur faster on darker skin tones?
A: Not inherently. The key factors are placement and spacing. On any skin tone, ultra-fine single-needle lines that sit too close are the ones that blur first. Talk to an artist experienced with your skin tone about line weight and spacing during consultation.
Q: How do I find an artist who specializes in dainty butterfly designs without naming specific accounts?
A: Search hashtags like #fineLineTattoo, check local studio directories, read threads in tattoo subreddits, and visit conventions to see portfolios in real life. Look for healed photos in portfolios rather than only fresh pictures, which shows how the artist's work ages.
Q: Are there placements to avoid if I want my small butterfly to last without touch-ups?
A: High-friction areas such as fingers, palms, and the insides of thighs require more touch-ups. If you want minimal maintenance, choose areas with less daily abrasion and avoid spots that stretch a lot with movement.
Q: What should I wear to a ribcage or sternum session to stay comfortable and give the artist access?
A: Wear a fitted sports bra or a wide-neck top you can lift slightly so only the tattoo area is exposed. A wide-neck shirt or a zip-front hoodie works well for modesty and access.
Q: Can I get a tiny butterfly on the finger and expect it to look the same in five years?
A: Fingers age differently because of constant use and washing. Expect some fading and possible blurring. Many people accept periodic touch-ups for fingers as part of the design choice. If you want longevity without upkeep, pick a less abrasive placement.
