
Fine line willow motifs are everywhere online, but what actually lasts and still reads like a living piece on your skin is different from the trend shots. Color, spacing, and placement decide whether the branches flutter into readable detail or blur into a green smudge over time. Below are thoughtfully staged willow tree ideas, with notes on how they age, what to ask your artist, and practical wardrobe tips to show them off.
1. Watercolor Willow Branch on Inner Forearm
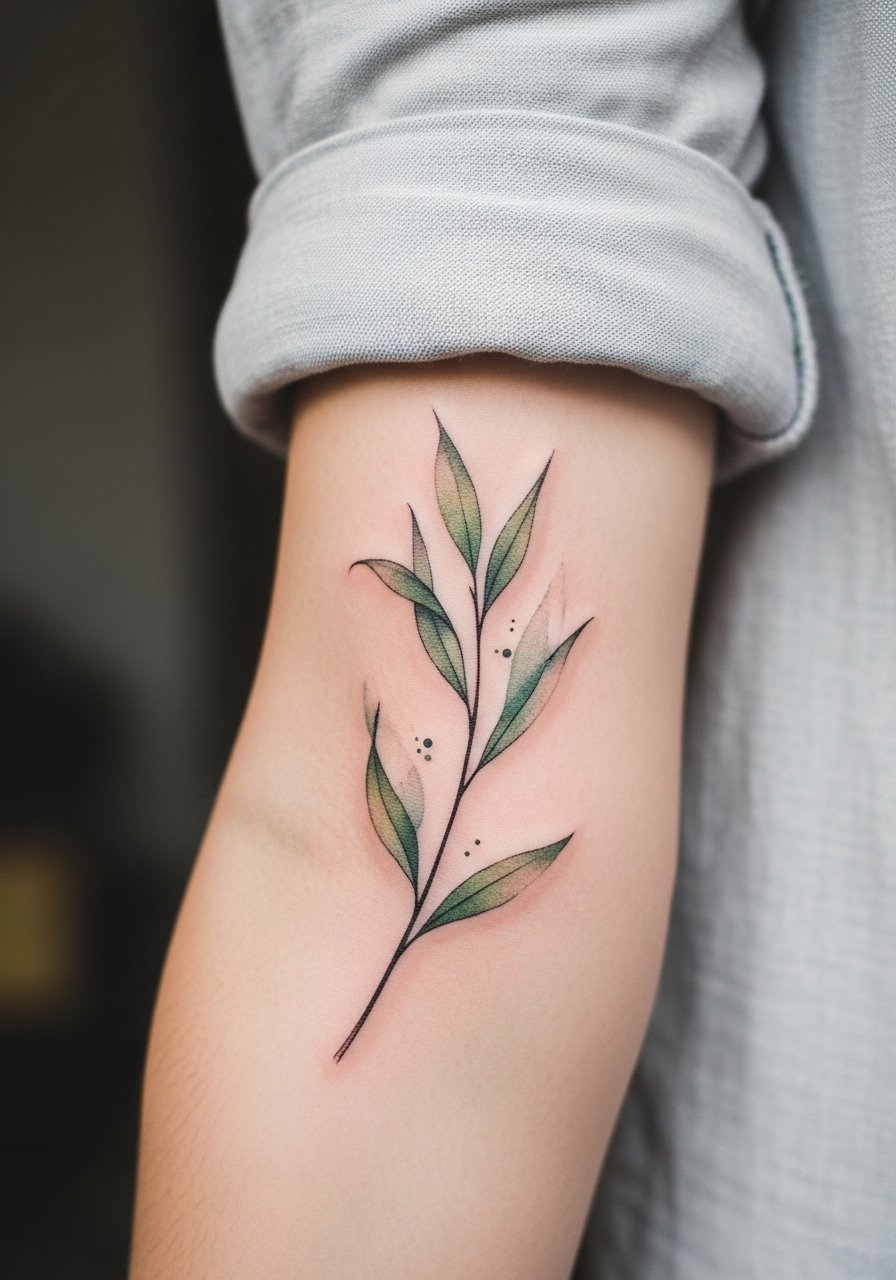
I recommend this when you want the motion of willow leaves without heavy black outlines. Pain is manageable for most people and sessions can run one to two hours depending on color layering. Tell your artist to keep the main branch in slightly stronger linework so the color wash can soften around it as the piece heals. A common mistake is packing too many tiny leaves into a compact area, which can merge over a couple of years. For the session wear something like a loose button-down shirt you can pull aside so the artist has clear access. Expect touch-up talk at year two if you love the soft watercolor look.
2. Tiny Willow Sprig on the Ankle
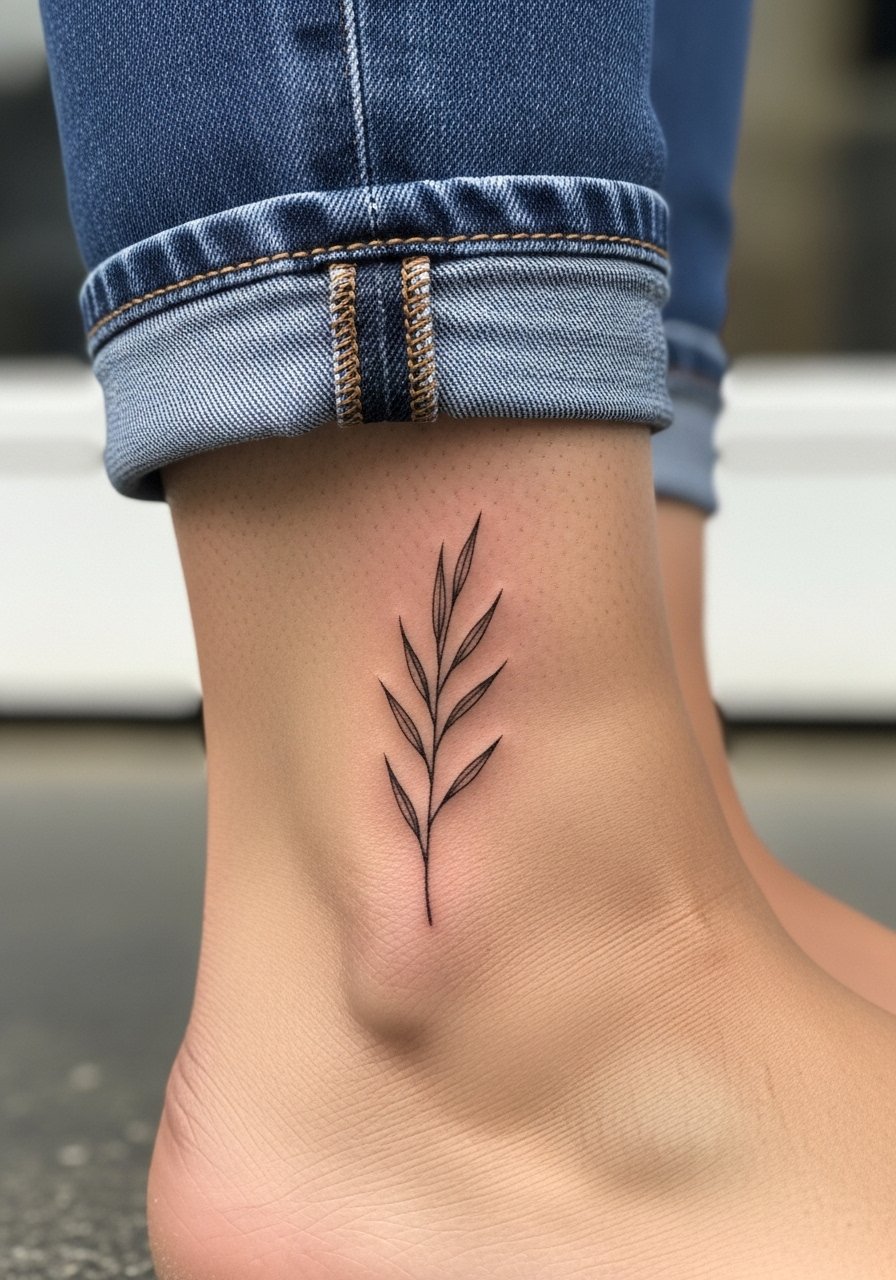
This tiny piece is a low-commitment way to carry willow energy. Ankle placements feel tender during the session, so expect brief breaks and a shorter sitting around 30 to 60 minutes. The main aging issue is friction from socks and shoes which can pull color faster than on upper limbs. Ask your artist for slightly bolder stems so the silhouette still reads after a year. Avoid asking for ultra-fine leaf details too close together. To show it off, consider a delicate anklet chain that sits below the tattoo instead of over it. For healing, watch rubbing zones and plan sock-free hours where possible.
3. Willow Silhouette Draping Across the Shoulder Blade

A shoulder blade placement lets the willow drape naturally with shoulder movement. Sessions range from 90 minutes to three hours for a medium piece. The biggest mistake is making the silhouette too tight against the spine or shoulder edge, which leads to distortion as the body moves and ages. I tell clients to place the thickest trunk where the shoulder muscle gives some padding so the piece does not sit on thin moving skin. This style ages well if the artist balances silhouette with negative space around the leaves. For evening looks, a racerback tank frames the piece without covering the drape.
4. Ribcage Willow in Stipple Shading

Fair warning: the ribcage is a high-pain placement and long sessions can be intense. Artists split on fine line here. One camp says the skin stretch makes lines blur within two years. The other camp argues that with proper needle depth and spacing, stipple shading and fine stems settle fine. When you consult, ask how the artist spaces dot work to avoid dense clusters near the rib fold. Most mistakes come from requesting excessive tiny detail in a high-movement area. This version uses stipple shading to keep contrast without dense saturation so it reads clearly at 6 months, two years, and beyond. For the session wear a loose cropped tee you can lift easily so the artist can work with minimal fuss.
5. Willow and Koi Fusion on the Calf
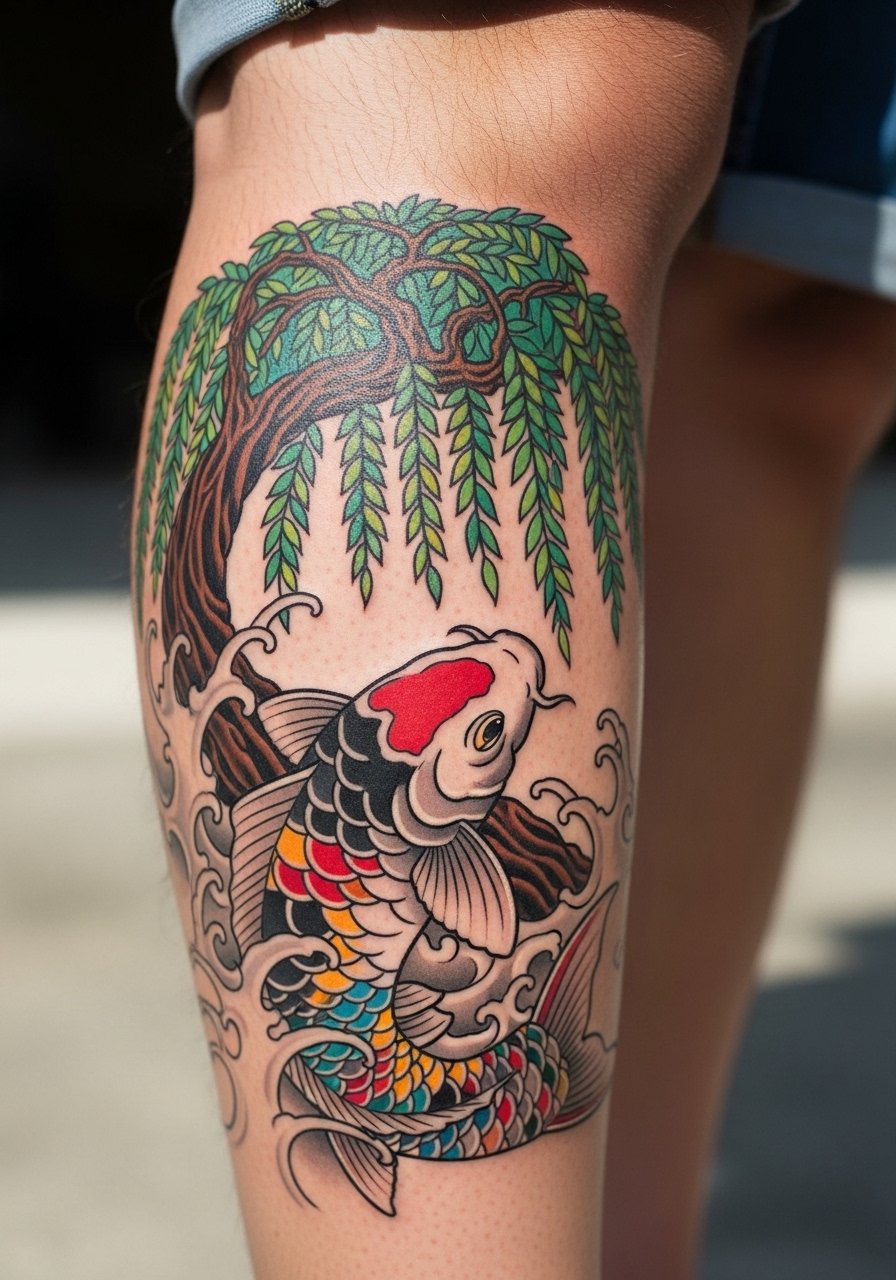
Pairing willow branches with koi brings story into the tattoo while giving the artist room to play with scale. Calf sessions are moderate in pain and often done in one to two sittings depending on color. Tell your artist you want the willow to read as background motion and the koi to have stronger saturation so it holds as the willow softens. A common oversight is trying to put too many narrative elements in one small panel. At six months the colors will look vivid, at two years the willow wash softens more than the koi. For showing it off, a mid-length skirt or casual shorts works well on warm days.
6. Micro-Realism Willow on the Side of the Neck

Neck tattoos are visible and invite career considerations, so think about placement before booking. This spot is more sensitive and sessions are often short with more frequent breaks. Micro-realism that relies on ultra-fine detail on the neck risks early softening due to constant movement and sun exposure. Ask your artist about slight scaling up of leaf details and deeper contrast near the stem to ensure longevity. A real mistake is asking for a tiny realistic cluster that ends up unreadable after a year. For the session, wear a wide-neck shirt you can pull aside easily and that keeps the rest of the shoulders covered.
Studio Day Picks
These first six pieces include delicate color and high-exposure spots, so a few items smooth the session and the first week.
-
Stencil transfer paper kit. Lets you preview placement directly on skin, which is vital for ankle and forearm pieces where scale reads differently in real life.
-
Alcohol-free cleansing foam. Gentle cleansing helps keep delicate color from irritating during the first wash without stripping pigment.
-
Thin protective film roll. Useful for wrist and neck spots that rub against clothing while the initial crust forms.
-
Medical-grade stencil pen set. Handy for artists who refine line placement for micro-realism and fine willow stems before the needle touches skin.
-
Aquaphor healing ointment. A thin layer during the first two to three days keeps the area moisturized and supports the delicate color in fine line and watercolor styles.
7. Willow Sleeve Accent with Negative Space

A sleeve accent allows you to use negative space to suggest movement without overworking leaf detail. Forearm work is moderate in pain and often completed over two or three sessions. Tell your artist you want open pockets of uninked skin inside the canopy so the design breathes over time. The mistake is packing continuous small foliage without rest, which makes the piece age into a muddled mass. At six months the negative spaces help the willow keep visual clarity, and at two to five years the reserved areas prevent blending. Pair this with rolled sleeves and a lightweight linen shirt to show the movement without hiding it.
8. Collarbones Willow Sprigs Framing the Neck

Collarbone pieces are visible and interact with jewelry. Sessions are short but precise because of the shallow bone and thin skin. The most common error is asking for ultra-fine multi-color detail right on the collarbone edge where movement and sun exposure cause faster fading. Ask for modest color saturation and slightly bolder anchor lines. Over time the outer leaves will soften first while the stem holds. For evening outfits, a thin chain pendant necklace sits above the sprigs without crowding them. Mention your daily wardrobe in consultation so the artist can advise on placement that complements what you wear.
9. Willow Wrapped Around a Finger

Finger tattoos are tempting but high risk. Expect touch-ups sooner than larger placements because of constant washing and thin skin change. The biggest mistake is asking for dense leaf clusters that sit on and around joints. Request a simple continuous stem with spaced leaves and stronger linework at the stem for longevity. Sessions are brief but can sting more due to bone proximity. In my experience, this approach needs a touch-up at year one to maintain crispness. Keep in mind some workplaces still react to hand ink, so consider that before committing. Wear minimal rings for the first month to avoid friction.
10. Willow and Moon Crescent on the Side Rib
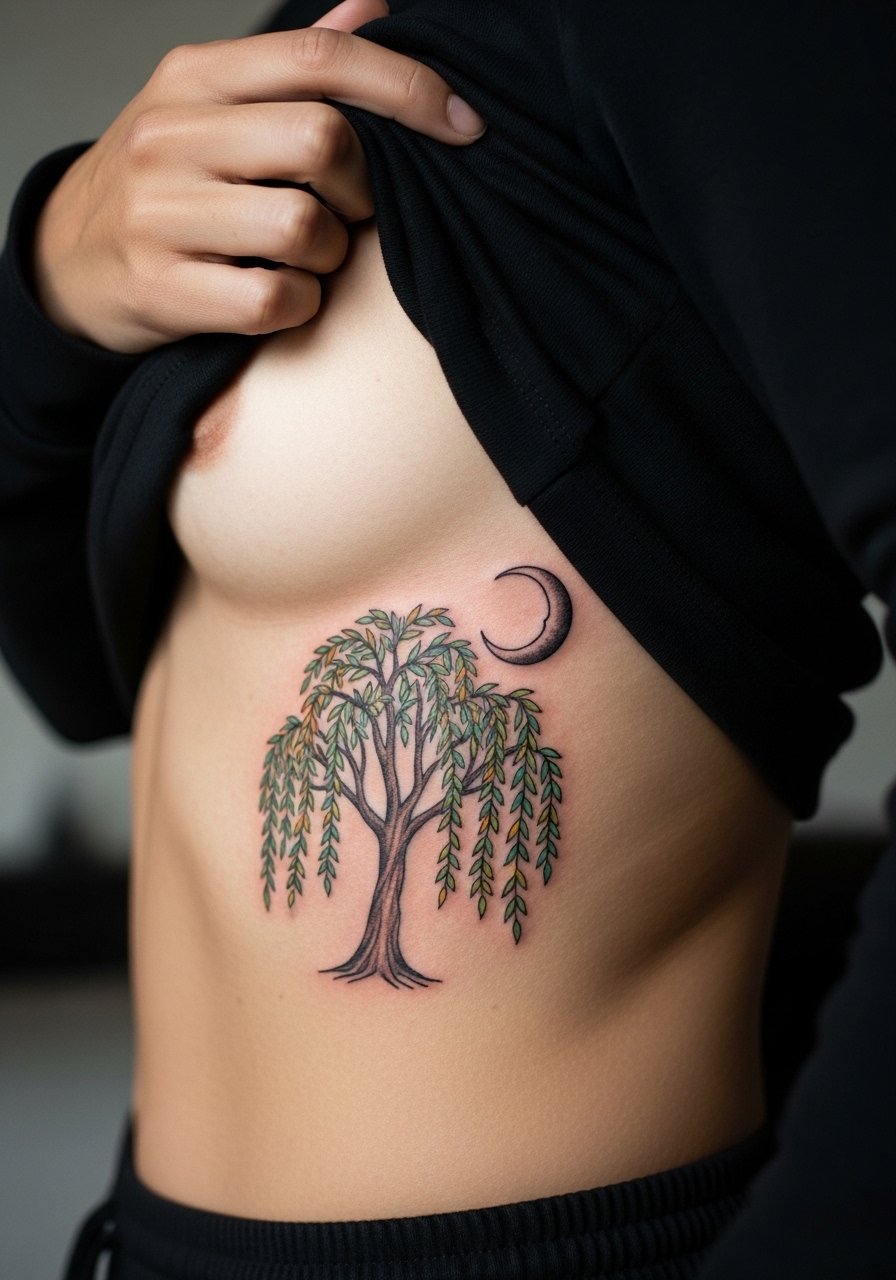
This composition brings a quiet narrative to the rib area but asks for patient sessions. Expect breaks; pain is high and sittings can stretch to two to three hours if color is involved. Discuss with your artist how the moon acts as a focal anchor so willow leaves can wash around it without cluttering. The common error is overloading the rib panel with micro-detail that loses clarity as the skin shifts. Over time the moon and bold stem will hold better than tiny leaf veins. For the session, pick a supportive sports bra or fitted top you can adjust so the artist has clean access and you stay comfortable.
11. Spine Willow Column with Fine Color Nodes

A spine placement creates a natural central axis that moves with posture. Sessions can be split across a few visits. The trick is avoiding too much tiny detail near the vertebrae where healing changes skin texture. Tell your artist to place color nodes slightly offset from the central stem so they do not rely on perfect alignment as the body moves. People often ask for dense stipple down the spine which can read fuzzy later. In this design the bold stem and spaced color keep the column readable at two and five years. For showing it off, an open-back dress or a low strap top frames the length without competing.
12. Mini Willow Cluster Behind the Ear

Behind-the-ear pieces are discreet and delicate. Sessions are short but require careful needle control because the area is thin and close to cartilage. A common mistake is requesting dense color or heavy shading which can feel lumpy and age poorly here. Ask for simple stems and a few leaves that follow hairline flow so the piece remains elegant whether your hair is up or down. Expect touch-up possible at year two if you wear your hair up often and expose the area to sun. This placement works well for those who want a small, personal mark.
13. Willow Branch Around the Thigh Hip Junction

Hip and upper-thigh spots are intimate and change with weight and movement. Sessions here are moderate in pain and often done in one extended sitting for a medium piece. The frequent mistake is placing too many rigid geometric elements on a curved surface, which warps over time. For willow designs keep the branch curves organic and allow negative space to follow your body contour. During consultation bring clothing examples so the artist can place the piece where swimsuits or shorts frame it best. Wear loose bottoms to the appointment so the area is easy to expose without strain.
14. Illustrated Willow in Retro Neo-Traditional Color on Upper Arm
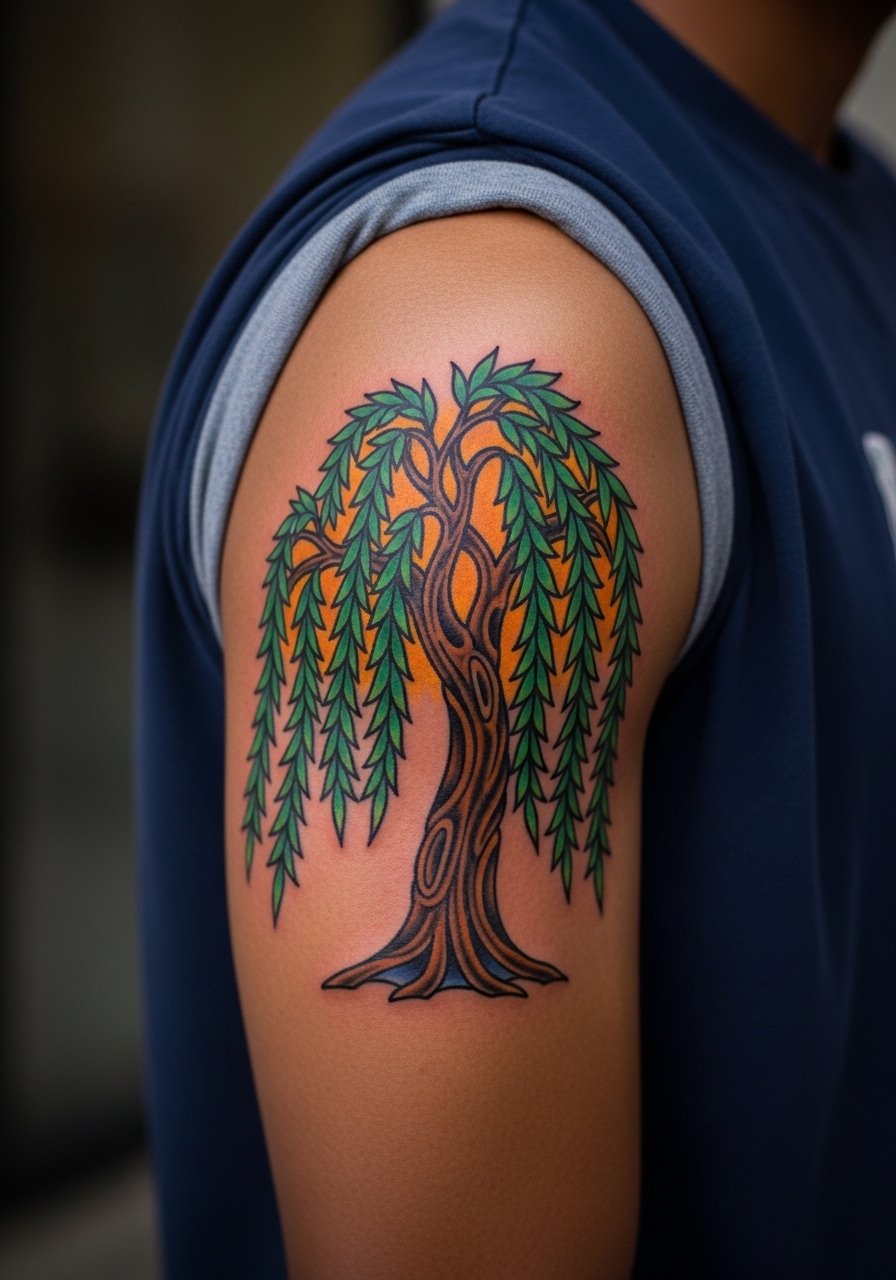
Neo-traditional palettes with heavier outlines age differently than soft washes. Upper arm placements have plenty of meat and typically heal well with less touch-up need. Ask for balanced saturation that gives the willow weight without expending all the negative space. A mistake is squashing too many bold elements into a small panel which can lead to color bleed visually. Over the years, the strong outlines will remain more readable than thin leaf detail. For casual show-off wear, a rolled sleeve or a fitted tee frames the upper arm and keeps attention on the bold color.
15. Willow Ash Canopy Across the Lower Back
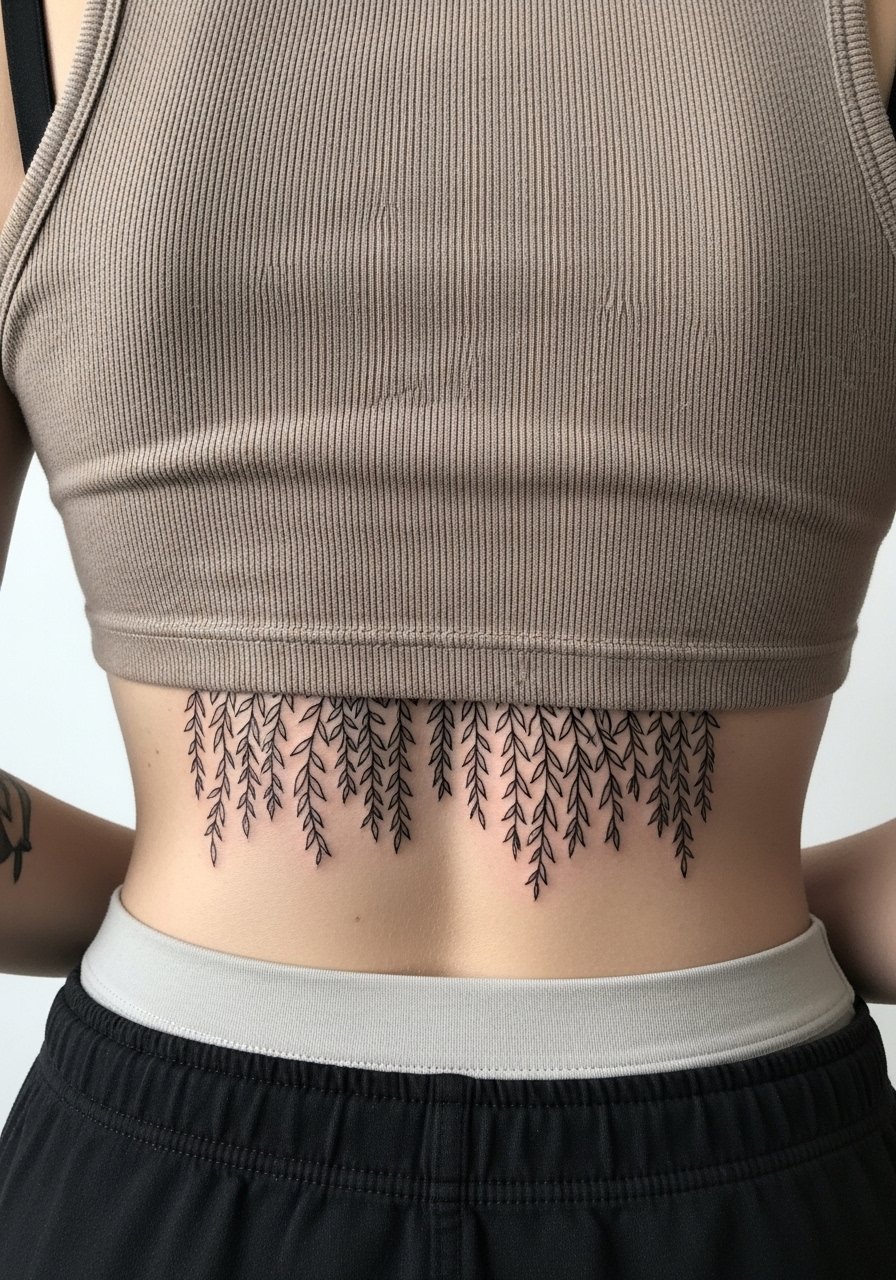
Lower back pieces can be discrete and expansive. Sessions can be split if you want a larger canopy with soft color. The main issue is friction from waistbands which accelerates fading. Avoid asking for ultra-tight leaf clusters on the lower back where clothing rub occurs. I usually recommend leaving a narrow band of negative space near the waistband to reduce wear. For showing it off, high-waisted jeans and cropped tops reveal the canopy without constant abrasion. Plan touch-ups around two to three years if you wear low-rise waistlines often.
16. Willow and Constellation on the Outer Bicep

This pairing gives the willow a celestial anchor and adds micro-detail that contrasts with branch motion. Outer bicep work is moderate in pain and often holds color well. The common error is packing constellation dots so close they merge with leaf details later, so ask for spacing that reads at arm distance and up close. At six months you will see crisp contrast, at two years the color might soften but the constellation dots remain readable if spaced properly. For casual display, sleeveless tops or rolled short sleeves complement the alignment.
17. Willow Spine of Leaves Along the Collar of a Jacket

This subtle placement sits where clothing often frames the ink, so it reads as an accent rather than a full piece. Sessions are brief and sensitivity is low compared with torso work. One mistake people make is requesting ultra-fine script-level stems that vanish under jacket friction. Ask for slightly stronger main stems so the row keeps its rhythm even if some leaf tips soften. Over time the collar-framed location can actually help preserve the piece because it avoids constant sun. For style, lightweight open collars and wide-neck jackets let the small row peek out without competing.
Frequently Asked Questions
Q: Will watercolor willow tattoos fade faster than neo-traditional ones on the forearm?
A: In my experience watercolor washes can look softer sooner because the color sits with less heavy outline. Neo-traditional pieces use stronger linework and saturation which holds clearer longer on forearms. Ask your artist about contrast points so the watercolor still has anchor lines that age more predictably.
Q: Are ribcage willow tattoos a bad idea because of skin stretch?
A: Artists are split on this. One camp says ribs blur fine line quickly due to movement and thin skin. The other camp believes correct spacing and dot work can keep detail intact. It depends on your anatomy and the artist's experience with rib placements, so discuss spacing, depth, and a realistic touch-up timeline in the consult.
Q: How should I dress for a neck or collarbone willow session?
A: Wear a wide-neck or button-down you can pull aside easily so the artist has access while keeping you covered elsewhere. A wide-neck shirt works well for most collarbone and neck sessions and keeps you comfortable during breaks.
Q: Do finger and ankle willow designs require more frequent touch-ups?
A: Yes. Fingers and ankles see constant washing, friction, and thin skin change so touch-ups are common at around one to two years. Choose simple stems and slightly bolder anchors to help longevity and expect a maintenance plan discussed during booking.
Q: Can I combine willow imagery with cultural motifs like mandalas respectfully?
A: You can, but be mindful of origins. If a motif traces to a tradition, consider adapting elements rather than copying sacred symbols directly. Bring that topic up in consultation and ask the artist for respectful variations that honor source aesthetics without replicating ritual pieces.
Q: What should I ask about when booking an artist for micro-realism willow work on the neck?
A: Ask about their track record with neck placements, how they handle line depth in thin skin, and examples of healed work in similar spots. Ask how they plan for touch-ups and what their recommendation is for scaling detail so the piece reads over time.
