
The stencil sits cool on the forearm and the room smells faintly of green soap. You can feel the pattern before the needle starts, and that moment decides how the color will settle for years. Pick line weight and saturation with as much care as you pick the actual image. The choices below show which colorful evil eye tattoo styles hold color, which need touch-ups, and what to ask for when you book the session.
1. Colorful Neo-Traditional Evil Eye with Florals on Outer Forearm
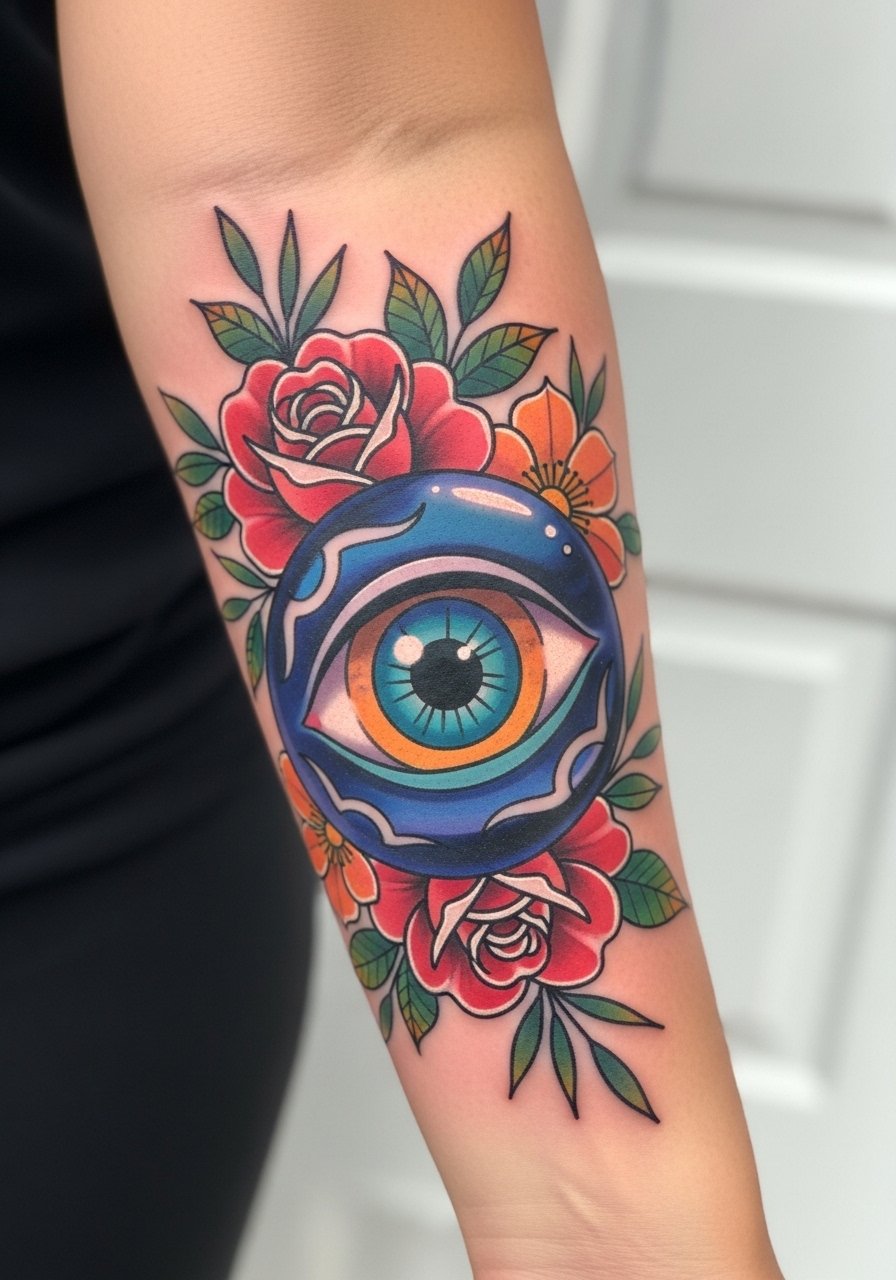
I see neo-traditional forearm pieces last when artists pair bold outlines with high saturation inside. For this evil eye, ask your artist for decisive linework and layered color fields rather than tiny painterly strokes. The biggest mistake is making the inner details too small. That causes the iris to blur into a gray mush by year three. Expect a two-hour session for a 3-inch piece and a touch-up around year two if you live in strong sun. For showing it off, rolled cuffs highlight the outer forearm. Try a rolled cuff chambray shirt on cooler days. During the session wear a sleeveless tank or an unbuttoned shirt so the artist has easy access.
2. Watercolor Evil Eye Mandala on Shoulder Blade
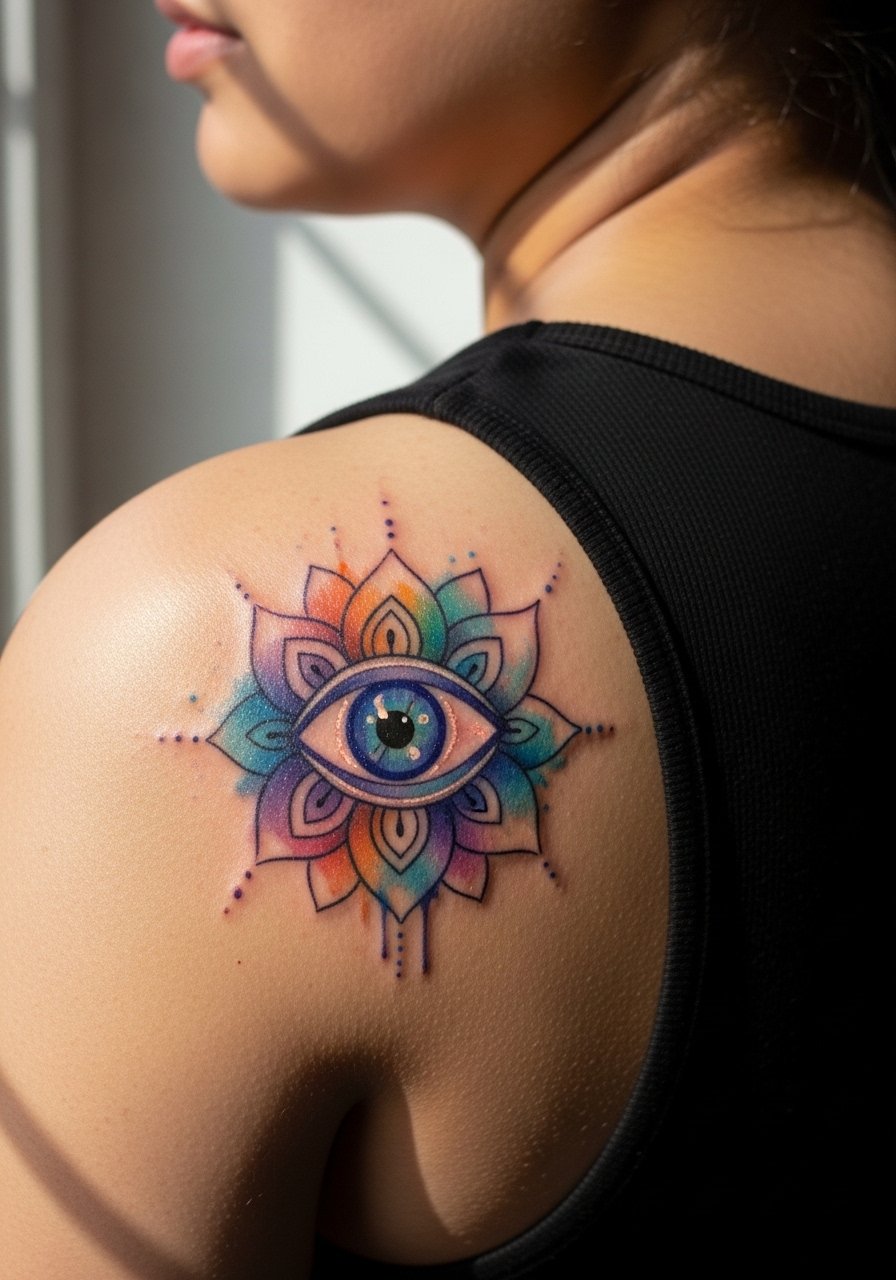
Watercolor washes look ethereal fresh but need careful edge control to age well. For shoulder blade placement the skin is forgiving and the piece usually heals with gentle blending. Tell your artist you want soft edges but clear contrast around the pupil so the eye reads from a distance. A common aging issue is over-blending at the edges, which causes the whole mandala to slump into a desaturated patch after a few years. Expect one to two hours and minimal pain. For the session wear a sleeveless muscle tank so the artist can work without tugging at fabric. The shoulder blade is a good place to test UV-reactive accents if you want a blacklight effect later.
3. Fine Line Evil Eye with Dots and Geometric Frame on Inner Wrist
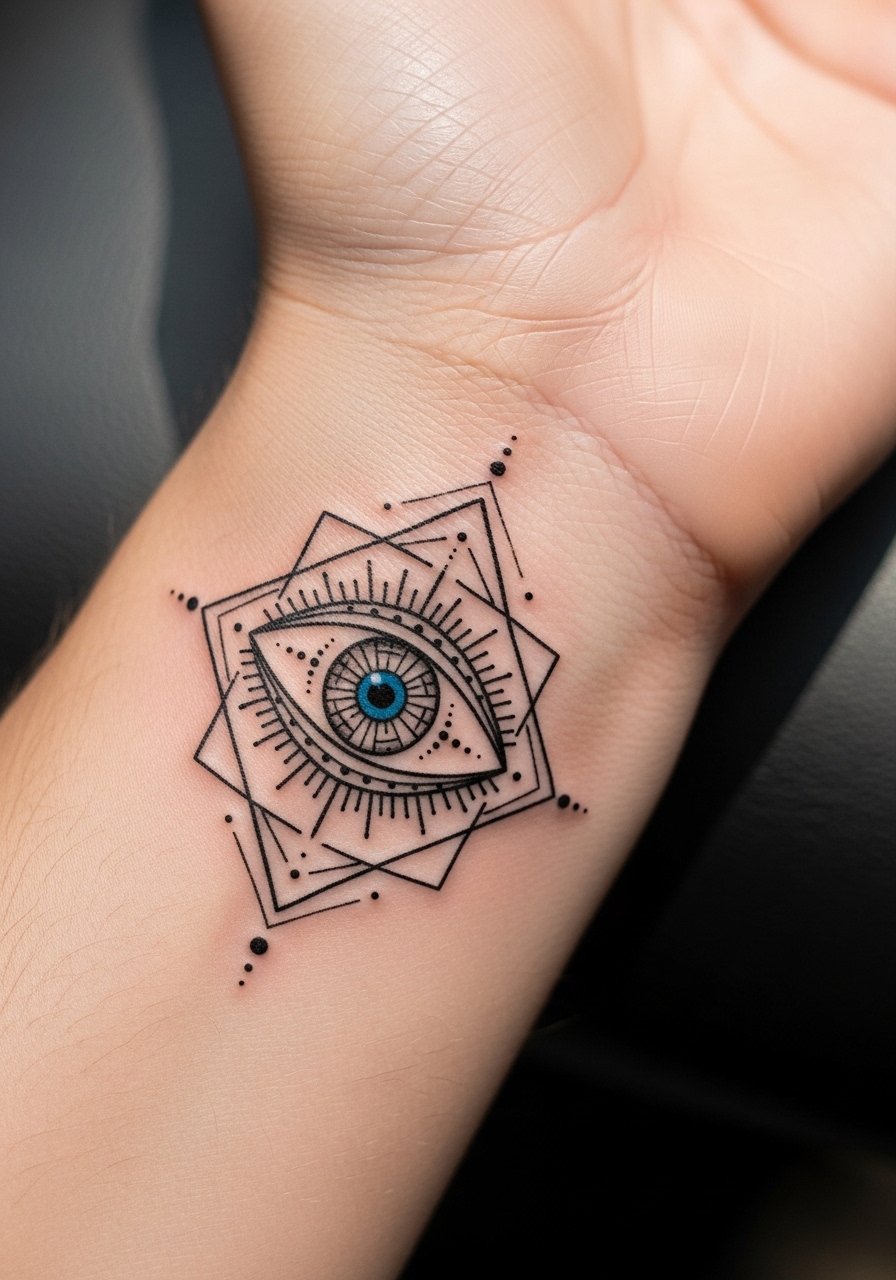
Fine line on the wrist is a top pick for low-profile protection motifs, but it carries a longevity trade-off. I've noticed thin single-needle work can blur quicker on active wrists. Ask for slightly heavier outer contour lines around the iris while keeping interior filigree delicate. A common mistake is asking for micro-detail at under one inch. That detail usually needs a touch-up by year two. Plan for a one-hour session with moderate pain. For showing it off, stack a dainty gold bangle set opposite the piece so attention sits on the wrist without crowding the linework. Avoid jewelry on the fresh tattoo during the first week.
4. Blackwork Evil Eye with Ornamental Patterns on Upper Arm
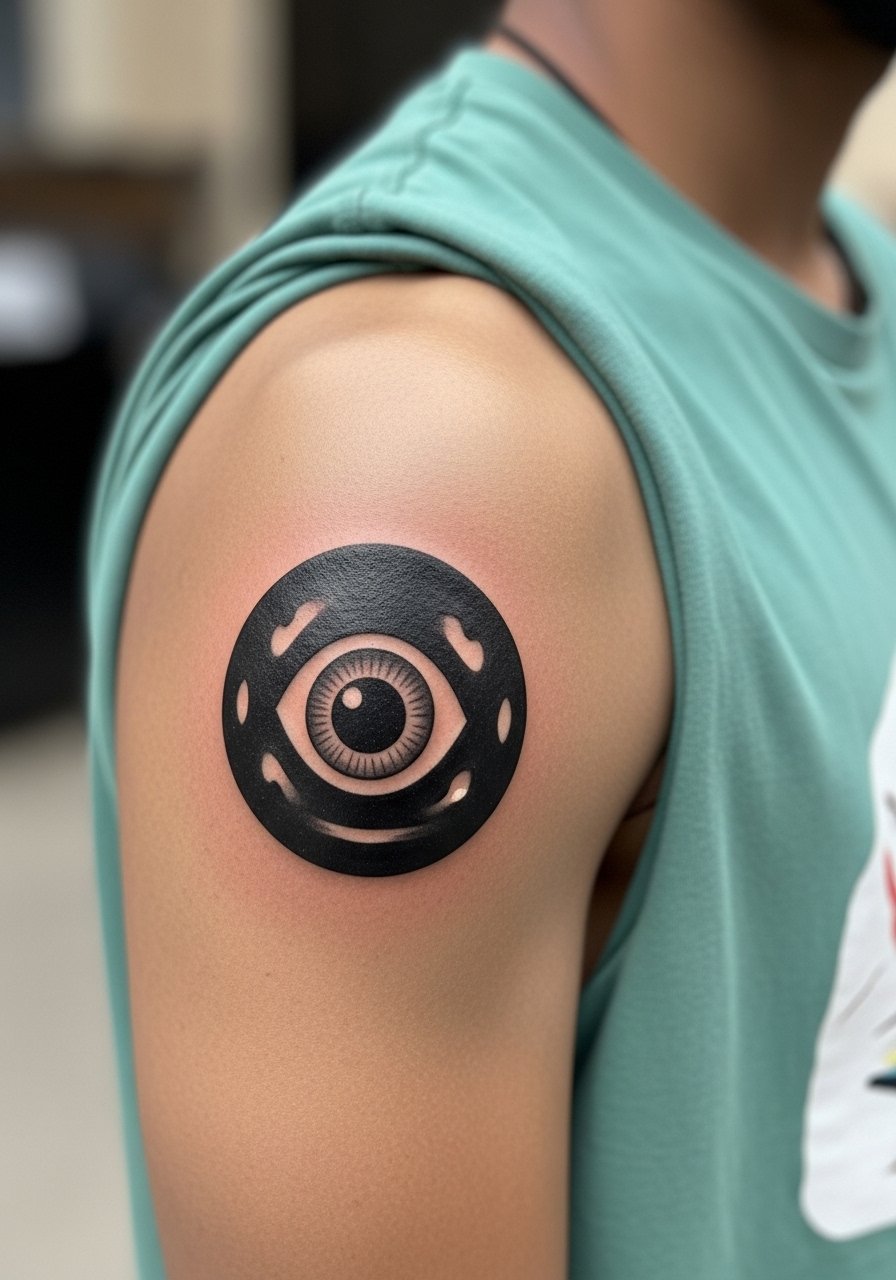
Blackwork survives years better than many color pieces, and on the upper arm it keeps contrast without constant sun exposure. For a colorful twist, request deep black outlines with selective turquoise or gold accents in the eye center. Artists disagree about contrast levels. One camp prefers dense black saturation for longevity. The other camp says selective color pops keep the design modern while still aging well. State where you stand in consultation. Expect two sessions if you want heavy fills and ornamental layering. This spot hurts less than ribs and often reads strong through gym wear. Pair with high-sleeve muscle tanks when you want to hide it or with a sleeveless muscle tank to show it off.
5. Micro-Realism Evil Eye on Finger or Behind Ear
Micro-realism on fingers offers a discrete option but accepts faster fading. Fingers see friction from washing and objects, so expect colors to soften within a year. For behind-the-ear placement pick a design sized to the small canvas and ask for pigment saturation deeper than a typical fine line piece. The common mistake is treating finger micro work like a forearm piece. The session time is short, often under an hour, but touch-ups are common. For showing off a finger piece in summer try strappy sandals and cropped jeans when the look includes ankle work. During booking search hashtags like #MicroRealism and check recent healed photos on local studio pages.
6. Ignorant Style Evil Eye with Hearts and Stars on Ankle

Ignorant style keeps lines bold and fills flat, which helps color survive in high-friction zones like the ankle. The design reads playful and usually needs one session for a small 2-inch piece. The biggest error is asking for tiny script inside the naive shapes. It clashes with the crude aesthetic and blurs. For showing off this placement wear strappy ankle sandals or cropped straight jeans. For the session wear loose joggers or shorts so the artist can access the ankle freely. Expect modest discomfort near the bone and a touch-up window around year two if you wear lots of open footwear.
Pack Smart
The ankle, wrist, and shoulder ideas above heal differently, so a few small items smooth the session and the first week.
-
OzHeal Salve. Lightweight balm praised by forum users for non-greasy healing in humid climates and for keeping bright colors from clumping on the first week.
-
InkFix Barrier Film. Second-skin alternative to standard wraps that helps reduce bubble issues on busy spots like fingers and ankles.
-
Japanese Hada Labo Lotion. Simple hydrating lotion some people use diluted for low-shine moisture on darker skin tones during later healing stages.
-
Indie Pine Tar Balm. Thin breathable balm artists recommend as a lighter option than heavy occlusives during color healing.
-
Indie Tattoo Lotion. A thinner hemp-based lotion many people choose post-first week to avoid clogged pores while keeping saturation intact.
7. Ornamental Evil Eye Hamsa on Collarbone
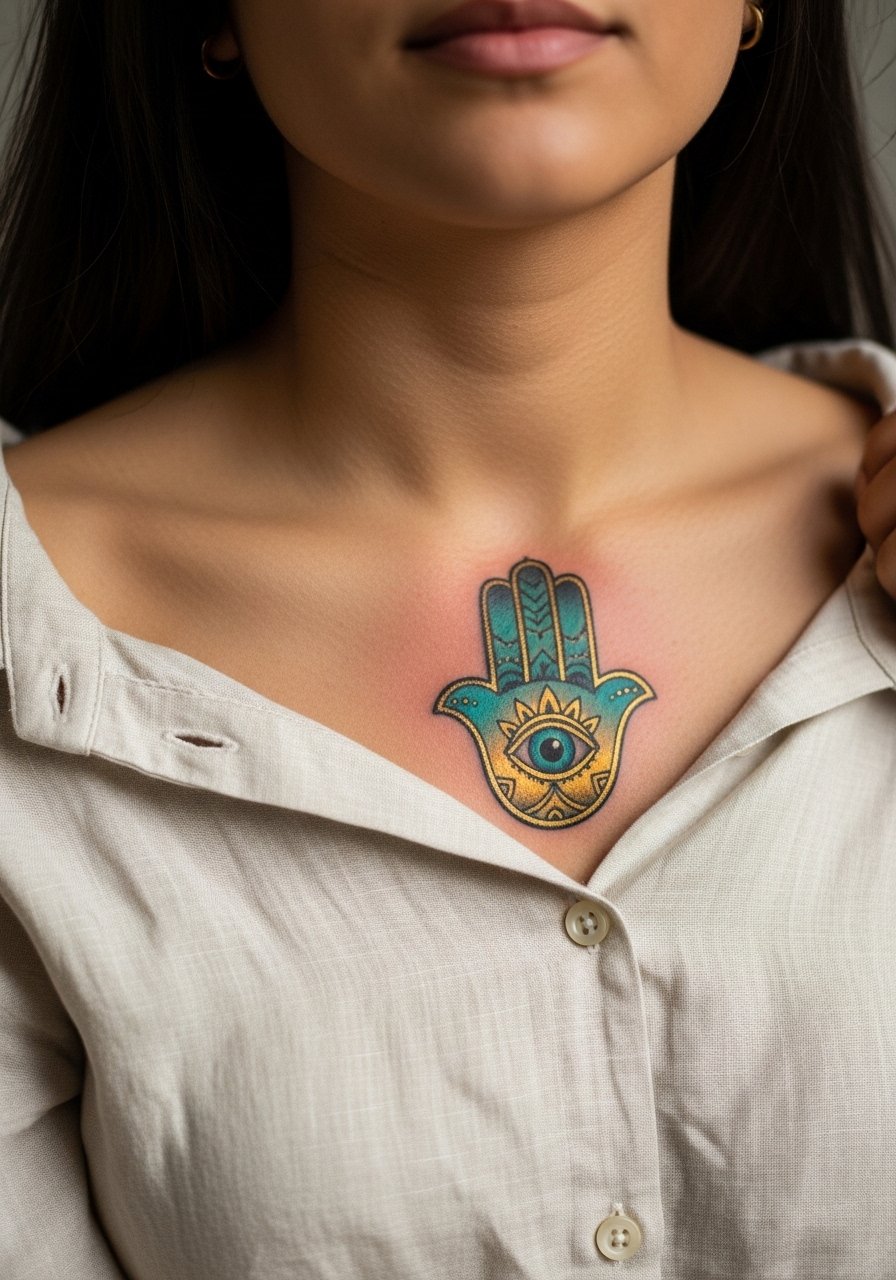
Collarbone work reads like jewelry if the linework is tight and the gradients are subtle. For an ornamental hamsa ask for spacing between filigree elements so the pattern breathes as it ages. A common mistake is packing too many tiny flourishes into a 3-inch area. That creates a muddy look after two to three years. Pain is moderate and touch-ups are more about color refresh than fixing blowouts. For showing it off, pair the piece with an off shoulder linen blouse or a long pendant necklace that sits above the design. Respect the pattern origin by asking the artist for slight, personal variations instead of a direct cultural replica.
8. Traditional American Evil Eye with Anchor on Calf
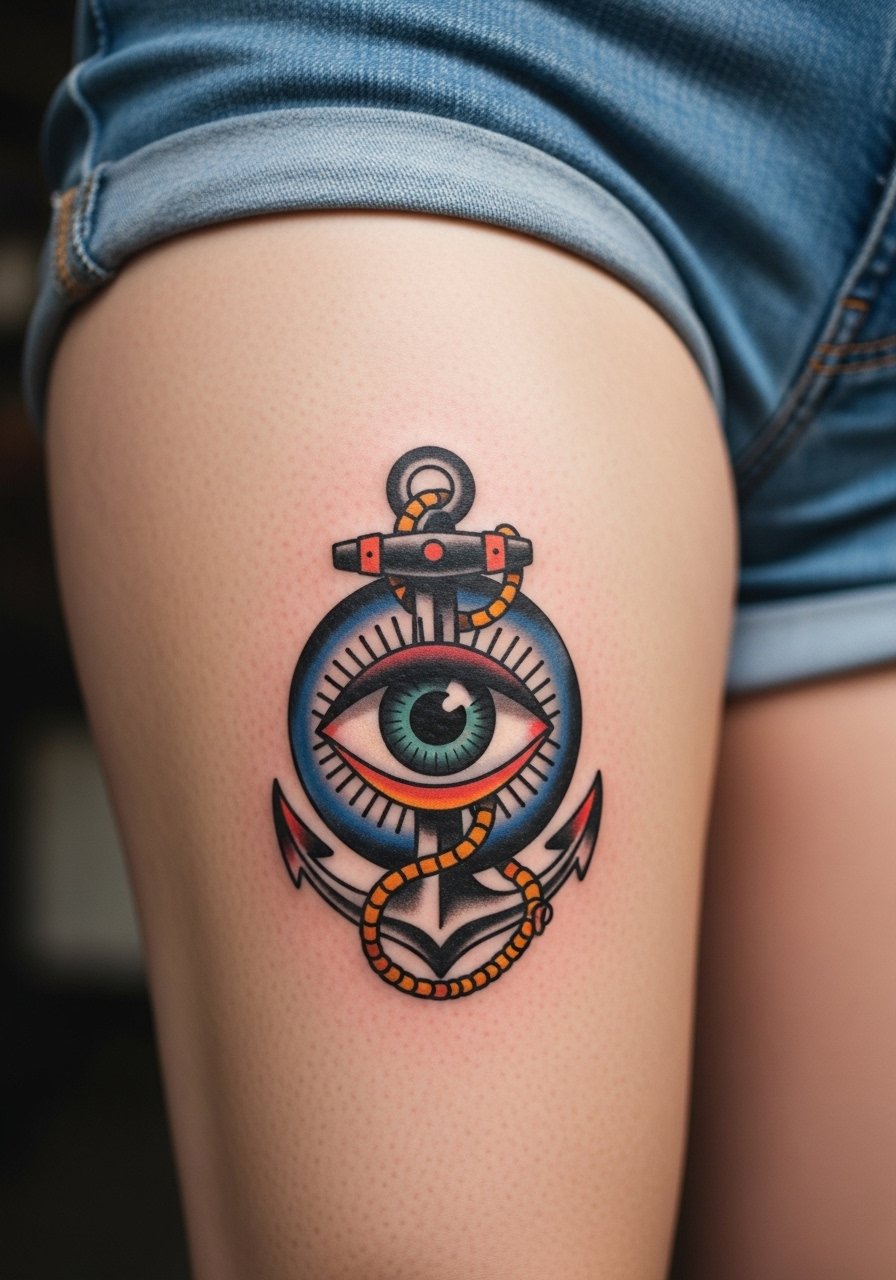
Traditional American saturation and bold lines age predictably well on the calf where sun exposure is low. This approach works if you want a logo-like presence rather than delicate detail. Tell your artist to keep color blocks large and to avoid tiny stipple inside the iris. A common error is adding small script around the anchor that does not survive sitting on moving skin. Sessions are usually one to two hours with tolerable pain. For summer visibility pair with high waist denim shorts. The calf is also a forgiving spot if you plan to expand into a larger leg piece later.
9. Minimalist Evil Eye Outline with Single Color Pop on Inner Wrist

Minimalist outlines keep commitment low but are vulnerable on thin skin like the inner wrist. The trick is to ask for slightly heavier contour lines and a saturated single-color center. A mistake people make is requesting micro-thin frames at under one inch. Those frames tend to fade into blur around year two. Sessions are quick and pain is mild. For showing this placement pair with a slim leather watch on the opposite wrist and avoid bracelets on the fresh side. Plan for a touch-up within 12 to 24 months if you use your wrists a lot.
10. Patchwork Colorful Evil Eye Sleeve Starter on Outer Forearm
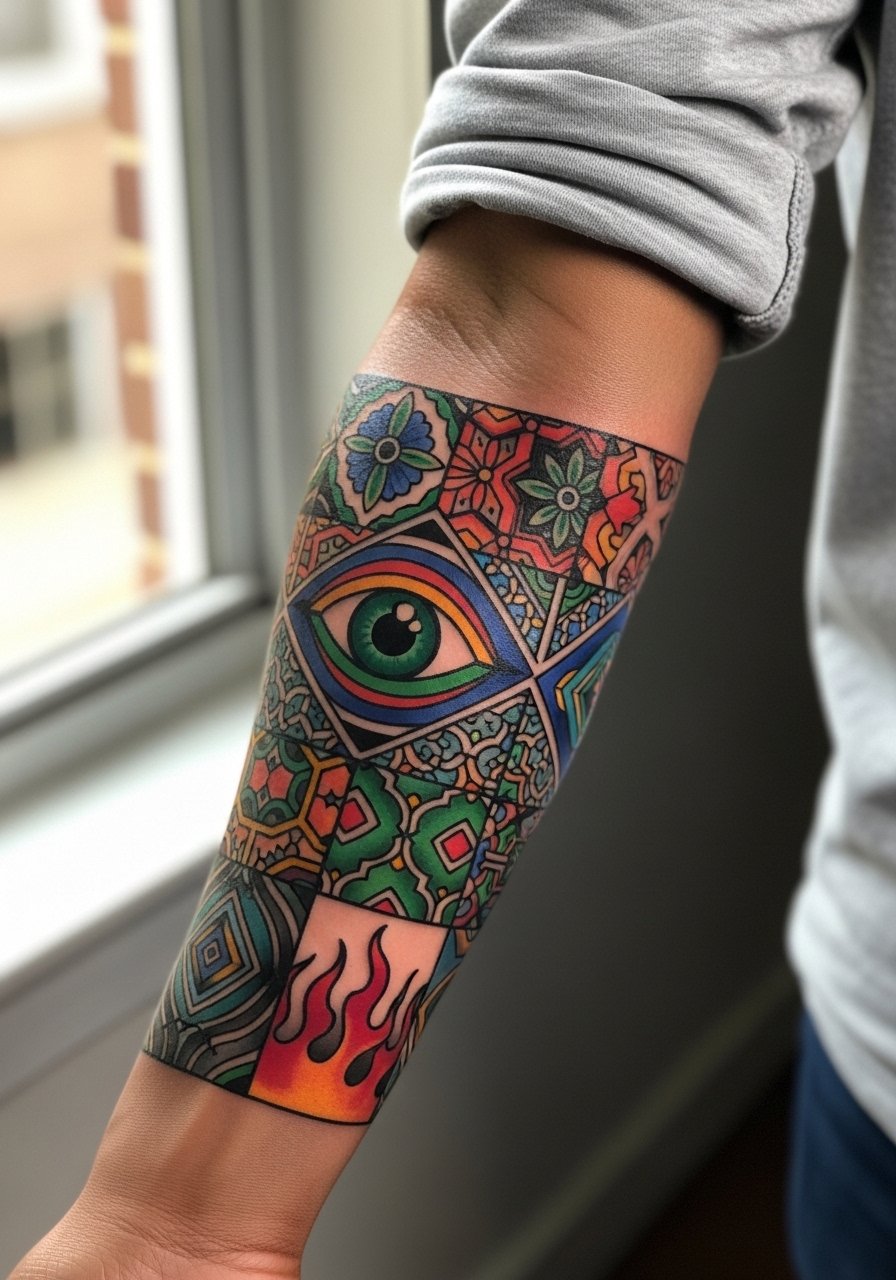
Starting a sleeve with a colorful evil eye module is a smart way to build a cohesive collection over time. I recommend a 4 to 5-inch starter piece with deliberate negative space for future elements. The common mistake is starting too many small, isolated pieces that never harmonize when joined. Session time for an initial 5-inch module is three hours or more. For showing off early sleeve work, try layering beaded cuffs on the opposite arm and a rolled cuff chambray shirt to echo the color palette. Budget time for 3 plus sessions to connect pieces into a full sleeve.
11. Dotwork Evil Eye with Mandala Layers on Back of Neck

Dotwork demands spacing and rhythm to avoid dense patches that blur. On the back of the neck the design should be spaced to accommodate hair growth and clothing contact. The split in opinion here is about whether dotwork needs heavier outlines. One camp says outlines preserve focal points. The other camp prefers pure dot transitions. Ask the artist how they plan to retain contrast. Sessions can be two hours with mild to moderate pain. Styling wise, pair the piece with a high ponytail holder and low-back dresses for evening wear. Consider that neck visibility may affect work dress codes.
12. Realism Evil Eye with Tear Drop Effect on Ribcage

Ribcage realism looks stunning when sized correctly but requires stamina. Fair warning, the ribs are higher on pain scales. Fine detail there risks blurring if the design is too small. The common mistake is compressing shading into tight areas, which then merges with body movement. Expect multiple sessions and downtime. Artists differ on using fine line on ribs. One group warns that skin stretch will make thin lines go soft. The other group says proper depth and spacing keeps lines readable. Ask about their ribcage experience. For session wear pick a fitted sports bra or a zip-up hoodie you can open for access. Plan a touch-up window at year two if you live an active life.
13. UV Reactive Colorful Evil Eye for Club or Festival Wear on Upper Arm

UV ink gives a hidden layer that pops under blacklight and stays subtle in daily life. Not every studio does UV work so search guest spots and festival artists. The main risk is that UV pigments can fade differently from normal inks. Ask your artist how they layer UV with visible color and whether they have healed photos under both lights. A good session plan is to do the visible color base first and add UV in a secondary pass. For showing this piece wear olive muscle tanks and medium hoop earrings during shows. Expect a single to double session depending on the size, and budget for color-matching touch-ups under both lights.
14. Constellation-Paired Evil Eye with Star Map on Thigh
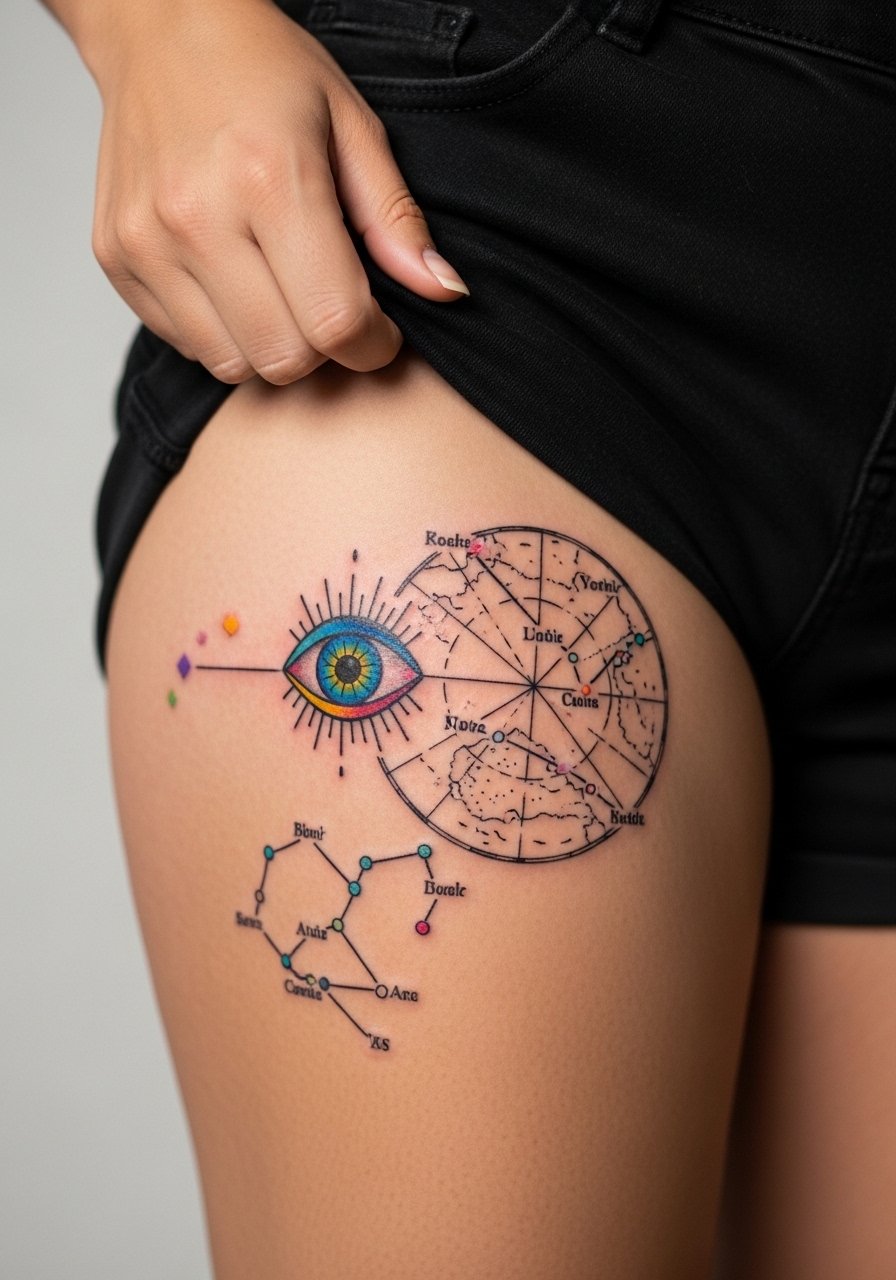
Pairing an evil eye with a small constellation creates personal layering without overcrowding. The thigh handles larger dimensions well and heals in a low-friction environment. One common mistake is drawing tiny constellations that get lost when the piece moves. Ask the artist to space stars with intentional gaps. For showing off wear high-waist shorts or a slit skirt and consider a thigh garter if you want a bold look. Session time for an outer thigh piece is usually one to two hours and pain is moderate. Keep in mind body changes like pregnancy or muscle gain can stretch the design over time.
15. Blackwork Eye Embedded in a Hamsa Sleeve Segment on Upper Arm

When integrating an eye into a hamsa sleeve segment, design hierarchy matters. Put the eye in a visually dominant position with negative space around it so the blackwork reads as intentional jewelry. A common mistake is over-decorating the surrounding area. That buries the focal point. Expect multiple sessions if you are connecting to a full sleeve. For showing off early sleeve work choose a sleeveless muscle tank and layered bracelets on the opposite arm. Blackwork in sleeves tends to need less frequent color refresh than tiny colored fills.
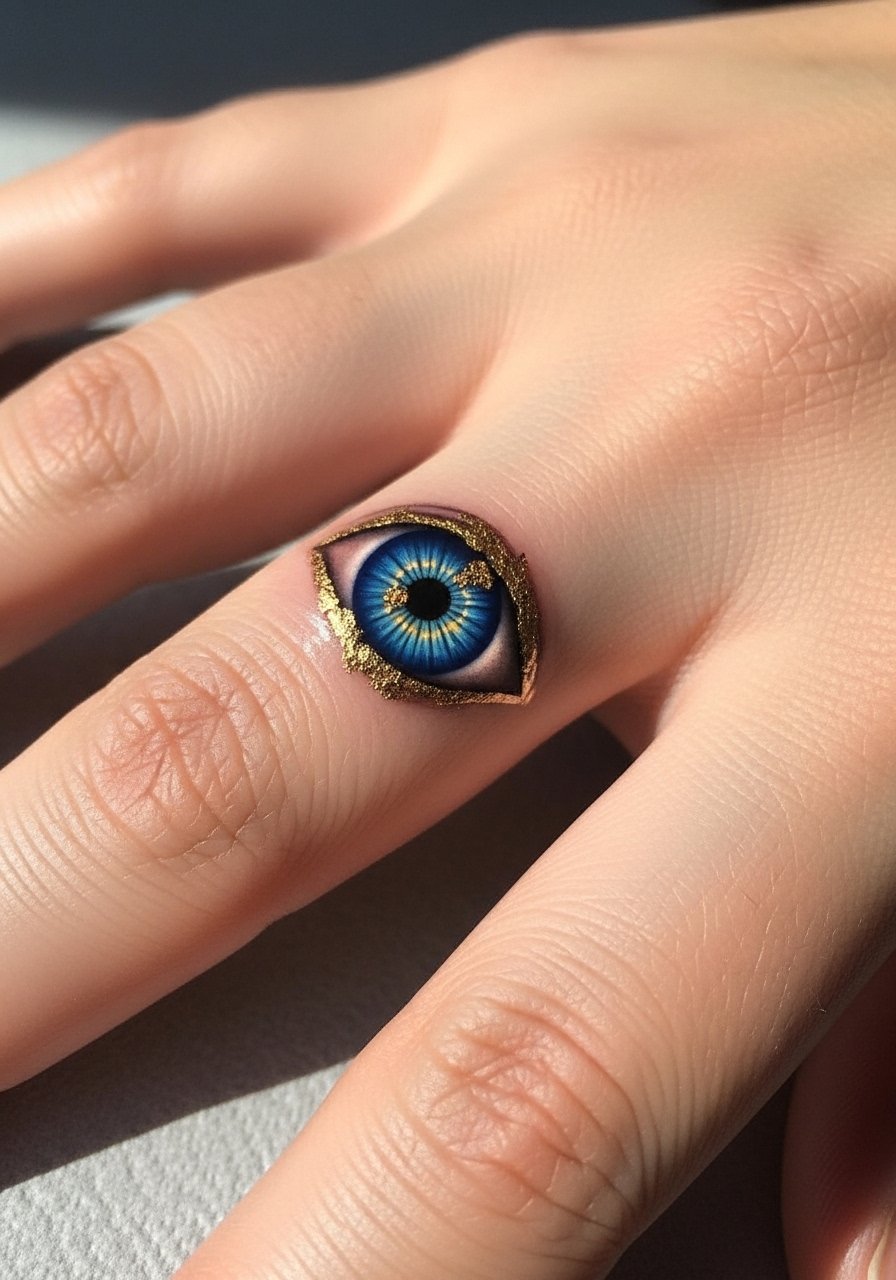
16. Tiny Gold and Blue Realism Evil Eye Behind Ear
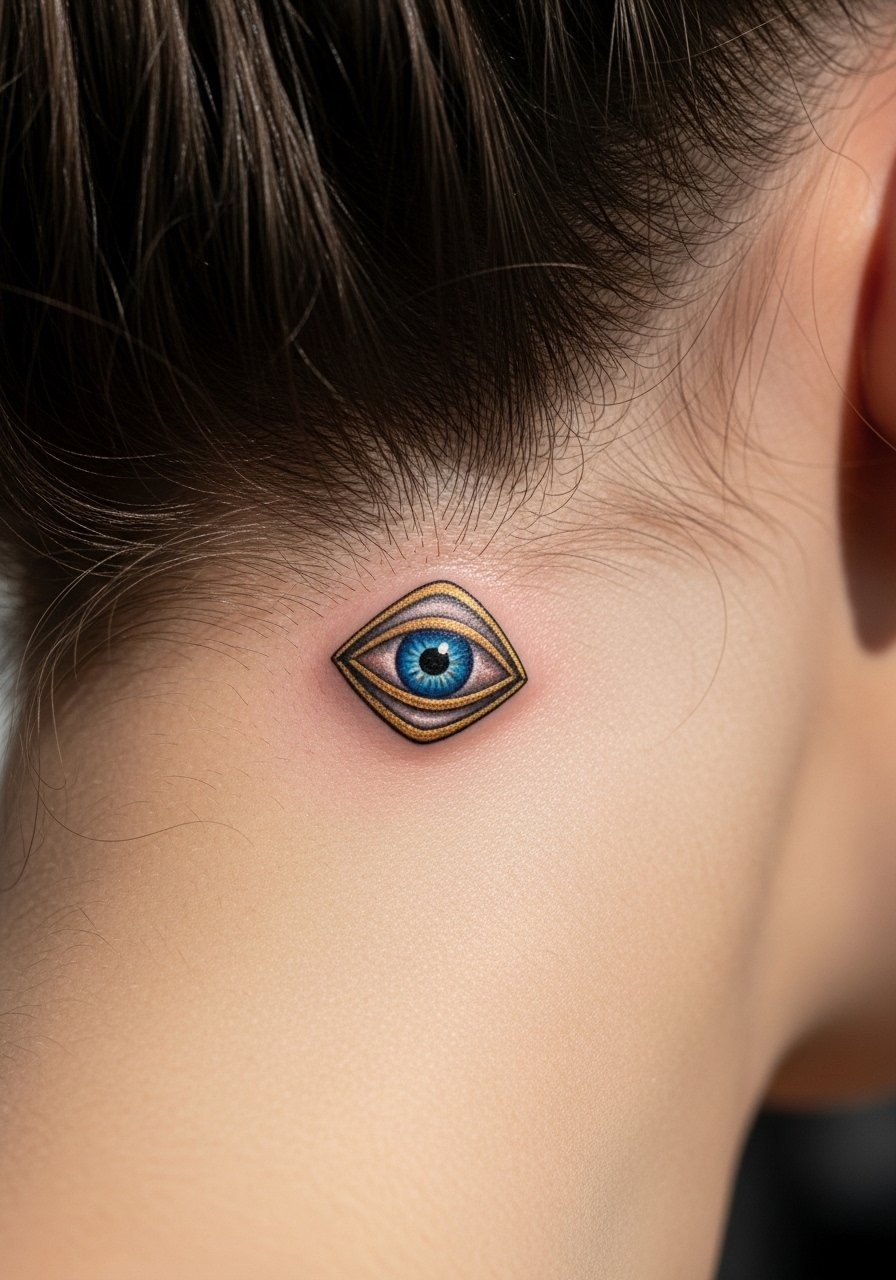
Behind-the-ear micro pieces are subtle and low-visibility. The area is forgiving for small realism but artists must avoid over-detail. A mistake is asking for metallic highlights that do not translate well in tiny scales. Session time is short and pain is mild. Because of the discreet placement many people choose numbing cream for comfort. For session wear pull your hair up and bring a slim hair tie. Consider that healed photos on social media can look different depending on lighting, so ask for healed images on varied skin tones.
17. Patchwork Mini Evil Eyes for a Finger-to-Wrist Cluster
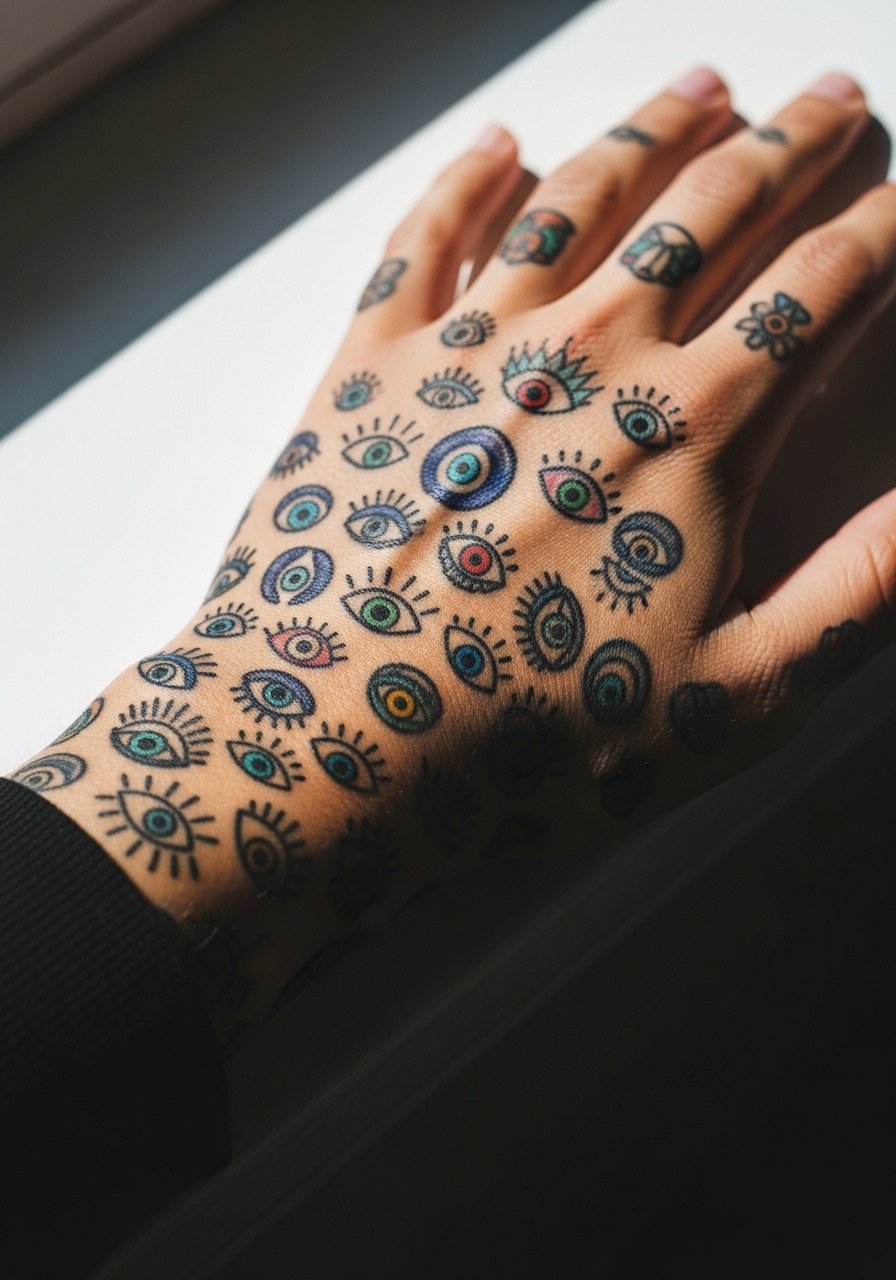
Cluster work is a collector move. When starting small motifs from finger to wrist think modular and leave breathing room. The most common error is filling the entire corridor without planning for connectors. That makes future blend work awkward. Ask your artist to leave negative space for ribbon or floral filler in later sessions. Finger areas need touch-ups more often because of daily friction. For showing this cluster, a dainty gold bangle stack on the opposite wrist frames the hand without overcrowding. Budget multiple short sessions rather than one long marathon.
18. Sternum Evil Eye for Hidden-Heart Placement
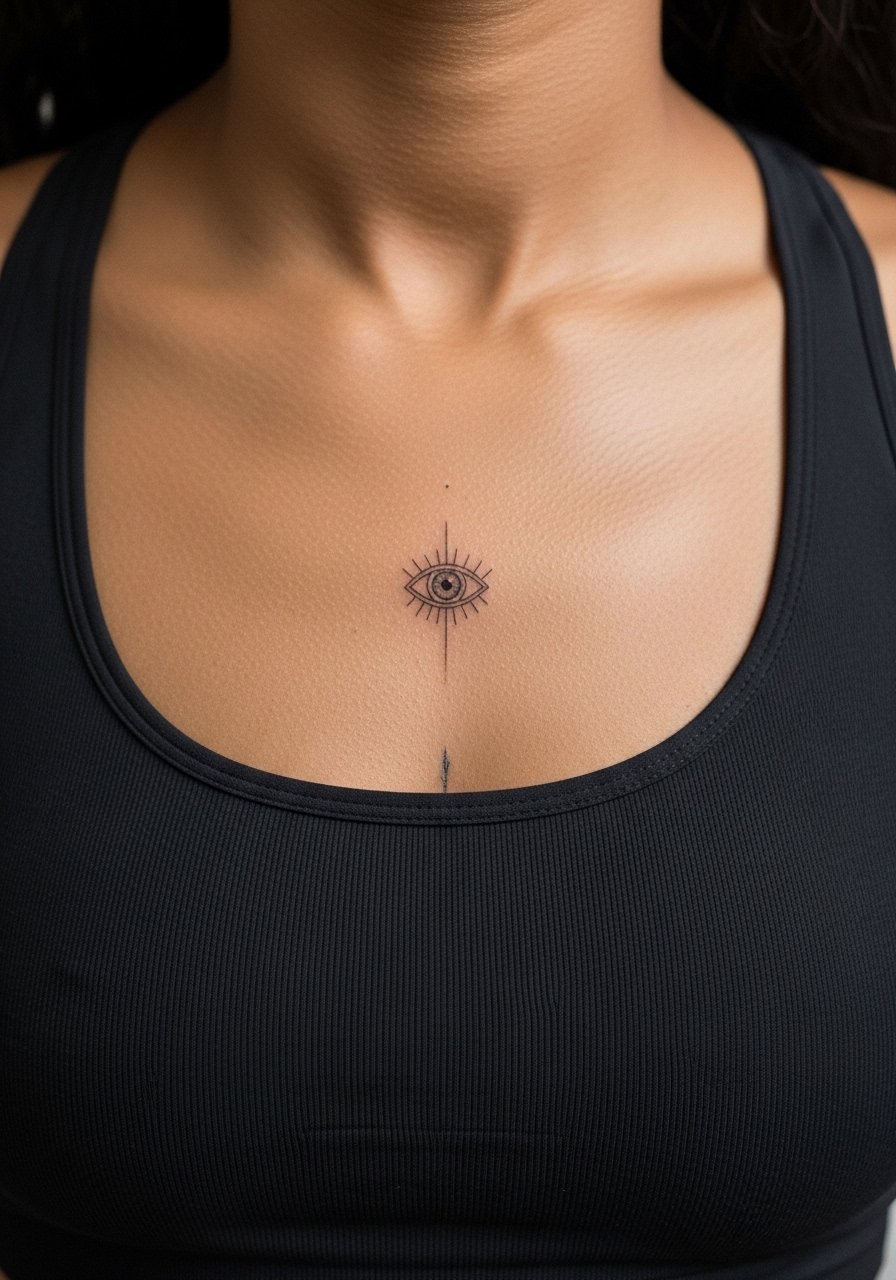
Sternum placements read intimate and can be designed to sit just above a bra line so the piece is hidden in many outfits. The sternum requires a specialized approach because skin there moves with breathing. A typical mistake is packing too much micro detail. That detail blurs faster around the sternum area. Sessions can be longer and pain higher. For the session wear a fitted sports bra or bandeau that you can adjust to expose only the area needed. If you plan pregnancy in the near future, discuss stretch considerations with your artist.
19. Thigh Blackwork Evil Eye with Color Accents

Outer thigh work keeps color vibrant because friction is lower and sun exposure is easy to control. Blackwork base with selective color accents lets you keep longevity without losing pop. A mistake is adding extensive gradients in tiny areas which then need blending later. Sessions are usually comfortable and allow for longer sittings. For showing this piece try high-waist shorts or a slit skirt. Wear loose shorts or a skirt for the appointment so the artist can adjust fabric without pressure on the area. Touch-ups are less frequent here than on hands or feet.
20. Geometric Frame Evil Eye on Calf with Fine Color Lines

Geometric frames ground an evil eye and make it look planned rather than tossed on. On the calf the geometry can be tighter without high blowout risk. The main error is making internal line distances too narrow. That causes merging after a few years. Ask the artist for slightly larger negative spaces inside patterned frames. Session time is moderate and pain is low. For showing off the piece wear cropped jeans or mid-length boots. Geometric calves are a good canvas if you plan to continue with symmetrical leg work.
21. Tiny UV Accent Micro Eye at the Base of the Neck
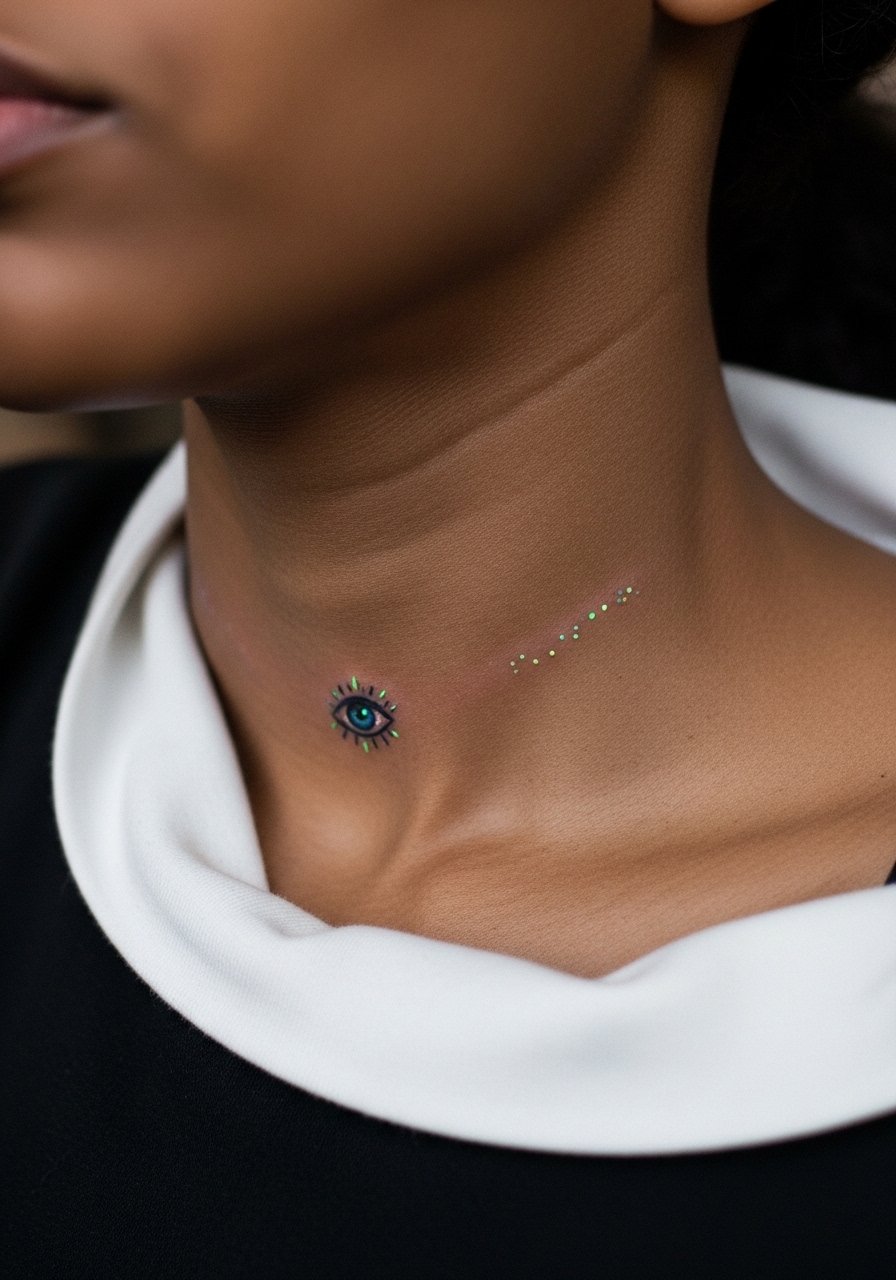
A micro eye at the base of the neck is discreet by day and playful under blacklight. Because the neck sits where clothing can rub, ask for a small design with stable pigment placement. The frequent mistake is overcomplicating the piece with micro shading that fails under friction. Session time is brief and pain is mild. For session wear a wide-neck shirt you can shift slightly for access. UV accents should be discussed up front since not all studios carry compatible inks and some venues restrict them.
Frequently Asked Questions
Q: How does a colorful evil eye tattoo age on darker skin tones and what should I ask my artist to preserve blues?
A: Darker skin tones can hold saturation beautifully when artists use adjusted pigment mixes and slightly heavier saturation. Ask your artist if they have recent healed photos on similar skin tones and whether they test color placement with temporary mockups. Avoid asking for very pale tints inside small areas because those can disappear into the base tone.
Q: Are fine line evil eye wrist pieces worth it if I want low visibility but long wear?
A: Fine line wrist pieces look elegant but expect more frequent touch-ups than bold outlines. If longevity matters more than a whisper-thin look, ask for a slightly bolder contour around the pupil and plan for a refresh at around twelve to twenty-four months.
Q: Should I expect different aftercare for watercolor versus blackwork evil eye designs?
A: Watercolor tends to need more careful sun protection and light hydration days three and beyond to keep washes vibrant. Blackwork is more forgiving but still benefits from the same basic hygiene. Use the healing window products suggested in the product block above rather than improvising heavily scented creams.
Q: Can I combine UV ink with realism and have it last in both visible and blacklight conditions?
A: You can combine UV with visible realism but expect uneven fade patterns. A common approach is to lay the visible color first and add UV accents in a second pass. Confirm that your artist tests UV in healed photos so you can see how both layers interact under daily light and blacklight.
Q: How do I find a tattooist who actually knows how to place color on melanated skin?
A: Use discovery pathways like searching hashtags with your city and style, checking recent healed photos on studio pages, and asking directly for portfolio examples on similar skin tones. Platforms that filter by guest spots can reveal artists who specialize in color work across skin types.
