
Fine line and saturated color trade attention differently, and colorful warrior angels are a good example of that tension. Trends push for delicate faces and watercolor wings, while practical choices favor solid saturation where the skin moves. Pick a placement and a technique that matches how you live, how often you wear sleeves, and whether you want this visible for years. The first idea shows what to ask for in consultation to keep the halos clear, not washed out.
1. Fine Line Angel Warrior on Inner Forearm

I recommend this when you want a readable portrait without heavy saturation. Fair warning, the inner forearm is moderate on pain and the area gets frequent sun exposure. Tell your artist you want slightly thicker contour lines around the face and lighter stipple shading in the wings so the portrait stays legible at year three. Common mistakes are asking for ultra-fine hairline details that blur into a gray wash. Expect a two- to three-hour session and a touch-up at year two if you wear short sleeves often. For the appointment, wear a loose button-down shirt so the sleeve can be rolled without rubbing the fresh ink.
2. Bold Neo-Traditional Angel with Saturated Wings on Shoulder Cap
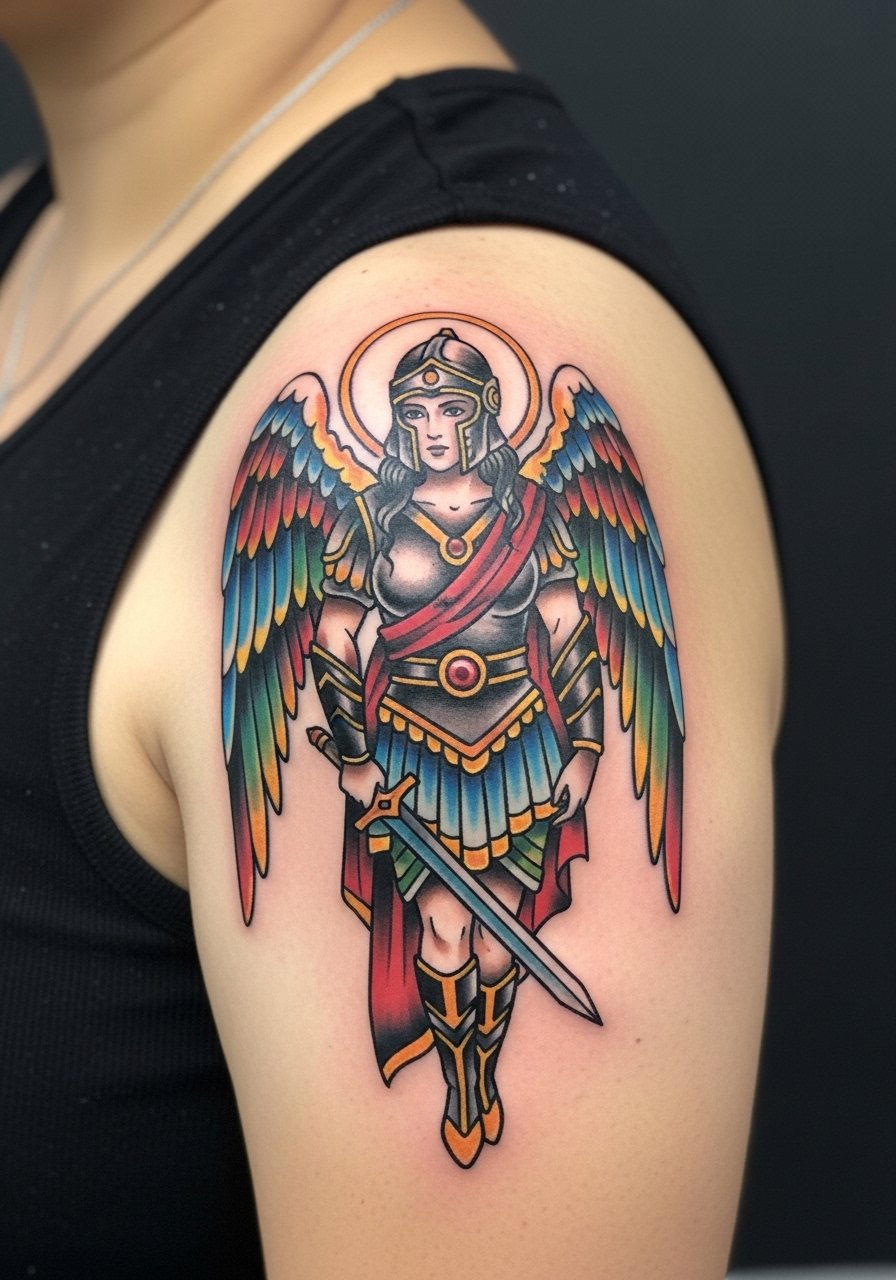
This version favors strong linework and heavy color saturation, which ages more predictably than faint washes. Pain is low on the shoulder cap and sessions run three to four hours for solid fill. Ask for dense saturation in the wing feathers and avoid tiny cross-hatching in shaded areas that can muddle over time. The core audience is people who want something that reads from a distance and holds up through summers. For showing it off, pair with a sleeveless linen top to keep the silhouette clean. Expect a touch-up around year three if you spend a lot of time in the sun.
3. Watercolor Angel Warrior Across the Sternum

Sternum placements are intimate and the tender skin means sessions feel sharp in short bursts. One camp argues watercolor effects in this area blur quickly because of movement and high friction. The other camp says with careful layering and selective line anchors the look can last several years. If you lean toward this piece, request small anchor lines at key contours so the colors keep a shape as they fade. Wear a fitted sports bra to the appointment for easy access. Expect longer healing and a likely touch-up at year two for color refresh.
4. Half-Sleeve Angel Warrior with Geometric Armor Motifs
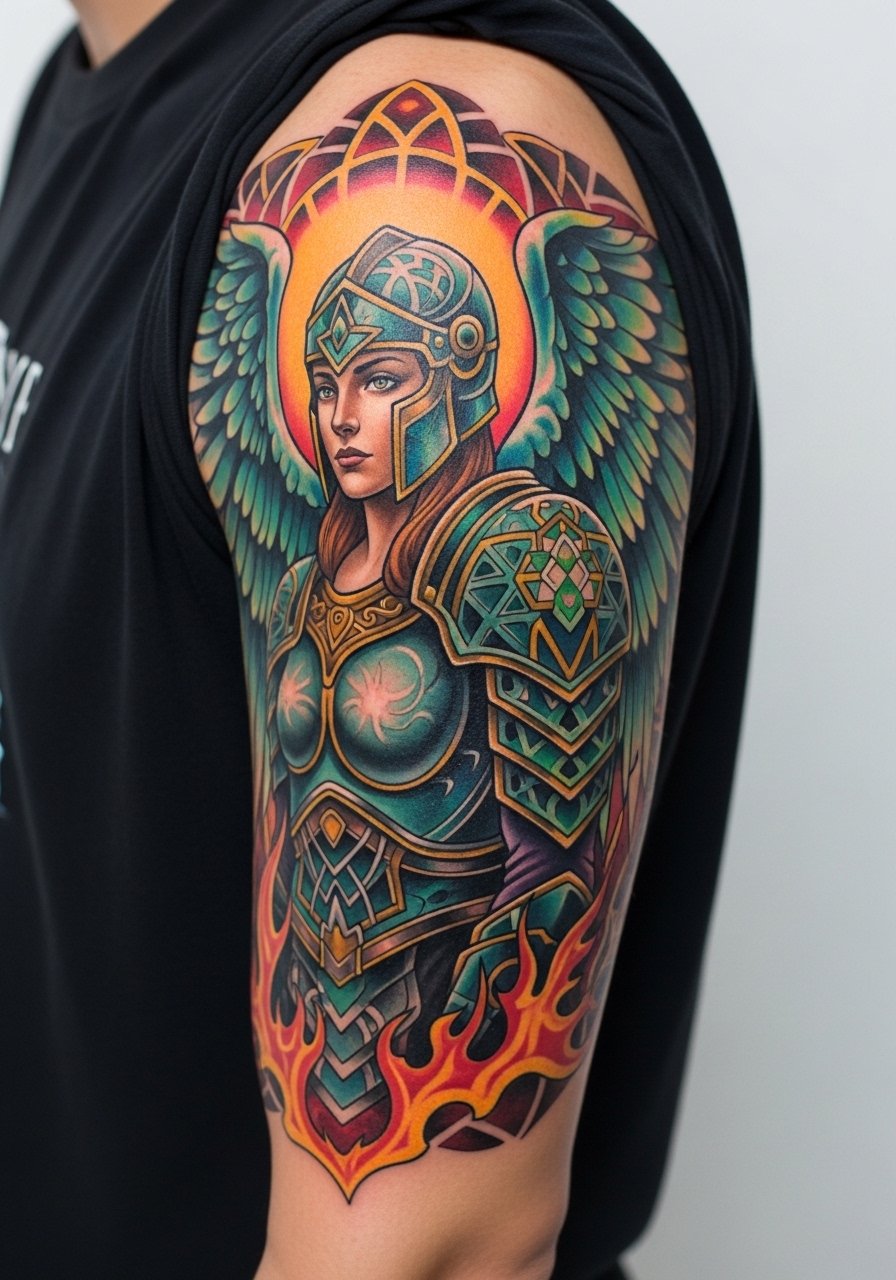
This design mixes illustrative portraiture with geometric fills in the armor. The upper arm tolerates heavier saturation and the skin there moves less, so the geometric elements stay crisp longer. During consultation, show examples of line weight for the armor and ask that dense patterns be slightly spaced to avoid future merging. Sessions typically split across two visits, each three to four hours. A common mistake is packing too many tiny geometric shapes into narrow bands. For daytime wear, roll sleeves or choose short-sleeve button shirts to frame the half-sleeve without hiding it.
5. Thigh Panel: Angel Warrior with Floral Mantle

The outer thigh is forgiving for saturated color and long sessions. Expect a moderate pain level and two long sittings for a full panel. The floral mantle gives natural edges so the piece ages more gracefully as the saturation softens. For consultation, ask for slightly more saturation near shadowed petals and lighter washes on highlighted feathers to maintain depth at five years. A common error is requesting too much micro-detail in the petals that blends later. For the session wear, choose high-waisted shorts so the artist can roll fabric without stretching the area.
6. Collarbone Angel Warrior with Micro-Realism Face

Collarbone pieces read delicate but age depending on movement and sun exposure. Pain is higher near bone and sessions often use short passes to reduce trauma. The micro-realism face benefits from slightly bolder outline on the nose bridge and jaw so features remain defined as color softens. Artists split on doing ultra-fine realism here. One group worries the area will blur; the other favors strategic line anchors. For showing off the piece, a wide-neck blouse frames the artwork without competing with it. Expect touch-ups for facial detail at year two or three.
Studio Day Picks
The pieces above include collarbone, thigh, shoulder, sternum, and arm work. A few practical items ease the session and the first week of healing.
-
Natural stencil transfer sheets. Useful to preview placement on curved areas like the collarbone and thigh before the needle hits skin.
-
Topical numbing cream. Helps during rib and sternum spots where sensitivity spikes and keeps session time manageable.
-
Thin protective film roll. Good for wrist and finger areas in ideas that face friction early in the healing window.
-
Fragrance-free gentle body wash. Cleanses without stripping color, which matters for fine line forearm and micro-realism collarbone work.
-
Aquaphor healing ointment. Thin layer during the first days helps maintain moisture without suffocating dense color blocks.
7. Back Piece Angel Warrior With Full Wing Spread

Full back work allows the most storytelling and large-scale color transitions. Sessions require multiple long days and the pain oscillates depending on proximity to the spine. Tell your artist whether you want hard edges or feathered transitions, because the former reads longer as saturation settles. A common mistake is compressing too many tiny portrait elements into one panel. Expect touch-ups at year three for wing gradations. For planning, schedule sessions with clothing that is easy to remove and replace like a loose button-down shirt so you can keep skin protected between passes.
8. Wrist-Band Angel Warrior Symbol with Tiny Halo
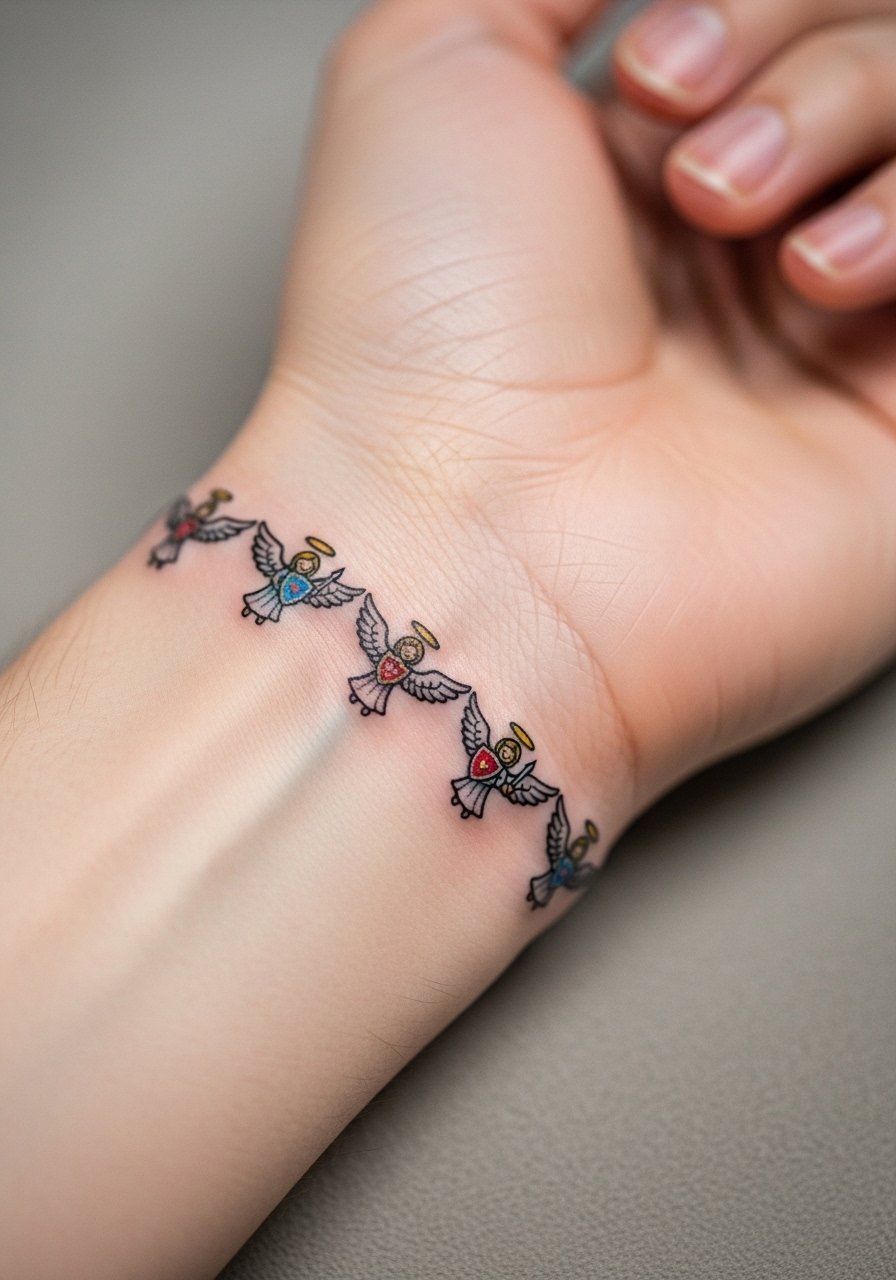
Wrist work looks great small but is vulnerable to blowout and daily friction. The main mistake is going too dense with ink on such a thin skin zone. Pain is moderate and sessions are quick, often under an hour. For longevity, ask for a slightly thicker band line and minimal inner shading. Fingers and wrists wash frequently so plan for a touch-up at year one to keep the halo crisp. Pair this with a thin chain bracelet to frame the piece without rubbing directly on the ink.
9. Ankle Angel Warrior with Tiny Shield Motif

Ankle tattoos face constant rubbing from socks and shoe collars. The pain is sharp but short. Avoid packing small, intricate details that will take a beating from footwear. For sessions, bring flats or sandals so the artist can access the area without stretching fabric. Request a slightly bolder outline on the shield to keep the motif readable at six months. A typical touch-up at year two is common for ankle pieces with frequent friction. For showing off, try sandals or rolled cuffs so the tattoo sits in clear view.
10. Forearm Sleeve Fragment with Angel in Motion

Outer forearm work is forgiving and visible, which makes it a popular location. Pain is low and sessions can be broken into manageable two- to three-hour blocks. The key is how the wings curve around muscles when the arm moves. Ask your artist to map the wings to muscle flows so the motion reads natural at rest and in action. A mistake is trying to squeeze a large torso onto a narrow forearm area. Expect touch-ups around year three if you wear short sleeves frequently. Pair with a rolled-sleeve linen shirt to show the flow of the piece.
11. Calf Angel Warrior with Armor Accents

Calf placements accept heavier saturation and hold up well through years of wear. Pain is moderate and sessions are usually comfortable for longer sits. Tell the artist to emphasize contrast between armor highlights and shadowed scales so the metallic illusion survives fade. Common errors include too many reflective dots that flatten once healed. For session wear, choose shorts or loose drawstring pants so the leg stays unbothered after the appointment. Touch-ups tend to be cosmetic and predictable.
12. Hand-Edge Angel Wing Accent

Hand tattoos are visible and historically still touchy in some workplaces. The skin on the hand is thin and the area sees constant washing, so expect quicker fading. One camp favors bold, simple designs for hands. The other insists hands are best left to flash or small symbols since blowout risk is higher. If you choose a hand edge piece, ask for simple block color and avoid tiny facial detail. Sessions are short and touch-ups are frequent, often at year one. Consider that some employers may react to visible hand ink when planning placement.
13. Ribcage Full-Profile Angel Warrior with Banner Script

Ribcage work is painful but dramatic. The skin flex and stretch pattern means fine line faces can blur if done too tightly. Artists debate this. One group says strict line anchors and slightly bolder contour preserve detail. The other group warns against fine realism on ribs altogether. Ask for a banner with slightly thicker lettering and more negative space in dense areas. Sessions are often split into shorter passes to manage pain. Plan for touch-ups at year two for script clarity. For the appointment, wear a cropped top so the artist can access the area without full undressing.
14. Neck Nape Angel Warrior Crest

Neck placements are bold and visible with higher social impact in some contexts. The skin there is thin and movement makes fine detail a risk. Pain is high near the spine base and sessions are usually brief. If you want a detailed crest, request stronger contour lines around the emblem to keep it readable as the color softens. A real mistake is asking for postcard-level detail in a postage-stamp-sized neck zone. Expect touch-ups by year two and plan clothing choices that let you show or hide the area. For session access, a pulled-down turtleneck fits well.
15. Shoulder Blade Angel Warrior with Negative Space Halo

Shoulder blade work sits between the shoulder cap and back, so it benefits from both concealability and surface area. Negative space halos age well because they do not rely on pigment longevity. Ask the artist to plan the halo as uninked skin framed by saturation instead of a faint painted ring. Sessions are moderate in length and pain is manageable. A common error is relying on thin color rings that vanish within a year. For showing it off, a tank top reveals the piece elegantly without strain on the area.
16. Inner Bicep Angel Warrior with Linework Shield
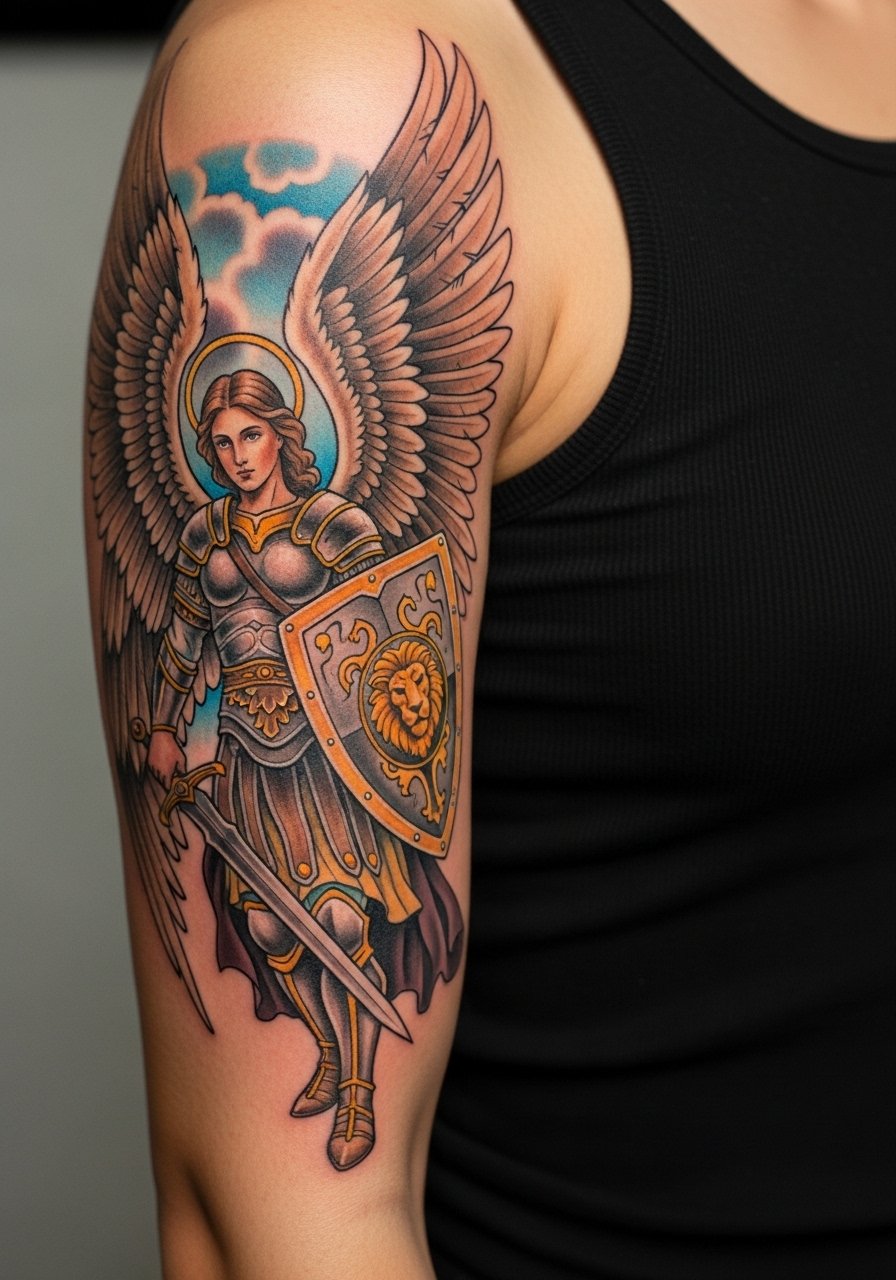
Inner bicep pieces can look crisp early but are vulnerable to stretching with muscle changes. Pain is moderate and sessions are often shorter to avoid prolonged arm elevation. Ask for a slightly heavier outline on shields and armor plates to prevent early blurring. A common mistake is ultra-fine stipple in compact areas that lose definition when muscles flex. Wear a tank top for the session for easy access. Touch-ups depend on weight and muscle shifts over time.
17. Half-Chest Angel Warrior with Heraldic Details
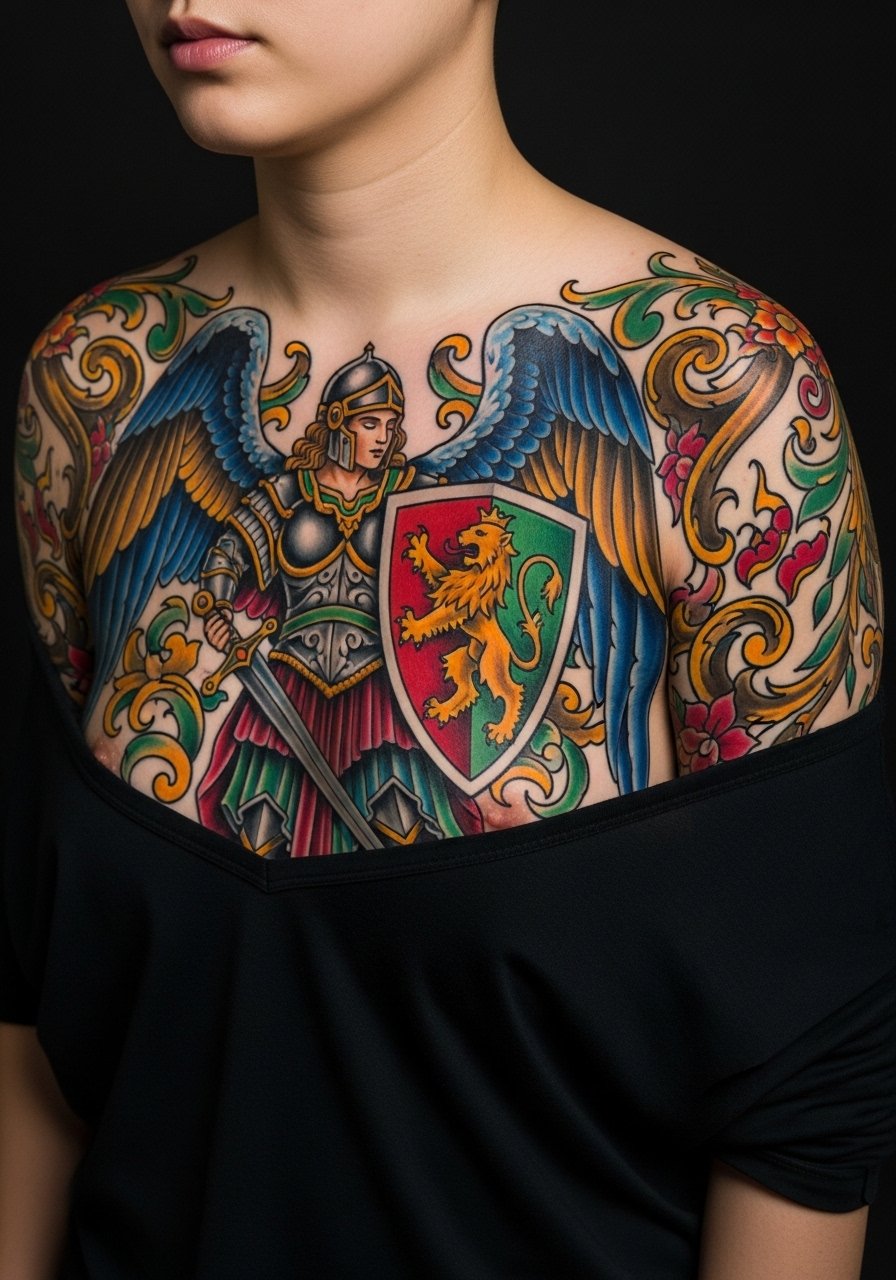
Upper chest pieces are visible and move with breathing, so plan composition to accommodate stretch. Pain is high near the sternum but lower on the pectoral curve. For longevity, request heavier anchor lines at the base of heraldic shapes and softer shading outward. The mistake is cramming too many small symbols near the sternum. Sessions often split into multiple visits. For showing the design, a wide-neck shirt frames it without overexposing the area.
18. Knee Cap Angel Warrior Accent
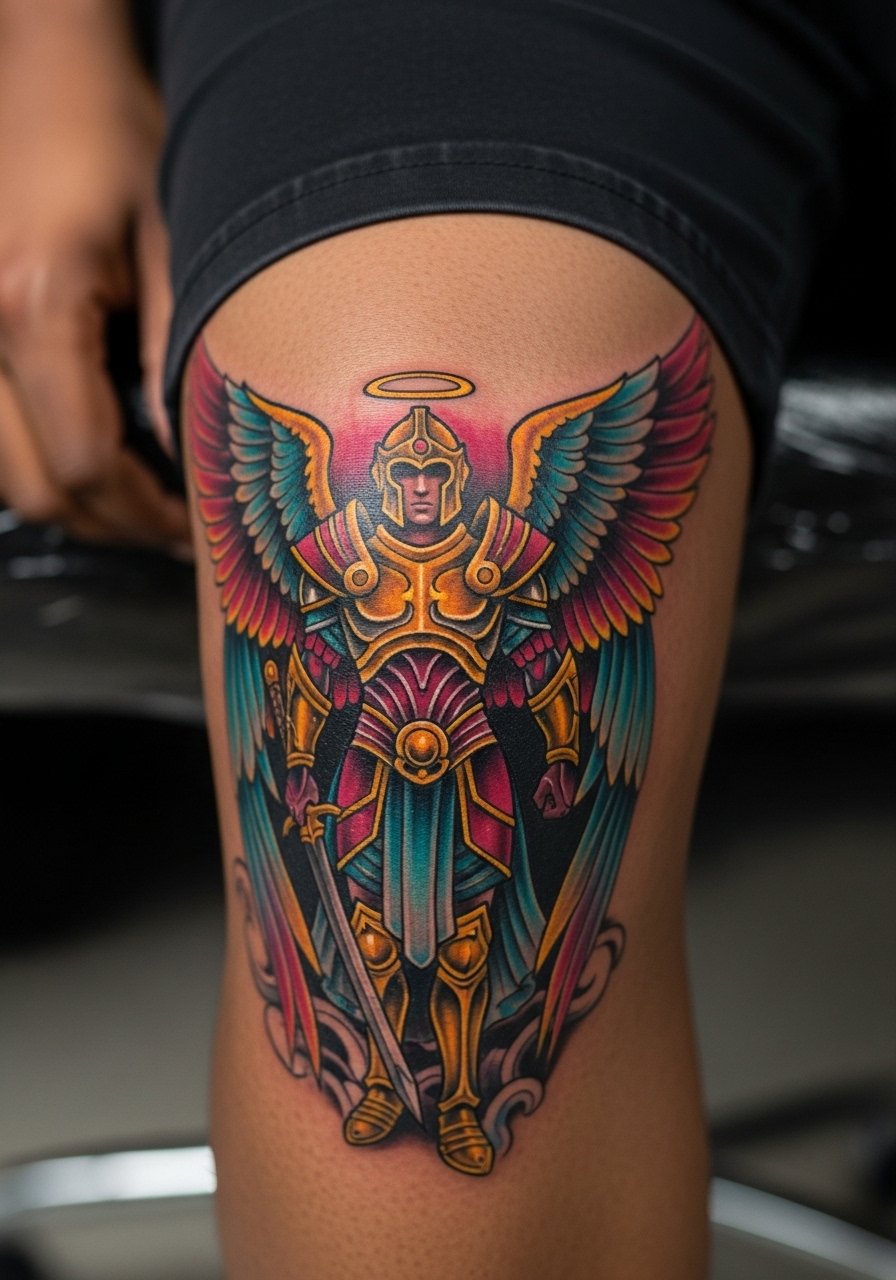
Knee caps are high-movement and high-impact areas, so color retention is unpredictable. Pain is intense over the kneecap itself. The safe approach is to keep details simple and use bolder blocks of color that can withstand scuffing. Tell the artist you want clear separation between armor panels rather than tiny hatch marks. Expect touch-ups more often than on calmer skin regions. For the session choose shorts or loose athletic shorts that let the artist reach the area without unnecessary pressure.
19. Lower Back Angel Warrior with Decorative Tail

Lower back tattoos sit where clothing and waistbands can cause friction. Pain is moderate and sessions are comfortable for longer spans. The trick is to keep the decorative tail high enough to avoid constant rubbing from waistbands. A common error is placing the lowest inkline where jeans regularly rub. During consultation, map the tail's lowest edge to your waistline when seated and standing. For the appointment wear high-waisted jeans that you can lower slightly without stretching the skin. Expect a touch-up where friction is highest.
20. Hip Socket Angel Warrior with Curving Wings

Hip tattoos are sensual and sheathed often in clothing, so plan for occasional concealment. Pain varies and the area tolerates saturation well. The design should curve with the hip contours so the wings look coherent when you move. Tell the artist to avoid tiny facial details and to focus on larger color planes. For the session, wear high-cut shorts so the artist can adjust coverage without full exposure. Expect a touch-up near the upper thigh junction within a couple of years.
21. Finger Angel Warrior Accent on the Side of the Index Finger

Finger tattoos fade fastest because of constant washing and skin renewal. Pain is sharp and sessions are brief. The main mistake is asking for complicated faces or thin script on a fingertip. For longevity, keep the design as a small accent with bold contrast and minimal shading. Expect touch-ups frequently, sometimes yearly. If you need a discreet way to wear it, match the piece with a thin ring or a minimalist band ring to draw the eye without covering the ink.
Frequently Asked Questions
Q: How do colorful watercolor wings compare to saturated neo-traditional wings in long-term visibility?
A: From what I've seen, watercolor wings offer a softer, painterly look but they tend to lose crispness faster, especially on high-motion or high-sun areas. Saturated neo-traditional wings trade subtlety for longevity because solid color blocks and stronger outlines hold up better under daily wear.
Q: Should I expect more touch-ups if I get fine line facial detail on the ribs or sternum?
A: Yes. Fine facial details on ribs or sternum are at higher risk because those areas stretch and rub during movement and clothing wear. One camp advises against tight realism there. The other camp will do it if they can set anchor lines. Expect at least one touch-up within two to three years.
Q: What should I wear to my session if I'm getting a shoulder blade or back piece?
A: Wear something you can easily take off and put back on without touching the tattoo. A button-down shirt that you can slide off sideways keeps the area protected and minimizes friction when leaving the studio.
Q: Are hand and finger colorful accents professional-friendly?
A: Hand and finger ink remains visible and some workplaces still react. If you need discretion, choose placements that can be covered or opt for small accents on fingers that can be disguised with rings. Expect faster fading and routine touch-ups for these pieces.
Q: How should I find an artist who can handle both portrait realism and bold color armor in one piece?
A: Use discovery routes like hashtag searches for specific styles, shop directories, and long-form posts in tattoo communities. Look for portfolios that show both consistent linework and saturated color across several healed photos. Ask about healed work rather than fresh photos during consultation.
