
Fine line work is trending on saved boards, but what holds up is rarely the same thing that looks best right after the session. I've seen delicate pads that blurred on heels and bold black saturation that brightened with time. Think about where the skin moves, how much friction hits the spot, and how you plan to show the piece. The examples below start with small, wearable options and move toward bolder placements so you can pick what lasts as well as what looks good now.
1. Minimalist single paw pad on the inner wrist
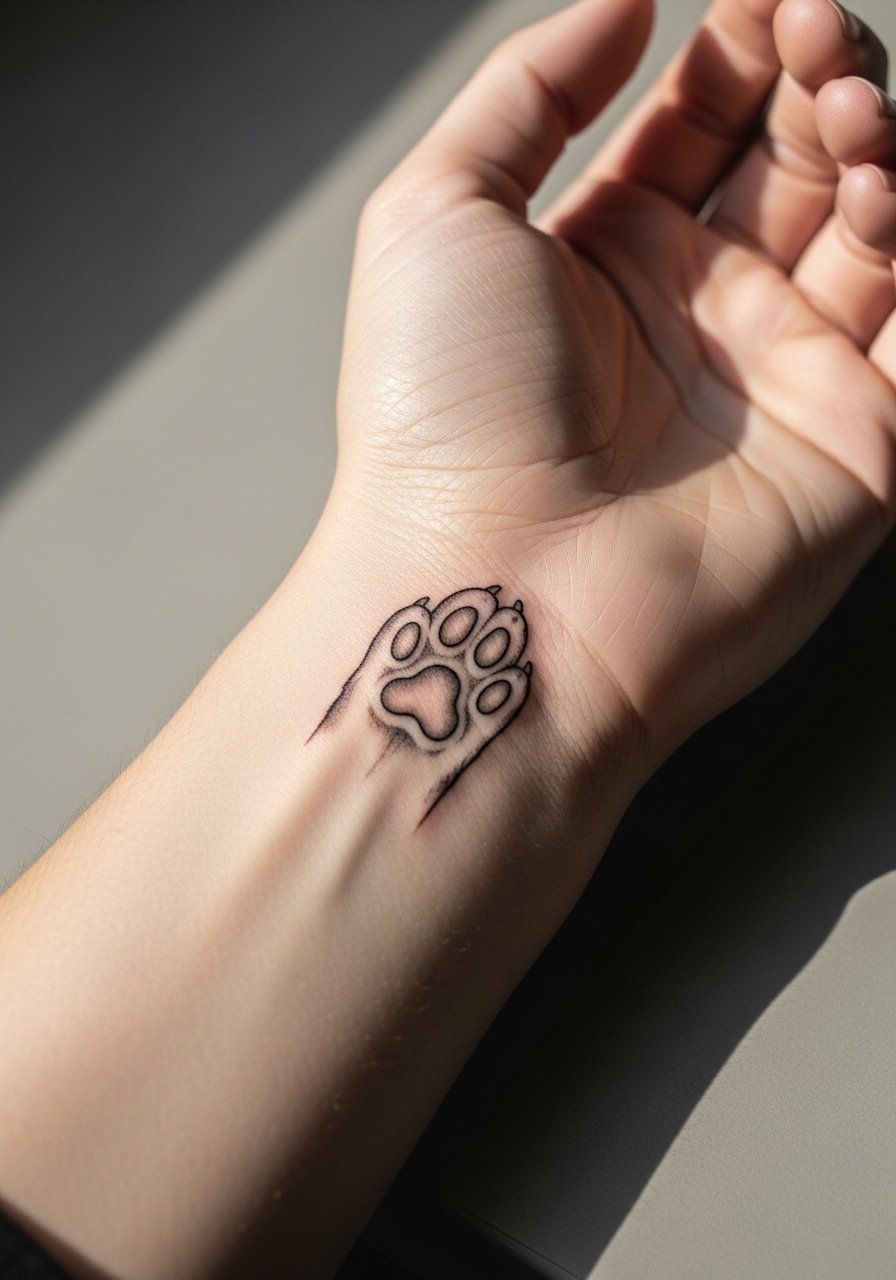
I recommend this for first-timers who want something subtle but readable. Tell your artist you want single-needle fine line, slightly thicker pad outline, and minimal interior shading so the linework holds over time. Fair warning, wrists see constant washing and bracelet abrasion, so expect a touch-up around year two depending on exposure. The session usually feels like moderate buzzing for 20 to 35 minutes. For showing it off, pair it with a thin gold chain bracelet on the opposite wrist so the ink reads as intentional styling rather than accidental mark.
2. Fine-line pad with claw accents on inner forearm
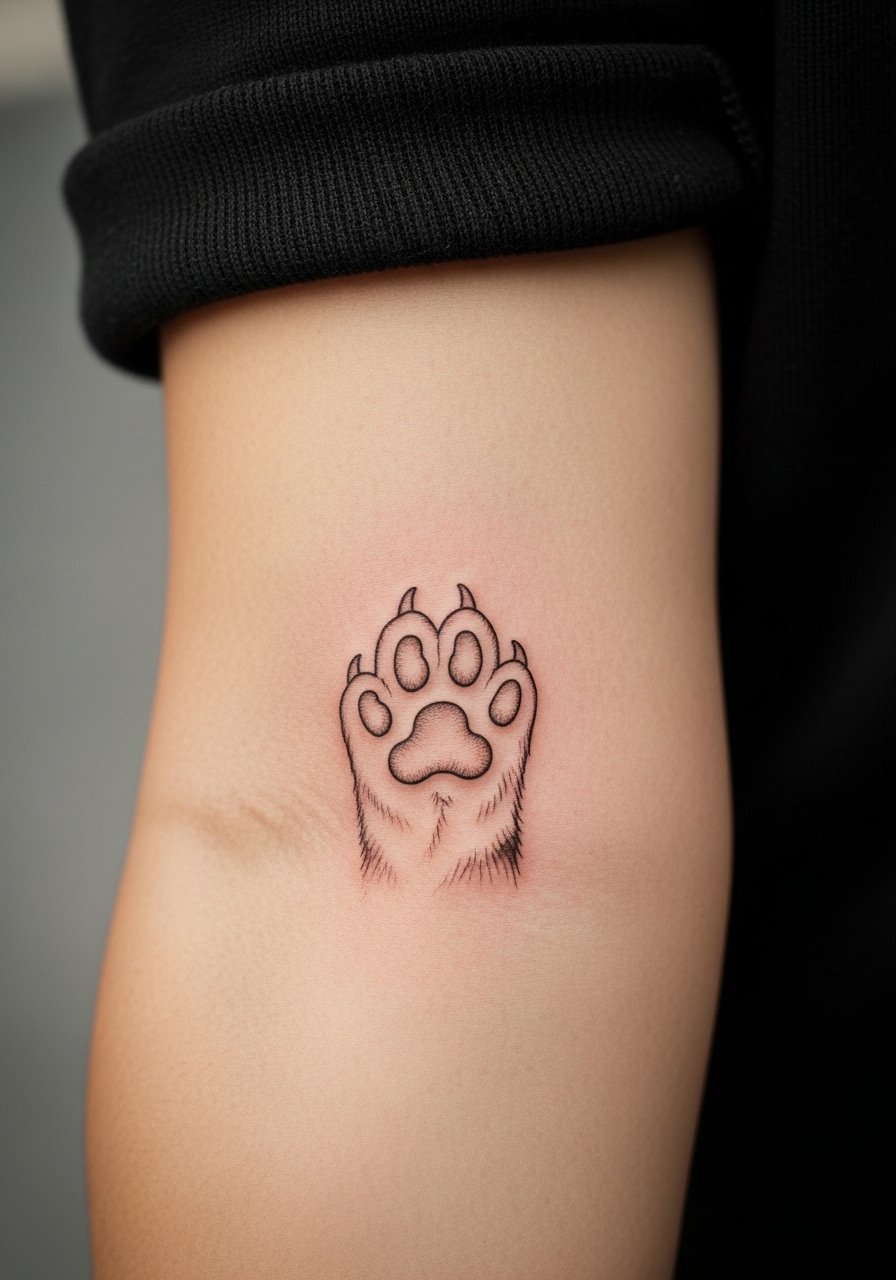
I've seen this style keep crisp contour if the lines are spaced and not packed too tightly. Ask for slightly bolder anchor lines around the pad and delicate claw strokes that taper with whip shading. The inner forearm is forgiving on pain and aging, but the common mistake is asking for micro detail without giving the lines room. Expect 30 to 50 minutes in a single session and plan a touch-up at year three if you wear sleeved garments that rub the area. Show it off with a sheer button up blouse with sleeves rolled so the placement looks deliberate.
3. Neo-traditional outline with color pads on the shoulder
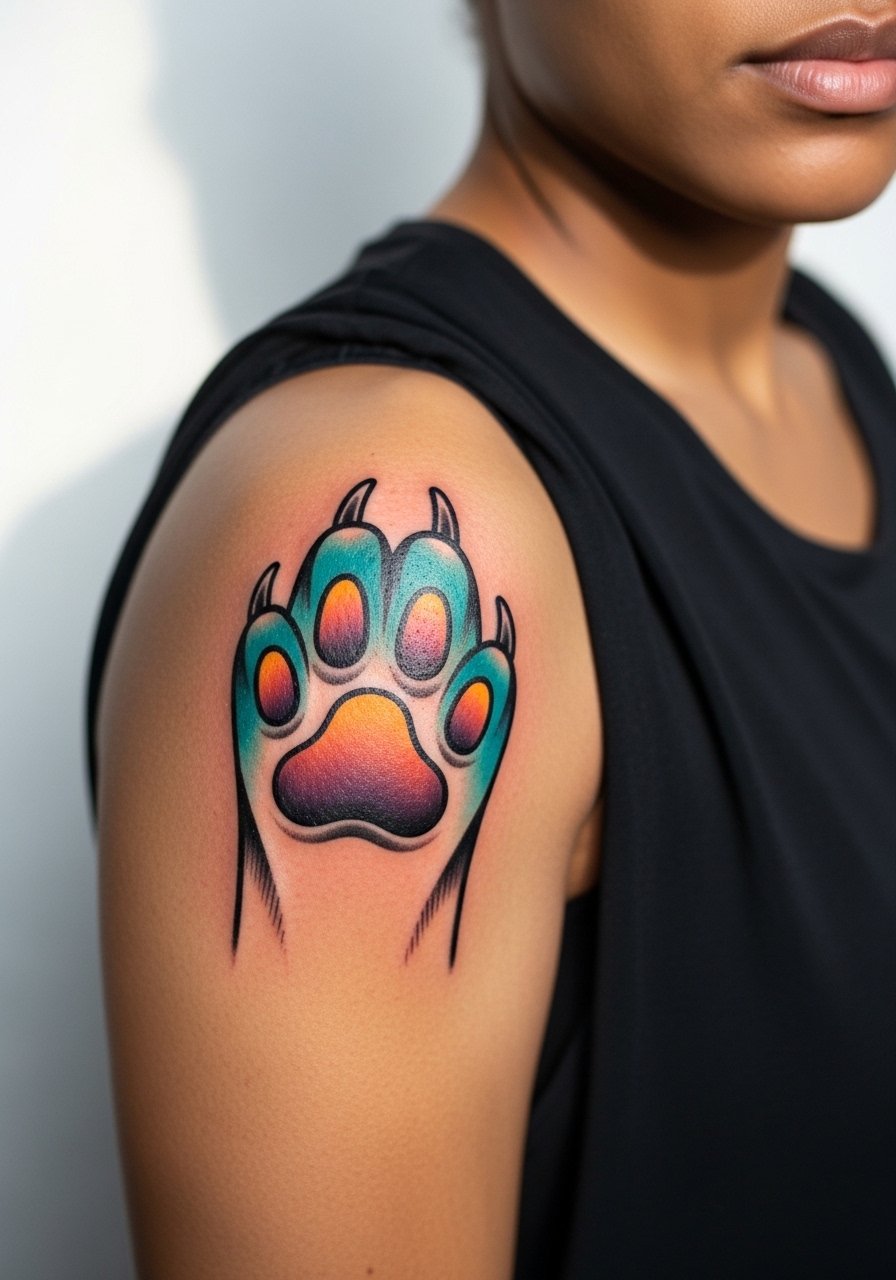
There's something about saturated color and bold outlines that reads from across a room, and shoulders are perfect for that scale. Tell your artist you want solid outlines with color saturation packed into the pads, not watercolor washes. The session feels like medium discomfort with stretches to access the deltoid, usually one to two sessions if you want richer hues. Color pads can fade faster on high-sun days, so plan on annual check-ins for saturation touch-ups. Pair the piece with an off shoulder top to reveal the design on warm days.
4. Solid blackwork pad for calf placement
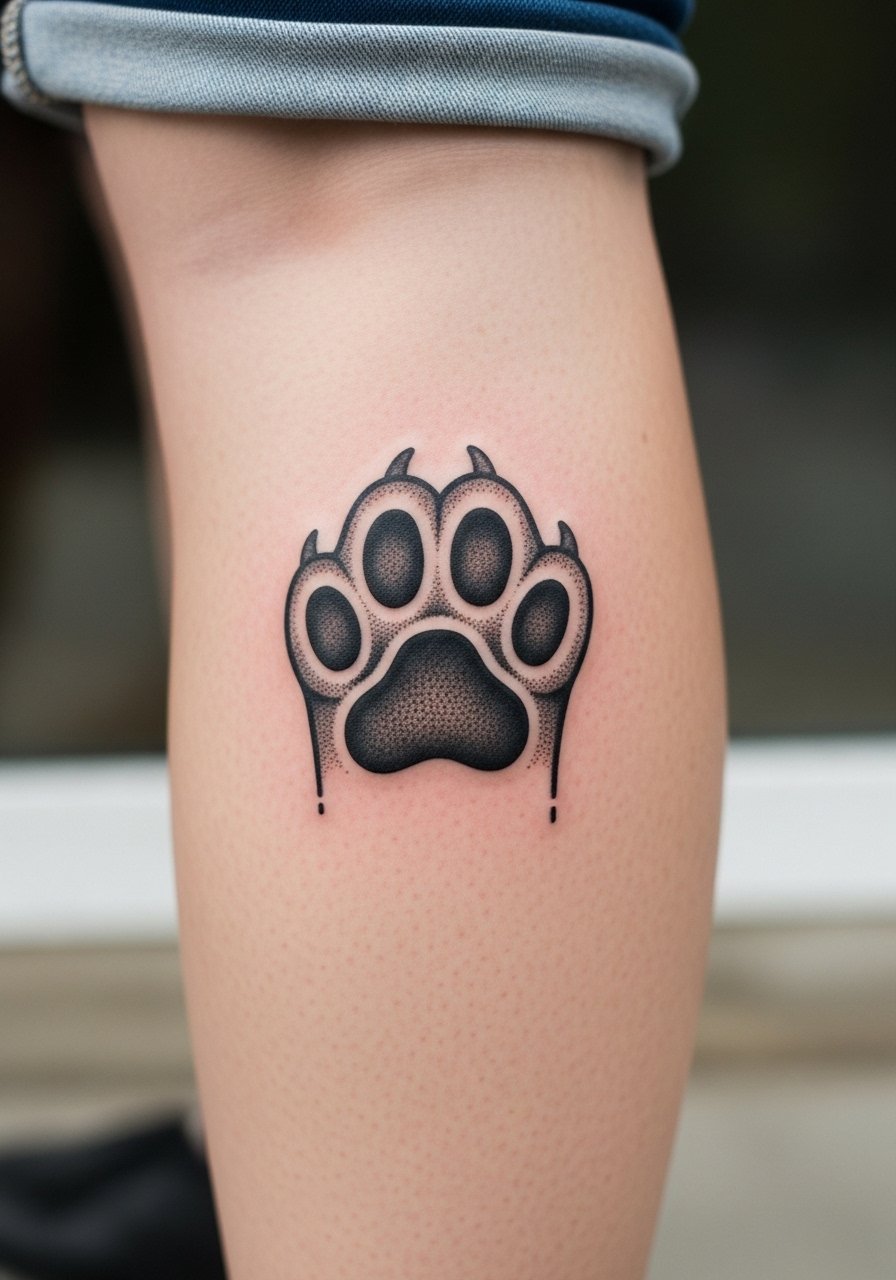
Bold blackwork is one of the most resilient choices for high-visibility placements like the calf. Ask for solid saturation with crisp edges and a single-session fill where possible. The calf tolerates long sessions well, but watch for blowout near very soft tissue areas. A common mistake is trying to miniaturize solid fills; bigger shapes age better. Expect 45 to 90 minutes depending on size, and minimal touch-ups beyond year three if you avoid prolonged sun. Show it off with high waisted leggings or cropped shorts for a bold look.
5. Watercolor pad splash on the thigh
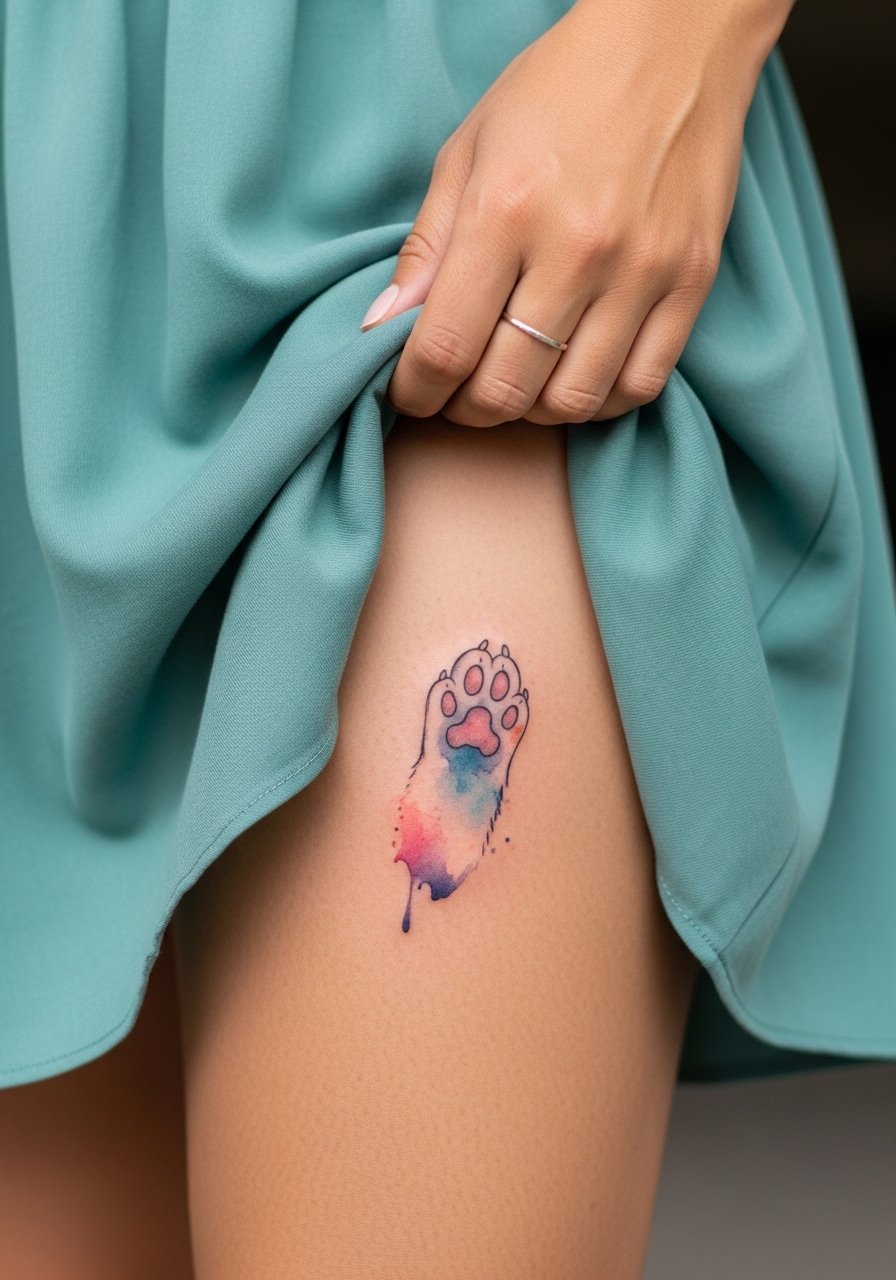
Watercolor effects feel playful and suit thighs where there is room to breathe. Most watercolor pieces need more sessions for smooth blending, and the big aging issue is color diffusion without solid anchors. Ask your artist for small anchor outlines or subtle dot work to keep the pads readable as pigments soften. Thigh sessions are comfortable with long-running periods of low to moderate discomfort and two sessions are common for depth. For outings, wear high cut shorts or skirts that echo the palette so the color reads like part of an outfit.
6. Black and gray realistic pads along the collarbone
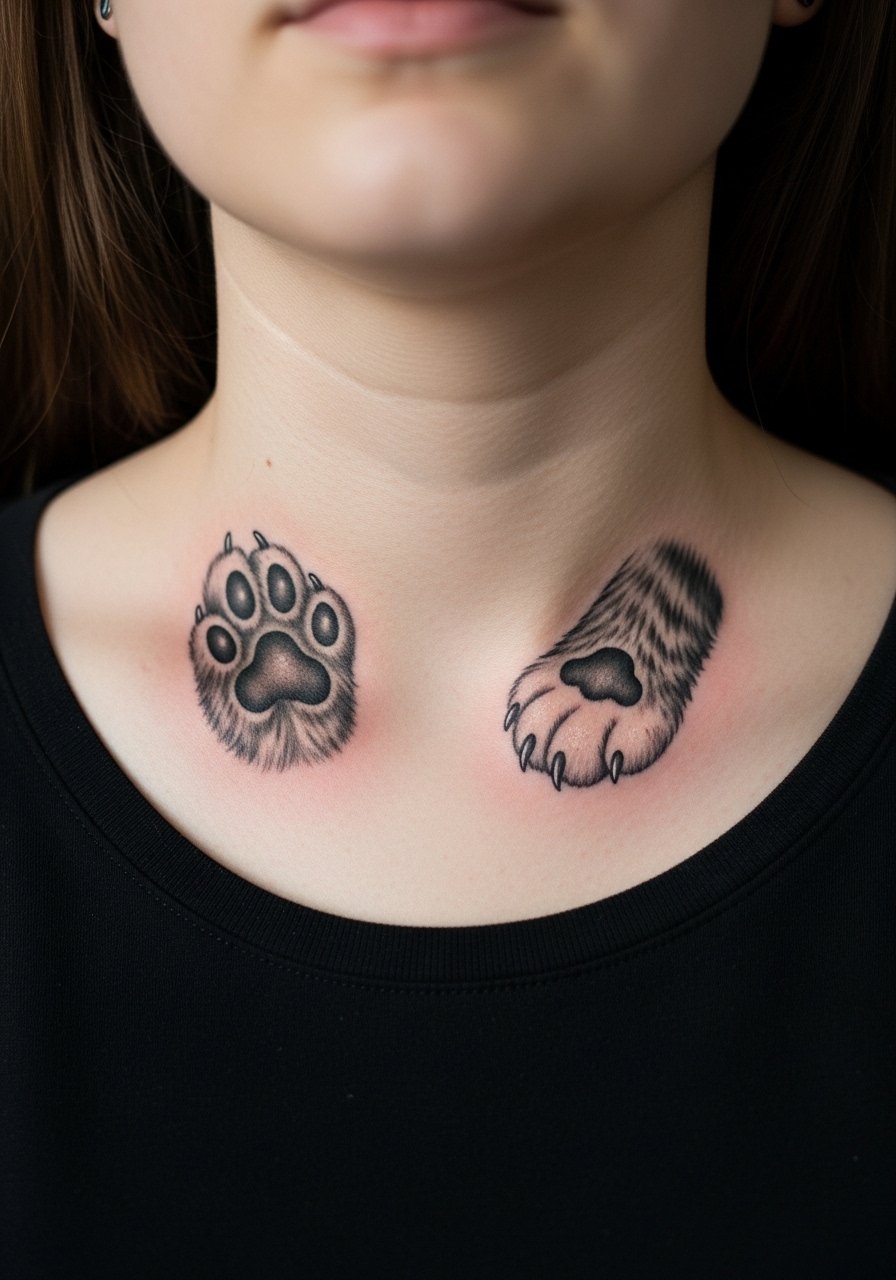
Realistic pad rendering uses stipple shading and soft gradients to mimic texture and depth. The collarbone is a sensitive spot for both pain and movement, so expect discomfort and brief shading sessions. The key consultation note is to ask for mid-gray transitions and avoid extremely fine dot clusters close together, which can merge with time. Artists split on whether extreme realism holds on the collarbone. One camp says the thin skin and motion blur delicate detail quickly. The other camp says careful spacing and slightly bolder midtones prevent that. If you want to reveal it in outfits, a v neck blouse silk or a strapless layering piece works for evening wear.
Pre-Session Essentials
The wrist and thigh picks above heal differently from shoulder or collarbone pieces, so these items smooth the appointment and the first week.
-
Stencil transfer paper kit. Lets you preview placement and lineweight on skin before the needle hits, which is helpful for small wrist and collarbone pads.
-
Topical numbing cream. Applied per the product directions 30 to 45 minutes before can reduce the sting for sensitive collarbone or inner forearm sessions.
-
Thin protective film roll. Keeps wrist and finger tattoos cleaner during the first week of washing and daily friction.
-
Fragrance free gentle body wash. A mild cleanser avoids irritating new linework on larger pieces like thighs or calves while you shower.
-
Aquaphor healing ointment. A thin layer in the first 48 hours helps protect fine line channels without suffocating ink.
7. Micro pad cluster behind the ear, hairline framing
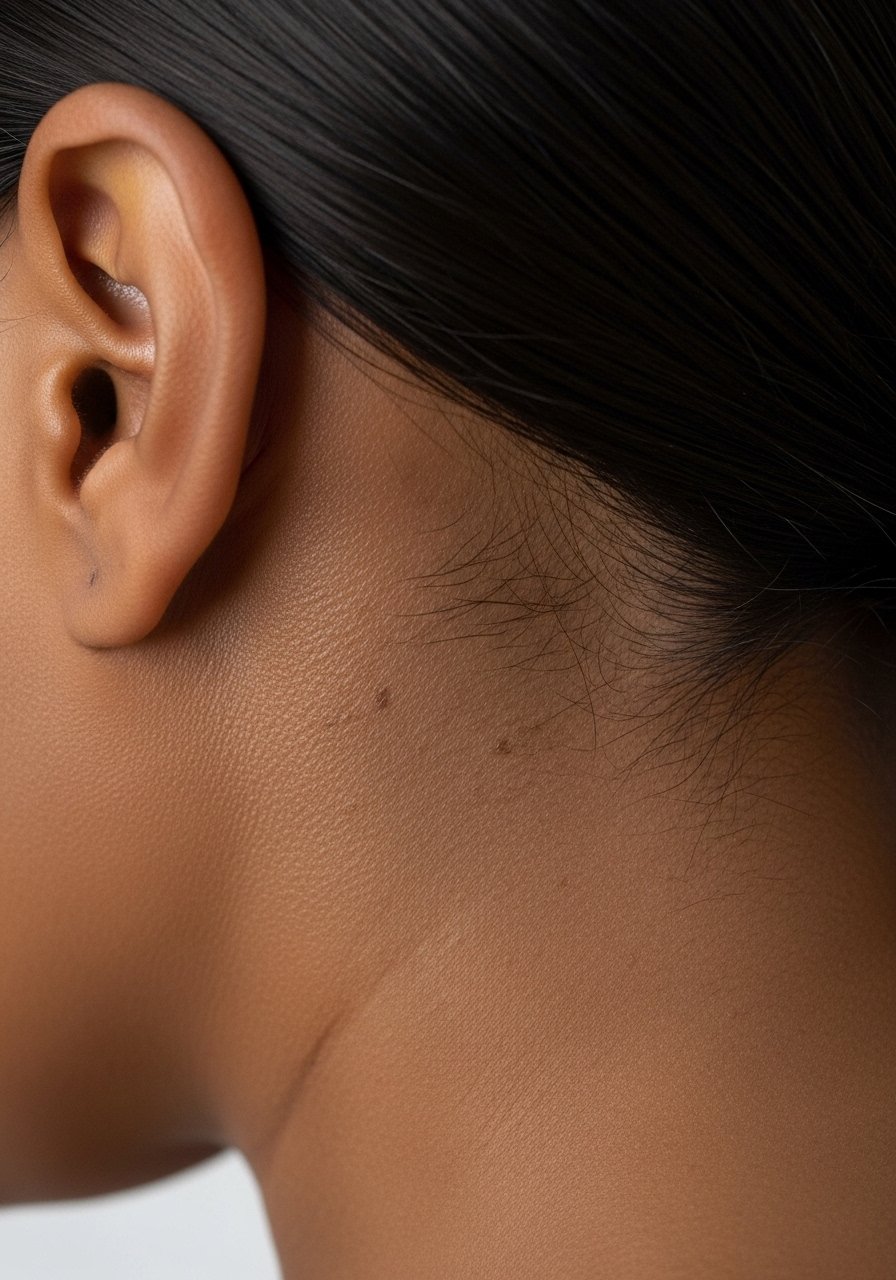
Behind-the-ear placements require careful framing in the stencil and a clear conversation about hairlines. These micro pads look delicate at first but can blur if packed too densely. Tell your artist you want 0.5 to 1 inch spacing with clean negative space between pads. The session is short and sharp, often under 20 minutes. Post-session the area gets hair and sweat contact, so expect a touch-up sooner than for forearm work. For discreet showing, tuck hair behind one ear or wear a thin chain pendant necklace that draws the eye upward.
8. Ornamental pad with geometric borders at the ankle
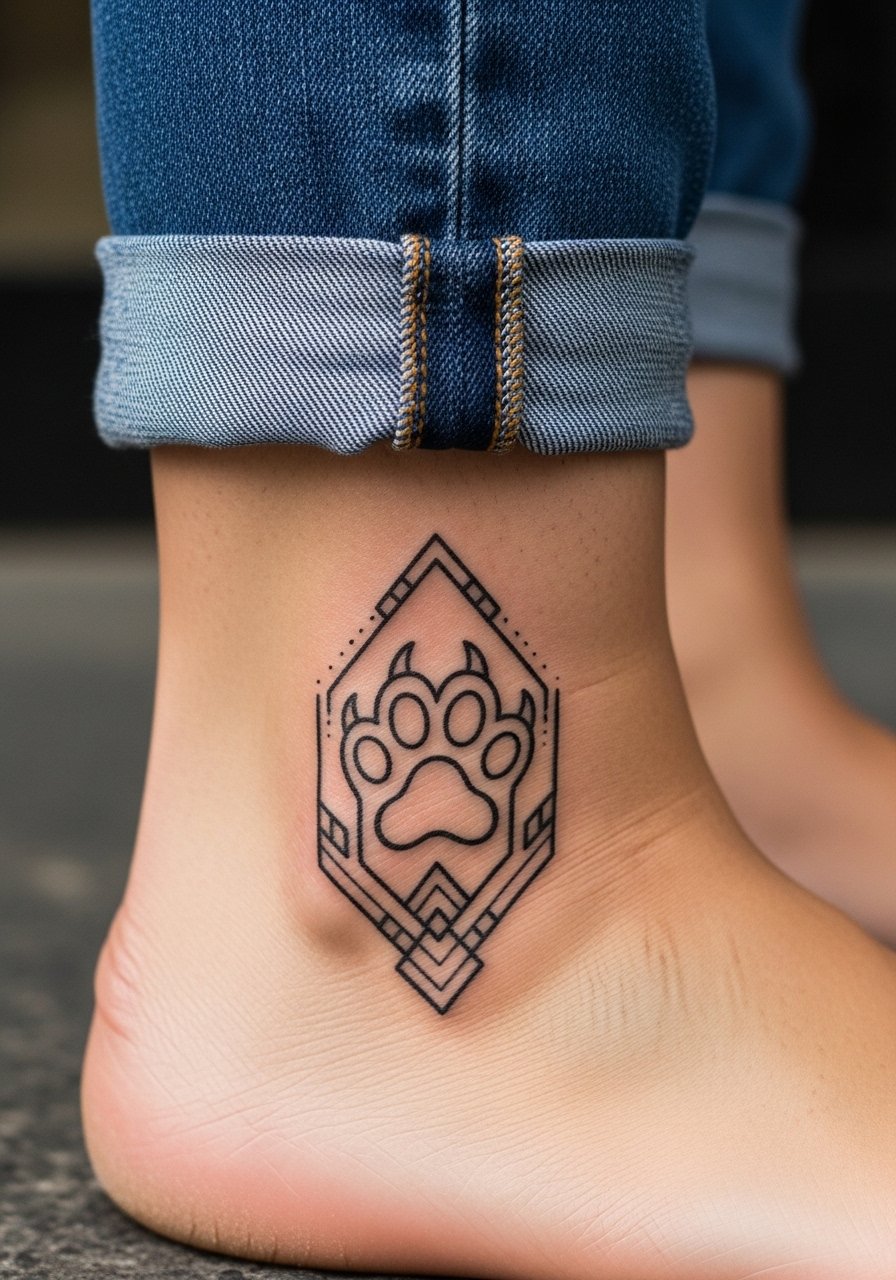
Ankle designs need protected negative spaces because the skin there flexes with movement and shoes create constant friction. The trick is to keep repeats with breathing room between dot work and lines so the pattern does not merge. Ask for a slightly larger scale than you think you need. Sessions are quick but may sting near bone. For show-off outfits choose strappy flat sandals or cropped jeans so the geometric border reads clearly.
9. Ignorant-style chunky pad on the hand
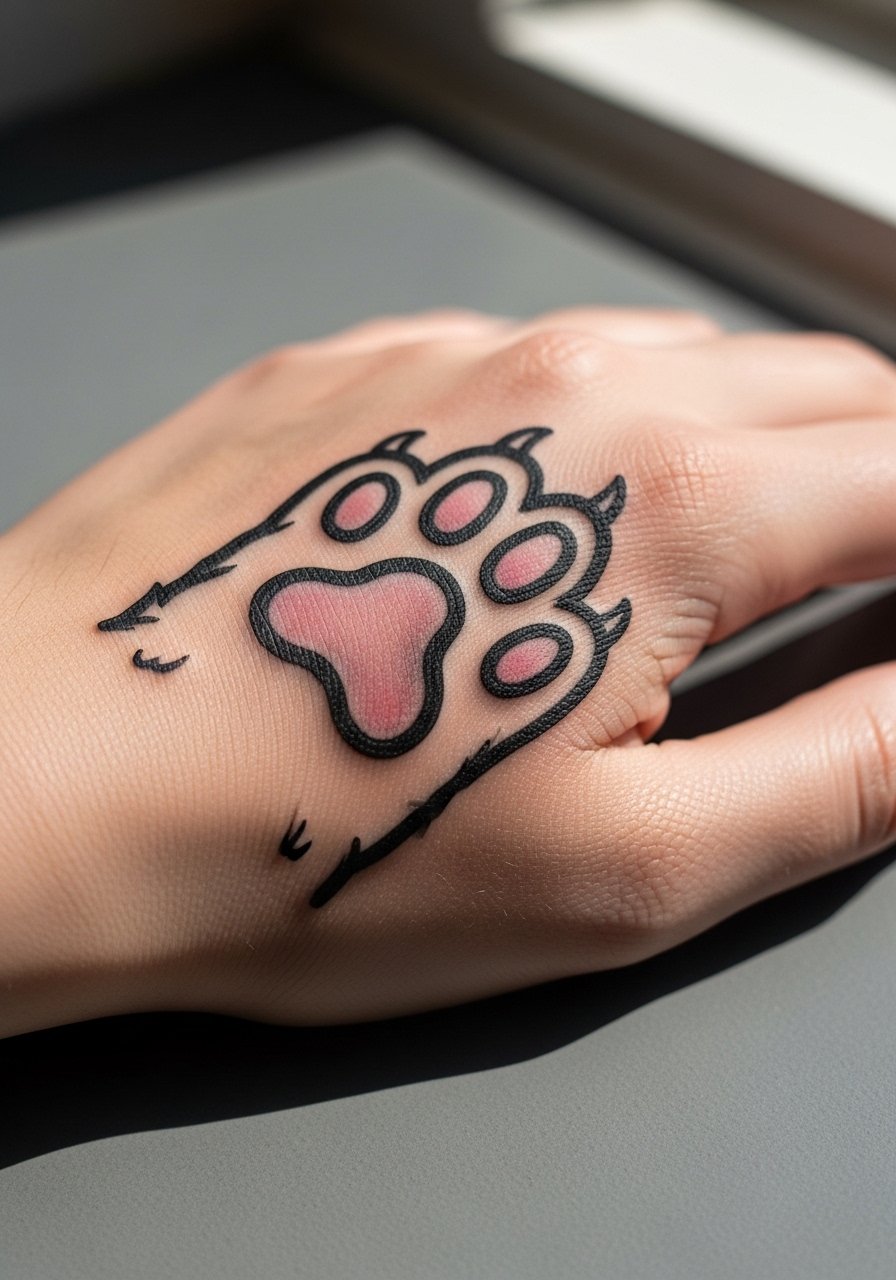
Hand tattoos demand a lot because they sit in high-wear zones and are exposed to water and UV daily. Ignorant or naive chunky pads resist looking thin as they age since the bold strokes armor against fading. Tell your artist you want solid black outlines with slightly rounded edges to avoid crisp corners that chip. Be prepared for a quicker touch-up cycle, often within a year, and some studios recommend multiple short sessions. For session day wear go minimal, no rings or bracelets so the artist has clean access.
10. Semi-realistic pad with fur texture on the ribcage
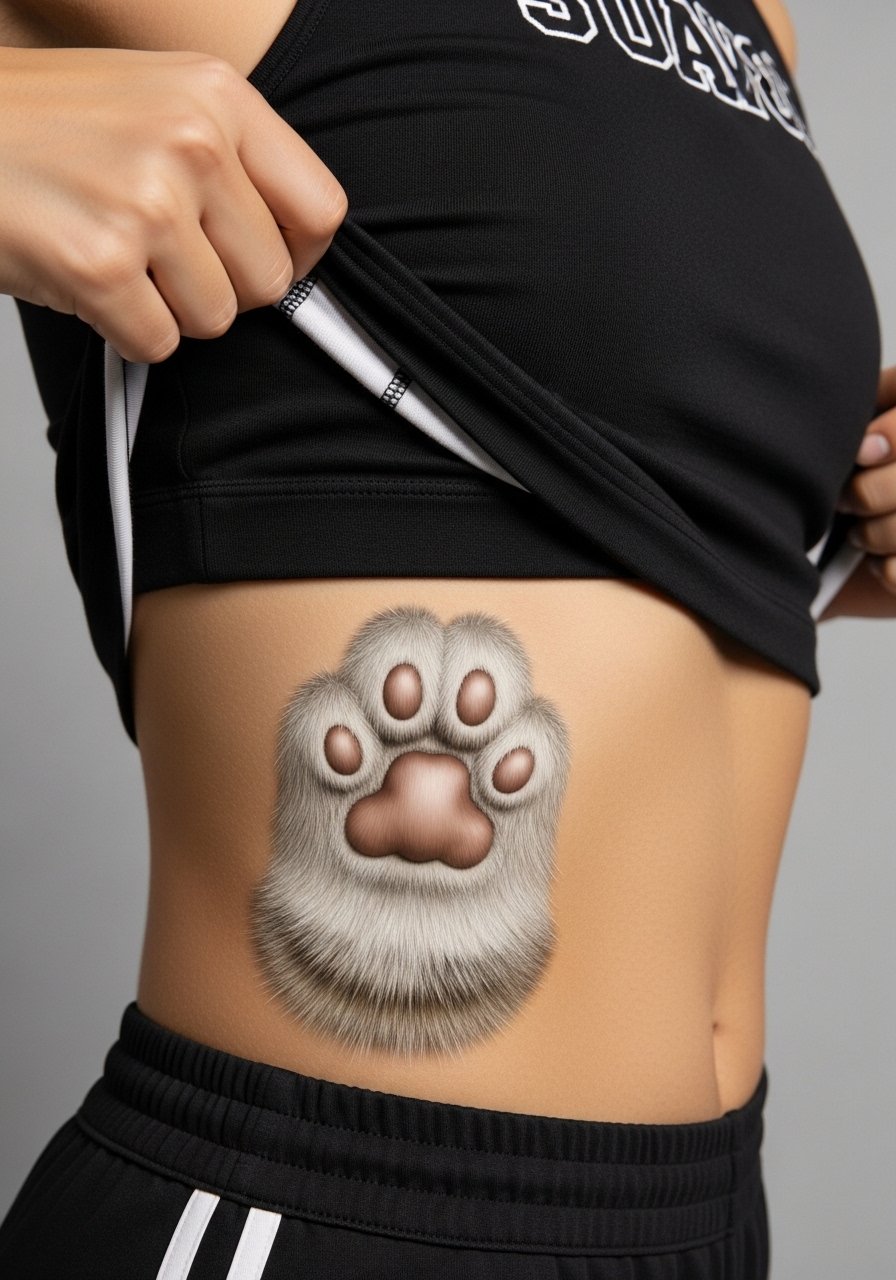
Fair warning, the ribcage rates high on pain scales, but it is where semi-realism can read with dramatic depth. Artists split on fine line here. One camp argues the skin stretch and breathing blur micro detail in two years. The other camp says slightly bolder directional shading and spaced stipple keep fur texture readable. For this style ask for layered stipple and directional strokes that mimic hair, not single microlines. Sessions can run two hours and often require a second pass. Wear a fitted sports bra that you can shift aside for the session.
11. Traditional American pad flash on the outer forearm
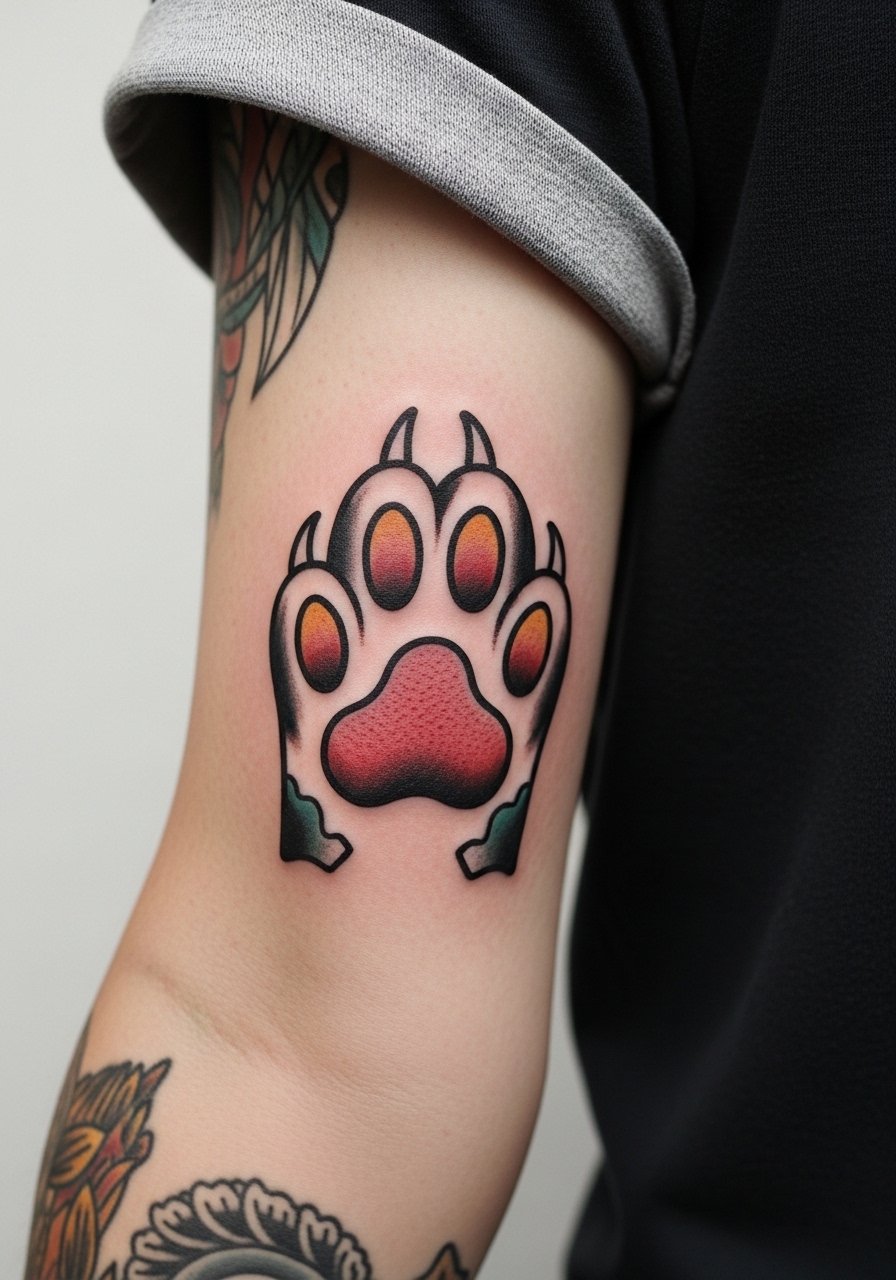
Traditional flash relies on bold outlines and saturation that age predictably. On the outer forearm this approach reads strong even as softer details relax. During consultation request classic outlines and solid color fills with minor highlight dots, not complex gradients. Expect a single session of 45 to 75 minutes depending on size. The common mistake is overcomplicating a flash look with microlines. Pair the forearm piece with a loose button-down shirt you can roll for an intentional reveal.
12. Patchwork minimalist pads building into a lower leg sleeve
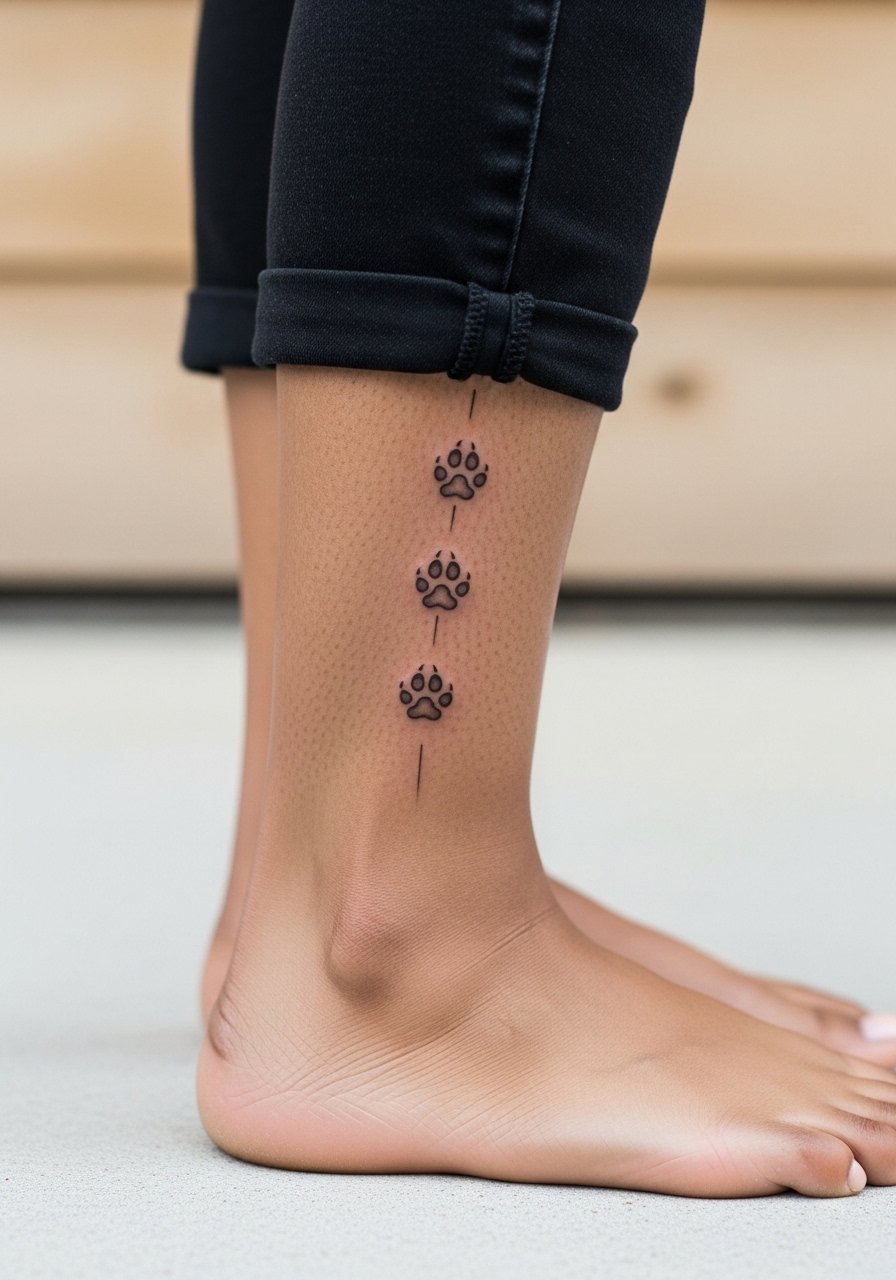
Patchwork starts with tiny pieces that connect into a coherent band over time. I recommend planning negative spaces and a color or line motif that threads through each pad so they look intentional when joined. The mistake is leaving each micro piece isolated without considering spacing and future scale. Each micro session is short and low pain. Over years you may want a connecting background for cohesion, which is easier if you leave 1 to 2 inches between entries. For summer show-off, wear cropped straight jeans to keep the lower leg visible.
13. Dotwork pad mandala on the upper back
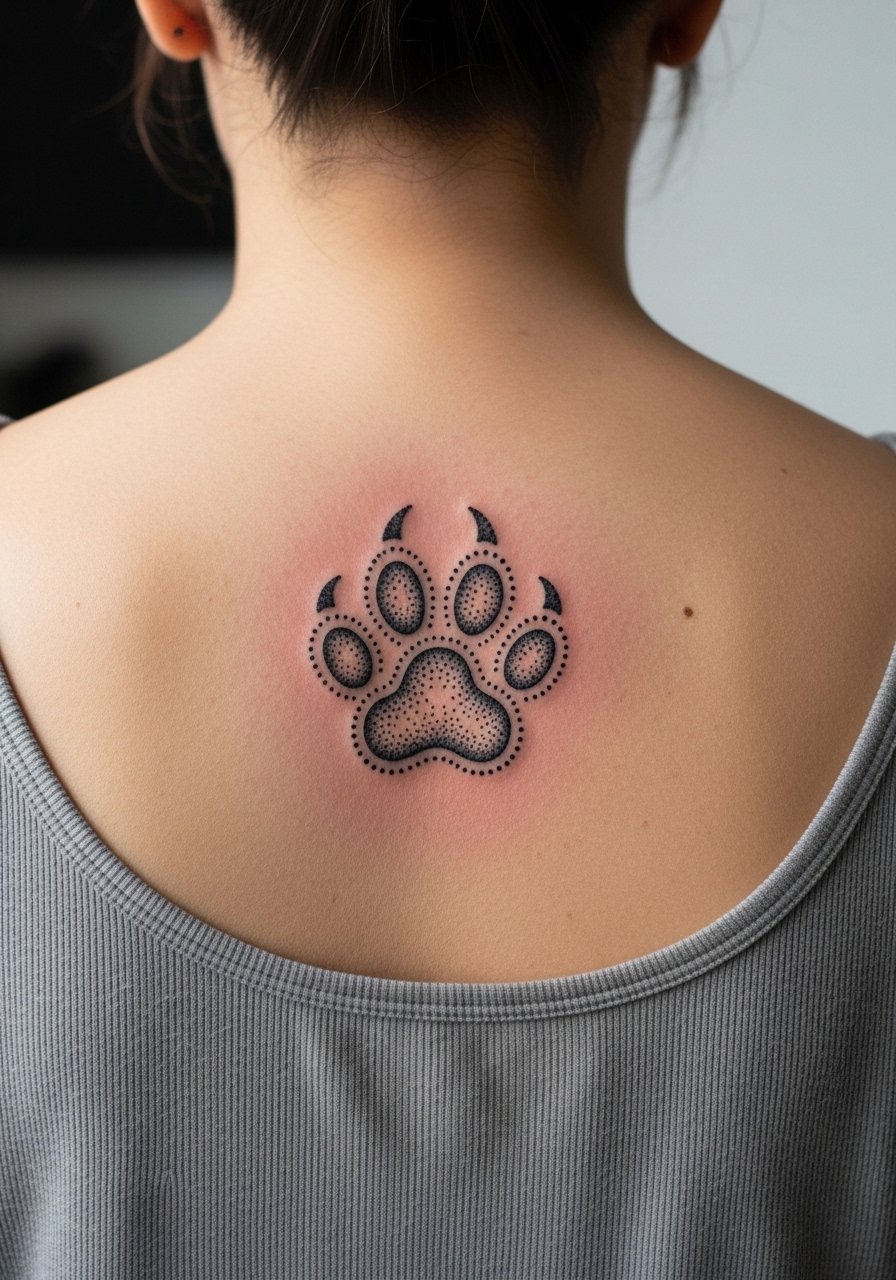
Dotwork mandalas depend on spacing and density. On the upper back there is room to build elaborate symmetry without crowding the dots. Tell your artist you want stipple shading that graduates outward and clear ring spacing. The common aging issue is packing dots too tightly in the center, which can merge into gray at year two. Sessions are longer and may be broken into two visits. For wardrobe, an open-back dress or tank shows off the pattern best.
14. Micro pad on the finger, single digit
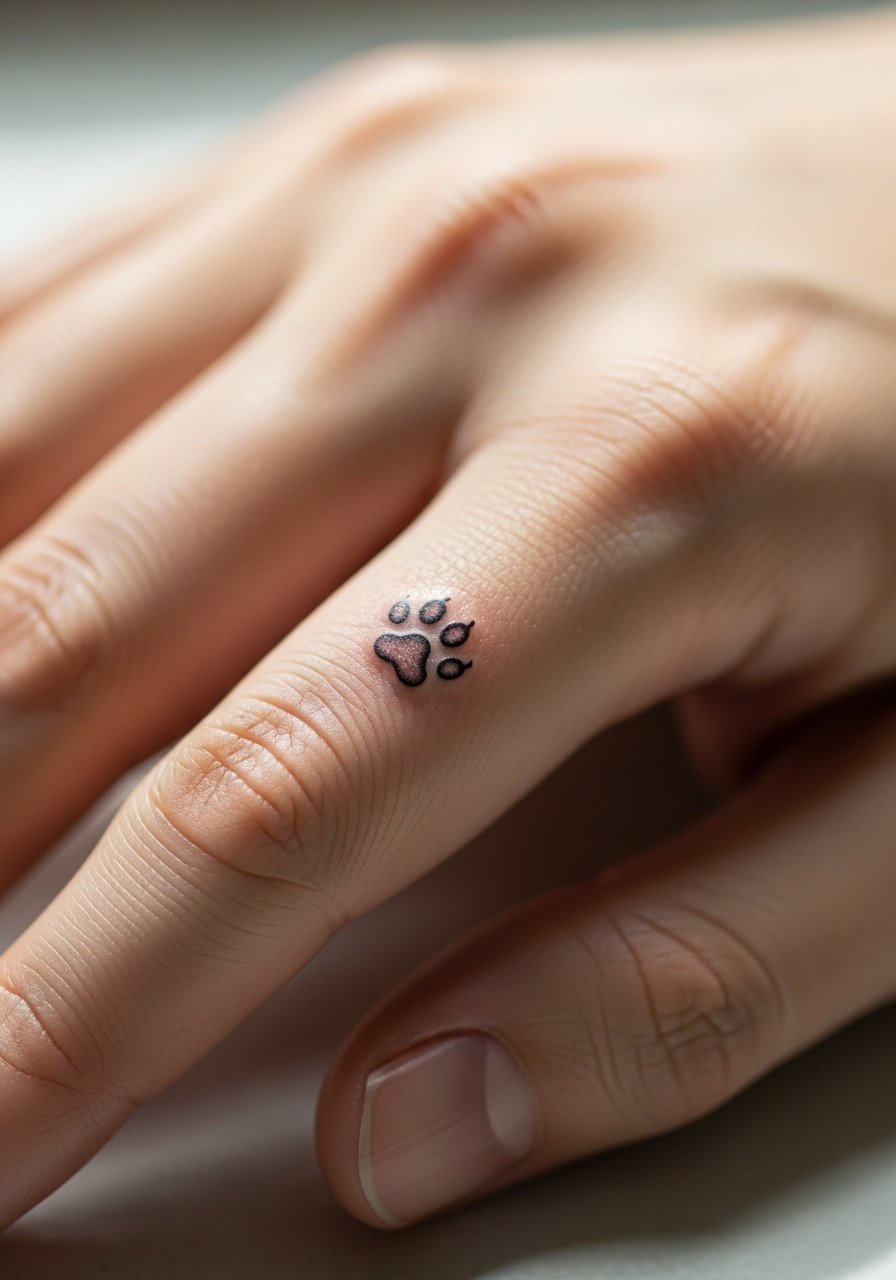
Finger tattoos are notorious for early fading because of constant washing and skin renewal. Micro pads on fingers need bold anchor lines and acceptance of more frequent touch-ups. Ask the artist for compact negative space and slightly thicker outer stroke. The session is quick but stinging and may take a follow-up. A common mistake is expecting a decade-long crispness from a finger micro. For session wear remove all rings and wear nothing on the hands to give the artist clean access.
15. Ornamental pad cuff around the ankle
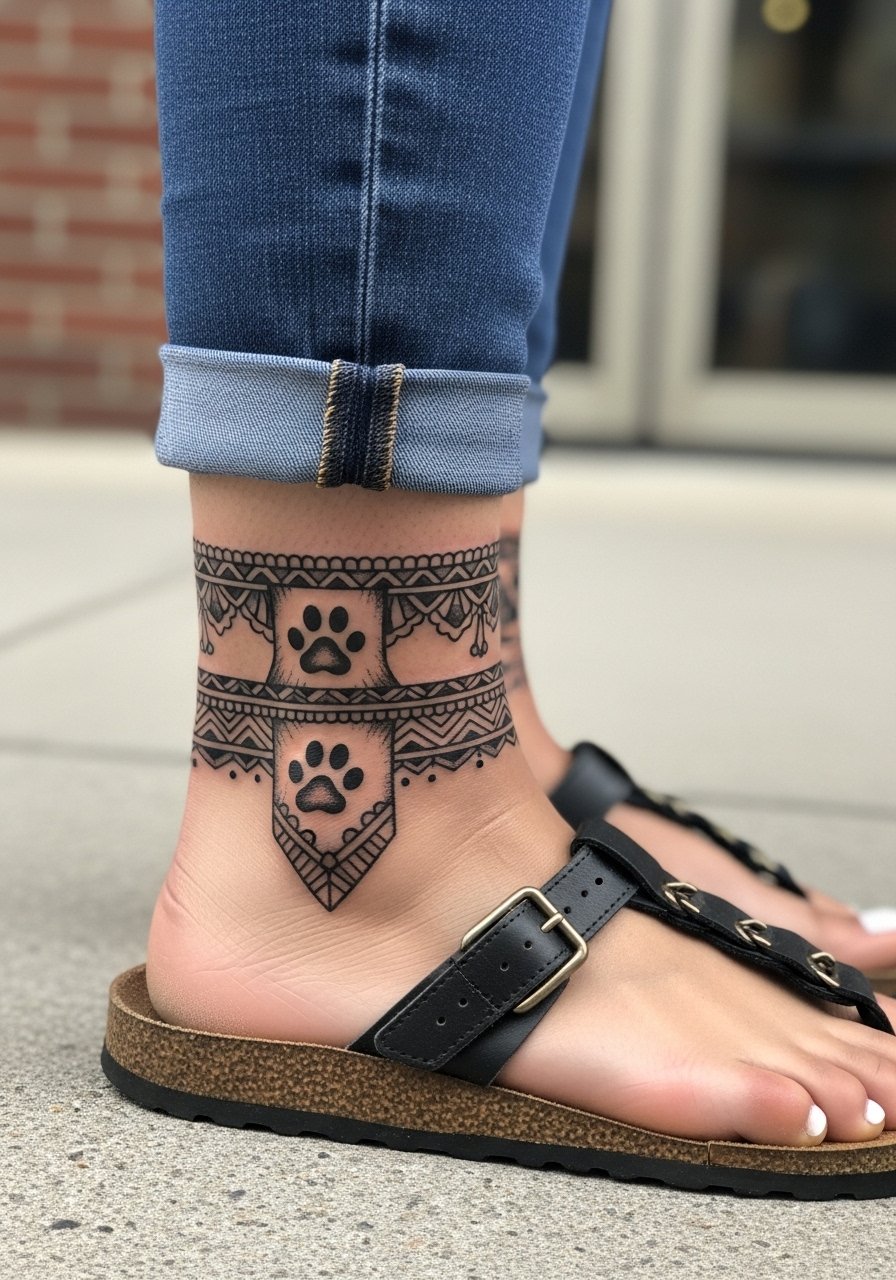
Ankle cuffs read like jewelry when composed with repeating elements and balanced negative space. Ask for pattern rhythm and avoid dense filigree that will blur under constant motion. The ankle heals well if you protect it from shoe friction in the first week. The tattoo feels sharp near the bone but short in duration. For an everyday look try ankle strap heels or sandals that let the cuff show.
16. Chunky black pad for the back of the hand
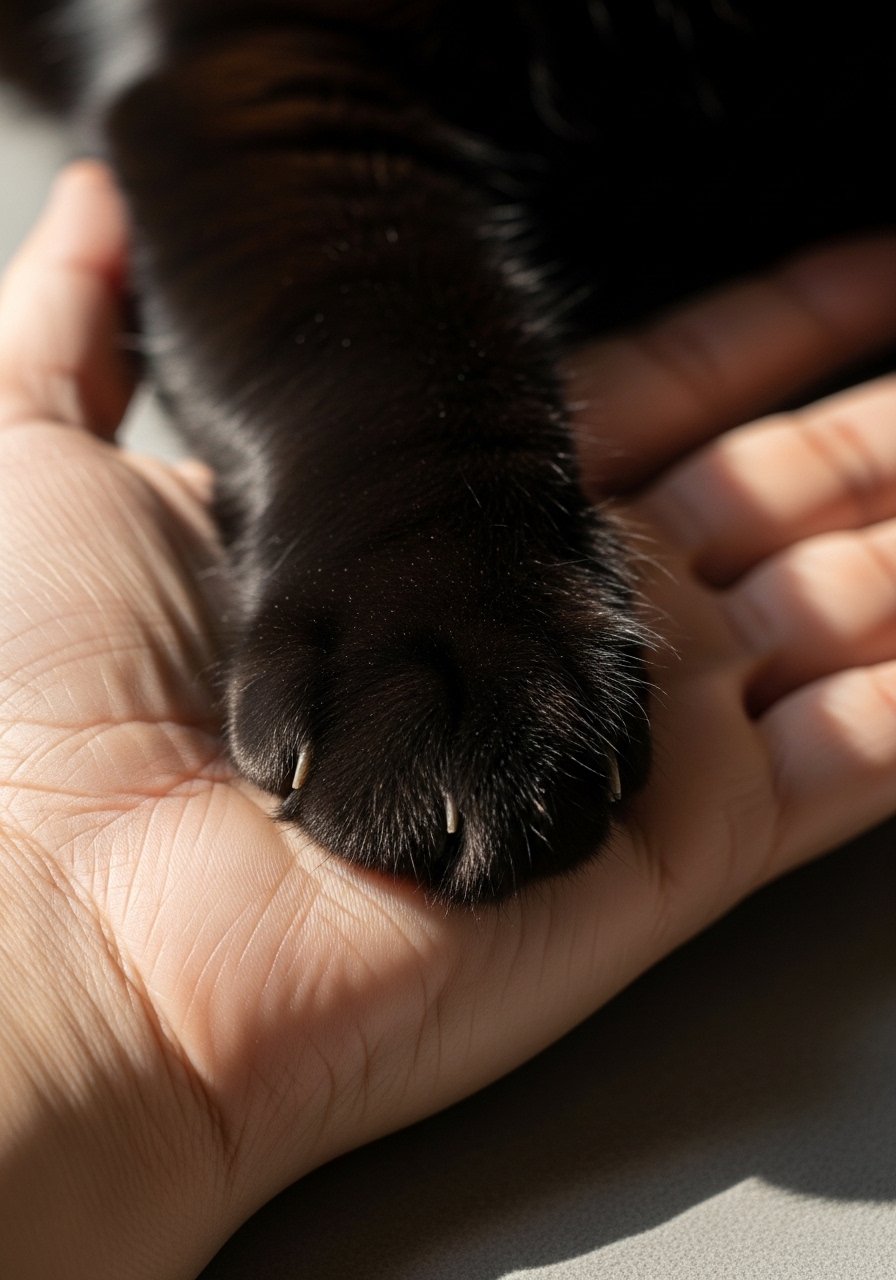
Hands take a beating from daily life which makes chunky black fills sensible. The key is slightly rounded edges and enough scale so the pad does not become a blot over time. Expect more maintenance than arm work, often a touch-up at 6 to 12 months. Mention in consultation that you want simple forms and minimal interior texture. For session logistics, no jewelry and clean skin help the artist.
17. Semi-realistic rib pad with directional hair strokes
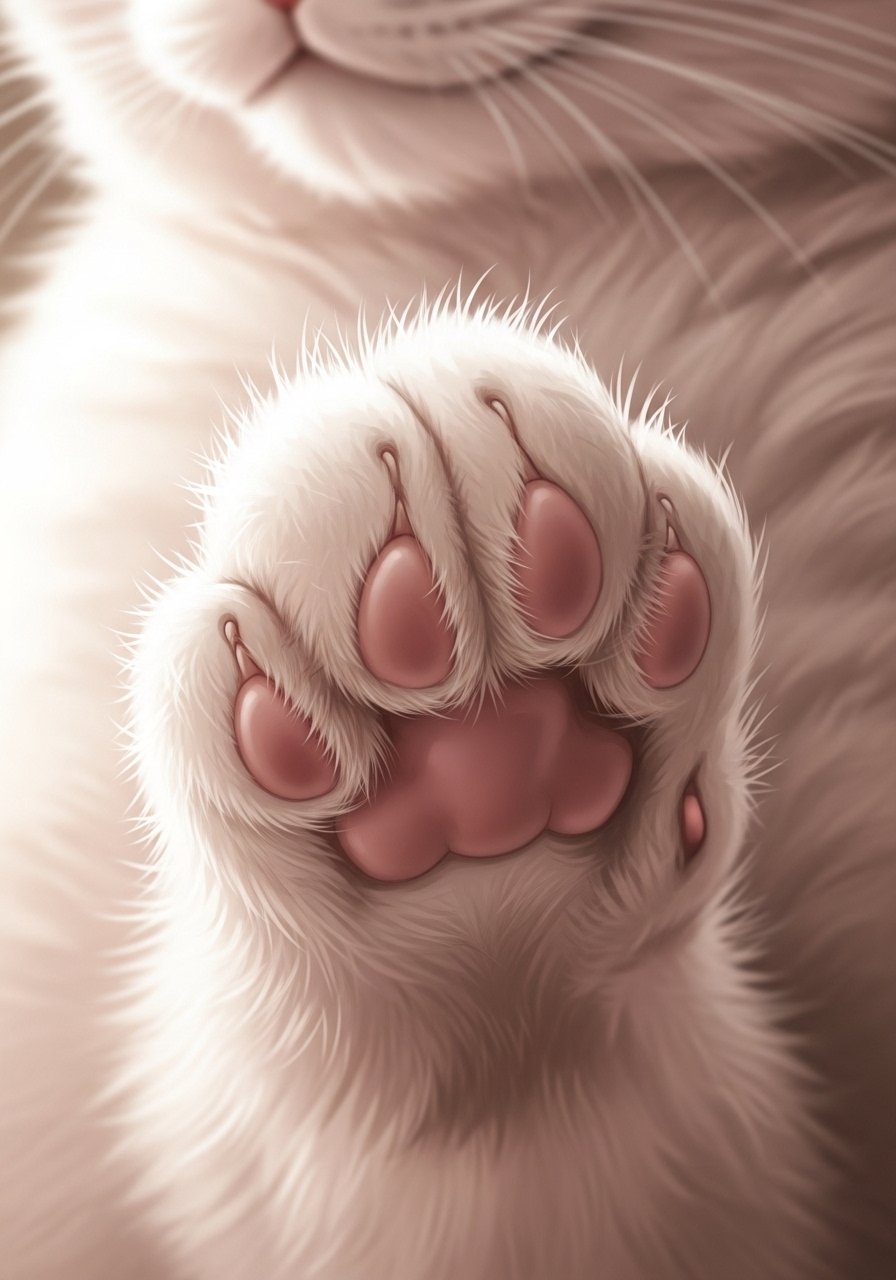
Ribcage sessions are painful, but the area makes semi-realism dramatic when done right. This is another spot where artists debate fine detail. One side says micro-detail blurs quickly with breathing motion. The other side prefers slightly bolder directional strokes and planned negative space to keep texture visible. Ask for directional stipple, not single hairlike lines. Plan for two shorter sessions and a touch-up once the area settles. Wear a loose cropped top for the appointment.
18. Minimal single pad on the ankle bone
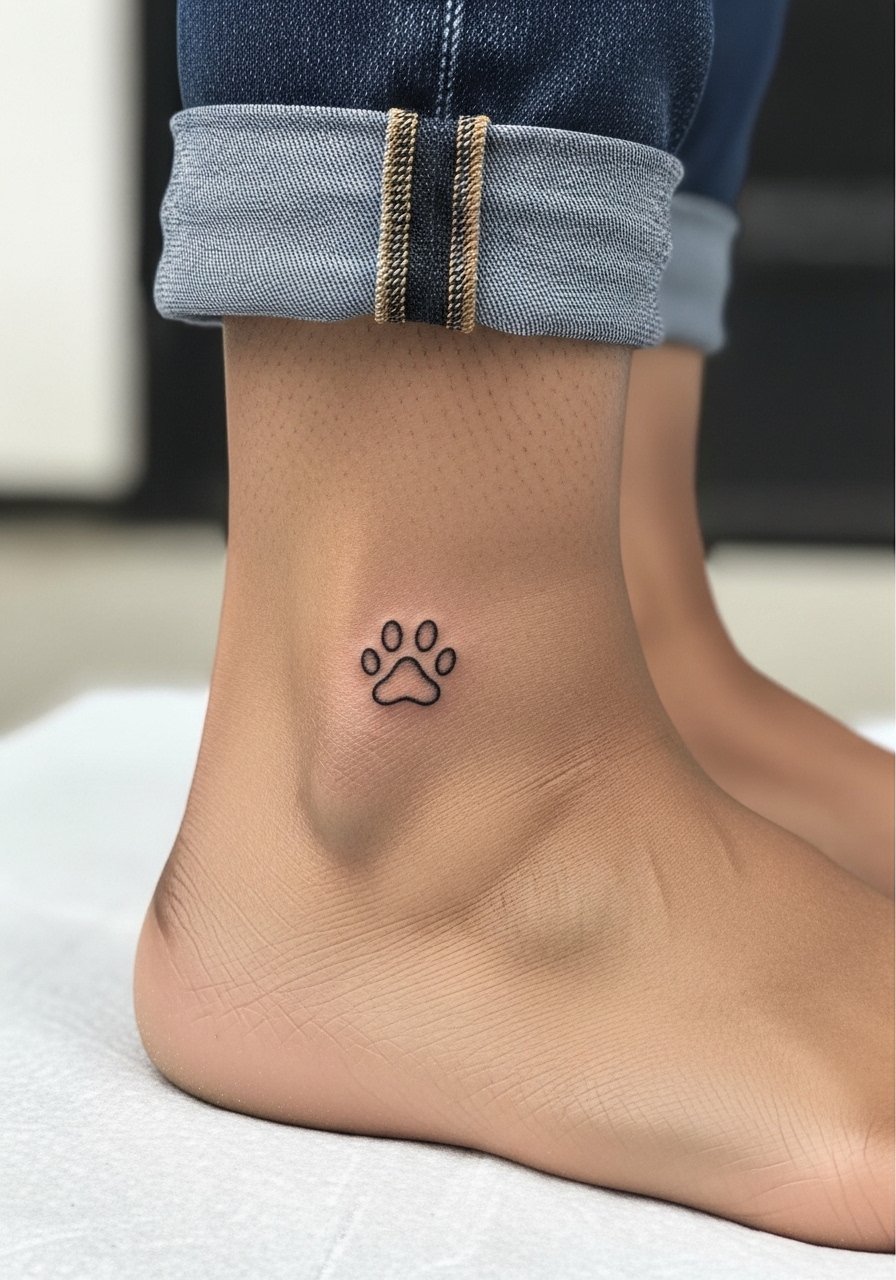
Ankle bones are high-contact but look delicate when done tiny. Make sure the artist scales the pad to at least 1 inch so the linework does not smear. The session is brief but uncomfortable on bony spots. The usual mistake is asking for micro size and then being surprised by early fading. For footwear choices pick flats or sandals that reduce rubbing while the area heals.
19. Tiny pad cluster behind the ear with initials
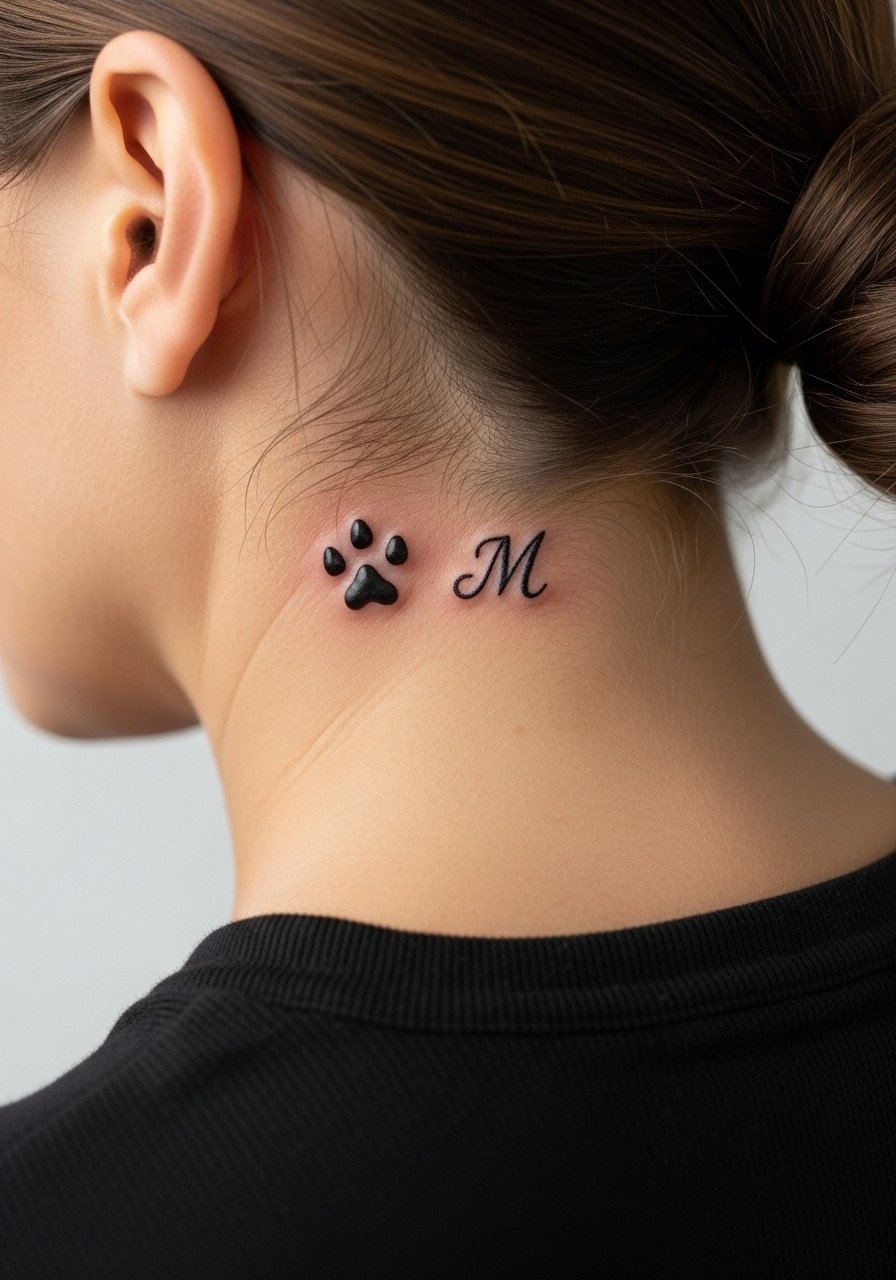
Personalization like initials or dates makes tiny collections feel like a story. When adding text to micro pads, specify exact lettering and size in the consultation. The hairline location needs careful placement to avoid ink touching hair follicles. Sessions are short but check the stencil on skin because curvature matters. For subtle revealing, tuck hair back or wear a small pendant to draw focus.
20. Black and gray pad near the collarbone with soft shading
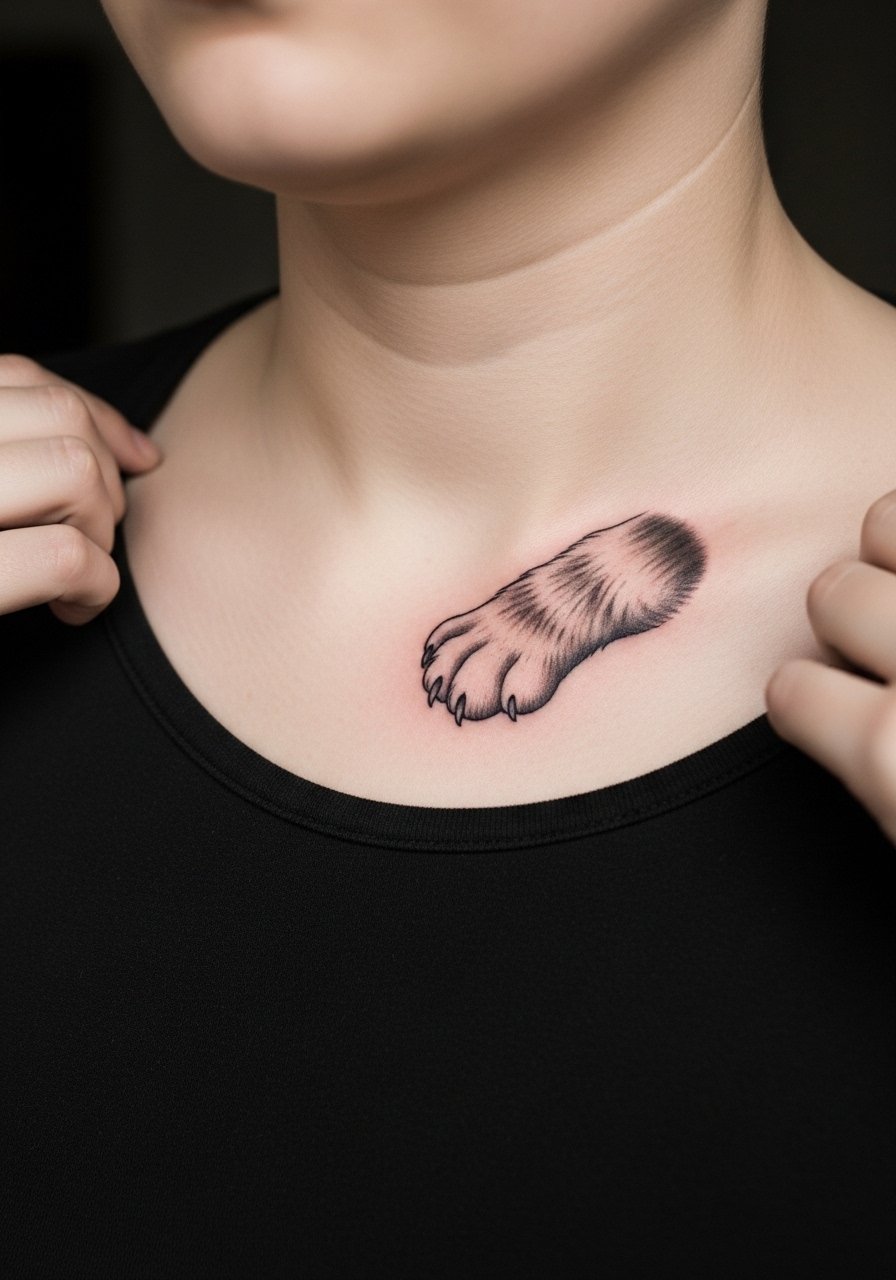
Subtle black and gray is a reliable choice for collarbone work because midtones mask minor softening over time. Ask your artist for graduated stipple and gentle feathering away from the pad edges. Pain is moderate and motion from shoulder movement can stress early healing, so plan gentle sleep positions. For outfits choose a wrap top women or similar neckline that frames the piece.
21. Watercolor pad with soft edge on the thigh near hip
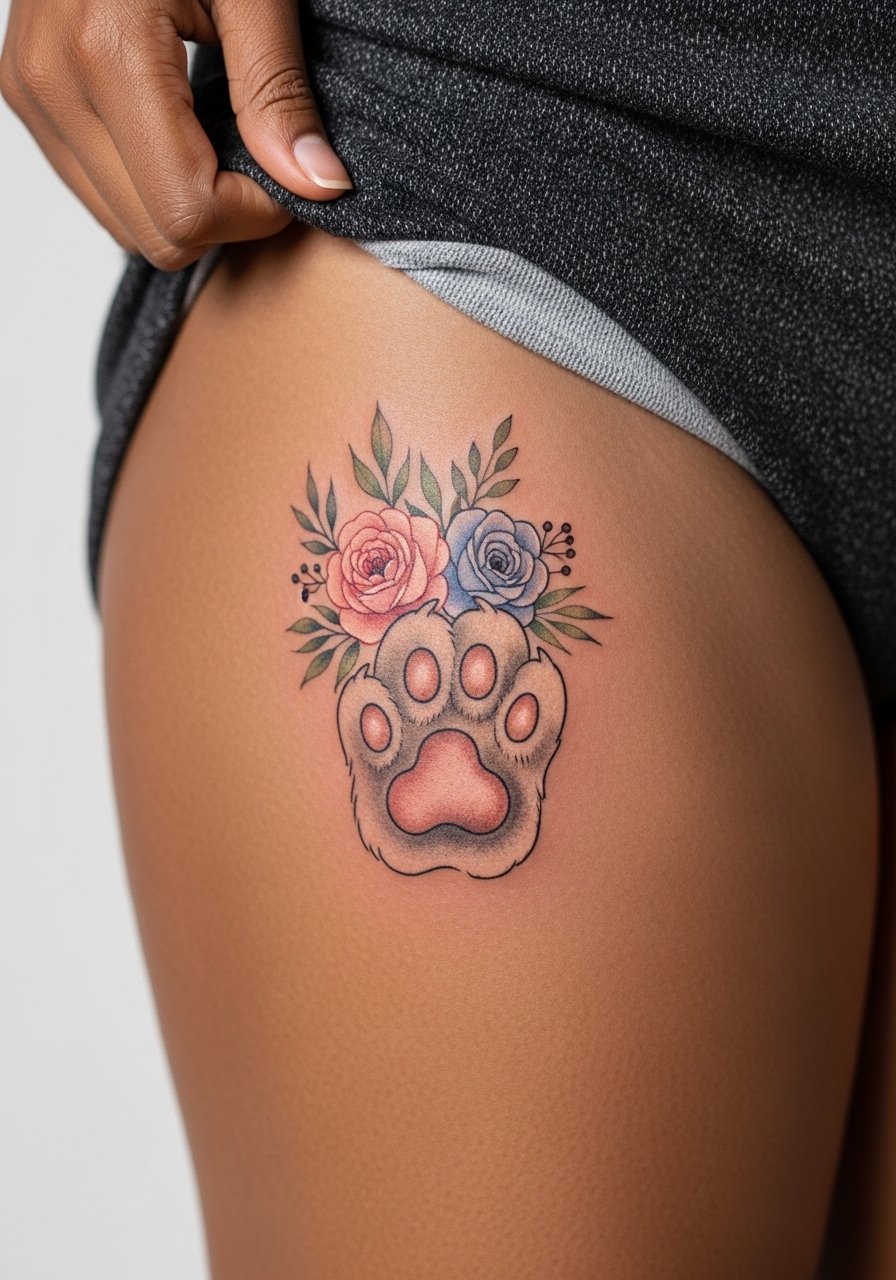
Hip and upper-thigh placements suit watercolor because clothing often hides them during healing and sun exposure is controllable. The longevity issue with watercolor is pigment migration and muted saturation over time. Ask for soft anchor outlines or dot work to retain definition. Sessions generally need two visits for depth. Wear high-waisted bottoms on the day so the artist can expose only the area needed without full undressing.
22. Micro-realism pad on the inner bicep
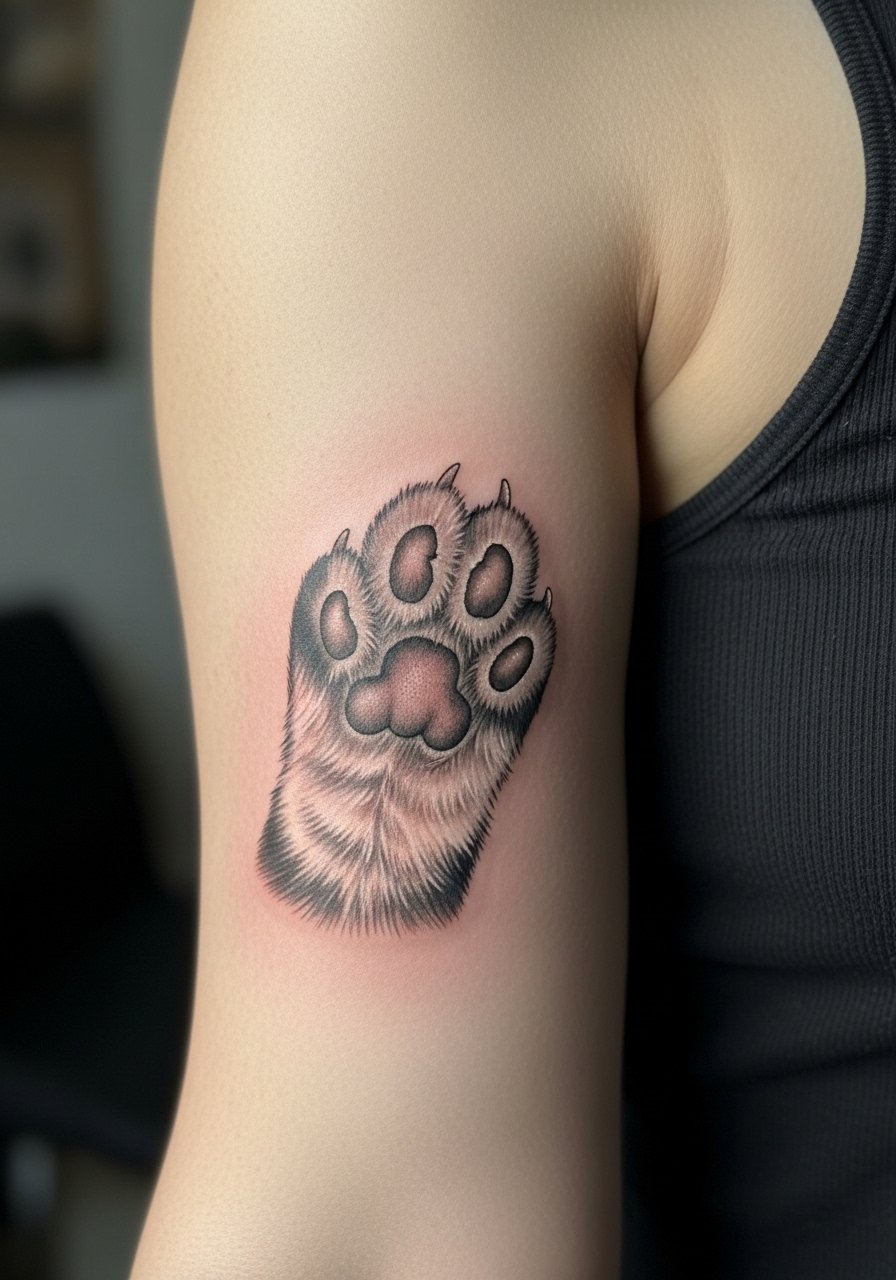
Inner biceps are protected from sun but see stretching when the arm moves, which can impact fine detail. Request balanced needle depth and slightly bolder contour to counteract future softening. The session has a short, sharp sensation as the artist works near the tender area. Expect a touch-up in two to three years if you want the micro realism to stay crisp. For the appointment wear a loose tank top you can lift to expose the area.
23. Stacked micro pads along the finger joints
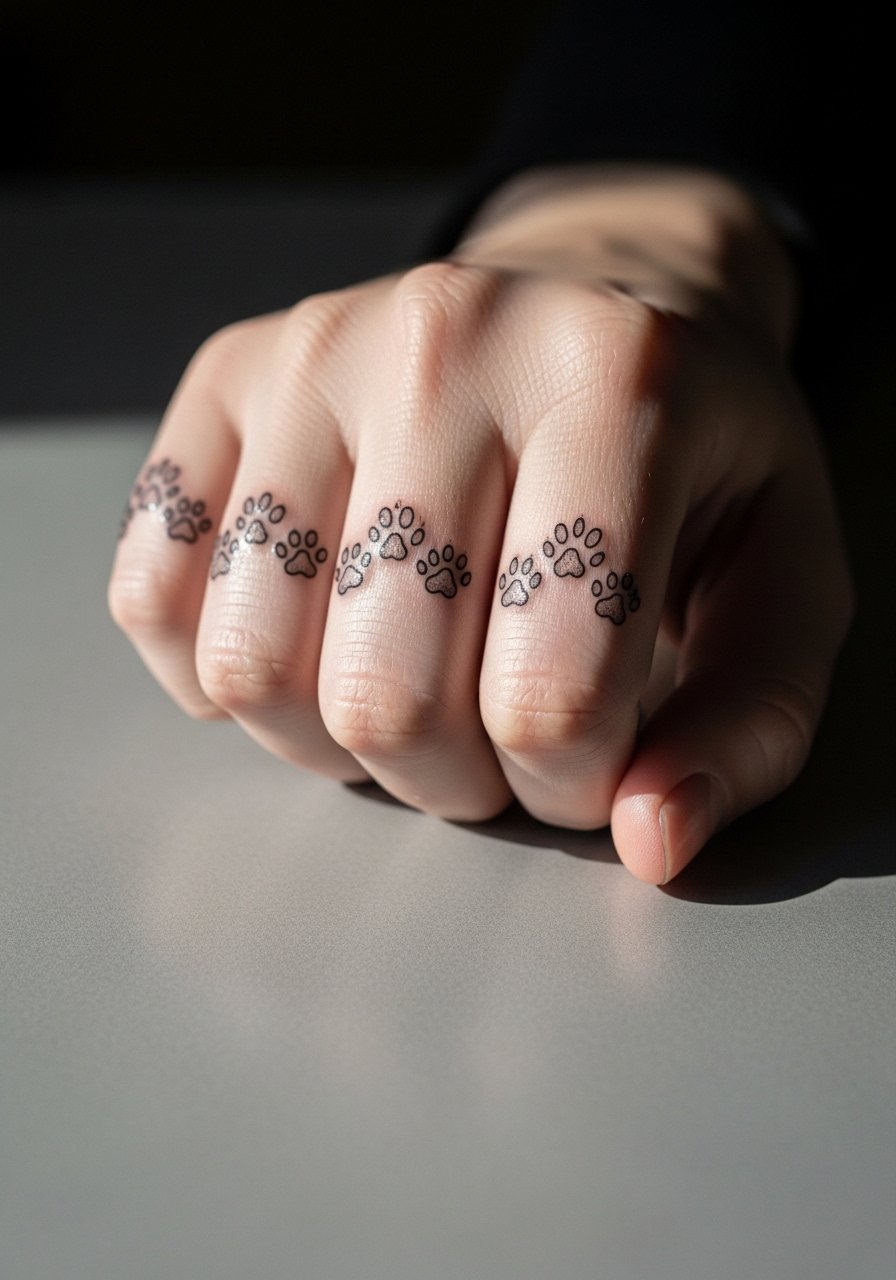
Finger joints are one of the most transient places for tattoos because of constant bending and skin regeneration. If you like the look, plan for regular touch-ups and slightly thicker lines. A common mistake is expecting permanence from joint micro work. Sessions are quick but somewhat painful. Avoid wearing tight rings during healing.
24. Patchwork of pads starting at the wrist flowing to the elbow
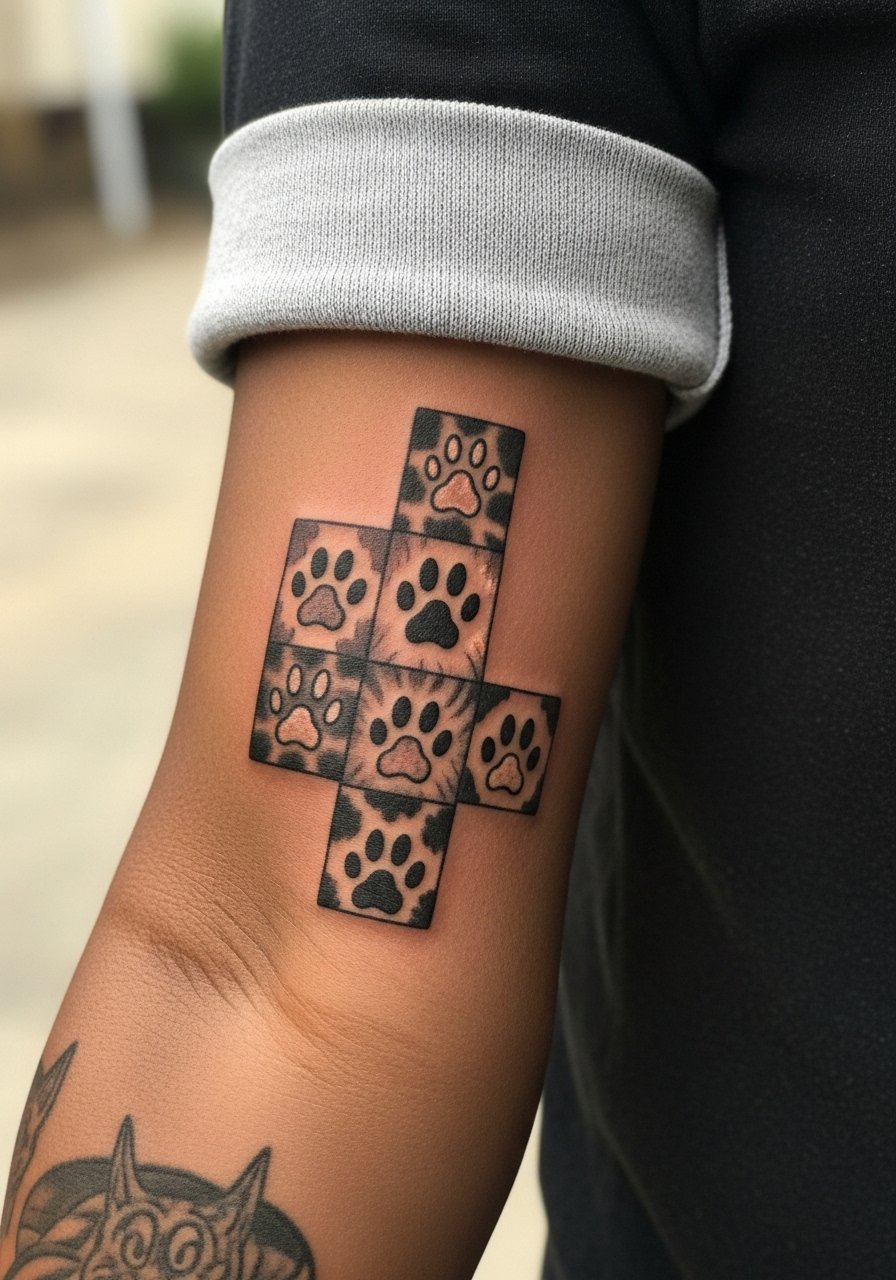
Building a flow from wrist to elbow allows narrative growth and flexible future additions like pet portraits. Tell your artist where you might want larger connecting elements later so spacing accommodates them. Early pieces should leave space rather than crowd the arm. Sessions are modular and comfortable. Pair these with a minimalist wrist stack to frame the lower pieces.
25. Dotwork pad with geometric halo on the back
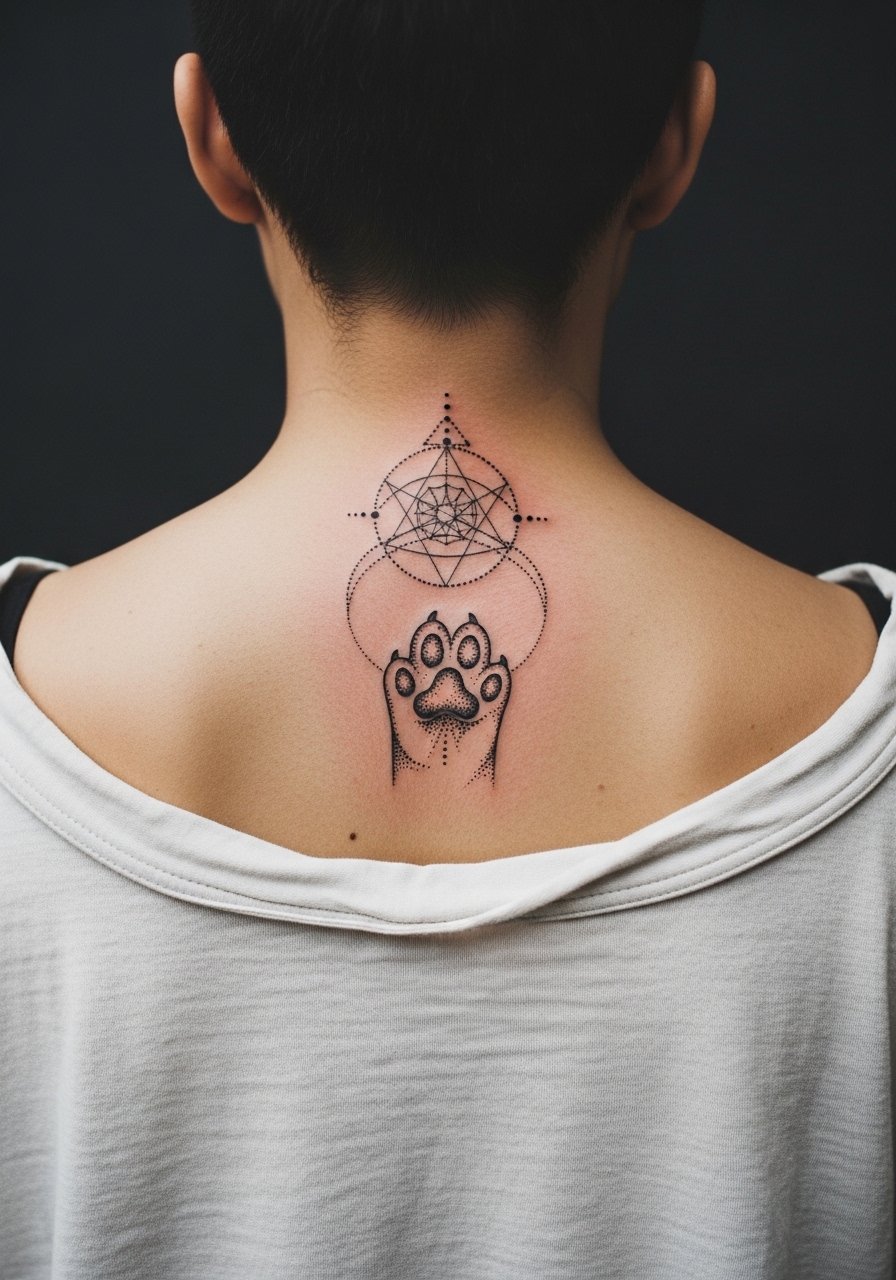
Center-back placements are great for symmetrical dotwork and geometric halos that retain visual balance as they age. The key is ring spacing that allows dots to breathe so the halo does not fog. Sessions can be long and may be split. For showing the upper back wear a tank top with a lower back dip to frame the piece.
26. Tiny pad near the sternum, nestled above a bandeau
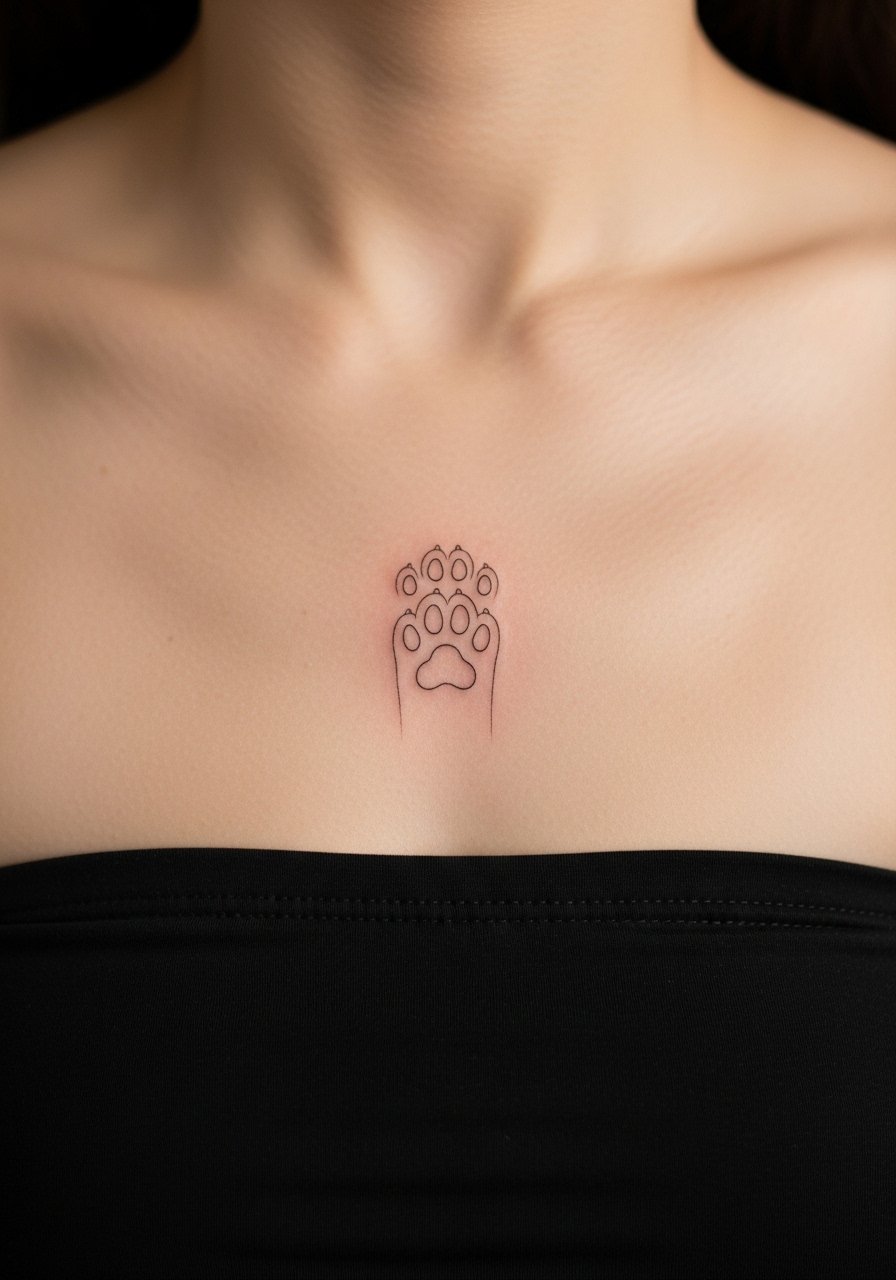
Sternum and underbust placements require a sports bra or bandeau for the image prompt and for the session to ensure modesty. These spots can be tender but look striking when framed by clothing. Ask for slightly thicker linework and leave a millimeter of breathing room around tiny pads. Sessions are short and intense. Choose strapless or bandeau tops for early reveals.
27. Ornamental pad cuff that links to a full sleeve plan
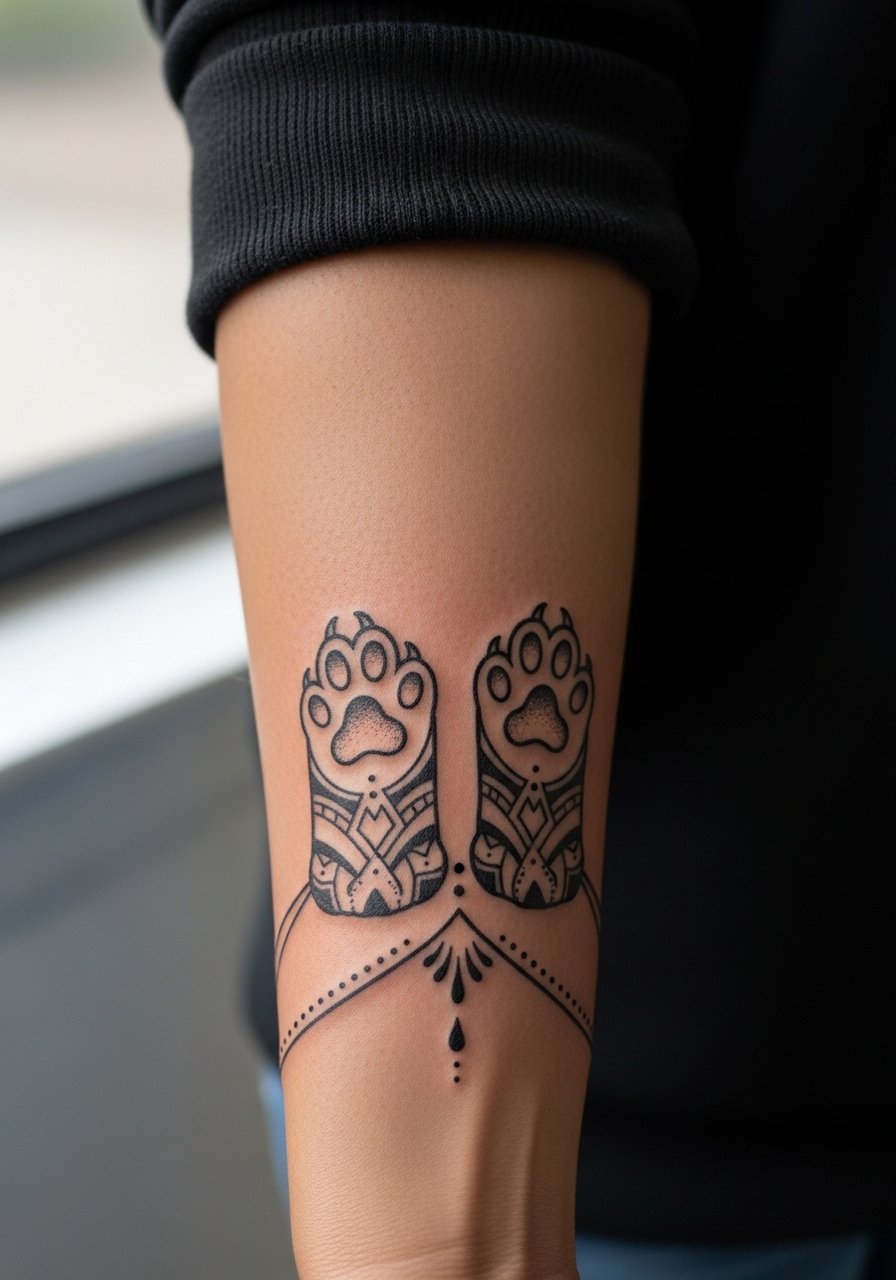
If you plan a sleeve, start with anchor motifs that can be integrated later. I advise designing cuff elements with negative space and recurring motifs so a future sleeve feels cohesive. The mistake is filling every inch at first then forcing additions later. Each cuff session is moderate in pain and often a single visit. For styling pair with a loose button-down shirt you can roll or push up to display the evolving story.
Frequently Asked Questions
Q: How fast will fine line pads blur on different placements like ribs, wrist, and collarbone?
A: It depends on movement and sun exposure. Wrists and fingers see more friction so expect softer lines sooner. Ribs can blur if the detail is too micro, but spacing and slightly bolder midtones help. Collarbone detail softens with motion, so plan touch-ups in the first three years.
Q: Do watercolor-style pads need more touch-ups than blackwork on thighs?
A: Yes, watercolor pigments often fade faster, especially on areas with regular sun exposure. Thighs give you room to add anchor lines or a secondary saturation session, which helps the colors stay vibrant longer.
Q: Are there placements I should avoid if I want the tattoo to age well?
A: High-friction zones like fingers, knuckles, and the side of the foot tend to lose crispness faster. If longevity matters, choose larger scale and heavier linework for those spots or pick the calf, shoulder, or back where saturation and space work in your favor.
Q: What should I wear to the studio for ankle, thigh, and shoulder sessions?
A: For ankle wear pants you can roll or shorts. For thigh choose loose shorts or a skirt. For shoulder bring a loose tank or button-down you can slide aside. A loose button-down shirt covers most needs and keeps you comfortable during the session.
Q: Can I combine initials or dates with tiny pads without losing legibility?
A: Yes, but specify exact lettering and size and ask for slightly bolder type than you think you need. Tiny script can blur on high-motion zones, so place initials in calmer areas or use simple monogram letters rather than thin cursive.
