
Fine line willow tattoos are everywhere online, but the reality is different. Many people find their delicate branch work blurs on darker skin, quoted prices jump between consults, and cancellations or sketchy reschedules wreck timelines. If you want a willow that still reads clean at year three, pick line weight, placement, and session prep carefully. Below are 27 bold willow tree tattoo ideas built to last and what to say at the chair.
1. Bold Willow Silhouette on the Forearm
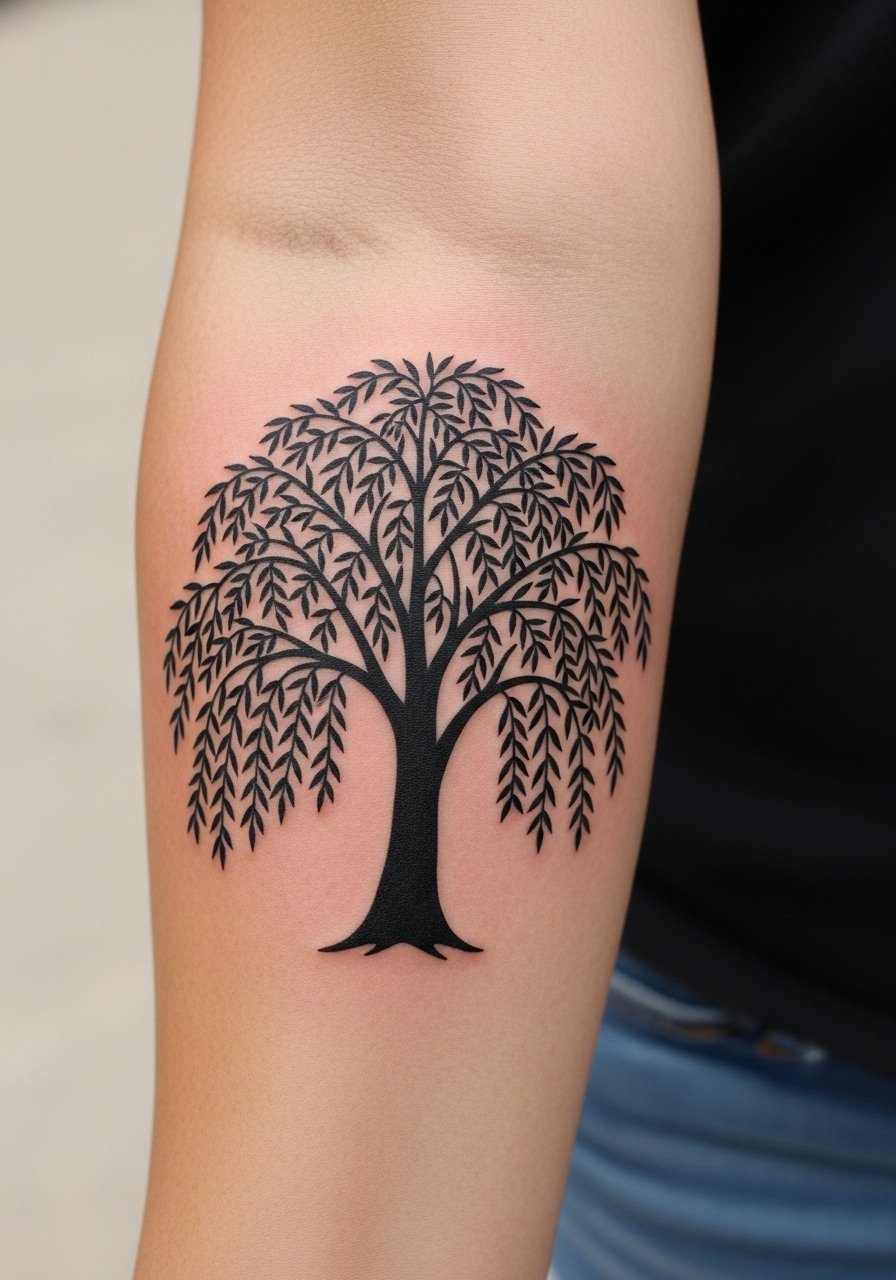
I recommend this for anyone who wants a readable, low-maintenance tree on a high-visibility arm. Tell your artist you want thick outlines with internal negative space so the branches keep definition as the skin moves. The common mistake is asking for intricate hairline branches on the forearm, which can blur after frequent sun and friction. Expect one to two sessions and moderate pain where bone sits close to the wrist. For the session, wear a loose fit tank top so the artist can roll your sleeve without tugging.
2. Drooping Branch Silhouette with Sun Backdrop on Shoulder
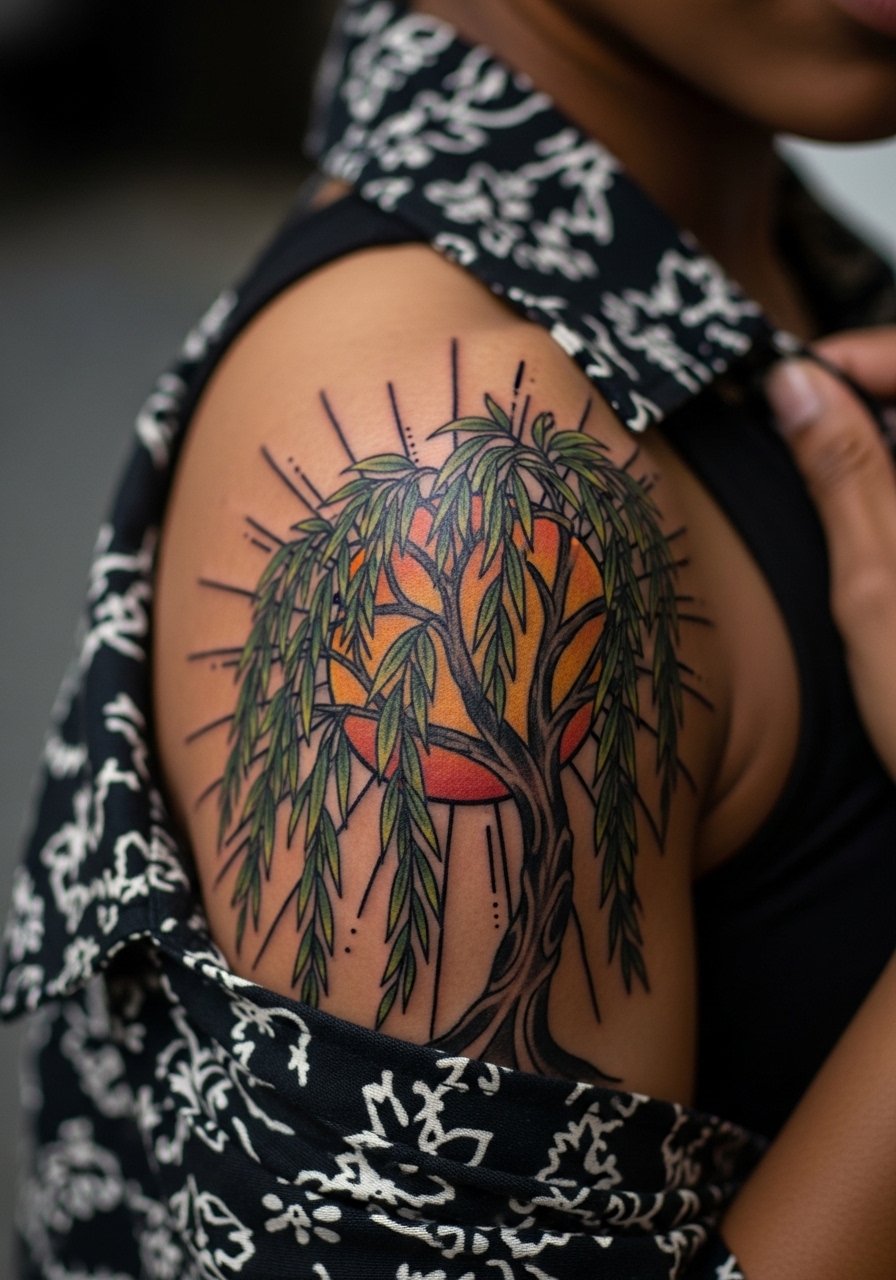
This mixes bold black linework with a saturated sun accent that still reads from across a room. For consult, ask for saturated yellow accents that sit behind the silhouette rather than over it so the black retains dominance as it heals. Shoulder skin tolerates shading well but can sting toward the top near the bone. A common aging issue is color washout if the sun motif is placed too close to the edge. For the session wear, pull aside a button camp shirt so the artist has clean access.
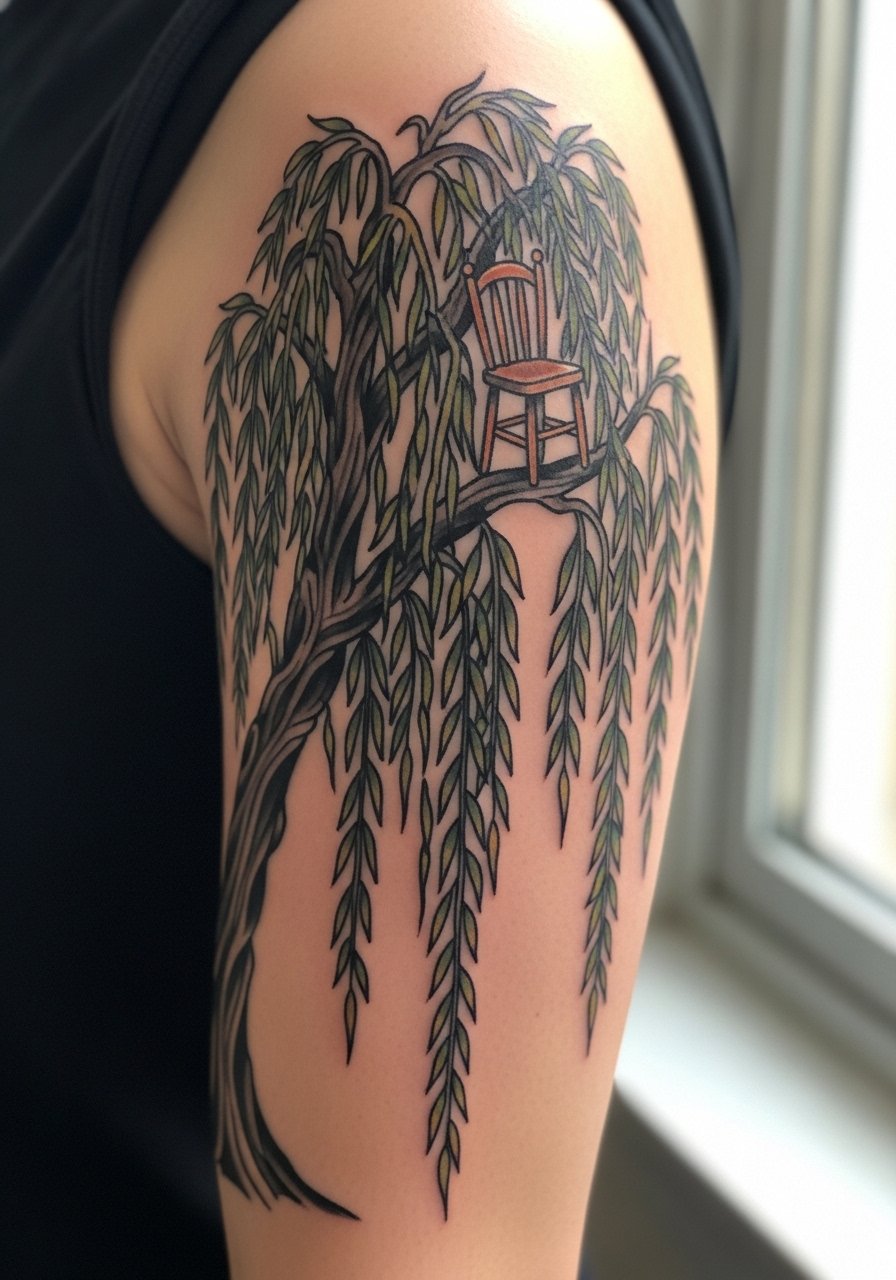
3. Traditional Willow Under a Chair Scene on Upper Arm
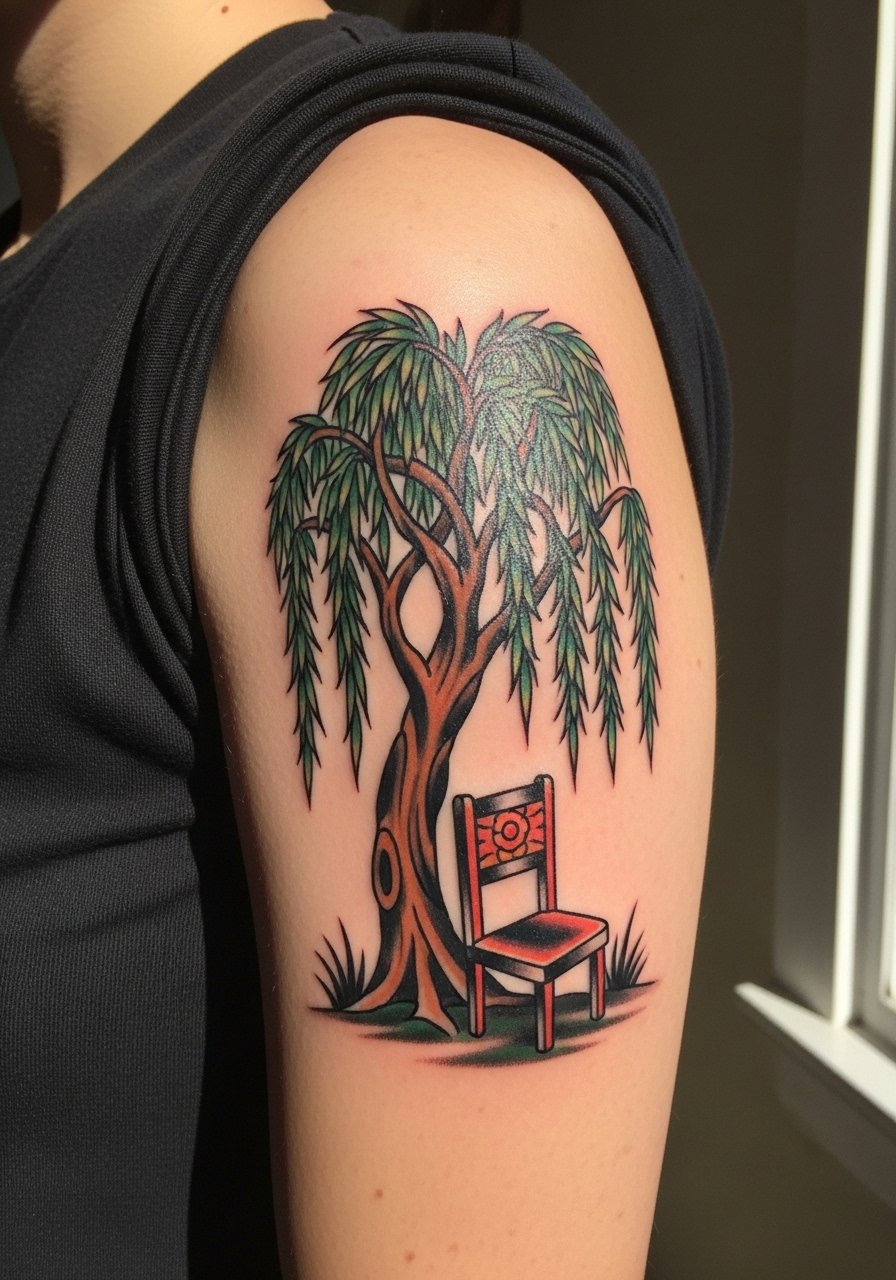
This narrative piece is larger and benefits from a bold trunk and clear silhouette so the chair remains legible over time. During consultation, bring reference photos that show the chair scale relative to the tree so it does not get lost in saturation. Expect two to three sessions and the usual upper-arm discomfort, which many find manageable. The mistake is compressing too much detail into one eight-inch panel. For showing it off, pair with high waist denim shorts in summer so the scene is visible.
4. Detailed Monochrome Leaves on the Wrist
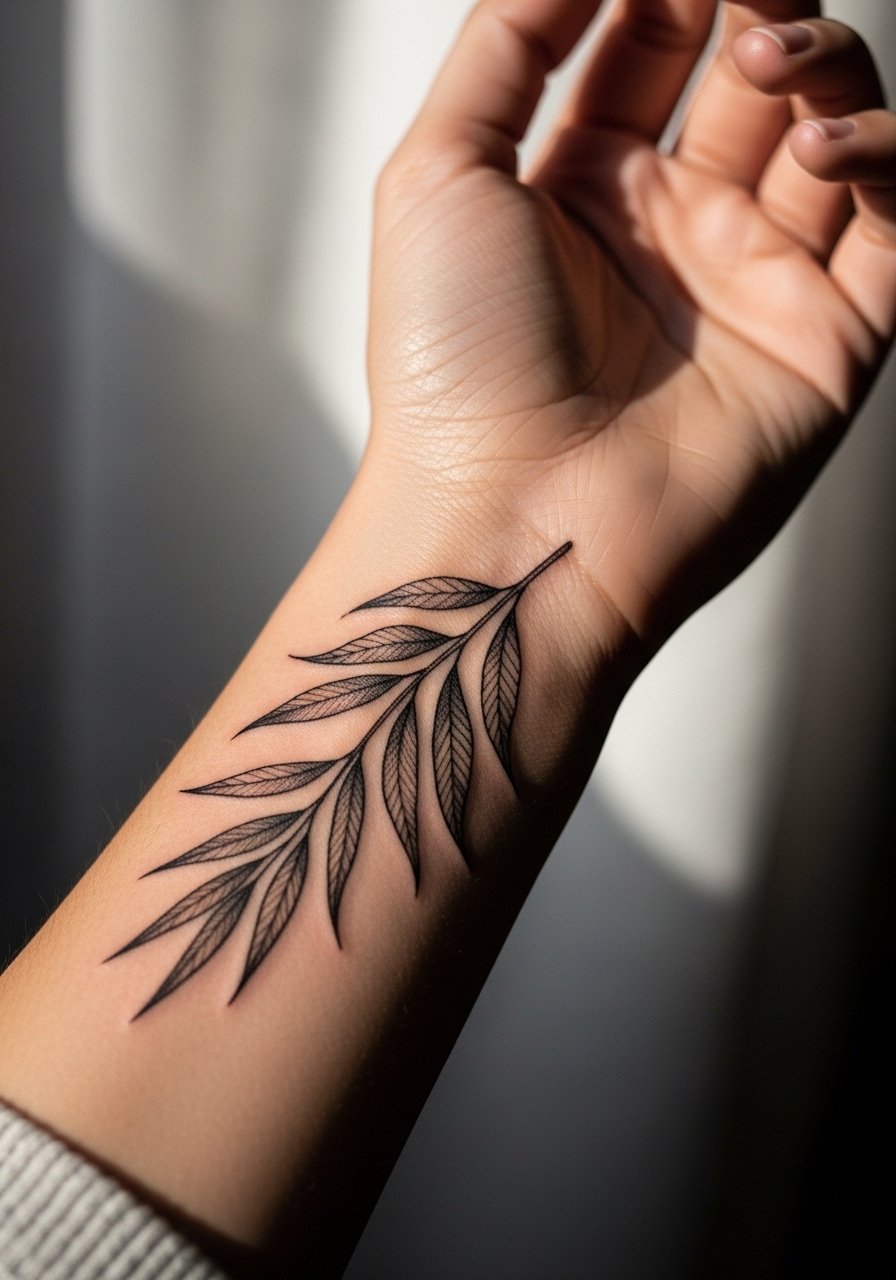
Wrist work reads intimate and delicate, but fine line here often fades faster. If you love leaf detail, request slightly heavier linework around the perimeter with lighter internal stippling so the leaf silhouette holds as it ages. Pain is low to moderate for most. The common mistake is asking for ultra-thin lines that vanish in six months. Touch-ups at year two are realistic for detailed wrist pieces. For the session, leave the wrist bare and wear a sleeveless muscle tee so the artist has full access.
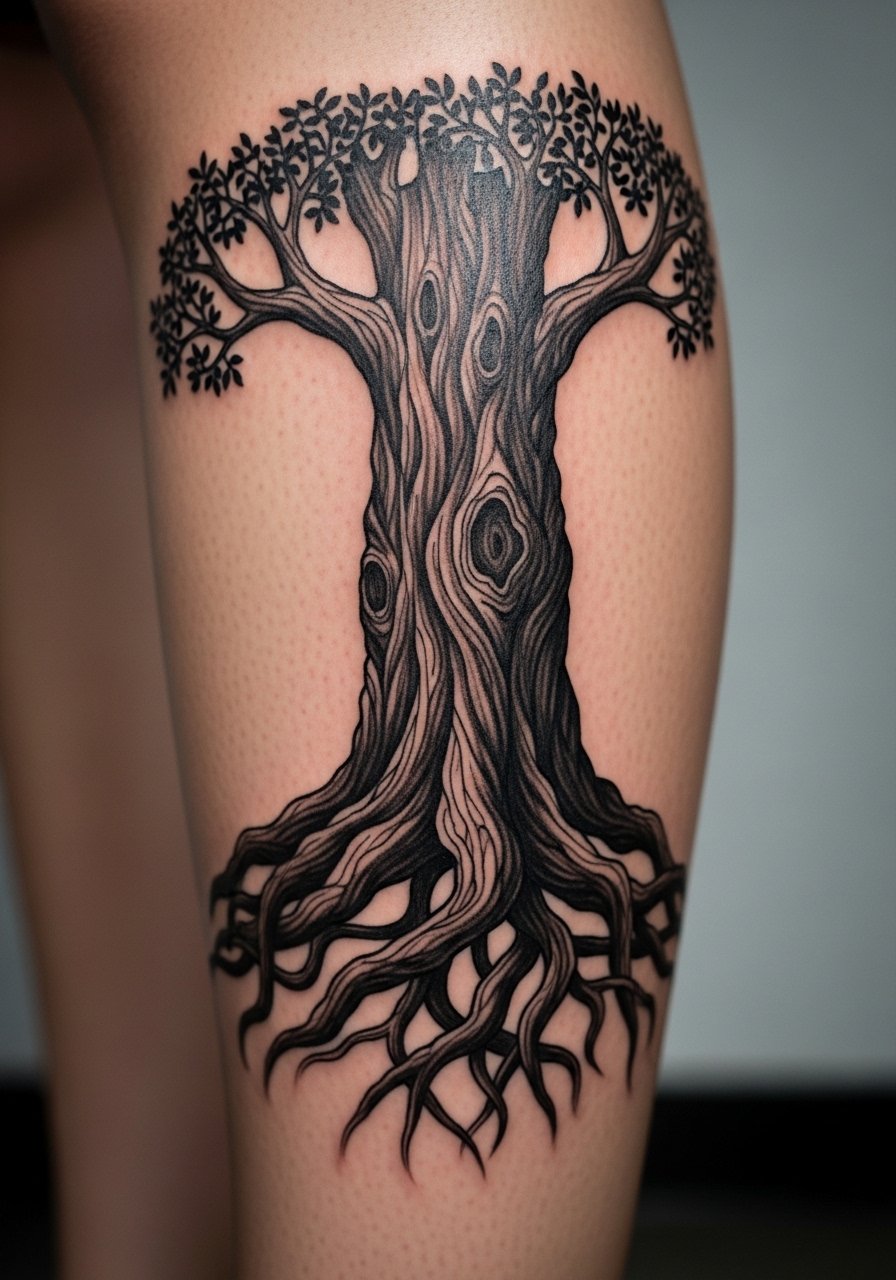
5. Knotted Trunk Outline on the Calf
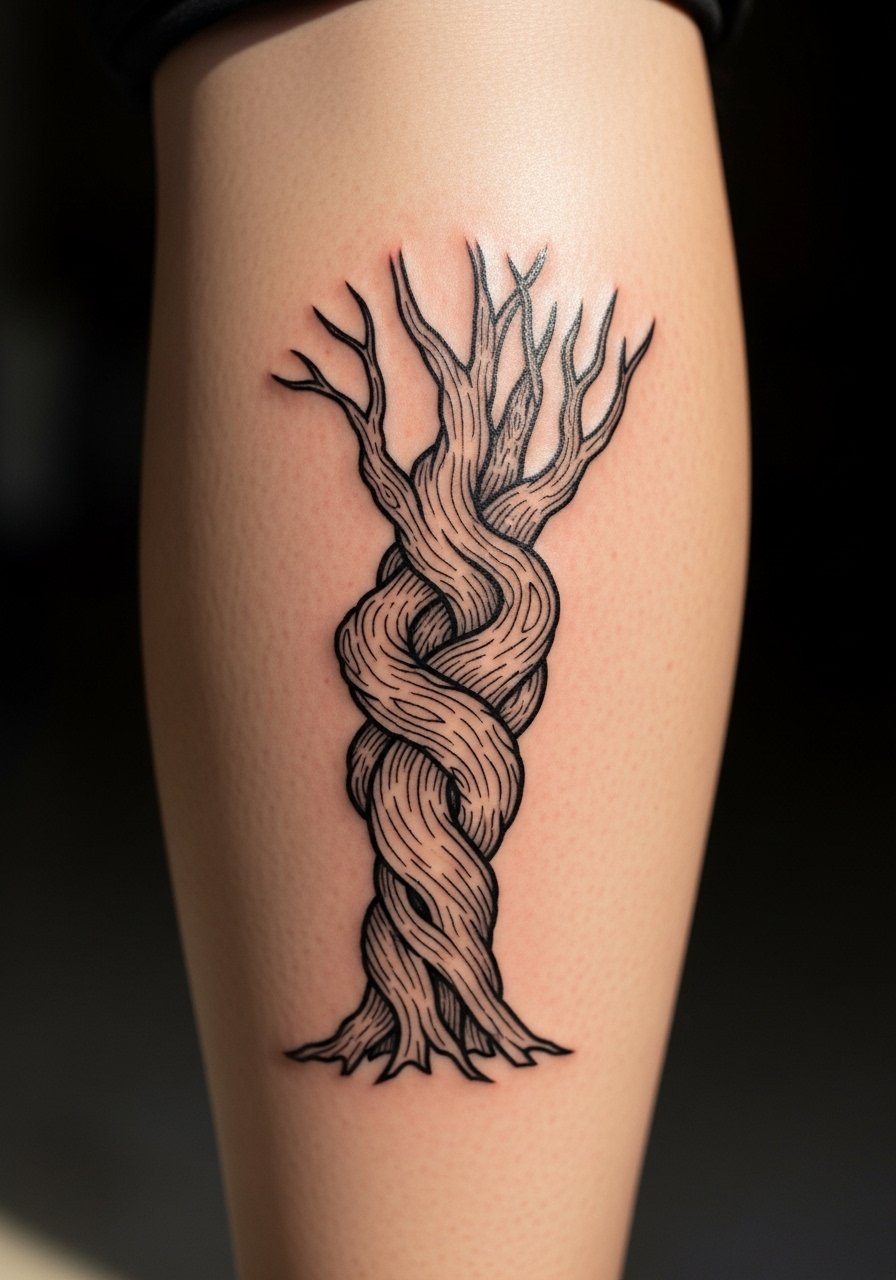
A knotted trunk benefits from thick line weight that ages clean on moving legs. Tell the artist to emphasize trunk texture with negative space instead of tiny cross-hatching that can fill in over time. Calf placement handles bold blackwork well and the session is often easier to tolerate than ribs. Athletes should note muscle changes can slightly warp long vertical trunks. For footwear pairing, cuffed chinos or canvas low top sneakers show the piece in summer.
6. Falling Leaves Branch on Inner Bicep
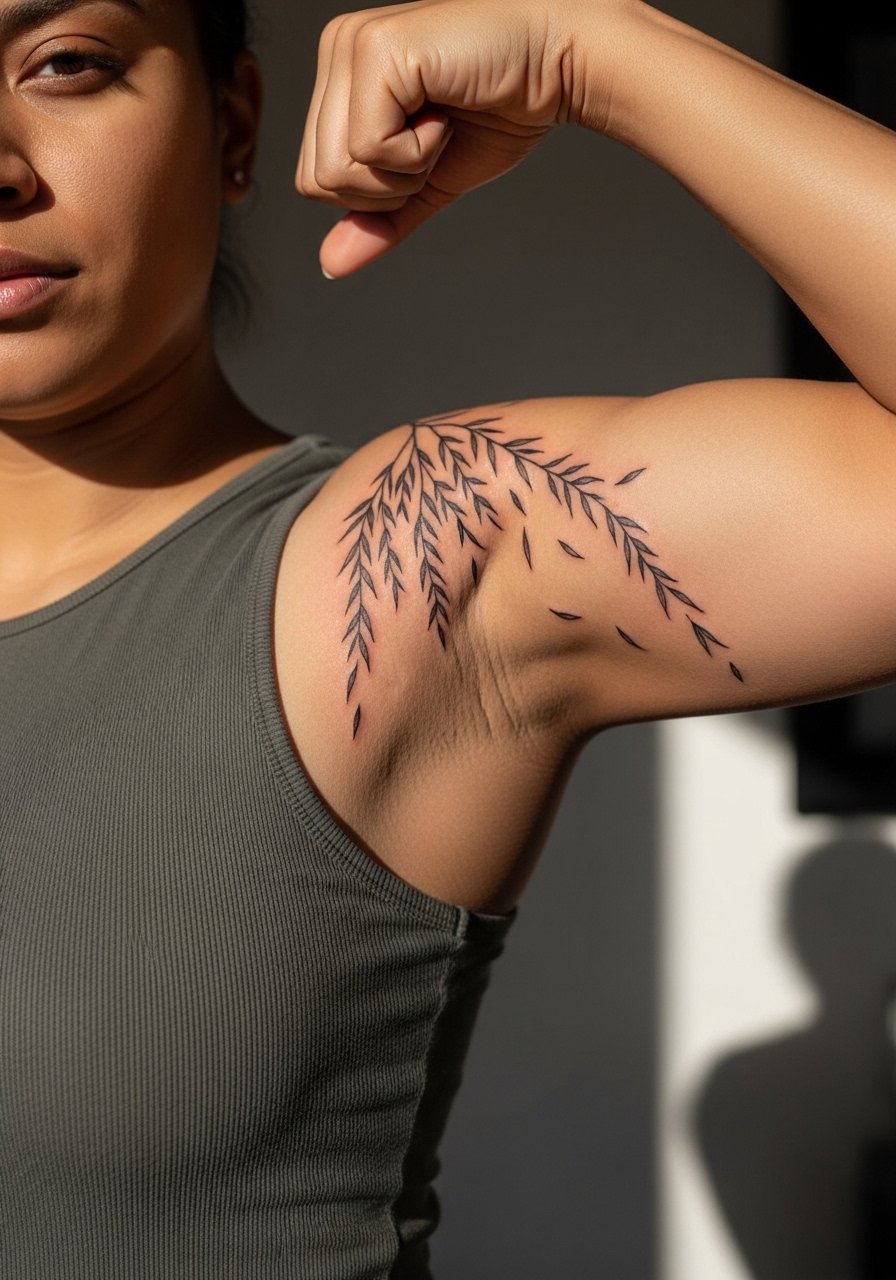
The inner bicep hides the piece well and it makes for a private, calm motif. Ask for a linear 4-inch composition with thicker strokes where the branch meets the trunk to prevent feathering. Pain can spike when the arm is pressed flat against the chair. A common error is requesting hair-fine leaves that migrate under the skin. For the session, wear a tank top you can lift so the artist can access the inner arm cleanly.
Studio Day Picks
The forearm and calf pieces above ask for different prep than ribcage or thigh work, so a compact kit makes those sessions smoother.
- Badger Tattoo Balm. A thinner balm option that users say absorbs quicker than heavy ointments, helpful for warm weather forearm pieces where clogging is a concern.
- Green People Aftercare. A gentle, lighter formula that is easier to wear on sensitive upper-arm scenes like the chair design in idea three.
- Ink Fix non-greasy balm. Good for humid climates and larger thigh pieces where heavy greasiness can be uncomfortable.
- Hada Labo lotion. A thin hydrating option some people use when they prefer dry healing support on ankle and rib tattoos.
- Fragrance free CeraVe healing ointment. A reliable thin ointment to use during the first few days on fine wrist work before switching to a balm.
7. Bold Thigh Silhouette with Solid Fill
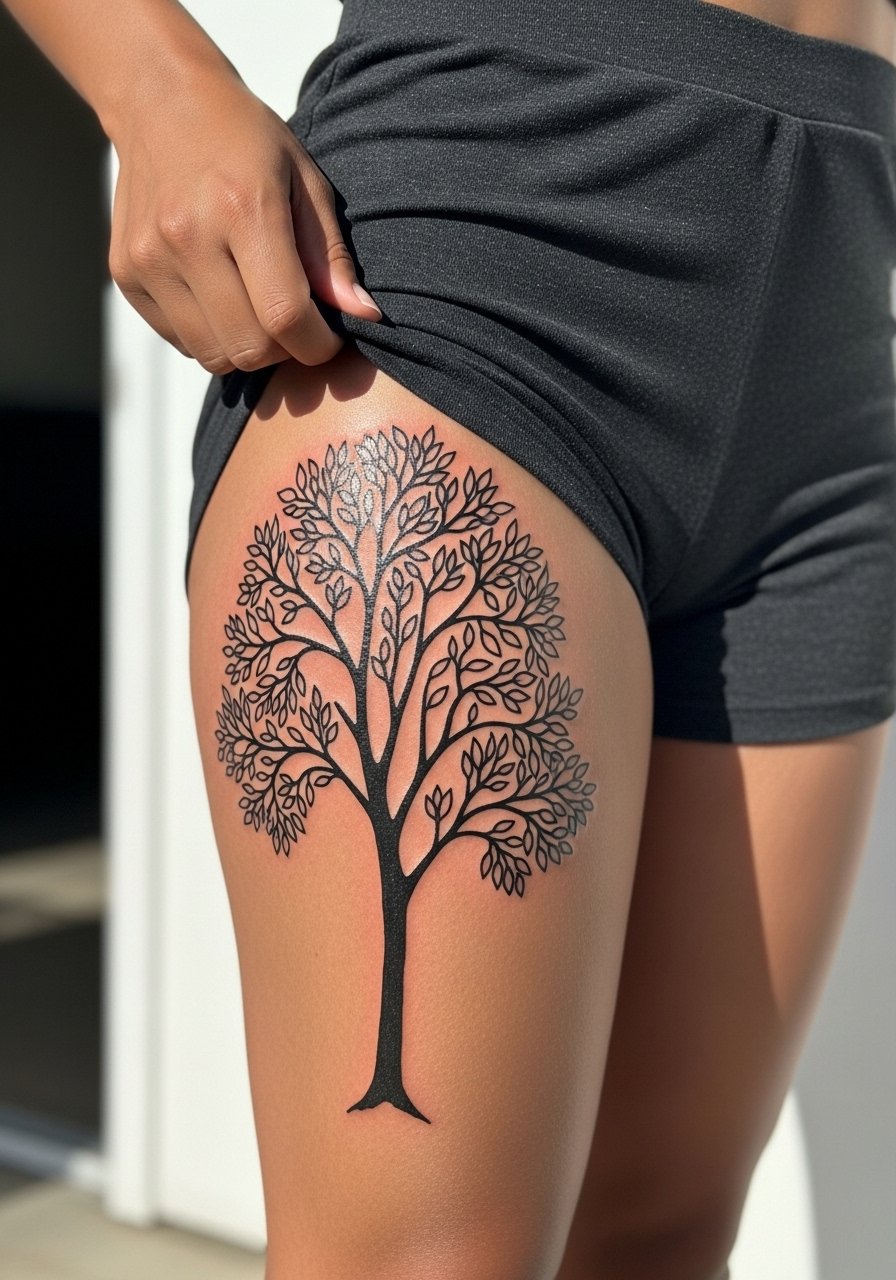
Thighs are a forgiving canvas for bold fill. For a ten-inch silhouette ask for solid black fill with crisp edges so the silhouette maintains contrast with skin over years. The common mistake is compressing too many small branches inside the fill, which loses definition as saturation ages. Expect multiple sessions for large fill and moderate pain in spots where muscle meets bone. For show-off outfits, high-waisted shorts or chunky leather belt frame the piece well.
8. Vibrant Green Leaf Watercolor on Ribcage

Watercolor gives a lively look but ribs stretch and move, which can affect pigment retention. If you want color here, request bold black outlines around key shapes so the design keeps form as the wash softens. Pain is high on the ribs and sessions are often split. There is a split opinion on healing: some artists prefer protective film, others favor dry healing. Name the camp your artist follows before booking so you match expectations.
9. Thick-Lined Memorial Tree on the Back

A memorial piece reads best when the trunk has stout lines and the plaque is set in negative space. During consult, decide whether names should be rendered in bold script so they age with the tree. Back skin handles larger pieces well and touch-ups at year two are common. Avoid placing tiny lettering inside dense bark texture, which tends to blur. For session wear, bring a strapless tank top to keep the area accessible.
10. Single Branch Sleeve Starter on Forearm

This is a smart way to start a sleeve while keeping future expansion flexible. Ask the artist to plan negative space where future elements can slot in so the branch does not crowd later additions. Forearm is high-friction so choose heavier line weight for the primary branch to avoid early fading. Sessions add up as you extend the design. A common error is requesting a full sleeve in one go and hitting touch-up fatigue. For session wear, roll up a chambray rolled cuff shirt so the artist can work comfortably.
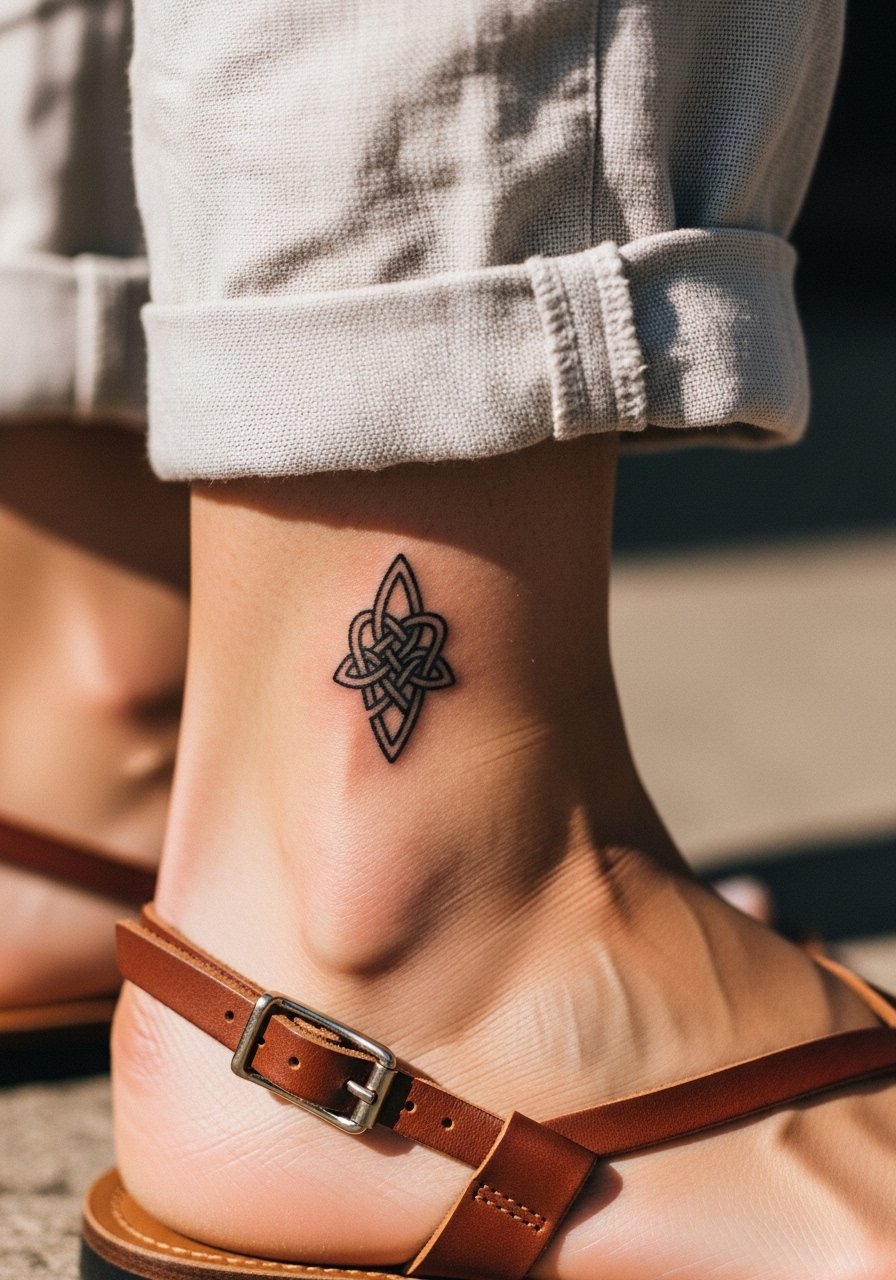
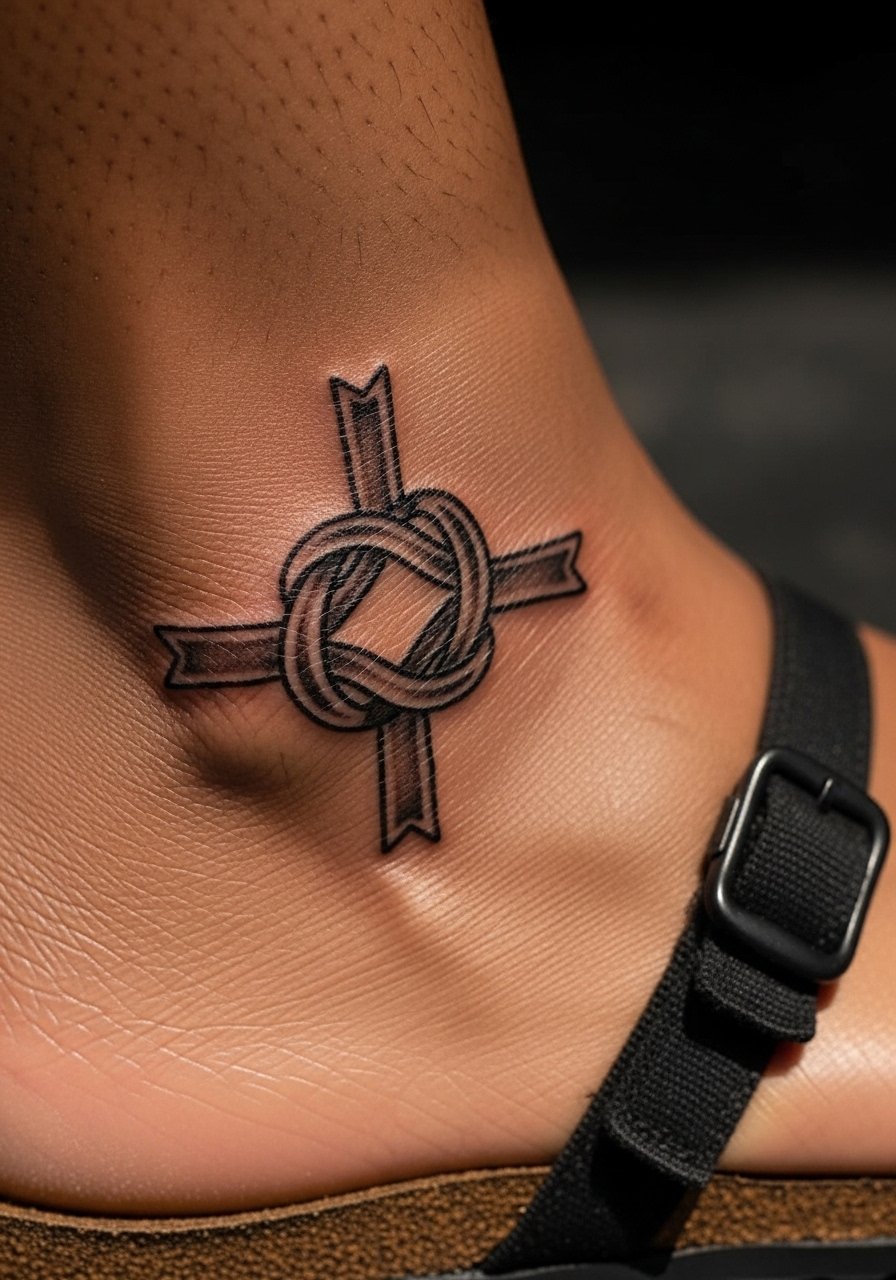
11. Micro Bold Knot on the Ankle

An ankle micro knot reads crisp with concentrated black and simple negative space. The mistake is making it too detailed for the 2-3 inch canvas. Ankle work faces a lot of friction from socks and shoes, so plan to protect the area in the first week. Pain is generally low but the bone can sting. For summer visibility, cuffed ankle pants or leather boat shoes pair well.
12. Ornamental Collarbone Willow with Sun Rays

Collarbone placement benefits from clean silhouettes and negative space around the sun to prevent color washout. Ask your artist to map rays so they do not crowd the willow outline. Collarbone sessions can be sharp near bone but brief. A common aging issue is sun exposure. For styling, try a v neck cotton tee or layered necklaces that frame rather than cover the work.
13. Root-Focused Forearm Piece Anchoring the Arm
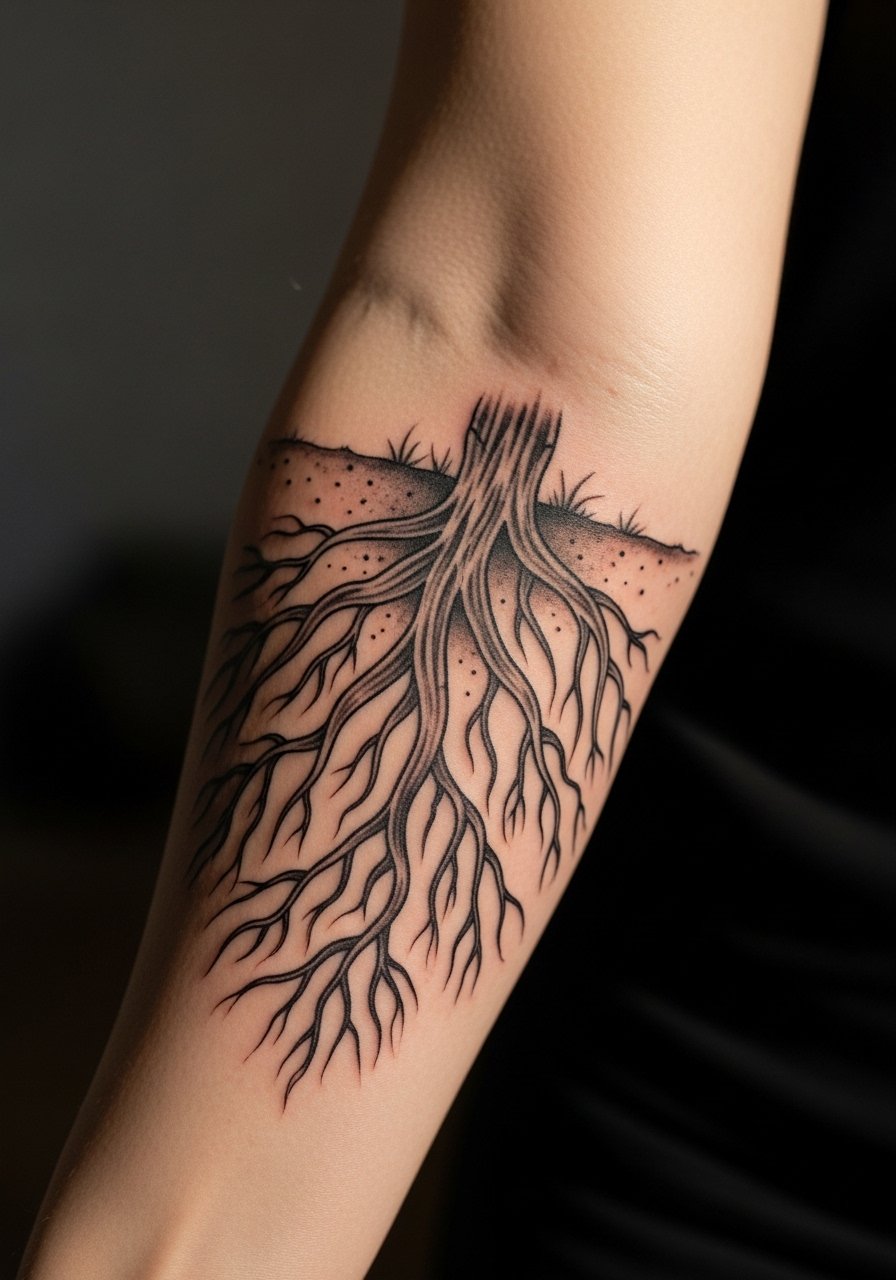
Root motifs anchor the composition and translate well into bold blackwork. Tell the artist you want pronounced base lines and clean negative space between root tangles so the shape remains legible. Forearm roots experience friction with shirts and desks, so expect gradual softening without heavy touch-ups. A common mistake is very thin root tangles that feather into a blob. For the session, wear a loose fit tank top you can roll up.
14. Bold Willow with Green Accents on the Ribcage

Selective color can add life to a rib piece while preserving longevity if black outlines anchor the leaves. Ribs are sensitive and sessions are split. The controversy around numbing comes up here because longer rib sessions tempt numbing cream. One camp says numbing helps long sessions. The other warns numbing can interfere with line depth and lead to blowout. Discuss this with your artist and agree before you sit.
15. Thick-Lined Calf Trunk with Knots
Calf muscle movement works in your favor for bold texture. Ask for broad trunk strokes with stippled shadow rather than tiny cross-hatching to keep texture readable over years. The session is comfortable for many and touch-ups are typically minor. People sometimes forget to map how gait and muscle growth affect vertical pieces, which can slightly alter branch orientation as seasons change. For show-off looks, roll joggers to mid-calf or wear cuffed chino pants.
16. Micro Knot on the Inner Ankle
Inner ankle micros are discreet and popular for summer. Because the area sees constant rubbing, choose thicker outline work rather than hairline detail. The mistake is expecting ultra-fine shading to last. Healing here can be fiddly with socks and shoes, so plan footwear accordingly. Pain is moderate near bone. For visibility, pair with thin anklet or sandals.
17. Blackwork Willow with Radiating Sun on the Collarbone

This bigger collarbone piece needs bold linework and intentional spacing between sun rays and branches so neither element overwhelms. The pain is sharp in short bursts and sessions are usually under two hours. If you want it symmetric, have the artist draw the stencil in situ and stand to check how the shape reads with your posture. For framing, wear a long chain necklace pendant that sits below the design.
18. Single Bold Branch on the Wrist Band
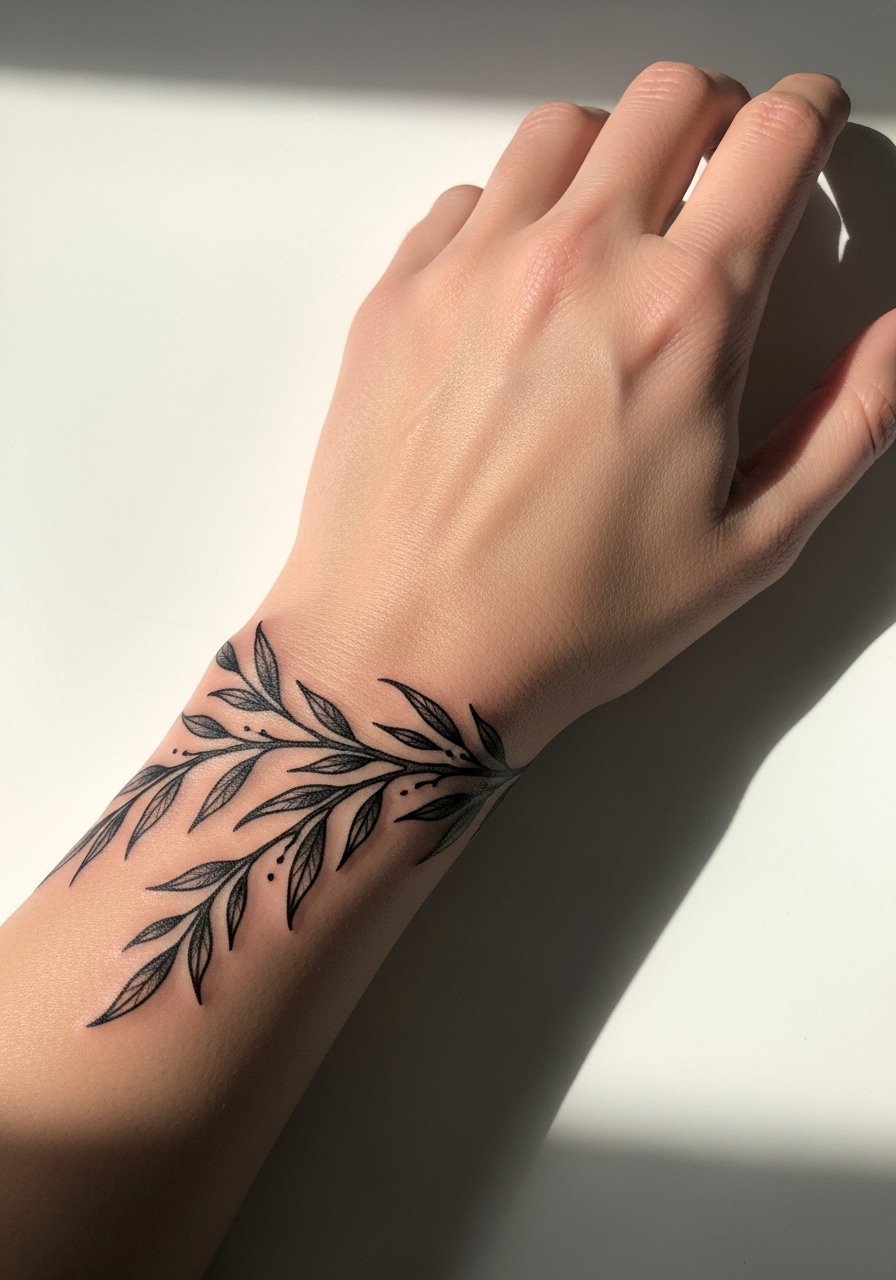
A band-style branch looks intentional when line weight is consistent around the wrist. Tell the artist you want thicker anchor points and guarded spacing where joints flex so the band does not blur. The wrist sees a lot of washing and friction, so expect color to soften faster than forearm pieces. Touch-ups at year two are common. For session wear, keep the wrist free and avoid jewelry on that side. Pair casually with a thin leather cord bracelet on the opposite wrist.
19. Bold Willow Roots Along the Side Thigh

Side thigh work scales well for long root runs and benefits from strong negative space between root strands. Ask your artist to preview the design in standing and seated positions so branches do not compress awkwardly. The thigh tolerates ink well, but weight changes can alter flow. A common oversight is not testing the stencil while sitting. For show-off wear, pair with high waist denim shorts.
20. Bold Branch with Falling Leaves on the Inner Bicep
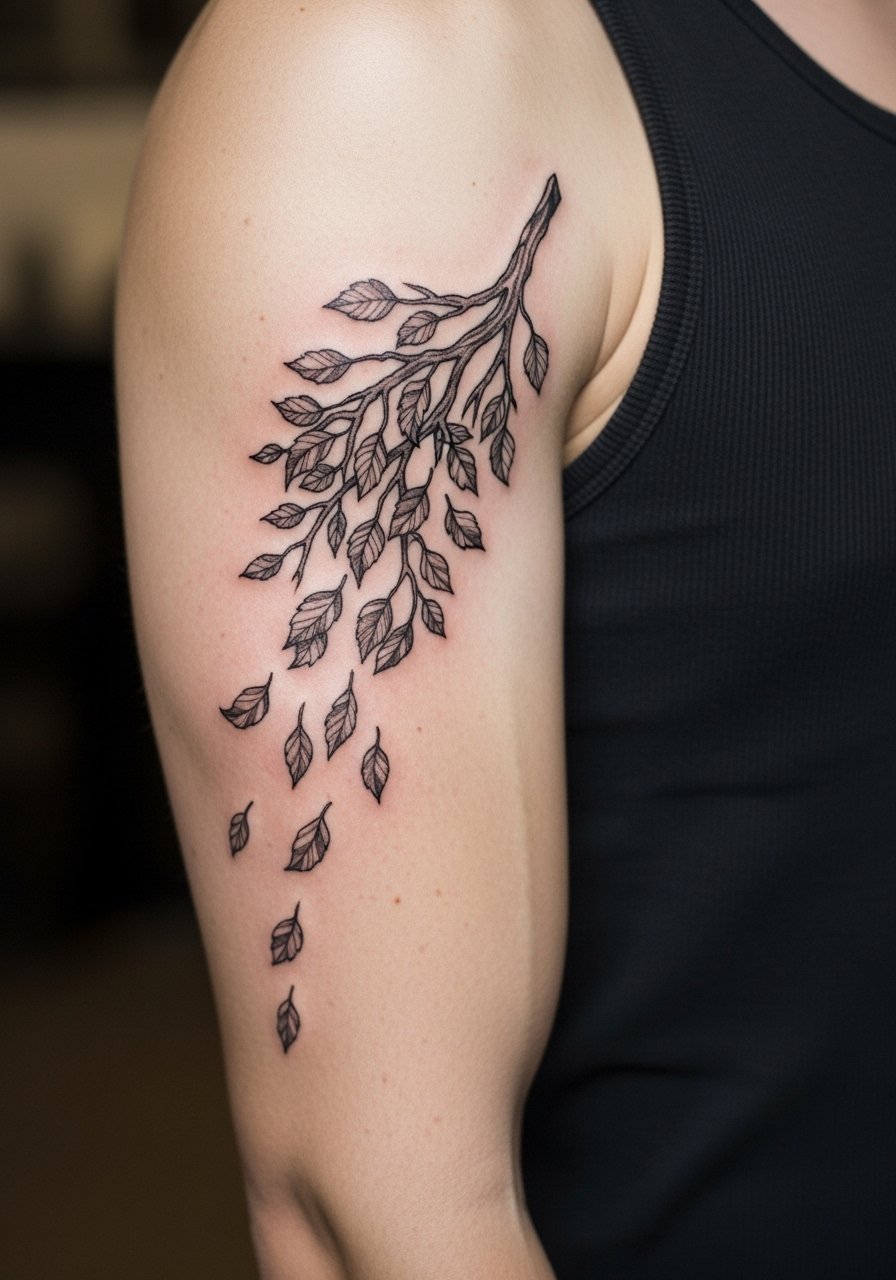
Inner bicep pieces sit quietly and expand into sleeves naturally. Request heavier outer strokes so the falling leaves remain distinct as skin stretches. The area can be sensitive when the arm is pressed, so brief breaks help. Avoid asking for detailed stippling too close to the fold, which often fills in. Plan for a touch-up at year two if you want crisp leaf edges. For session prep, a loose tank top keeps the area accessible.
21. Bold Willow Silhouette with Negative Space Trunk on Back

Center back silhouettes benefit from large negative space inside the trunk to suggest texture without micro-detail. Discuss stencil centering while standing so alignment matches your posture. Back skin usually takes ink well and ages steadily if sun is avoided. The mistake is cramming tiny detail into a broad trunk. For the session, bring a loose button-down shirt to pull aside.
22. Bold Knot Detail on the Calf with Subtle Stipple

Adding stipple for shadow around a knot brings depth without risking dense cross-hatching that blurs. Ask for stipple only in shadow zones and for bold outlines on the knot edges. Calf shading holds well because of movement and thicker skin. Expect one session for this scale and minor touch-ups later. For shoes, canvas sneakers or rolled joggers work well with the design and show it off.
23. Micro Realism Knot on the Ankle with Negative Space
Micro-realism at ankle size needs strong contrast and simplified values. Ask for negative space to carve out highlights rather than tiny white ink. Ankle pieces face constant wear so schedule a quick touch-up if lines soften in year one. Keep footwear loose in the first two weeks. For seasonal styling, thin anklets and boat shoes complement the placement.
24. Bold Willow with Chair Drawn at Scale on Upper Arm
Integrating a chair is a subtle narrative move that reads best when the chair is scaled to the trunk and roots. Ask your artist to lay out the chair with clear separation so it does not sink into bark texture. Upper arm sessions are steady but expect two sessions for color and outline. A common mistake is reducing the chair to a decorative knot. Pair with casual short sleeves for visibility and a loose button-down shirt for the session.
25. Bold Willow Sleeve Mosaic Starter

If you plan a full sleeve, start with anchor branches that leave negative space for filler panels. Tell the artist you want modular elements so you can add waves, roots, or animals later. The mistake is committing all space to one dense motif, which limits options. Expect multiple sessions across months. For the sitting, wear a chambray rolled cuff shirt to keep the arm accessible and comfortable.
26. Bold Willow Collar Accent Near the Sternum

Sternum-adjacent accents demand careful stencil placement because chest movement and breathing alter how the design sits. Ask for compact linework with strong anchors and discuss how breathing will shift the image during the session. Sternum sessions are painful for many and require short bursts with rests. For the session, wear a fitted sports bra so the artist sees only the area needed.
27. Bold Willow Roots Winding into a Small Thigh Garden

Upper thigh gardens let you blend bold roots with small botanical elements that can be added later. Ask for clear root anchors and keep smaller plant motifs simple so they do not crowd the roots over time. Thighs are forgiving for touch-ups and age gracefully with bold black. The common oversight is over-detailing tiny plants that lose clarity when sat on. For the session wear, bring loose basketball shorts so the artist can access the area without tight fabric.
Frequently Asked Questions
Q: Will fine line willow tattoos blur faster than bold blackwork on darker skin tones?
A: From what I have seen, extremely fine lines tend to lose definition quicker on darker tones because contrast matters. Choosing heavier outlines or solid black fills preserves the shape longer. If you want subtlety, ask for a hybrid approach with bolder perimeter lines and internal fine details you accept as potential touch-ups.
Q: How should I handle pricing surprises and canceled sessions when booking bold willow work?
A: Multiple quotes solve sticker shock. Ask each shop for a written estimate for the exact line weight and size you want so you can compare. Book through platforms that show cancellation policies and confirm the appointment 48 hours before. Guest spots often have different pricing, so double-check before you pay a deposit.
Q: Saniderm or dry healing for bold blackwork willows, which camp should I follow?
A: Artists are split. One camp prefers protective film for faster, less messy care. The other prefers dry healing to let scabs form naturally. The best path is to ask the artist which method they use and why, then follow their protocol. If you switch methods mid-heal you risk irritation.
Q: What should I wear to a thigh or ribcage session so the artist has clean access?
A: For ribcage bring a cropped athletic top you can lift slightly. For thigh work choose loose shorts or basketball shorts you can pull down a bit. These choices make positioning easier and reduce repeated clothing adjustments during long sessions.
Q: How long before a bold willow needs a touch-up if I pick solid blackwork?
A: Expect solid blackwork to hold the longest. Many people need minor touch-ups around year two to three for high-friction zones like wrists and ankles. Large saturated fills on thighs or backs often go longer before any touch-ups are needed.
Q: Are numbing creams safe for long bold sessions or do they increase blowout risk?
A: Opinions differ. Some artists use numbing for long sessions without issues. Others say numbing can affect needle depth and increase blowouts in delicate areas. Talk with your artist about their experience and make a decision together based on the placement and session length.
Q: How do I find a tattooist who has healed examples of bold willows on a similar skin tone?
A: Search tags like #BoldWillowTattoo and #BlackworkTree on Instagram and look for healed photos. Check forum threads where people post follow-up shots. Use apps and guest spot listings by style and city to find portfolios that show healed work on varied skin tones.
