
Bold black silhouettes read like a statement at arm's length and age into a graphic presence on skin. Blackwork crow tattoos simplify contrast so the design reads from across a room, and that graphic clarity is why people choose them over detailed realism. Below are 21 directions you can bring to a consultation, with notes on how they feel in the chair, how they settle over time, and what to wear the day of the session.
1. Bold Crow Silhouette on Outer Forearm
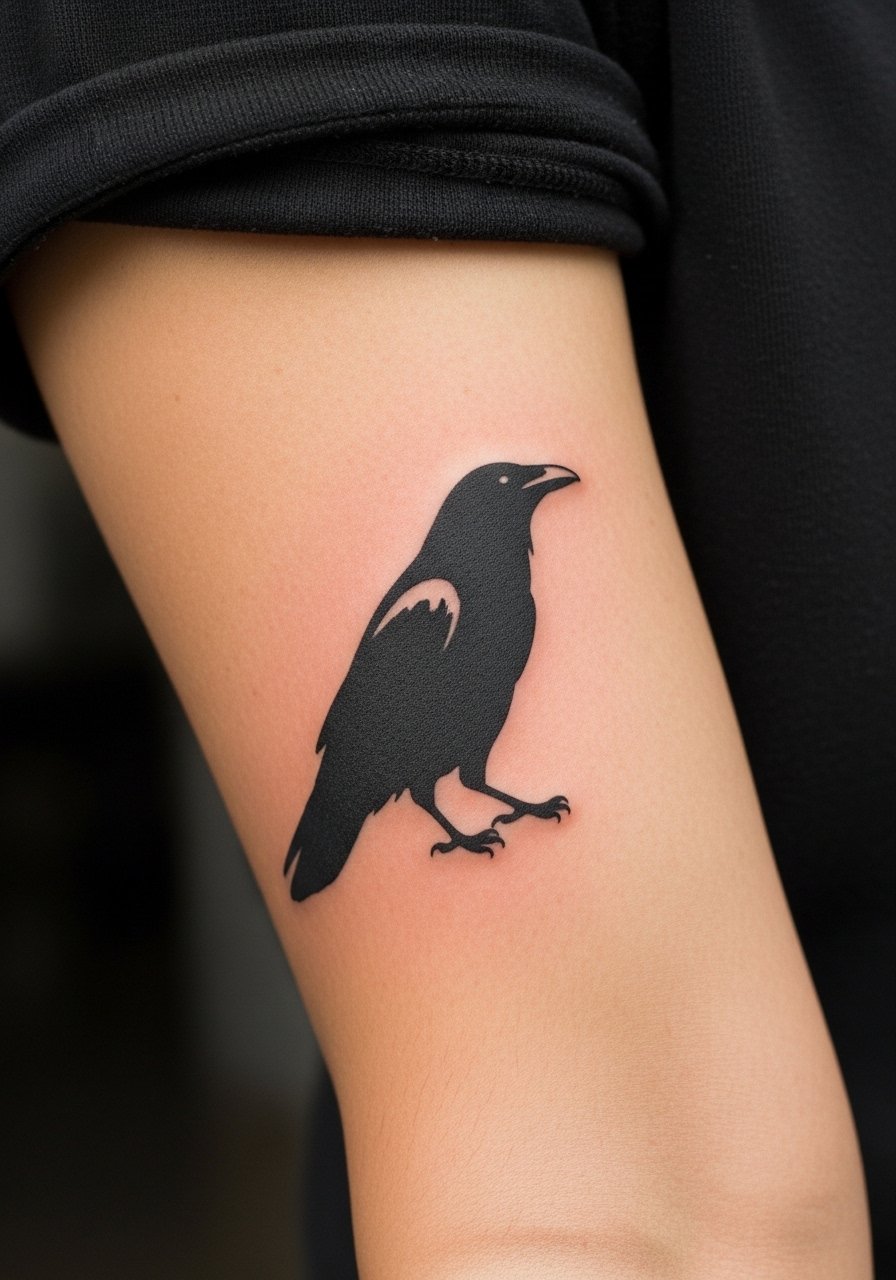
This is the bread-and-butter blackwork crow. I recommend a strong outline and solid saturation so the silhouette keeps contrast as it ages. Tell your artist you want bold linework with dense fill and ask them to space any feather detail for breathing room. Pain is low to moderate on the forearm, so most sessions finish in under two hours. A common mistake is asking for tiny feather strokes inside the silhouette, which can blur into a muddy texture by year three. For the appointment, wearing a loose button-down shirt makes it easy to expose the area without tugging on fresh ink.
2. Stipple-Shaded Crow Over the Collarbone
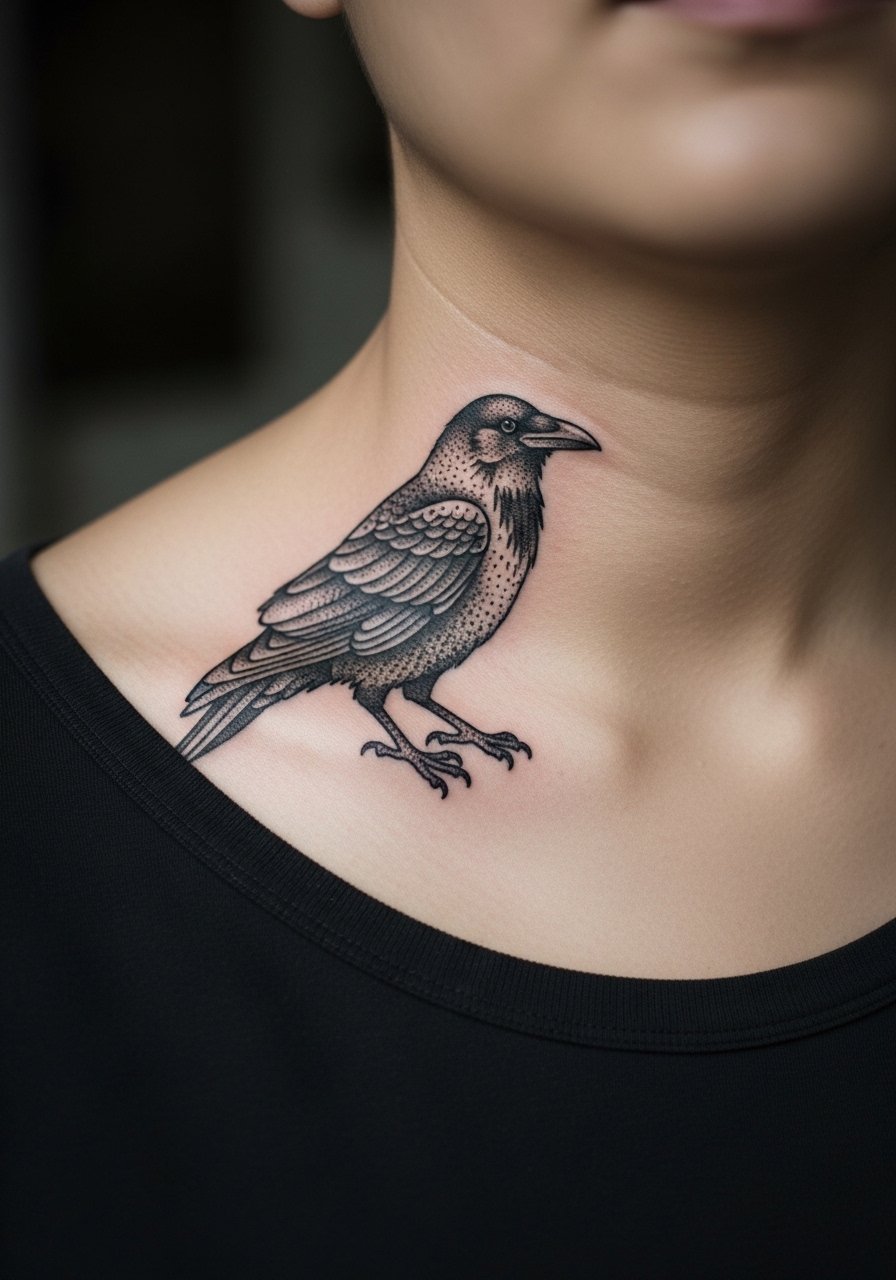
A collarbone placement gives the crow a sculptural quality because the bone provides natural framing. Stipple shading keeps the piece graphic while adding texture, but talk to the artist about spacing because dense dot work too close to the collarbone can flatten with time. The session feels scratchy near bone and may require short breaks. This spot shows through tees and dresses, so wear a thin chain pendant necklace low on purpose when showing it off. If you want long-term clarity, avoid ultra-fine dots right over the bone edge.
3. Geometric Halo Crow on Upper Arm
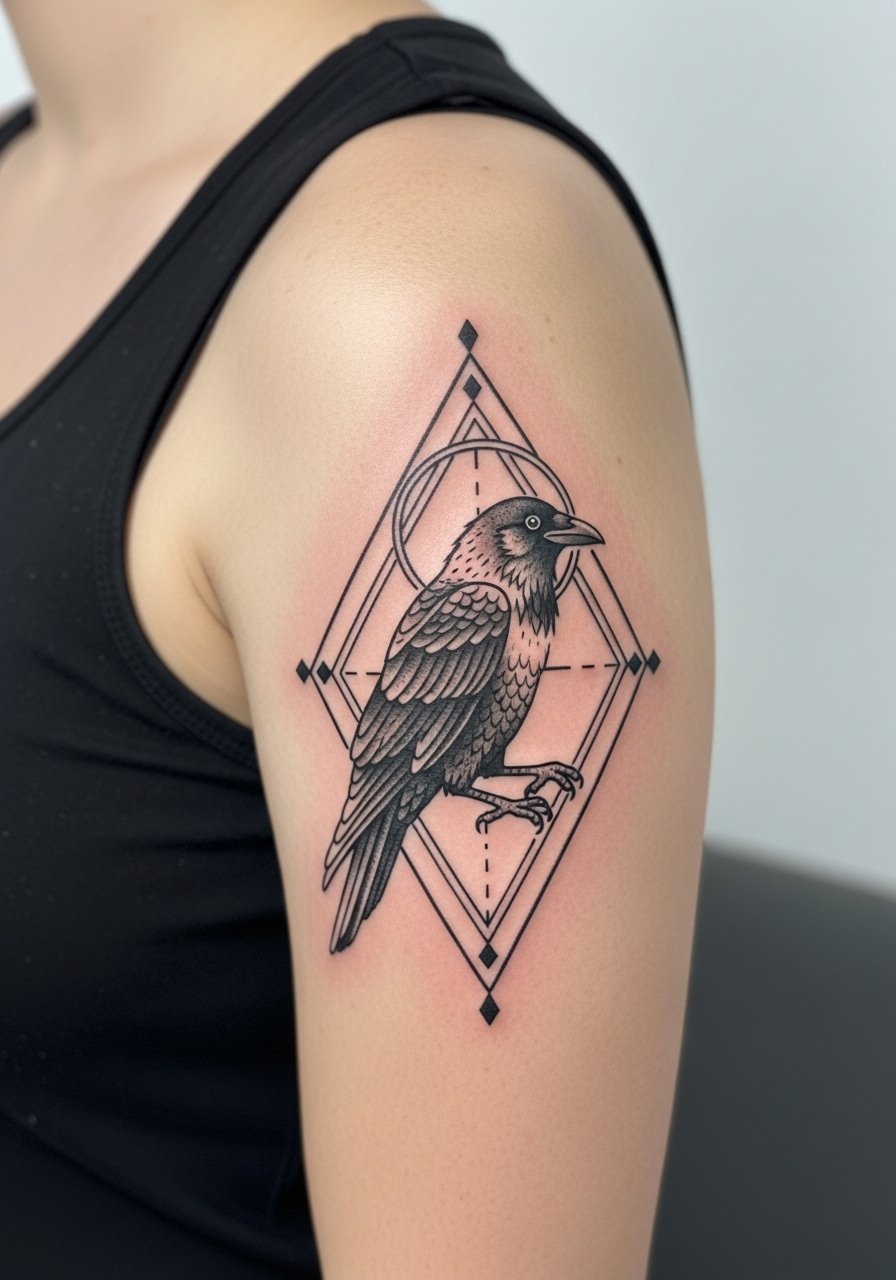
Pairing a crow with geometric shapes gives the piece a modern edge while keeping blackwork integrity. The upper arm tolerates heavy saturation well, so a dense black halo will stay readable for years. Mention in consultation that you want crisp negative space between the bird and geometry so the two elements read separately as they age. Expect a one-to-three hour session depending on halo complexity. For showing it off, a racerback tank top frames the shoulder and keeps attention on the composition.
4. Full-Back Blackwork Crow Spread
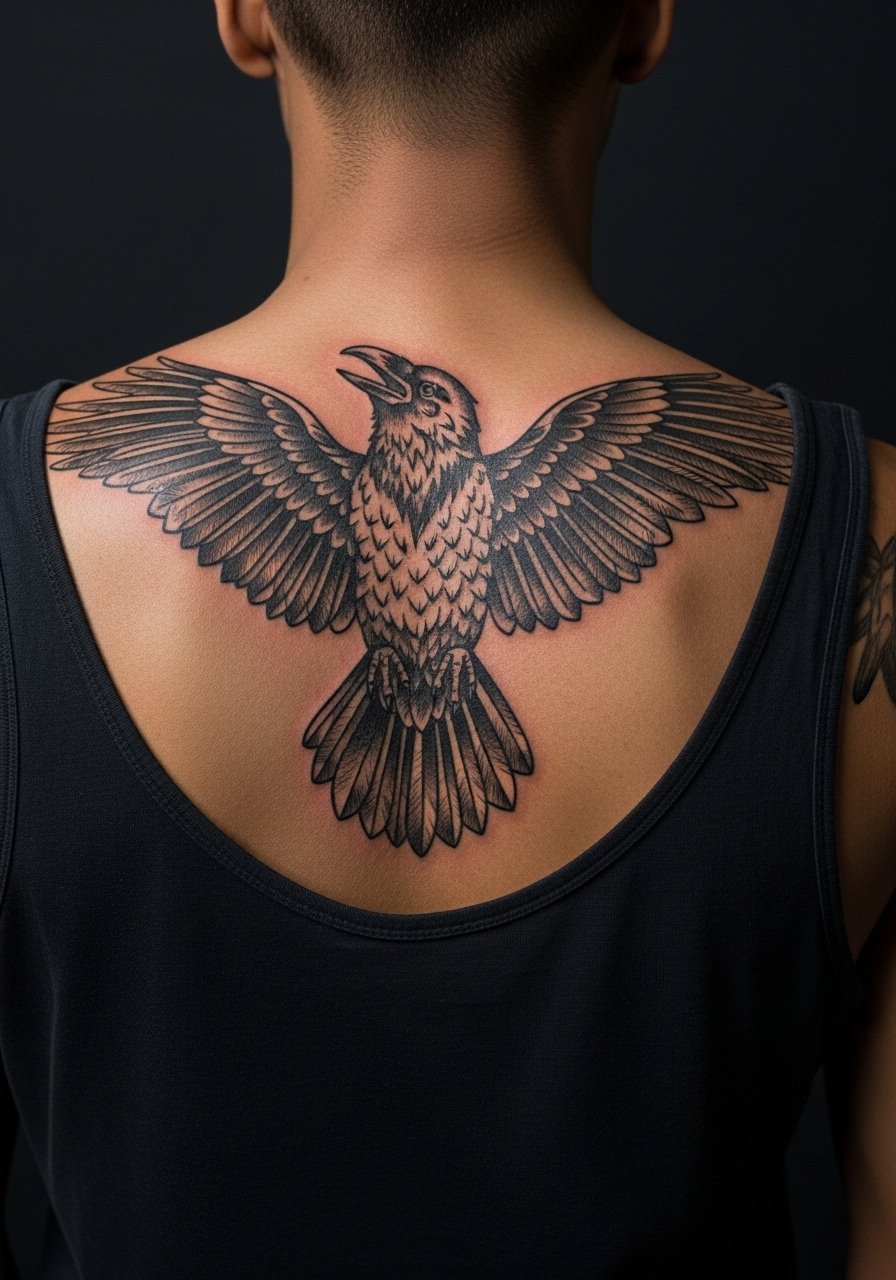
A back piece lets you scale the crow into an emblematic spread with bold negative space and heavy saturation. The shoulder blade and upper back handle dense blackwork well, which helps avoid patchy fading. Sessions are longer and often split across two appointments. A mistake is crowding the composition with tiny details that get lost at a distance. For the session and later outfits, an open-back midi dress or a tank with a low cut will show the spread without rubbing against healing skin.
5. Sternum Crow with Dot Work Crescent
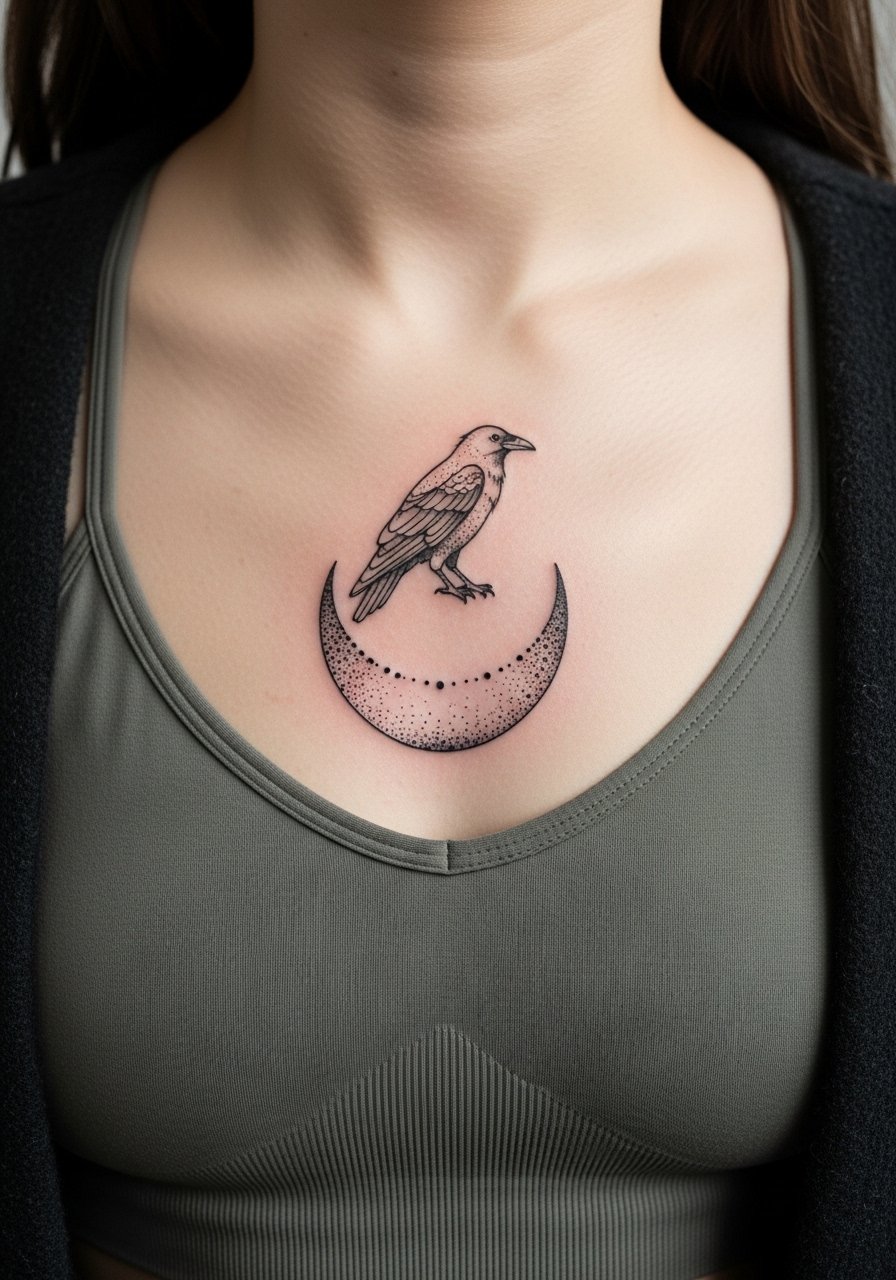
Sternum placements read intimate and demand an artist comfortable with contoured surfaces. Pain is high here, and session breaks are normal. Artists split into two camps on delicate work over the sternum: one camp warns that fine detail blurs quickly on moving tissue, the other says careful depth and spacing hold up. Name both views in your consult and ask which they follow. Expect touch-ups sooner than on the arm. For the appointment, wear a fitted sports bra so the artist can access the area without full exposure.
6. Ribcage Crow with Whip Shading
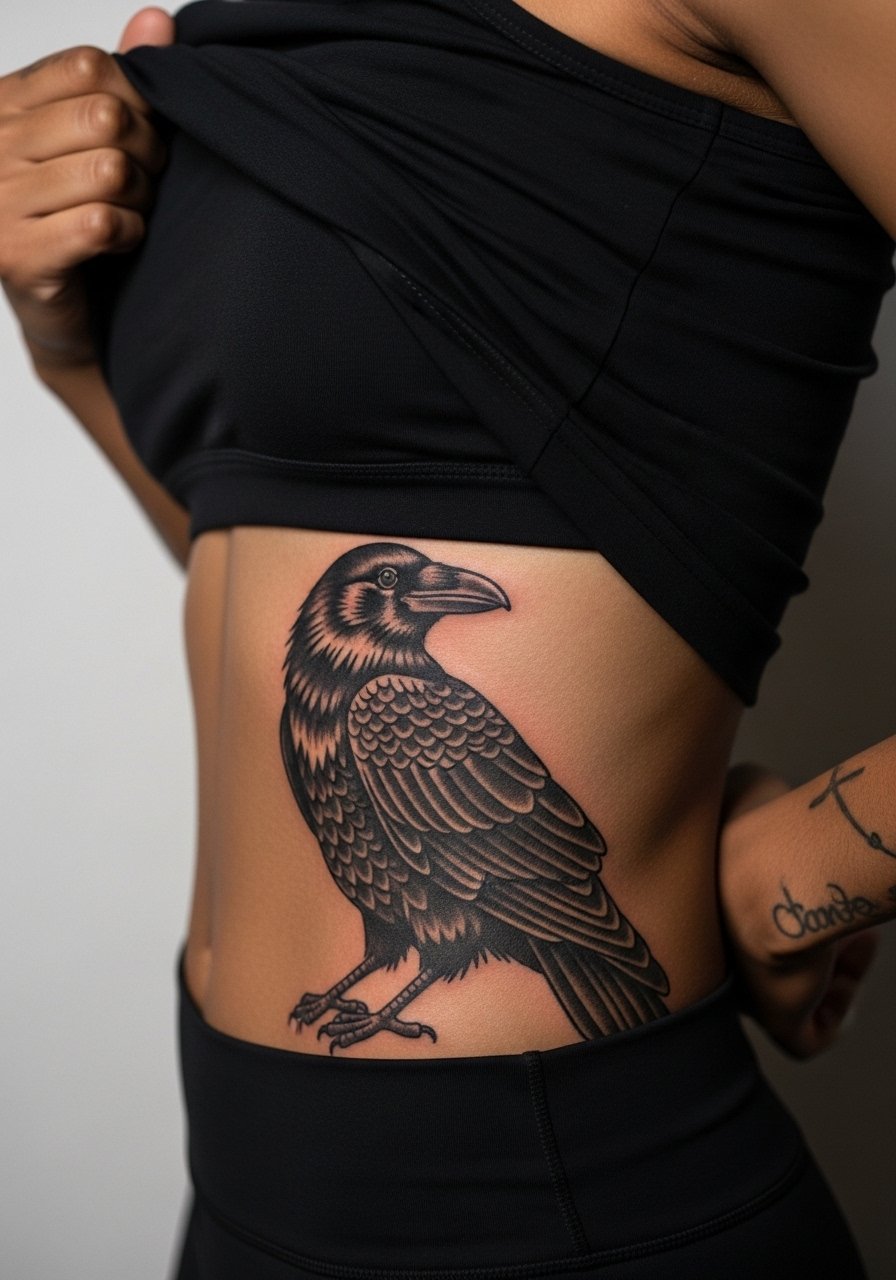
Ribcage work is a commitment on the pain scale, but the long vertical canvas suits a crow in motion. Whip shading adds motion without breaking the blackwork aesthetic. Expect a longer session and a good chance you will need a touch-up at one to three years if you or the artist push lineweight too light. A common mistake is compressing too much detail into a small rib area. Artists are divided on fine line on ribs, with one group saying the skin movement blurs lines fast and the other claiming proper depth prevents that. Ask your artist about their ribcage portfolio and their touch-up policy before booking.
Studio Day Picks
The sternum and ribcage sessions above ask more from the body than the forearm pieces, and a few targeted items smooth out the chair day and the first week of healing.
-
Stencil transfer paper kit. Lets you preview placement on the collarbone and sternum so you can tweak size before the needle touches skin.
-
Topical numbing cream. Applied under the artist's guidance it can take the edge off rib and sternum sensitivity for long sessions.
-
Thin protective film roll. Useful for keeping chest and back pieces clean during the first few days when clothing rub is most likely.
-
Fragrance free gentle body wash. A milder wash helps clean healing areas like the upper back and ribcage without stripping moisture.
-
Aquaphor healing ointment. A thin application in the first days seals moisture for dense black fills while avoiding heavy buildup.
7. Forearm Crow with Negative Space Feathers

Using negative space inside a filled crow keeps the silhouette bold and gives feather detail that stays readable. Ask your artist to mark the high-contrast areas during the stencil step so you can approve where the negative shapes sit. The inner forearm is a predictable healing zone, but tiny internal cutouts that are too close together risk merging over years. Session time is usually under two hours. For showing it off pair with rolled sleeves or a loose linen shirt to keep attention on the negative shapes.
8. Minimalist Finger Crow Silhouette

Finger tattoos read bold when kept very simple. Solid black silhouettes will last longer than micro-detail on a finger, where skin moves and friction is constant. Expect a higher chance of early touch-up because fingers are exposed to washing and rubbing. Tell your artist you prefer single-needle saturation inside the silhouette rather than tiny strokes. For accessories, a dainty stackable ring set complements the tiny crow without covering it. Remember that finger work requires maintenance more often than arm placements.
9. Thigh Crow Perched in a Floral Base
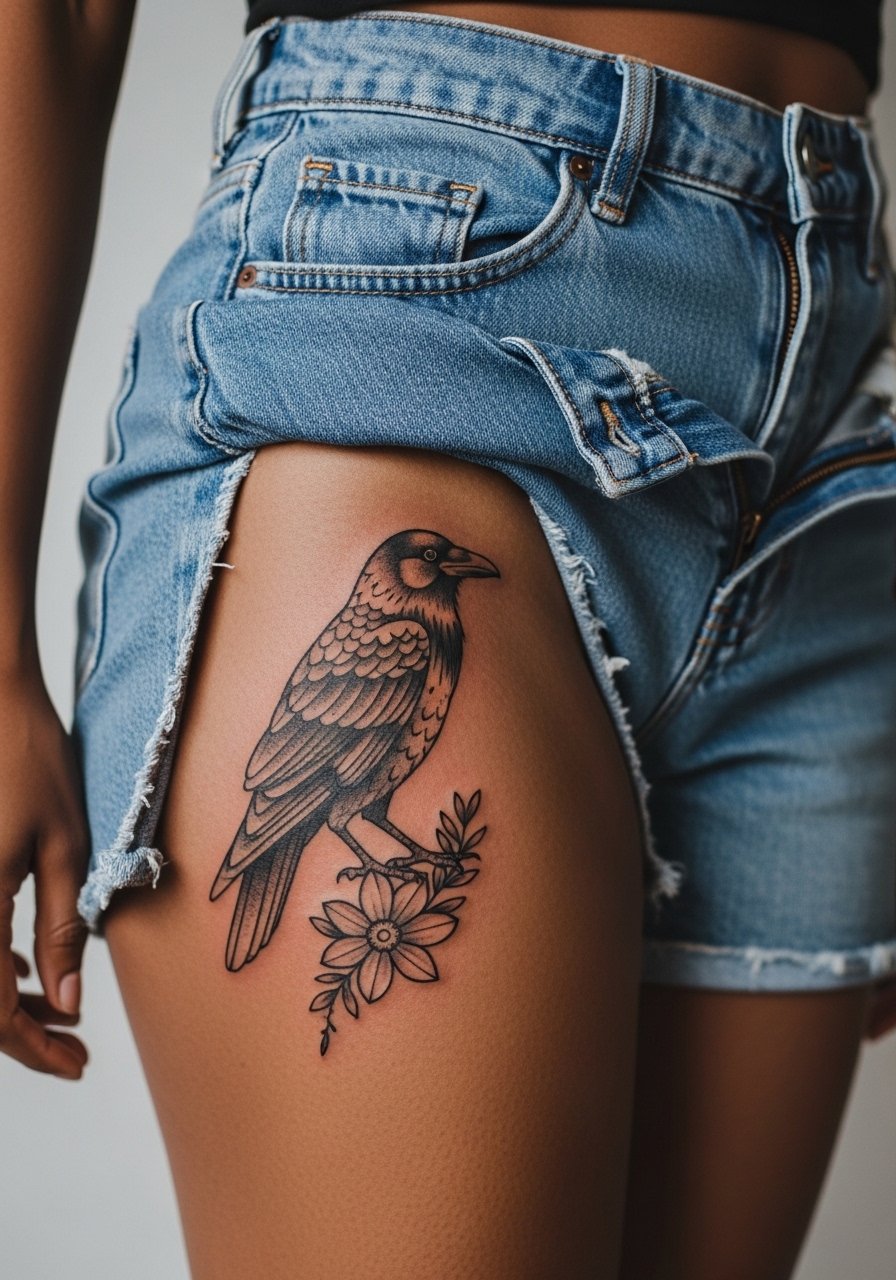
The thigh gives space for a crow with added botanical elements. It tolerates heavy saturation well and usually requires fewer touch-ups than exposed areas. Session pain is moderate and you can usually sit for multiple hours comfortably. A common error is packing too much tiny detail into the floral base; keep the florals slightly graphic so they age with the crow. For this more private placement, choose an artist experienced with large blocks of black on curved skin. You may want to book a consult where the artist can lay a full-size stencil on the area to test composition.
10. Crow and Skull on the Calf

Calf placements let you play with vertical compositions that read well both close up and from a distance. Saturated black holds on the meat of the calf, so a crow and skull combo will keep its contrast. Expect a moderate pain level and a session that moves quickly unless you include lots of texture. A mistake is overfilling tiny skull crevices with dense black that later looks like a dark patch. For footwear pairings, short boots or rolled jeans show the calf work; wear comfortable shorts to the session so the artist can work without fabric tugging. Combat or Chelsea boots frame the piece for cooler months.
11. Geometric Accent Crow as a Sleeve Highlight

Using a crow as an accent inside a sleeve helps it pop without becoming the whole story. The key is to plan for negative space so the crow does not get folded into surrounding elements. Mention in consultation you want clear separation between the crow and adjacent patterns. Sleeve sessions are typically multiple visits. For showing a mid-sleeve highlight, roll up an oversized tee and choose colors that let the black ink stand out.
12. Twin Crow Mirrors on the Upper Chest Sides
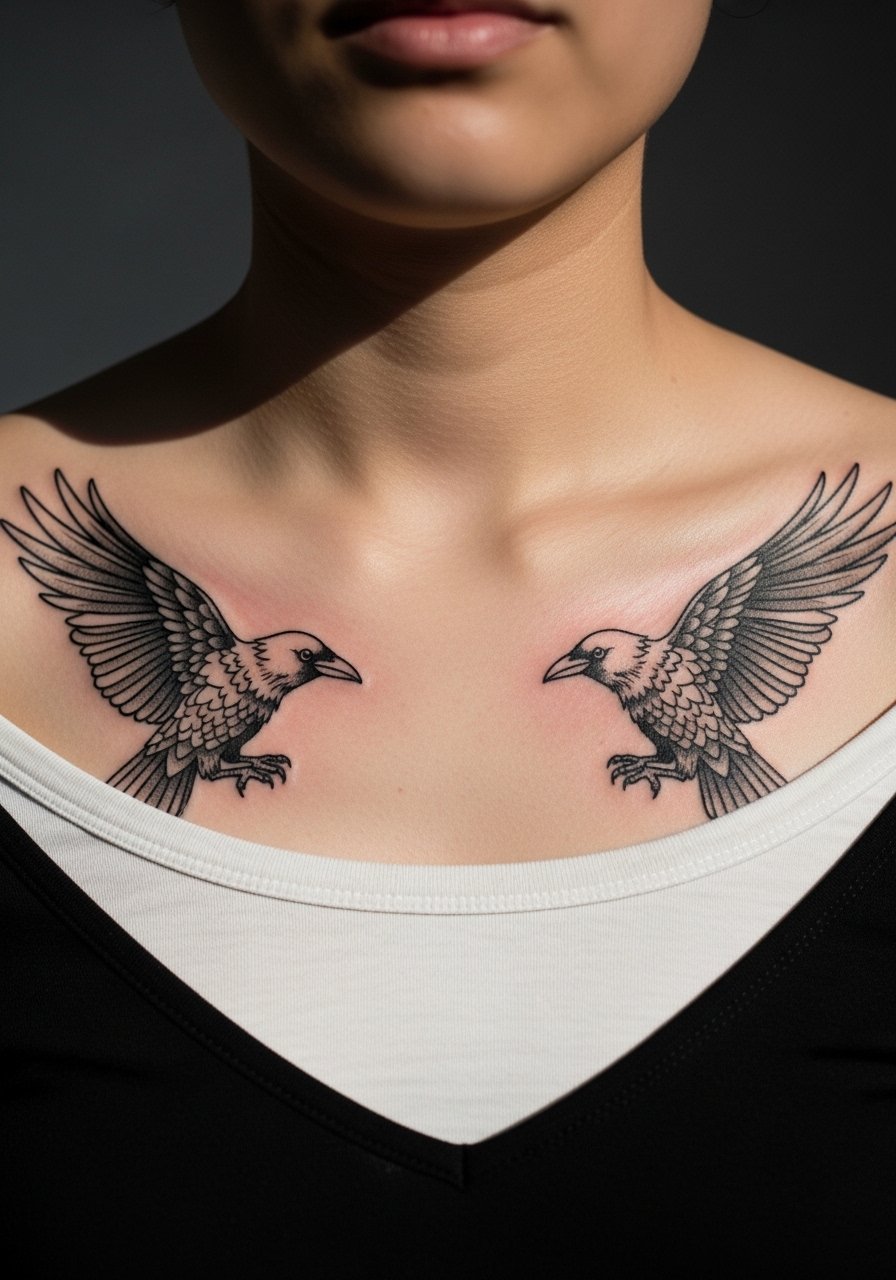
A mirrored pair across the upper chest reads like a statement and balances well with clothing that exposes the collarbones. Symmetry is harder to execute than it looks, so insist on a precise stencil placement check. The chest can bruise and feel tender for a few days. For show-off outfits, a wide-neck shirt or open collar blouse frames both crows evenly. Expect touch-up discussions if one side settles differently than the other after healing.
13. Tiny Wrist Crow Above the Vein
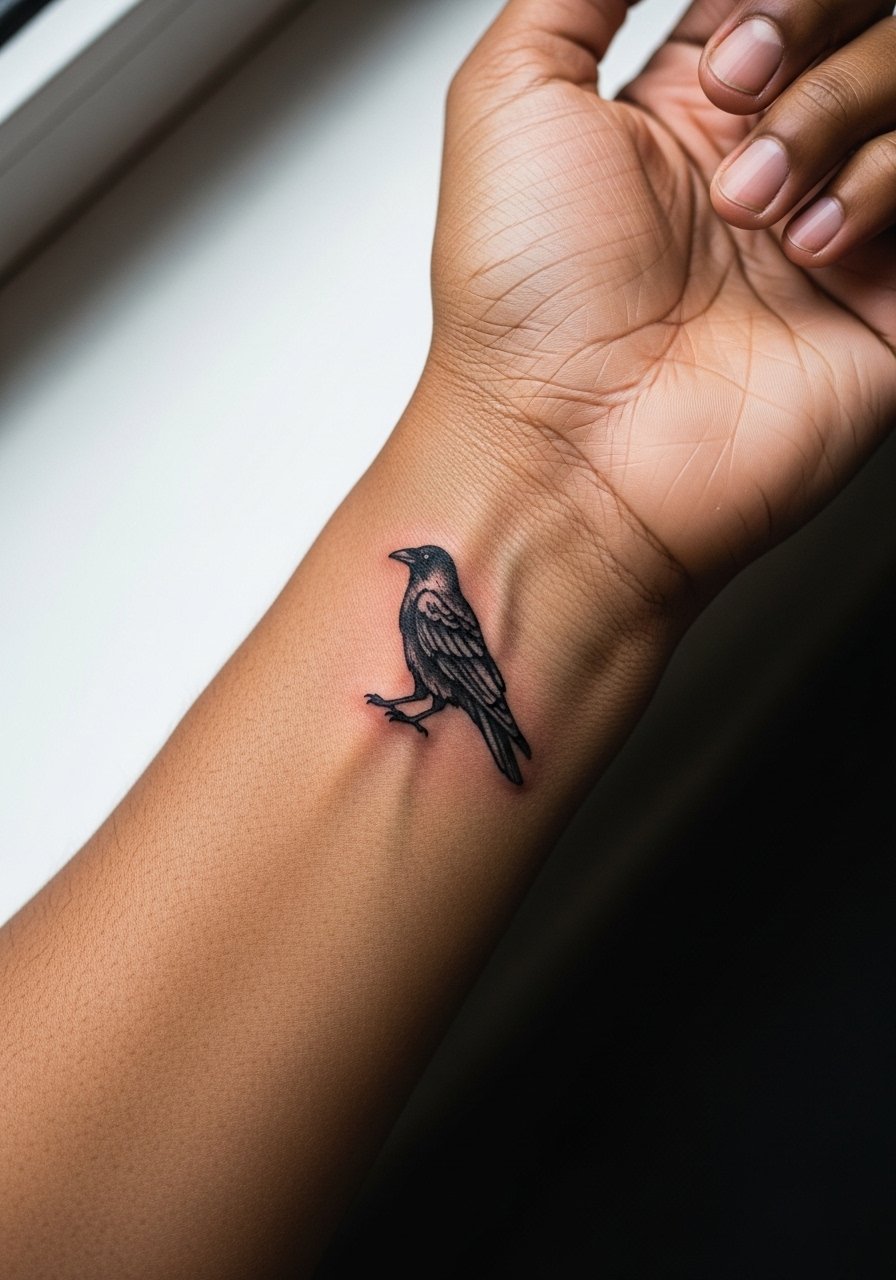
A wrist crow is visible every day, so prioritize bold silhouette over fine interior detail. Thin lines close to the vein can blur with time, so ask for a slightly heavier lineweight to maintain clarity beyond year two. The wrist hurts more than the forearm but less than ribs. For accessories, a minimalist watch or thin bracelet works with the placement as long as it does not rub the fresh tattoo. Plan for frequent exposure to sun on this spot and discuss sunscreen use with your artist after healing.
14. Crow Rising Along the Spine

Spine work creates a dramatic vertical axis and looks especially bold in blackwork. The area tolerates saturation, but the midline has uneven tissue that can change how linework heals. Sessions can be painful near bone and usually need breaks. A common mistake is over-detailing the wings where the spine curves. For showing off, an open-back dress exposes the spine without rubbing the healing skin. If you plan larger back pieces later, discuss how this crow will integrate into future work.
15. Shoulder Blade Crow with Stipple Moon
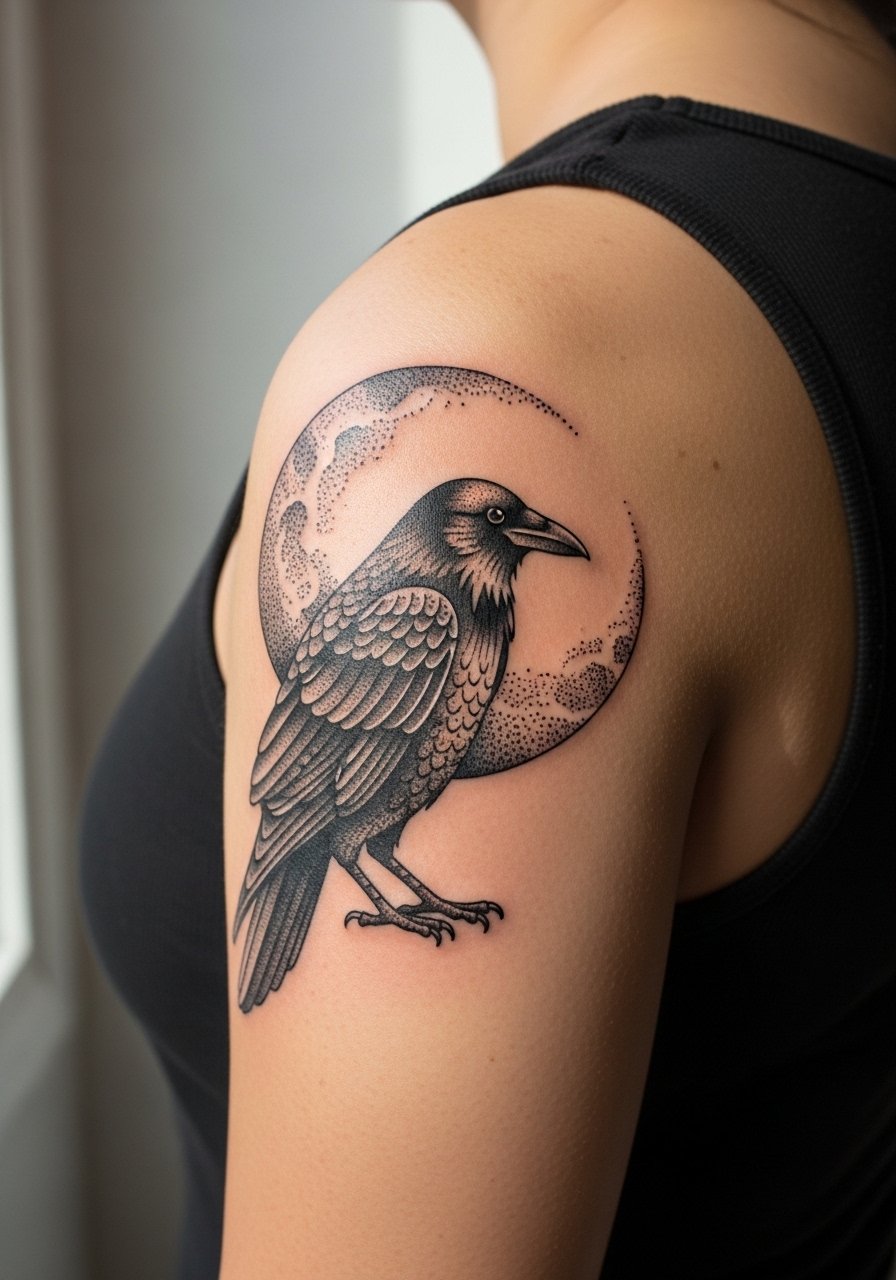
Shoulder blade placements let you combine silhouette and texture. The stipple moon gives depth without adding heavy black that could overwhelm the crow. Pain is moderate and sessions are easy to position for both artist and client. Avoid cramming extra small motifs close to the wing tips, as those details often soften. For the appointment wear a loose tank top you can move without tugging on the healed area.
16. Linked Mini Crows from Finger to Wrist

A chain of tiny crows creates motion and reads well when each silhouette is bold. Fingers and wrists are both high-maintenance zones, so expect multiple short sessions and earlier touch-ups. Tell your artist you prefer solid silhouettes at this scale rather than micro-feather detail. For jewelry pairings try stacked bracelets that sit above the wrist so they do not rub the design while healing. Keep in mind constant hand washing and friction will be the main aging factors.
17. Blackwork Sleeve Anchor with Negative Space Script

Using a crow as the sleeve anchor gives the tattoo a focal point that ties varied elements together. Negative space script beside the crow can read nicely, but script close to saturated black risks losing legibility over time. Discuss spacing in the consult and ask to see healed examples from the artist. Sleeve work usually spans multiple sessions. For a casual reveal, wear a short-sleeve henley you can roll to frame the anchor without pressing on the fresh ink.
18. Thin-Line Crow Behind the Ear
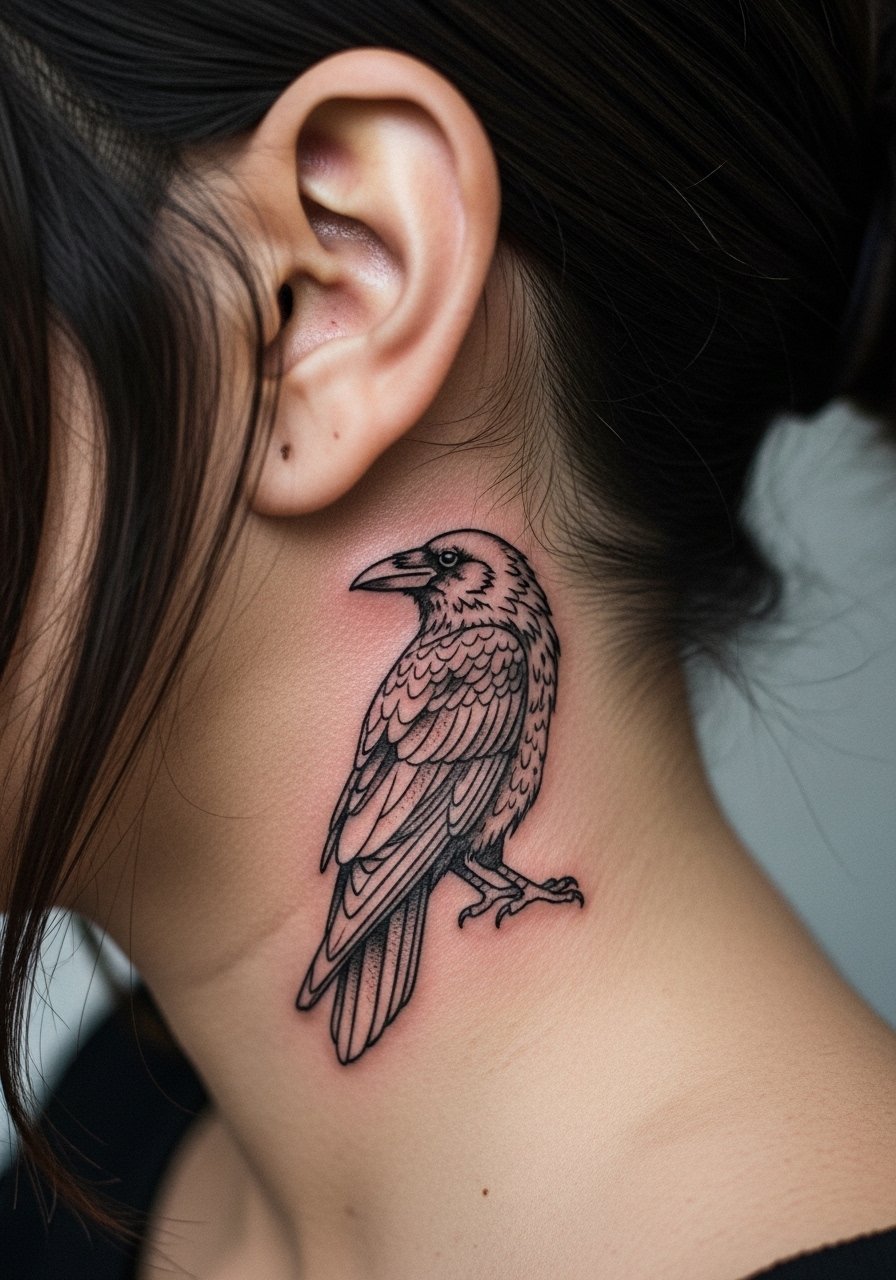
Behind-the-ear placements are tiny and intimate. Only a specialist comfortable with small, contoured areas should take this. The skin sits right under hair and moves a lot, which makes longevity a toss-up if lines are ultra-fine. Include a one-sentence note in your consult asking about experience with hairline pieces. For showing it off, a high ponytail or hair clip will leave the area visible without risking fabric friction. A small artist portfolio that shows healed ear-adjacent work is a helpful decision factor.
19. Crow and Compass on the Ankle
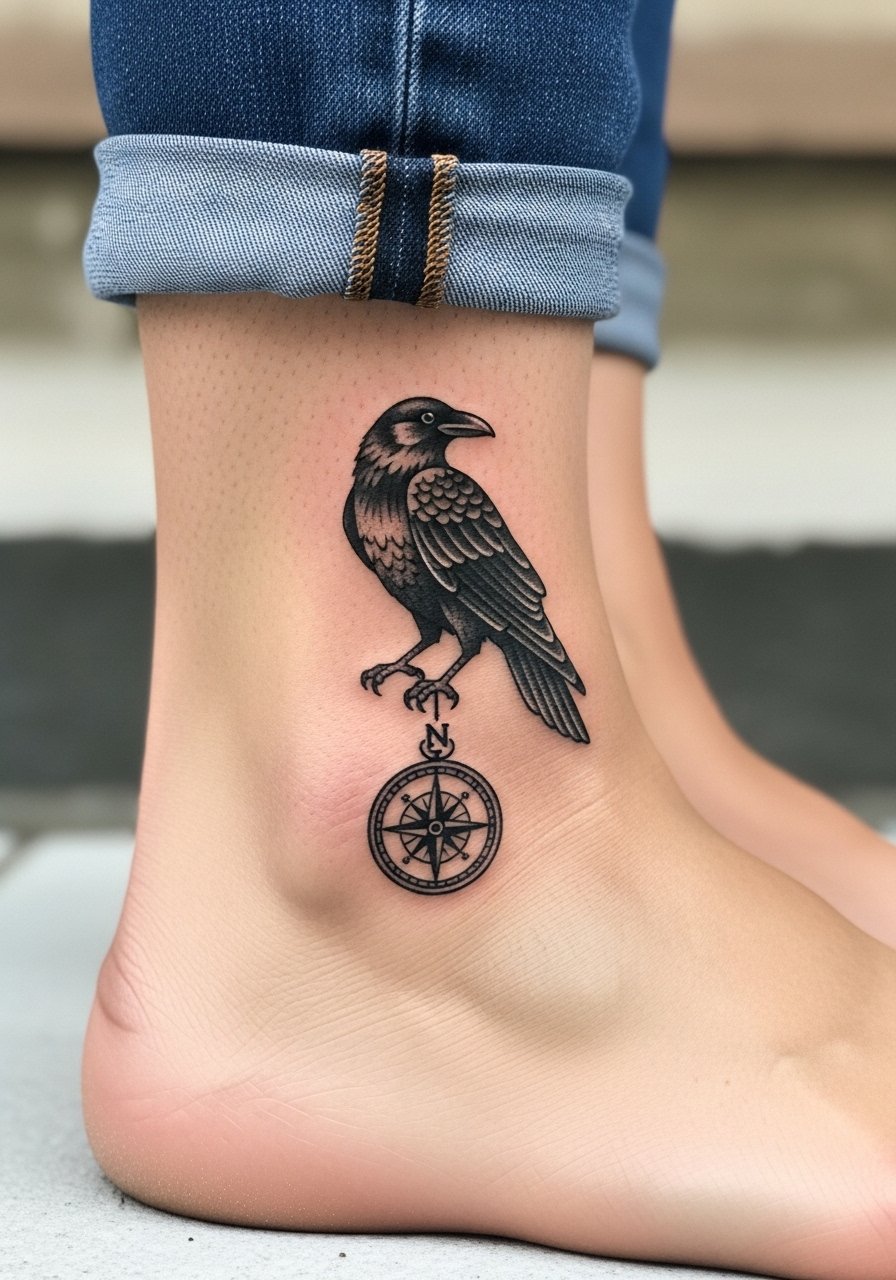
Ankle placements are great for narrative accents. Because the ankle sees footwear friction and frequent movement, keep the crow silhouette bold and avoid tiny cross-hatching near the bone. Pain is moderate and sessions are short. For showing it off in summer, sandals or cropped pants frame the ankle; for the appointment choose loose trousers you can roll up easily. A compact design with clear negative space will fare better over time than dense detail down by the bone.
20. Half-Sleeve Crow with Stippled Starfield
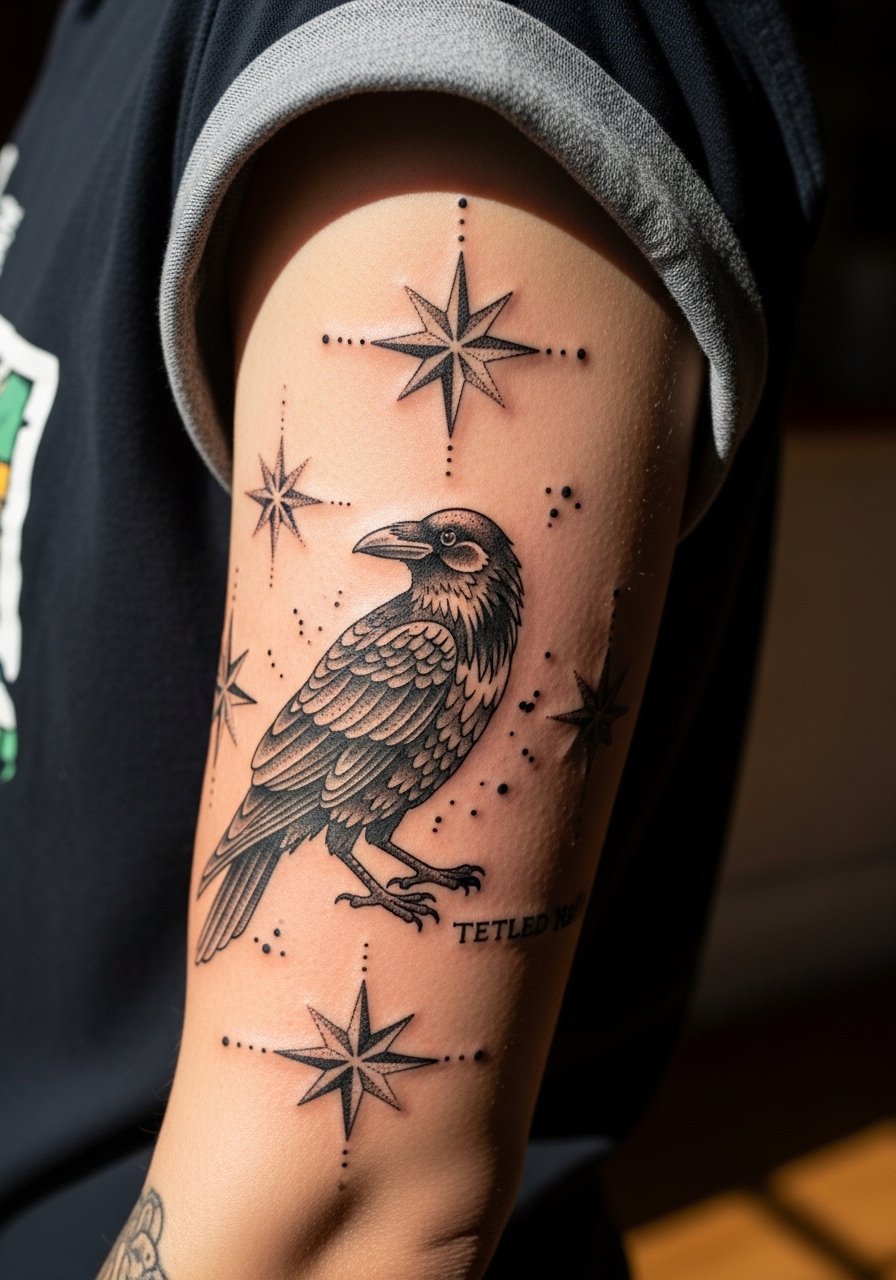
A half-sleeve lets you balance a large crow with surrounding stipple stars for texture without breaking the blackwork aesthetic. The upper arm foundation keeps saturation even, but dense stipple zones need spacing to avoid merging. Sessions are medium to long depending on coverage. For showing a half-sleeve, short sleeves and neutral tones help the black read sharply; bring references that show the scale you want so the artist sizes the crow to the limb.
21. Micro-Realism Crow Eye on the Back of the Hand
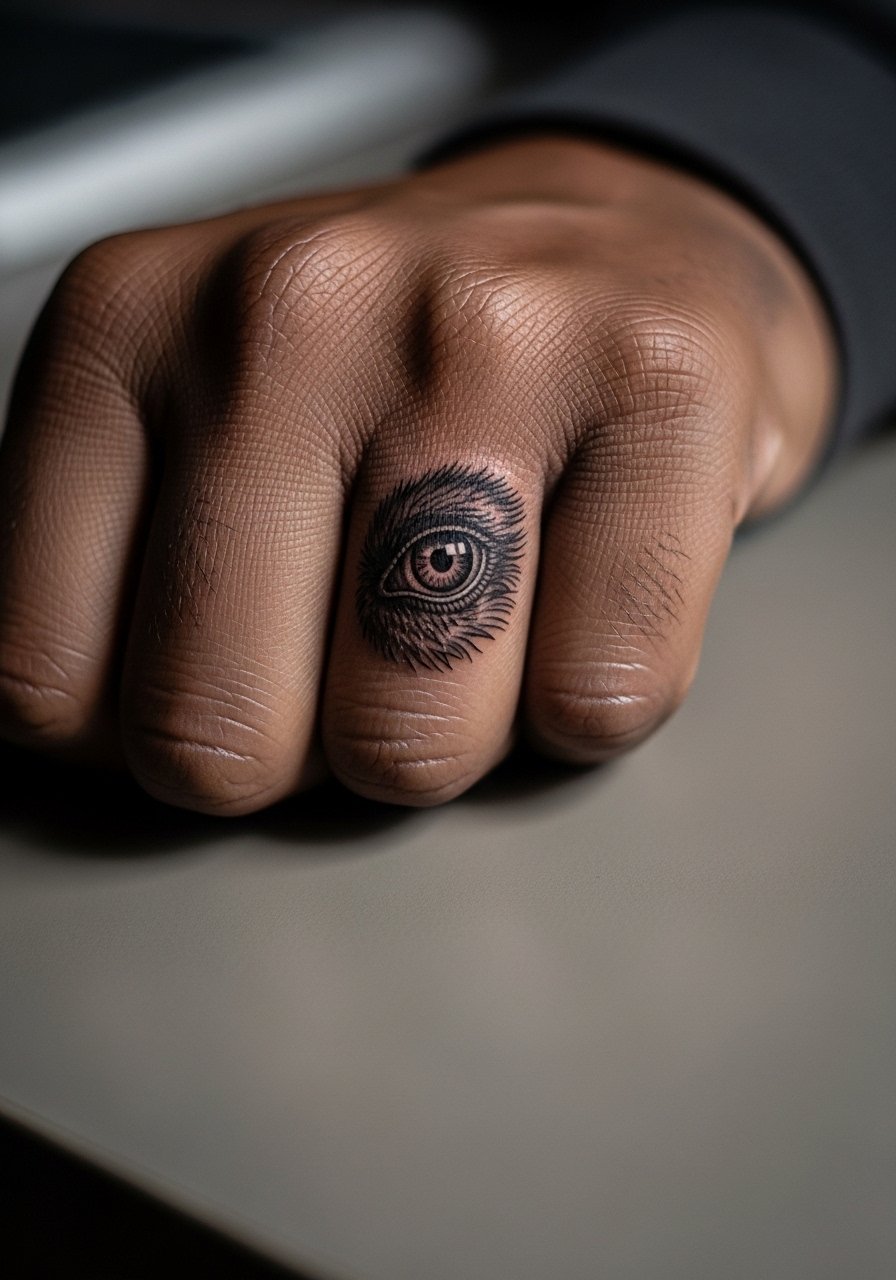
Hand tattoos are high-visibility and higher maintenance. A single micro-realistic eye can be striking, but hands experience heavy wear and frequent washing that can break down fine detail. Be honest with your artist about career considerations because hand work still affects some industries. If you proceed, plan for touch-ups and accept faster fade than arm or back work. Keep the design bold where possible and avoid ultra-fine shading that will blur with daily use.
Frequently Asked Questions
Q: Will a blackwork crow on my ribs need touch-ups more often than one on my forearm?
A: Yes, ribs often need touch-ups sooner because the skin shifts with breathing and movement. The forearm is a stable canvas that holds solid black longer. Discuss expected touch-up timing with your artist and ask to see healed ribcage examples from their portfolio.
Q: Can negative space details in blackwork stay crisp after five years?
A: They can if the shapes have enough room and the artist spaces them during the stencil stage. Tiny negative shapes too close to heavy fill are most at risk. Bring clear references and request a slightly larger scale for pieces you want to survive long-term. A rolled-up sleeve or fitted top shows these details best once healed.
Q: Are there special session clothes I should bring for sternum or rib work?
A: Yes. For sternum wear a fitted sports bra or zip-front hoodie so the artist can access the area without full exposure. For rib sessions bring a cropped tank or shorts you can adjust. A fitted sports bra is often the simplest choice for chest access.
Q: Will a finger or hand crow ruin my chances at certain jobs?
A: Hand and finger tattoos still matter in some industries. Think about how visible ink could interact with your current or planned career path. If you need discretion, choose placements like the thigh, upper arm, or back that are easy to cover.
Q: How should I prep the skin for a long blackwork session?
A: Sleep well, hydrate in the days before, and avoid sunburn or fresh tanning on the area. Wear loose clothing that gives the artist clean access without rubbing the skin after. Bring snacks for long sessions and follow your artist's pre-session guidance.
Q: Does blackwork need different aftercare than finer styles?
A: The basic aftercare is similar, but dense black fills can feel drier while healing. Follow your artist's instructions and expect saturation to soften slightly during healing. If you have questions about products, ask your artist and compare their healed examples so you know what to expect.
