
Fine line looks wonderful in photos, but what holds up on real skin is often the work that respects spacing, depth, and placement. I see the trend-driven references people bring into consultations at five shops across the city, and the same mistakes repeat: designs that are too dense, lines scaled too fine for the chosen spot, or expectations set by filtered photos. Below are 27 black and grey design drawings with notes on how to make each one age well and what to wear for the session.
1. Fine Line Arrow on Inner Forearm
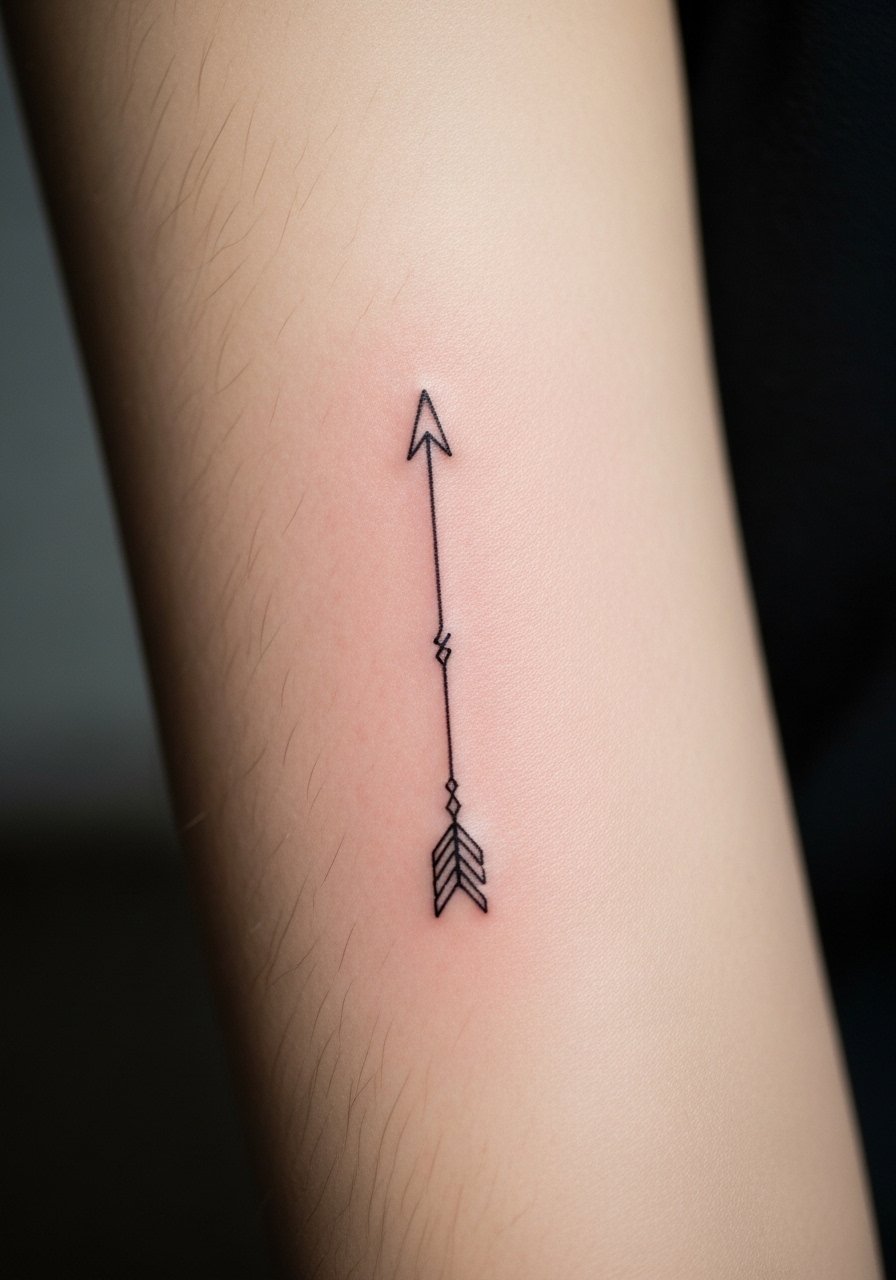
I often recommend a narrow arrow in this spot for people who want a small, readable symbol without risking blowout. Fair warning, the inner forearm is forgiving for linework but the lines need slightly more weight than you see on trend boards. Tell your artist you want a slightly heavier single-needle weight and extra space between parallel lines. Expect a low pain session that can be 30 to 60 minutes. For showing it off, rolled-up sleeves work best, try a loose button-down shirt in a neutral tone so the linework sits clear against skin. A common mistake is asking for hairline-thin arrows that blur inside two years.
2. Micro-Realism Wolf Head on the Bicep

I've seen this style hold up when artists use micro-dot stippling and careful saturation rather than trying to render tiny hair strokes everywhere. During consultation, bring high-contrast references and ask for emphasis on contrast and negative space so the face reads at a distance. This placement feels moderate on the pain scale and takes one to two hours depending on scale. For the appointment, wear a loose tank top so the artist can move freely across the bicep. The most common mistake is asking for ultra-fine whiskers without enough darker anchors, which leaves the piece looking patchy after a year.
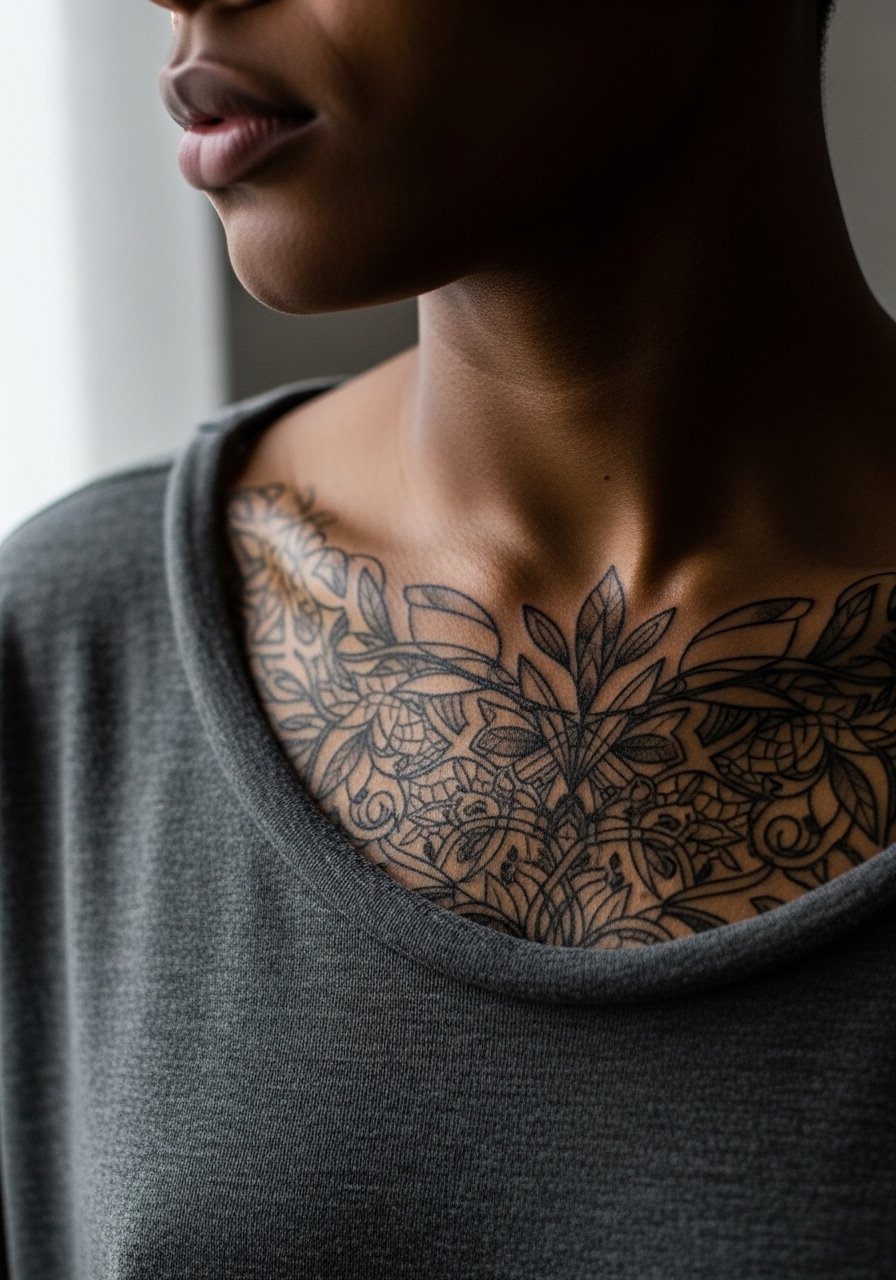
3. Geometric Mandala Near the Collarbone

This piece reads as both decorative and architectural if you give the pattern room from the clavicle. When you consult, ask the artist to scale negative space so the dense center can breathe. Expect a sensitive session because the upper chest is closer to bone, and plan for one long session or two short sessions. For evenings out, pair the piece with an open-back midi dress or a wide-neck top to frame the lines. Note on origin: mandala patterns trace to spiritual traditions, so some people prefer a simplified, non-ritual version rather than a direct replication.
4. Stipple Shaded Floral on the Ribcage
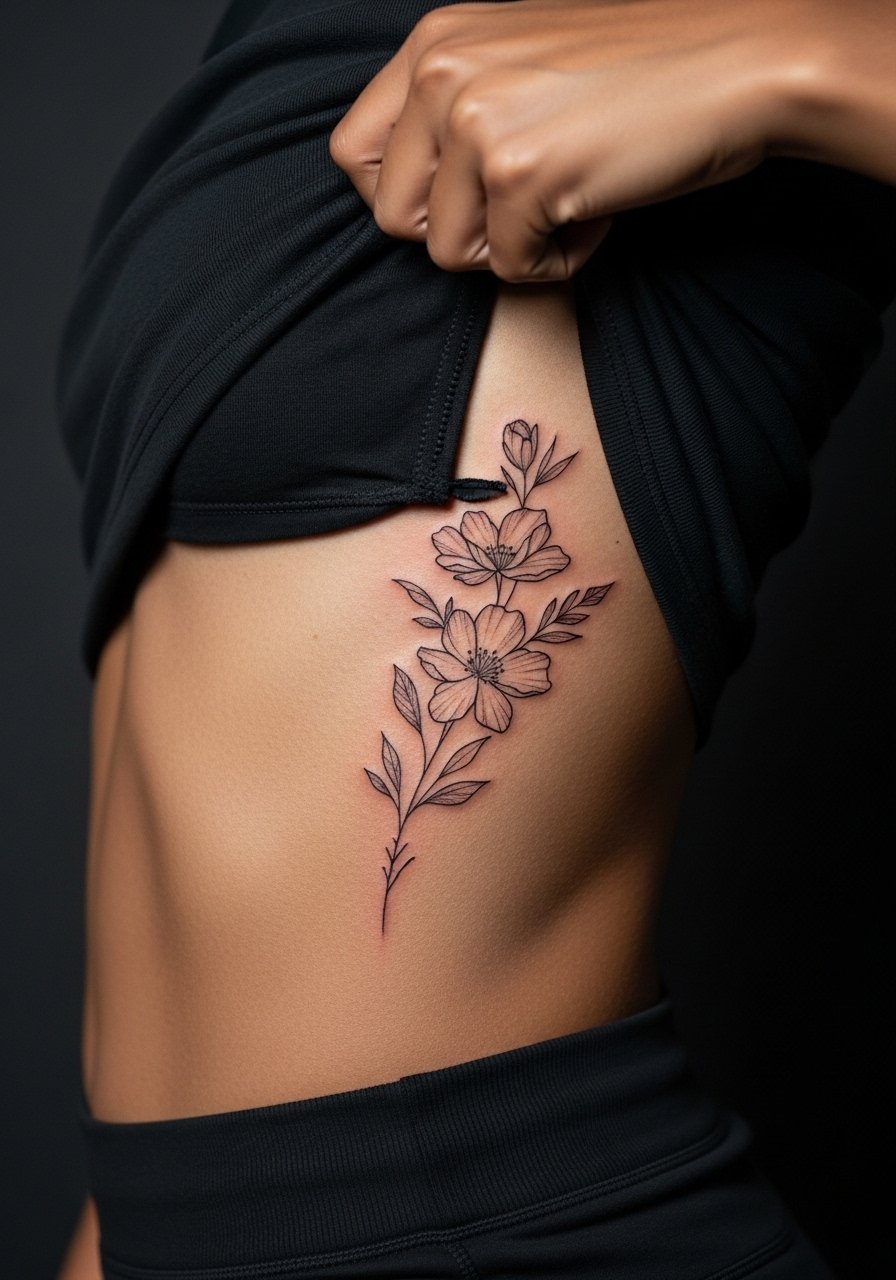
Fair warning, the ribcage is a high-pain area but it offers beautiful vertical canvas for flowing florals. Artists are split on fine line on ribs. One camp warns that the skin stretch and movement blur delicate lines within two years. The other camp says with proper needle depth and spacing the lines settle fine. Ask your artist where they stand before booking. Sessions here can be long and may need breaks. Expect touch-ups sooner than on the forearm. The common mistake is packing petals too closely; leave breathing room between elements so stipple shading reads at six months and at year three.
5. Minimal Constellation Ankle Tattoo

The ankle is a compact spot that shows off tiny dot work. Plan for a short, sharp session with predictable discomfort near bone. Small constellation dots do well if the artist spaces them and uses slightly stronger dots rather than whisper-light pricks. For showing it off in summer, rolled jeans or sandals frame the ankle nicely, try a pair of jeans rolled up with simple sandals like those you can find when searching for casual sandals. Fingers and daily shoe friction speed fading here, so expect a touch-up window earlier than larger pieces.
6. Tiny Script on the Side of a Finger
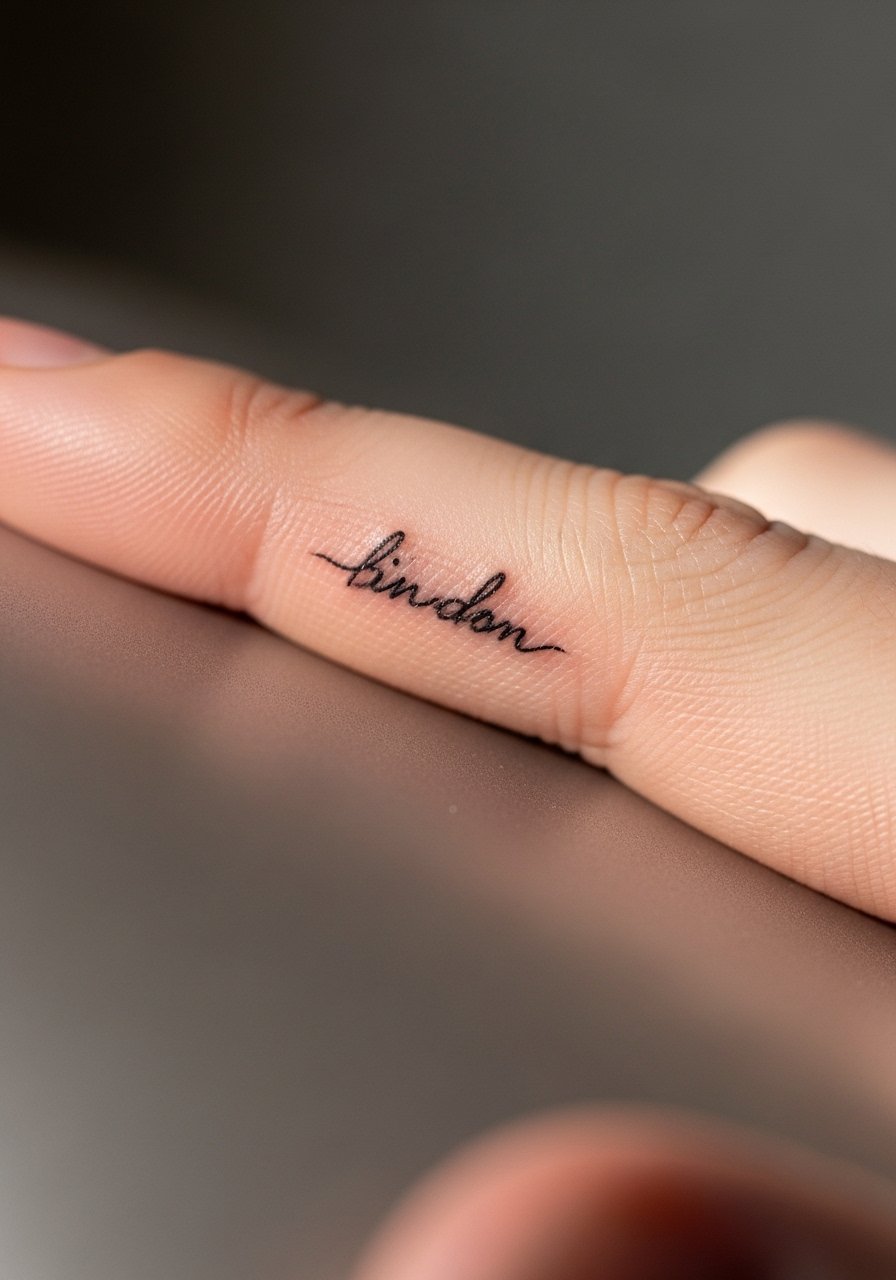
Finger script is a quick session but a long-term commitment. Hands and fingers are high-motion friction zones that often need touch-ups within a year. Ask your artist for slightly bolder lettering and consider spacing letters so the script does not merge. The session is short but can sting more than a forearm piece. For styling, pair this with stacked dainty bracelets that frame the hand without rubbing directly on the letters. A frequent mistake is copying tiny cursive from a phone screenshot without adjusting for scale.
7. Botanical Full Sleeve with Stipple Shading
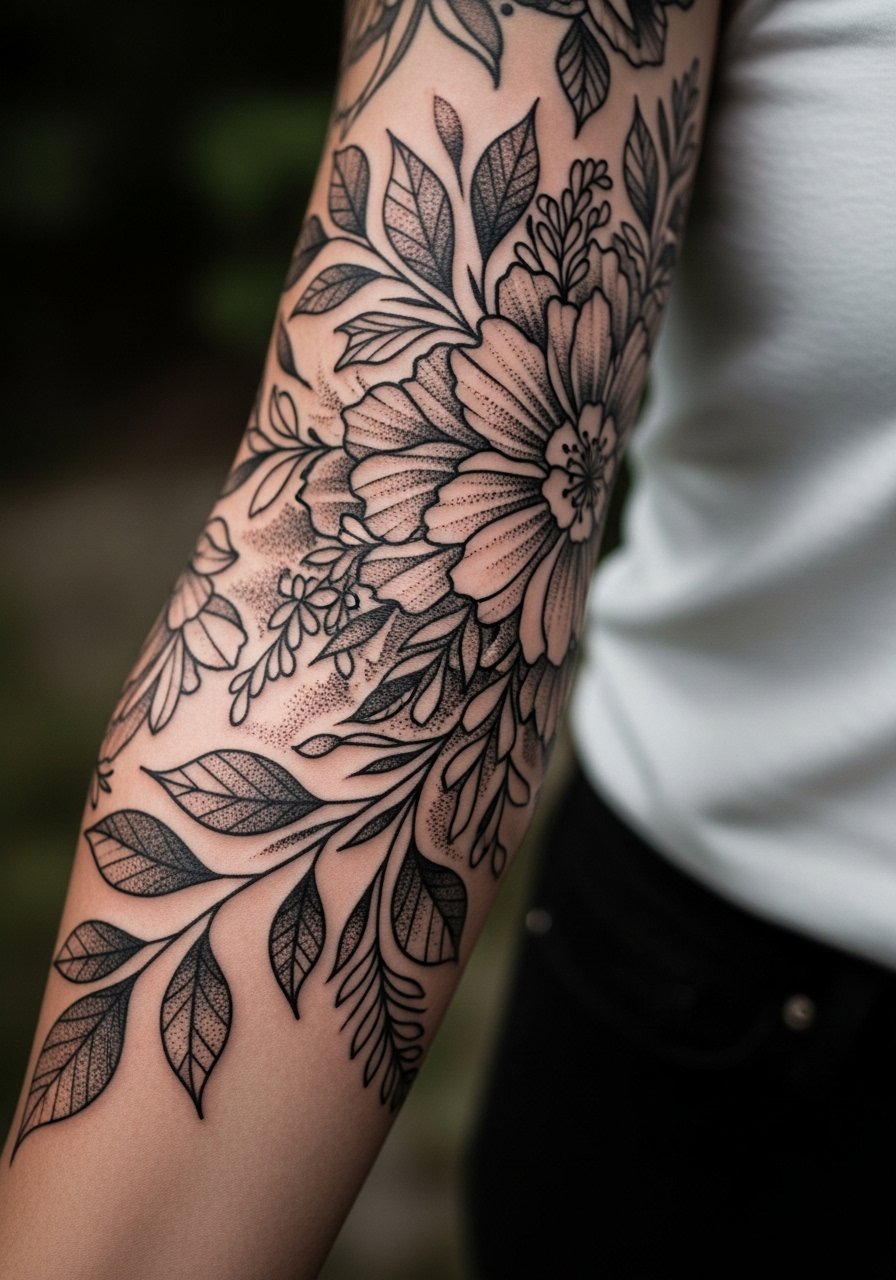
I recommend botanical sleeves when you want flow from wrist to shoulder without heavy color. Start consultations with a clear idea of focal pieces so the sleeve breathes rather than becoming a texture blanket. Sessions come in multiple blocks, usually two to six hours each depending on saturation and coverage. For showing progression, roll linen sleeves or cuffed shirts frame the wrist and forearm. Wear a loose linen shirt the day of the session so the artist can access the entire arm. A common mistake is asking for constant dense shading; the best sleeves use open skin patches to let linework stay readable over years.
8. Micro-Realism Eye on the Shoulder Blade
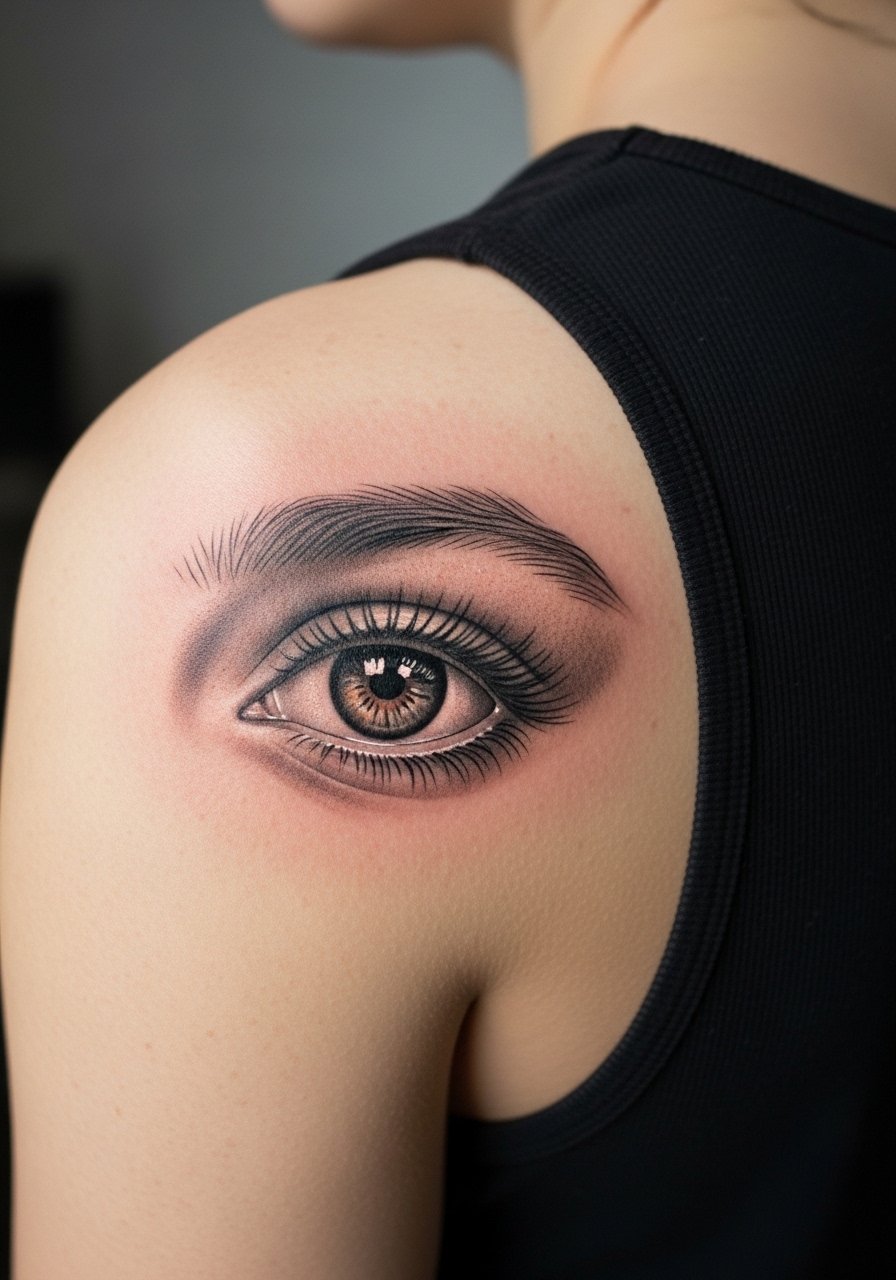
Most people expect micro-realism to read like a photograph on the day it is done, but what matters is contrast and negative space. The shoulder blade is forgiving for detail and less prone to blowout than hands. Bring a range of reference photos and tell the artist which elements must remain crisp. Sessions are moderate in pain and often one long appointment for medium-size pieces. The most common error is demanding ultra-fine lashes with no darker anchors. If you want to show it off at events, choose tops with an adjustable back strap to reveal the work.
9. Geometric Forearm Band That Ages Well
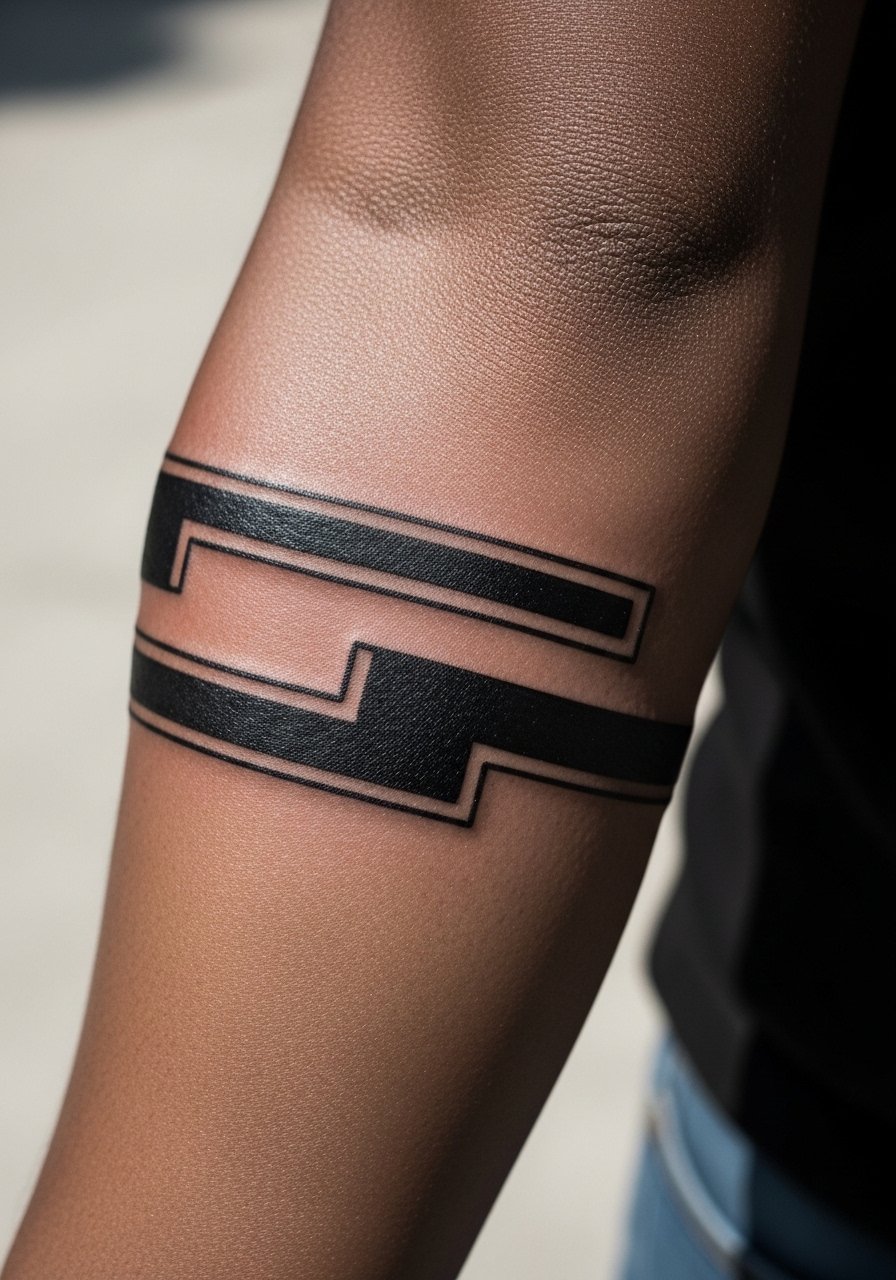
The trick with band work is spacing the lines, not shrinking the motif. When you book, ask the artist to scale the geometry to your arm circumference rather than copying a flat photo. Expect one to two hours depending on complexity. Overly dense bands on thin arms tend to merge after a few years. For daily wear, short sleeves and rolled cuffs highlight the band, try a short sleeve button-down you can roll for a casual look. A common mistake is using identical line weight throughout the band; mix thin and medium linework to keep the piece readable with age.
10. Spine Script from Nape to Upper Back

Spine scripts read best when letter spacing is generous and the font has clear counters. The area sits on a column of movement so expect more sensitivity during the session and potential fading across the midline. Ask your artist about vertical spacing and whether they prefer a slightly bolder serif or a clean sans for longevity. For showing it at events, open-back dresses frame the spine beautifully, pair with an open-back dress to let the script sit center stage. A common mistake is choosing a very tight cursive for a long vertical placement.
11. Calf Portrait in Black and Grey
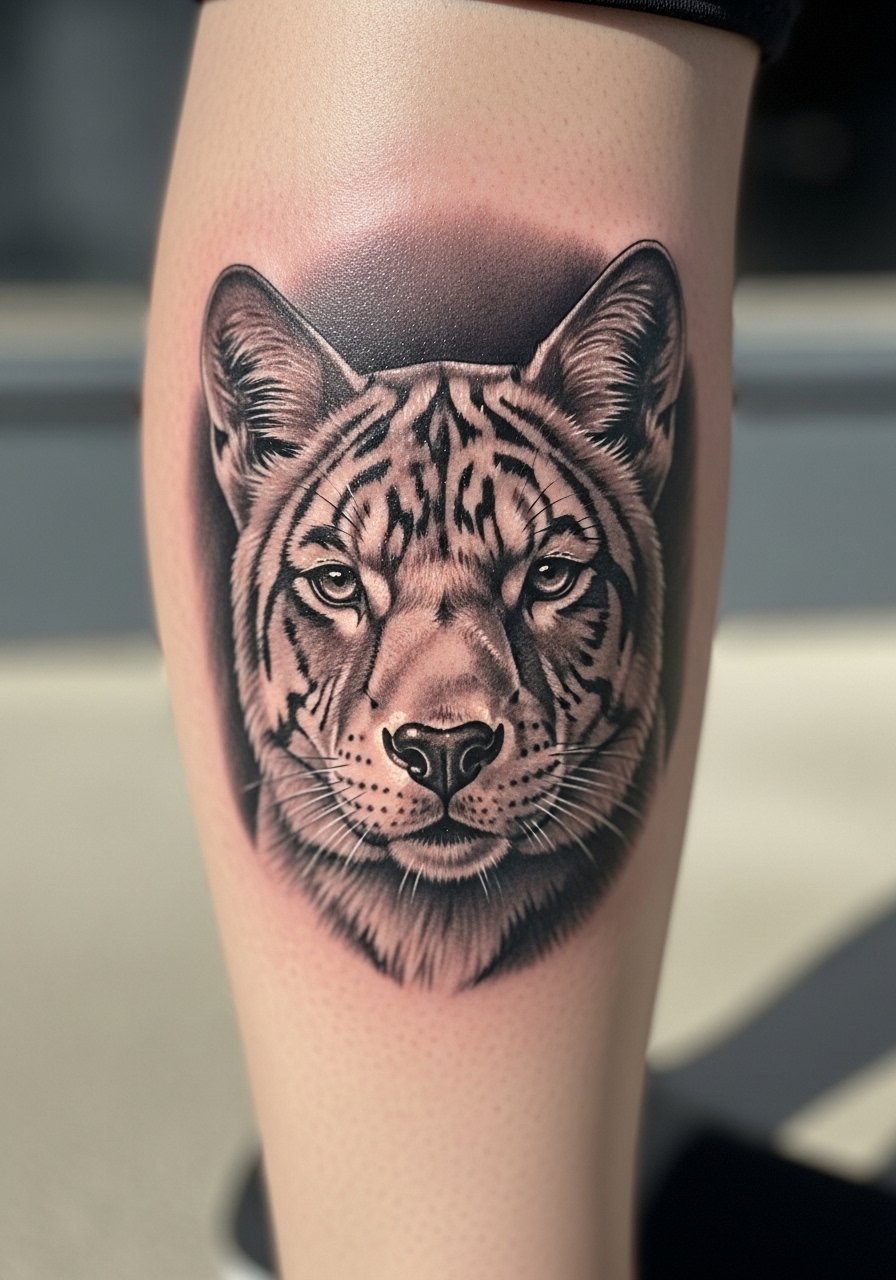
Calf portraits age well because the skin there holds saturation and sees less daily friction. During the consultation, discuss contrast anchors and midtone management so facial features sustain depth. Sessions feel moderate and you can usually sit comfortably for one to three hours. The usual mistake is under-saturating the darkest values; a portrait without darker anchors flattens after healing. For display, cropped trousers or dresses with a side slit let the calf read from a distance.
12. Delicate Script Under the Collarbone
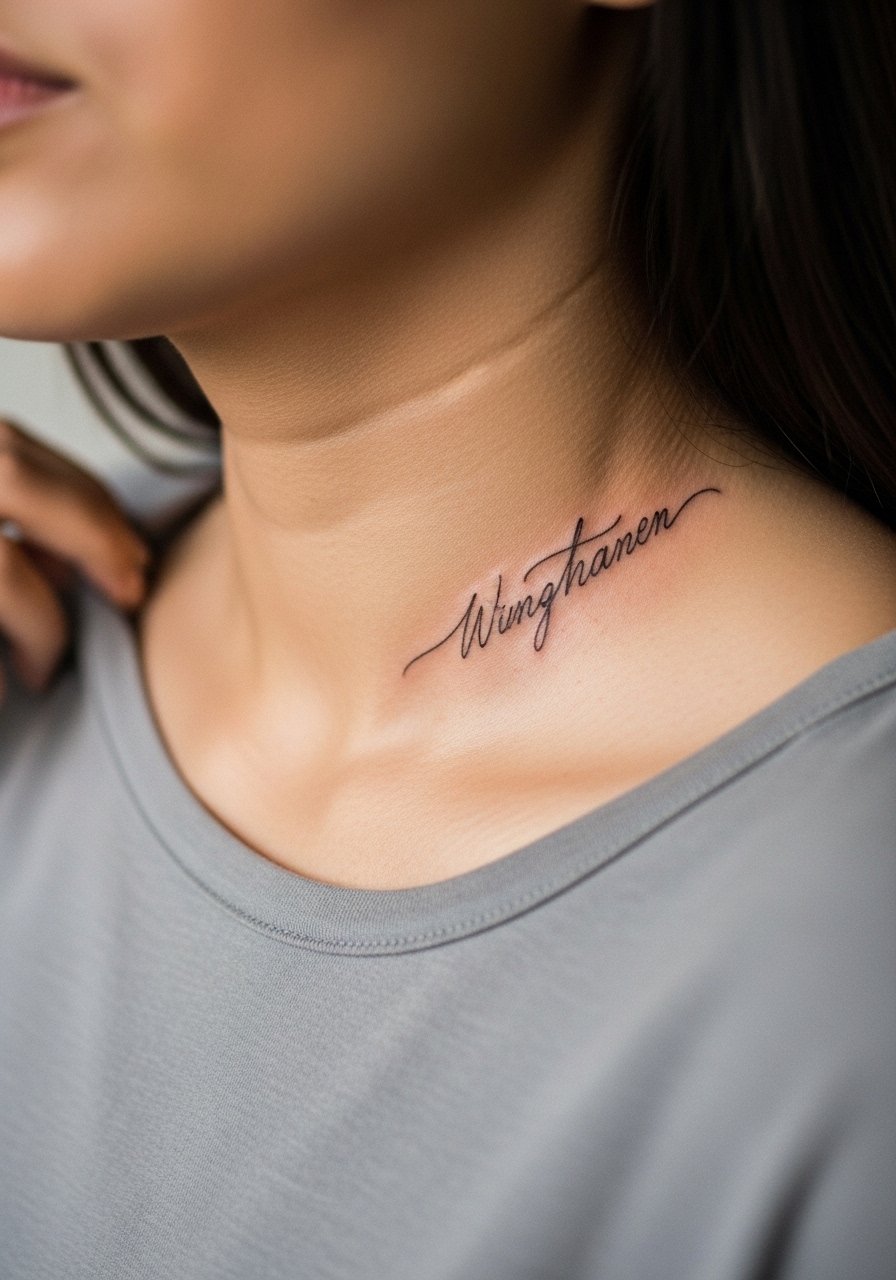
This is a classic small spot for meaningful words. Because skin is thin here, ask for slightly heavier strokes so letters hold over time. Sessions are short and discomfort is mild to moderate. For everyday wear, a thin chain pendant necklace sits just above the script without competing. A common error is choosing a dense, blackletter type in a tight size; wider counters and simpler letterforms last longer on this plane of the body.
13. Lace-Like Sternum Motif

Sternum work needs a specialist touch because the skin there shifts with breathing and movement. Expect a sensitive session and possibly multiple short sittings rather than a single long one. Tell your artist you want spacing that accounts for expansion so the lace pattern does not compress when you move. This placement often requires experience with chest stitching and careful stencil placement. The common mistake is treating sternum like a flat canvas, which leads to overly dense centers that blur over time.
14. Tiny Glyph on the Thumb Side

Thumb-area tattoos are convenient but they live in a high-wash, high-wear zone. For longevity, ask for slightly larger negative space around the glyph and a compact, bold mark rather than fine filigree. Sessions are quick and can be surprisingly painful. For styling, choose a minimalist watch or ring set that frames the hand without rubbing the fresh ink. A common error is shrinking the glyph to postage-stamp size without accounting for constant contact and hand soaps.
15. Bold Blackwork Shoulder Cap
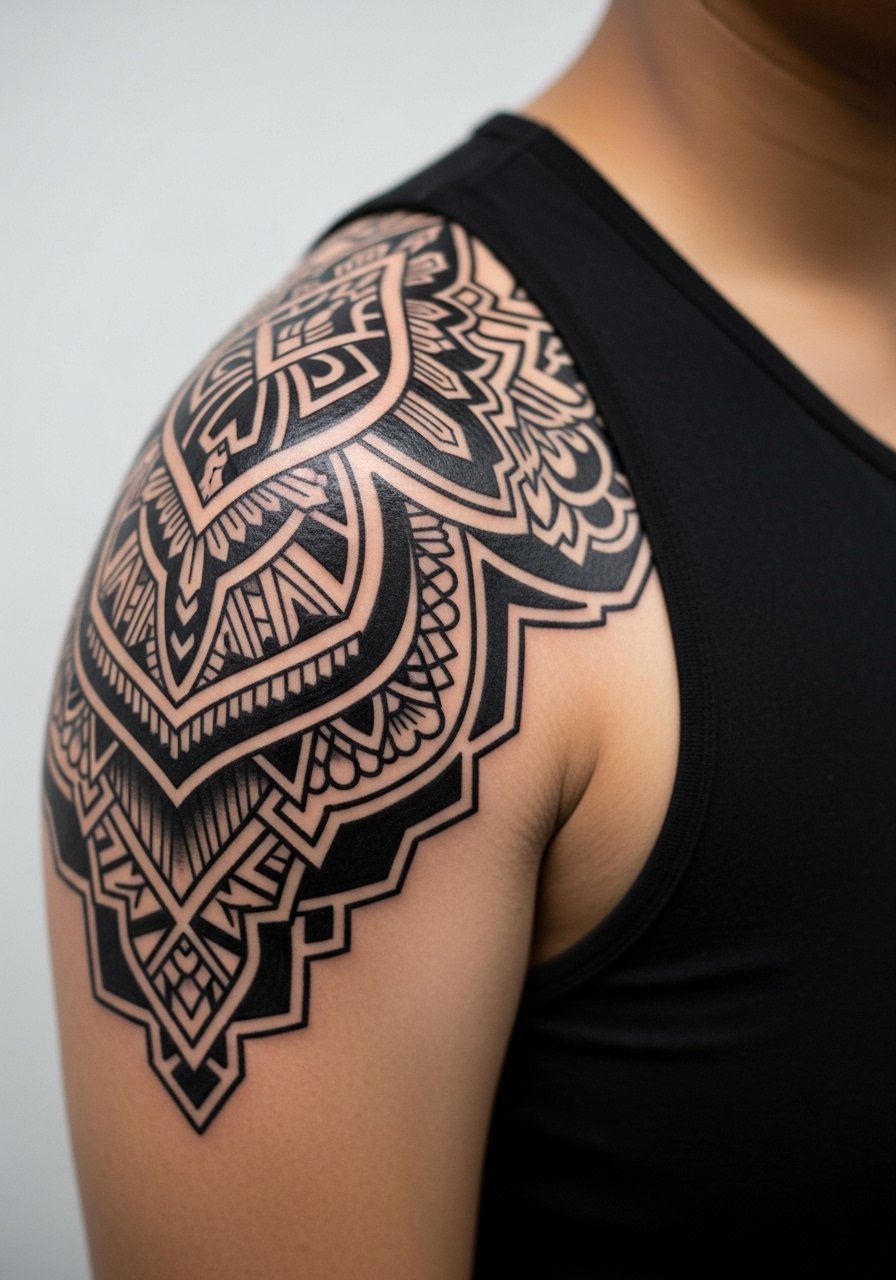
Shoulder caps offer a striking graphic that keeps its punch because of solid saturation and minimal fine detail. This is a moderate pain area and often completed in a single long session if coverage is limited. During the consult, tell the artist you want solid fills rather than textures to keep maintenance low. The most frequent mistake is pairing dense blackwork with tiny internal details that disappear when the skin shifts. This style is forgiving for touch-ups due to its bold nature.
16. Inner Bicep Micro Script

The inner bicep is tender and can be worth the trade-off for a hidden, intimate phrase. Ask your artist to scale the lettering slightly larger than your initial impulse. Sessions feel more sensitive and may require a couple of short breaks. For the appointment, wear a racerback tank so the artist can access the area cleanly. Expect a touch-up timeline sooner than outer bicep work because of movement and sweat.
17. Lower Back Floral Band
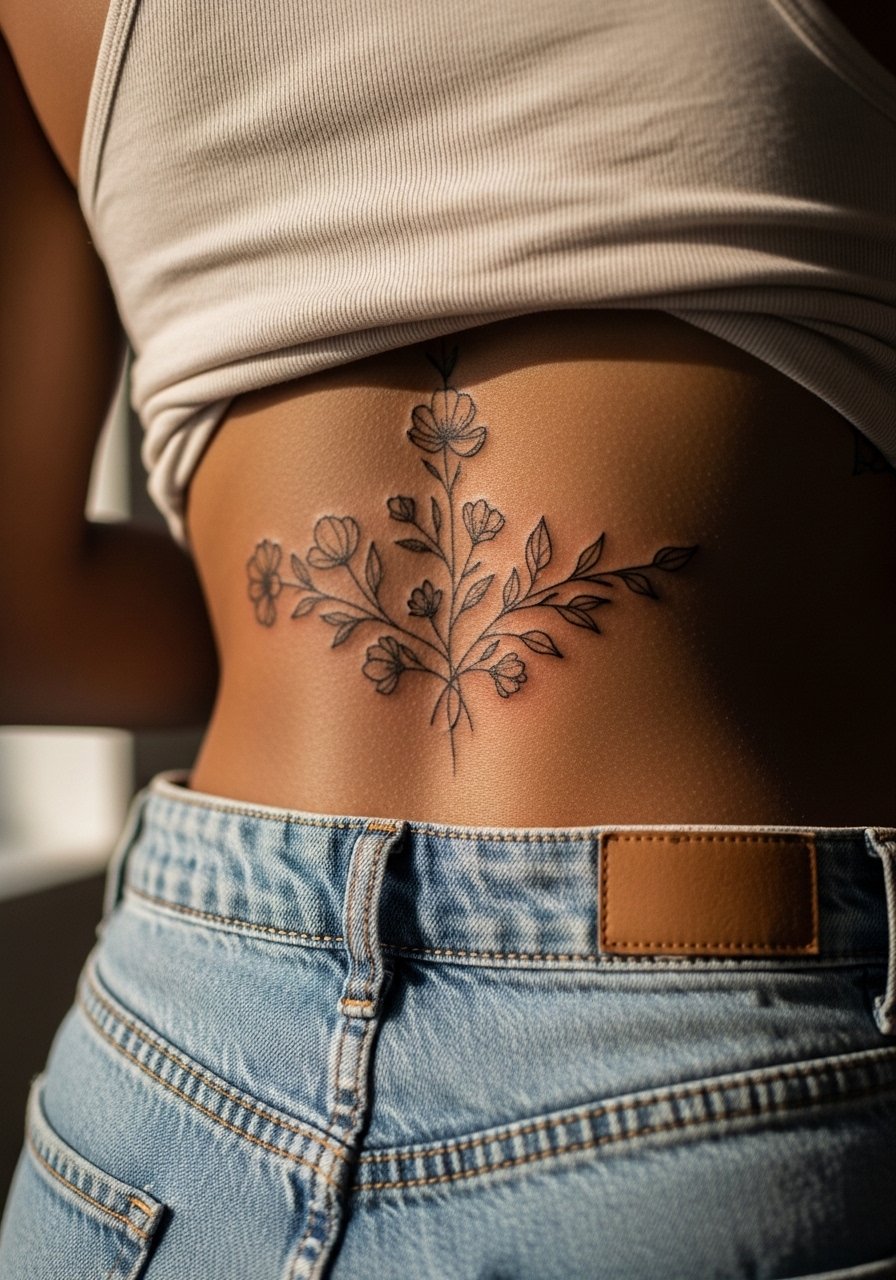
Lower back pieces are low-friction and can keep detail for years if the design avoids tiny filigree. In consultation, discuss how the band will sit with your typical clothing and consider how high-waisted items will frame the work. Sessions are moderate in time and generally comfortable. Common mistakes include tight, lace-like patterns that lose clarity when the body moves. For show-off looks, a slightly cropped top or low-rise bottoms can make the band visible when desired.
18. Upper Thigh Botanical Cluster

Thighs are ideal for medium-size botanical clusters because they take saturation and see less sun than arms. Sessions are moderate to long depending on scale and the area is less sensitive than ribs. For the session, wear high-waisted shorts so you can expose only the working area and stay comfortable. A frequent error is cramming too many small stems into a narrow area. Leave breathing room between sprigs to preserve the negative space that makes stipple shading read.
19. Tiny Behind-the-Ear Crescent

Behind-the-ear pieces are subtle and delicate by design. The spot needs a precise stencil and a steady hand because there is little room for correction. Sessions are short and discomfort is low, but healing can be tricky with hair and shampooing. Keep the design single-element and avoid dense shading. For professional considerations, remember some workplaces still have conservative views on visible neck-area tattoos, so plan accordingly.
20. Geometric Thigh Panel
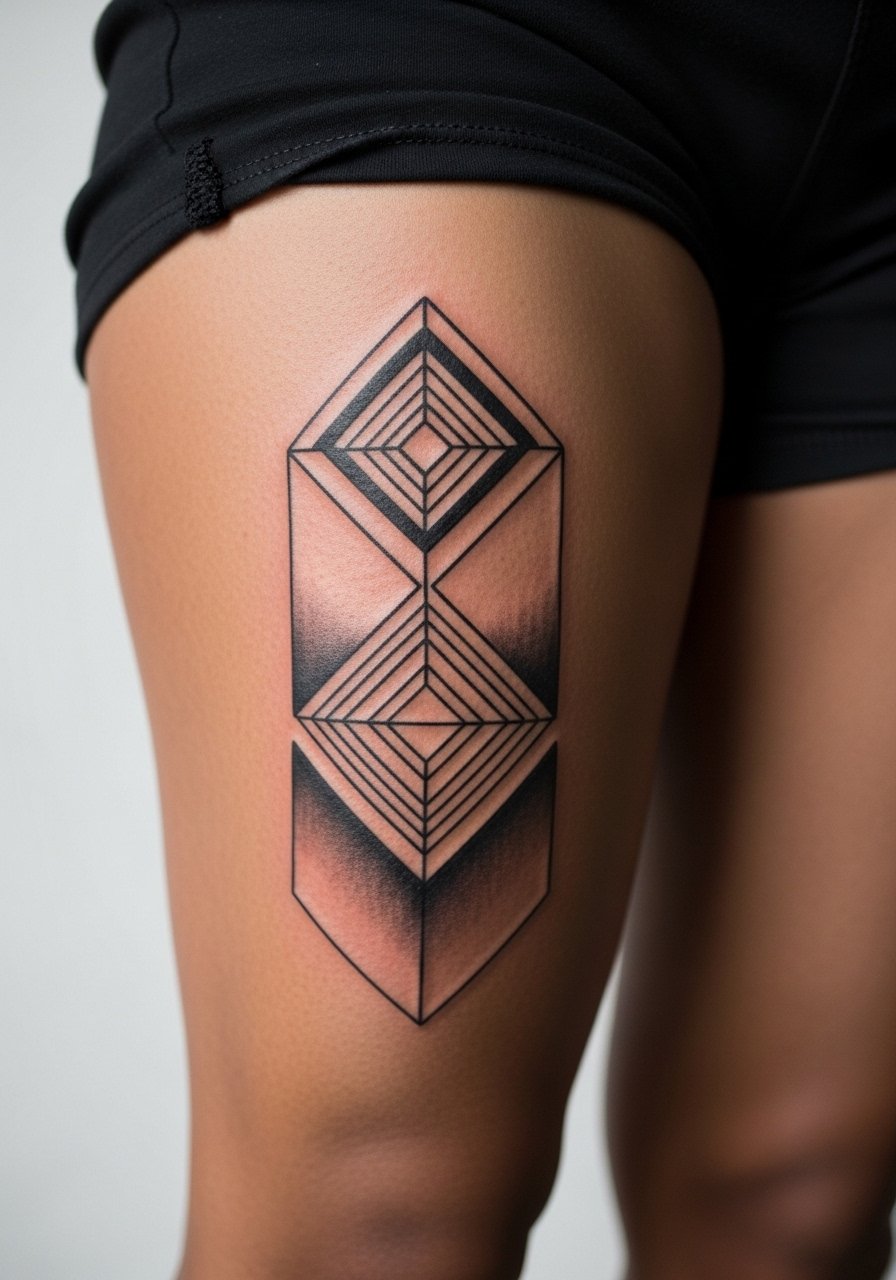
Large thigh panels let geometry breathe and maintain crisp intersections when scaled properly. During the consult, ask the artist to test a full-size stencil and stand while you move to see how the pattern responds to hip motion. Sessions are long but tolerable and the thigh holds saturation well. For summer looks, a high-waisted skirt or shorts frame the design without covering it. The most common mistake is collapsing the pattern toward the seam where pants rub the ink.
21. Minimalist Rib Sliver Script

Rib sliver scripts are intimate and can look very elegant if spaced for breathing. Because ribs move with each breath, ask the artist for slightly larger letter spacing and modest line weight. Expect a higher pain level and plan for breaks during the session. The usual mistake is picking a dense italic that compresses when you move. If you plan changes in body shape, discuss placement with your artist to avoid distortion over time.
22. Ankle Chain of Dots and Lines

Ankle chains are delicate and look great when dots are done with a slightly stronger impression so they do not fade into wash within months. Sessions are short and the pain is focused near bone. For a polished look, wear sandals or rolled jeans during outings, try searching for jeans rolled up style to frame the ankle. A standard mistake is packing too many tiny dots in a small circumference, which speeds visual blurring.
23. Micro-Realism Portrait on the Chest Side
Side-chest portraits need strong contrast and careful placement relative to the rib curve. Sessions are sensitive and may be split across multiple sittings. Ask the artist how they will anchor darkest values so eyes and facial features maintain depth. Avoid asking for tiny, ultra-detailed textures without corresponding darks. Many clients underestimate the touch-up timeline for chest portraits; plan on a follow-up at year two.
24. Blackwork Geometric Hand Accent

Hands are high-risk for fading and partial loss because of constant use and washing. If you want a geometric accent, favor bold blocks and clear negative spaces that can withstand abrasion. Sessions are short and can be painful near knuckles. The usual mistake is over-detailing small shapes that vanishing under daily wear. Keep expectations realistic and plan for regular touch-ups if you want a crisp look long-term.
25. Ornamental Hip Piece

Hip pieces photograph beautifully and the area tolerates larger, decorative elements with modest friction from clothing. For the session, choose bottoms you can shift slightly so only the working strip is exposed. A high-waisted denim style works well. A common error is demanding ultra-fine lacework that rubs against seams, so plan the pattern to avoid high-friction zones.
26. Minimalist Ankle Symbol with Negative Space

Negative-space work on the ankle looks modern and lasts when artists prioritize clean edges over micro detailing. Sessions are quick and the pain is focused where bone sits shallow. Avoid asking for very thin interior cuts inside the symbol. For maintenance, expect a touch-up by year two if you wear shoes that rub against the area daily.
27. Full Back Panel with Stipple and Linework

Full back projects need long-term planning and modular sessions. Start with a layout meeting and agree on focal areas so the panel reads from a distance and up close. Sessions are long and stamina matters for both client and artist. The common mistake is trying to finish too much detail in one sitting, which leads to inconsistency in saturation. For a project like this, expect staged sessions and scheduled touch-ups to keep the panel cohesive as it heals over months.
Studio Day Picks
The wrist, finger, chest, ankle, and ribcage pieces above need different prep and a few small items smooth out the session and the first week.
-
Stencil transfer paper kit. Lets you preview the linework on skin before committing, especially helpful for the finger and script pieces in ideas above.
-
Topical numbing cream. Applied 30 to 45 minutes before can take the edge off sensitive ribs and sternum sessions without affecting the artist's stencil.
-
Thin protective film roll. Keeps ankle and hand tattoos cleaner during the first week of regular washing and foot friction.
-
Fragrance-free gentle body wash. Cleanses healing areas like forearms and chest without irritating delicate linework.
-
Aquaphor healing ointment. A thin layer for the first few days locks in moisture for fine line work without clogging the channels.
Frequently Asked Questions
Q: Will fine line mandalas fade faster on the chest than on the forearm?
A: Fine line tends to blur faster on areas that move and stretch, and the chest is more affected than the forearm. It depends on spacing and your daily exposure to sun. If you want a chest mandala, ask for increased negative space and slightly heavier linework so it keeps its form over time.
Q: How often do finger scripts need touch-ups compared with forearm scripts?
A: Finger scripts typically need touch-ups sooner because of constant washing and friction, often within a year. Forearm scripts usually hold longer because the skin there sees less abrasion. Plan for a realistic touch-up timeline with your artist during the consult.
Q: Are ribcage florals a bad idea because of aging concerns?
A: Artists split into two camps on ribs. One says the constant stretch blurs fine lines quickly. The other argues proper depth and spacing make it work. The right choice depends on your artist's technique and how willing you are to accept touch-ups later. Ask the artist to show healed rib examples from their portfolio before booking.
Q: What should I wear to a sternum or upper chest session?
A: Wear a fitted sports bra or wide-neck top you can pull slightly aside so only the area being worked on is exposed. This keeps you comfortable and preserves modesty while giving the artist clean access.
Q: Do geometric thigh panels need special aftercare compared with ankle pieces?
A: Aftercare principles are similar but the thigh sees less daily abrasion and usually needs fewer touch-ups. Ankle pieces rub against shoes and often require more frequent attention. Adjust your plan based on the placement and your clothing habits.
Q: How can I find an artist who understands how these black and grey techniques age?
A: Look for portfolios showing healed work over time and ask about specific healed examples in consults. Discover artists through local shop directories, tattoo conventions, and community forums where people post healed photos so you can see real-world results.
