
Fine line and soft-shaded black and grey pieces keep circling the trend feeds, but they do not all age the same. A lot of flowy work looks ethereal fresh and then muddles if the spacing and saturation were wrong from the start. These ideas focus on line spacing, shading choices, and placement tweaks that hold up so the flow stays readable at year three and beyond.
1. Flowing Botanical Forearm Sleeve
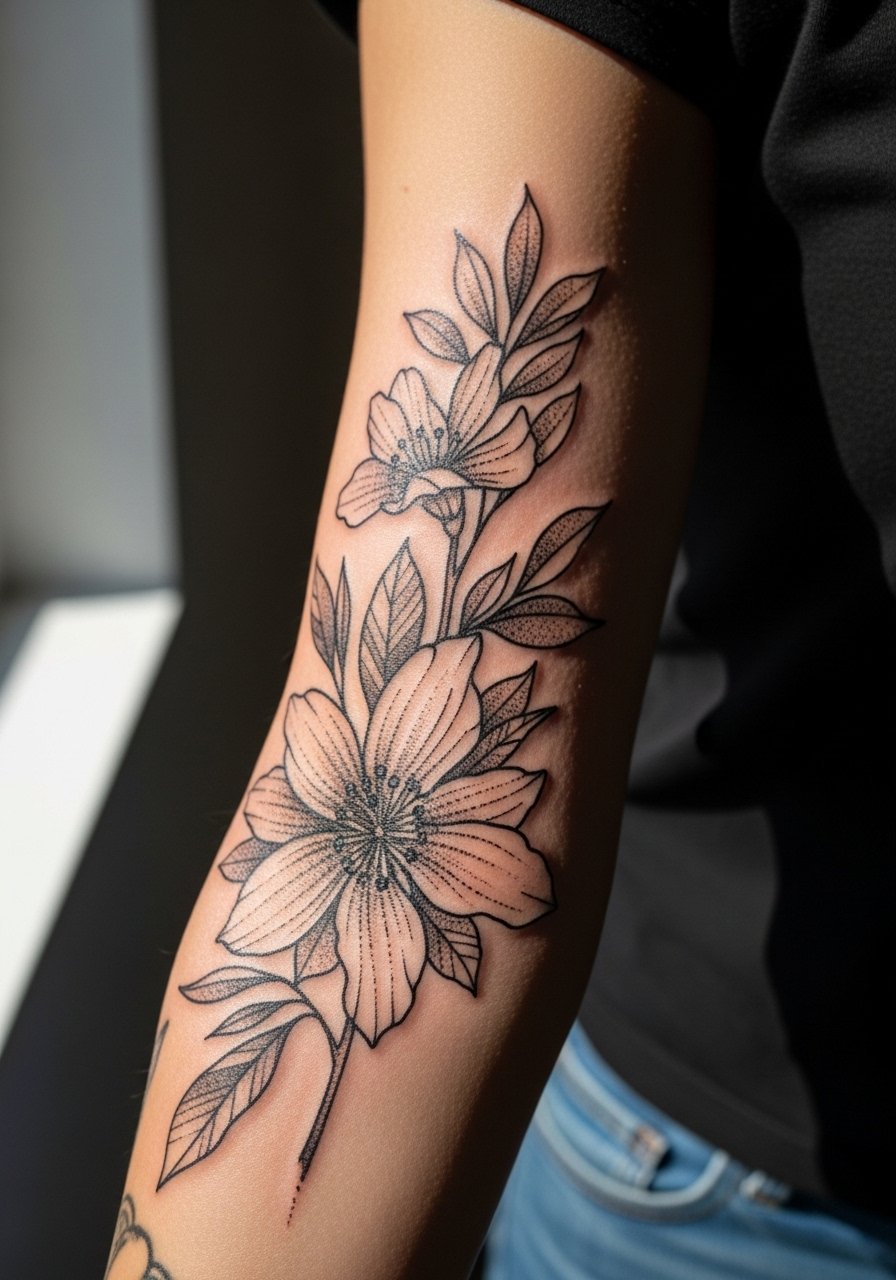
I've seen forearm botanicals keep their character for years when the artist balances negative space with slightly bolder primary veins. Ask for staggered stems and stipple shading behind the main linework so the piece breathes instead of packing ink tight. Fair warning, the inner forearm can soften under constant sunlight, so expect a light touch-up around year three if you spend lots of time outdoors. The session feels straightforward, moderate in pain, and usually takes two to four hours for an outlined half-sleeve. For showing it off, rolled sleeves or a loose button-down shirt frame the design without covering the contour.
2. Wispy Spine Vine
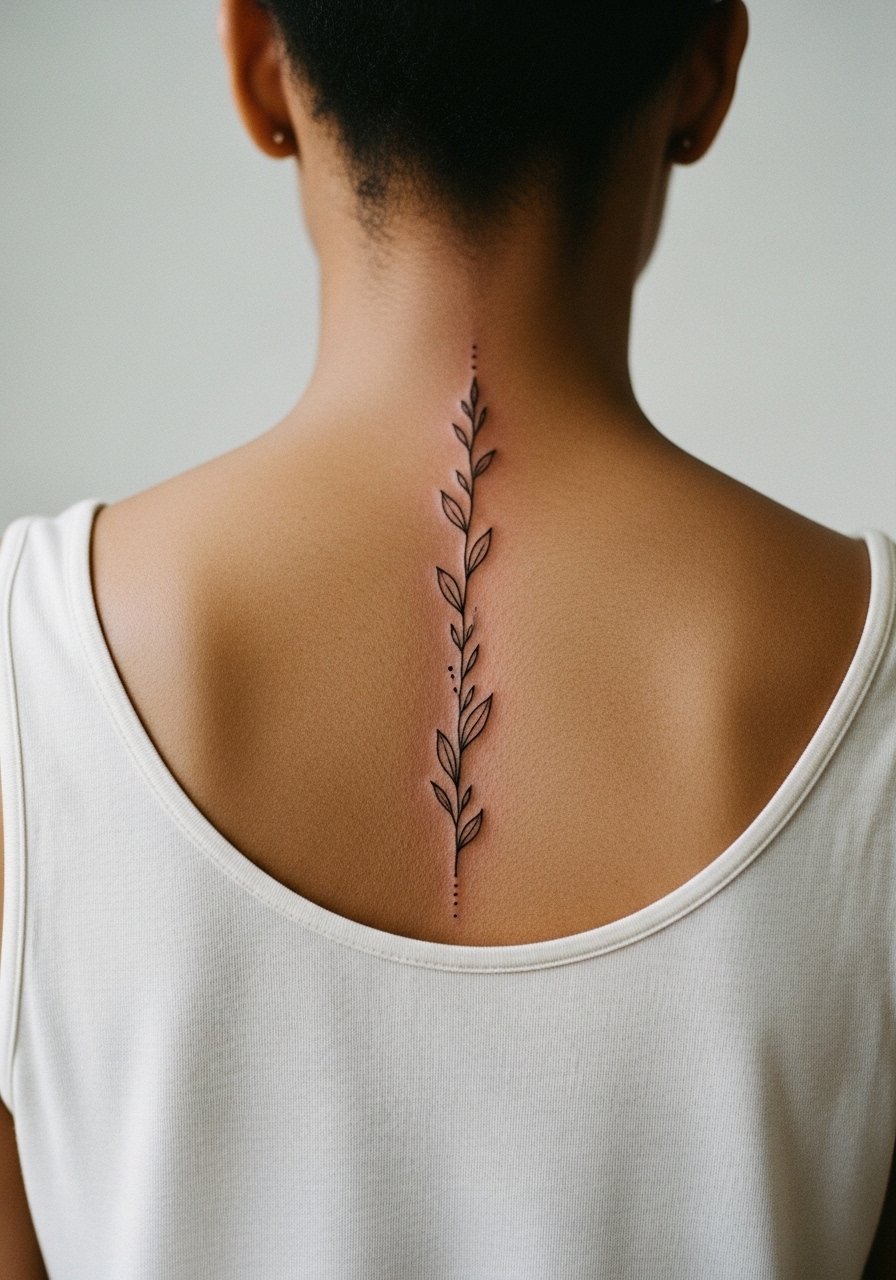
Most people do not realize how much movement the spine sees until they stand up after the session. The long, vertical flow reads elegant when the vine spacing leaves breathing room between branches. Pain is higher toward the center spine and lower near the shoulder blade, so plan for breaks and hydration during a longer session that can run three to five hours. For the session wear, pull on a button-down shirt worn backwards or a loose tank so the artist has clear access without you exposing more than necessary. Healed, this placement opens visually with skin stretch, so err toward bolder midlines rather than ultrafine ones.
3. Waterfall Thigh Band
Fair warning, the inner thigh is a high-movement zone and sessions can feel intense when needles cross tender skin. I recommend a band that hugs the curve rather than a densely packed panel. During consultation, ask the artist to sketch the band on while you stand so the flow matches how clothes will sit. Session wear should be shorts you can pull aside or a high-waisted bottom so access is easy. The healing window for thigh bands is forgiving because clothing can cover the area, but friction from tight fabrics will fade the edges faster. Expect one touch-up within two years for crisp edge rescue.

4. Smoky Collarbone Script with Flourish
There is a sweet balance between flowy script and collarbone anatomy that either flatters or fights the bone. For a collarbone placement, ask for a slight upward tilt at the central flourish so the line sits visually centered when you stand relaxed. The area is low on pain but high on visibility, so plan wardrobe that complements rather than competes. A thin chain or a thin chain pendant necklace sits above the script without crowding it. Expect light softening in shaded bits by year two, and budget a touch-up then if you want the flourish to stay crisp.

5. Flowing Paisley on the Ribcage
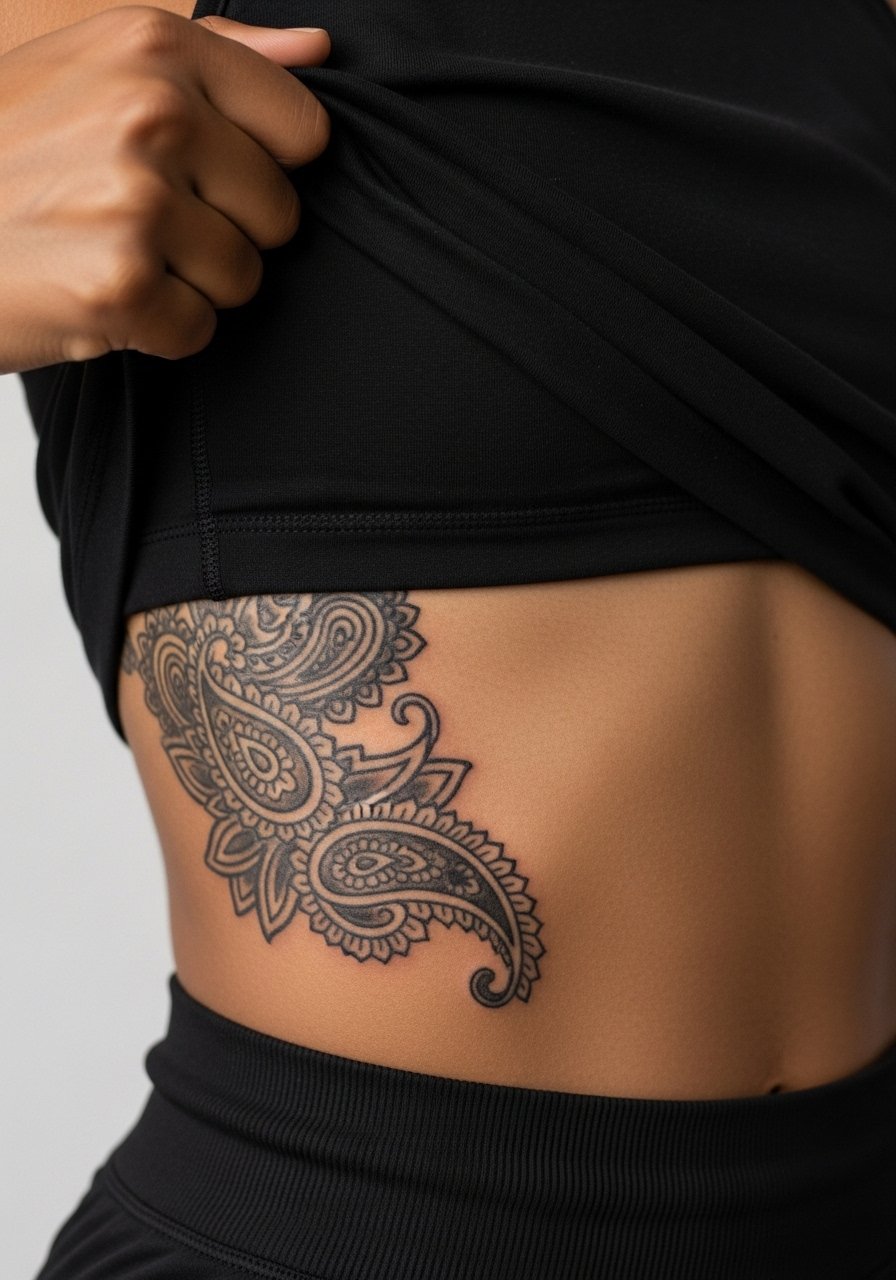
Fine line on ribs splits artists into two camps. One camp argues the skin stretch and breathing blur lines within two years. The other camp says with proper spacing and correct needle depth it settles fine. I mention both because this placement rewards someone who asks the artist where they stand before booking. The session can be painful because the ribcage sits over bone, and it often runs longer due to careful line placement. For longevity, request open internal spacing and soft whip shading behind the paisley motifs. For the session, wear a cropped top you can lift or a zip-up hoodie you can pull aside.
6. Whip-Shaded Peony on Upper Arm
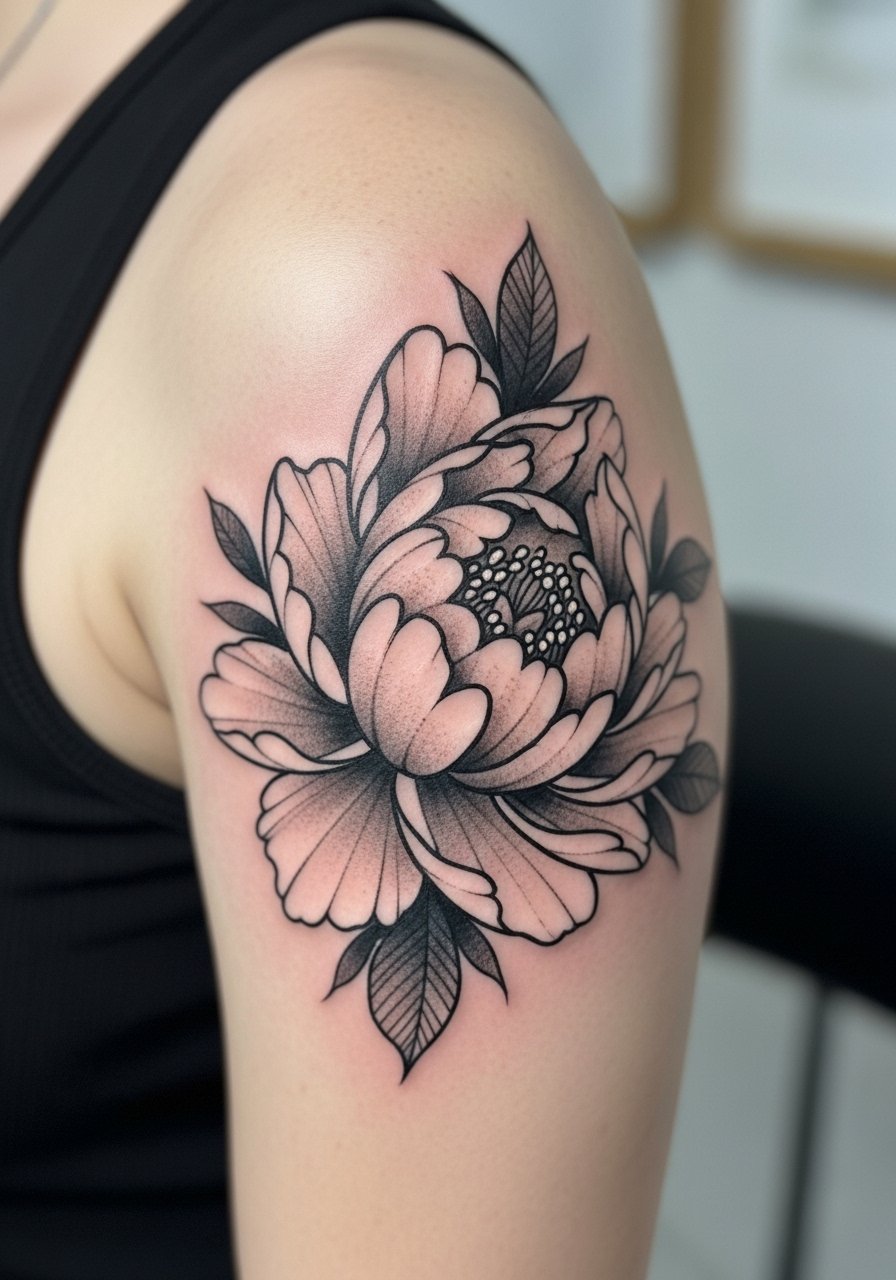
I've seen whip shading make peonies read three-dimensional without heavy saturation. The upper arm is forgiving for touch-ups and takes shading well, so ask for a balance of stipple highlights and whip-shaded shadows to keep soft edges. Pain is manageable and sessions often finish in one to two hours for a medium-sized bloom. If you want to show the shoulder cap, throw on a loose tank top for the appointment so the artist has clean access. Over time the petal edges may soften, but the contrast from darker inner shading helps the shape remain readable.
Studio Day Picks
The forearm, ribcage, and upper arm pieces above need different prep, and these small items smooth the session and the first week of healing.
-
Stencil transfer paper kit. Lets you preview the line placement on skin and saves time on the chair for designs where flow matters.
-
Topical numbing cream. Apply per label about 45 minutes before the session to ease rib and inner thigh sensitivity without changing how the artist sees the stencil.
-
Thin protective film roll. Useful for small wrist or finger pieces where daily washing and friction risk blurring fine linework.
-
Fragrance free gentle body wash. Cleans the area during showers without stripping the healing stencil or irritating delicate stipple shading.
-
Aquaphor healing ointment. A thin layer for the initial days keeps moisture balanced for fine line and shaded areas, helping lines settle without clogging.
7. Flowing Wave Calf Piece
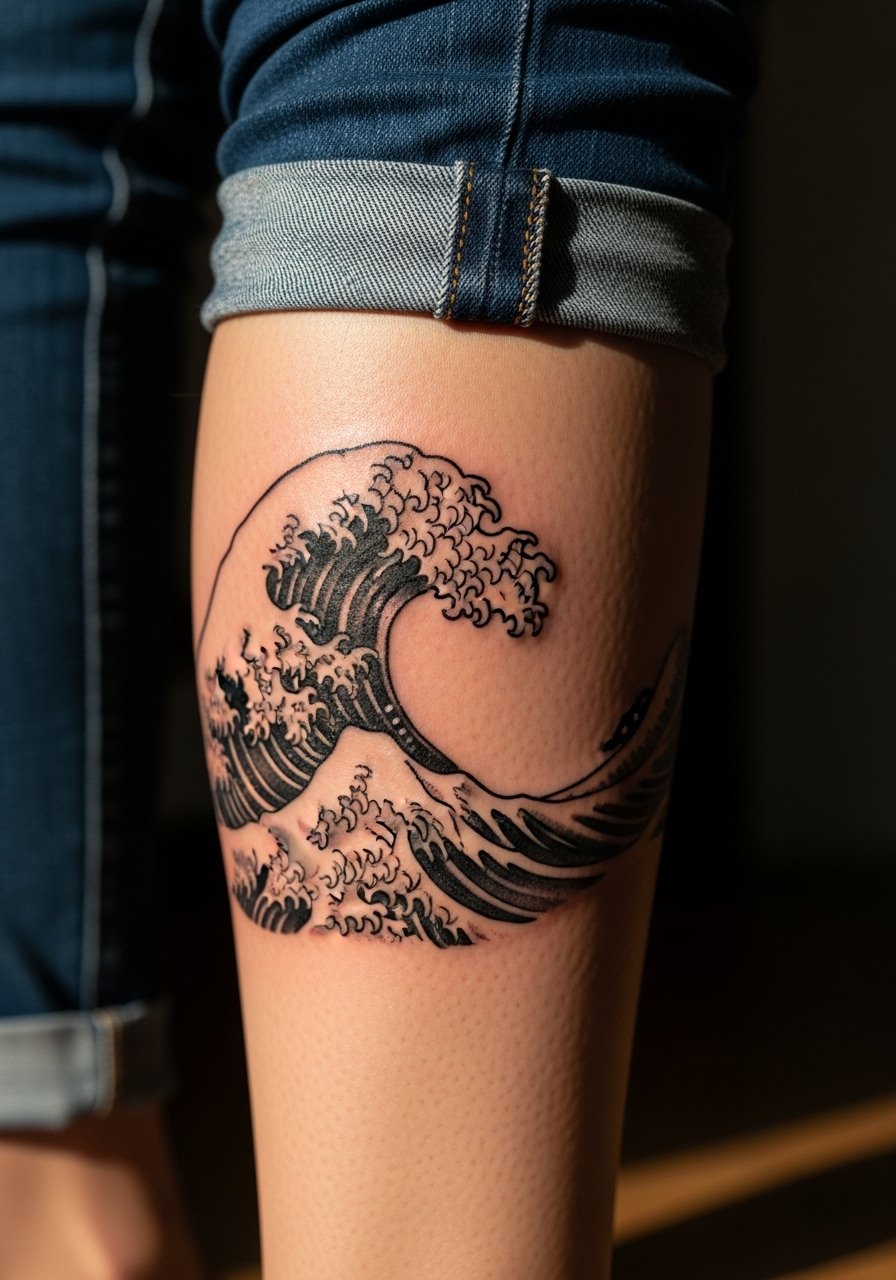
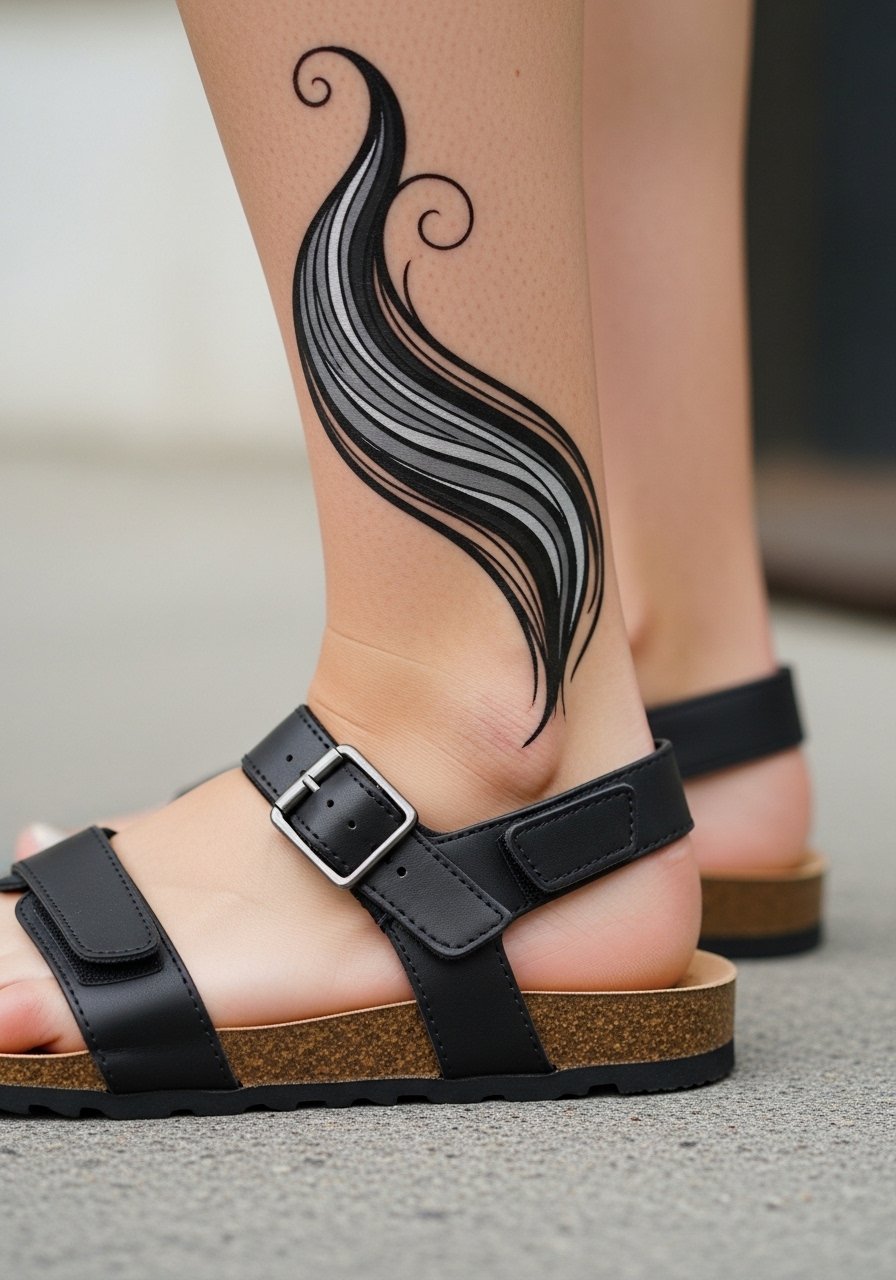
Visual impact leads here. Calf pieces read well from a distance because of natural contour and muscle. The area tolerates longer sessions and holds saturation, making it a good canvas for fluid black and grey gradients. Discuss how the design will sit when you walk and where the cadence of waves should align with muscle flow. Sessions feel medium in pain and can span two to four hours for a panel. For showing the calf in warm months, a midi skirt or rolled pants pairs well without covering the art.
8. Delicate Ankle Crescent
The ankle sees a lot of daily friction and shoe contact, which speeds edge softening. A crescent band that hugs the bone rather than crossing the ankle joint will last cleaner. The session is quick but can sting near the bone. For healing, loose socks and soft footwear help; avoid tight trainers for the first week. If you want it visible, low-cut shoes or sandals show the arc without rubbing. Expect a light touch-up in the first 12 to 18 months to keep the crescent edge sharp.

9. Wind-Blown Sleeve Edge
A wind-blown motif along the sleeve edge works best when negative space is intentionally left between strands. The biggest mistake is asking for too many small overlaps that merge over time. During consultation, have your artist map where each flow line ends so the sleeve edge reads airy and not cluttered. Sessions for edge pieces run from one to three hours depending on coverage. For casual showing, rolled-up cuffs or a linen short-sleeve shirt keeps attention on the outer forearm without stealing focus.

10. Crescent Moon Behind the Ear
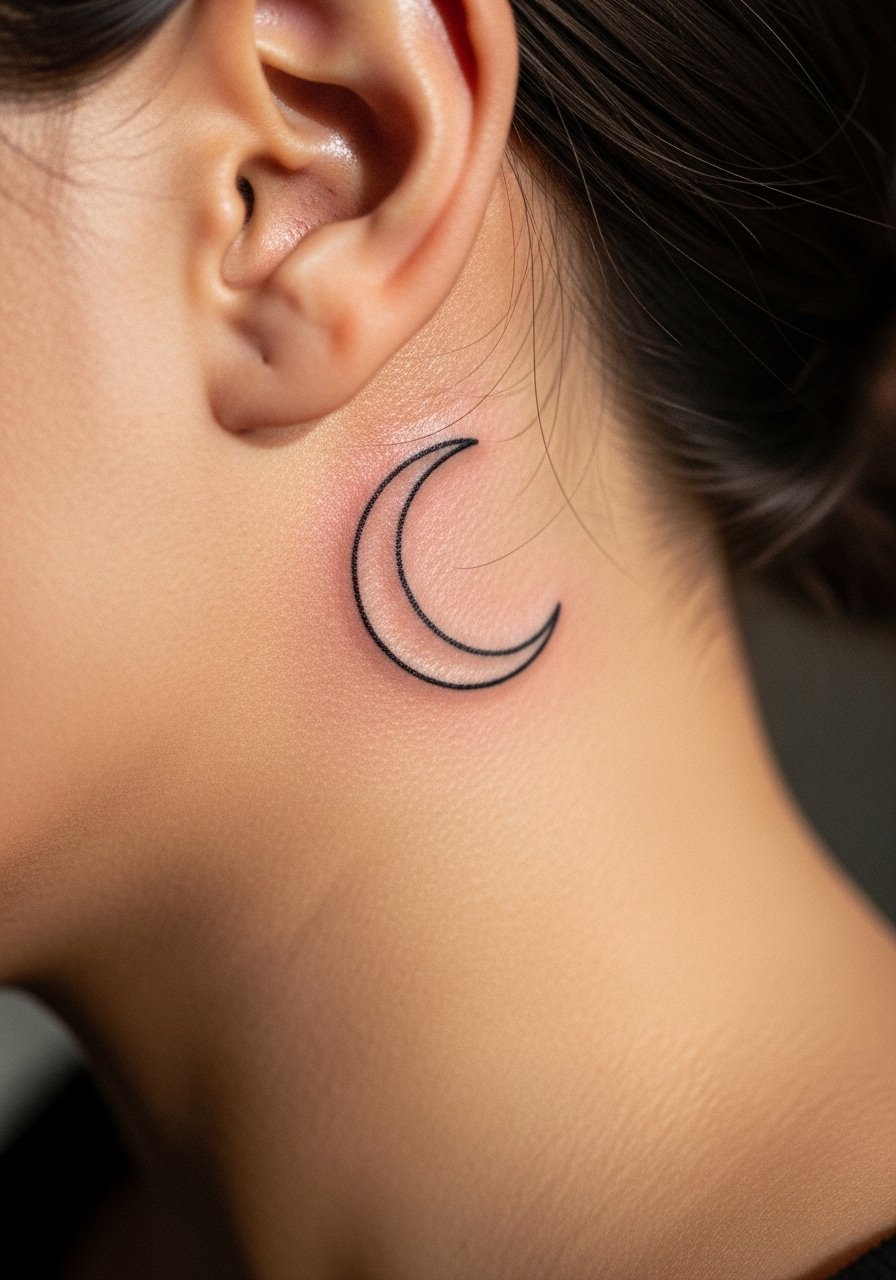
When done behind the ear, keep the motif small and placed on the skin below the hairline on the neck to avoid awkward visibility. The area is tender but sessions are short. Consultations should include a hairline check so the curve sits where your style will show it. This placement is subtle for daily life and can be hidden by hair if needed. For professional considerations, note that head and neck placements still affect hiring in some industries. Expect delicate fading because hair products and neck movement touch the zone.
11. Flowy Mandala Sternum Panel
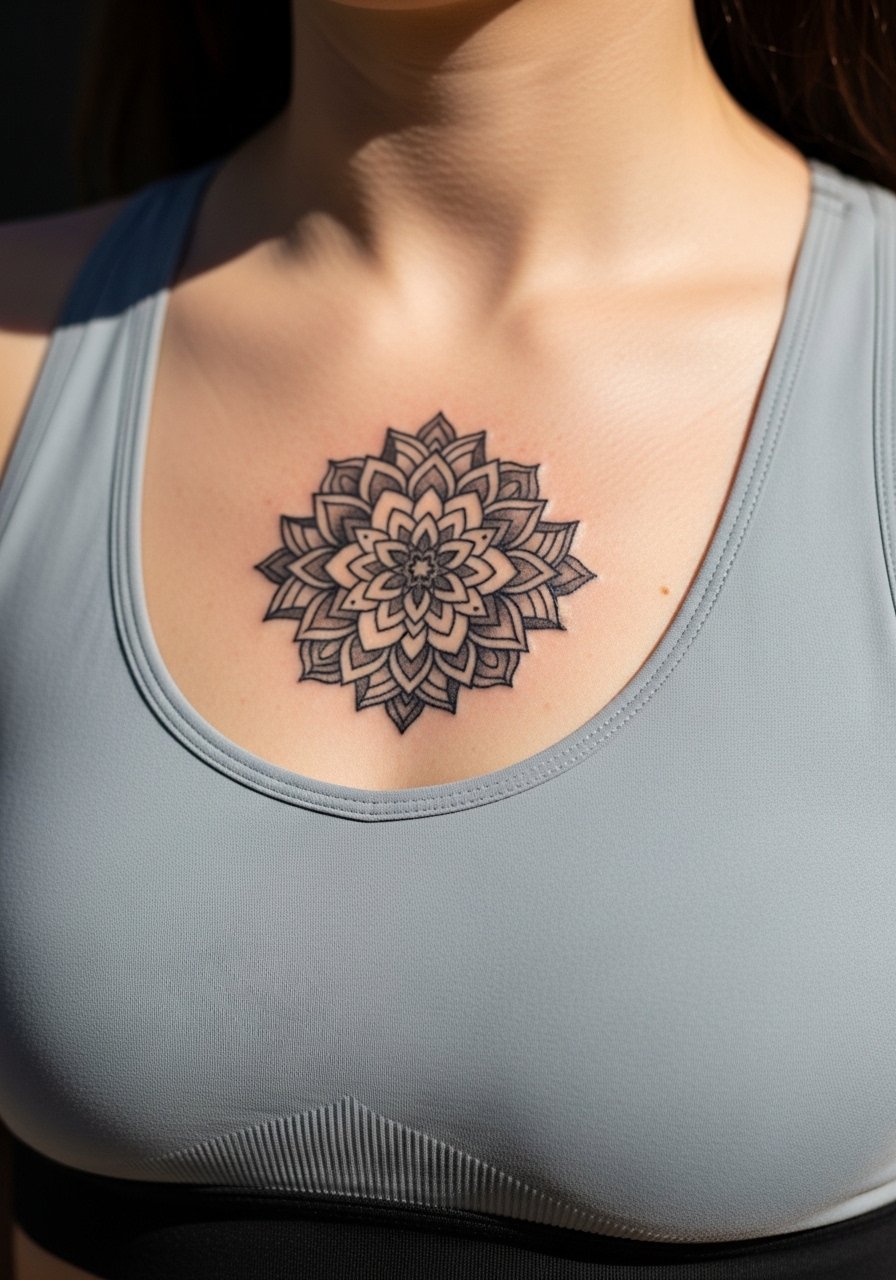
Artists split on dense mandala work across the sternum. One group warns tight radials on sternum blur with breathing and chest movement. The other group says spacing and dot work prevent clumping. A middle path is to keep the central mandala slightly raised in saturation and send radiating, airy dots outward. The sternum session is intense for many and requires short breaks. Wear a fitted sports bra or bandeau during the appointment so only the sternum area is exposed. Healed, the design can remain legible for years if negative space is respected.
12. Ribboned Shoulder Blade Sweep
Personal observation: shoulder blade pieces benefit from soft gradients that read against clothing straps. Ask for a ribboned flow that terminates in stipple shading so the design does not run into the scapula crease. Sessions are moderate in pain and often split into two sittings for larger panels. For session wear, a button-down shirt worn backwards or a low-back top gives the artist access without you feeling exposed. Over time, the outer edges may soften but the core ribbon holds when contrast is preserved.

13. Hip-Flow Lace Panel
The hip area sees a lot of clothing friction so lace-like patterns should avoid ultra-fine filler lines near waistband zones. A common mistake is bringing motifs too close to where jeans sit, which causes edge loss. When you consult, mark where your waistline typically hits in the pose you wear most. Sessions can be uncomfortable because the hip is sensitive near bone, but overall healing is steady if loose clothing is worn post-appointment. Consider a slightly bolder midline in the lace to preserve silhouette under fabric pressure.

14. Feathered Nape Accent
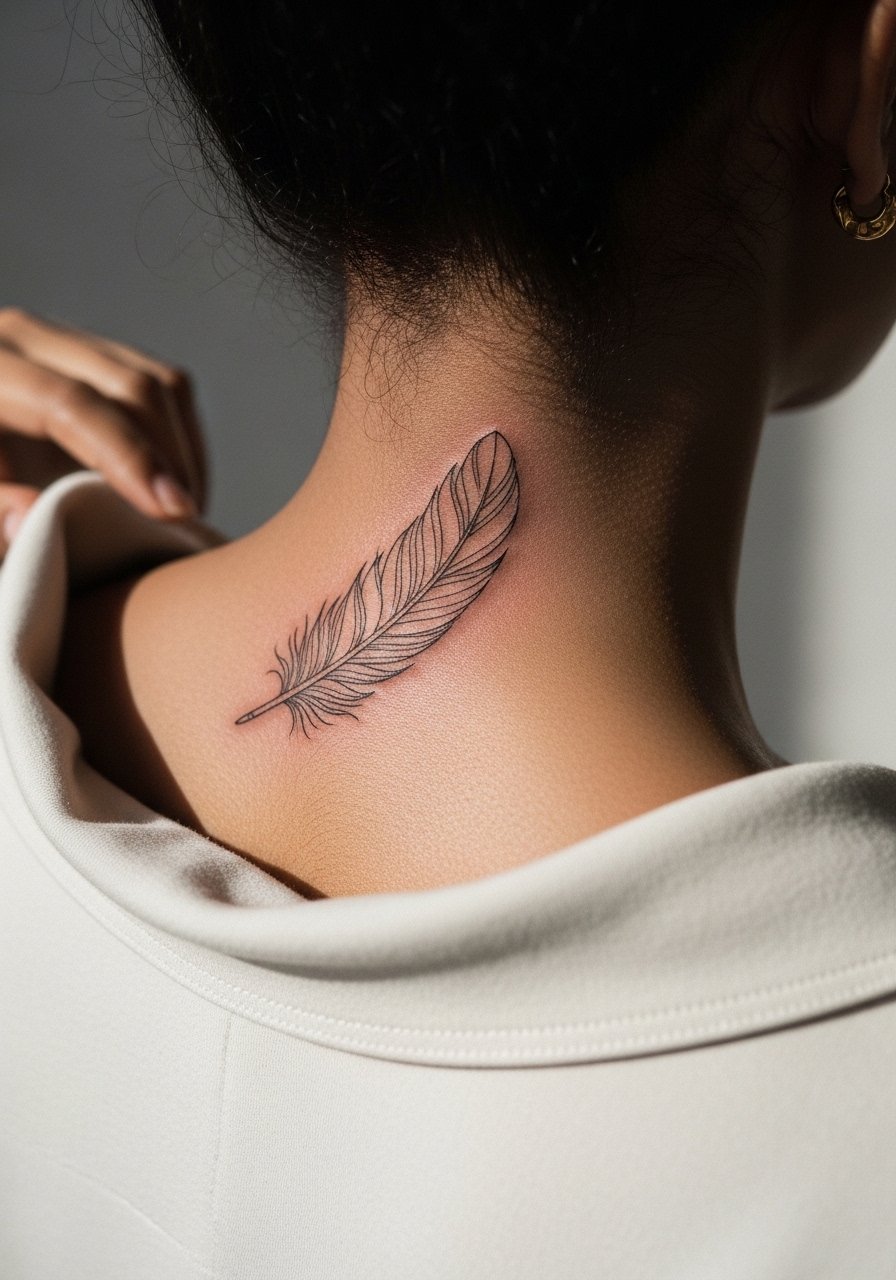
A feathered nape piece needs to sit below the hairline and above clothing, framed by a wide-neck shirt pulled slightly to one side during the appointment. The area tolerates delicate lines but can blur if strands are too dense. For visible staging, short hair or an updo shows the nape accent cleanly. Sessions are quick and low to medium in pain. Choose stipple highlights that age into soft texture rather than thin parallel lines. If you plan frequent hair dyeing, mention that to your artist because chemical exposure affects healing.
15. Flowing Script Along the Foot Arch
The arch is sensitive and moves a lot with walking, so keep script flowing with the foot's natural curve rather than across high-friction zones. The session stings but is usually short. A common version that fades quickly packs letters close to the sole, which blurs from pressure. For showing this piece, select low-profile shoes or flat leather sandals that reveal the arch. Expect a touch-up timeline of one to two years because daily wear can soften thin strokes.

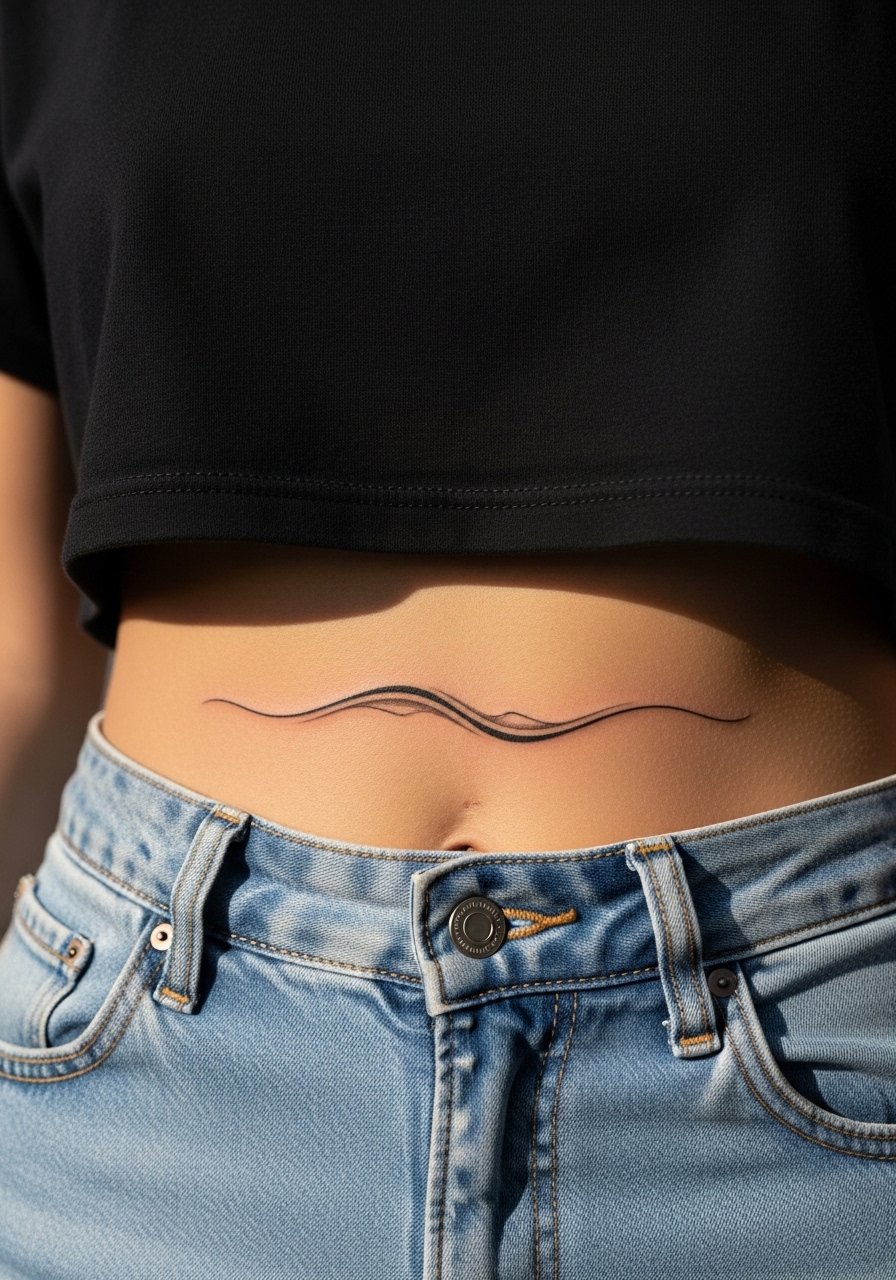
16. Minimalist Flowing Stomach Accent
Stomach placements shift with weight and posture, so ask for a design that keeps main lines anchored to immobile landmarks like the hip bone. The biggest mistake is choosing symmetrical density over asymmetrical flow, which can buckle with natural body changes. Sessions may feel moderately painful and require short breaks. For the session, wear a cropped tee and high-waisted bottoms so only a narrow strip of skin is exposed. Healed, the design softens at edges, so allow more negative space to avoid visual muddiness over time.
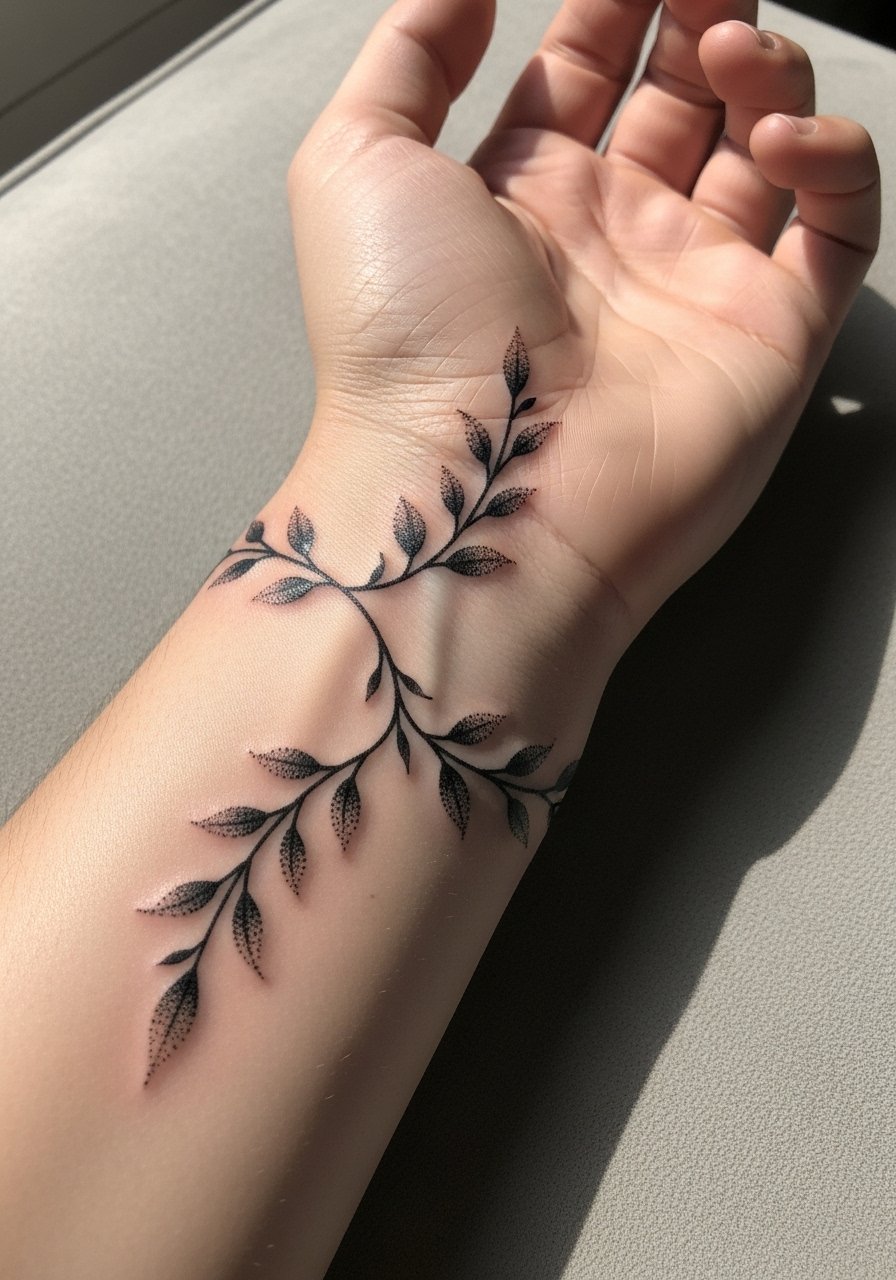
17. Stippled Vine Wrap Around the Wrist
Mistake lead: packing tiny vines around the wrist without leaving room to breathe results in mashed detail within a year. The wrist is high-motion and high-wash, so ask for slightly bolder stems and stipple shading that breaks up the silhouette. Sessions are quick but the area is sensitive. For showing and styling, stacked bracelets or a set of dainty stacked bracelets highlight the wrap without crowding the linework. Expect touch-ups at 12 to 24 months, especially on the inner wrist where friction is highest.
18. Black and Grey Flowing Back Panel
Visual impact lead. A large back panel with flowing clouds and ribbons benefits from layered saturation in darker anchors and lighter graduations above. The session often splits into multiple days because of scope and the body's soreness. For wearing, open-back dresses or a backless top show the sweep without obstruction. Healed results age well when the artist keeps core contrast in the darkest areas and leaves soft transitions rather than edge-heavy fins that can soften into blur.

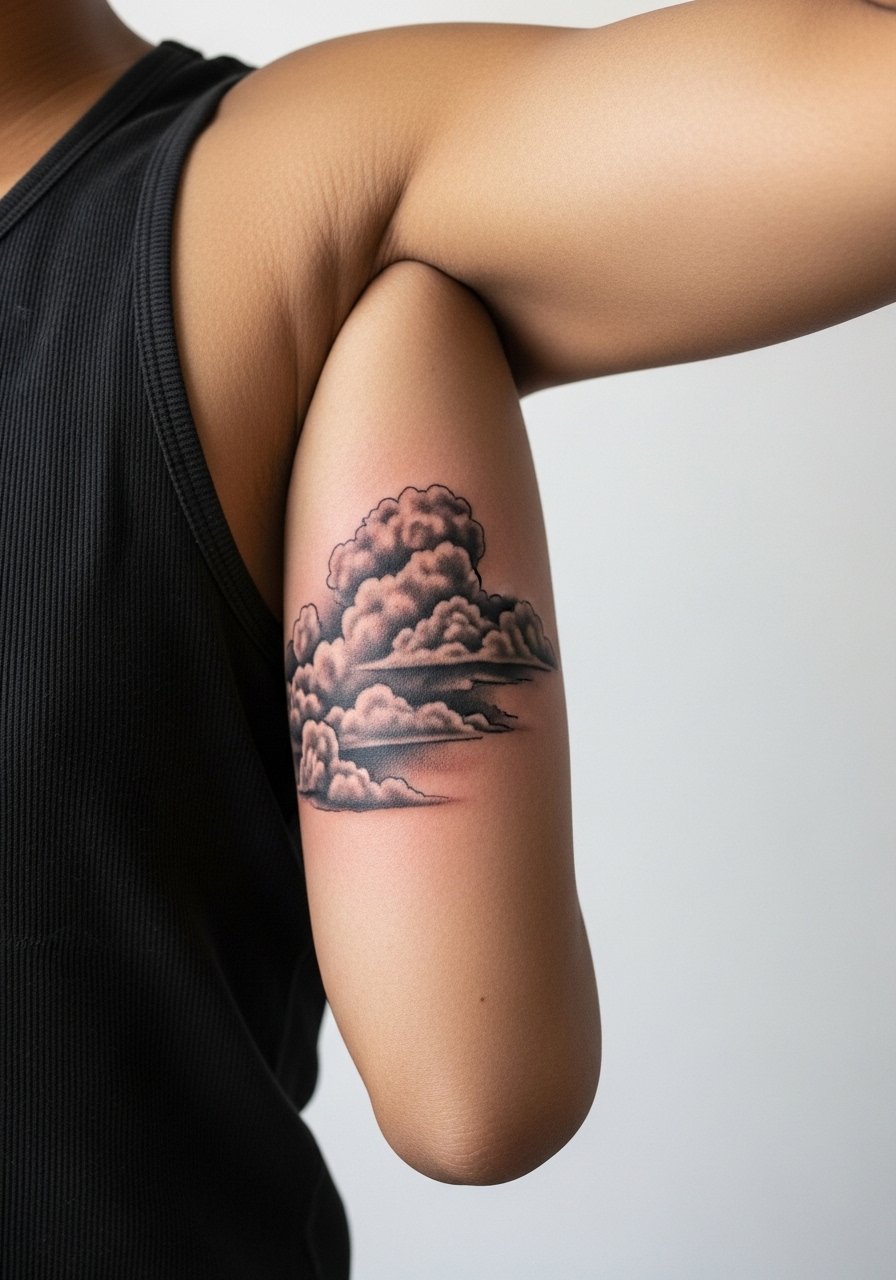
19. Micro-Realism Cloud on Inner Bicep
Controversy lead: some artists avoid micro-realism on inner biceps because the skin there can be looser and detail may lose definition. Others argue that with correct depth and dot work it holds. The truth depends on the artist's comfort and your skin elasticity. If you pursue it, ask for slightly larger tonal areas and stippling instead of ultra-fine lines. Session pain is moderate. For placement that stays private, inner bicep pieces are easy to hide under sleeves and age predictably when shading is slightly more saturated.
20. Flowing Celtic Knot on the Calf
There is a temptation to shrink complex knotwork to fit a narrow space. The visual mistake is under-sizing; knots need room to avoid the lines blending. Plan for broader bands and clearer over-under passages so the knot language reads at six months and five years. Sessions are comfortable for most people and heal reliably with minimal friction when wearing low socks. For warmer months, pair with athletic shorts or rolled pants to show the knot cleanly.

21. Floating Petal Finger Band
Finger work is high-risk for fading and blowout because skin is thin and constantly washed. The best versions use slightly bolder single-line bands and minimal internal detail. For what to tell your artist, ask for reinforced outline and plan a touch-up at 6 to 12 months. Hand tattoos still affect hiring in some industries, so consider placement and career path. Styling-wise, a minimalist stack of rings can complement the band. Try a minimalist stacking ring set when showing the piece without overwhelming it.

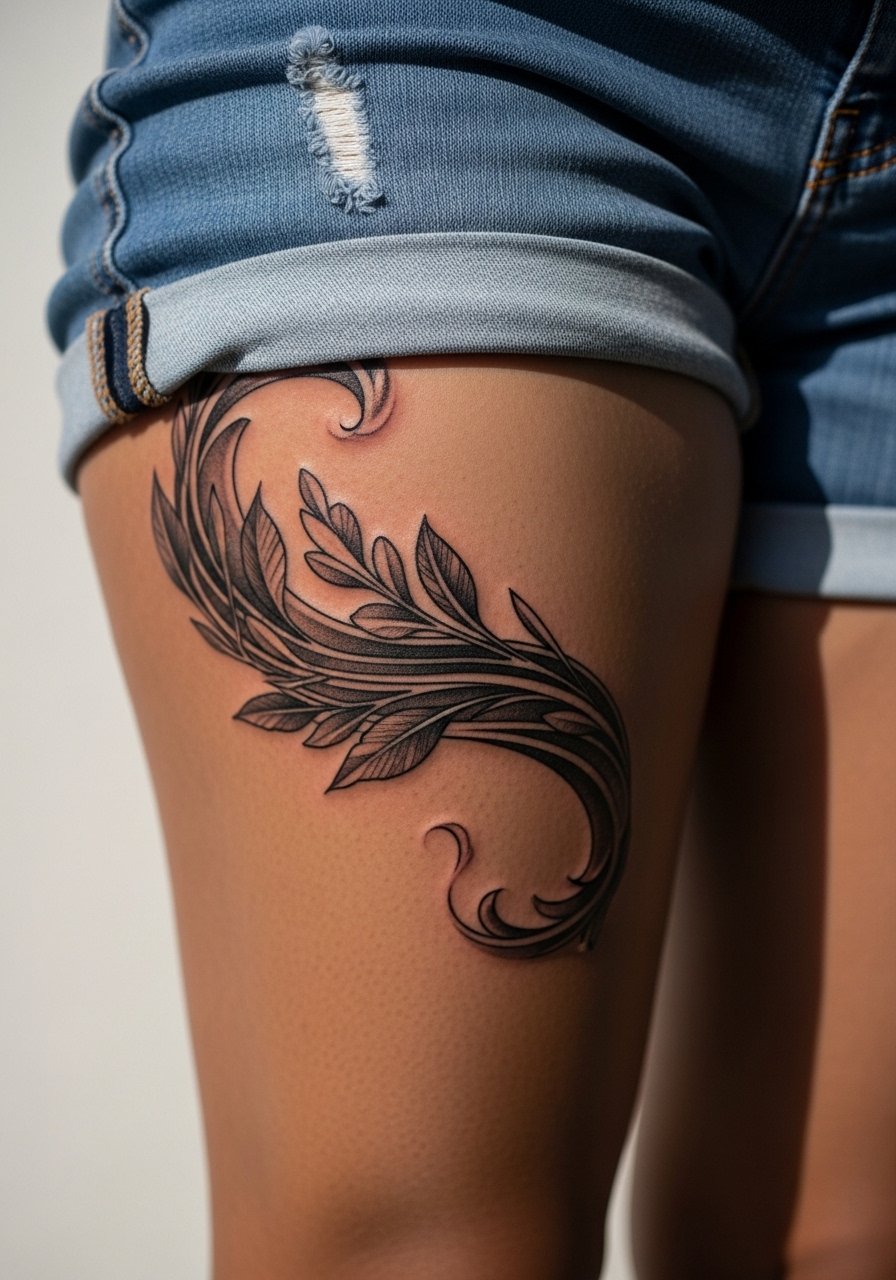
22. Flowing Botanical Thigh Panel
A thigh panel benefits from broad strokes and open leaf shapes that avoid the inner crease. Session pain varies with proximity to bone, but the outer thigh is comfortable and accepts shading well. Wear loose shorts for the appointment so the artist can access the entire panel. Over time the thigh holds saturation well if clothing does not compress the area. If you plan to change body composition, mention that in consultation so anchor points are placed where the skin moves least.
23. Liquid Ink Shoulder Cap
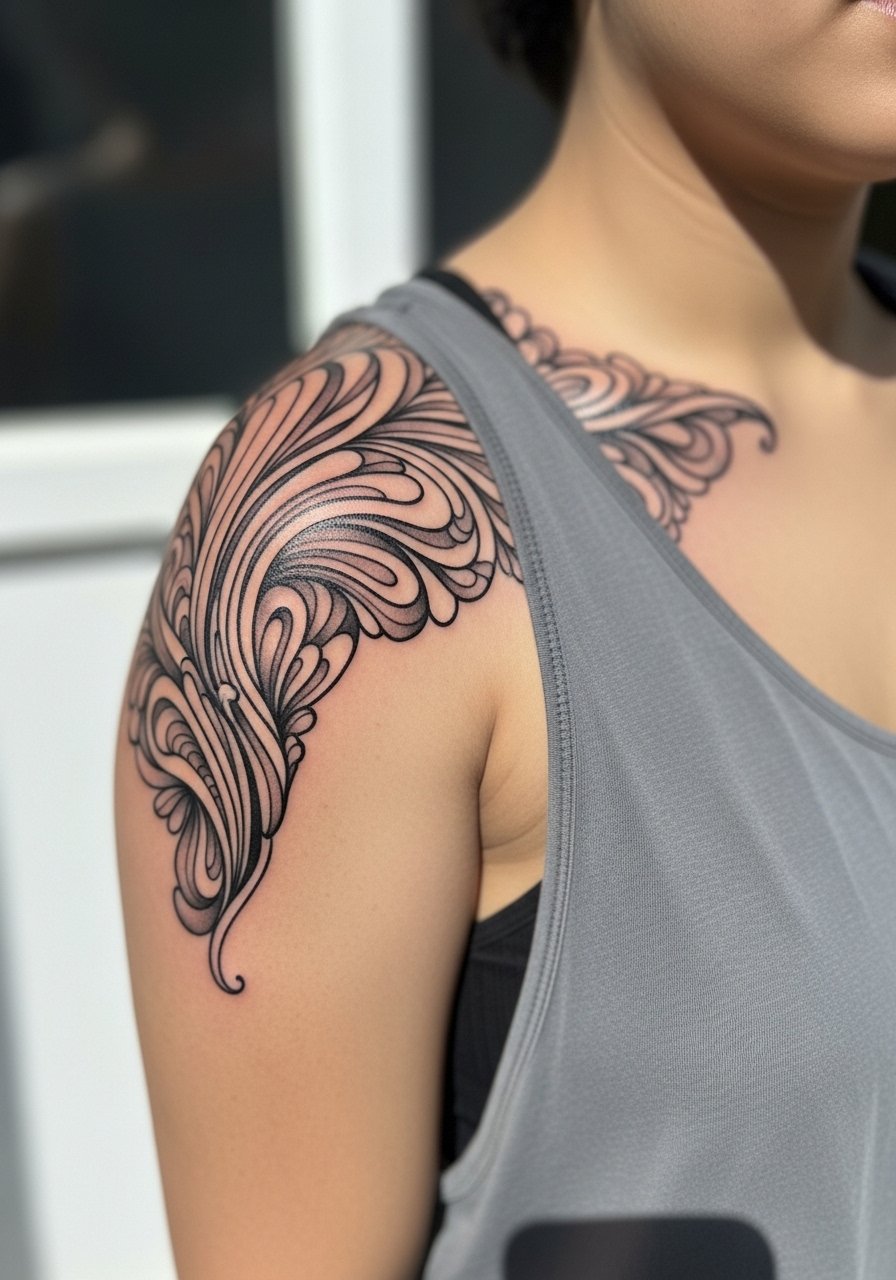
Visual and practical: shoulder caps age well when the darkest values sit near the shoulder peak and gradients soften outward. The biggest mistake is crowding detail into the cap where arm movement distorts composition. Sessions are short and tolerable, and a loose tank top gives clean access. For showing, a loose sleeveless tank or a halter keeps attention on the cap without competing fabric lines. Expect the outermost gradients to smooth over time while the core silhouette remains stable.
24. Flowing Script Across the Upper Chest
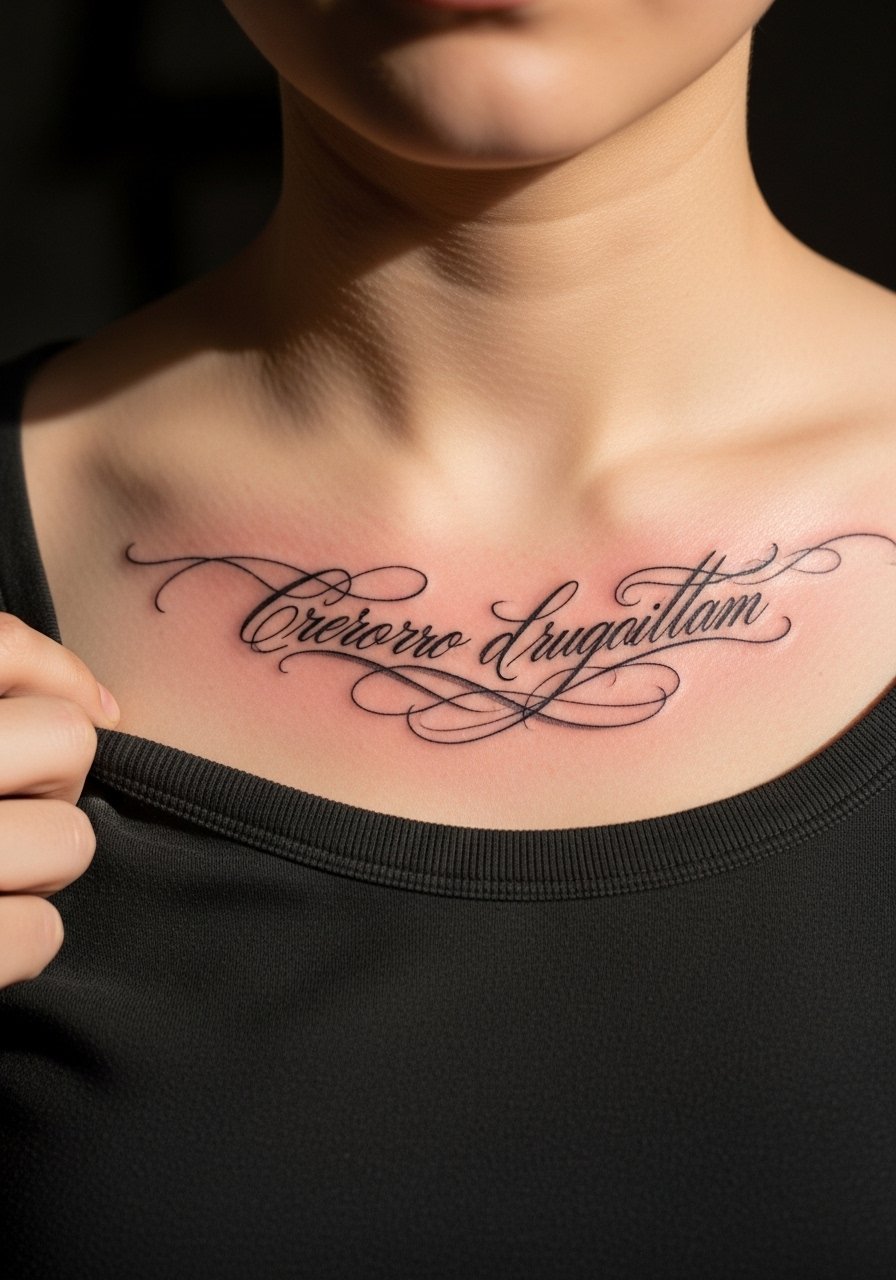
Consultation lead: when you place script across the upper chest, bring the exact line weight examples you prefer so the artist can adapt to collarbone anatomy. This area reads best with a gentle arch that follows the sternum and collarbone rhythm. Wear a wide-neck shirt pulled slightly aside for the session so the artist has clear access. For show-off pairing, a wide-neck blouse or a delicate pendant keeps the composition balanced. Healing is steady but expect subtle softening in long shaded tails.
25. Elbow Surround Flow
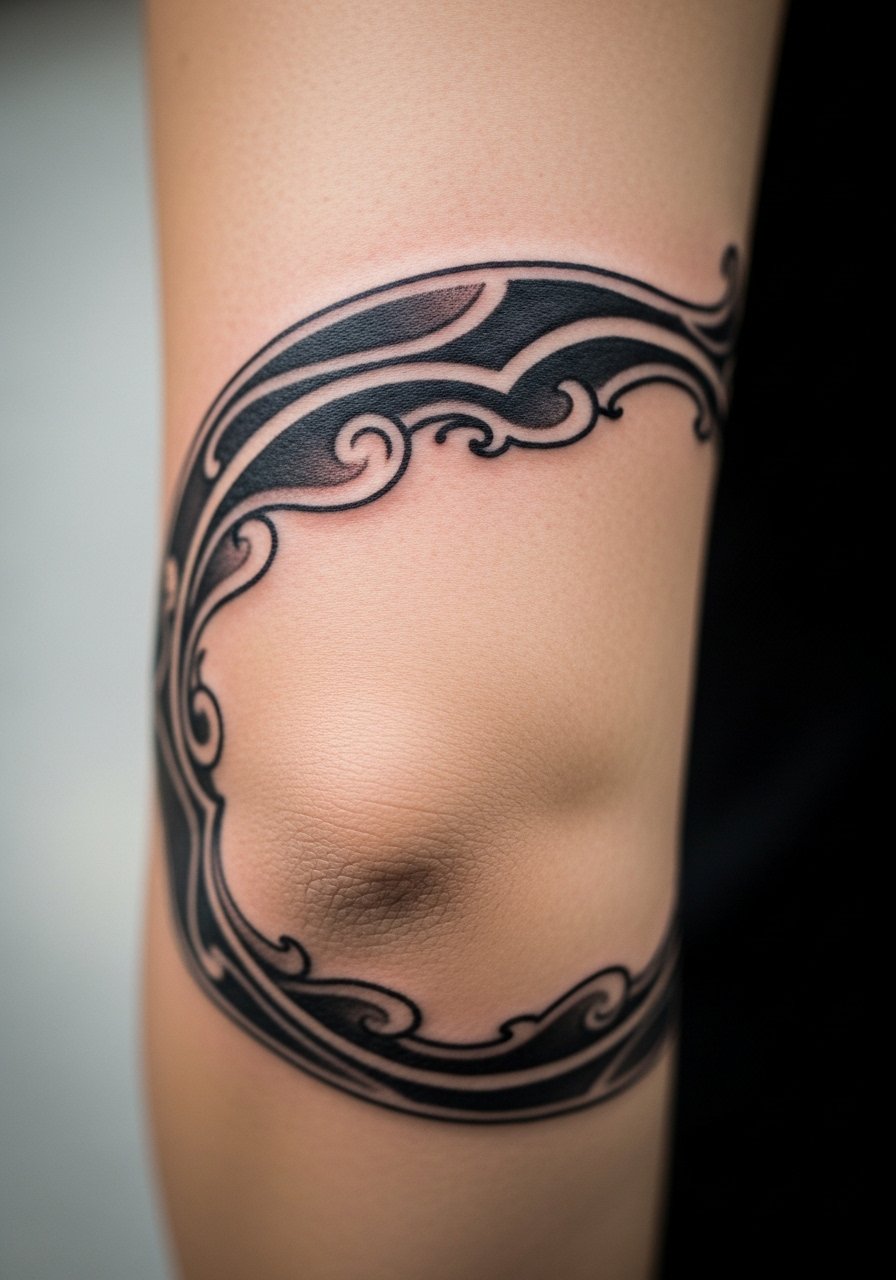
Pain warning: the elbow is candidly more painful and the skin texture there challenges saturation. Instead of packing heavy detail across the joint, design a surround that arcs around the hinge and uses negative space at the crease. That way the piece reads when your arm is both bent and extended. Sessions can be broken into short bursts. For longevity, accept that the absolute edge near the crease will need touch-ups sooner than areas with thicker skin.
26. Flowing Hairline Nape Connector
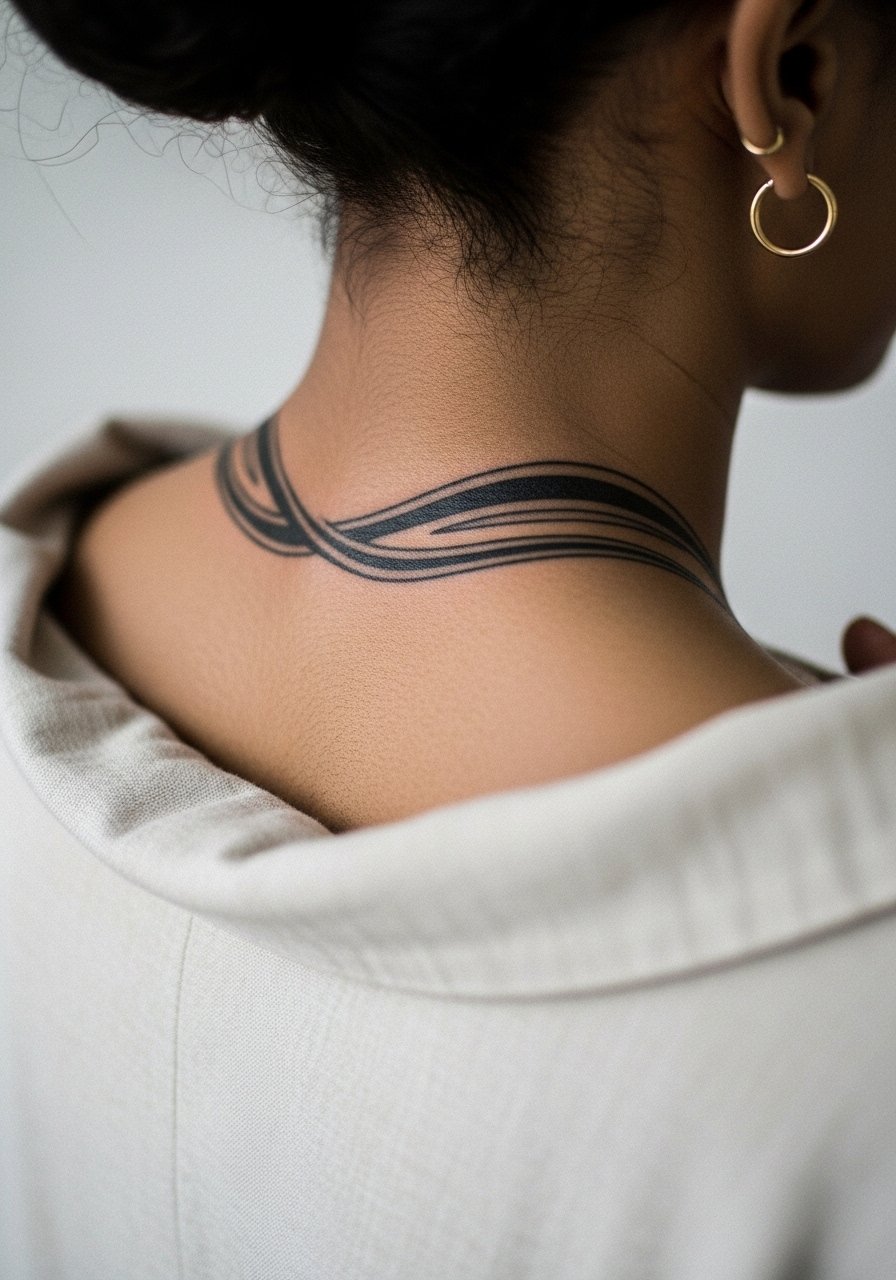
When a piece connects from nape to upper back, coordinate how your hair will sit most days so the connector peeks out naturally. The design benefits from soft stipple transitions where hair may intermittently cover the area. Sessions are quick and relatively low in pain. Wear a wide-neck shirt for the appointment and style your hair to confirm how the connection shows. The connector ages discreetly because hair can shield from UV, but mention dye schedules since chemicals affect pigment during healing.
27. Wind-Swept Ankle-to-Foot Sweep
A long sweep from ankle down the side of the foot should avoid high-wear zones like the sole or where straps rub. The best design arcs along the bone and finishes near the outer toes. Sessions involve the ankle and foot and can feel sharp near bone points. For footwear during healing, opt for slip-ons or sandals that do not press across the sweep. If you want it visible for evenings out, low-profile shoes or sandals with thin straps work without rubbing the ink while it settles.
Frequently Asked Questions
Q: Will fine black and grey flowy lines always need touch-ups sooner than heavier blackwork?
A: It depends on placement and how the design uses negative space. Fine lines on high-motion or high-friction zones like fingers, wrists, and ankles usually need touch-ups within one to three years. If you prioritize longevity, ask for slightly bolder primary strokes and airy shading behind them so the silhouette holds up.
Q: How should I dress to a ribcage or sternum session to keep modesty while giving the artist access?
A: Wear a fitted sports bra or a cropped top you can lift slightly for sternum and rib sessions. A zip-up hoodie also works because you can pull one side aside without full exposure. This keeps the session practical and comfortable.
Q: Are flowy mandalas or Celtic knots cultural appropriation if I like the look?
A: Some designs trace to specific traditions. One way people handle this is by using motifs as inspiration while avoiding direct replicas of sacred symbols. Ask your artist to adapt elements respectfully and learn a bit about the origin if the design has cultural weight.
Q: How much does sun exposure affect black and grey flowy work on forearms and legs?
A: From what I've noticed, UV is the single biggest factor in early fading. Regular sunscreen over healed pieces dramatically slows softening of edges. For show outfits, lightweight long sleeves or a wide-brim hat help protect forearms and shoulders when you're out for long periods.
Q: Can I get a detailed flowing thigh or calf piece if I plan to gain or lose weight?
A: Yes, but be upfront with your artist. Ask them to anchor the design to less mobile landmarks like the hip bone or knee and avoid tight symmetry across stretches of skin that may change. That approach preserves overall flow through body changes.
Q: Will a wrist vine affect my ability to wear watches or bracelets?
A: The wrist vine may compete with chunky watches. Choose thin watch bands or stackable bracelets during show-off moments, and avoid habitual tight bracelets during the first month of healing to prevent rubbing and early fading.
