
Fine line trends and viral wraps make back arm tattoos feel like instant wardrobe upgrades, but there are trade-offs most people miss. Lines that look razor-sharp in a phone photo can blur when the triceps flex, small pieces are surprisingly pricey to scale correctly, and the back of the arm is hard to inspect during the first week of healing. Read through these ideas and you will find designs that account for movement, session comfort, and wardrobe choices that actually show the work.
1. Neo-traditional Snake Wrap on Back Upper Arm
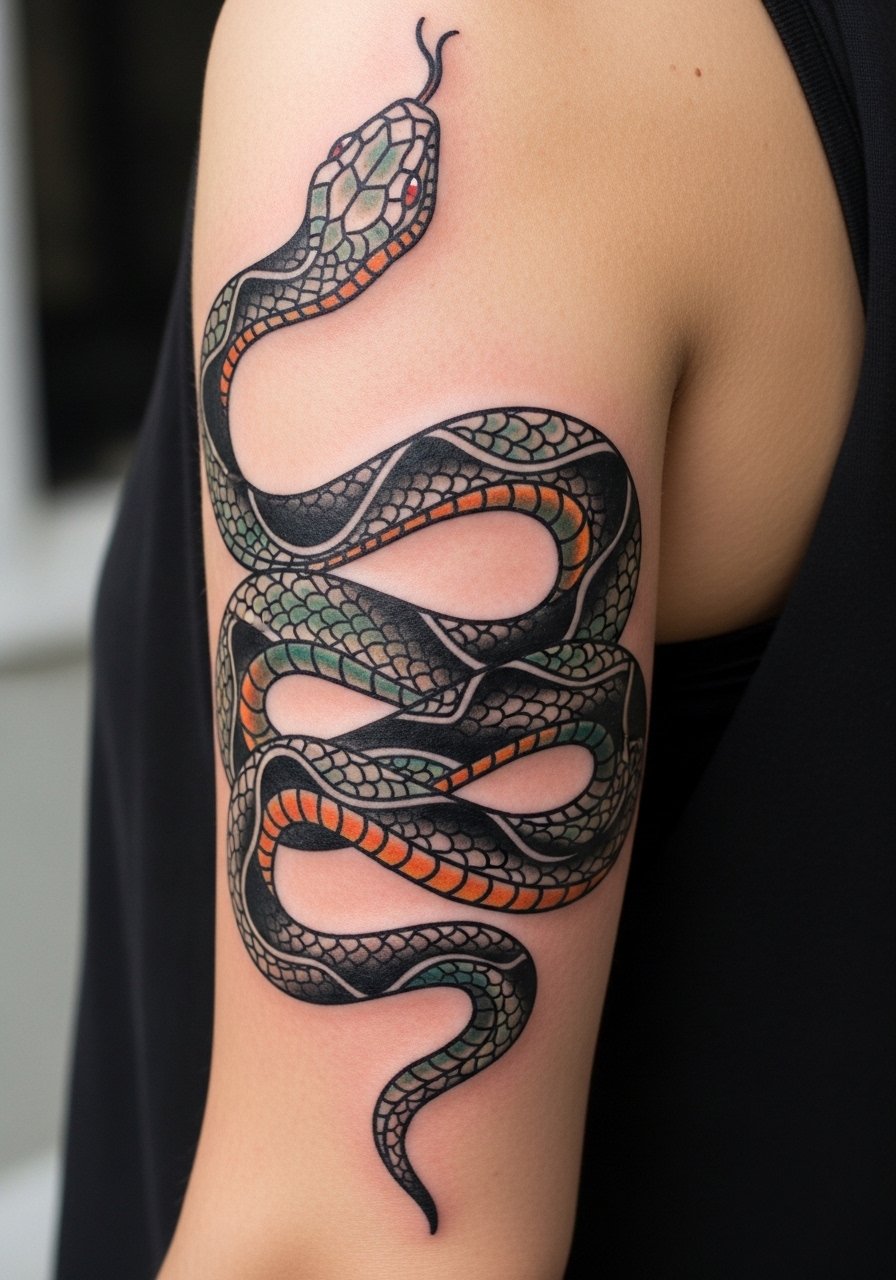
I recommend this when you want a dynamic piece that moves with the arm. Tell your artist to map the snake so its head sits toward the outer triceps when you relax, that keeps the focal point stable when you flex. The common mistake is shrinking the design to fit a small spot, which loses the wrap effect and looks cluttered after a year. Session feel is moderate; expect two shorter sittings rather than one long day. For showing it off, wear a fitted tank top that reveals the wrap and keeps attention on the coil.
2. Tribal Armband Pattern on Back Mid-Arm
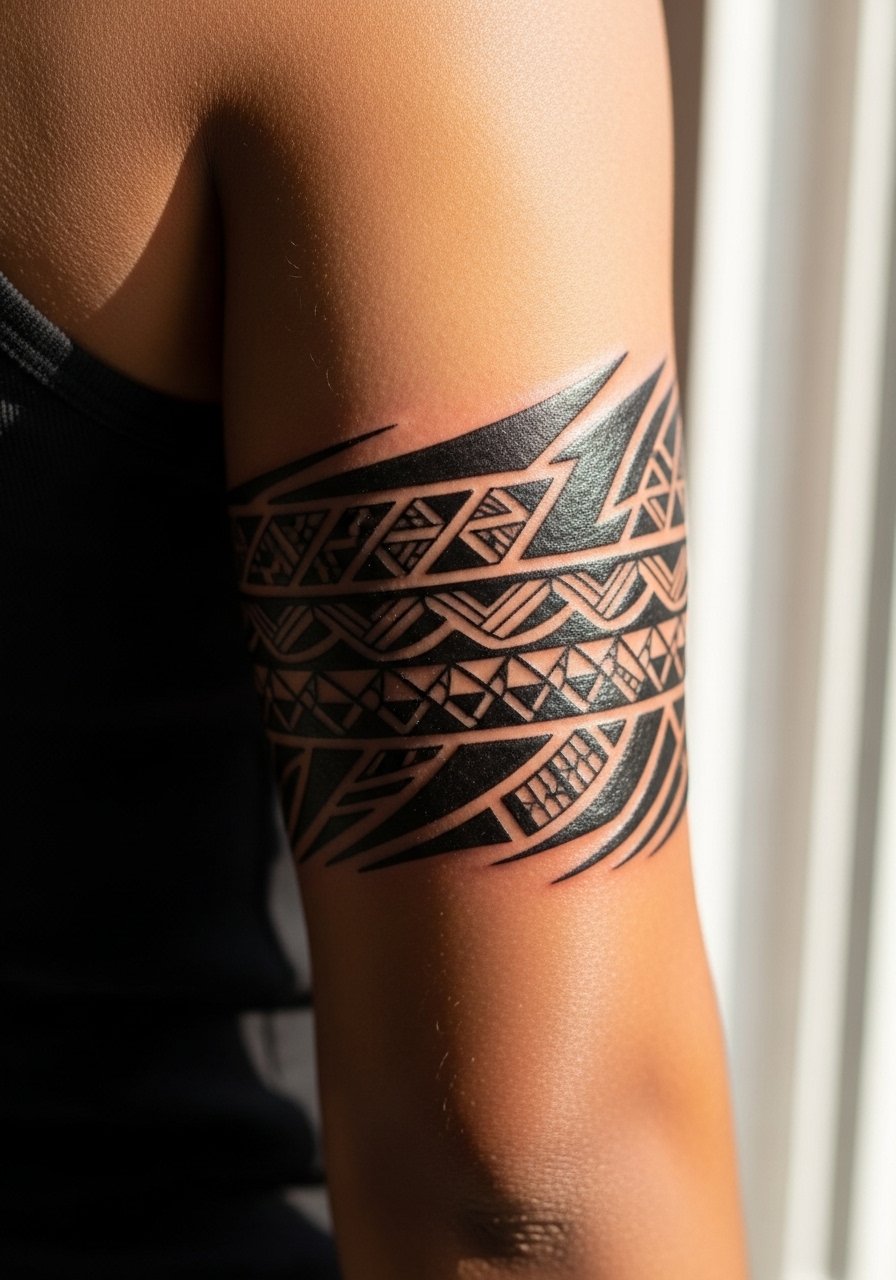
This style is all about optical flow and shape memory. Ask for consistent 1/8-inch outline weight and connected negative space so the pattern reads from every angle. The tribe-of-two debate here is clear. One camp favors dense blackwork that ages into a solid graphic, the other prefers thinner open motifs to reflect heritage patterns. If you want longevity through heavy gym use, err on the denser approach. Pain is lower than inner arm work. During the session wear a sleeveless tee so the artist can wrap the area without fabric bunching.
3. Jellyfish Tentacle Flow Draping Triceps
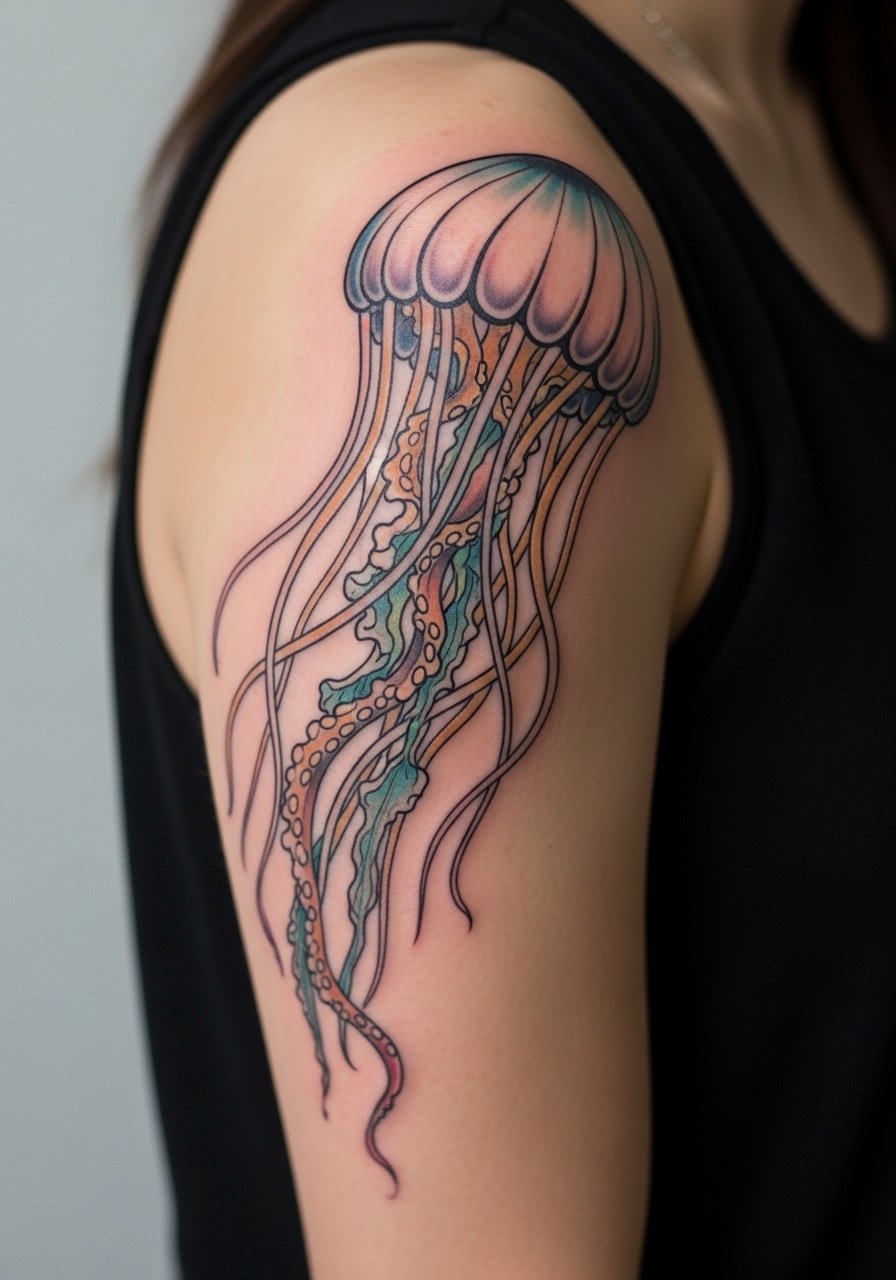
This design plays with translucency and motion, so ask the artist for layered grey washes and thin color veils rather than flat fill. It is a three-session piece if you want delicate tentacle tips that do not merge. A common aging issue is letting the tentacles bunch too close together, which blurs over time. If you lift weights regularly, map the longest tentacles away from the deepest flex lines to limit distortion. For session day, pull on a loose button-down shirt you can slide off without rubbing fresh ink.
4. Cross Silhouette with Shadowed Triceps Dip
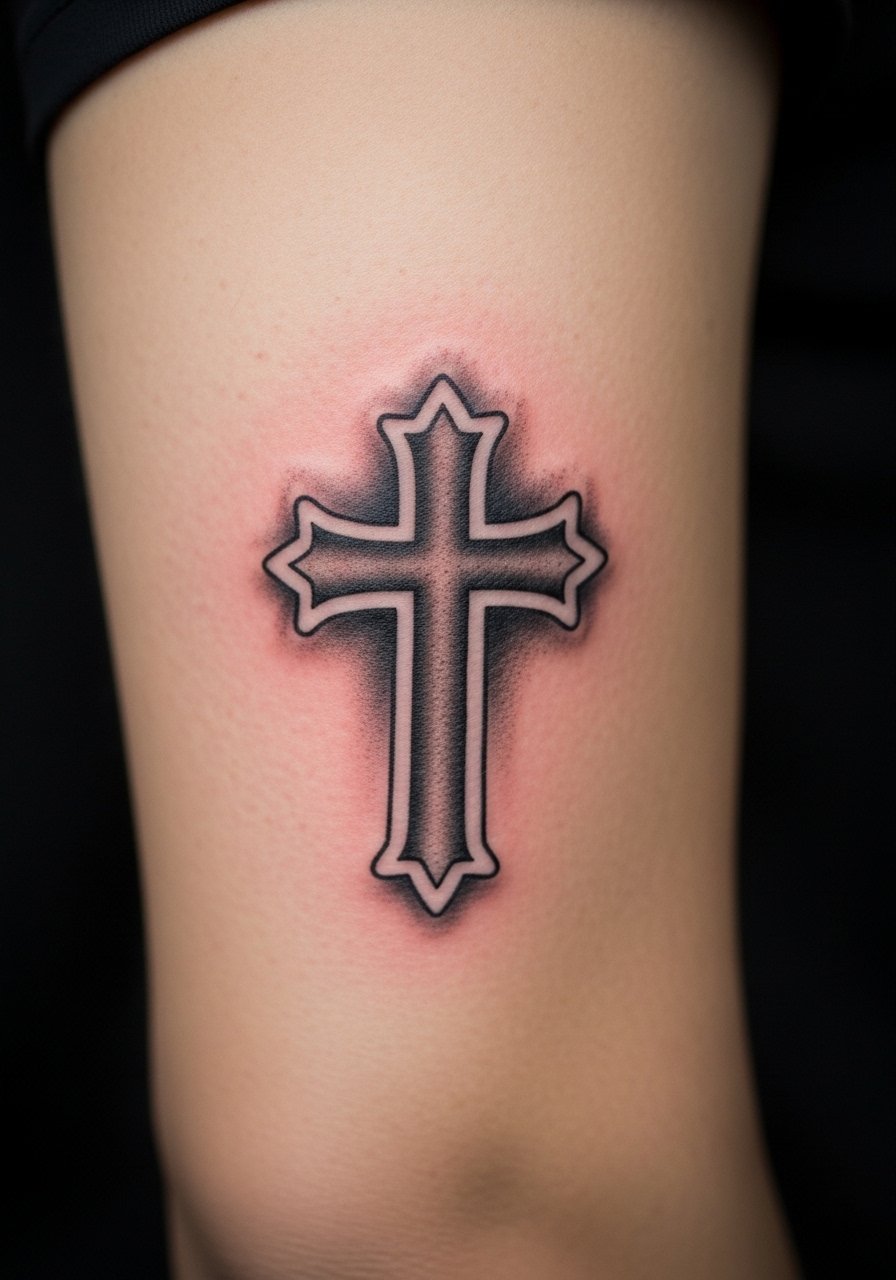
This compact blackwork hits hard visually and fits the muscular dip behind the triceps. When you consult, specify whether you want pure silhouette or small negative-space highlights to suggest depth. Expect one to two sessions and minimal pain compared with inner-arm pieces. The design that ages poorly is over-detailed shading inside the silhouette; keep the shadowing soft so touch-ups are straightforward at year three if needed. Pair with a short-sleeve henley for evenings when you want the arm to read cleaner in natural light.
5. Nature Mountain Landscape Across Back Upper Arm
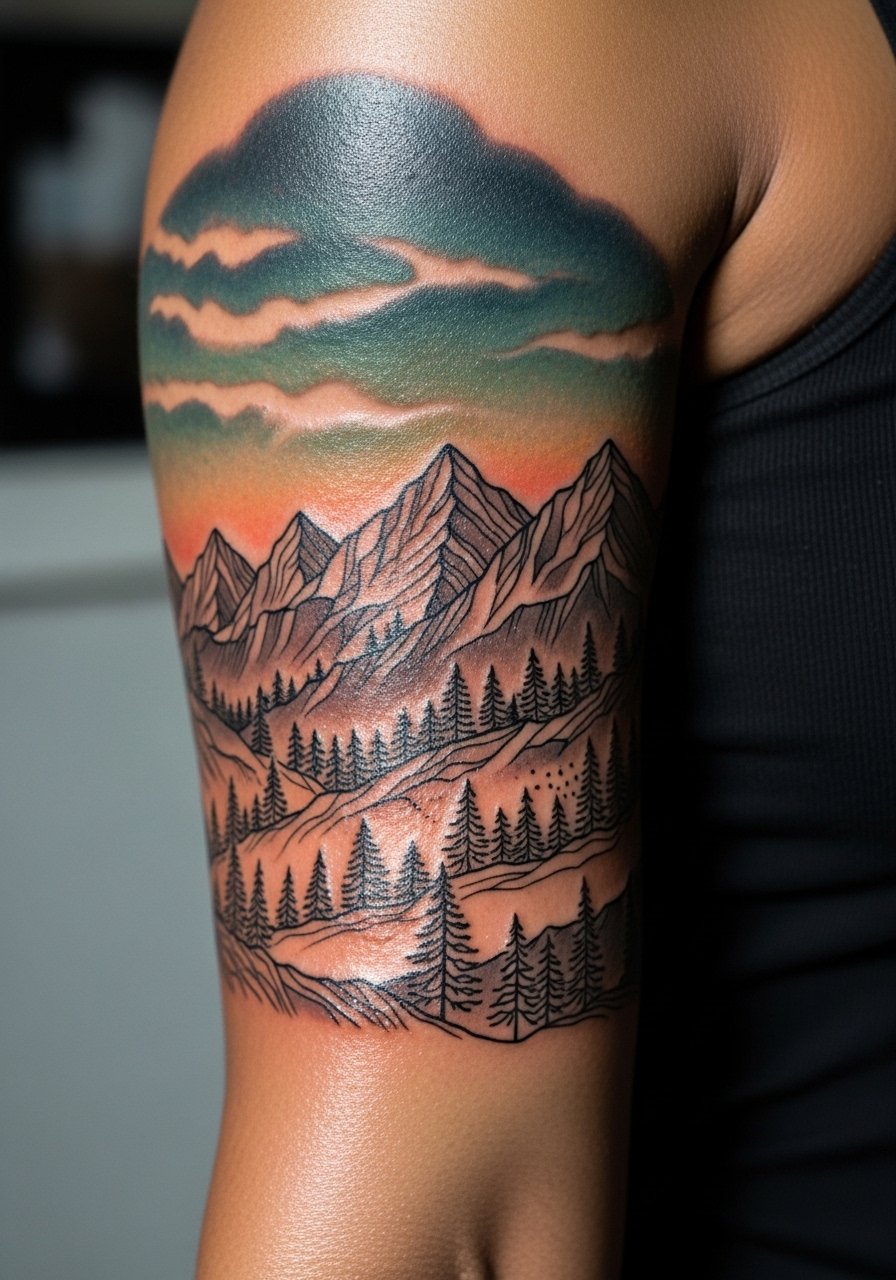
This design suits anyone who wants a little vista that scales with the muscle. Tell your artist to compose the ridge horizontally so the horizon follows the arm contour. The mistake I see is compressing a full scene into a tiny patch; the details need breathing room or they merge. Expect two to four sessions depending on color saturation. For showing it off choose a fitted tank top in black or navy that frames the horizontal flow without visual clutter.
6. Abstract Textural 3D Waves on Back Forearm
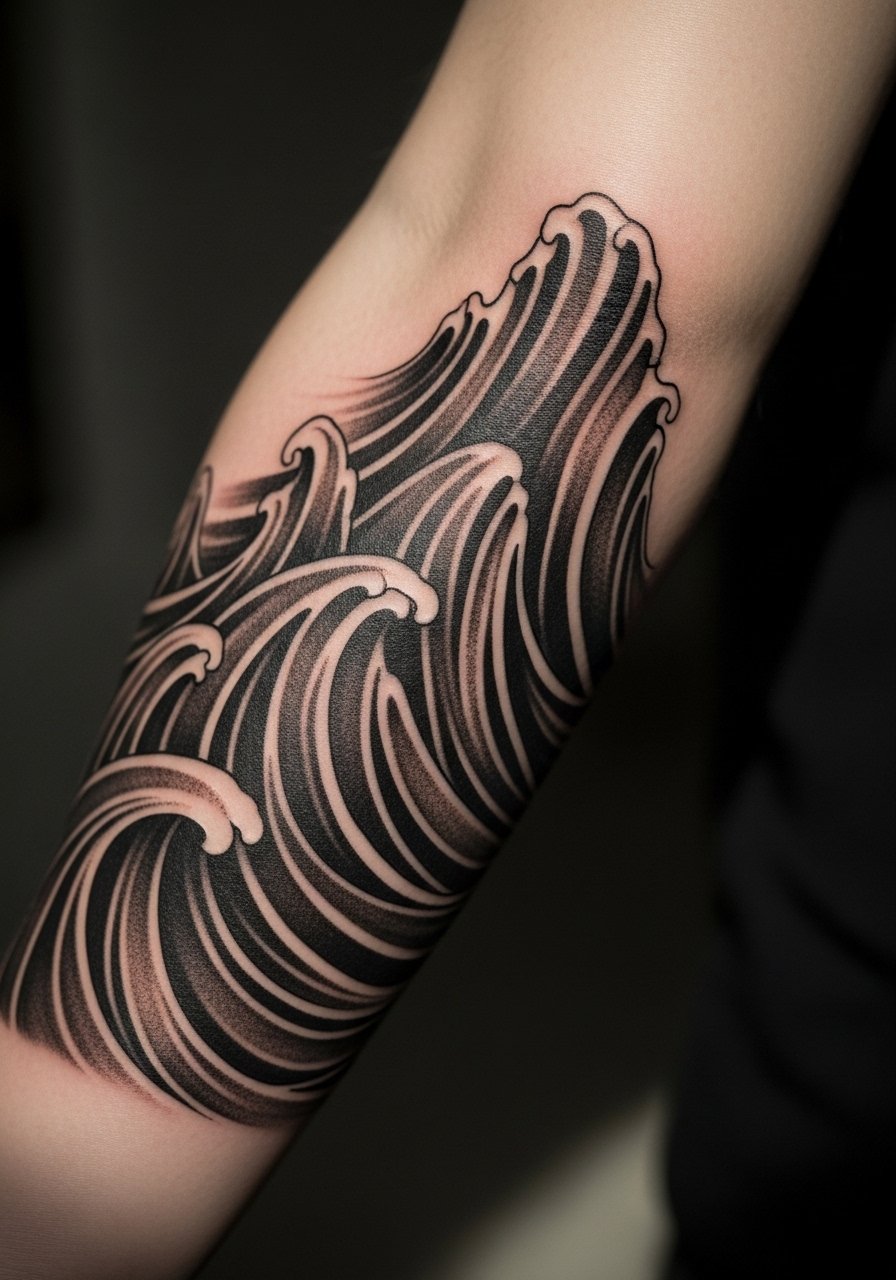
This piece is about motion as the arm moves and about shadows that change with muscle flex. Tell the artist you want high-contrast blocks and stipple transitions to sell the depth, not smooth gradients that can gray out. A common error is layering too much fine shading into tight areas, which softens quickly. Expect two sessions and a touch-up window around year two. For show-off styling roll up a chambray shirt sleeve so the wave textures sit cleanly against the cuff.
Studio Day Picks
The snake wrap, tribal band, jellyfish drape, cross silhouette, mountain vista, and textural waves above each call for a different studio prep and first-week kit.
-
Stencil transfer paper kit. Lets you preview placement on the curved back arm before the needle touches skin, which helps with wraparound pieces like the snake.
-
Topical numbing cream. Helps with triceps sensitivity for first-timers who want to get through a longer session without losing composure.
-
Thin protective film roll. Useful for forearm textures and small bands to reduce friction during the first 48 hours.
-
Fragrance-free gentle body wash. Cleanses the arm without stripping ink or irritating the delicate early scabbing phase.
-
Aquaphor healing ointment. Thin layers early on keep fine blackwork and color saturations from drying into flaky patches.
7. Roman Numeral Date Band on Back Triceps

This elongated script sits well across the triceps dip and reads like a band. Tell your artist the exact spacing you want and bring the numerals typed in the font size you like, since generators sometimes garble spacing. The fine-line camp warns that thin scripts on high-motion spots blur faster, while the bold camp says slightly thicker strokes keep clarity longer. If you prefer subtlety, plan a touch-up at year two. For session day wear a loose tank top so you can lower the arm without rubbing fresh ink.
8. Tree Silhouette Branching from Upper Back Arm to Elbow
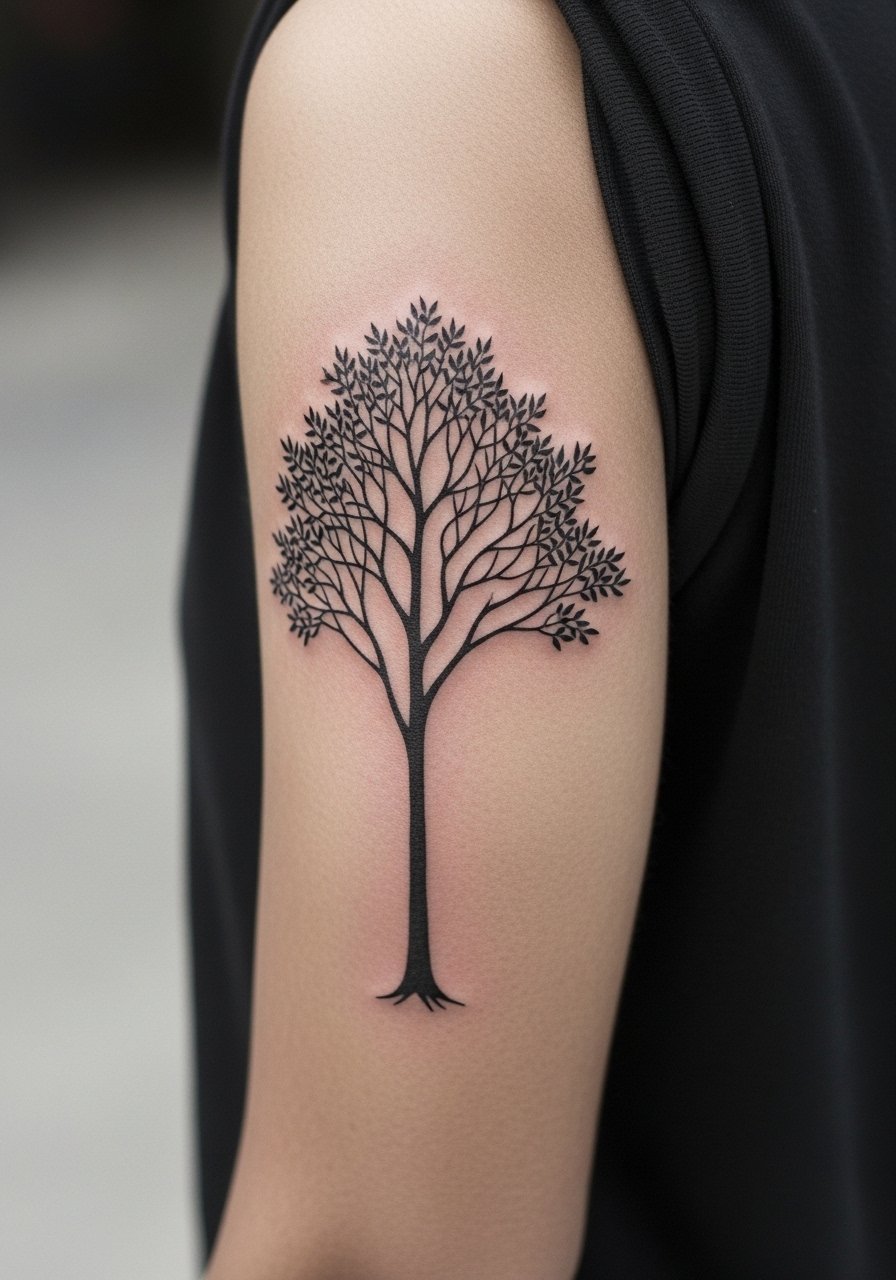
This vertical piece follows natural contours and avoids crowding. When you ask for this, specify branch spacing so the fine twigs do not sit inside heavy shadow patches. There is a real debate here. One side says fine line trees on moving areas will soften fast. The other side argues that deliberate spacing and slightly deeper placement of lines makes them hold. Ask the artist which approach they use and request healed photos when possible. Common mistake is adding too many tiny leaves that become indistinct. It pairs well with an open-sleeve button-up shirt when you want to let the trunk show.
9. Anatomical Heart Draped on Inner Back Arm Curve

This intimate placement shows detail if the artist keeps linework slightly bolder than typical micro-realism. Ask for selective highlights rather than full photoreal fill to prevent muddying. The session can be sensitive due to soft tissue, so expect a higher pain rating than outer-arm work. A practical mistake is insisting on extreme tiny strokes; scale up the elements modestly. For the appointment wear a tank top and raise the arm so the inner curve is exposed without strain.
10. Minimalist Wave Band Around Back Forearm
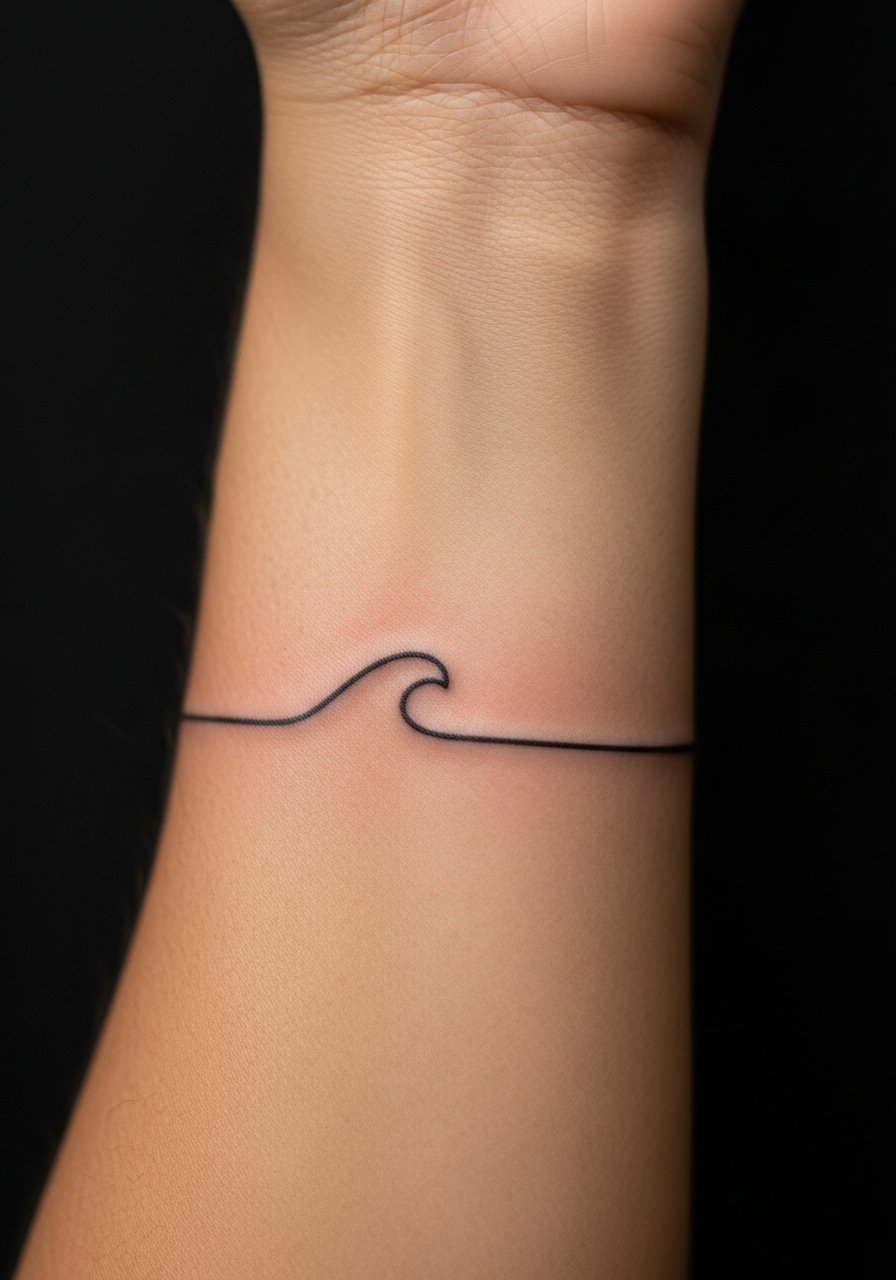
Small single-line bands read crisp initially but need room to breathe. Tell the artist you want slightly thicker single-line weight than a hairline to survive everyday friction. The common aging problem is placing tight curves where skin folds occur, which makes the wave kink over time. Expect one short session and possible touch-up at year three. Roll your sleeve to show the band with a minimalist watch on the opposite wrist for contrast.
11. Geometric Mandala on Back Upper Arm Outer Edge
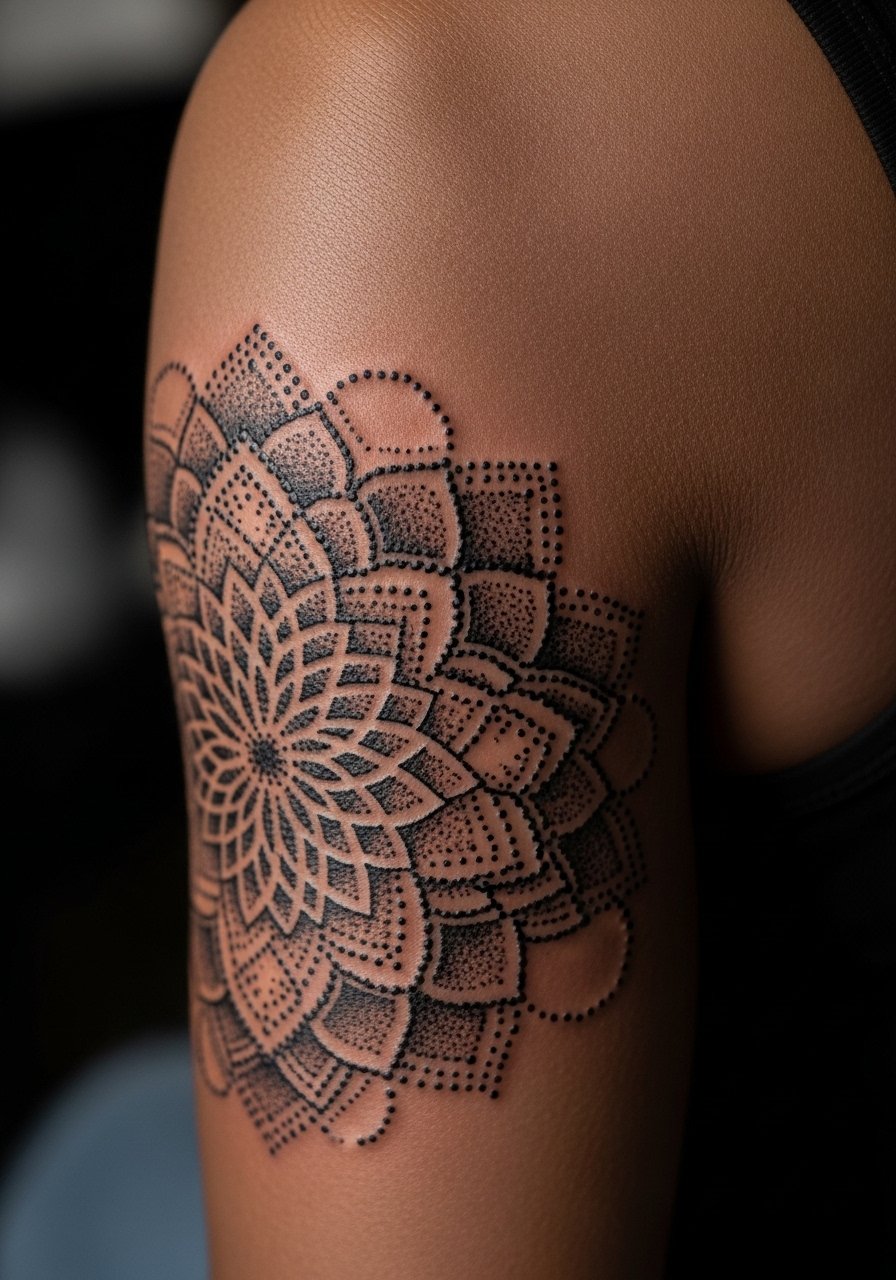
Mandala work needs spacing to avoid blurring in the dense center. Ask your artist for slight negative space between concentric rings so the pattern can age without merging. The mistake is shrinking a complex mandala into a cramped circle. Pain is moderate and session time varies with detail. For show-off style, wear a fitted tank top in neutral tones to keep the circular symmetry visible without distraction.
12. Micro-Realism Portrait Slice on the Back Triceps
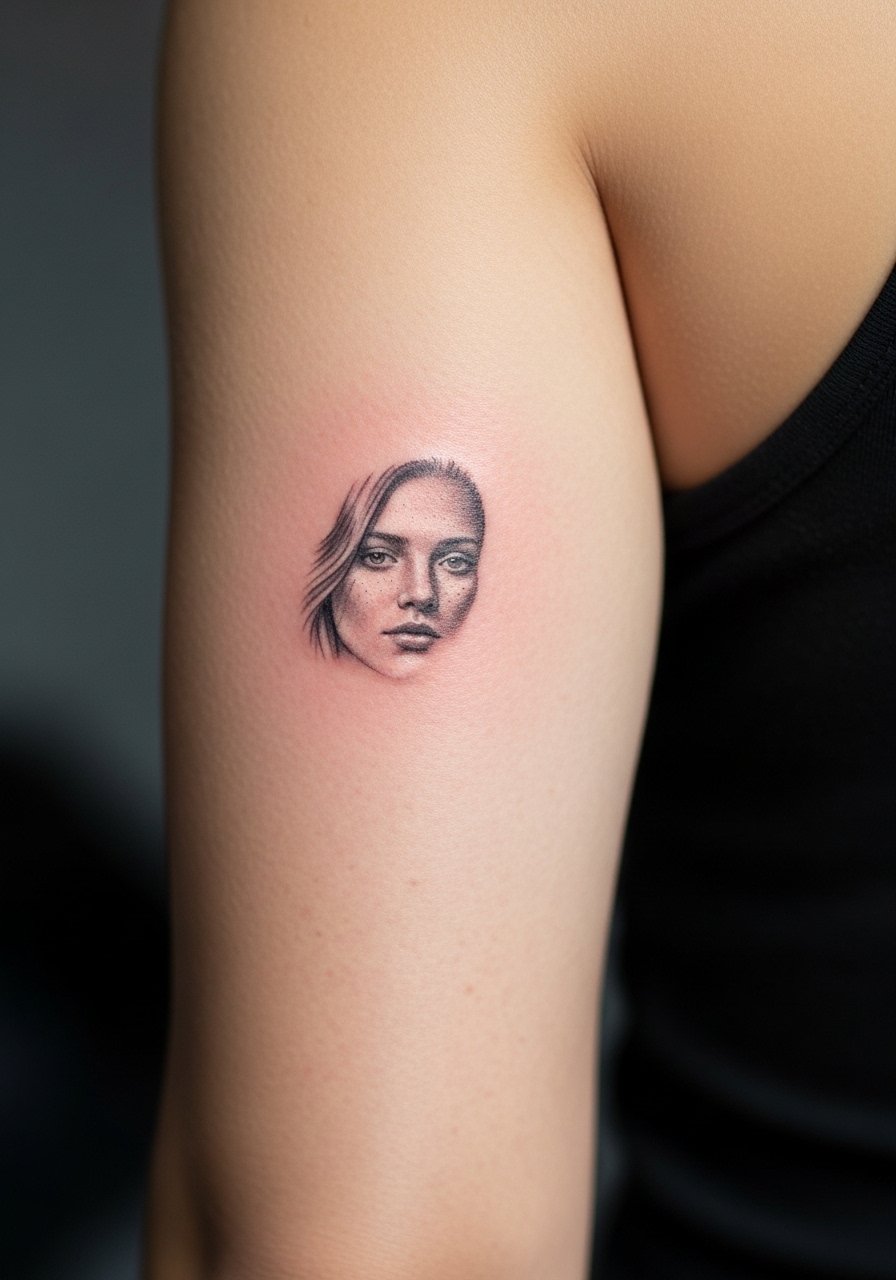
Portrait fragments on the back arm read best when treated as part of a larger composition. During consultation, ask the artist to scale facial features so the important planes do not sit across deep flex lines. Portraits here are a higher touch-up commitment because soft tissue movement can distort fine detail. Plan for three sessions and expect a sensitive area. For the session wear a loose tank top so the artist can access the triceps without rubbing the finished piece.
13. Botanical Vine Wrapping Toward the Elbow
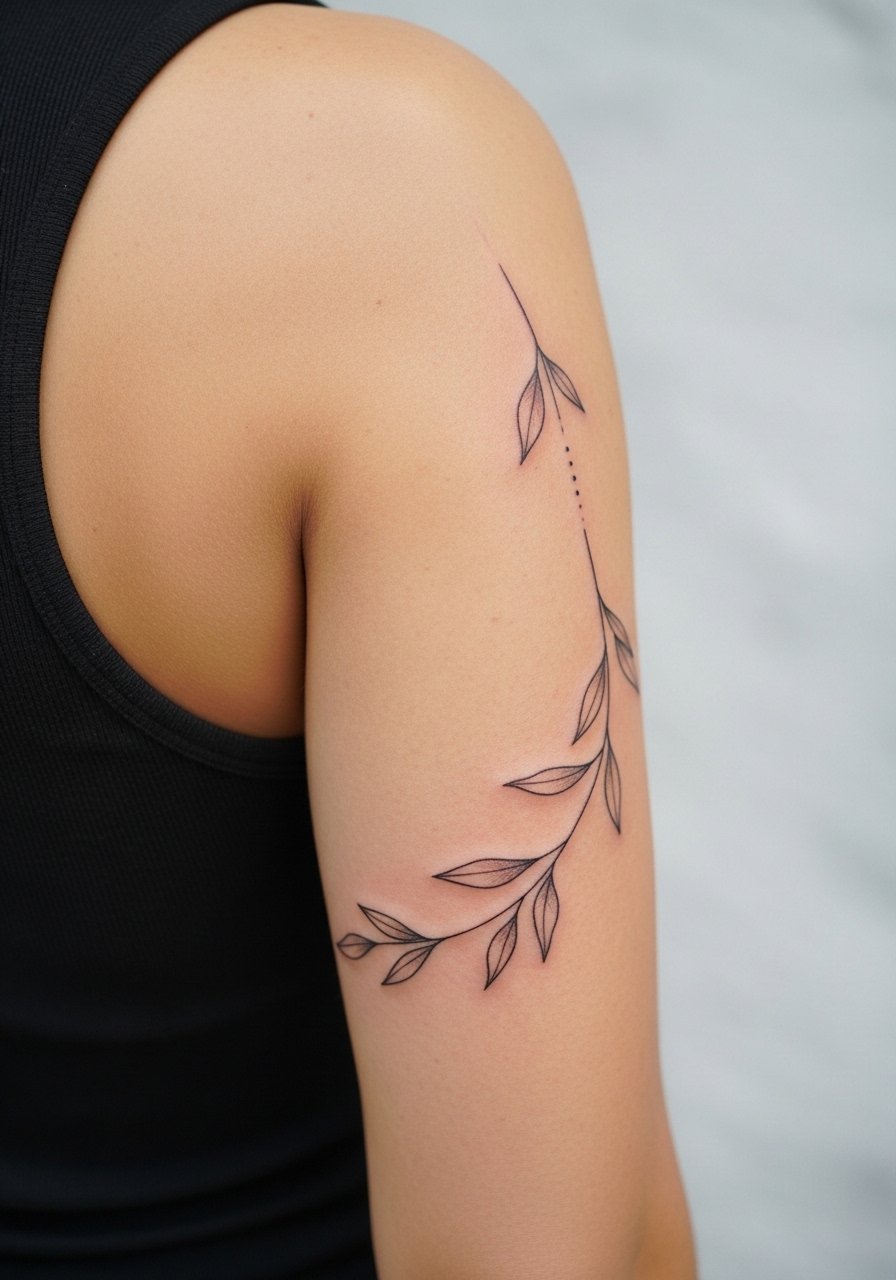
A vine that travels with the muscle looks organic if the artist follows the curve of the arm. Ask for leaf spacing that keeps negative space between elements. The mistake is over-detailing tiny leaves that merge when healed. Expect one to two sessions and potentially a touch-up at year two. Pair with a rolled-sleeve chambray shirt to frame the vine without covering its length.
14. Optical Illusion Spiral for Mid Back Arm
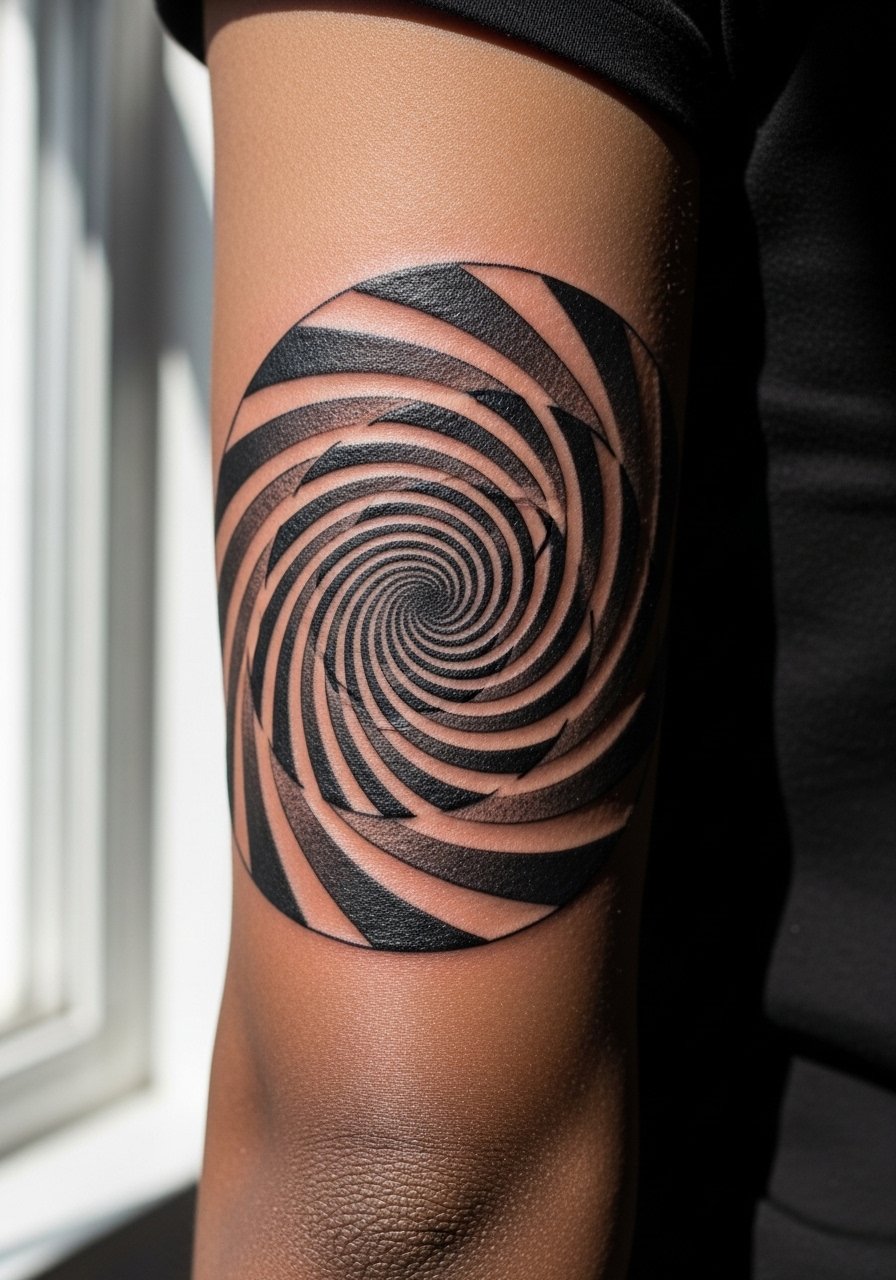
This one is graphic and demands crisp linework and consistent spacing. Tell the artist you want clear negative space to maintain the optical effect rather than blended shading. The session can feel quick but it needs steady handwork. A common error is letting the spiral sit too close to the elbow crease where movement ruins the illusion. Wear a solid color tee when showing it off so the background does not compete.
15. Small Script Quote Along the Back Triceps Line
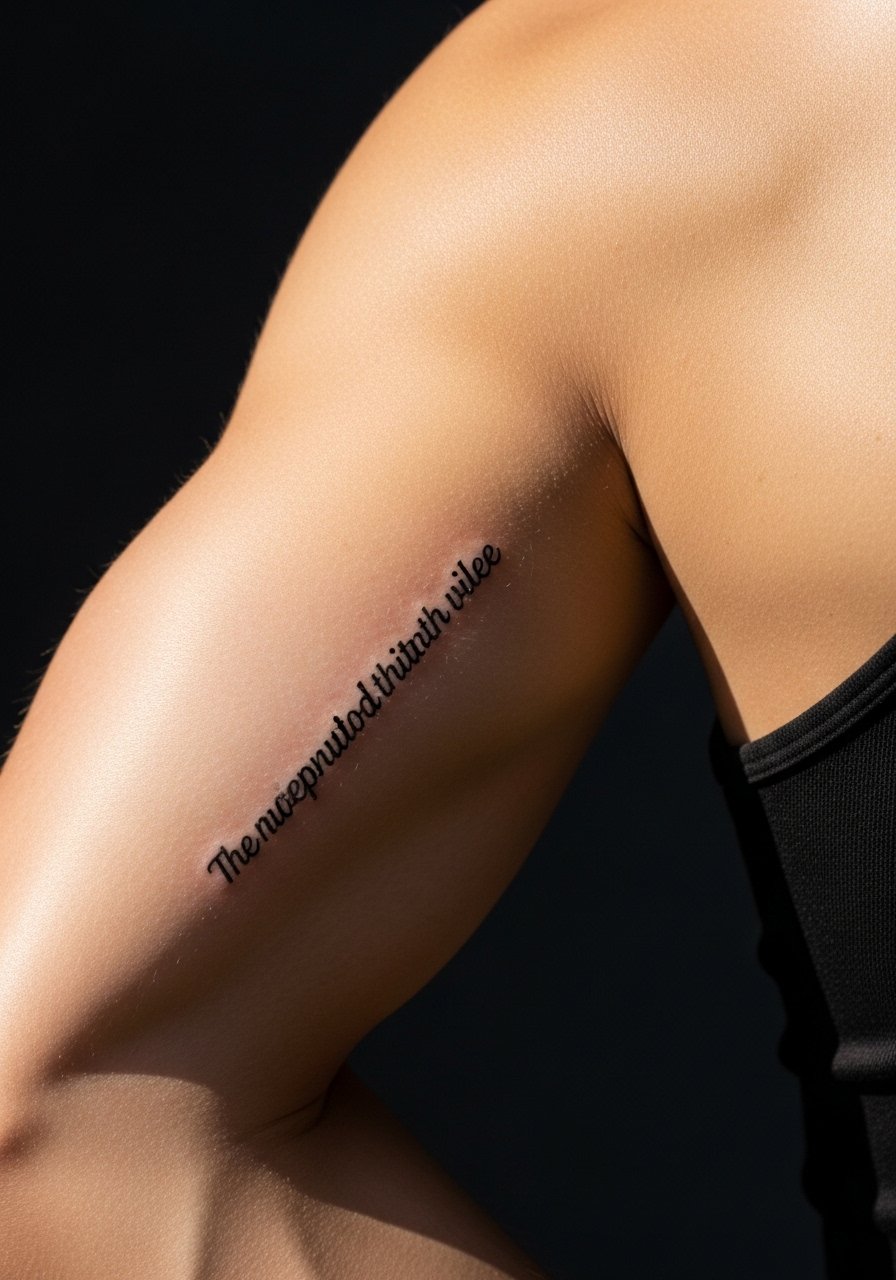
Text must be spaced and sized to survive the stretch of the triceps. Bring the exact line and font you want typed and printed. The fine-line versus bolder-script debate applies here. Thin scripts can look elegant but tend to soften with motion. If you want it to last without frequent touch-ups, request slightly heavier strokes. For session comfort wear a loose button-down shirt you can slide off without tugging at the fresh ink.
16. Minimalist Arrow Running Toward the Elbow

Arrows work well with motion when the shaft follows muscle length. Ask for a slightly thicker shaft than your initial sketch to survive abrasion. The common mistake is placing a narrow point where friction from clothing blunts it. Expect a short session and possible touch-up at year three. For showing it off pick a solid color crewneck tee with sleeves rolled to mid-bicep.
17. Kintsugi Crack-Style Linework on Back Forearm
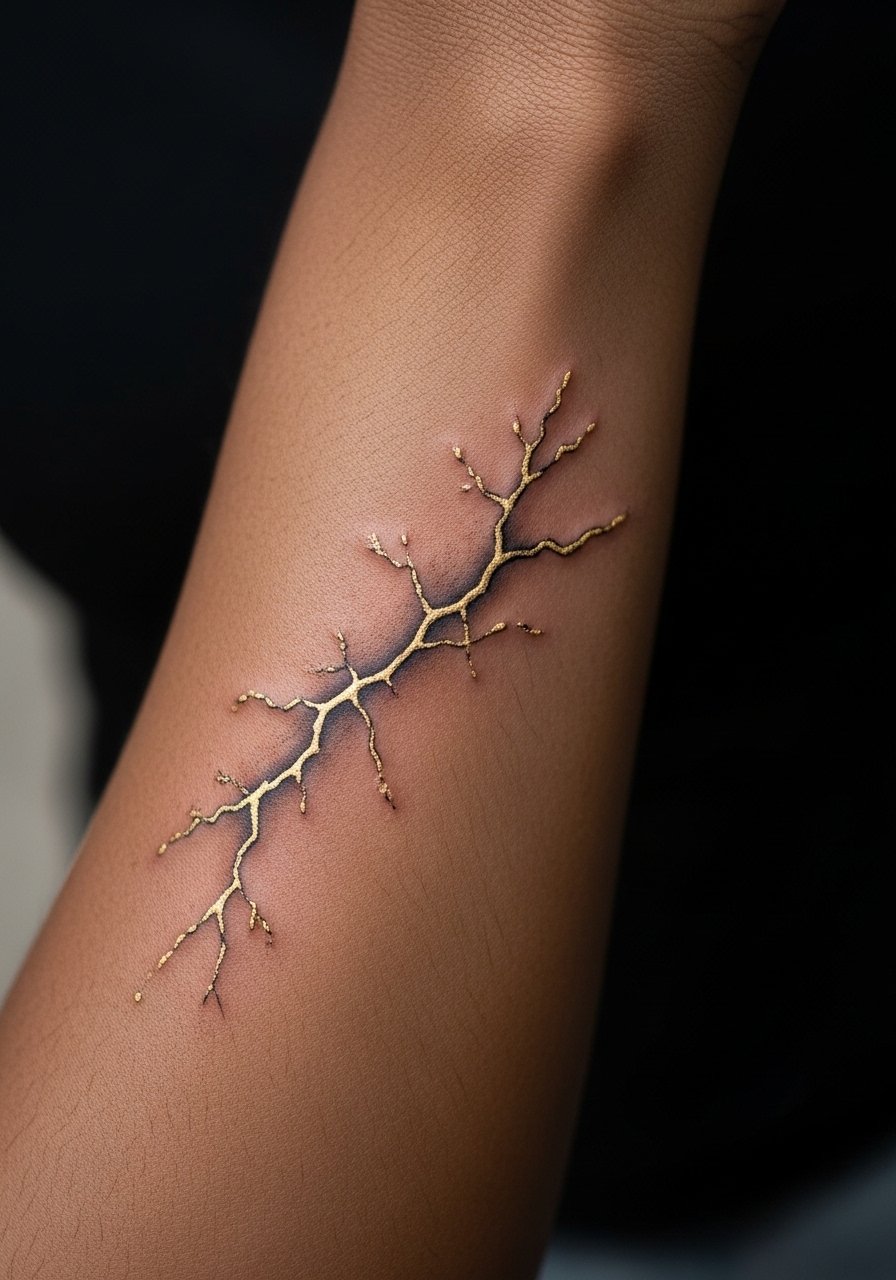
This subtle concept borrows the visual of repaired lines to make a sculptural mark. Ask for minimal metallic accents rather than full metallic fill so the piece heals like linework. The aging advantage is that the implied cracks look better as they soften rather than worse. A mistake is asking for too much gold pigment in the first session, which can fade unevenly. Roll a sleeve to mid-forearm or use a minimalist watch to balance the detail.
18. Soundwave of a Personal Clip on Back Upper Arm
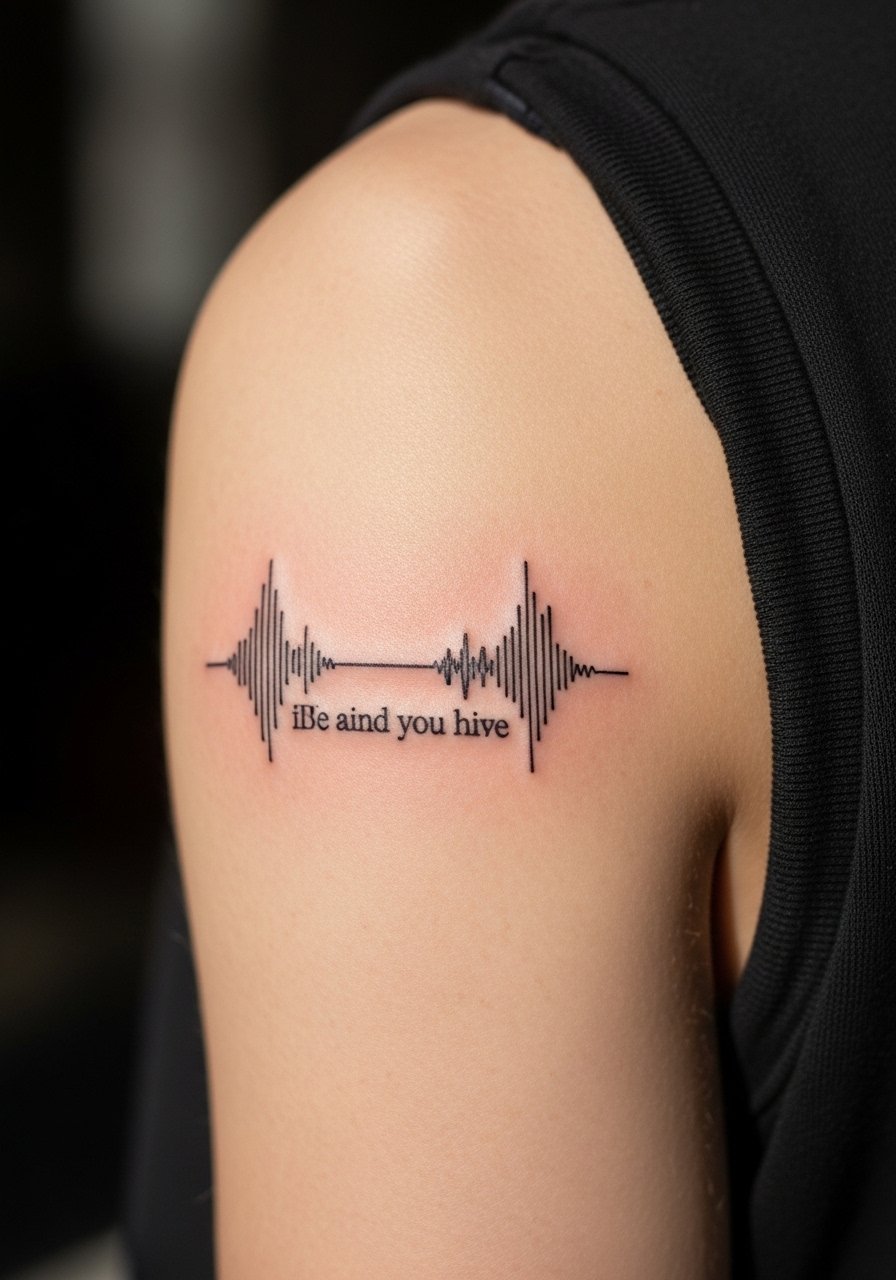
Encoding a soundwave is a modern keepsake that reads both visually and personally. Bring the exact clip and the artist will translate it into a waveform. The common error is placing tiny caption text too close to the waveform, which can blur. Expect one session and a touch-up if you want crisp text longevity. For the session wear a fitted tank top to keep the upper arm accessible.
19. Anchor with Rope That Wraps the Back Mid-Arm

Traditional anchors age predictably because of strong outlines and saturated fills. Specify saturated color fields and steady outlines to avoid early glazing. The mistake is asking for fussy rope detail that sits over high-motion zones. One session usually gets you a solid anchor, two for saturation. For showing it off wear a short-sleeve henley and consider a leather cuff on the opposite arm for contrast.
20. Tiny Constellation Cluster on the Back Forearm
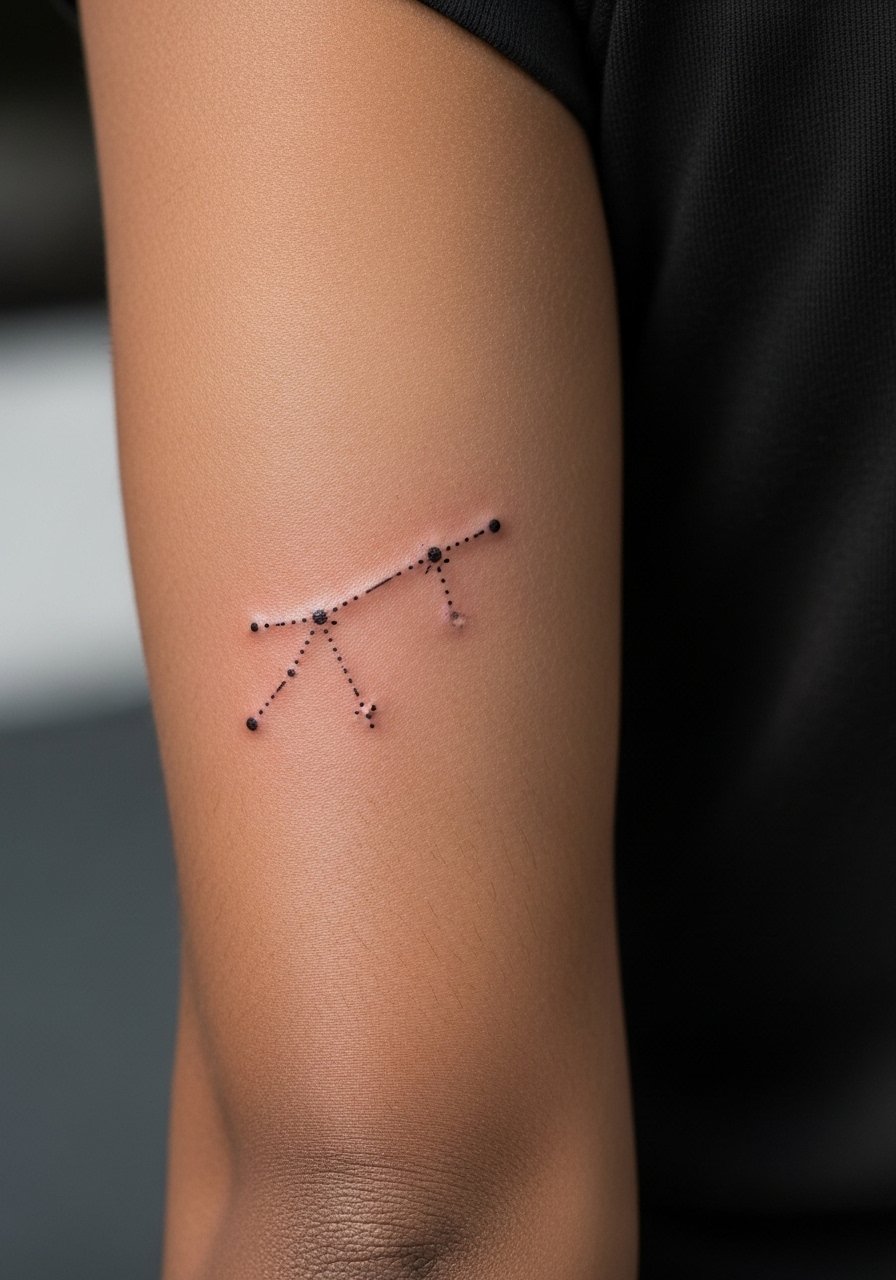
Constellation clusters need deliberate spacing to keep stars distinct. Ask your artist to use dot work rather than hair-thin strokes for the star points. The common aging issue is putting too many tiny stars close together so they appear as a smudge after a year. Expect a brief session and a likely touch-up at year two. Roll up a chambray shirt when you want to show the sparseness against denim.
21. Anatomical Compass Centered on Back Upper Arm
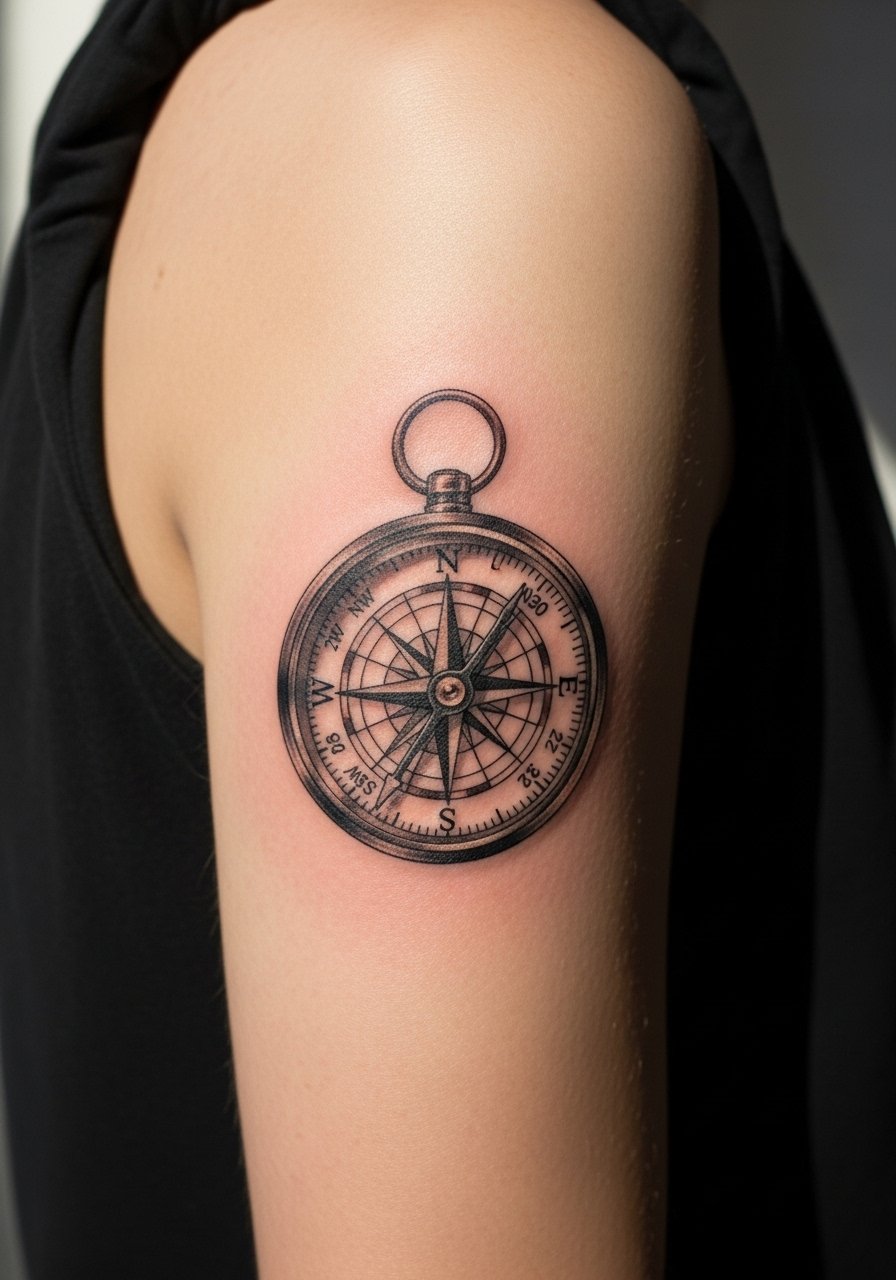
Compasses translate well into back-arm placement when centered so the cardinal points avoid deep creases. Ask for slightly thicker pointers and subtle stipple shading rather than dense gradients. The mistake is packing ornate filigree into a small space where it loses legibility. Two sessions may be needed for fine detail. For the session pull on a loose button-down shirt to prevent fabric from brushing the fresh ink.
22. Wave Crest with Stipple Shading at the Triceps Edge
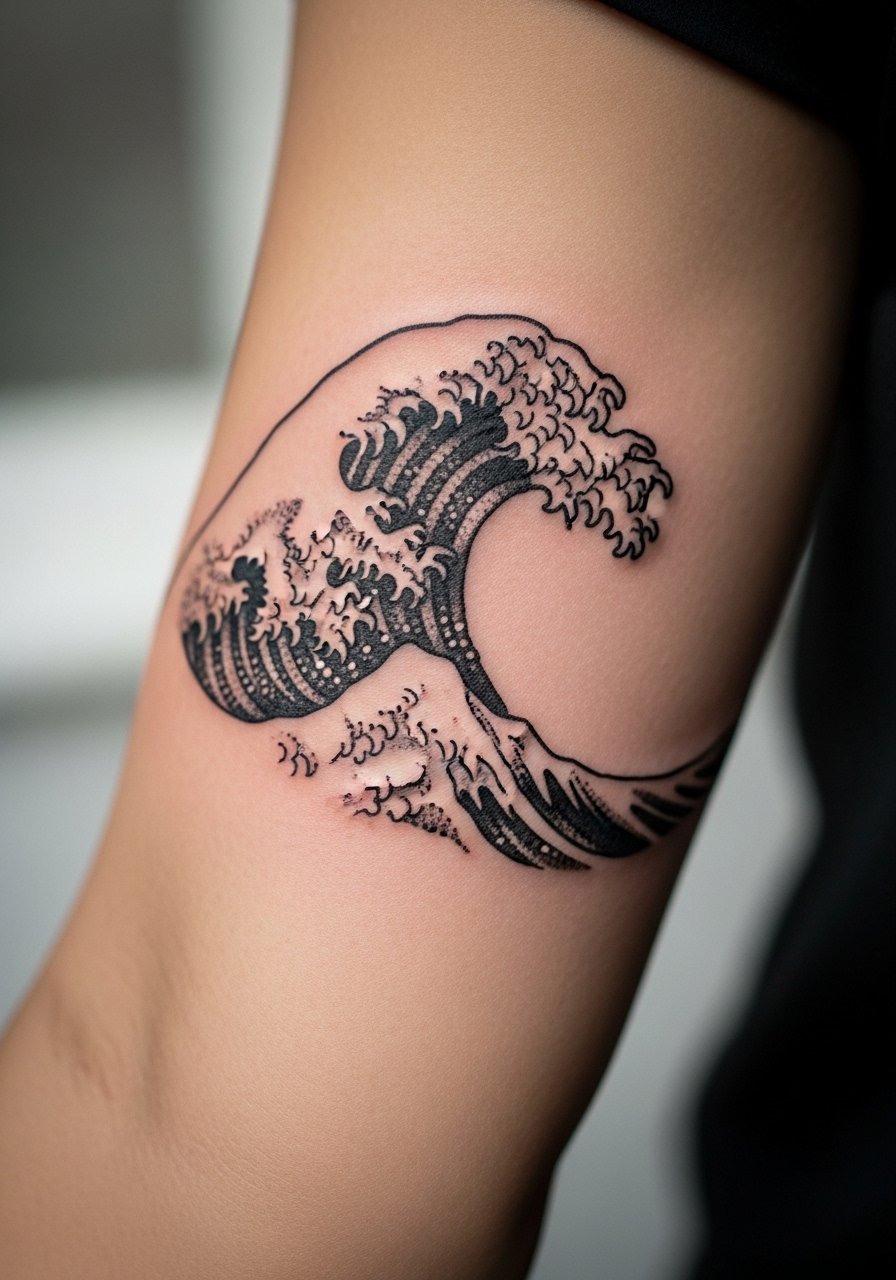
Stipple shading sells motion without heavy gradients that gray out. Tell the artist you want separated dot clusters so the texture reads even as the ink softens. Common errors include overpacking dots that merge into a gray block. Pain is moderate and you may want breaks during stippling. For showing it off consider a short-sleeve henley which frames the crest nicely.
23. Barcode That Reads as Coordinates on the Back Forearm
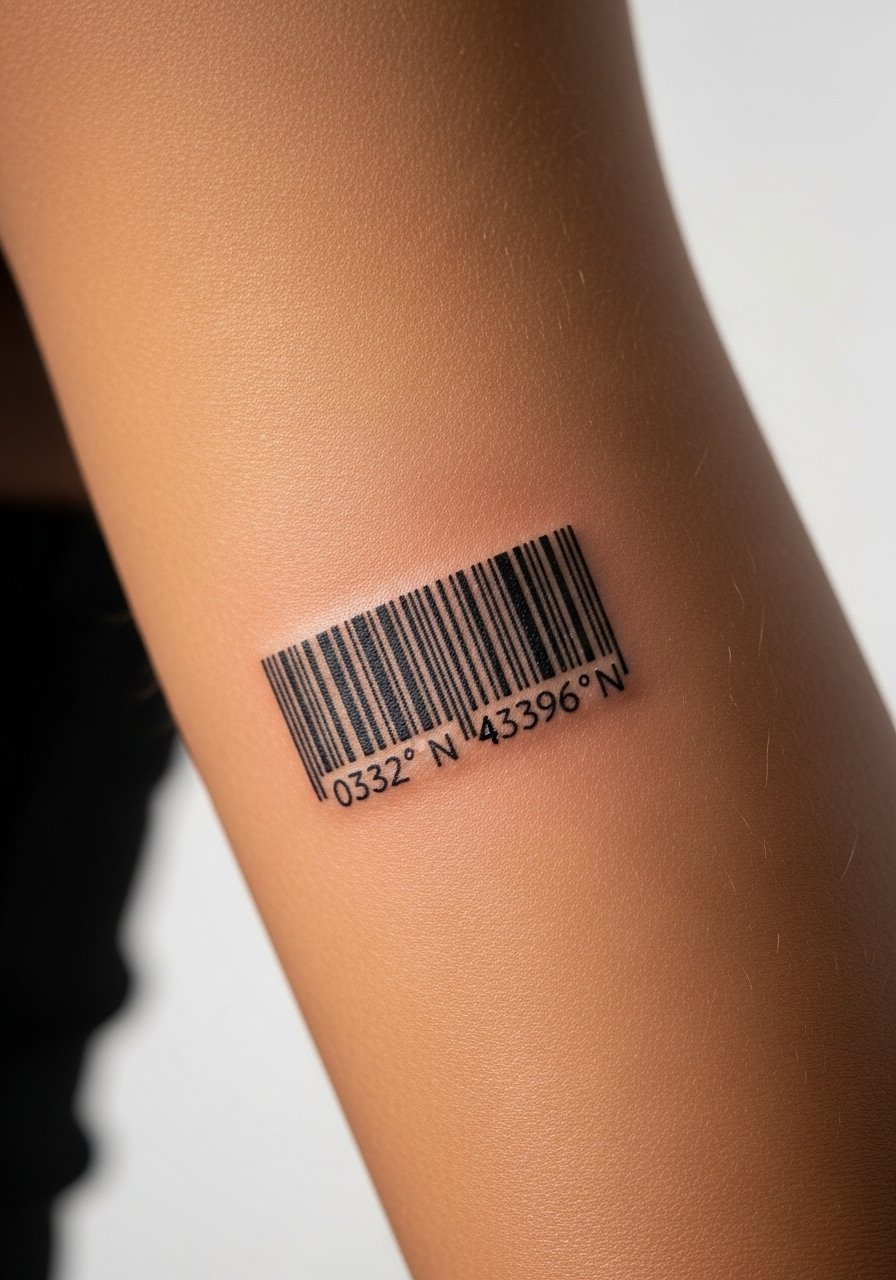
This graphic idea hides a location in plain sight. Provide the exact coordinates as text to the artist so the numeric translation is precise. The main aging concern is line merge if the bars are too close. Ask for measured spacing and slightly bolder bars to survive. One short session usually suffices. Roll the sleeve and pair with a minimalist watch for a tech-savvy look.
24. Lightning Bolt with Stipple Halo on Back Upper Arm

This is a punchy accent that benefits from clean negative space. Ask for a small stipple halo rather than solid glow so the bolt remains crisp as it ages. The mistake is surrounding the bolt with heavy shading that crowds it. Expect one session and a touch-up if the halo softens. For showing it off wear a fitted tank top to let the bolt sit against bare skin.
25. Minimalist Skull Outline Near the Elbow
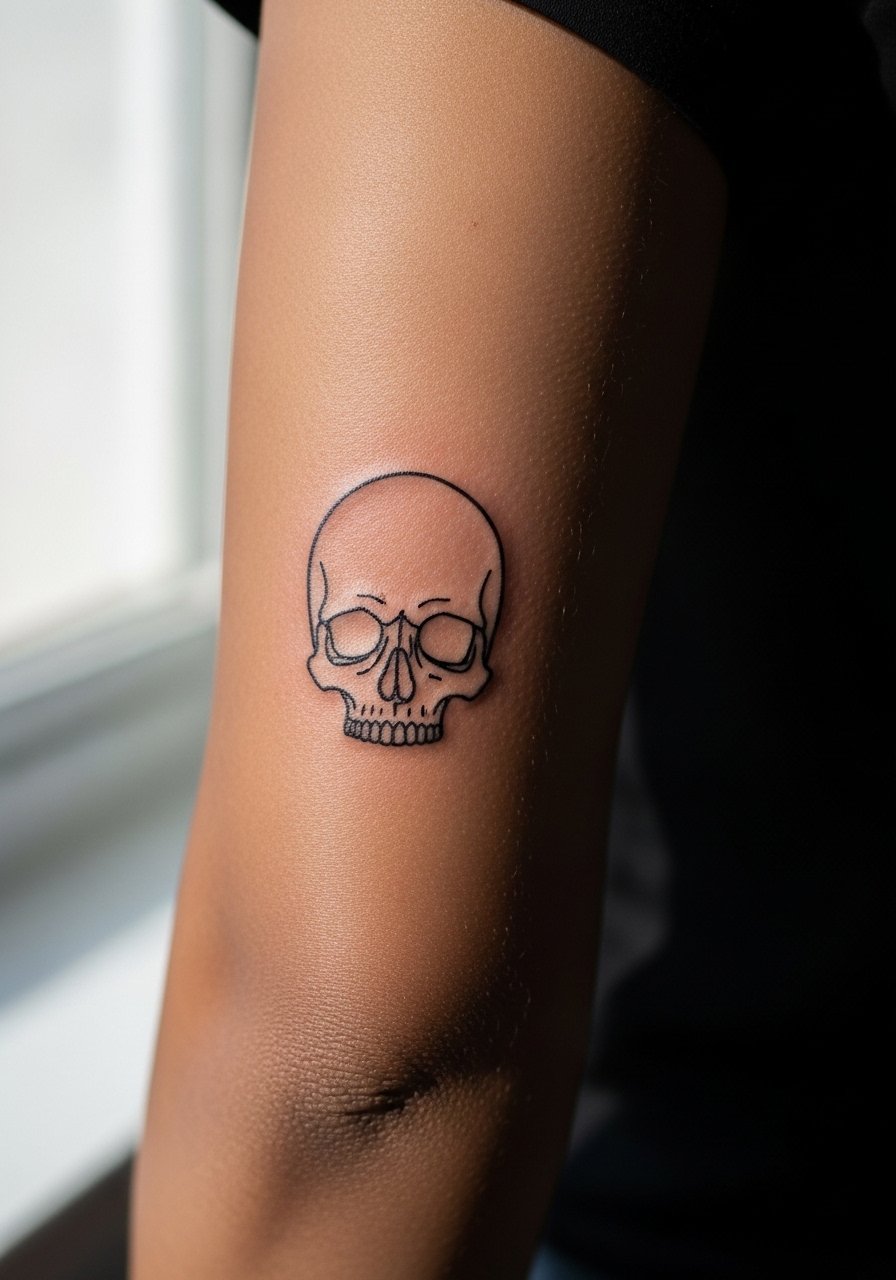
Elbow-adjacent work faces motion and creasing. Request the skull be set slightly upstream of the elbow crease and lines thickened modestly so features do not wash out. The typical error is centering intricate teeth details that blur. Expect a short session and a possible touch-up at year three. Pair with a solid color tee to keep the look cohesive.
26. Map Fragment with Tiny Landmark Marker on Back Mid-Arm
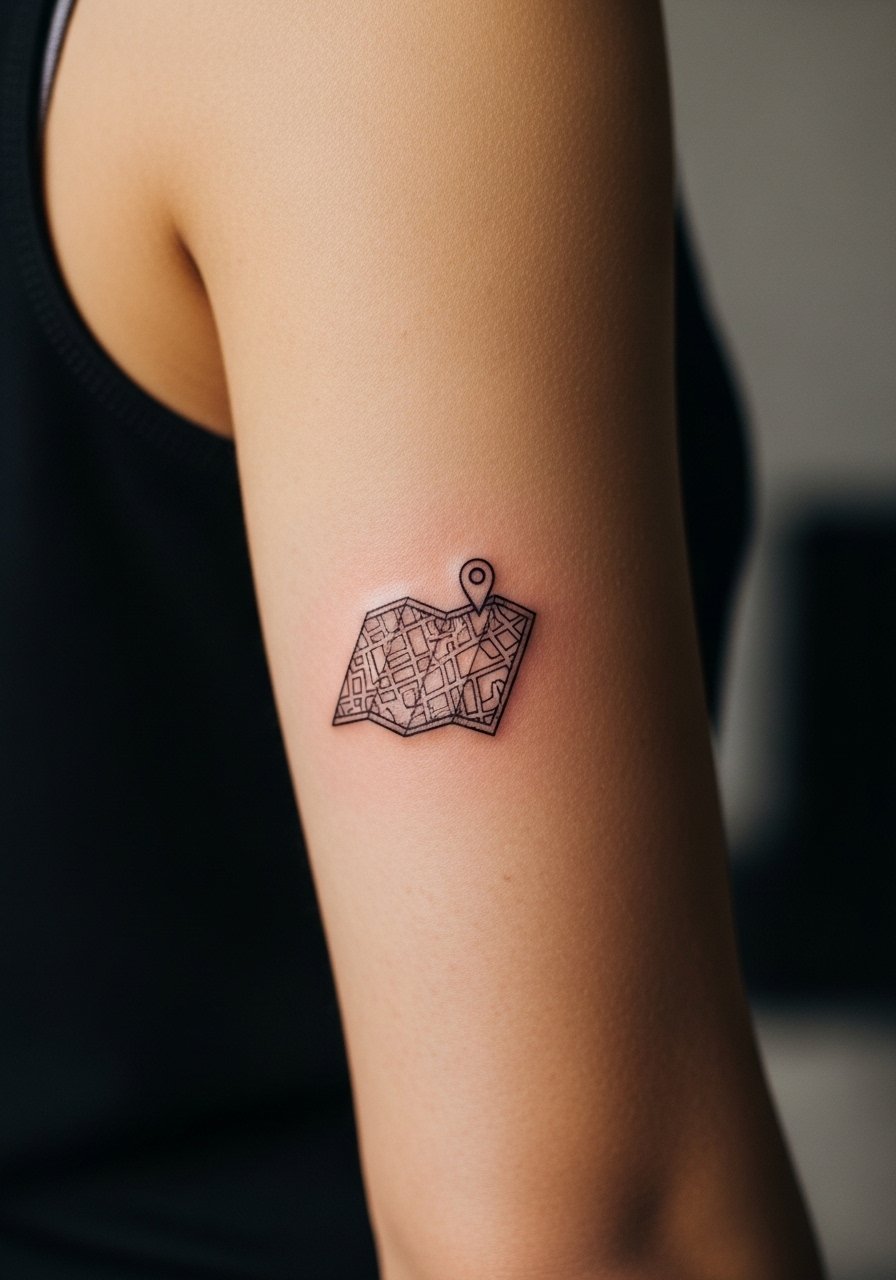
Map fragments read like micro-scenery if you resist packing too much topography in. Give the artist the exact area you want and ask them to simplify contour lines into readable forms. A mistake is insisting on micro type that becomes illegible. One session can achieve a clean fragment. For the session wear a loose tank top that allows easy access.
27. Celtic Knot Variant That Wraps the Back Arm Midsection
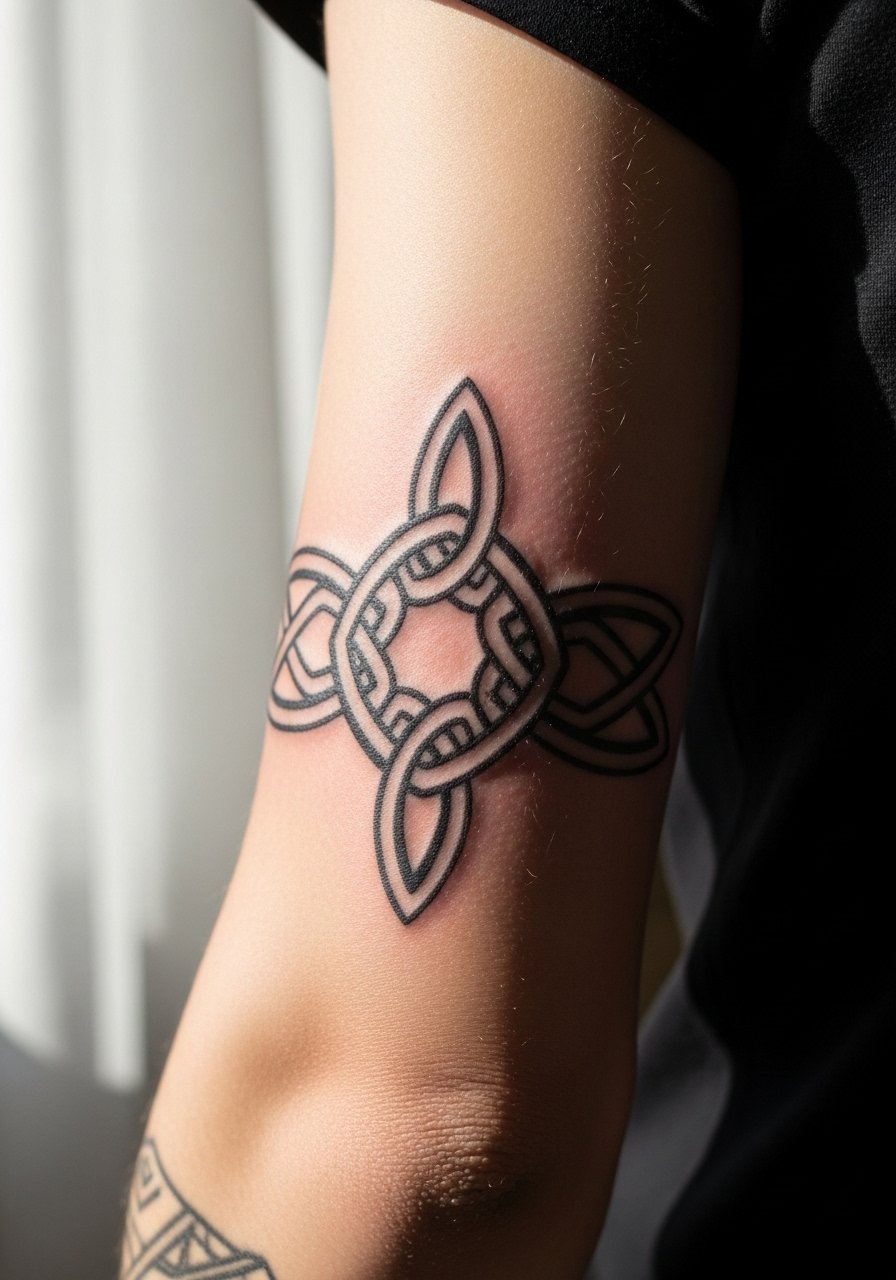
Interlaced knots are striking when lines are slightly thicker and negative space is generous. Clarify you want a variant rather than a direct cultural replication and consider small alterations out of respect. The common problem is cramming too many interlaces into a small band, which becomes a muddle. Expect one to two sessions and ask the artist for healed pictures of similar scale. Wear a sleeveless tee for the session so they can work uninterrupted.
Frequently Asked Questions
Q: Will fine line back arm tattoos blur faster than bolder work?
A: It depends on placement and line weight. Fine line pieces near high-movement areas like the triceps often soften faster, while slightly thicker strokes keep clarity. Ask the artist to show healed examples at the exact scale you want and plan a touch-up at year two to three if you prefer delicate work.
Q: How should I prep my wardrobe for a back upper arm session?
A: Wear clothing that exposes the area without rubbing it. A loose button-down or a fitted tank top you can slide aside is ideal. Avoid tight sleeves that could brush the fresh ink during the session and the first 48 hours.
Q: What causes a back arm tattoo to look distorted when I flex?
A: Distortion comes from placing dense details directly over flex lines. Designs that follow muscle flow and use negative space to separate elements will hold shape better. During consultation ask the artist to position focal elements where the skin sits more stably.
Q: Are jellyfish draping designs harder to find an artist for?
A: Yes, because they rely on layered translucency and subtle color veiling. Look for portfolios showing similar illustrative realism and ask for healed photos. Platforms like Tattoodo, Booksy, and location-tag searches will help you find artists experienced with draping motifs.
Q: If my artist cancels last minute what should I do about deposits and rescheduling?
A: Check studio deposit policies before you book and keep screenshots of any communications. If a slot opens, consider guest spots or apprentices for lower-cost options, but verify healed photos first. Booking through verified apps reduces the chance of surprise cancellations.
Q: Do back arm tattoos need different aftercare than forearm pieces?
A: The basics are the same, but friction plays a bigger role on the back arm due to clothing and movement. Keep sleeves loose for the first week and use protective film if you expect lots of rubbing. The right prep and a quick touch-up plan make a noticeable difference over the first year.
