
Fine line trends look great on saved boards, but they reveal their true life when the sun and sleeves have had a say. The arm wrap idea asks more than a single motif. It asks how a design moves with your muscles, how it sits against everyday clothes, and what will still read crisp after two summers of sun. Below are 27 specific arm wrap references with what to ask your artist, how they age, and simple wardrobe moves to show them off.
1. Fine Line Vine Around the Inner Forearm
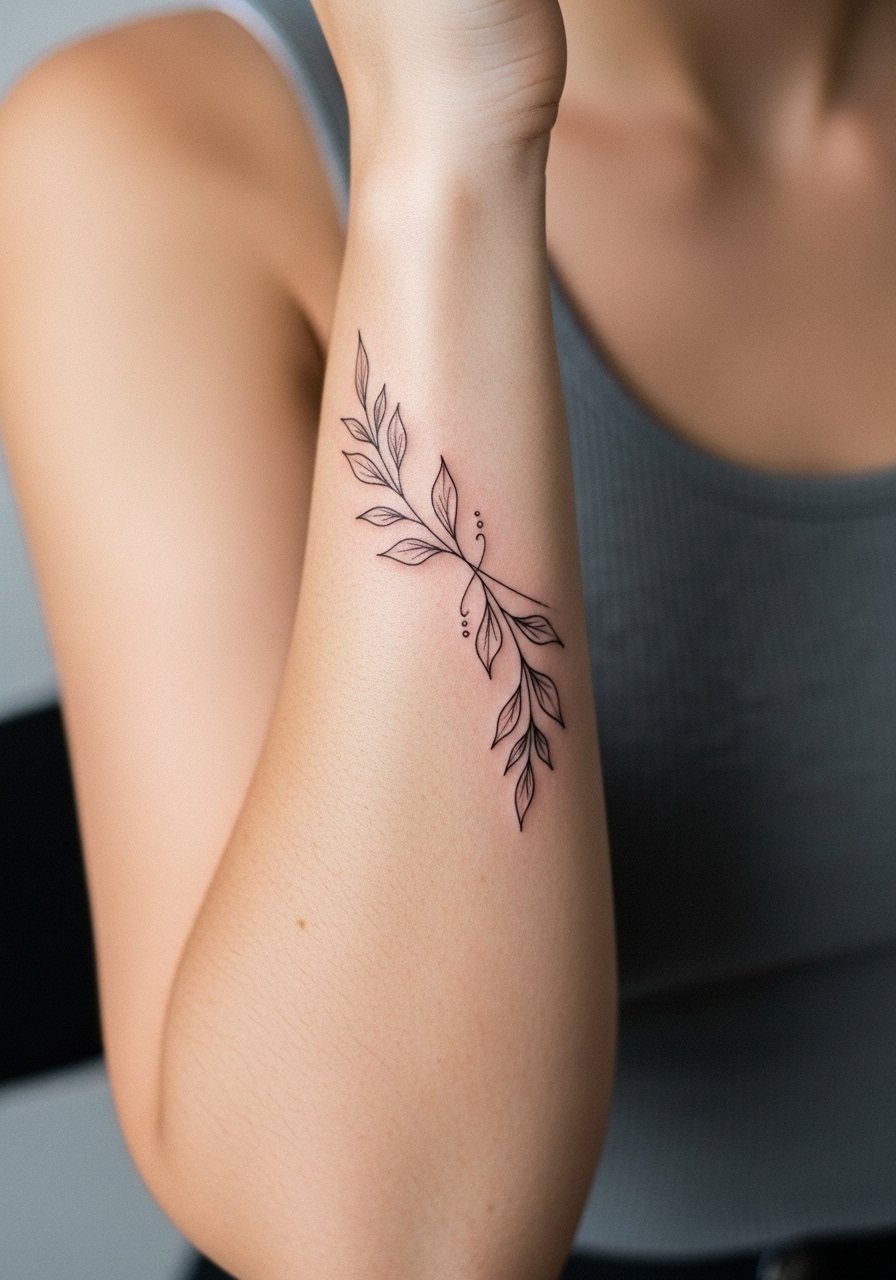
I recommend this when you want an elegant wrap that reads like jewelry rather than heavy imagery. Tell your artist you want varied lineweight and room between leaves so stipple shading can age without merging. Common mistakes include packing too many tiny leaves and running out of negative space, which causes the vines to blur by year three. Expect the session to feel moderate for about 90 minutes and plan a touch-up at year two for any lost crispness. For showing it off, roll sleeves or wear a loose linen shirt in neutral tones so the vine stands out without competing.
2. Micro-Realism Wrist Wrap Chain
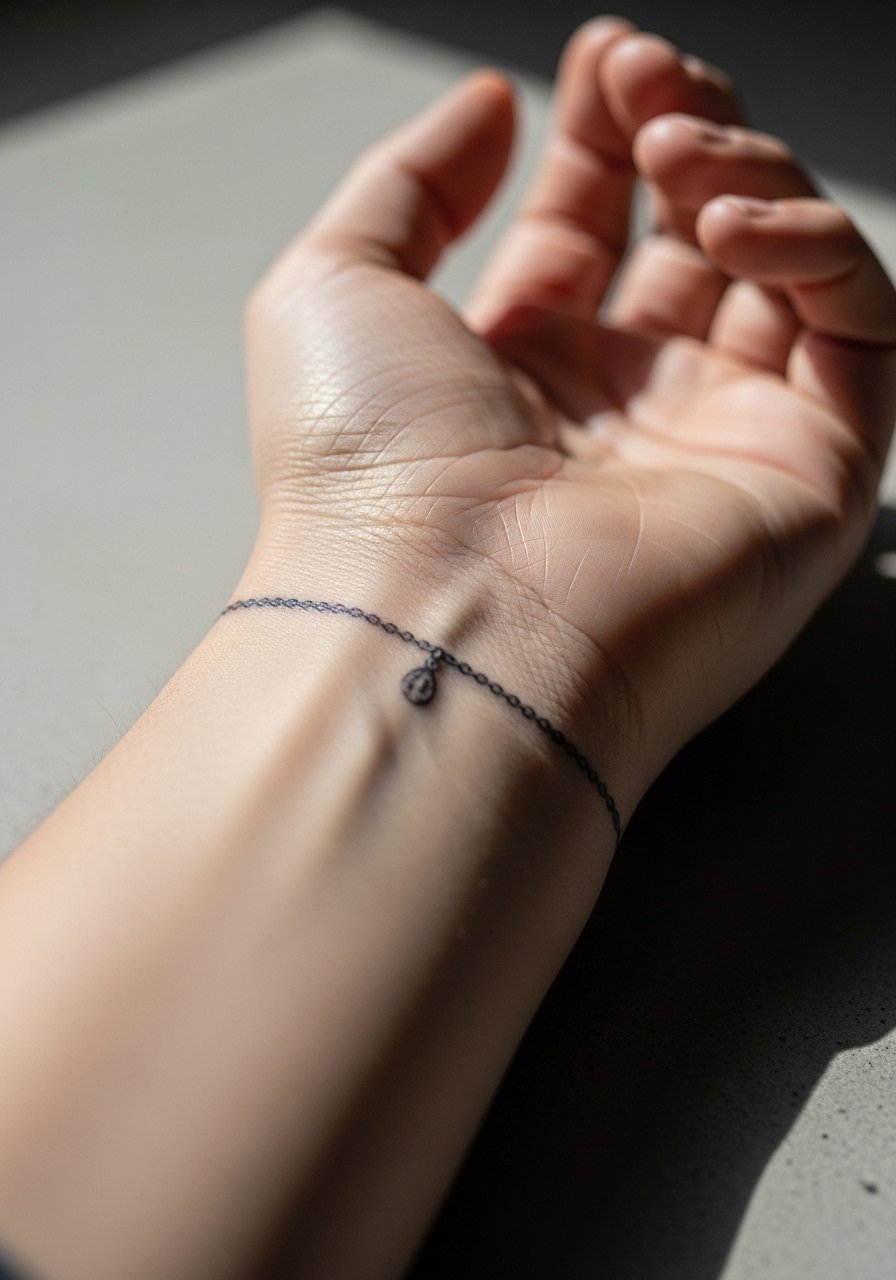
This tiny linked chain works best when scaled to the wrist circumference, not copied from a bracelet photo. Ask for slightly heavier anchor links where the wrap crosses the tendon so the illusion remains at two years. A frequent error is choosing lines that are too thin, which are prone to blowout on the wrist. The session is short and sharp, about 30 to 45 minutes, and may sting more during wrist movement. Pair it with a thin chain bracelet to echo the tattoo without covering the ink.
3. Stipple Shaded Floral Band on Upper Arm
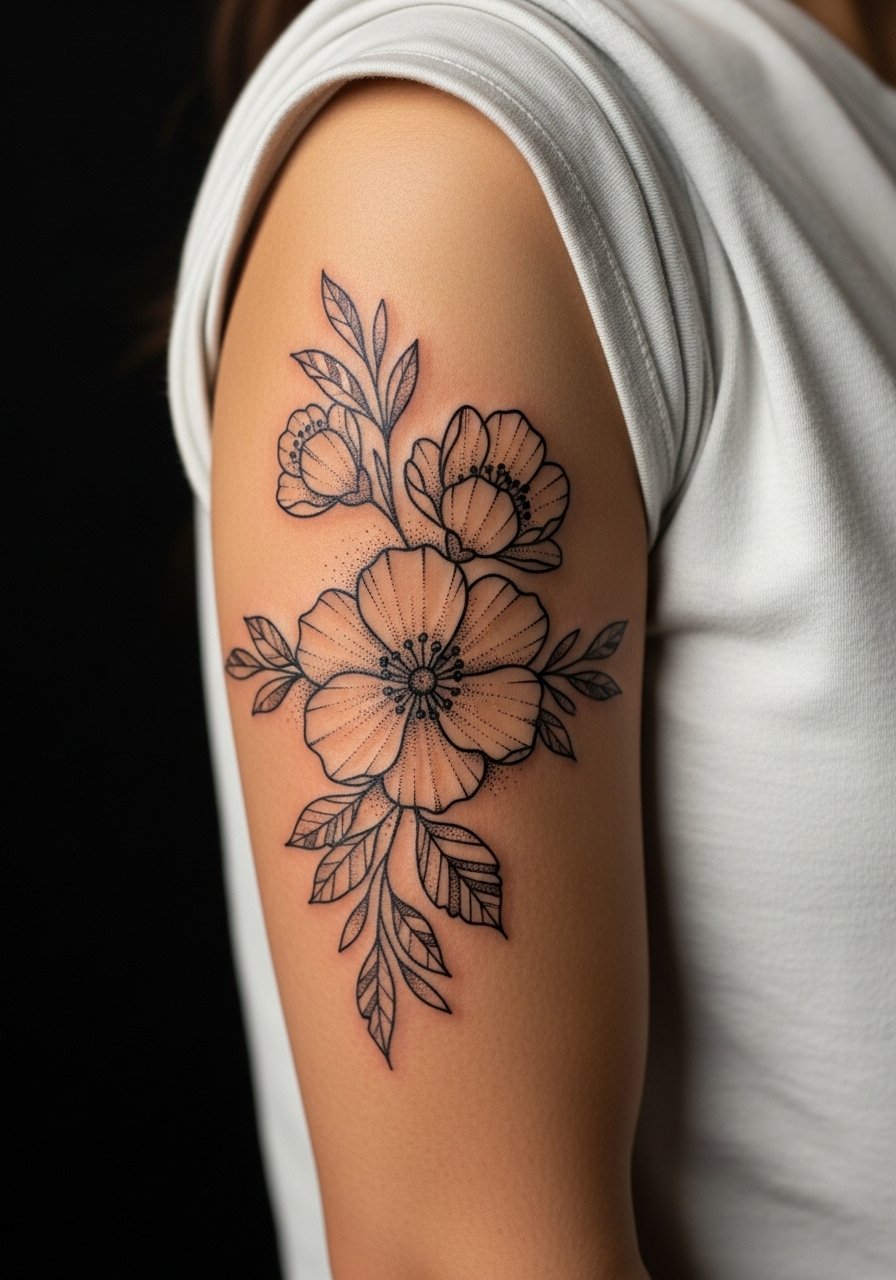
This dot work band reads textured from a distance and holds up because stippling avoids solid blocks that can smudge. Tell your artist you want deliberate gaps in the stipple so the skin tone becomes part of the design. The main mistake is over-saturating the petals which turns stipple into a muddy patch after a few years. Expect a two- to three-hour session with gentle, repeated passes that can surprise you with mild tenderness. For evenings out, a rolled-sleeve cotton tee frames the band without hiding the shading.
4. Geometric Arm Wrap with Negative Space
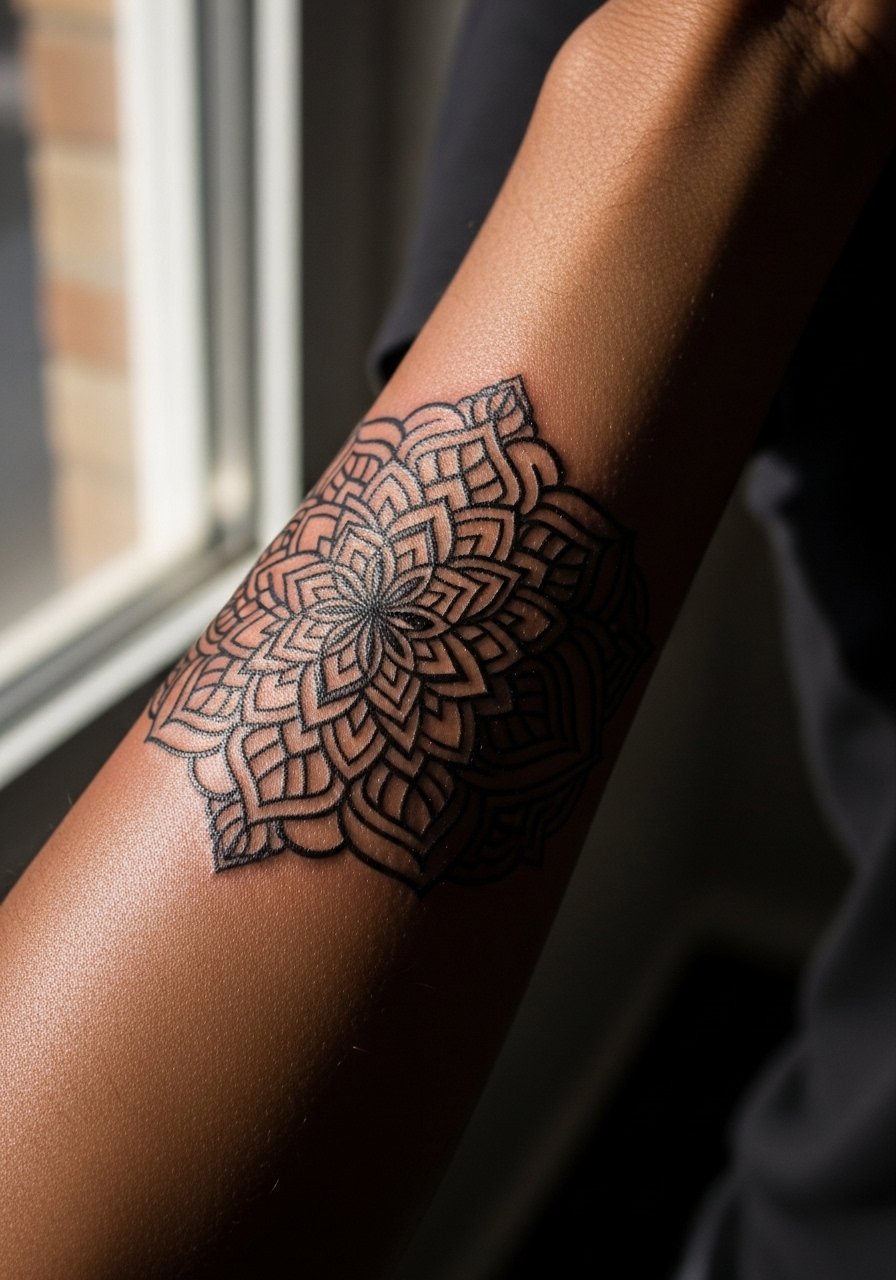
This geometric wrap is about spacing more than complexity. In consultation, show the exact line thickness you like and ask the artist to mark preview stencils at full scale. A common aging issue is crowding the pattern, which causes lines to merge at year three. The session can run long because alignment matters, and numb areas are rare. Artists split on whether dense mandalas hold up on flexible skin. One camp says the tight geometry blurs quickly. The other camp argues that with correct spacing and depth the pattern settles well. Ask your artist which side they land on before booking. For a simple outfit pairing, a short-sleeve button shirt with the cuff hit above the design keeps it visible.
5. Traditional Bold Band With Colored Fill
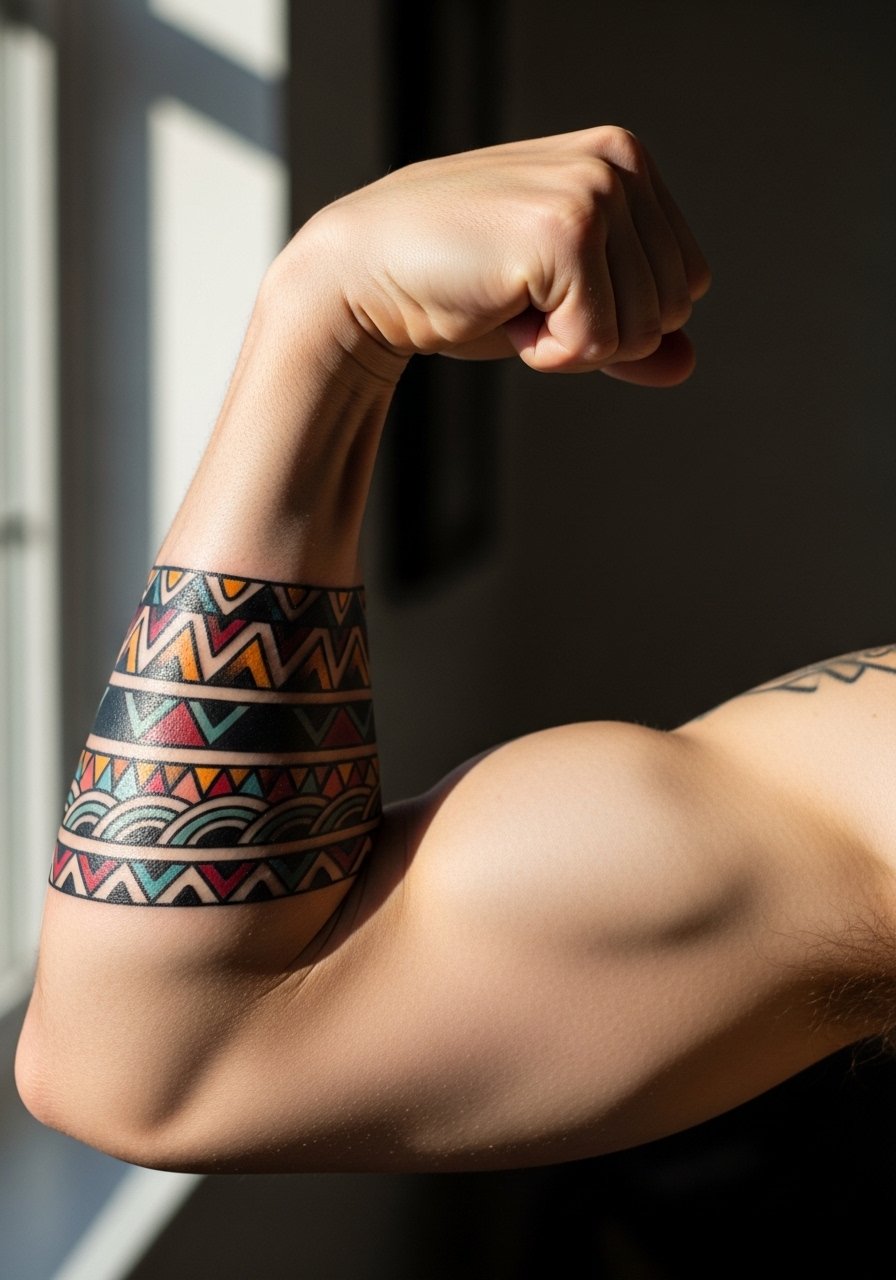
Classic saturated bands age into a bold statement because saturation resists fading better than thin work. Tell your artist you want solid black outlines and modest color saturation for longevity. The mistake is tiny decorative details inside the band that get lost as saturation spreads. Sessions are straightforward and comfortable for most people and often completed in one sitting. A small yearly touch-up keeps color vivid at the edges. Pair with a vintage-style short sleeve tee to create a retro frame around the band.
6. Scripted Wrap of Coordinates Around the Forearm
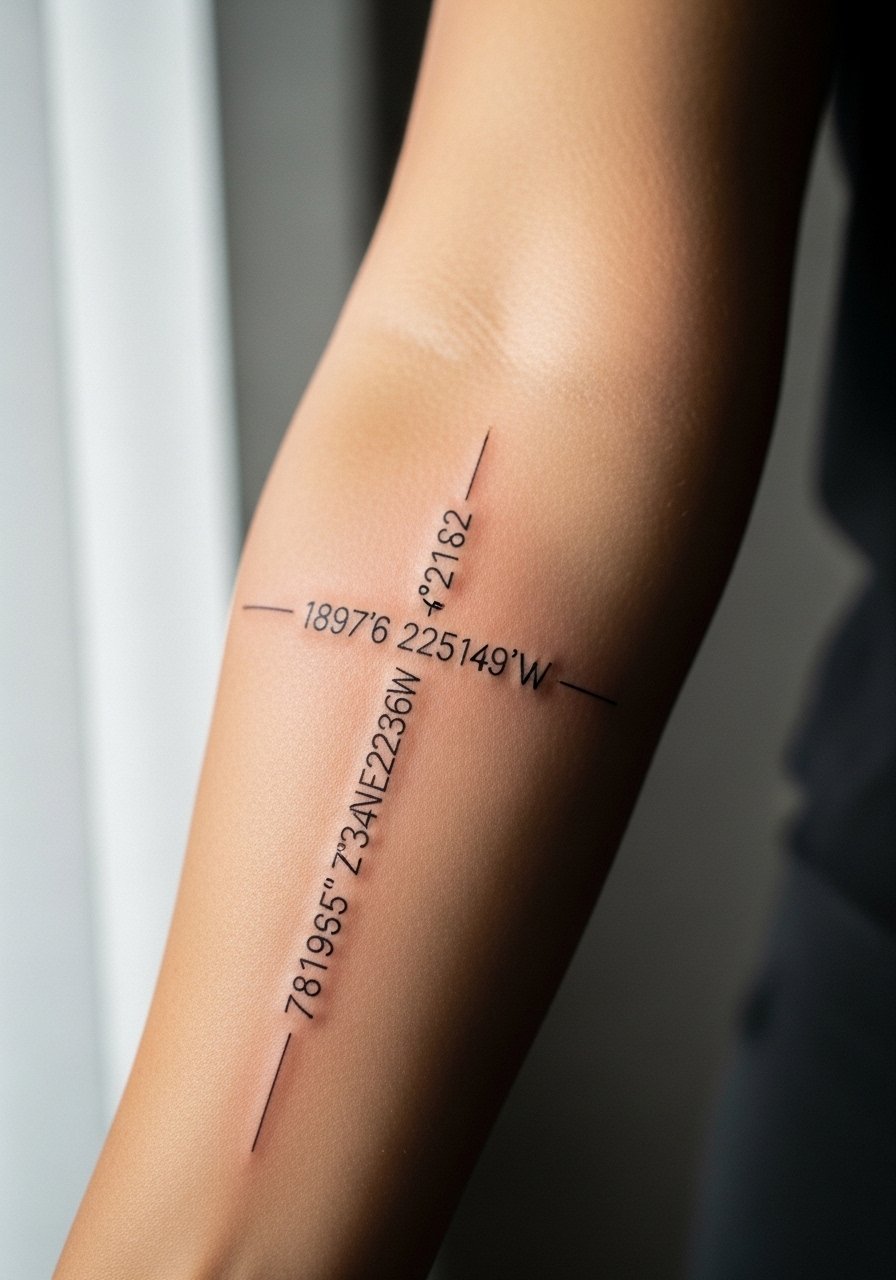
A coordinates wrap reads personal and graphic when the lettering size is planned to move with muscle flex. Specify exact font and character height, and have the artist draw the full wrap on skin before tattooing. The most common mistake is shrinking text to fit more content, which leads to illegible script at two years. Plan for a light touch and expect mild soreness along the tight tendon areas. Wear a delicate thread bracelet when showing it off instead of bulky watches that crowd the wrist.
Studio Day Picks
Those inner forearm, wrist, and upper arm wraps above ask for small but specific prep items you can bring to the chair.
- Stencil transfer paper kit. Lets you test placement across the forearm before the artist inks so you can confirm flow with arm movement.
- Low-residue topical numbing cream. Helps on sensitive wrist wraps when you want the artist to keep steady lines without extra flinching.
- Thin protective film roll. Useful for banded designs that sit near cuffs and risk rubbing in the first week.
- Fragrance-free gentle body wash. Cleans the area during healing without stripping ink or irritating linework.
- Aquaphor healing ointment. A thin layer in the early healing window keeps fine line wraps from drying into flakes that pull pigment.
7. Celtic Knot Wrap Around the Forearm
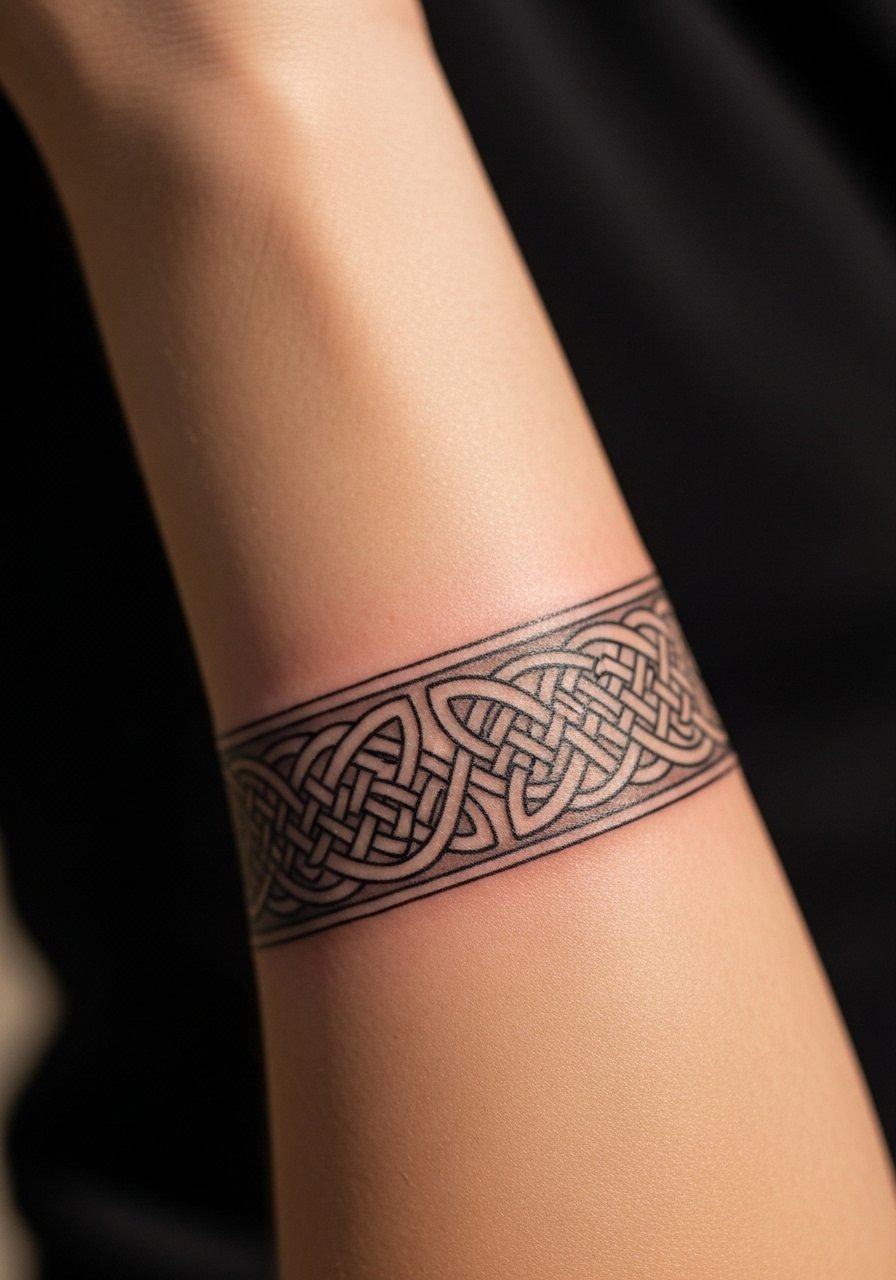
Continuous knotwork depends on rhythm more than detail. Ask for slightly thicker anchor lines where the pattern crosses high-movement zones so knots remain distinct. The mistake is treating the knot as micro detail and scaling it down. On forearms that see frequent movement, tiny knots can smudge and require touch-ups at three years. The session feels steady and deliberate as the artist maps the repeats. For casual show-off, cuff your sleeves and wear a rolled linen button shirt that lets the knot breathe visually.
8. Watercolor Arm Wrap with Black Line Anchors

Watercolor fills can age poorly if they lack defined outlines, but pairing soft washes with bold black anchors helps the design hold. Tell the artist you want the watercolor to act like a background wash, rather than the main structure. The common version that ages badly uses only diluted pigments, which fade into bruising tones. Sessions vary by size but often require layering, and touch-ups are more frequent for color longevity. Wear a short-sleeve flowy top to show the color without sun overexposure.
9. Botanical Sleevelet With Negative Space Leaves
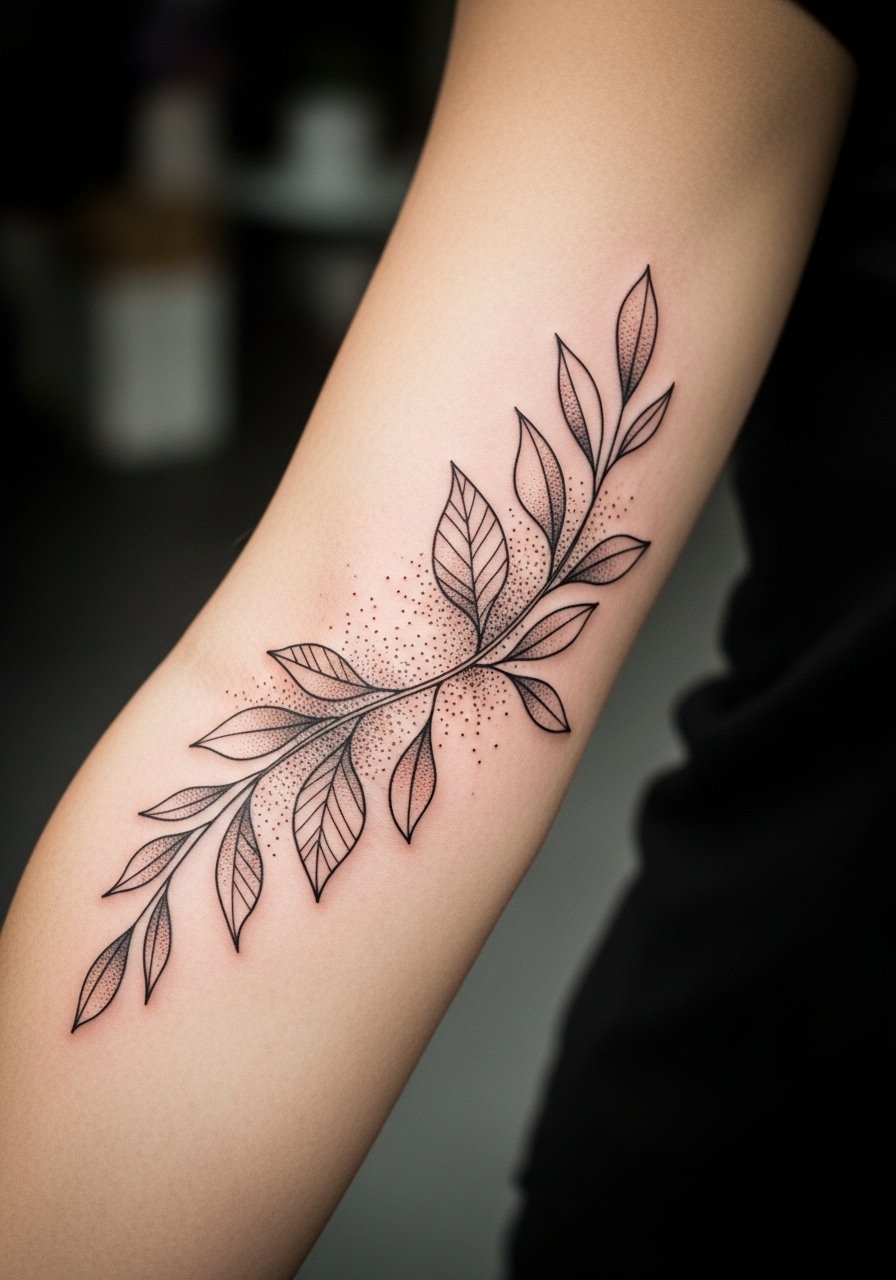
A sleevelet like this plays with skin as a color. Ask for leaves left intentionally blank and specify where the design should breathe. People often overfill the area which kills the airy look and accelerates blurring. The session is gentle but long enough that skin may redden around denser stipple. Expect maintenance touch-ups for the lightest linework at year three. For pairing, short sleeves or a rolled-sleeve chambray shirt keeps the botanical silhouette readable.
10. Chain of Tiny Symbols Encircling the Wrist
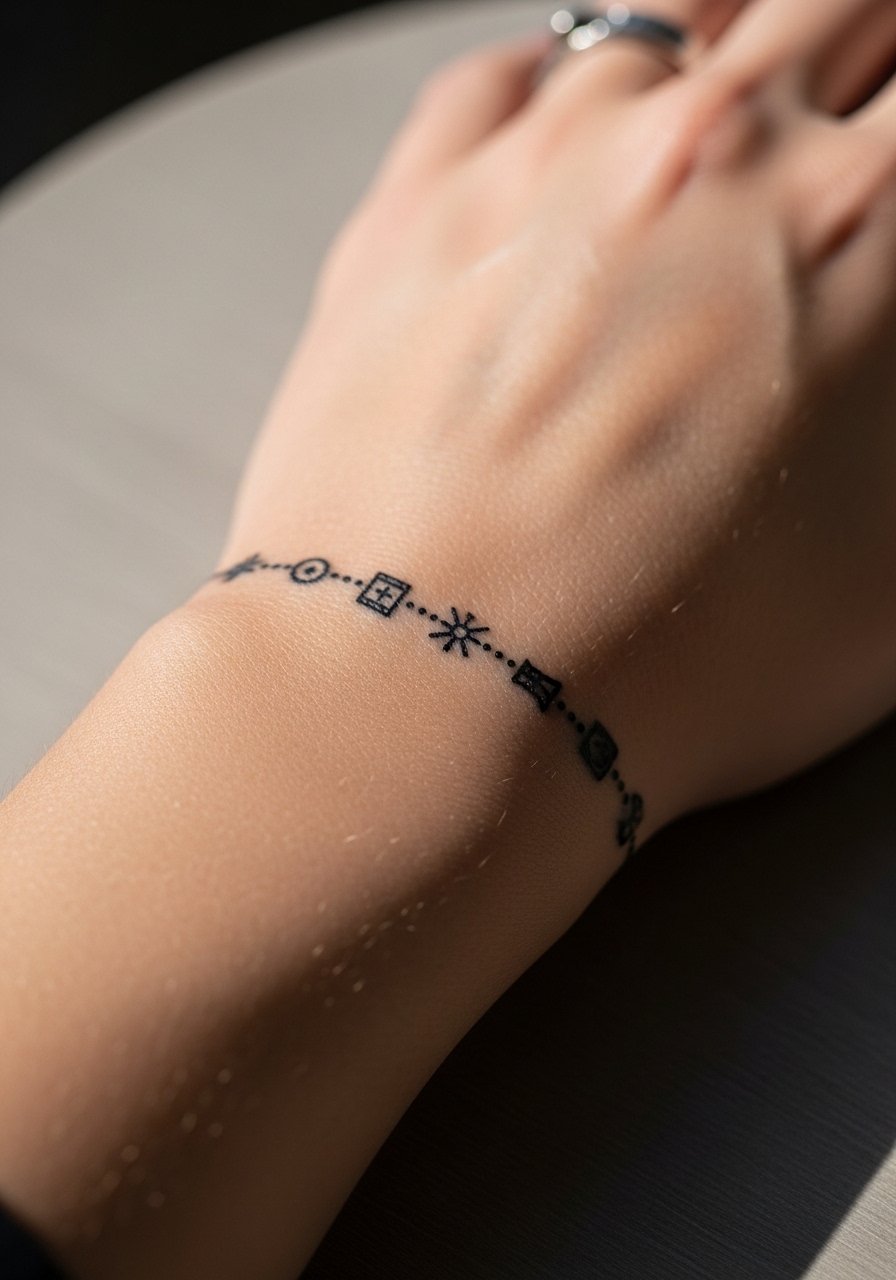
This design is great for mixing meaningful symbols into a subtle wrap. During consultation, map each symbol and confirm order with the artist to avoid surprises. A frequent mistake is choosing icons that are too detailed for the tiny scale. The wrist moves a lot, so anticipate touch-ups sooner than forearm work. The session is quick but precise and the pain is sharp near the tendon. For accessorizing, pair with a minimalist watch strap that complements the icons without covering the ink.
11. Blackwork Scales Wrapping the Outer Forearm

Blackwork scales read strong from distance and age predictably because saturation resists fading. Tell the artist you want moderate spacing between scales so the pattern ages without filling in. The usual error is packing scales too tight, which creates a blurred texture after a few years. Sessions are steady and can be tiring because saturation layers build gradually. For casual dress, a short sleeve cotton henley frames the scales without hiding the contrast.
12. Minimalist Arrow Wrap on the Inner Wrist
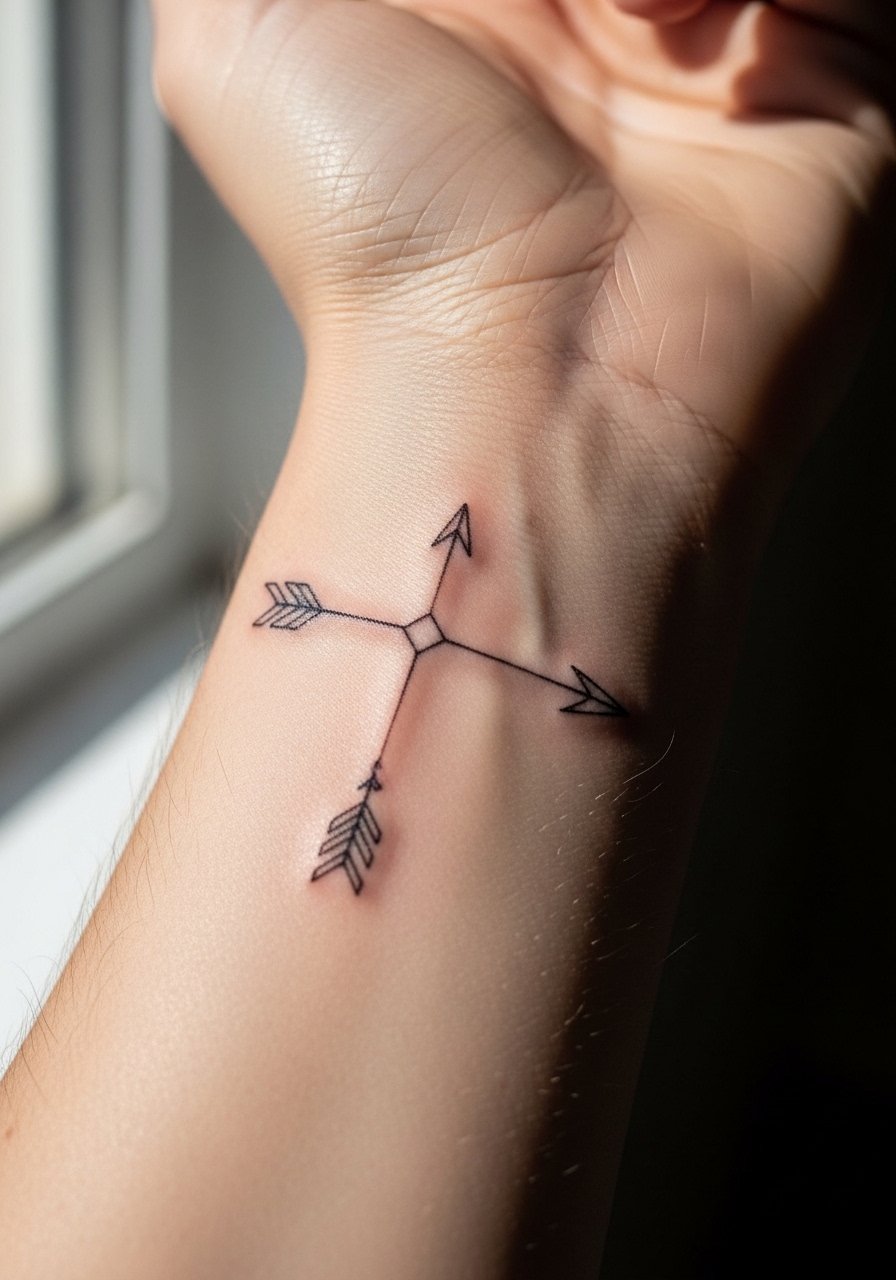
An arrow wrap reads minimalist when the line weight matches tendon movement. Ask for slightly thicker arrowheads so the silhouette survives daily wear. The mistake is making everything microscopic which tends to fade into a gray smudge. Sessions are short but can sting more over bone. Expect a touch-up by year two for restored crispness. For showing off, pair with a simple leather cuff that sits just below the arrow without obscuring it.
13. Botanical Inner Bicep Wrap With Script
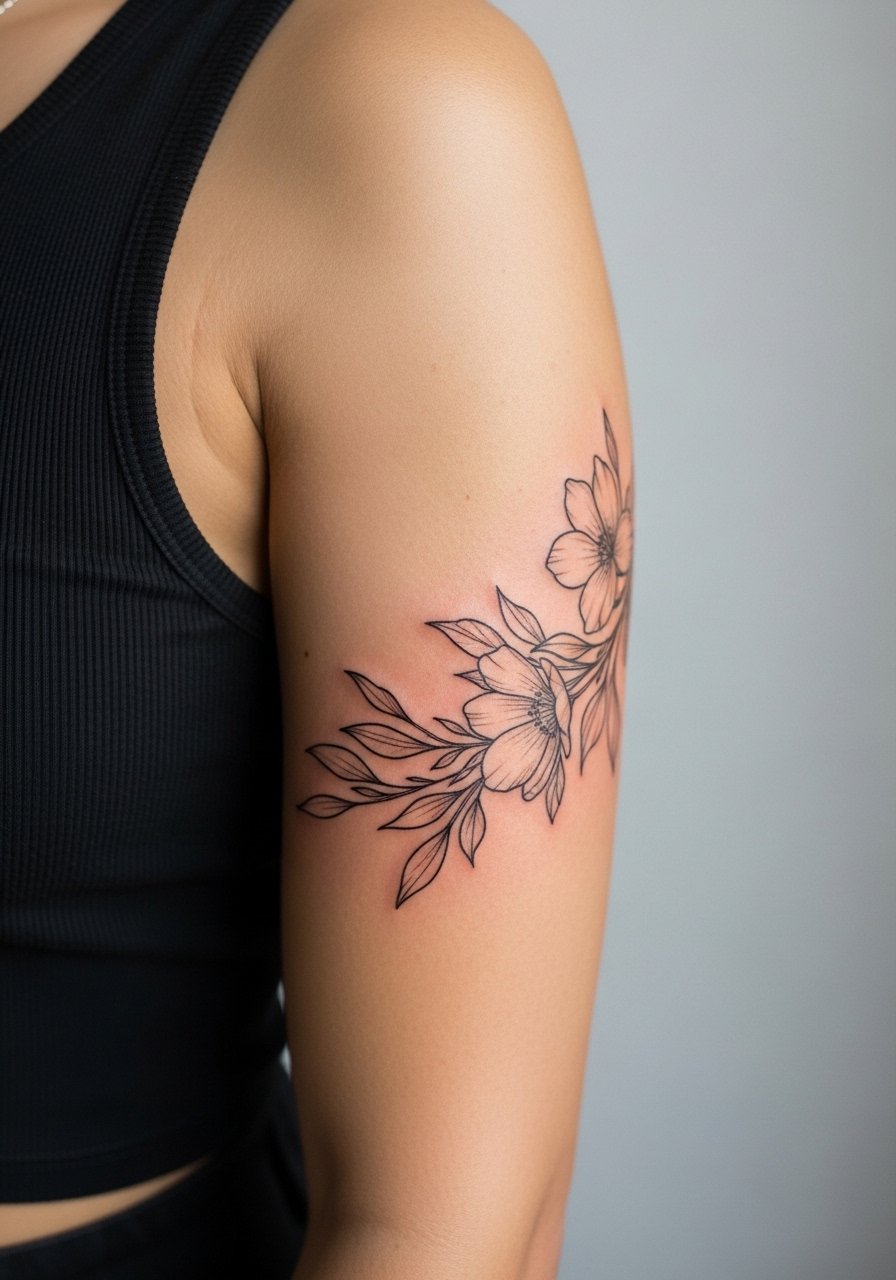
Inner bicep skin moves and stretches, so ask your artist about spacing and needle depth to prevent early blur. A common mistake is trusting tiny script in this area because muscle shifts can distort lettering. Sessions can be tender and may need breaks for comfort. Artists split on fine line here. One camp says the skin will blur lines within two years. The other camp says careful depth and spacing keep fine line readable. Ask where your artist stands in that debate. For the session wear, choose a loose tank top you can raise slightly without feeling exposed.
14. Interlocking Triangles Arm Wrap
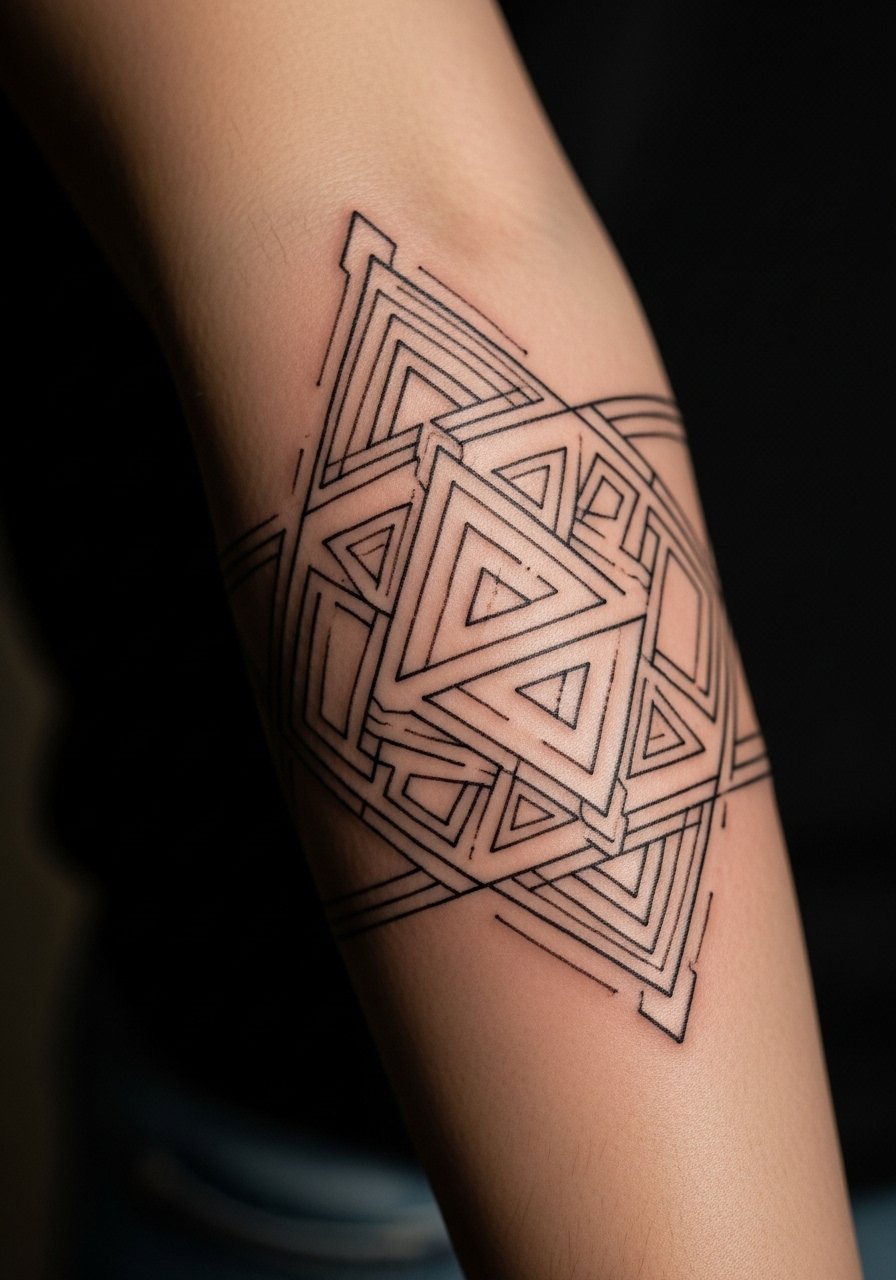
Geometric interlocks need breathing room. Tell your artist to scale the negative spaces proportionally rather than shrinking to fit. The common error is compressing the pattern which causes edges to merge in a few years. The session requires careful stencil placement and may take a couple of hours. For wardrobe, a short sleeve graphic tee rolled slightly up keeps edges visible.
15. Scripted Quote Wrapping the Arm Like a Band
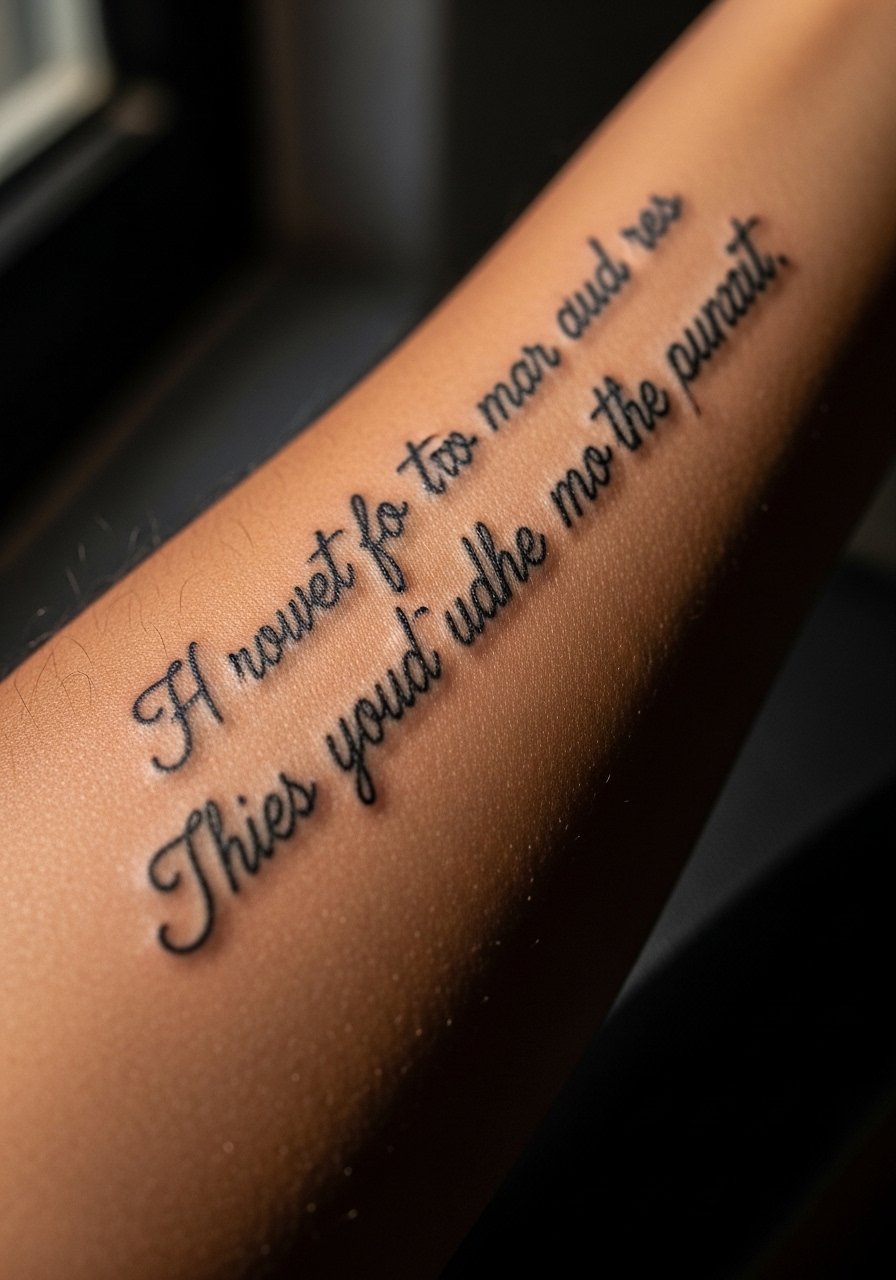
When the quote is the focus, limit the words and pick a font that matches your handwriting preferences. A common mistake is overlong phrases that force tiny letters and illegibility. The session is measured and can be broken into short passes if necessary. Expect the thin strokes to need a touch-up at year two. For showing the line, a delicate pendant necklace sits above the script and balances the look.
16. Botanical Back-of-Arm Wrap Near Elbow
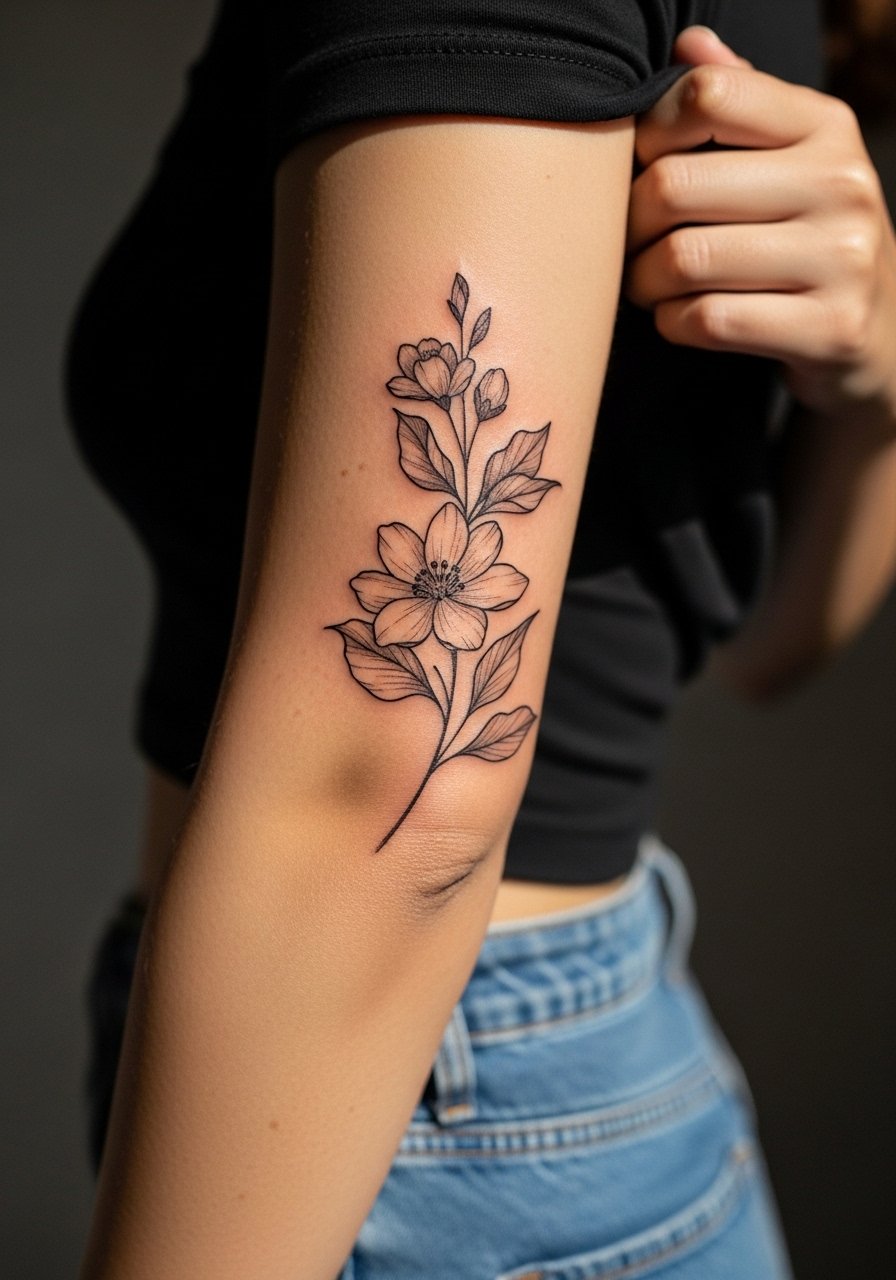
This placement sees bending and pressure which affects longevity. Tell your artist to avoid tiny connecting stems across the fold so the design keeps form. The mistake is placing dense detail right at the crease which blurs fast. The session might be more sensitive because of movement, and touch-ups focus on the crease zone. For showing off, roll sleeves to the right height and pick a soft cotton tee that hits above the wrap.
17. Ornamental Dot Work Half-Wrap
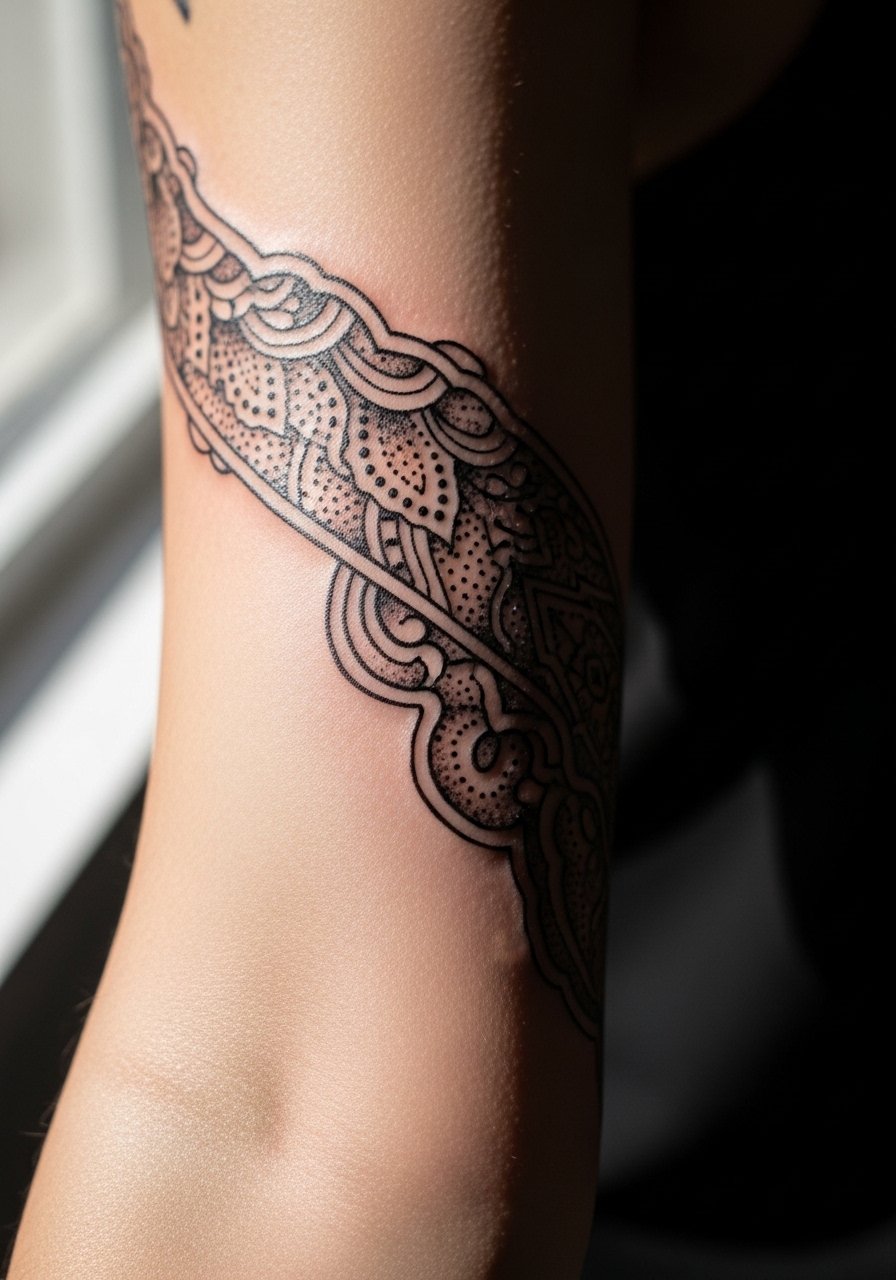
Dot-based ornaments create texture without heavy fields that pool. Ask for staggered dot density so areas age with distinct light and dark balance. People often ask for fully packed dots which look heavy later. Sessions are slow and precise but generally less painful than solid fill. A yearly spot touch-up keeps the fine contrasts readable. Pair with a rolled-cuff blazer sleeve when you want the tattoo to peek out in a tailored outfit.
18. Nautical Rope Wrap with Anchor Accent
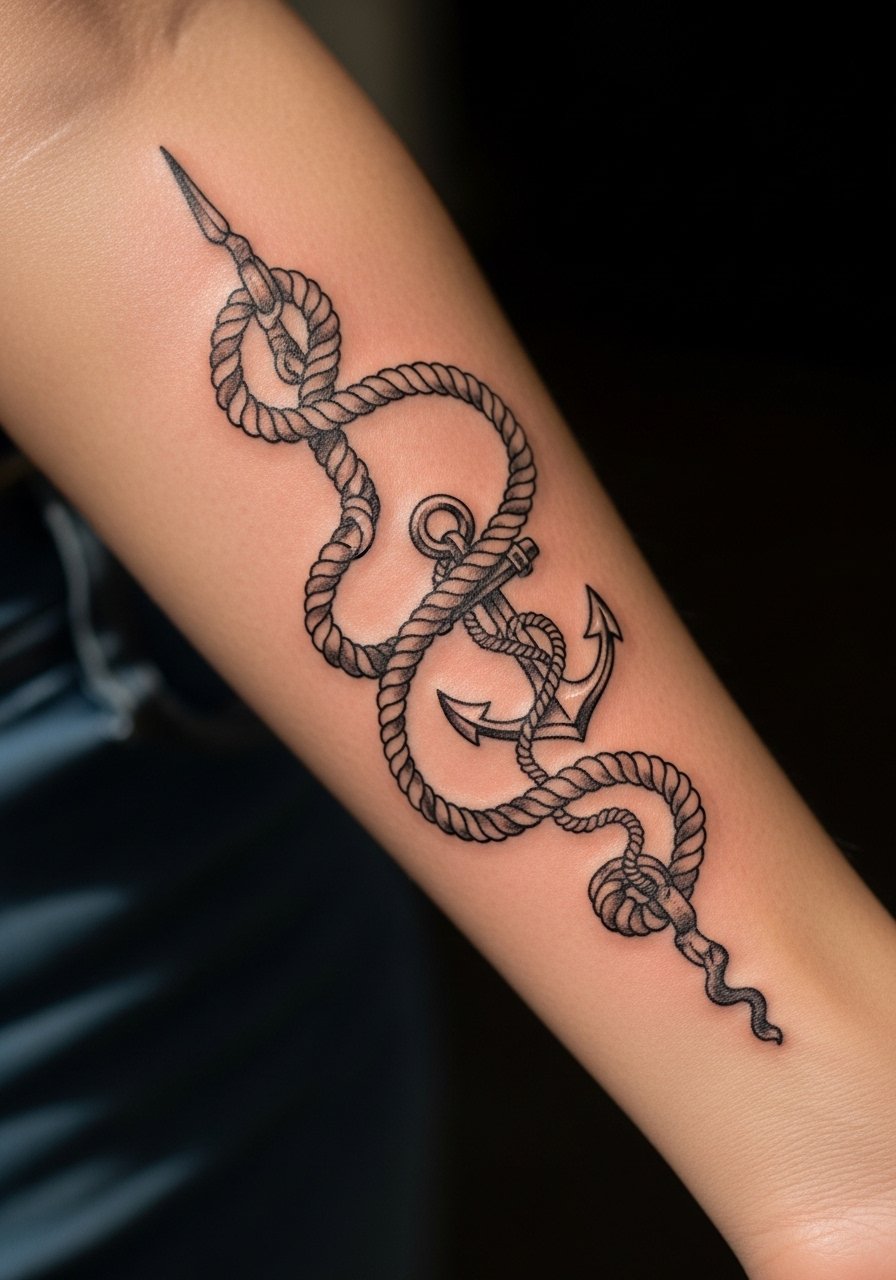
Rope textures can frame a forearm nicely when anchor points receive slightly bolder lines. Tell the artist to thicken the crossing strands just enough to resist spreading. The usual error is over-detailing each twist which becomes indistinct as skin settles. Sessions are comfortable and short, with predictable pain levels. For style, a striped boatneck tee complements the nautical theme without busying the arm.
19. Thin Barbed Wire Wrap for an Edgy Look
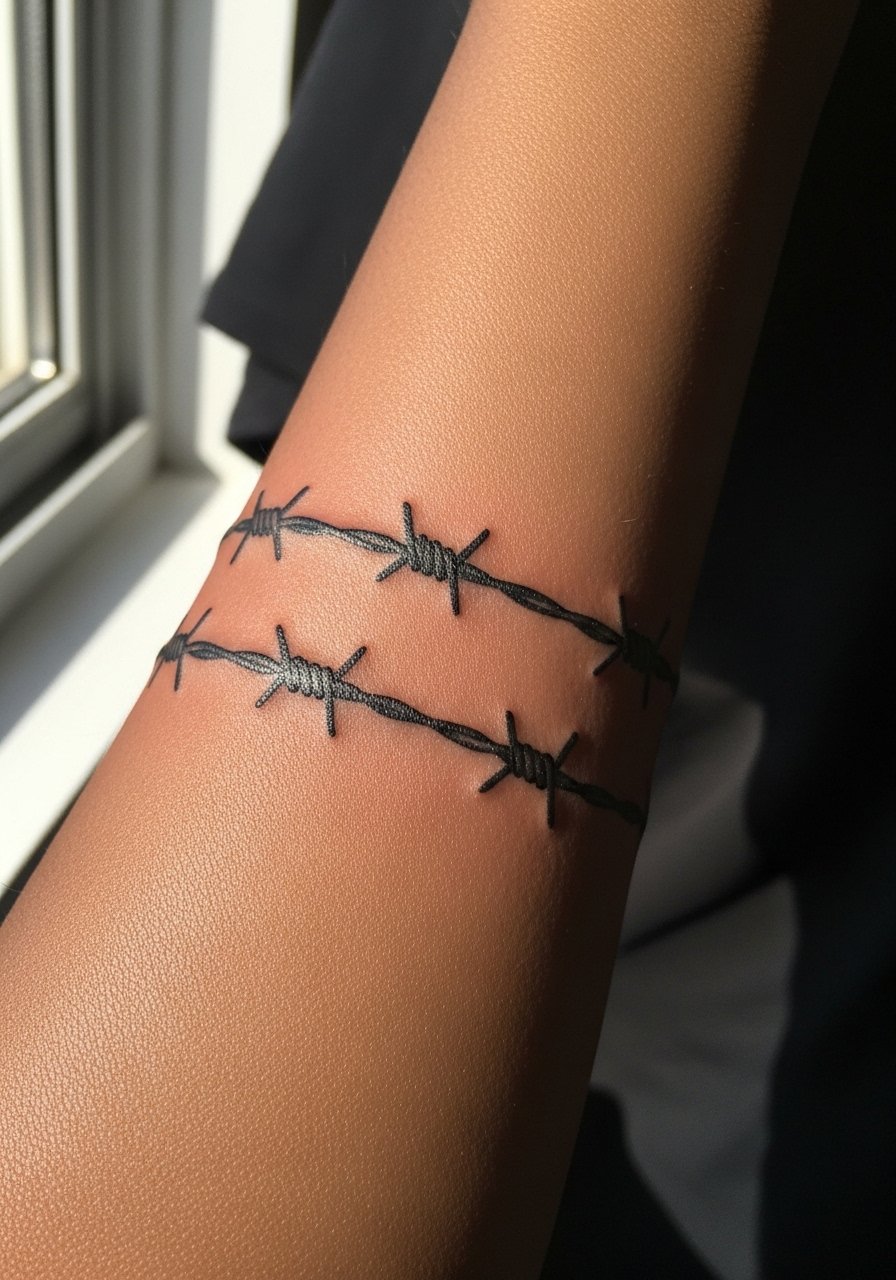
Barbed wire reads bold when the line weight is consistent. Discuss exact barb spacing and ask for preview placement so the pattern sits naturally with muscle lines. Overly tiny barbs are the mistake most people make and those details disappear over time. Sessions are quick but the skin near barbs can be more sensitive. For styling, pair with a leather jacket sleeve pulled back to show the wrap against texture.
20. Botanical Half-Sleeve Around the Arm with Soft Color Washes
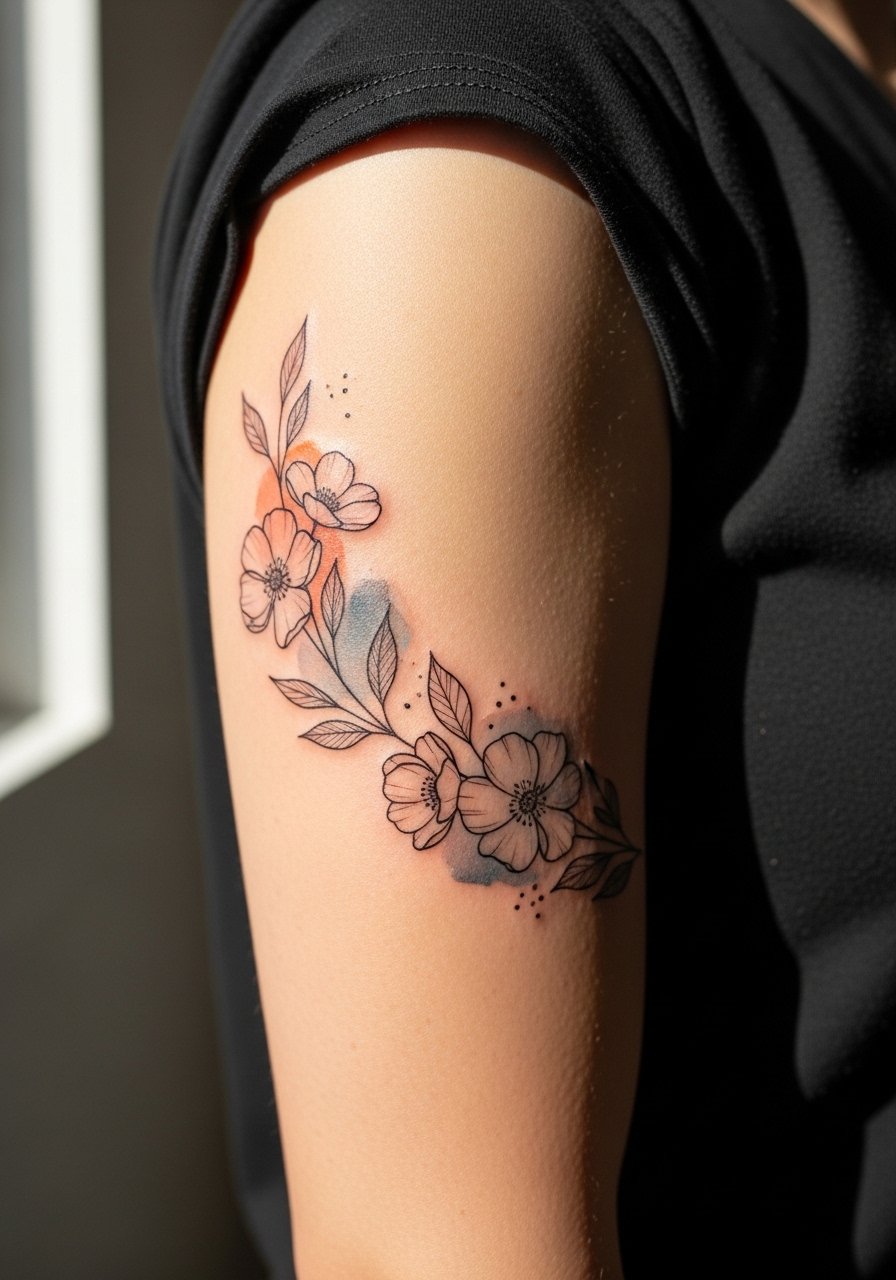
When color is involved, ask for pigments known to hold on your skin tone and request black anchors for structure. The mistake is too many pastel fills without anchor lines which fade into an indistinct wash. Sessions take longer and often include breaks between color layers. Expect periodic color top-ups at years two to four depending on sun exposure. For showing it off, a sleeveless dress or top works well if you want the botanical to be the focal point.
21. Geometric Chevron Wrap With Whip Shading
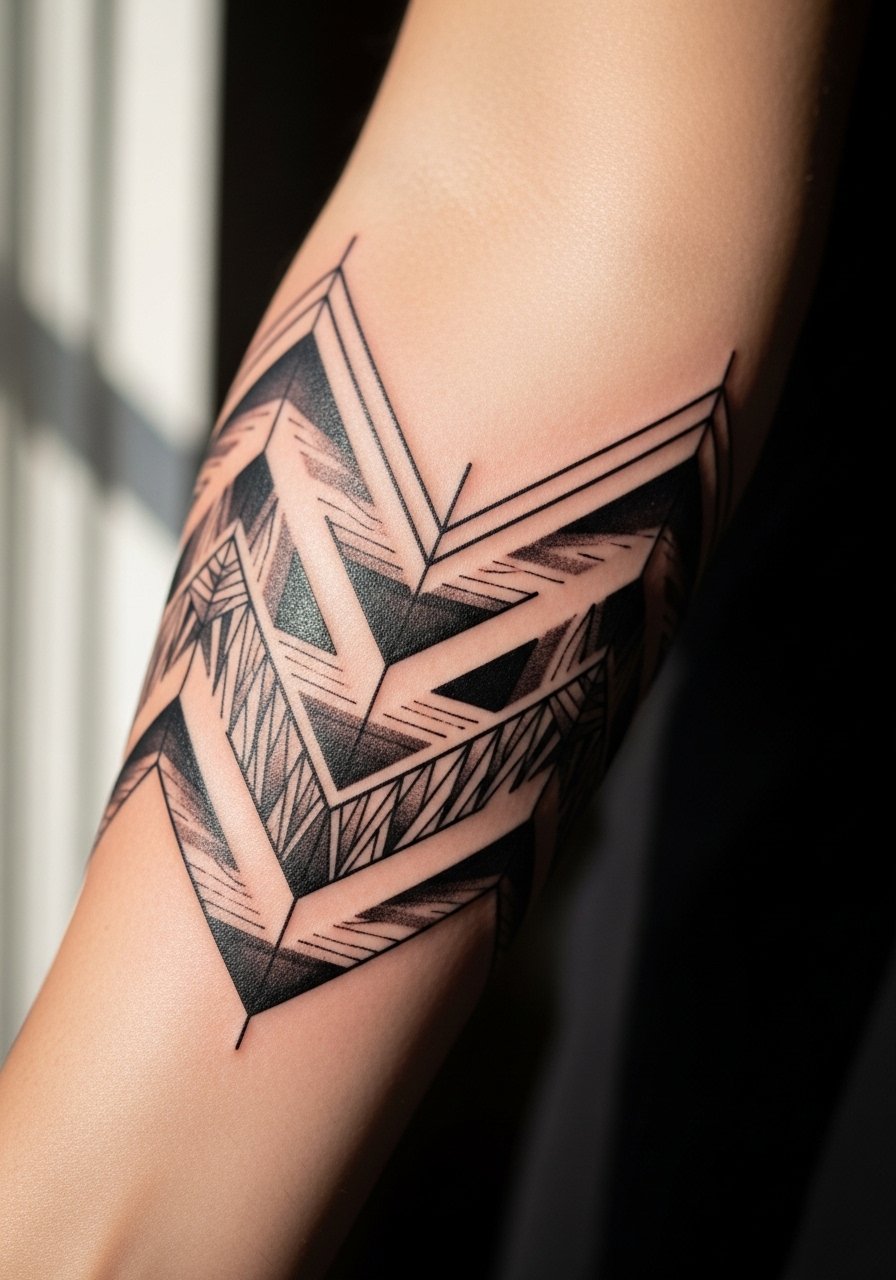
Chevron patterns need consistent angles and measured shading. Tell the artist you want minimal overlapping shading so edges stay crisp. The common mistake is dragging shading into the chevrons which softens the graphic. Sessions are rhythmical and may take two hours. For everyday wear, a rolled-sleeve denim shirt keeps the chevrons visible and modern.
22. Tiny Constellation Wrap With Negative Space Stars
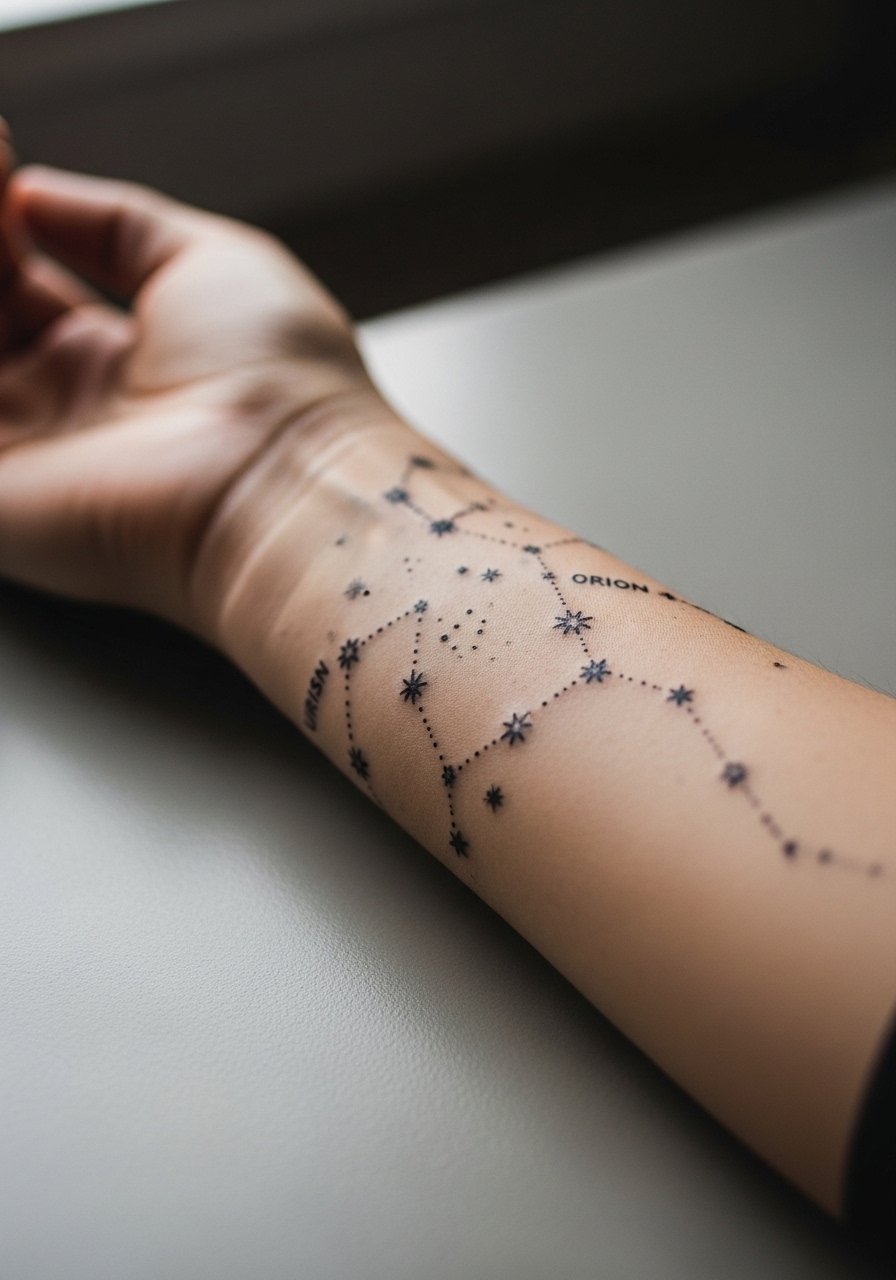
Constellation wraps feel personal when the star spacing respects skin texture. Ask for negative space stars instead of filled dots so the pattern breathes. Too many tiny stars packed close is the typical error, which creates a gray cloud after a few years. The session is brief and precise. Pair with a thin chain pendant and avoid wide bracelets that will flatten the constellations.
23. Floral Vine That Wraps From Wrist to Hand

Hand wraps age differently and can show wear from frequent washing. For this reason, ask the artist to keep the vine focused on the wrist and back of hand with thicker stems near knuckles. A common mistake is extending delicate lines onto fingers which often blur or fade quickly. The session can be more painful and may need touch-ups sooner. If you plan to show it daily, avoid rings that sit directly on the vine. For pairing, a simple ring stack worn below the vine complements the flow without covering ink.
24. Abstract Brushstroke Wrap Around the Forearm
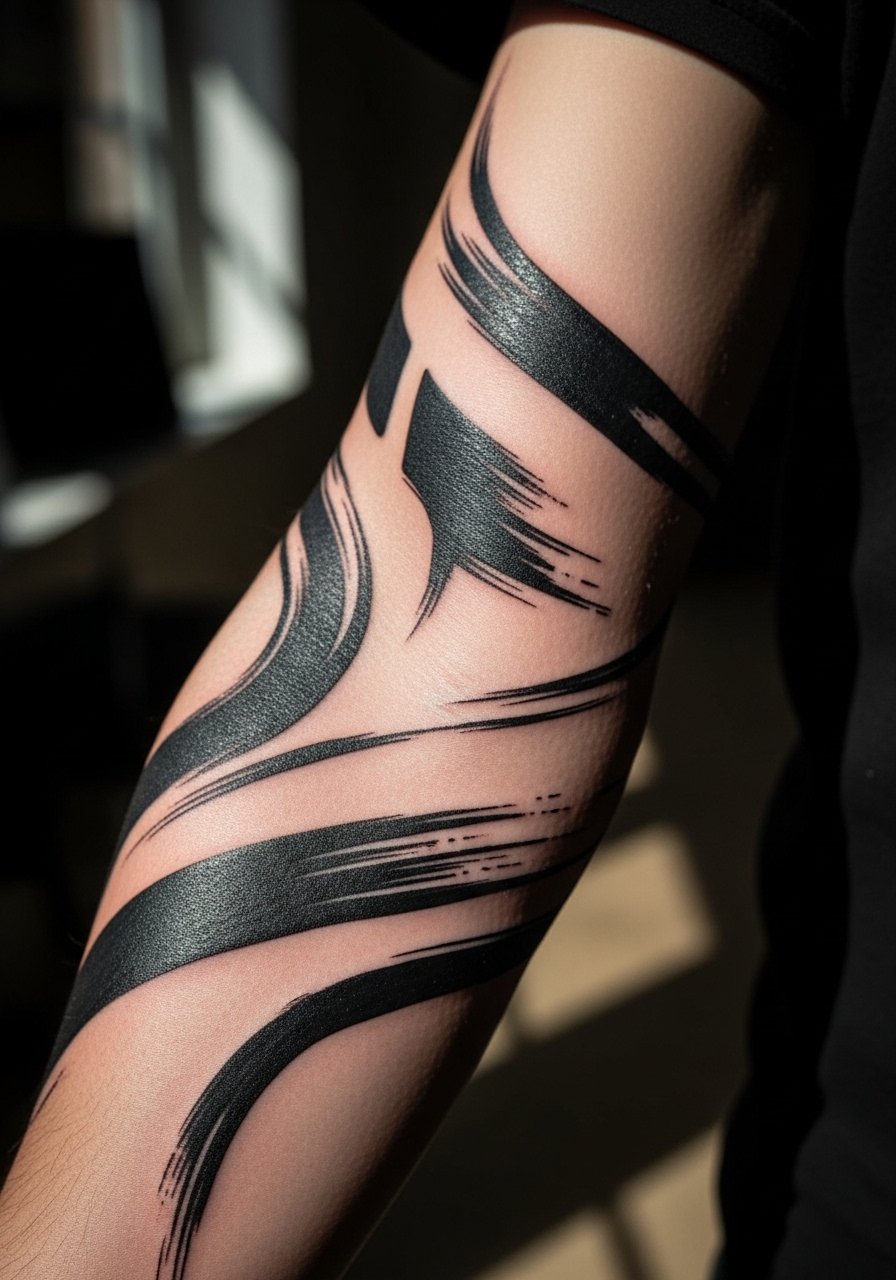
Brushstroke wraps read modern and age well when brush edges are given room to breathe. Tell the artist you want deliberate breaks in the strokes rather than solid fields. Overfilling loses the painterly quality and leads to a single dark band with no texture. The session feels dynamic and often moves quickly. For a clean pairing, pick a short-sleeve boxy tee to balance the movement.
25. Mandala Half-Wrap Near the Elbow
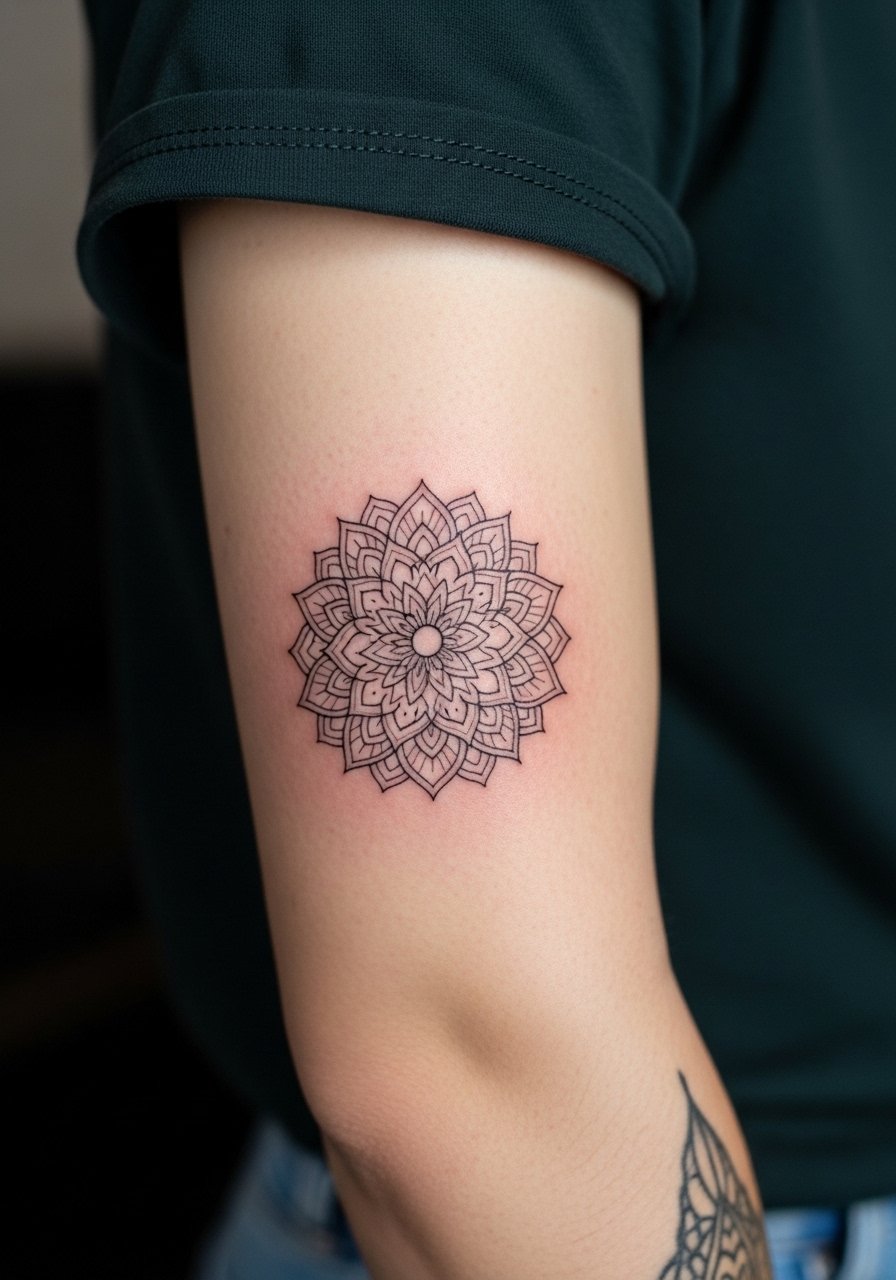
Mandalas need scale to read over time. Ask for larger gaps in dense sections so the pattern keeps its lace-like look. The most common mistake is cramming too many spokes into a small area. Artists also debate placement over the elbow. One camp warns that skin motion around the joint blurs detail faster. The other camp believes with correct spacing and deeper anchoring the mandala keeps form. Decide which view your artist follows before you start. For the session, wear a loose sleeve top that can be adjusted to expose the area comfortably.
26. Minimal Dot Band With Single Accent Gem

Minimal dot bands work if the accent point is slightly bolder than the dots. Tell your artist to keep the gem proportionate and give it a tiny halo of negative space. The mistake people make is making the dot field too dense which looks like a gray smudge over time. Sessions are short and usually tolerable. For wearing, a thin bangle bracelet placed below the band can create a layered look without sitting on the accent.
27. Custom Illustrated Story Wrap That Circles the Arm

A story wrap is custom by nature and benefits from a clear narrative plan. Bring reference images and a prioritized list of scenes so the artist knows which elements to emphasize. The biggest mistake is trying to fit too many distinct scenes without transition elements, which makes the band read cluttered after settling. Sessions are modular and can be split across appointments to preserve energy and skin quality. Expect touch-ups that refine the smallest illustrations at year two. For showing the narrative, wear a short-sleeve textured knit that lets scenes peek through without competing.
Frequently Asked Questions
Q: Do fine line arm wraps need touch-ups more often than bold blackwork?
A: In my experience fine line work does require touch-ups sooner because the thin strokes rely on precise channels of pigment that can spread or lighten. Bold blackwork tends to age into a readable shape more reliably. Plan for a touch-up at year two to three for fine line arm wraps and a later touch-up for heavily saturated bands.
Q: Will a wrap across the inner bicep blur faster than on the outer forearm?
A: Yes, inner bicep skin moves and stretches more, so lines there can diffuse more quickly. The risk depends on depth, spacing, and aftercare. If you want fine details in that area, discuss spacing and a conservative scale with your artist.
Q: How should I dress for a full half-sleeve session that includes the elbow and forearm?
A: Wear a loose button-down or a short-sleeve top you can adjust so the artist has full access without you feeling exposed. A loose button-down shirt is a practical option that covers non-work areas while letting the arm be worked comfortably.
Q: Are arm wrap tattoos harder to keep equal around the whole circumference?
A: They can be because arm circumference varies and muscle tone changes shape as you move. Good artists mark live stencils and check alignment with your resting pose. Asking to see the full wrap on skin first is the key step.
Q: Should I avoid certain styles if I work in a conservative job?
A: Visible wraps on wrists and hands are more likely to attract attention than upper arm pieces that sleeves can hide. If discretion matters, choose placements higher on the arm or plan designs that work well when covered.
Q: How do I find artists who specialize in arm wraps without following specific handles?
A: Use image-focused directories, local shop portfolios, and convention galleries. Search relevant hashtags for the style you want, then confirm the artist has healed photos in similar placements. Visiting a shop and asking to see healed photos in person is also a solid discovery path.
