
Fine line angel tattoos are everywhere on saved boards right now, and people assume the fresh photo is the final verdict. The reality is different. Bold blackwork and neo-traditional pieces usually read clearer after a few years, while delicate linework often needs touch-ups or careful placement to last. Below are 17 angel warrior directions that balance what looks great today with what will still look crisp five years from now.
1. Armored Archangel Michael with Sword on Outer Forearm

I recommend this when you want a statement piece that reads from across a room. Ask your artist for confident linework, slightly larger spacing between feather details, and a hint of red only in the sword or cloak so color doesn’t wash into gray over time. Forearm sessions feel medium on most pain charts and usually run two shorter sessions rather than one marathon. The common mistake is asking for micro-detail in a 4-inch block. Scale up or simplify the feathers and the piece will hold. For showing this off, roll your sleeves and wear a fitted black t-shirt or layer with an olive cargo jacket to keep attention on the arm.
2. Winged Warrior Angel in Battle Pose on Upper Arm
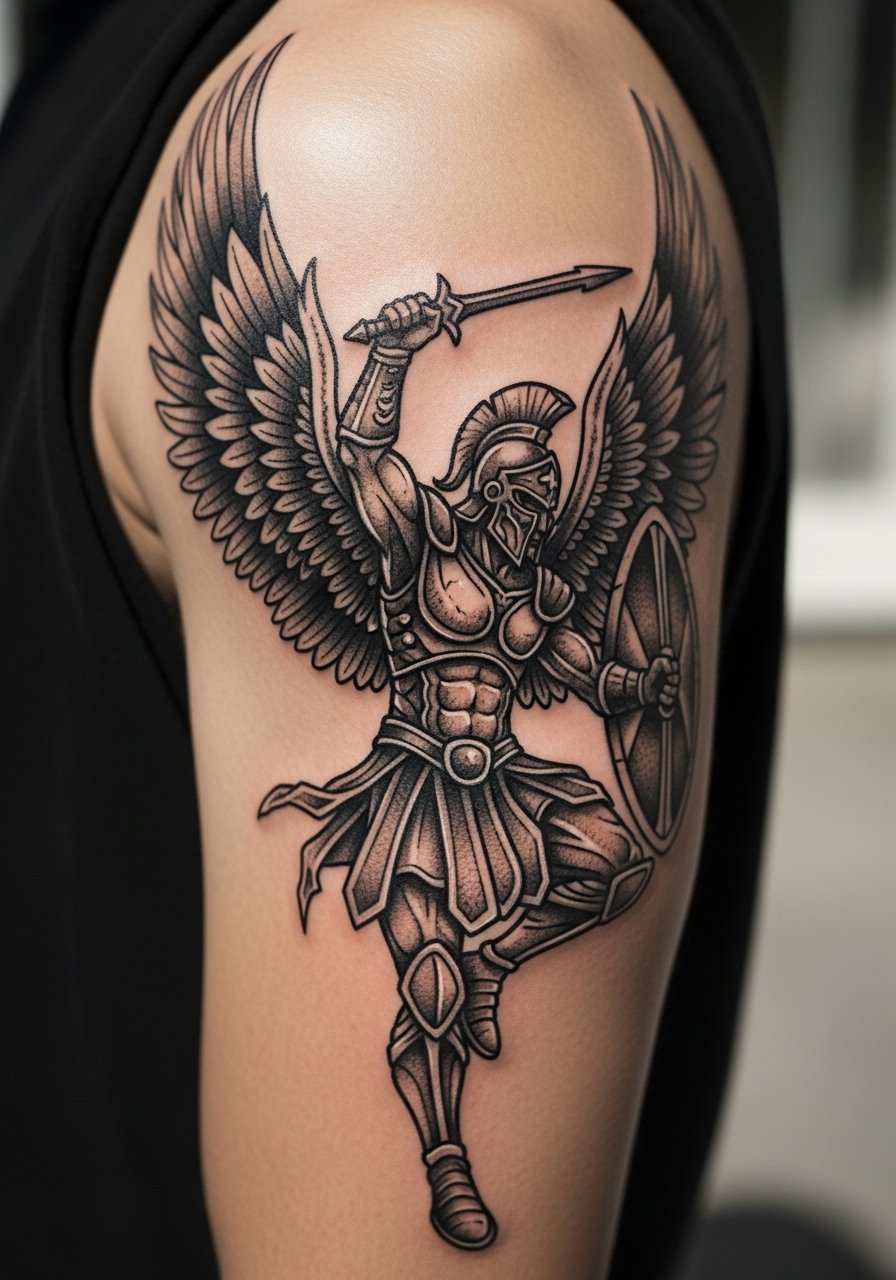
If you want aggressive silhouette and longevity, this is a pick. Upper arm blackwork ages well because the skin there rarely stretches dramatically and the bold saturation resists blur. Tell your artist to prioritize solid saturation over tiny ornamental details. Expect three sessions if you expand into a half sleeve. The most common regret is requesting too many thin lines inside the wings. For session comfort unbutton a shirt so the artist can work the full upper arm without you feeling trapped. This style pairs with sleeveless basics when you want to show it off, try a sleeveless muscle tank in muted tones.
3. Shield-Bearing Angel on the Shoulder
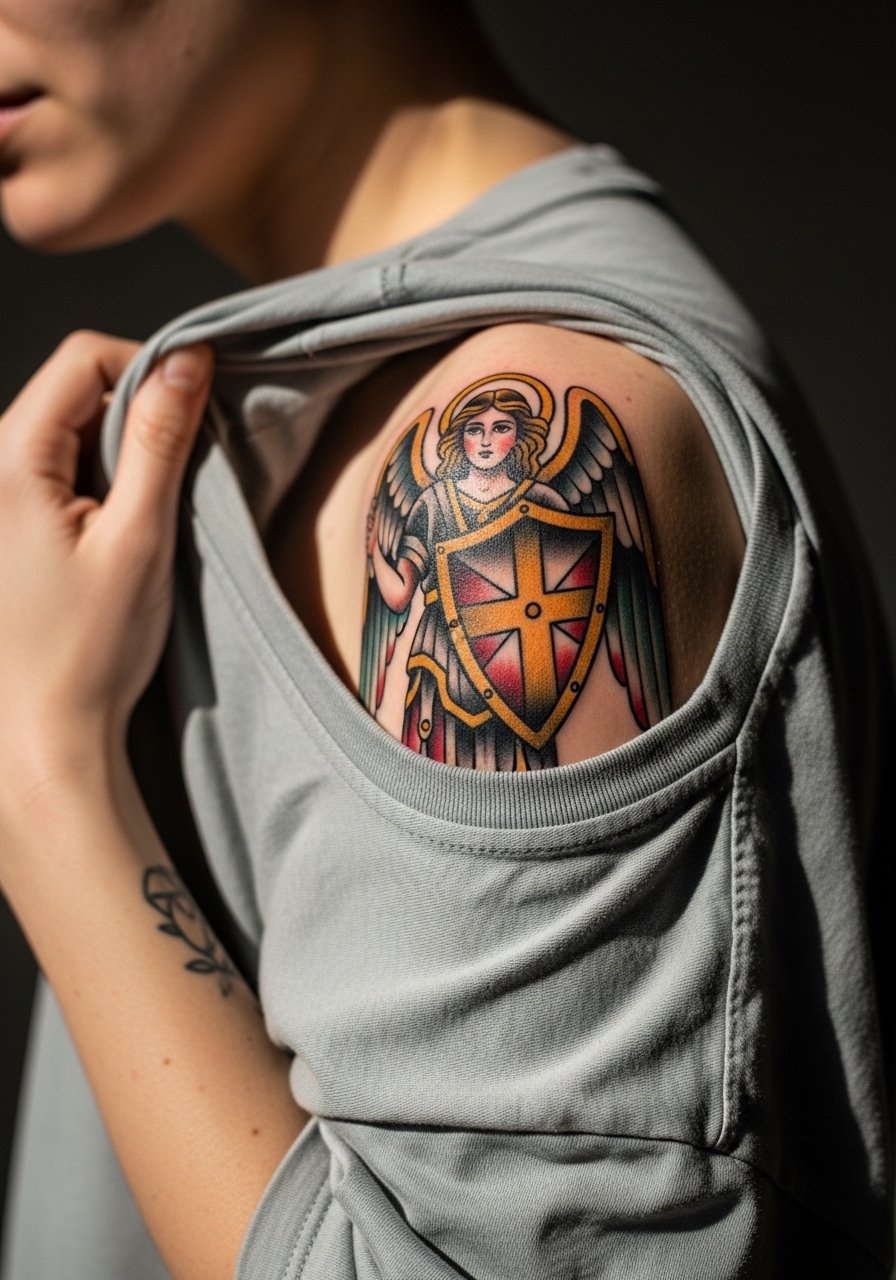
Shoulder placement is forgiving on the pain scale and is a solid first large piece. Ask for traditional bold outlines with selective gold highlights rather than full metallic fills. The common error is packing too much tiny shading into a small shoulder cap. That detail blurs first. Sessions are quick for single pieces and the area responds well to touch-ups within six months. For showing off, off-shoulder tops and a black leather vest frame the wings without competing. For the appointment itself, wear a loose tee you can slide aside.
4. Celestial Warrior with Halo and Armor on Chest or Back
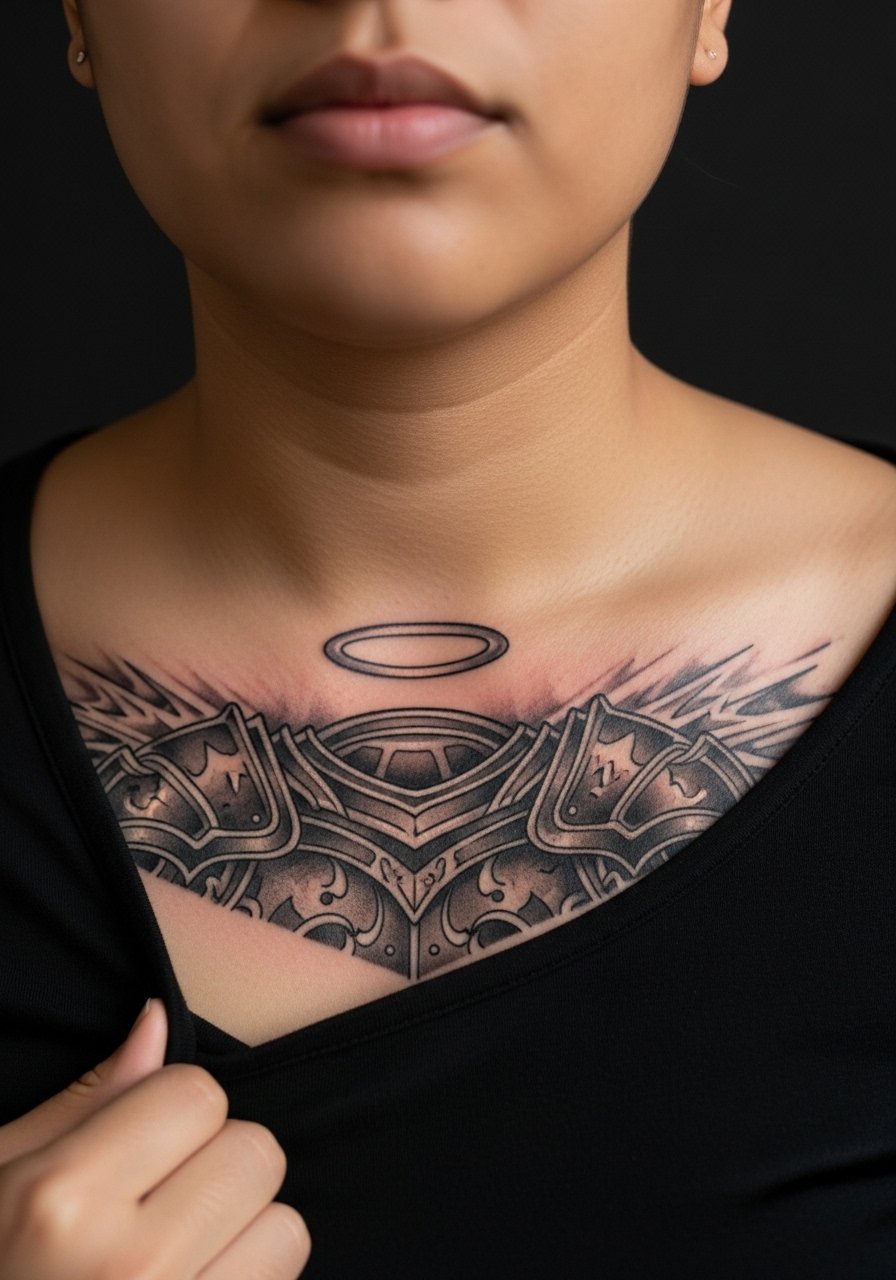
This is for people who want portrait-level detail across a broad canvas. Expect a multi-session build and a longer overall timeline. Micro-realism demands perfect stenciling and careful shading placement so the halo and armor keep depth without muddying. Fine line purists argue this level of detail can be done small. Others say it needs scale to survive. Name that debate in your consultation so you both land on the same scale. Chest sessions are higher on the pain chart than the shoulder, and you will want to schedule recovery days. For showing the piece, low V-neck tees or an open button-down make for a subtle reveal while keeping clothing comfortable during sessions.
5. Sword-Wielding Angel in Dynamic Flight for Sleeve Starts
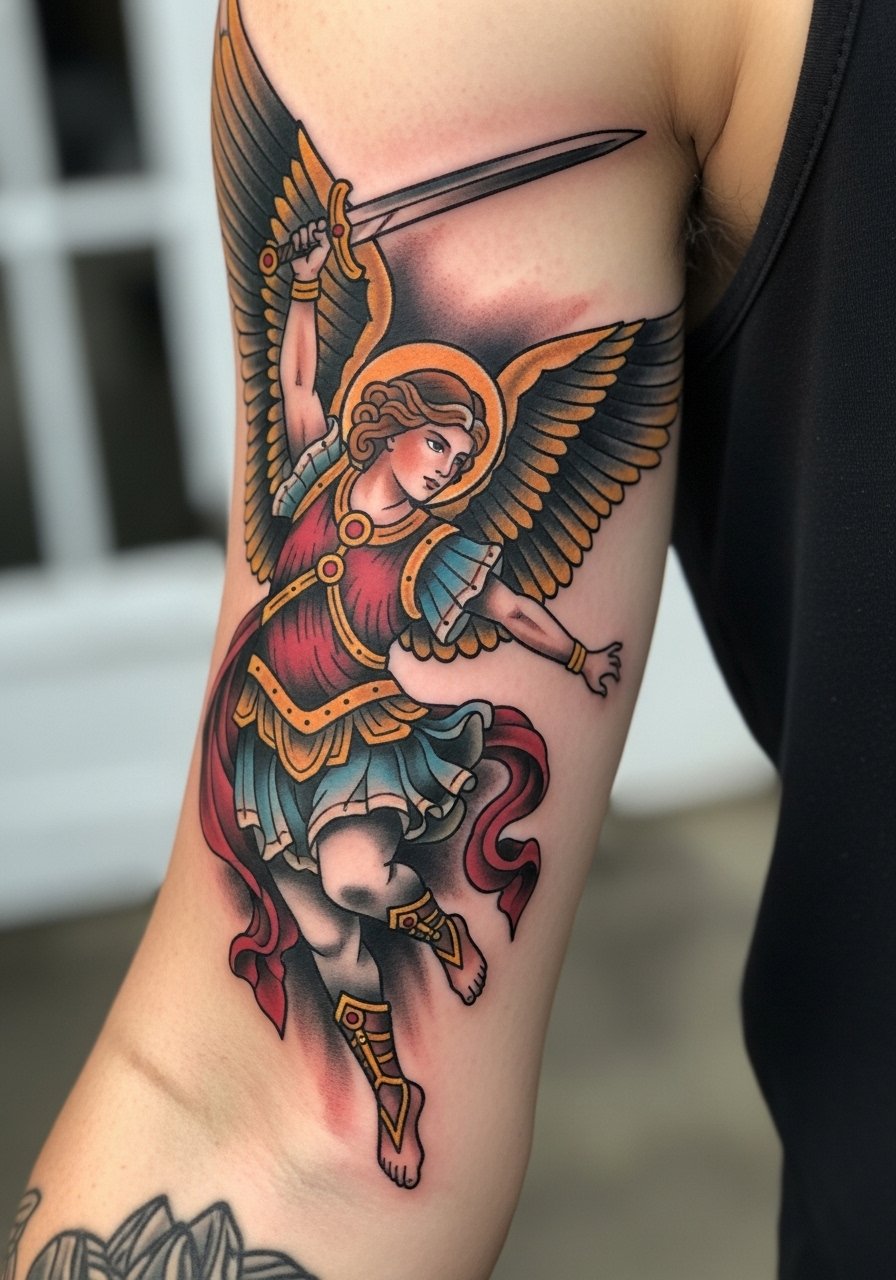
Begin with a bicep anchor if you want a sleeve that expands over years. The motion of a flying angel helps future panels flow into one another. Tell your artist you want larger feather masses and fewer micro-feathers near joints to avoid early blurring as the arm moves. Sessions feel medium to long depending on how much color you add. The frequent mistake is insisting on perfectly symmetrical wings around a curved area. Work with asymmetry and the design will sit more naturally when the arm relaxes. For the session wear a loose button-down shirt you can open wide so the artist has clear access.
6. Muscular Angel Warrior Silhouette on the Calf
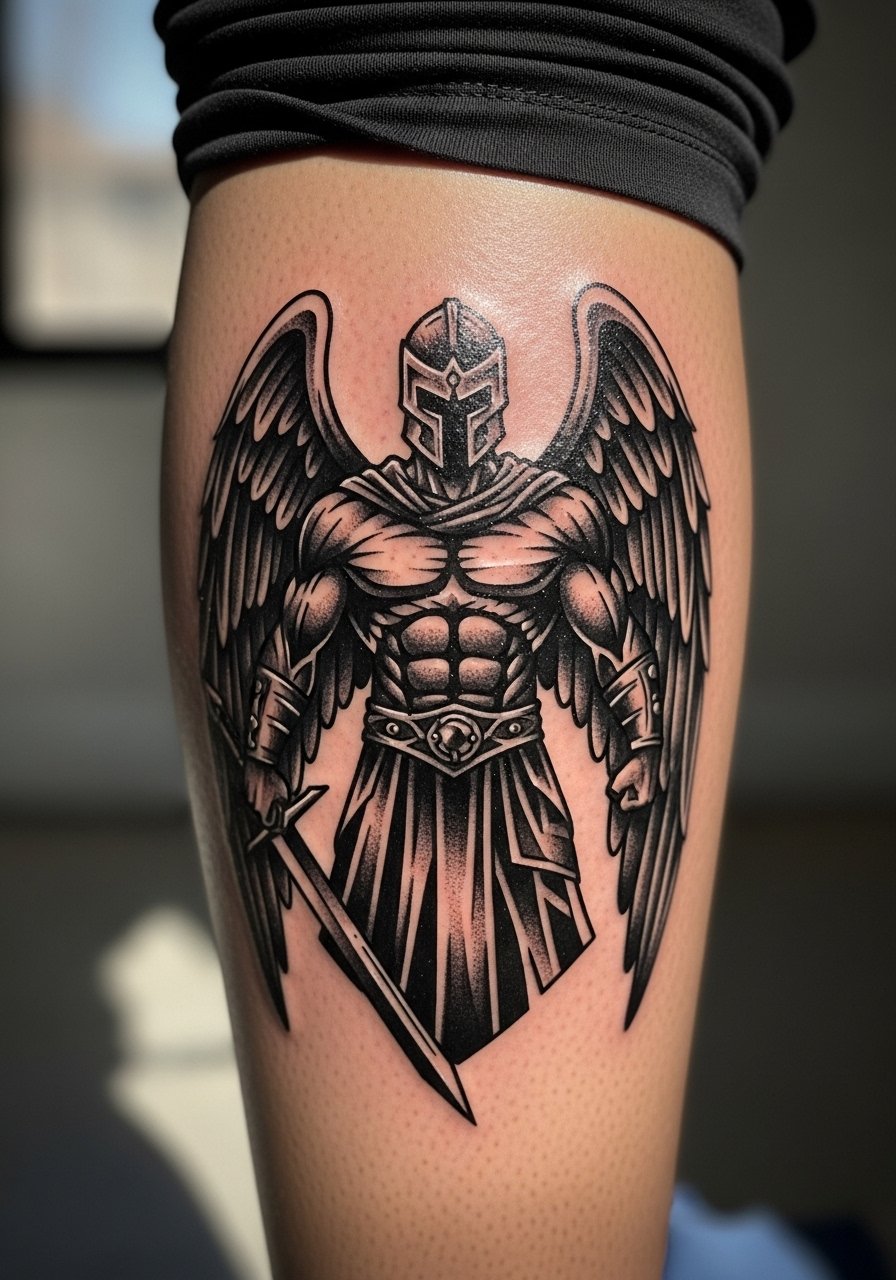
Calf tattoos survive activity like running and gym time better than lower shin pieces, so this is a strong choice if you expect regular wear and sweat. Silhouettes age by preserving clean negative space and avoiding thin cross-hatching. A single session usually handles a 5-inch silhouette. The main mistake is trying to pack realism into a silhouette. If you want depth, plan a second session for subtle highlights. For showing this off in summer roll slim joggers or hit the beach in swim trunks. Try rolling to mid-calf with slim joggers to frame the shape.
Studio Day Picks
Those first six pieces include high-motion areas like forearms, sleeves, and calves, so a few specific items smooth the session day and the first week.
- Kuro Sumi Ink Balm. A non-greasy balm that people mention helps blackwork hold during winter heals without sitting heavy on the skin.
- Tea Tree Tattoo Salve. Useful for reducing itch and inflammation on detailed realism areas like chests and inner arms.
- Aussie After Inked Lotion. Breathable moisturizer that performs better than thick ointments in humid conditions for calf and forearm pieces.
- Hada Labo Hyaluronic Lotion. Lightweight hydration for fine line areas that are prone to scabbing on oily skin types.
- Indie Tattoo Butter. Thinner than Aquaphor and absorbs quickly so it does not clog pores on bold blackwork while helping color sit evenly during early healing.
7. Archangel with Broken Chains on the Thigh
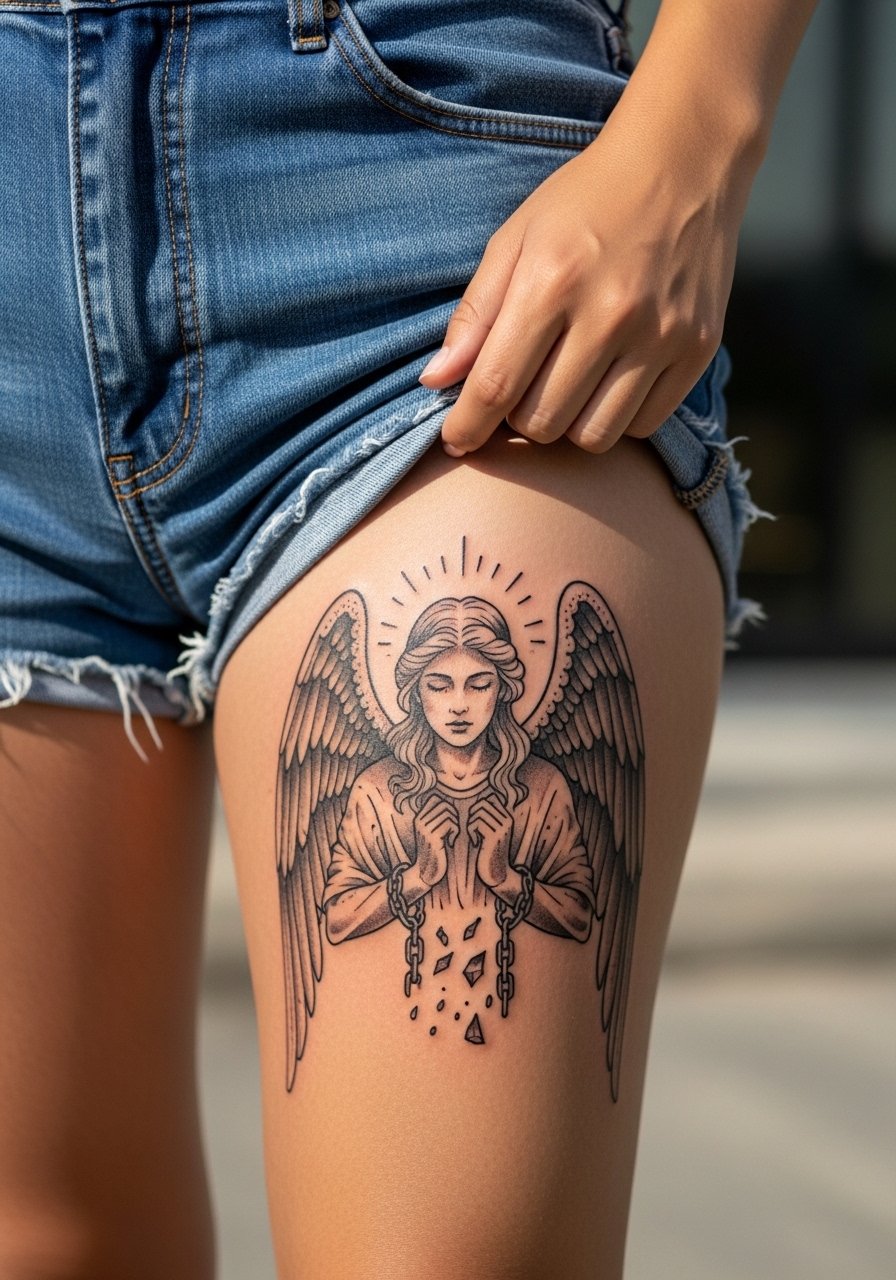
Thigh pieces let you go vertical and detailed without the constant sun exposure forearms face. The design reads best when the chains and geometric borders are given clear negative space so the broken links remain legible after a year. Two sessions usually cover linework and filler shading. Watch out for overfilling the borders with micro-dot shading. That density tends to merge after weight changes or stretching. For sessions wear loose athletic shorts so the artist can move around the leg easily. Thigh work also offers privacy for people who want a dramatic piece that is not always on display.
8. Battle-Ready Angel with Spear on Inner Bicep
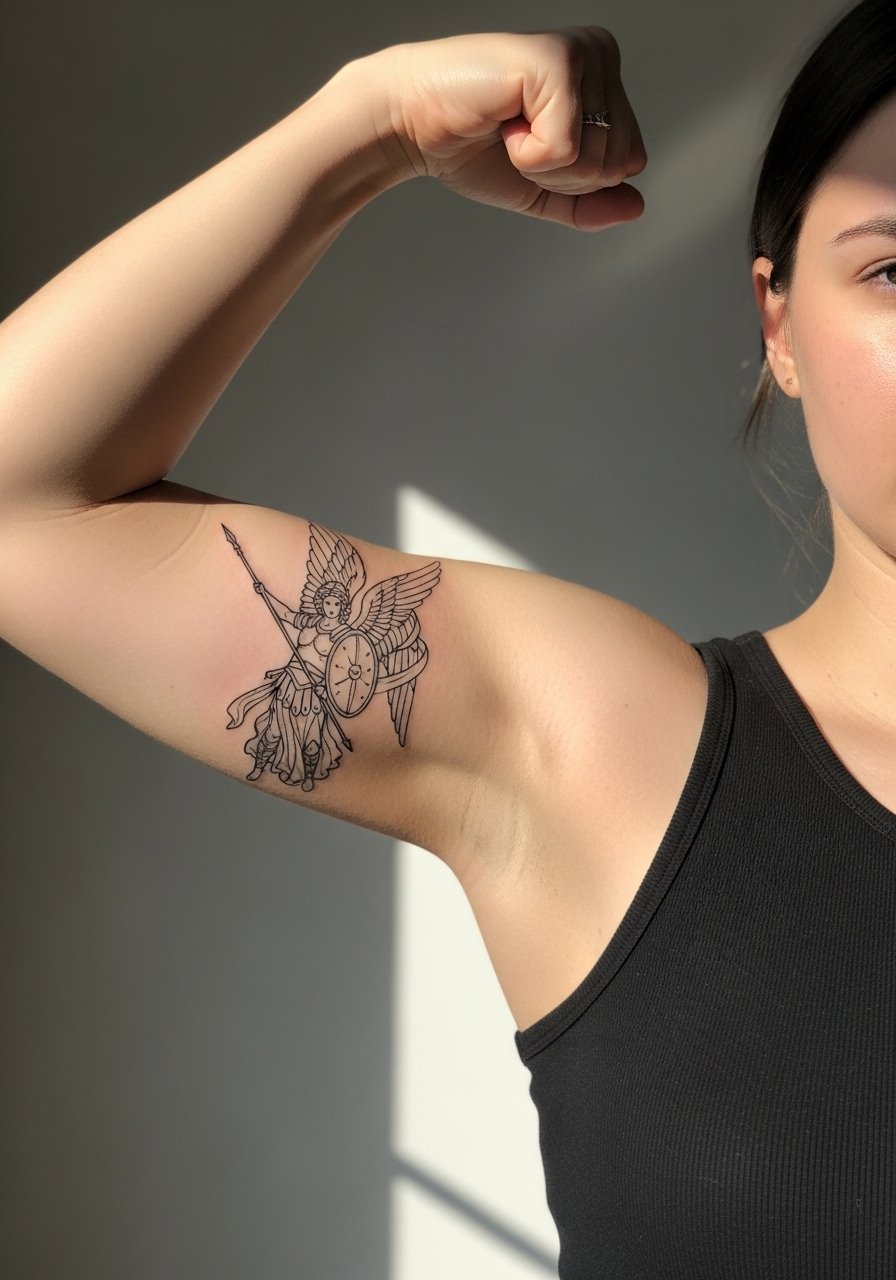
Inner bicep pieces look intimate and read best elongated. This placement feels tender for many people so plan for a two-hour session and expect a little extra redness. The fine line approach can be gorgeous but it is vulnerable to blur if you push the spacing too tight. One common fix is switching from hair-fine lines to slightly heavier contour lines while keeping inner detail delicate. For the appointment a sleeveless muscle tank gives the artist room to work and keeps the area relaxed. Inner bicep tattoos might need touch-ups at year two depending on your skin type.
9. Winged Protector Over Shield, Forearm Wrap
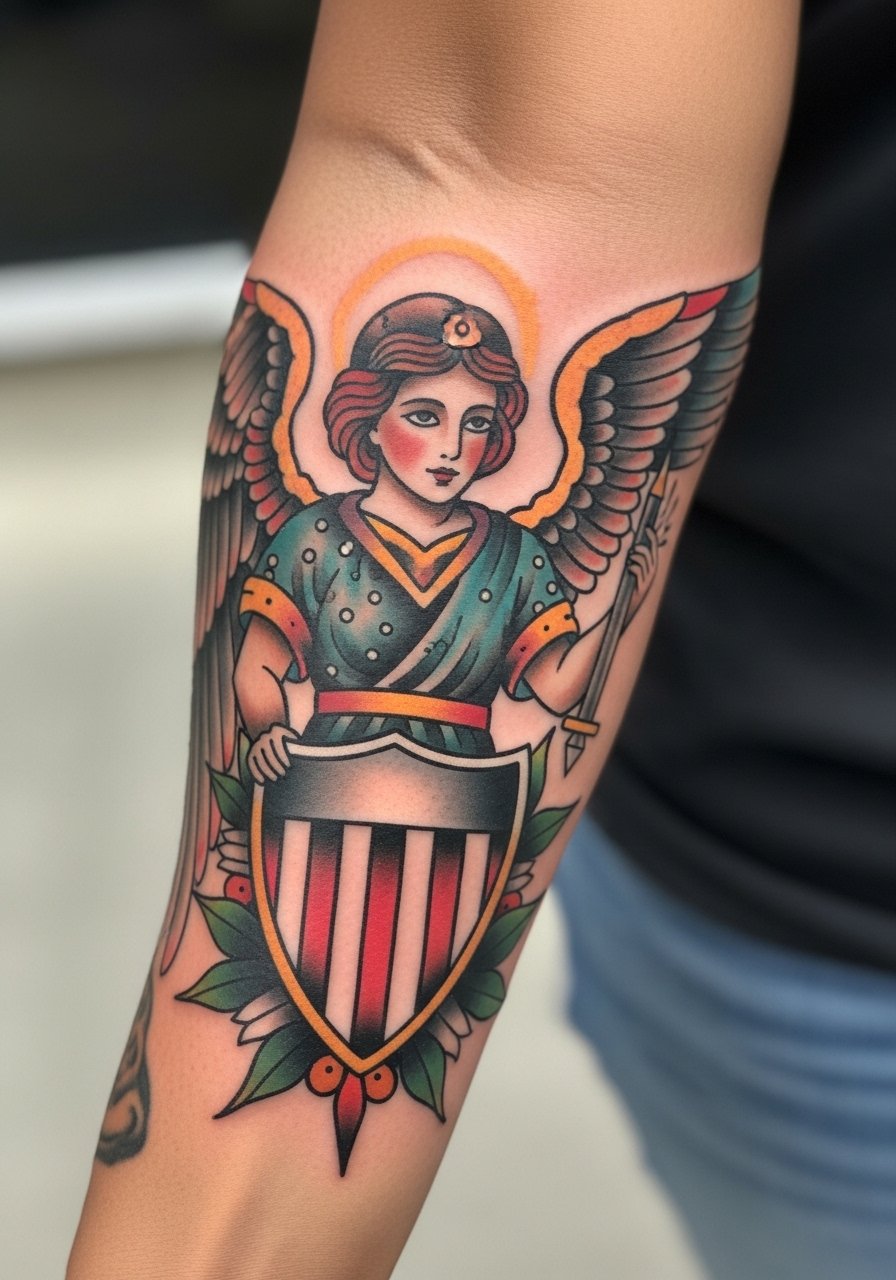
Forearm wraps show well in most social situations and take advantage of long viewing angles. The trick is letting the shield sit centered with wings that flow around the arm instead of trying to cram an emblem too small. Bold saturation and thick outlines avoid the early fade that tiny color details suffer. This piece usually needs two sessions for full saturation. Avoid requesting watercolor fills here because those fade and lose contrast faster on this placement. For daytime wear, rolled sleeve henleys or short sleeves put the wrap on display. A single touch-up within six months is normal for color pieces.
10. Hyper-Realistic Angel Warrior Face on Upper Back
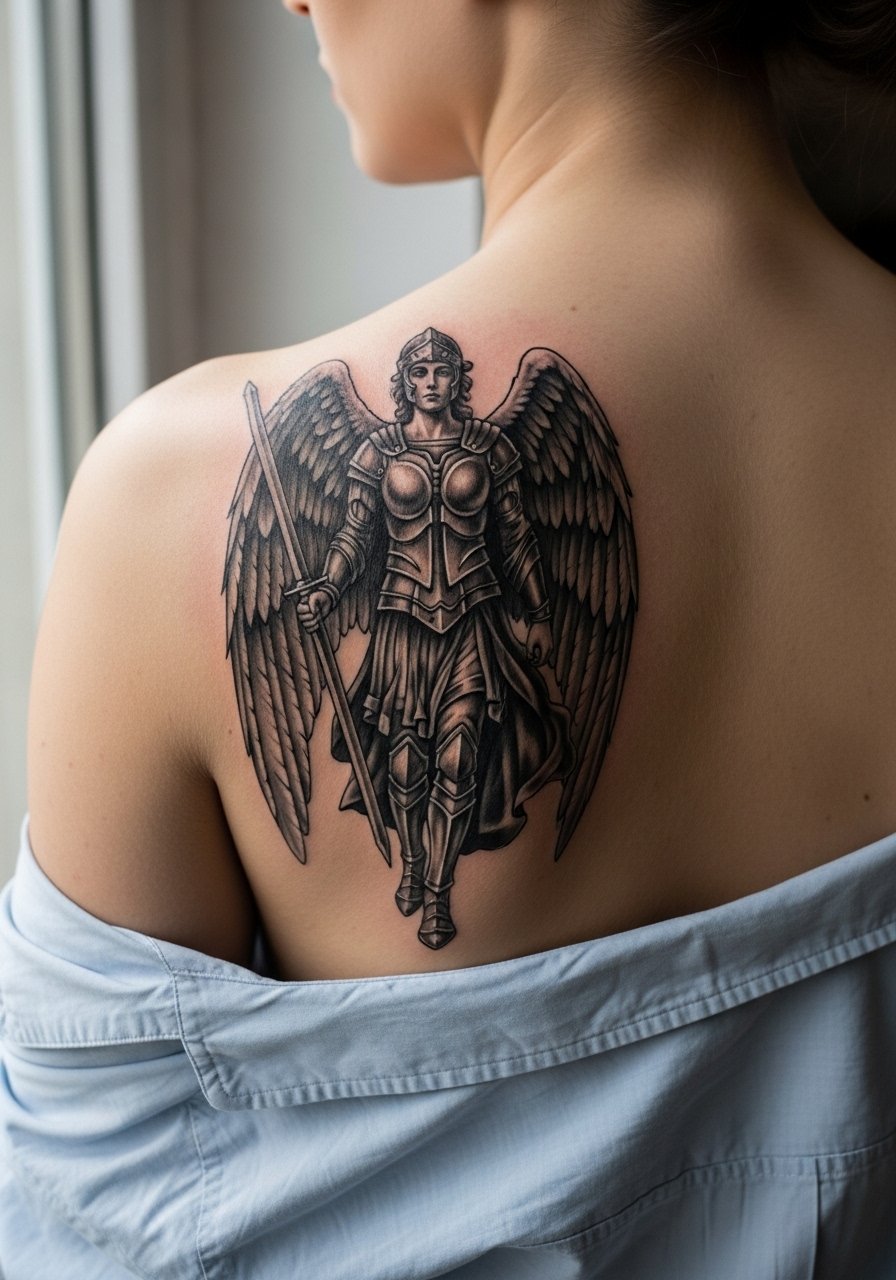
Portrait-level realism on the upper back demands scale and patience. Expect multiple long days and careful shading plans so highlights and lowlights keep depth without becoming muddy. Small lettering or microfeatures are a risk here. If you want a stare that feels intense, plan larger than eight inches and budget four to five sessions. Recovery is manageable because clothing can be loose and sternum pressure avoided. For showing it off, an open-back shirt or low racerback dress reveals the portrait without compressing the area during daily movement.
11. Angel with Flaming Sword Descent on the Ribcage

Ribcage work is a high-pain, high-impact choice. The flames and vertical descent look dramatic, but the skin there stretches and compresses a lot. Artists split into two camps about fine line on ribs. One camp says the stretch and movement blur fine line fast. The other camp says with intentional needle depth and spacing fine line can settle well. Name that split in your consult and ask which camp your artist belongs to. If you go neo-traditional here, request bolder outlines around the flames to preserve contrast. For the session, wear a cropped top or a button-down you can lift so only the work area is exposed.
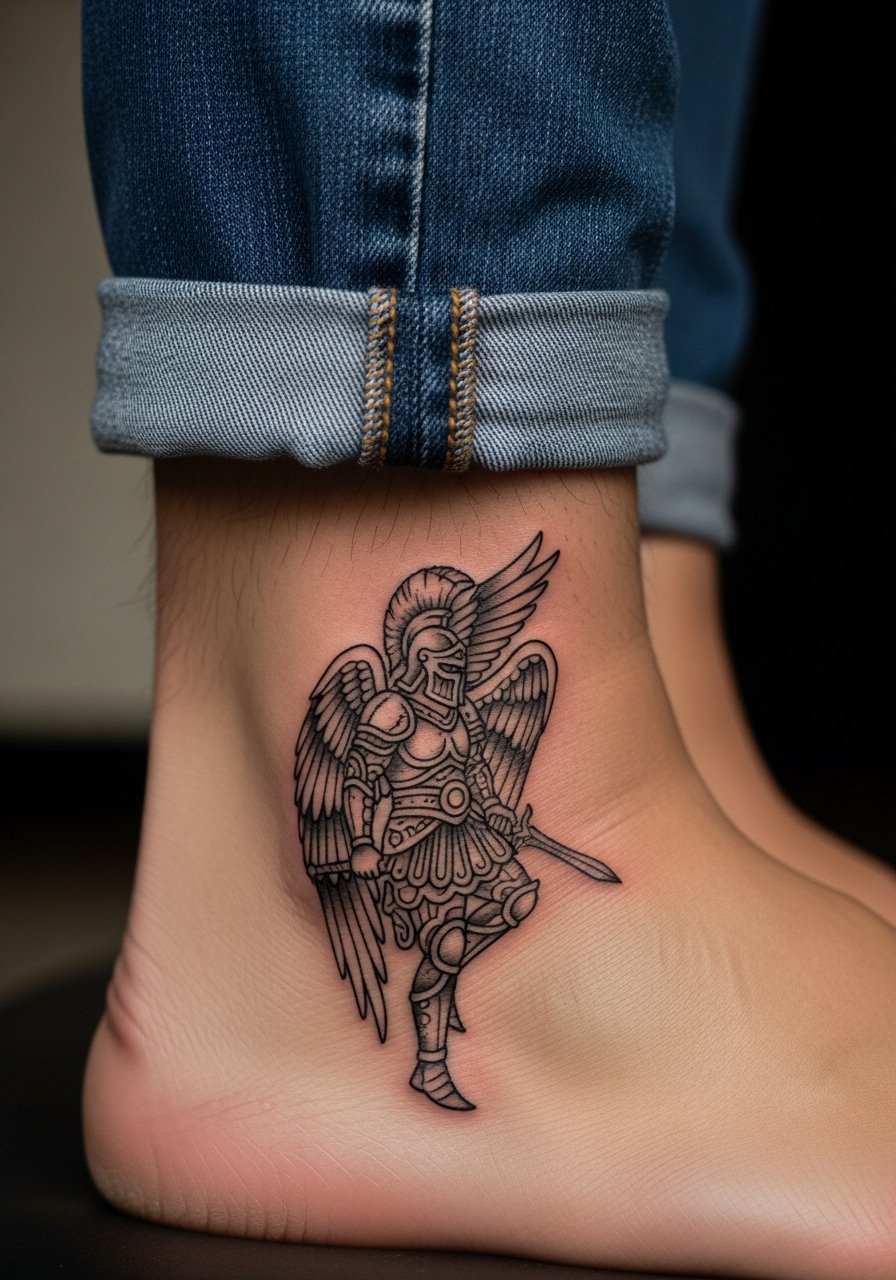
12. Compact Winged Knight on the Wrist or Ankle

Tiny wrist or ankle pieces are quick and low commitment, but they age fast if they rely on hair-fine detail. For wrists especially, I advise a slightly thicker outline and clear negative space inside the knight. Expect a single short session and a likely touch-up at year one or two for fine elements. Pay careful attention to daily friction zones like watches or shoe straps. For showing off a wrist piece pair it with a thin leather cuff on the opposite wrist to frame the design without crowding it.
13. Tribal-Influenced Angel Warrior on Shoulder Blade
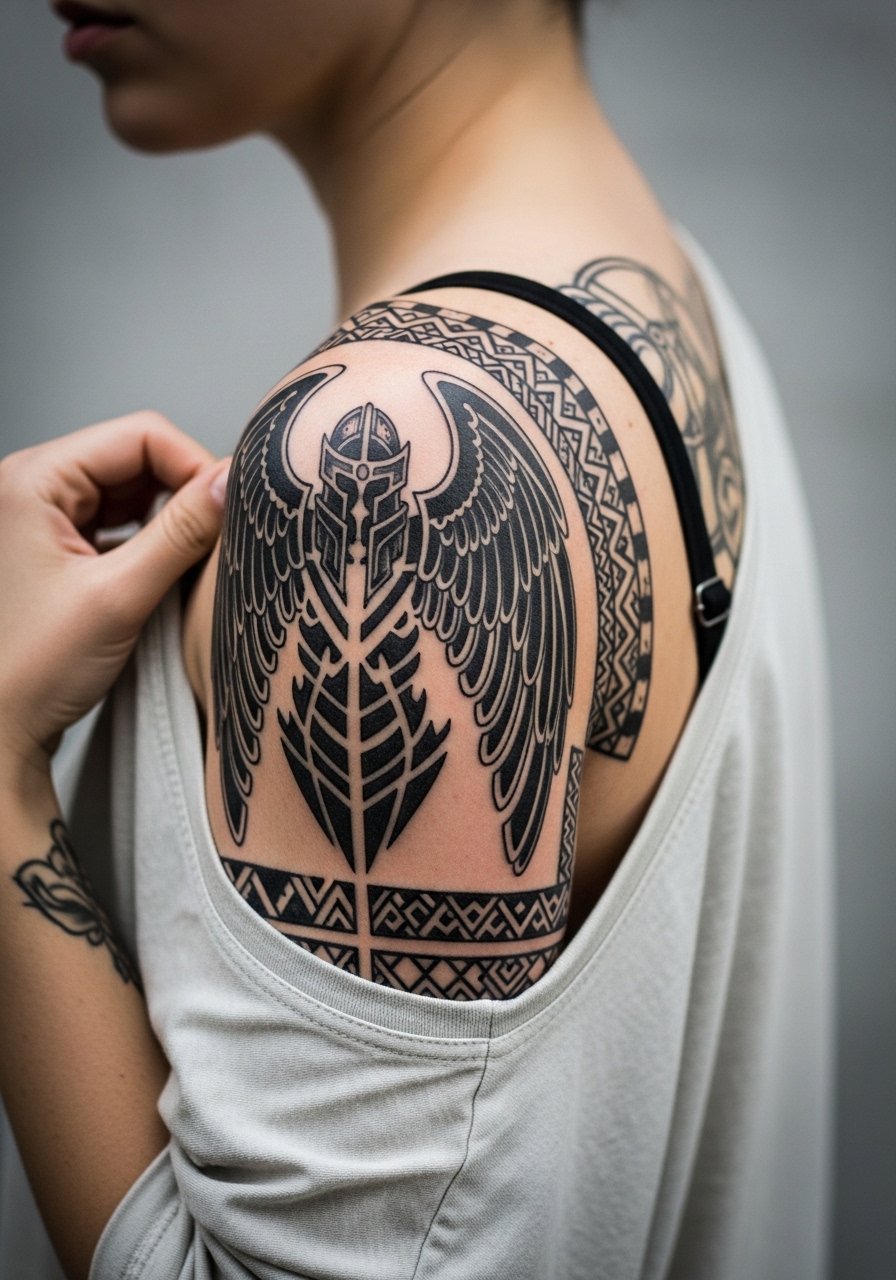
Shoulder blade projects let you use heavy blackwork and negative space to make geometric frames pop. The tattoo holds well if the tribal elements have breathing room and do not compete with dense stipple in the center. Two sessions usually cover linework and fill. A frequent mistake is insisting on tiny interlocking triangles that become one after a year. For showing the shoulder blade consider off-shoulder tops that reveal the upper arc. For the studio day wear a strapless bra or loose tee so the artist can position your shoulder freely.
14. Negative Space Wings Framing a Warrior Silhouette on Ribs
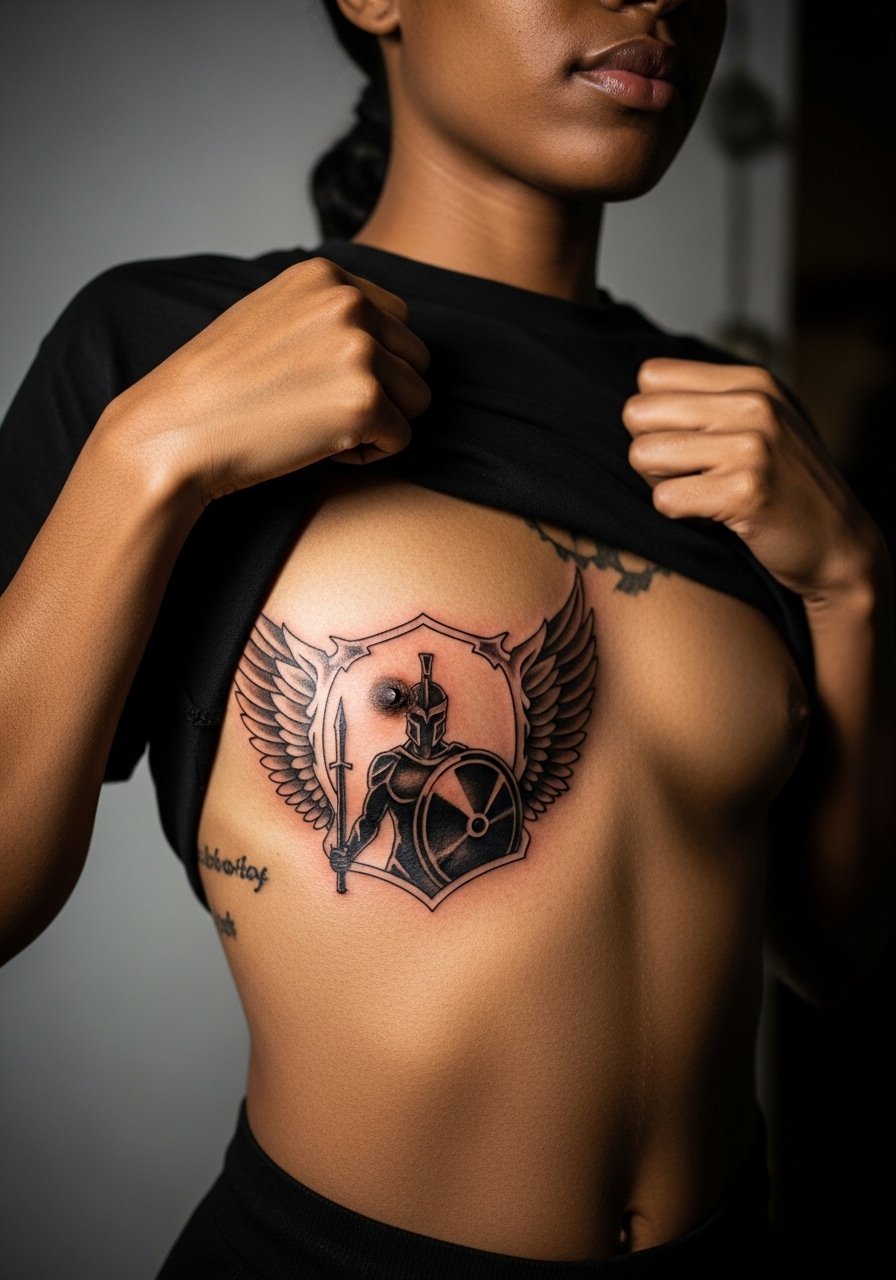
Negative space works well when you want an airy look that still reads as armor and motion. On the ribs this approach mimics how armor shadows shift with breathing. The main pitfall is making the negative areas too narrow. Give each wing a margin so the silhouette remains distinct as the skin moves. Pain here is higher and touch-up expectations are realistic. Consider laying the design out with a stencil you can view on your skin while standing and moving so you know how the shadow plays with your posture.
15. Patchwork Angel Sleeve Starter on Forearm and Bicep

If you want a sleeve you add to over years, start with an anchor piece like a warrior mid-chest or mid-bicep and leave negative space around it for future panels. Budget a phased build plan so you know what to save for each year. A common mistake is filling every available inch initially. Pieces that breathe integrate much better later. For the session wear a loose tank top and bring layered references so the artist can design future flow. For show-off outfits, rolled linen shirts or short sleeves put the evolving sleeve in view. Try a fitted black t-shirt when the sleeve is in progress.
16. Dark-Skin Optimized Bold Outlines with White Ink Highlights on the Collarbone
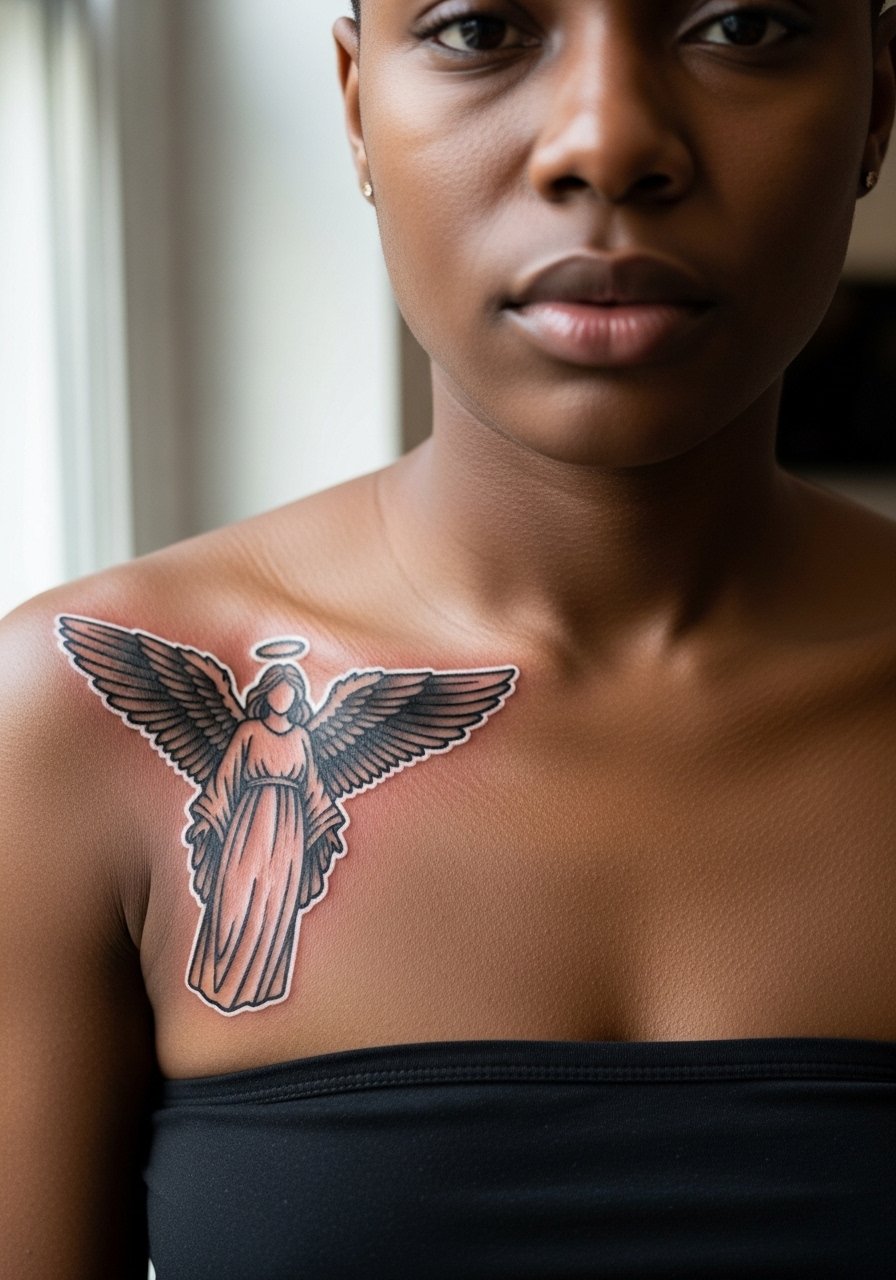
Dark skin tones often benefit from heavier outlines and selective white highlights to preserve contrast in photos and up close. Request healed examples on similar skin tones from any artist you consider. The common regret is choosing hair-fine wings that disappear over time. Collarbone placement reads elegantly with strap-free tops, but remember the area shifts with posture and clothing. For showing it off try a strapless top or a slight V crew that frames the collarbone.
17. Guest Spot Warriors and Traveling Artist Flash
Guest spots can be the way to book a specialist without waiting months. They also carry logistical quirks. Deposits and reschedules are common pain points. If a guest cancels you want documented deposit terms and communication about refunds. When you chase a traveling artist for a flash piece, bring clear references and arrive with your availability windows nailed down. For discovery search hashtags like the ones used by the scene and filter by city reels and convention schedules. Smaller flash pieces are great for these pop-ups because they can be finished in one sitting and expanded later if you want.
Frequently Asked Questions
Q: How much does a neo-traditional angel tattoo usually cost by size?
A: Expect a wide range depending on detail and scale. Small to medium neo-traditional pieces commonly fall in the $400-$1,500 range. Full sleeves or micro-realism chest work can run towards the higher end because they require more sessions and saturation. Always get a written quote and a session plan before you hand over a nonrefundable deposit.
Q: Will fine line angel wings hold up on oily or dark skin tones?
A: Fine line can struggle on oily skin and darker tones because the lines tend to spread or photograph as less contrast over time. Many artists recommend heavier contour lines or bold blackwork for longevity. Ask to see healed portfolio photos on skin tones similar to yours and plan on touch-ups at year two if you choose delicate detailing.
Q: Artists disagree about Saniderm versus dry healing. What should I do for a chest or ribcage realism piece?
A: There are two camps. One camp prefers Saniderm because it reduces scabbing and can speed the initial heal. The other camp favors dry healing and warns that films can trap sweat or bacteria, especially on curving or high-movement zones. For realism on the chest or ribs ask your artist which method they use and why. Their preferred approach should match their healed portfolio for similar placements.
Q: How do I avoid getting ghosted after paying a deposit for a thigh or sleeve appointment?
A: Ask for a short written agreement that covers reschedule windows and refund policy. Book guest spots through official studio booking systems when possible. If an artist only communicates via social DMs consider that a risk for long-term scheduling. Clear confirmation messages and a studio receipt reduce most common deposit disputes.
Q: What should I wear to a session for a collarbone or shoulder piece so the artist has access and I stay comfortable?
A: Wear a strapless bra or a wide-neck shirt you can pull aside for collarbone work. For shoulders a loose tee or off-shoulder top works well. If you plan to show the piece later, a low v neck tee pairs nicely without compressing the tattoo area during healing.
