
Fine line tattoos dominate feeds and saved boards right now, and the same pieces that get the most double-taps fresh often need extra care later. Some styles hold color and linework for a decade, others look soft by year three. Pick a design that fits your skin tone, placement, and lifestyle and plan for touch-ups if you want it to stay crisp. Below are 27 arm ideas with practical notes, what to tell your artist, and outfit tips to show them off.
1. Fine Line Floral Vine Wrapping Forearm
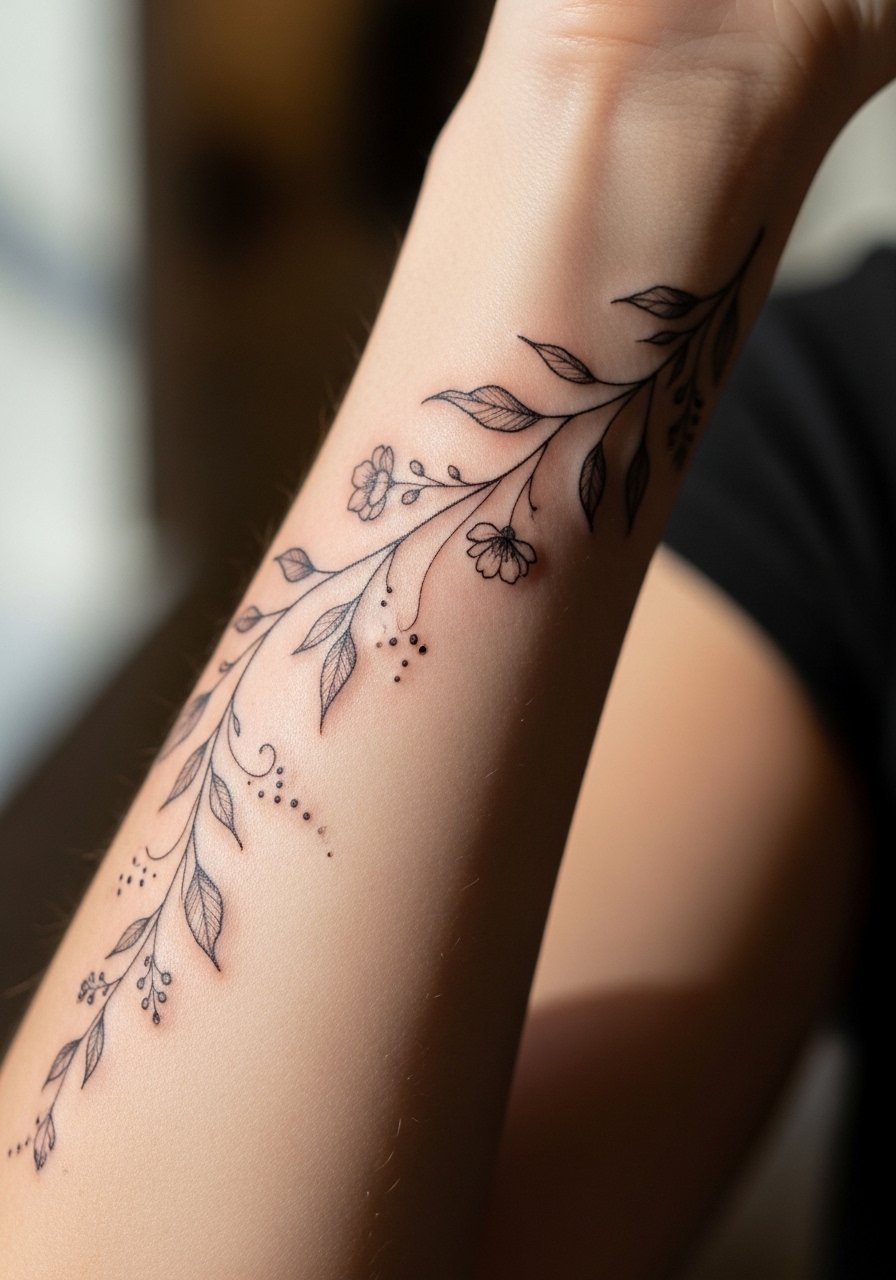
A delicate vine that follows the arm curve reads elegant but needs breathing room. Tell your artist you want slightly heavier single-needle outlines where stems cross skin folds so the pattern does not blur. The controversy here is obvious. One camp says fine line fades and blurs fast and needs yearly touch-ups. The other camp argues that with proper spacing and slightly bolder anchor lines, it settles well. Expect a light pain level on the outer forearm and one short session for a 2-4 inch piece. For the session wear a rolled cuff chambray shirt so the artist can roll the sleeve without stretching fabric over the area.
2. Minimalist Geometric Hourglass on Inner Bicep
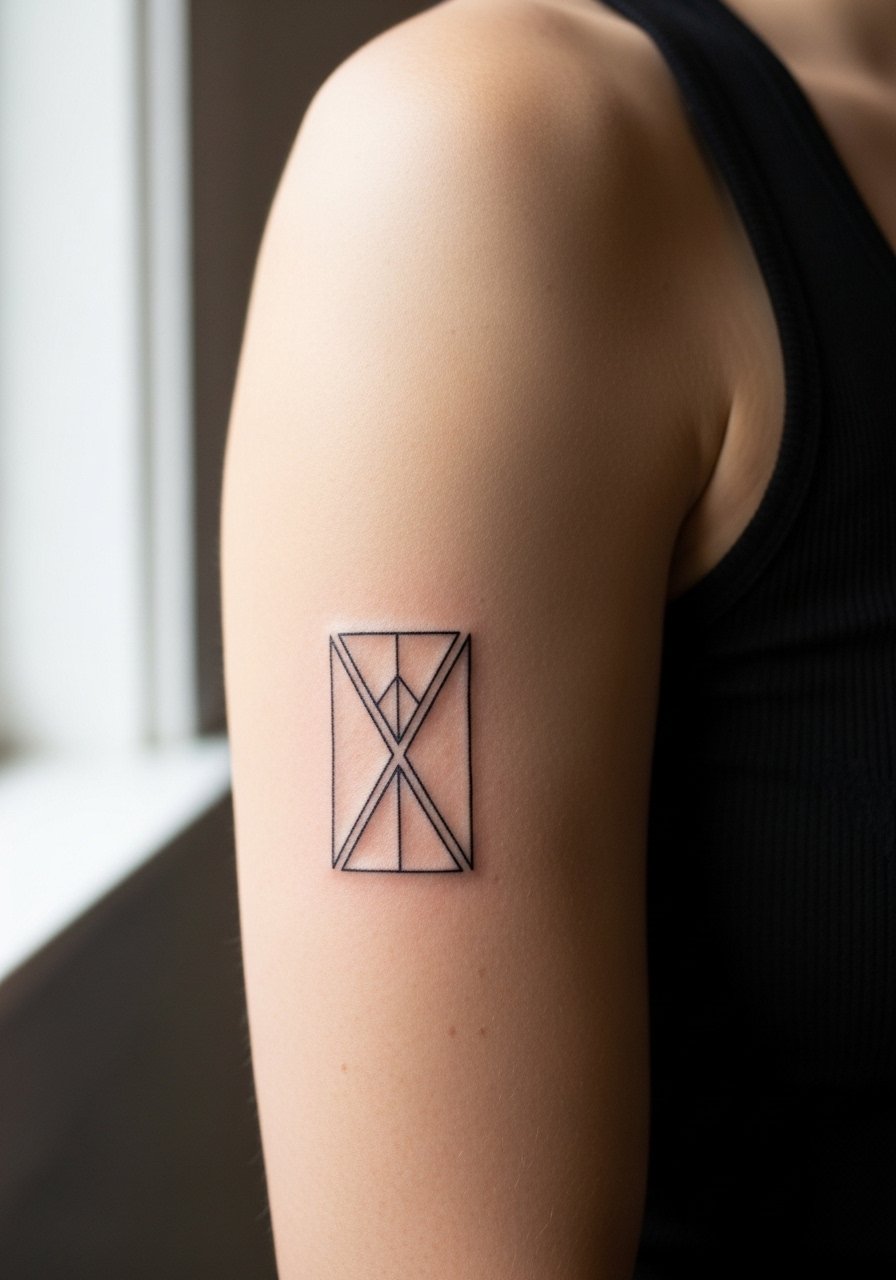
This compact symbol fits hidden spots and reads private when relaxed. The inner bicep can be tender, expect a medium pain level and a calm session. Ask the artist for 3mm spacing between parallel lines so shading does not merge by year two. A common mistake is shrinking the design to save cost. If you want the crisp, minimalist look to last, keep it at least three inches tall. For the session, wear a muscle tank top men so you can lift the arm without tugging at the collar.
3. Neo-Traditional Anchor with Waves on Upper Arm

Neo-traditional pieces use saturated color and bold outlines that age into a strong silhouette. Tell your artist you want color accents limited to two hues so the design keeps contrast over time. Upper arm skin handles saturation well, so blowout risk is low and touch-ups are often about color boosting after a few years. Session time for a 5-7 inch anchor is typically two sessions. Pair the finished piece with a muscle tank top men when you want the curve of the bicep to complement the motif.
4. Blackwork Mandala Half-Sleeve
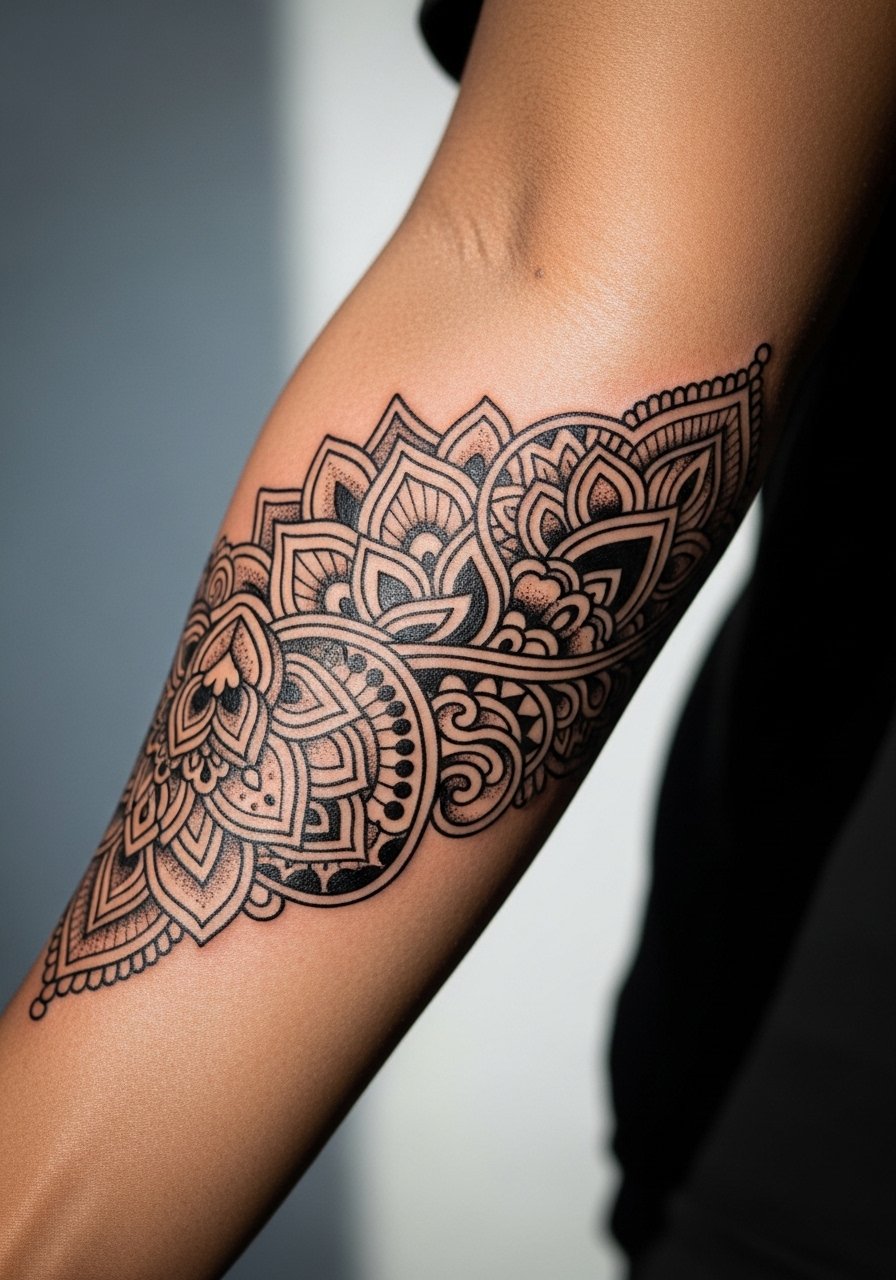
Blackwork mandalas build from negative space and need room to breathe. Ask your artist for clear spacing in dense areas and for progressive session plans so each layer settles before filling. Expect multiple sessions and a heavier session feel because of coverage. The healed look at two years is usually a blocky silhouette, which is its strength. A common mistake is compressing too many details into a small forearm panel, which turns into muddy shading. For showing off, a fitted henley frames the mandala cleanly.
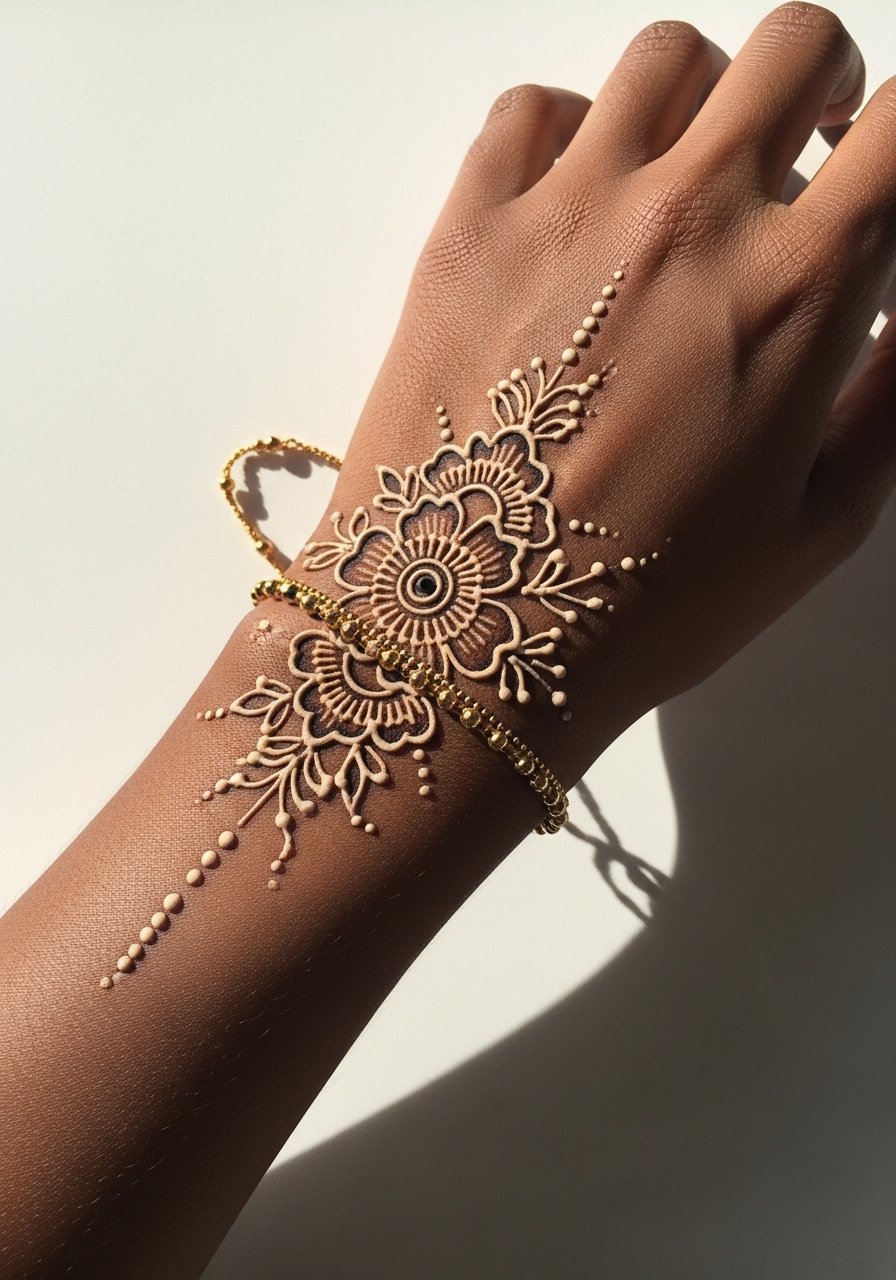
5. Watercolor Rose Bouquet from Wrist to Mid-Forearm

Watercolor washes give painterly movement but fade unevenly under constant sun and wrist friction. Artists split on aftercare methods too. Some prefer protective film for the first week while others favor open-air damp healing. Tell your artist you want color saturation concentrated in key petals to preserve contrast as the hues soften. Wrist placement means more friction from watches and bracelets, so expect touch-ups sooner than on the upper arm. For evenings out, pair the piece with a leather minimalist watch on the opposite wrist.
6. Micro-Realism Portrait Eye on the Bicep
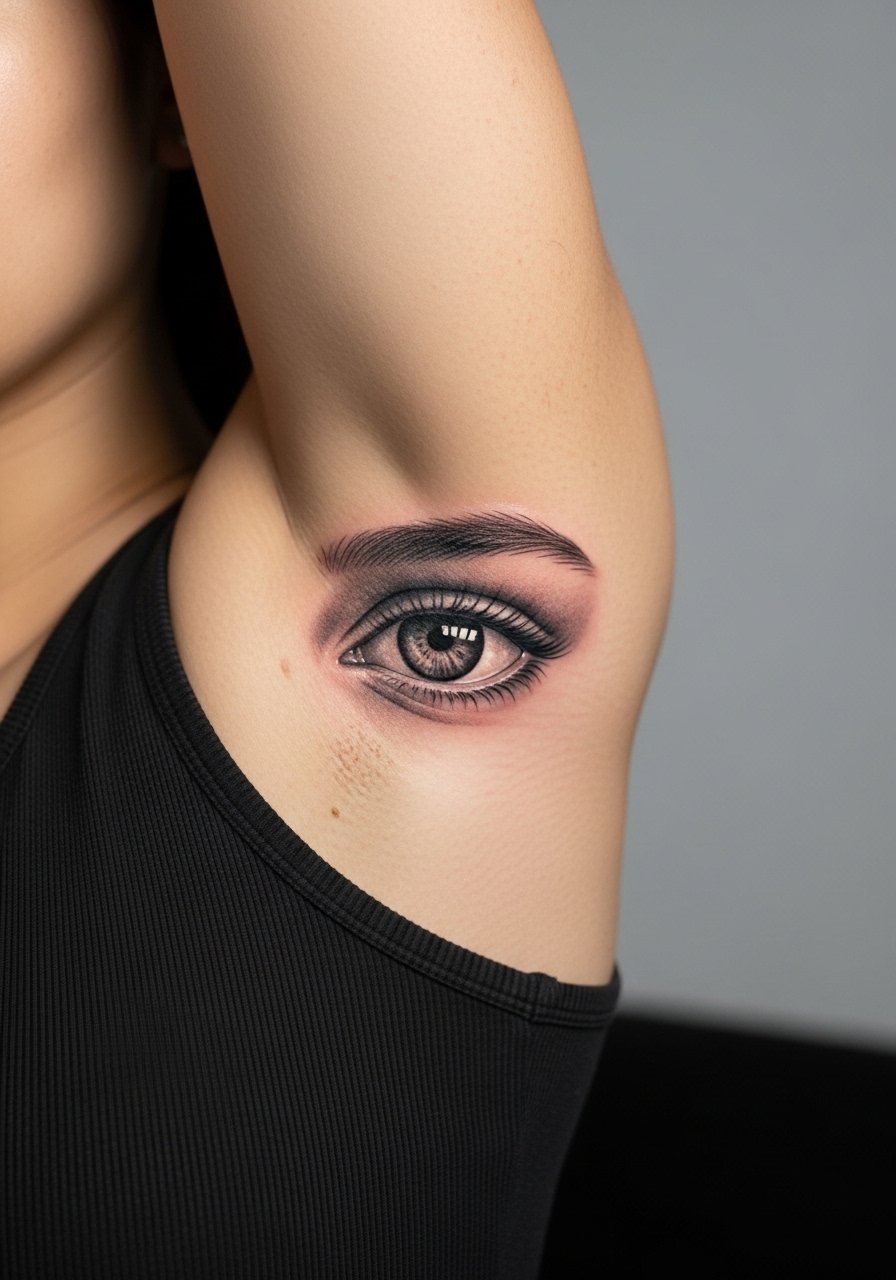
Micro-realism demands a calm surface and steady hands. This placement hides well and gives the piece privacy while healed. Ask for a clear reference photo and request the artist show the stencil on the skin for proportion checks. Expect two sessions for a 2-3 inch diameter eye and prepare for medium pain on the inner bicep. A common mistake is asking for too much micro detail in less than the ideal size, which flattens over time. For session comfort, wear a muscle tank top men so the artist can access the area without fabric drag.
7. Ornamental Dotwork Arrow Forearm Band

Forearm bands feel graphic and customizable. Ask your artist to test dot spacing across skin folds so the band does not look patchy when the arm moves. This style usually takes a single session and has low blowout risk when dots are spaced correctly. A mistake is requesting overly tight dotwork too near the wrist where skin ages faster. For casual wear, roll up a short sleeve button up to frame the band without covering it.
8. Ignorant Style Cartoon Skull on the Elbow
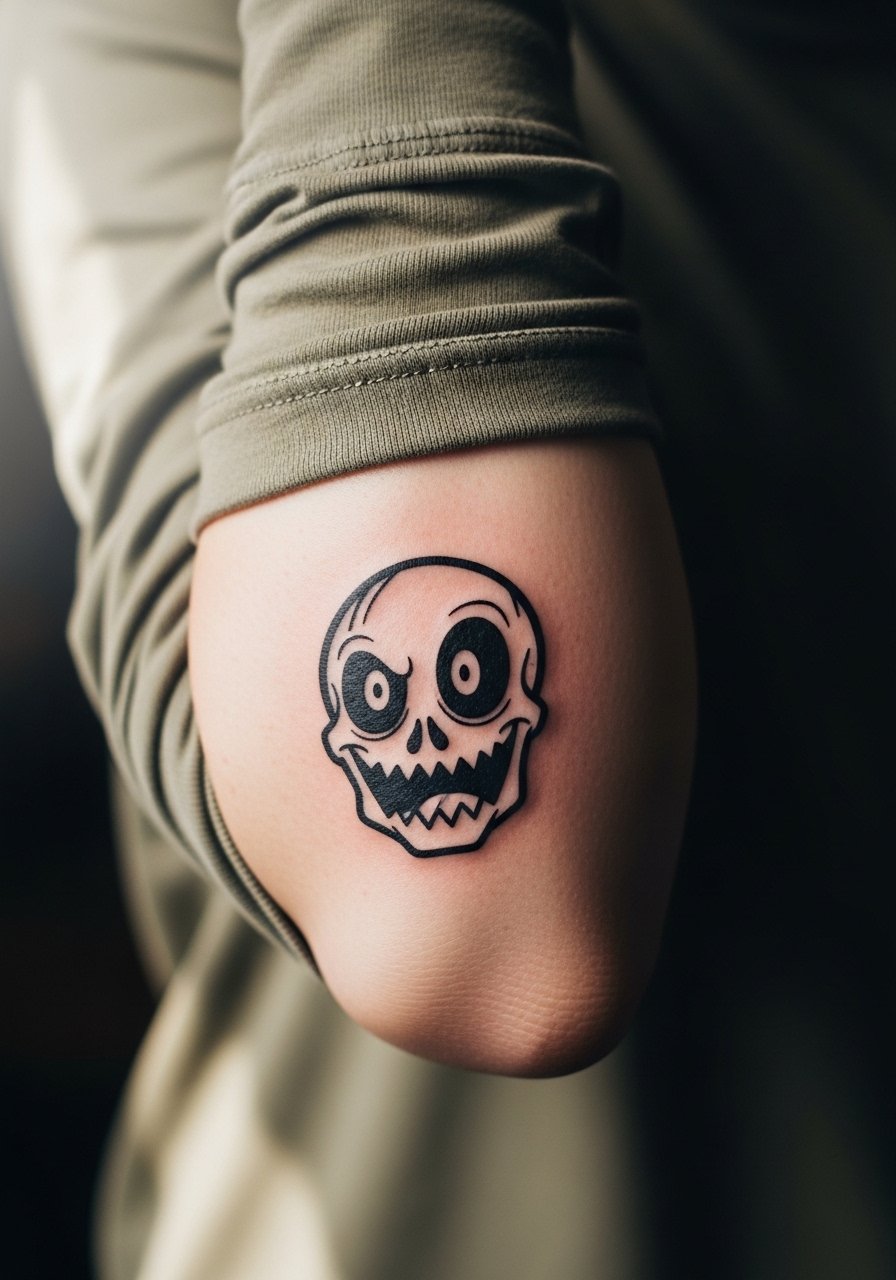
Elbow tattoos read playful and hold their character because the contour hides minor blur. The elbow is a painful spot and the skin texture makes saturation uneven. Ask the artist for bolder outer lines and minimal interior detail. The common mistake is too-small detail on the elbow, which disappears as the joint flexes. Session time tends to be short but intense. Show it off with an oversized graphic tee with sleeves pushed up for the right edge of attitude.
9. Traditional Dagger with Roses on Outer Bicep

Traditional Americana holds up because of color saturation and decisive linework. Ask for solid black anchors in the outline so the roses retain shape as color fades subtly. Expect two sessions for a six-inch piece and low blowout risk on the outer bicep. A common error is shrinking the dagger to wrist size, which loses the classic negative space. For warm-weather showing, pair with a gray tank sleeveless so the motif sits on clean skin.
10. Fine Line Constellation Cluster on the Wrist
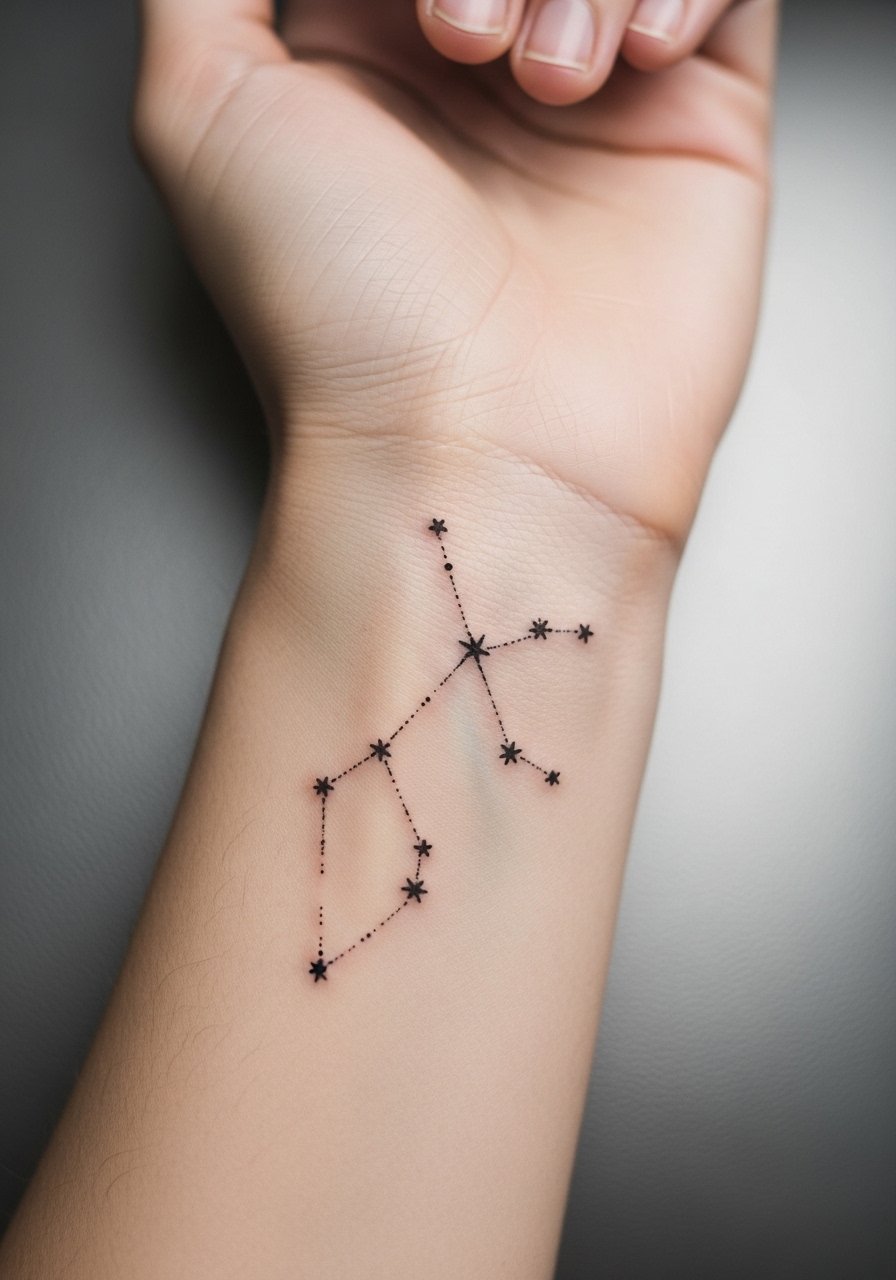
Tiny wrist constellations are intimate and easily hidden by a watch or bracelet. Ask for slightly larger star dots than in the reference so they photograph on dark skin tones and hold for two-plus years. The wrist sees constant washing and friction, so touch-ups are common. A mistake is choosing an overly dense map in under two inches. For outfit pairing, cuff slim chinos and add a leather minimalist watch on the opposite wrist to balance subtlety.
11. Blackwork Geometric Wolf on Forearm
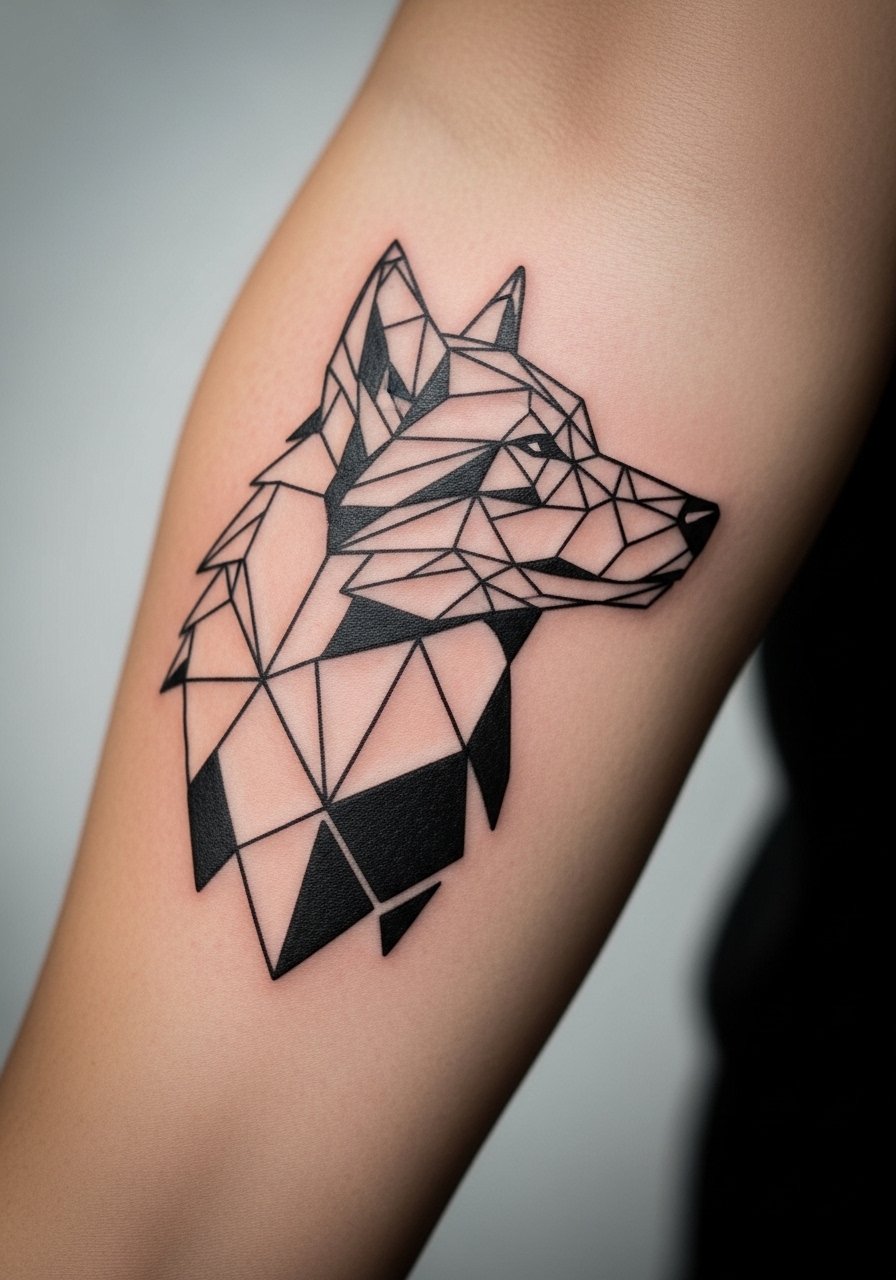
Geometric animals scale well across forearms. Ask for clear negative-space channels so the wolf still reads when clothing covers parts of the design. Expect several sessions depending on coverage and plan for touch-ups to maintain saturated black. A typical mistake is cramming too many shapes into a limited area, which flattens the geometry. This piece pairs well with a fitted henley in black or navy when you want the moonlit vibe.
12. Patchwork Botanical and Script Half-Sleeve
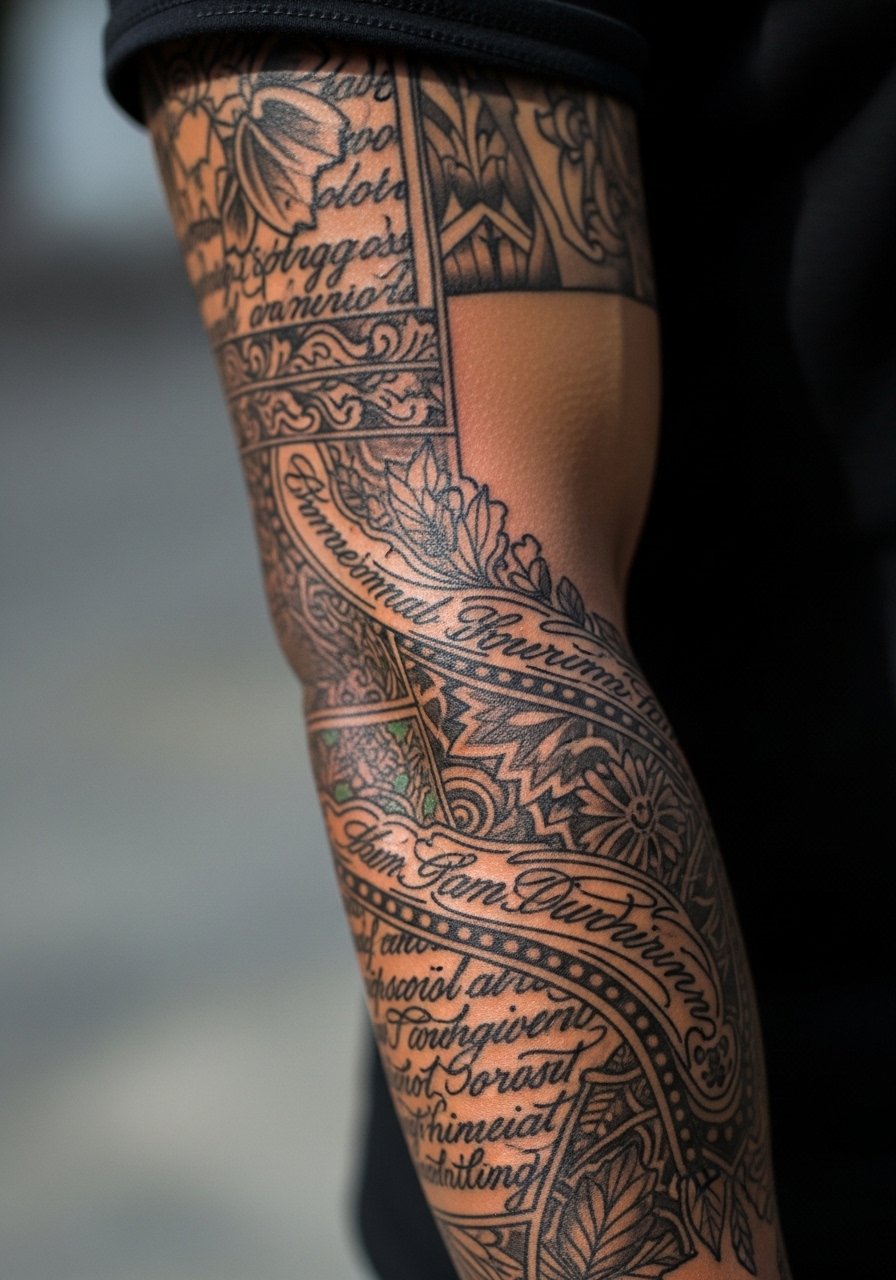
Patchwork sleeves build over time and are forgiving of style shifts. During consultation, bring the script font and a botanical reference so the artist can scale each element for future additions. Sessions are staged and the biggest mistake is starting with tiny filler elements that complicate later linking work. Expect five or more sessions if you plan color pops. For session comfort on forearm work, wear a short sleeve button up you can roll without stretching the inked area.
13. Single-Line Minimal Mountain Range on Upper Forearm
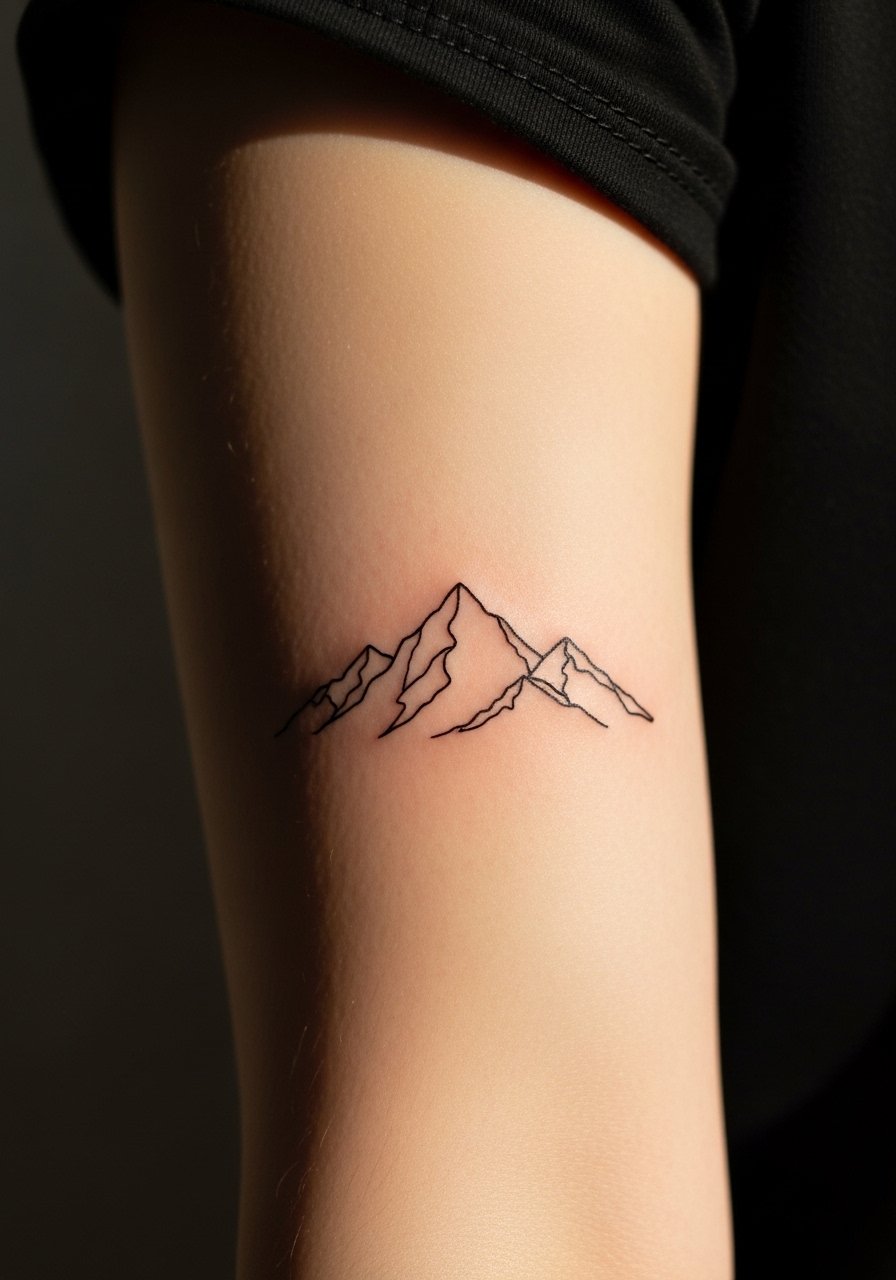
A continuous single-line design looks modern but needs precise stencil placement. The main risk is unsteady curvature when the arm flexes during healing. Ask your artist to mark the line while standing and in a neutral arm position to avoid a warped horizon. Pain is low and session time short. Keep the line at least 1.5mm thick in spots that cross joints to reduce blur. Pair it with rolled sleeves or a rolled cuff chambray shirt for clean framing.
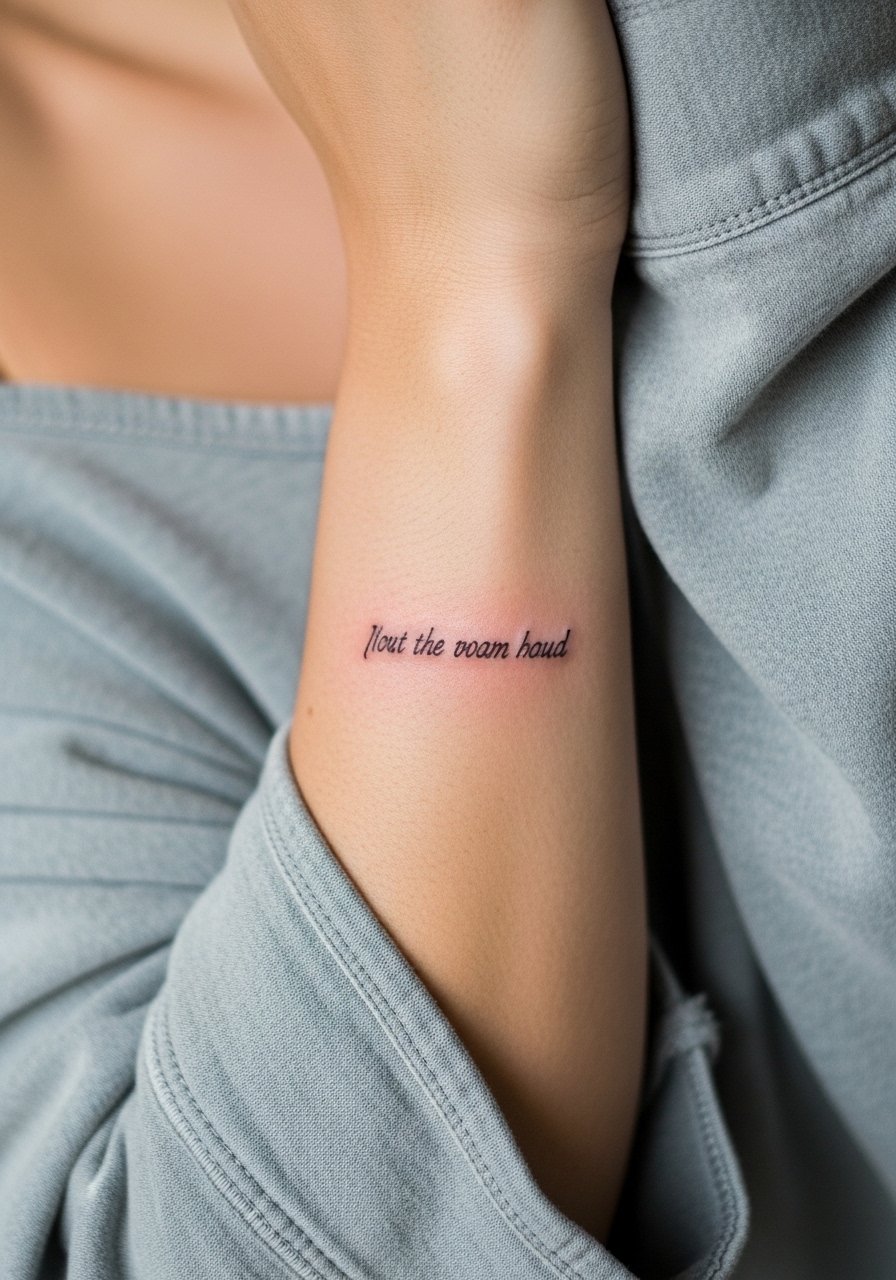
14. Small Script Name Along Inner Forearm
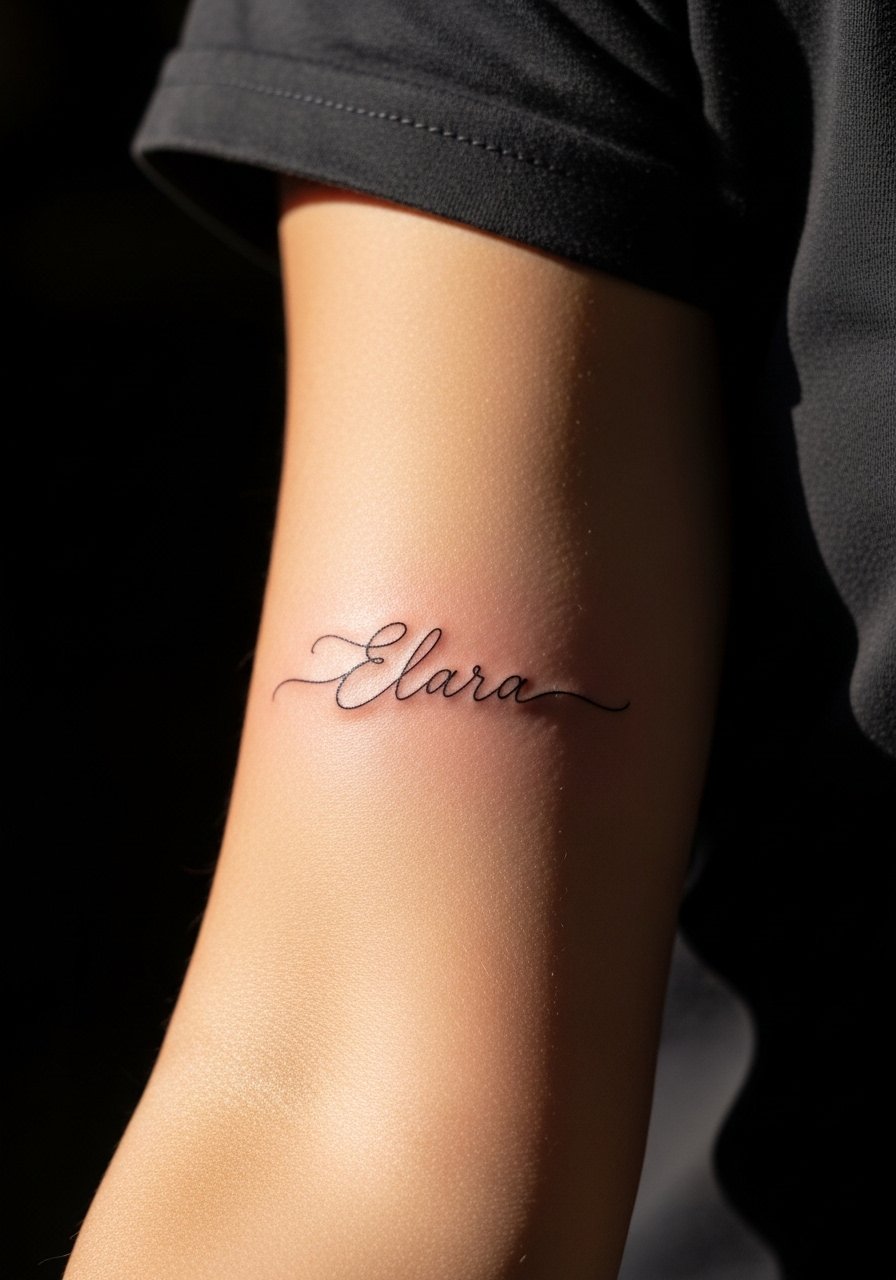
Script works best when not too tiny. Specify the exact font and request a stencil proof on skin so spacing is clear. Tiny script on the inner forearm can blur if letters sit too close. Expect a single session and plan for touch-ups to maintain crisp counters. Avoid cramped letterforms. For showing the ink, cuff sleeves and wear a thin leather cuff bracelet on the opposite arm to balance a simple name.
15. Geometric Mandala on the Inner Elbow
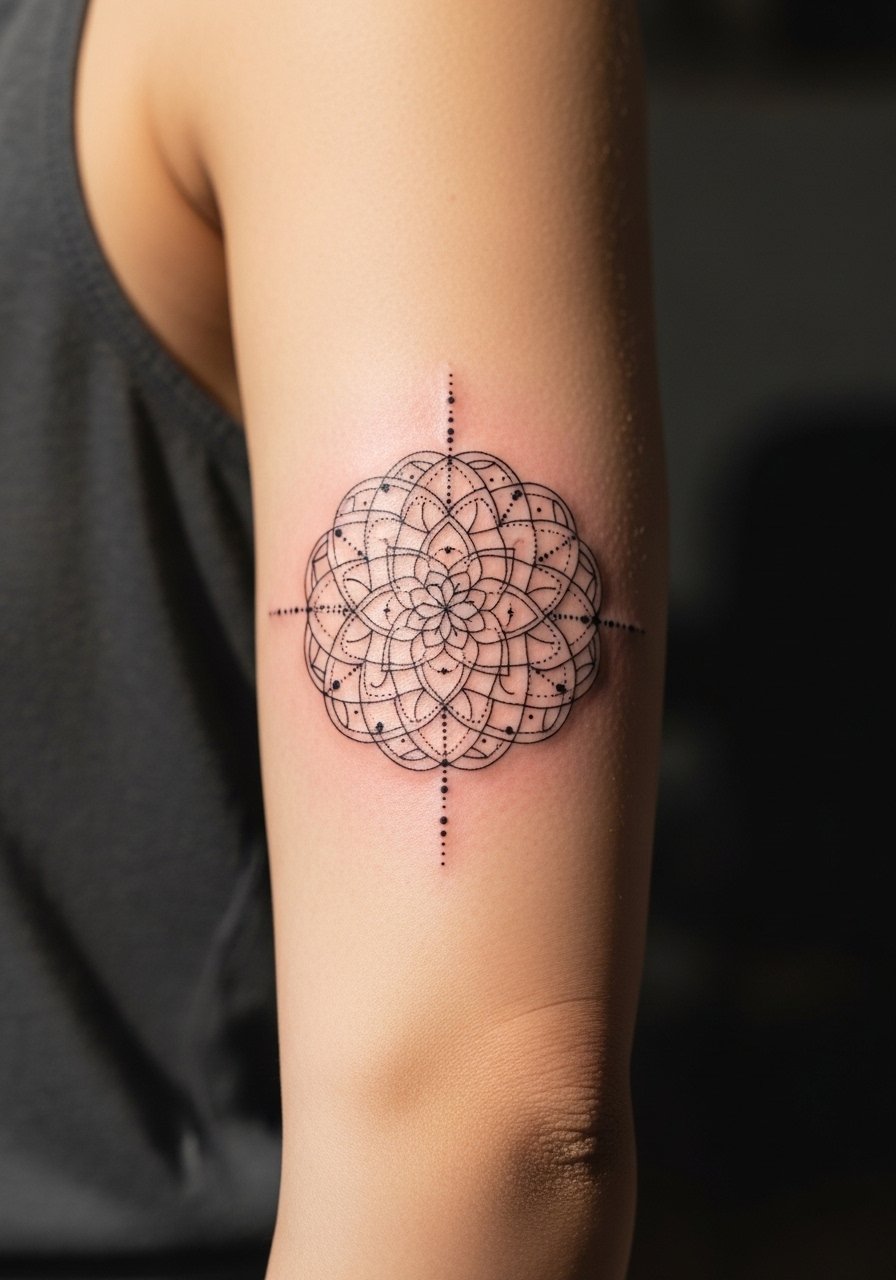
Inner elbow pieces face constant flexing and thin skin that can blur dense detail. Two camps debate whether tight mandalas work here. One side says the folding skin destroys detail in years. The other says scaled-up spacing and careful depth make it last. Ask for wider rings and simpler center geometry so the design keeps its shape when you bend your arm. Expect a medium to high pain session. For a casual look, push up an oversized graphic tee to reveal the mandala edge.
16. Tiny Anchor Near the Wrist Bone

Small wrist anchors are classic, but wrist placement is a high-friction zone. Ask for a slightly larger scale than what looks perfect on a screen so it photographs and holds. The common regret is picking an inch or less for a design that needs line separation to stay legible. Expect one short session and plan on a touch-up in a couple of years. For showing the piece discretely, wear slim cuffed chinos and a bracelet on the opposite wrist to create balance.
17. Negative Space Chevron Sleeve Accent on Outer Forearm
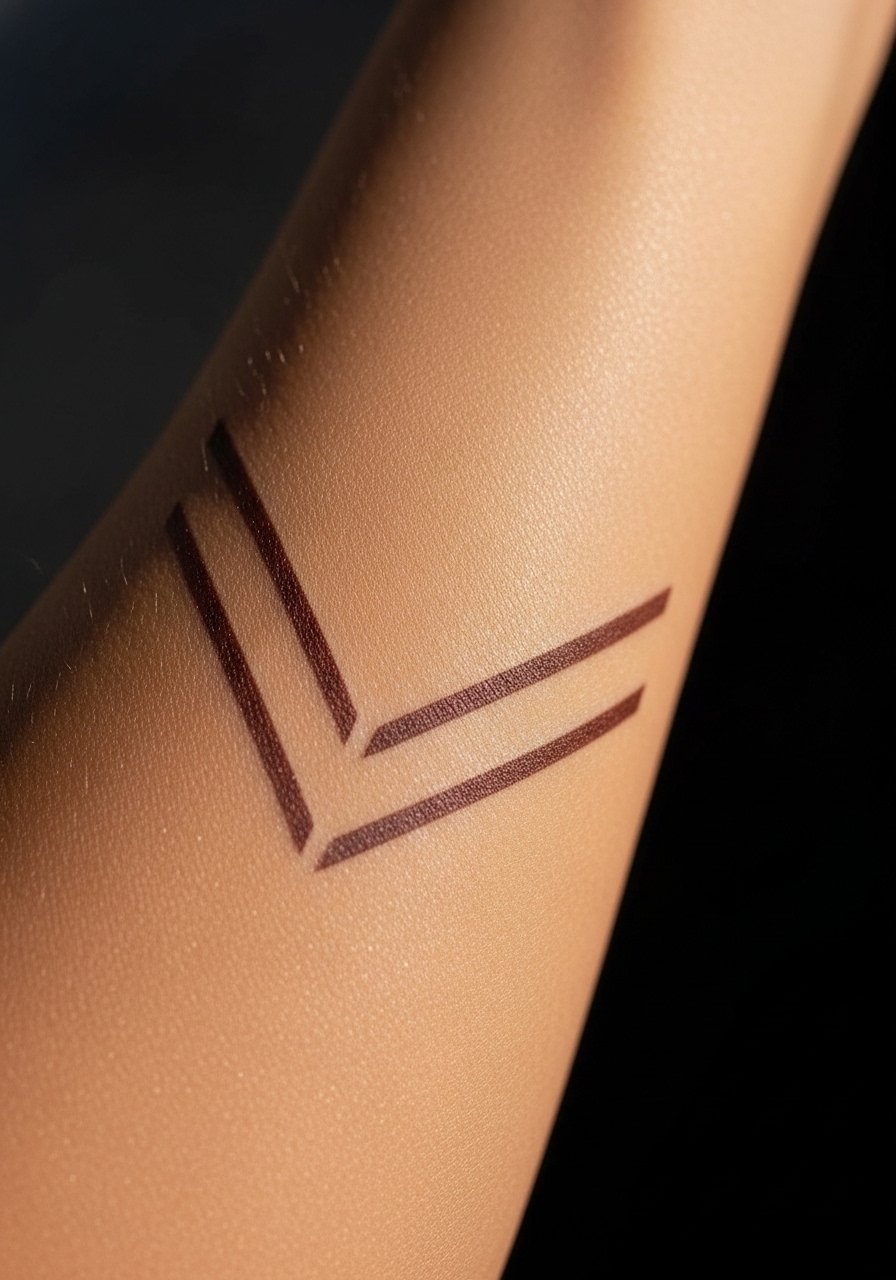
Negative space work depends on crisp linework and spacing. Tell your artist to leave at least 5mm of clean skin between filled panels to avoid visual merging after healing. This design scales well and has moderate session time. People often ask for too many chevrons too close together, which reduces the intended contrast. For a pared-back outfit, wear a fitted henley shirt in a solid color to keep attention on the pattern.
18. Floral Wristlet with Tiny Beads
Wristlets read like jewelry and need clear spacing between petals and bead dots. Ask the artist to place beads slightly larger than your reference so they remain visible through washing and wear. Friction from bracelets and constant movement means touch-ups are likely in the medium term. A typical mistake is having the band too low toward the palm, which ages faster. For sessions, go sleeveless or short sleeves with no jewelry.
19. Micro Lettering on the Inner Forearm
Micro lettering can be elegant when spaced correctly. The key is to test the font at actual size with a stencil. Tell the artist to bolden key letters slightly to keep counters readable after a year or two. Expect low to medium pain and a single session. A common mistake is choosing ornate typefaces that turn illegible small. For subtle show-off, a loose button-down shirt pulled aside keeps attention on the text without exposing too much.
20. Stipple Shaded Fern Along the Outer Forearm

Stipple shading ages gracefully when dots are spaced for the skin type. Tell your artist exactly where you want the highest contrast and request a test stencil to check flow. Expect a patient session since dot work can take longer to build. People often rush stipple into too-tight areas which causes mottling later. For a wardrobe match, roll sleeves or pick a rolled cuff chambray shirt so the fern lies flat against visible skin.
21. Minimalist Bar Code or QR Line on the Inner Wrist
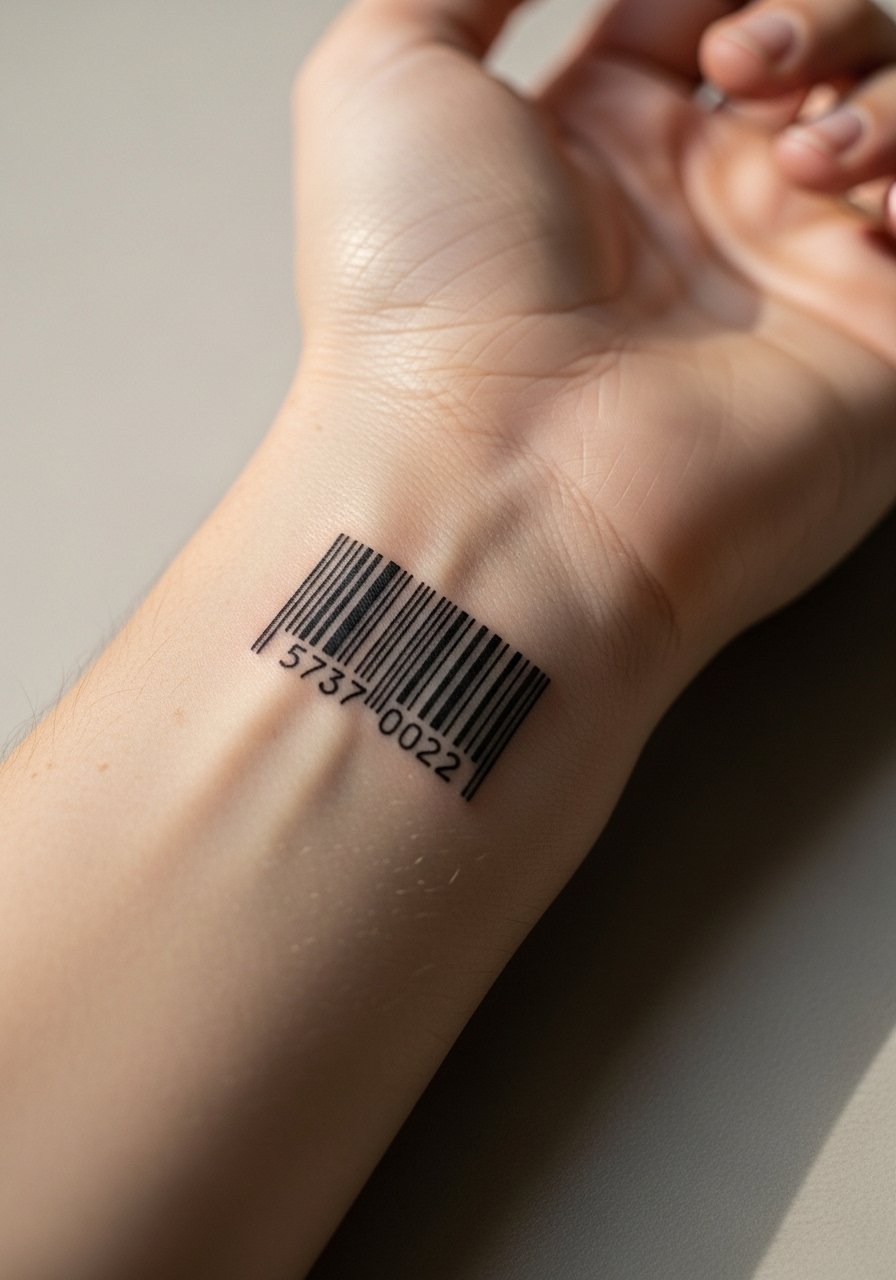
Novelty pieces like bar codes need exact scaling and perfect stencil transfer if they will encode anything. If you plan a QR element, tell the artist the exact characters to test scan at full size. Keep the bars wider than you think because wrists blur faster than limbs. A mistake is making the bars too thin to read after healing. For minimal show, keep sleeves short and a slim watch on the other wrist.
22. UV Ink Accent Hidden on the Inner Forearm

UV accents look striking under blacklight but are subtle in daylight. Ask for UV only as accent washes and not as the primary outline since UV pigments can fade differently. Pain and session time mirror regular fine line work but plan on periodic boosts for UV. A common regret is relying on UV for legibility in normal light. For session wear, a muscle tank top men gives clear access.
23. Patchwork Minimal Symbols Along the Outer Arm

Patchwork allows gradual additions and is forgiving of style shifts. During your consultation, discuss an eventual linking plan so small pieces do not fight for space. Keep each symbol slightly larger than it looks on-screen to preserve clarity. Touch-up schedules vary by placement. For daytime wear, a short sleeve button up rolled at the cuff frames multiple small motifs.
24. Single Needle Script Along Tricep

Tricep script sits at a place that catches sun and movement. Ask for letter spacing increased by 10 to 15 percent compared with the desktop mock-up so counters hold. Expect a medium pain level and modest session time. The typical error is compressing script too near the armpit where sweat and friction speed fading. For session comfort and access, wear a muscle tank top men.
25. Bold Outline Rose on the Upper Inner Forearm
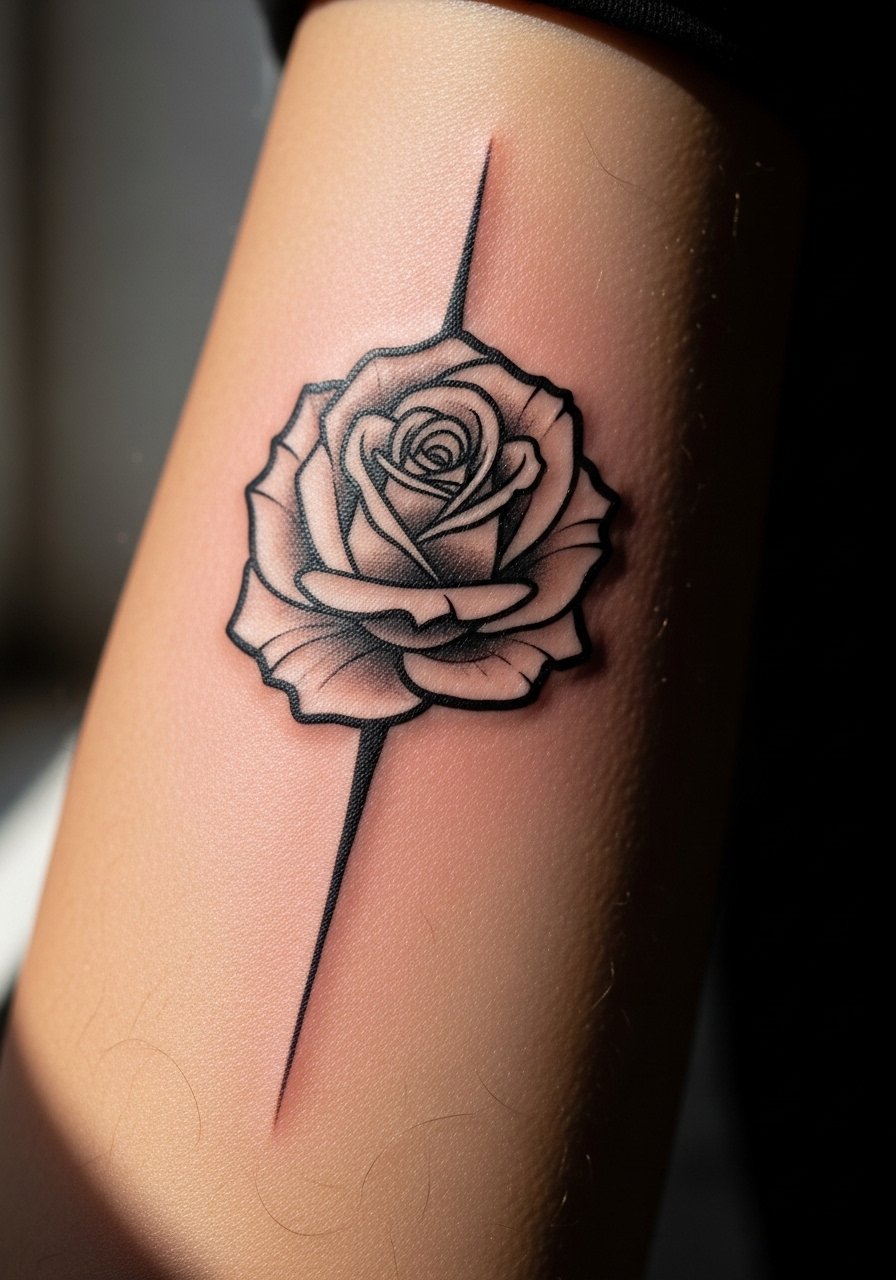
A bold outline rose endures because of clear linework and minimal delicate fills. Request defined anchors around petals so the silhouette keeps reading as subtle shading softens. This placement is lower pain than inner bicep but still visible. A common issue is tiny internal details that get lost; keep interior shading broad and intentional. For an everyday look, a rolled cuff chambray shirt rolled to the elbow shows the rose off cleanly.
26. Geometric Sleeve Starter Panel on the Outer Forearm

Starting a sleeve with a modular panel lets you build over time. Ask the artist to draft potential link points so future sessions thread smoothly. Sessions are staged and the chief mistake is committing too early to colors that limit future cohesion. Planning spacing avoids cramming. A fitted henley keeps the starter panel visible while you plan the rest.
27. Tiny Compass Near the Elbow Crease
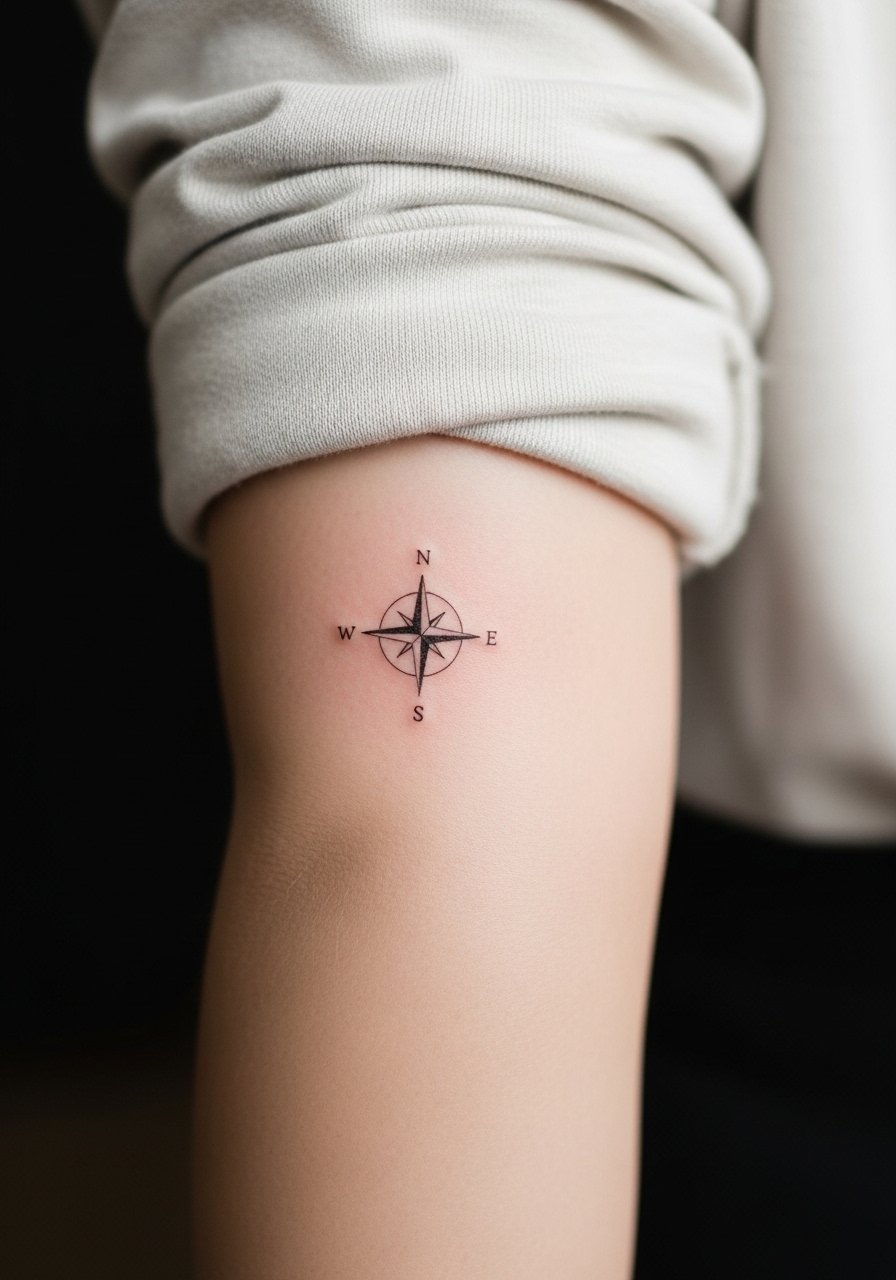
Compasses work well when sized to allow clear directional points. Place it slightly above the crease to avoid distortion when you bend. The elbow area is tender so expect a short, sharp session. A common mistake is putting the compass too low where the skin compresses. For casual wear, push up a loose fit long sleeve so the piece peeks out without rubbing raw.
Studio Day Picks
The first six ideas above include wrist, forearm, and inner bicep pieces that need different prep and protection. A few specific items smooth the session and the first week of healing.
-
Stencil transfer paper kit. Lets you trial the exact placement on skin before the needle hits, especially helpful for the constellation and script pieces.
-
Topical numbing cream. Applied before wrist or inner bicep work takes the edge off sensitivity without masking stencil detail.
-
Thin protective film roll. Useful during the first 24 to 72 hours for wrist and forearm pieces that rub against clothing.
-
Fragrance free gentle body wash. Keeps washing gentle on delicate wrist and inner arm linework without adding irritants.
-
Aquaphor healing ointment. Thin layers in the immediate days after a session lock in moisture for fine line work without clogging pores.
Frequently Asked Questions
Q: Will fine line floral vines on the forearm need touch-ups often?
A: It depends on placement and your skin. Fine line on exposed forearms usually softens sooner than larger traditional work. Ask for slightly bolder anchor strokes and plan on a light touch-up around year two to three if you want crisp lines long term.
Q: Are watercolor wrist pieces riskier than blackwork for longevity?
A: Watercolor fades differently because the pigment sits as washes rather than dense saturation. Blackwork tends to hold shape longer. If you choose watercolor for the wrist, concentrate color in key areas and expect periodic boosting in the years after.
Q: How should I prepare clothing-wise for an inner bicep or upper arm session?
A: Wear something you can easily lift or remove without tugging the head or shoulders. A tank top or muscle tank works best so the artist has clear access and you do not stretch the area during dressing.
Q: Do I need to be concerned about skin tone when choosing fine line versus blackwork?
A: Yes. Lighter, single-needle work can read faint on darker tones in photos. If you have darker skin, ask for slightly heavier lineweight or spot shading to maintain contrast while keeping the delicate look.
Q: Can I mix styles in a patchwork half-sleeve and still make it look cohesive?
A: Definitely. The key is to set a consistent value range or a repeating motif to link pieces. Discuss a long-term plan with your artist for spacing and anchor elements so later additions mesh without reworking older sections.
