
Inner lip tattoos are their own category of experiment. They look sharp for a few weeks, then keep shifting as the mouth heals and the mucosa regenerates. That transience is exactly why people choose them, and why others warn against them. Below are curated abstract ideas that respect how the inner lip behaves, what to ask your artist, and how each tiny design will probably age.
1. Tiny Dot Cluster on Lower Inner Lip

I bring this one up when someone wants an abstract touch without commitment. The cluster of three to five micro dots reads like a motif but fades into a smudge faster than more spaced marks. Tell your artist you want the dots slightly larger than they would usually do and spaced to avoid merging. Expect a sharp look at six weeks, softer edges at six months, and likely noticeable fading by year two. Pain is brief and sharp. Common mistake is requesting dots too close together. For showing it off, a bold matte lipstick can frame a smile and draw attention to the tiny interior detail so try wearing matte liquid lipstick for photos.
2. Micro Geometric Sliver Shapes

Fair warning, the inner upper lip moves more and that mobility shortens crisp edges. Choose elongated slivers rather than closed shapes so healing favors line retention. In a consultation, say you want single-needle fine line work with slightly deeper placement for longevity, and ask about touch-up policies. Sessions are quick, often under 20 minutes, with a sharp pinch. Blowout risk is low compared to soft tissue areas, but expect touch-ups earlier than external tattoos. I recommend avoiding dense patterns here. If you want a subtle pairing, a clear lip gloss catches light and can help photographs pick up the inner-lip detail.
3. Wavy Abstract Line That Mirrors Smile Curve
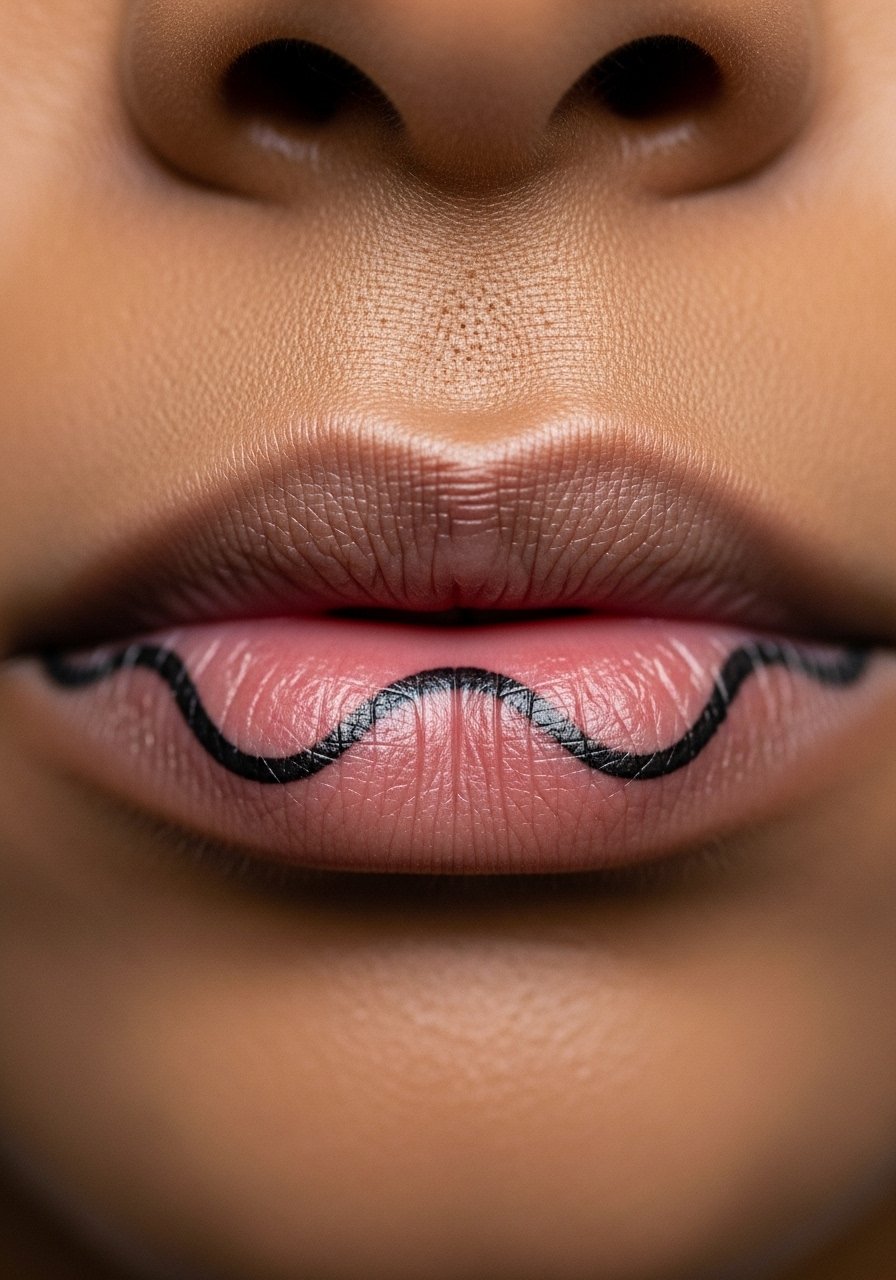
Most people underestimate movement when placing a curving line. The design reads very clean at six weeks if the curve follows the natural fold of the lip. By year one the line softens, and by year three it often needs a touch-up to re-establish crispness. I suggest bringing a few photographic references that show the exact curvature you like. A common mistake is forcing symmetry across both lips; asymmetry can age more gracefully. Session time is short. For a discreet reveal, pair with a portable compact mirror when checking photos after the session.
4. Tiny Negative-Space Crescent

There is something about a negative-space mark in the inner lip that feels modern without shouting. This holds up better than intricate shading because there is less pigment to migrate. Tell your artist you want crisp margins and ask them to slightly overline the edges so the negative portion remains visible after a bit of fading. Mistake to avoid is overcomplicating the crescent with tiny dots around it, which merge fast. Expect a quick session and modest discomfort. For photos or nights out, a long-wear lip stain frames the mouth without smearing.
5. Mirrored Micro Marks on Upper and Lower Lip
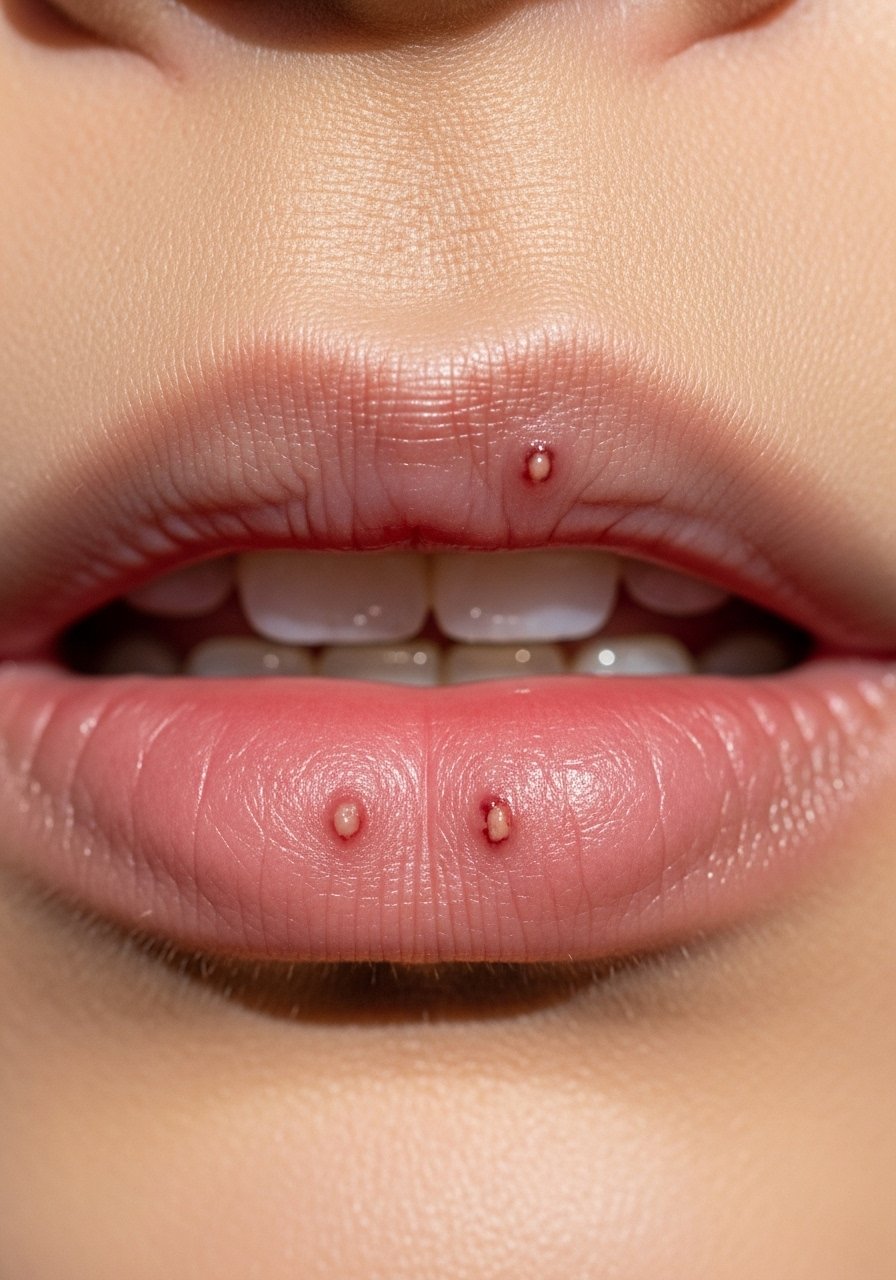
The mirrored idea is bold because it creates balance when you smile. The biggest mistake is expecting them to stay identical over time. One camp of artists says symmetry is achievable and worth the effort. The other camp warns that mucosal healing and slight differences in depth make long-term symmetry unlikely. Ask your artist which of those camps they fall into and plan for a touch-up if perfect balance matters. The session takes a little longer because both areas are worked on. This idea photographs well with a bright lip color and a travel-size lip brush for precise application.
6. Tiny Stippled Texture Patch
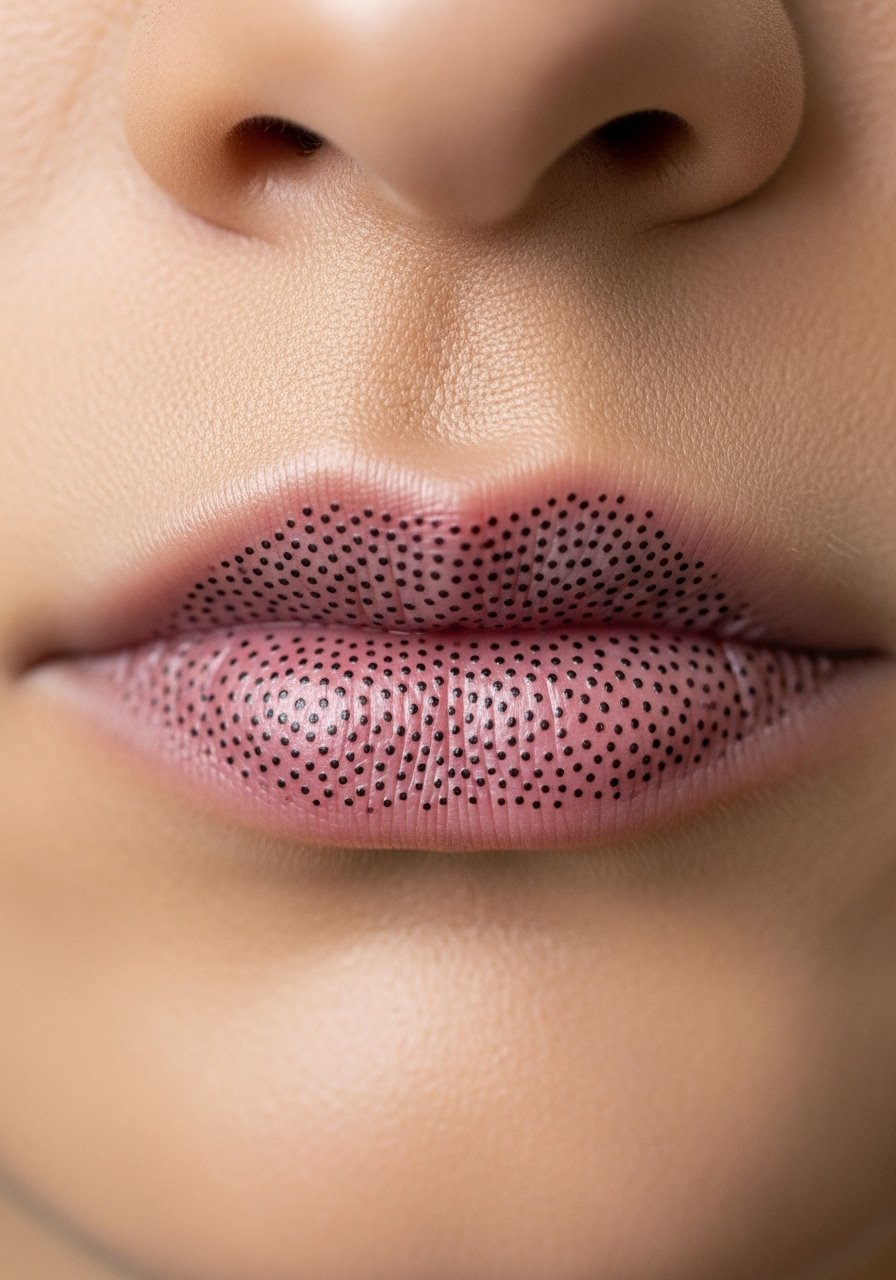
When you want texture rather than a line, stipple dot work inside the lip gives that effect without filling large areas. Mention to the artist that you prefer dot spacing that avoids visual saturation, because dense stippling blurs quickly inside the mouth. At six months the pattern will soften, and a light touch-up at year one is common. The process feels like rapid pinpricks. For the session, avoid minty toothpaste beforehand if your mouth is extra sensitive, and wear a neutral lip color afterward for photos. A small lip balm kept in your bag helps with comfort, but follow aftercare instructions from the studio.
Studio Day Picks
The lower and upper inner lip ideas above call for small tools and gentle prep to keep the session quick and the first week tolerable.
-
Disposable dental mirror pack. A compact mirror helps you and your artist check placement during brief lip adjustments, especially useful for mirrored micro marks.
-
Alcohol-free mouthwash travel size. Gentle rinses reduce irritation without drying the mucosa, which matters for early healing of inner lip designs.
-
Topical numbing cream. Applied as instructed 30 to 45 minutes before the appointment eases the sharp sting of inner-lip sessions without altering the artist's linework.
-
Soft disposable lip shields. Keeps the outer lip and clothing protected during short healing windows and reduces accidental rubbing.
-
Aquaphor Healing Ointment. Thin application if recommended by your tattooist helps protect tiny external areas that might get friction during the first couple of days.
7. Abstract Micro Wavelets Cluster

When a client wants movement without a central motif, I point them to a cluster of tiny wavelets. Each mark is separated so the design keeps line clarity as it softens. Tell your artist you prefer spacing that prevents merging. The session is quick and the pain is sharp but brief. Expect the most dramatic change in the first three months as surface pigment sheds. A common error is packing too many marks into a small zone. For after-session selfies, a compact LED selfie light helps capture the faint interior detail without overexposing the skin.
8. Minimal Abstract Chevron

This placement works for people who want a directional motif that reads when they smile. Ask for a slightly thicker stroke than you might choose for an external chevron, because the mucosa eats fine needles over time. At six weeks the chevron looks crisp, at six months the point softens, and by year two a touch-up may be needed to restore the edge. Common mistake is choosing an overly intricate tip. Session time is under 15 minutes and sensation is intense but brief. For visibility in photos, try pairing with a bold lip liner to define the lip edge and complement the tiny interior mark.
9. Micro Abstract Grid
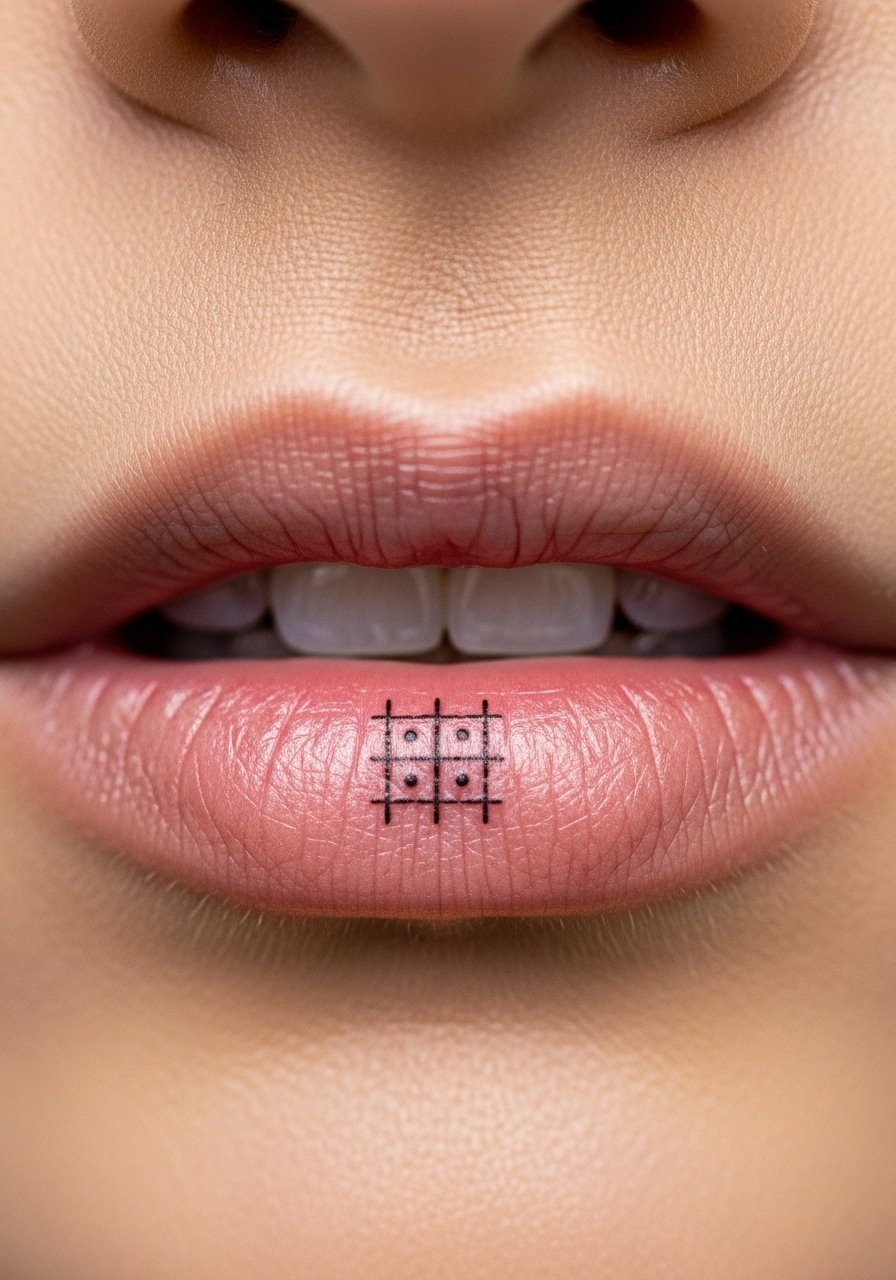
Grids inside the mouth are an intentional geometry test. They age by blurring the intersections first, so ask for slightly wider spacing and larger dot size at the consult. One practical tip is to avoid aligning with natural folds. A mistake is expecting grid precision to last without yearly touch-ups. Expect the session to feel like a series of pinpricks in a short block of time. For photos, a neutral matte lipstick can create contrast and help the inner-lip design read clearer in close-up images.
10. Single Abstract Slash Mark
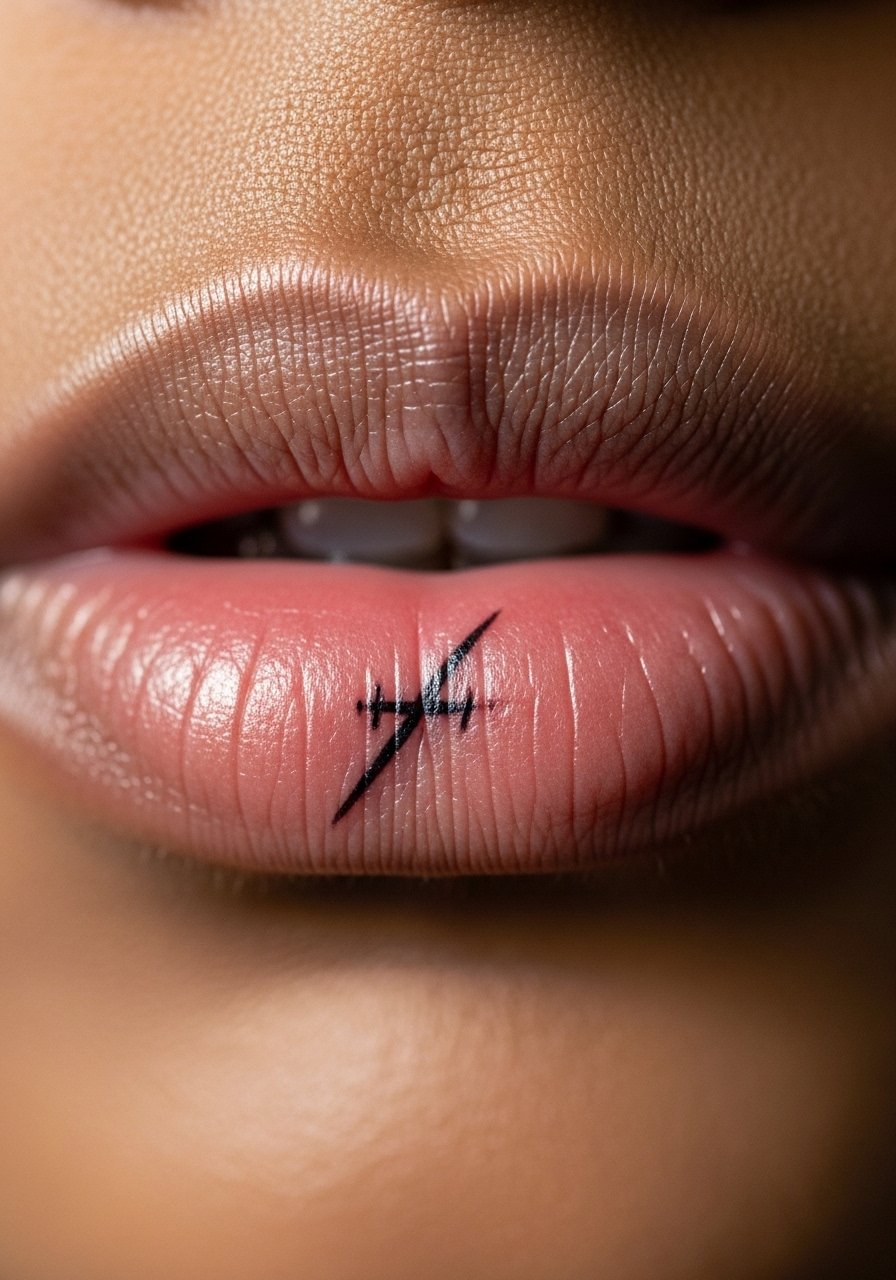
A single slash feels purposeful and reads well when placed to follow the mouth's fold. Specify depth and angle in consultation so the line does not cross too many mobile points. The slash will look very defined at six weeks and will thin visually over months. Common error is choosing a slash too long for the lip span. Expect touch-up sooner than an external tattoo. If you want to style around it for photos, a matte lip balm keeps shine low so interior contrast shows up.
11. Micro Asymmetrical Shapes Pack
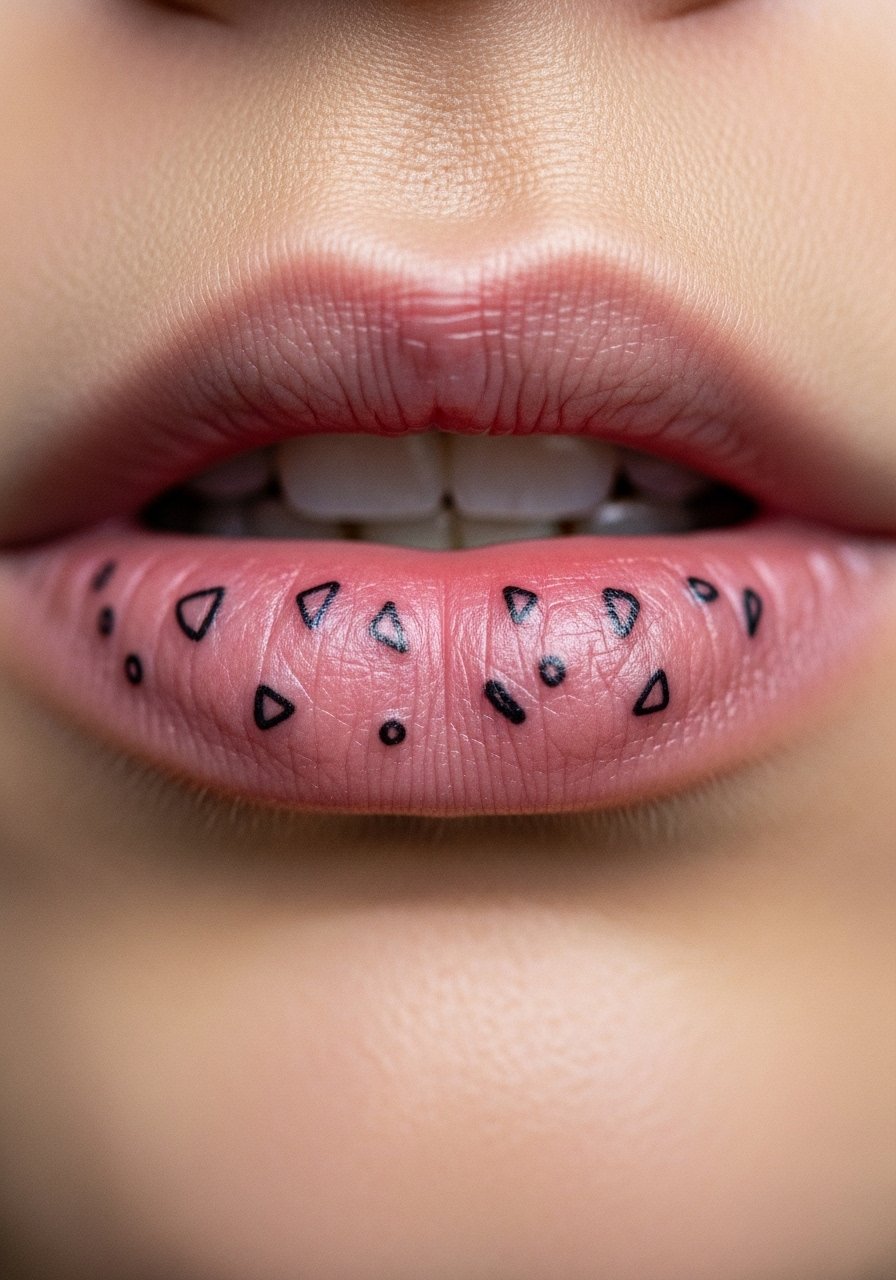
Asymmetry is forgiving inside the mouth because slight differences become part of the design story. Tell your artist you want varied negative space and avoid mirrored arrangements. The session time rises slightly with more shapes, but each mark is small. Expect different fading rates across the cluster, which is normal. One mistake to avoid is asking for mirrored balance when the canvas will not stay identical. For candid snapshots, a travel-size concealer brush helps you edit the outer lip area for photos.
12. Abstract Micro Spiral
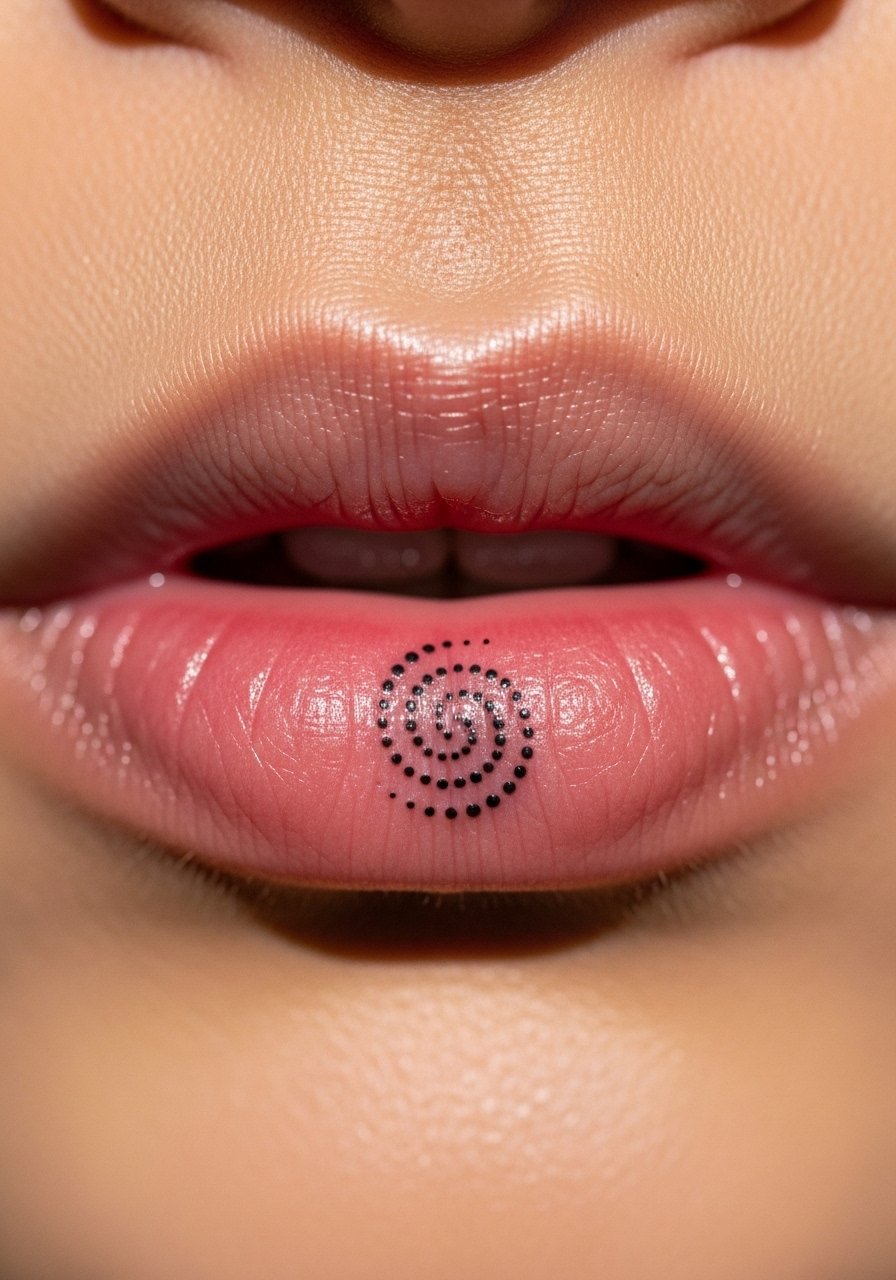
Micro spirals make clever use of minimal ink. They tend to spread outward slightly as the tissue heals, so request one with a slightly looser central coil. The visual timeline is crisp to muted within the first year. Common complaint is wanting too tight a coil which loses definition quickly. The procedure is brief and sharp. For editorial photos, a small portable mirror with magnification helps you frame the mouth without awkward angles.
13. Tiny Abstract Arrow Fragment
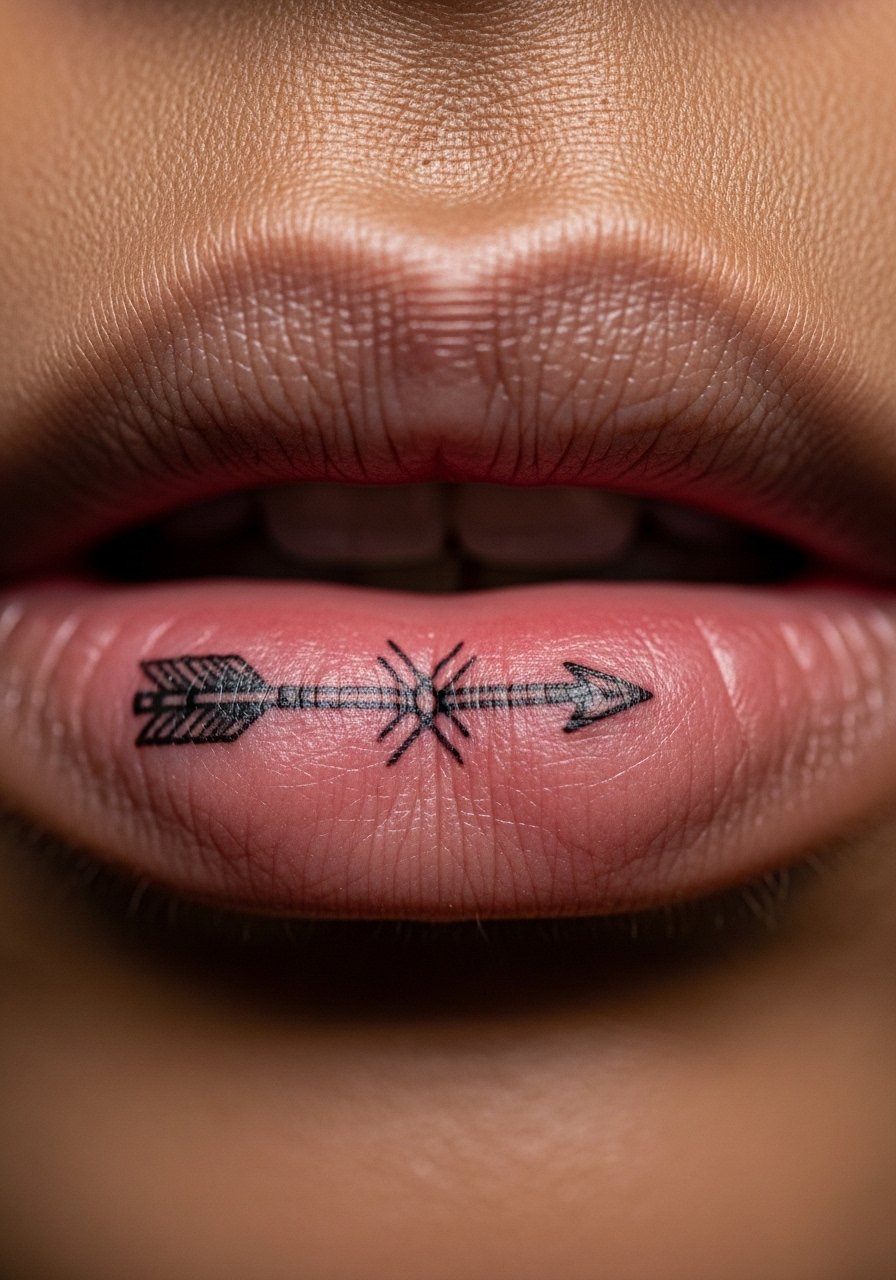
Arrow fragments point inward and work with the mouth's natural motion. Ask your artist for a short shaft and a mild barb rather than an extended arrow, because longer shafts blur. Expect a solid fresh look at one month, then gradual softening. A common mistake is requesting fine feathering on the arrowhead, which becomes indistinct. The session is quick but the sensation can be intense. For camera-ready smiles, a thin lip liner pencil helps shape the outer lip contour without covering the inner detail.
14. Micro Fragmented Wave Cluster
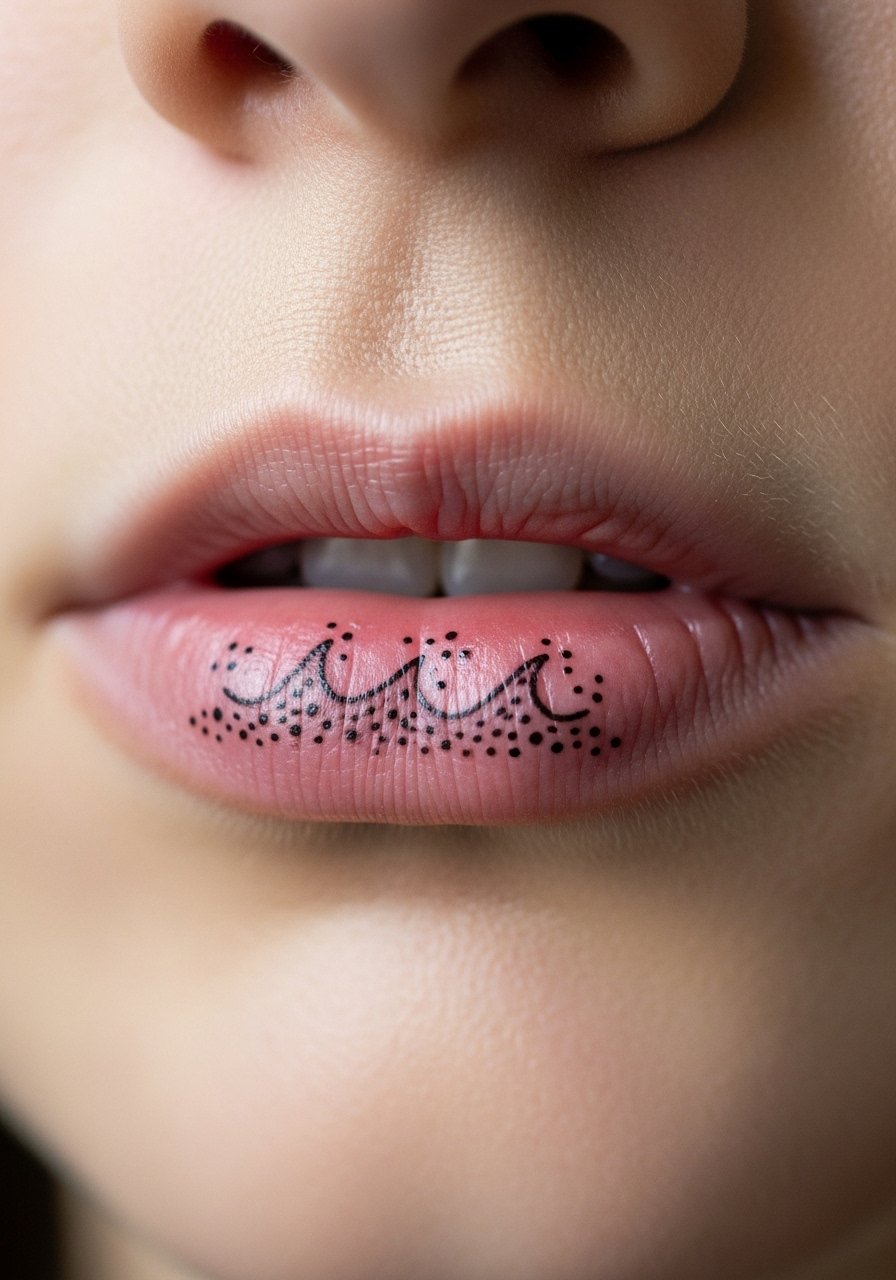
Fragmented waves read like movement and are forgiving as they blur. Ask for more separation between strokes to preserve negative space. This design is less likely to form a single blurred block because of the natural gaps. At six months it looks softly textured and by year two it will need re-saturation if you want the original contrast back. The process is brief and you will feel sharp pricks. To enhance photos of your smile, dab on a clear lip gloss to catch light without smudging pigment.
15. Tiny Abstract Chevron Pair Near Commissure
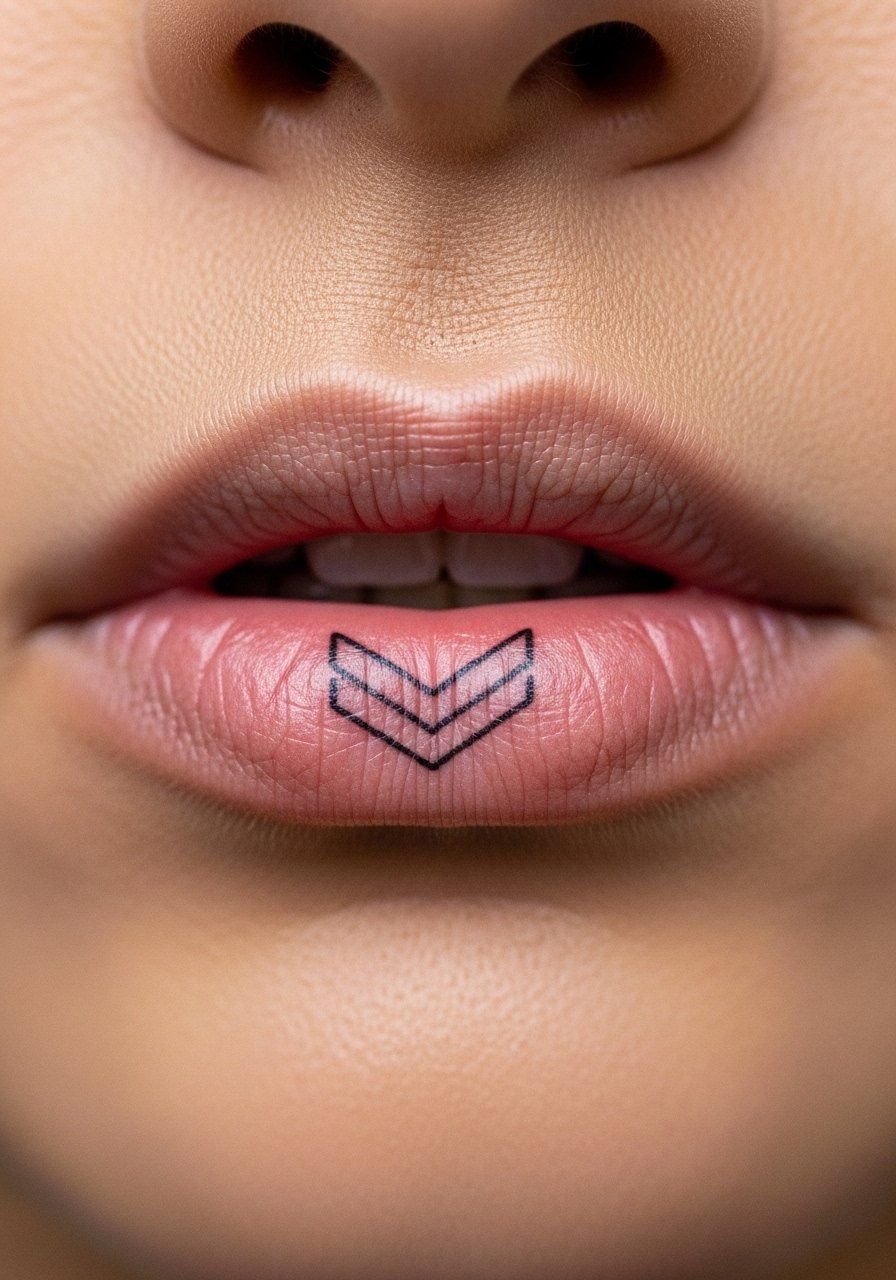
Placement near the commissure moves with every smile, so ask for chevrons oriented to the natural pull. One camp favors placing such marks closer to the center for longevity. The other camp prefers the outer edge because it photographs with the smile. Name which approach you prefer during consultation. Expect the outer-edge version to fade faster because of greater friction. The session is very short. For photos, a neutral lipstick shade complements the tiny chevrons without overpowering them.
16. Miniature Abstract Knot
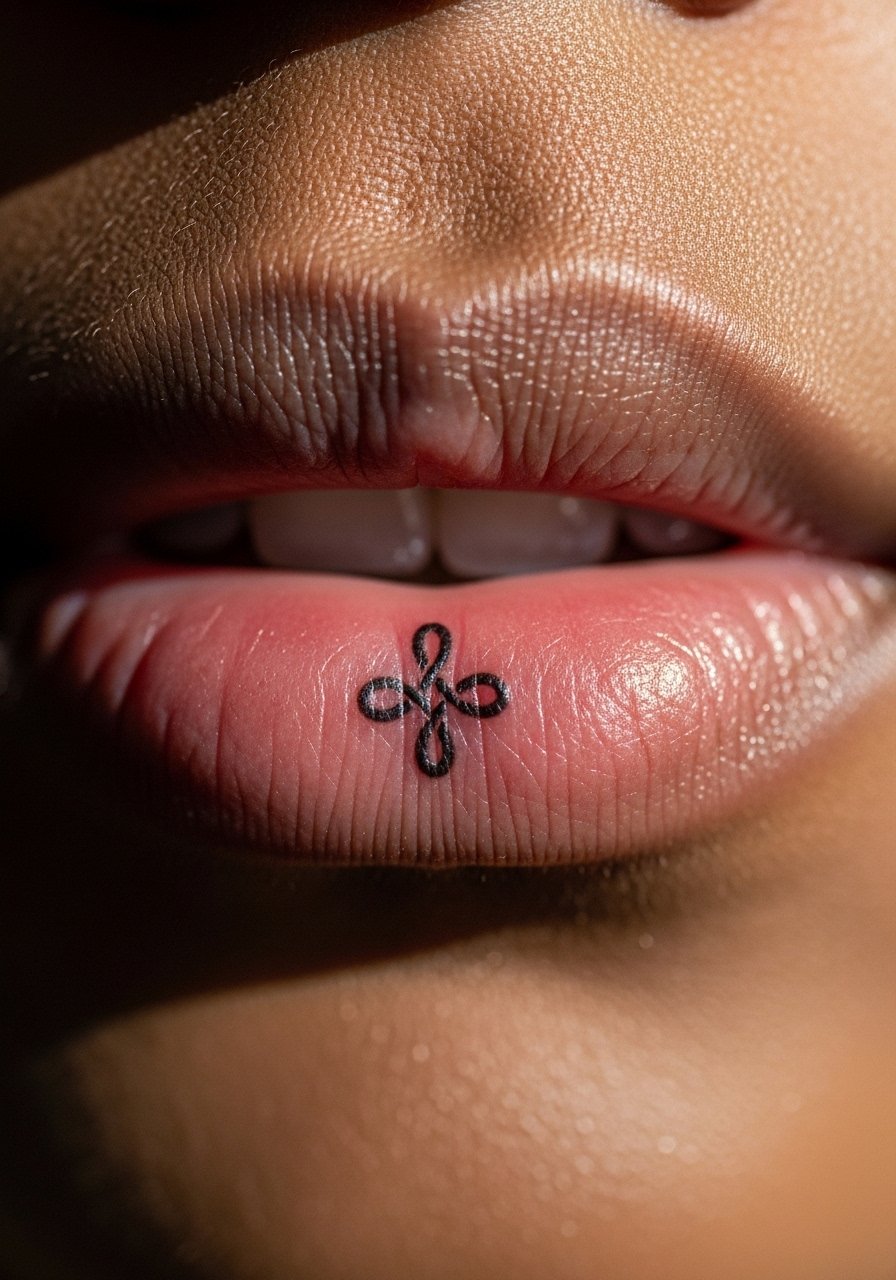
Knots inside the lip make a tidy focal point, but tight knots can blur into a blob. Tell your artist you want open loops with deliberate spacing so the structure remains readable. The knot looks defined at six weeks and softens steadily over months. Touch-ups are routine for this kind of detail. Session discomfort is short and sharp. If you plan to highlight it in images, a small professional lip brush helps you blend gloss or liner for a polished look.
17. Tiny Abstract Constellation
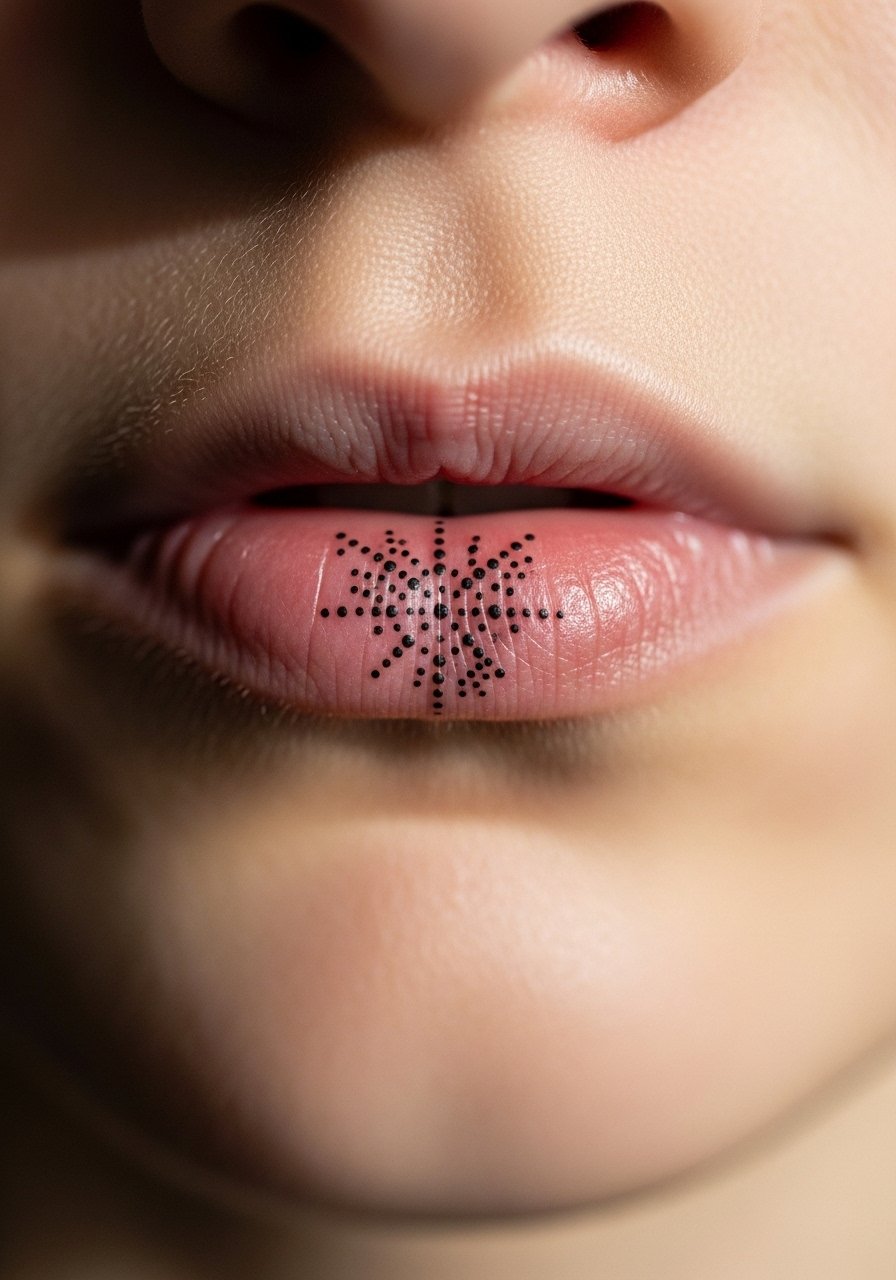
A tiny constellation inside the lip uses dots of varying size to suggest pattern. Spacing is everything here. Ask your artist to scale up the smallest dots slightly so the constellation keeps its identity over time. Expect some dots to fade faster, which can alter the constellation's shape. The session is quick and the sensation sharp. For sharing photos, a small LED clip-on light helps illuminate the mouth without harsh angles.
Frequently Asked Questions
Q: How long do abstract inner lip tattoos typically last before they need a touch-up?
A: From what I see, many inner lip tattoos need a touch-up within one to three years if you want the original contrast back. The exact timing depends on placement, pigment depth, and oral habits. Plan for a follow-up with your artist when you book so expectations are clear.
Q: Are inner lip tattoos more likely to get infected than external ones?
A: The mouth is a bacteria-rich environment, which makes careful hygiene important. Using a gentle, alcohol-free rinse as your artist recommends and avoiding irritating foods during the first week reduces risk. If you notice unusual swelling or persistent pain, contact the studio or a medical professional.
Q: Will smoking or eating spicy foods affect healing for inner lip tattoos?
A: Smoking and spicy foods can increase irritation during the initial days of healing and may accelerate fading. If you can pause those habits for the first few days, the tattoo has a better chance to settle cleanly.
Q: Can I combine inner lip abstract marks with external lip piercings or jewelry?
A: Combining tattoos with piercings increases movement and friction in the same area, which can speed fading and complicate healing. If you plan both, space them out or discuss sequencing with your artist so each has time to settle.
Q: How should I find an artist who is comfortable doing inner lip abstract pieces?
A: Look for artists who list mucosal or inner-lip work in their shop notes, or search community threads and hashtags focused on micro or oral tattoos. Directories and local tattoo forums can point you to artists who regularly do this niche.
Q: Can makeup or teeth whitening affect how the inner-lip tattoo photographs?
A: Yes. A well-chosen lip color or a quick whitening touch can change contrast and make the inner-lip detail read more clearly in photos. For subtle enhancement, a neutral or matte lip product usually helps without drawing too much attention away from the tiny interior design.
