
Fine line and watercolor perfects dominate feeds right now, but the pieces that still read clean in five years are not always the ones that looked best fresh. I have seen delicate Kintsugi cracks lose their sheen, gold veins muddy on darker skin, and tiny wrist lines need touch-ups far sooner than expected. This list collects 27 imperfectly rendered ideas that consider longevity, placement, and what to wear to show them off without losing the emotional edge.
1. Kintsugi Cracked Pottery on the Wrist
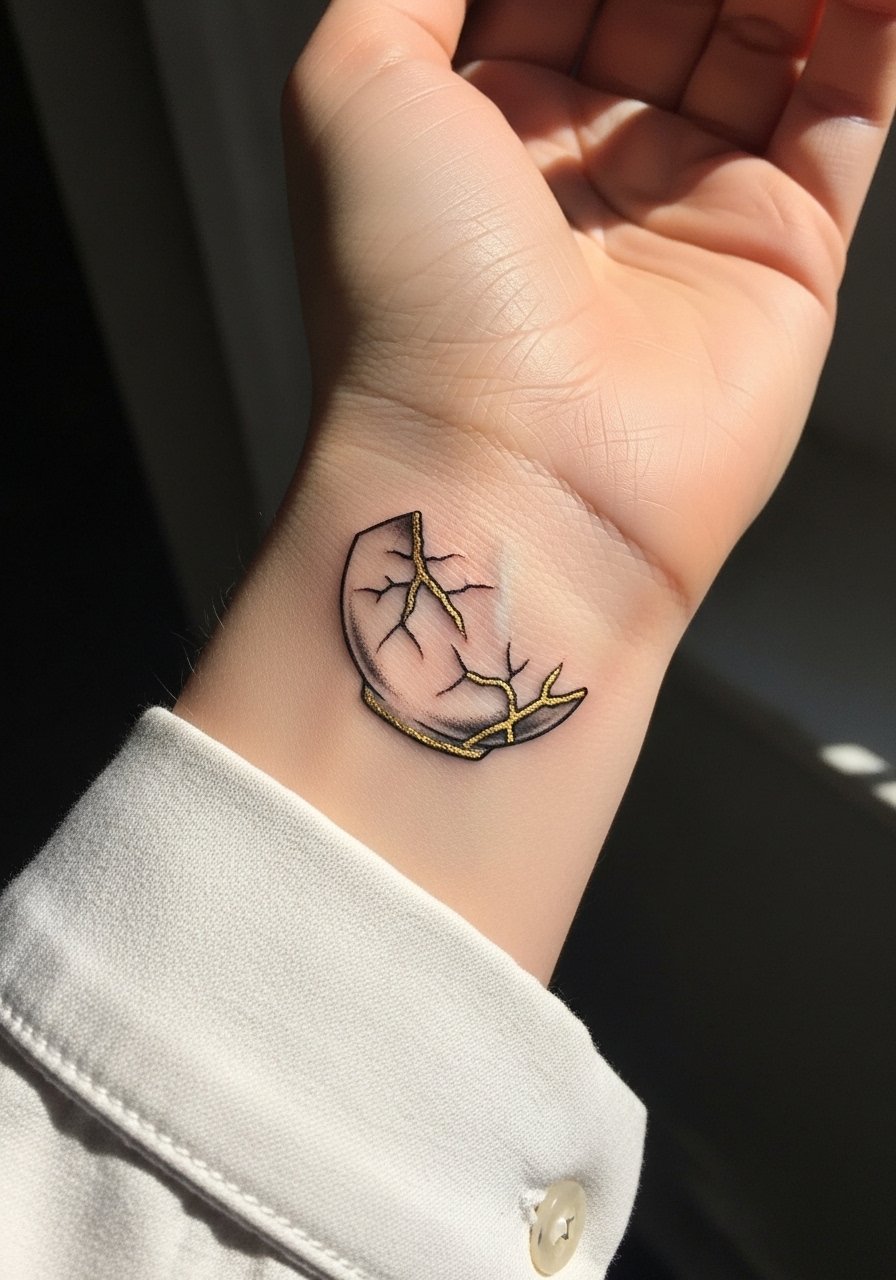
Wrist Kintsugi reads intimate and constant. Fair warning, fine line there fades faster because of washing and wrist motion, so ask your artist for slightly bolder crack lines with fine gold accents rather than wafer-thin veins. During consultation bring a photo that shows the exact crack thickness you want and mention touch-ups up front. For the session wear a sleeveless tank so the artist has clear access. Expect a short session and a likely touch-up window at 12 to 18 months. Avoid requesting gold that sits purely on surface ink because it can lose contrast on darker tones.
2. Irregular Line Abstract Flaws on the Inner Forearm
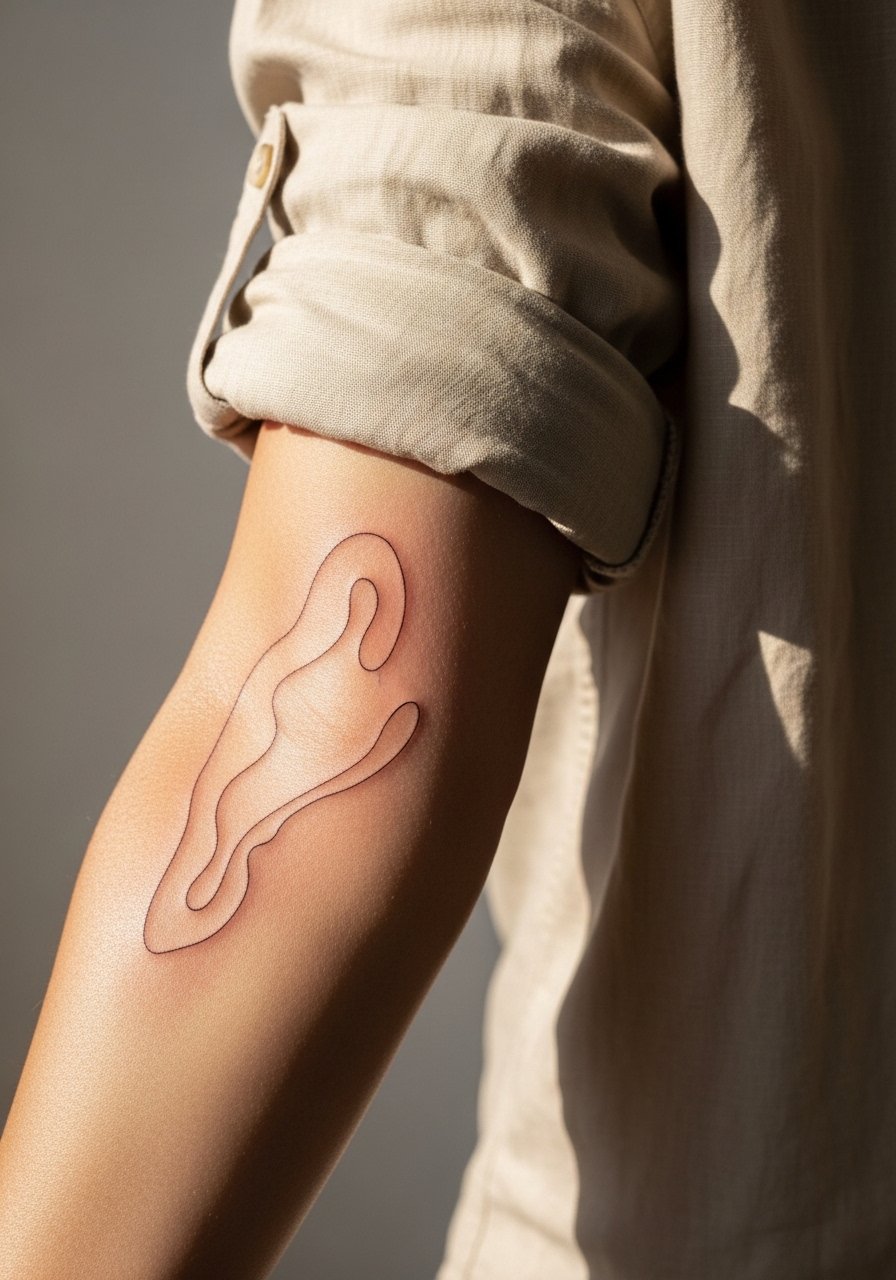
I recommend this when you want a quiet, wearable nod to imperfection that still photographs clean. Tell the artist you want varying line weights and intentional micro-breaks in the strokes to prevent a flat, machine-precise look. The inner forearm is forgiving for fine line, but the trap is going too tiny. Ask for modest spacing so the lines do not merge after two years. For showing it off try a linen button up shirt with sleeves half-rolled, and wear a minimalist leather wrap bracelet on the opposite arm. Session feels low to moderate on the pain scale and usually fits into a single appointment.
3. Watercolor Imperfect Florals with Drips on the Collarbone
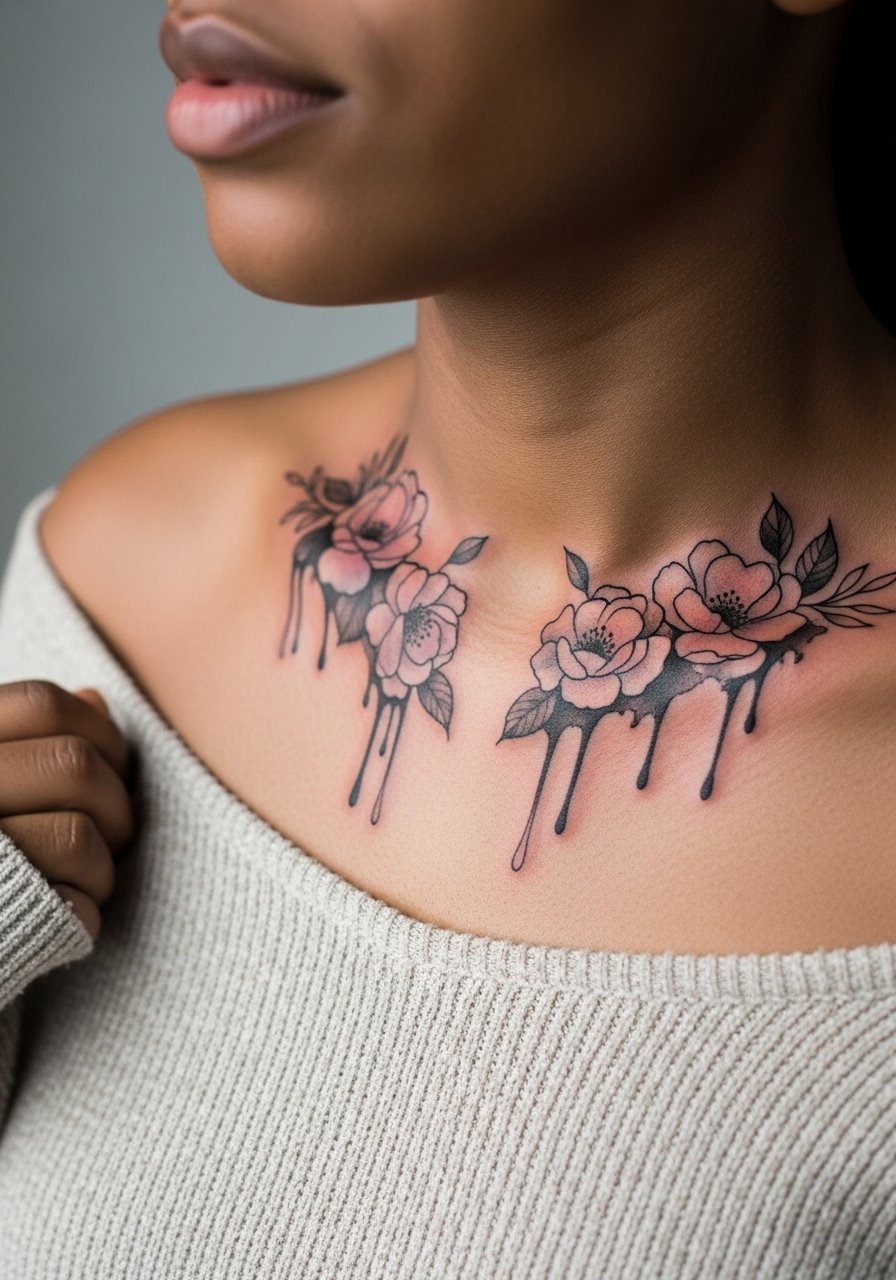
Collarbone watercolor can look ethereal, but pigment migration is a real risk if the color is too thin. Ask for saturated color fields that bleed into stipple shading and for darker outlines to anchor the drips. On darker skin tones, request contrast with deeper hues rather than relying on pale pastels. For show-off dressing, an off shoulder sweater or a dainty lariat necklace keeps attention on the piece. Sessions often require two sittings for layering and touch-ups, and avoid too-fine watercolor dots near the clavicle where sun exposure accelerates fade.
4. Minimalist Asymmetry Shape Behind the Ear
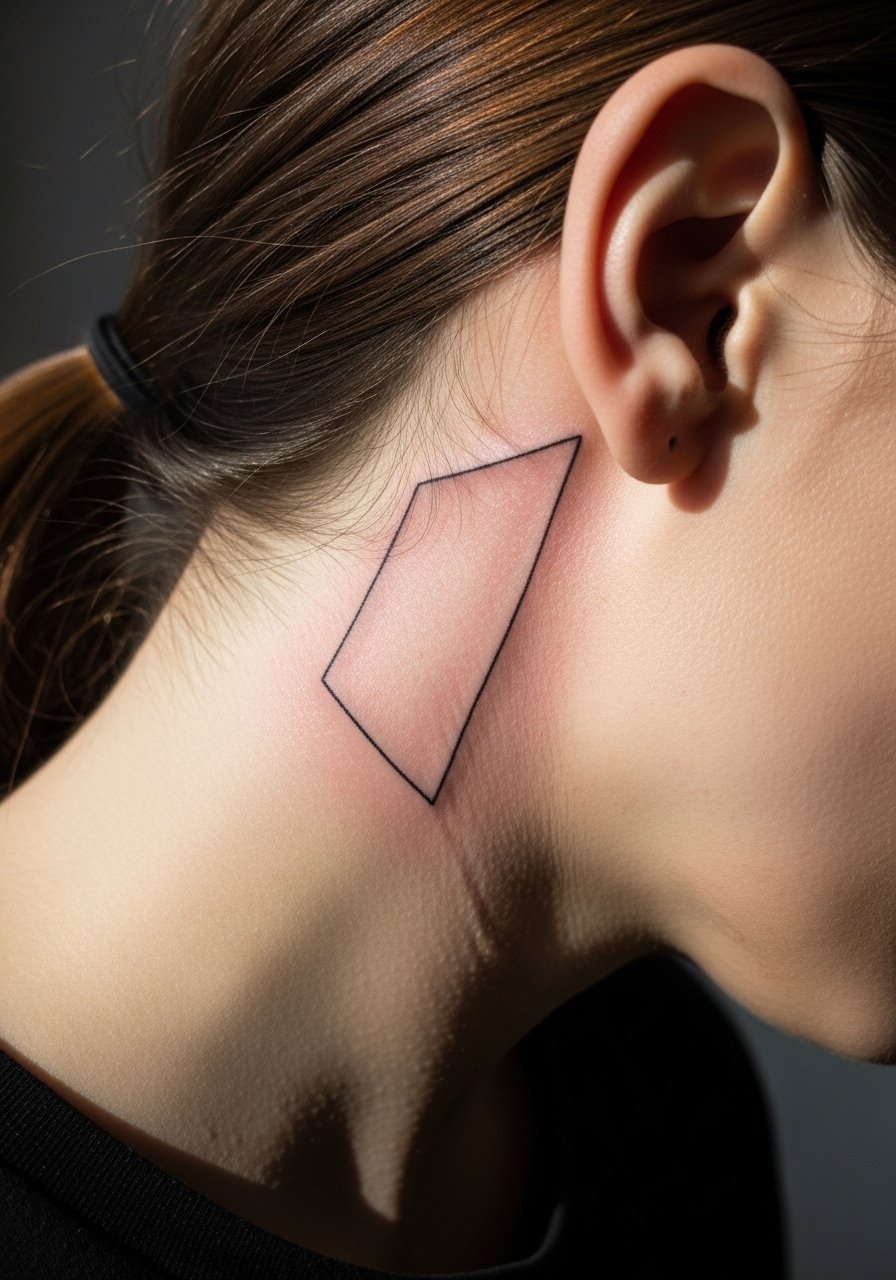
Behind-the-ear micro pieces read like a secret. The biggest mistake is asking for ultra-tiny detail that blurs into indistinct marks after healing. Ask for a slightly heavier line weight and clear negative space so the asymmetry reads even as it softens. This placement is sensitive and the session feels buzzy but quick. For session wear pull hair up and bring a loose top that is easy to leave on. Because this is a discreet spot, it is a good pick for first timers who want a meaningful small imperfect design without major visibility.
5. Kintsugi Vessel Outline on the Shoulder Blade
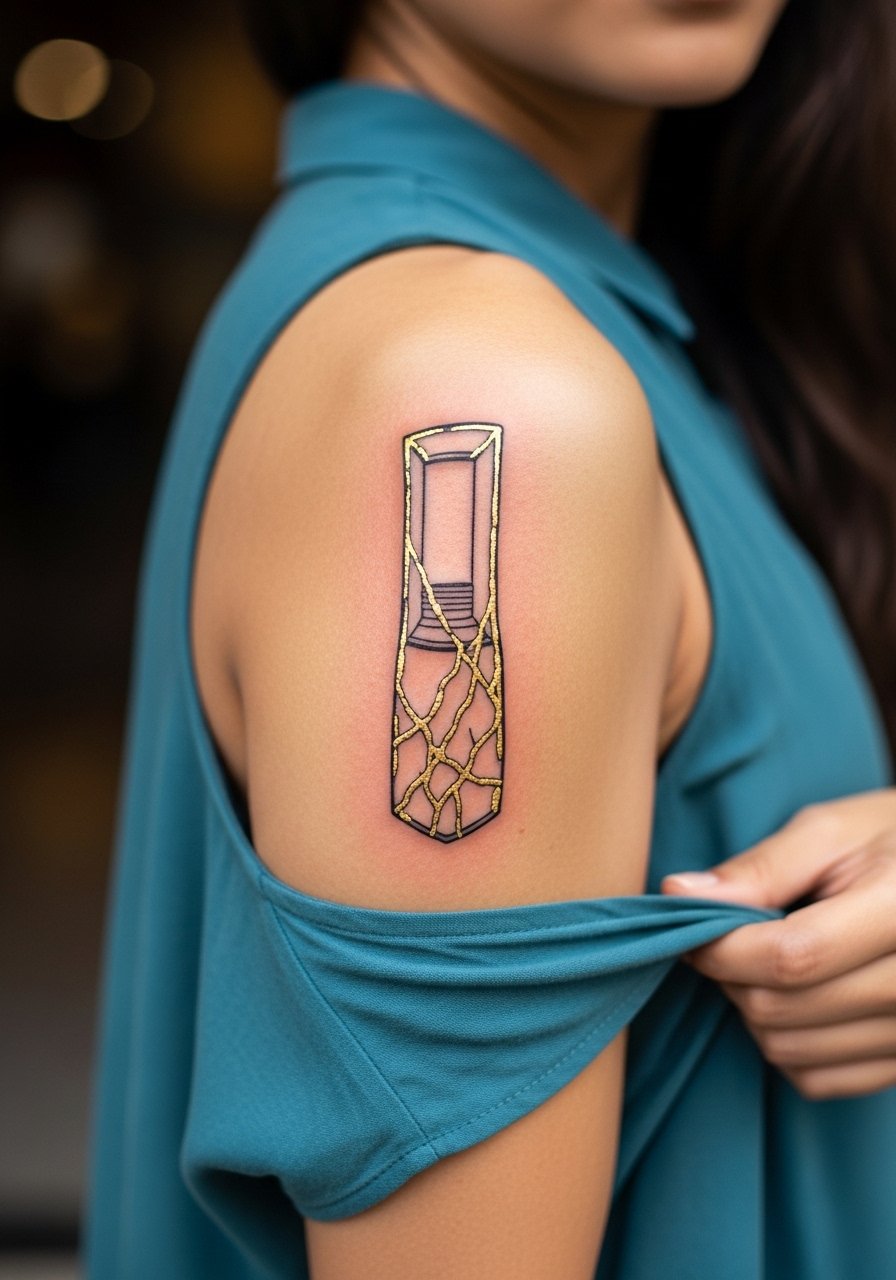
I have seen this one age well when the gold is used sparingly and the black outline is confident. Shoulder blade gives room for the cracks to breathe so spacing matters more than tiny detail. During the consult ask for gold accents that sit between the black lines rather than over them and bring references of healed work. For the session wear an open-back or sleeveless top so the artist can reach the area without tugging. Pain is moderate and sessions may be split if you want soft shading inside the vessel. For darker skin, test a metallic white or silver patch first.
6. Splashed Imperfect Mandala on Upper Arm
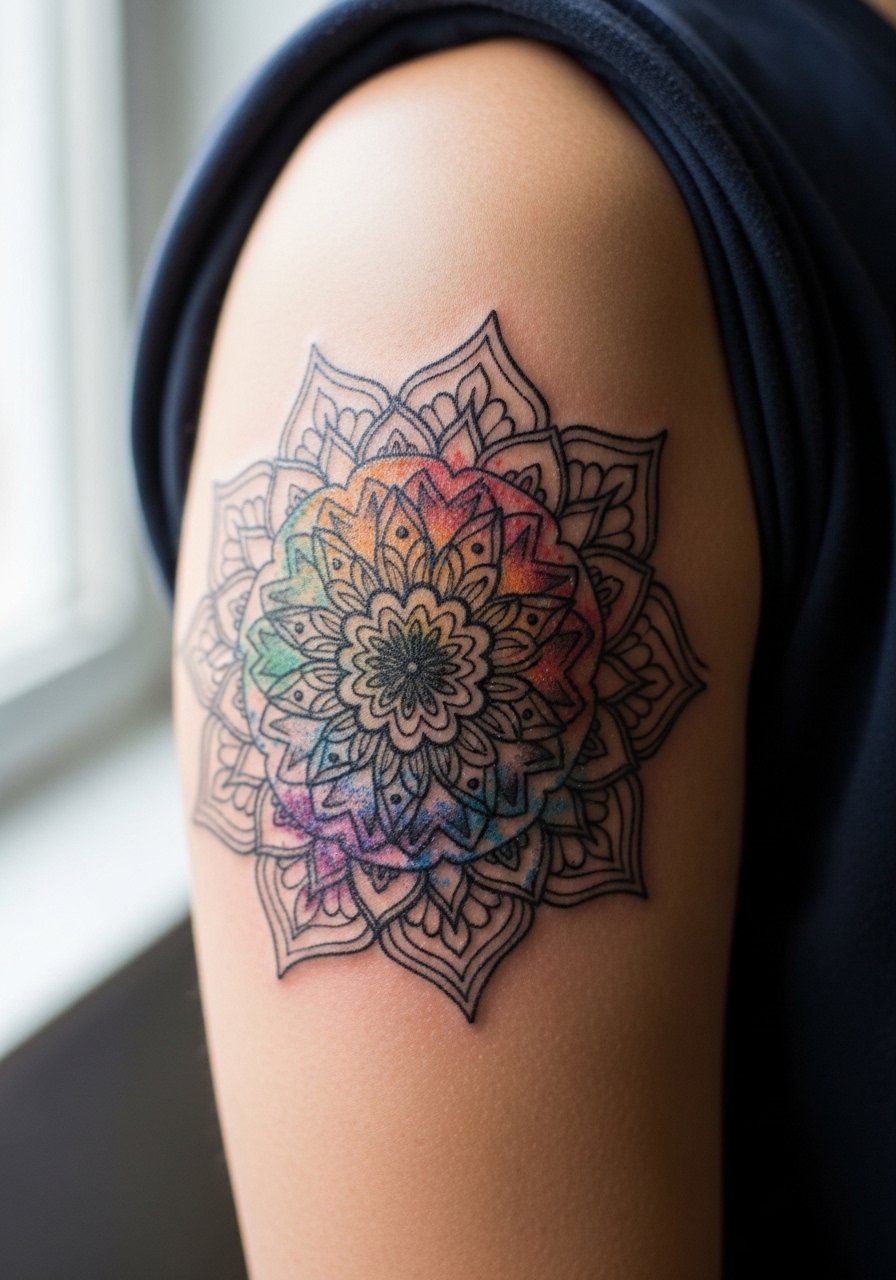
Upper arm mandalas absorb chaos well because the surface is wide. The common error is packing too many concentric lines into a small circle. Ask the artist to leave breathing room between rings and to use splashes of watercolor that anchor into black stipple. This style usually needs two sessions for color saturation and touch-ups. For showing it off, sleeveless dresses or open back tops keep the arm visible without competing patterns. Blowout risk is low here, but dense dot work may soften over several years, so plan spacing accordingly.
For The Healing Window
The wrist and rib ideas above handle friction and movement differently, so the kit below helps whether you booked a forearm touch or a ribcage piece.
-
Indie gold leaf pigment pack. Thinner gold leaf pigments can layer into Kintsugi veins without the heavy migration some metallic inks show on darker tones.
-
Tattseal non-greasy balm. A lighter balm that artists sometimes prefer to avoid greasing up fine line work while keeping watercolor areas hydrated.
-
InkGuard spray. Dries matte and helps bold black cracks set clean during the first 48 hours, though it is not recommended for dense color saturation.
-
Conscious Ink temporary tattoos set. Try a peel-and-stick version of your chosen Kintsugi or abstract layout to preview placement and scale before committing to permanent ink.
-
Rubbing alcohol prep wipes. Handy for quick skin prep before appointments when shops advise a clean, product-free surface, but avoid using on fresh tattoos.
7. Small Asymmetry Shapes on the Ankle
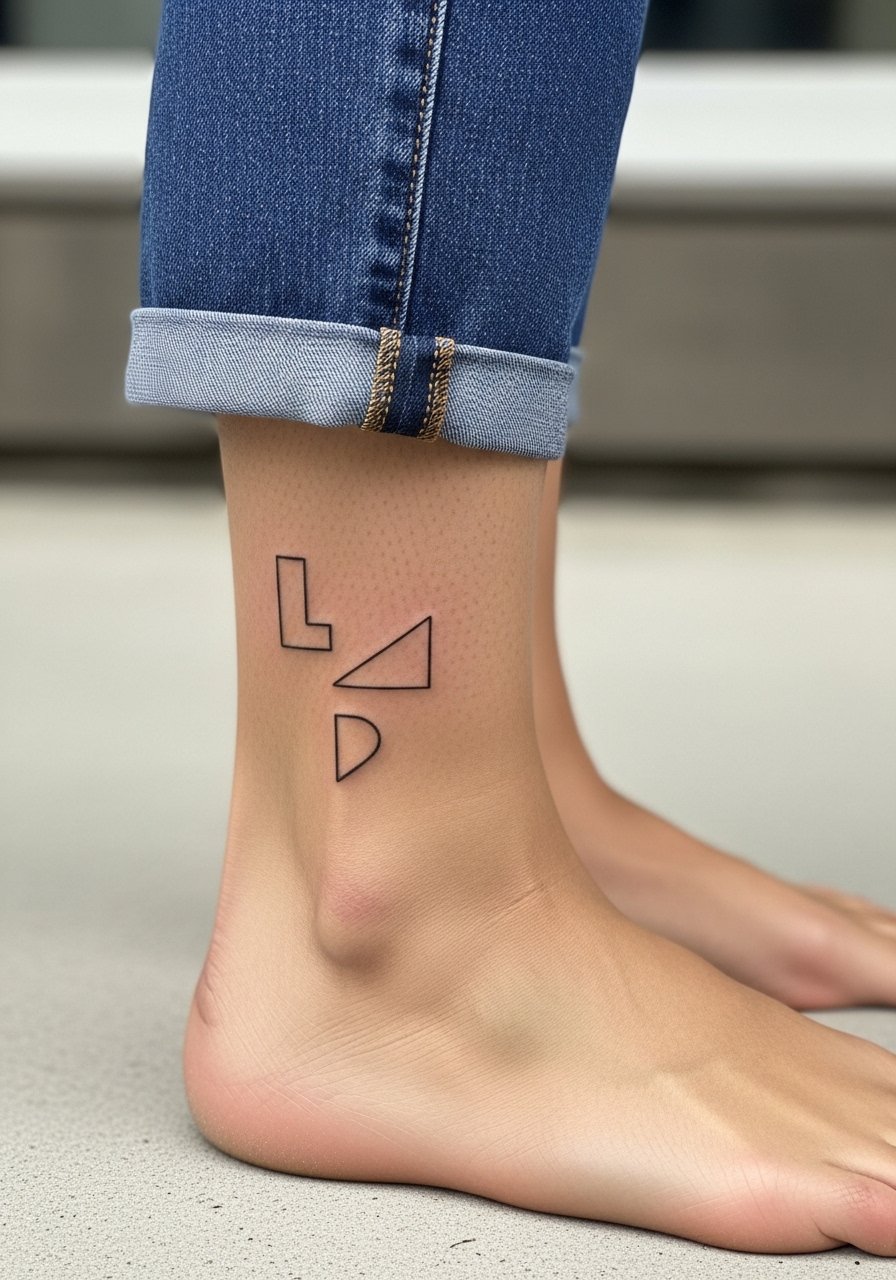
Ankle micro shapes read casual and easy to show. The main mistake is placing fine line too close to bony edges where movement accelerates fading. Ask for slightly heavier anchor lines and avoid super-thin connecting strokes. For show-off fits try cropped straight jeans and canvas espadrilles so the ankle gets framed without overcrowding. Sessions are short but expect more touch-ups over the years than on fleshy areas. Keep in mind socks and footwear can rub at the fresh ink during the first week.
8. Bold Cartoonish Cracks for Knuckles
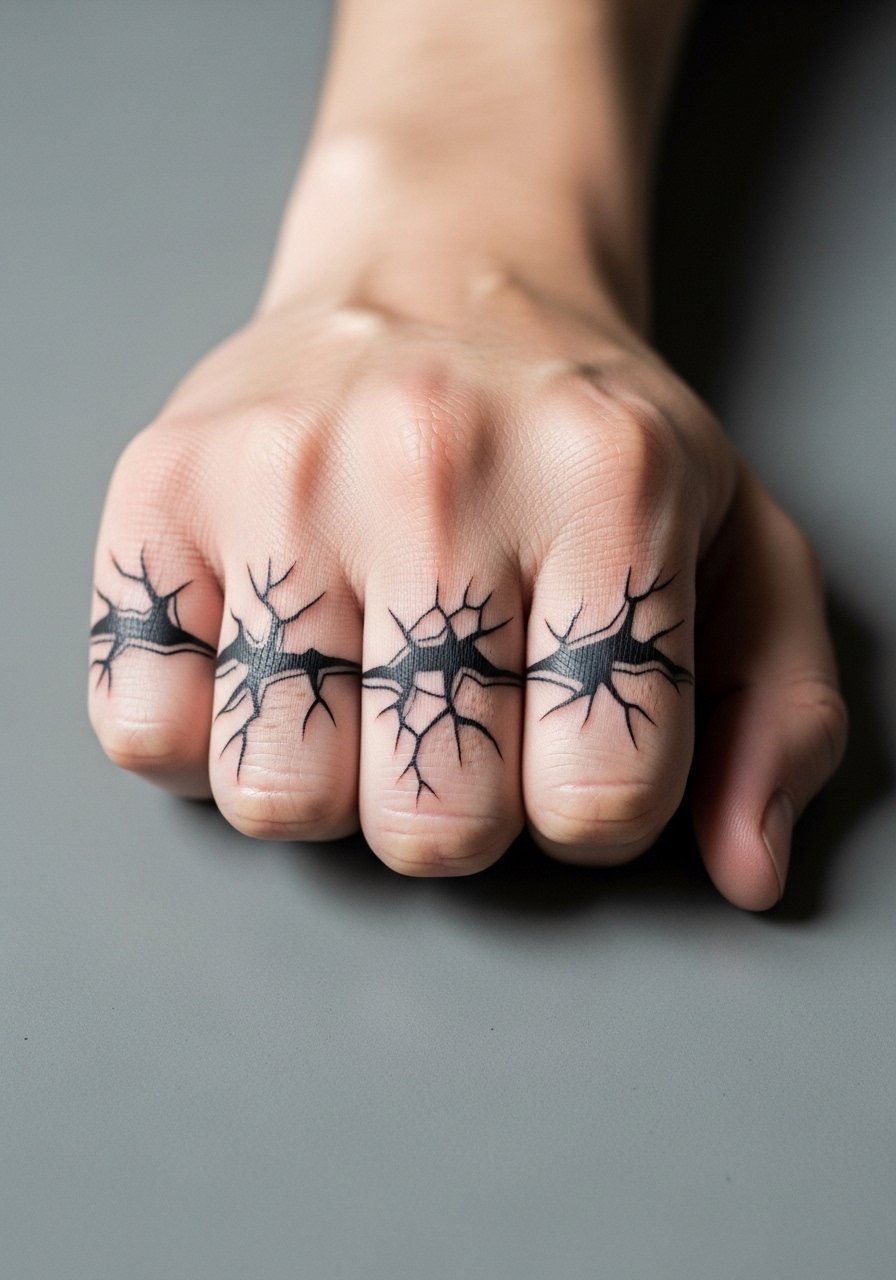
Knuckle work is visible and unforgiving. I advise bold, simplified crack shapes rather than tiny, fussy details. The truth is knuckles often need yearly touch-ups because of skin movement and constant washing. During the consult ask about stencil placement over knuckle creases and whether the artist recommends white ink accents for contrast. Session pain is sharp and brief. Also remember some workplaces still screen knuckle tattoos, so check your situation first.
9. Aging Simulation Scar Sketch on the Ribcage
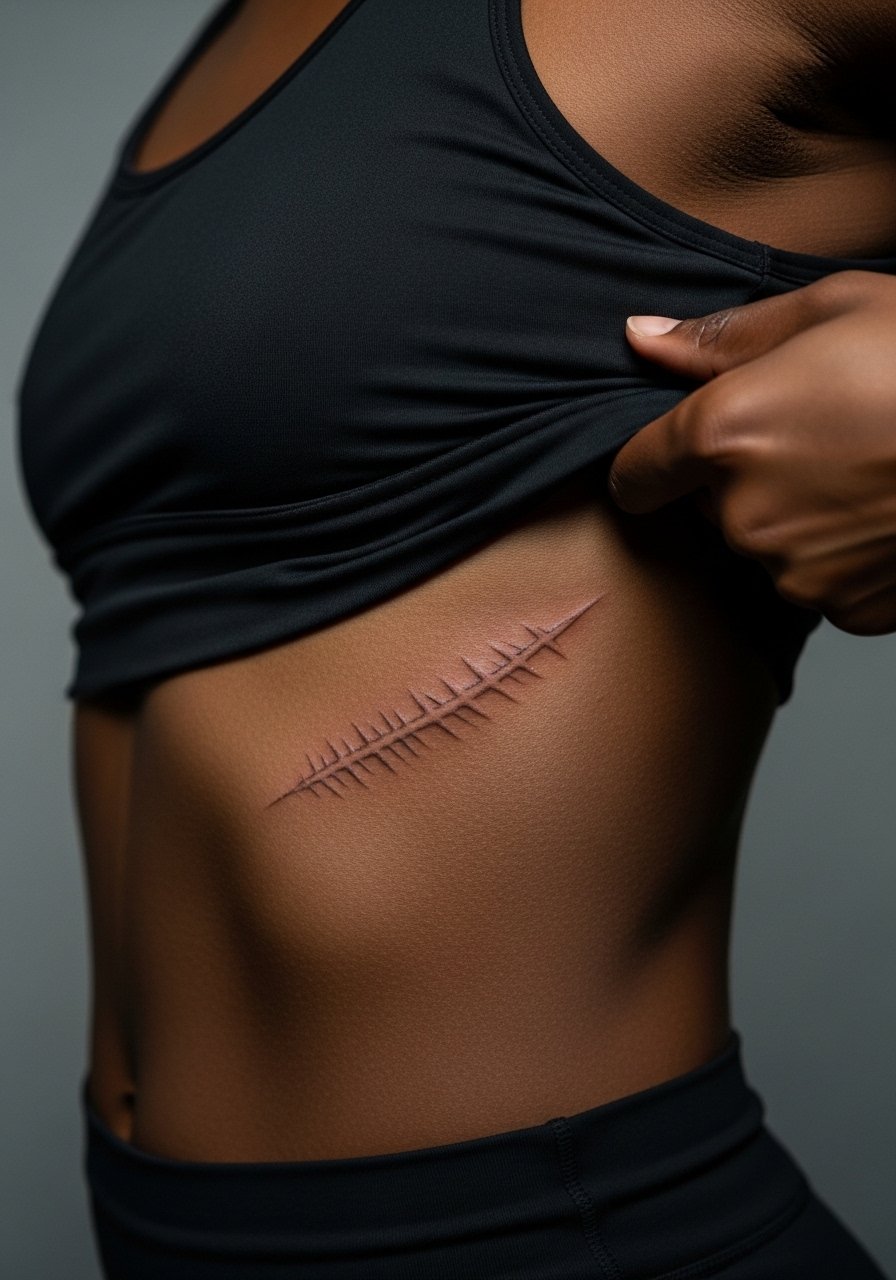
Ribcage is a dramatic placement with above-average pain. The rib surface stretches, so tiny detail can blur. One camp of artists says fine line on ribs softens fast, while the other camp insists that proper spacing and needle depth will hold. Ask which approach your artist prefers and request a healed portfolio sample. This style works as a memorial or personal repair motif and reads well under crop tops. Wear a loose sports bra to the session to help with access. Expect a longer, sometimes two-part session and plan for touch-up talk.
10. Micro-Realism Scar Sketch on the Thigh
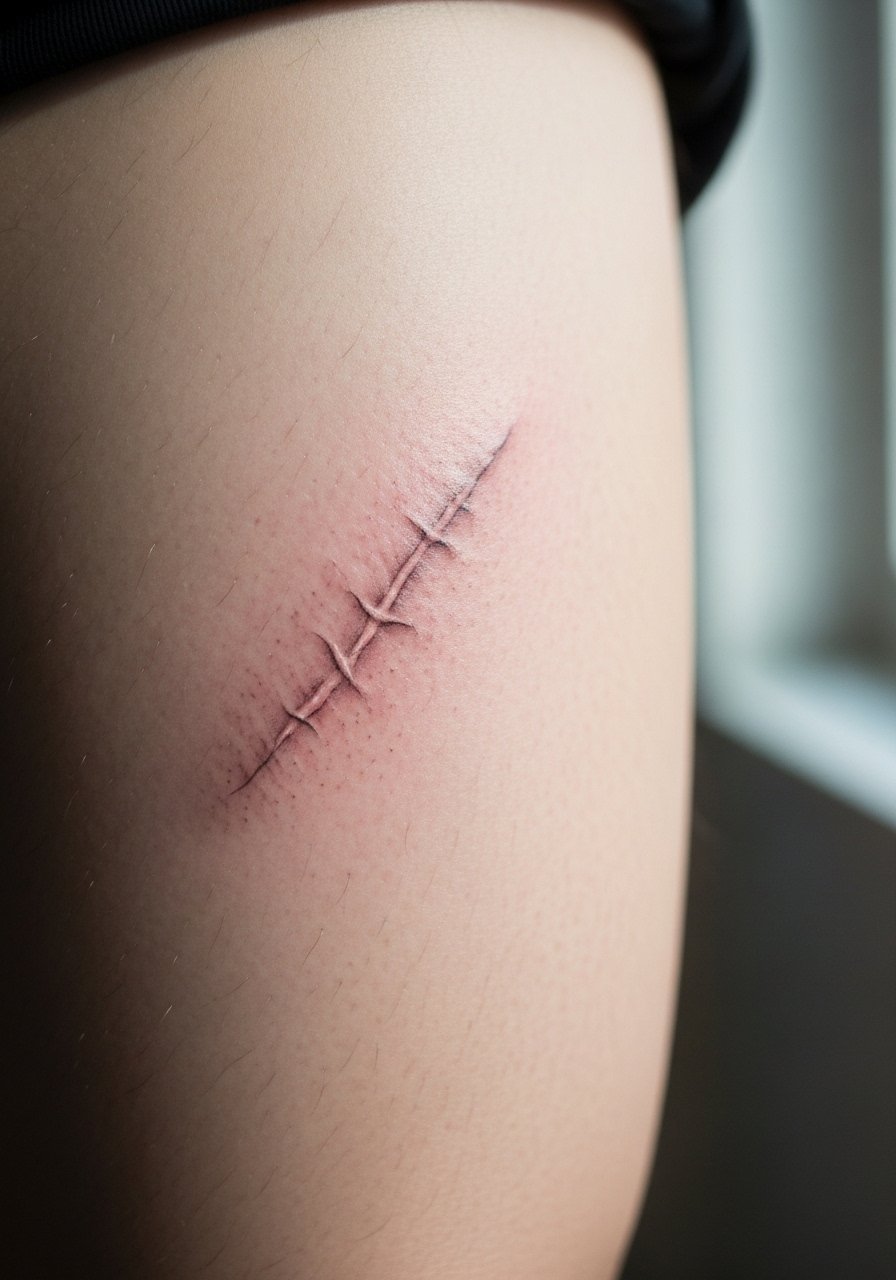
Thigh gives room for realism without stress from movement. The most common mistake is over-detailing tiny scars that lose clarity. Ask your artist for simplified shading techniques like stipple or whip shading to keep texture readable at distance. Session feels moderate and you can wear loose shorts to keep pressure off after. This placement is forgiving if body changes occur, but discuss plans if you expect significant weight fluctuation.
11. Watercolor-Drip Bloom on the Collarbone
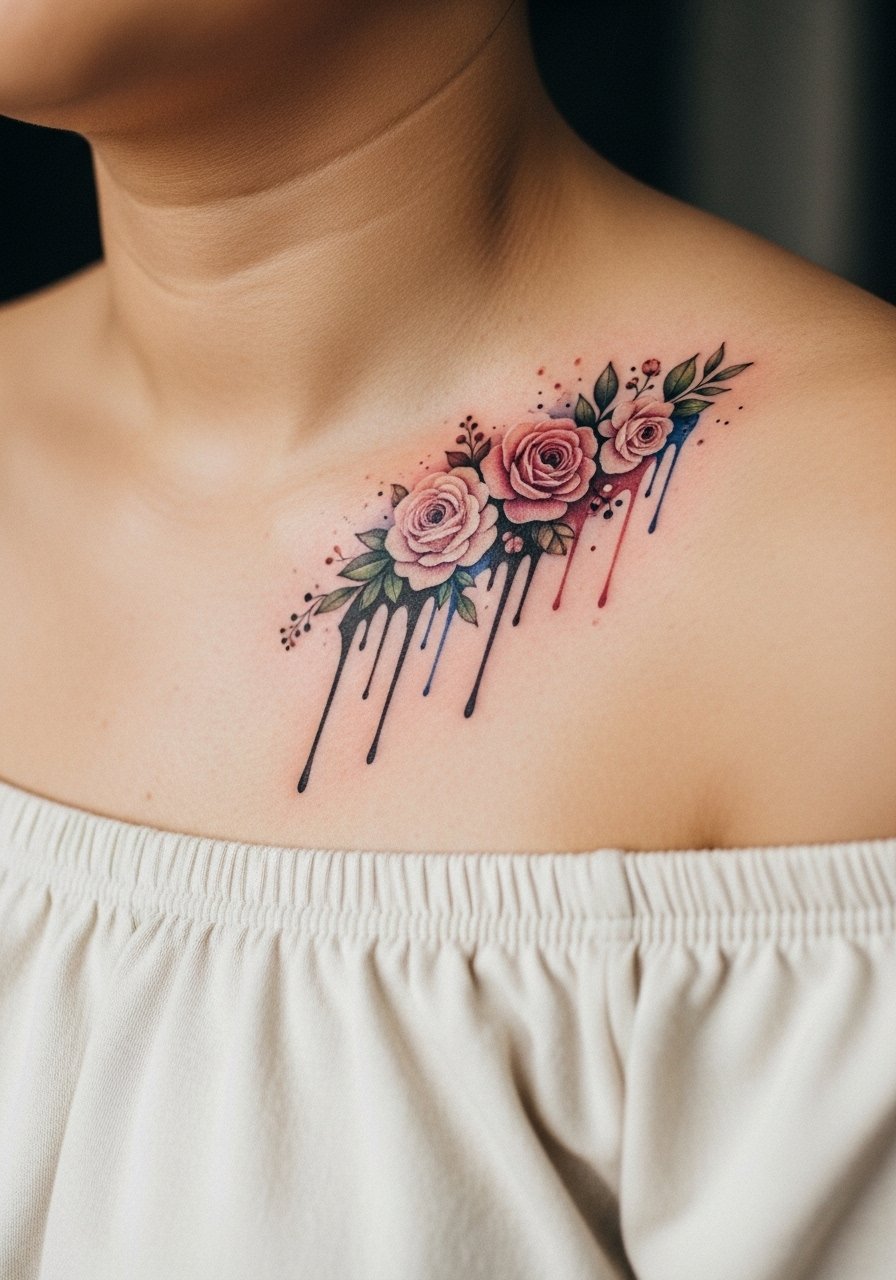
A second collarbone watercolor can be more subtle than a larger shoulder piece. For longevity, favor stronger pigment cores and darker anchors in the stems. Avoid faint pastel midtones that wash out on darker tones. For showing it off try an off shoulder sweater in cream or gray and a dainty pendant necklace. The session is tolerable and usually done in one visit if the color fields are modest.
12. Imperfect Mandala for the Upper Arm
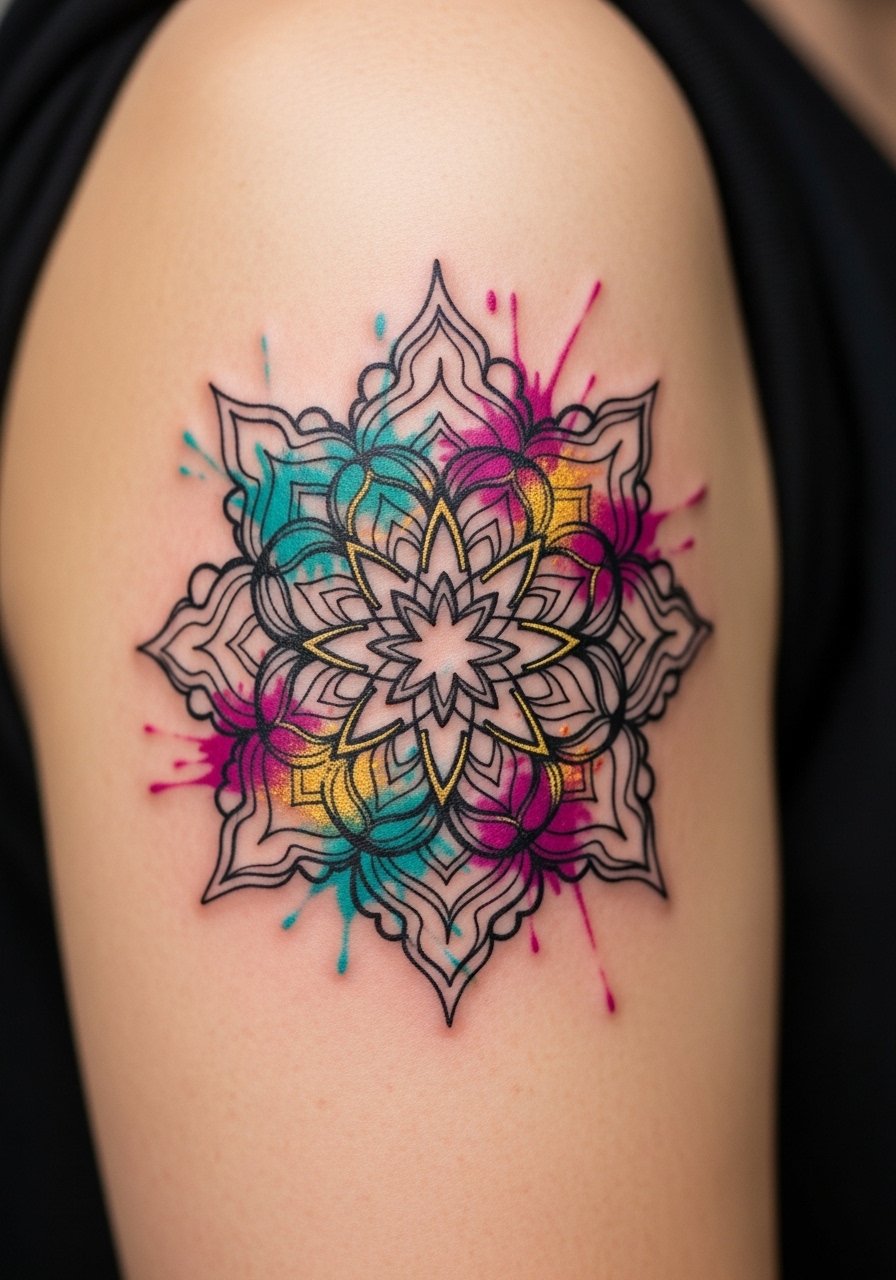
Upper arm mandalas allow more experimental irregularities without losing legibility. The mistake I see is compressing ornate elements into too-small circles. Ask for spread-out motifs and deliberate blotches that read as intentional imperfections. This spot is low pain and low blowout risk. Design ages gracefully if spacing is prioritized, and color touch-ups at year five often restore original intent.
13. Small Script with Intentional Wobble Behind the Ear
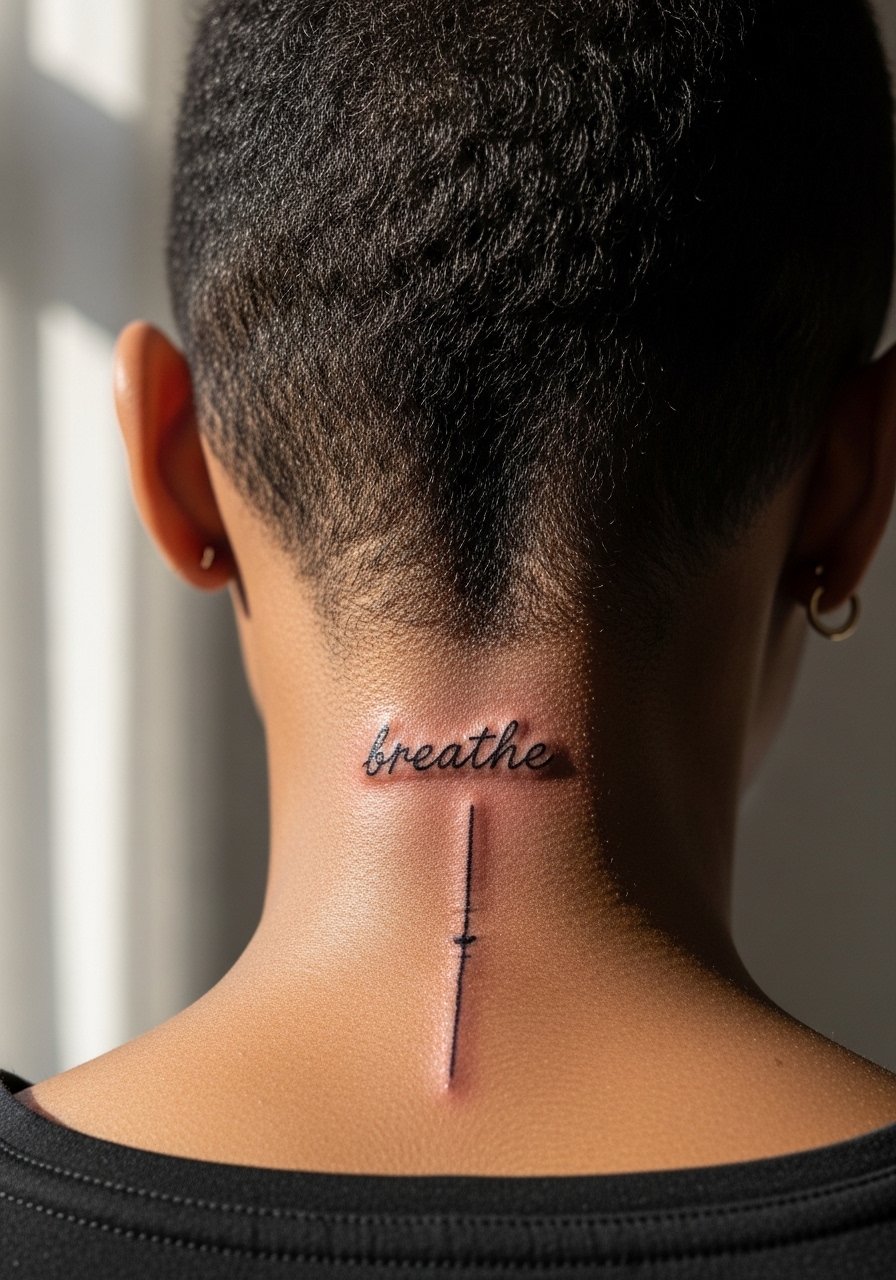
Micro script here reads discreet and intimate. The common error is asking for ultra-fine, cursive letters that merge into a smudge. Ask for slightly spaced lowercase letters and confirm the exact text in the consult so healing size matches the stencil preview. For the session tie hair up and wear a wide-neck shirt that lets the artist work without full exposure. Healing is quick but check with your artist about touch-ups if you want the letters ultra-crisp.
14. Knuckle Imperfect Symbols for Daily Wear
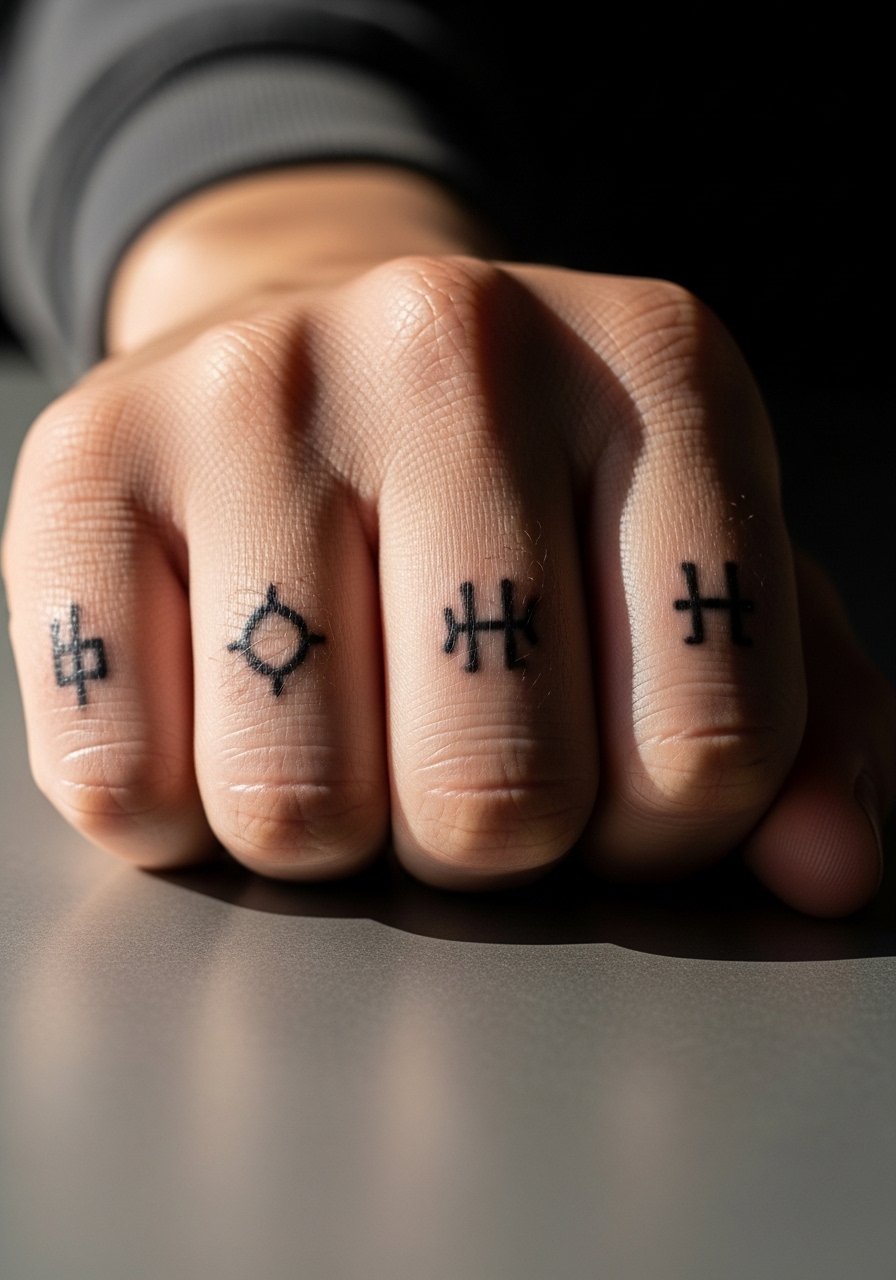
Symbols on knuckles test daily wear. Simpler glyphs with negative space hold better than dense linework. Discuss sizing so the shapes do not collapse into indistinct marks after six months. Sessions are short and painful in spurts. Because these are high-friction zones, expect more frequent touch-ups than for arm or back pieces. Consider non-dominant hand placement if you type a lot or wash hands frequently.
15. Minimalist Broken Circle on the Inner Forearm
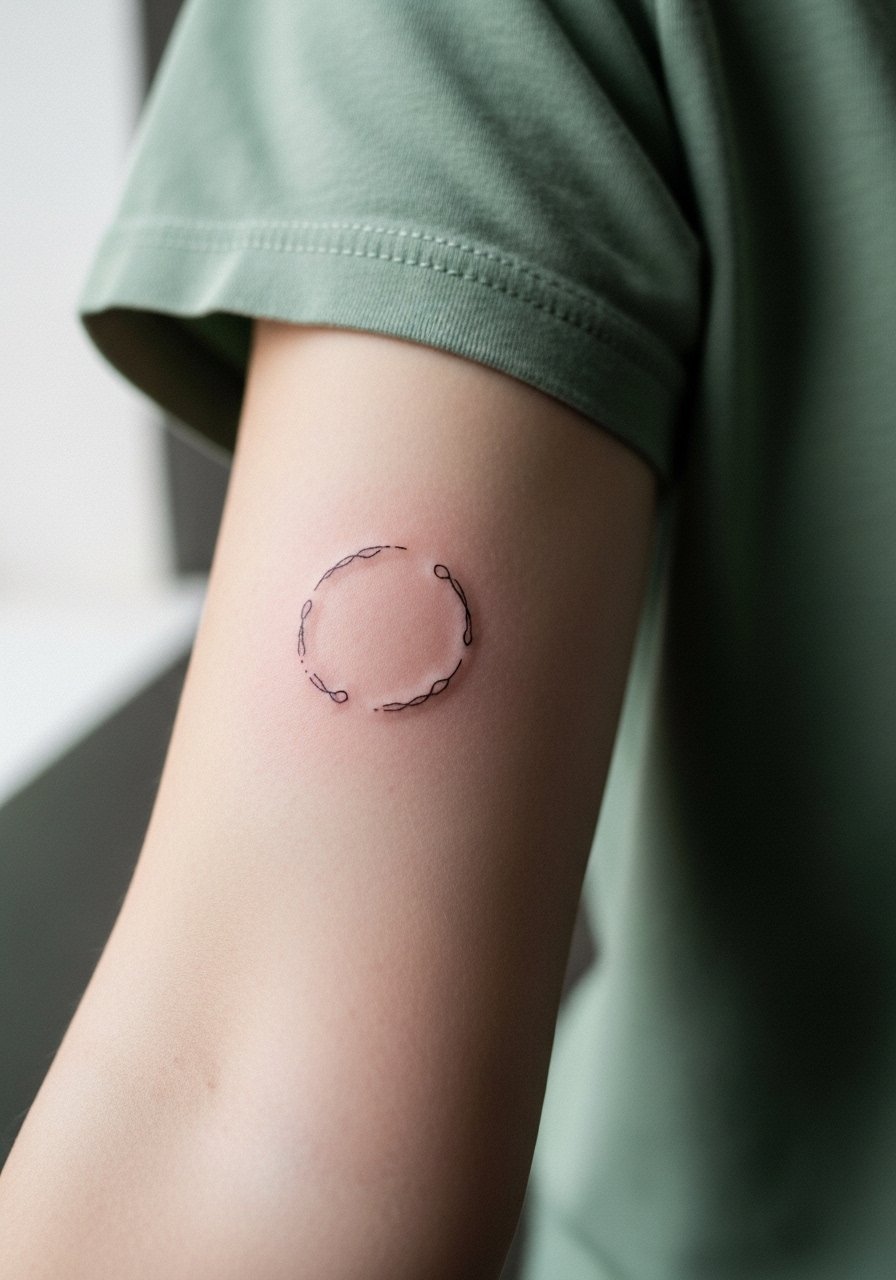
A broken circle reads symbolic without overt illustration. The typical mistake is going too small and losing the gap that defines the break. Ask for a 2-3 inch diameter so the negative space holds. For showing it off, roll up a sage short sleeve shirt and pair with a minimalist leather bracelet opposite the arm. Expect a quick session and touch-up talk at the consult.
16. Hybrid Bold Flaw on the Calf
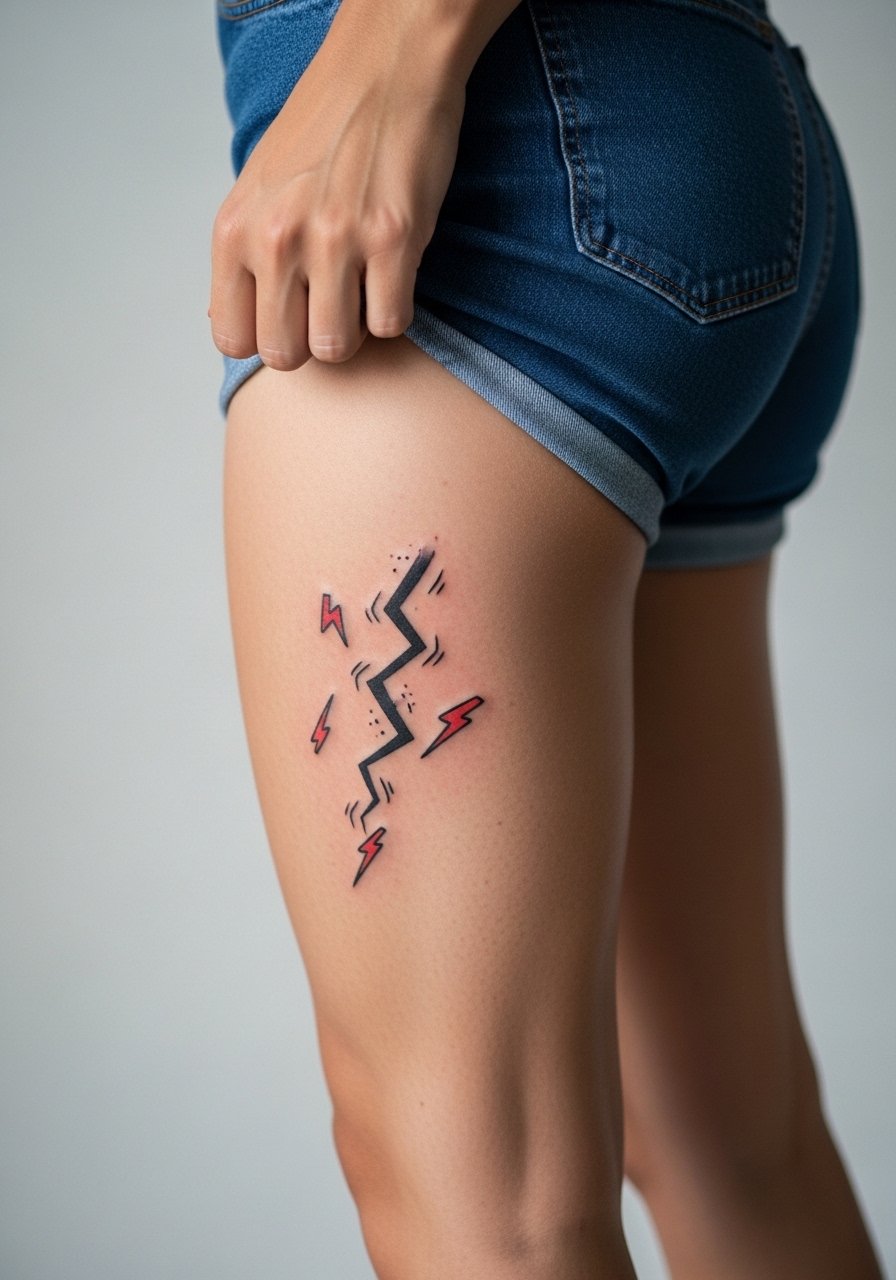
Calf placements take boldness well. The hybrid ignorant style cracks lean into cartoonish unevenness so they remain legible at distance. A common mistake is overcomplicating negative spaces inside the cracks. Ask for strong black anchors and choose color fields sparingly. Sessions are moderate and healing is straightforward. This spot handles larger experimental designs without the same risk of early blur as hands or feet.
17. Imperfect Constellation on the Ankle
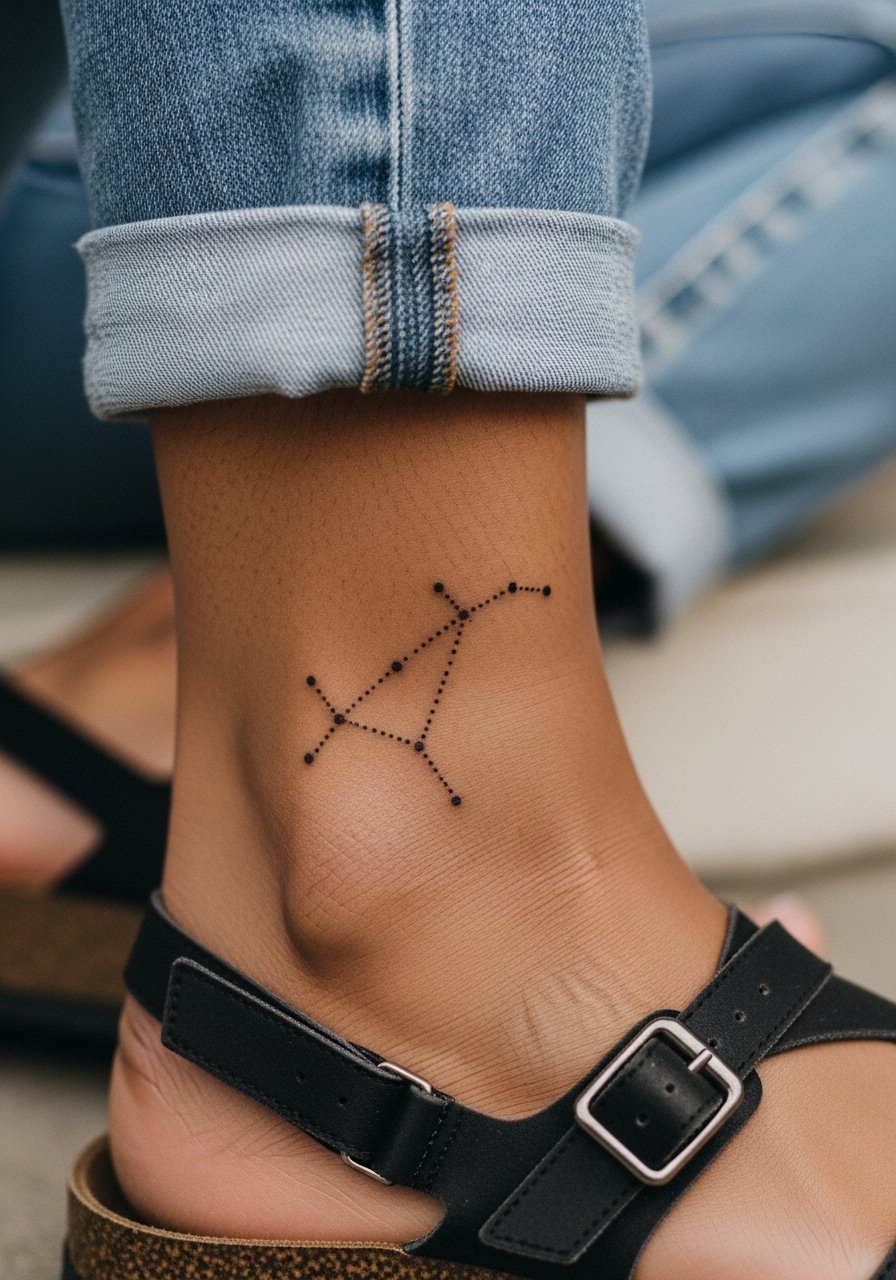
Ankle constellations are playful but need a clear dot hierarchy. The mistake is placing dots too close so lines soften into a blur. Ask for slightly larger anchor dots and thin connector lines. For showing it off choose canvas espadrilles or rolled jeans. Sessions are short and pain is manageable, though the bony area can sting. Expect touch-ups more often than thigh or upper arm.
18. Imperfect Mandala Matching Ribs and Chest
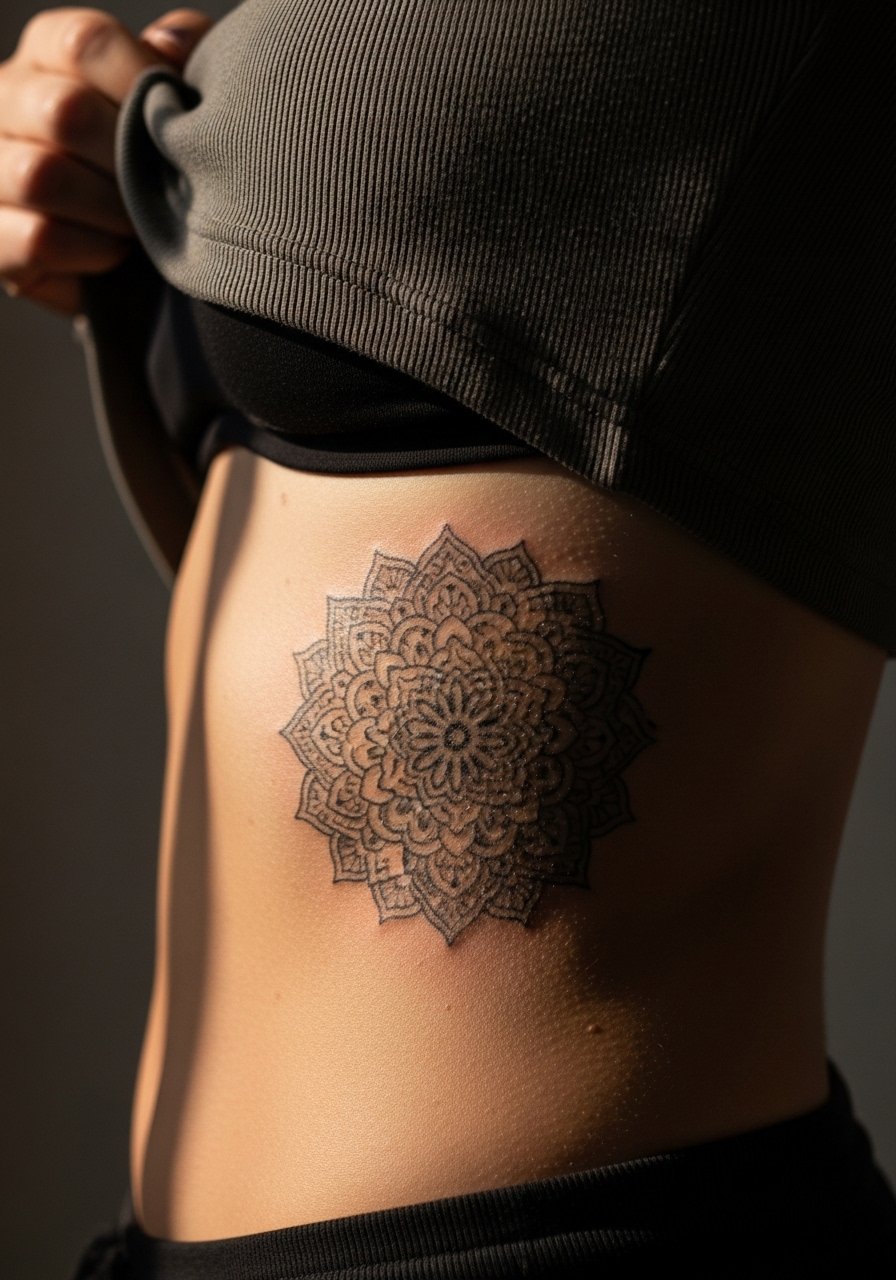
Rib mandalas can be arresting but the skin there stretches with breathing. Artists disagree on fine line ribs: one camp says lines blur in two years, the other says proper depth and spacing keep them intact. Name both camps in the consult and ask for the artist's healed examples. Pain is high and sessions often split. Because the area is sensitive, wear a fitted sports bra to the appointment and plan for a slower healing window.
19. Tiny Asymmetry Shapes on the Finger
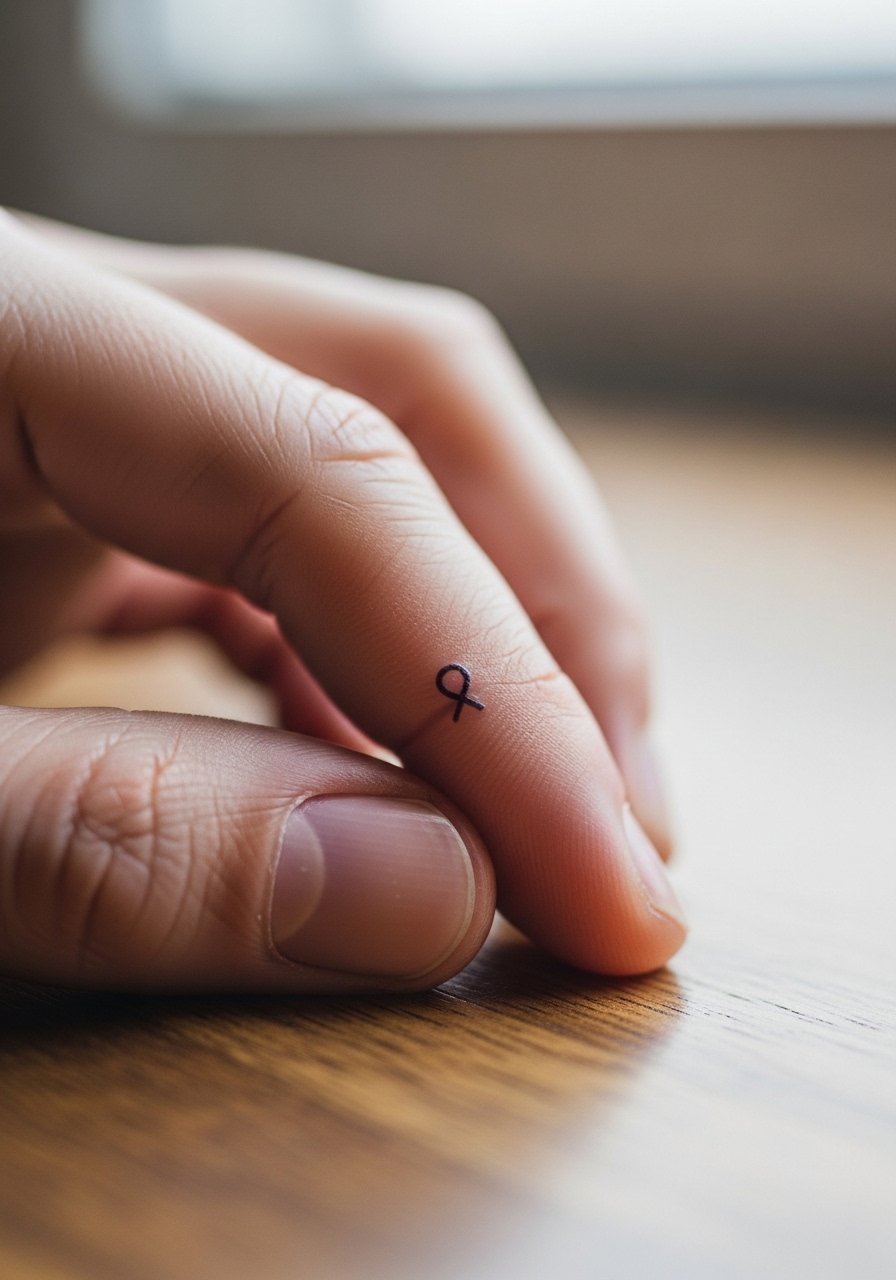
Finger micro shapes are trendy but fade fast from constant use. The truth is very small work here often needs touch-ups yearly. Ask your artist about bolder anchor strokes and consider placing on the side of the finger rather than the pad. Session time is brief and pain is sharp. If career visibility is a concern, think through placement because finger tattoos are highly visible.
20. Ribcage Kintsugi Vessel with Embedded Relic Idea
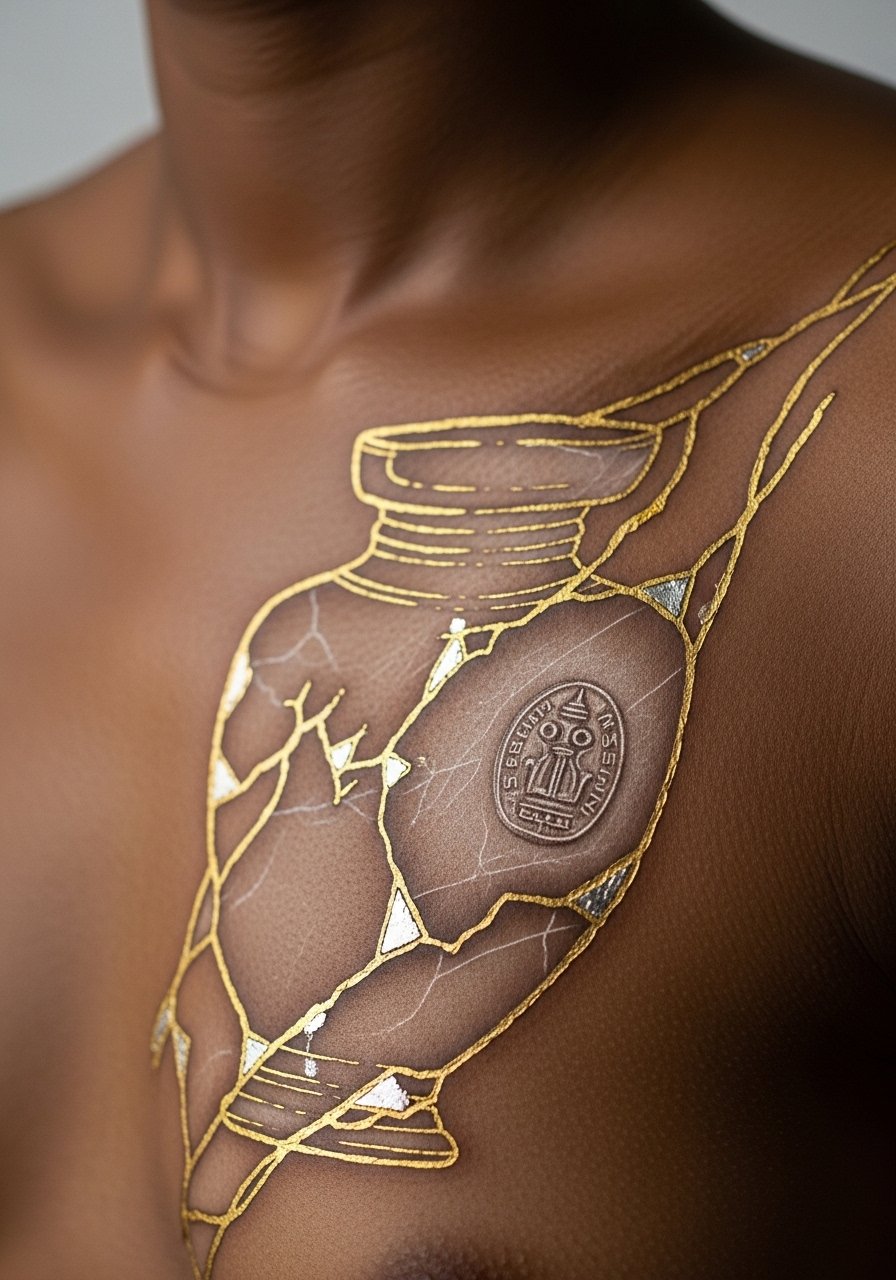
This is one of the understudied personalization routes. Embed a tiny relic sketch or coordinate inside a Kintsugi crack to tie the repair metaphor to a date or place. The main risk is over-detailing on ribs. Ask for simplified forms with bold anchors and plan for touch-up discussion. The session is painful and often split. Wear a loose sports bra so the artist has side access. If working with metallic ink, test a patch for contrast on your skin tone.
21. Collarbone Minimalist Script with Drip
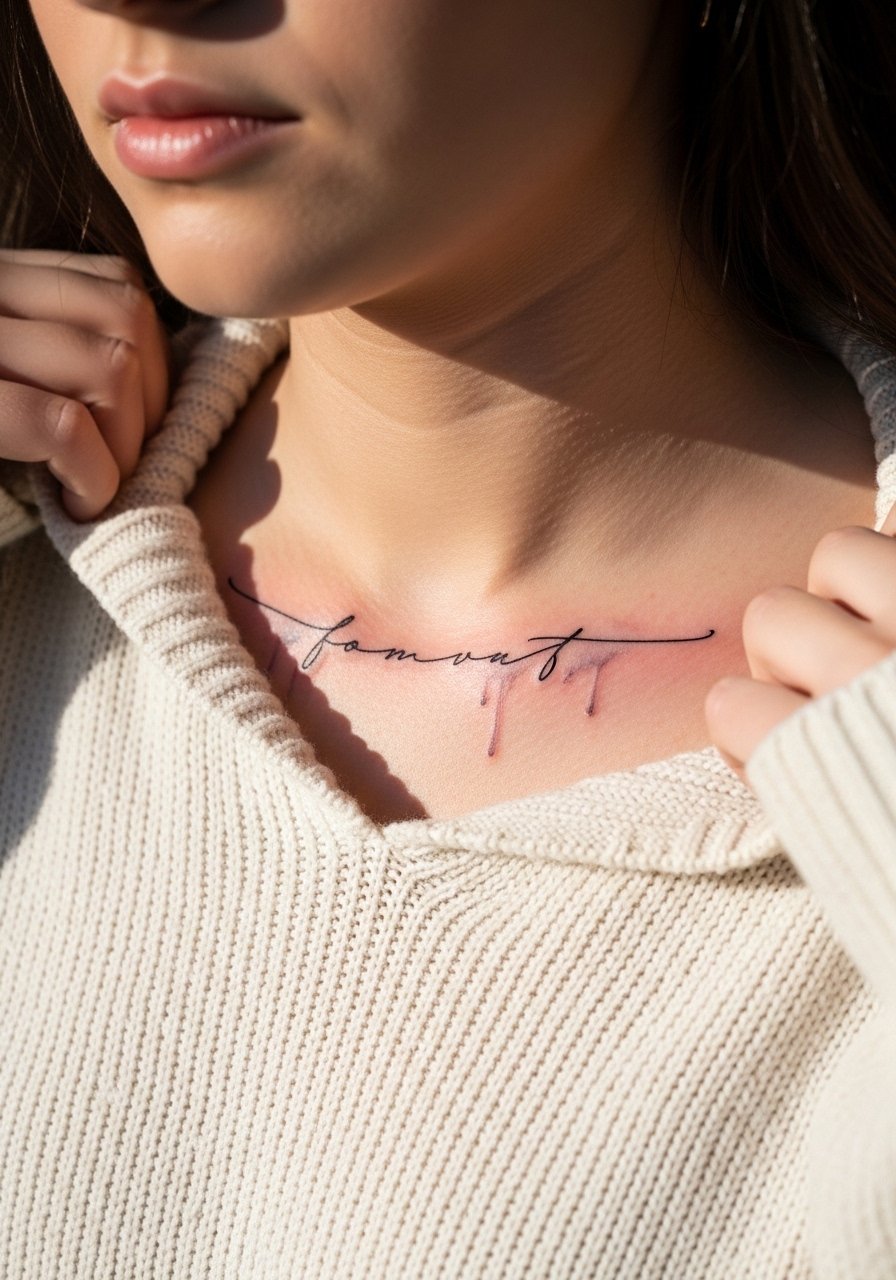
A drip under script adds an imperfect flourish that ages into its own texture. Avoid ultra-light script that disappears in showers. Request a slightly weighted baseline and let the watercolor drip be the imperfect element. For show-off outfits, try a dainty lariat necklace and an off-shoulder top. Sessions are short and most of the time a single visit suffices. Check with your artist on sun protection for collarbone color.
22. Inner Bicep Micro-Realism Accent
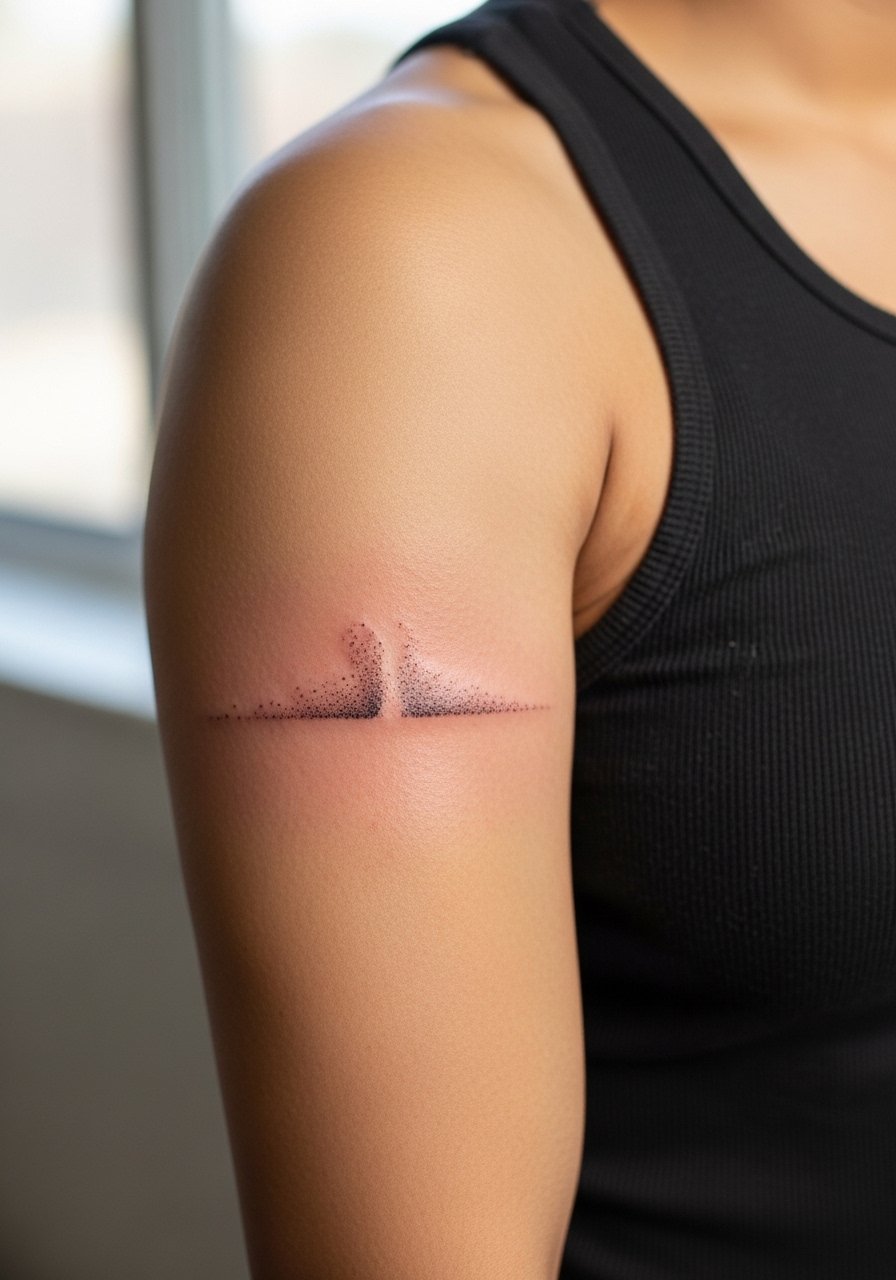
Inner bicep holds micro-realism well if you can tolerate the sensitivity. A common mistake is asking for dense contrast that the arm shape will distort when flexed. Ask for softer stipple shading and test poses so the tattoo reads in relaxed and flexed positions. Session feels sharp in places and moderate overall. This spot is private and good for personal motifs that you can show selectively.
23. Lower Back Imperfect Floral Panel
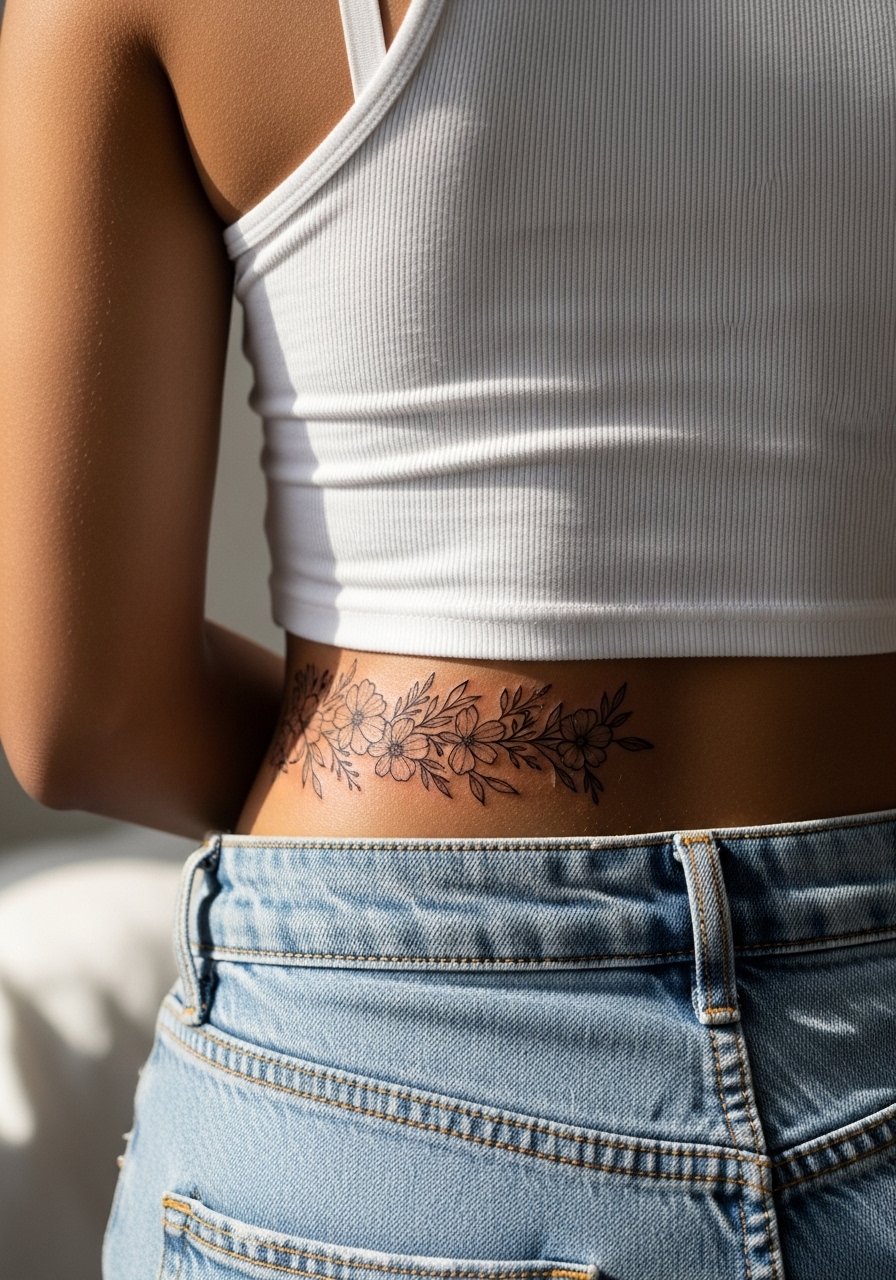
Lower back florals offer generous canvas and forgiving flesh. The mistake is compressing delicate curls into tiny stems which eventually blur. Ask for roomier stems and a few bold anchor petals that maintain form as the design ages. For sessions, wear a tank top or a shirt that can be shifted to expose only the area. Pain is moderate and healing tends to be consistent, though the lower back can catch friction from waistbands.
24. Hip Imperfect Line Bloom
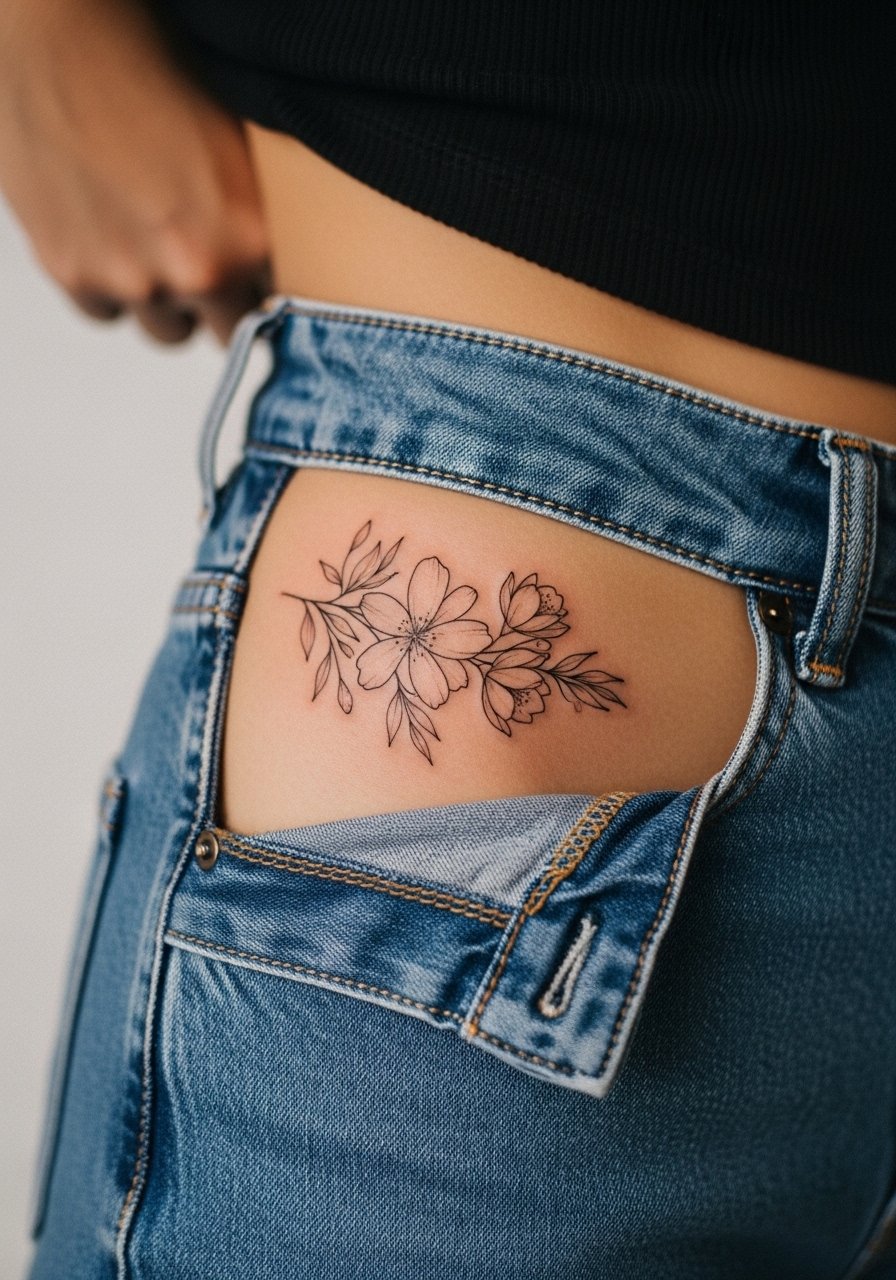
Hip pieces read like private art and age well if you avoid super fine stipple near stretch-prone zones. Ask for a few bold anchor lines with airy filler strokes. Session feels tolerable and wearing high-waisted bottoms allows easy access while protecting the area afterward. Discuss how weight fluctuation could affect placement if that is a concern.
25. Inner Thigh Botanical Accent
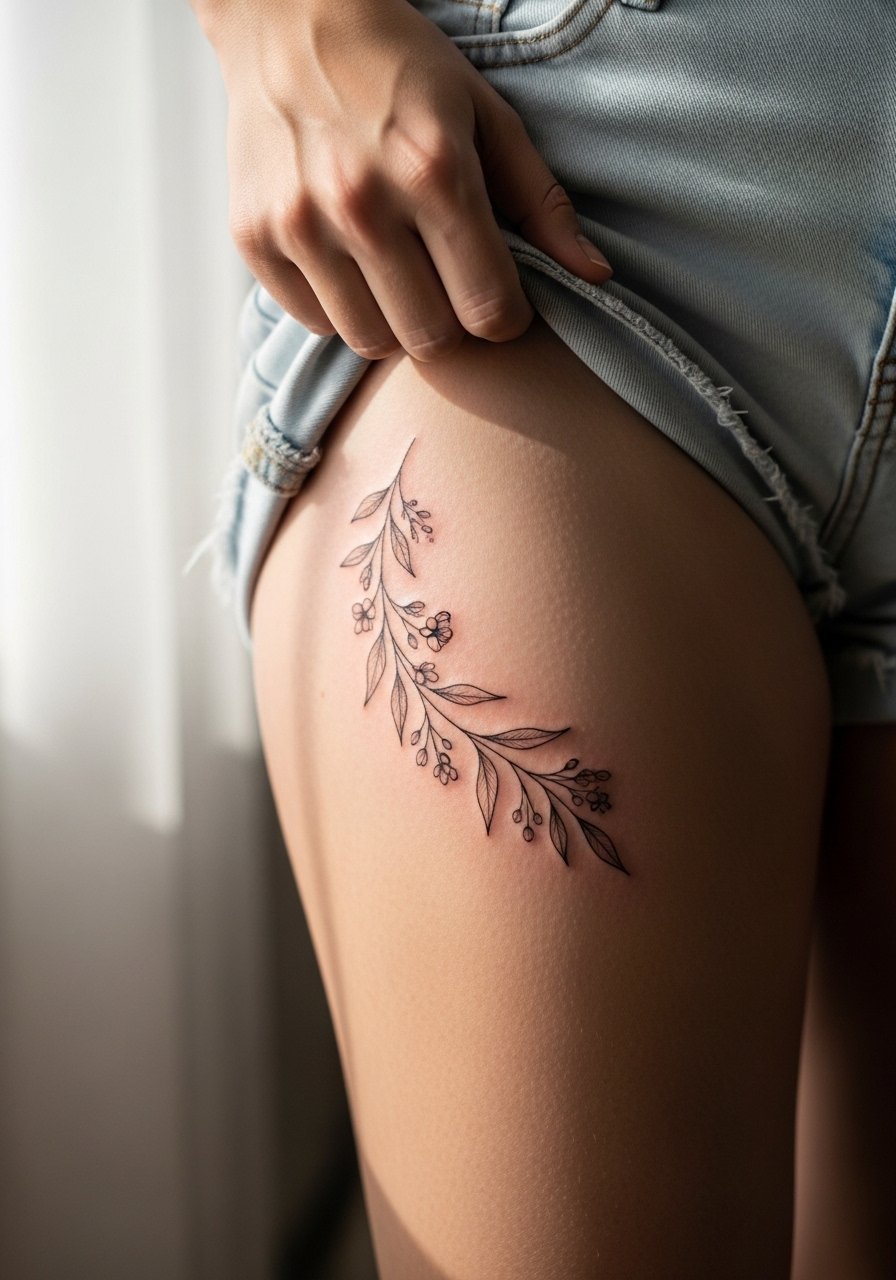
Inner thigh is intimate and heals with less friction than knees or ankles. The common error is using too-fine filigree that gets lost when clothing rubs during healing. Request mid-weight lines and a tapered silhouette to keep the design readable. For the session wear shorts that you can shift without pressure. Pain is moderate to high depending on placement depth and sensitivity. This is a good place for private, meaningful imperfect motifs.
26. Shoulder Cap Imperfect Cluster
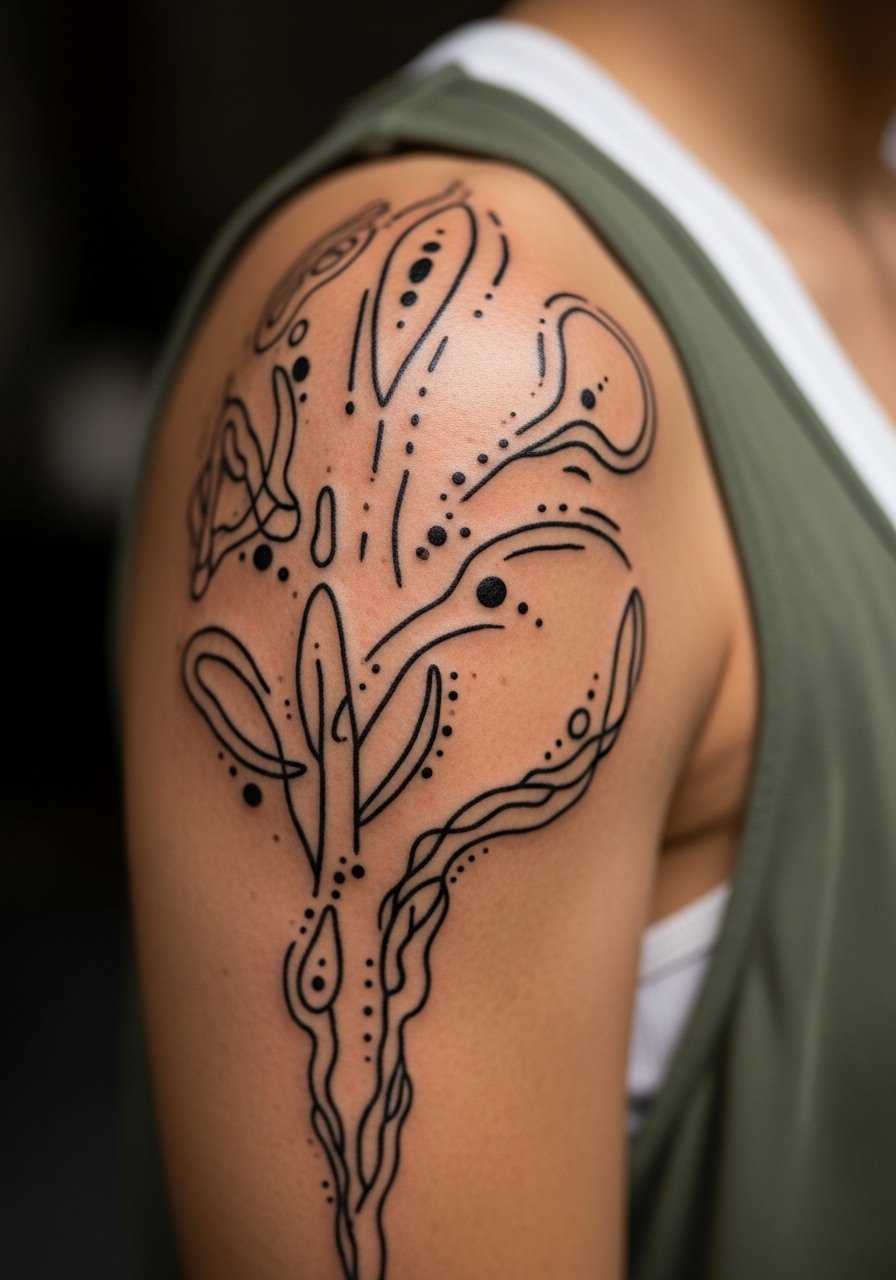
The shoulder cap tolerates experimental layouts because it sits naturally under many clothing types. The main mistake is cramming too many tiny elements into the rounded surface. Ask for a composition that follows the shoulder curve with negative spaces to hold its shape. Sessions are comfortable and allow for single-visit completion for smaller clusters. For showing it off, sleeveless shift dresses or tanks work well.
27. Ankle Chain of Tiny Imperfect Shapes
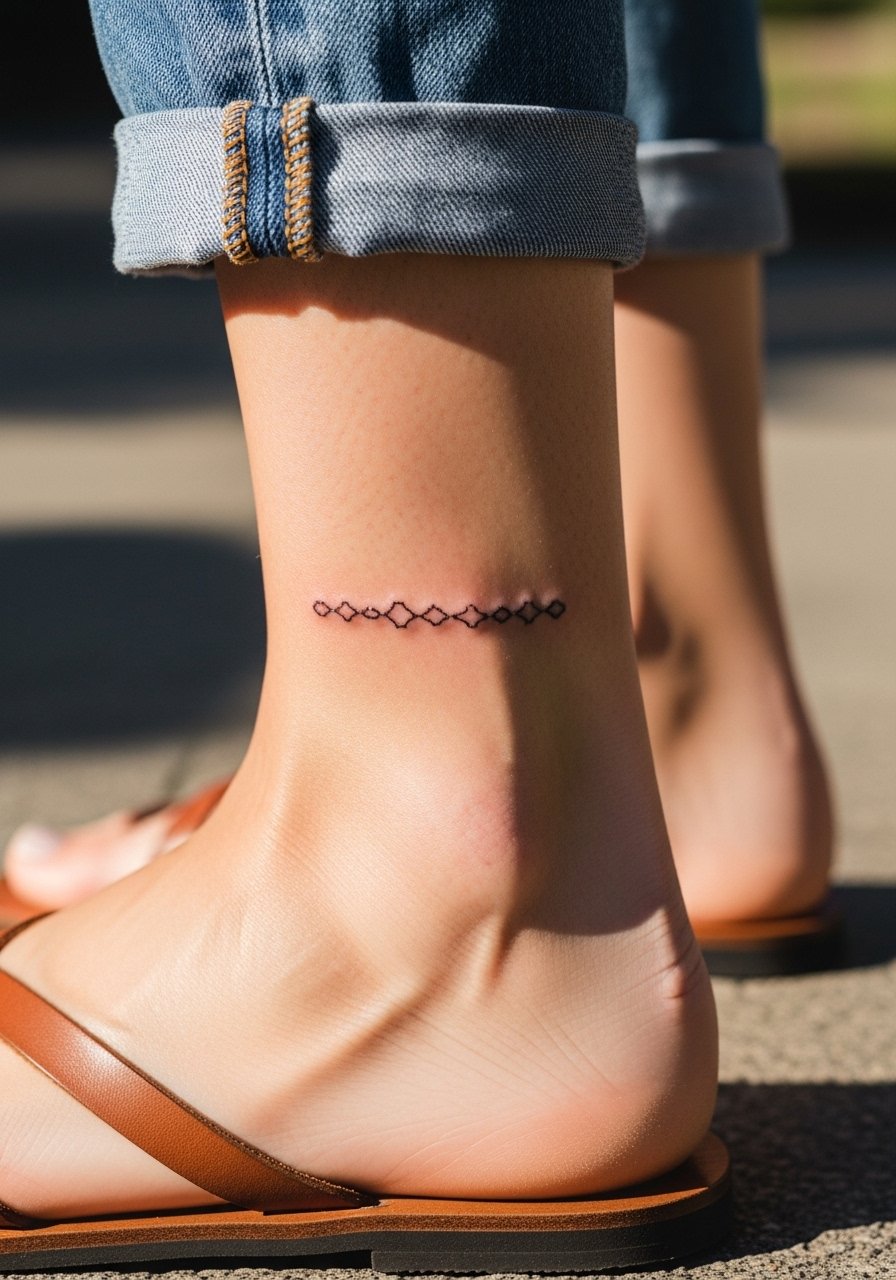
A chained sequence around the ankle reads like jewelry without being literal. Avoid asking for ultra-tiny connections that suffer from friction. Ask for slightly enlarged link shapes and consistent spacing so the chain still reads at year three. For show-off looks, pair with an ankle chain gold or simple sandals. Sessions are short and healing is straightforward but expect light touch-ups over time.
Frequently Asked Questions
Q: Will fine line Kintsugi cracks on wrists fade faster than on the shoulder blade?
A: Yes, wrists see more friction and washing, so fine lines there usually need touch-ups sooner. On the shoulder blade you have more surface area and less repeated abrasion, so the same crack spacing and line weight tend to hold longer. Ask your artist about slightly bolder anchors for wrist pieces and plan a touch-up at around the 12 to 18 month mark.
Q: How should I prep for a ribcage session that uses watercolor drips or very fine cracks?
A: Wear a fitted sports bra or a cropped top to the appointment so the artist can expose just the side torso. Hydrate in the days before and expect a longer healing window due to breathing movement. Discuss whether the artist favors dry healing or protective film; the community is split and both camps claim better clarity. Name both approaches in the consult and make your choice with their healed examples.
Q: What do I ask artists about gold inks if I have dark skin?
A: Ask to see healed photos on darker skin and request a patch test for metallic pigments. Some artists prefer thinner indie gold leaf pigments or silver alternatives because pure gold can read muddy after healing. If you want metallic contrast, request a test or a tiny preview stencil applied with a temporary so you can see how it ages over a week.
Q: Can I preview a perfectly imperfect design before committing to real ink?
A: Try a peel-and-stick temporary to test placement and scale for a few days. Temporary previews help you verify how the imperfect lines sit with movement and clothing. The Conscious Ink temporary set is a straightforward way to evaluate size without a permanent decision.
Q: Do watercolor tattoos need different aftercare than black linework?
A: They can. Watercolor pieces often need careful sun protection and slightly longer saturation sessions to lock pigment. Avoid heavy ointments that may sit on top of delicate color fields in the first 48 hours. Your artist will advise on balm choice and timelines, but ask specifically about sun-blocking once healed to preserve vibrancy.
Q: Where should I look for guest spots or budget-friendly artists who do "perfectly imperfect" work?
A: Search hashtags like #KintsugiTattoo and #PerfectlyImperfectTattoo on Instagram and TikTok for guest spots. Reddit threads in r/tattoos often list city-specific guest recommendations. Booksy and Tattoodo filters for "minimalist" plus "linework" are another practical route to find affordable custom work.
