
Fine line Lucky Cat sketches have been everywhere on saved boards, and the reality is they age in very different ways depending on placement and line weight. Trends push tiny, intricate cats on wrists and fingers because they look delicate fresh. The catch is that skin movement, sun exposure, and needle depth decide whether the design reads as crisp in two years. Read on for 21 sketches that balance how they look now with how they heal.
1. Traditional Maneki-neko on the Outer Forearm
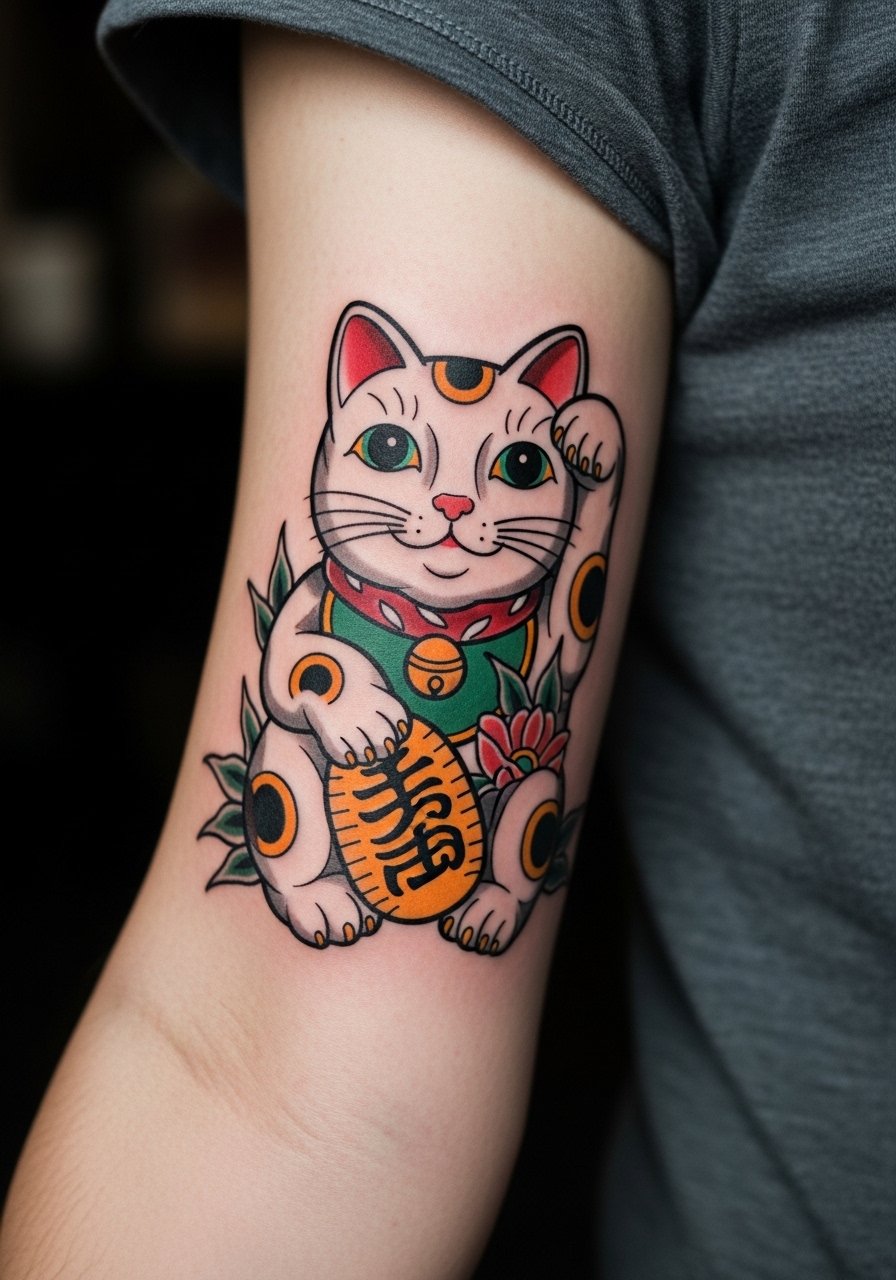
I've seen this classic on entrepreneurs and retail workers who want a bold emblem that still reads across a room. Ask for heavier linework around the paw and coin so the silhouette stays legible as the piece softens. Common mistakes are shrinking the coin or over-detailing the face, which leads to muddy detail at year three. Placement on the outer forearm keeps the design visible without extreme stretching. Pain is moderate and most artists finish a 6 to 8 centimeter version in one session. For showing this off, roll up a rolled sleeve chambray shirt or wear a vintage leather cuff opposite the tattoo for balance.
2. Minimalist White Cat Outline for Wrist
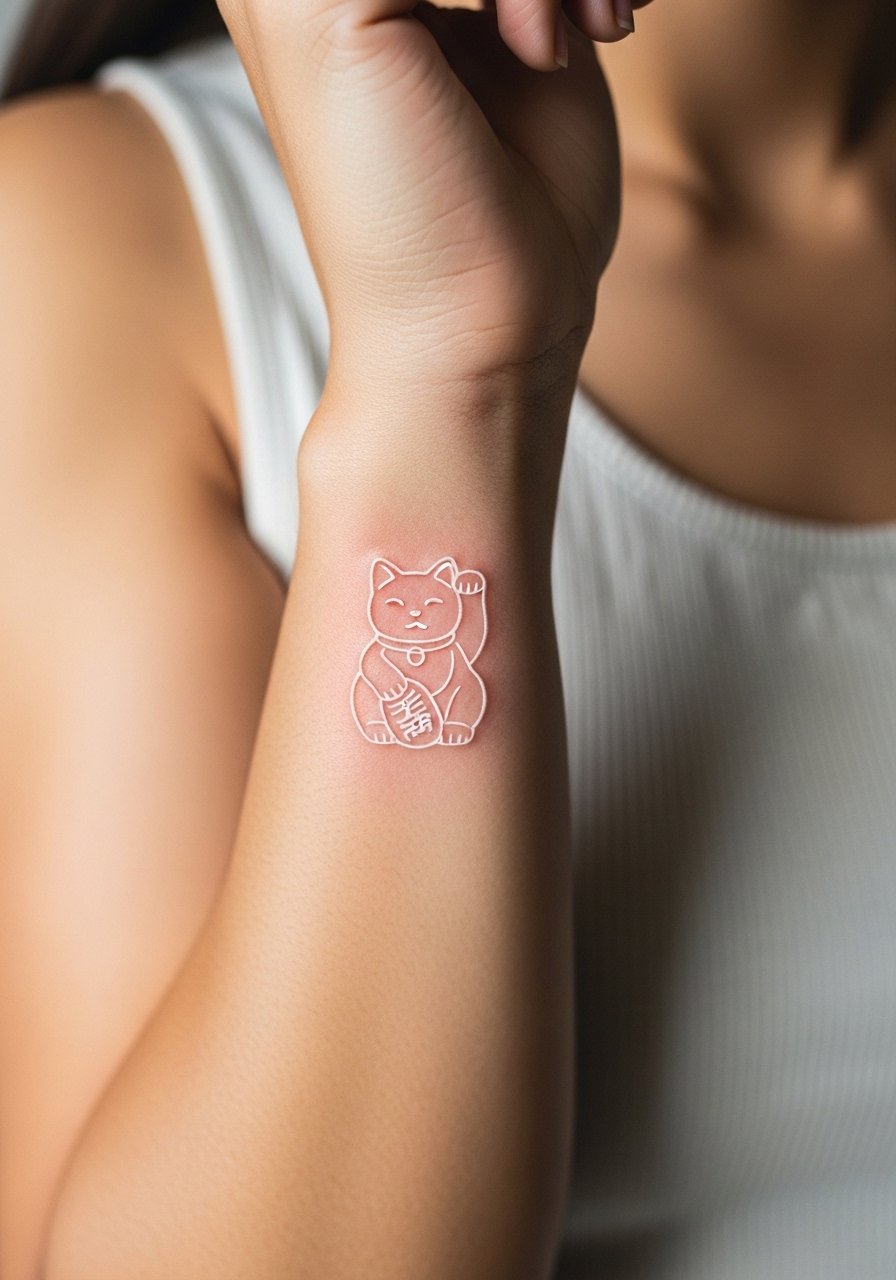
The clean black outline version that mimics a white cat translates well to a wrist piece for first-timers. Fair warning, wrists get plenty of sun and friction from watches, so tell your artist to use slightly bolder linework than a typical fine line wrist piece. The common version that fades into a smudge is the ultra-thin single stroke. This keeps clean longer. Expect a short session and light discomfort. For the appointment wear a sleeveless tank and bring minimal jewelry. To frame the tattoo day-to-day try stacking a thin silver bangle set on the opposite wrist so the outline reads like a deliberate accent.
3. Gold Coin Neo-Traditional on the Shoulder
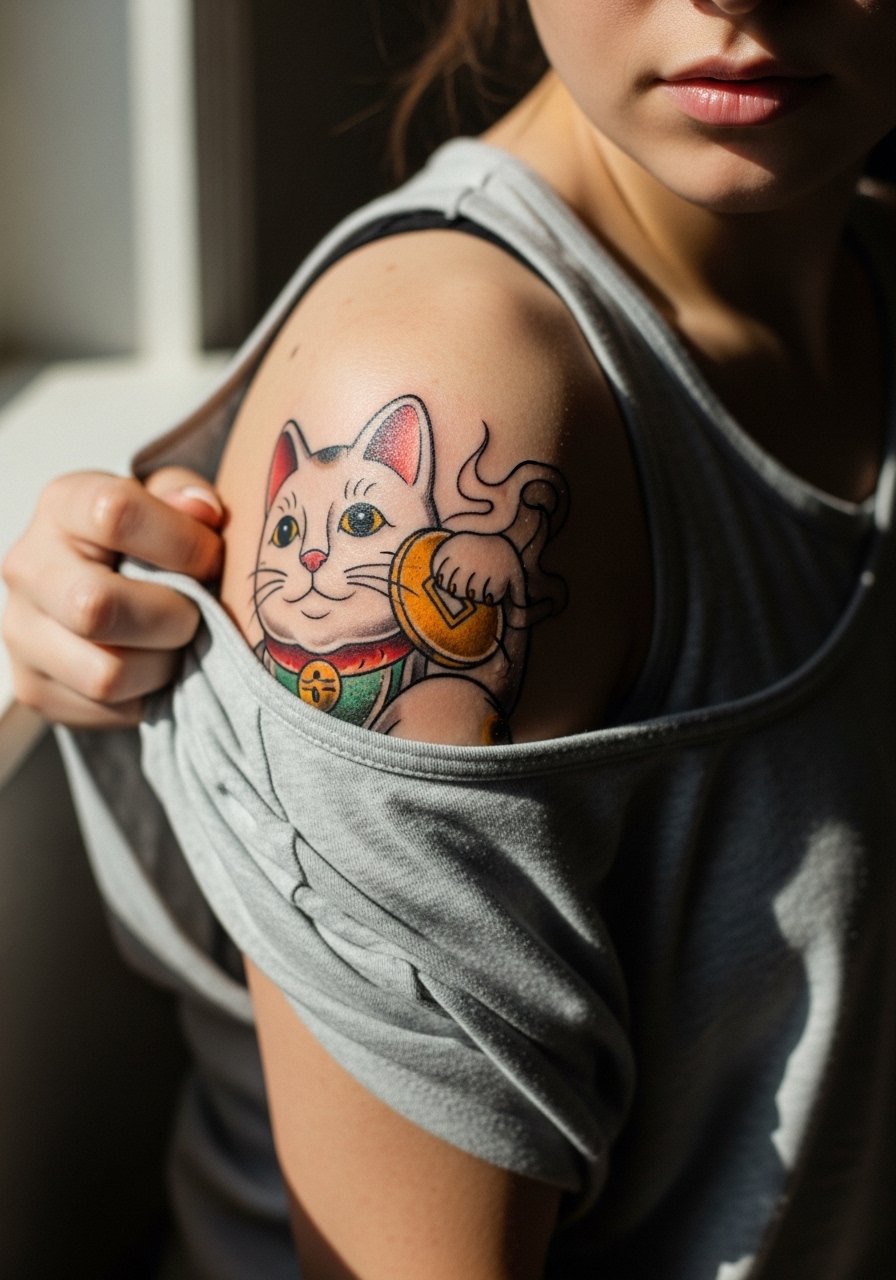
Shoulder pieces give color room to breathe and are forgiving as lines soften. For a gold coin motif ask for saturated yellows with layered shading rather than flat fills. Artists I know recommend avoiding tiny coin text because it blurs under tension. The session is comfortable and often done in two shorter passes for saturation. This placement is great if you like off-shoulder tops. Pair evenings out with an off shoulder top black and layer delicate gold chains to echo the coin without crowding the skin.
4. Blackwork Cheshire Fusion at the Back of the Neck
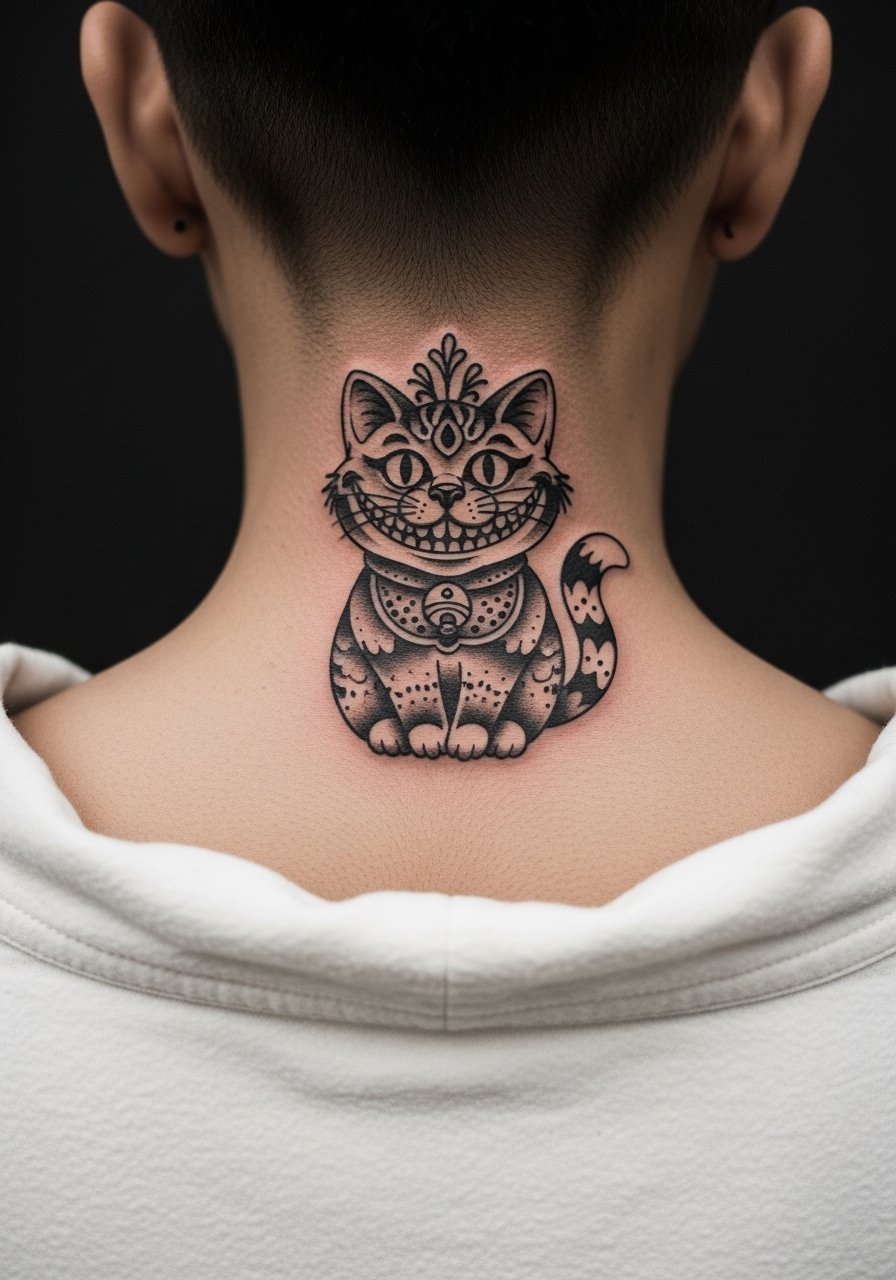
This whimsical fusion leans into solid black fields and negative space for a graphic look. Back of neck work can be hidden under hair when needed. Expect a 1 to 2 hour session and moderate pain from the proximity to bone. One real debate among artists is whether heavy blackwork at this spot heals better than fine detail. One camp says solid fills age remarkably well. The other warns about heavy scabbing with dense black. Ask your artist which method they prefer. For showing the piece, high-neck crop tops or open-back dresses frame it depending on the reveal you want.
5. Pink Watercolor Love Cat on the Inner Thigh
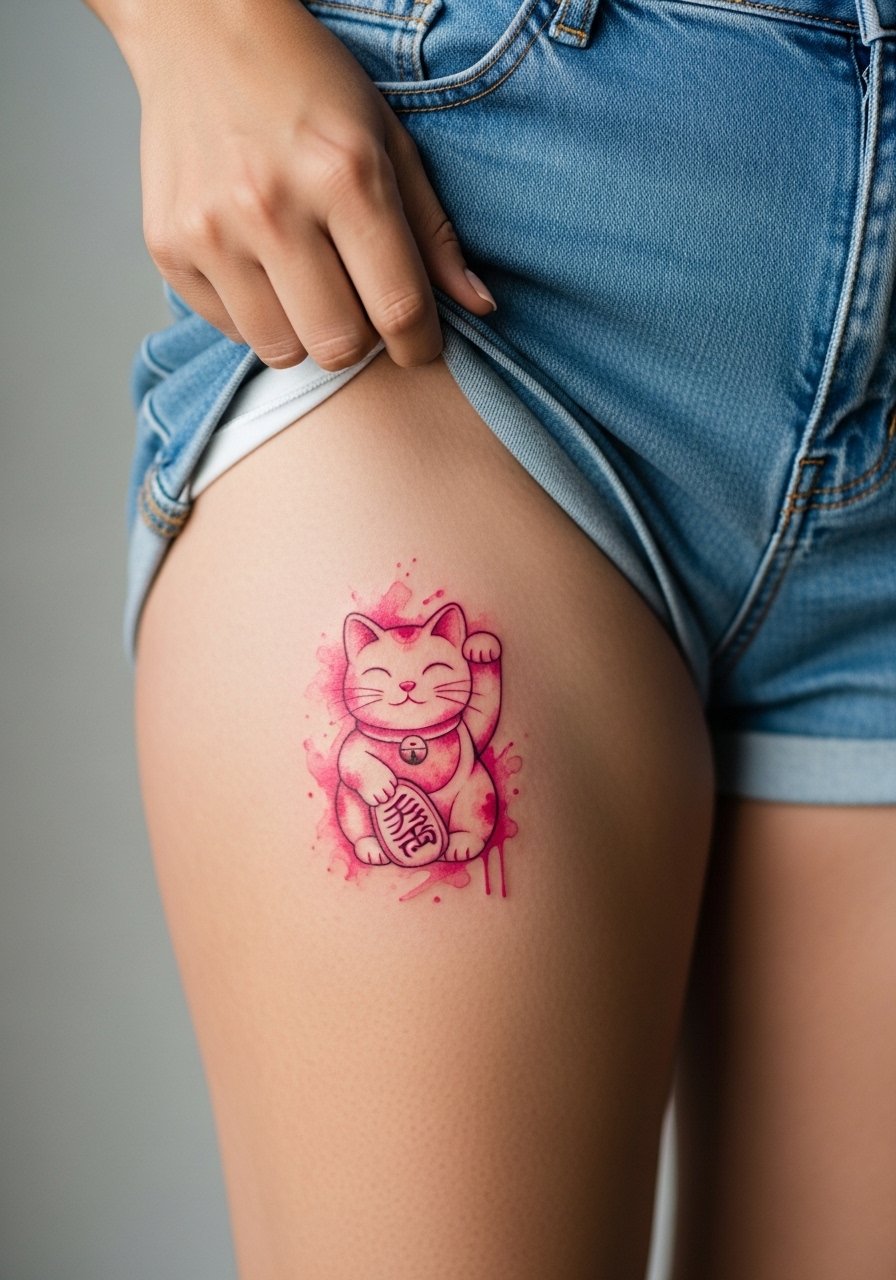
Watercolor works beautifully for romance-themed cats, but thighs shift with body changes and fabric friction. The common mistake is packing watercolor too shallow on the inner thigh which causes bleeding between hues during healing. Ask the artist for light layering and centella-friendly aftercare instructions. Sessions are moderate and often done in one visit for a 7 centimeter piece. Wear loose shorts to your appointment so the artist can work without the fabric rubbing. For summer show-offs, high-waisted shorts pair well and make the pastel washes pop against bare skin.
6. Blue Career Cat with Cherry Blossoms on the Calf
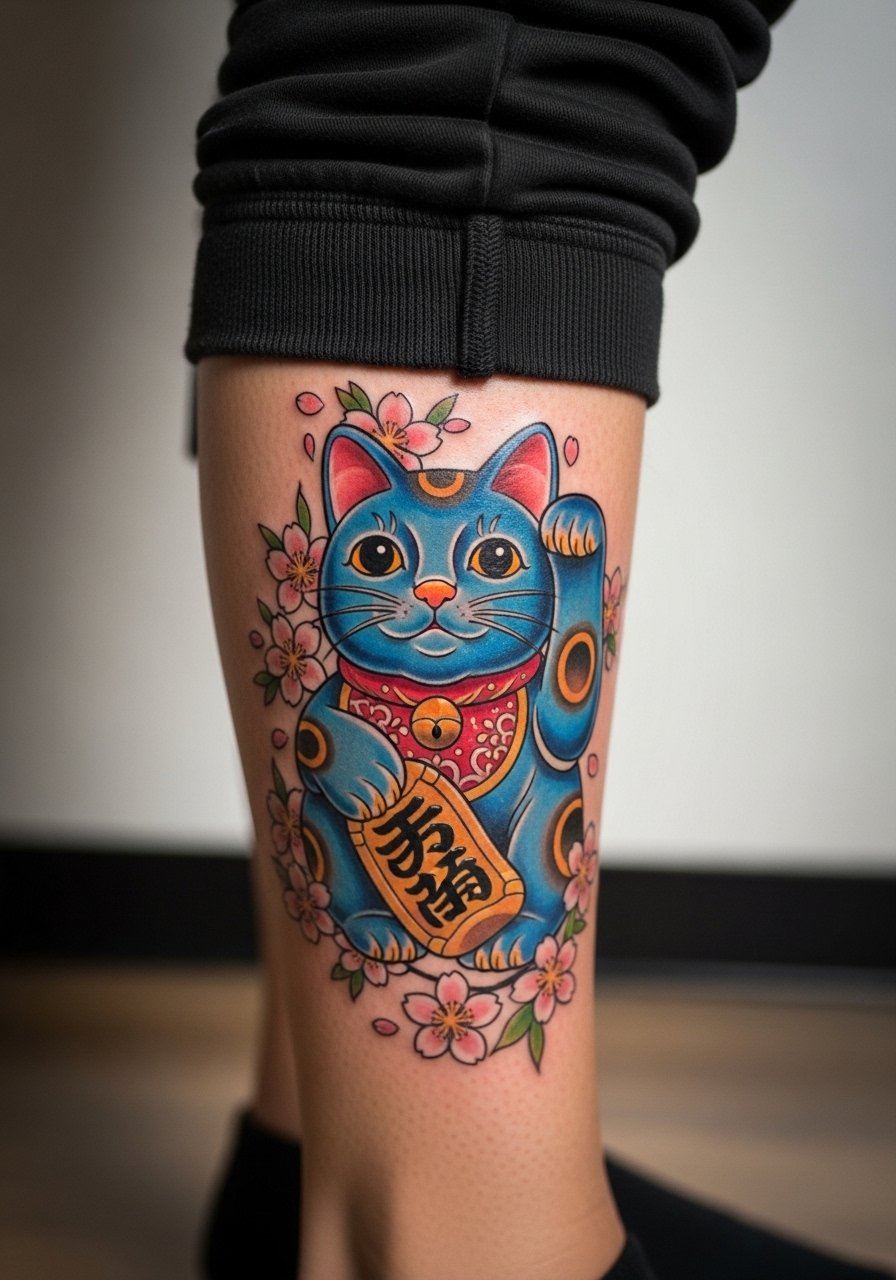
Calf placement gives motion and depth to cherry blossom accents and the larger canvas supports crisp shading. I often suggest stronger contrast in blue tones so the petals keep their edge over time. Typical errors include putting too many tiny blossoms that blur into texture by year three. Healing is straightforward and friction from socks is the main concern. When you want to show this off, cuff your joggers or wear chino shorts. For casual wear, try slim cuffed joggers men or summer shorts so the piece sits on display.
Studio Day Picks
These small items smooth the session and the first week for the wrist, calf, shoulder and thigh pieces above.
-
Tea tree aftercare balm. Thinner texture than heavy ointments helps humid heals breathe on larger color pieces like the calf design while still providing moisture during the first week.
-
Japanese rice bran lotion. Lightweight maintenance lotion that keeps neo-traditional yellows from looking greasy, useful after the initial scab phase on shoulder pieces.
-
Indie soy-based moisturizer. Breathable daily moisturizer that works for tattooed skin sensitive to thicker balms, handy for thigh watercolor areas.
-
Korean centella cream. Calming formula for delicate or irritated skin, especially helpful after rib or inner arm sessions that tend to scab more.
-
Aquaphor healing ointment. Thin application for the earliest days keeps fine line work protected on wrists and collarbones without creating a heavy barrier.
7. Black Fine Line on the Collarbone
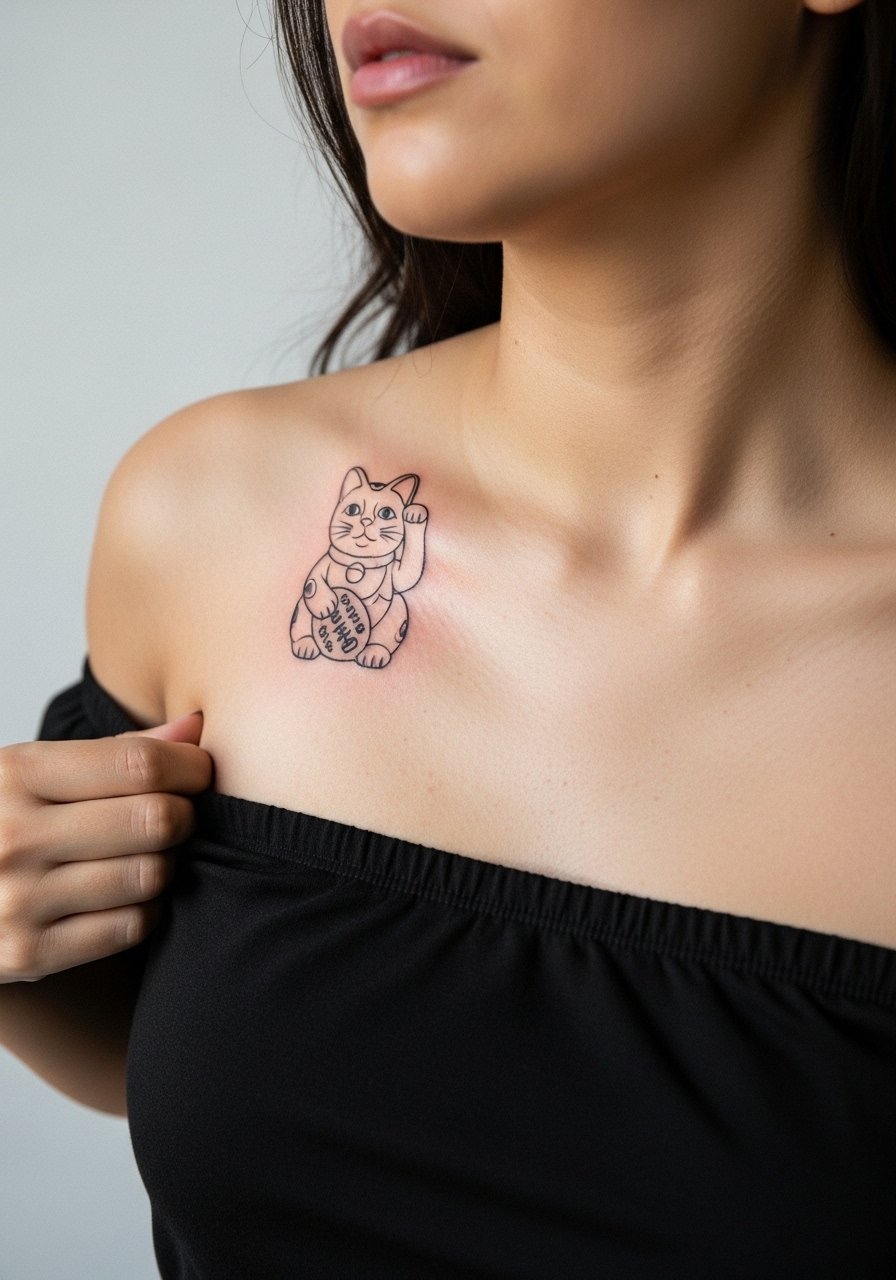
Collarbones are delicate and show detail well but they also move with breathing, which is a factor for fine lines. The usual problem is requesting ultra-fine contouring without spacing. That results in line convergence within a couple of years. Tell your artist you'd like slightly more spacing between whisker lines and a clean, simple silhouette. Pain is higher than arm spots but session time is short. For dates or events, a strapless midi dress frames the collarbone elegantly while keeping the tattoo visible without competing jewelry.
8. Micro-Realism Black and White on the Shoulder Blade
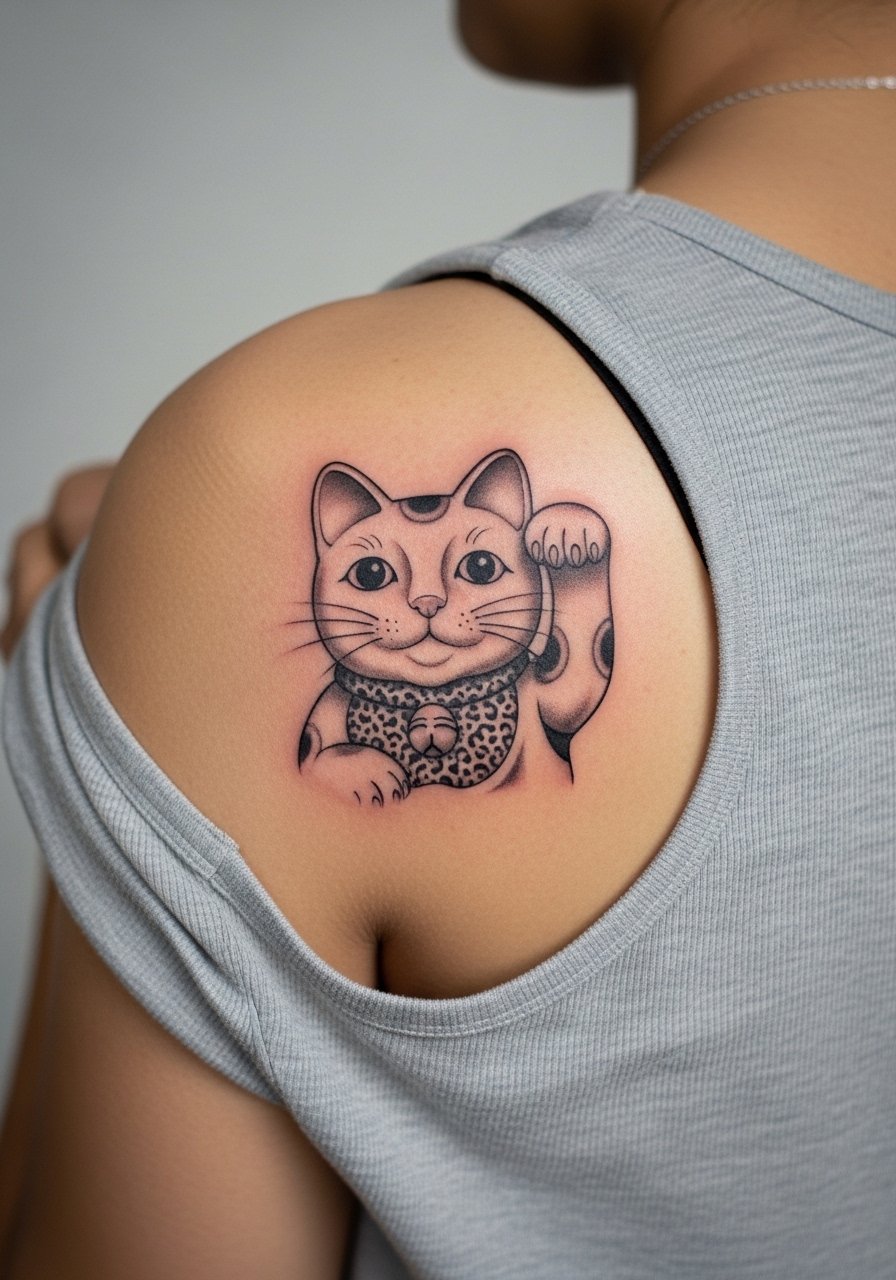
Micro-realism gives lifelike fur texture but needs space. On a shoulder blade the design reads beautifully and ages more predictably than on tighter areas. The frequent error is trying to shrink micro-realism into a tiny patch under five centimeters. That compresses stippling and leads to a muddy look later. Expect a longer session and a possible second sitting for perfected shading. Wear a loose tank for the appointment so the artist has access. If you want to show it subtly, a loose button-down shirt pulled aside works well.
9. Left-Paw Customer-Attracting Cat on the Outer Forearm
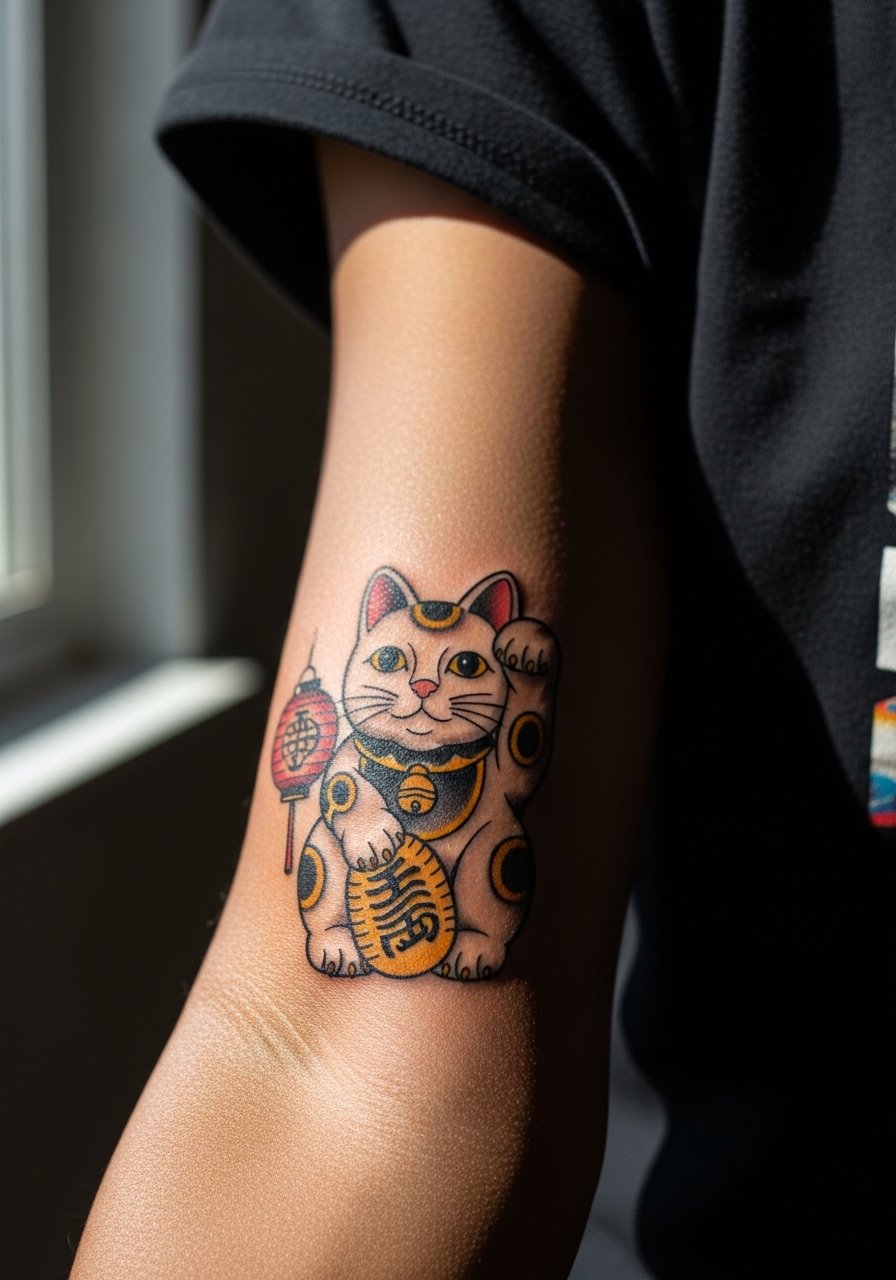
Choosing left versus right paw is one of those small cultural decisions that changes the intent. Left paw cats are said to attract people or customers while right paw cats traditionally invite financial gain. Artists and clients differ on how strictly they follow this meaning, so ask which paw better suits your intent. For visibility, keep the lantern simple so it does not fight with the paw silhouette. Sessions are similar to other forearm traditions and healing is straightforward. For work-friendly show-off wear, roll up a sleeve of a rolled sleeve chambray shirt to keep the piece on display without overexposure.
10. Minimalist Paw-Only Finger Tattoo
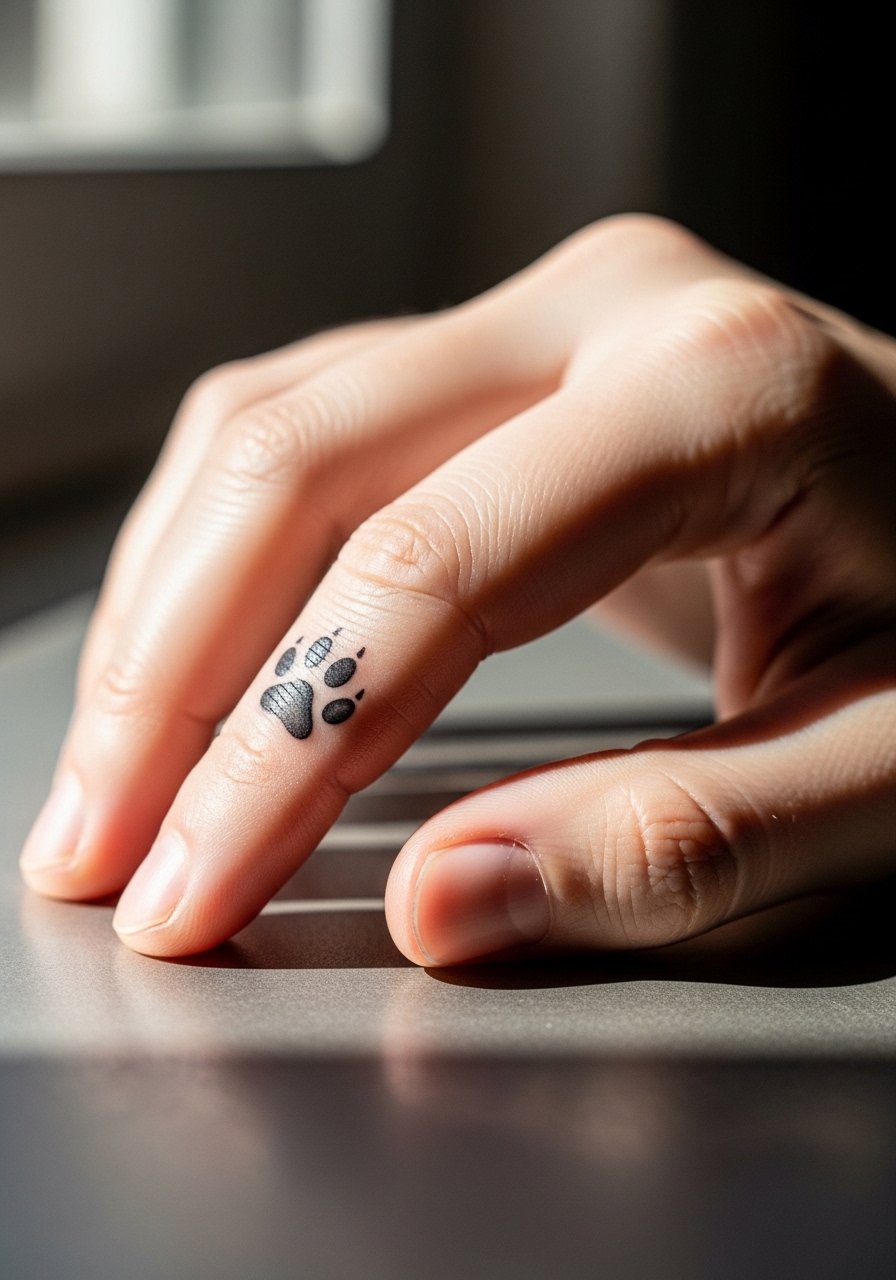
Finger tattoos are notoriously prone to fading because of constant washing and motion. The biggest mistake is expecting a finger paw to last as long as a forearm piece without touch-ups. For longevity ask your artist to place the paw slightly off the joint and consider a small negative-space border to keep the dots from spreading. Sessions are quick but healing needs patience. For appointment day, leave rings at home. Finger designs are subtle when paired with a minimalist dainty ring set across multiple fingers.
11. Black and Gray Realism on the Upper Arm
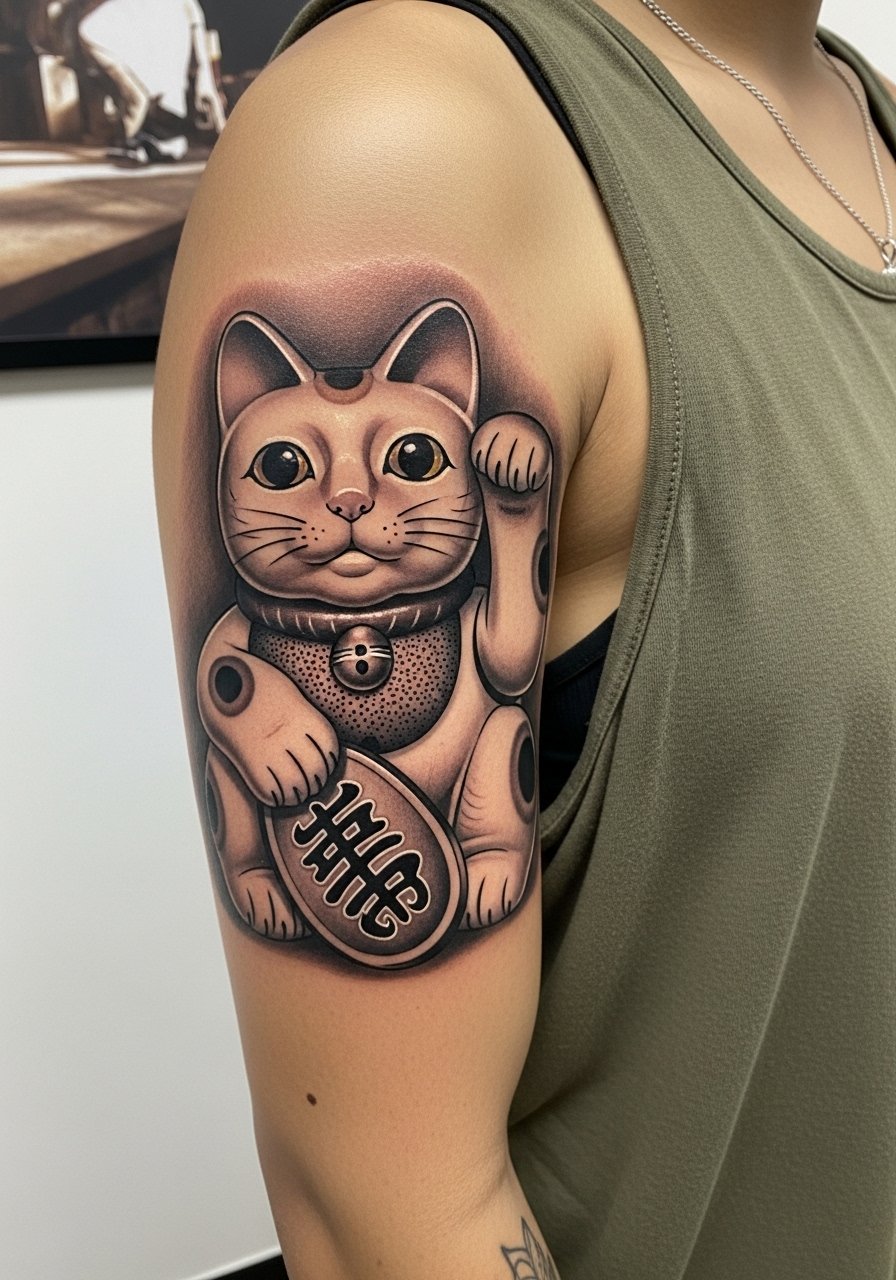
Upper arms tolerate a lot of needlework and are forgiving as tattoos settle. A black and gray realism cat can show detailed fur and coin texture without risking early blurring. Avoid overly fine crosshatching that reads fine fresh and disappears later. Sessions may span two appointments for full tonal range. For casual show-off, short sleeve tees or rolled sleeves look intentional and balance the arm with other accessories like a leather cuff or watch.
12. Neon-Accent New School Cat on the Outer Forearm
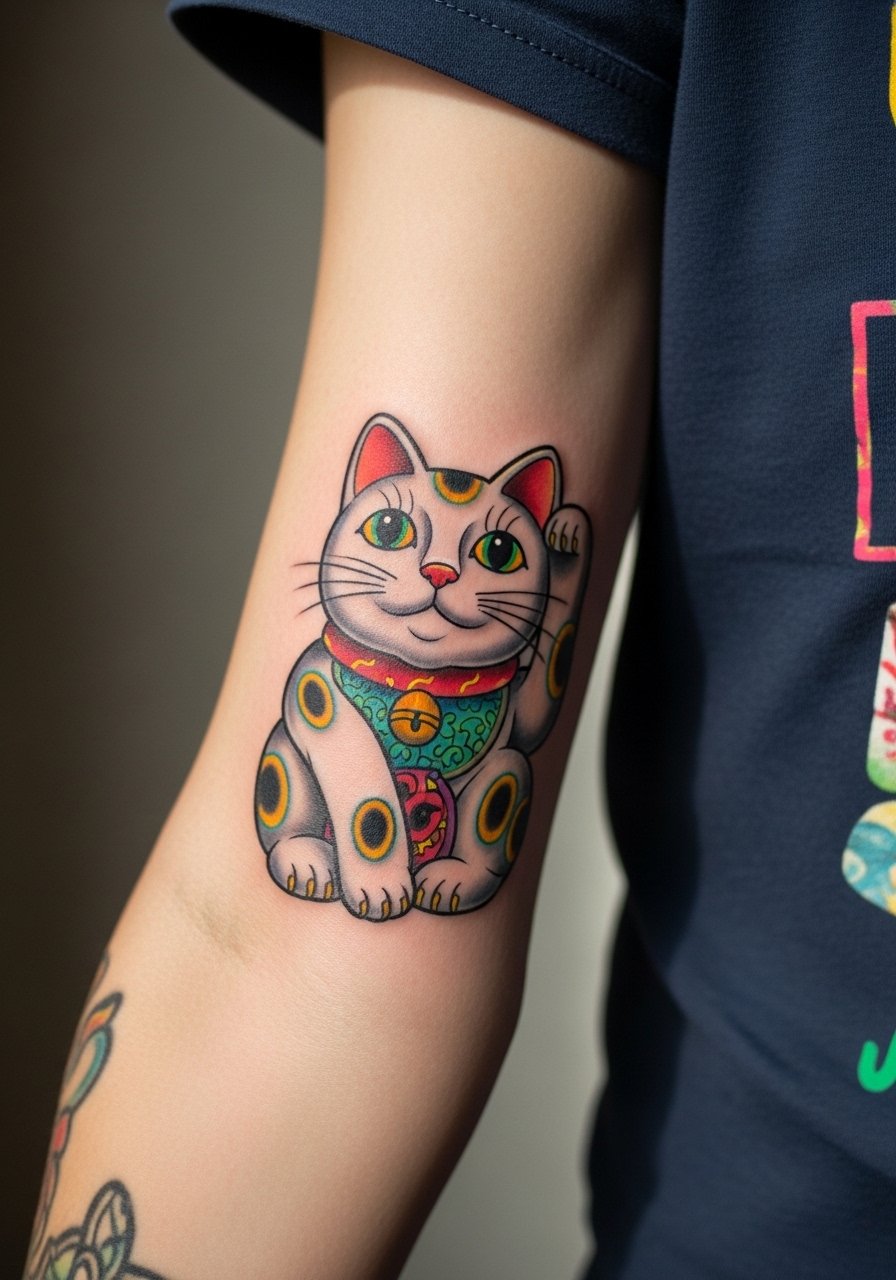
New school choices let you play with oversized eyes and playful lanterns. Neon accents look electric fresh but they can fade faster in sun-exposed placements. Ask the artist for layered saturation and a contrast outline to keep neon elements readable. The session is lively and often finishes in one sitting for a moderate-sized piece. For daytime wear, pair with short sleeve graphic tees or cuffed denim so the neon pops against muted fabrics.
13. Sphynx-Style Minimal Cat on the Ankle
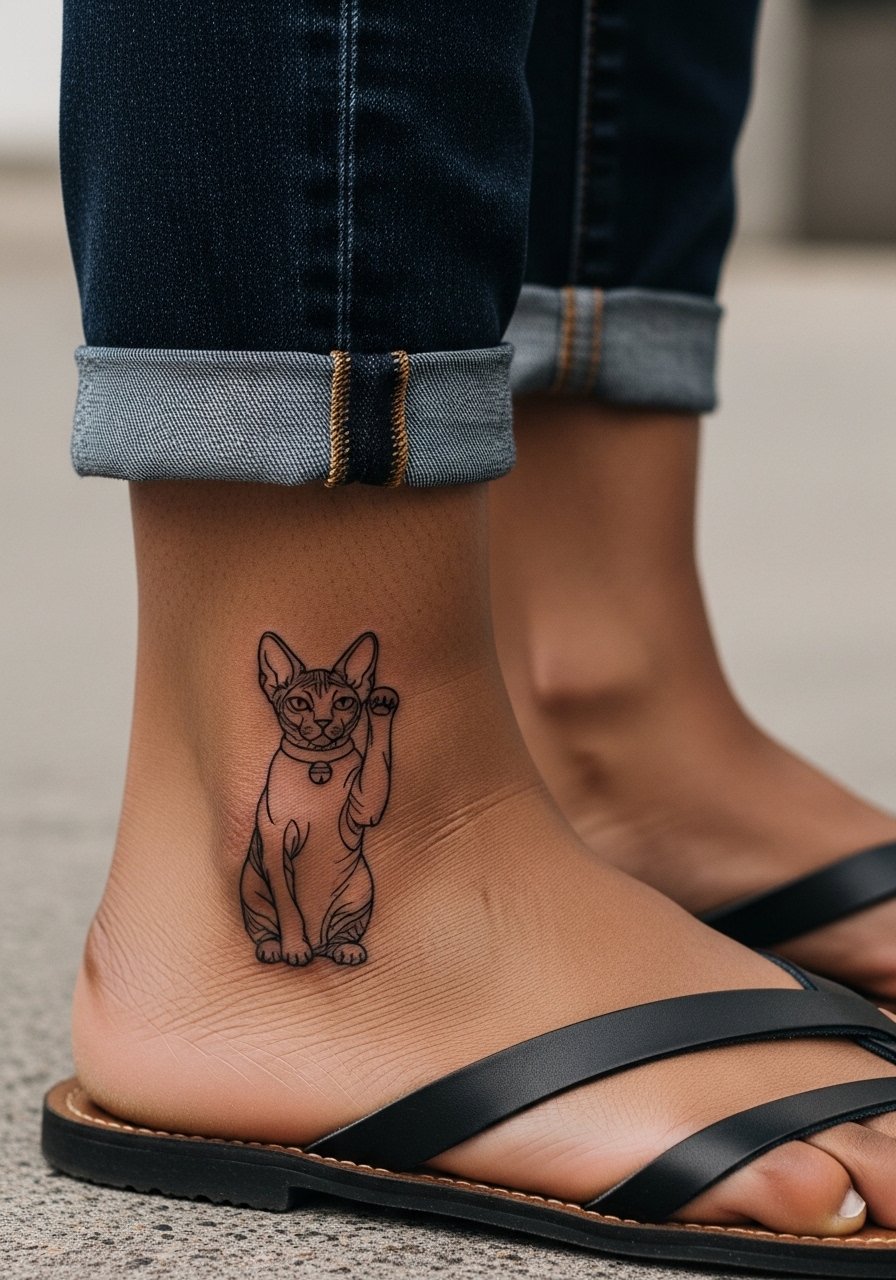
A sphynx take trims fur detail into smooth planes and suits the ankle's small canvas. The mistake people make is cramming facial angles into such a small space. Keep the design simplified and bold around the silhouette. Ankles see friction from socks and shoes so expect touch-ups sooner than arm pieces. For the appointment roll your jeans up and wear sandals. When showing off the piece in summer, low sandals and cuffed jeans highlight the area without rubbing the tattoo.
14. Fortune Cat With Japanese Waves for an Upper Arm Sleeve Starter
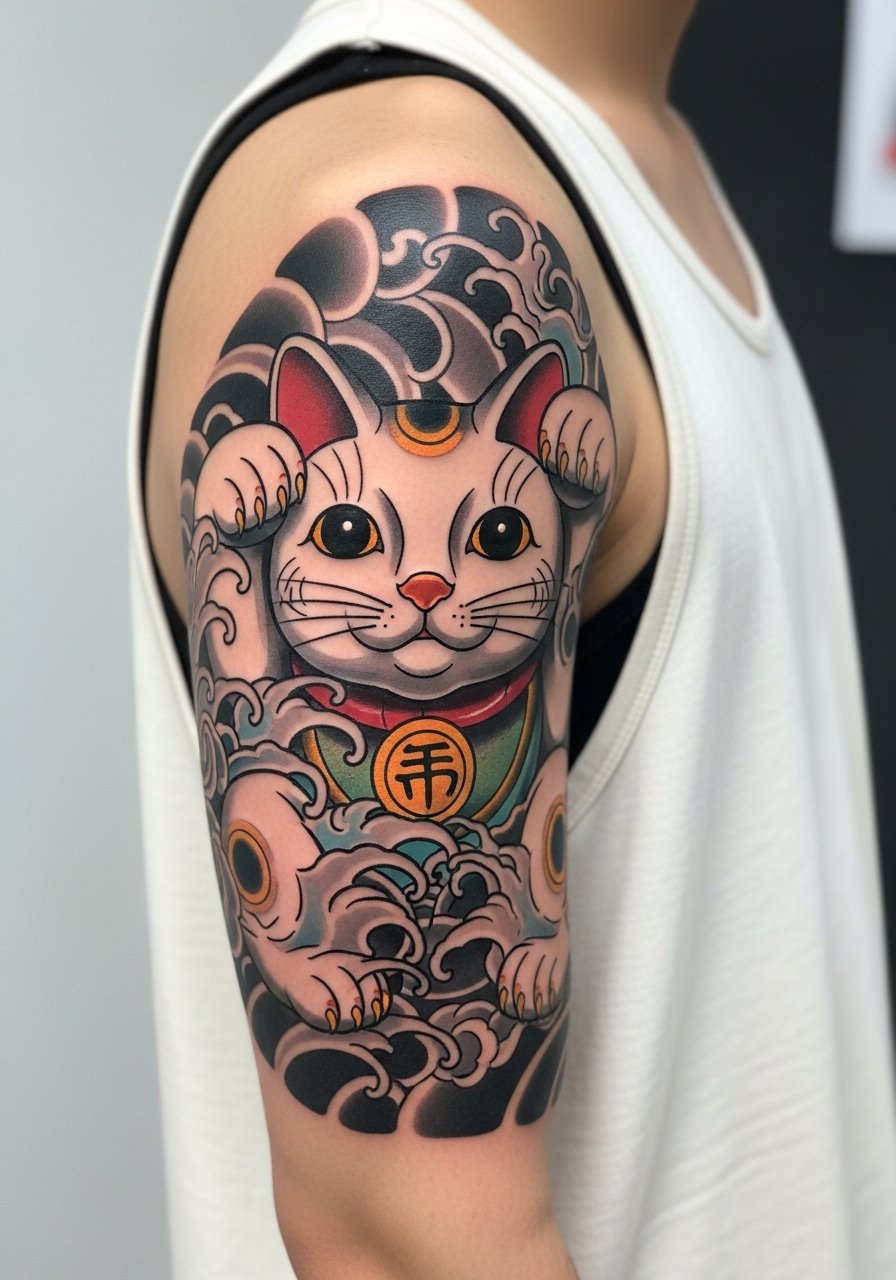
Sleeve starters need space and clear negative areas for future pieces. Incorporate waves and kibune elements with deliberate breathing room around the cat so future koi or blossoms can integrate cleanly. A common error is over-detailing the background now and not leaving extension pathways. Sessions will be broken into parts. For comfort, wear a loose tank and bring a supportive pillow for longer sittings. In daily wear, an off-shoulder or rolled sleeve tank keeps shoulders free and showcases the start of a larger narrative.
15. Cheshire Grin Blackwork on the Calf
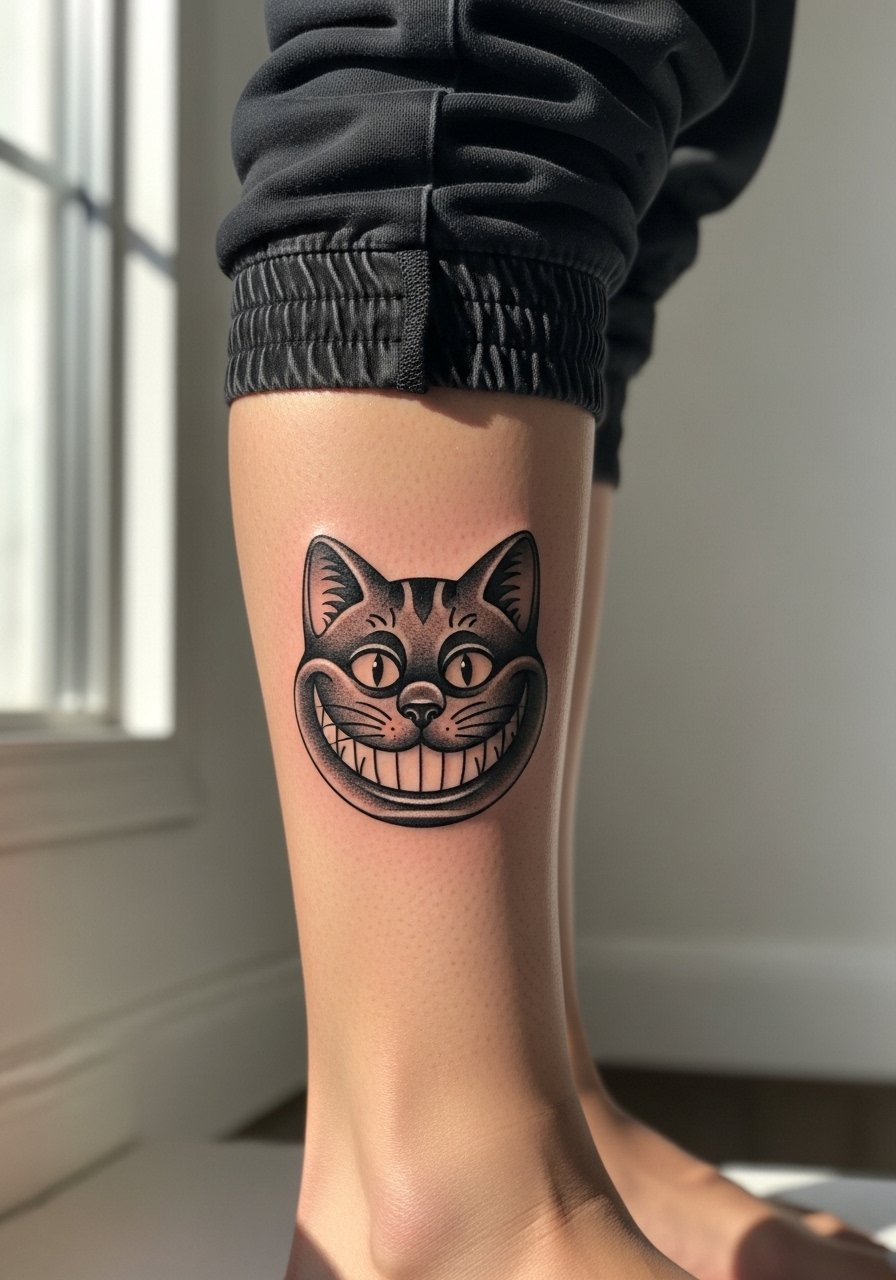
Blackwork reads strongly on calves and resists the softening that affects tiny lines. The risk is letting solid fills dominate so facial features lose character. Keep negative-space teeth and eyes to maintain expression. Calf sessions are generally comfortable and heal without much friction if you manage sock lines early on. For showing it, cuff joggers or wear ankle boots. Blackwork also pairs well with monochrome footwear that frames the art.
16. Pink Romance Watercolor on the Ribcage
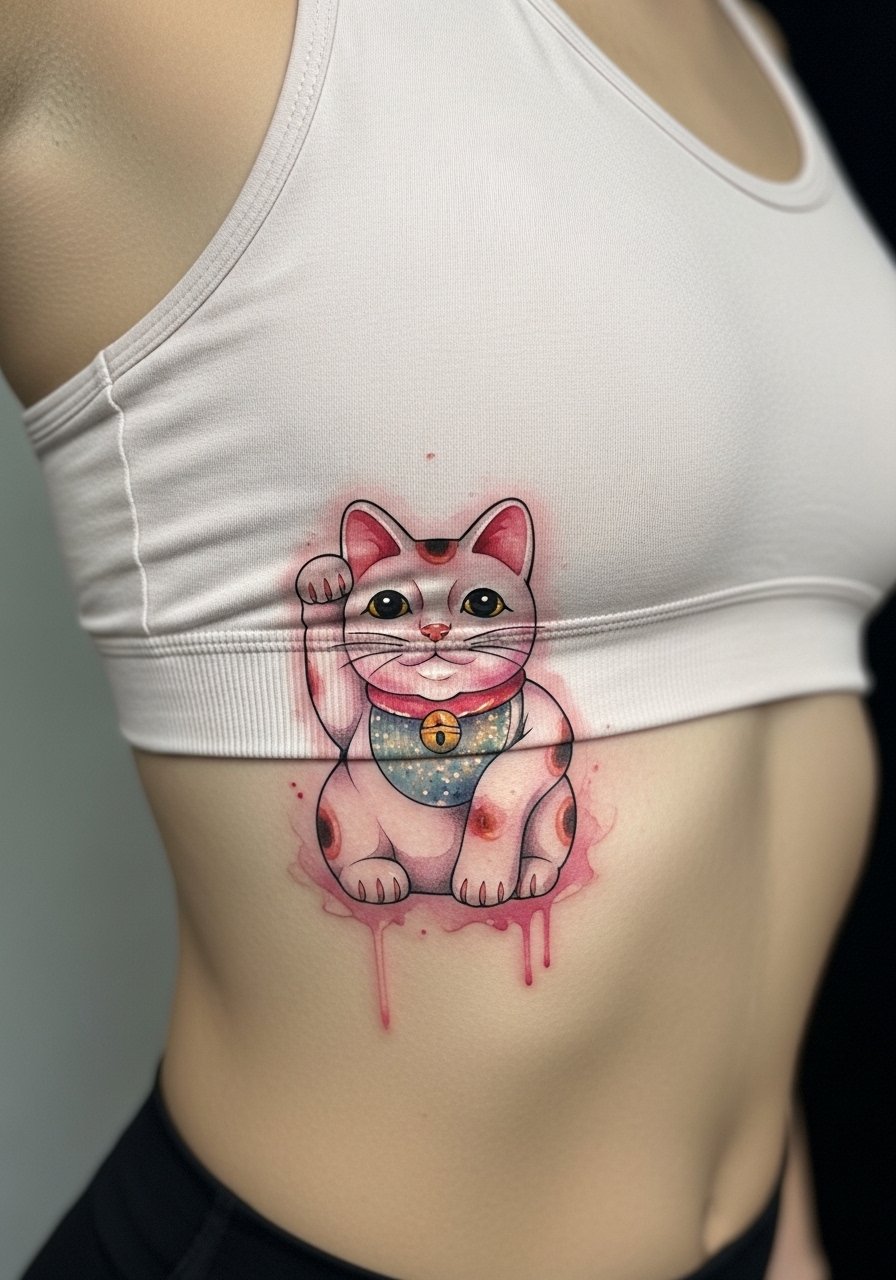
Ribcage is a higher-pain area but it gives dramatic canvas for watercolor washes. One debate among regulars is whether fine watercolor on ribs heals cleanly. One group favors dry healing and reports less color bleed. The other group prefers protective films for initial days. Ask your artist which route they recommend for color retention. Expect an emotional session and plan comfortable breathing during the appointment. For reveal outfits, a bandeau or cropped top shows the piece without overexposure.
17. Small Coin QR Code in the Coin on the Thigh
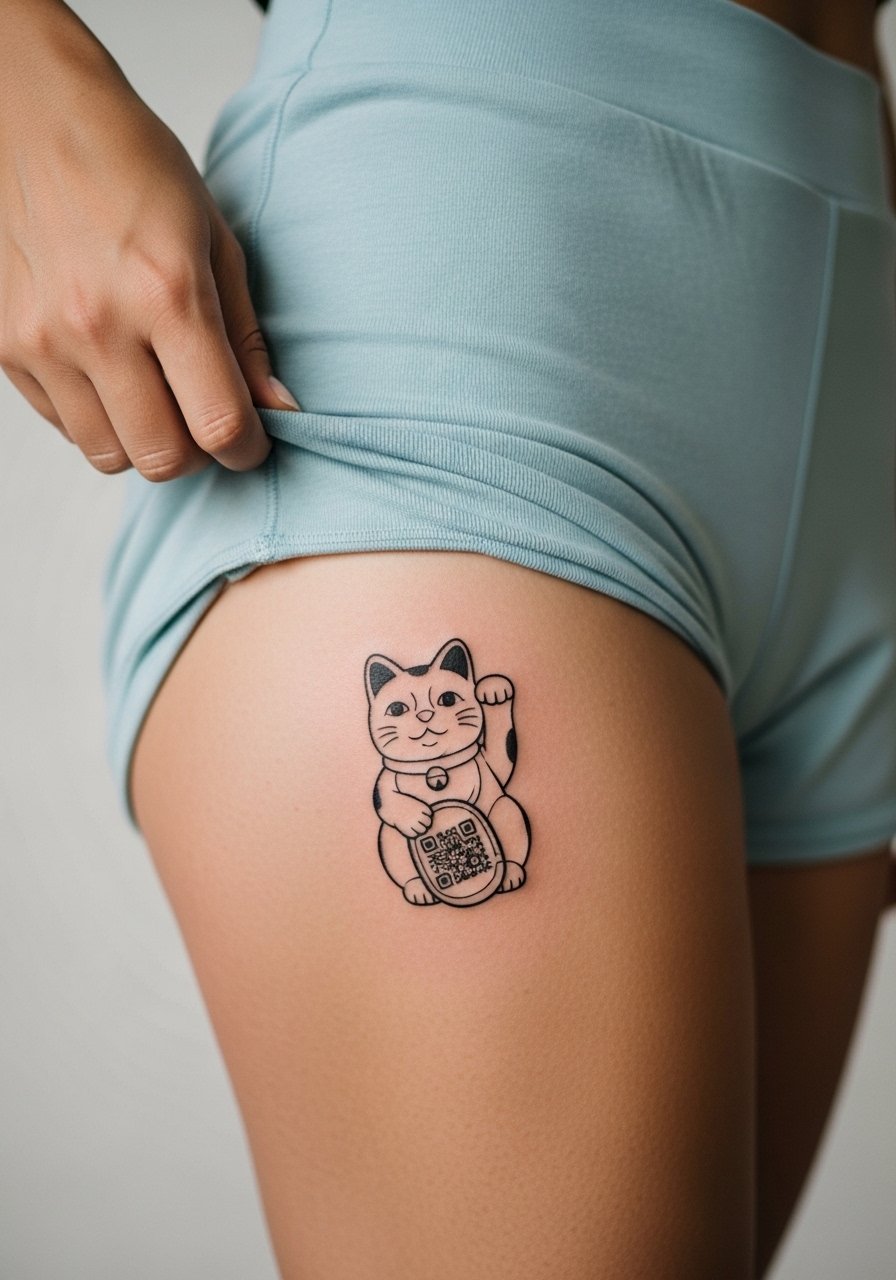
This is one of those modern twists where a tiny scannable QR can link to a playlist or a written intention. The technical challenge is keeping the QR block large enough to scan and simplifying surrounding detail so the code remains readable. Thigh flesh shifts with weight changes so plan for potential resizing later on. Sessions are comfortable but expect a slightly longer sittings for crisp squares. Wear loose shorts to the appointment. For nights out, high-waisted shorts or slit skirts reveal the design in controlled ways.
18. Left Rib Mini with Stipple Shading
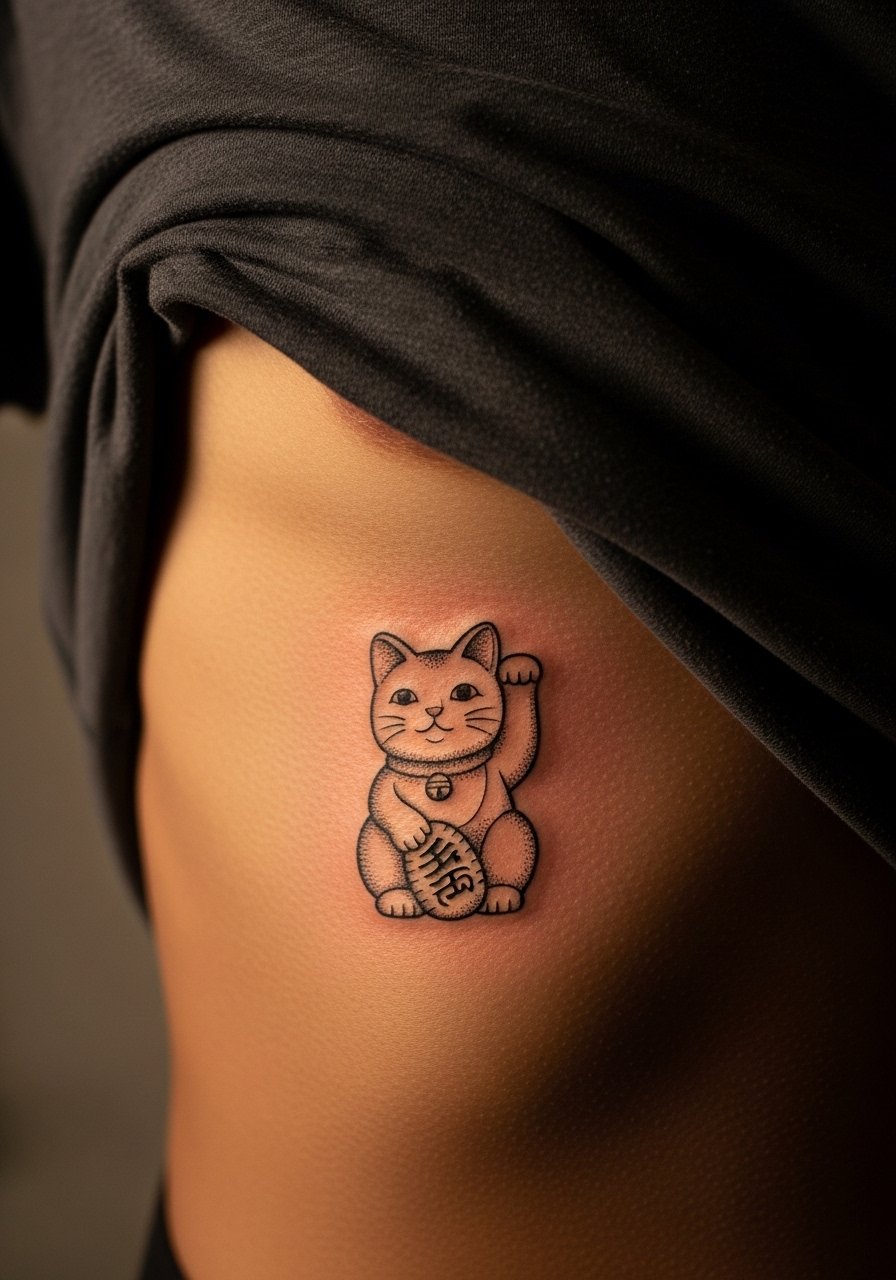
Stipple shading yields delicate gradients and plays well on ribs when sized appropriately. The common mistake is packing dots too densely in a small area, which makes the texture flatten as it heals. Leave breathing room and ask for staggered dot placement. Pain is higher but sessions for small pieces are brief. Because ribs are sensitive, discuss needle depth and touch-up policy beforehand. For comfort, bring a zip-up hoodie you can pull aside rather than removing layers.
19. Tiny Paw Behind the Ear with Neck Framing
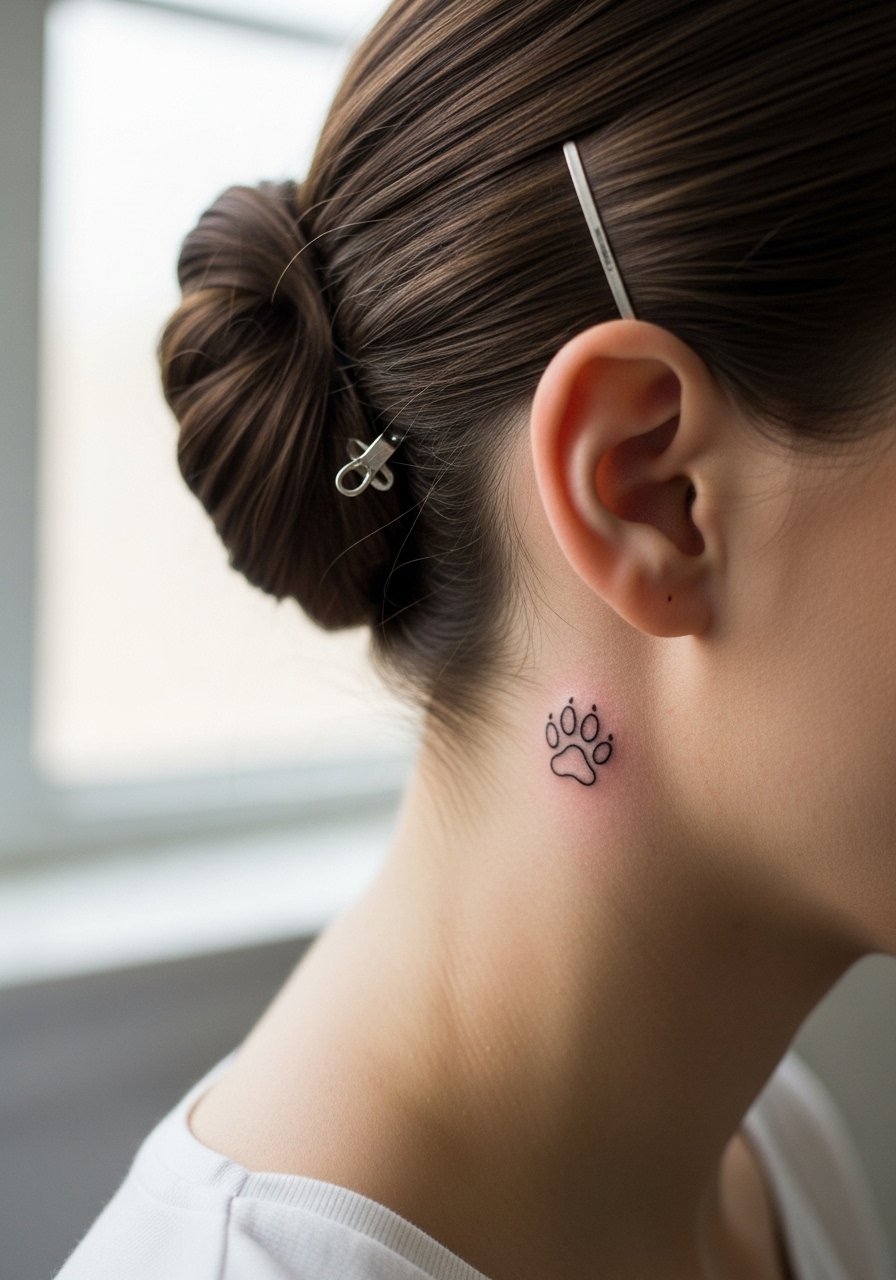
Behind-the-ear placements are discreet and personal. They require a careful hand because the surface is small and curved. Avoid dense detail. The real-world issue is friction from collars and hair during healing. Artists often advise letting hair be tied up for the first week. Pain is brief but sharp. For professional considerations, remember this spot can be hidden or revealed depending on hairstyle. No jewelry needed for showing it off, but small hoop earrings can complement the peek.
20. Collarbone Minimal Script With a Tiny Cat Accent
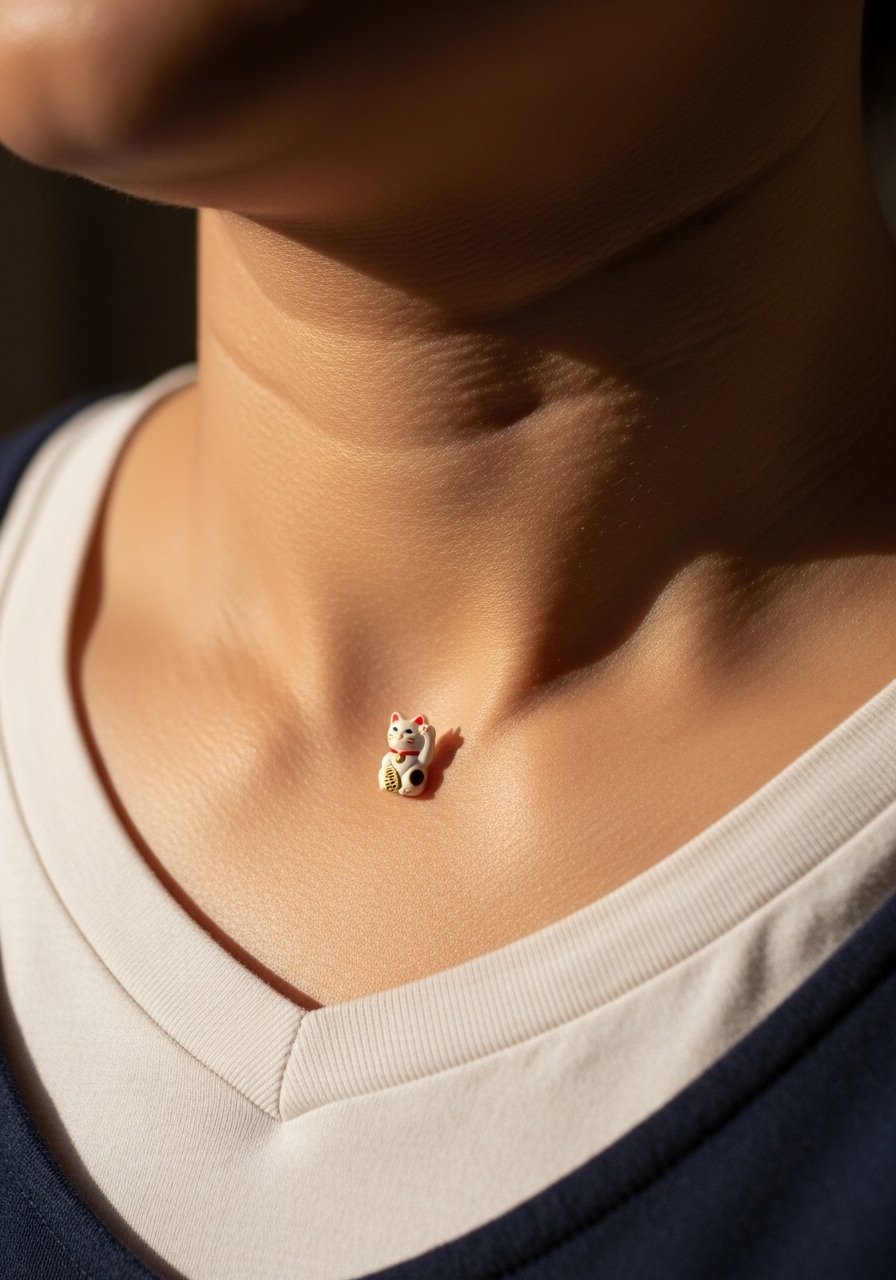
Script and small accents play well around the collarbone, but the pitfall is overlapping text and imagery too closely. Keep at least a centimeter between the word and the cat accent. Fine script on collarbones can blur with movement if letters are too narrow. Sessions are short and sensitive. For the appointment wear a V-neck tee you can pull aside. To accessorize the final look, a thin chain pendant necklace sits above the script and keeps focus on the linework.
21. Neo-Traditional Thigh Panel With Koi Motif
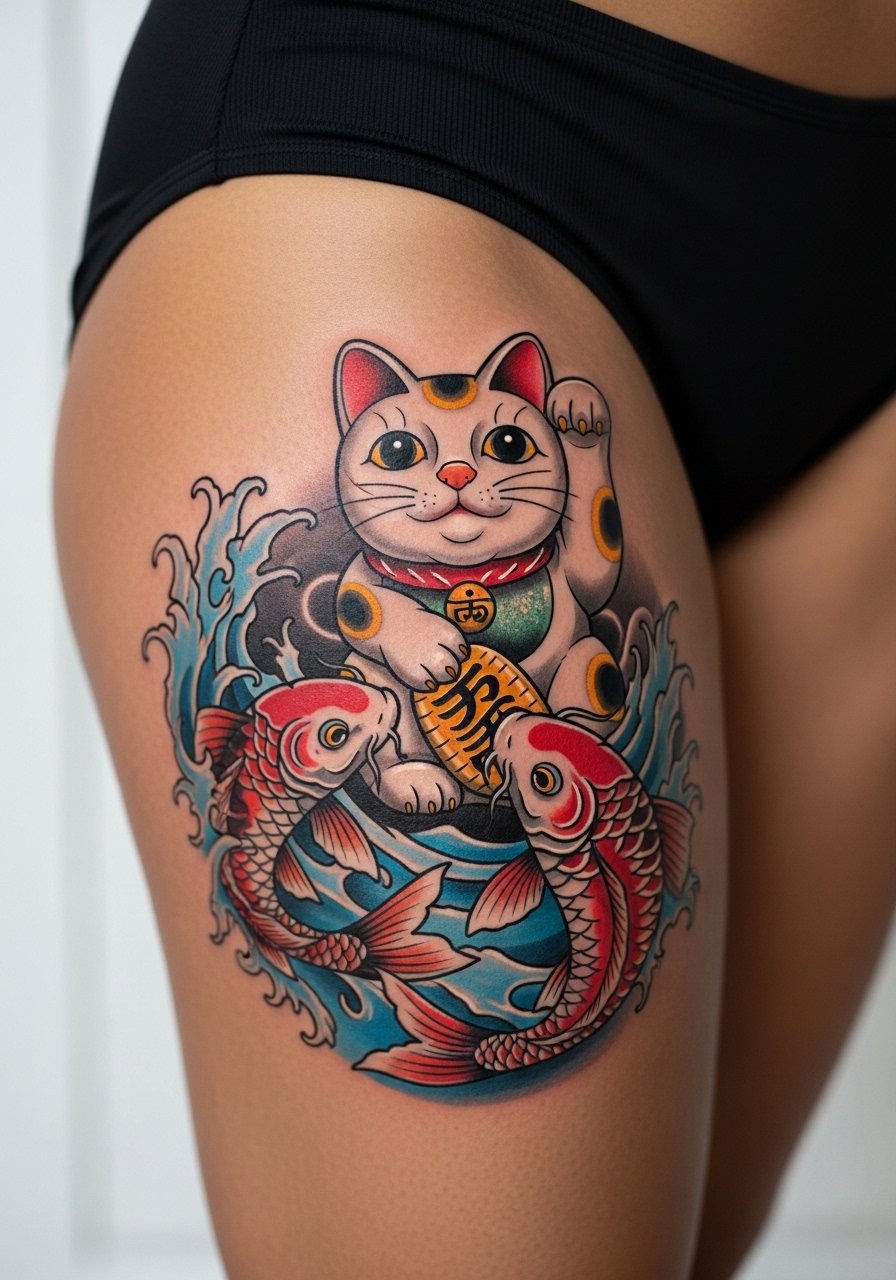
Thighs are generous canvases and tolerate bold color and narrative. Pairing a lucky cat with koi fish creates a classic luck and perseverance story without forcing tiny details. Keep the koi scale patterns readable by spacing and using bold outlines. The main risk is stretching if you plan major body changes. Sessions may take multiple visits and healing is usually smooth if friction from clothing is minimized early on. Wear loose shorts or a swimsuit to the appointment so the artist has access. For reveal looks, high-waisted shorts and slit skirts let parts of the panel peek through.
Frequently Asked Questions
Q: Will a fine line lucky cat on the wrist blur faster than a traditional one on the forearm?
A: Yes, fine line on wrists tends to soften sooner because of constant movement and washing. A forearm traditional piece with heavier linework often holds its silhouette longer. If you want a delicate wrist look ask for slightly heavier line weight and a touch-up plan at around year two.
Q: How do color choices change the meaning of a lucky cat design?
A: Color shifts can signal different intents without changing the base design. Golds and yellows often read as wealth-focused in neo-traditional pieces, pinks lean romantic, and blues get used for career themes. Choose colors that suit how visible you want the piece to be since vibrants need sun care to stay lively.
Q: Is Saniderm or dry healing better for these small wrist and finger sketches?
A: Artists and hobbyists split into two camps. One camp prefers Saniderm for less mess and predictable protection. The other camp favors dry healing, saying it prevents trapped scabs and breathes better. The right choice depends on your skin, placement, and your artist's protocol. Ask what they recommend and follow their timing for removal or dryness.
Q: Can a QR code inside a coin realistically scan after healing on a thigh?
A: It can, if the code is sized properly and done with crisp, high-contrast lines. Thigh flesh is forgiving but avoid tiny QR squares under 2 centimeters. Plan on touch-ups for scanning reliability if you want it to remain functional long term.
Q: What should I wear to a shoulder or upper arm session to make the process easier?
A: A loose tank or a button-down you can pull aside works best. You want easy access without removing too many layers. Bringing a loose button-down shirt makes it simple to expose one shoulder while staying comfortable.
Q: Do blackwork cats work better on darker skin tones than subtle watercolor designs?
A: Blackwork tends to read more reliably across darker tones because solid contrast is visible longer in photos and real life. Watercolor can look beautiful but often needs careful placement and stronger saturation to avoid washing out over time. If you prefer pastels, discuss pigment choices and highlight options with your artist.
Q: How often should I plan touch-ups for a tiny finger or ankle paw?
A: Expect touch-ups within one to three years for friction-prone spots like fingers and ankles. Factors include daily wear, bathing routines, and sun exposure. A realistic plan is to assume at least one touch-up in the first two years and then evaluate from there.
