
Bold minimalism is having a moment, and not every trend survives a year on the arm. Fine line wraps look amazing fresh, but the bands that still read clean after seasons of gym sessions and sun exposure are the ones planned around movement, contrast, and placement. Below are 27 modern bracelet tattoo ideas for men with practical notes on how they heal, what to tell your artist, and the clothing choices that make each design sing.
1. Thick Blackwork Armband with Negative Space Knot
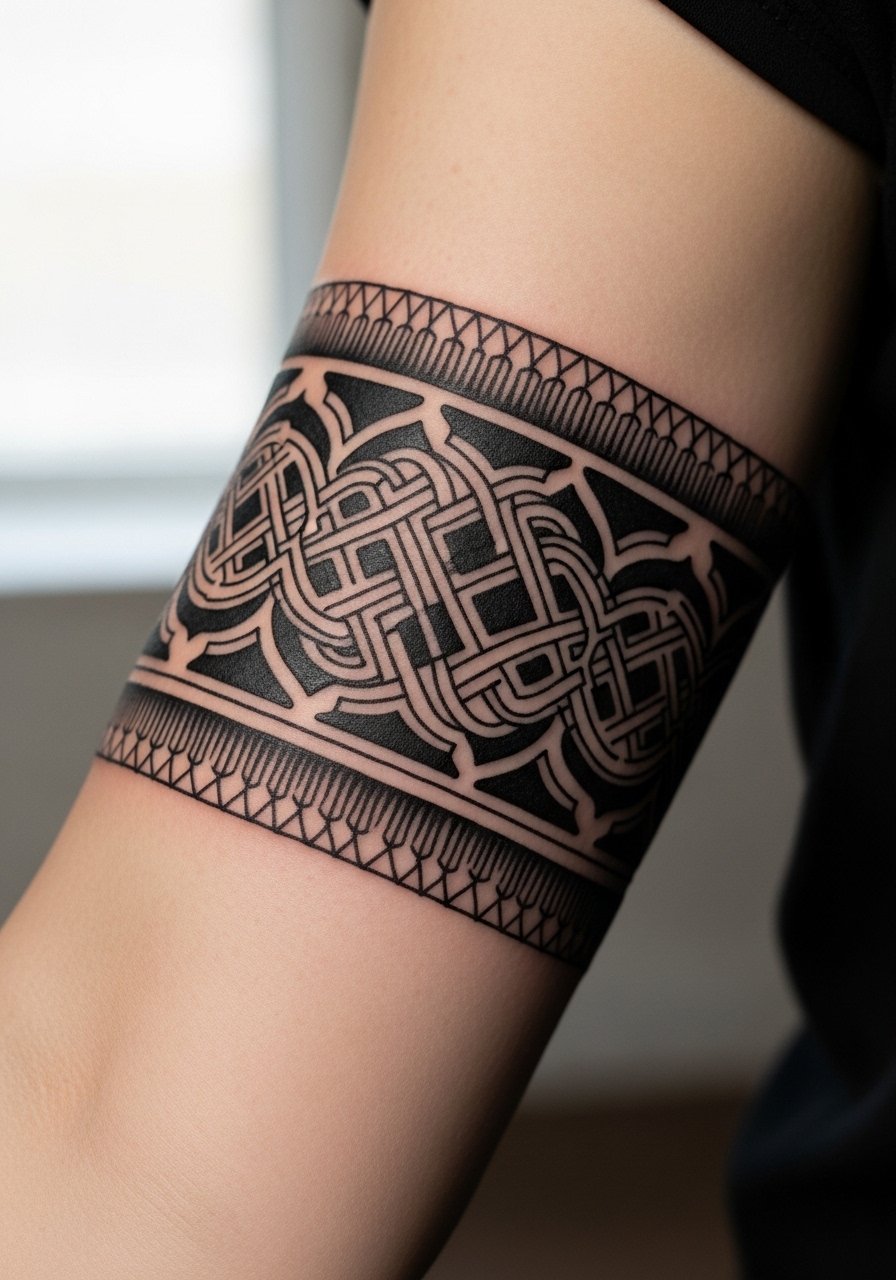
I recommend this when you want a bold band that still reads on muscular arms. Tell your artist you want full saturation with crisp negative-space breaks so the knots breathe when you flex. A common mistake is making the negative gaps too narrow, which leads to merging after a year. Expect a first-session of one to two hours and a touch-up at six weeks if the edges feather. Pain is moderate on the outer forearm. Pair this with a fitted black crewneck tee and rolled sleeves to show off the contrast without overcomplicating your look.
2. Geometric Knot Band, Wrist Placement
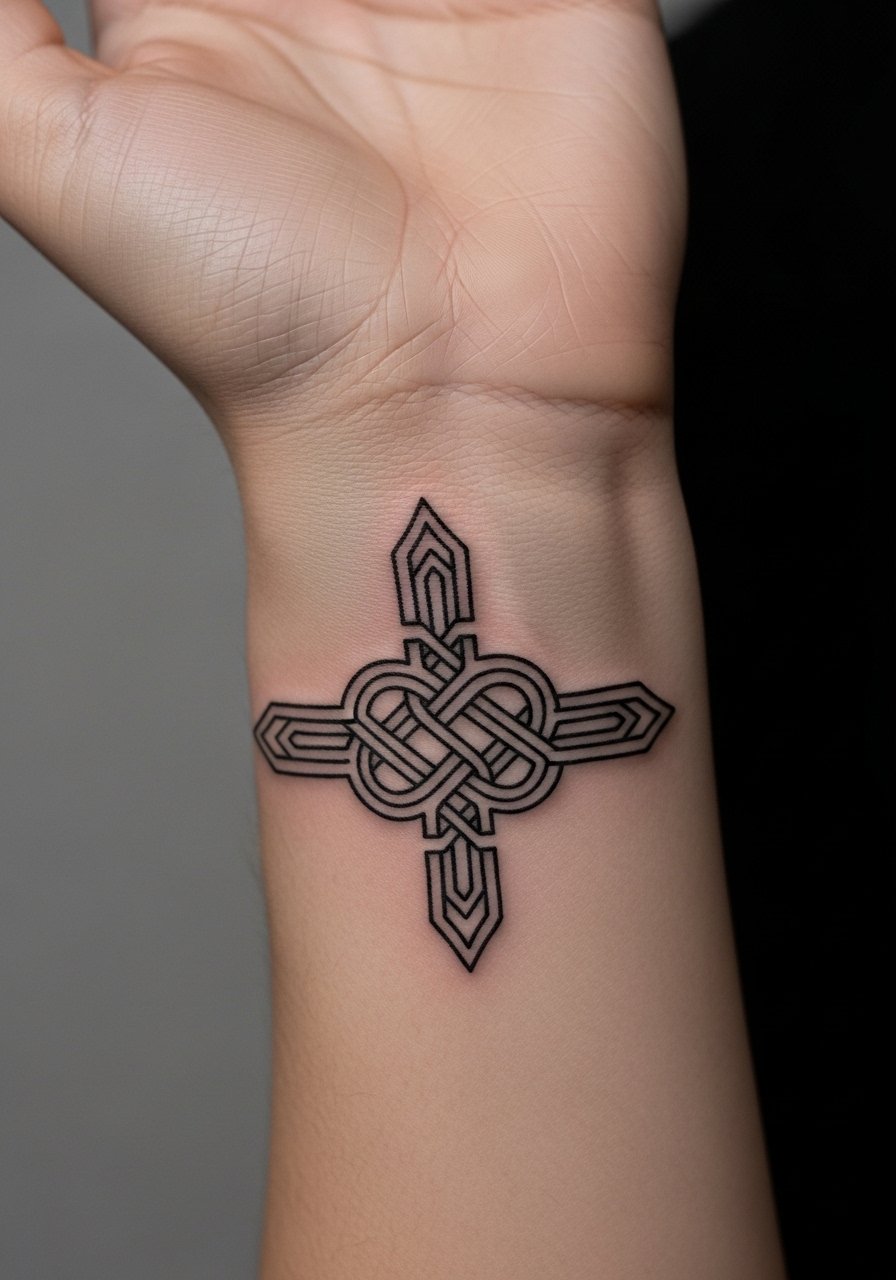
When symmetry and simplicity matter, this one fits small spaces like the wrist. In consultation ask for consistent line weight and a single-repeat pattern so it wraps without a visible seam. The common aging problem is going too small. If the knotwork is tight, lines blur into a block at year two. Session time is short, often under an hour, but expect higher sensitivity near the wrist bone. For showing it off, wear a thin leather watch or a single beaded bracelet on the opposite wrist to balance the look.
3. Braided Rope Armband in Black and Gray
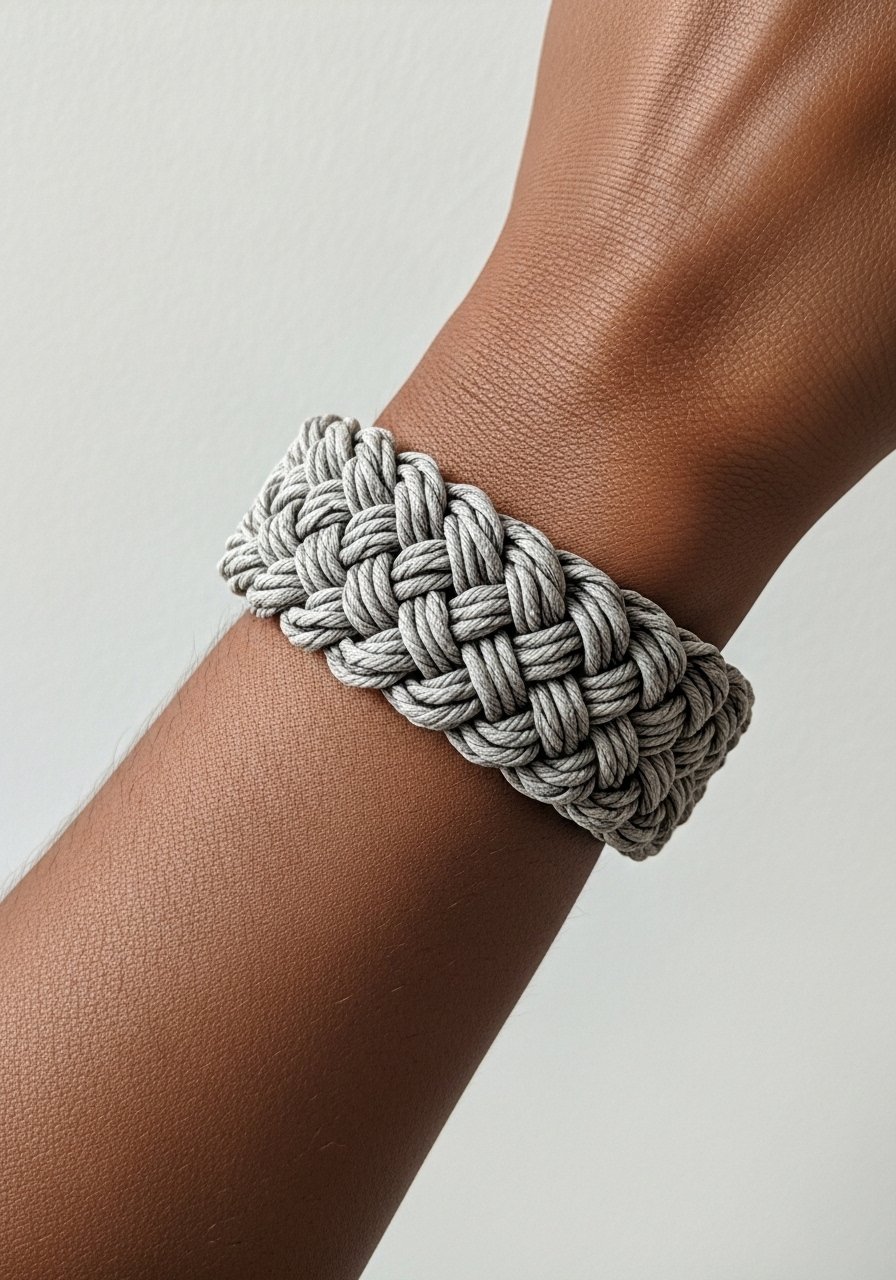
This option mimics nautical rope with soft shading to create depth. I suggest asking for layered shading and stipple work rather than flat fill so the texture reads in photos and in person. The failure mode is over-detailing the plait; too much tiny shading can soften into gray in two to three years. Expect two sessions for a full wrap and minor discomfort when the needle crosses the inner curves. It pairs well with a sleeveless muscle tee for gym flex and with an olive tank for casual days.
4. Dotwork Mandala Band, Upper Arm
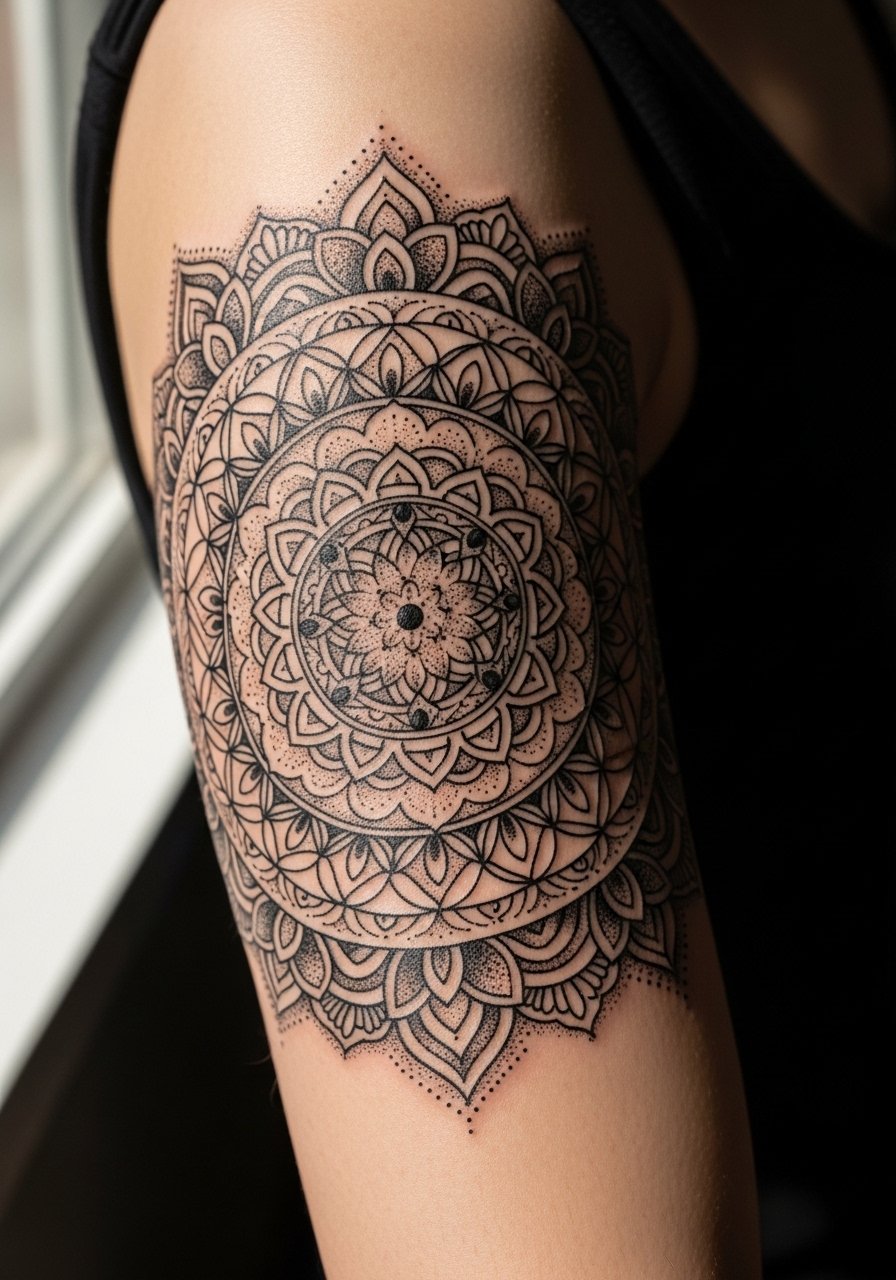
Pick this if you want ornamental repetition that ages into texture rather than blurring. When you talk to your artist, specify dot density in the center versus the edge so the central motif does not fill in. A common mistake is packing dots too tightly. At six months the stipple reads crisp, and by year three the pattern softens but keeps the mandala form if spacing is respected. Sessions can run longer because stipple is methodical. For showing off, rolled chambray sleeves and a wooden bead bracelet on the opposite wrist add organic contrast.
5. Fine Line Wave Armband on Inner Forearm
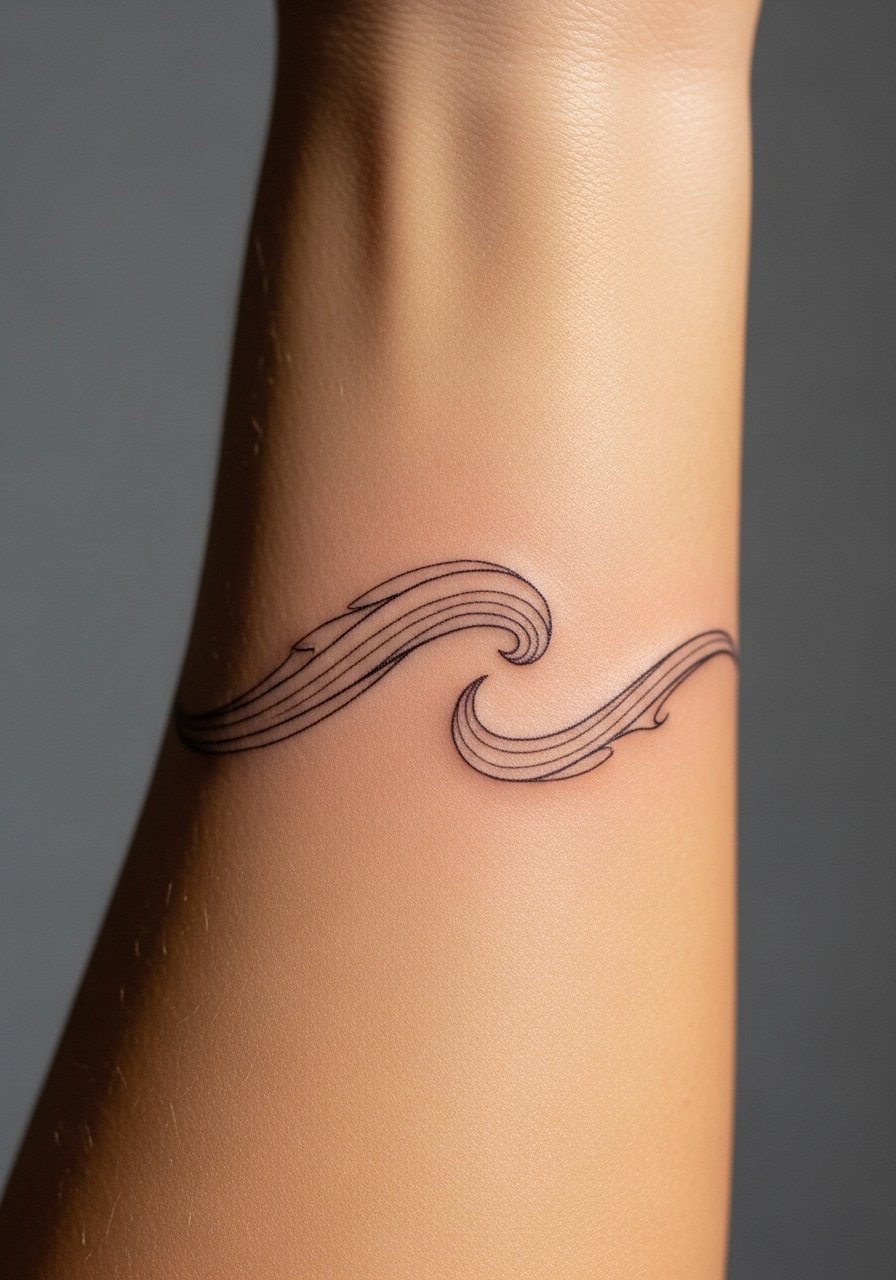
Fine line wave bands photograph beautifully but split the community on longevity. One camp says fine lines on inner forearms hold if spaced; the other says the constant flex makes them blur. My practical take is ask for slightly heavier single lines and leave more negative space between waves. Expect a short session and mild soreness where the needle crosses the inner forearm. Avoid putting the band directly over veins. Pair this with a linen short sleeve shirt men rolled to the elbow for a clean show-off look.
6. Skull-Integrated Neo-Traditional Band, Bicep Wrap

If you want edge and motif rather than repeat pattern, skull elements integrated into a continuous band work well on the bicep. Tell the artist to keep skulls stylized and evenly spaced so the wrap does not feel top-heavy. A common error is cramming too many motifs into a narrow band which blurs into a texture over time. Sessions vary by color accents and detail, expect two sessions if color is included. Pain is lower on the bicep than the wrist. Show this with a sleeveless muscle tee in navy or olive for gym and casual wear.
Studio Day Picks
Those first six designs include wrist, inner forearm, and bicep work, so a few targeted items make the session and first week easier.
- Tattoo Goo Indie Balm. A non-greasy balm that many people prefer in humid climates, especially for blackwork that needs moisture without shine.
- Green Sheep Aftercare Lotion. A thinner lotion used by some for breathable moisturization during dry-healing phases on forearm wraps.
- Australian Tea Tree Salve. Can reduce intense itching on dense dotwork pieces, but patch-test first for sensitivity.
- Indie Soy-Based Cleanser. Gentle pre-session skin prep option that avoids over-drying lines before tattooing.
- Hustle Butter. Thicker than small ointments and useful after the first 48 hours to reduce surface dryness on bold black bands.
7. Arrowhead Chain Band for Wrist
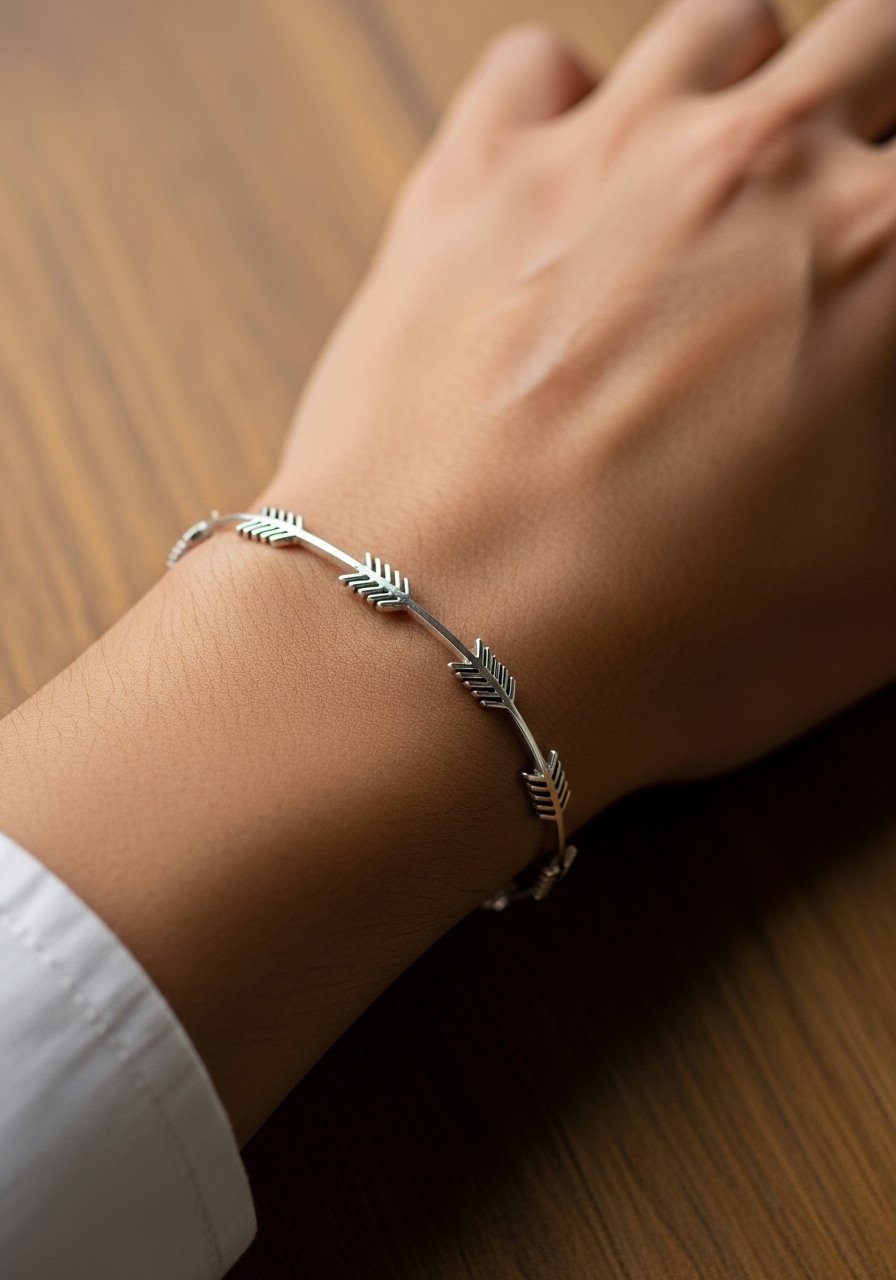
This repeating arrowhead pattern is great for a directional, compact wrist band. Ask for slightly thicker outlines so the arrow points keep their shape under daily wear. The common issue is lines too thin near the wrist bone which fade into a single dark band. The session is quick but can be painful over the radial styloid. Plan for a touch-up around the six- to eight-week mark if you’re often outdoors. Stack it with a thin leather watch men on the other wrist to avoid overcrowding one side.
8. Feather Quill Armband, Lower Bicep
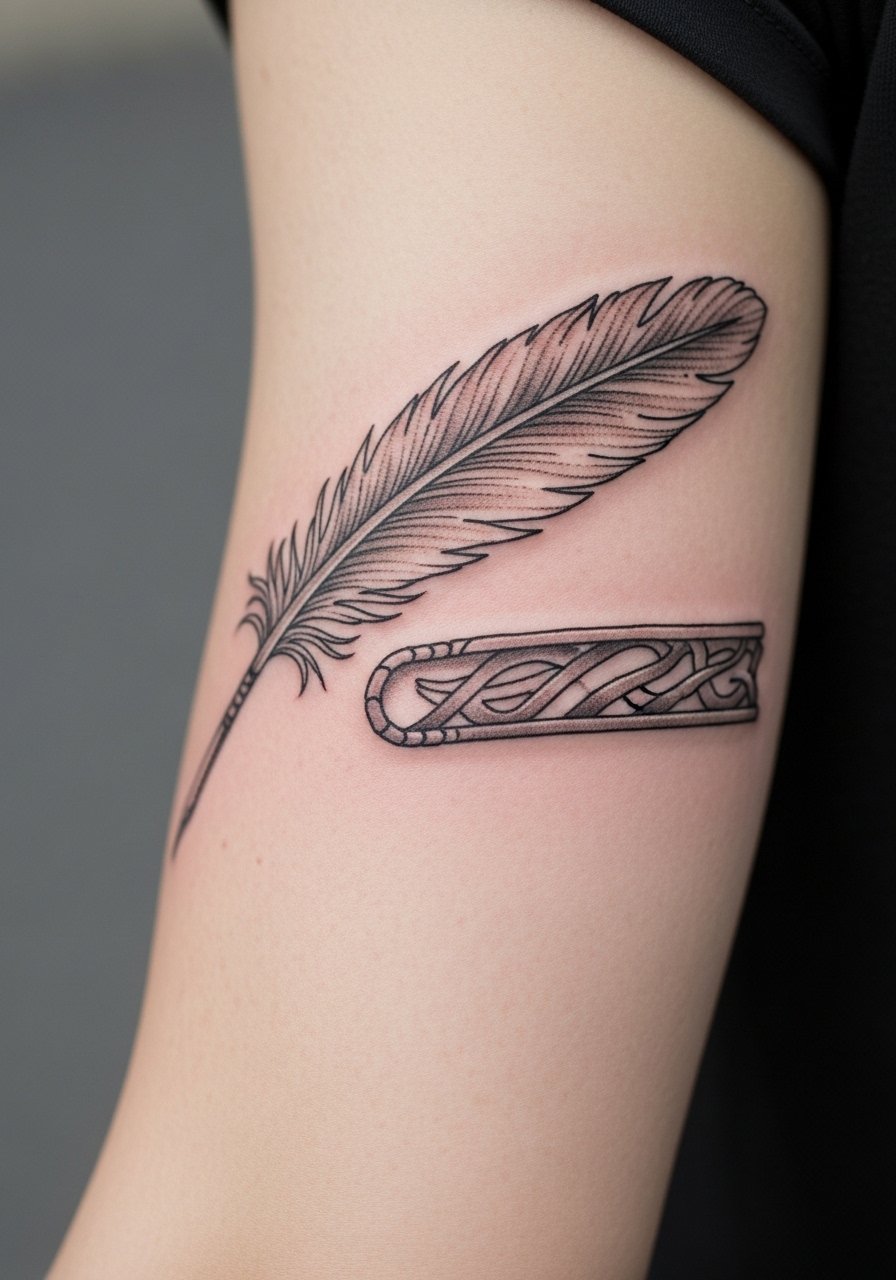
Feather quill wraps use tapered linework to simulate weight and movement. In consult, request feather barbs that are slightly bolder at the shaft to resist early blur. The mistake is doing too many micro-barbs that merge. Pain is mild to moderate on the lower bicep, and sessions are typically short. Healed at one year the feather keeps its sense of motion if spaced properly. For show-off wear a button front camp shirt or rolled sleeves to let the quill peek out.
9. Celtic Knot Thick Band, Full Forearm Wrap
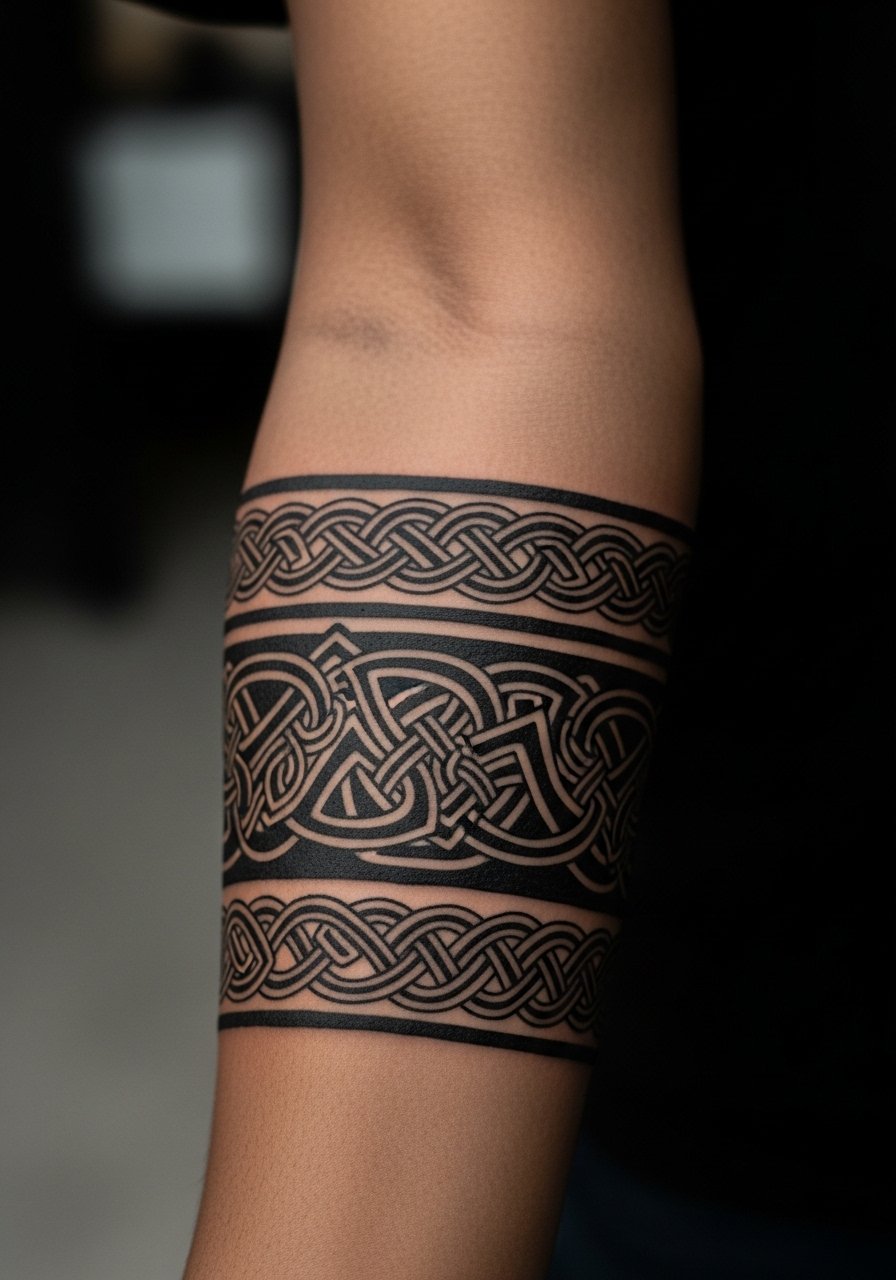
Celtic knot work ages well when line spacing is respected because the interlace requires breathing room. Tell your artist you want larger loops and fewer tiny interlocks so the pattern holds at year five. A common fail is compressing the design into a narrow band; that softens the knots quickly. Expect two sessions for a full wrap. This design hides well under shirts for conservative workplaces. Pair with a fitted black crewneck tee and leather cuff on the opposite wrist for balance.
10. Abstract Line Wave, Outer Forearm

Abstract wave bands play with line weight to follow the forearm’s shape. In the consultation, ask the artist to test the stencil while you flex so the rhythm of lines does not warp with muscle movement. The usual mistake is ignoring flex tests. Over time, thinner lines may blur into the thicker ones if spacing is too tight. Sessions are usually short and low on pain. It pairs well with rolled sleeves and a leather cuff bracelet men opposite the design.
11. Barbed Wire Armband, Upper Arm Edge
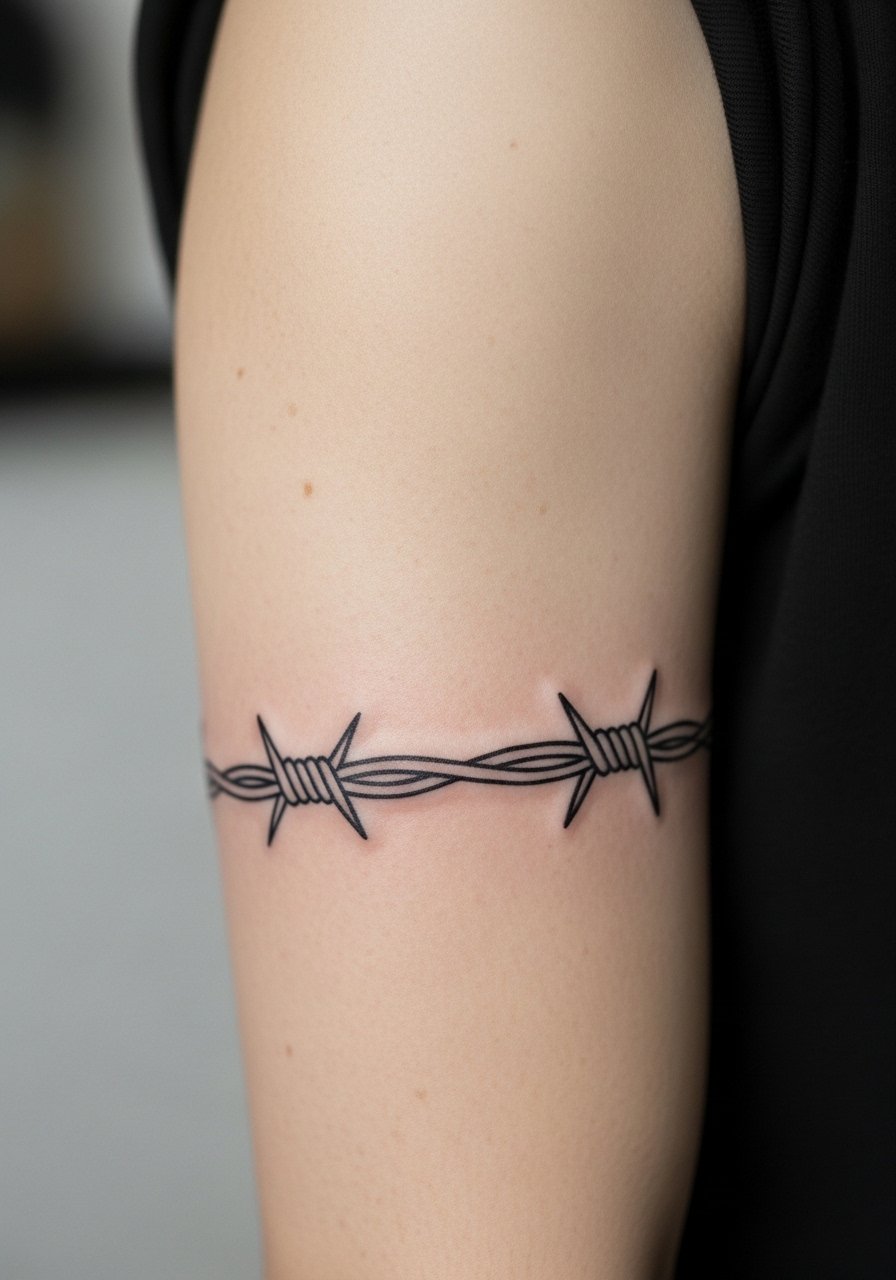
This classic motif reads tough and clean when done with confident, evenly spaced barbs. Ask for thick barb nodes and a small gap between wraps so the wires do not blur into a single band. The common regret is choosing a cliché placement without unique twists. Pain is moderate on the upper arm. If you want less predictability, request subtle texture between the wires rather than repeating the same stock pattern. Wear a sleeveless muscle tee to show the wrap without overdoing it.
12. Hourglass Sandflow Micro-Realism Band
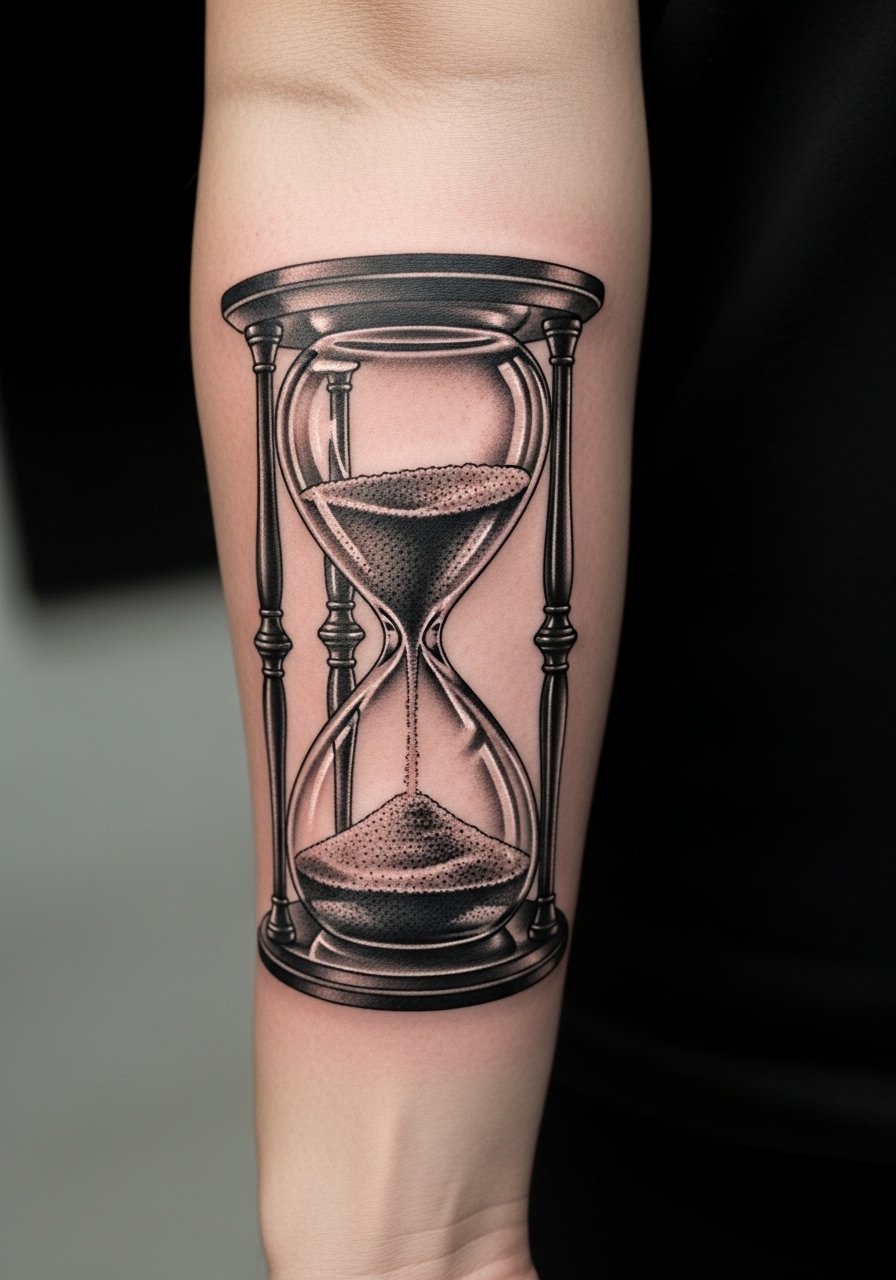
Hourglass motifs in a narrow band require crisp micro-shading to read as timekeeping rather than blur. Tell your artist you want clear negative space for the falling sand so the motion stays visible as the piece heals. The downside is over-detailing too small, which turns to gray within a couple of years. Sessions are longer for micro-realism. Placement on the mid-forearm gives room and lower movement than the wrist. For session wear, pick a loose tank top so the artist can access the area comfortably.
13. Negative Space Flex Illusion Band

This under-covered idea uses negative space strategically so the band changes visually when muscles contract. In consult, ask the artist to mock up the stencil on your arm and test with flexes. The main mistake is planning the illusion on the wrong anatomy where skin moves unpredictably. Healed, the effect still works if gaps are generous and lines are slightly thicker. Sessions are usually single appointment but involve stencil tweaks. Show it with a fitted black crewneck tee and short sleeves to let the flex effect show in motion.
14. Hybrid Cuff Extending Into Finger Webs
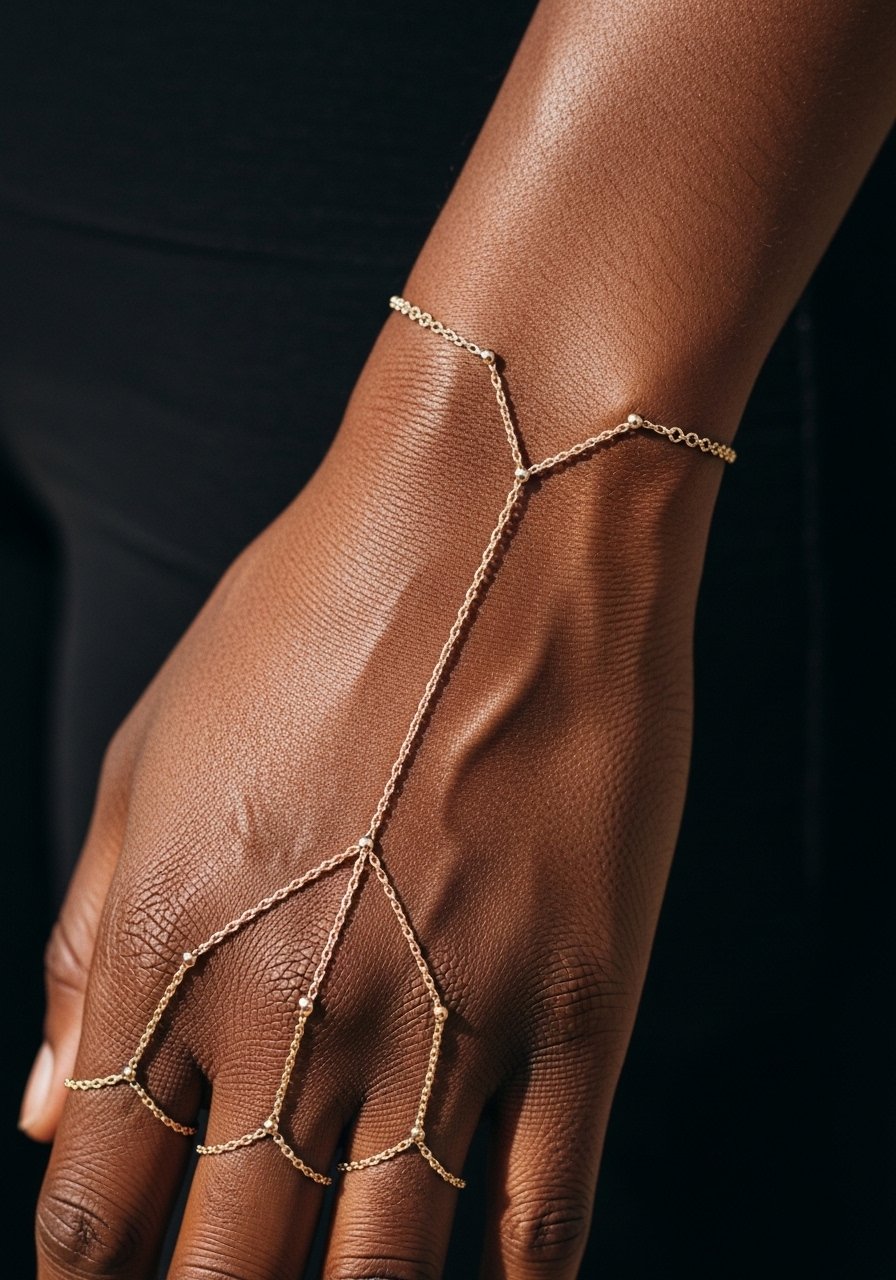
This cuff that continues into the finger web gives a cohesive cuff effect. Ask for clear termination points on the webbing so the ink does not creep into high-friction zones. A common issue is extending too far into finger webs, which suffer fast fading and require frequent touch-ups. Sessions cover both wrist and finger webbing and can be more uncomfortable around tendon crossings. For showing off, avoid overcrowding with rings and consider a single beaded bracelet on the other hand.
15. Watch-Stack Friendly Band with Tactical Breaks
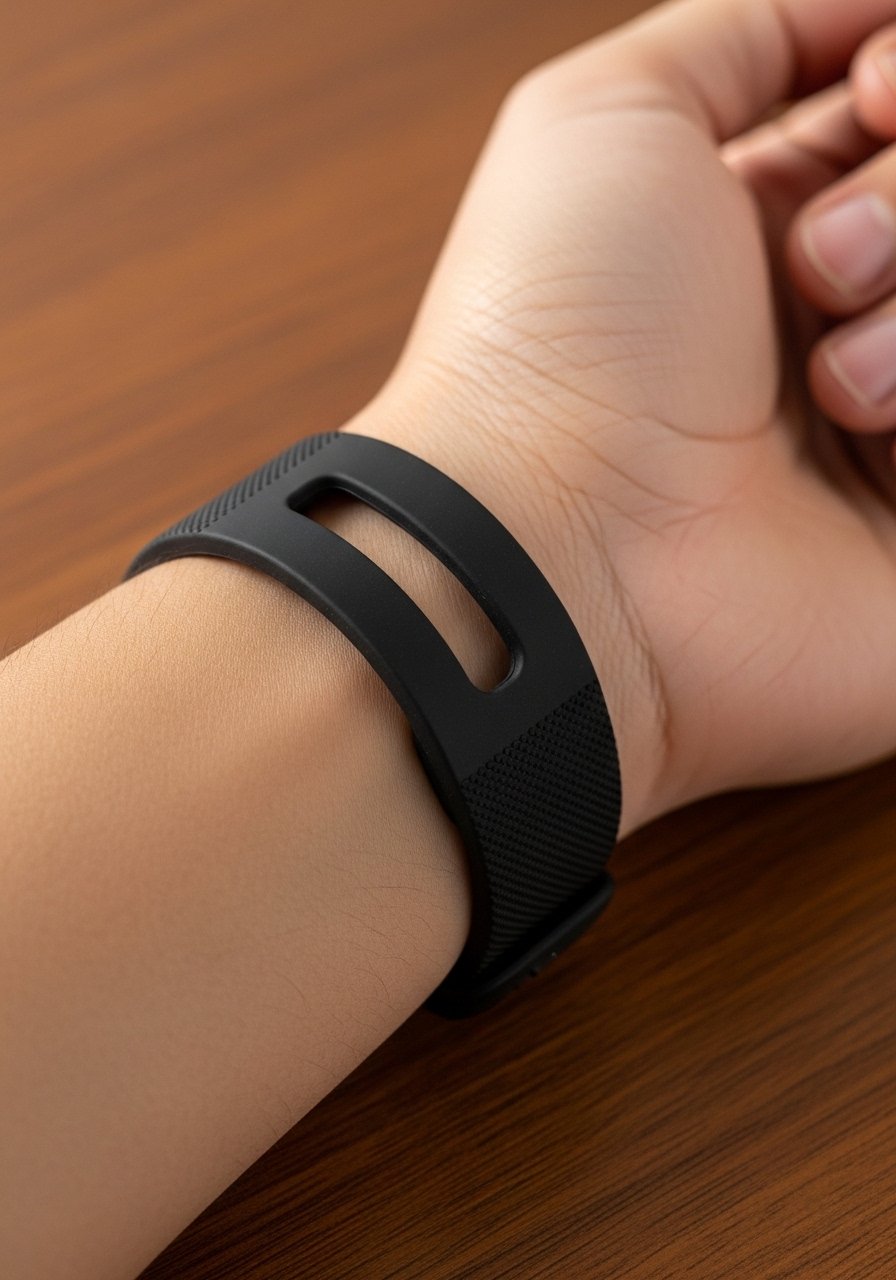
If you wear a watch daily, this design reserves small gaps so the band does not collide with tan lines or strap placement. Tell your artist where you wear watches so they can plan line breaks. People skip this step and end up with clashes of ink and hardware. This style heals like any wrist tattoo but benefits from strategic spacing. Session is short. Style it with your watch as part of the outfit rather than an afterthought. For watch-friendly display, choose a thin leather watch men that complements the band.
16. Dark-Skin Optimized Blackwork with UV Accent
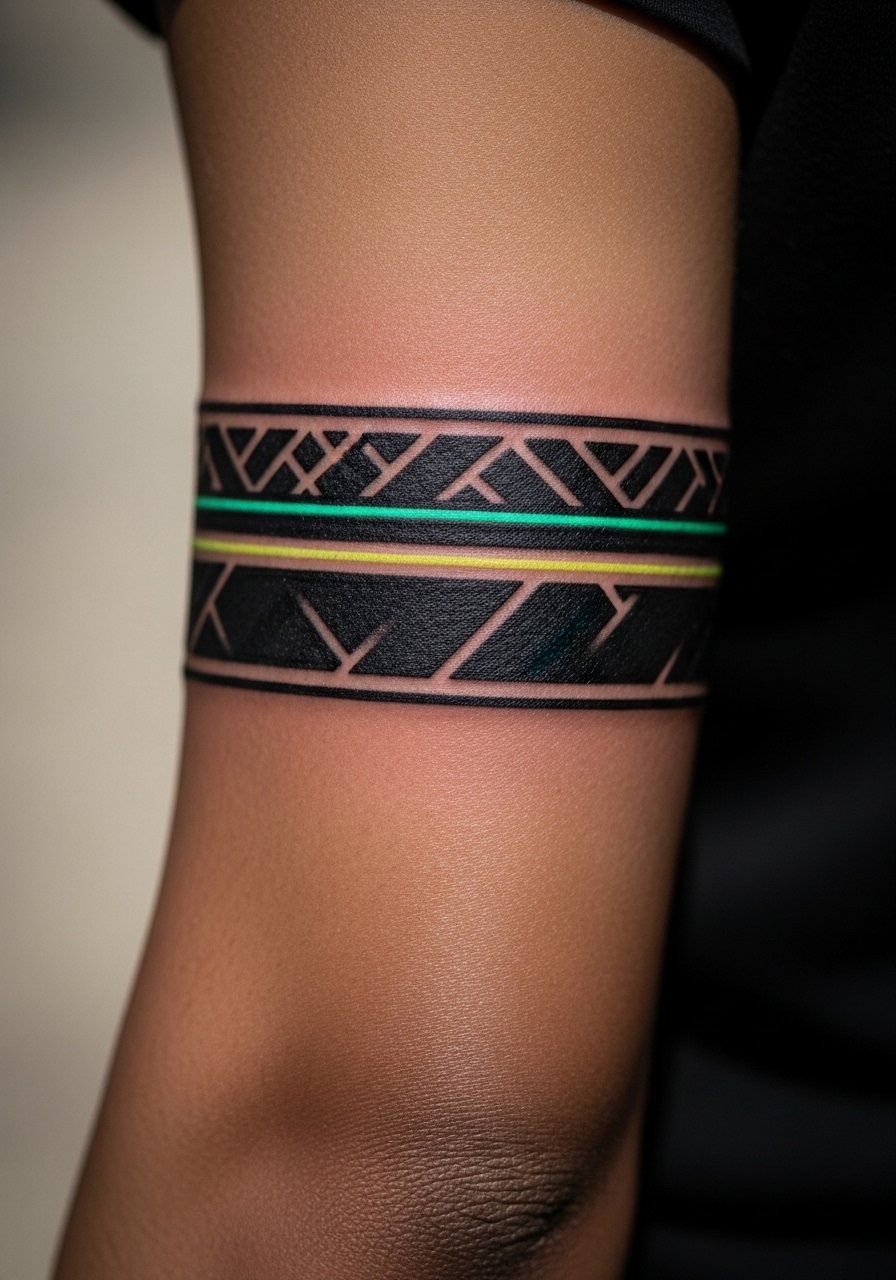
Dark skin can change how blackwork photographs. Ask for higher contrast with bolder line weight and selective negative space. If you want UV accents for night visibility, request them as sparing highlights rather than large fills so the effect does not depend on them. The mistake is copying line weights designed for lighter skin. Sessions vary by size. This approach keeps the band visible in daylight and offers a discreet glow for night events. Pair with a fitted black crewneck tee to make daytime contrast pop.
17. Braille or Morse Code Message Band
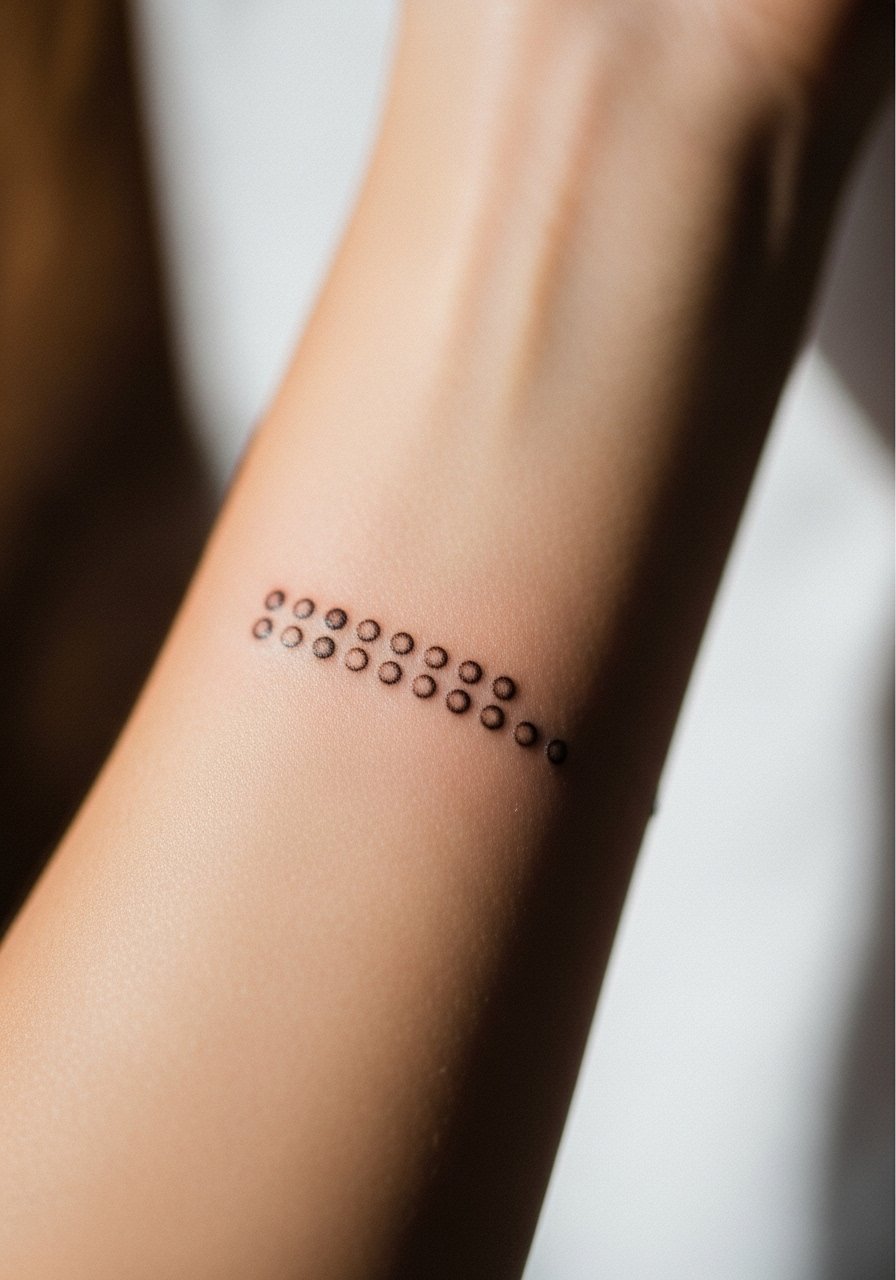
A coded band can carry a short message without obvious imagery. Ask the artist to plan spacing carefully because small dot clusters can merge if too close. The usual mistake is compressing characters into a narrow band and losing legibility. Sessions are short but require precision. Healed, the dots can soften so expect a light touch-up if you want crispness long term. For showing it off, roll up a linen short sleeve shirt men to the elbow to reveal the hidden message.
18. Soundwave Bracelet Band

Turn a meaningful audio clip into a band that reads like topography. Key consult items are width and vertical scale so peaks do not collapse into each other as the piece ages. The mistake is mapping a long waveform into a tiny band. Sessions usually under an hour but demand exact stencil placement. Over time peaks soften, so plan for a bolder base line if longevity matters. Style with a single beaded bracelet on the other wrist for texture contrast.
19. Roman Numeral or Date Band
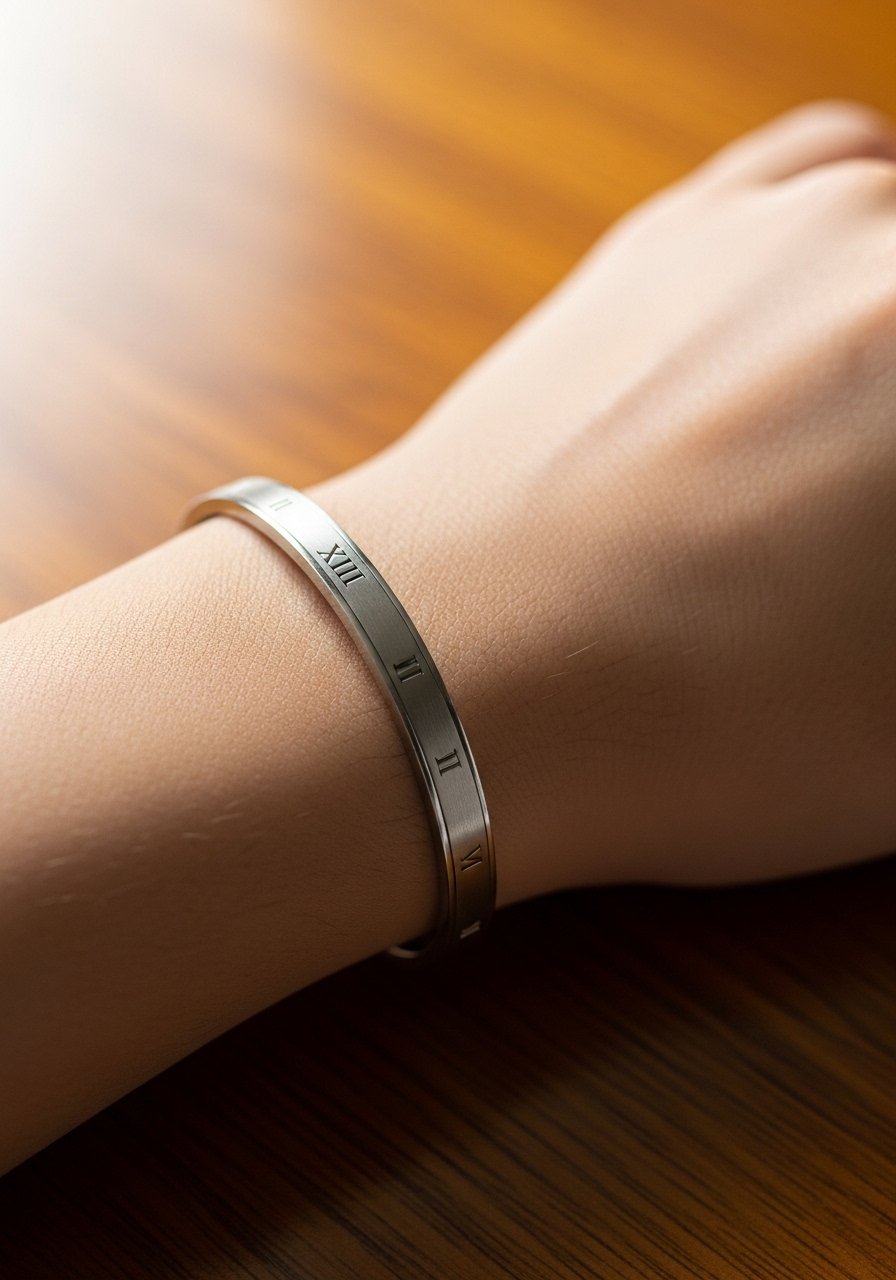
Dates in roman numerals read clean when executed with consistent spacing and a single typeface. Tell the artist the exact characters you want and ask to preview the spacing on your wrist before the first needle. The common error is choosing a tiny font that blurs into a line in a couple of years. Sessions are quick but sensitive at the wrist. For display, a thin leather watch men on the other side keeps the look balanced.
20. Micro-Script Band, Inner Forearm
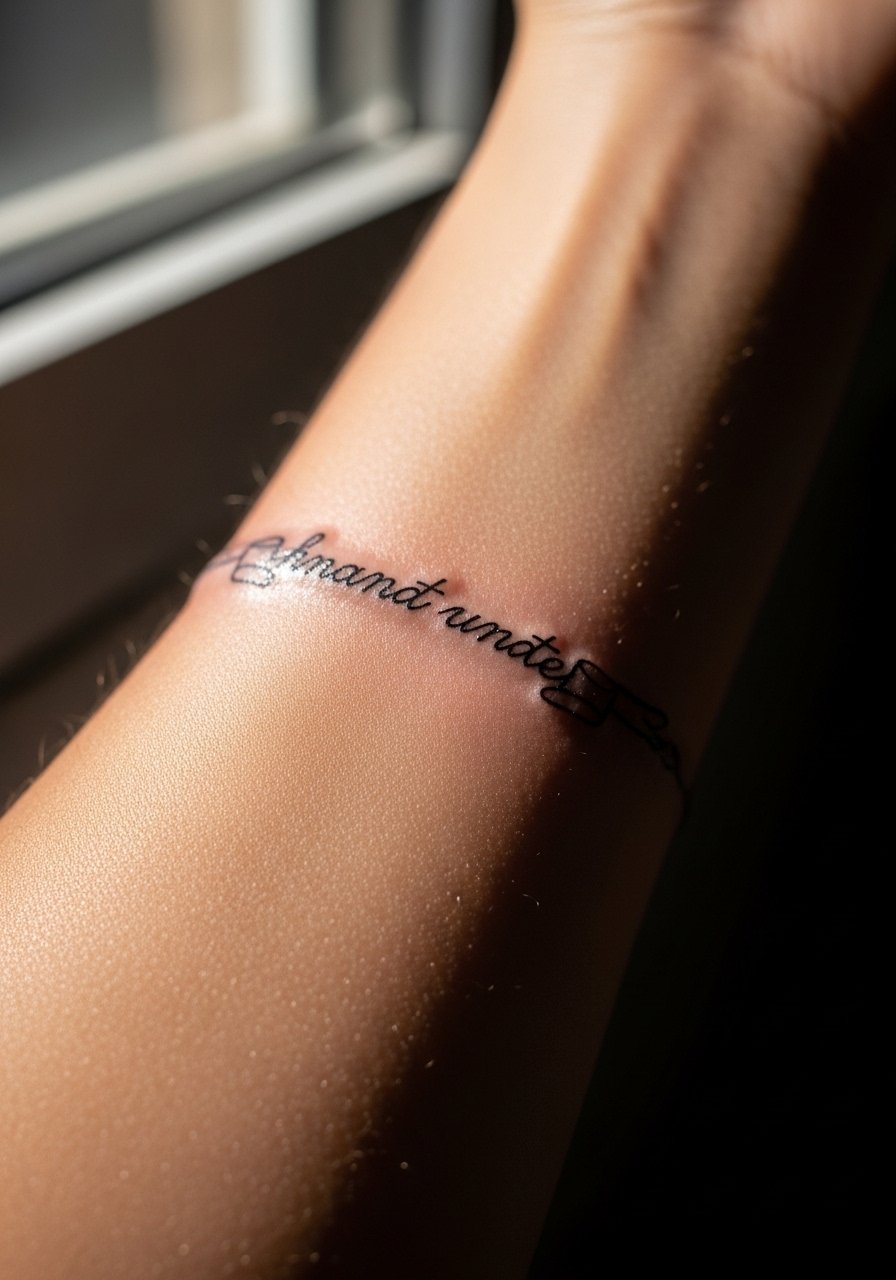
Micro script can be a discreet cuff when written to run around the arm. In consultation, request slightly thicker stroke weight than a purely calligraphic reference so the letters survive regular wear. The main mistake is using ultra-fine strokes that disappear. Expect a touch-up within one to two years for crispness. Inner forearm placement reduces friction compared to the wrist. Pair with a slim silver chain bracelet on the opposite wrist for subtle balance.
21. Repeating Chevron Band, Outer Forearm

Chevron patterns age well if the alternating lines have enough breathing room. Tell your artist you want a consistent rhythm and test the wrap in different arm positions. The mistake is making chevrons too tight, which causes visual muddiness as the piece settles. Sessions are usually quick. Healed, the rhythm still reads if spacing was generous. Wear rolled sleeves or a fitted black crewneck tee to highlight the pattern.
22. Mechanical Gearwork Band for a Technical Look
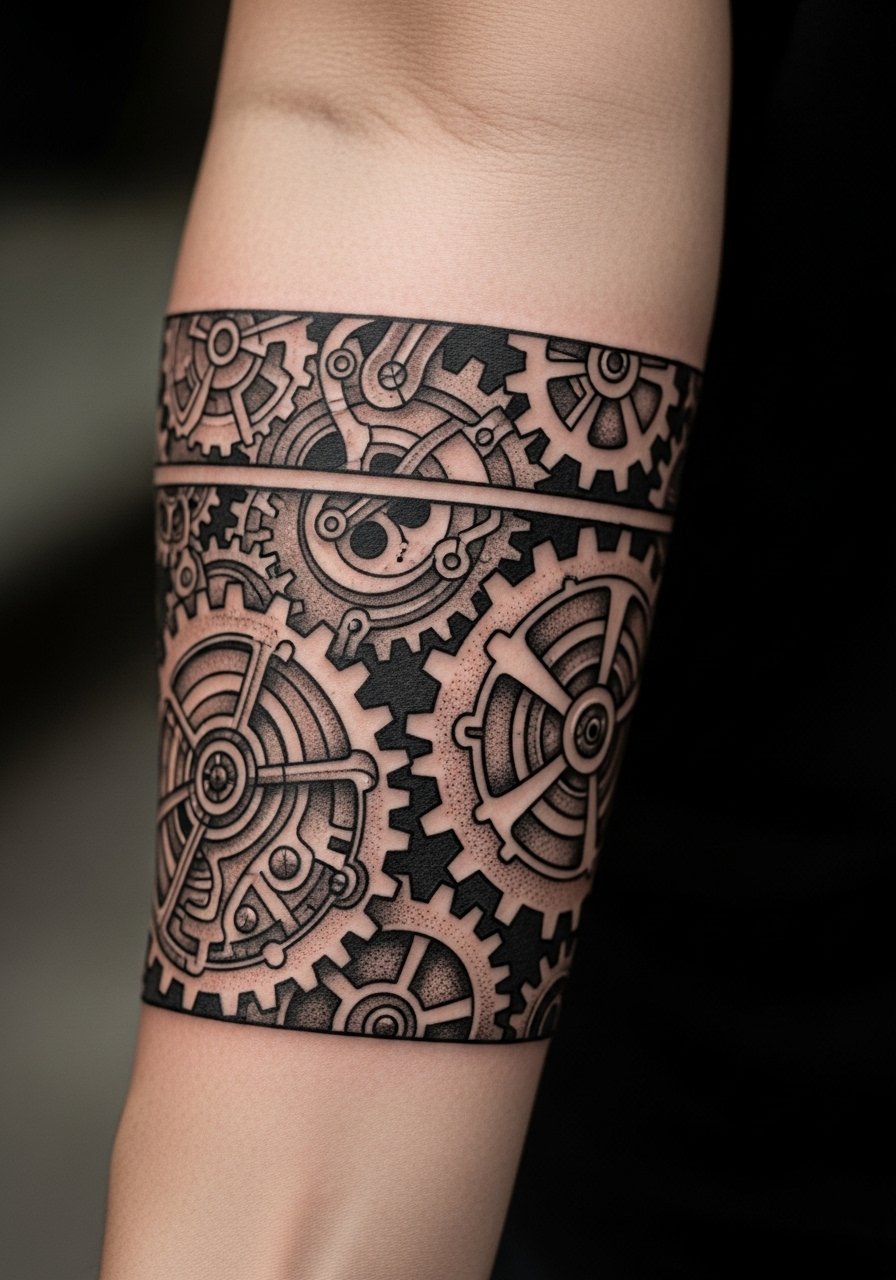
Interlocking gears create a mechanical cuff vibe that works for those who favor industrial aesthetics. Ask for clear separations and avoid tiny tooth details that fill in. The common mistake is over-detailing which loses clarity as shading softens. Expect one to two sessions depending on coverage and slight discomfort where shading is dense. Style it with rolled sleeves and a leather cuff bracelet men opposite the arm to complete the mechanic motif.
23. Minimalist Dot Band, Wrist or Forearm
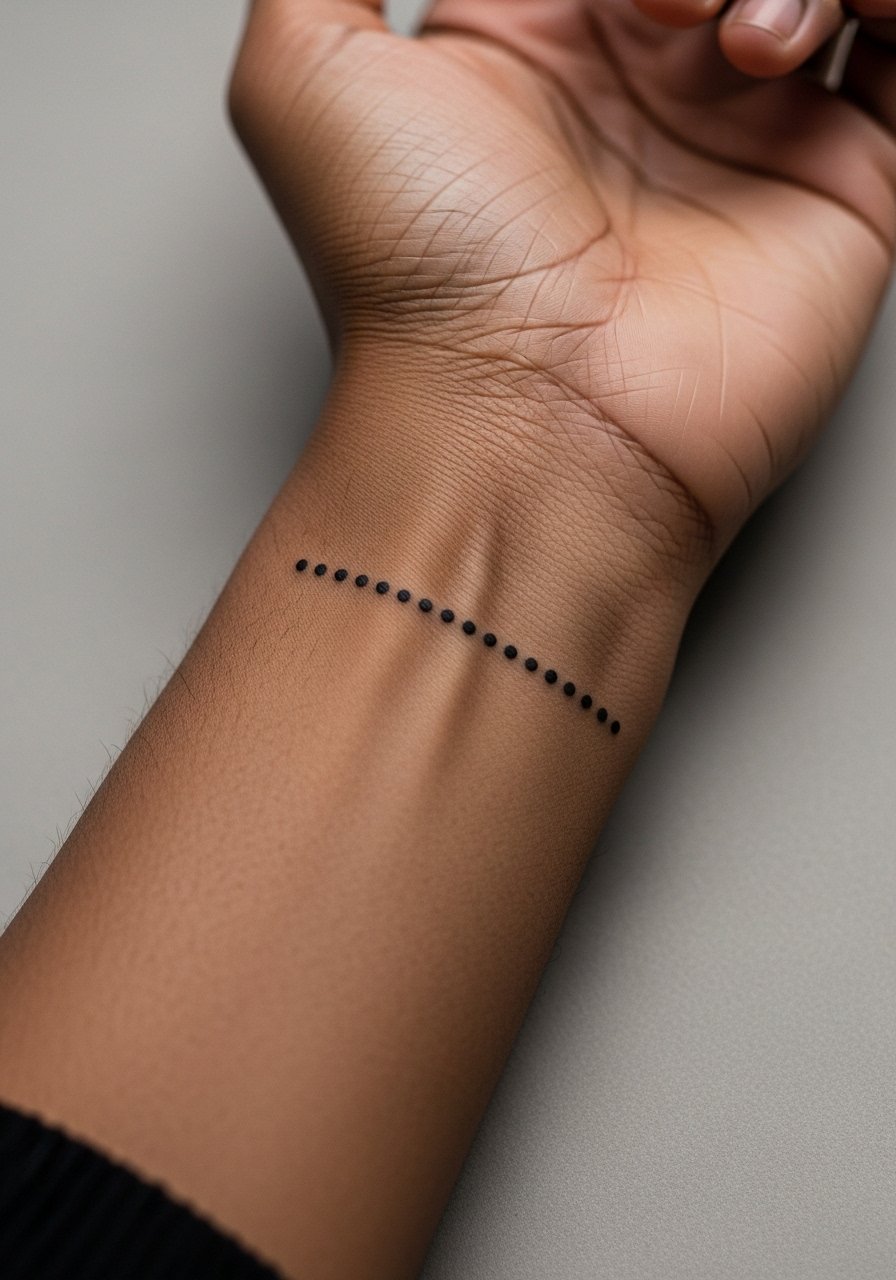
A single row of dots can be powerful when spacing and scale are calibrated to the anatomy. Tell the artist you want dot diameter and inter-dot spacing approved on your skin before starting. Too small and the dots fade into a line, too large and the band looks heavy. Sessions are quick but wrist placement is sensitive. Healed, the pattern can lose contrast, so plan for a follow-up touch-up if you prefer crisp dots. Pair with a single beaded bracelet for coordinated texture.
24. Mountain Range Band, Outer Forearm
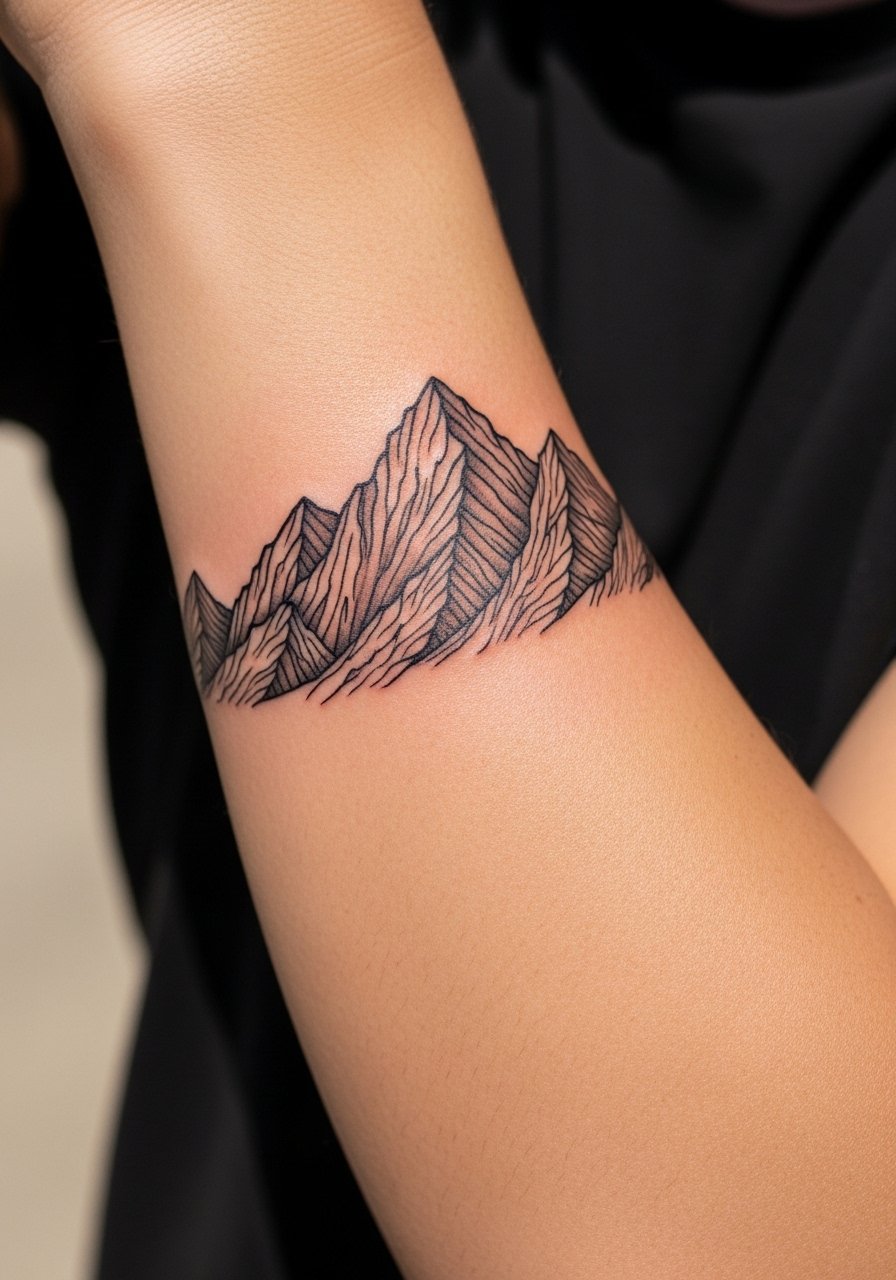
Landscape wrap designs like mountain ranges work best when simplified into a repeating silhouette. Ask for bold ridgelines and negative-space valleys so the peaks do not merge. The frequent mistake is excess fine texture in the valleys that softens quickly. Sessions are typically short and low on pain on the outer forearm. Healed, the silhouette maintains its form if lines are not too thin. Show it with rolled linen sleeves and a chambray rolled sleeve shirt for a rugged, outdoorsy look.
25. Barcode or Linear ID Band
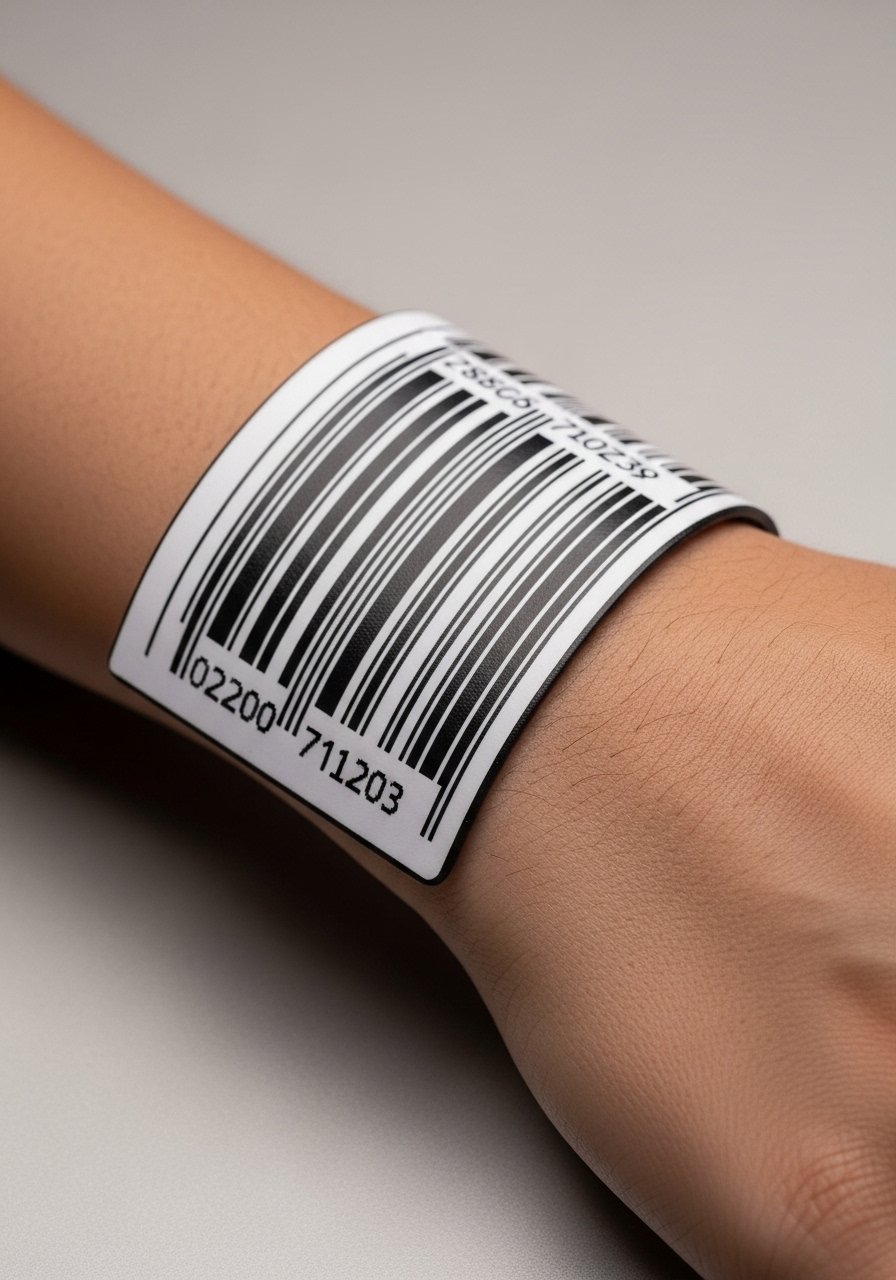
A barcode band can be visually bold and modern if the bars have adequate thickness and spacing. Tell the artist you want a simplified scan aesthetic rather than tiny barcode lines which will fill in. The usual error is too much detail in a small wrap. Sessions are quick but sensitive at the wrist. Over time the vertical rhythm will soften, so plan for touch-ups to keep contrast sharp. For show-off wear a thin leather watch men on the opposite wrist and avoid stacking on the barcode side.
26. Anchor or Nautical Rope with Tiny Accent Symbols
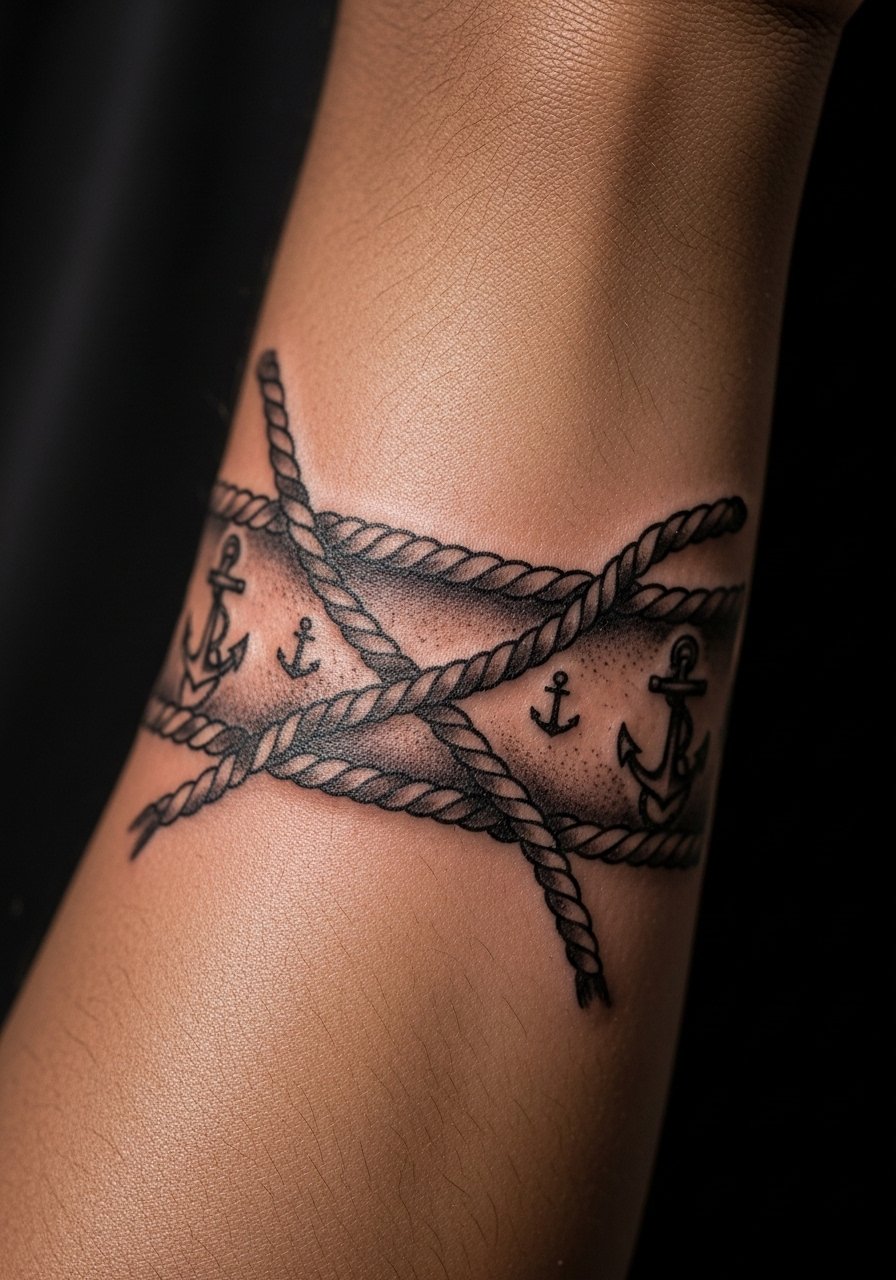
For an understated maritime nod, combine a braided rope band with small spaced icons like anchors. Ask for larger anchors with clear negative space around them so the icons do not blur into the rope texture. The mistake is running icons too close to dense shading. Sessions require shading finesse and can take two sittings if full forearm wrap is involved. Healed, the icons remain defined if spacing was respected. Pair with a sleeveless muscle tee or rolled sleeves for a sailor-ready look.
27. Abstract Fragmented Band with Optical Breaks

This modern take uses deliberate interruptions in the band to create movement and to allow the skin to age differently across the pattern. In the consult, stress that the breaks align with natural flex lines so distortion becomes part of the design and not a flaw. The common mistake is random breaks without anatomical logic which look messy once healed. Sessions are one appointment for most pieces. Healed, the interruptions make the band feel dynamic rather than static. For showing off choose rolled sleeves or a fitted black crewneck tee to let the negative space be visible.
Frequently Asked Questions
Q: How do I avoid an armband warping when I flex my forearm?
A: Do a flex test with the stencil in your consult. Ask the artist to place line breaks over the muscle belly or move the band slightly higher if you expect body changes from weight or workouts. From what I’ve seen, bands placed a bit above the pump area hold shape longer than those sitting directly across the widest point.
Q: Will blackwork bands wash out on darker skin tones?
A: Darker skin changes contrast but a heavier line weight and strategic negative space keep the pattern readable. Ask your artist to show healed examples on a similar skin tone during the consult. If you like subtle highlights, tiny UV accents can add night visibility but keep them minimal so daytime contrast stays the priority.
Q: Fine line wrist bands faded on me before. What are better long-term options?
A: Wrist skin and constant friction accelerate fading. Pick slightly thicker single-line work or a repeating motif with negative space. If you want a delicate look, plan on touch-ups at year one to retain crispness. Also, remove wrist accessories during healing to lower friction.
Q: Should I use protective film or dry-heal for armband aftercare?
A: Opinions split on protective film versus dry healing. One camp favors protective film for a sealed environment in the first 24 to 48 hours. The other camp prefers breathable care to avoid trapped moisture. Ask your artist how they handle forearm pieces and follow their protocol for the first 48 hours.
Q: What should I wear to the appointment for an inner forearm or wrist band?
A: Wear clothing that the artist can easily roll or slide aside without compressing the area. For inner forearm pieces, a linen short sleeve shirt men you can roll to the elbow is ideal. For wrist work, sleeveless or short sleeves that do not constrict let the artist position your arm naturally.
Q: How often do armband tattoos need touch-ups?
A: It depends on line weight, placement, and sun exposure. Fine line wrist bands may need a light touch-up at year one. Thicker blackwork and well-spaced motifs often go three to five years before touch-ups. Expect to schedule a six-week check if any areas did not retain saturation during initial healing.
