
Fine line Creation of Adam hands dominate feeds, but the trending look often needs real-world tradeoffs to last. I've seen tiny forearm reaches that blur by year two, back pieces that keep crisp detail for a decade, and appointments canceled at the last minute that wreck healing windows. Read these 27 classic takes and the exact choices you can make in consultation so the design you love still looks good years from now.
1. Fine Line Hands on Inner Forearm
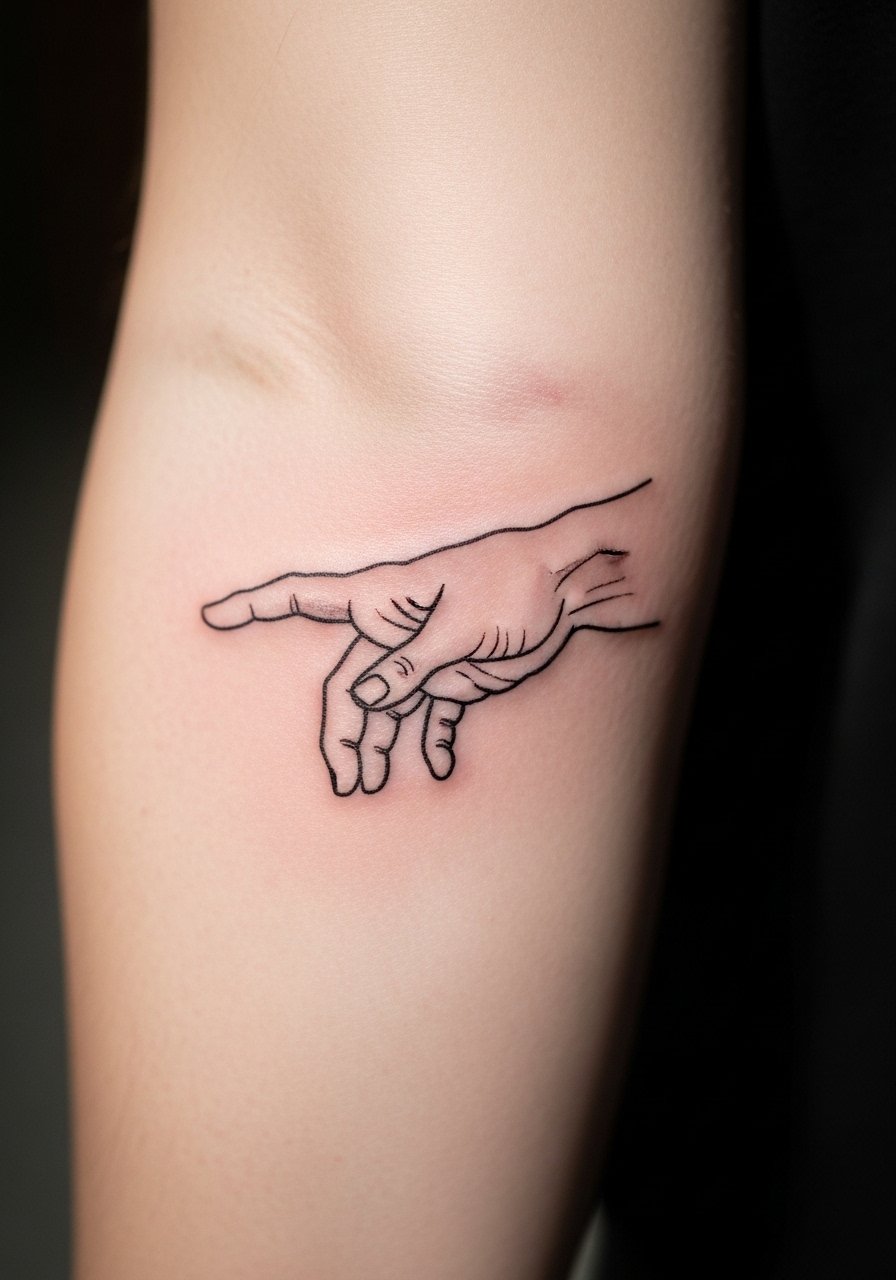
I've seen more forearm fine line hands than any other small Creation motif, and the reason is simple: they read like a quiet nod to the original without overwhelming the arm. Tell your artist you want a slightly heavier line weight than the thinnest single-needle samples, ask for portfolio shots on similar skin tone, and set a realistic size at 2–3 inches so the spacing survives touch-ups. Common mistakes are going too small and expecting the same crispness after heavy sun exposure. Pain is mild, session time is short, and touch-ups around year two are common for active sun exposure.
2. Micro-Realism Sistine Scene on Upper Back
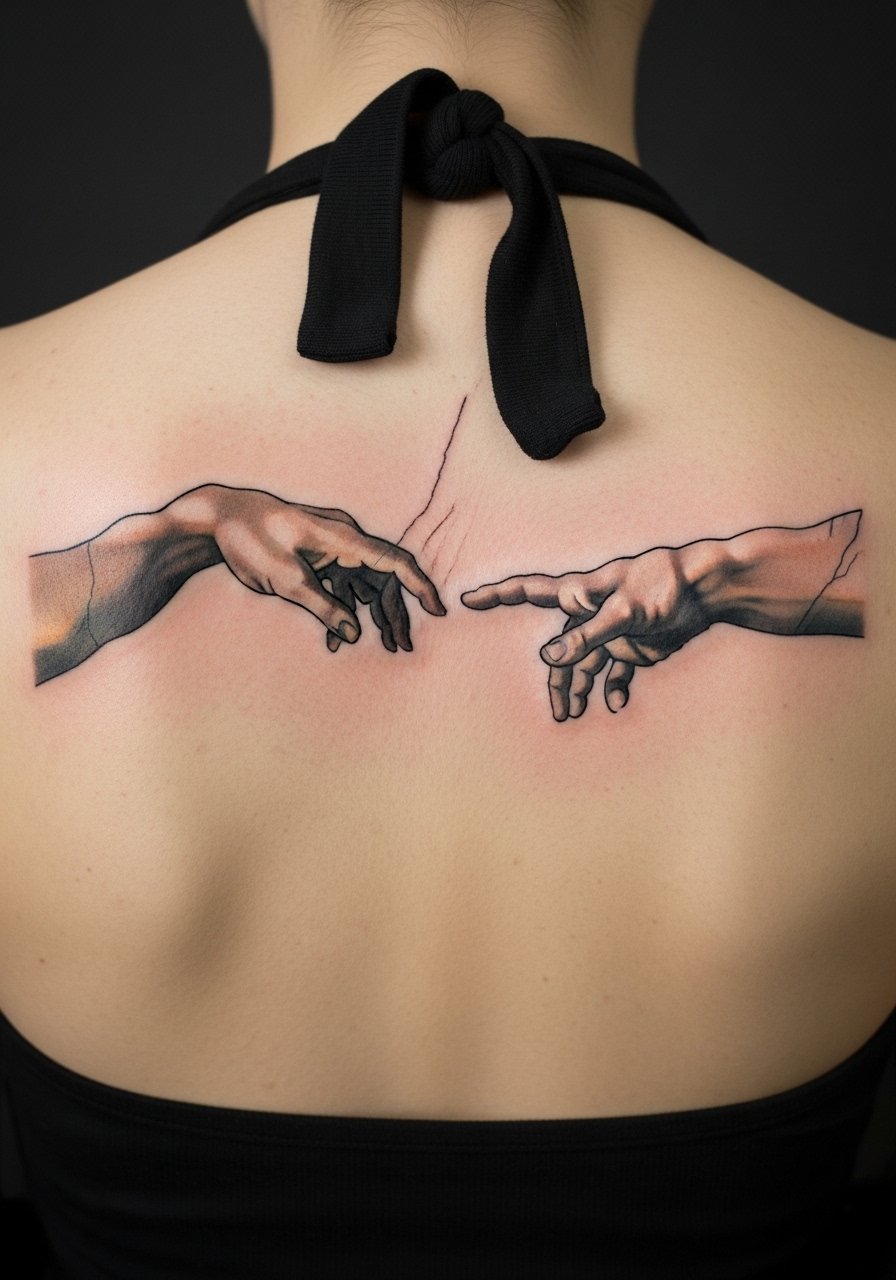
Full Sistine scenes belong on the upper back when you want scale and depth. Expect multiple sessions spaced weeks apart and a discussion about color saturation for flesh tones that will stand up to UV. In consultation, bring close-up references of healed back realism so the artist knows the palette you like. The rib-to-back stretch is lower here, so detail holds better than on the chest. Sessions are long and moderately painful under the shoulder blades. Plan clothing for the appointment like a loose tank that slides aside, which keeps the area clean while you get tattooed.
3. Neo-Traditional Outstretched Arms on Outer Thigh
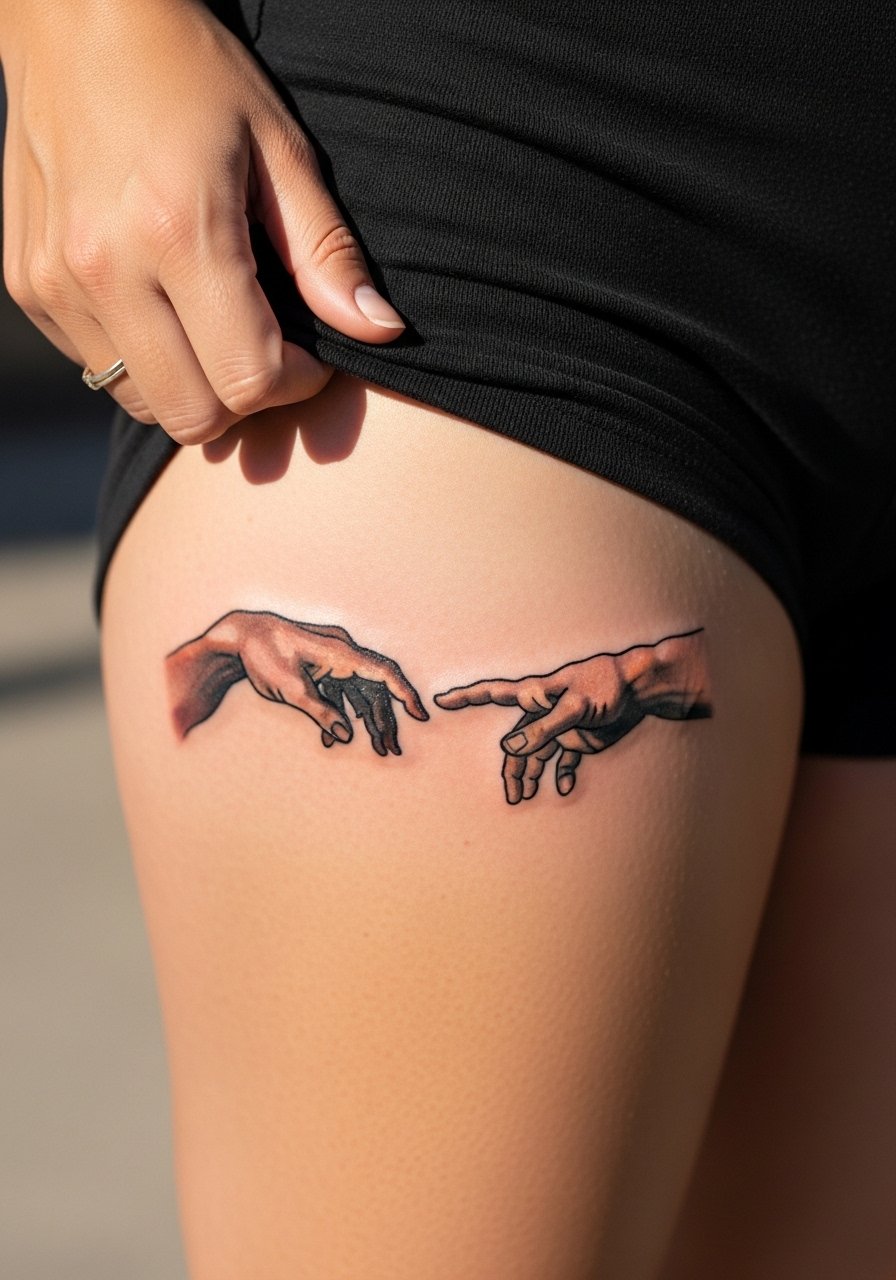
Neo-traditional versions let you keep the gesture but add bold color and frames that age more forgivingly than fragile linework. For this outer thigh placement, ask for saturated color fields and a simplified background so the hands stay legible even with minor stretch. The thigh handles larger sessions well and pain is moderate. Watch out for weight fluctuation because significant gain or loss can change proportions. When showing it off, high-waisted shorts or rolled jeans work well with layered belts and leather accents, especially for summer looks. For the session, bring loose athletic shorts so the artist can access the area easily. high-waisted denim shorts
4. Minimalist Single Hand Wrist Tattoo
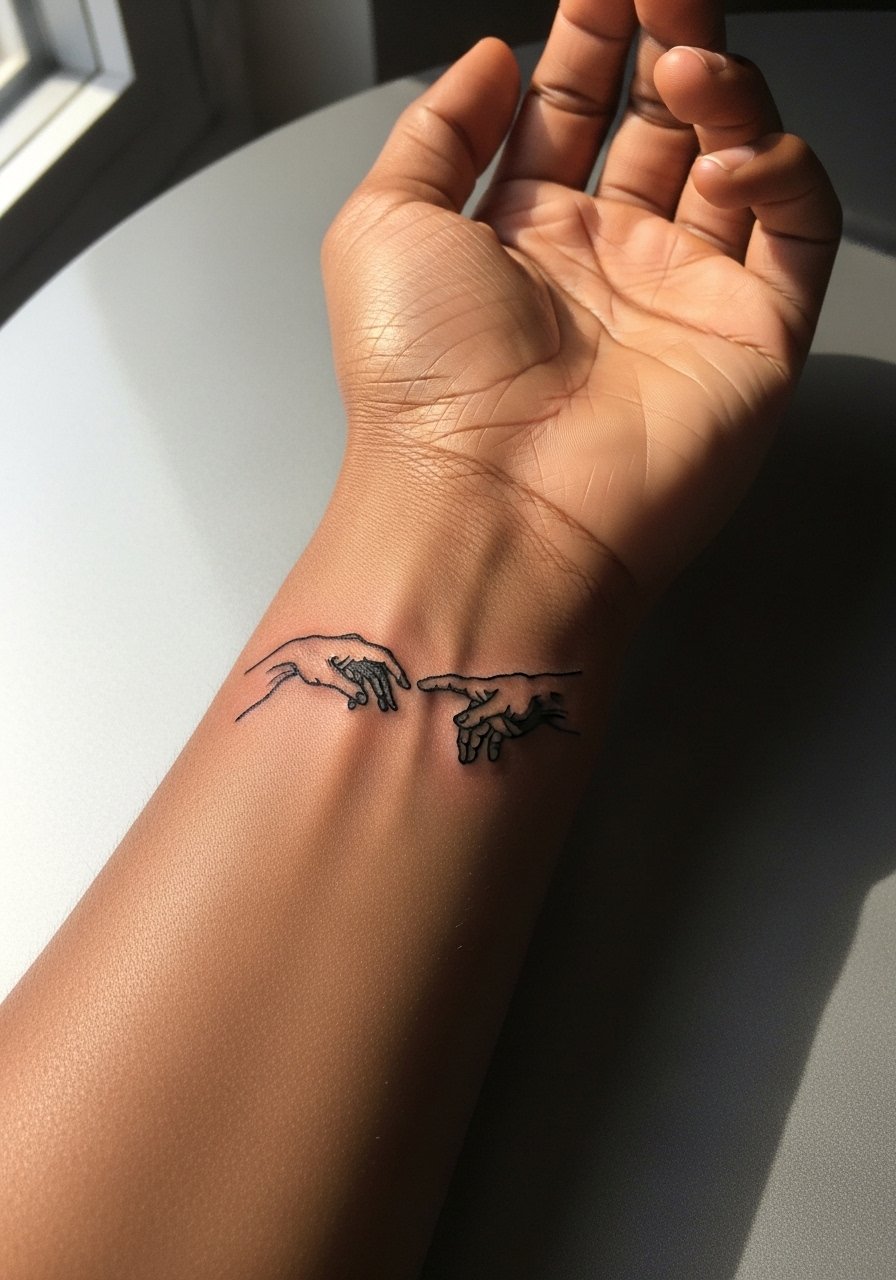
Wrist placements sell the minimalist God-finger motif for people who want a visible nod without a full scene. Fair warning, wrists get friction from watches and cuffs so thicker blackwork holds better than the finest needle. Tell the artist you prefer 0.25mm or slightly heavier line weight and that you use a wristwatch daily. One session, short pain, and expect touch-ups at 1–2 years if you move sleeves a lot. Pair the wrist piece with a thin leather cuff or a minimalist watch to highlight the area. thin leather cuff bracelet
5. Watercolor Silhouette on Shoulder Blade
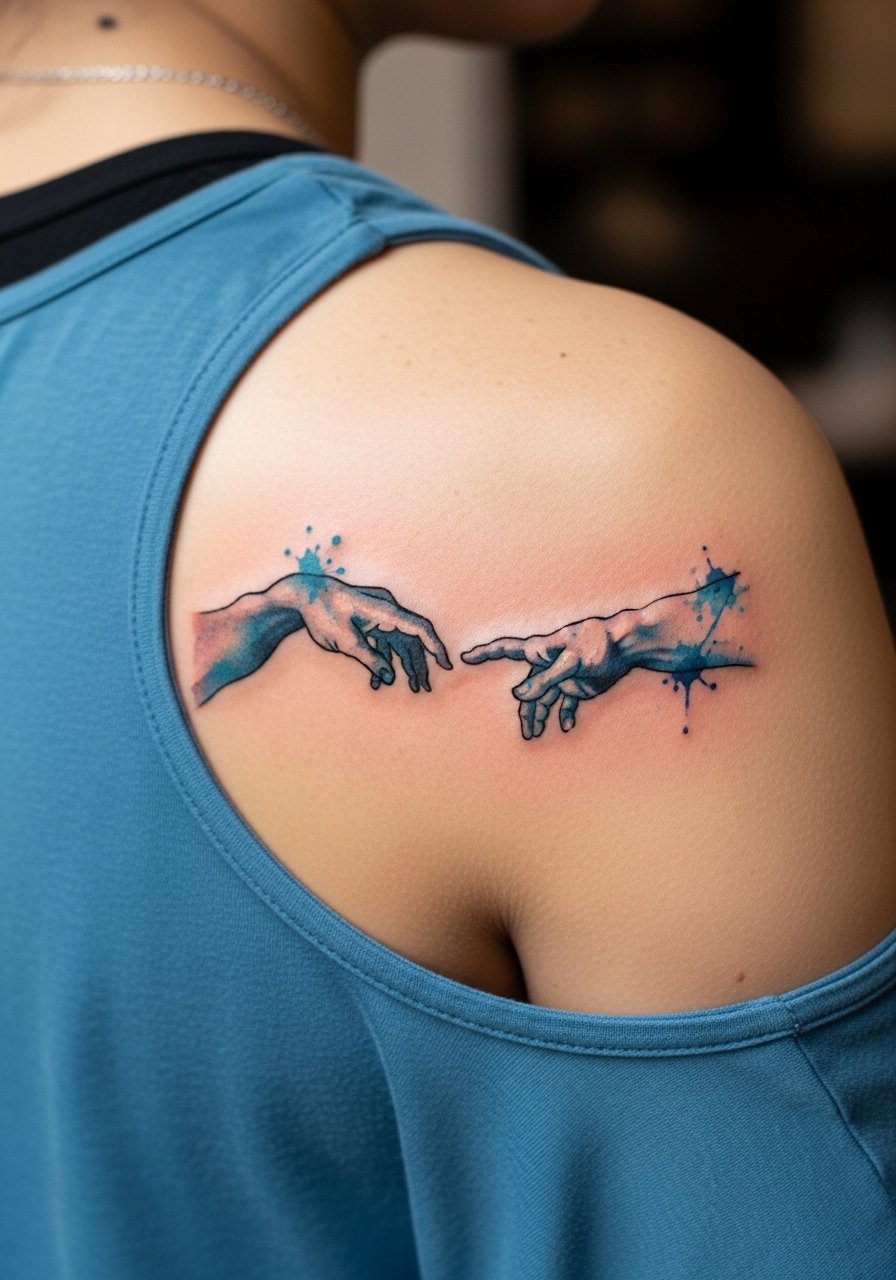
Watercolor silhouettes give the hands an ethereal backdrop while keeping the touchpoint simple. The downside is color fade, especially with light blues on exposed shoulders. Ask your artist for stronger saturation under the watercolor wash and a small black outline around the hands if you want longevity. Expect two sessions and moderate pain when the needle crosses the shoulder blade. For outfits, a backless or low-strap top shows the shoulder blade without forcing a reveal. backless halter top
6. Ornamental Framed Touch on Collarbone

Ornamental frames lift a small hands motif into jewelry-like territory and suit the collarbone because the frame sits naturally along the bone. In consultation, ask for geometry that respects collarbone curvature so the frame does not distort with movement. Collarbone work can be surprisingly sharp in pain but sessions are short. A common mistake is asking for too much tiny detail in the frame. Pair with off-shoulder blouses and a delicate drop necklace to keep attention on the area. off shoulder blouse
Studio Day Picks
The first six ideas above include wrists, collarbones, shoulders, and an upper back realism. Those placements each need different prep from clothing to ointments.
- InkGuard Balm. Lightweight balm many users prefer in humid conditions to reduce ink migration on fine line wrist and forearm pieces.
- OzHeal Salve. Non-greasy salve that some people report speeds epithelialization for thigh and ribcage sessions.
- Tattoo Goo Lite. Absorbs sweat better on mobile areas like knees and inner thighs, which helps early healing.
- Fragrance Free Gentle Body Wash. Keeps detailed areas like fine line forearms clean without irritating fresh linework.
- Hustle Butter Deluxe. Favored for realism healing because it is thinner than heavier ointments and less likely to clog fine needle channels.
7. Ignorant Style Blocky Hands on Calf
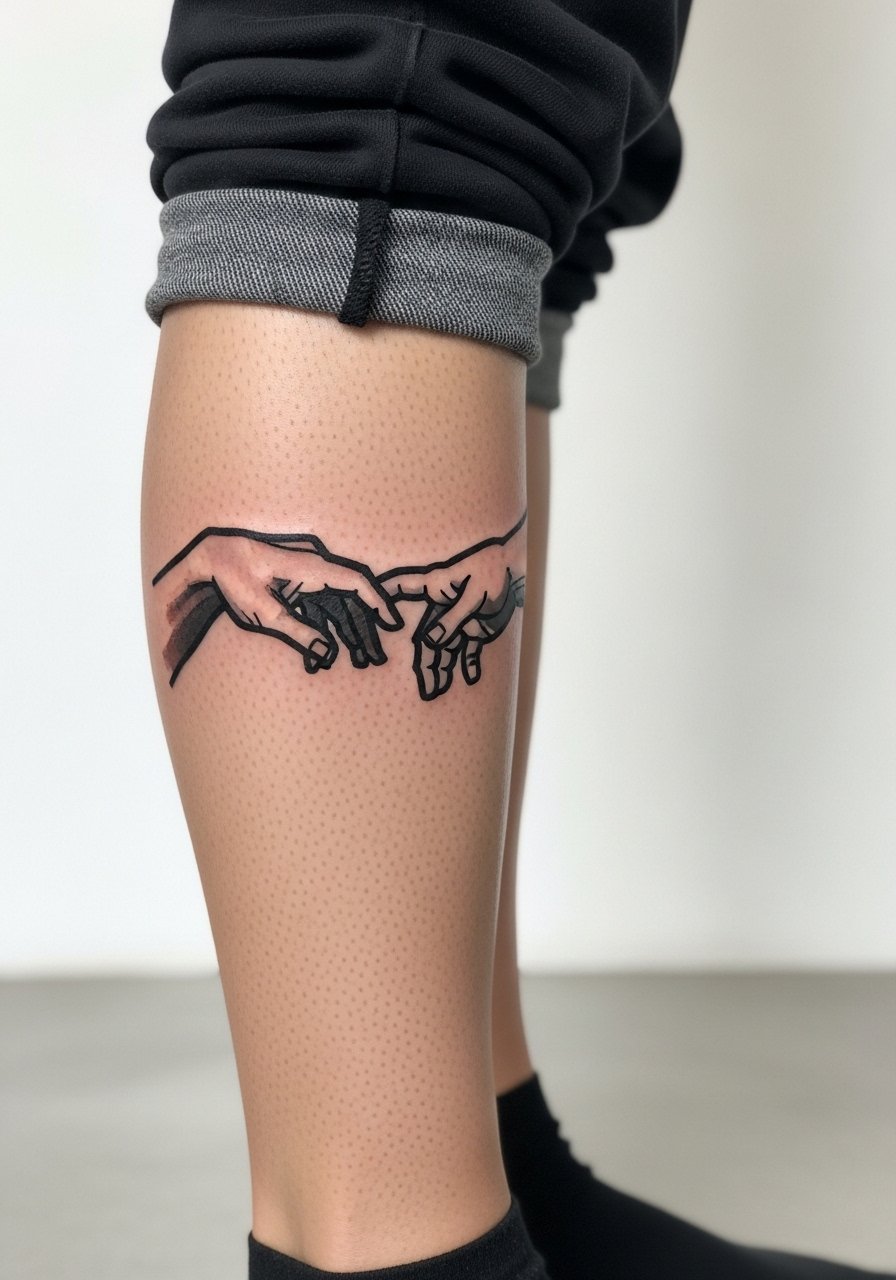
The ignorant style is a playful low-fi take that ages well because the bold outlines simplify healing. For calf placement, the skin takes ink reliably and blowout risk is lower than on the wrist. Tell the artist you want solid black fills and minimal internal shading. Common mistakes are asking for tiny internal detail that muddies during healing. Sessions are comfortable if seated, and ankle boots with cuffed pants hide the piece in professional settings. cuffed jogger pants
8. Traditional American Hands with Banner on Bicep
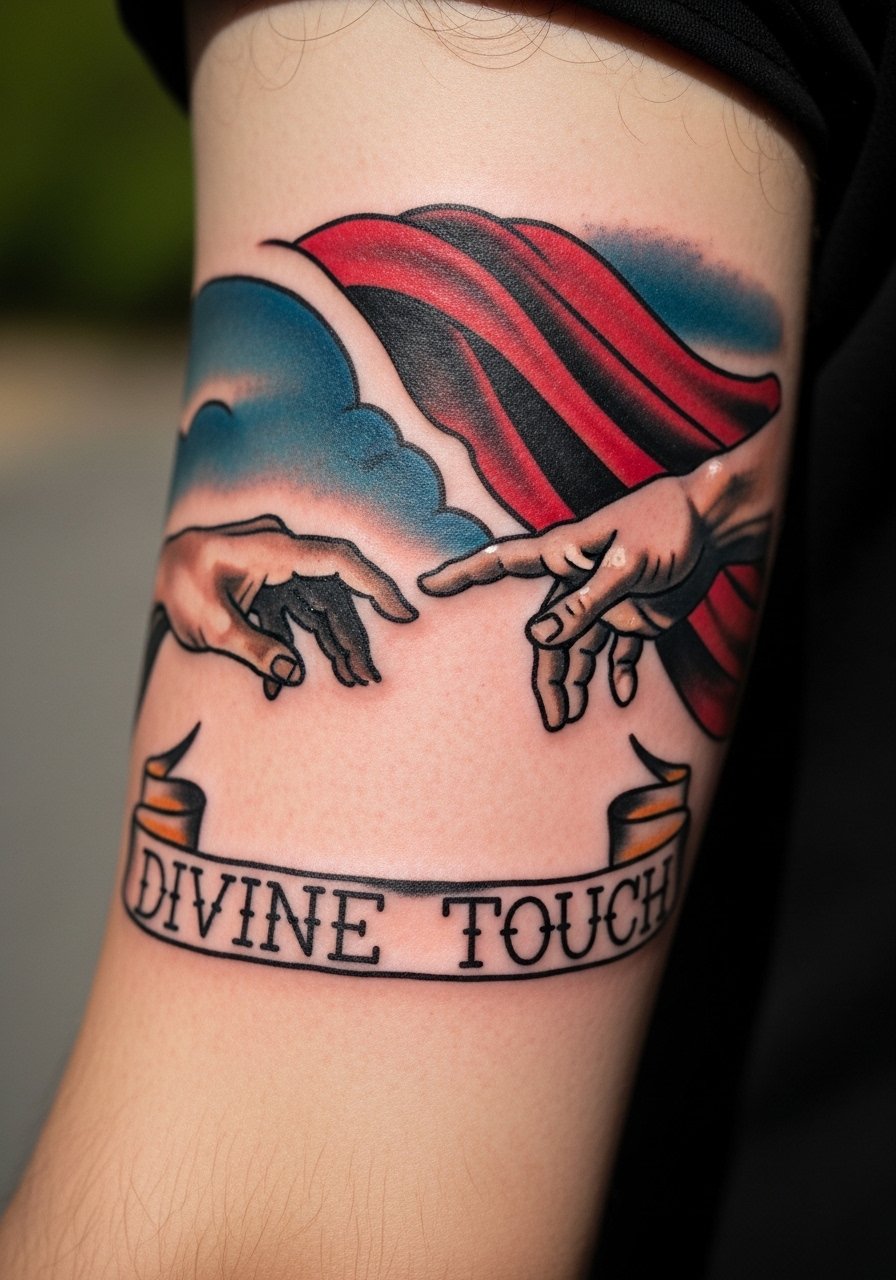
Old-school flash styles translate the touch motif into bold shapes and readable color blocks. The bicep is forgiving for saturation and will age into a solid silhouette. Ask for bold outlines and classic color fills rather than micro-detail. Mistakes include tiny typography in the banner that blurs over time. Pain is mild and sessions are single to double length depending on color. Pair with sleeveless tees to show the bicep work. loose button down shirt
9. Single-Hand Ankle Mini
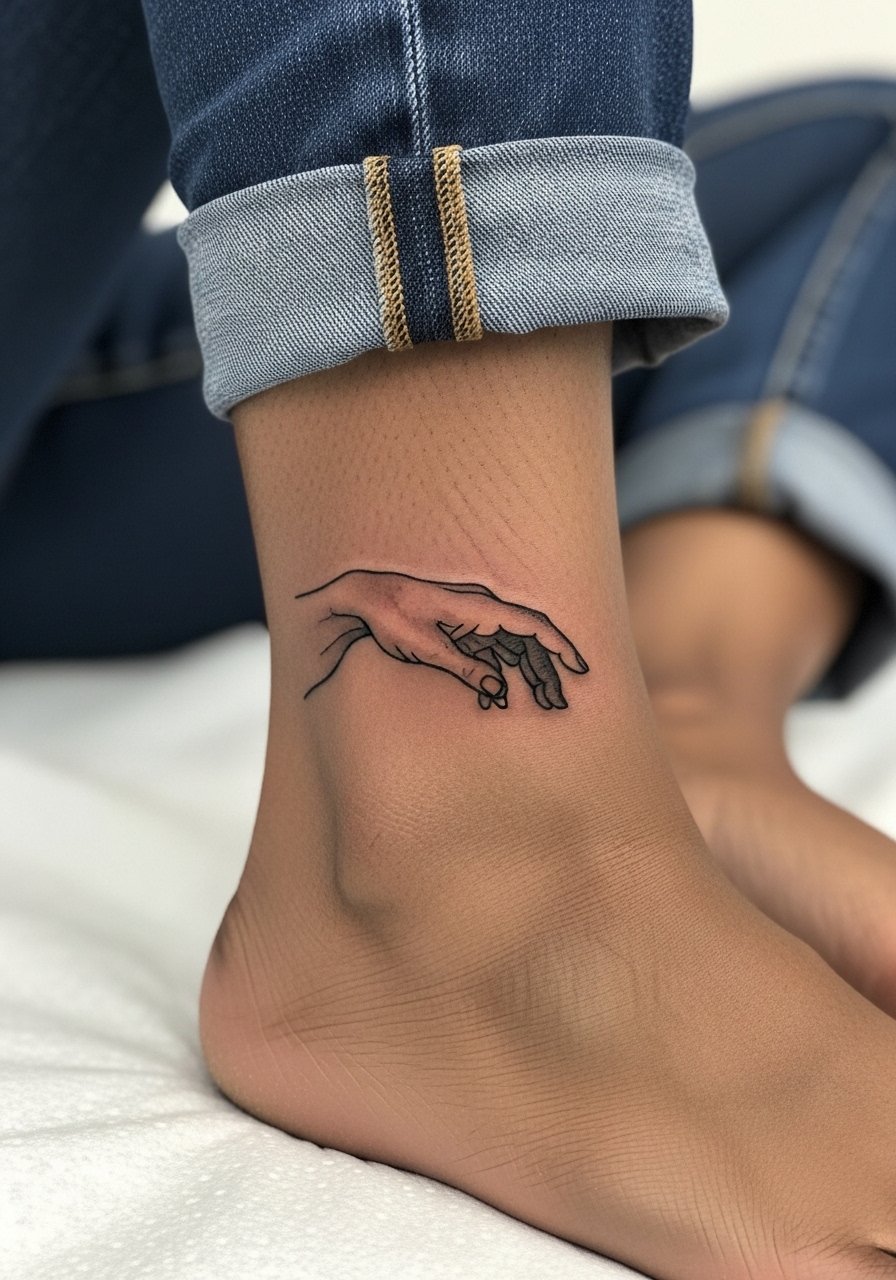
Ankle minis are subtle and great for people who want a small nod to the pose. The ankle sees a lot of friction from shoes, and the skin here can thin. Ask for slightly heavier linework and avoid micro-shading. Mistakes include going too small and then needing a touch-up after constant rubbing. Pain is medium for bone proximity, session time short. For showing it off, roll jeans or choose sandals that leave the ankle visible.
10. Above-Knee Concealable Full Scene
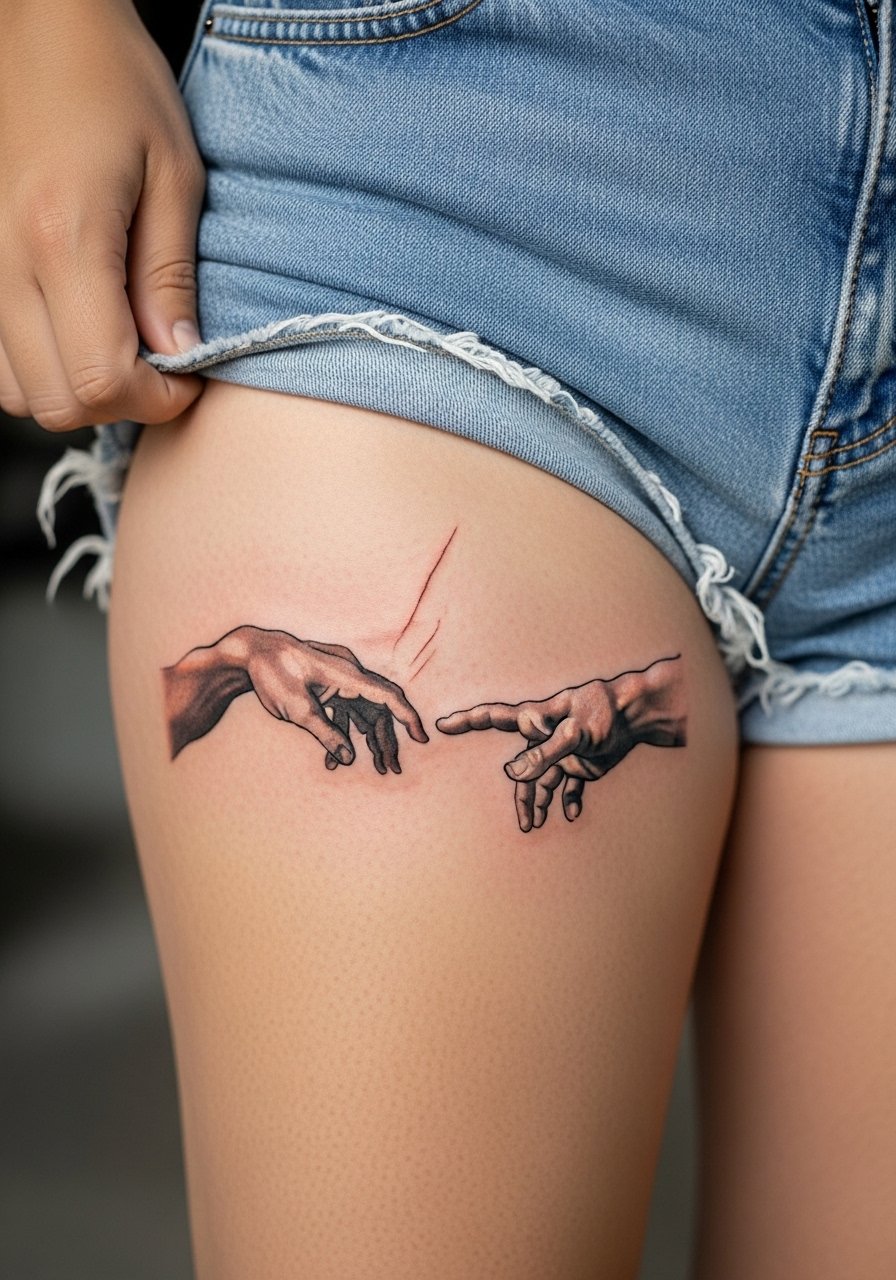
Above-knee placements let you get a larger scene while keeping it concealable under pants. Mention in consult that the skin in this area moves with walking and squatting, and request composition that avoids small horizontal details across dynamic folds. A major benefit is reduced daily exposure to sun. Sessions are medium-length and pain is moderate. The common mistake is packing in too much fine detail across a zone that expands with weight change. For session comfort, bring loose shorts you can adjust easily.
11. Dark Skin Adaptation with Bolder Linework
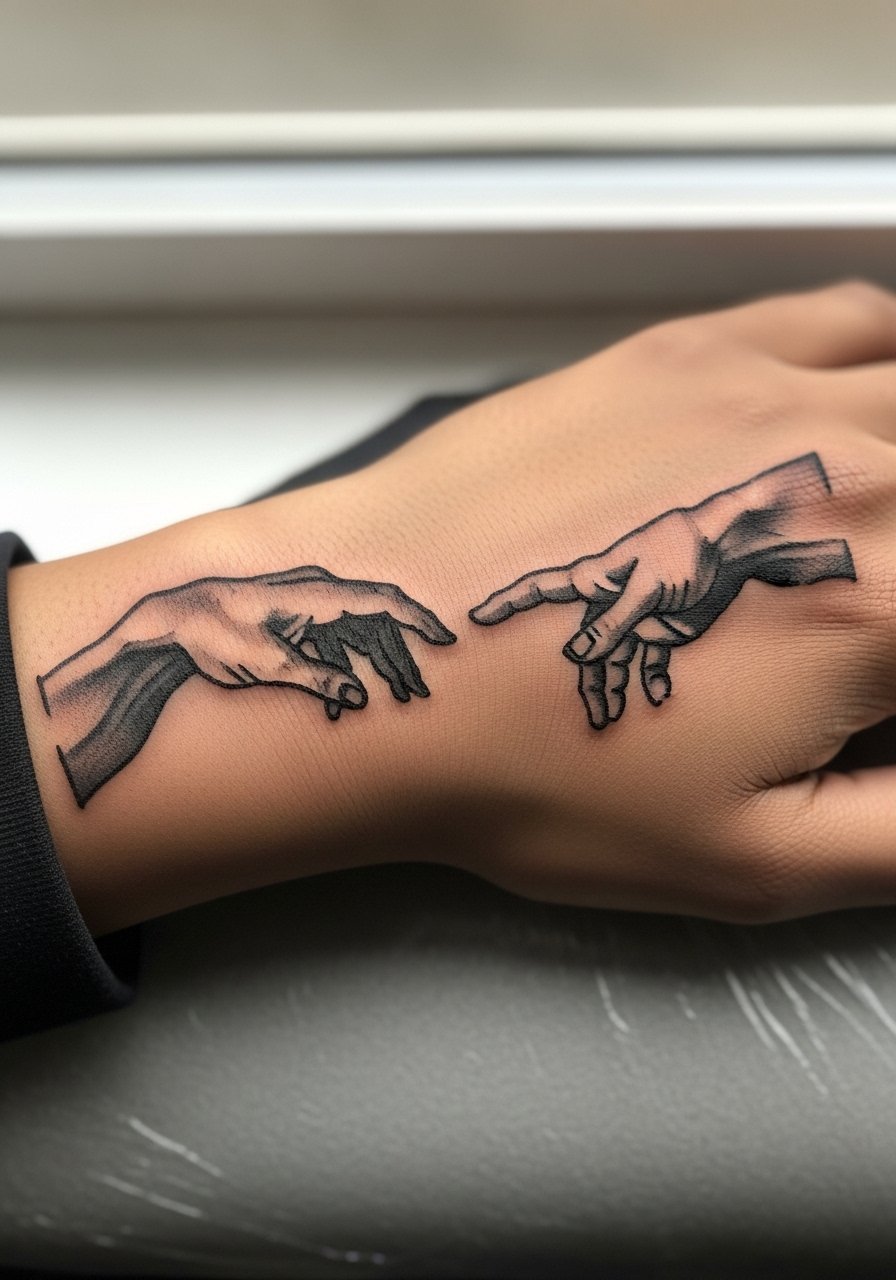
Dark skin clients report that thin single-needle work can disappear in photos, so thickening line weights to 0.25mm or higher often helps. Ask the artist for healed photos of similar skin tones and request bolder silhouettes rather than faint stippling alone. This version favors contrast and strong black saturation. A common error is expecting the same thin look that shows up on lighter tones. Sessions are similar but require a clear portfolio check. For photos, higher contrast clothing like neutral tones frames the blackwork.
12. Collarbone Mini with Roman Numeral Date
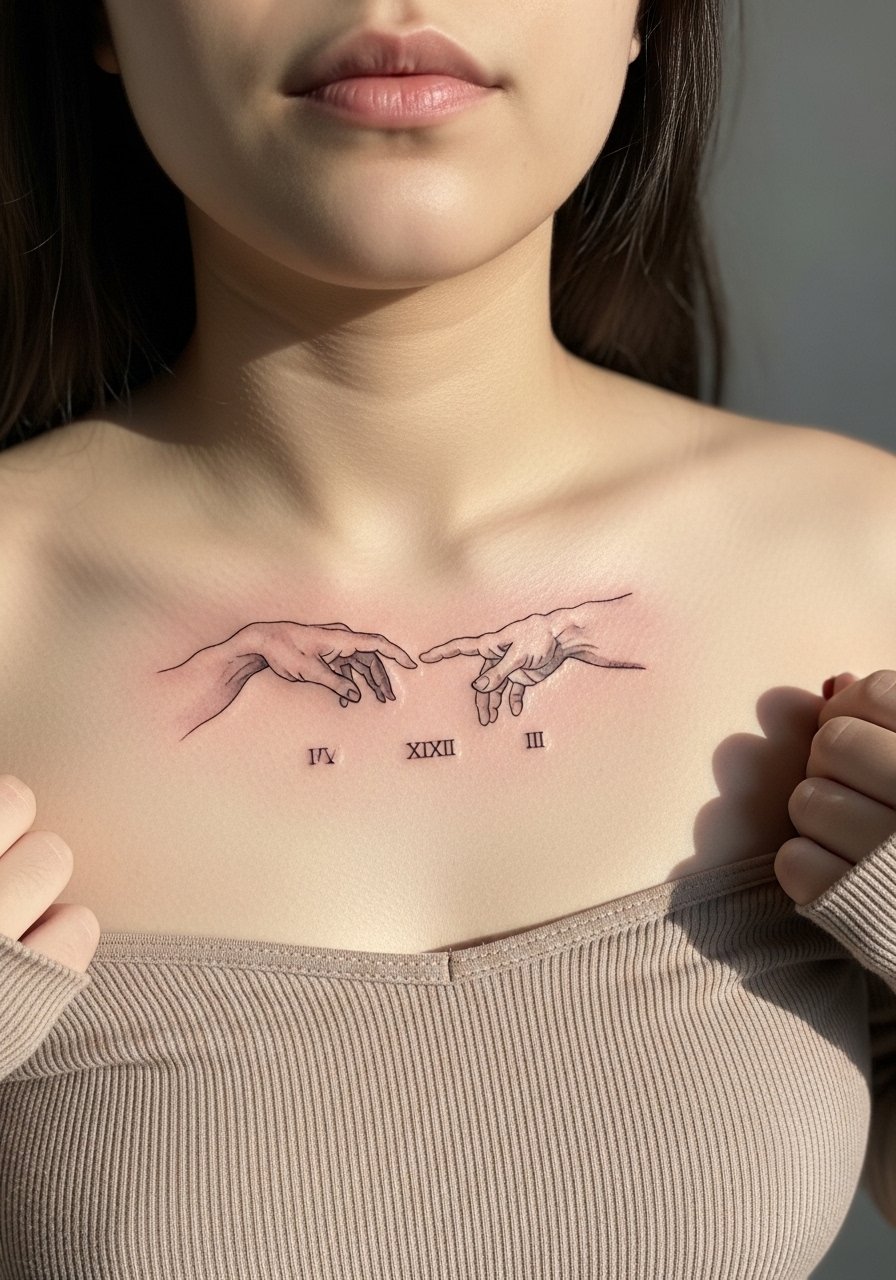
Adding personal dates or initials under the motif gives memorial weight while keeping the visual simple. For collarbone text, specify exact lettering and font in consult to avoid illegible scripts after healing. The sternum and collarbone are sensitive so sessions may sting more than a forearm piece. Keep the date small but bold enough to survive touch-up intervals. Pair with delicate necklaces that sit below the script. delicate drop necklace
13. Inner Bicep Micro-Realism Fragment
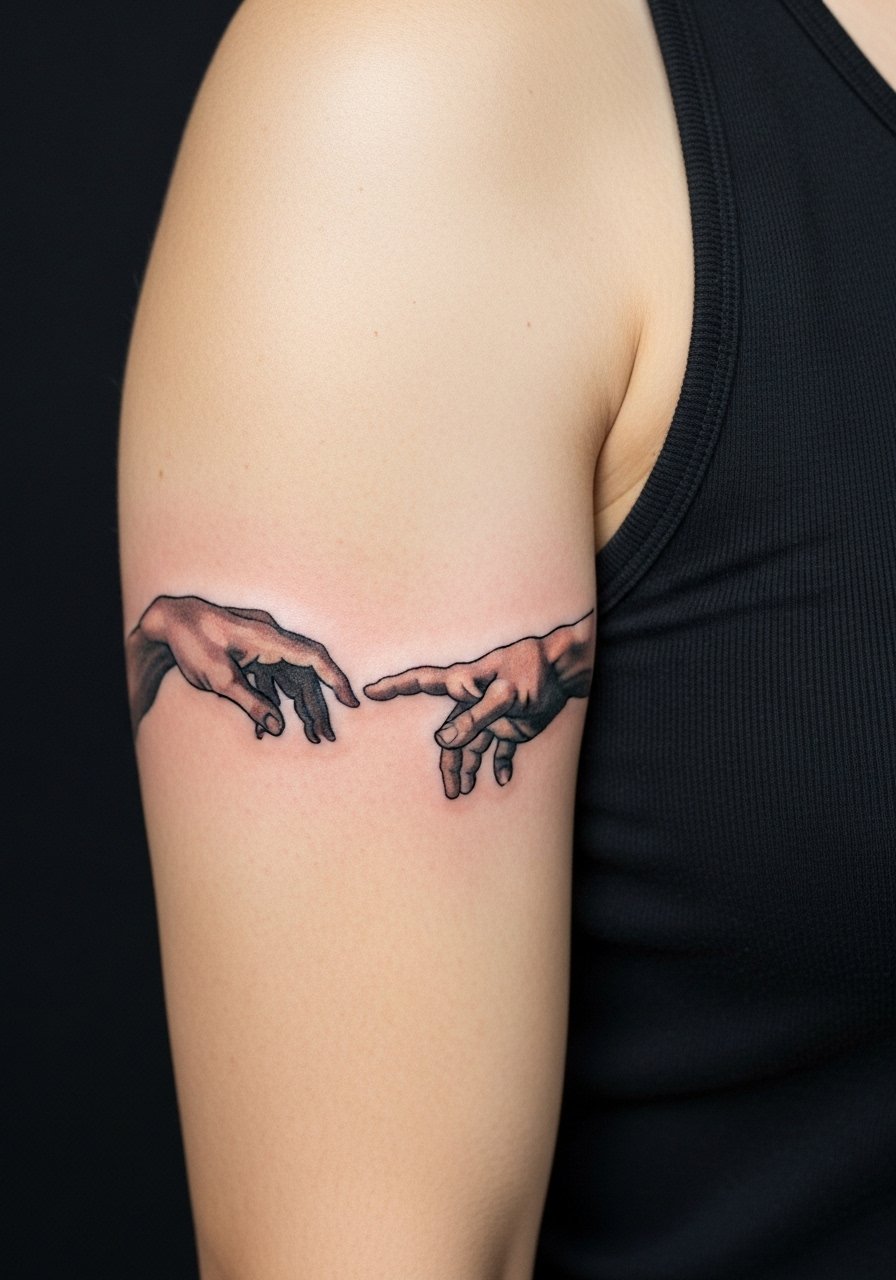
Inner biceps let you tuck more detail into a private area that only shows when you lift your arm. Artists warn that this skin can be temp-sensitive and needs careful depth. A common mistake is asking for full back-level detail in a piece that will only fit a smaller canvas. Sessions can be less comfortable due to sensitivity. For appointments, wear a tank so the artist has clear access and so the area remains clean during healing.
14. Finger Tip Touch with Tiny Frame
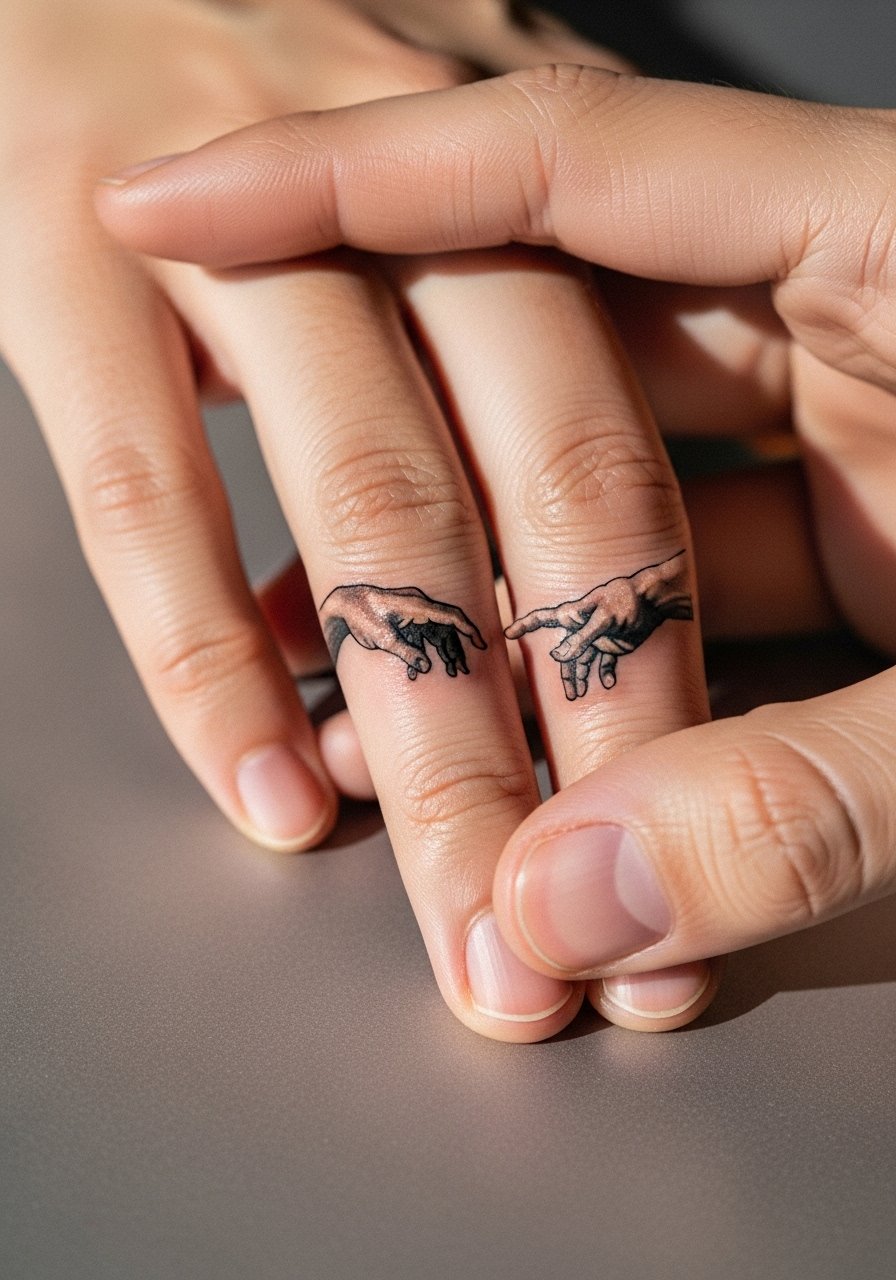
Finger tips and side-finger placements demand heavy outlines and expectation management. The skin here sheds and fades quickly. Tell the artist you want reinforced black and a plan for yearly touch-ups. Expect higher fade and potential blurring after frequent hand washing. Pain is sharp but quick. Accessory pairing like thin rings or negative-space stackable rings keeps attention on the area without covering the tattoo.
15. Chest Fragment on Upper Sternum
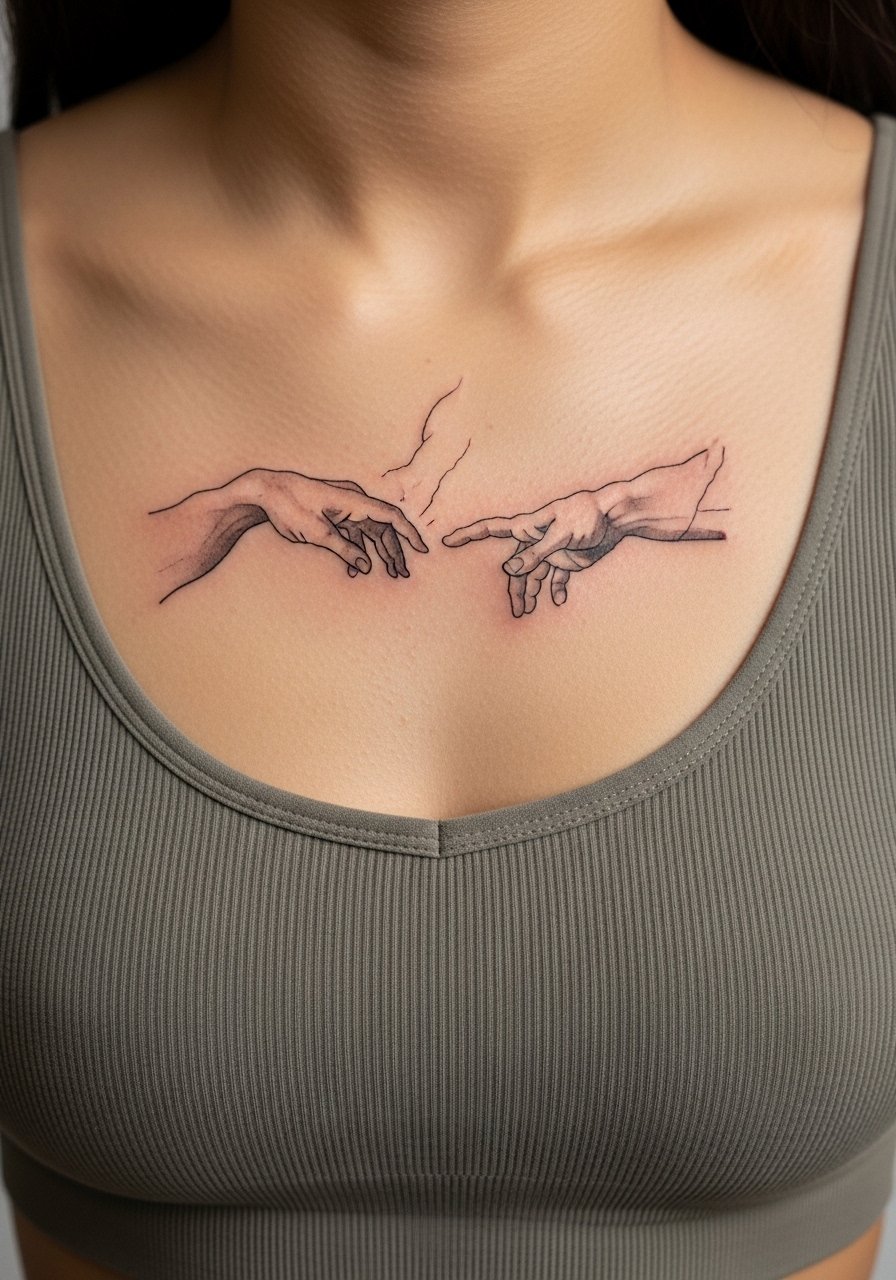
Sternum placements look striking but are sensitive and move with breathing. Artists disagree on dry healing versus protective film for this location. One camp favors protective film to avoid scabbing trauma, the other favors dry healing to minimize maceration. Ask what method your artist prefers and why. Sessions here can be painful and often require breaks. For outfits, choose strapless or wide-neck tops that reveal the area selectively.
16. Thigh Panel with Personal Symbol Integration
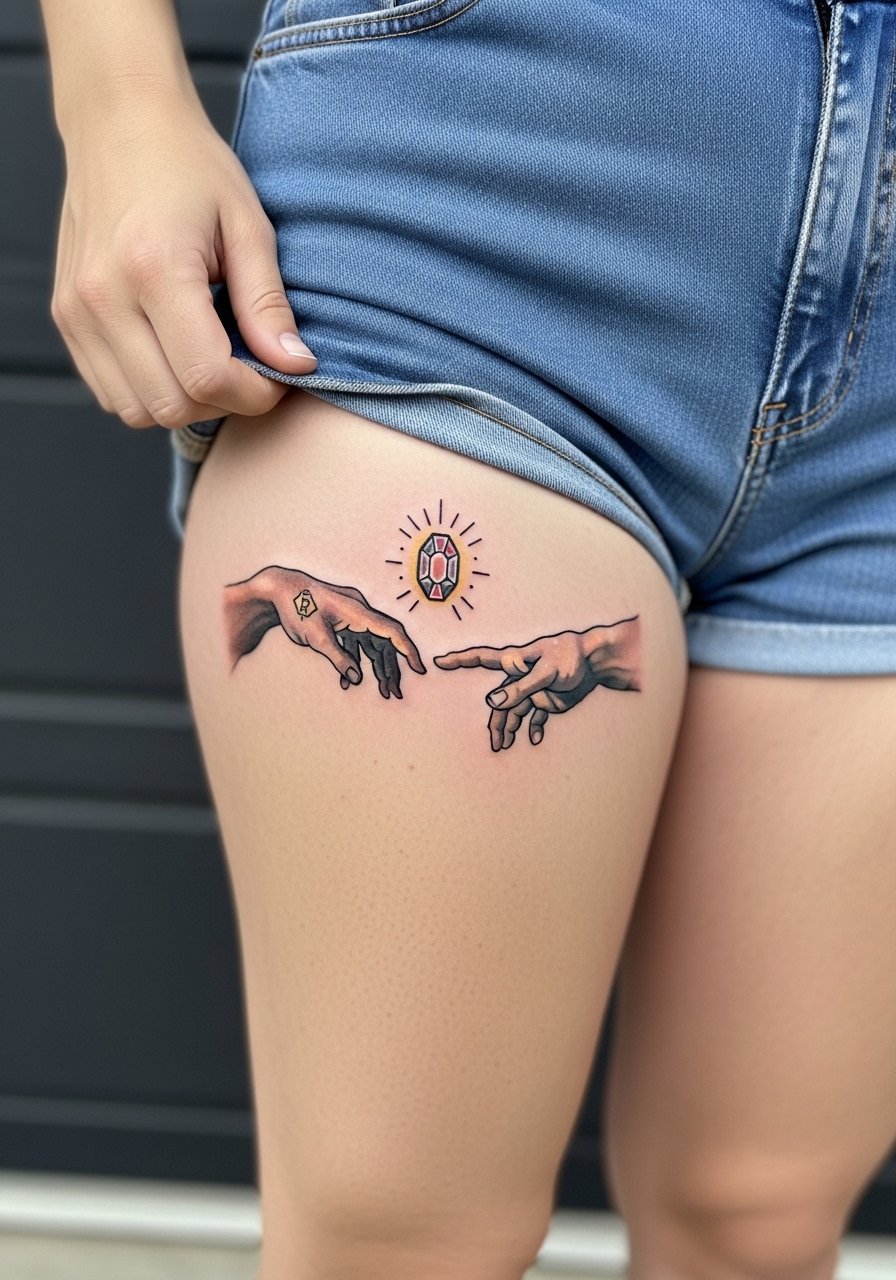
Integrating personal symbols like a birthstone or small glyph into God's hand creates a narrative without altering the pose. For thigh panels, request placement that reads when you sit and stands when you stand. The thigh tolerates full color saturation and is less affected by sun. A common mistake is burying the personal symbol inside busy shading. For session wear, loose shorts are best and high-waisted denim pairs well when you show it off. high waisted denim shorts
17. Knee Crease Miniature
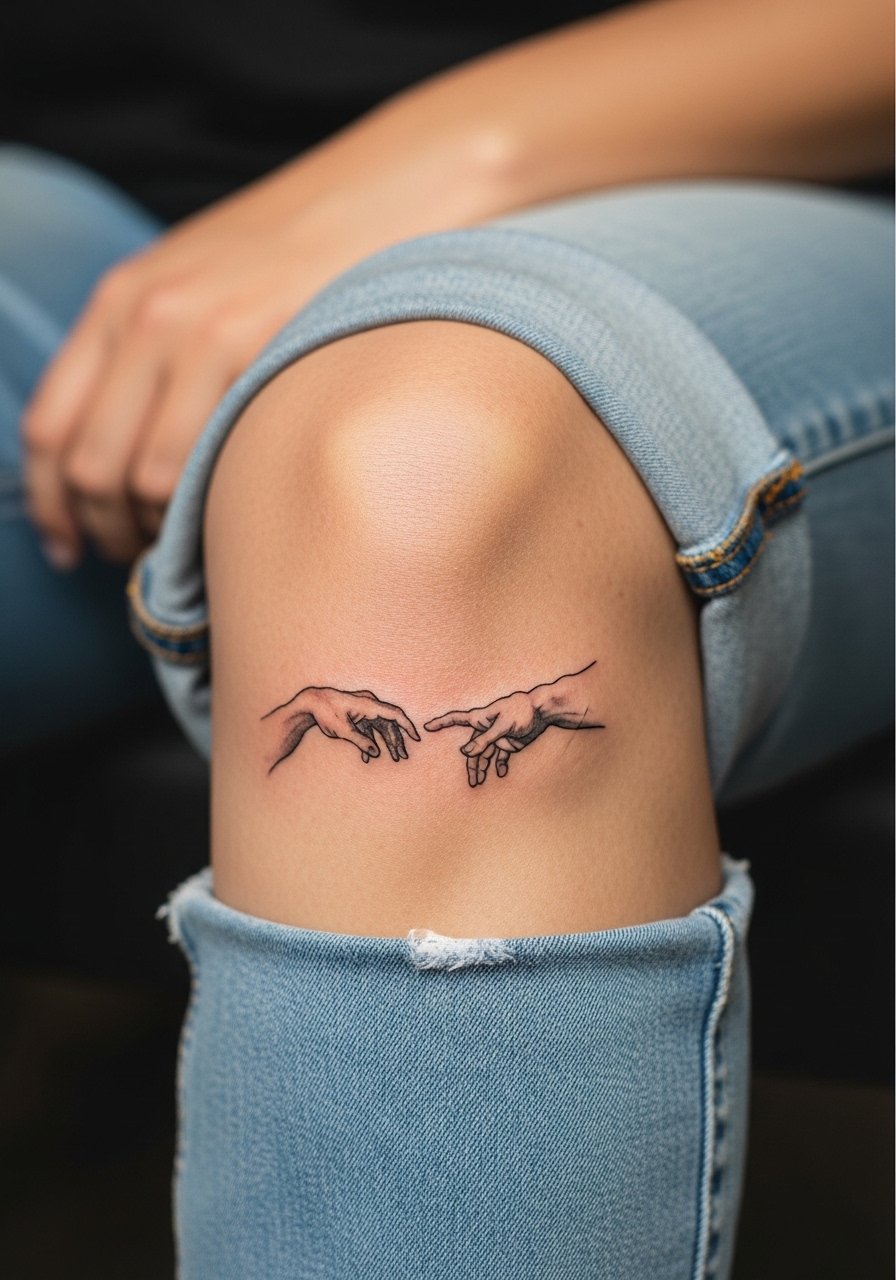
Knee crease tattoos face a unique challenge because the skin folds and stretches with movement, which can distort detail. For this placement, prefer bold silhouettes and avoid dense micro-shading across the crease. The biggest mistake is trying to cram a detailed scene into a moving fold. Sessions are higher on the pain chart and healing needs care around bending and kneeling. Consider placement slightly above the crease for less distortion over time.
18. Chest Sternum Half-Scene in Black and Gray

Black and gray chest scenes age differently than color because gray tones can hold contrast longer on many skin types. Ask for stronger mid-tone saturation in the first session and schedule a color-lock follow-up if needed. Pain is higher near the sternum and collarbone. The technique suits memorial additions like dates or small names included under the main touch motif. Bring a strapless support garment to the appointment to keep fabric off the area.
19. Back of Hand Micro Blackwork
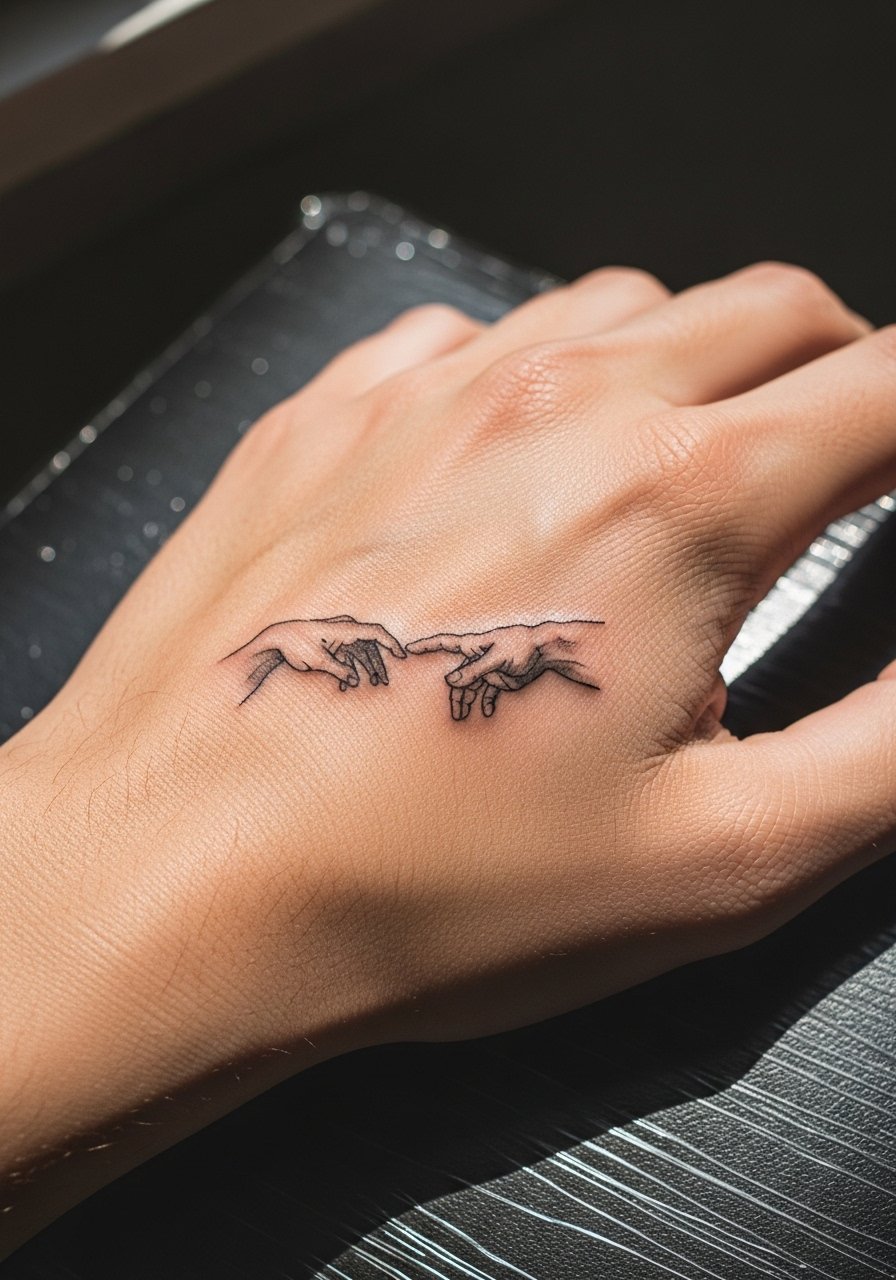
Back-of-hand tattoos are highly visible and face heavy sun and friction. For any Creation hand motif here, request bold blackwork and plan for faster fading. Some people avoid hand work for career reasons. Pain is moderate and sessions are short. The common mistake is treating hand work like forearm work. If you choose this area, maintain sunscreen and expect touch-up within a year.
20. Low Back Subtle Linework
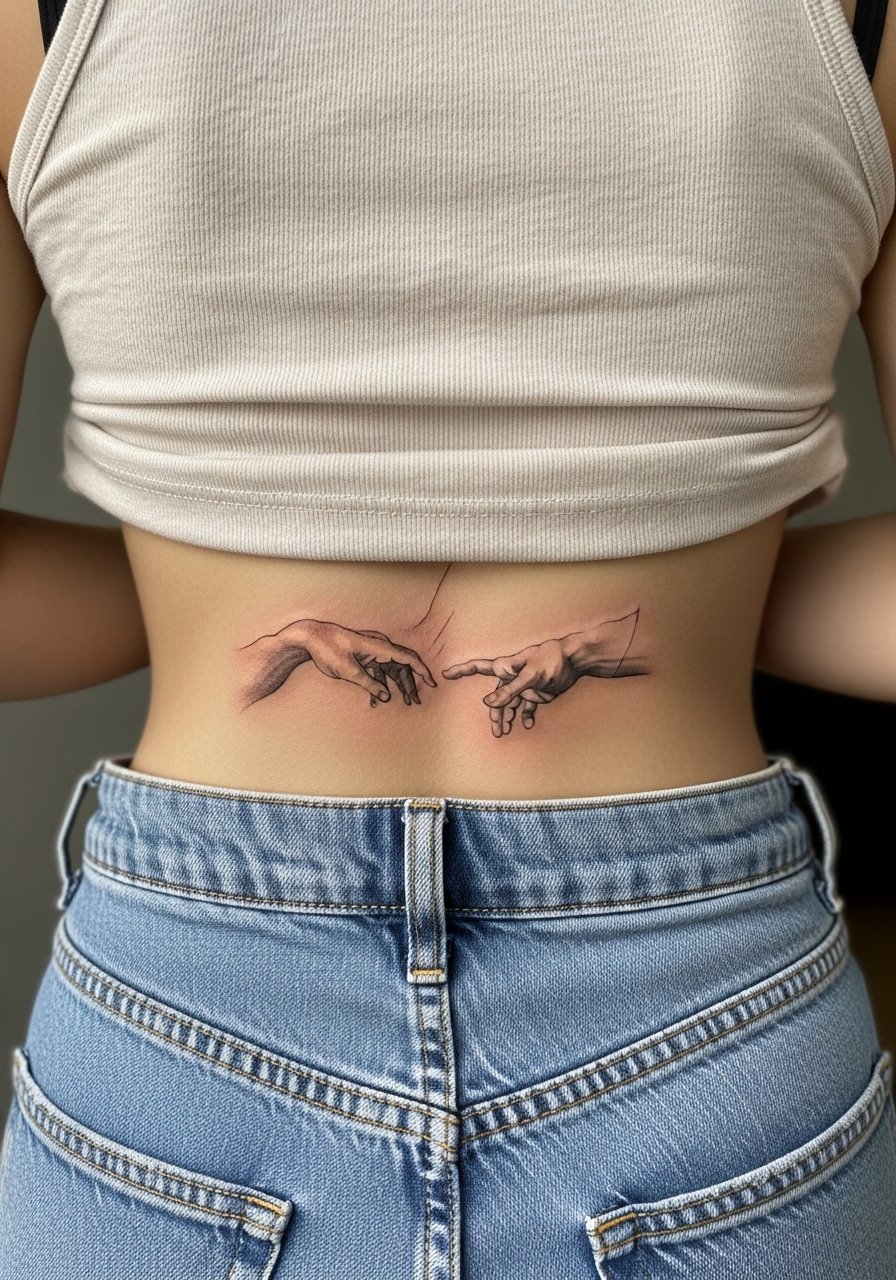
Low back pieces can be flirtatious and are easy to conceal. The skin here handles linework well but may get occasional friction from waistbands. In consults, ask the artist to place the touch slightly above the belt line to avoid repeated abrasion. Sessions are low to moderate pain. A simple mistake is placing it too low where clothing constantly rubs the site, which speeds fading. For wardrobe, tank tops and high-waisted bottoms frame the area without revealing too much.
21. Shoulder Cap Mini with Subtle Glow
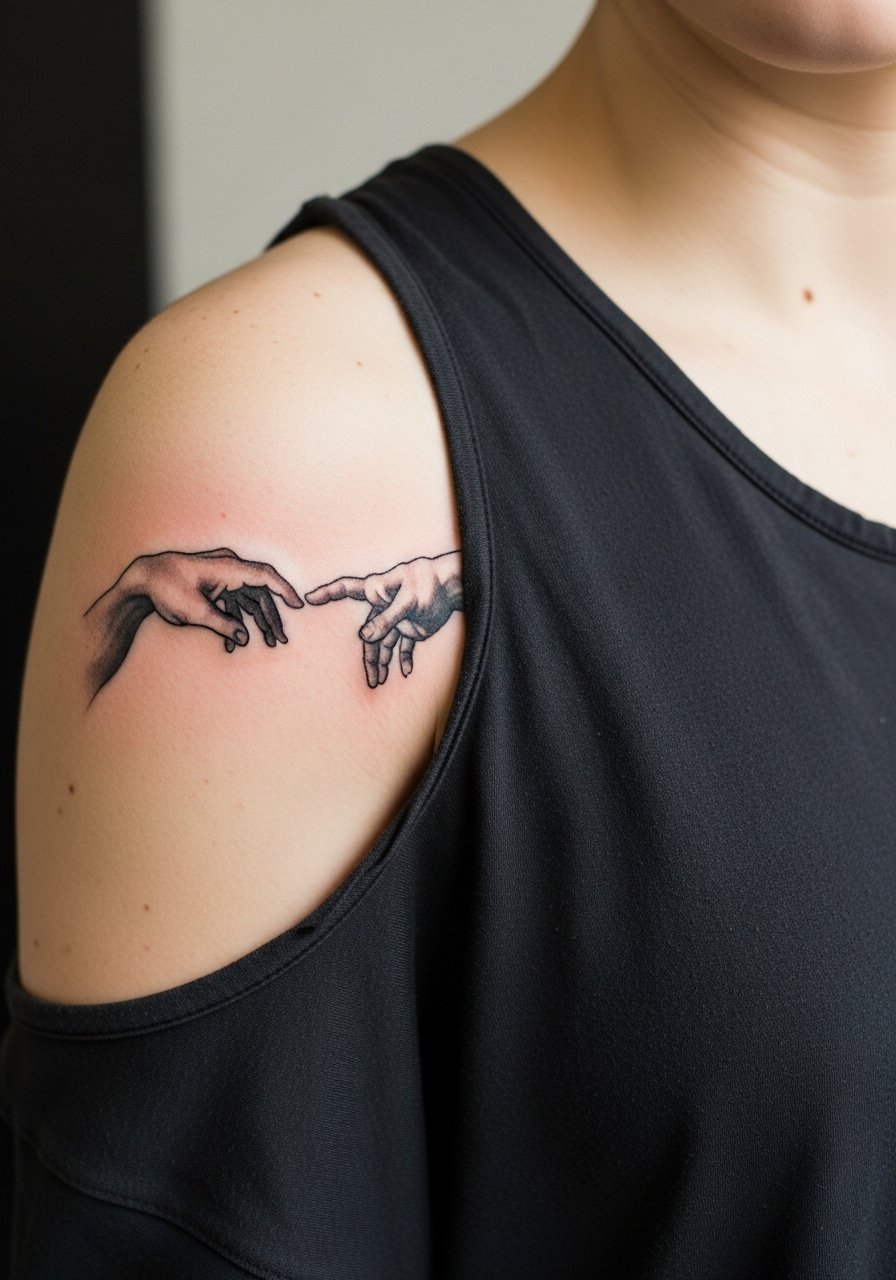
Shoulder cap placements show well with summer clothing and are less affected by daily friction. Ask for a small halo wash or subtle shading to give depth without relying on thin lines. A common error is packing tiny stipple work that loses contrast. Pain is mild and sessions are quick. For showing it off, loose tank tops and rolled sleeves work as a simple pairing.
22. Inner Thigh Private Piece
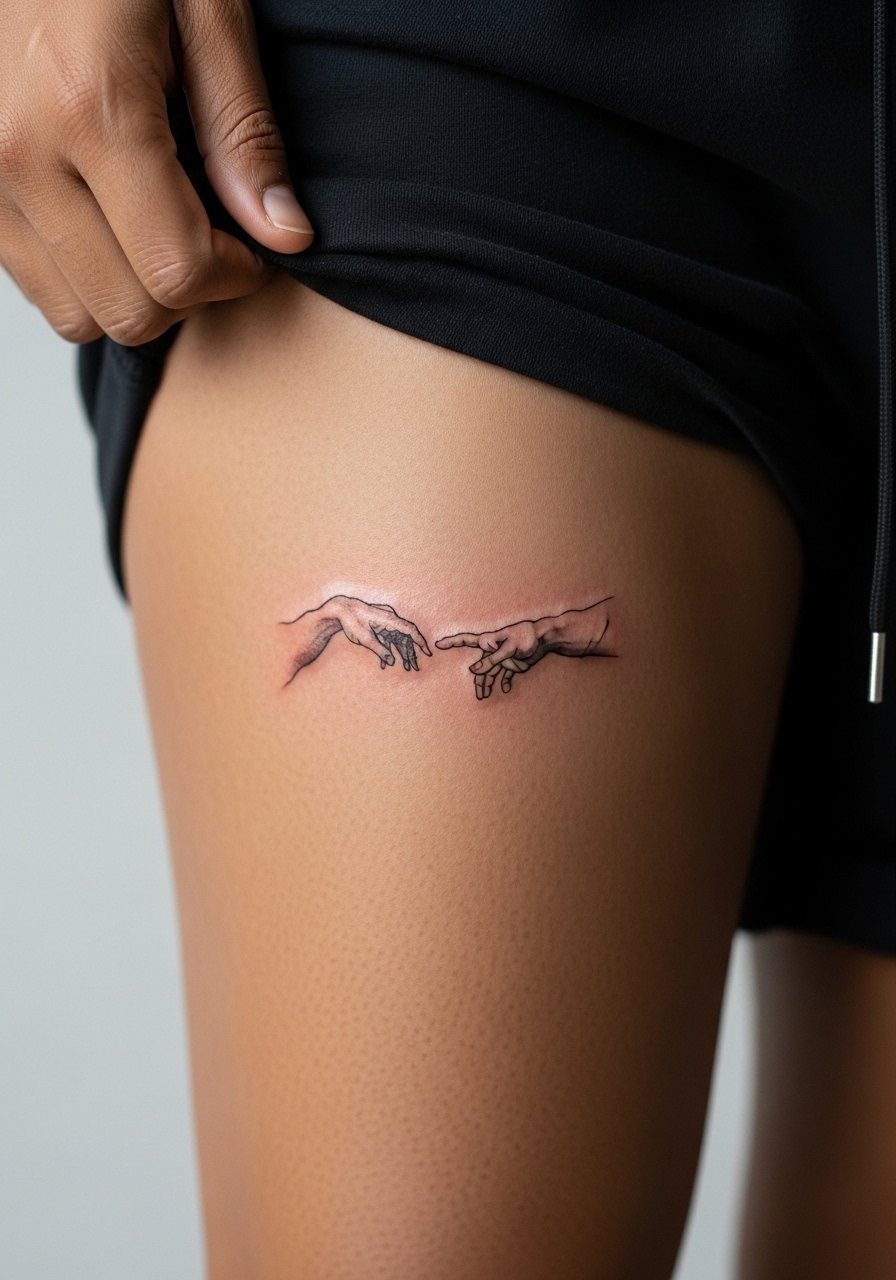
Inner thigh tattoos are intimate and heal in a humid environment, which can complicate aftercare. Ask your artist for guidance on staying dry and ask whether they recommend a light balm versus dry healing. Expect moderate pain and avoid heavy exercise for the first week. Many people like this placement because it is easy to conceal and tends to be shielded from UV.
23. Ankle Wrap Minimalism
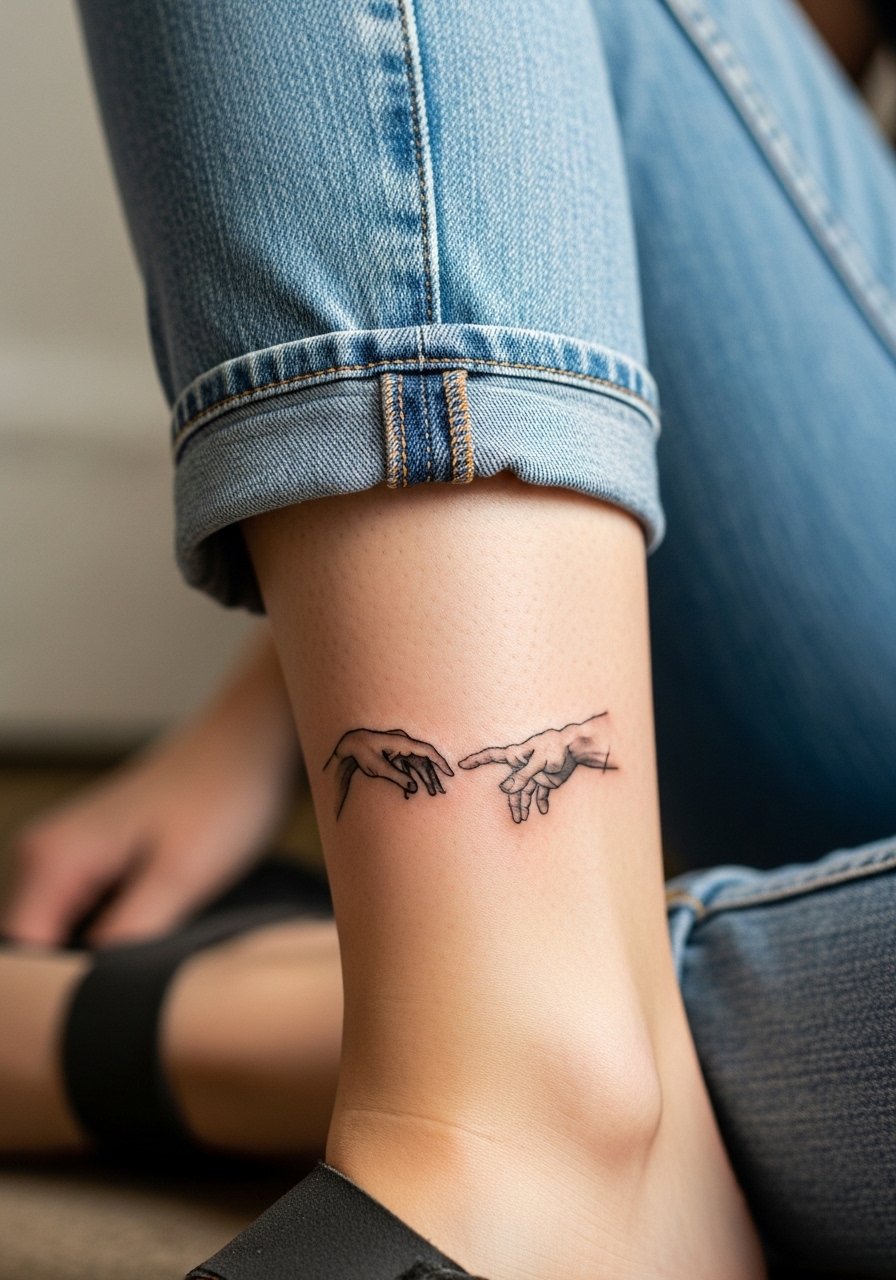
Ankle wraps read as jewelry and pair well with minimal sandals. Because ankles face frequent rubbing, choose steady blackwork and avoid delicate cross-hatching. Sessions are brief but can sting over bone. The usual mistake is making the wrap too tight so it breaks across joints. Roll pants or pick shoes that leave the ankle visible to show the wrap.
24. Upper Arm Half-Scene with Negative Space

Upper arm pieces let you balance detail and negative space for a modern classic take. Request the artist plan the composition so the hands remain the focal point even when you add background elements. Pain is mild and sessions can be single to double length. Avoid asking for ultra-dense shading right next to thin lines, which tends to age poorly. Short-sleeved shirts and rolled cuffs frame upper arm work nicely. loose button down shirt
25. Minimalist Back-of-Neck Dot Work
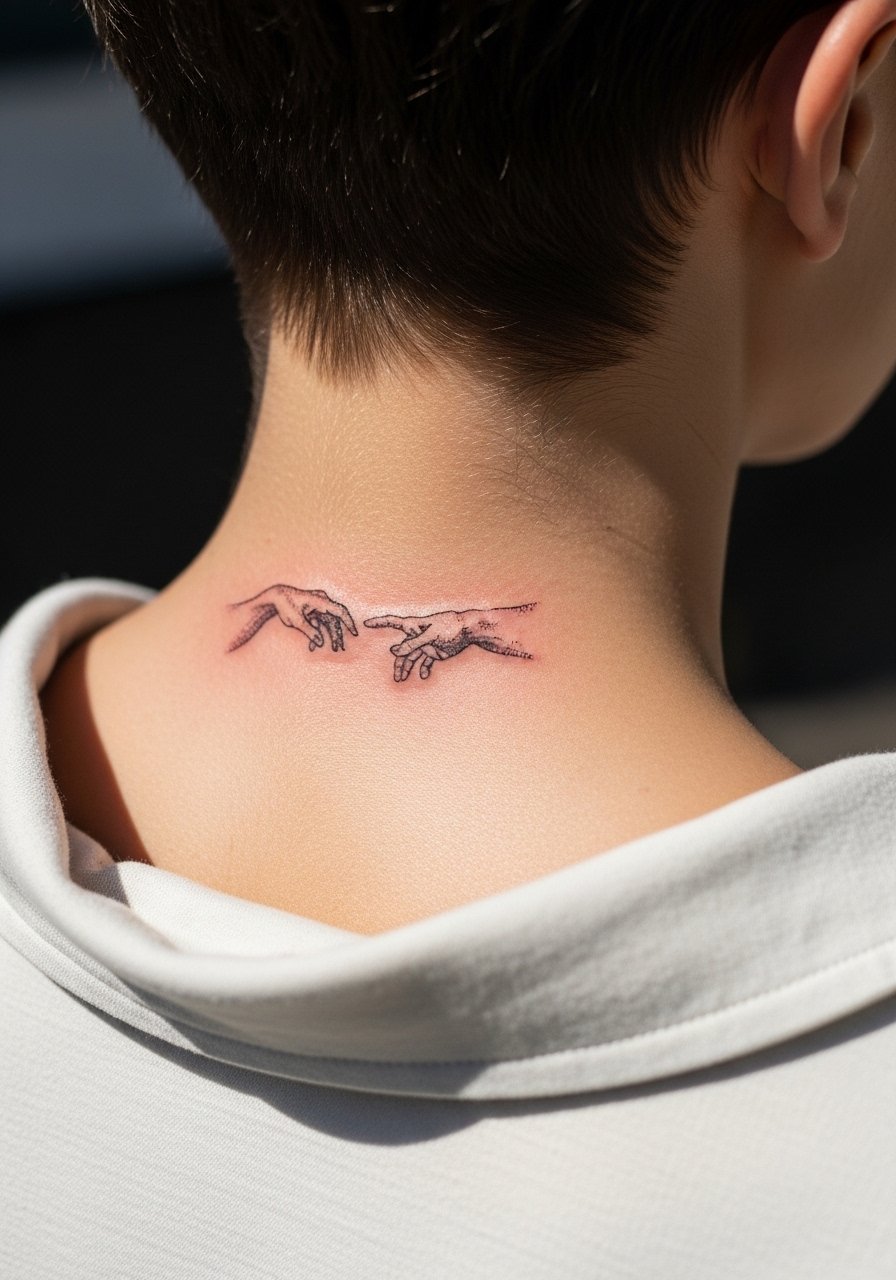
Neck work is visible and requires career consideration. For tiny back-of-neck pieces, request conservative sizing and discuss long-term maintenance with the artist. One mistake is going too big for the area, which can limit clothing choices. Pain is moderate and frequent touch-ups are likely. If visibility is a concern, plan wardrobe that covers the neck during professional settings.
26. Sleeve-Adjacent Small Motif Near Elbow
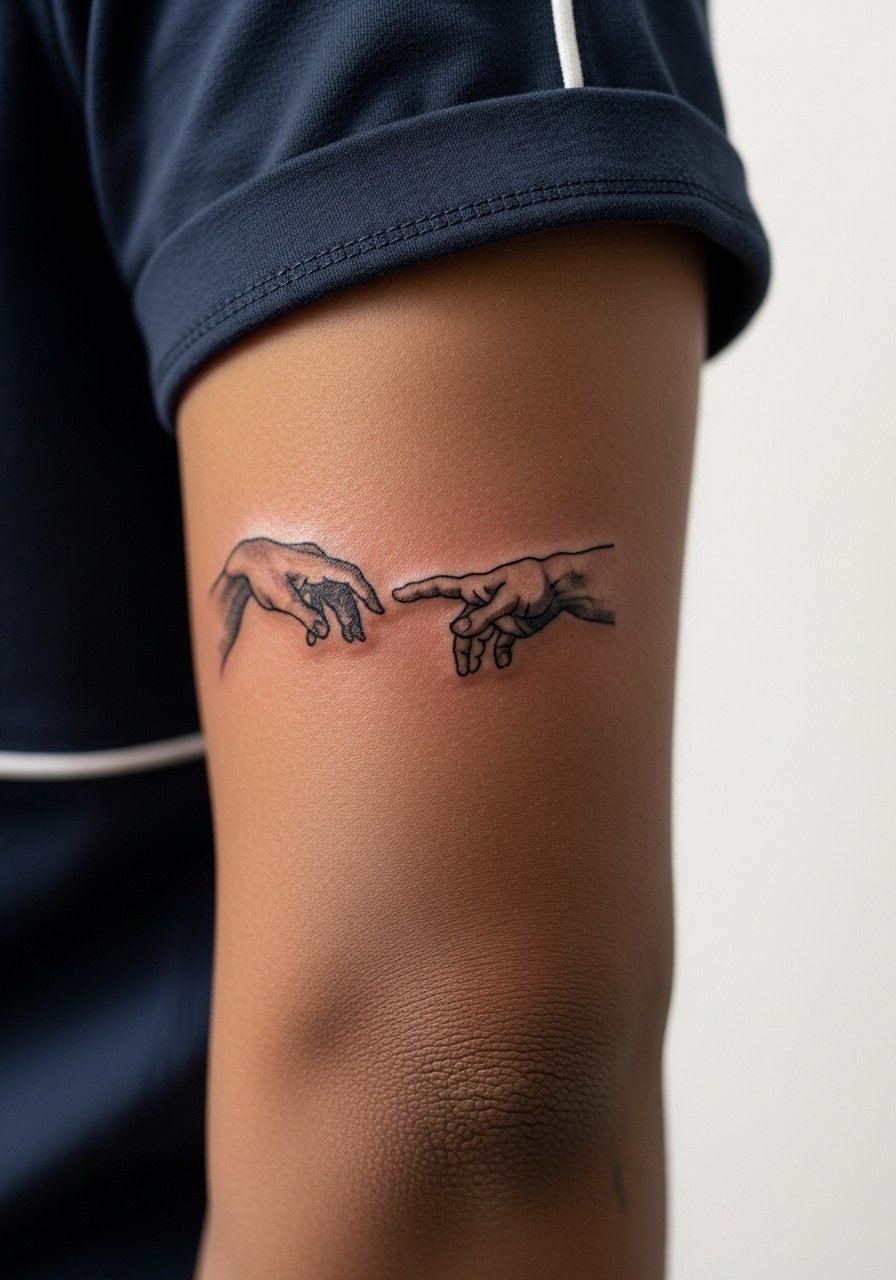
Elbow-adjacent placements need spacing so lines do not converge when the arm bends. Ask the artist to keep the motif slightly away from the crease and favor bolder edges rather than micro-detail. Pain can spike around the joint. A common regret is placing intricate work too close to the moving crease. For sessions, wear a loose short-sleeve top you can roll easily. loose button down shirt
27. Pocket-Sized Flash on the Hip
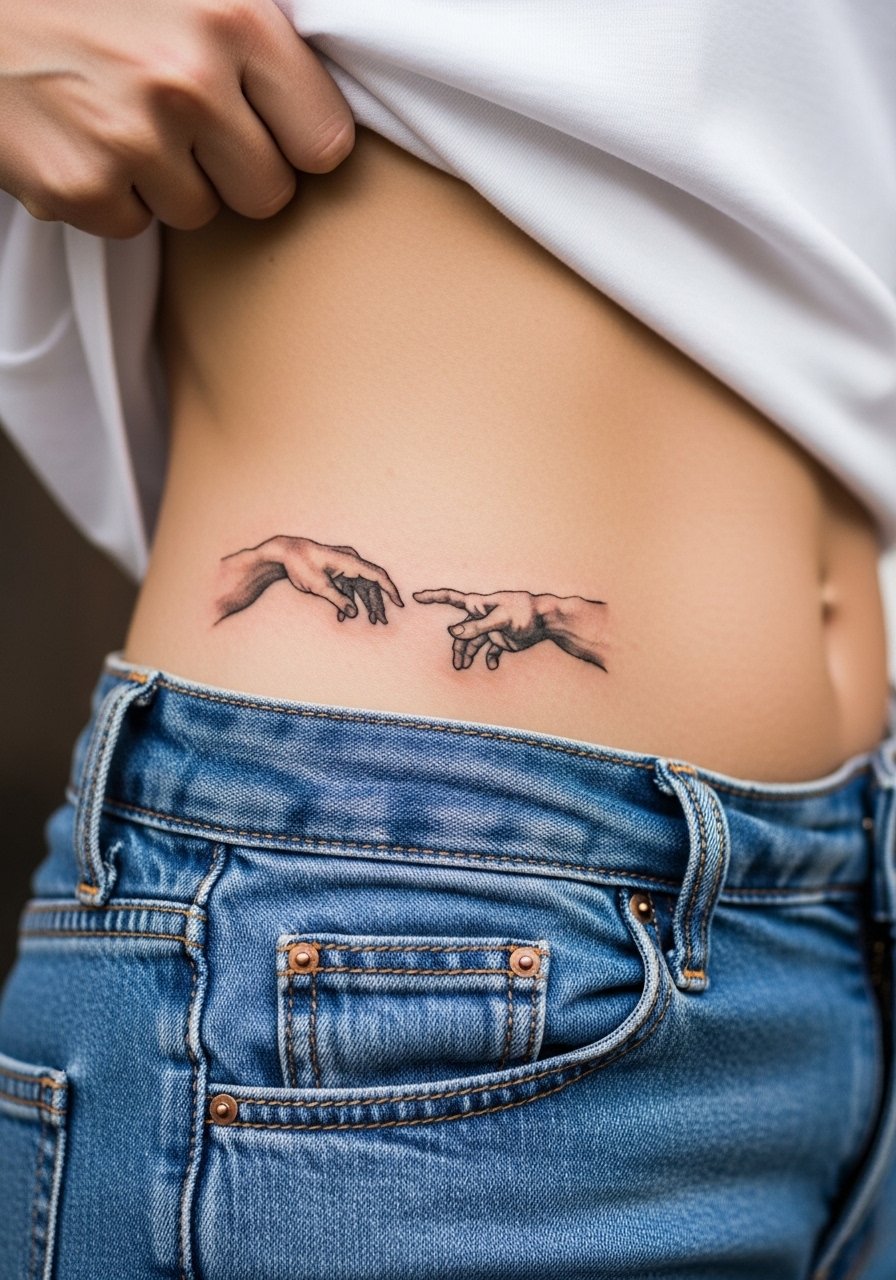
Hip placements are flirtatious and great for small flash that you want to keep private. Ask the artist for a compact composition that reads at a small scale. The skin here tolerates detail reasonably well but can face friction from waistbands. Sessions are moderate pain and touch-up needs depend on clothing friction. High-cut shorts or swim bottoms frame the hip work when you want to show it off. high waisted denim shorts
Frequently Asked Questions
Q: Do fine line Creation of Adam forearm tattoos fade faster than bolder versions?
A: From what I have seen, fine line forearm pieces can blur quicker than bold blackwork, especially if you spend a lot of time in the sun. The main factors are line weight, sun exposure, and how the artist places depth in the first session. Expect possible touch-ups around year two to three for very delicate lines.
Q: How do I adapt a Creation of Adam design for dark skin so it shows up well?
A: Ask your artist to use stronger line weights and higher saturation rather than whisper-thin needlework. Request portfolio examples on similar skin tones and pick solid black silhouettes or bold blackwork accents. Testing healed photos is the best way to be confident before booking.
Q: Should I worry about Saniderm versus dry healing for micro-realism back pieces?
A: Artists split into two camps. One group favors protective film for realistic pieces to keep contaminants away during the first 48 hours. The other group prefers dry healing to avoid maceration under film. It depends on the artist's technique and the piece location, so ask your artist which method they use and why.
Q: What should I wear to a thigh session for a neo-traditional Creation of Adam?
A: Wear loose athletic shorts so the artist can roll the leg without tight seams digging in. That keeps the area accessible and reduces movement irritation during a longer session. For showing off later, high-waisted shorts look great with thigh panels. high waisted denim shorts
Q: If an artist cancels a guest spot, how can I avoid ruining my healing timeline?
A: Book with platforms that require deposits and confirm 48 hours before your slot. If a cancellation happens, try to reschedule with a similar-skilled guest artist quickly so your stencil timing and personal schedule still allow proper aftercare. Keep your schedule flexible the week after the appointment when possible.
