
Fine line bow and arrow pieces dominate saved boards right now, and the images that score the most likes often tell a different story a few years later. I have seen that pattern across five shops in Brooklyn and at two weekend conventions. This list focuses on bold bow and arrow approaches that read clearly when healed, with practical notes on placement, what to ask for, and how to style the look, starting with an outer forearm classic.
1. Bold Traditional Bow on Outer Forearm
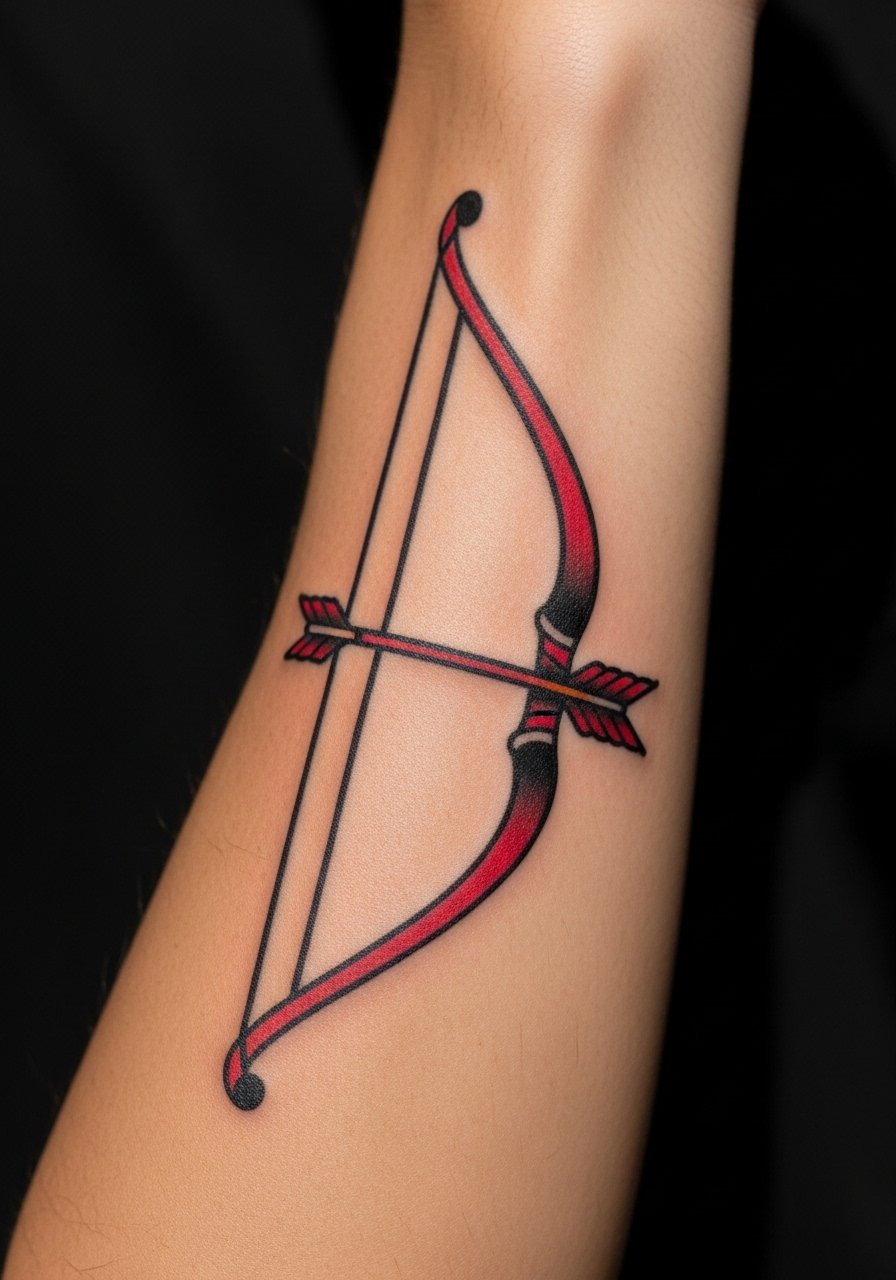
There is something about a bold traditional bow on the outer forearm that reads from across a room. I recommend this for anyone who wants a graphic, long-lasting piece that handles sunlight better than fine line work. Tell your artist you want strong outlines and flattened saturation rather than tiny hatch shading, and ask for spacing between arrow fletching lines so the piece does not blur into one shape. Fair warning, the forearm will need touch-up less often than fingers, but plan on an initial touch-up at year two if you wear heavy sun. For showing it off, roll sleeves and try a loose button-down shirt so the arm is visible without looking deliberate.
2. Minimalist Single-Needle Arrow on Inner Wrist

Fair warning, the wrist is unforgiving for single-needle detail. I steer people to a slightly bolder line weight than the Pinterest reference. During consultation say "fine, not fragile," and show a photo of healed single-needle work to set expectations. The session itself is quick but the wrist stings more than the forearm, and daily washing adds friction that fades ultra-fine lines faster. A common mistake is asking for tiny script with the arrow at the same scale. Instead, keep the arrow slightly larger or pair the design with negative-space arrows so the main line stays crisp. For the appointment wear a short-sleeve tee you can roll up easily.
3. Geometric Arrow Cluster on Upper Arm

This idea uses multiple arrows in a geometric cluster to create motion without tiny detail that will blur. I suggest stipple shading between arrows rather than dense black fills so the pattern keeps breathing as it ages. Tell your artist you want visible spacing and heavier anchors on each arrowhead so the shapes read at distance. The upper arm tolerates bolder saturation with moderate pain, and the session often runs one to two hours depending on size. A common mistake is compressing arrows too close; that makes touch-ups a headache later. Pair this with a tank top for warm-weather show-off looks.
4. Compass Arrow on Ribcage with Script Accent

The ribcage splits artists into two camps about fine detail. One camp says the skin there stretches and blurs lines fast. The other camp argues that correct needle depth and spacing keep details intact. If you want a compass-arrow with script, choose the latter approach but increase line weight and space the script from the compass points. Expect the session to be more physically demanding. Pain is high on the ribs, so plan for short breaks and a single longer visit or two shorter visits. For fitting the look into outfits, an open-back top or cropped sweater reveals just enough of the piece. During the consult ask about touch-up etiquette for ribs specifically.
5. Wrapped Arrow Sleeve Accent Near Elbow
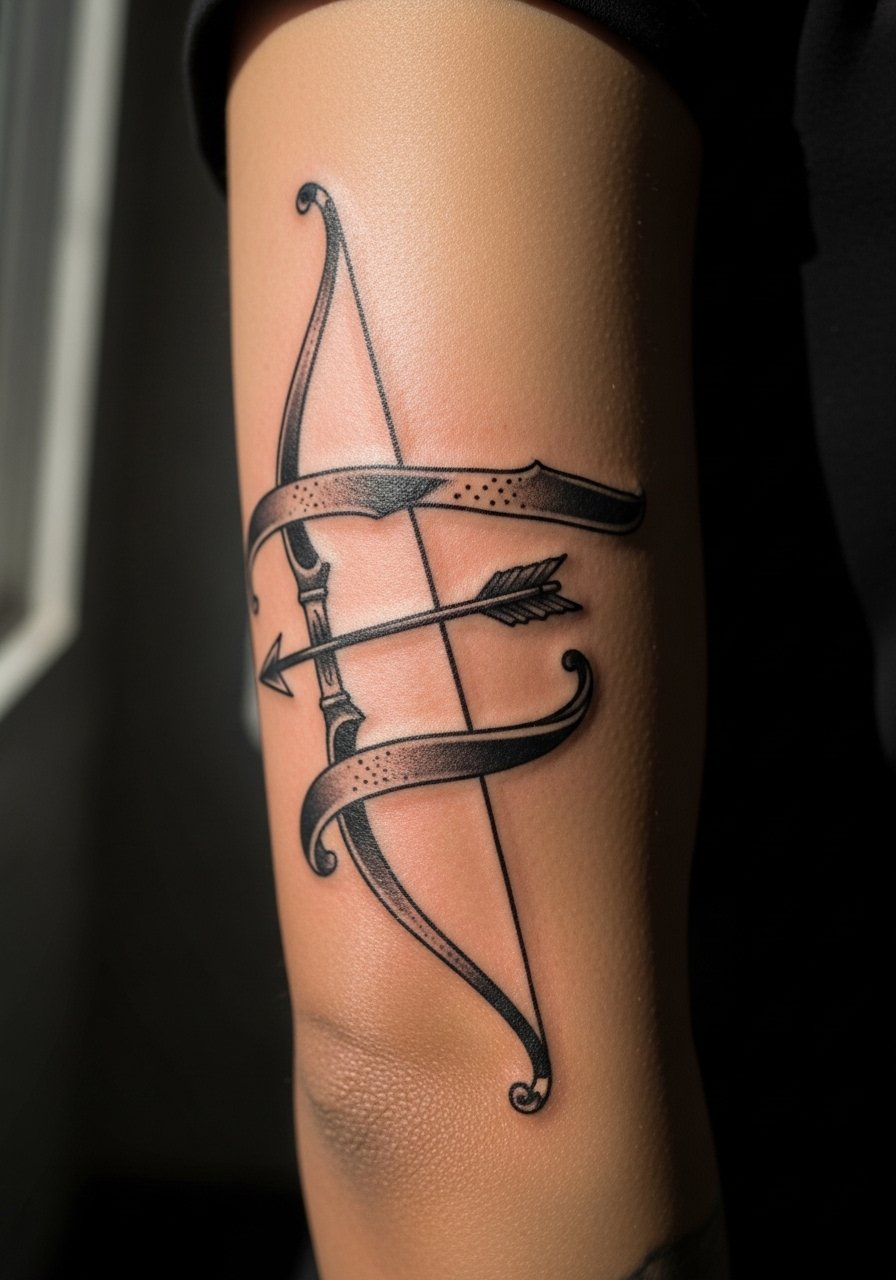
A wrapped arrow accent that moves around the elbow needs breathing room. The elbow area tends to blur if lines pass over flex points, so avoid continuous thin lines across the joint. I tell people to expect a session that pauses at the joint and resumes on either side to keep pigment stable. The elbow hurts more than the upper arm and less than the ribs, and movement during healing can influence color retention. A common mistake is asking for a full continuous wrap with delicate lines. Instead, break the wrap into segments with negative space at the bend and ask the artist about spacing. For the session wear a loose buttoned shirt you can slide off easily without stretching the elbow area.
6. Blackwork Arrow Spine Accent

A bold, single arrow along the spine reads like a graphic centerline. Tell your artist you want a solid black spine anchor and slightly softened edges where the arrowhead tapers. Spine sessions can be noisy and more painful than limb work, so expect breaks and a calmer appointment pace. The main aging concern is stretching across the back; spacing and thicker anchors prevent the shaft from breaking into dots over time. For showing the piece, open-back dresses or halter tops work well, and for the session choose a zip-up hoodie that you can take off without pulling over your head.
Pre-Session Essentials
The upper arm, ribcage, and wrist pieces above all benefit from a bit of prep. A handful of targeted items smooth the session and protect delicate linework during the first week.
-
Stencil transfer paper kit. Lets you preview placement on skin and avoid surprises for the forearm and wrist designs above.
-
Topical numbing cream. Applied as directed before a ribcage or spine session eases the edge without impacting the artist's work.
-
Thin protective film roll. Useful for finger and wrist pieces that face constant friction in the first week.
-
Fragrance-free body wash. Gentle cleansers help preserve fine line and stipple shading during showers.
-
Aquaphor healing ointment. Thin layers in the initial days keep linework supple for the wrist and forearm pieces without clogging.
7. Rustic Arrow with Woodgrain Detail on Thigh
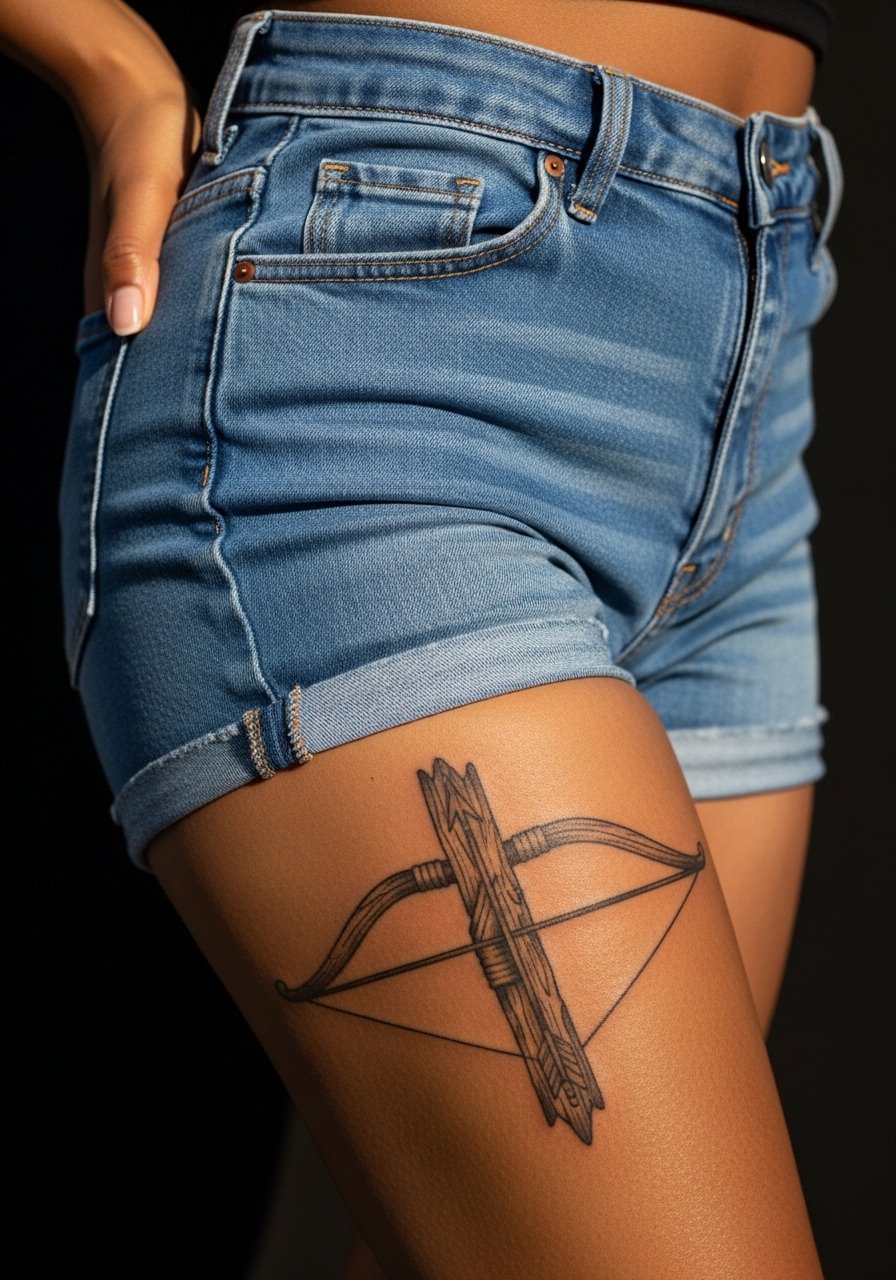
The upper thigh is forgiving for texture work like woodgrain and weathered arrow details. Sessions are more comfortable there than ribs, and the area handles shading and saturation well because it gets less UV exposure. Ask your artist for broader contrast between plank-like fletching and the arrow shaft so textures do not merge over time. One mistake I see is tiny crosshatching intended to read as grain, which compresses into a muddled patch in five years. For a bedroom-friendly show-off, high-waisted skirts or denim work well, but think about how often you will wear lower waistlines when planning placement. The thigh rarely needs touch-ups as often as hands or feet.
8. Constellation Arrow Wrist Band
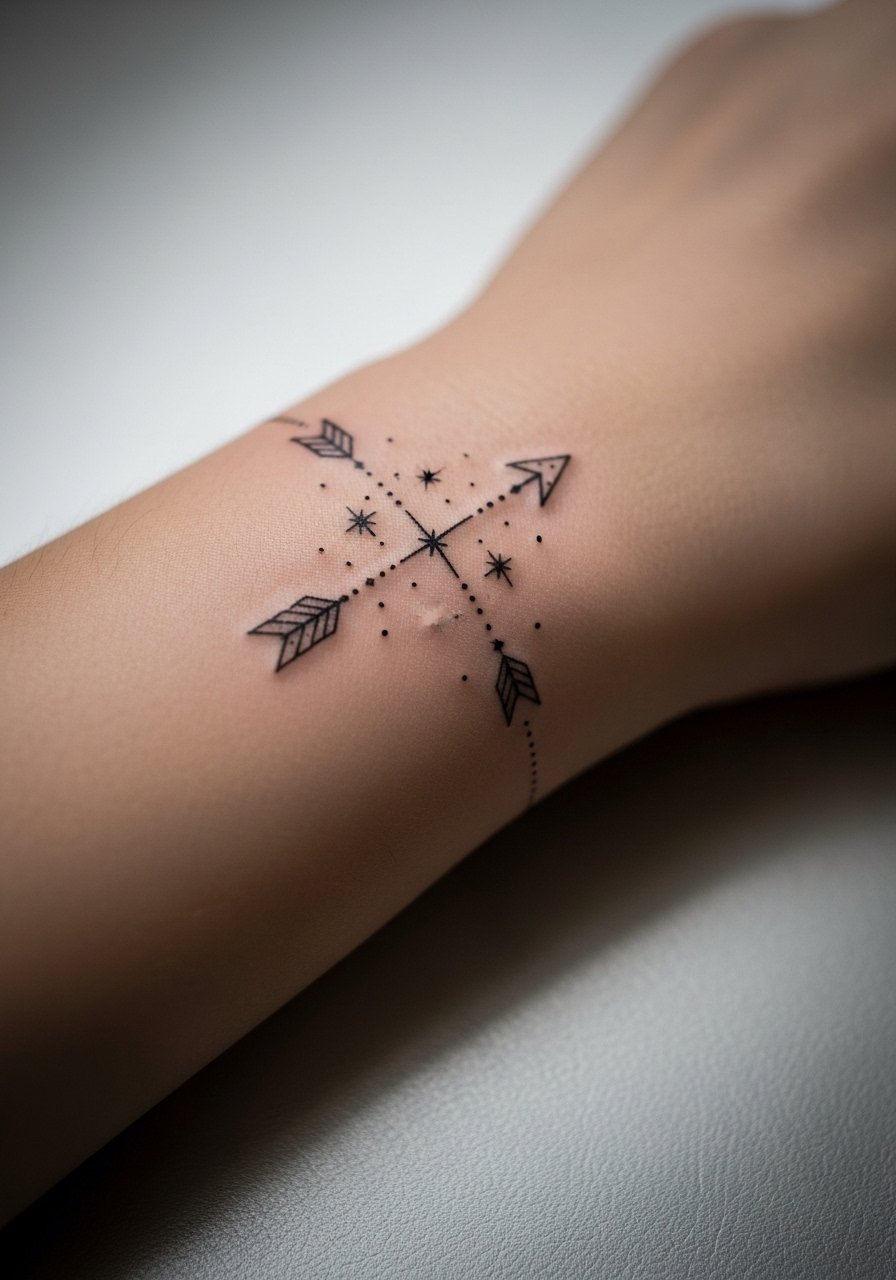
A constellation-style arrow band plays well with skin that moves a lot. Dot work here reads better than long continuous thin lines that melt into skin with daily motion. In consults I ask people to show photos of healed dot work so the artist matches spacing. The wrist is prone to friction and soap exposure, so expect more gradual fading and a potential touch-up at the two to three year mark. For showing and layering, a thin bracelet or minimalist watch keeps attention on the dots without crowding the wrist.
9. Watercolor Arrow with Bold Outline on Shoulder Blade
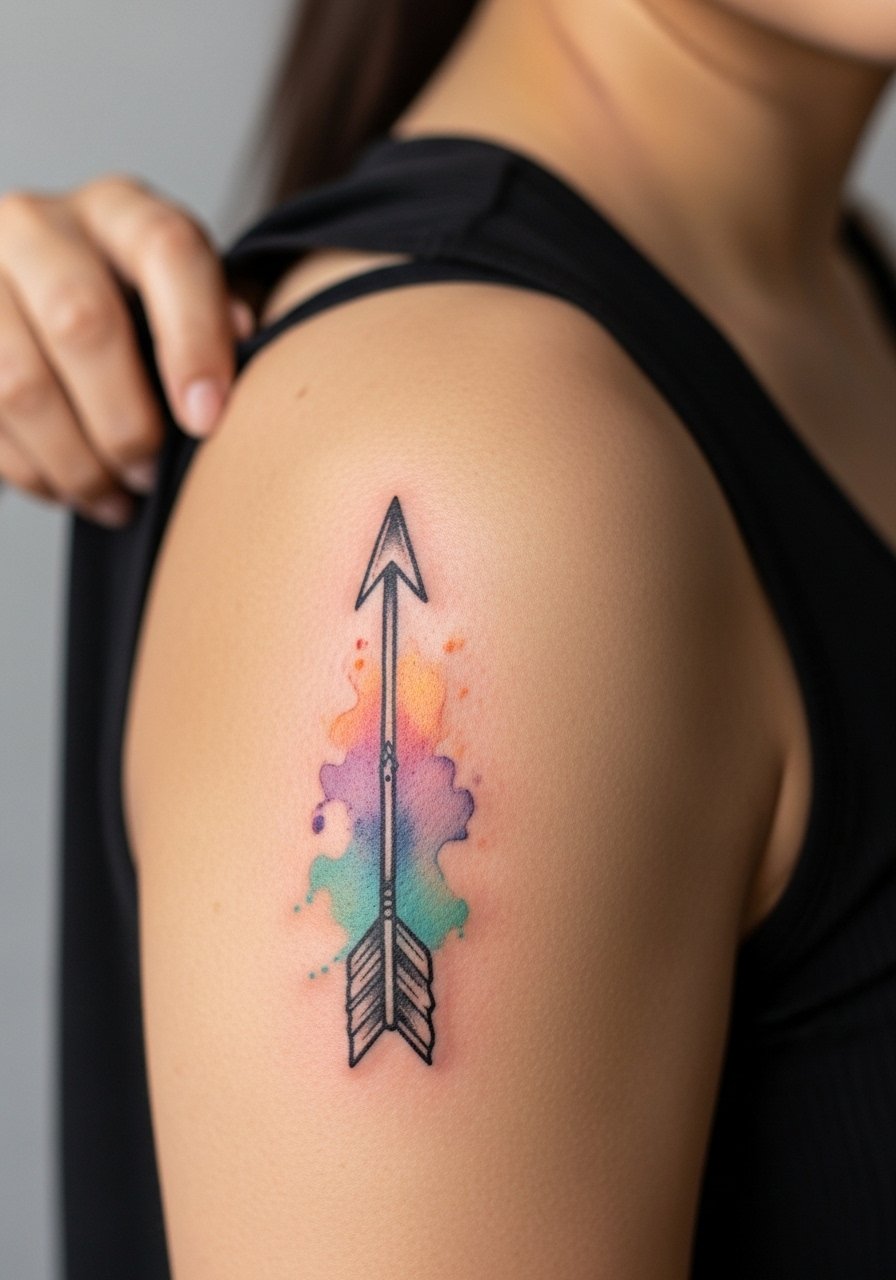
Watercolor fills can be risky for longevity when paired with ultra-fine outlines. The fix is a bold outline that contains the wash, which lets color fade gracefully while the silhouette holds up. Tell the artist you want the outline to carry the piece and the wash to feel secondary. Shoulder blade work is medium pain and often done in a single session for modest sizes. A common mistake is asking for a tiny watercolor spot with a fragile outline. For evenings out a low-back top frames the shoulder blade, and a thin chain pendant necklace can balance the look.
10. Arrow and Laurel Collarbone Pairing
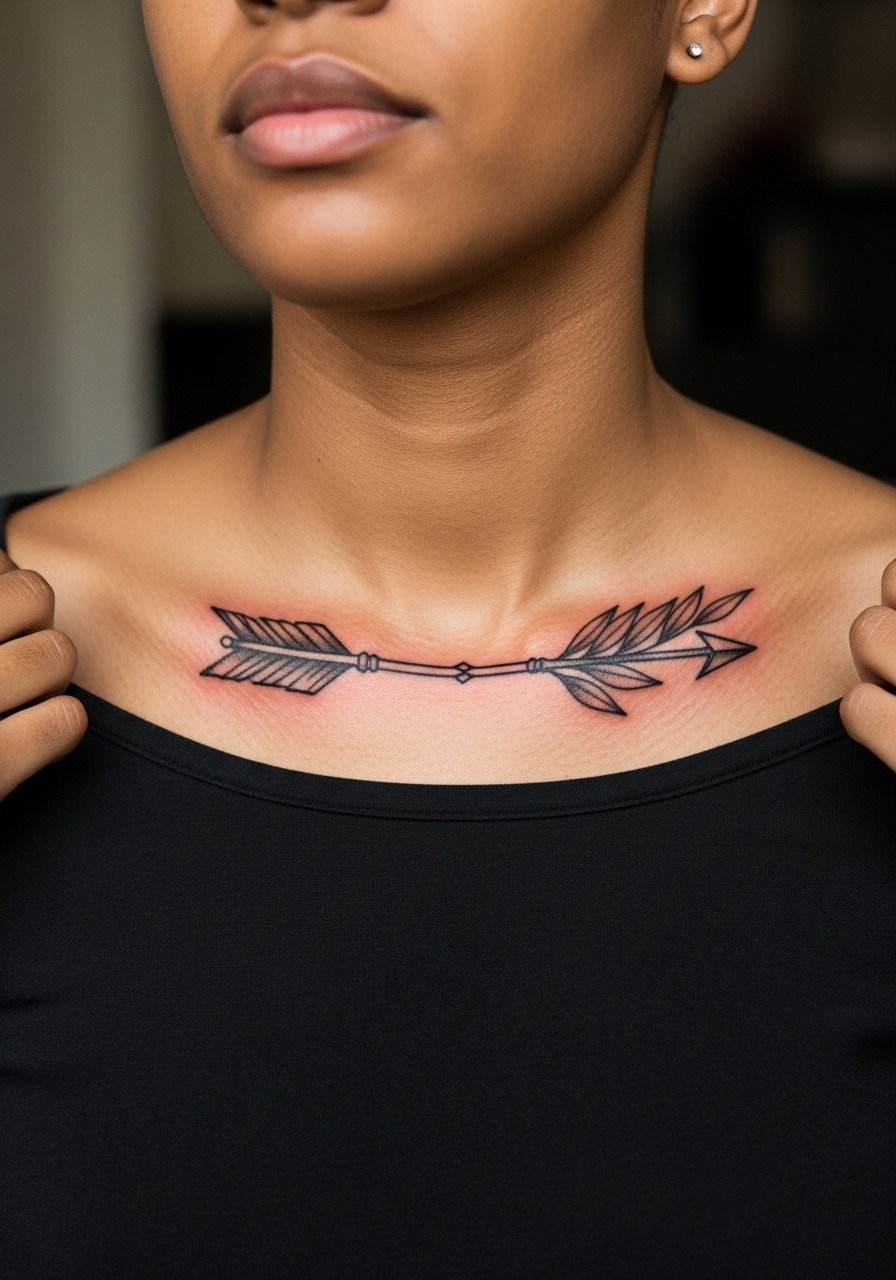
Collarbone pieces need a careful balance between line weight and placement. The skin sits over a bony ridge and thin lines can either read exquisitely or blur into faint scratches. I suggest slightly heavier stems on laurel leaves to hold up against movement and clothing. Sessions are quick but the area is sensitive. One controversy around collarbone work is whether fine foliate detail holds up near bone. Name both camps and ask the artist where they land before booking. For showing off, open-neck or wide-neck shirts frame the piece well and a v-neck blouse keeps the collarbone visible without forcing exposure.
11. Arrow Through Mountain Micro-Realism on Calf

Micro-realism works on the calf because the area tolerates subtle shading and tiny tonal shifts without the extreme abrasion of hands or feet. Tell your artist you want clear contrast between mountain ridges and the arrow shaft so the silhouette does not wash out. The calf is a moderate pain zone and sessions are comfortable for most people. A common mistake is compressing too many tiny elements into a postage-stamp area. Instead, keep a single focal ridge and a defined arrow to preserve clarity at year three and beyond. For seasonal show-off, rolled pants or cropped trousers frame the motif.
12. Stacked Arrows on the Side Ribcage

Ribcage placements favor stacked compositions where each arrow has room. When arrows sit too close, the muscle expansion and contraction blur the spacing. I advise spacing each arrow by at least the width of the shaft and opting for slightly heavier shafts. The session will be painful and might be split into two shorter visits. The controversy about fine line on ribs appears here again. State both positions explicitly and ask how your chosen artist handles compression and touch-ups for ribs. For session wear bring a loose zip-front hoodie that you can slip off without sliding fabric across the ribcage.
13. Broadhead Arrow on Palm Edge
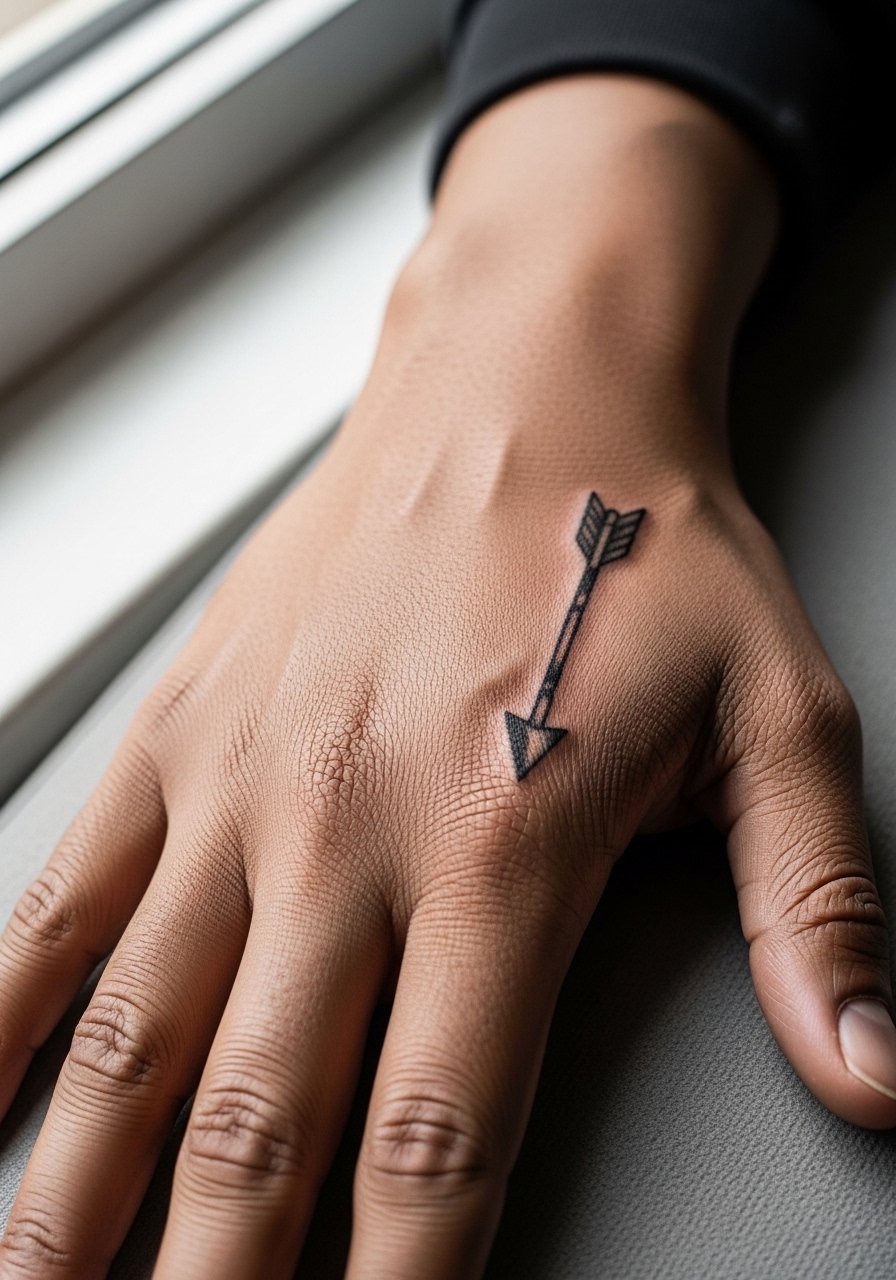
Hand and palm-edge tattoos are high-maintenance. Ink in zones that see constant washing and friction fades fastest. If you get a broadhead arrow here, expect heavier line weight and a likely touch-up within a year. Artists who do hand work often use denser pigment and recommend smaller, bolder shapes rather than delicate detail. A common mistake is assuming hand tattoos will age like forearm pieces. Think of this as a more visible, more ephemeral statement and plan accordingly. Consider placement just below the edge or on the outer thumb to maximize longevity.
14. Arrow and Feather Ankle Wrap
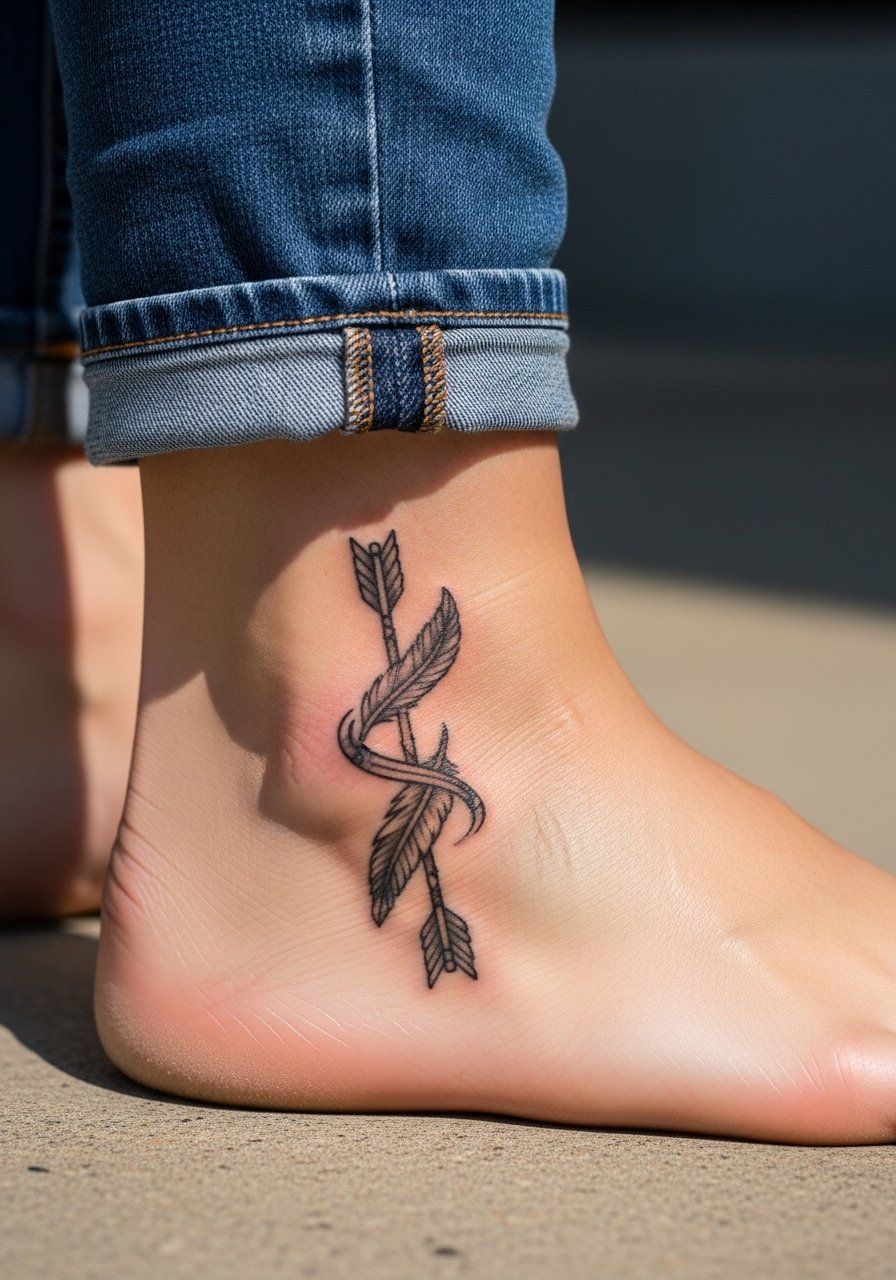
Ankle wraps read well when the design uses a mix of bold anchors and lighter feather details. Small feather lines near the ankle should be slightly thickened to avoid disappearing under sock edges. The ankle feels tender and the session can sting more than the calf. Watch for friction zones when choosing exact placement. A common mistake is putting the most delicate feather strokes where shoes will rub. For showing, sandals or rolled pants highlight the wrap, and a simple ankle bracelet frames the look without obscuring the arrow.
15. Double-Ended Arrow Over the Sternum
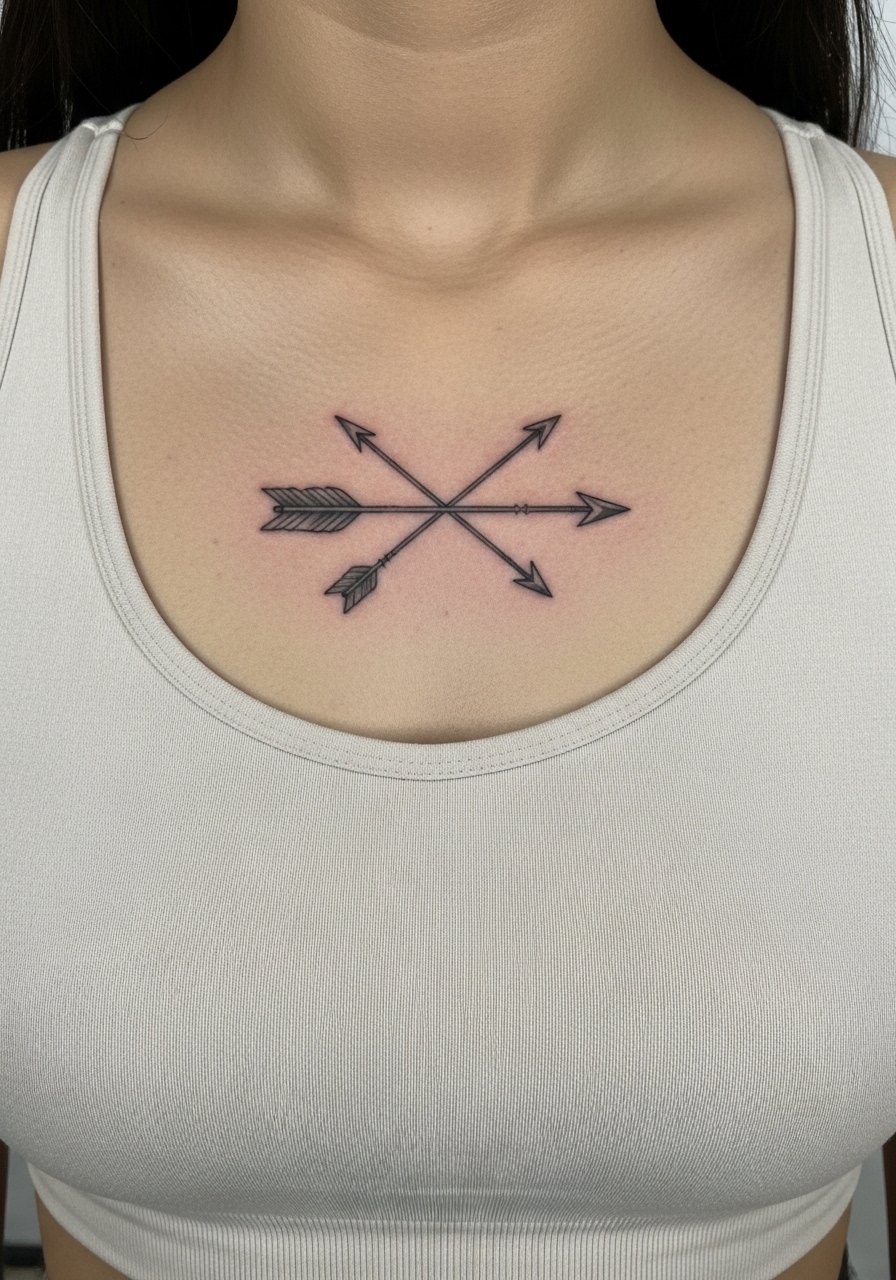
Sternum work is intimate and requires an artist experienced with curved chest planes. The sternum moves with breath, so thin opposing points can merge unless given a bold central spine. Be upfront about breathing during the session and plan short breaks. One camp will say fine symmetry is possible here, the other warns about line convergence. Ask which side your artist is on and request test spacing on the stencil. For sessions wear a supportive sports bra that can be lowered slightly so the artist has clear access without exposing more than needed.
16. Arrow Tattooed Across Finger Joints

Finger joint tattoos are convenient but prone to early fading. The skin on knuckles regenerates faster and often pushes pigment out. I recommend bolder shafts and shorter arrow lengths that avoid crossing multiple joints. The session feels sharp and quick, and frequent touch-ups are the norm. A common mistake is expecting the same longevity as wrist work. If you want a finger arrow that lasts, accept more maintenance and ask your artist about re-inking schedules during consultation.
17. Heraldic Arrow Crest on Upper Chest
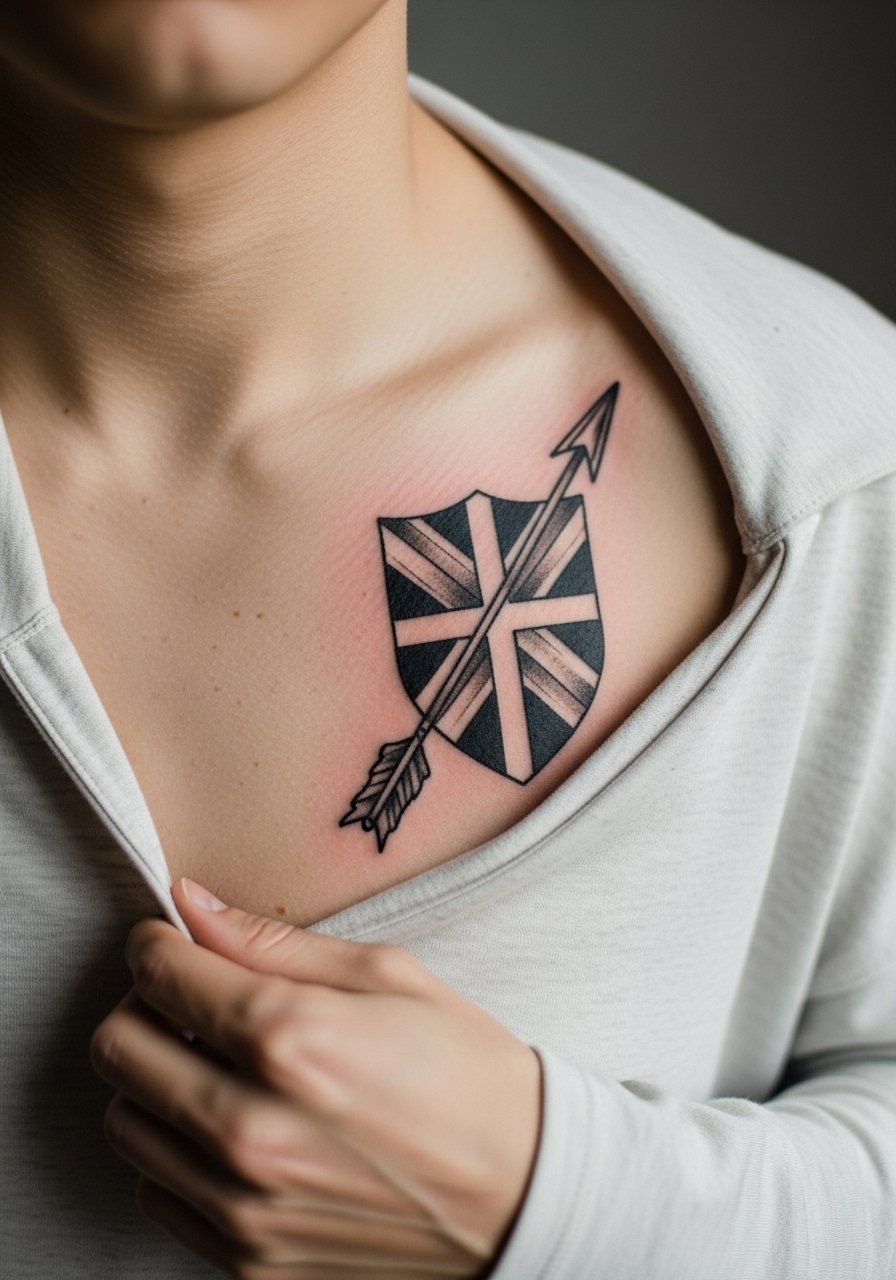
Upper chest placements suit heraldic, emblem-style arrows where strong silhouettes matter. The skin here tolerates bold shapes and the area is visible in many clothing choices. Ask for a clear contrast between crest elements and the arrow so the crest keeps its structure as skin moves. Pain is moderate and many choose a single session for a compact crest. When negotiating design, avoid tiny filigree and instead aim for simplified motifs that age into clear symbols. For show-off wear low-collar shirts or a crew-neck tee with the neckline shifted slightly.
18. Arrow Quiver Half-Sleeve
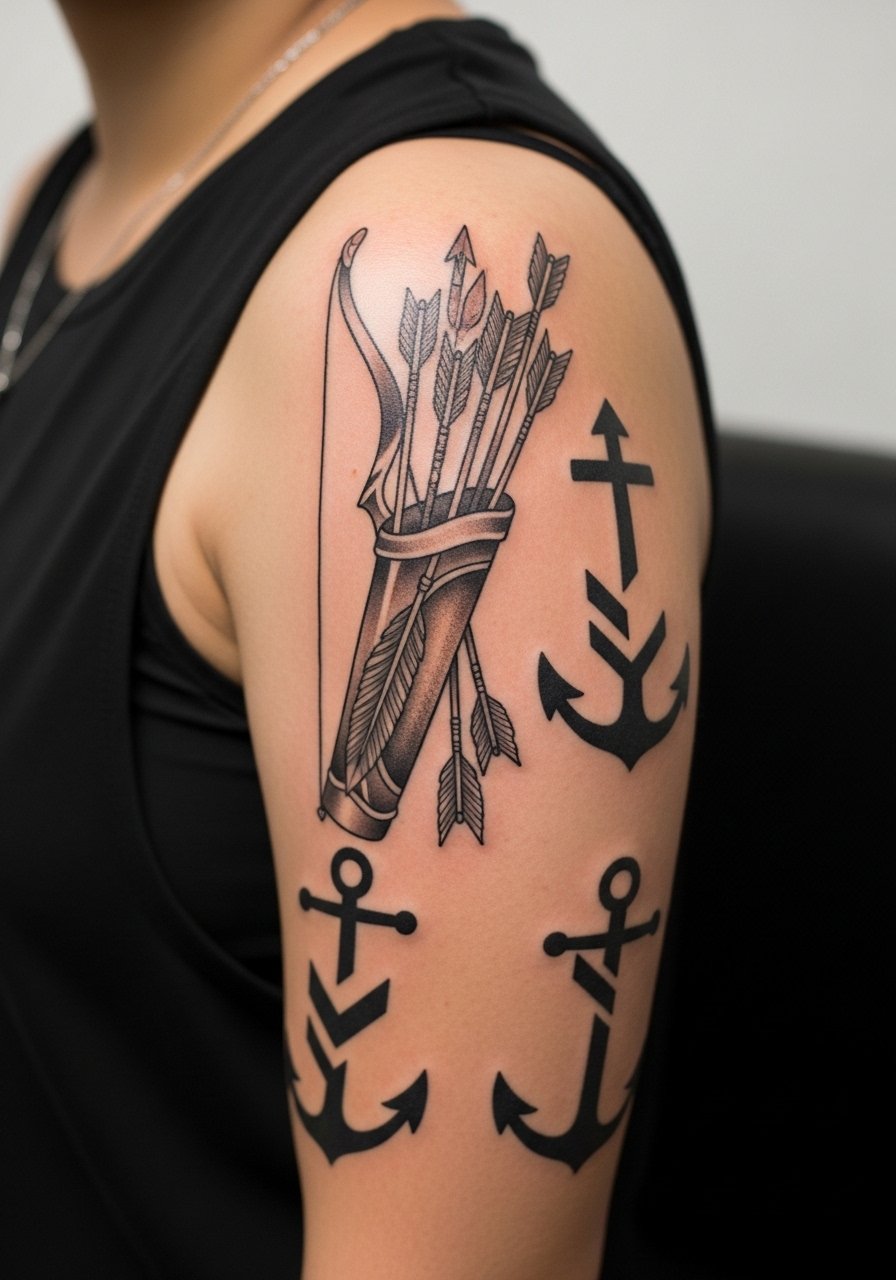
Half-sleeve quiver compositions work best when arrows are given rhythm and pockets of breathing room. I tell people to plan for multiple sessions and to prioritize broad anchors rather than thin internal detail. The upper arm tolerates this density well, and the result holds up if saturation is balanced. A common mistake is cramming too many tiny arrows into a narrow column. For the appointment wear a sleeveless top you can take off easily without tugging across the shoulder.
19. Arrow Piercing a Floral Heart on Inner Bicep

The inner bicep is tender but excellent for intimate, visible art that you can choose to show or hide. Keep the floral details slightly bolder than you might on an outer limb because the inner skin can blur finer veins of detail. Touch-ups here are predictable and not unusual after the first year. One mistake is placing ultra-fine script adjacent to tiny petals. Instead, bolden the heart silhouette and keep the floral work slightly stylized. For sessions wear a loose tank so the artist has clear access and you stay comfortable.
20. Arrow with Compass Rose on Thigh Side

A compass rose anchors an arrow design and the thigh gives enough real estate for a slightly larger, clearer composition. I like to increase negative space between compass points so the piece keeps its radial clarity over time. Sessions are comfortable and can run longer if you want texture and stipple. Avoid compressing numbers or tiny degree marks into the design. For session wear loose shorts or a wrap skirt that you can shift without discomfort. Try pairing the finished piece with high-waisted shorts in summer to let the compass breathe.
21. Archer Silhouette with Bold Arrow on Lower Back
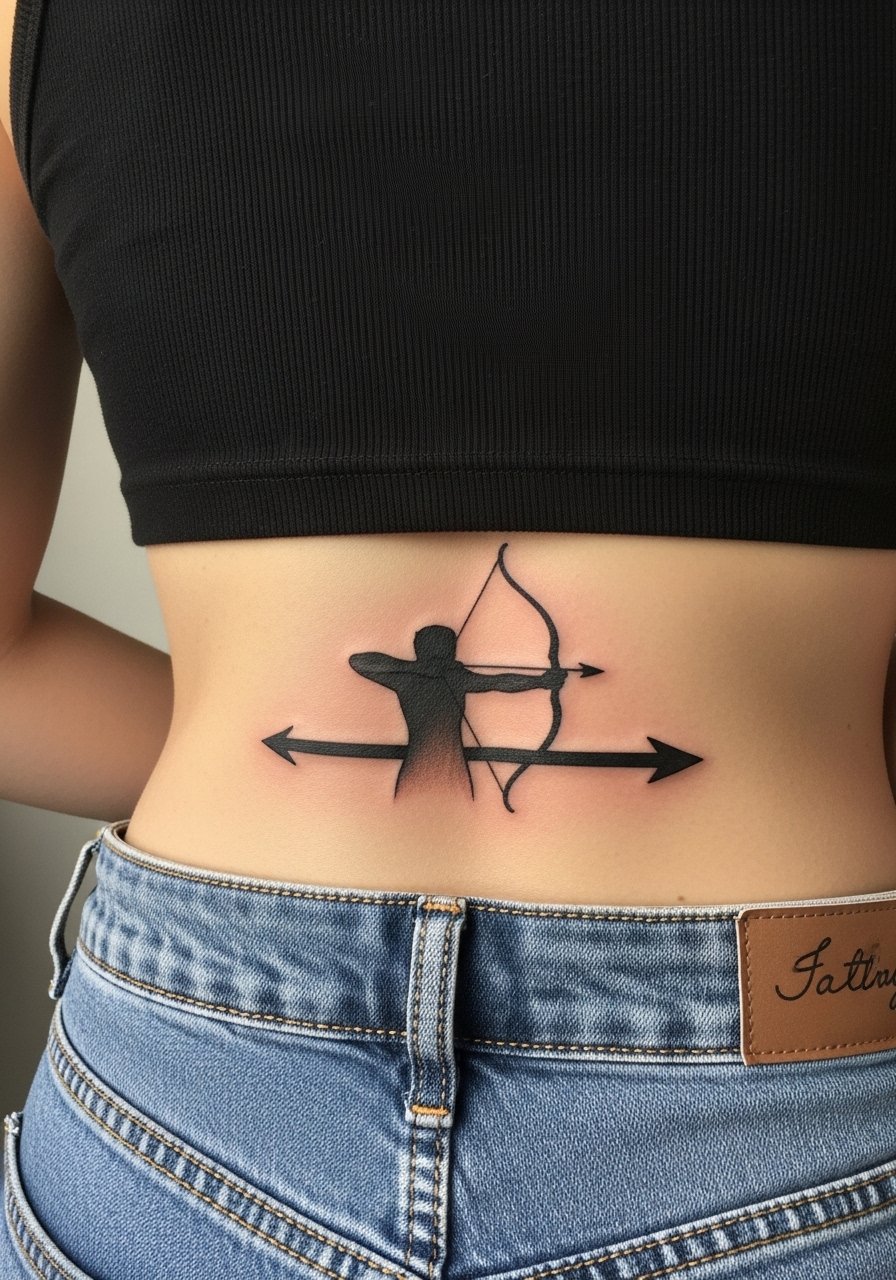
Lower back placements offer a cinematic canvas for narrative bow and arrow pieces. Because motion and clothing sit differently there, I ask for strong silhouettes and avoid thin crosshatch details that sit under waistbands. Sessions are moderate in pain and often done in a single sitting for compact silhouettes. A common mistake is placing the most delicate strokes where belt friction will occur. Discuss clothing habits with your artist so the piece sits where it spends most of its life. For evening looks an open-back top frames the scene while keeping the piece intentional.
Frequently Asked Questions
Q: Will a fine line bow and arrow blur faster than a bold traditional one on the forearm?
A: From what I have seen, yes. Fine line work tends to soften faster under regular sun exposure and daily friction. If longevity matters pick slightly heavier line weights for the forearm and ask your artist about spacing so the silhouette stays readable at year three.
Q: Are ribcage arrow pieces worth the pain for delicate detail?
A: It depends on your tolerance and the artist's approach. The ribcage can be great for bold, well-spaced arrows but extra-fine detail risks blurring. Name the controversy in the consult and ask your artist how they adjust needle depth and spacing for ribs.
Q: How often will a wrist constellation arrow need a touch-up?
A: Expect more maintenance on the wrist than on the upper arm. Many people plan for a touch-up around year two to three, depending on sun exposure and hand washing frequency. Keeping the line weight slightly bolder from the start buys longevity.
Q: Can I wear regular clothes to a sternum or ribcage session?
A: Yes, but prep matters. For sternum sessions wear a fitted sports bra or a top you can lower slightly without exposing more than needed. For ribs choose a cropped top or loose zip-front layer so the artist can access the area cleanly.
Q: Is a hand or palm-edge arrow still professional for most workplaces?
A: Hand tattoos remain visible and some workplaces still have policies about them. If your career path has formal dress codes consider placing the arrow on the outer thumb or lower wrist instead. Discuss visibility with someone who understands your industry.
Q: What are realistic discovery routes to find an artist who specializes in bold arrow work?
A: Search local studio directories, browse portfolio hashtags focused on blackwork and traditional linework, and check tattoo community threads for recent recommendations. Spend time looking for healed photos in portfolios rather than just fresh shots so you can see how a style ages.
