
Fine line sleeve trends dominate feeds this year, but what keeps looking crisp after a few summers is often different. Traditional linework and saturated color age in predictable ways, and the choices you make in placement, spacing, and line weight are the real longevity levers. Read these sleeve ideas with an eye for how each design heals and what to ask your artist at the consultation.
1. American Anchor and Rope Full Sleeve
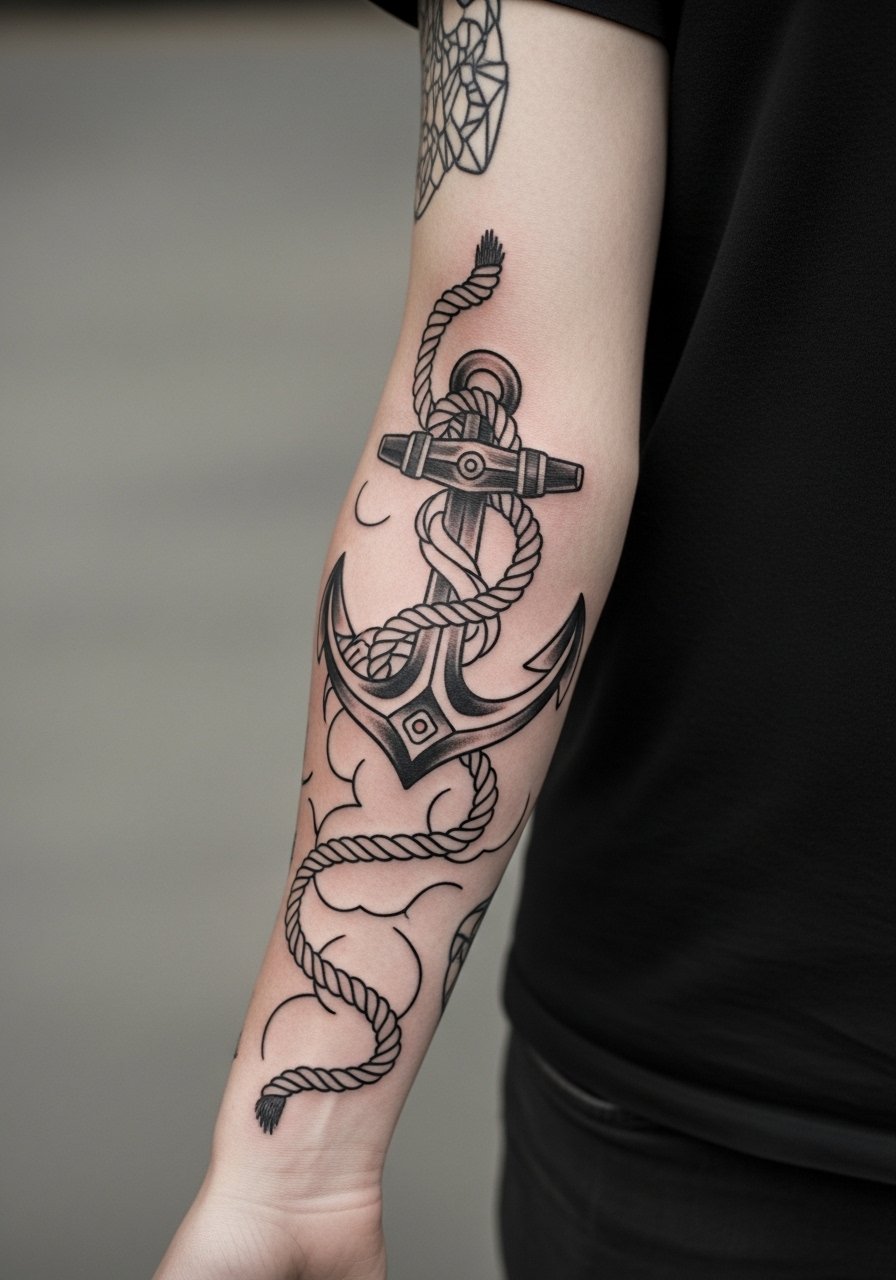
Start this sleeve when you want continuous nautical flow down the arm and clear high-contrast linework that reads at a distance. Expect forearm and upper arm sessions to be 3 to 5 sessions and the inner bicep to be slightly more sensitive. Tell your artist to use thicker outlines around anchors and thinner inner strokes for rope texture, that prevents early blending. A common mistake is packing tiny details into the rope with no negative space, which ends up muddy after a couple of years. For show-off outfits, a fitted white tank top keeps the arm visible without competing with red accents.
2. Neo-Traditional Rose and Dagger Full Sleeve

This mix of classic motifs with modern shading suits people who like color depth but still want traditional line anchors. Sessions run 4 to 6 times depending on wraparound filler. When you consult, ask for stipple shading in shadow areas rather than soft painterly fills, because stipple holds better on active skin. Artists split on fine detail versus scale. One camp says scale down tiny petals to keep composition airy. The other camp says add micro-detail and accept touch-ups later. If you plan outfits around it, try a black leather vest to frame the rose and dagger without color clash.
3. Traditional Eagle and Banner Sleeve
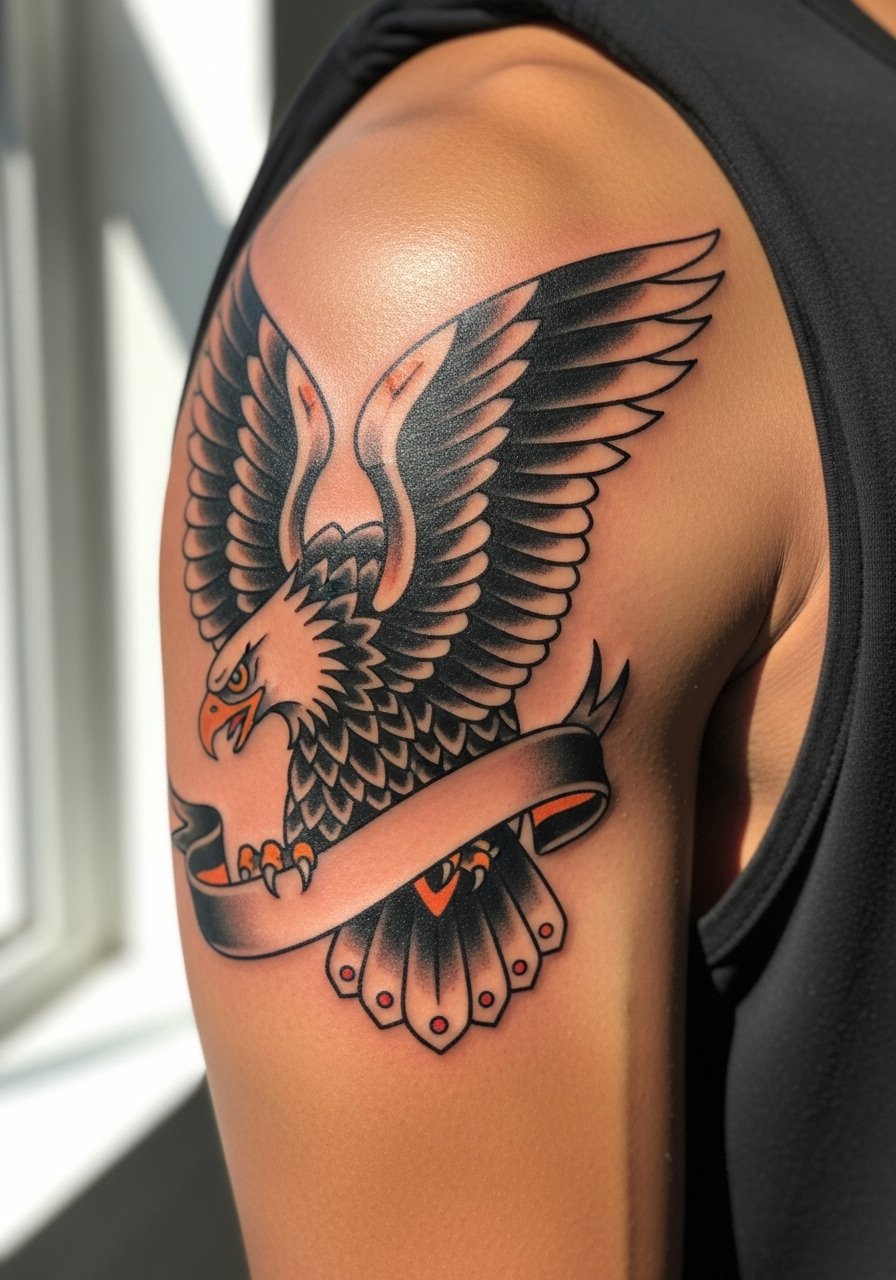
Go for an eagle and banner when you want iconic silhouette and high contrast that prints well in photos. Upper-arm placement means lower pain and faster sessions, typically 2 to 4 sittings to finish the banner work. Tell the artist to keep banner lettering thick and spaced so it remains legible as the skin ages. A common error is script that is too thin for the banner width, which blurs into the fill. This motif pairs well with a muscle tank men look when you want to show the shoulder cap.
4. Traditional Ship and Ocean Wave Half Sleeve

A half sleeve ship reads like a story that travels with your arm and usually finishes in 3 to 4 sessions. For durability, ask for strong black outlines on hulls and simplified wave patterns rather than micro-texture. The inner forearm will feel less painful than the elbow, but expect some discomfort when the needle follows the curve near the wrist. Common mistakes include packing too many small sea elements close together, which leads to muddy texture later. For wearing it proudly, try a rolled chambray shirt in navy and a chambray work shirt men to keep the arm visible without clashing with blue tones.
5. Neo-Traditional Swallow and Compass Sleeve

This design works if you want migration and guidance motifs with a nostalgic flash twist. Expect 5 to 7 sessions for a full wrap with compass backgrounds and bird movement. During consultation, show photos of exact swallow poses you like and ask for compass elements to be sized so they remain readable from a short distance. A frequent mistake is making the compass tiny and then losing the cardinal markers within a year. For show-off outfits, a muscle tank men gives a retro vibe that complements the birds.
6. Traditional Heart with Mom Banner Full Sleeve

Choose this when you want a sentimental focal point inside a larger sleeve that wraps outward. Inner-bicep work can be more painful and will need shorter sessions of about 1.5 to 3 hours each. Ask your artist to draw the banner wider than you think is necessary so the script ages legibly. A mistake I see is script placed too close to the heart outline, causing the letters to merge down the line. For session comfort wear a loose button-down shirt you can pull aside so the artist has clean access.
Studio Day Picks
If ideas 1 through 6 are heavy on arm wraps and inner-bicep banners, a few targeted items will keep the session smooth and the first week less fussy.
- Tattoo Goo. Non-greasy moisture that users prefer for large sleeves, helpful when you're covering long areas and want color to settle without heavy residue.
- Revive Lotion. Lightweight, breathable lotion that can make a difference if you and your artist are debating Saniderm versus dry healing during the consultation.
- Australian Gold SPF 30 Post Tat. Travel-friendly sun protection that keeps fresh arm work from fading on warm days out.
- Ink Ichiban Balm. Thin balm that helps prevent cracking on bold lines while still letting color show through cleanly.
- Hustle Butter. A thinner alternative to heavier ointments for the first days, useful if humidity made previous sleeves bubble.
7. American Traditional Panther Climbing Sleeve
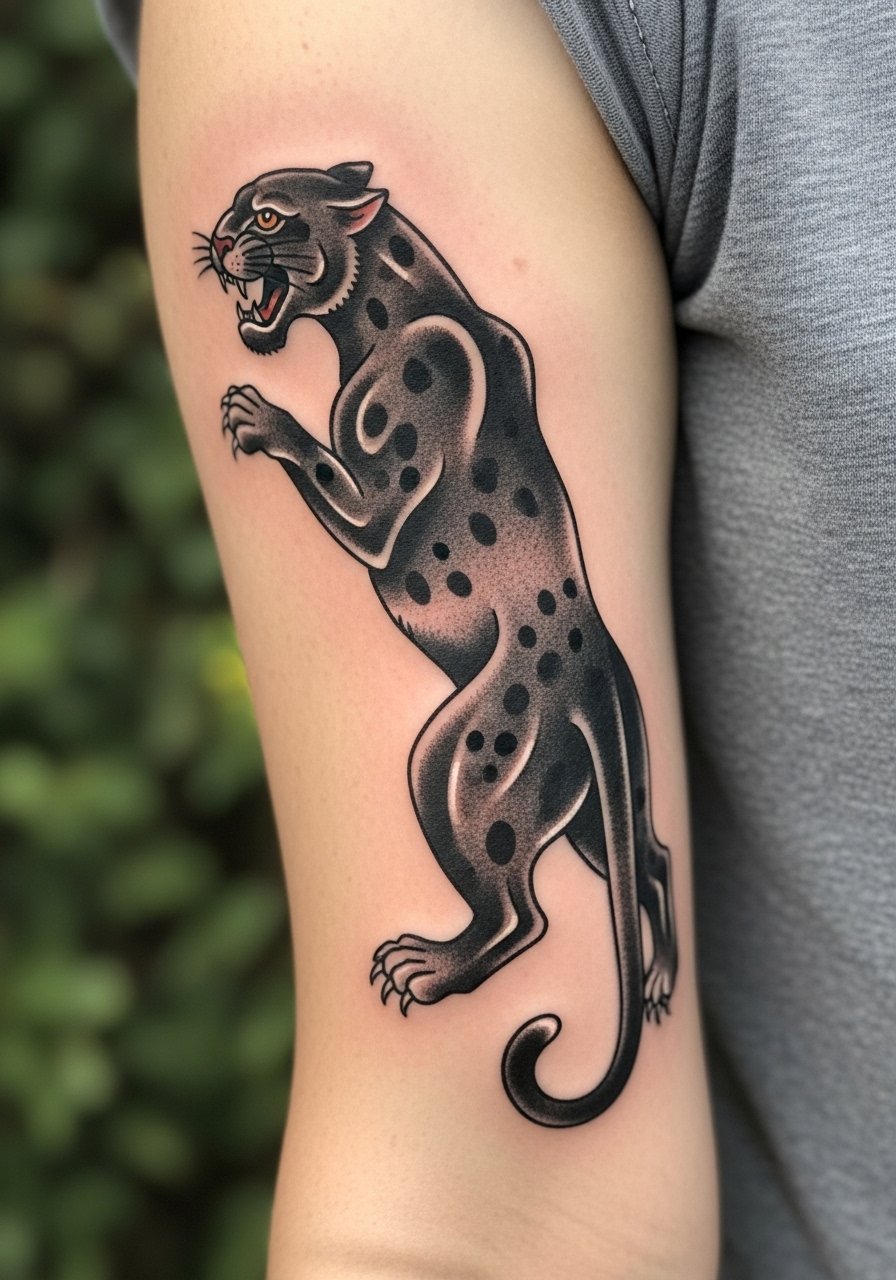
A climbing panther is ideal if you need dynamic coverage that blends with existing pieces. Expect 6 to 10 sessions for a full shoulder-to-outer-arm wrap because of the shading and motion. Tell your artist you want the panther in a climbing posture to solve coverage gaps rather than a static head. A common mistake is overloading the elbow with fine shading, which tends to fade faster there. This sleeve looks sharp with a slim henley shirt you can roll for shoulder reveal.
8. Traditional Skeleton Hand and Dice Forearm Extension
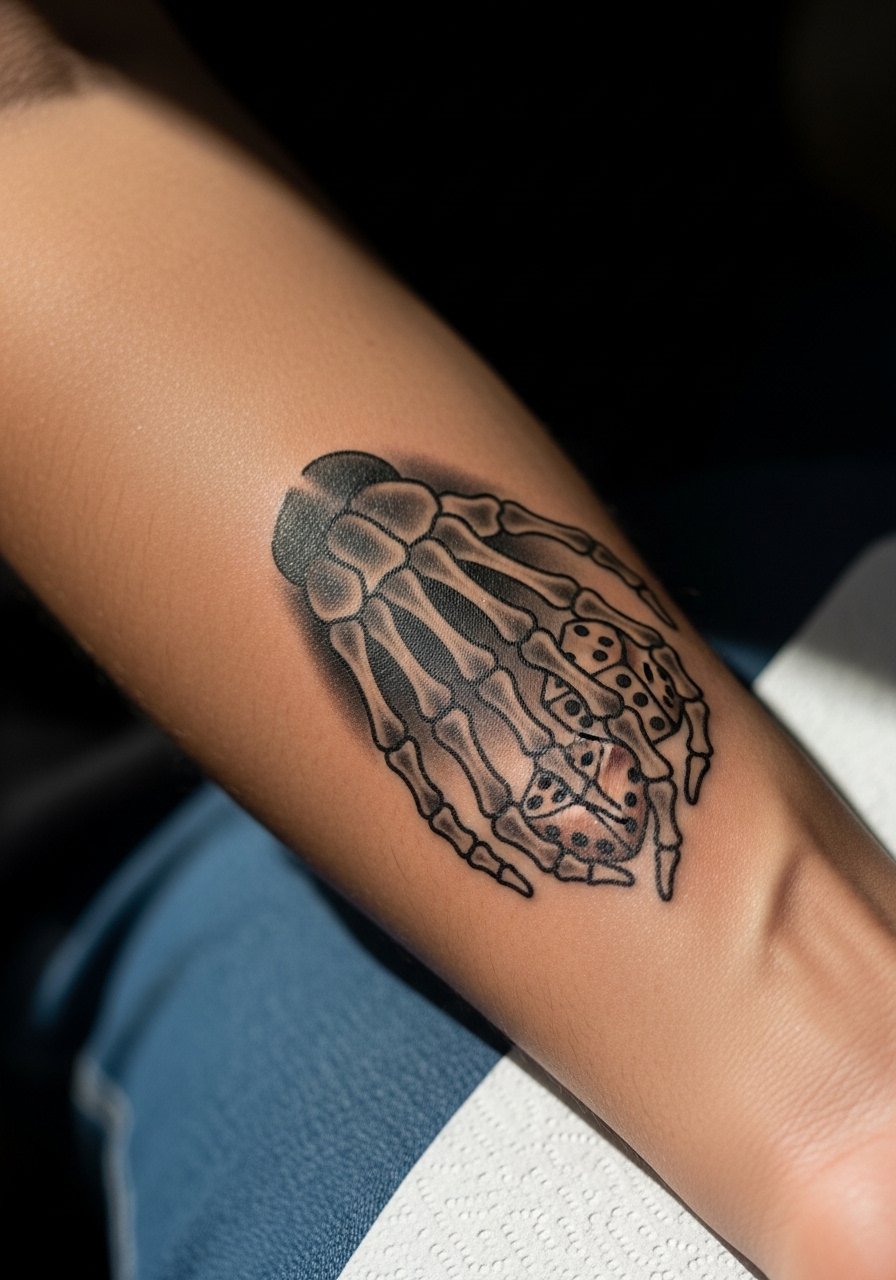
Go for dice and a skeleton hand if you want an edgier forearm extension that reads well in low light. Forearm pieces usually take 1 to 3 sessions depending on how much background you want. When you sit for this, wear a short-sleeve button-up so the artist can reach the transition area easily. A frequent mistake is leaving too little negative space between dice and bones, which causes the composition to blend after healing. Expect touch-up at year two or three where the dice corners softens.
9. Neo-Traditional Pinup Girl and Anchor Sleeve
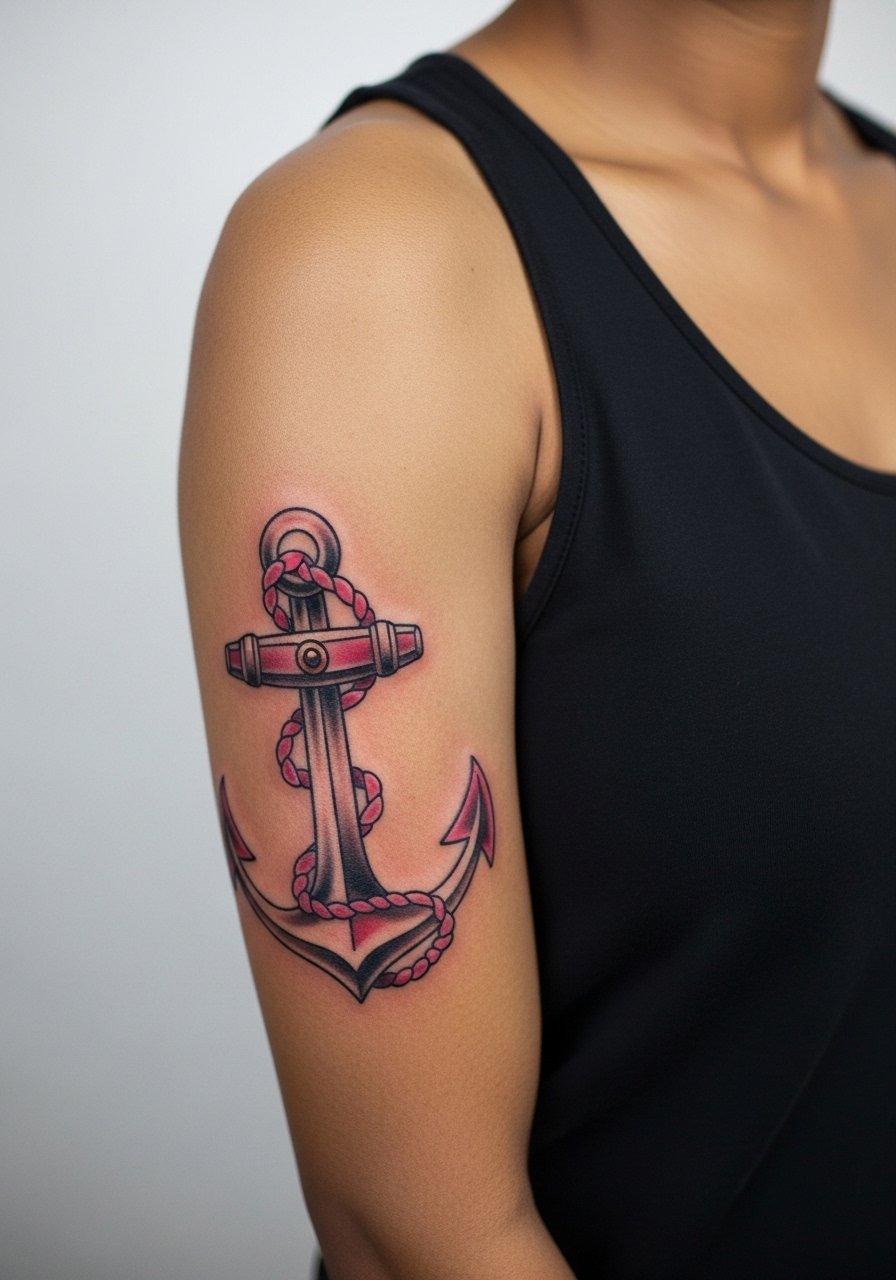
Pinup sleeves bring retro femininity into a traditional framework and usually need 5 to 8 sessions for full detail. Ask your artist for reference photos that match the pose and how much facial detail you want, because tiny facial lines can blur if scaled too small. One mistake is insisting on micro-realistic faces at the same scale as bold traditional elements. For nights out try a slim henley shirt or an off-shoulder tee to let the shoulder artwork breathe.
10. Horse Shoe and Four Leaf Clover Luck Sleeve
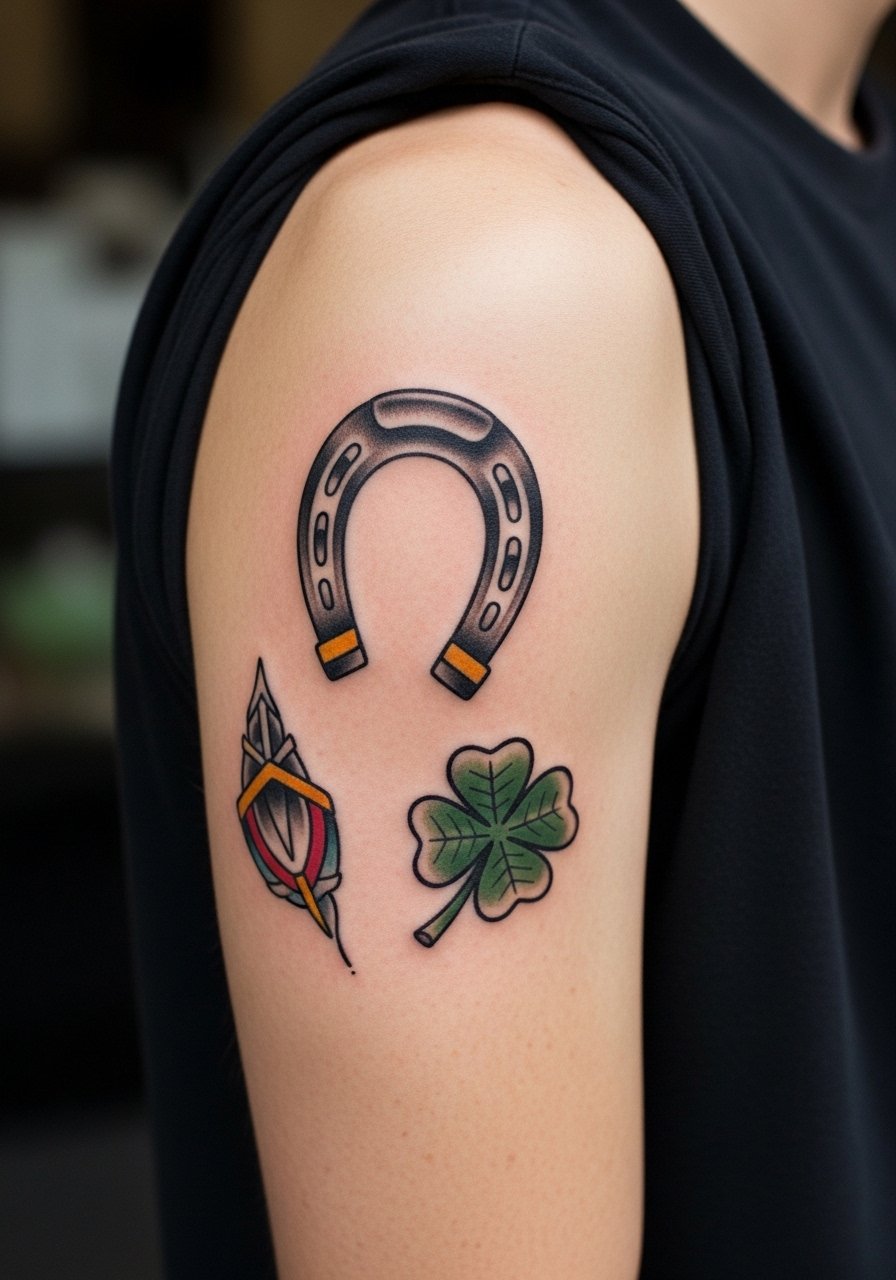
This compact good luck patch works well if you prefer quarter or half sleeves in short bursts of bold imagery. Sessions are short, usually 2 to 4 sittings depending on filler. Ask for green accents that are saturated but not overworked so the clover holds pigment on different skin tones. The mistake is cramming too many tiny luck symbols close together, which leads to loss of definition after a year. Pair this with a muscle tank men for a casual show-off look.
11. American Traditional Wolf Head with Stars Background
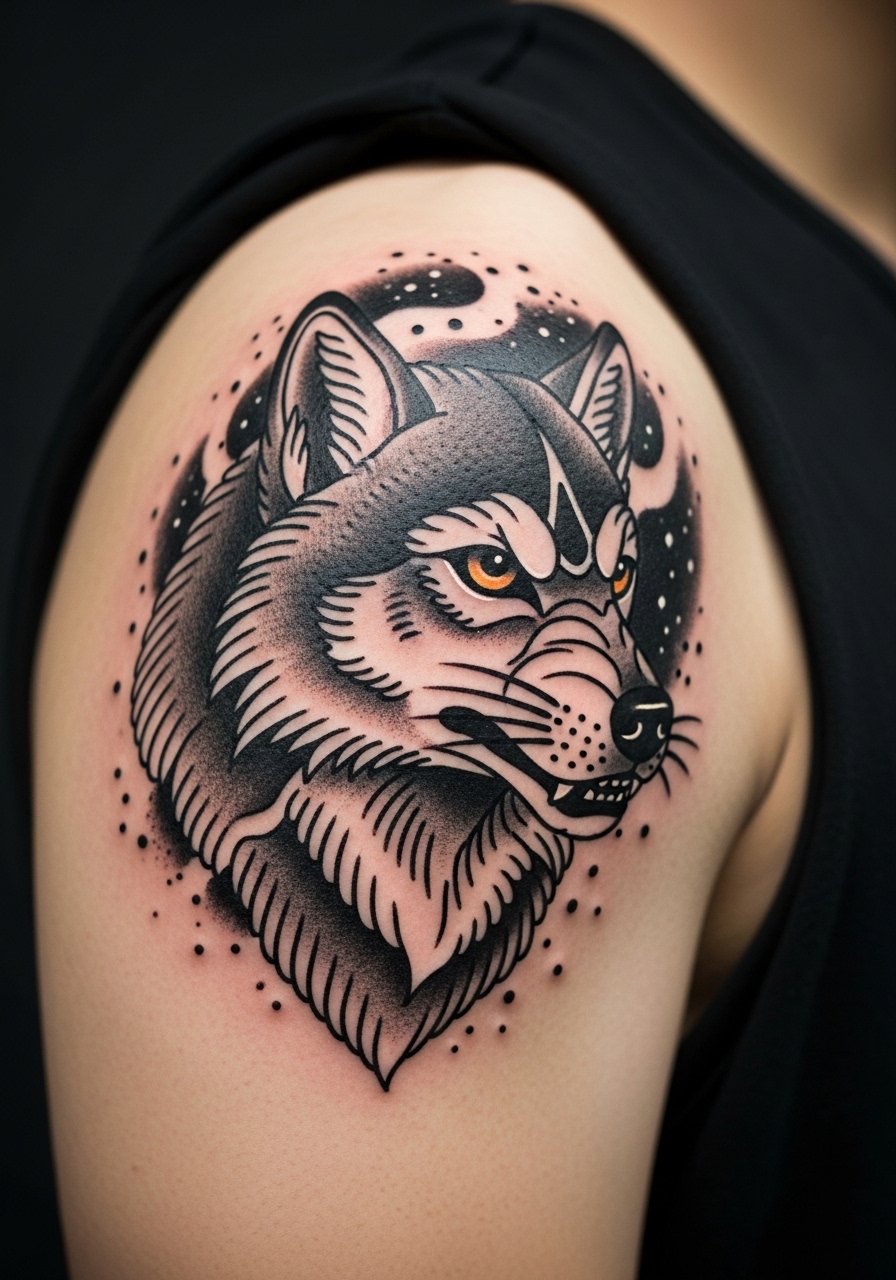
A wolf head across the shoulder cap reads well for anyone wanting high saturation and clear linework that ages evenly. Shoulder placement lowers blowout risk compared to inner arm and sessions run 3 to 5 times. Tell your artist to use thicker outer linework on the wolf and stipple or dot work in the star-field for texture that lasts. A common error is over-shading the ears with soft fills, which can flatten over time. Wear a slim henley shirt for easy access and styling.
12. Traditional Pocket Watch and Rose Timepiece Sleeve
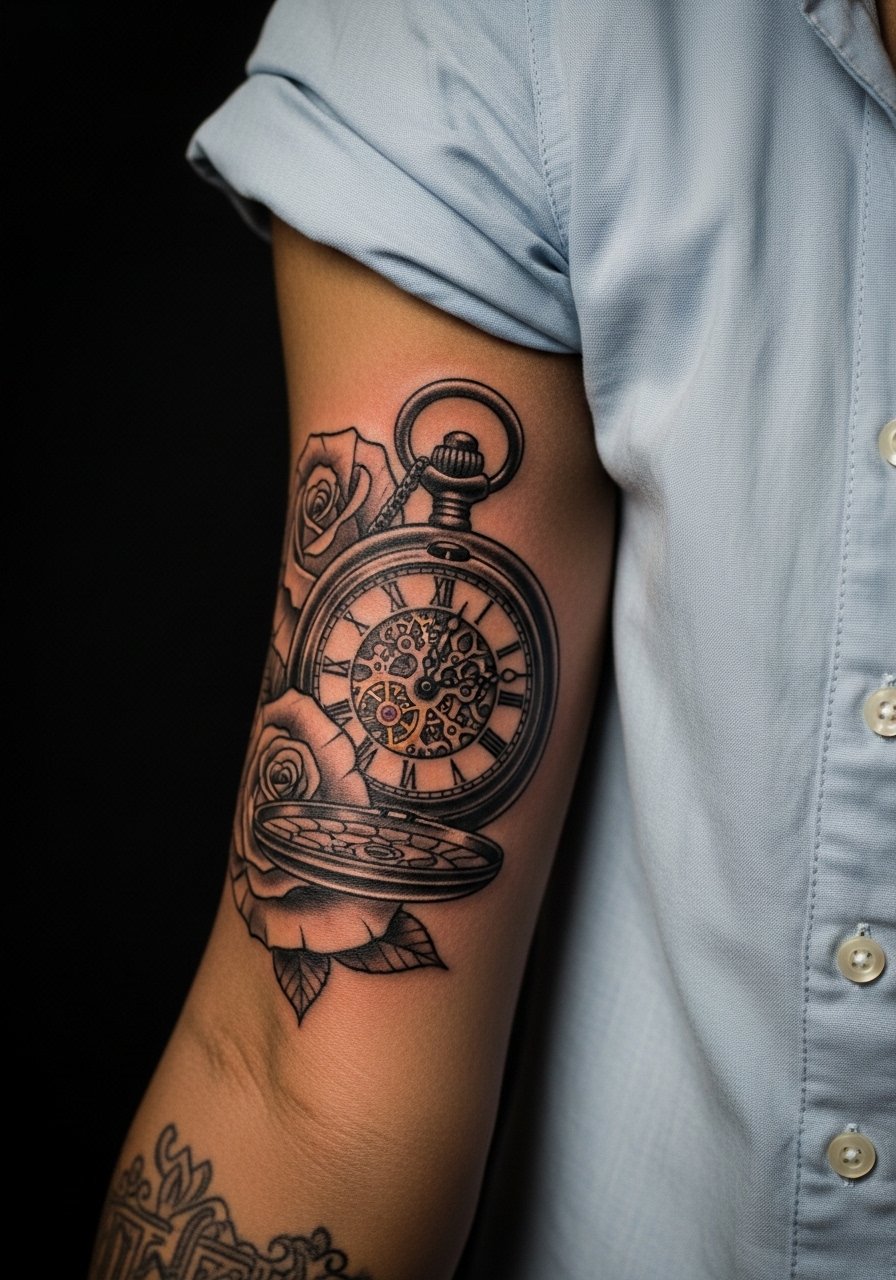
Pocket watch tattoos are great for symbolic sleeves that incorporate time and memory, especially when placed on the inner arm. Inner-arm work is more sensitive and usually done in shorter sessions to let the skin rest. Ask your artist to draw gears slightly larger than you expect so the details age clearly. Artists also split on initial coverings and healing product choices. One camp prefers protective film for the first few days and the other favors dry healing. Be explicit about which approach your artist recommends. For pre-session comfort, wear an earth tone tee you can roll for easy access.
13. Negative Space Optical Filler Sleeve

This approach uses traditional anchors and roses but leaves deliberate gaps so the skin becomes part of the pattern, which helps with long-term legibility. Request your artist plan negative spaces as intentional shapes rather than random gaps, because that is what prevents early muddiness. It is also a practical fix if you want to add pieces later without scale clashes. A common mistake is squeezing filler too tightly between main motifs. For outfit pairing, a vintage band t-shirt shows off the sleeve without competing visually.
14. Birthstone Accent Traditional Patchwork Sleeve
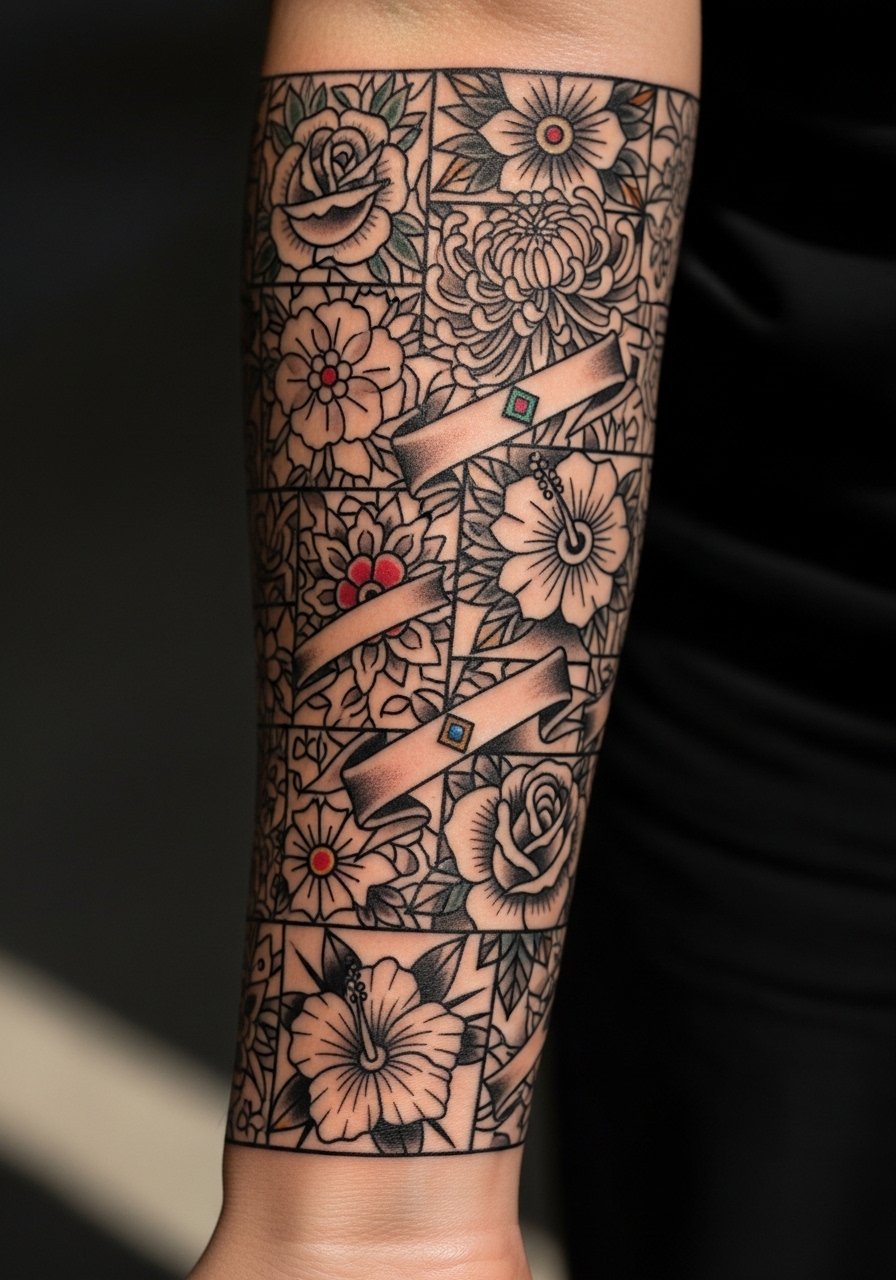
If you want personalization without full portraiture, adding birthstone color spots into a traditional flash patchwork is subtle and durable. A patchwork build works well over multiple sessions so you can test how color settles on your skin tone. Tell your artist which tones you prefer and where you want them as small accents rather than full fills. The mistake is trusting tiny color dots in high-friction zones where they can blur. For session wear, a loose button-down shirt makes forearm access clean.
15. Hybrid Trad and Irezumi Wave Sleeve
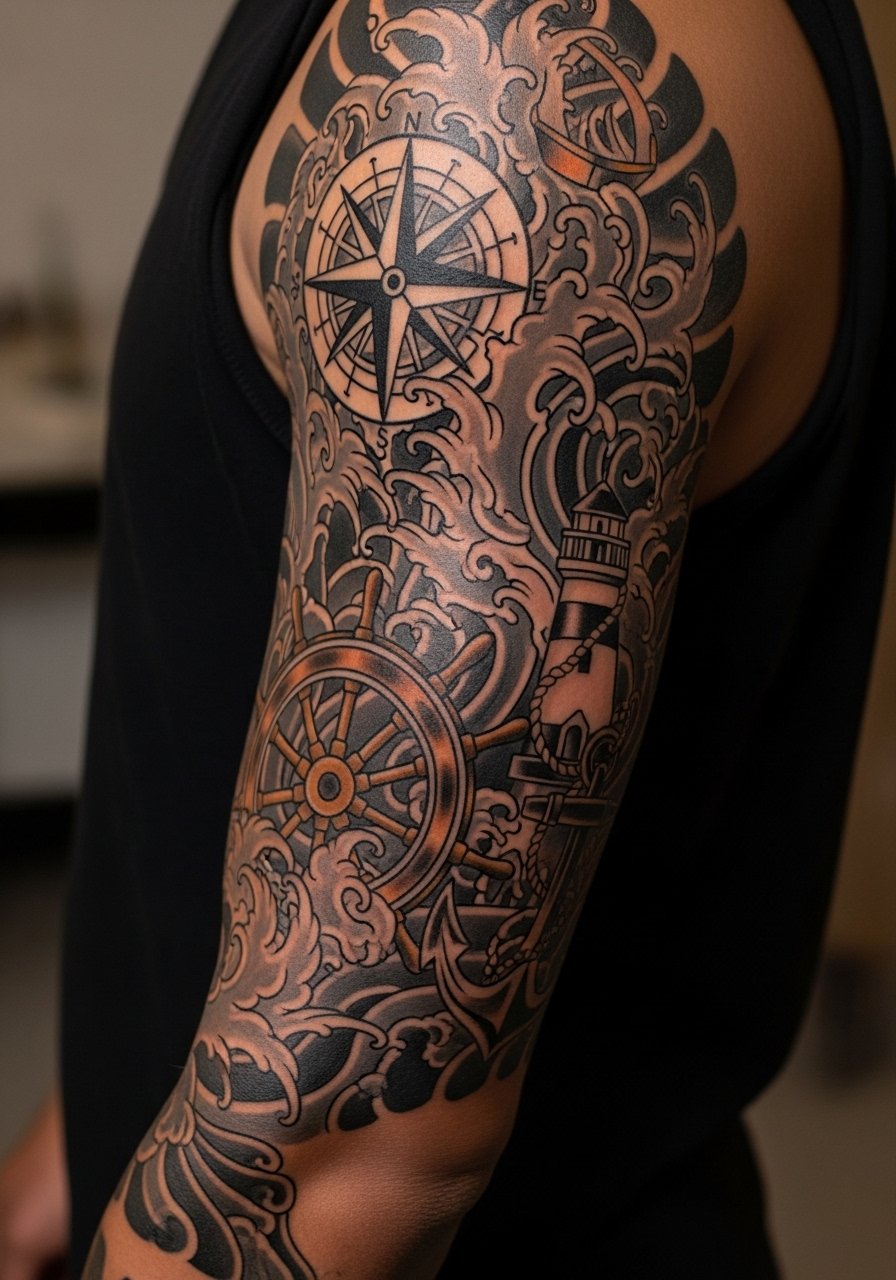
Combining Western sailor flash with Japanese wave elements creates scale and movement that can unify a multicultural sleeve. For success, ask for simplified wave patterns that match the bold outlines of trad pieces so the two languages read together. A common error is adding highly detailed Irezumi shading into small gaps, which becomes visually noisy. This hybrid is best for people ready to commit to 4 to 8 sessions since the scales and wave flows must be mapped early.
16. Compass Rose and Map Panel Sleeve

A forearm compass and mini map panels create directional flow and storytelling on a visible plane, with 3 to 5 sessions typical. During consultation show the artist exact map elements you want and ask to keep compass markings bold and spaced. The usual mistake is squeezing tiny coordinates into the map that later merge into background texture. For daytime wear, a rolled chambray or a chambray work shirt men lets you flash the compass without overexposing the panel.
17. Traditional Panther or Jaguar Wrap with Stipple Shading
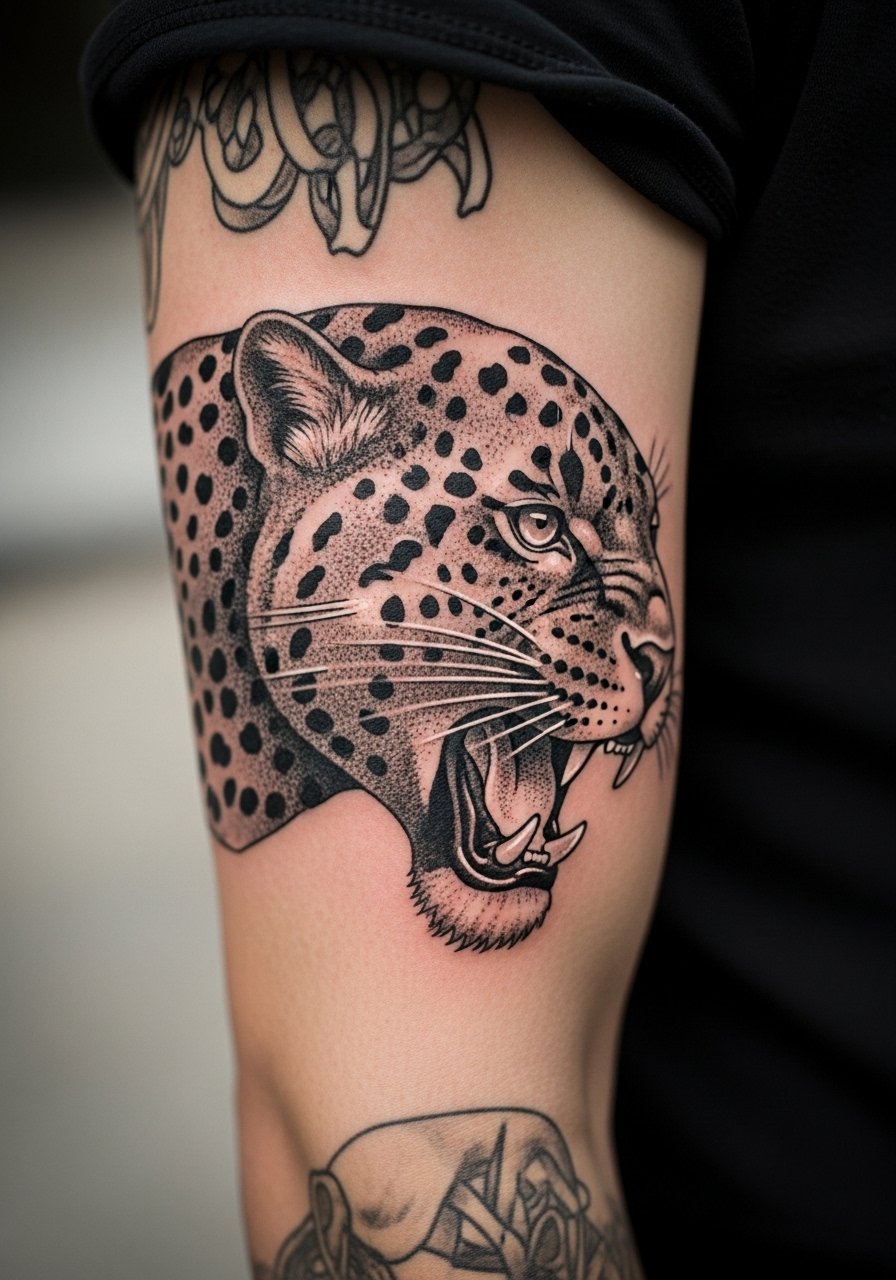
Choose stipple shading if you want texture that reads without the heavy smooth fills that can blur over joints. This wrap style uses motion to solve coverage and usually needs 4 to 7 sittings. Tell the artist to use stippling in the shadow zones and solid black in primary outlines to retain contrast. A mistake is using too much soft gray wash near the elbow crease, which fades unevenly. If your sleeve includes joint work, schedule shorter sessions and expect touch-up around high-movement areas.
18. Traditional Dagger and Snake Arm Wrap
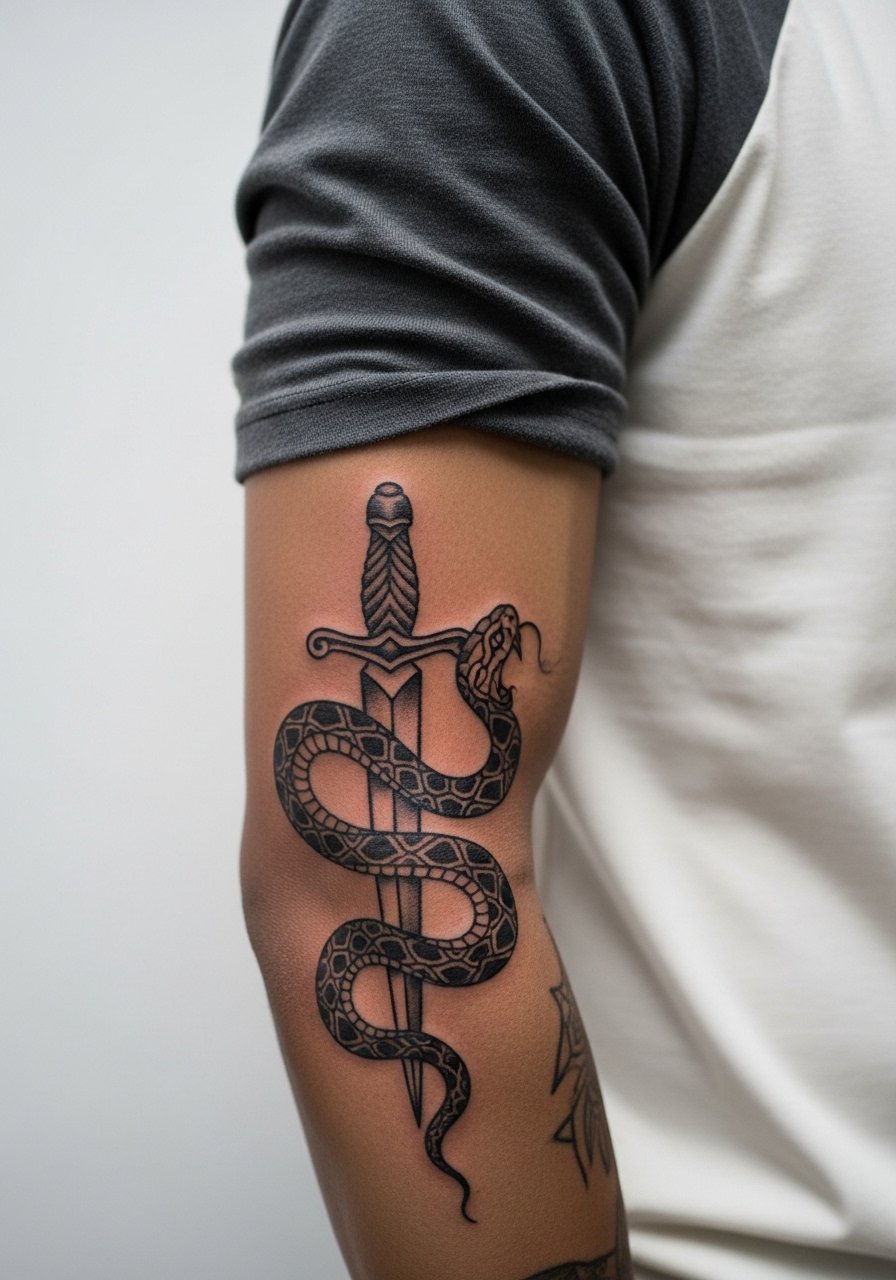
A dagger and snake offers vertical motion and relief for gap fillers while still keeping strong line readability. Elbow-area work rates higher on pain scales and may require short sittings to finish uncomfortable zones. Ask your artist to leave a buffer of negative space around the elbow crease so the design does not compress when the arm bends. People often make the mistake of forcing dense shading across the crease which softens quickly. For session comfort, wear a three quarter raglan so cuff rub is minimized.
19. Floral Band and Rose Quarter Sleeve

A floral band is a quick way to get a sleeve feel without a full wrap and usually finishes in 2 to 3 sessions. Specify petal spacing and bold outlines for each rose so petals do not merge after healing. A typical error is over-detailing leaves that sit in high-motion areas, which then lose crispness. This placement pairs easily with short-sleeve shirts and will age predictably on the outer arm.
20. Anchor, Wheel, and Nautical Map Half Sleeve

This compact nautical set reads well when the wrist-to-forearm transition is used as a storytelling strip. Plan 3 to 4 sessions and ask for strong outlines on the wheel and simplified map hatching for legibility. A common mistake is cramming tiny map text into the skin which blurs quickly. For accessorizing try a leather cuff bracelet on the opposite wrist which complements rope and hardware details.
21. Traditional Lion Head and Crown Sleeve
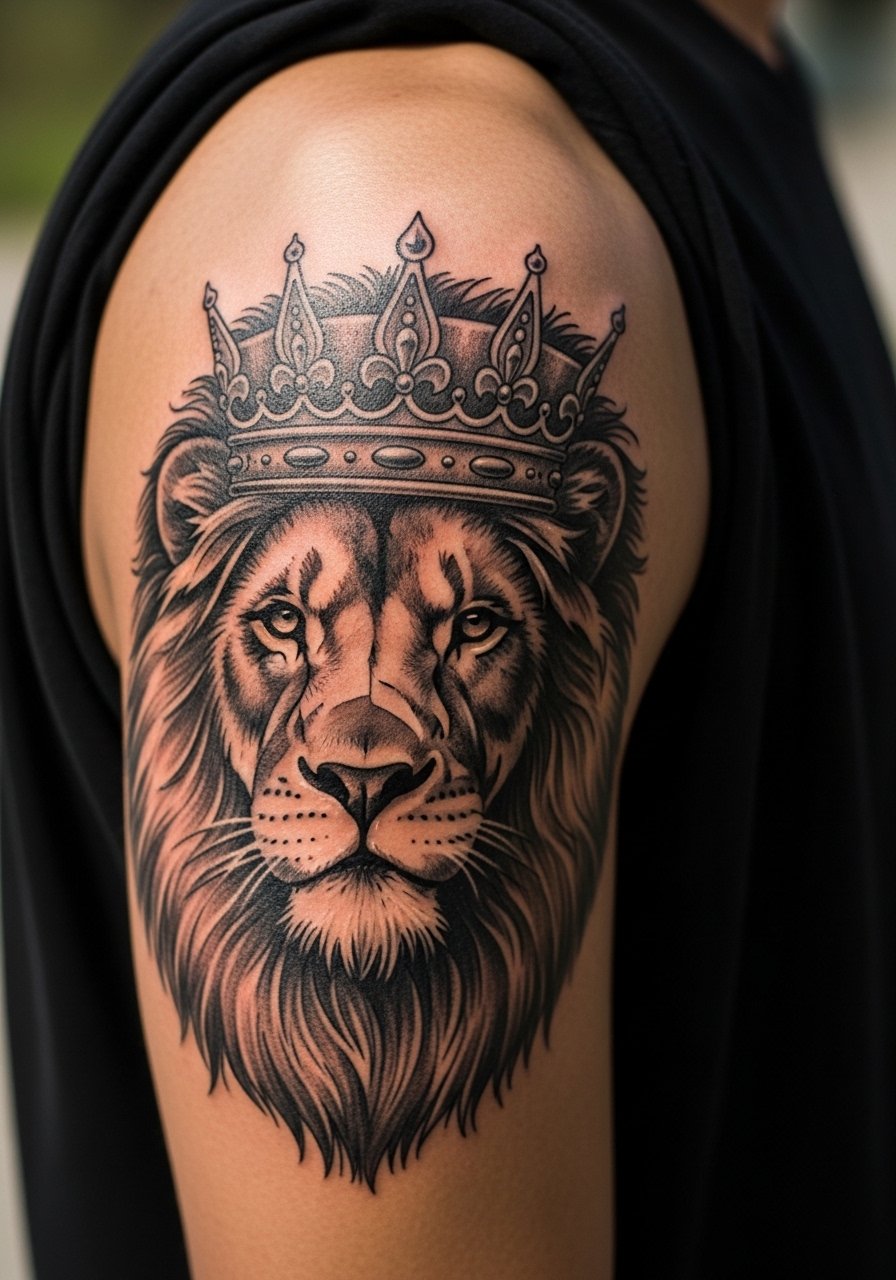
A regal lion and crown suit someone who wants a bold focal point that holds up in photos, and it usually needs 3 to 6 sessions depending on mane detail. Tell the artist to keep mane linework directional rather than clouded shading so strands remain readable. People sometimes request too many tiny mane strokes that blur into a gray mass. For placement, the shoulder cap is forgiving and often safer from blowout than inner arm spots.
22. Shipwreck Scene with Banner Memorial Sleeve
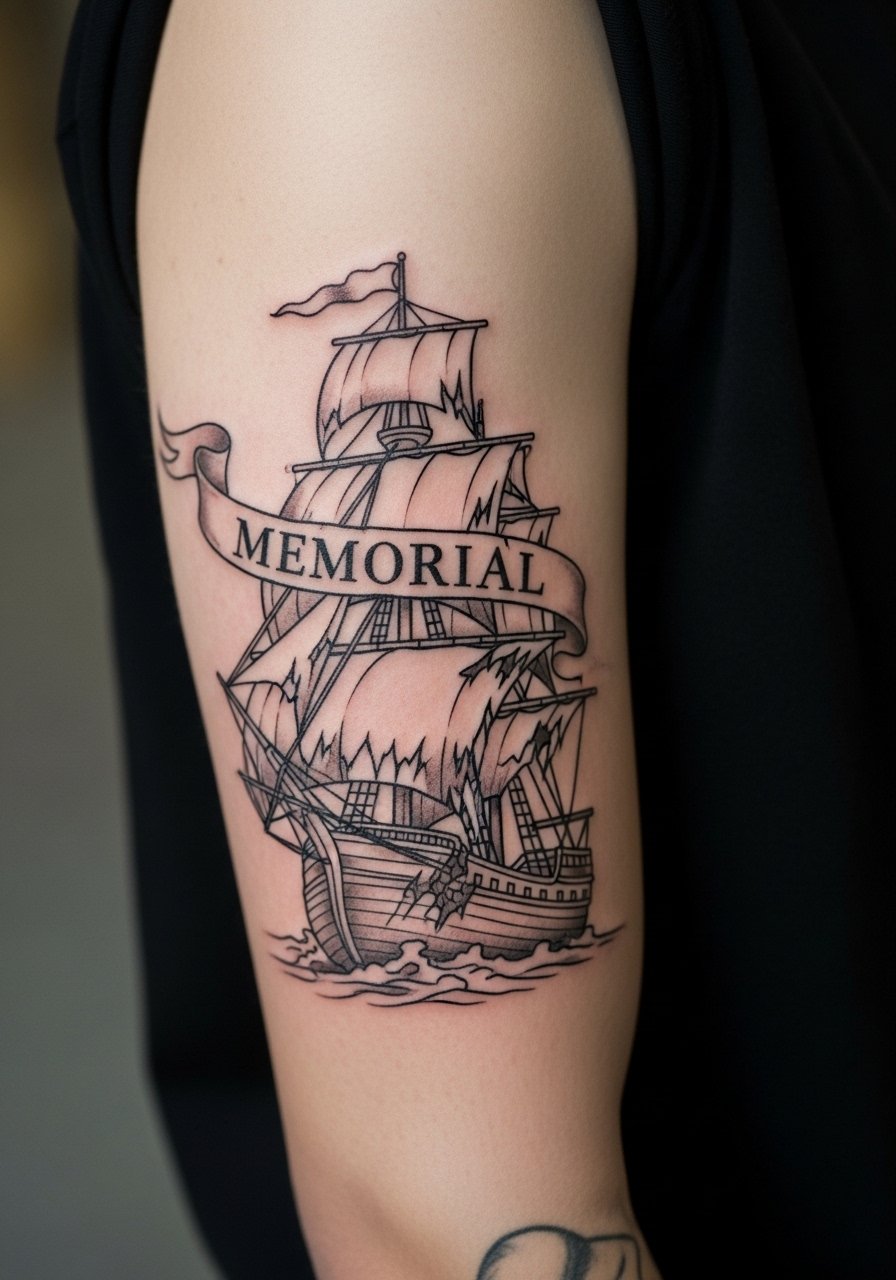
Memorial sleeves with shipwreck scenes carry strong visual narrative and need careful spacing to avoid overcrowding. Plan 4 to 6 sessions and tell your artist which elements must stay readable so the banner text survives. A mistake I see is packing too many tiny wreck details into a small area which becomes indistinct. For session comfort and reveal, a slim henley shirt lets the upper arm show without revealing chest.
23. Gypsy Fortune Teller Hand Sleeve
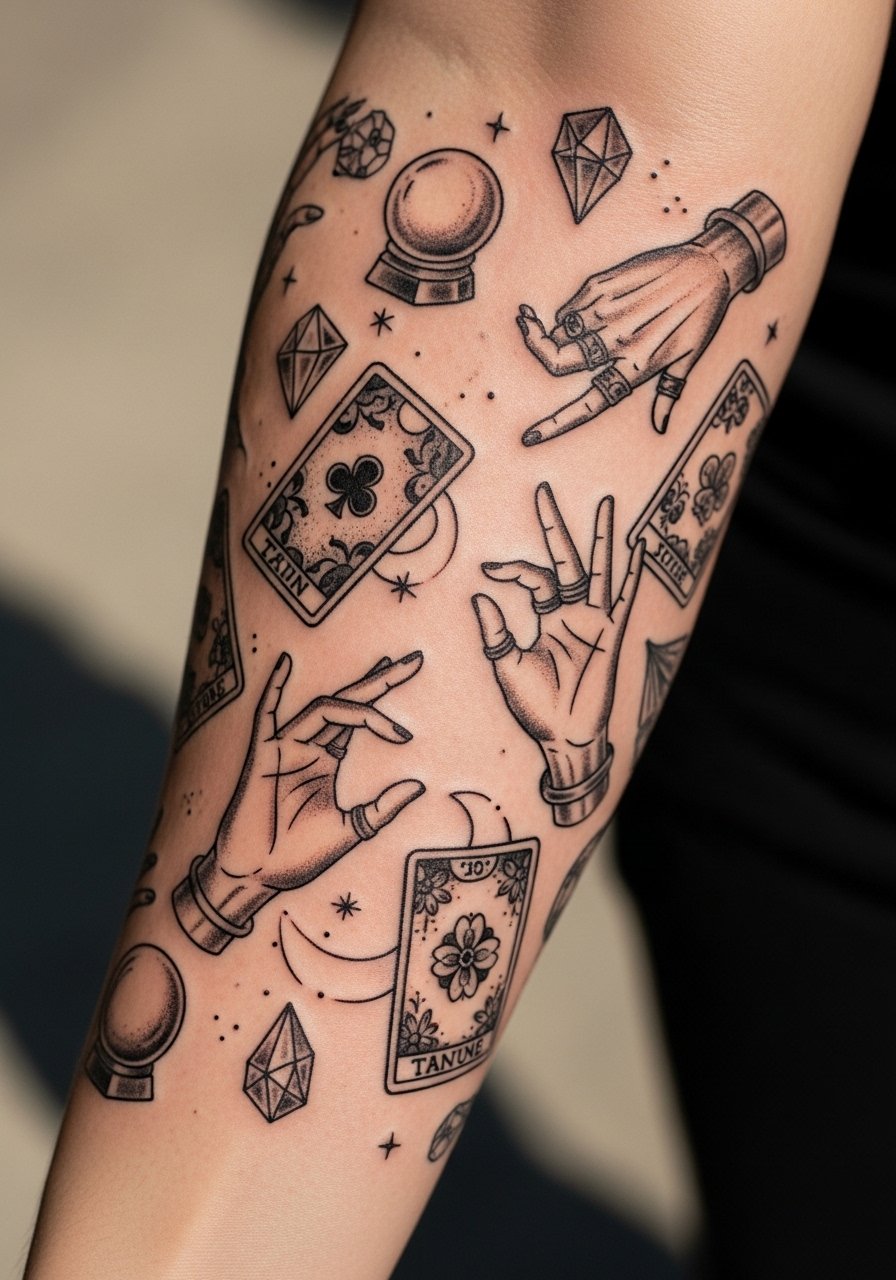
This themed sleeve blends symbolic flash with readable motifs and suits someone who wants modular pieces that can be added over time. Sessions are flexible and can be scheduled in smaller blocks to test how the icons age. Tell the artist which motifs you want as main anchors and which can be filler. A mistake is over-scaling tiny symbols which then vanish into background texture. This design ages well if main icons are mid-sized and spaced.
24. Traditional Climbing Koi and Wave Sleeve
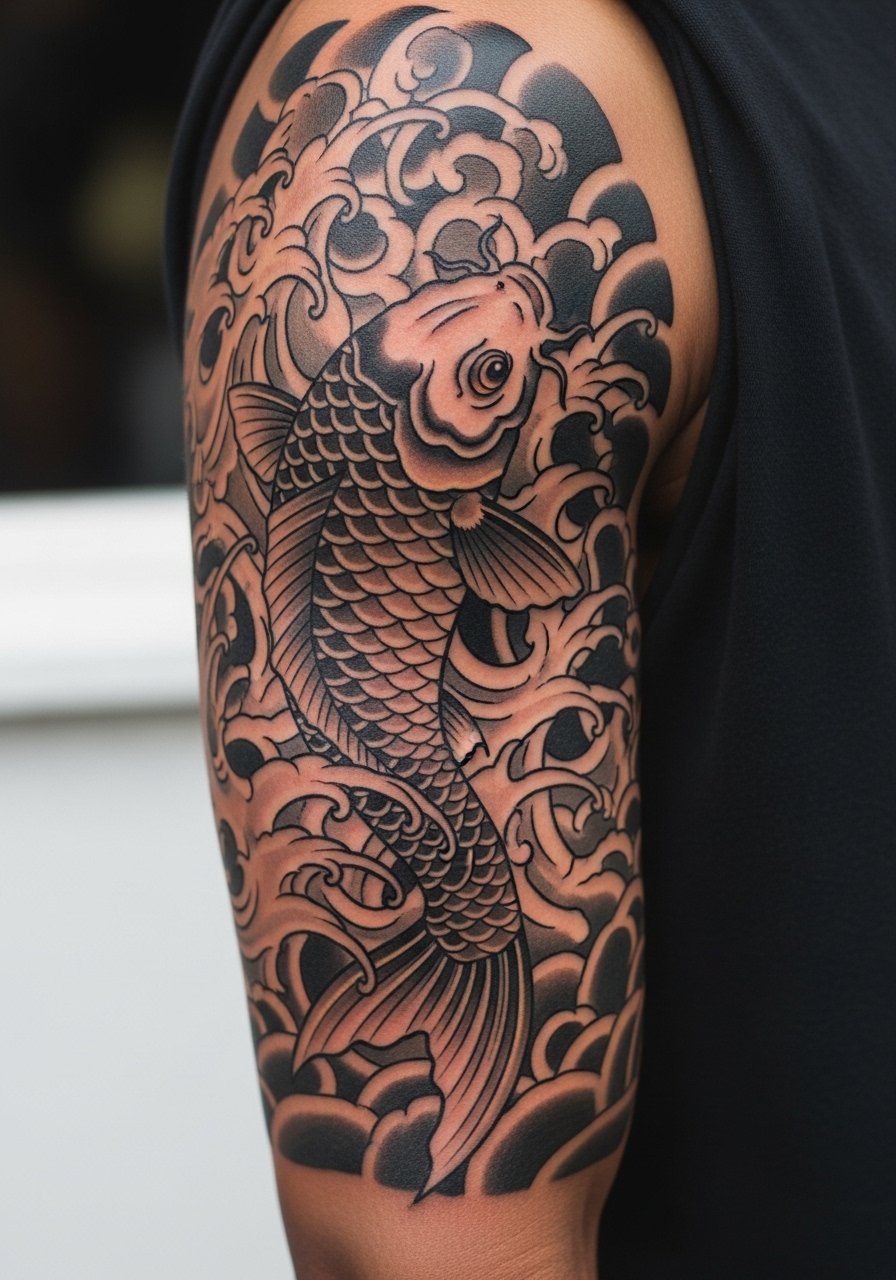
Koi and wave movement works if you want a climbing composition with strong dark outlines and controlled color. Expect 4 to 7 sessions and ask for bold outlines around the koi to protect fin detail from early softening. A common error is using watercolor-like fills near scales which can dull quickly. For showing it off, an off shoulder tee or wide-neck tank frames the shoulder and upper arm gracefully.
25. Traditional Skull and Rose Coverage Sleeve
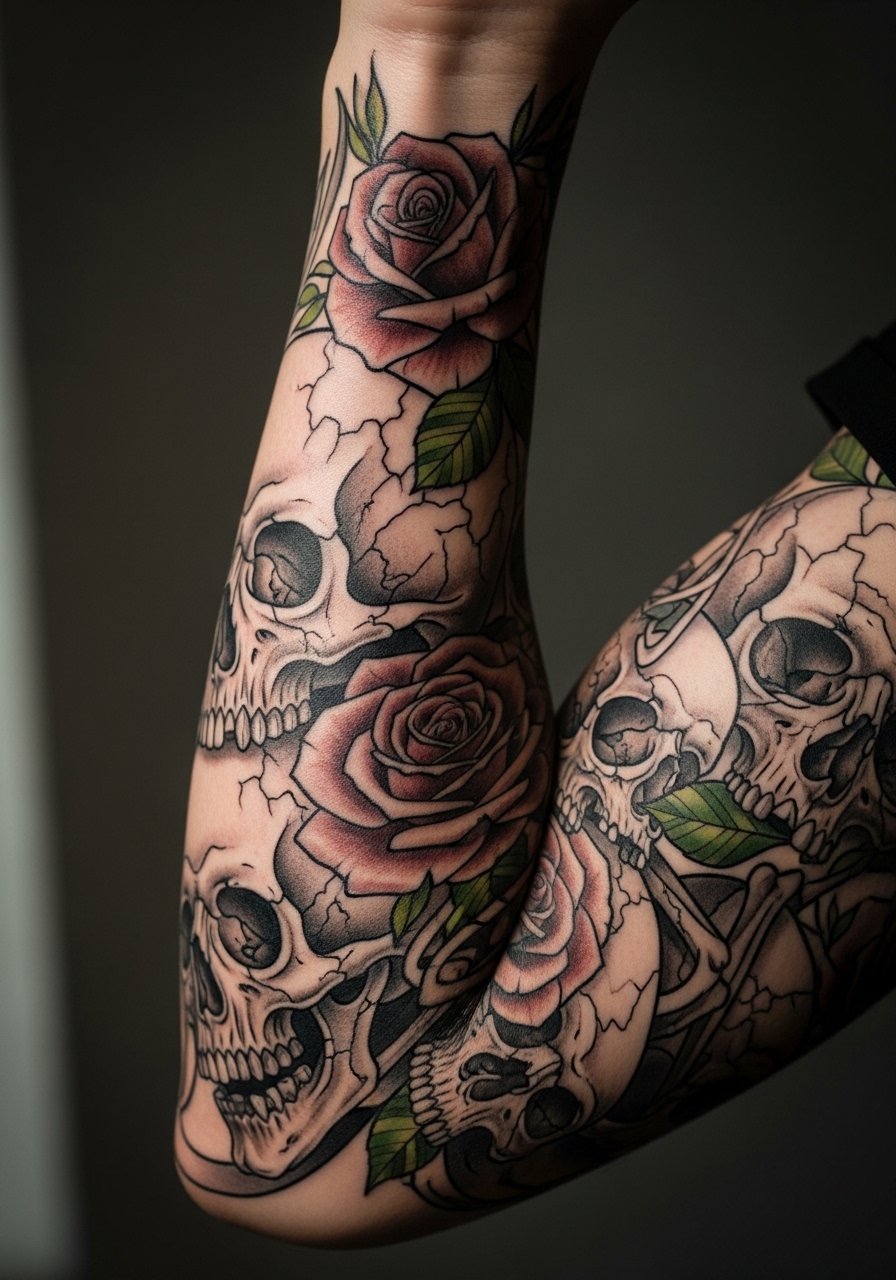
Skull and rose combos are coverage-friendly and often used to mask old work with new lines. Plan 3 to 6 sessions based on how much overlap you need. Ask the artist to prioritize bold lines on skull contours and keep rose centers open so the petals retain depth. A mistake is attempting detailed micro-etching inside skull caverns which can blur. This composition benefits from planning filler negative spaces early.
26. Star-Filled Background with Celestial Motifs Sleeve
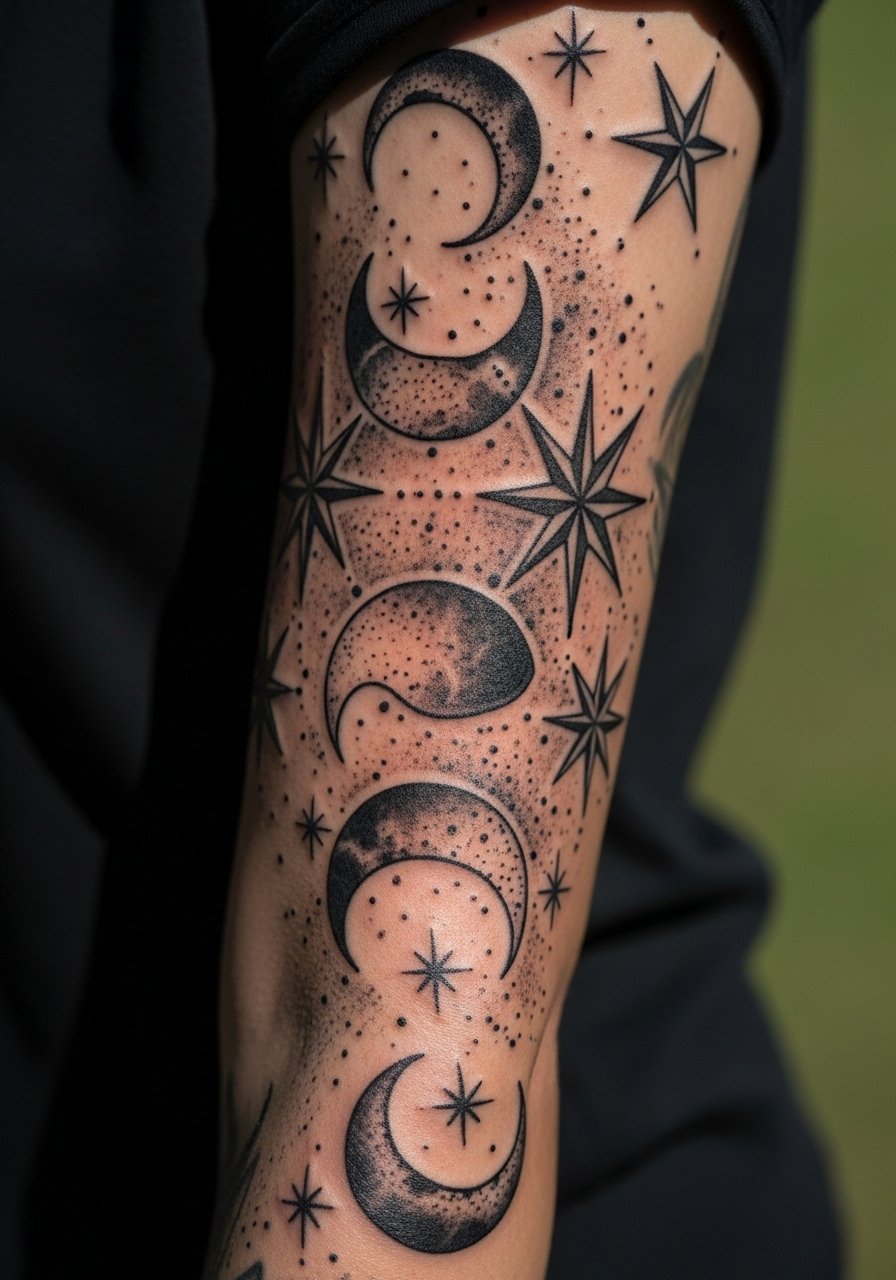
A celestial background makes for cohesive patchwork when you want to tie different motifs into one sleeve. Sessions depend on how dense you want the stars and usually range from 3 to 5. Tell the artist to use varied star sizes and dot work for depth rather than soft wash. A typical mistake is making every star the same size which flattens the background. For wrist-accessorizing, a slim nautical watch keeps attention on the arm without overcrowding the look.
27. Patchwork Sailor Flash Quilt Sleeve
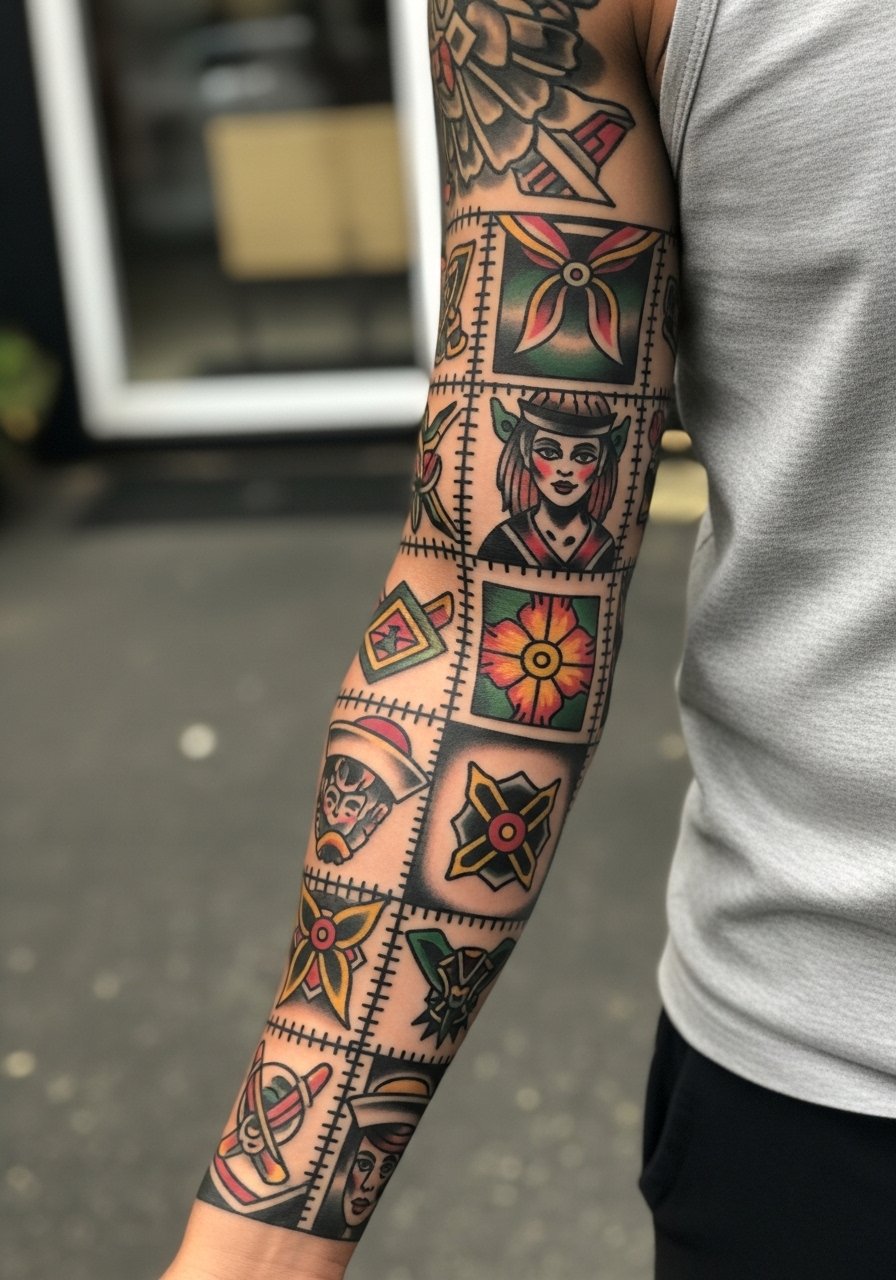
If you want a sleeve built from classic flash panels, a sailor flash quilt gives modularity and easy scaling over multiple sessions. Each tile can be booked as a single session so your budget and time stay flexible. Tell your artist to keep panel borders bold to avoid bleed between squares. The mistake is letting panels run into one another without clear separators which causes motifs to merge. Pair this with a vintage band t-shirt so the sleeve reads like a curated collection.
Frequently Asked Questions
Q: Will fine line details survive on a full traditional sleeve or should I stick to thicker linework?
A: Fine line details can survive in a sleeve if placed away from high-motion zones and given room to breathe. If you want both, ask your artist to combine thicker primary linework with selective micro-detail in protected areas and expect touch-ups earlier on the fine bits.
Q: How do humidity and sweat affect sleeve healing for forearm and wrist pieces?
A: Humidity increases the chance of scabbing and color migration in the first week, especially on forearms that rub against clothing. Many people switch to breathable protective film initially and keep showers brief. Talk to your artist about product preferences because clinicians and artists often recommend different post-session options.
Q: Can I mix neo-traditional fillers with old traditional flash without it looking mismatched?
A: Yes, as long as you plan scale and negative space from the start so the newer pieces match the visual weight of the older flash. Use unifying elements like a star-field, rope, or similar banner work to tie panels together.
Q: Do certain skin tones need different line weight for sleeve work to photograph well?
A: From what I have seen, higher contrast lines and selective black-red palettes tend to read more consistently across darker skin tones. That does not mean changing the design concept, but ask the artist to test a small transfer and photo it in different light before committing.
Q: How often will I need touch-ups on a traditional sleeve that includes joints like the elbow?
A: Expect touch-ups at year two to four in high-movement zones like the elbow, and possibly every five to seven years across the rest depending on sun exposure. Planning buffer negative space near joints helps reduce how often you have to redo dense shading.
