
Fine line clovers are everywhere right now, and the gap between what looks perfect on a screen and what lasts on skin is getting louder. Fading on wrists, artists ghosting or canceling consults, and green inks that look muddy on darker tones are common complaints I keep hearing. Below are 17 four-leaf clover tattoo ideas that balance trend and longevity, with placement, styling, and real wear-time notes to help you pick one that keeps working years down the line.
1. Minimalist Single Four-Leaf Clover Outline on the Wrist
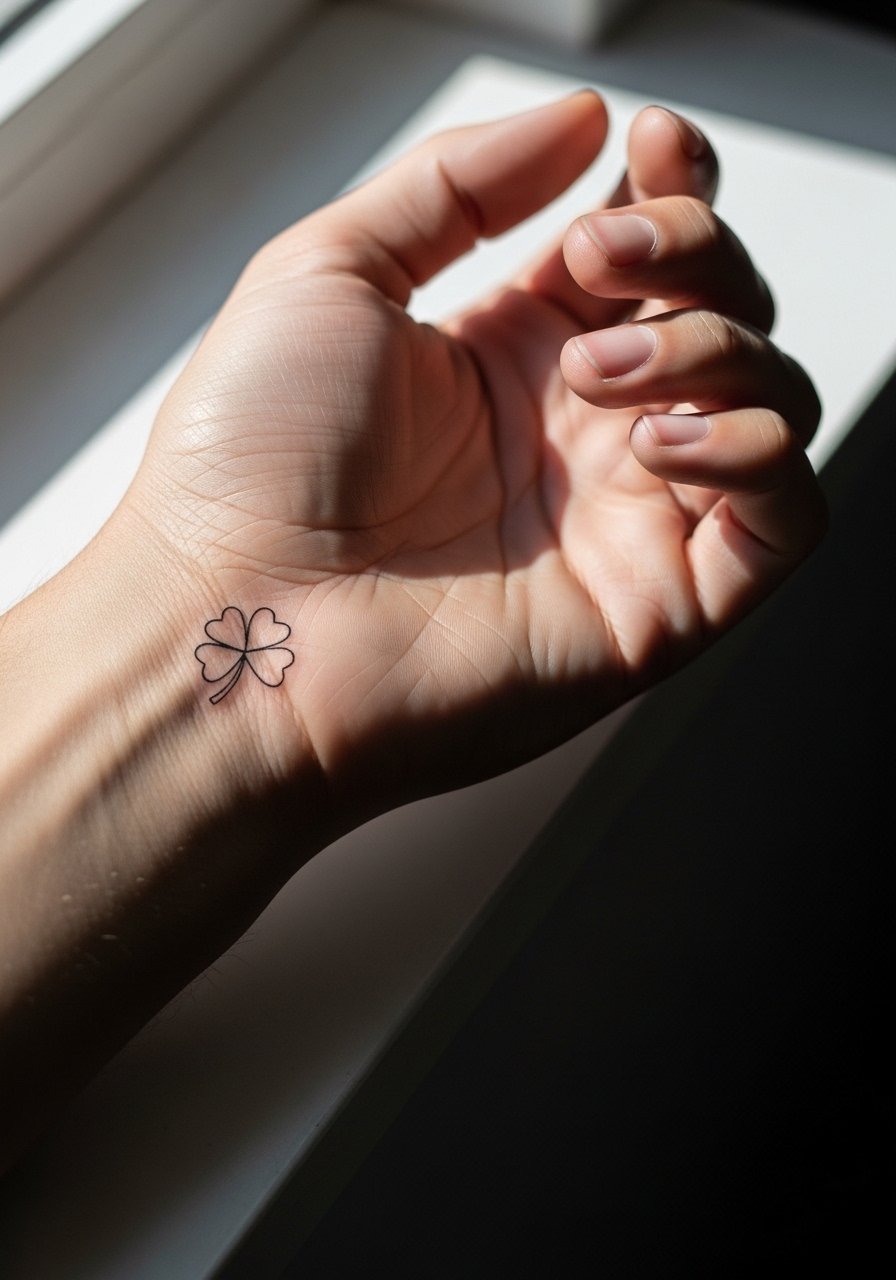
I recommend this one when you want a micro piece that reads like a neat accent rather than a badge. Tell your artist you want the linework on the thicker side of ultra-fine so it survives daily hand washing and friction from watches. Expect a 30 to 60 minute session, light pain, and a likely touch-up at 12 months for line retention. A common mistake is asking for single-needle fineness on a wrist with little spacing, which blurs into a gray shadow. Pair with a dainty gold chain bracelet when showing it off, and wear a sleeveless tank top to the appointment for easy access.
2. Fine Line Four-Leaf Clover with Stem on the Inner Forearm
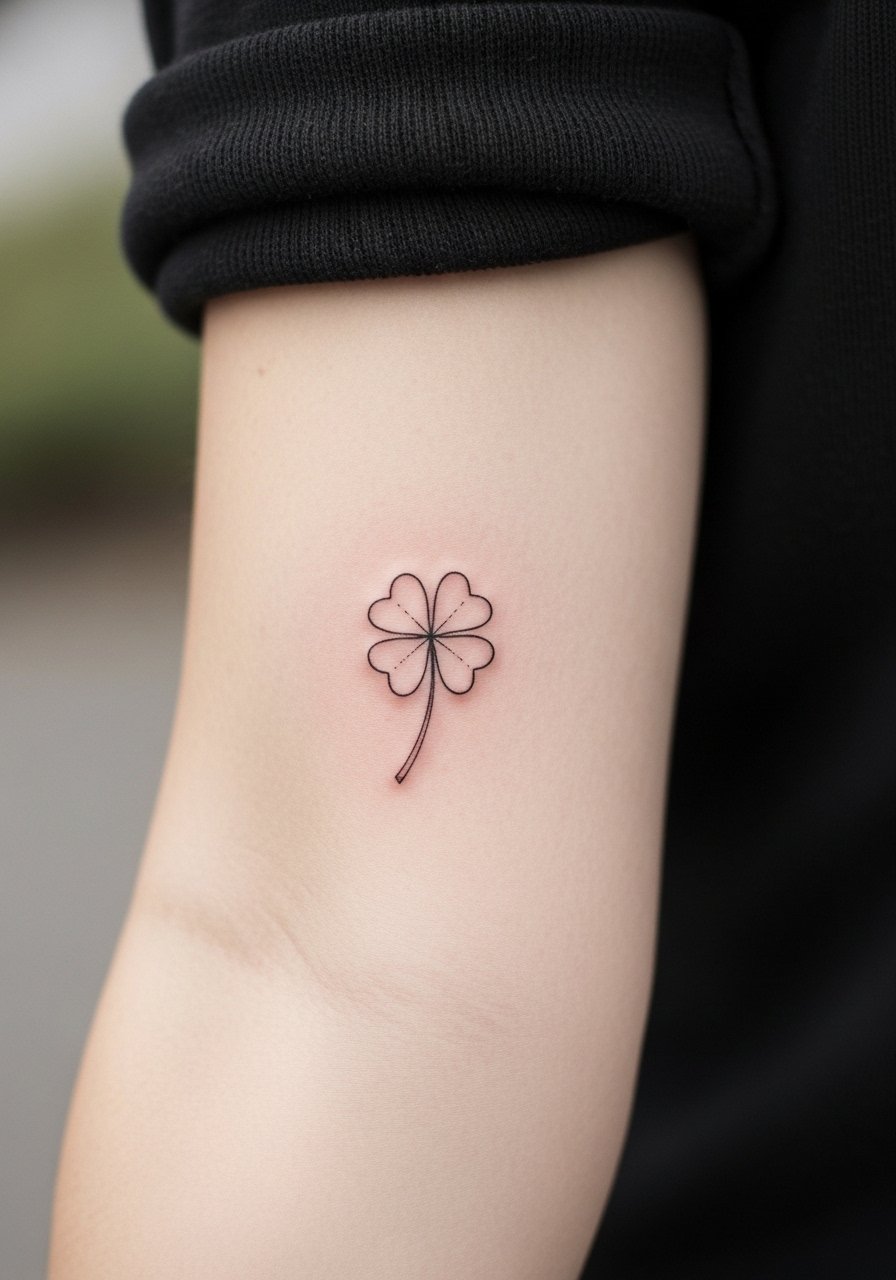
This is a go-to for first timers who like subtle work that can sit beside other tattoos later. Artists split on fine line durability. One camp says single-needle work can hold if depth and moisture are right. The other camp says those lines blur fast on high-movement zones. Ask an artist where they fall and request slightly heavier lineweight than your Pinterest sample. Plan a 1 to 2 hour session and expect touch-ups at year two as a realistic timeline. For session wear bring a linen button down so the artist can roll the sleeve without tugging.
3. Traditional Four-Leaf Clover with Banner on the Outer Bicep
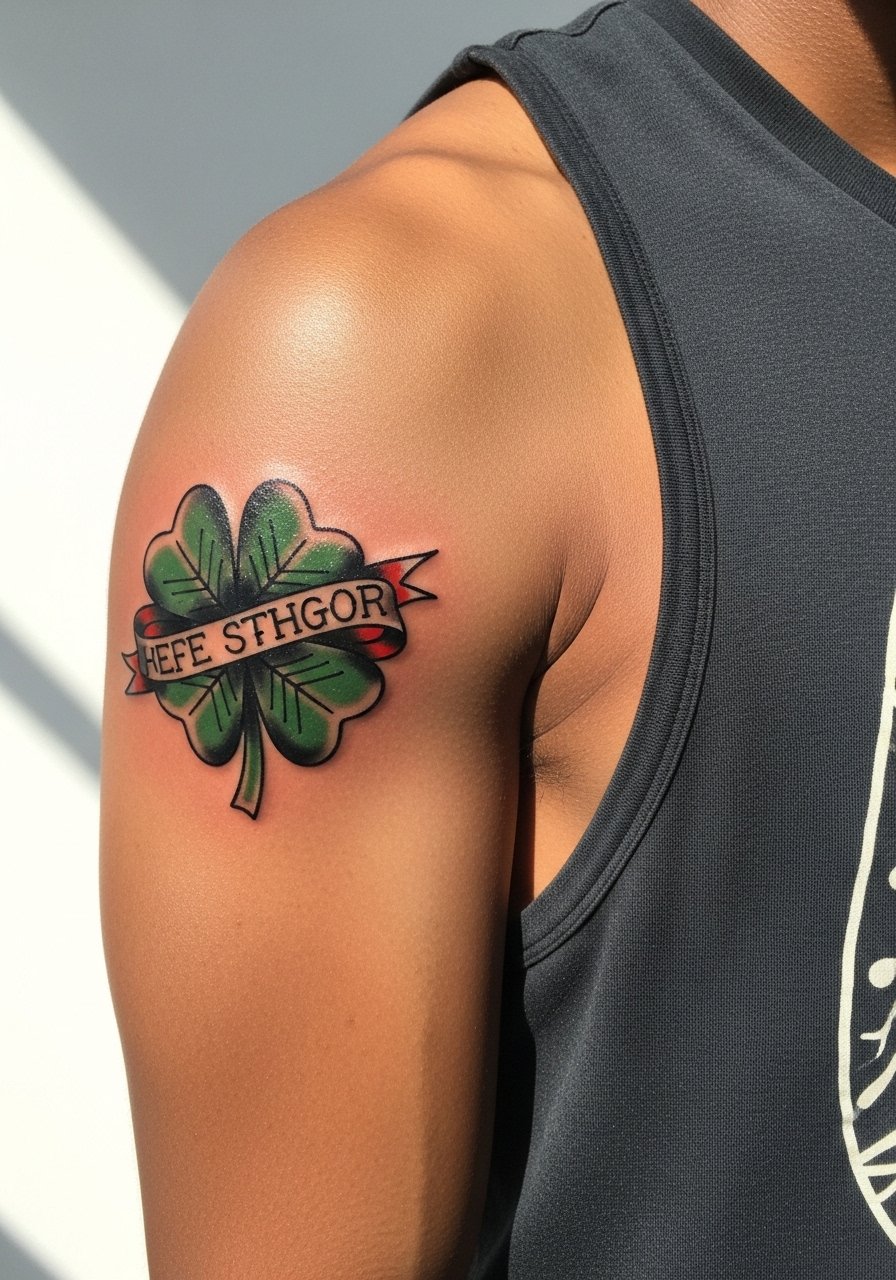
If you want bold read from across a room, this style ages predictably because saturation and thick outlines hold. Tell your artist the banner text size you want and ask for a mock stencil first to judge scale. Outer bicep expands and contracts with muscle, but it is low risk for blowout. Sessions are typically two sittings for color saturation. A common error is shrinking the banner too small which forces cramped lettering later. For showing it off wear athletic shorts in summer and roll sleeves to reveal the piece.
4. Blackwork Four-Leaf Clover Geometric on the Shoulder Blade
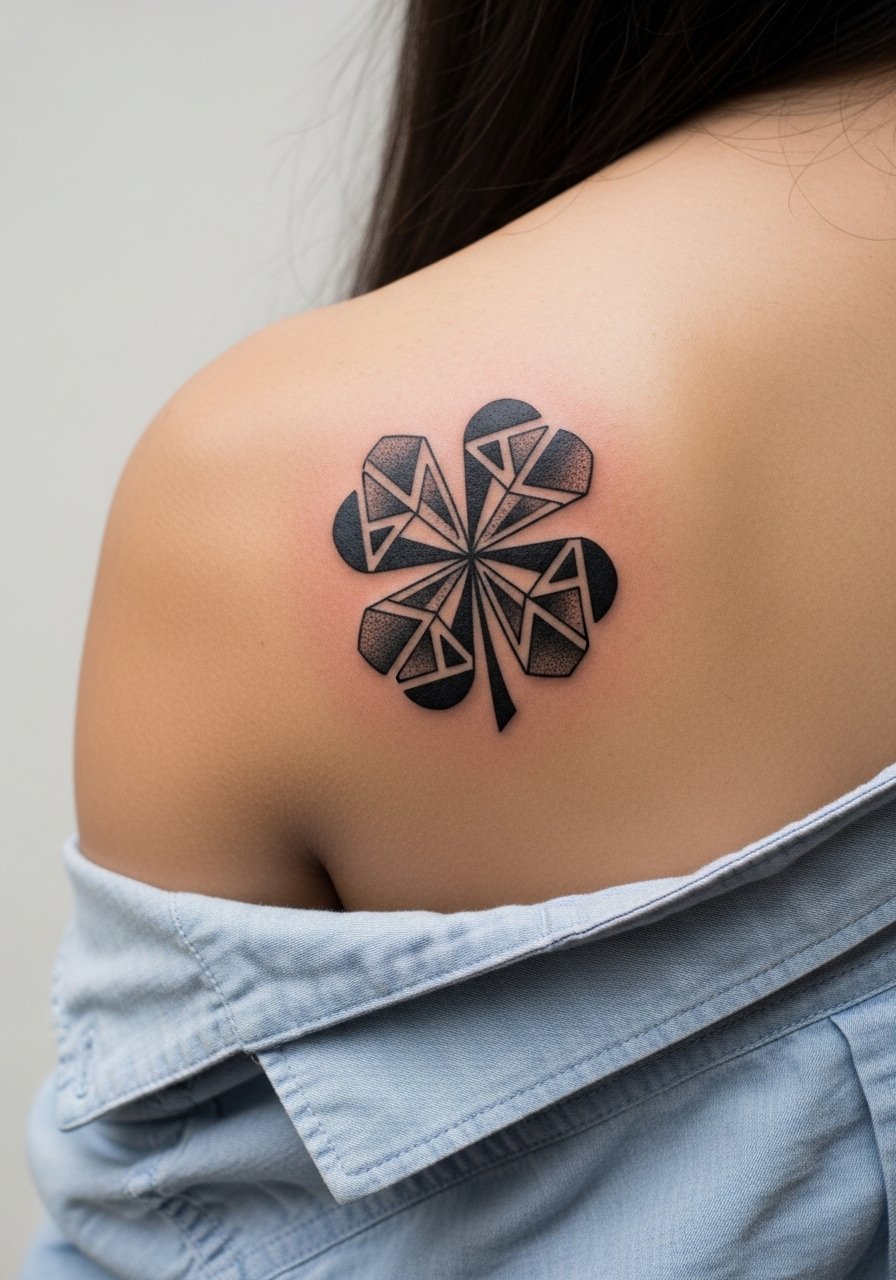
Collectors who want contrast pick this for longevity and visual punch. It reads well on darker tones because saturation wins over muted green. During consultation ask for clear spacing and large negative areas so the geometry does not merge over time. Shoulder blade sessions are comfortable and allow for longer single sittings, but expect two sessions if you want deep saturation. Styling tip: pair with a black kimono jacket or a sleeveless tee that keeps the silhouette clean.
5. Watercolor Four-Leaf Clover Splash on the Collarbone
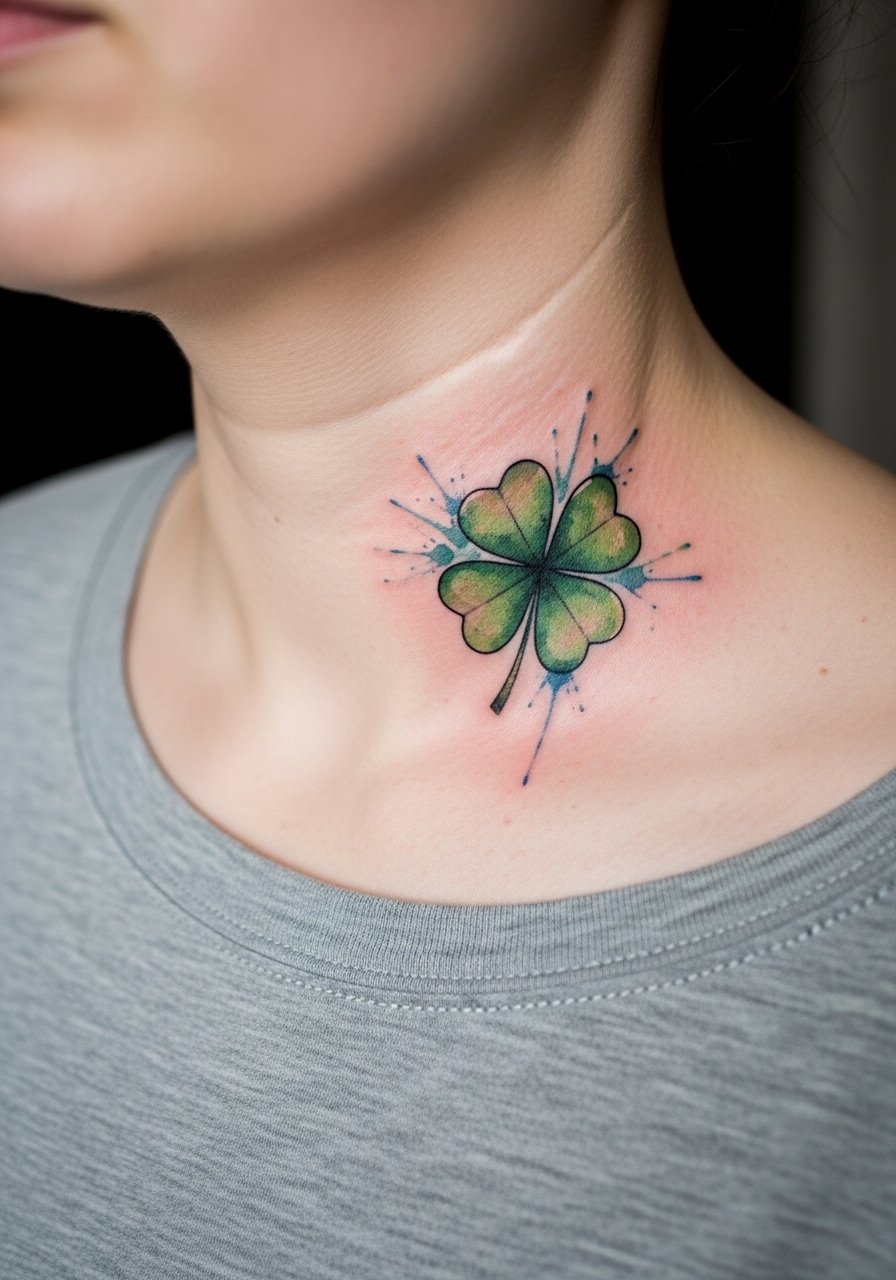
Watercolor gives painterly movement and looks stunning against off-shoulder outfits. It is more fragile than blackwork and the common mistake is stacking too many colors in a 3 inch area, which can bleed during healing. If you choose watercolors, ask for darker anchor outlines or subtle black veins to preserve form as the pigments settle. Plan two sessions for layering and expect color softening by year two. For show-off outfits try an off shoulder blouse and a delicate drop necklace that sits just below the wash.
6. Neo-Traditional Four-Leaf Clover with Horseshoe on the Calf

Calf canvas takes saturated neo-traditional work well and it stands up to runners and sun exposure better than delicate placements. Expect 2 to 3 sessions for layered color and shading. Communicate the exact color palette up front and ask the artist to show healed color samples on similar skin tones if possible. The biggest rookie move is shrinking the design so it loses the horseshoe detail. Wear loose shorts to the session so the artist can prop the leg easily.
Pre-Session Essentials
The pieces above include wrists, forearms, shoulders, collarbones, and calves, and those areas all demand slightly different prep and first-week care.
- Lush Oat Tattoo Balm. A thinner balm option that some people prefer for fine line work because it moisturizes without heavy residue that can obscure tiny lines during the first week.
- Australian Gold Aftercare Spray. Handy for no-touch rinsing on lower leg and ankle pieces where sand and sweat are likely during summer sessions.
- Indie Butter by Ink Junkies. Breathable balm that artists sometimes recommend for rib and thigh pieces to reduce clogged pores while keeping color intact.
- Japanese Hada Labo Moisturizer. Lightweight hydration that helps fine line areas stay supple without greasiness during longer forearm sessions.
- Hustle Butter Deluxe. Often used in studios for early healing on larger color pieces because it feels thinner than heavier ointments and can reduce bumping during week one.
7. Micro-Realism Four-Leaf Clover on the Finger
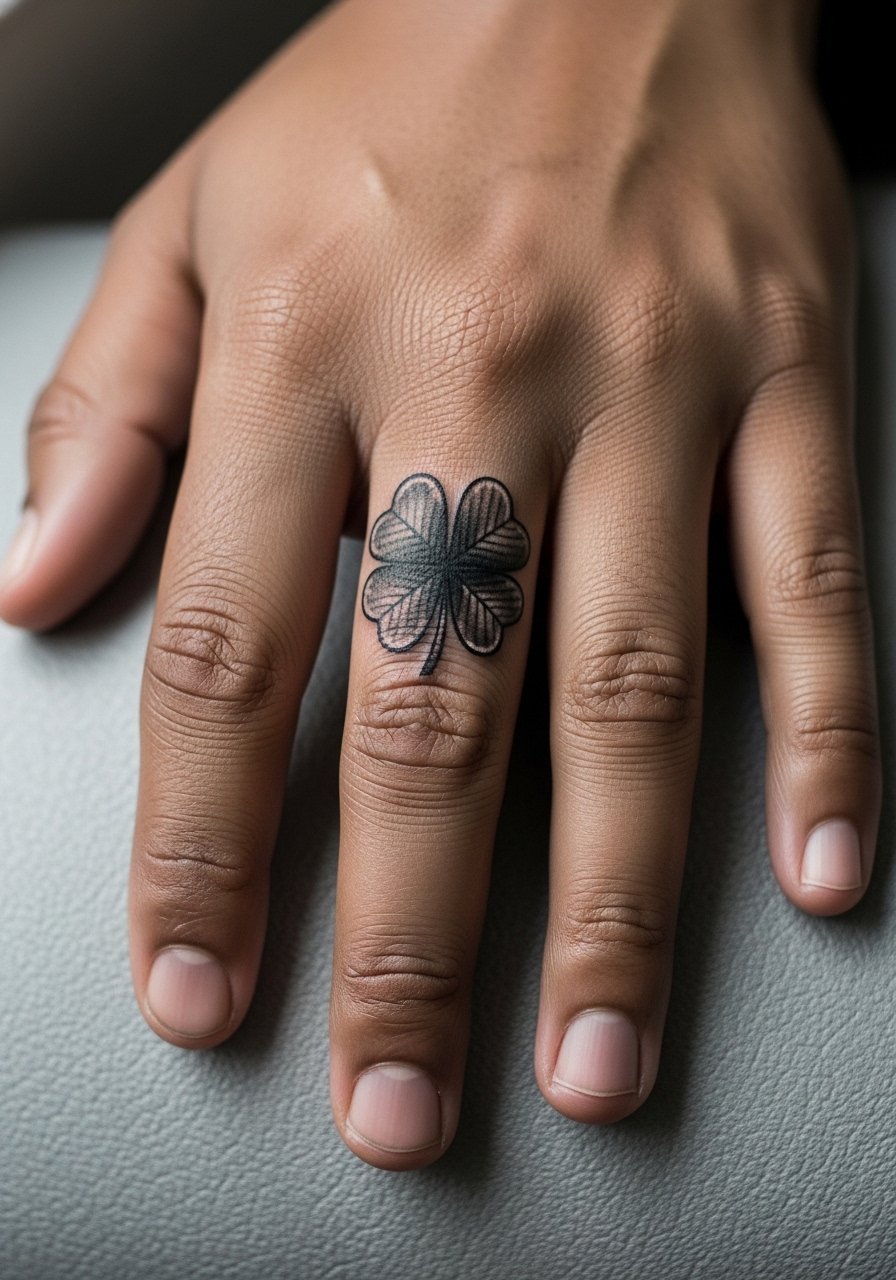
Fingers are notoriously high-wear. If you want hyper-detail on a finger, accept that frequent touch-ups are common. The best move is to keep the size minimal and the contrast high so the leaf veins read for longer. Ask for stronger black anchor points in the design rather than only gray wash. Session time is short, but healing is tricky because of constant washing and friction. For showing the piece, layer a thin stackable ring set on the opposite hand instead of crowding the tattooed finger.
8. Ornamental Four-Leaf Clover Mandala on the Upper Thigh

Mandala clovers are great when you want symmetry and a design that reads as art. Thigh placement gives room for detail and it ages better than tiny crowded rib pieces. Tell your artist you want spacing between mandala rings to avoid lines merging after weight changes. Expect two sessions and a pain level that is moderate. One practical tip is to preview the design by placing a sticker stencil and walking around to see how clothing rubs the area. Pair with high-waisted shorts or a skirt slit for display.
9. Ignorant Style Four-Leaf Clover Doodle on the Inner Bicep
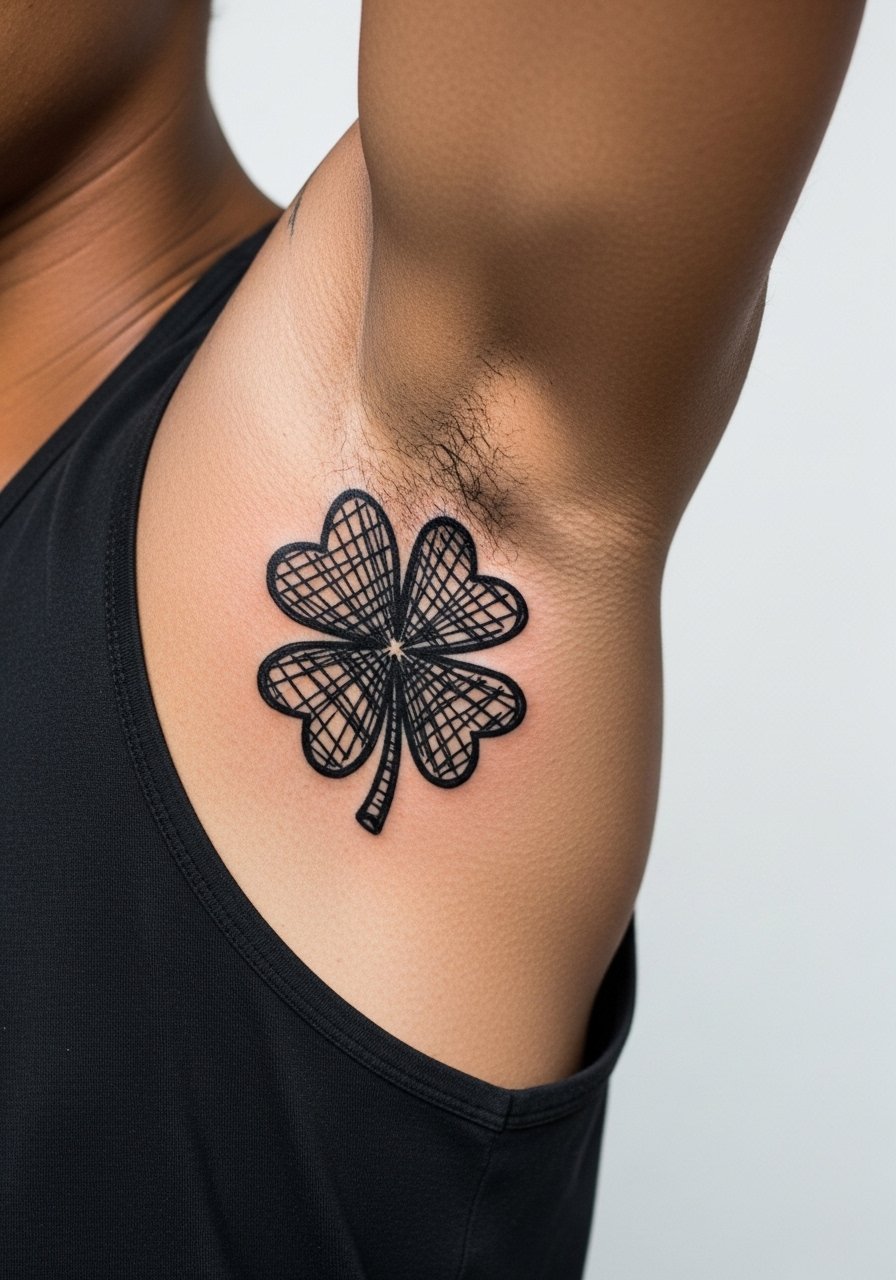
This raw, hand-drawn vibe celebrates imperfection and works well in a zone that is easy to hide. Inner bicep movement can soften lines over time, so ask the artist to keep the strokes confidently thick rather than fragile. The session feels like moderate pain with the arm raised. The design reads best at around three inches so the scribble legibility survives occasional blurring. For studio prep wear a tank top so the artist can access the area cleanly.
10. Dotwork Four-Leaf Clover with Dots at the Back of the Neck
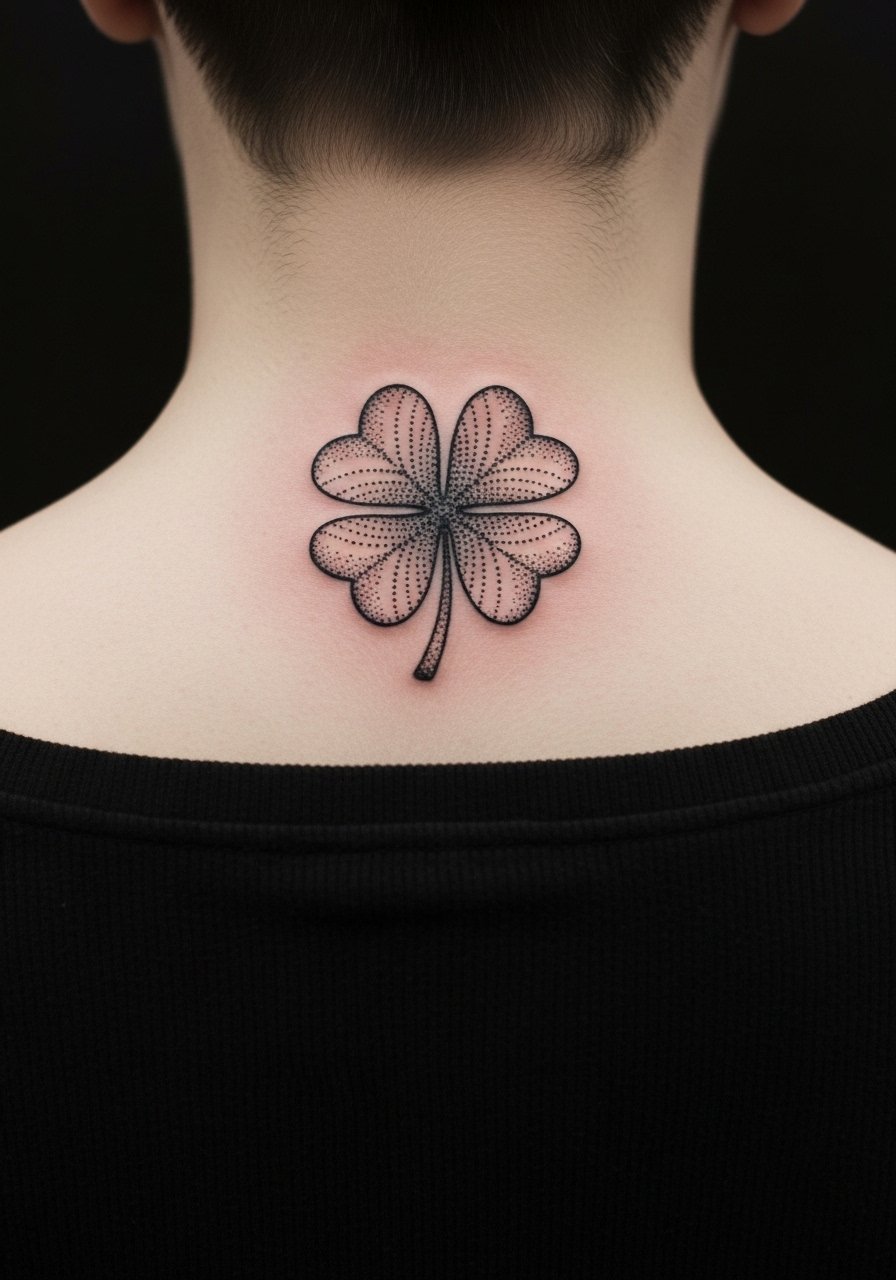
Dotwork creates texture and meditative rhythm and the back of the neck is a subtle yet visible spot. Dot density matters. Too tight and the stippling merges into solid gray in a couple of years. Ask for negative spaces and larger dots at the leaf edges to keep the shape crisp as it ages. Pain is low to moderate and sessions can often be completed in one sitting. Style it with an open back top for evenings out.
11. Fine Line Four-Leaf Clover Cluster on the Ribcage
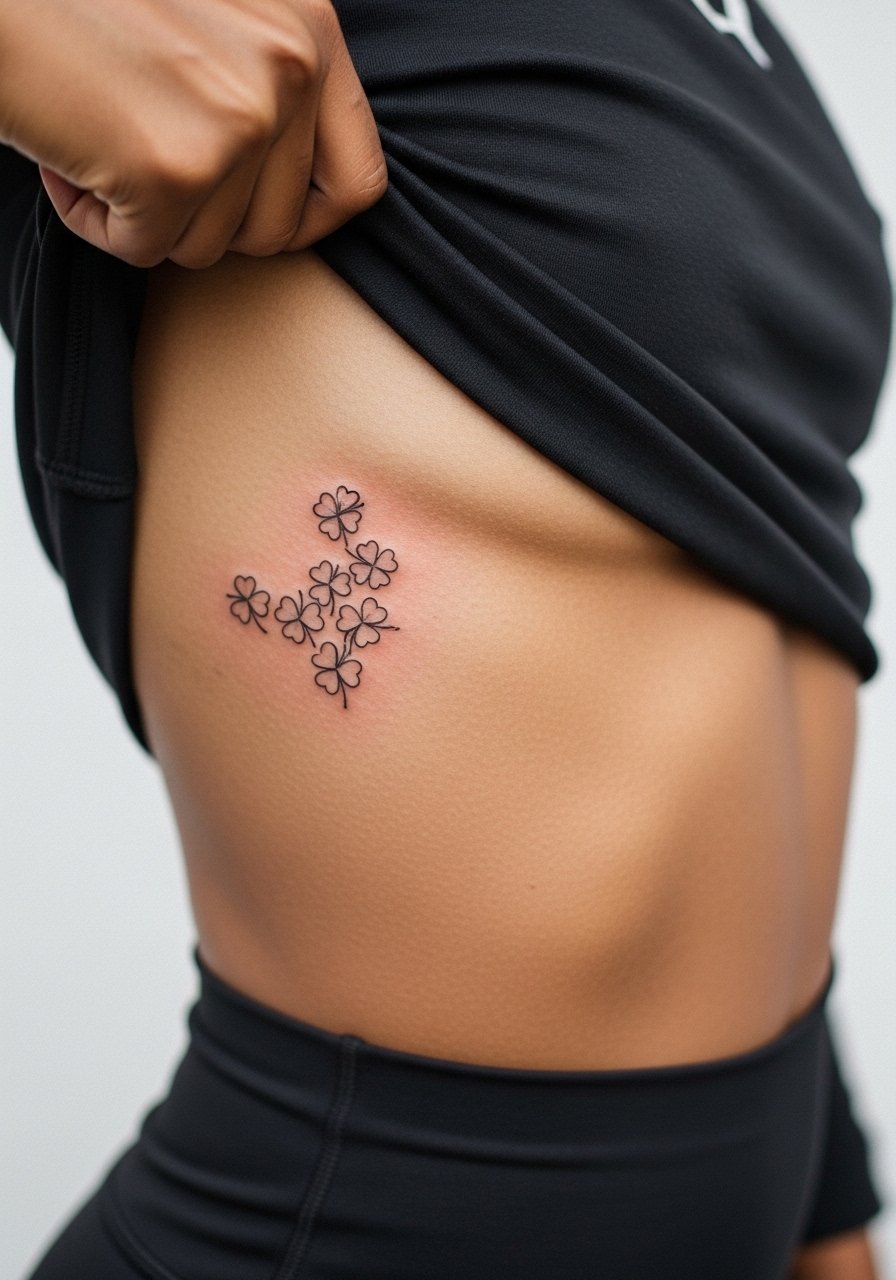
Rib work can be beautiful but lets name the split: one camp says ribs stretch with breathing and blur fine line work fast. The other camp says proper spacing and needle depth make fine line acceptable there. If you want clusters on the ribs, ask for more spacing between leaves and a slightly heavier anchor line around the main shapes. Expect higher pain and a one to two hour session. A common mistake is packing too many tiny clovers into a narrow vertical band. Bring a strapless bra or zip-up hoodie to the session for comfort.
12. Black and Gray Realism Four-Leaf Clover with Dew Drops on the Ankle

Realism adds depth and the ankle is a visible spot that also takes a lot of friction. Ask your artist to exaggerate contrast between leaf midtones and shadows so the dew drops remain readable in photos and skin movement. Sessions are usually one long sitting for this scale. Beware the common issue of choosing green color for darker skin which can read muddy; black and gray realism keeps detail legible. Wear cropped straight jeans to the appointment for easy access.
13. Patchwork Four-Leaf Clover Integration for Sleeves on the Forearm
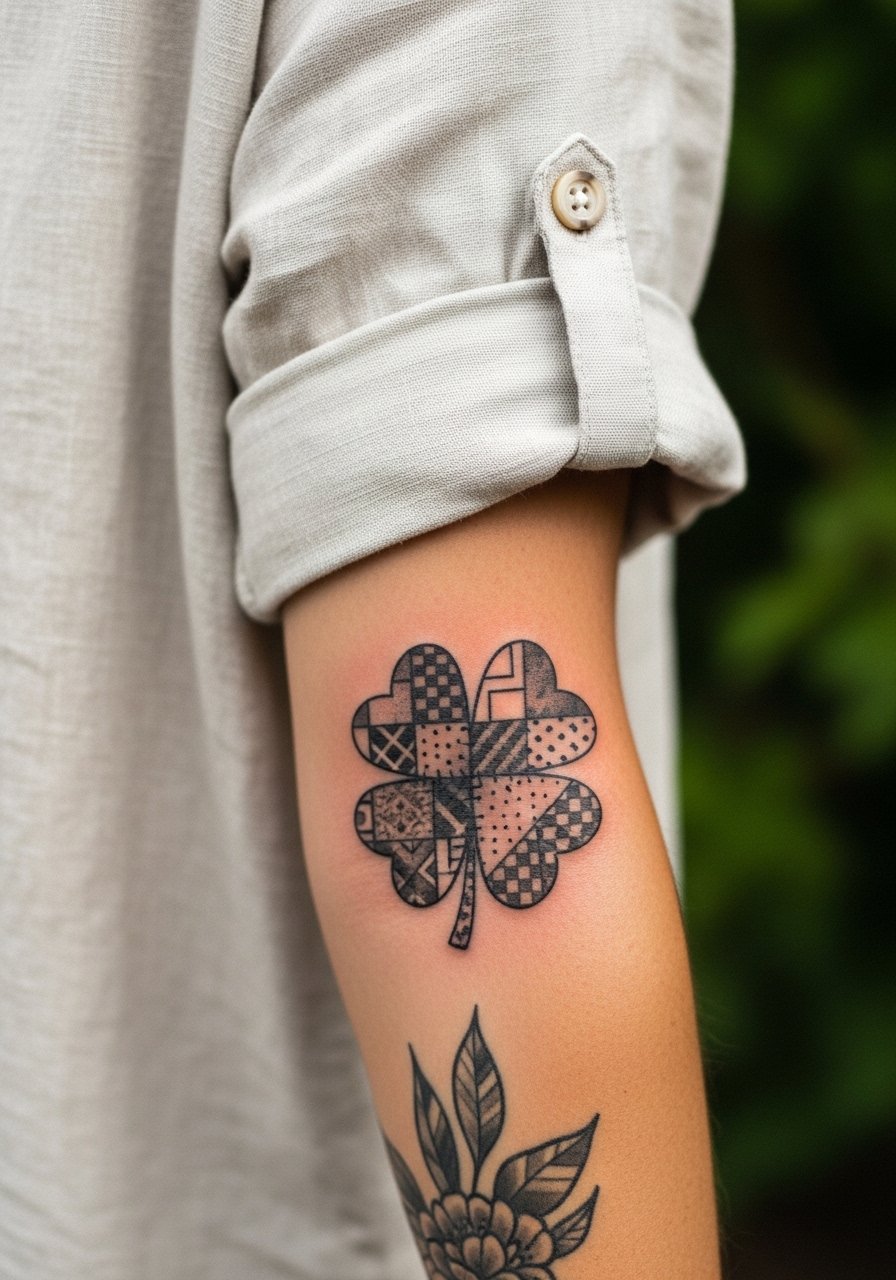
Sleeve builders use clover motifs as modular fillers that can be added over multiple sessions. When using patchwork, tell your artist the anchor pieces you want to keep visible from a distance and request shading transitions that bridge different styles. Count on four plus sessions for full integration. A mistake is overloading one small forearm area without thinking how future pieces will balance. For show-off outfits roll up a linen button down sleeve to frame the work.
14. Inverted Four-Leaf Clover Twist on the Upper Forearm

Flipping the clover visually tilts the meaning in a playful way and suits the anti-perfect aesthetic of ignorant styles. Upper forearm placement minimizes stretch issues compared with ankles or ribs. Ask for clear negative-space boundaries so the inversion reads after a few years. Session time is short and pain is low. A common error is making the inversion too subtle which reads as awkward rather than intentional. This design pairs well with rolled sleeves and short-sleeve shirts.
15. Hybrid Clover-Runes Design on the Inner Forearm
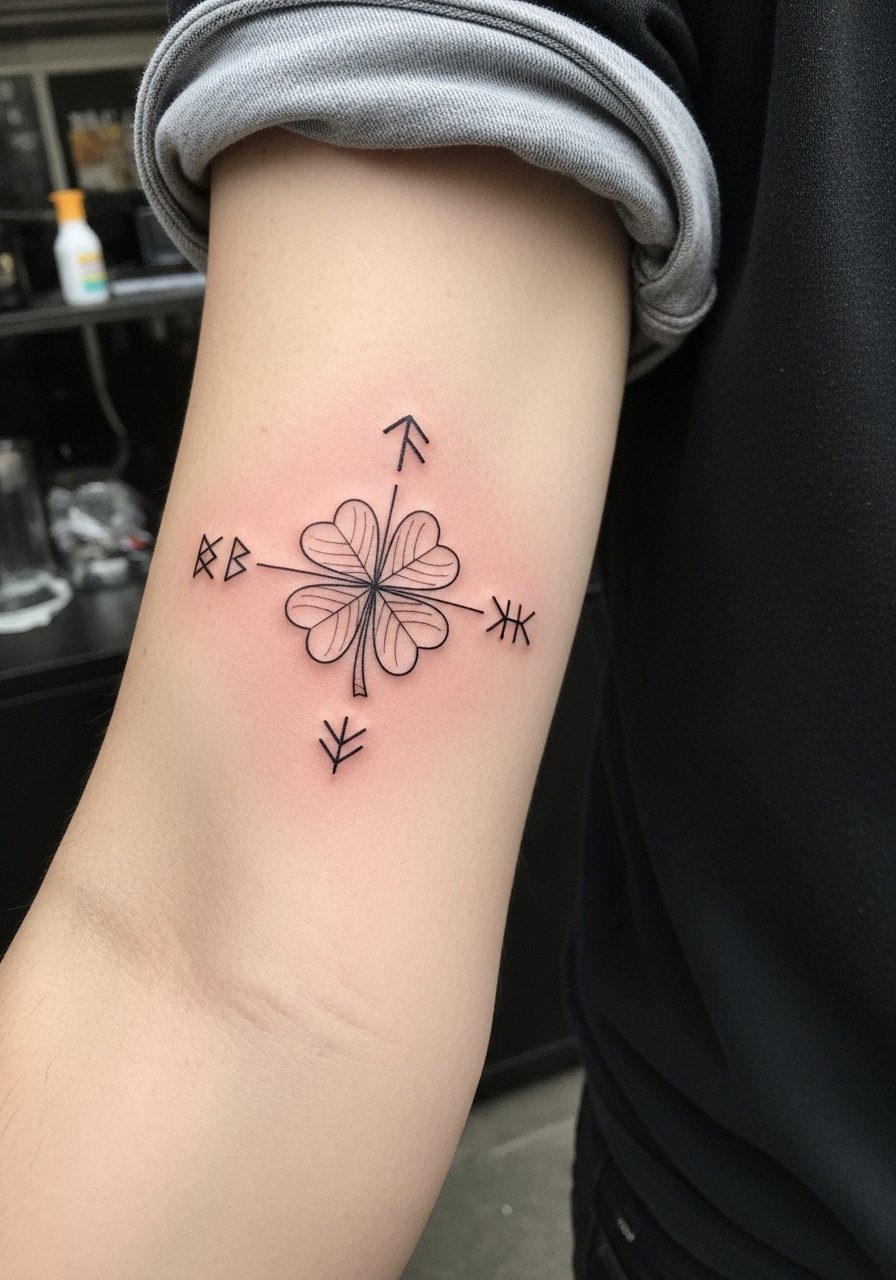
If you want pagan or runic elements, be mindful of cultural origins when choosing symbols. Ask your artist to adapt runes into a personal pattern rather than copying sacred or culturally specific sequences. Inner forearm is forgiving for detail and takes fine line nicely, but again expect a touch-up sooner than thick blackwork. In consultation bring clear references and specify which runes you want stylized so the result stays respectful. Wear a loose short sleeve button-up for the session.
16. Knuckle Four-Leaf Clover for “Grip Your Luck” Boxers
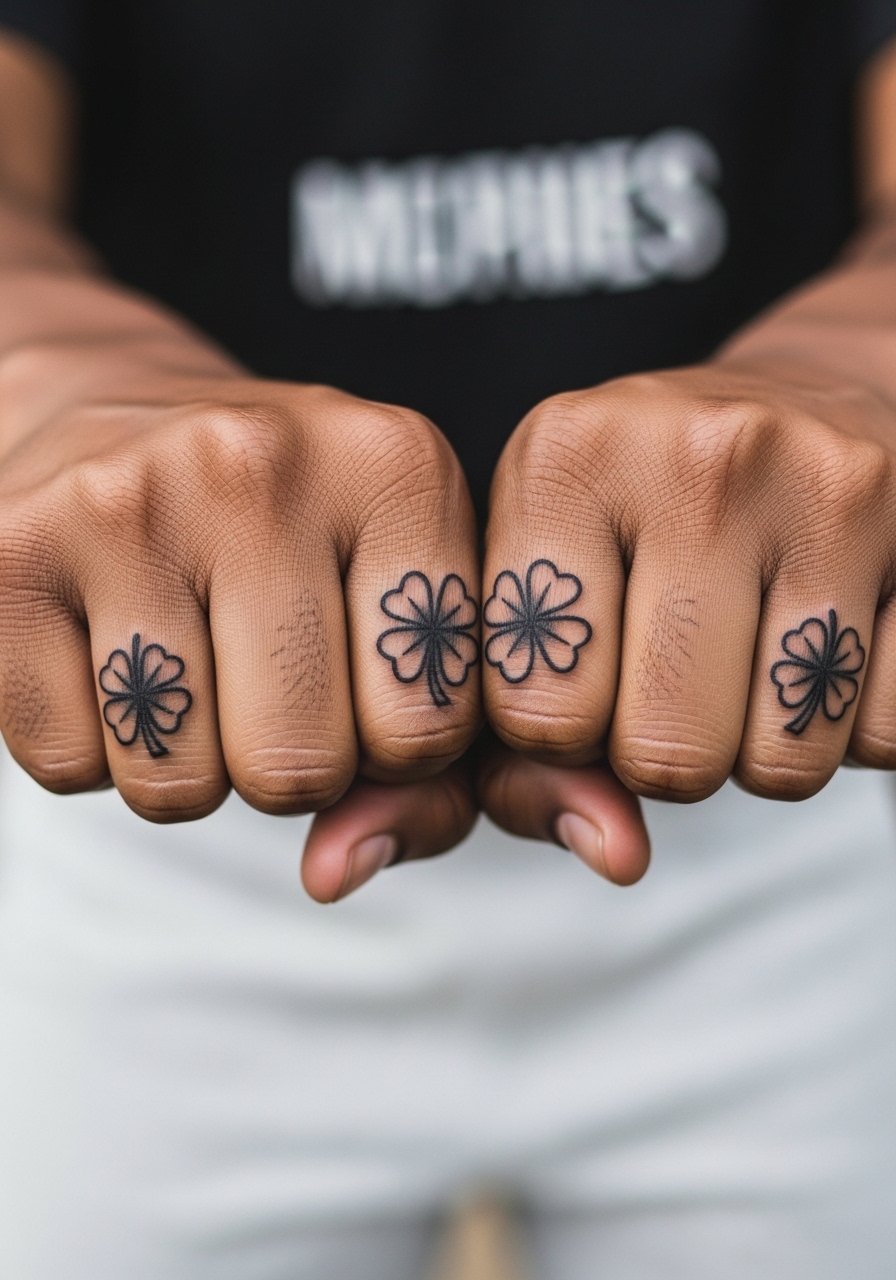
Knuckle placement is bold and practical for athletes or boxers who want a tactile reminder. Note that knuckle tattoos face heavy fading from glove use and repeated impact, so touch-ups are often on the table. Also consider career effects in certain professions before committing. Ask the artist to keep the shapes compact and to use hardy linework. Sessions are short but healing can be rough due to constant hand use. For display avoid heavy rings that crowd the space.
17. Aged Clover Simulation Mockup for Realistic Expectations

Previewing how a clover will look after five years is underrated and it prevents regrettable scale and line choices. Ask artists for a faded mockup that simulates the blur and softening you can expect, especially for fine line and watercolor designs. This step highlights whether you need bigger spacing or heavier anchors before the needle hits skin. It also helps you budget for likely touch-ups. If you plan body changes, try drawing the design on then moving around for a few days to see clothes and movement effects.
Frequently Asked Questions
Q: How fast do fine line four-leaf clovers typically fade, and when should I expect a touch-up?
A: Fine line pieces often show softening around year one to two in areas with lots of movement or friction. Expect a touch-up anywhere between year one and three depending on placement and sun exposure. If you want longer intervals between touch-ups choose slightly heavier linework or blackwork alternatives.
Q: My consult was canceled twice, how do I avoid artist ghosting when booking a clover piece?
A: Use booking platforms that show confirmed guest spots and clear cancellation policies or ask for a small nonrefundable deposit and a timeline. Also check the artist’s healed portfolio for clover work so you know they have done similar pieces before committing.
Q: I have darker skin. Should I avoid green clovers?
A: Green pigments can read differently on darker tones and sometimes look muted. Blackwork or high-contrast designs keep leaf detail clear. Ask an artist to show healed examples on similar skin tones and consider black-and-gray options if photos are a concern.
Q: Does Saniderm help wrist tattoos more than dry healing, and which camp should I pick?
A: The debate is split. One camp uses adhesive films like Saniderm for a cleaner first week and less scabbing. The other camp prefers air exposure after initial cleansing to avoid trapped moisture. Your best bet is to ask your artist what they use for wrist placements and follow their timeline closely.
Q: Which placements from this list are the least likely to need frequent touch-ups?
A: Outer biceps, shoulder blades, and saturated blackwork on calves tend to hold up longer. High-wear spots like fingers, knuckles, wrists, and ribs usually need more frequent touch-ups because of friction, washing, and skin movement.
