
Fine line crowns dominate saved boards, and collarbone placement makes them read like a permanent necklace. Trend photos show delicate points and micro details, while in practice spacing and needle depth matter more than tiny flourishes for long-term clarity. Below are 21 collarbone crown ideas with what to ask your artist, how they age, and styling notes that actually help you show the work off.
1. Delicate Fine-Line Crown Centered on the Collarbone
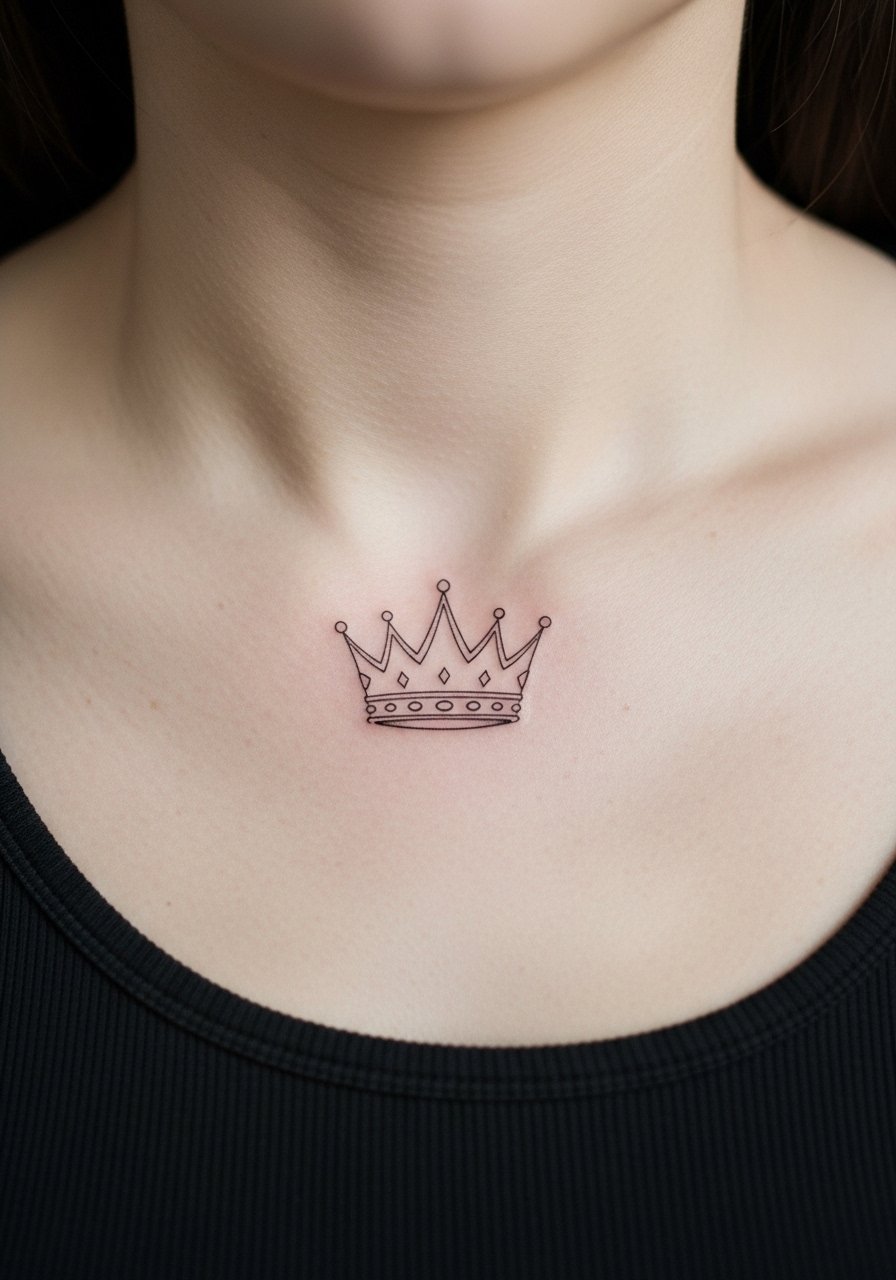
Consultation lead: when you sit with your artist, bring close-up references that show the exact line weight you want. Ask for slightly heavier outer lines and thinner inner detail so the crown keeps its silhouette as it heals. Pain around the collarbone is typically a 5 to 6 out of 10, the session usually fits into a single short appointment. A common mistake is requesting ultra-micro points across the whole crown, which often blur over time. For showing it off, wear a wide-neck shirt that frames the collarbone without covering the design.
2. Asymmetrical Mini Crown Over the Clavicle
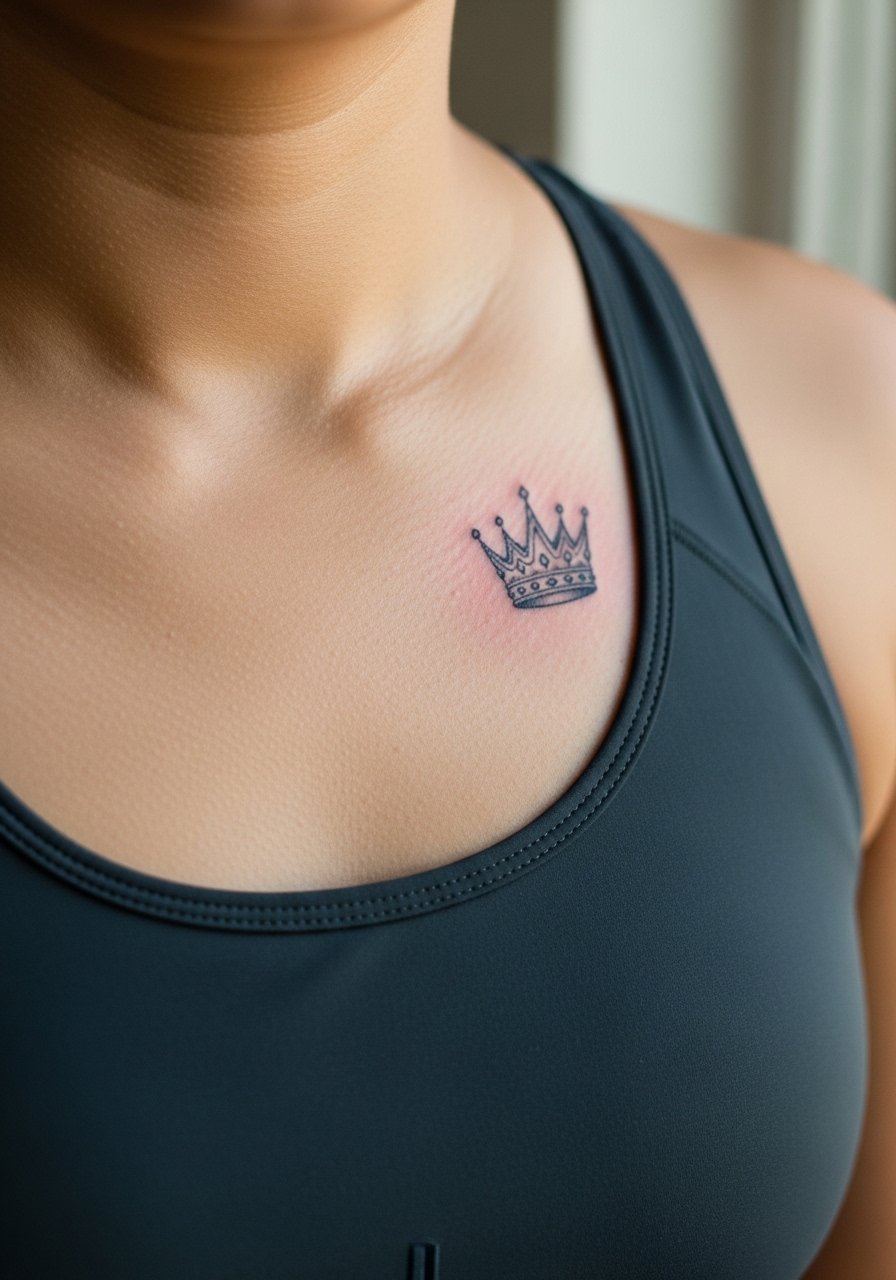
Personal observation lead: I have seen these off-center crowns read more personal than centered pieces, especially when paired with a small script. The area is shallow so the needle feels more sting than on fleshy parts, expect brief sharp moments rather than long dull pain. Tell your artist you want the tallest point off to one side and ask them to test a single pass of the main outline. The common aging issue is too-tight detail at the tips, which can turn blotchy. For session comfort, slip into a racerback tank that gives easy access and keeps you covered.
3. Ornamental Baroque Crown Spanning the Collarbone
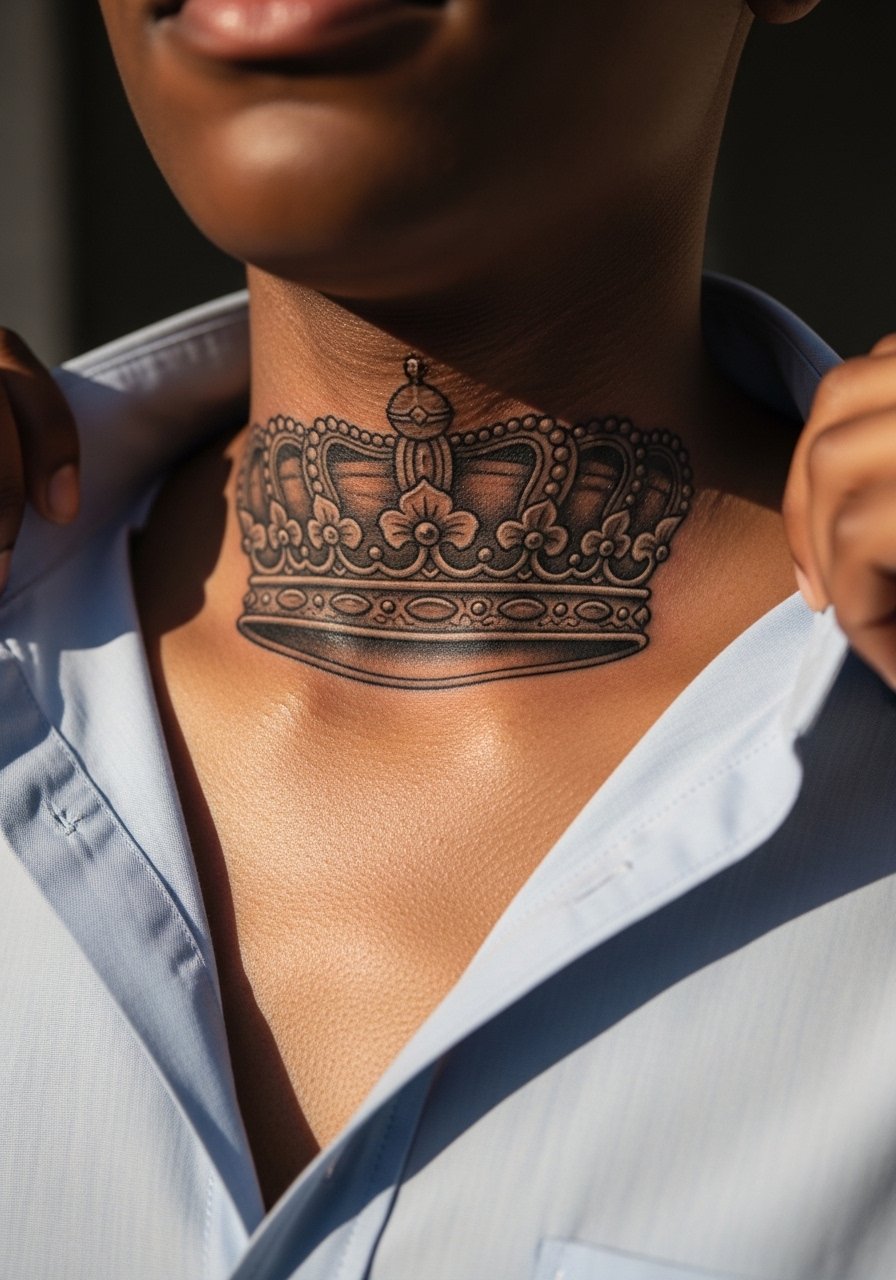
Aging/healing lead: ornate crowns with lots of tiny filigree look incredible fresh, but the dense interior lines are where problems start after a few years. Ask for negative space inside the filigree and stronger frame lines so the motif keeps definition as it softens. The session can take longer because of careful linework and may require a touch-up at year two to three. Blowout risk increases if the lines are too close to the bone edge, so request slightly wider spacing near the clavicle to avoid ink migration. Pair this with a delicate chain necklace that sits above the crown without competing.
4. Tiny Dotwork Crown Cluster Along the Bone
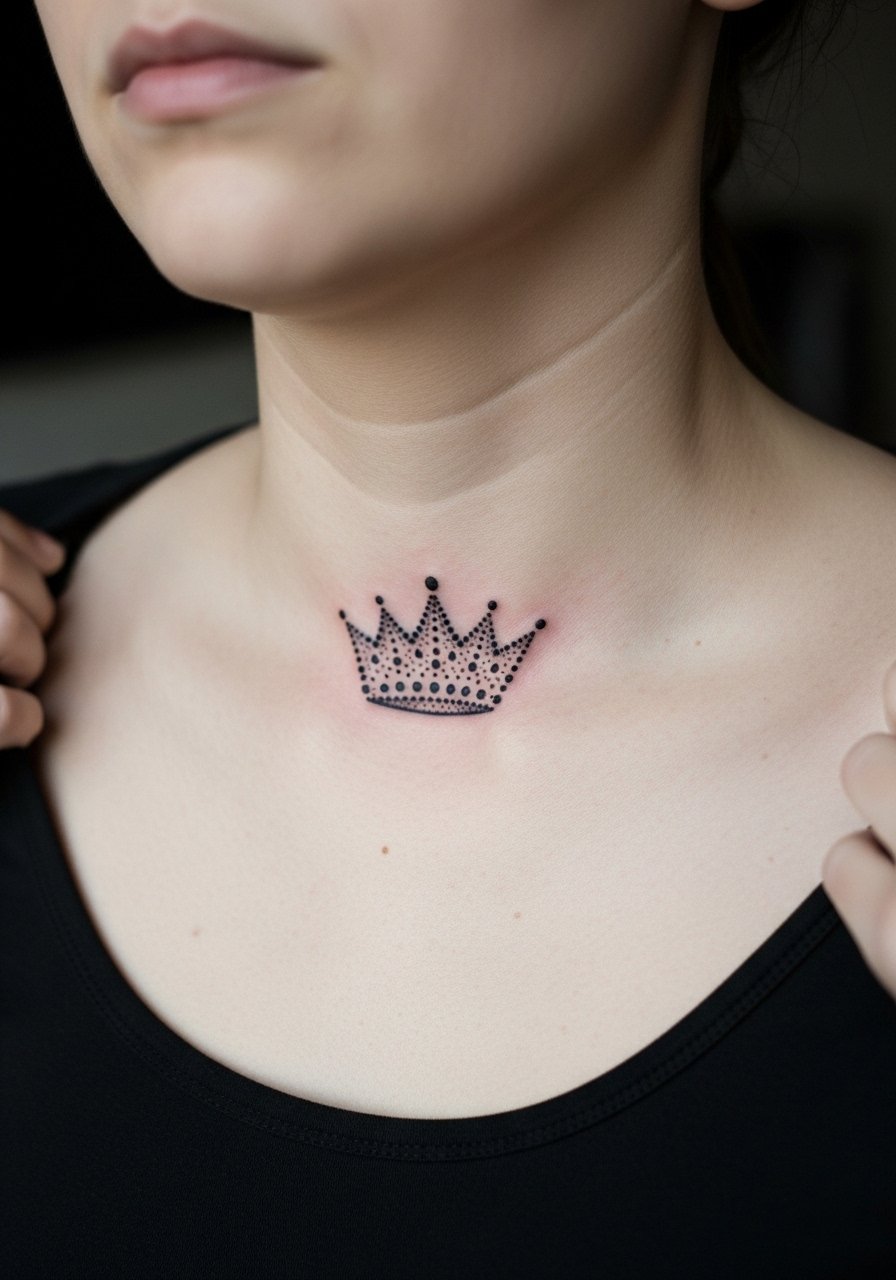
Controversy lead: dotwork crowns spark debate in studios. One camp says dotwork holds beautifully when done with spaced stippling because it breathes with skin movement. The other camp warns that tiny dots packed too close can merge into a gray patch over time. Name both camps when you book and ask your artist which technique they use. In practice, request spaced stippling and ask to see healed portfolios at six months. Session-wise the collarbone dotwork feels prickly but short. For outfits, a scoop-neck blouse frames the cluster without hiding it.
5. Blackwork Solid Crown Along the Collarbone Edge
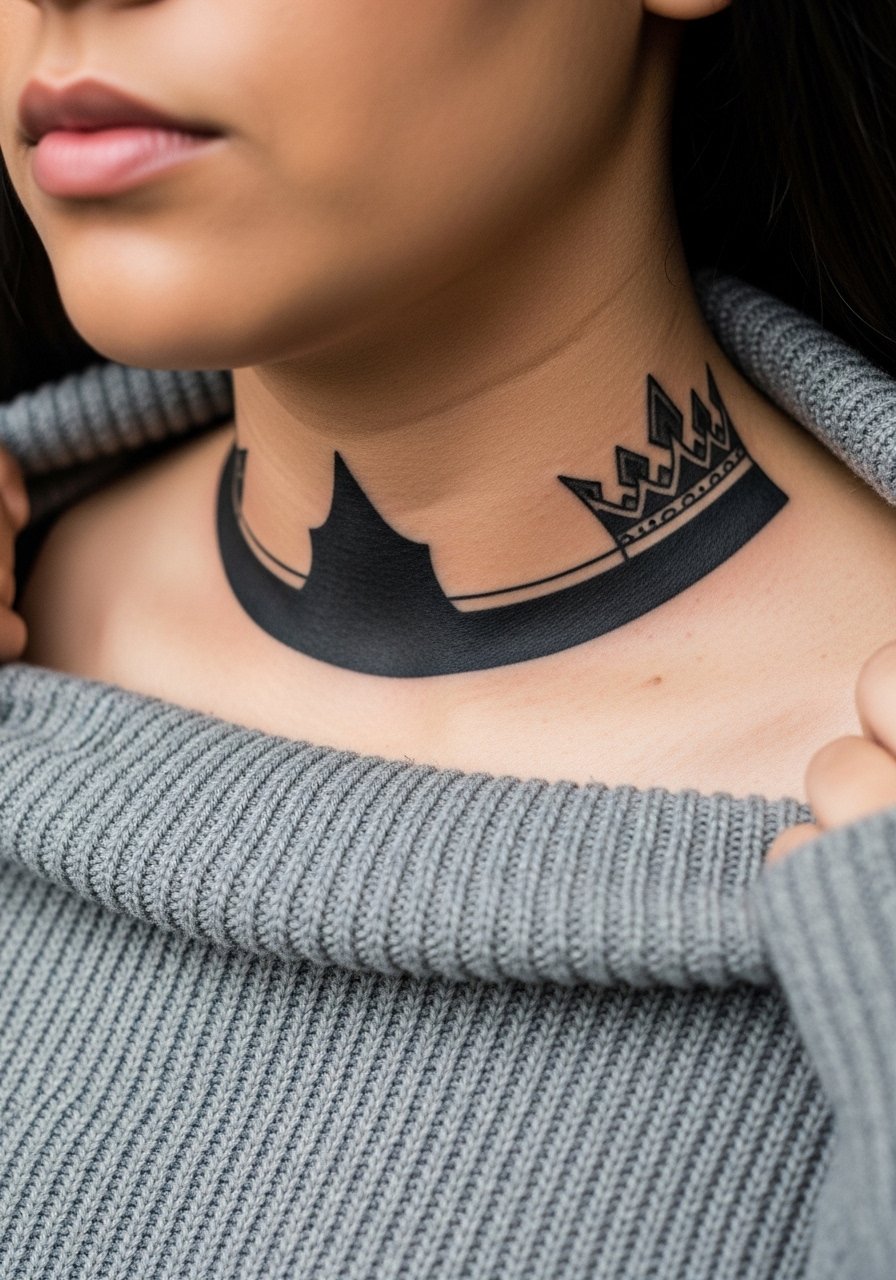
Visual impact lead: solid blackwork reads from a distance and ages into a confident silhouette. For longevity, ask the artist to prioritize flat saturation over micro detail since heavy black holds longer on shallow collarbone skin. Expect more discomfort where the needle crosses the bone, but the single-session payoff is immediate. A common mistake is packing tiny textures into black blocks, which can look muddy later. Wear a wide-neck knit top the day you reveal so the crown sits smoothly against the neckline.
6. Minimalist Single-Line Crown with Negative Space
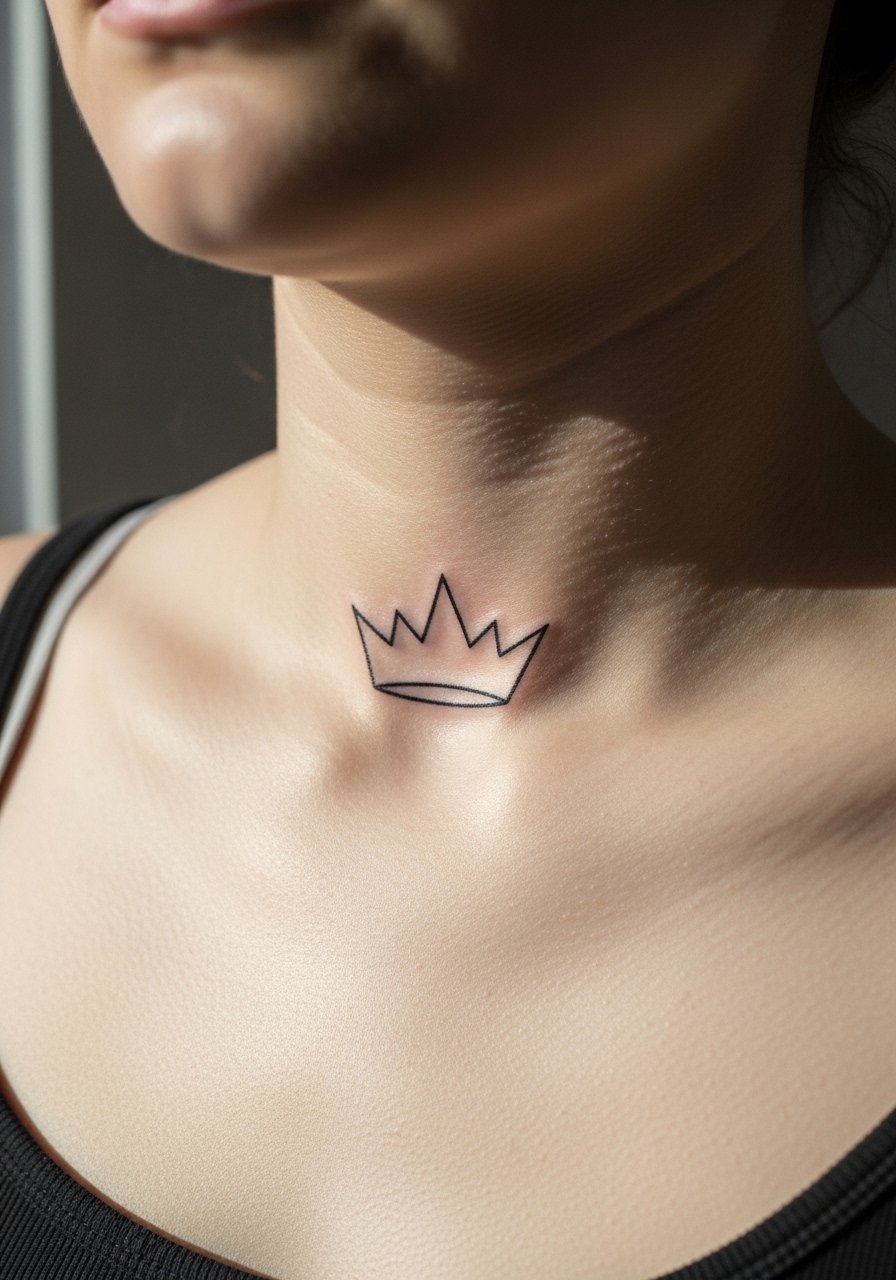
Mistake lead: the biggest error with single-line crowns is asking for lines so fine they disappear after healing. When you consult, ask for one slightly bolder anchor line and keep inner gaps open. The session is quick and tends to be less painful than denser pieces, but tiny lines might need a touch-up at year two. For appointments, a thin-strapped tank gives perfect access and keeps you comfortable while artists work.
Studio Day Picks
The chest and collarbone pieces above ask for easy chest access and minimal friction during healing, so a few focused items smooth the session and first week.
-
Stencil transfer paper kit. Lets you preview the linework placement on skin before the needle hits, which matters when the crown sits directly on the bone.
-
Topical numbing cream. Applied as directed before the appointment it reduces collarbone sensitivity without changing the artist's approach.
-
Thin protective film roll. Useful for first-day coverage when shirts might rub the fresh collarbone area.
-
Fragrance-free gentle body wash. Cleanses the healing zone without irritating delicate linework on the collarbone.
-
Aquaphor healing ointment. A thin layer for the initial days helps manage scabbing and keeps fine lines from drying into flakes.
7. Tiny Crown with Script Underneath
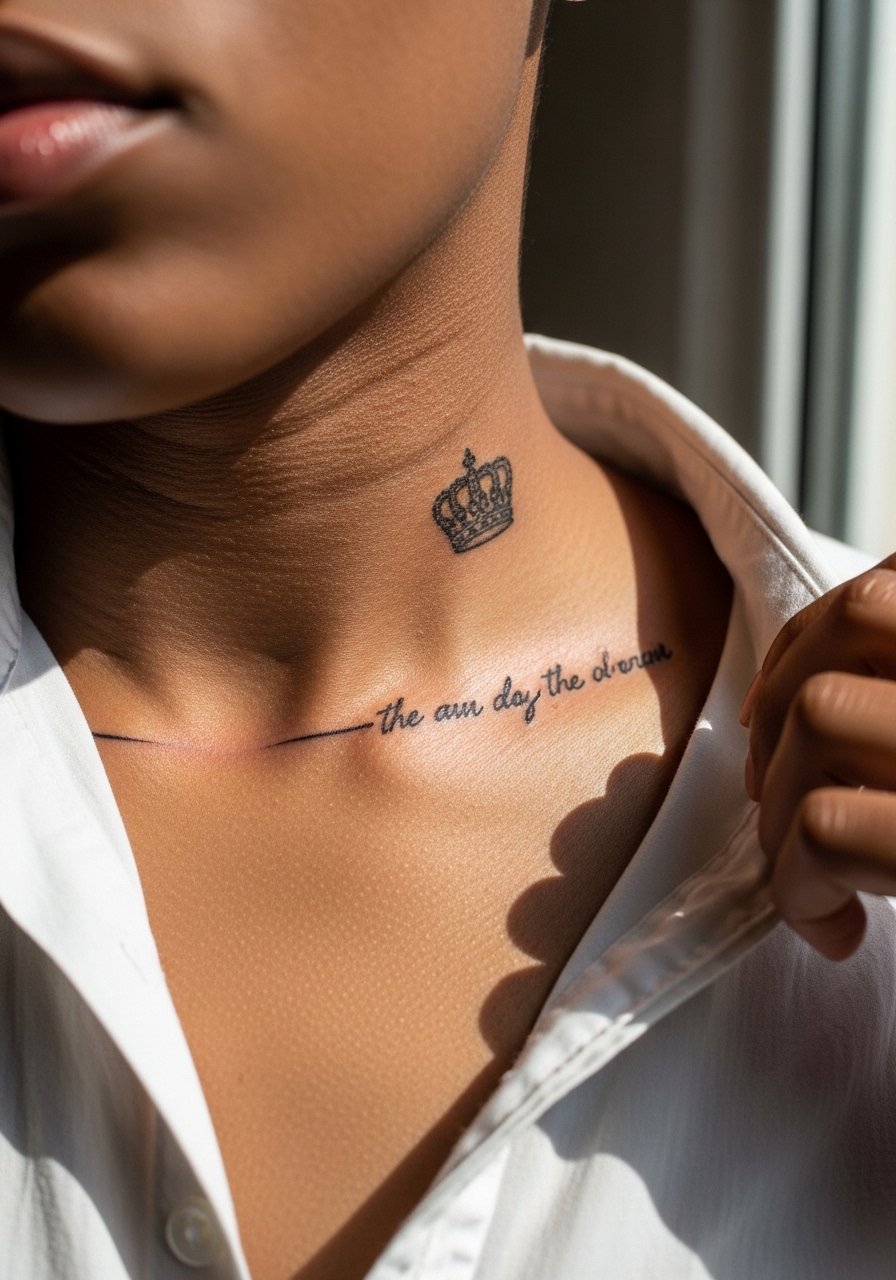
Consultation lead: bring the exact script font and ask the artist to size the letters so they match the crown proportionally. A common mistake is pairing tiny script with tiny crown detail, which makes both elements fight for space. On the collarbone, letters may widen slightly as they heal, so request slightly increased letter spacing. The session time is short but expect the needle to skate over bone edges. For showing this combo, a thin chain pendant necklace sits above the script without crowding the crown.
8. Laurel Crown with Slight Curve Along the Bone
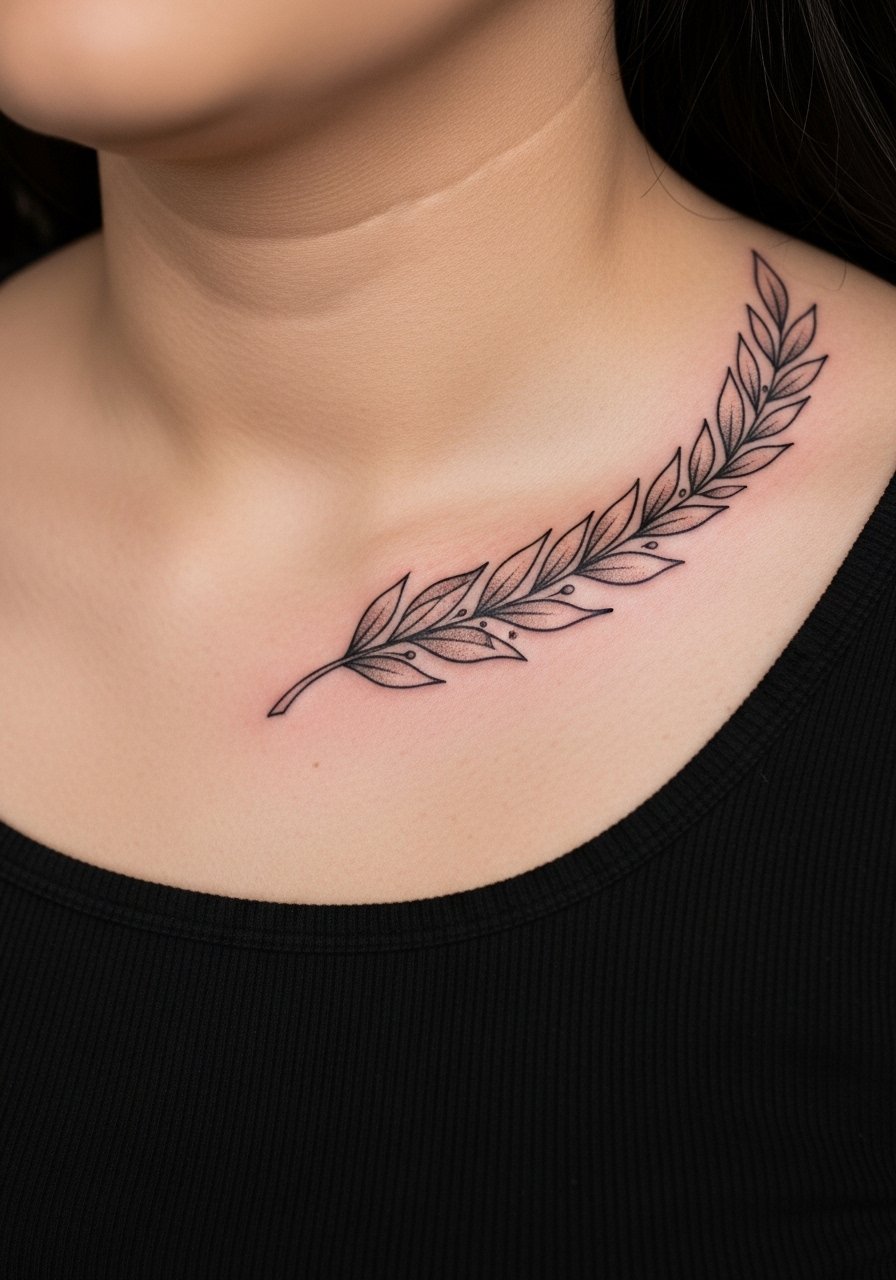
Visual impact lead: a laurel crown that follows the collarbone curve reads naturally like jewelry. Tell your artist you want the leaves to breathe, not pack into a single mass. If the leaves are too small they can merge, so ask for modest leaf spacing and subtle stipple shading for depth. Expect moderate discomfort at the bone edge. For evenings out, pair this piece with an open-back dress or a wide neckline to let the wreath read like an accessory.
9. Micro-Realism Crown with Tiny Gems
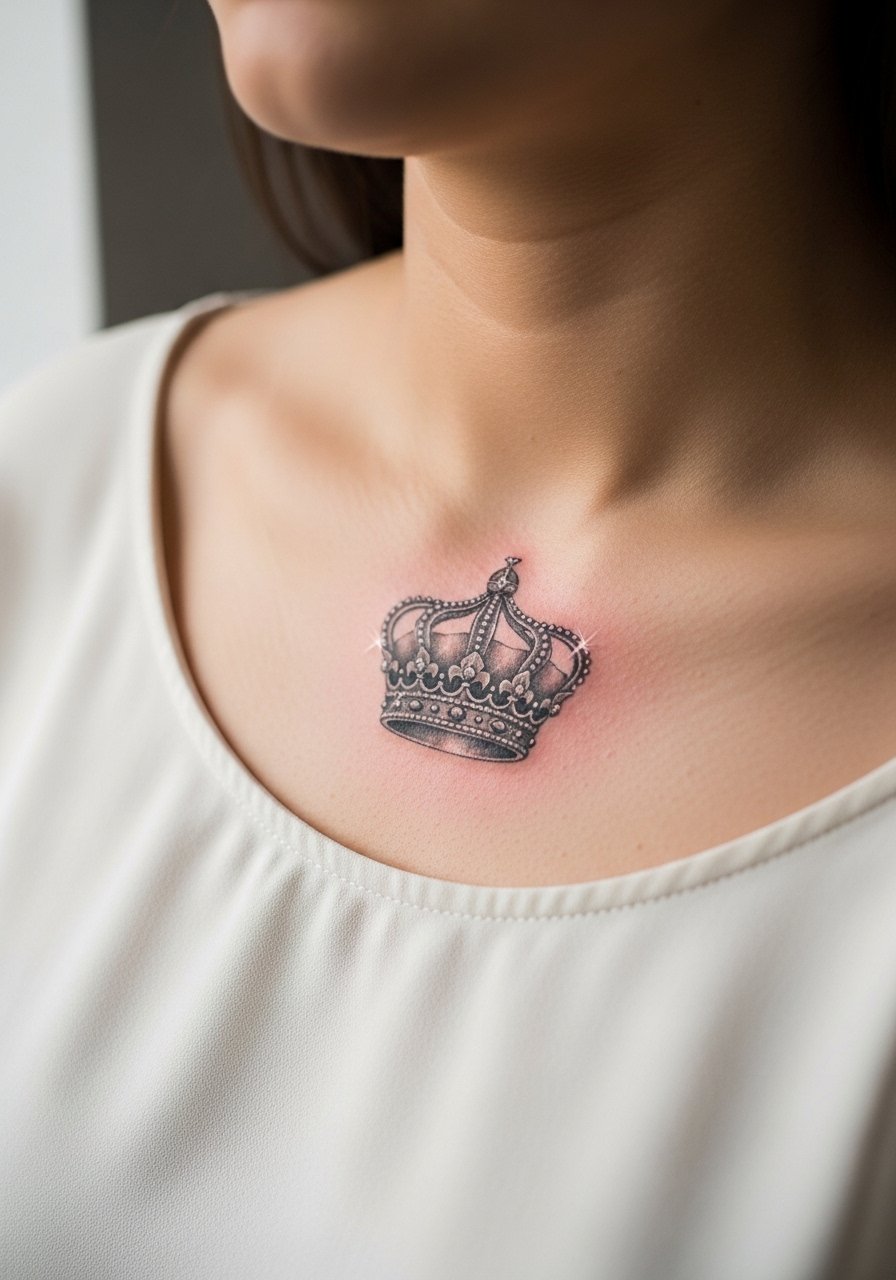
Personal observation lead: micro-realism gems can look jewel-like when healed, but they need breathing space. Ask for tiny bright spots of negative space to mimic glints rather than relying on dense white ink. On collarbone skin, white ink rarely holds perfectly, so use contrast rather than relying on highlights. Sessions take a bit longer due to careful shading, and you might want a touch-up on the highlights. For styling, a delicate pendant layered above the tattoo keeps the eye moving.
10. Geometric Crown with Openwork Lattice
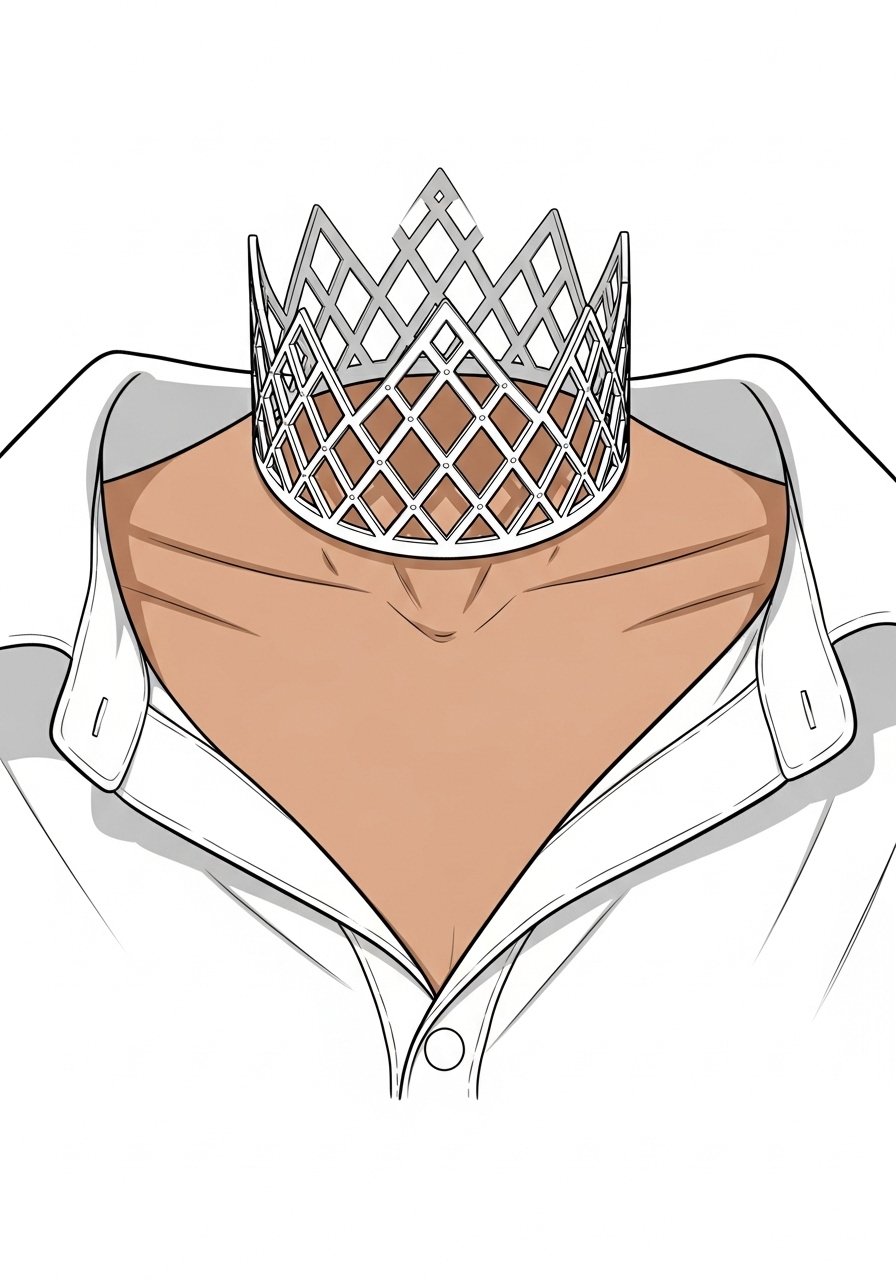
Mistake lead: the most frequent error for geometric crowns is scaling too small. On the collarbone, dense lattice loses clarity if the lines are under the ideal thickness. Tell the artist you prefer clearer negative spaces and ask for slightly wider grid lines near the bone. Expect periodic touch-ups around year three for crisp lattice edges. For a casual daytime look, roll a sleeve or choose a button-down worn open that frames the collarbone.
11. Vintage Signet Crown with Small Shield
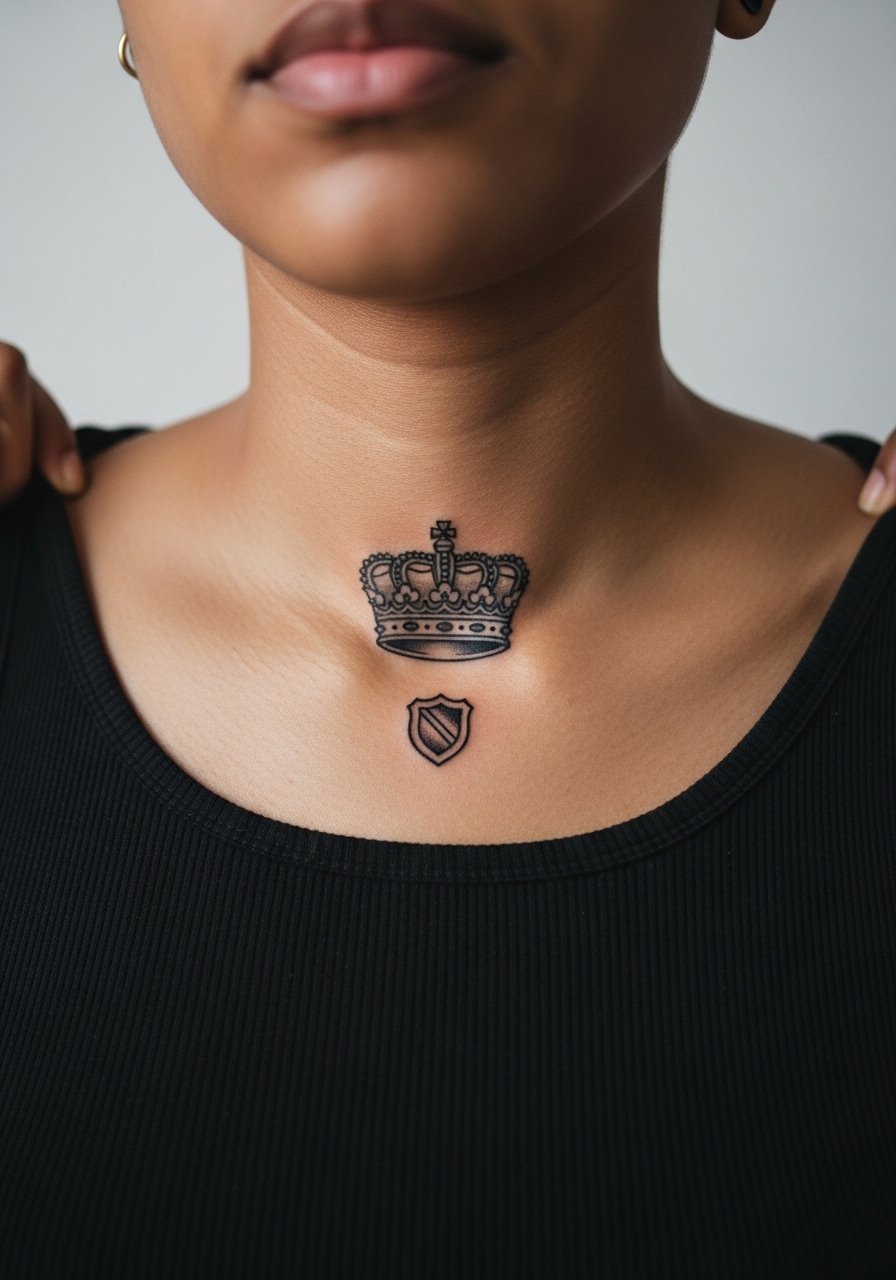
Consultation lead: mention if you want a heraldic feel and bring references for shield proportions. The shield needs a clear border so the interior icon does not blur. Sessions are steady and may be paused and restarted because of the bone contour. The common aging issue is filling the shield with tiny motifs that do not read later. For styling, a simple chain bracelet draws attention to the collarbone area without overpowering the signet.
12. Tiny Crown and Constellation Cluster

Aging/healing lead: star dotwork and tiny crowns age differently. Dots used for stars soften faster than bold outlines, so balance the piece with a slightly stronger outline on the crown and subtle dot spacing for stars. The session is light and usually quick, but expect some early fading in the dots that may need a touch-up at year two. For layering jewelry, pair this look with a thin chain anklet-style necklace worn short so the collarbone remains focal.
13. Crown Integrated into Floral Motif Along the Collarbone
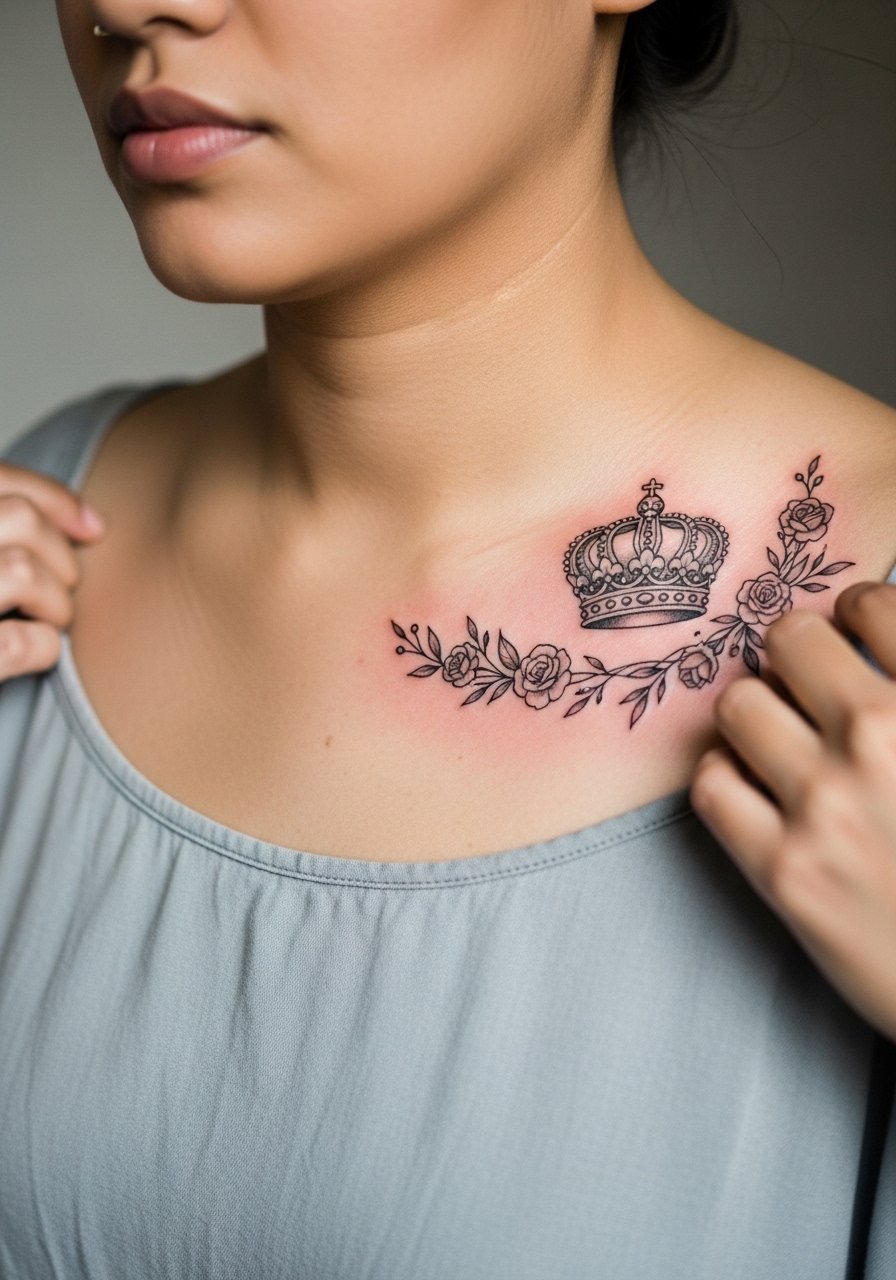
Visual impact lead: combining a crown with flowers adds softness and gives the piece longevity because the floral negative spaces help maintain clarity as the crown's fine points soften. Tell the artist you want the crown to anchor the composition and the roses to have open petals, not dense petal knots. The session can be longer because of the floral shading, and the collarbone will feel the needle over bone edges. For showing it off, choose an open-back dress or a wide neckline to keep the floral crown visible.
14. Minimal Crown with Chain Detail Hanging Below
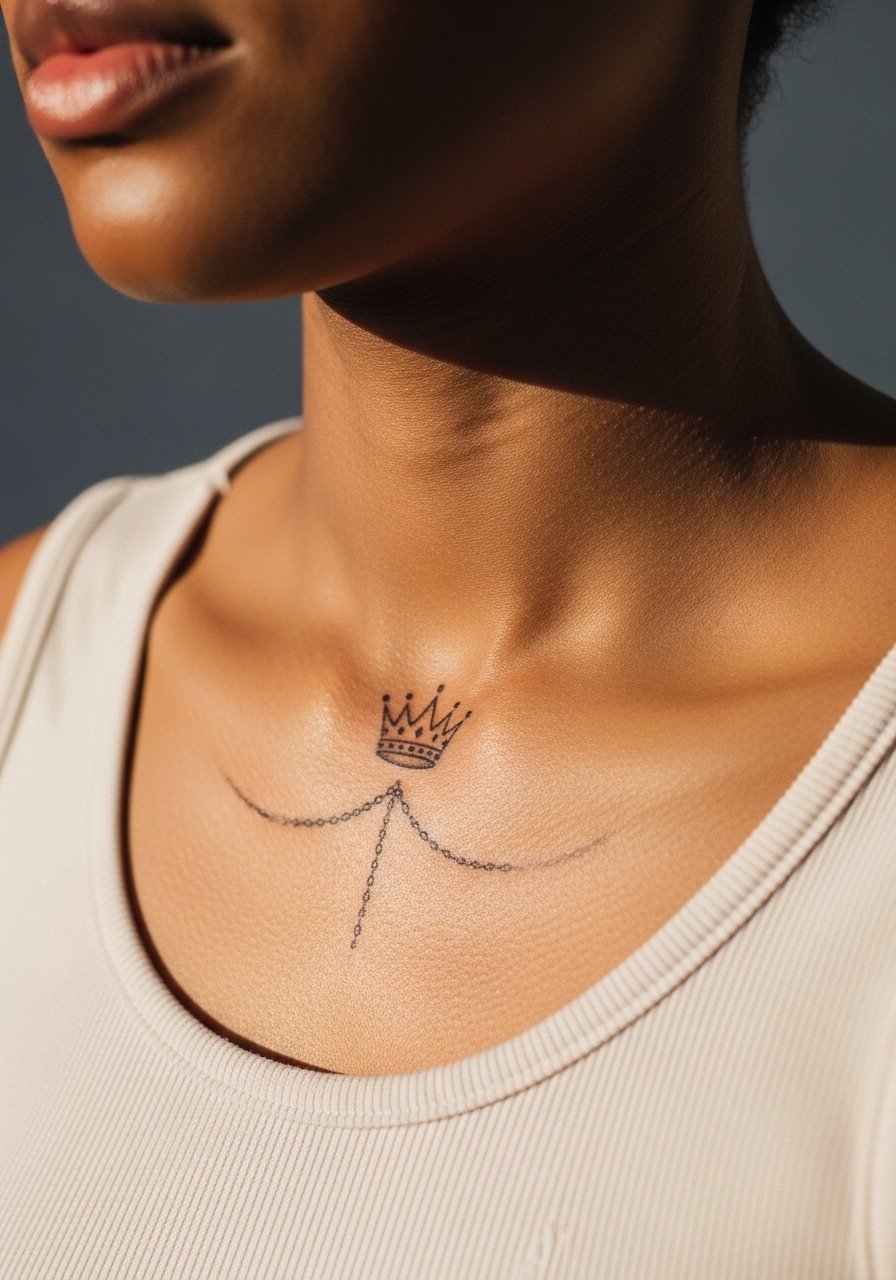
Mistake lead: chain details tend to look sketchy when done too thin. Ask for a slightly bolder single-pass chain to maintain continuity as the ink settles. The chain element can trap scabs if it is too dense, so keep it airy. Sessions are straightforward but expect sensitivity where the needle crosses the bone ridge. For outfit pairing, a thin chain pendant necklace layered just above the tattoo complements the ink without mirroring it exactly.
15. Tiny Crown with Laurel and Minimal Dot Accents
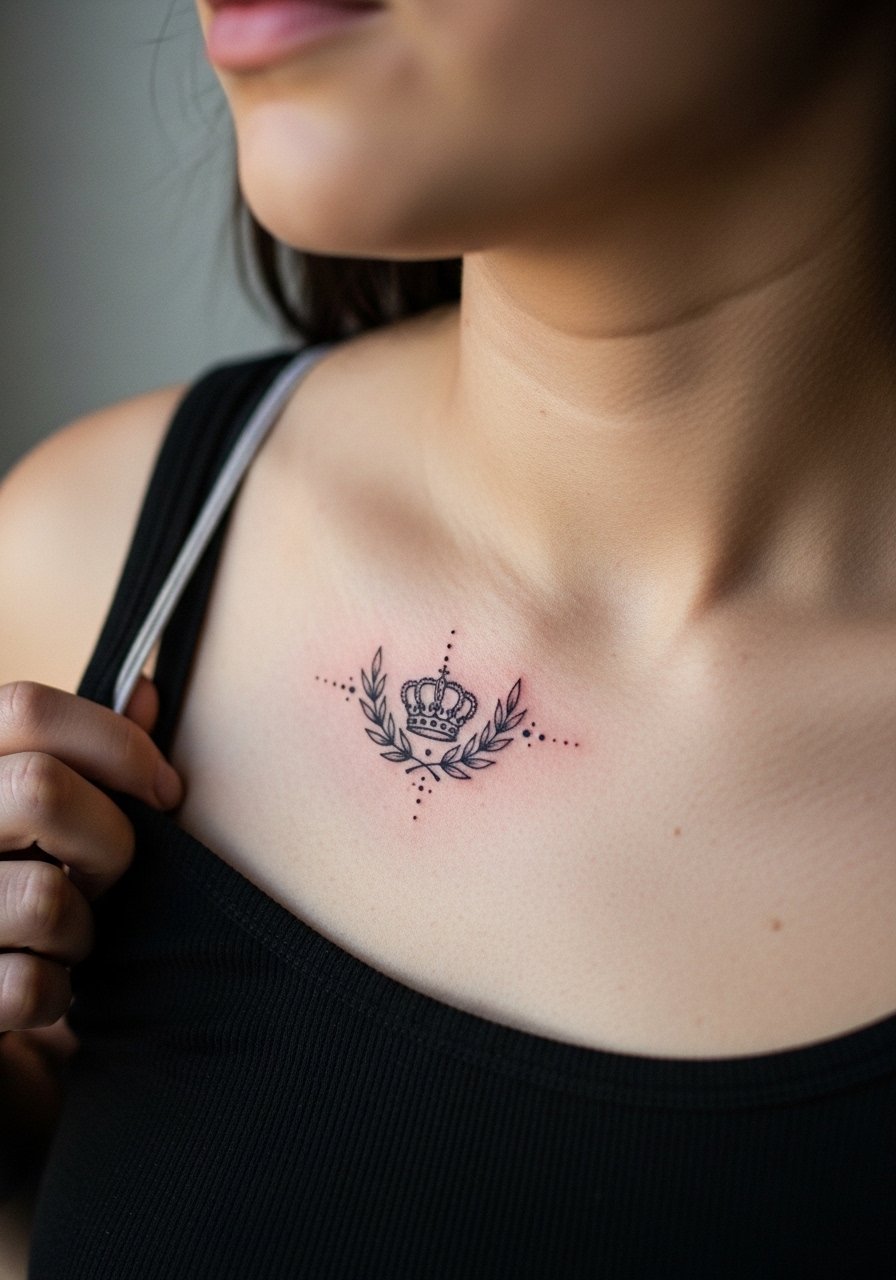
Mistake lead: combining laurels and dots creates clarity problems when the elements are too small. Ask your artist for modest leaf size and spaced dots for longevity. The session is a moderate-length appointment that stays comfortable with short breaks. A common long-term issue is dot accumulation, which can gray out. For casual days, a thin-strapped tank keeps the area visible without catching on scabs during healing.
16. Classic Tiny Crown with Cross-Hatching Shading
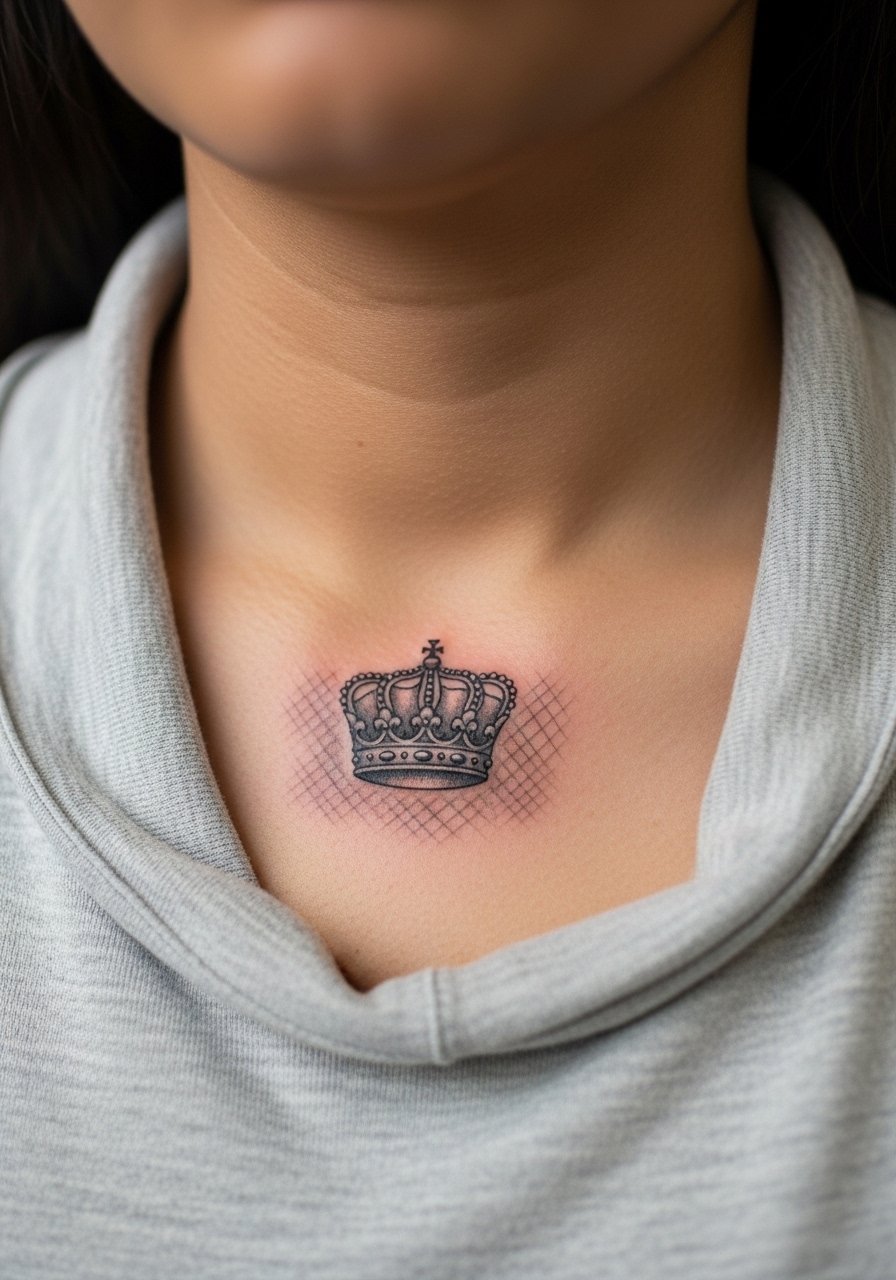
Consultation lead: cross-hatch gives a timeworn look, but the hatch spacing must be generous near bone to avoid muddying. Tell the artist you want visible texture rather than solid fill. The technique takes slightly longer and the collarbone can feel twitchy under the needle. Expect touch-ups for texture at year three depending on sun exposure. For styling, a delicate pendant necklace keeps attention on the collarbone without hiding the cross-hatch detail.
17. Art Deco Crown with Symmetrical Points
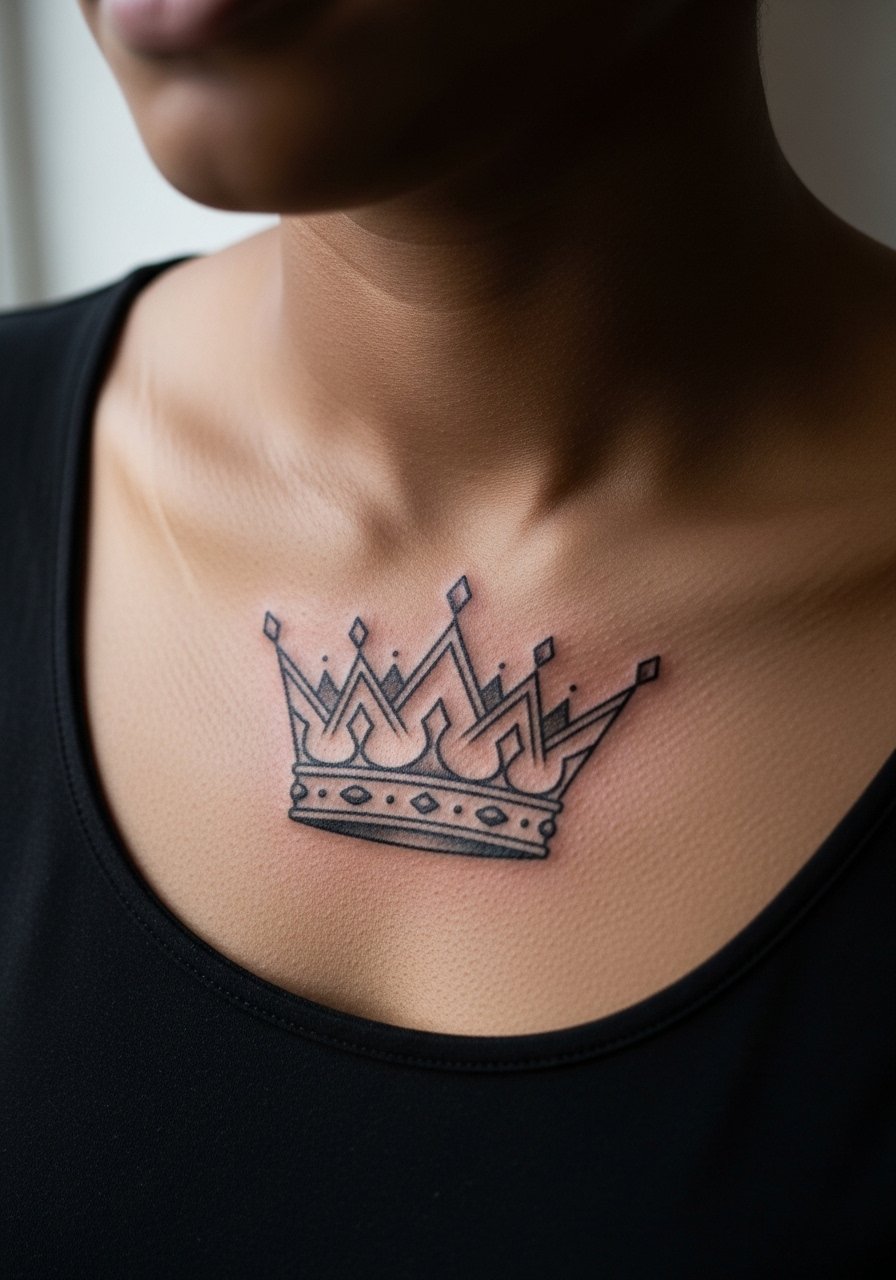
Personal observation lead: Art Deco crowns age well because the bold geometry survives softening better than lace-like ornament. Ask your artist for bold anchors and minimal interior detail so the silhouette holds. The session is precise and may require cross-checking the stencil in multiple poses so the symmetry reads well on the curved bone. For evening wear, an open-collar blouse frames the geometry cleanly.
18. Crown with Tiny Gemstone Color Accents
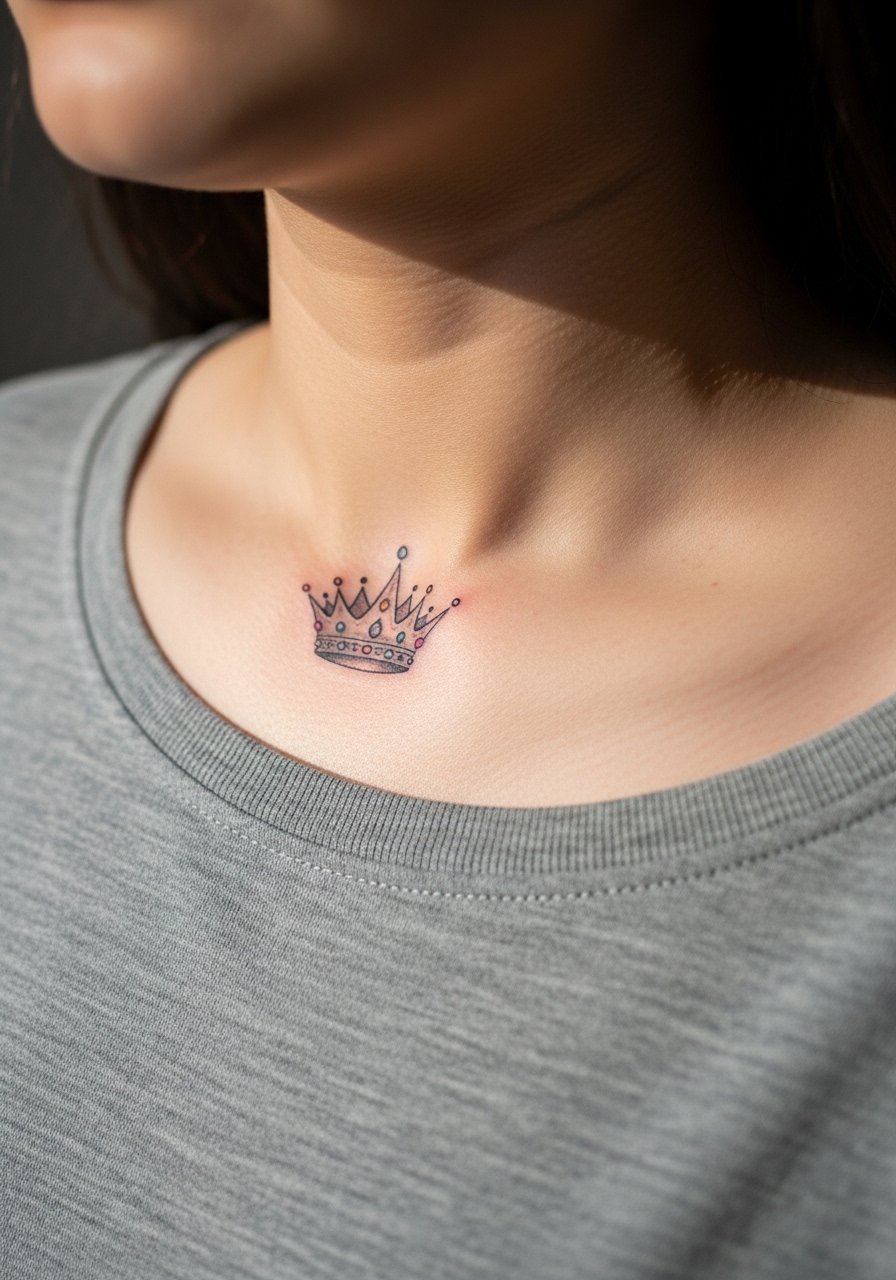
Aging/healing lead: small color dots can fade faster than black outlines. If you want color gems, ask for slightly larger, concentrated pigment spots and discuss potential touch-up timing. The collarbone accepts color but the pigment may need refreshing at year two to three. A common mistake is overdoing pastel shades that vanish quickly. For layered jewelry, pair with a thin chain pendant that echoes the gem placement without covering the ink.
19. Crown Silhouette with Negative Space Lace
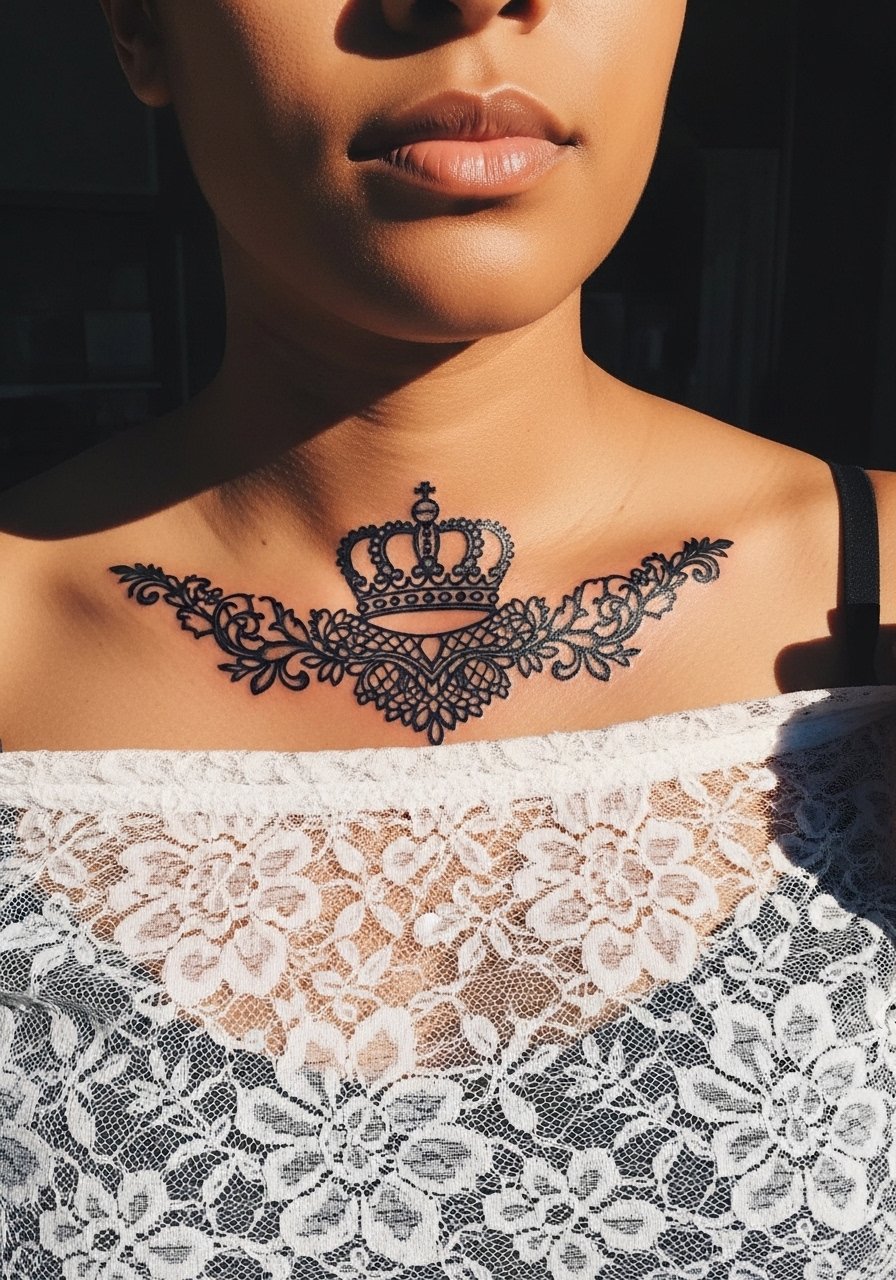
Mistake lead: lace-like negative space requires deliberate spacing or the pattern disappears. Ask for bold outer edges and deliberate empty areas rather than tight filigree. Expect lighter sessions physically but plan for a touch-up if you want the negative spaces crisp at year three. For styling, a wide-neck lace top can echo the design without crowding it.
20. Tiny Crown with Tiny Anchor Tattooed Nearby
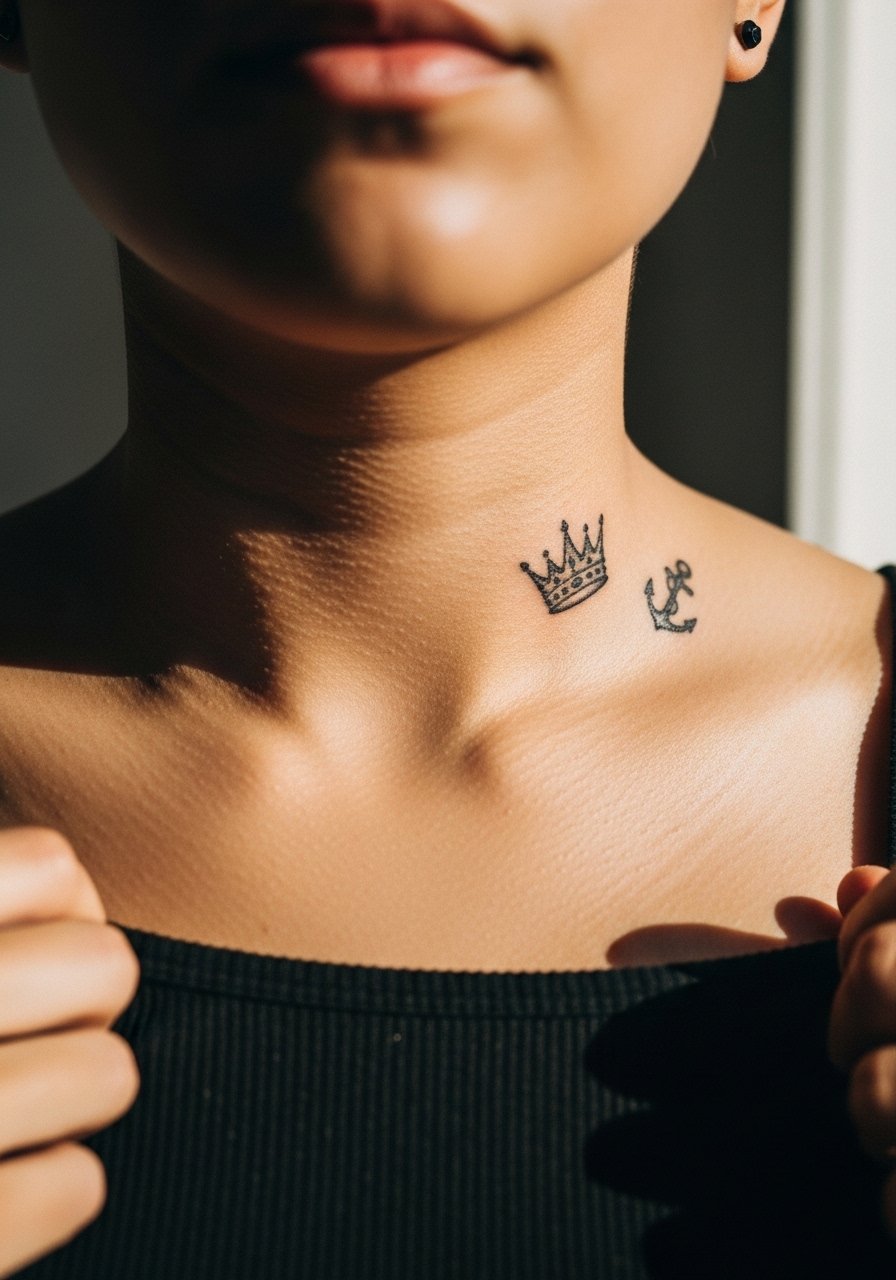
Consultation lead: if you plan paired symbols close together, map their spacing in the stencil stage. Symbols too close will blur into one shape after a few years. The collarbone placement makes mapping essential because the natural curve can compress motifs. Sessions are short but precise. For showing the pairing casually, a thin chain necklace keeps focus on the artwork.
21. Crown in Micro Script Frame on the Collarbone
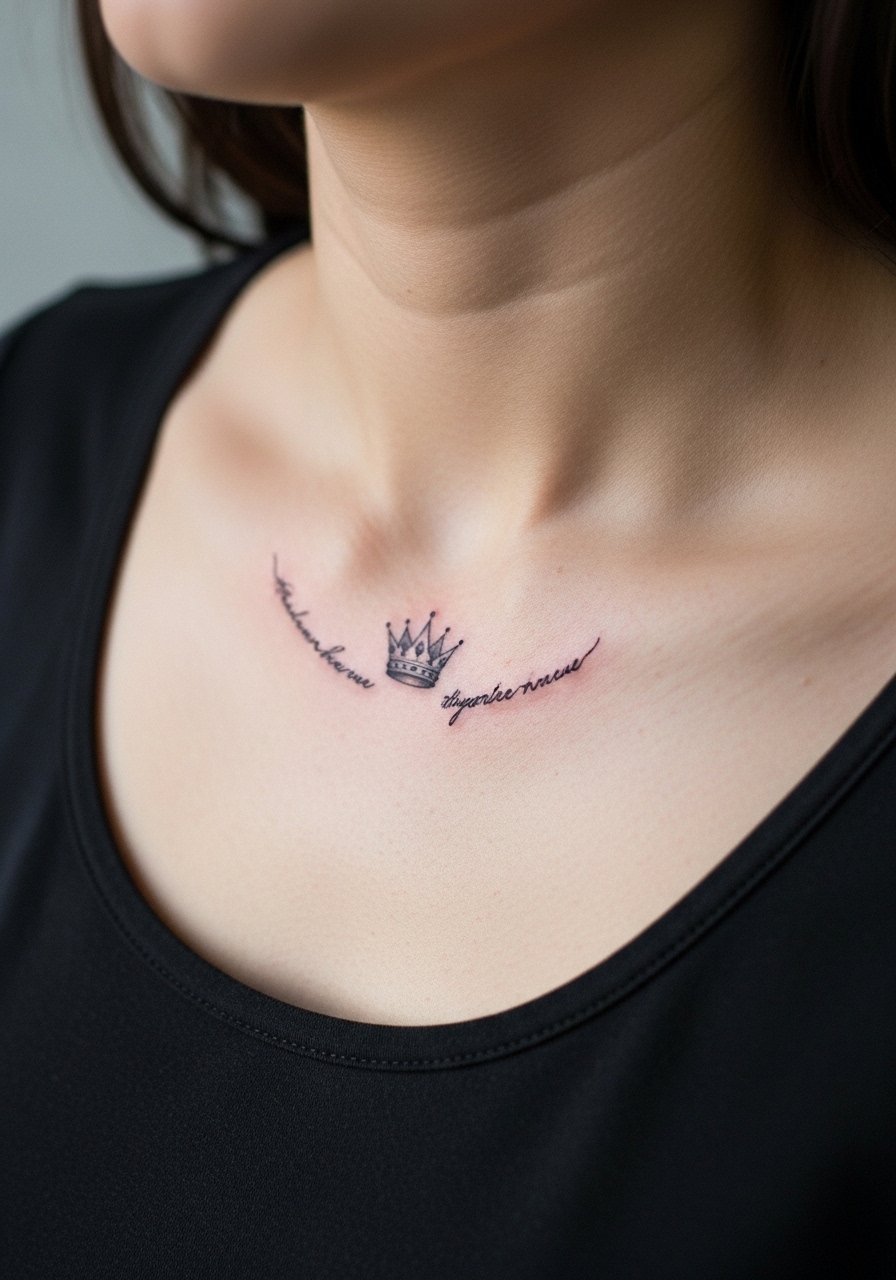
Personal observation lead: micro script around a crown reads poetic when letter spacing is generous. The most common regret is tiny letters squeezed too close to flourish elements. Ask your artist for increased kerning and a slightly larger x-height for letters so the phrase stays legible. Expect a longer session if the script wraps along the bone. For a finishing touch, pair with a thin chain pendant necklace that sits above the phrase without touching it.
Frequently Asked Questions
Q: Will a fine-line crown on the collarbone need touch-ups sooner than a bolder crown?
A: It depends on spacing and line weight. Fine-line crowns with ultra-thin points tend to blur faster on the collarbone because the skin sits over bone and the ink disperses differently. If you want thin work, ask for slightly heavier anchor lines and plan for a possible touch-up around year two to three.
Q: How should I dress for a collarbone tattoo session to give the artist clear access?
A: Wear anything with an easy shoulder or neckline you can pull aside, like a racerback tank or a button-down you can open. Loose fabrics reduce friction during healing and make it simple to expose just the tattooed area.
Q: Are there long-term problems with getting color accents on collarbone crowns?
A: Small color dots fade faster than black outlines, especially on sun-exposed areas like the upper chest. You can keep color longer by using saturated pigments and scheduling gentle touch-ups, but expect color to need more maintenance than blackwork.
Q: Should I worry about blowout on a collarbone crown?
A: Blowout risk increases when lines sit directly over bone and are placed too deep or packed too tightly. Request slightly wider spacing near the clavicle and ask the artist about their line depth technique during consultation.
Q: How do I find an artist who understands collarbone placements without naming specific people?
A: Search studio directories and event lineups, browse recent convention portfolios, and look through local hashtags for healed photos. Ask artists for healed images of collarbone work and check that the examples show clear negative space and consistent linework before booking.
