
Fine line tattoos are everywhere online, but the phantom troupe tattoo aesthetic that actually ages well tends to be simple blackwork and smart placement. I've noticed fans who mix numbered spiders, character silhouettes, and nen motifs tend to get the best long-term results when they plan for touch-ups and choose areas that handle linework. Below are 21 ideas that balance show-off looks with realistic aging and session advice.
1. Phantom Troupe Spider Logo with Number 4 on the Wrist
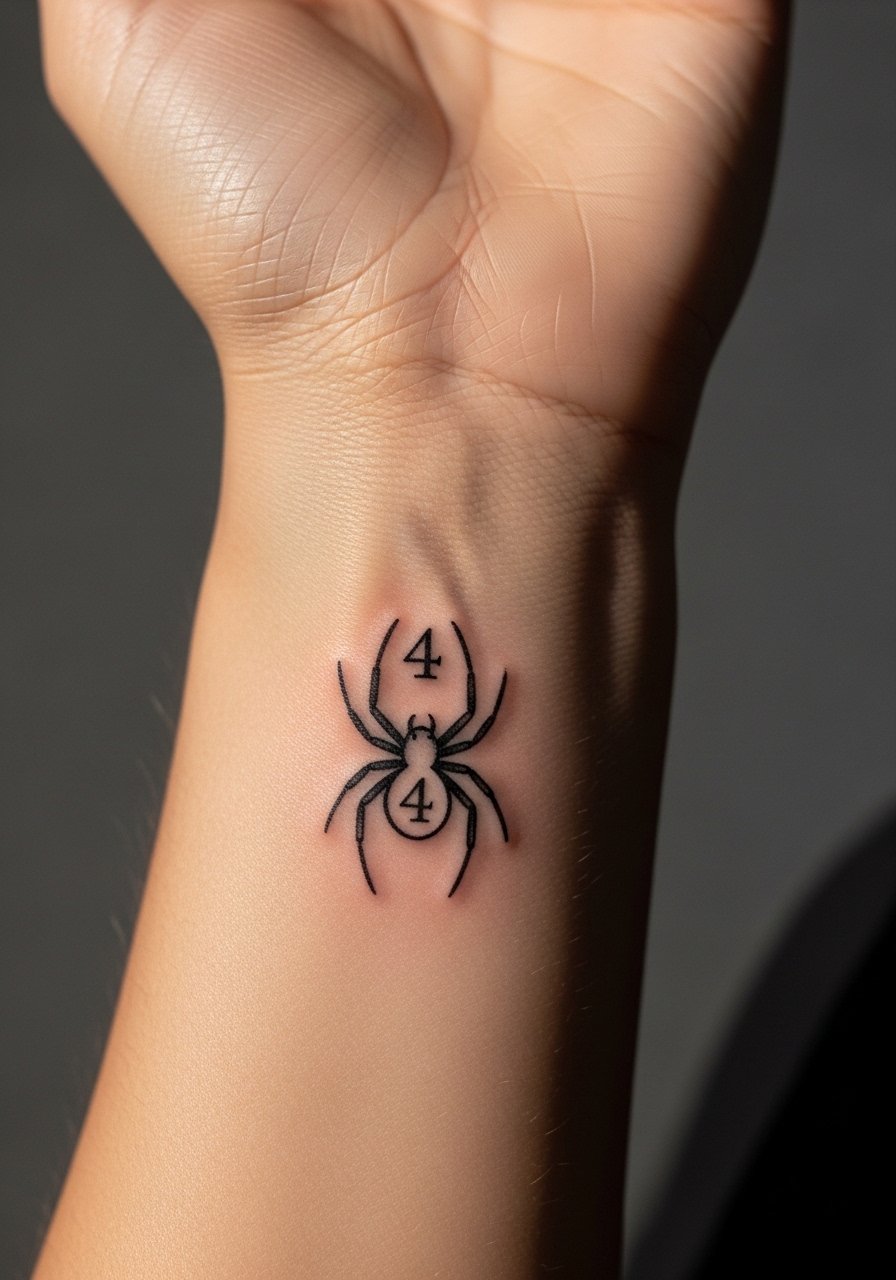
Start with the classic: the numbered spider on the inner wrist reads small and intentional. I recommend asking your artist for slightly thicker primary legs and a simplified numeral so the piece holds at year two and beyond. Common mistake is asking for ultra-fine legs that blur after frequent washing and typing. Pain is low to moderate on the inner wrist. Expect a short single session and a touch-up at 12 to 18 months if you use fine line. For showing it off, wear a slim leather cuff bracelet on the opposite wrist and pull on a cropped hoodie men for casual framing.
2. Feitan Pain Packer Cloak Flow on the Outer Forearm
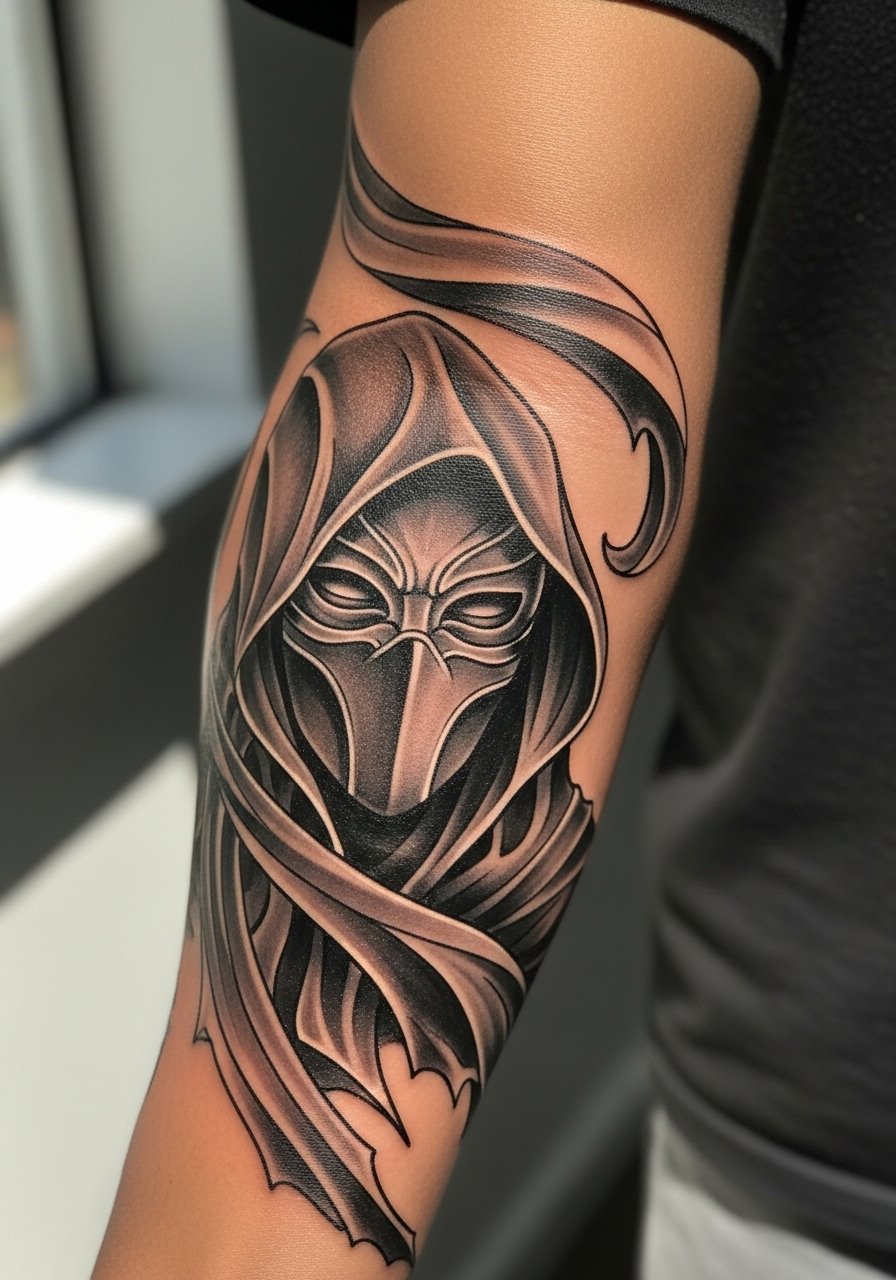
This forearm piece uses motion to disguise minor shifts as muscles move. In consultation, bring reference poses that show cloak folds. The common error is packing too many tiny details in the cloak folds, which compress and soften after two years. Forearm sessions are moderate in pain and usually take two sessions for full shading. Ask for stipple shading in shadowed areas to age more predictably than dense gray fills. For session comfort, wear a loose fit tee men you can roll up, and for showing it off roll sleeves or wear a roll up sleeve shirt.
3. Full Phantom Troupe Silhouette Group Across the Upper Back

A back silhouette reads as narrative and keeps tiny details from aging poorly. Back pieces tend to be less exposed to sunlight, which helps saturation last. Expect multiple sessions and a higher pain tolerance in certain spots near the spine. A common mistake is shrinking the composition too much so individual figures lose clarity when healed. Tell your artist you want clear negative space around each silhouette to avoid merge over time. For summer show-off wear a low back tank top to reveal the work without competing elements.
4. Machi Nen Threads Interwoven into a Wrist or Inner Bicep Detail
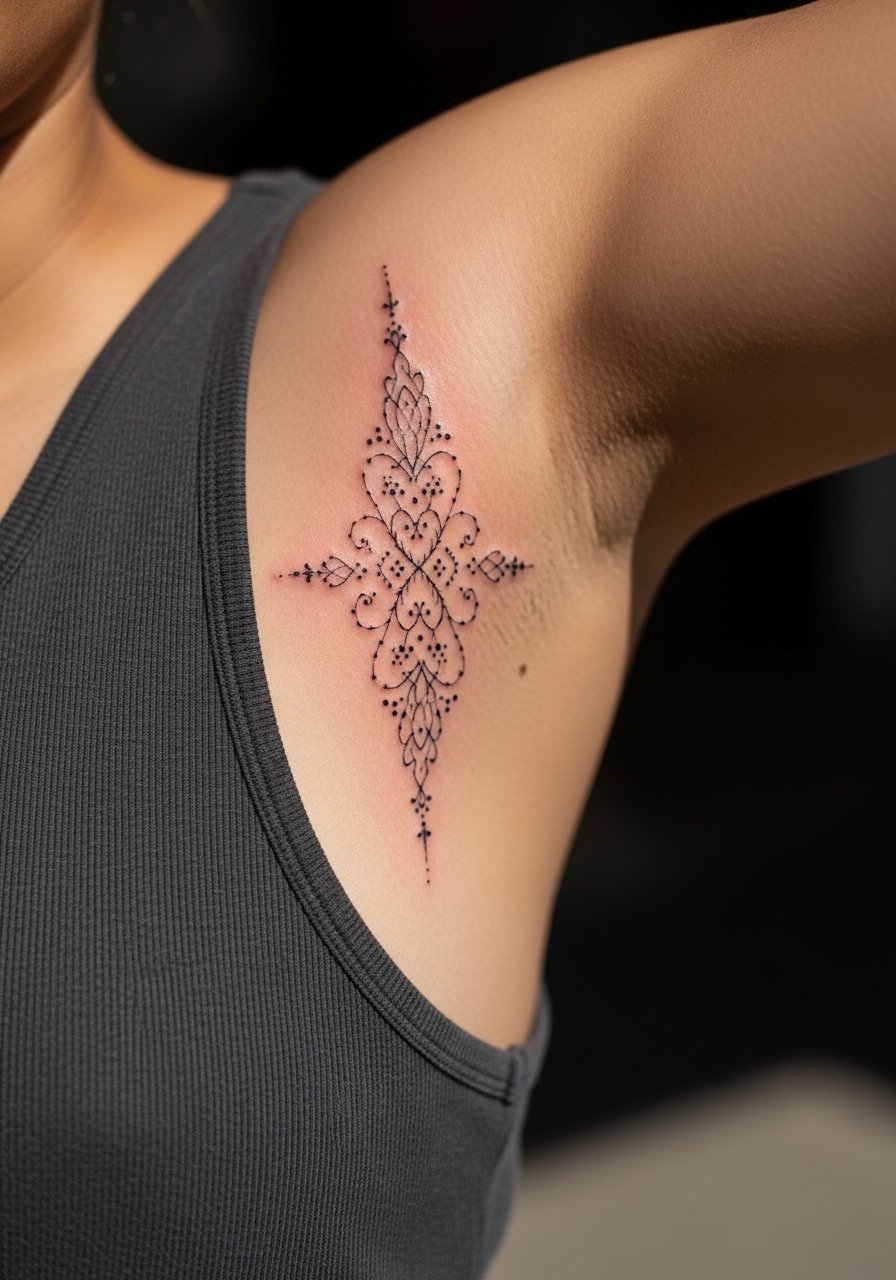
Machi-style thread motifs look delicate, and that is part of the appeal. Artists split on fine line here. One camp argues fine thread detail on the inner bicep holds if spaced and placed deeply enough. The other camp says the inner arm stretches and those lines blur fast. I suggest asking where your artist stands and requesting slightly bolder anchor points for the main threads. Inner bicep pain varies, often moderate. Plan for a possible touch-up at year two. For the session wear a tank top so the arm can be raised without rubbing.
5. Bonolenov Bandage Wrap with Musical Notes on the Calf
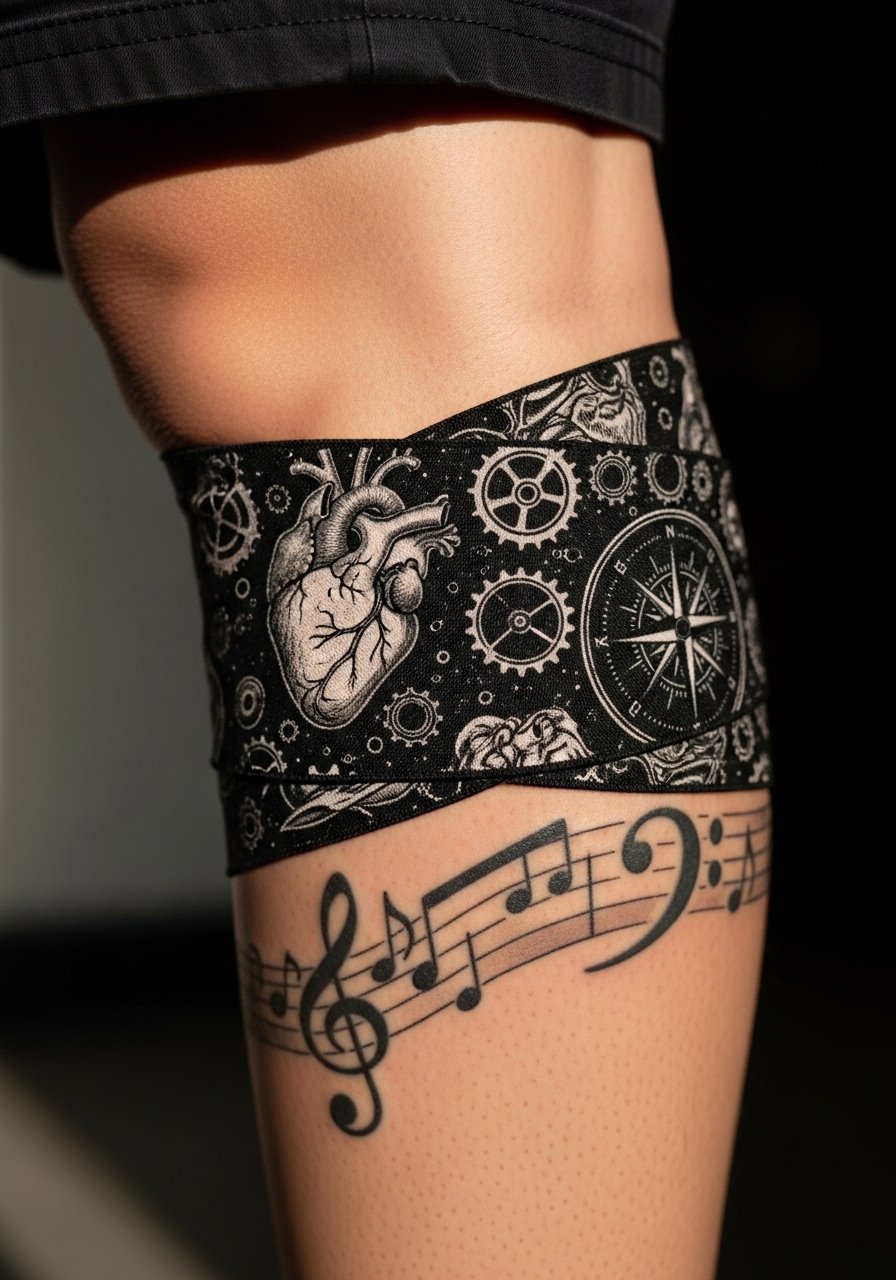
A calf piece gives room to render wrapped bandages and small note motifs without crowding. Calf sessions are a solid moderate pain and often finish in two sessions. People sometimes compress the bandage layers into one flat fill and lose the sense of wrap. Ask for distinct edge shading and thin negative gaps to preserve separation as it heals. Calves are easier to protect during healing than hands, and a pair of cuffed joggers framed with cuffed joggers men or slim shorts shows the design off.
6. Twelve-Legged Spider on the Side of the Hand or Ankle
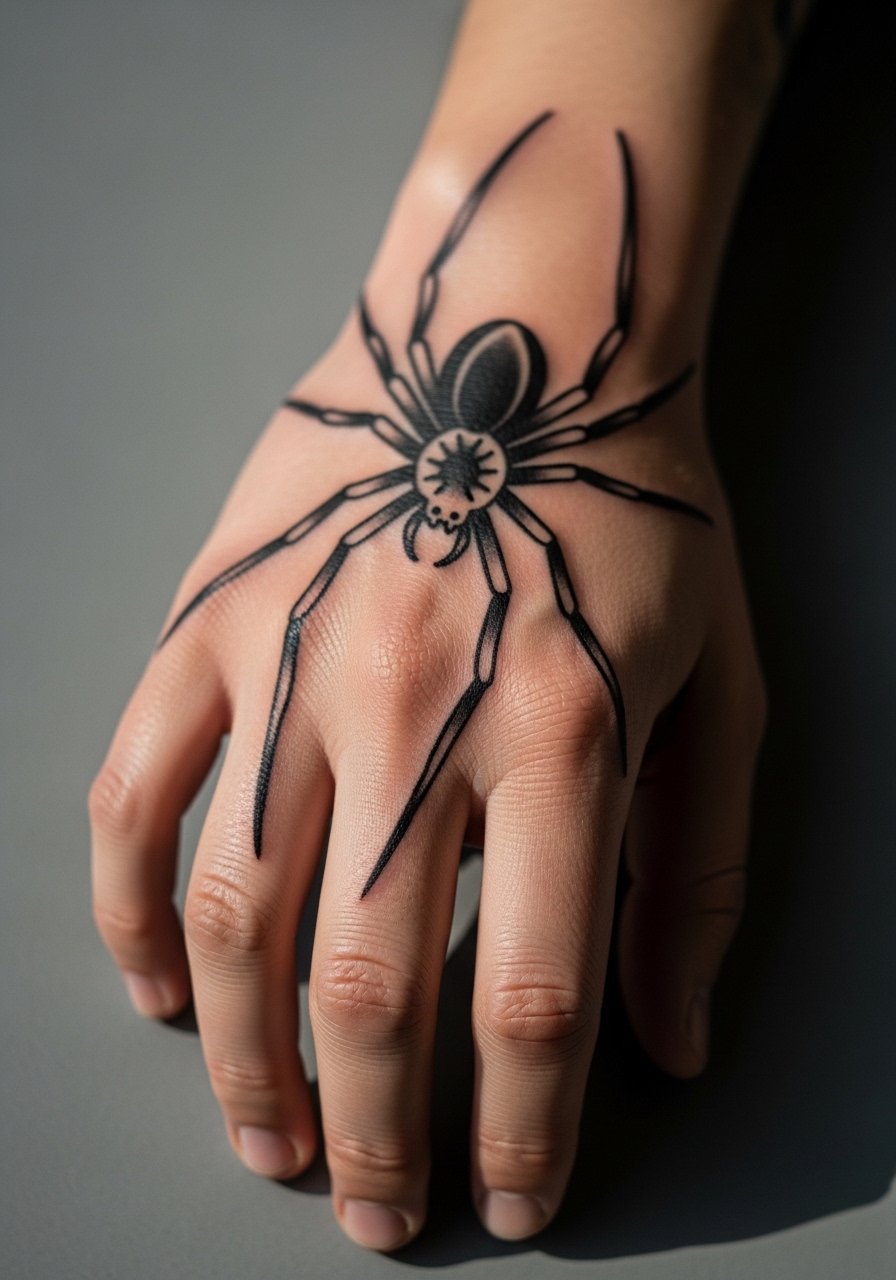
Hand and ankle spiders read immediately as membership motifs in the series but come with trade-offs. Artists split into two camps on hand placements. One group warns that fingers and the hand blur quickly and say go bold and simple. The other group embraces fine detail for the first year and accepts periodic touch-ups. If you want a hand spider, choose thick legs and a compact body for longevity. Hands are high friction zones so expect touch-ups sooner than on forearms. For session prep keep hands bare and wear short sleeves so the artist has clear access. If you prefer less daily visibility, the ankle is an easier long-term option.
Pack Smart
The wrist, hand, and calf pieces above each have different access and healing needs, so a short kit smooths the session and the first week.
-
Stencil transfer paper kit. Lets you preview proportions on skin for small wrist and hand pieces so you can confirm scale before the needle hits.
-
Topical numbing cream. Applied as directed before a wrist or calf session to ease the first thirty to sixty minutes of sensitivity.
-
Thin protective film roll. Helpful for finger and ankle work that rubs against clothing during day-to-day movement.
-
Fragrance free gentle body wash. Cleans the area without stripping natural oils that help linework heal clean.
-
Aquaphor healing ointment. Thin application for the initial days keeps fine line and blackwork pieces from drying into flakey scabs that pull ink unevenly.
7. Chrollo Lucilfer Variant on the Collarbone

Collarbone spiders have strong visual impact because they sit near clothing edges. Pain can be sharp near the bone, so count on a single shorter session or two brief sittings. A common error is putting too many tiny legs close to the clavicle where movement and clothing cause friction. Ask for slightly wider spacing and a crisp numeral treatment so it remains legible. For showing it off, wear an off shoulder tee or a layered chain like a layered chain necklace that echoes the spider's silhouette.
8. Phinks Arm Spider Wrapped Around the Outer Forearm
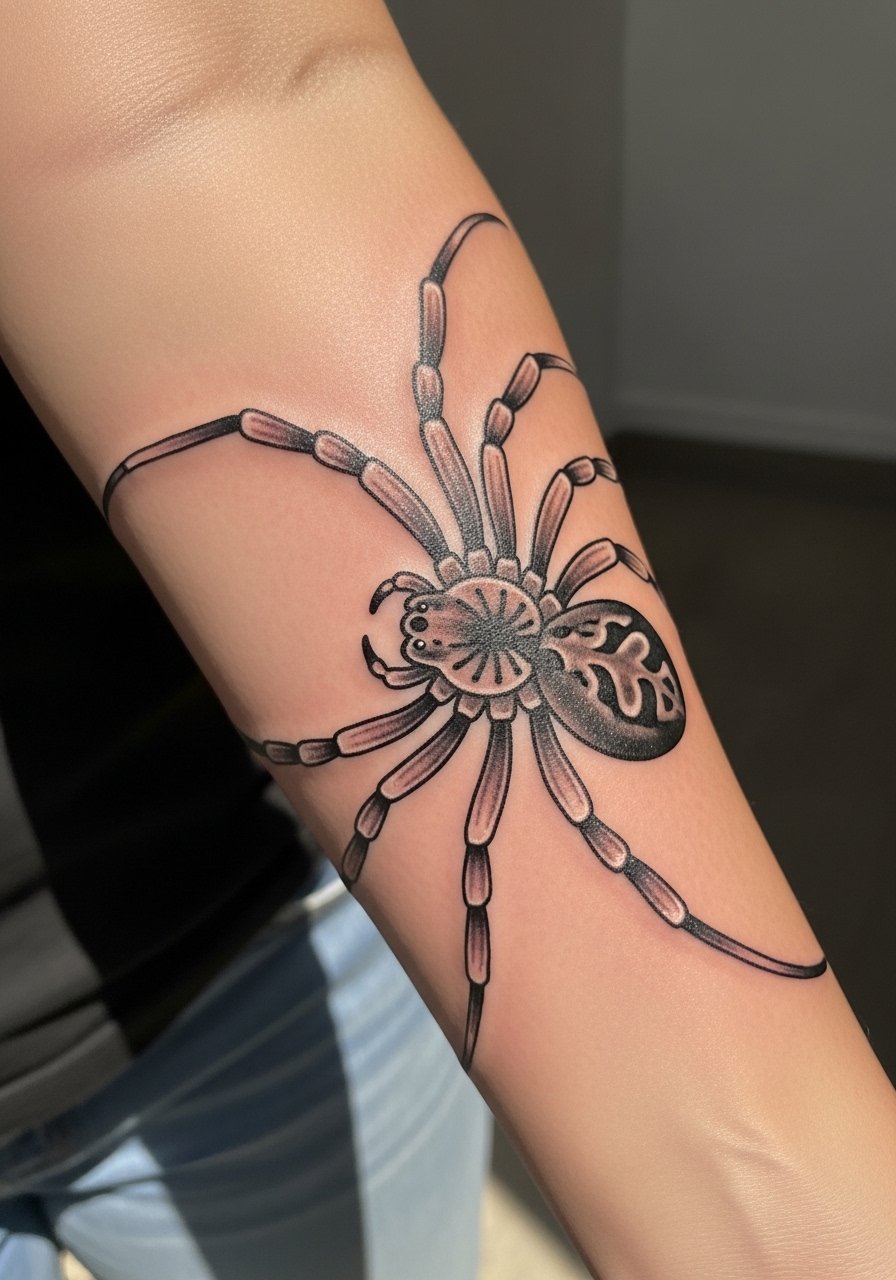
A spider that wraps around the forearm uses anatomy to enhance motion. Tell the artist you want each leg to follow muscle contours so it reads dynamic in different arm positions. The usual mistake is forcing too many legs across a small circumference, which compresses detail. Forearm work averages a moderate pain and may need two sessions for shading. For session comfort wear a loose fit tee men. For daily wear, roll sleeves or cuff a shirt to keep attention on the wrap.
9. Nobunaga Silhouette Inside a Spider Web on the Ribcage
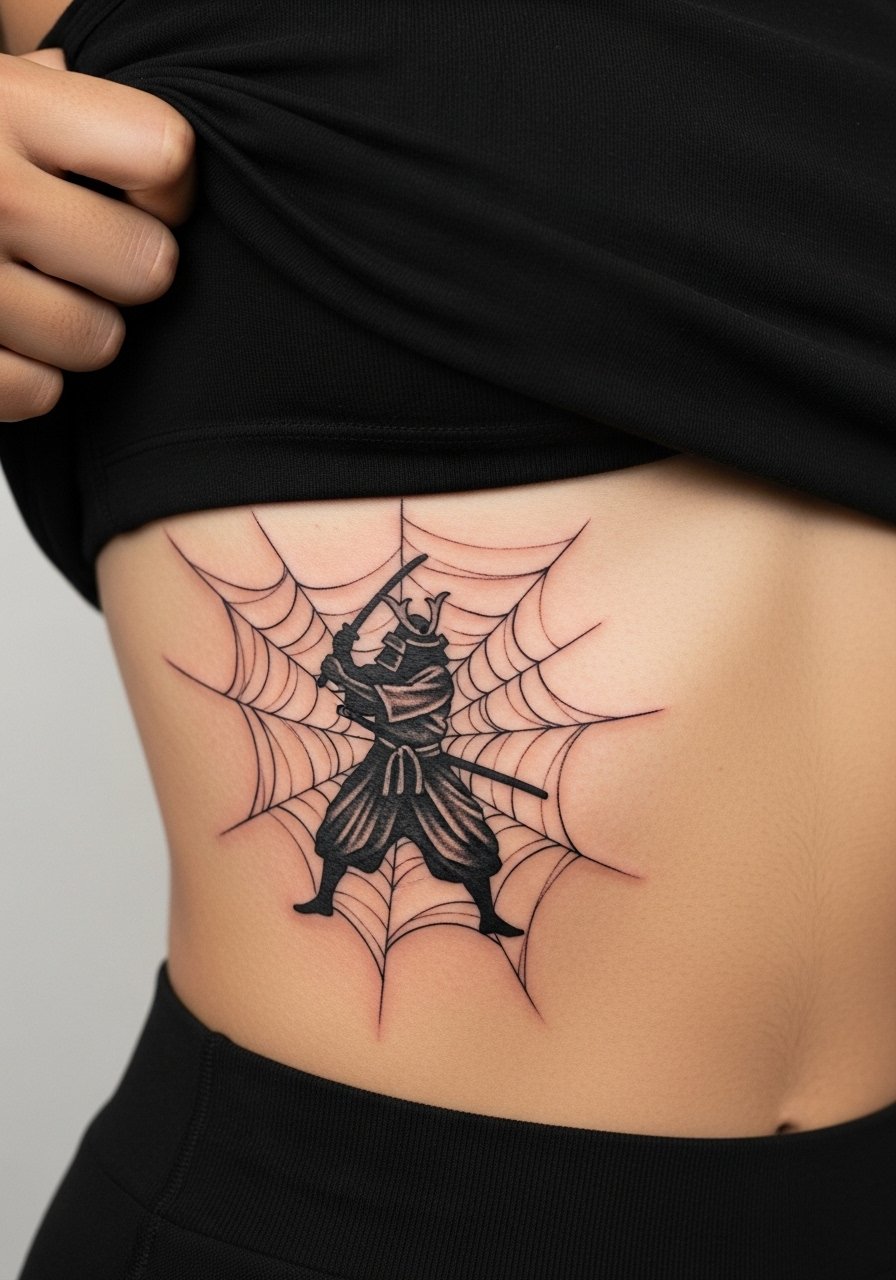
Ribcage pieces age and move differently because of breathing and stretch. Pain is higher and sessions usually need breaks. Artists disagree about fine detail on ribs. One camp says dense detail here blurs because of motion and thin skin. The other camp counters that careful needle depth and spacing can preserve it. If you pick this placement, prioritize clear negative space and avoid micro-detail in the web intersections. Expect a two to three session schedule and a touch-up at year two if the web lines soften. For the session wear a loose athletic tank you can lift easily.
10. Uvogin Power Fist with Spider Over the Shoulder Blade
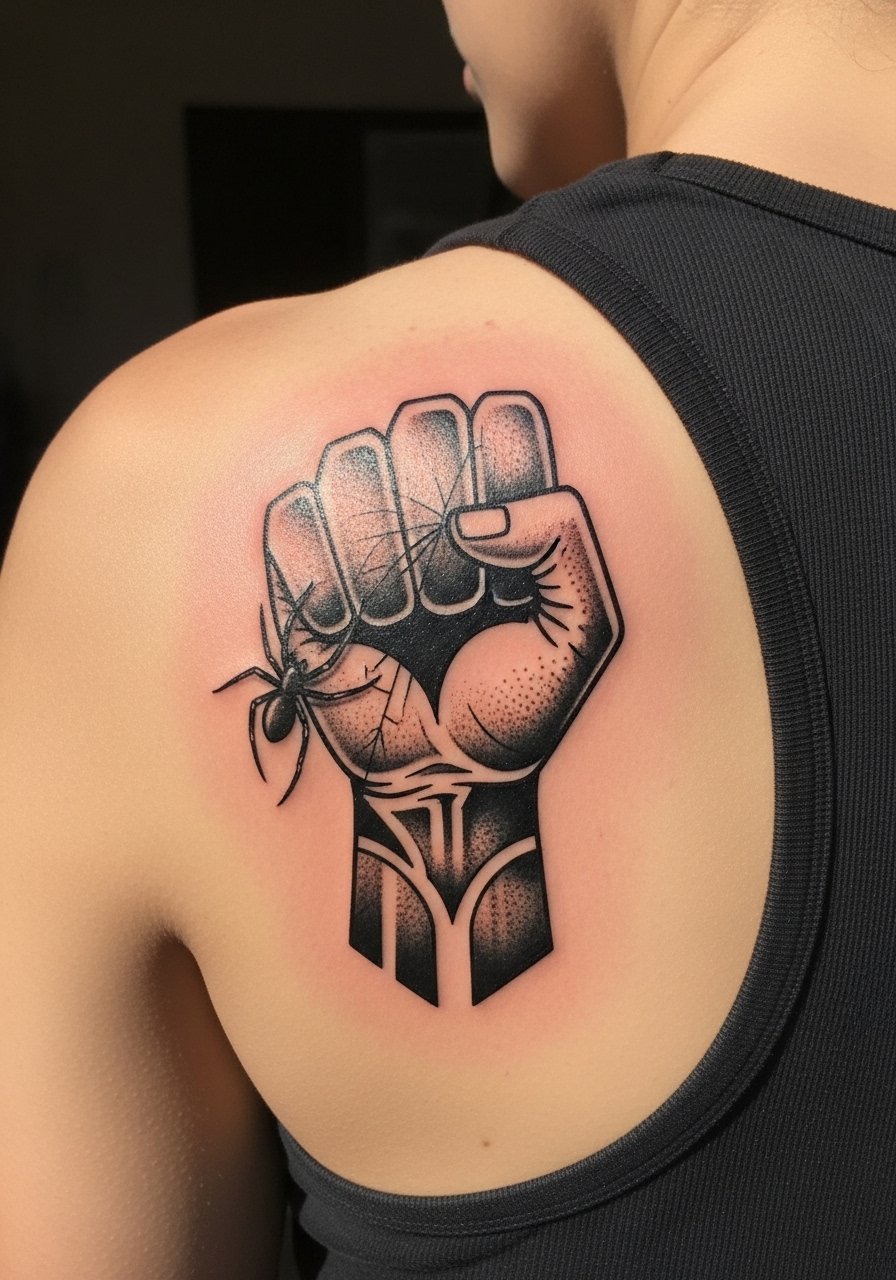
Shoulder blade placements let you scale up dramatic imagery while staying easy to cover. Expect moderate pain and a session that is comfortable to long depending on size. A common mistake is crowding the fist with background texture that competes with the spider. Ask for distinct silhouette contrast and clean edges so the spider remains a clear reading element at distance. Wear a loose button down shirt you can pull aside for access, and layer with layered chain necklaces when showing it off.
11. Small Traditional Twelve-Legged Spider on the Ankle

Ankle spiders are discreet and photograph well with cropped jeans or sandals. The ankle tolerates small traditional fills; blowout risk is low if the lines are bold and compact. A mistake is asking for tiny thin legs that the ankle cannot hold, which leads to early merging. Plan for a single session and protect the area from shoes that rub during the first two weeks. For show-off styling, cuff pants or wear minimal sandals so the spider sits cleanly at the ankle.
12. Machi Thread Bracelet Around the Wrist
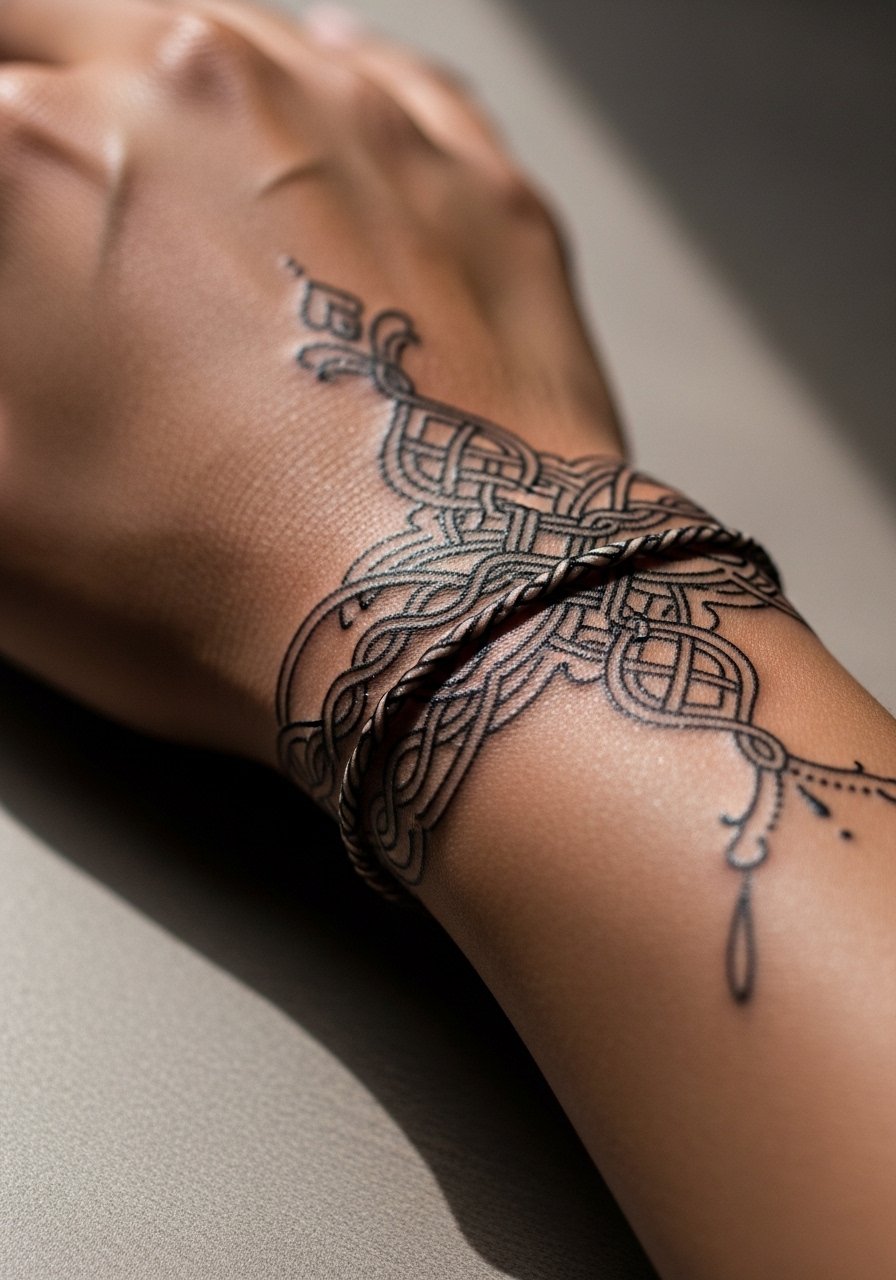
A bracelet of thread motifs along the wrist looks like jewelry and can be scaled for subtlety. Hands are high friction zones, so prefer slightly bolder anchors where threads loop. Common mistake is ultra-thin continuous lines that dissolve after a year. Tell the artist you want negative space between threads and ask how they handle wrist movement when placing anchors. Wear a slim leather cuff bracelet on the opposite arm to create balance when showing off the bracelet piece.
13. Phantoms as an Armband Silhouette Around the Upper Arm
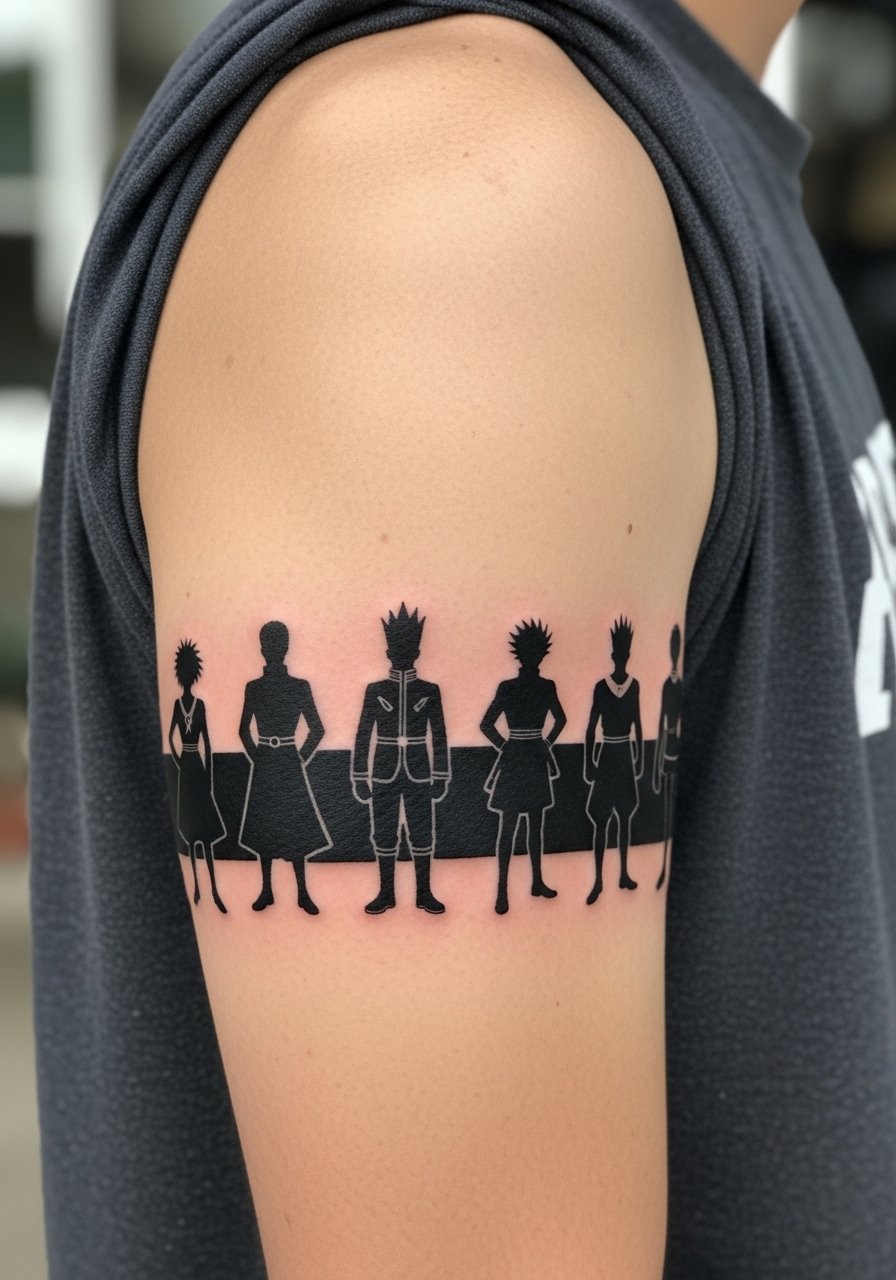
Armband silhouettes read like a subtle club mark while staying easy to conceal. Upper arm skin holds saturation well, which keeps silhouettes crisp for years. A mistake is making the band too narrow, which causes figures to merge. Ask for spacing and varied figure heights to preserve separation over time. Sessions are manageable and often complete in one longer sitting. For showing it off, roll sleeves or pick a short sleeve that frames the band carefully.
14. Nen Ability Motif: Machi Threads Turning into a Spider Web on the Side Torso
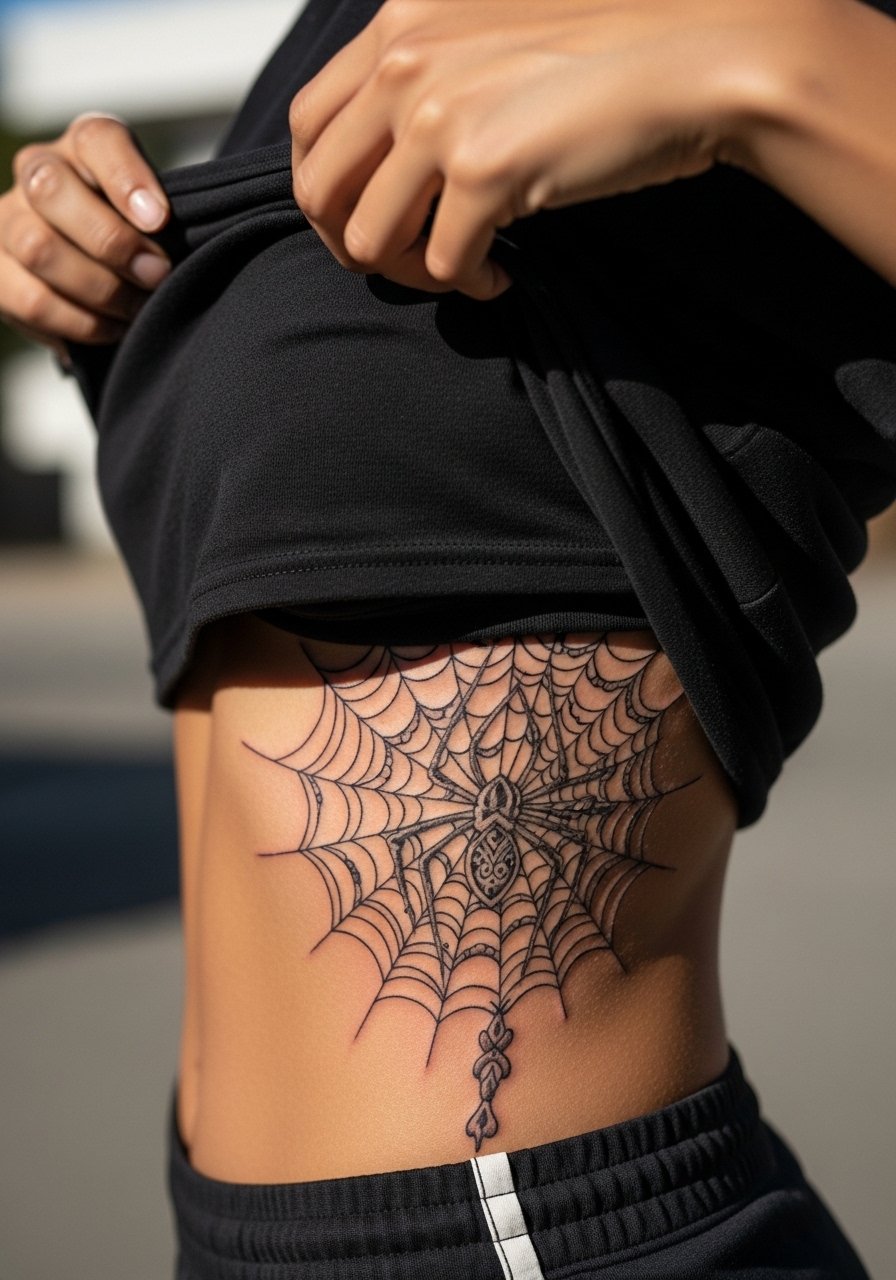
Side torso pieces hug the body and can be breathtaking when spaced properly. Pain varies and ribs will increase sensitivity. The key is avoiding overly dense thread crossings that compress as the skin moves. Ask your artist to stage the motif so main threads have breathing room. For session wear a cropped athletic top you can lift slightly, and expect careful aftercare in the first week to avoid friction from clothing.
15. Bonolenov Bandage Motif as a Thigh Panel
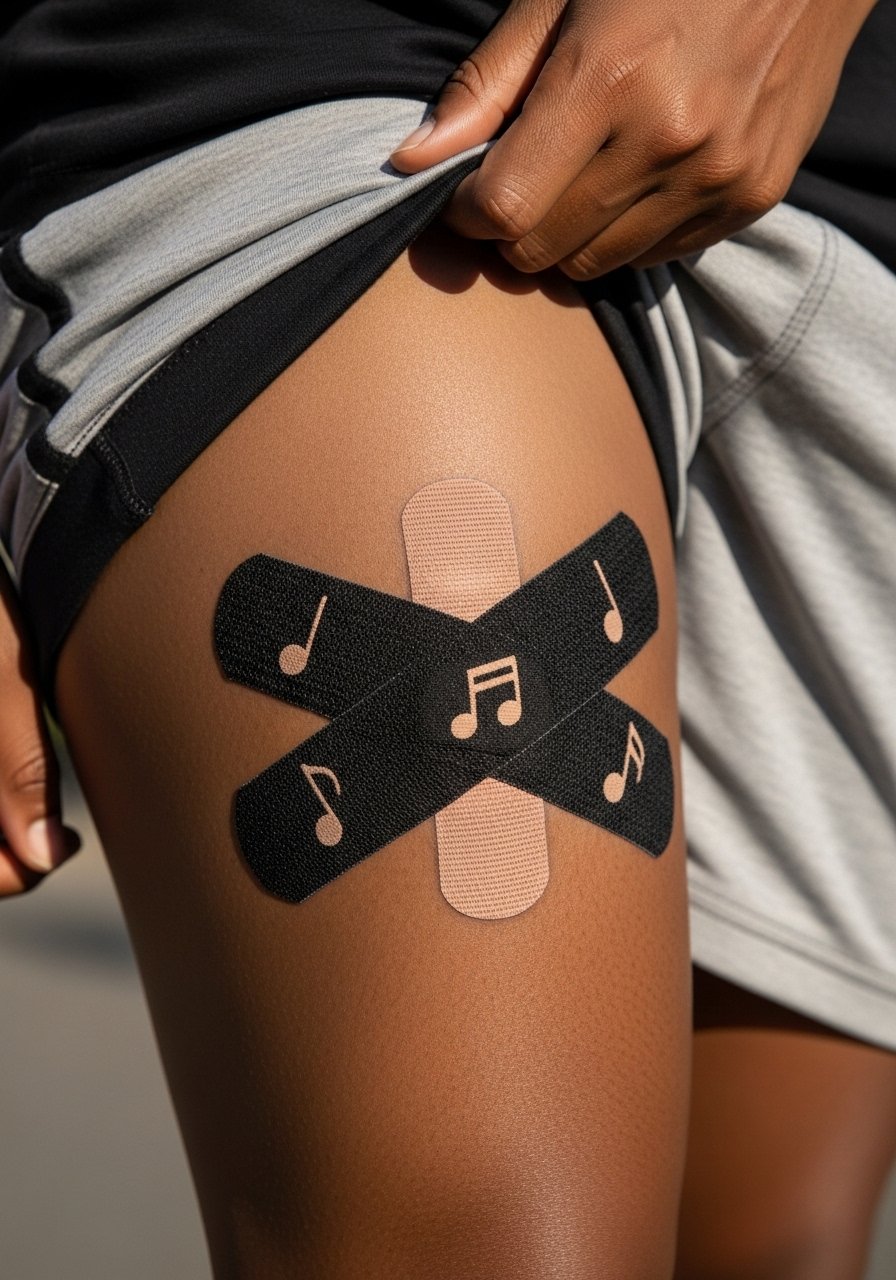
Thigh panels give room for micro-realistic bandage texture and note work without crowding. Healing is forgiving since clothing can be loosened and friction limited. Avoid asking for hairline detail in the bandages that will disappear into natural skin texture. Thigh sessions are moderate and usually finish in two visits. Wear loose shorts on the session day so the artist can access the area without fabric pressure. For summer show-off, pair with slim shorts to display the panel.
16. Chrollo Centerpiece on the Sternum with Small Spider Accent
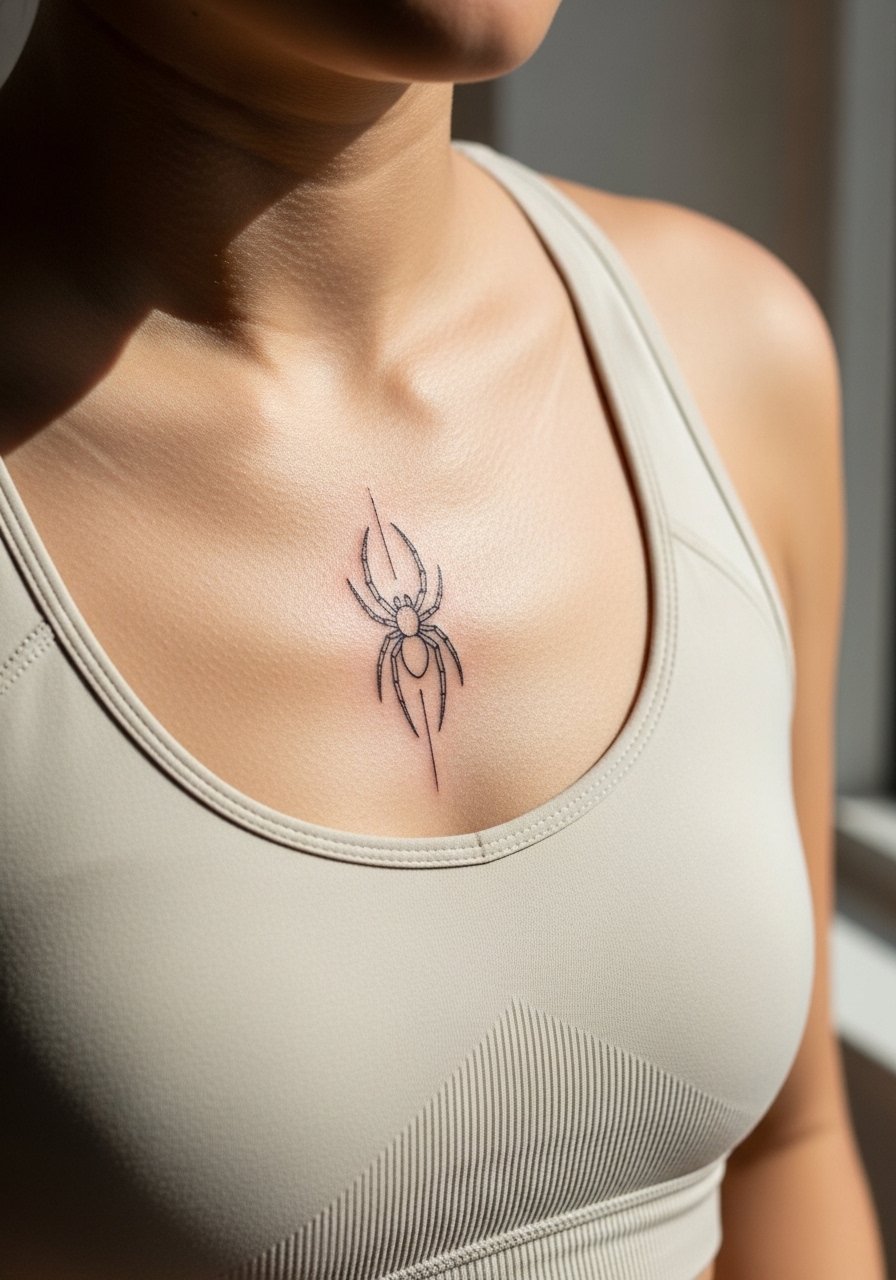
Sternum pieces need careful planning because clothing and movements can chafe during healing. Pain is higher near the bone and sessions may be split. The mistake I see is shrinking a center composition so details press into the sternum's curves; instead ask for slightly larger elements and clear spacing. For the session wear a fitted sports bra or bandeau top for quick access. Expect a touch-up at one to two years if you carry the design close to high-friction clothing lines.
17. Minimalist Spider at the Nape of the Neck
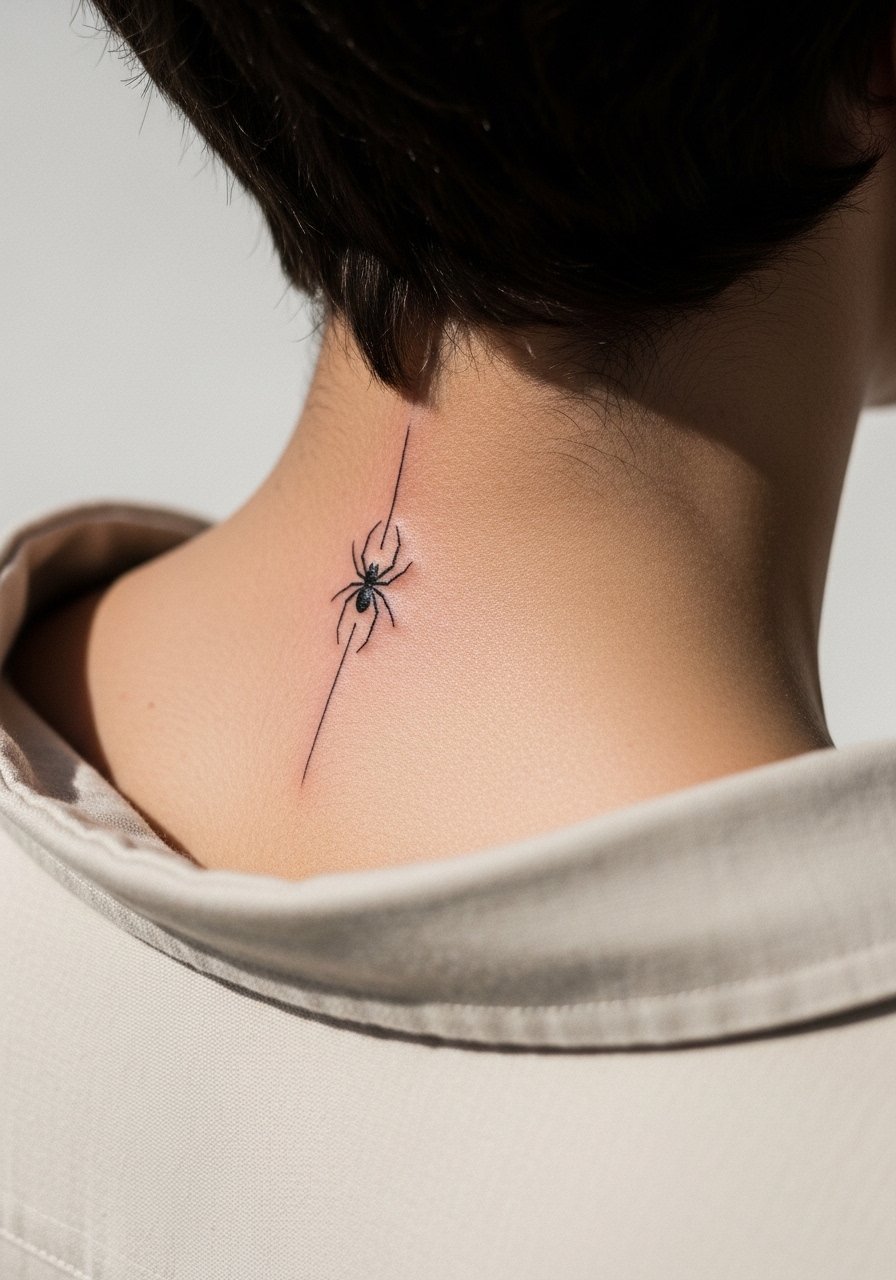
Neck placements sit between visible and concealable. The back of the neck tolerates small minimalist blackwork but be realistic about career visibility. A common mistake is over-detailing in a tiny design here. Ask for a compact composition and discuss how often you plan to show it. For session wear a wide-neck shirt that gives quick access without exposing chest or shoulders. Expect annual check-ins for touch-ups if you often wear high collars that rub the area.
18. Group Silhouette as a Low Back Band

Lower back is a classic spot for a longer, horizontal composition. It stays protected from sun for most people, which helps saturation. The mistake is compressing too many figures into a narrow strip, which reduces legibility. Ask for varied figure heights and negative space so the silhouettes remain distinct. Session time varies with size and may be completed in multiple sittings. For showing off choose a low back dress or top with a backless crop top that reveals the band cleanly.
19. Uvogin-Inspired Bold Fist on the Shoulder Cap
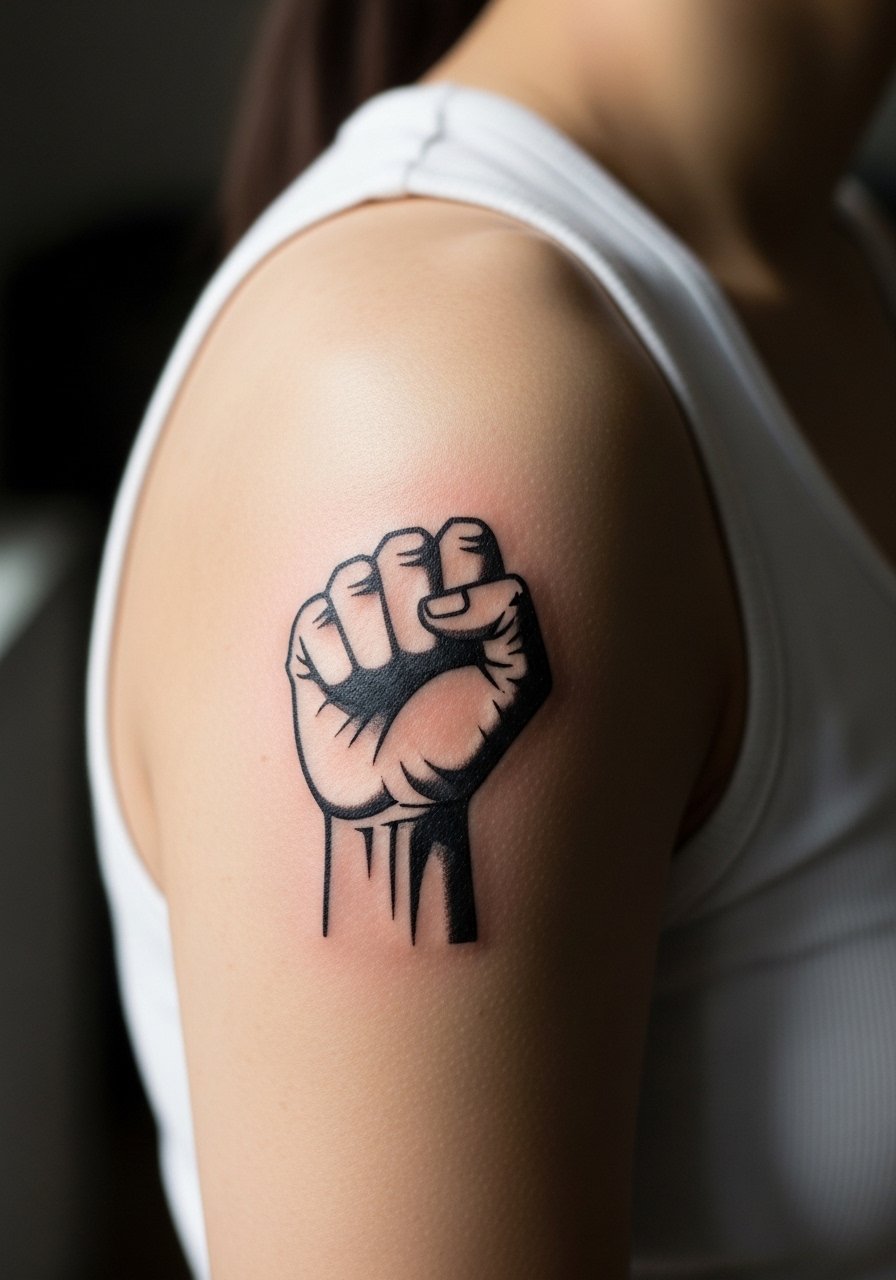
Shoulder cap pieces are ideal for bolder blackwork that reads at a distance. The skin here holds saturation well and blowout risk is low for bold lines. People sometimes over-detail in negative spaces that should remain clean. Ask for solid edge lines and minimal internal texture to keep the fist from softening. Sessions are comfortable and often done in a single longer visit. For showing off, an off-shoulder top or tank is an easy choice.
20. Micro-Realism Bonolenov Notes Around the Calf Achilles Area
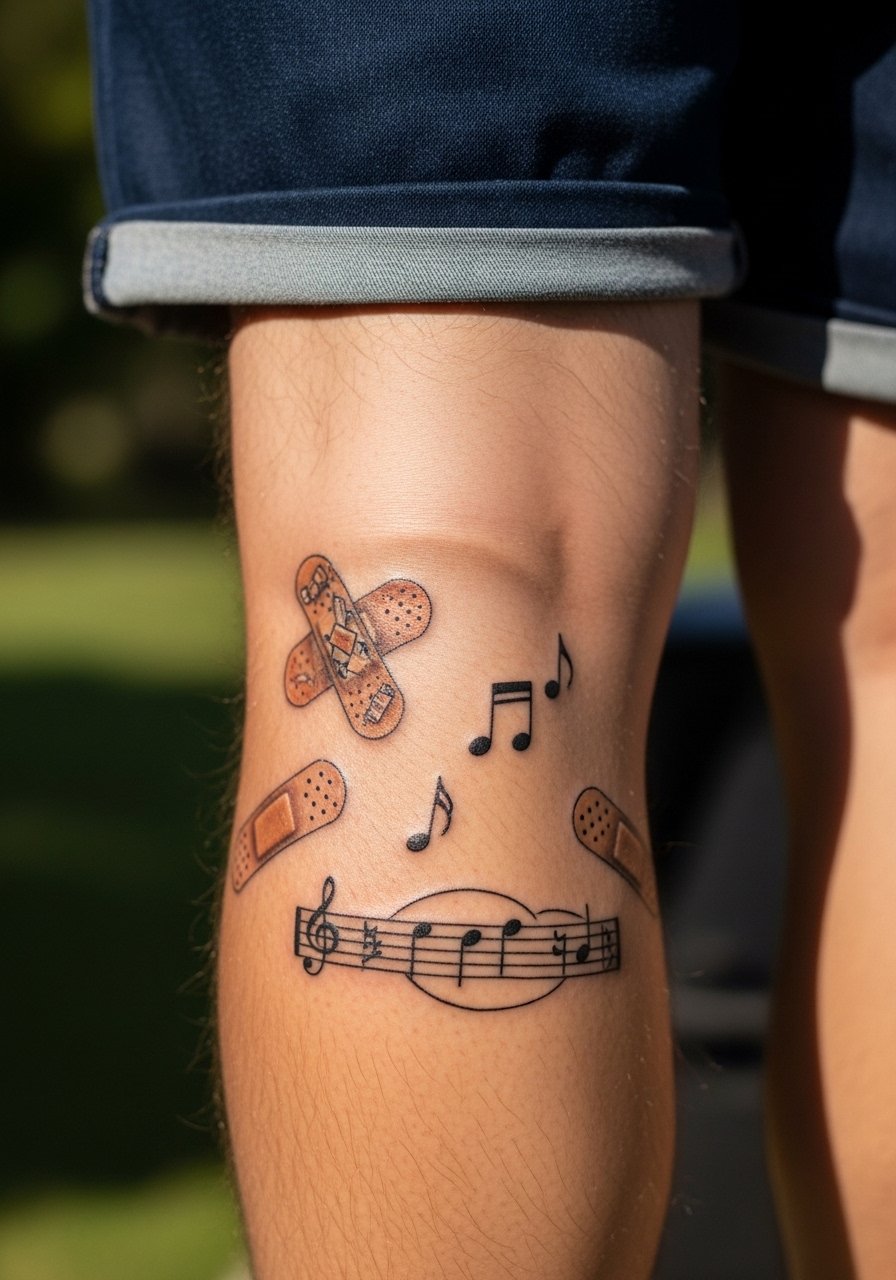
The Achilles and lower calf see a lot of movement and potential rubbing from shoes. Micro-realism can work here if the notes are spaced and not too tiny. A common error is placing minute note heads that blur with scarring or shoe friction. Tell your artist you want moderate spacing and slight bolding for note anchors. Sessions are moderate and usually two visits. For recovery, loosen your shoe laces and wear sandals when possible to limit early friction.
21. Custom Flash Mix: Small Blackwork Spiders with Nen Icons as a Finger Stack
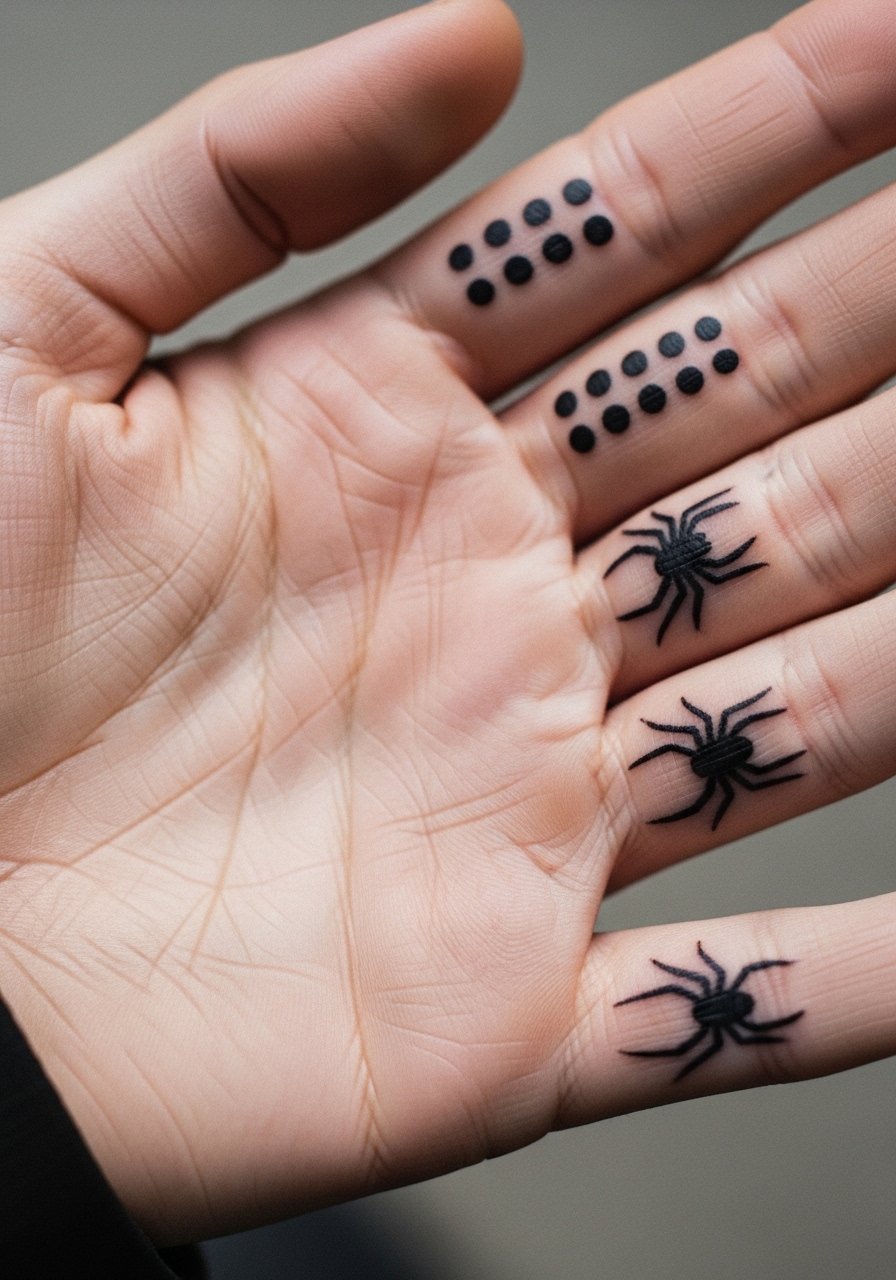
Finger stacks are visible and require acceptance of faster fading. The biggest mistake is wanting ultra-fine detail on a small canvas. For finger work, consolidate key elements into small bold marks and accept yearly touch-ups. Ask for deeper anchor points and slightly thicker dots for nen icons so they remain round as they heal. Session time is short but expect more frequent maintenance. For showing the finger stack, consider fingerless gloves for a styled look or thin stackable rings on adjacent fingers to balance attention, such as thin stackable rings.
Frequently Asked Questions
Q: Will a fine line Machi thread design hold up on the inner bicep?
A: It depends on spacing and needle depth. Fine line can work on the inner bicep if the artist uses slightly bolder anchor points and plans negative space deliberately. Expect a potential touch-up around year two when lines start to soften, and keep sun exposure low during the first year.
Q: Is a hand twelve-legged spider risky for professional settings?
A: Hand tattoos are more visible and some workplaces still treat them differently. If you worry about career impact, choose the ankle, inner wrist, or an upper arm placement instead. Temporary testing with a real-skin transfer can help you understand daily visibility before committing.
Q: How should I prep clothing for a sternum or ribcage session?
A: Wear easy-to-shift pieces like a fitted sports bra or a cropped athletic top so the artist can expose just the tattoo zone without you removing layers. Loose bottoms and a robe for comfort during longer sittings help manage post-session cooling and movement.
Q: Do blackwork silhouettes really age better than colored anime portraits?
A: From what I've seen, solid black silhouettes resist fading and blur more predictably than tightly shaded color portraits. Color can look vibrant fresh but often needs more touch-ups as pigments shift. Placement and sun exposure matter more than color choice for longevity.
Q: Where can I find an artist who nails anime blackwork without it looking cartoonish?
A: Look at hashtags like #phantomtroupetattoo and #animeblackwork on Instagram, search "anime blackwork [city]" on directories, and check r/tattoos or r/HunterXHunter for peer referrals. Review healed photos, not only fresh shots, and ask about healed portfolios during consultation.
