
Fine line dominates saved boards and short clips, but what lasts on a back is often the thing you did not pick for looks alone. Designs that follow traps and lats, that plan for sweat and gym time, and that phase in over sessions age better than snap-viral pieces. Below are 27 back tattoo concepts for men, each paired with what to ask your artist, how it heals, and wardrobe tips to show it off.
1. Samoan Tribal Full Back Piece
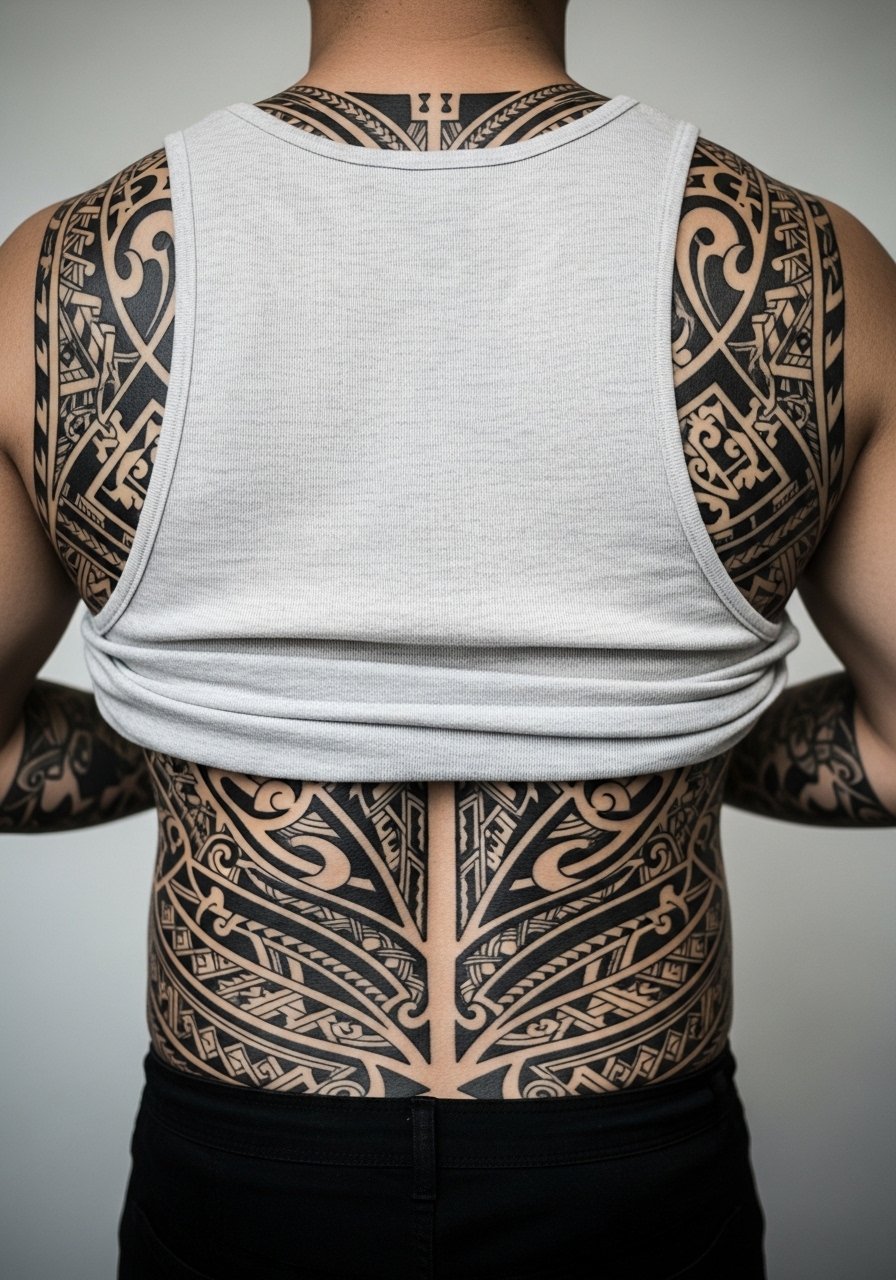
Personal observation lead: I have seen this pattern carry best when lines track the muscle fibers rather than block them. Tell your artist you want the motifs to flow with your traps and lats, not sit as rigid panels. Common mistakes include making repetitive blocks too close together which looks good fresh and merges over time. Expect long sessions face down and plan breaks every 90 minutes. Touch-ups every few years keep edges crisp. For the session wear a mens fitted tank top black you can pull aside, and discuss phasing the work over multiple trips to avoid burnout.
2. Japanese Irezumi Dragon Across the Canvas
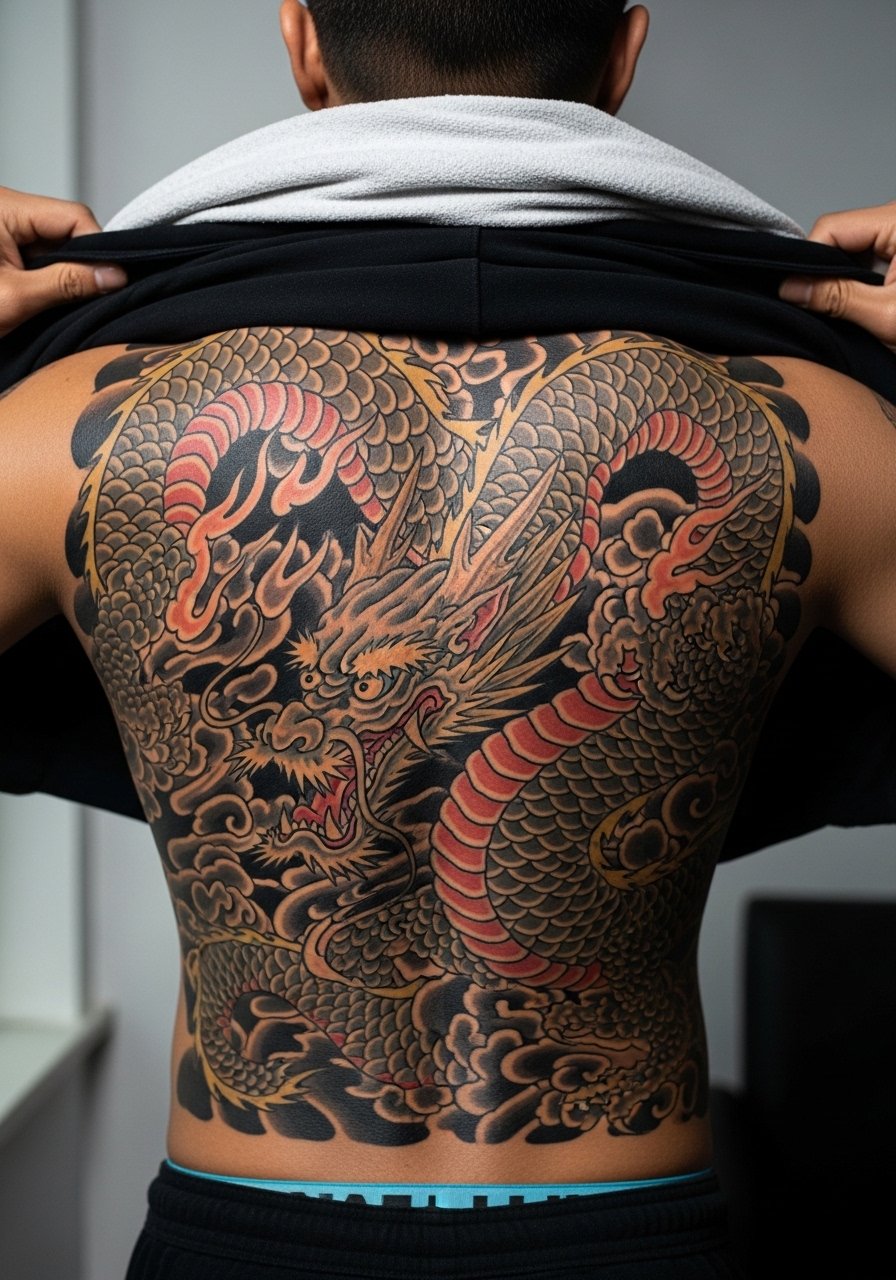
Pain warning lead: Full-color Irezumi means more time in the chair and more attention to saturation. In consultation, ask about session phasing so color sits evenly across sessions. The usual mistake is asking for too many small color passes in one day which raises swelling and slows saturation. Healed at six months the color settles, and by two years only high-contrast palettes keep the silhouette readable. For evenings out try an open front leather jacket paired with a simple tee to frame the upper back without covering the work.
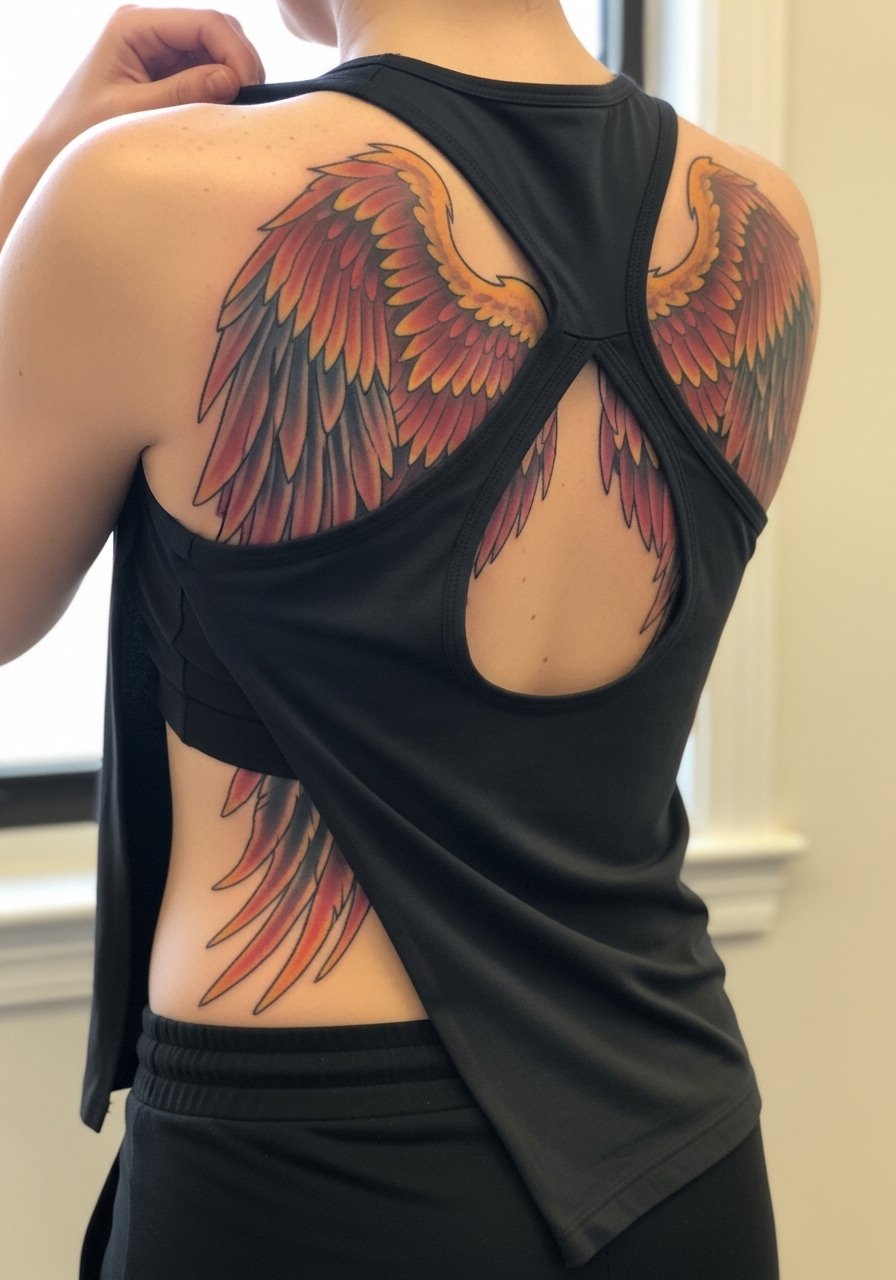
3. Angel Wings on the Upper Back
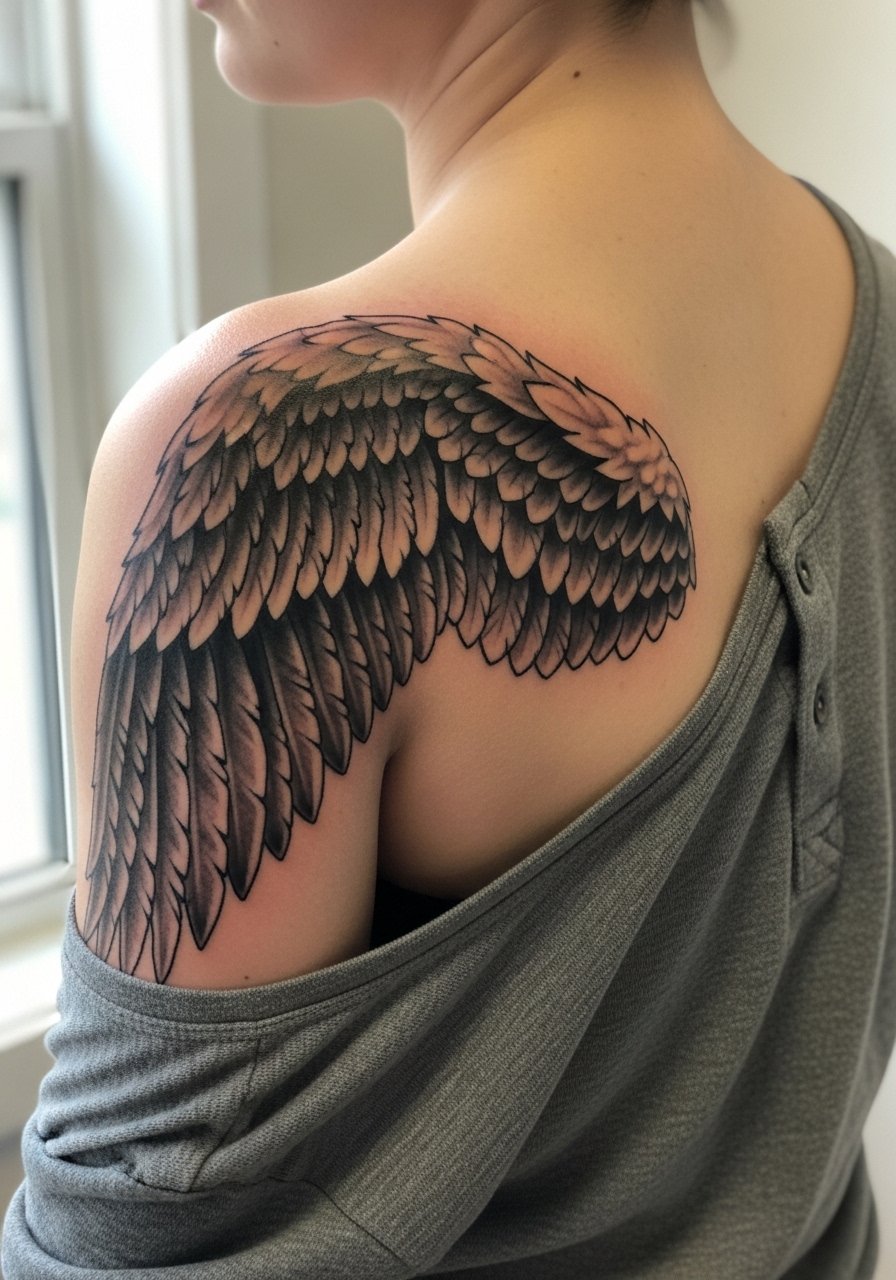
Aging/healing lead: Wings show their quality in the shading months later. Ask for strong contrast between primary feathers and background so the wings stay readable in gym lighting. A typical error is overly thin secondary feathers which blur into shading after a year. Expect moderate pain around shoulder blades and a few sessions for symmetry. For sessions wear a mens v-neck henley you can pull aside. For showing off, an unbuttoned henley frames the wings without busy patterns.
4. Geometric Mandala Center Spine
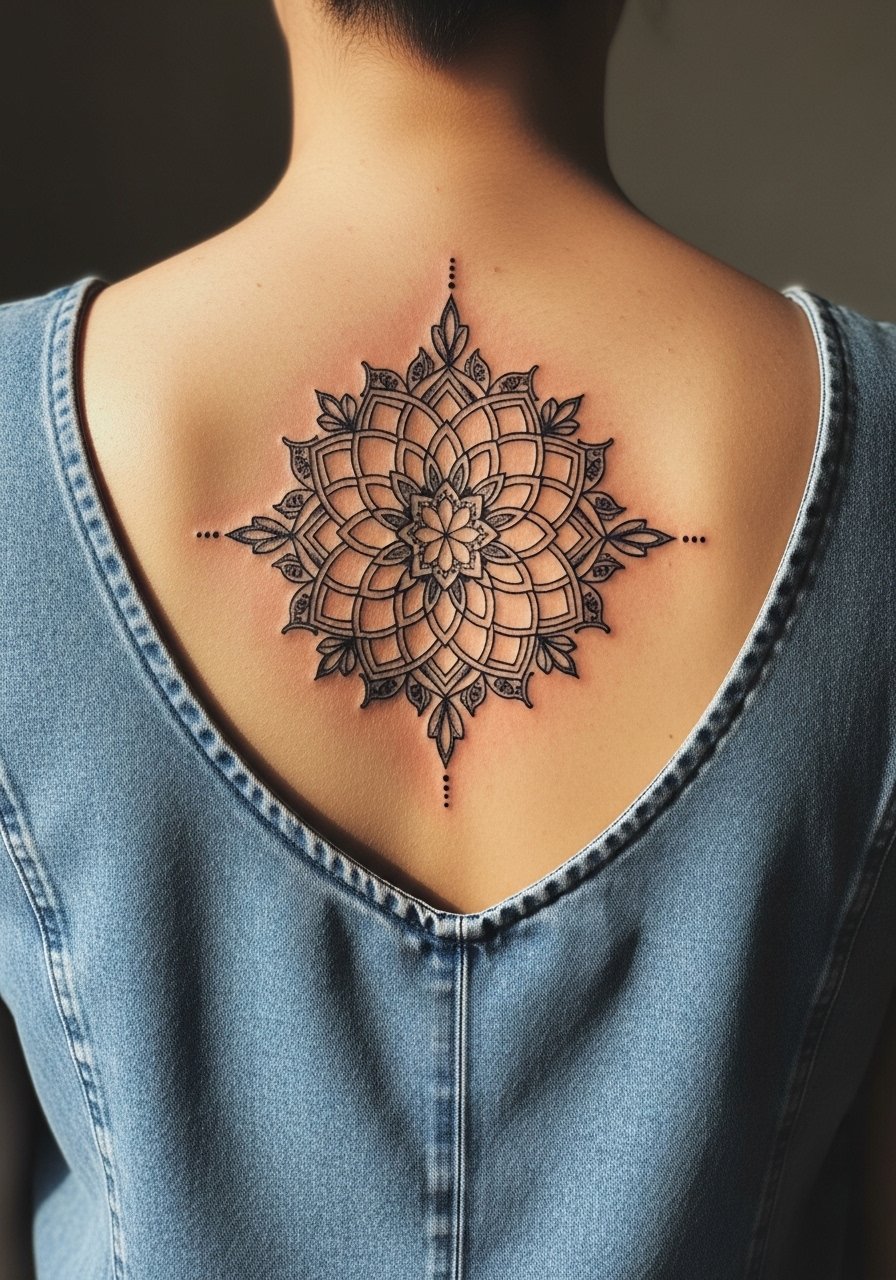
Aging/healing lead: Most mandalas that fail are drawn too tight for the scale of the spine. The common mistake is cramming dense elements next to the vertebrae. Tell your artist you want larger spacing and heavier primary lines so the pattern survives two to five years. There is a debate on fine line here. One camp says dense fine line blurs with movement and sweat. The other camp says with proper needle depth and spacing it holds. Ask where the artist stands and see healed photos. For nights out try a mens backless vest or a mesh athletic tank to reveal the vertical symmetry.
5. Viking Battle Scene Full Back
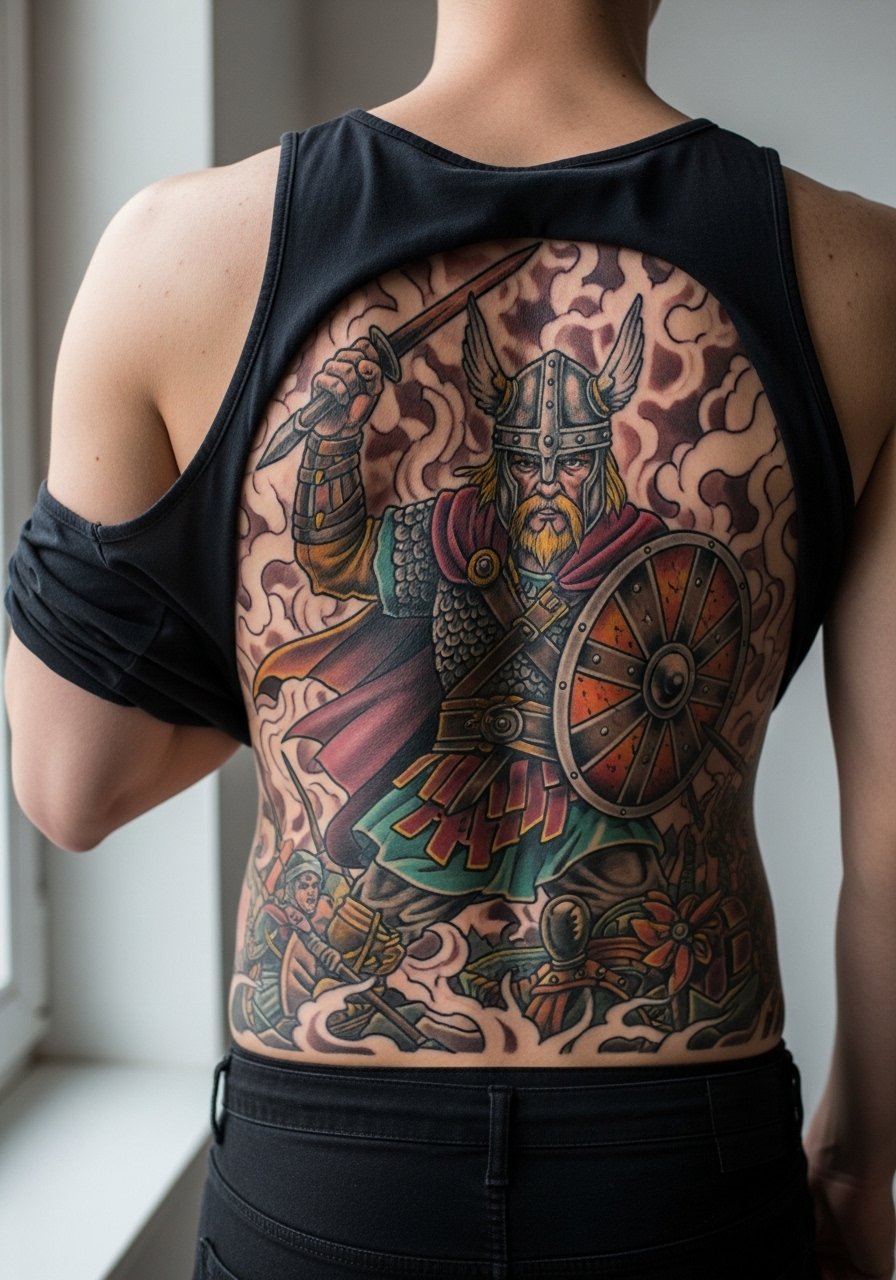
Visual impact lead: These read best when background negative space separates figures so composition stays strong at a distance. Tell your artist you want foreground characters with clear outlines and simpler backgrounds. People often request dense scenery that becomes muddy when healed. These projects are marathon bookings over months to years. For the session, wear an athletic muscle tank you can pull aside, and budget time for recovery after long color days.
6. Biomechanical Gears Lower Back to Spine
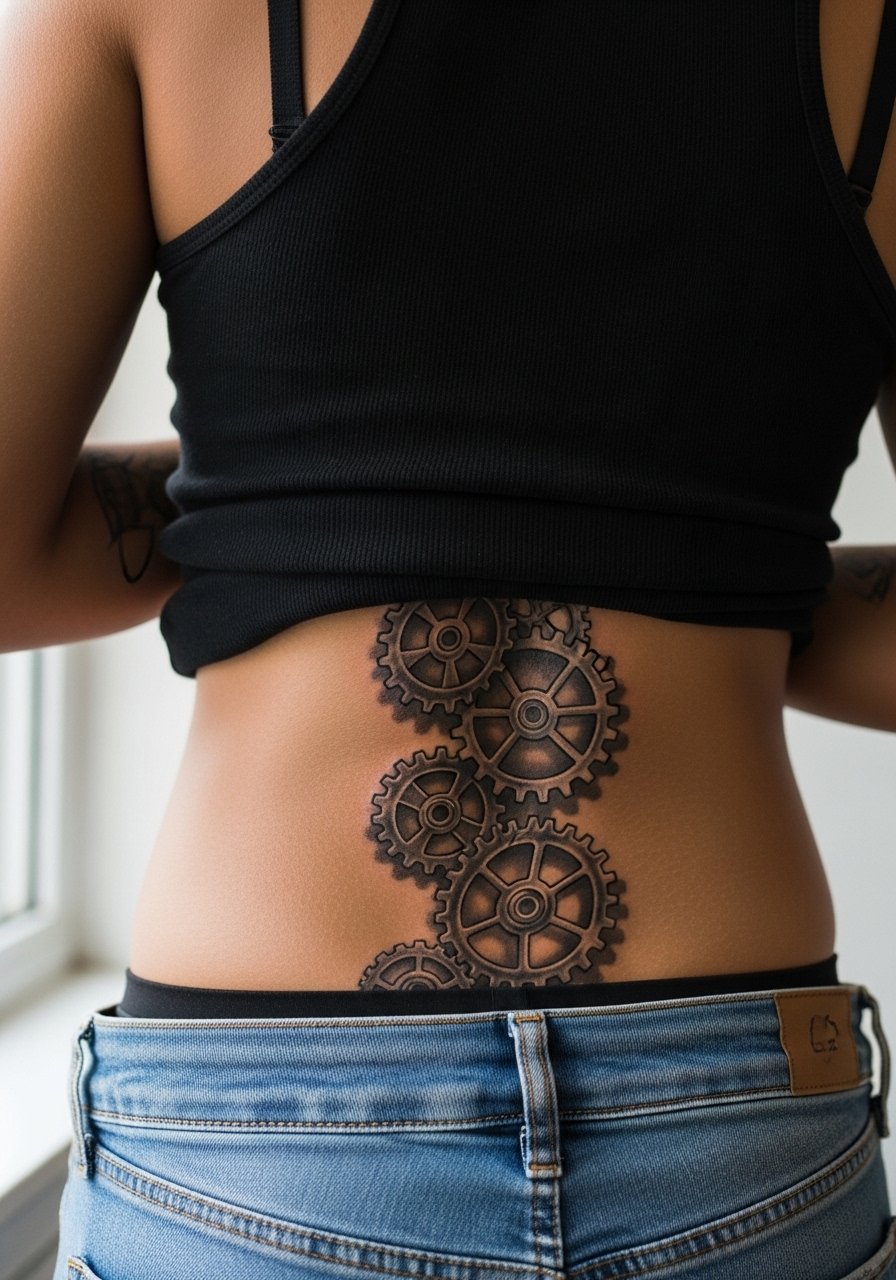
Mistake lead: The biggest error with biomech is flat shading and mismatched perspective. Ask for staged mockups that follow the spine curvature so the illusion reads when you move. There is a controversy over Saniderm versus dry healing for hard-to-see areas. One camp favors sealed film to keep bacteria out on unseen spots. The other camp says sealed film traps sweat on the back and can cause irritation. Decide with your artist based on your sweating tendencies and gym schedule. For session wear pull-on low rise joggers men so waistbands do not press on fresh ink.
7. Wolf Pack Lats Panels
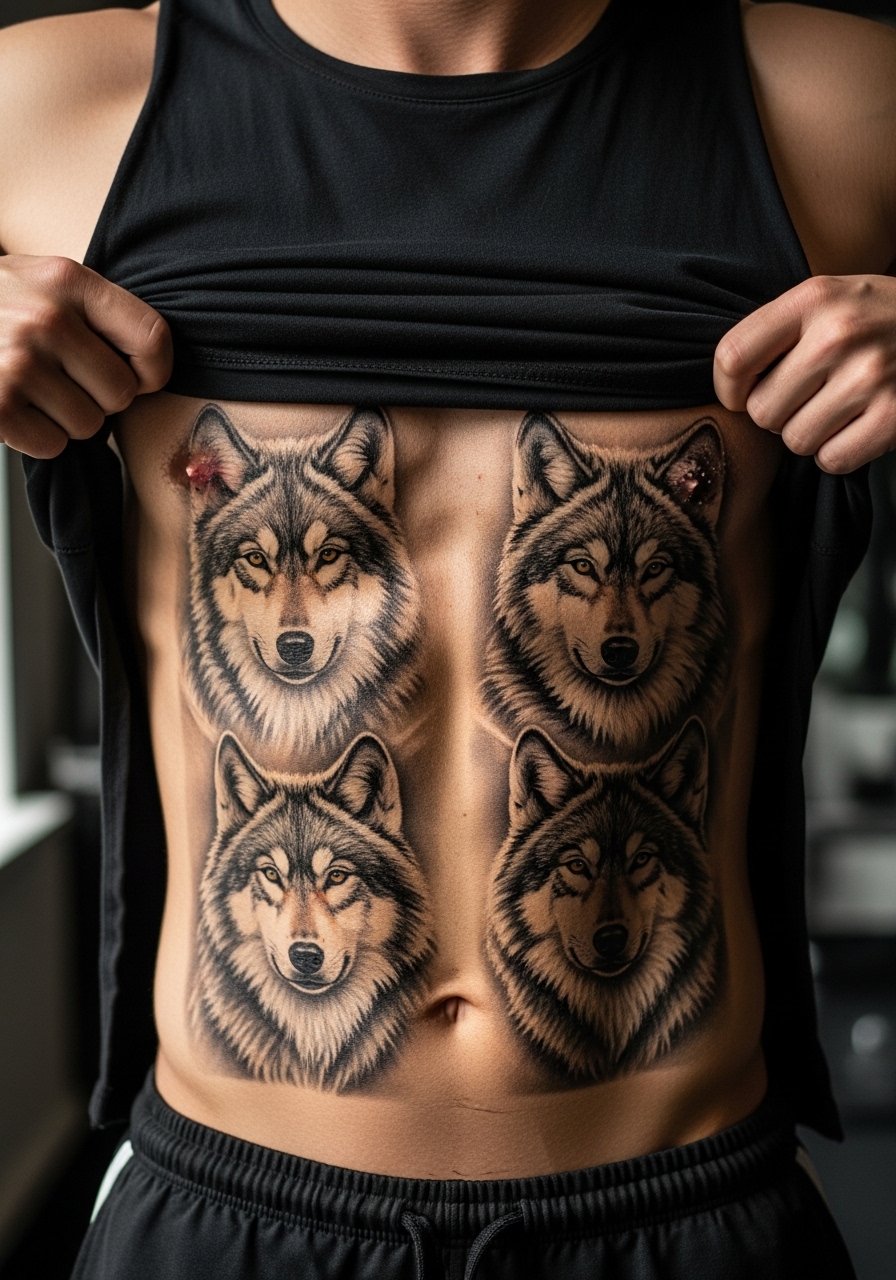
Consultation lead: Bring photos showing how your lats look flexed and relaxed so the wolves sit where they growl with motion. A common mistake is centering a single wolf on a moving muscle which distorts with hypertrophy. Expect 3 to 4 sessions per side and schedule them around off-season training to reduce sweat complications. For showing off, an side slit gym tank highlights the panels without breaking the silhouette.
8. Spartan Helmet Over Shoulder Blades
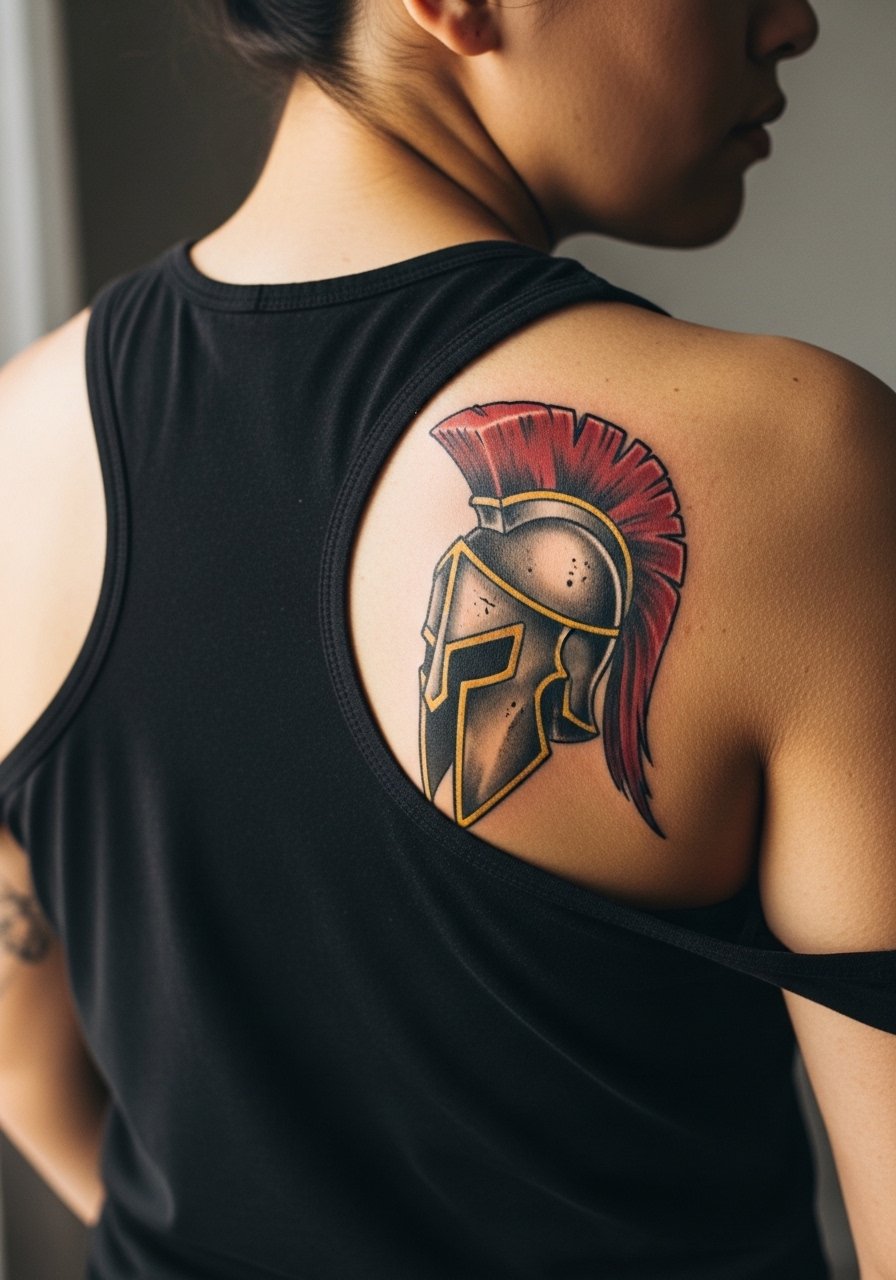
Mistake lead: The biggest mistake is over-detailing the helmet in tiny areas that lose definition when healed. Ask for simplified ornamentation and stronger edge work. Pain is moderate on the blades and sessions are shorter, which is good for symmetry checks. Pair this with a racerback tank top to show the shoulder line without covering details. If you plan to suit up often, mention how the piece will read under a jacket.
9. Lion Silhouette Full Back
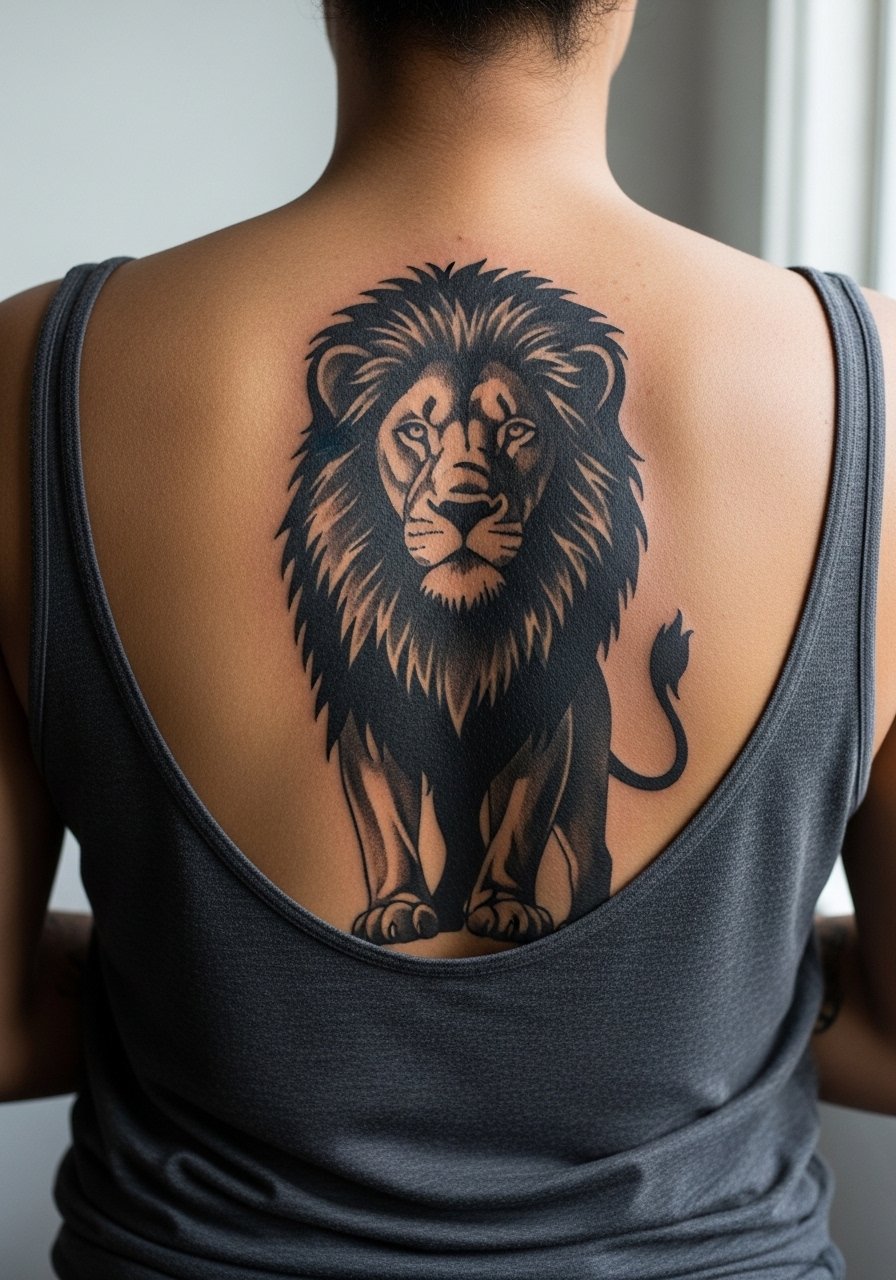
Personal observation lead: Large silhouette work ages predictably when the fill is even and edges are bold. Tell the artist you want deep saturation and clean outer linework. A common error is half-filled shading that leaves textured patches after healing. Expect fewer touch-ups than color work but plan on a refresh at year three depending on sun exposure. For wardrobe, an open front leather jacket and low-slung jeans keep the silhouette visible without being loud.
10. Samurai Armor Upper Back Panel
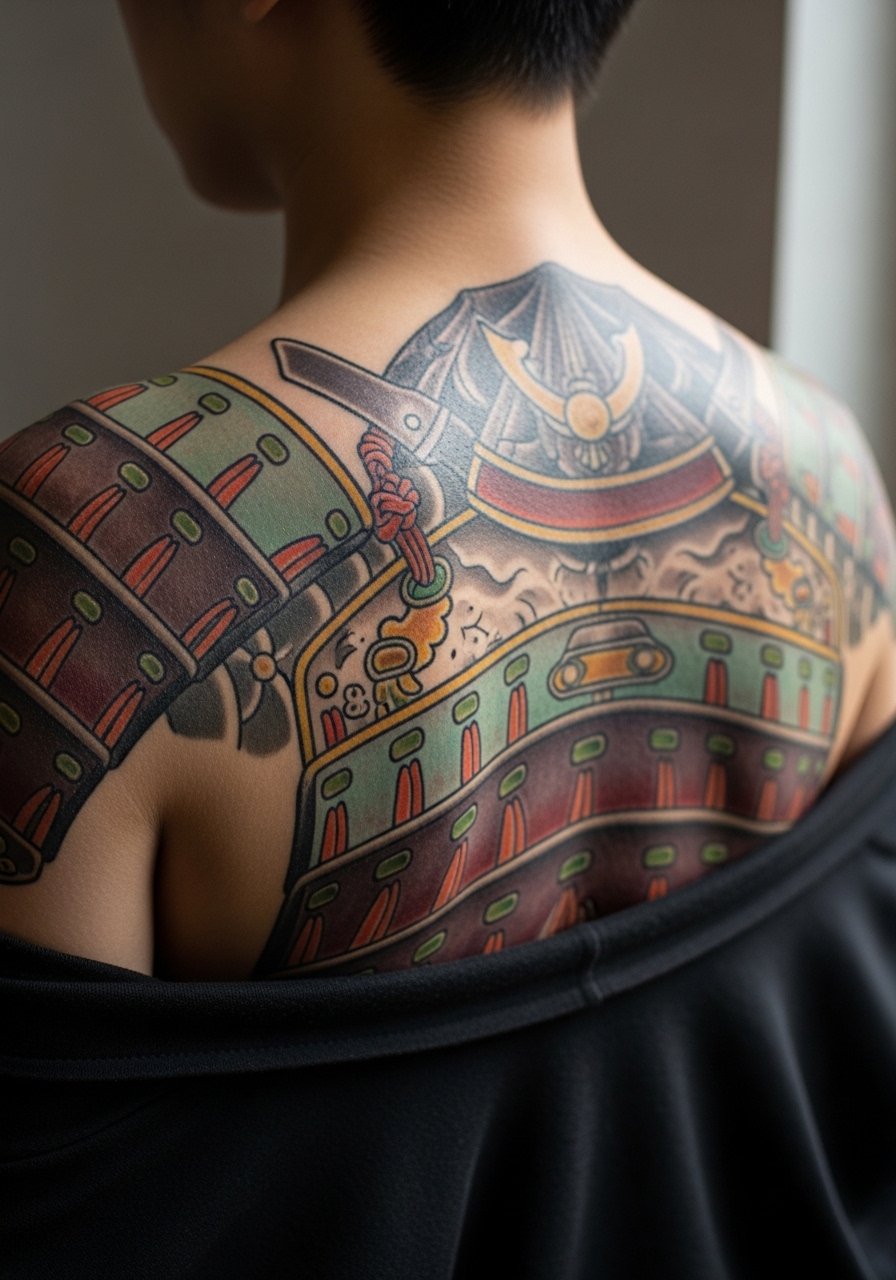
Mistake lead: Overcrowding is the failure mode for armor pieces. Ask for negative-space channels between plates so each element reads on its own. Sessions are medium length and involve a mix of linework and color passes. Bring reference photos of actual armor plates to help scale ornamentation. For the session, a sleeveless performance tee works well and keeps shoulders accessible.
11. Bear Claw Tribal Half Back
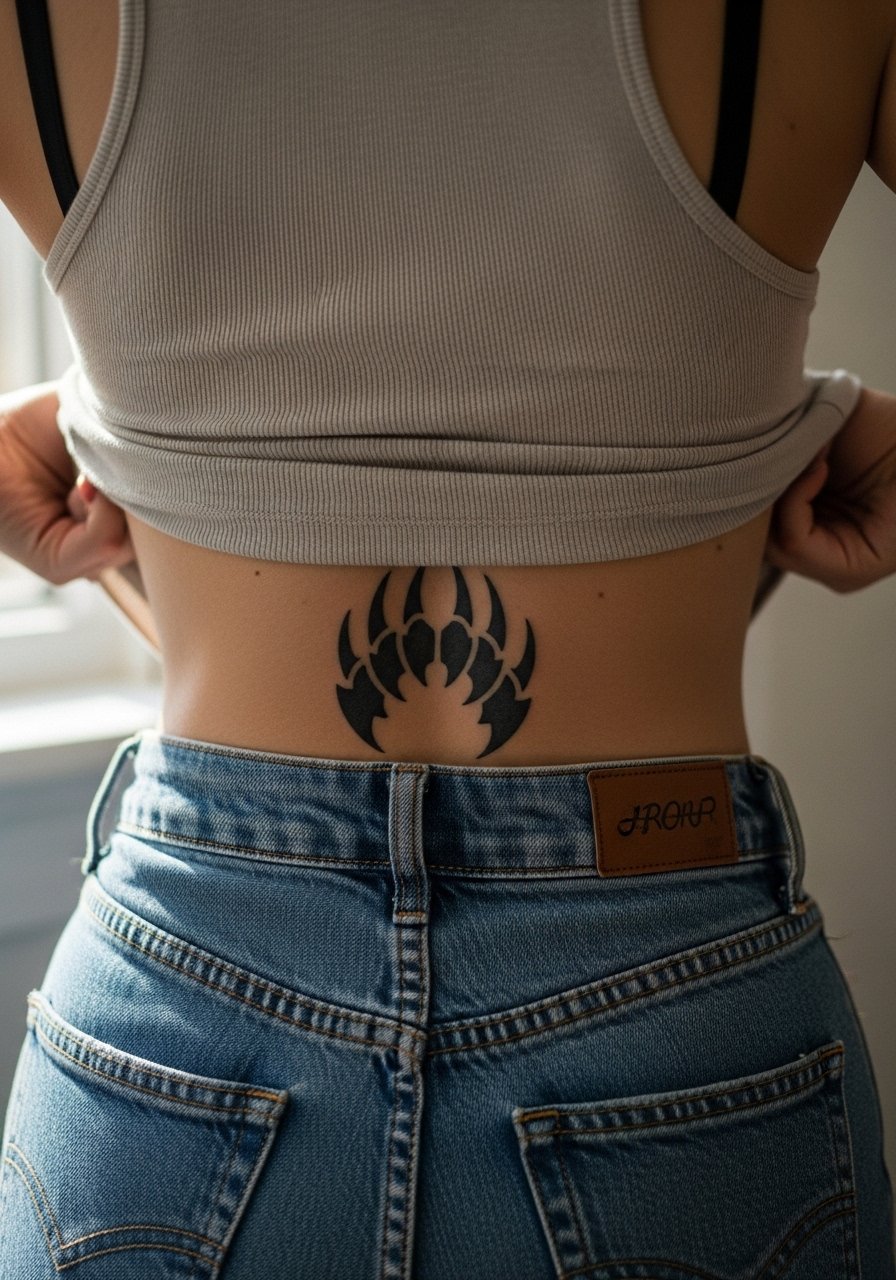
Visual impact lead: Half-back allows you to phase a larger back piece while keeping initial cost and time manageable. Tell your artist how you might expand it later so seams line up. A common mistake is placing a hard geometric edge at the waistline which gets distorted with body changes. Lower back heals with friction from waistbands so wear loose pants for the first two weeks. For showing off, low-rise joggers or untucked shirts create the industrial look without rubbing.
12. Tech-Organic Pistons Spine Panel
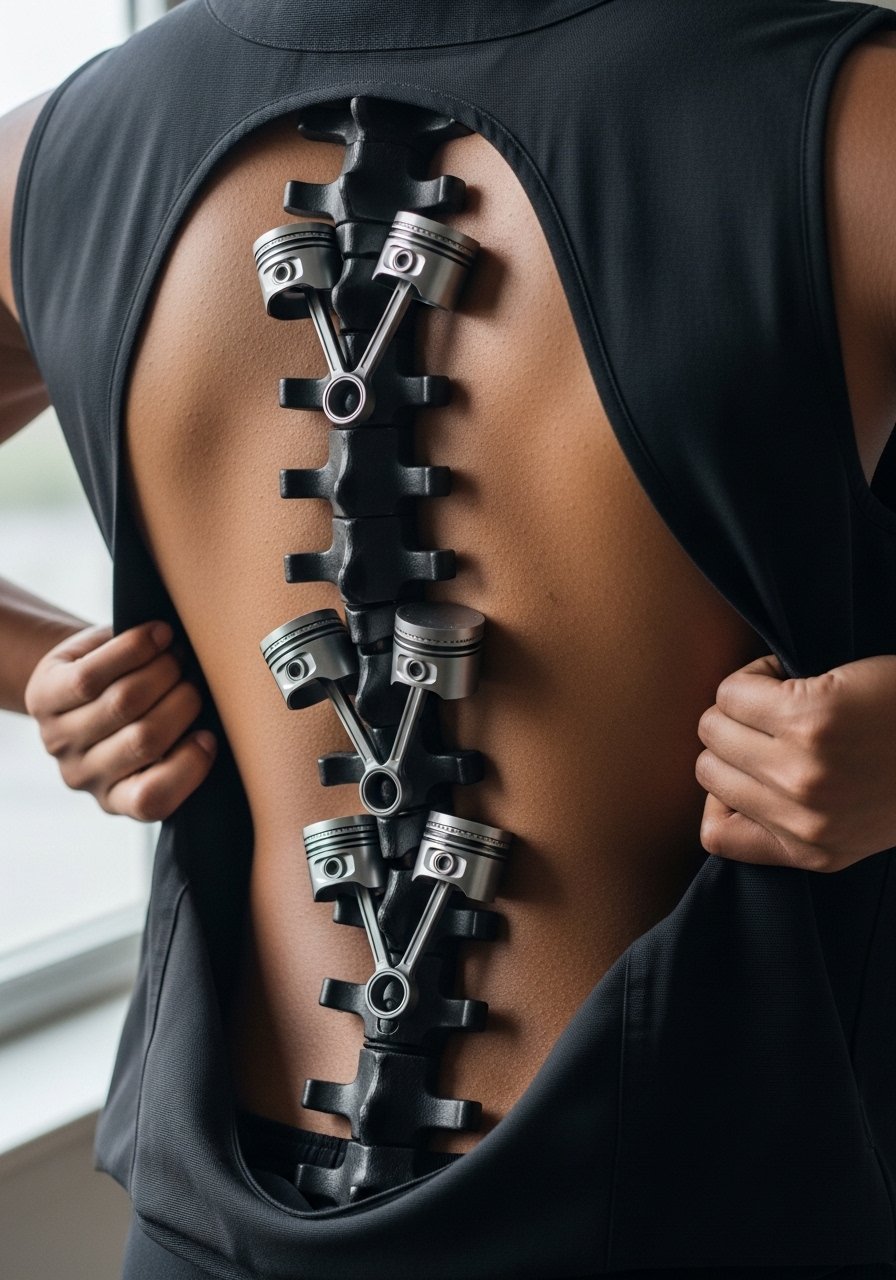
Consultation lead: The strength of this piece is in the illusion of depth, so ask for staged shading studies before tattooing. The common mistake is tipping too many tiny highlights which fade into noise. Spine placements can be more painful and demand steady posture. For session comfort, bring pillows and request short breaks. A mesh athletic tank is easy to adjust during line and fill work.
13. Phoenix Rising Across the Lats
Visual impact lead: Color across moving muscles needs strong contrast at feather tips or the design blurs when you flex. Ask for darker outlines around feathers and simplified midtones. A mistake is tiny gradients with no anchor lines which become indistinct after a year. Schedule sessions during a training lull to avoid early sweating. A muscle fit hoodie is good to throw on after the session without rubbing the area.
14. Norse Knotwork Between Shoulders
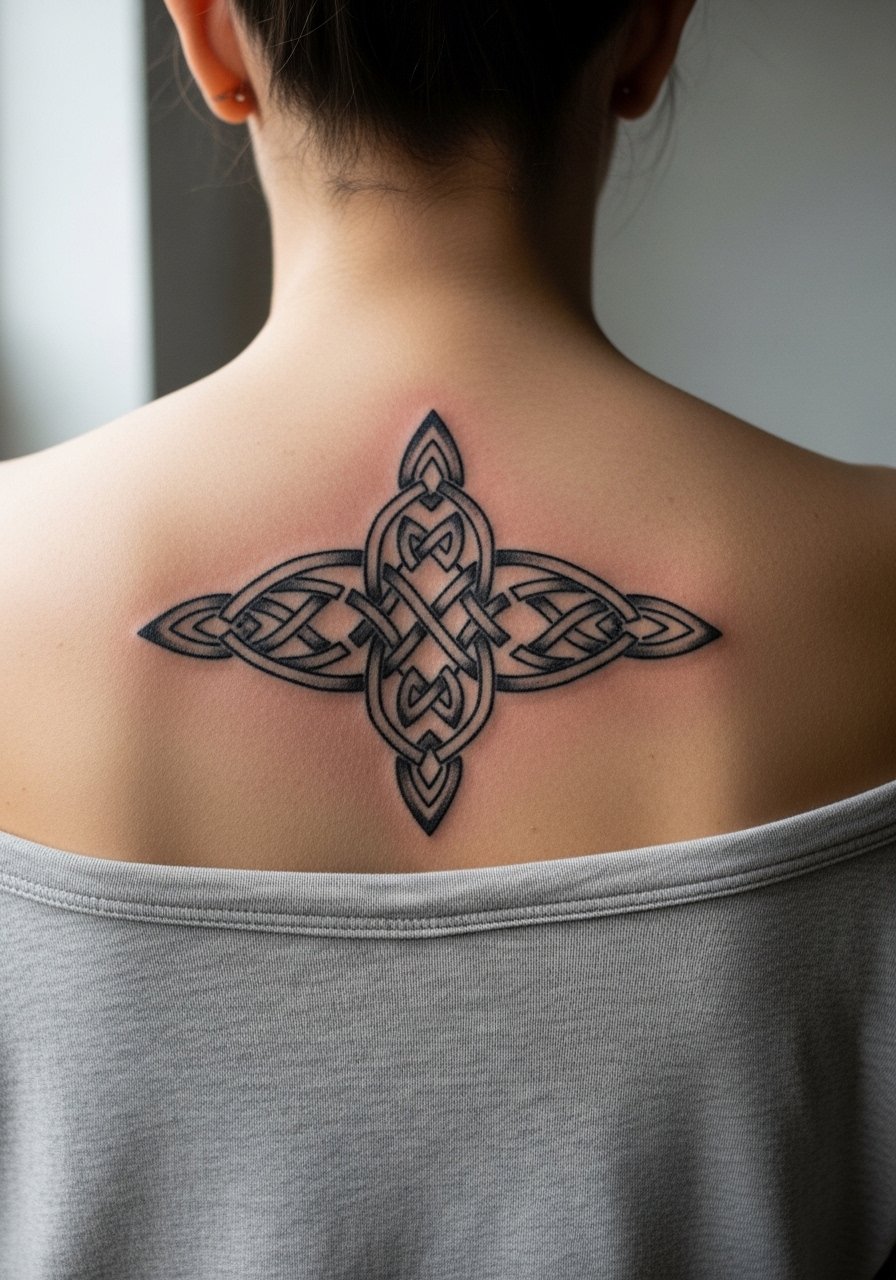
Mistake lead: Knotwork fails when lines are too thin and too close. Request heavier primary paths and simplify secondary crossings. Expect the artist to map the piece to your bone landmarks to avoid a lopsided repeat. Knotwork can be sensitive to blowout if the lines are placed too shallow. For showing off, an off shoulder men's tee or a vintage leather vest frames the pattern.
15. Compass and Nautical Map Lower Back Panel
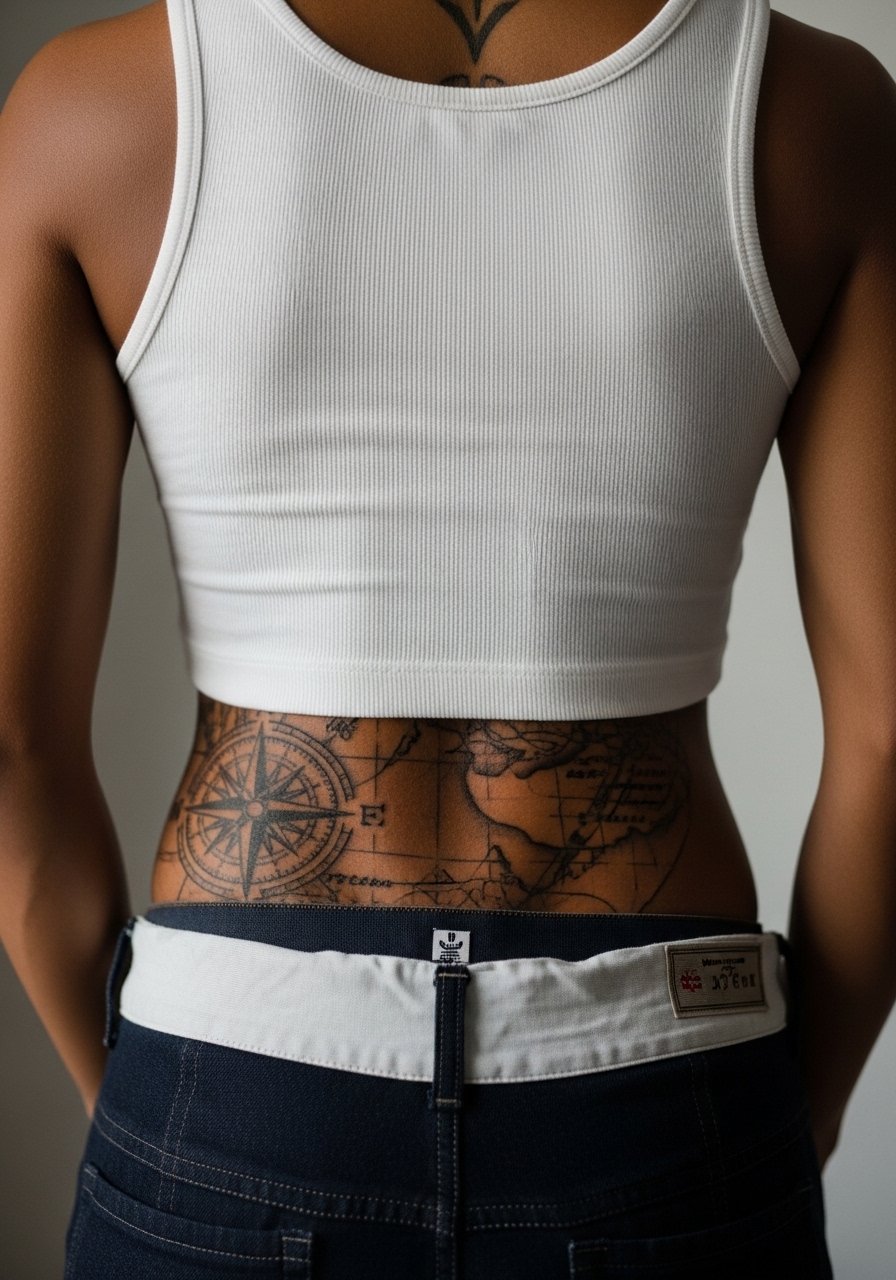
Mistake lead: Tiny script and map markings used too small will blur, especially near seams. Ask for larger coordinates or a simplified map grid. Lower back sees a lot of friction from belts and waistbands. Plan wardrobe for the first two weeks and consider a quick touch-up after six months. For session wear, pull-on drawstring pants like drawstring gym pants to avoid pressure on fresh ink.
16. Minimalist Spine Script

Consultation lead: When the design is text, insist on exact wording and font on paper and skin mockup. Small script on the spine needs a heavier base line than many clients expect. The common error is trusting a tiny font from an online mock without seeing it on the curve of the spine. Fine line text proponents and skeptics disagree about longevity. Ask to see healed text photos on similar skin tones. A simple olive green muscle shirt is a good layer when you want partial reveal.
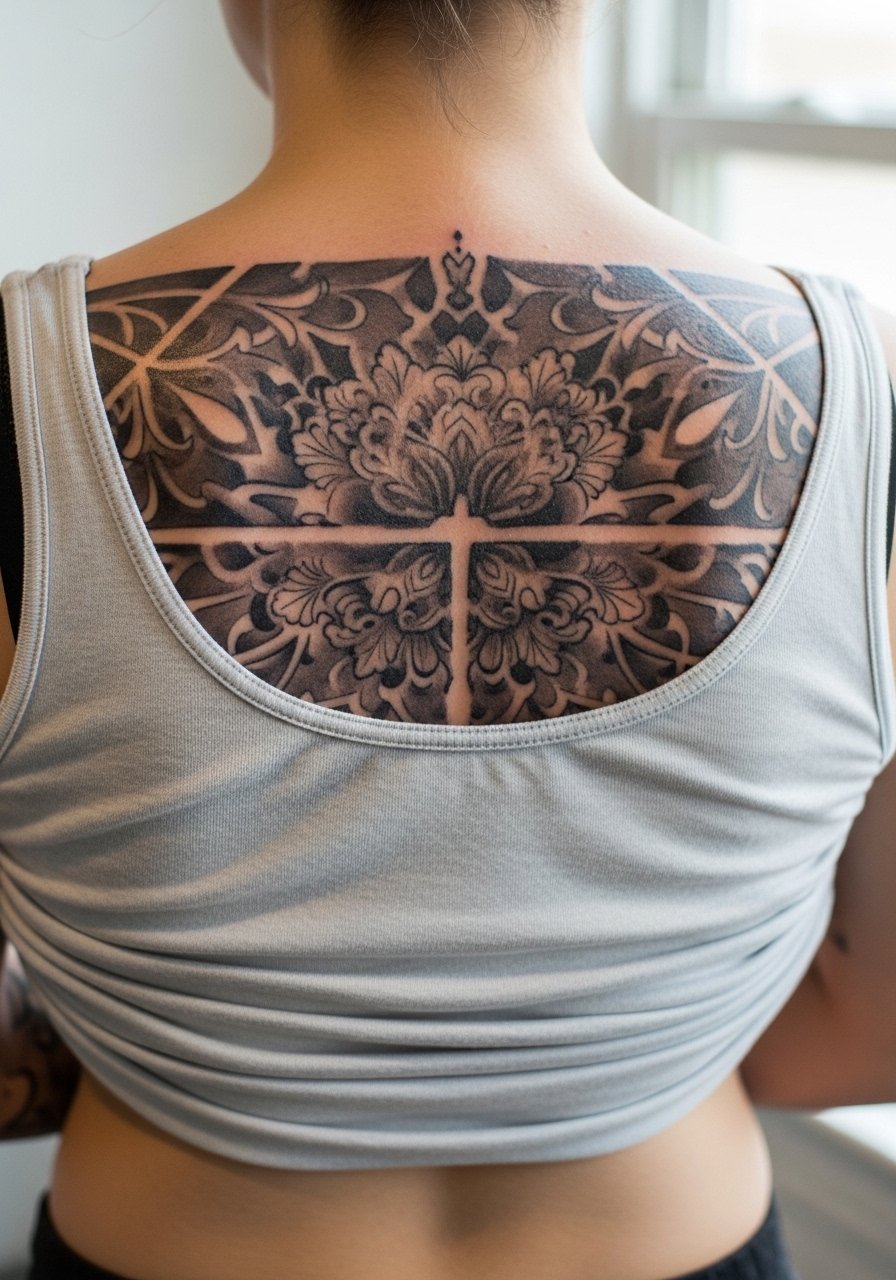
17. Half-Back Floral Panel
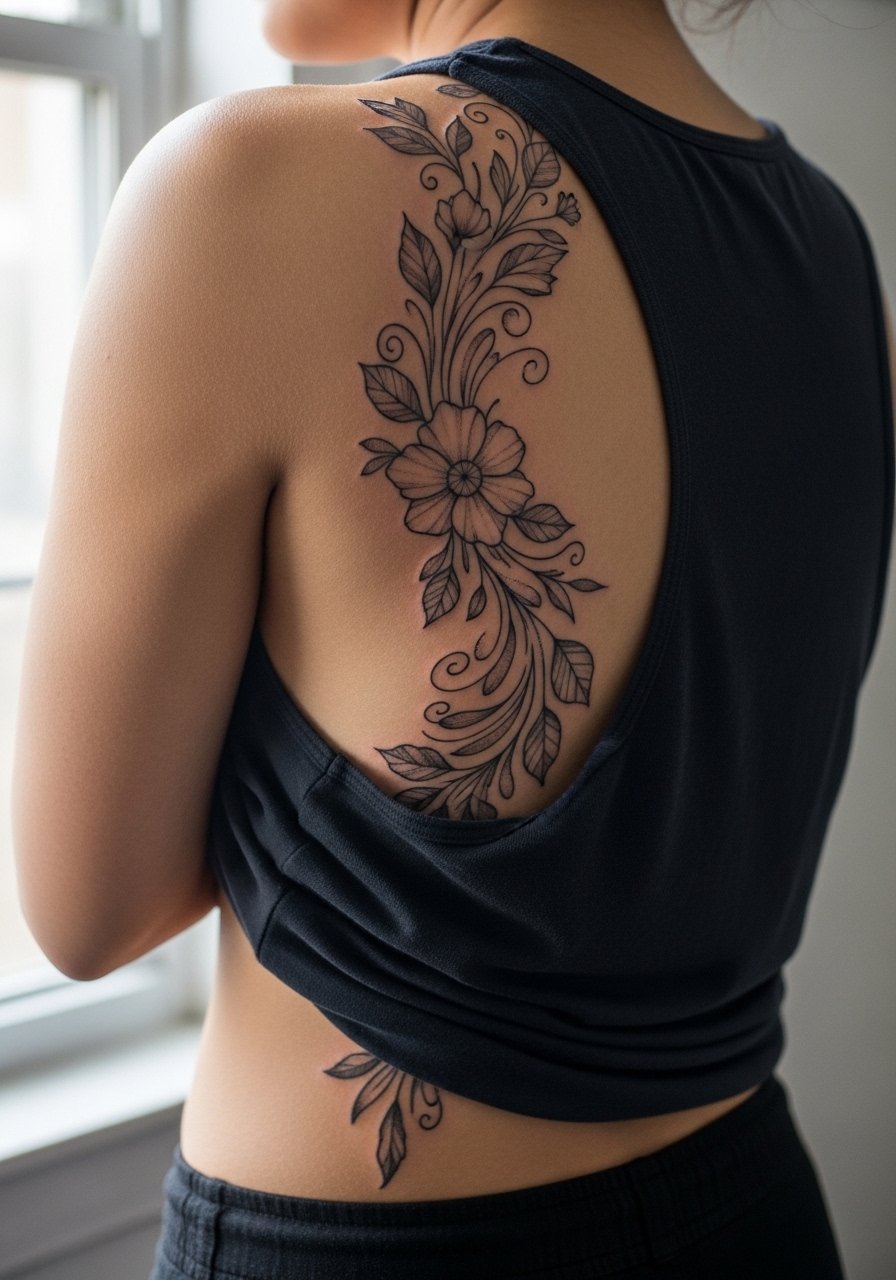
Mistake lead: Floral compositions that ignore back contours flatten when healed. Request that stems and leaves curve with the waist and flank. A mistake is asking for tiny petals in dense clusters which fill in after a year. Session-wise, half-back work is forgiving and allows staged expansion. If you plan to grow the piece, tell your artist early so they reserve flow space.
18. Baroque Ornamental Panel Across the Upper Back
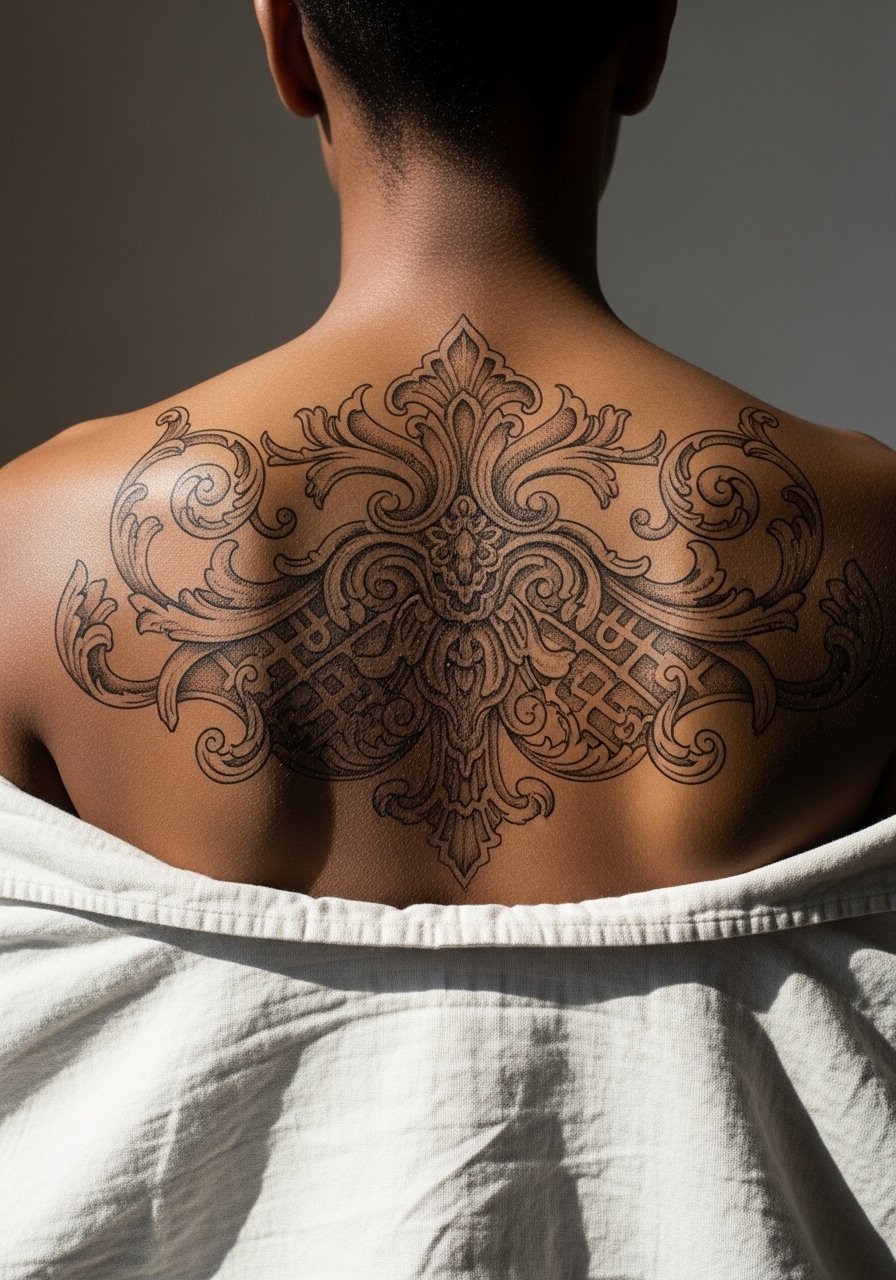
Aging/healing lead: Ornamental work reads best with clear dark anchors and airy negative space. Overfilling will make the filigree look muddy over time. One practical note is to avoid too many micro-details near the spine since movement breaks consistent shading. Sessions are moderate and require precision. For formal wear, the piece peeks under a slightly open collar for a refined effect.
19. Cover-Up and Blend Strategy for Old Back Tattoos
Consultation lead: A successful cover-up starts with a candid photo of the old work. Tell your artist what to preserve, and what to bury. Common mistakes are asking to hide very bright colors with small new designs. Often the fix is a larger dark element and gradual blending. Expect stencil trials and possibly a laser consult before full cover work. Plan phasing so you can evaluate how the new composition sits as each section heals.
20. Negative Space Slash Panel
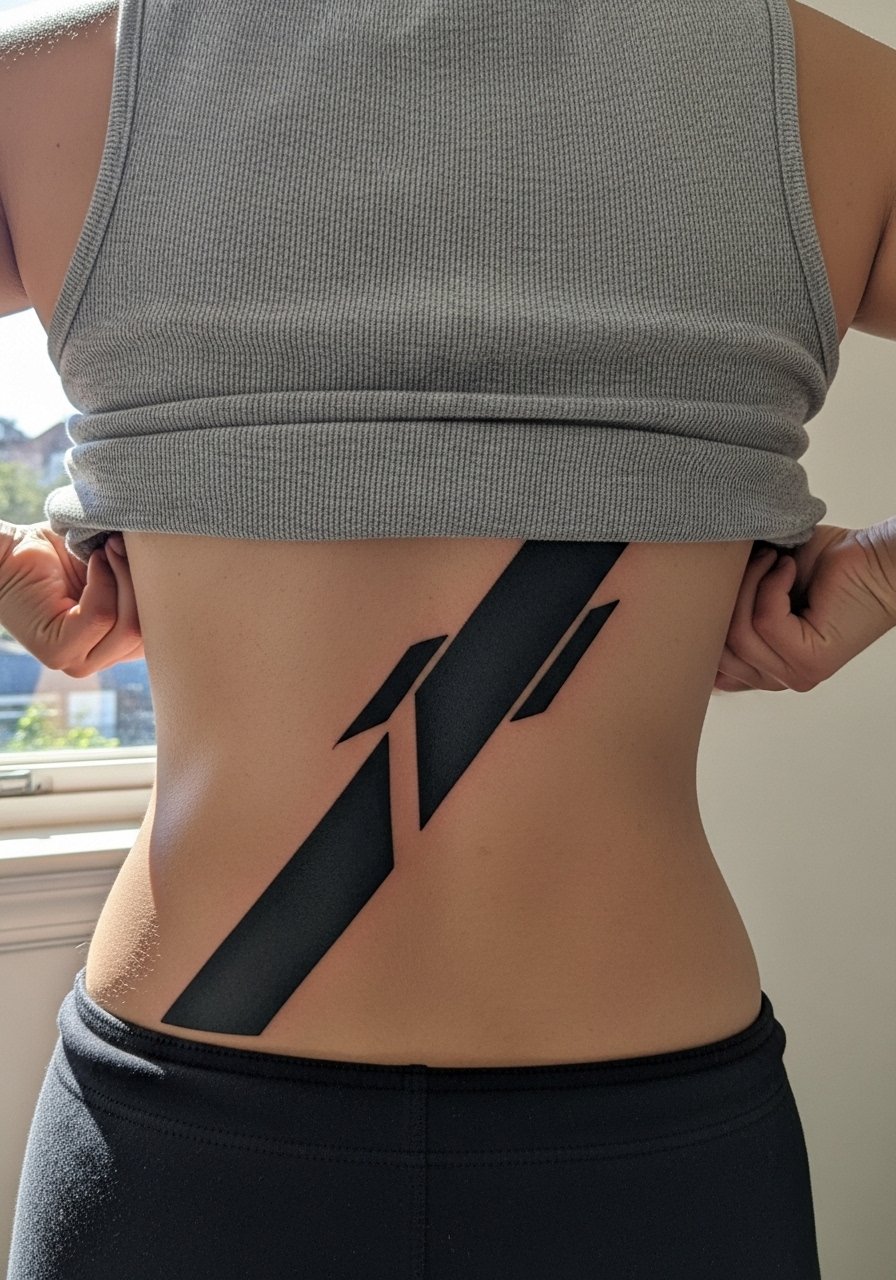
Mistake lead: Negative space designs demand clean edges. Ask for crisp, bold outer lines to protect the cutouts as they settle. A common error is going too small with the cutouts which then merge into fill after healing. These pieces heal reliably if you avoid sun exposure and heavy abrasion during recovery. The session will be shorter for line and fill passes, and touch-ups are usually about edge crispness.
21. Optical Illusion Geometric Panel
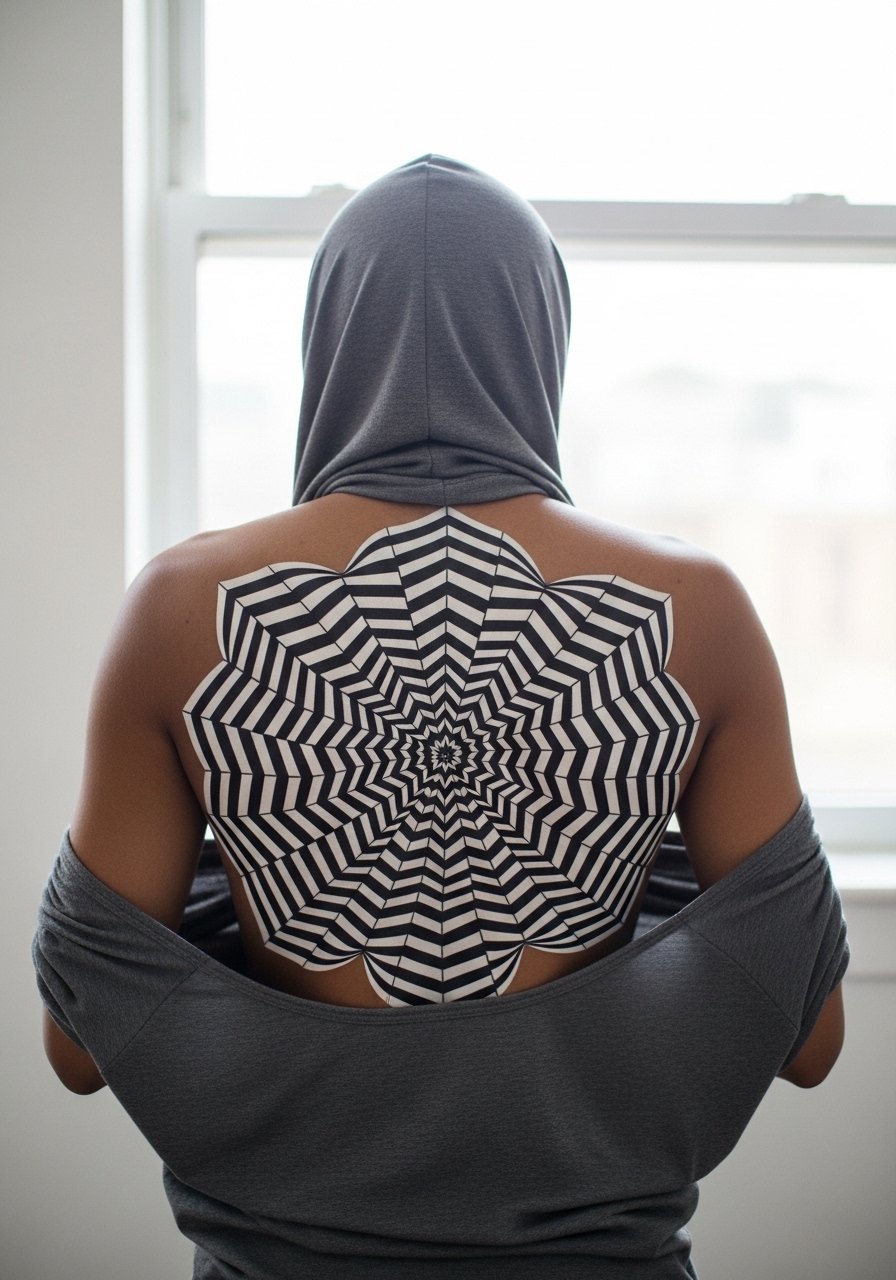
Consultation lead: Optical pieces must be tested on a curved surface so the illusion reads in motion. Bring photos of your posture and any asymmetry so the artist can adapt the pattern. A frequent mistake is not accounting for shoulder height differences which breaks the visual when healed. Expect precise linework and a slower session pace to keep hand control steady.
22. Constellation Map Upper Back
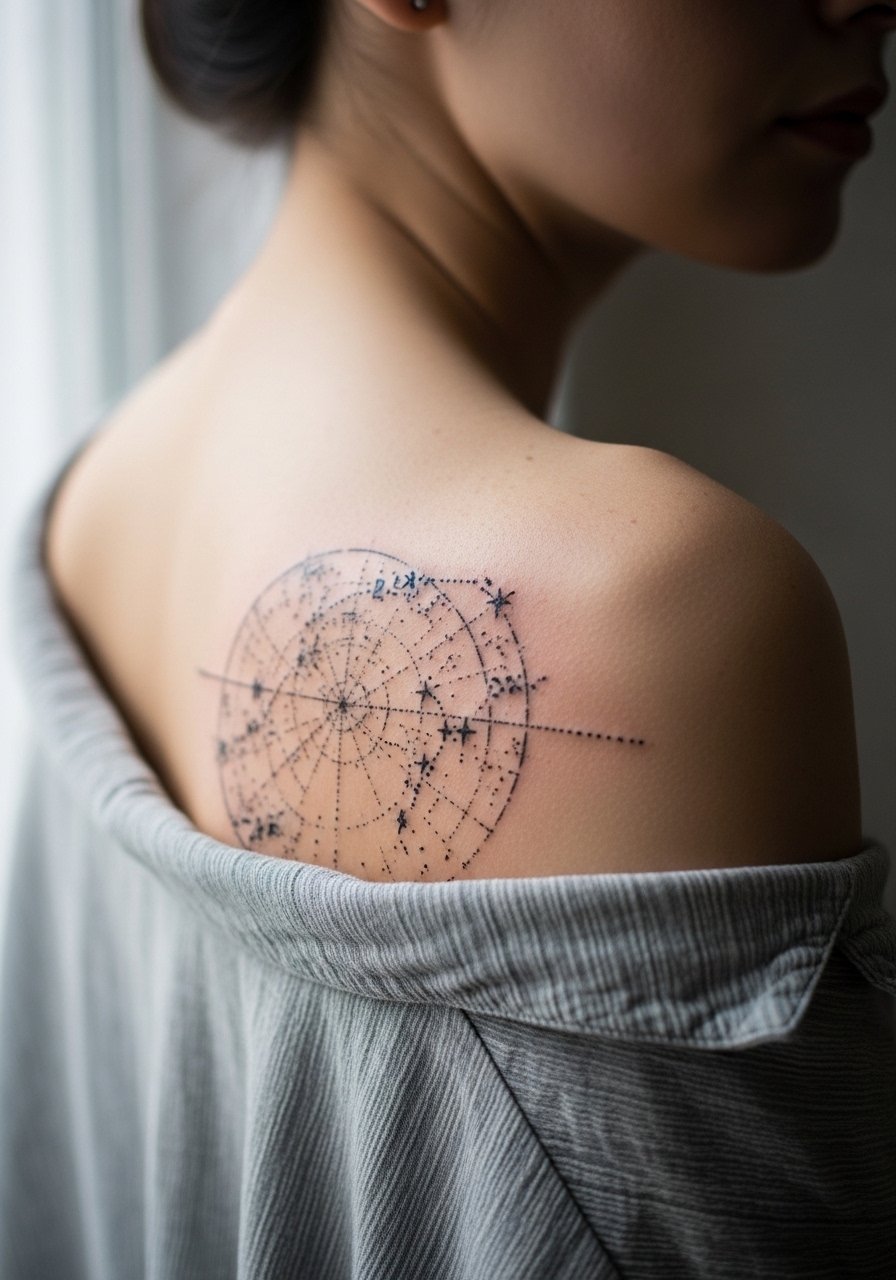
Personal observation lead: Dot work and microstars need spacing to survive sweat and showers. Ask for slightly bolder dots than you think you need so connections stay legible after a year. The mistake is trying to copy tiny star charts at the expense of spacing. For the session, wear a button front henley shirt you can open to provide full shoulder access without full exposure.
23. Atlas World Map Across Mid Back
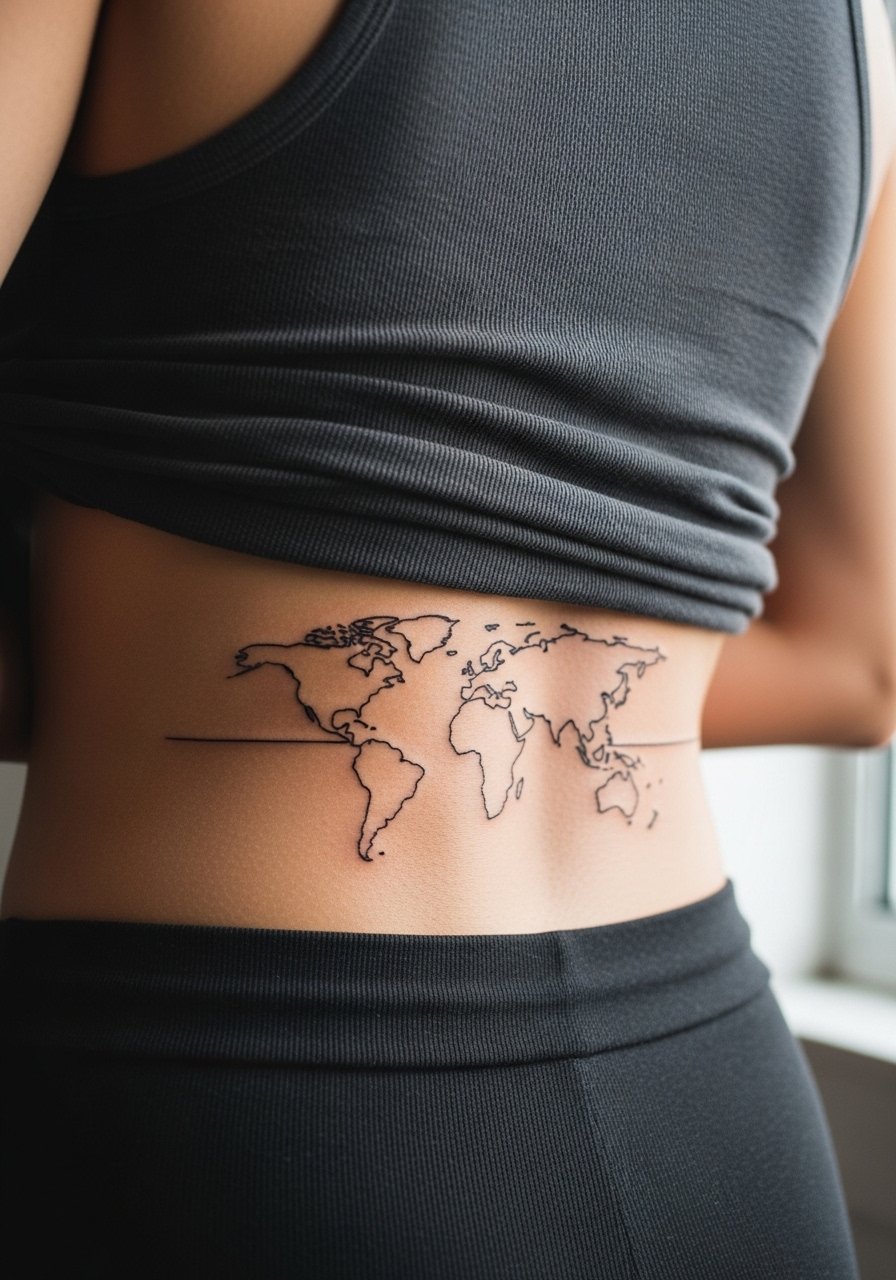
Mistake lead: Tiny coastlines and micro islands vanish when done too small. Ask for simplified continents with clear anchor lines and larger scale elements. Mid back gives a wide flat canvas so use it. Sessions are long if you want continental detail. For travel buffs plan a staged approach where landmasses can be shaded later.
24. Clock Face and Mechanical Compass
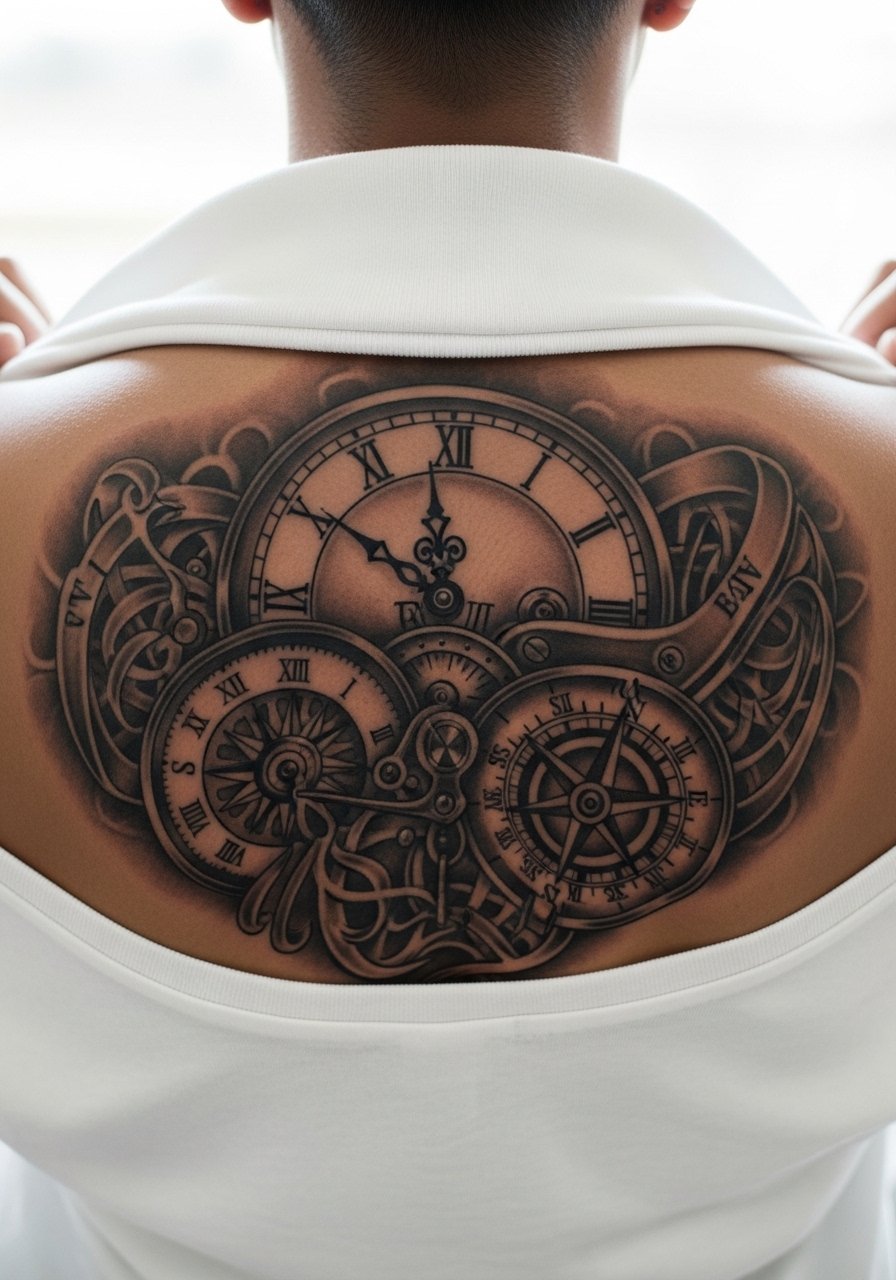
Aging/healing lead: Mechanical faces need strong anchors and minimal micro-detail near edges. The common error is intricate teeth and gears that lose definition. Ask for simpler teeth and stronger shadow anchors. These read well under jackets and peeking through open collars.
25. Māori-Inspired Pattern Blending Respectfully
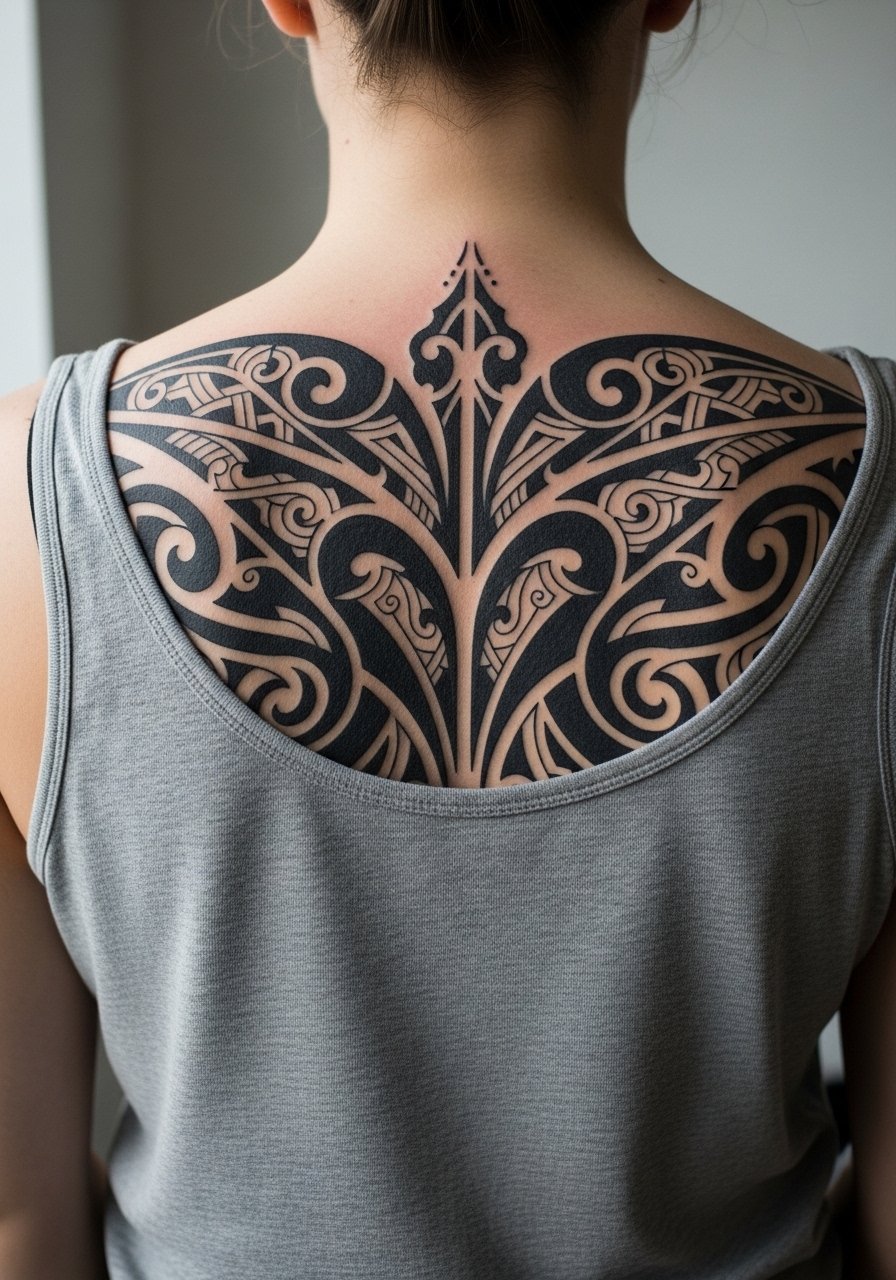
Cultural origin sensitivity: This pattern has roots in Polynesian traditions, so be explicit about whether you want a respectful interpretation rather than a direct replication. Ask the artist how they translate motifs in an informed way. The mistake is requesting specific cultural symbols without discussing origin and meaning. For longevity, let the artist adapt motifs to your anatomy rather than forcing exact copies.
26. Tree of Life with Roots and Canopy
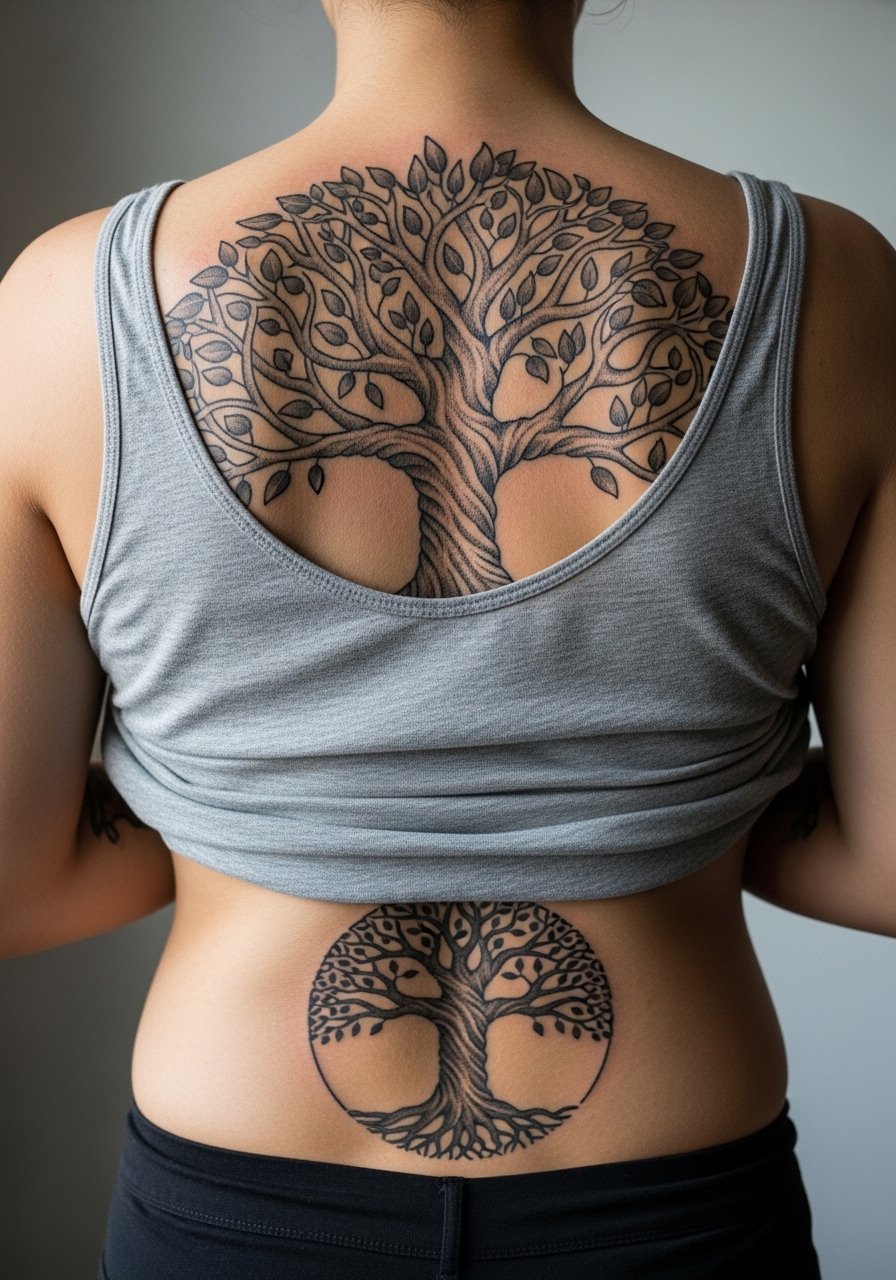
Mistake lead: Trees that cram fine root detail into tight lower back zones fade into texture. Tell your artist to simplify root structures and emphasize trunk silhouette. This piece ages gracefully when the main trunk lines are bold and the canopy is open. Sessions are comfortable if you break into canopy and roots across separate appointments.
27. Biomech-Tribal Fusion Along the Spine
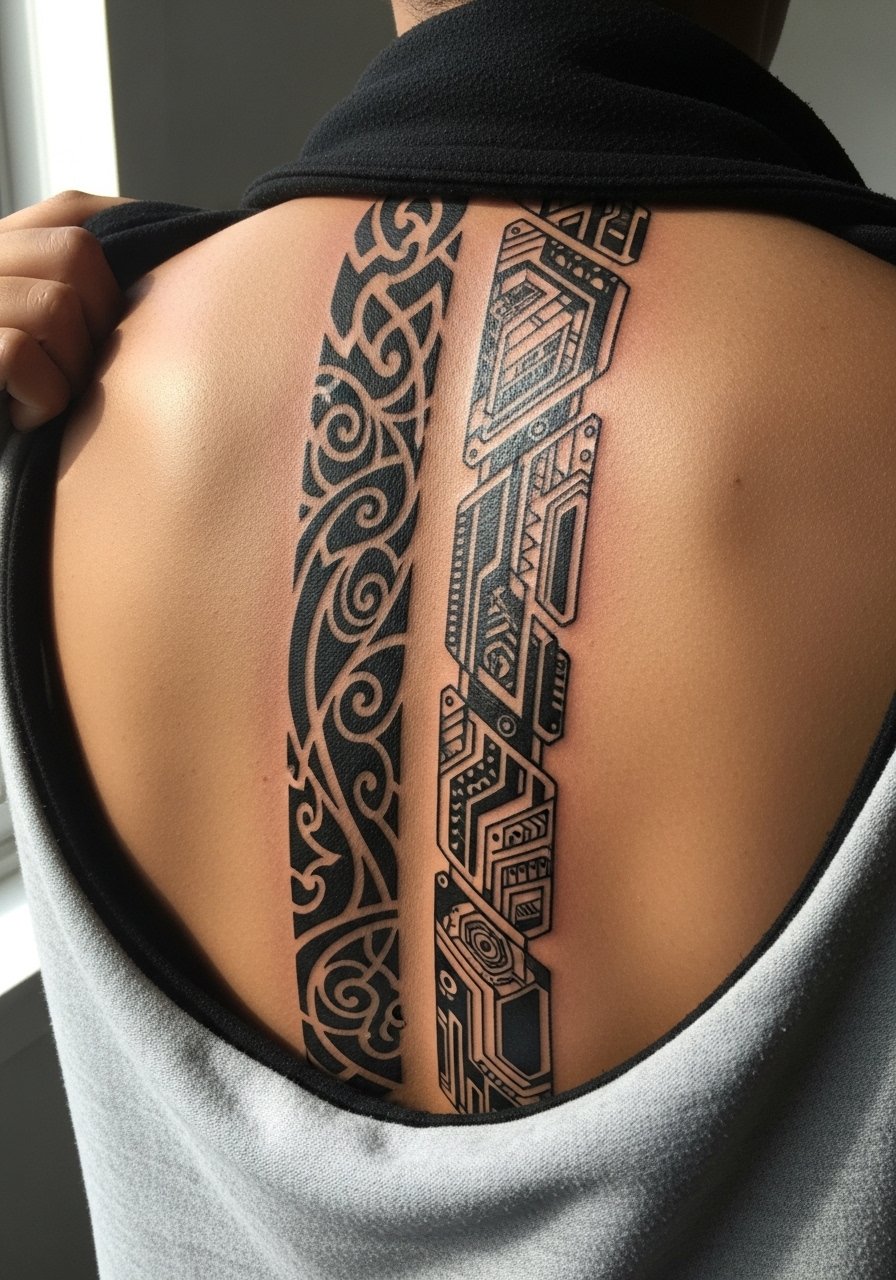
Styling lead: When combining cultural motifs and biomech, be clear about which elements are decorative and which are inspired. A common mistake is clashing line languages that fight rather than fuse. Ask for cohesive negative-space channels and test sketches on the spine curve. Sessions will alternate between bold black saturation and softer shaded transitions. For the session wear a mens backless vest so the spine is accessible without full exposure.
Pack Smart
The full-back and upper-back pieces above demand different prep than small lats work, so these items smooth the session and the first week.
- Tattopaste Balm. A thinner balm that many people prefer in humid climates because it reduces shirt sticking while still keeping the skin supple during the early healing window.
- Frida Skin Barrier. A breathable protective barrier some artists recommend for returning to the gym, it helps shield lats and shoulders from friction without sealing in excess sweat.
- Ink-Icing Gel. Useful for long chair days to reduce immediate inflammation and soreness across the traps and lower back.
- Manuka aftercare balm. An antibacterial balm that can be helpful on lower backs where moisture and friction increase infection risk.
- Aquaphor healing ointment. A thin layer in the first few days keeps delicate linework from drying into tight crusts, which helps fine lines settle evenly.
Frequently Asked Questions
Q: How should I pick between full back tribal and a staged half-back plan?
A: It depends on time and budget. Half-back lets you test how a large motif ages on your skin and gives you an exit point if life changes. Full back is cohesive but requires long-term scheduling and commitment. Talk with an artist about phasing so future fills match the initial work.
Q: Will a biomechanical spine panel or a geometric mandala need more touch-ups over time?
A: Geometric mandalas need clear spacing and heavier anchors to avoid lines merging, so they may need touch-ups if done too tight. Biomech depends on 3D shading and contrast which usually holds if the initial saturation is deep. Both can benefit from an honest set of healed photos from the artist.
Q: What is the best way to find a back specialist if my city is small?
A: Use style hashtags, location tags, and platforms that let you filter portfolios. Search for the style plus your city, check guest-spot announcements, and ask in community forums for recent healed photos. Booking a guest spot at a convention is another way to work with a specialist without long-distance uncertainty.
Q: How do sweat and gym sessions affect back tattoos while healing?
A: Sweat traps dirt and can irritate fresh ink on the back. Wear breathable cotton and delay intense workouts for at least a week. Some people choose a brief dry-heal approach for 48 to 72 hours, while others use a breathable barrier. Discuss your exercise routine with the artist and plan sessions around rest days.
Q: Are dark skin tones at a disadvantage for blackwork on the back?
A: No, but the approach matters. High-contrast bold lines and thicker anchors keep the design readable in photos and healed condition. Ask to see healed images on similar skin tones and choose slightly heavier primary lines rather than fragile microwork.
Q: Should I use numbing cream for an eight-hour back session?
A: Numbing can make a long day manageable, but some artists prefer natural sensation for session pacing and tissue feedback. If you consider numbing, talk logistics early, confirm timing and what products they allow, and expect a slightly different sensation afterward.
