
Fine line willow branches are everywhere on mood boards right now, and the gap between what looks perfect on a phone and what lasts on skin is wider than most people expect. Fine detail can disappear, color can migrate, and placement choices drive most of the work you will need later. Read the first idea and you will get a practical pick that shows well now and still reads clean after a touch-up.
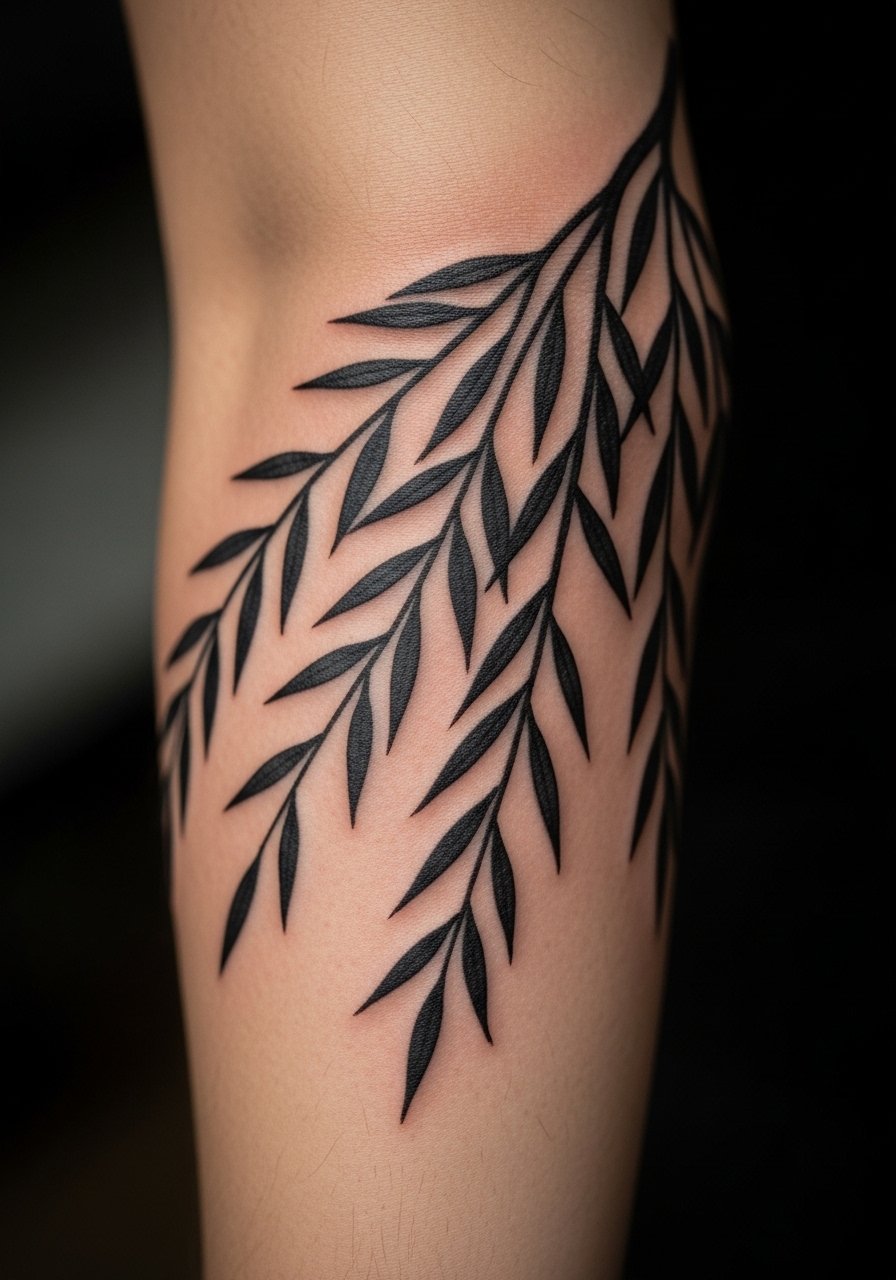
1. Fine Line Full Willow on the Inner Forearm
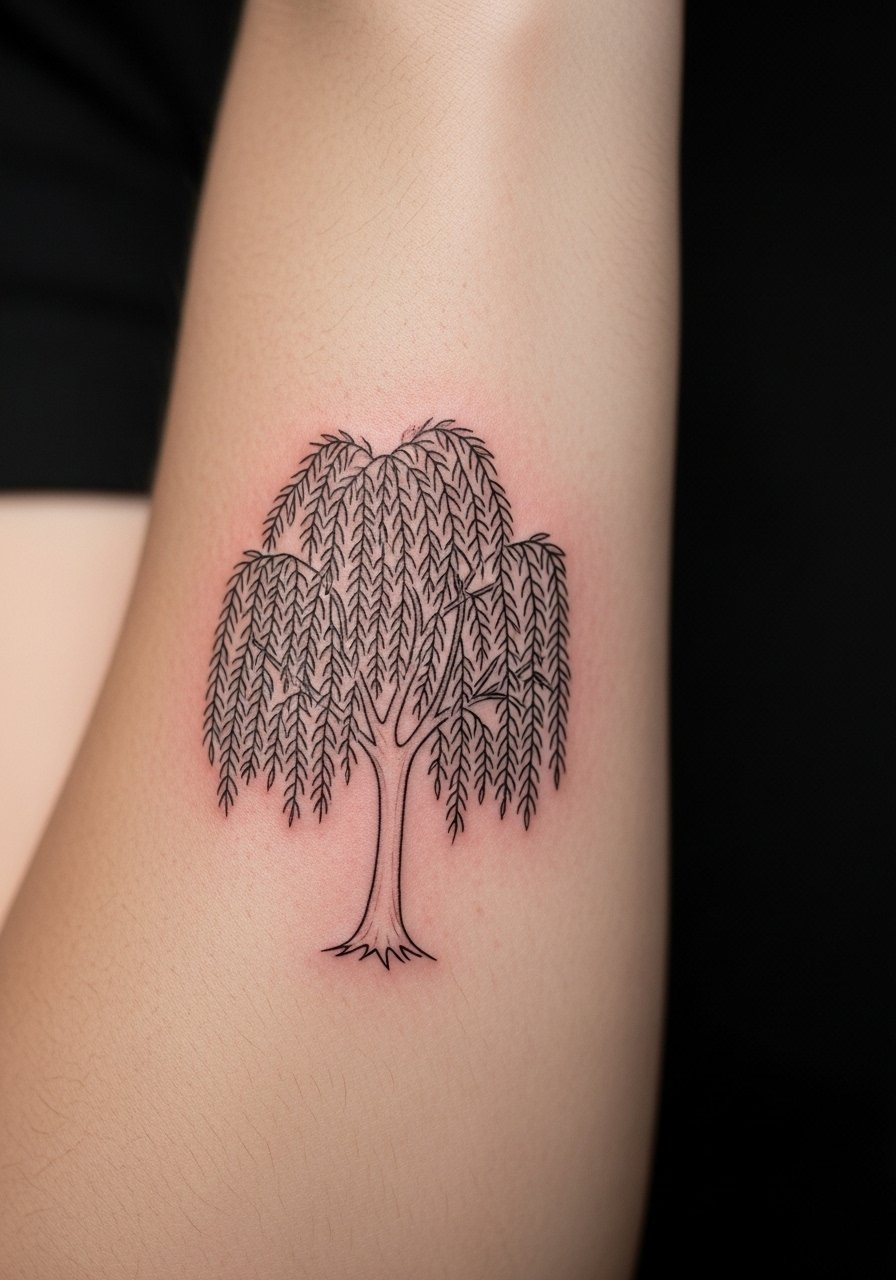
I recommend this forearm placement when you want a willow that reads like a sketch but stays serviceable. Ask your artist for slightly heavier primary stems and single-needle secondary lines so the main silhouette keeps contrast as the hairline details soften. Forearm sessions are usually one sitting under two hours and feel like steady scraping with short sharper spots near the wrist. Roll sleeves up for the session and come wearing a rolled cuff chambray shirt you can pull easily so the artist has full access.
2. Minimal Willow Branch on the Wrist
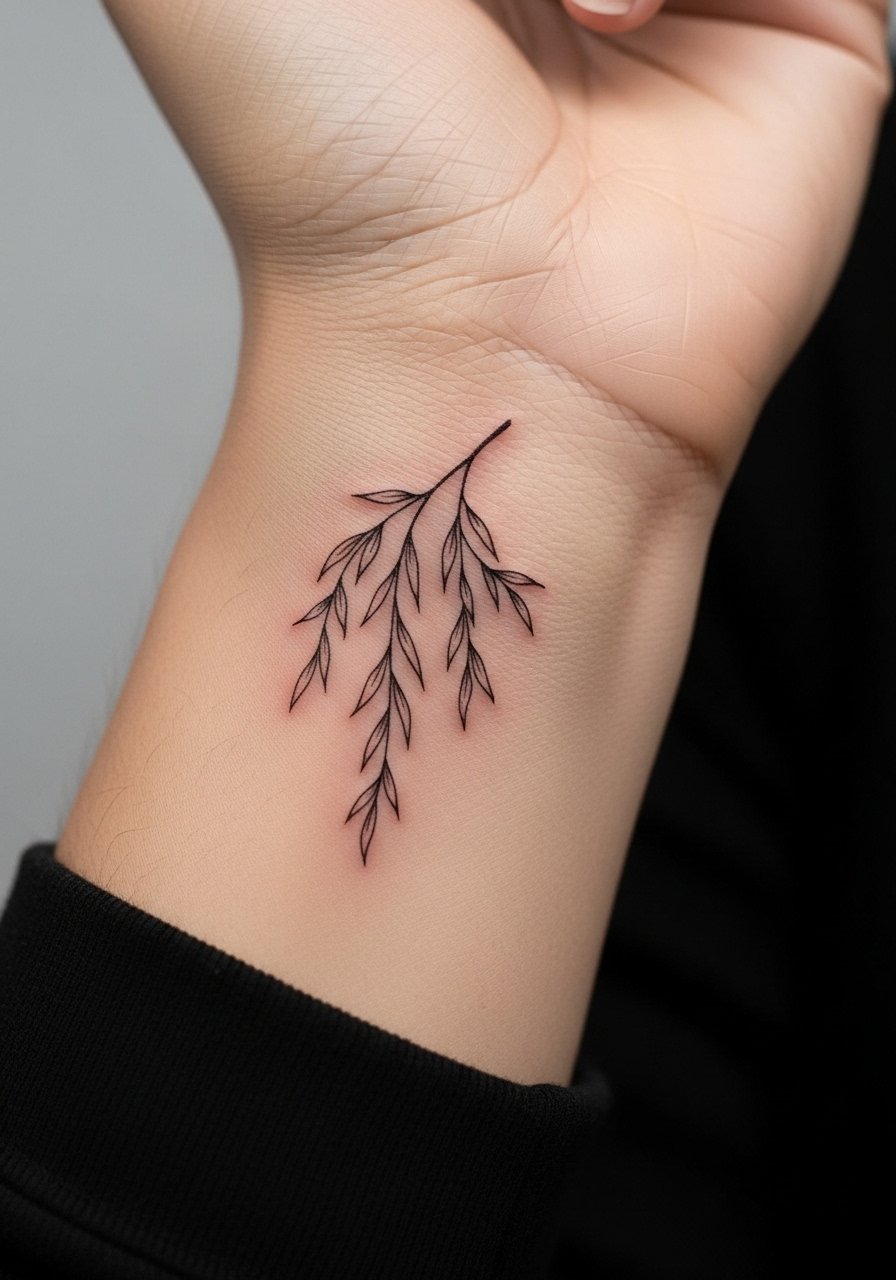
Wrist branches are tiny statements that attract attention. The common mistake is making the branch too dense. For longevity request open spacing and a slightly bolder anchor line near the stem so the silhouette holds after a year. Pain here is noticeable for most people for short bursts. Wear a sleeveless top to your appointment and leave jewelry off. To show it off, pair the wrist piece with a thin silver bangle stack on the opposite wrist so the new ink doesn’t get crowded by metal during healing.
3. Silhouette Willow Across the Collarbone
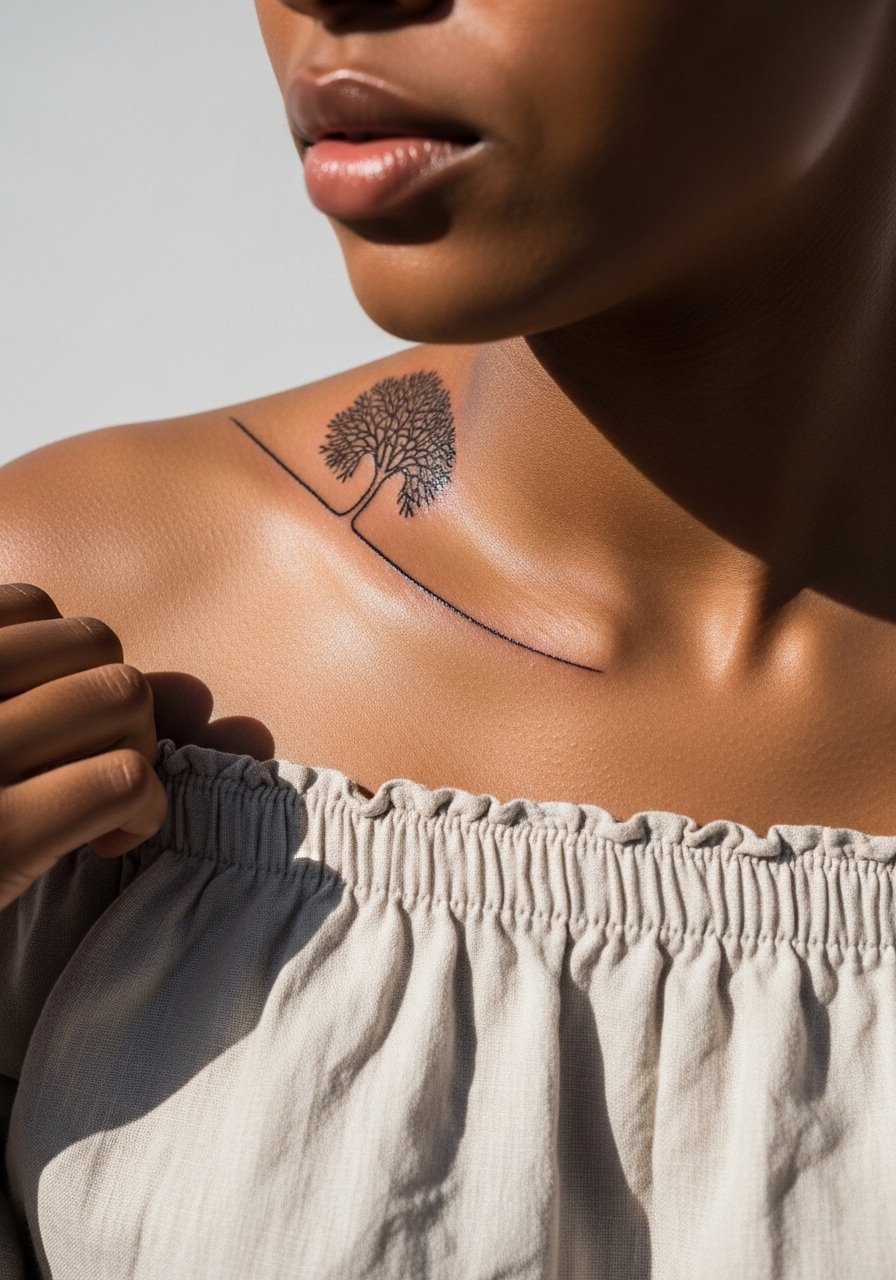
The collarbone frames a willow silhouette beautifully, but the area moves with breathing and posture. Ask for negative-space leaves and soft grey wash rather than tight stippling. Sessions take 1 to 2 hours and the bones make sharp sensations during lining. For the session wear a cream off shoulder linen blouse you can pull aside so the artist works without stretching the skin. Expect touch-up at year two if you push the grey too light.
4. Watercolor Willow Splash on the Shoulder Blade
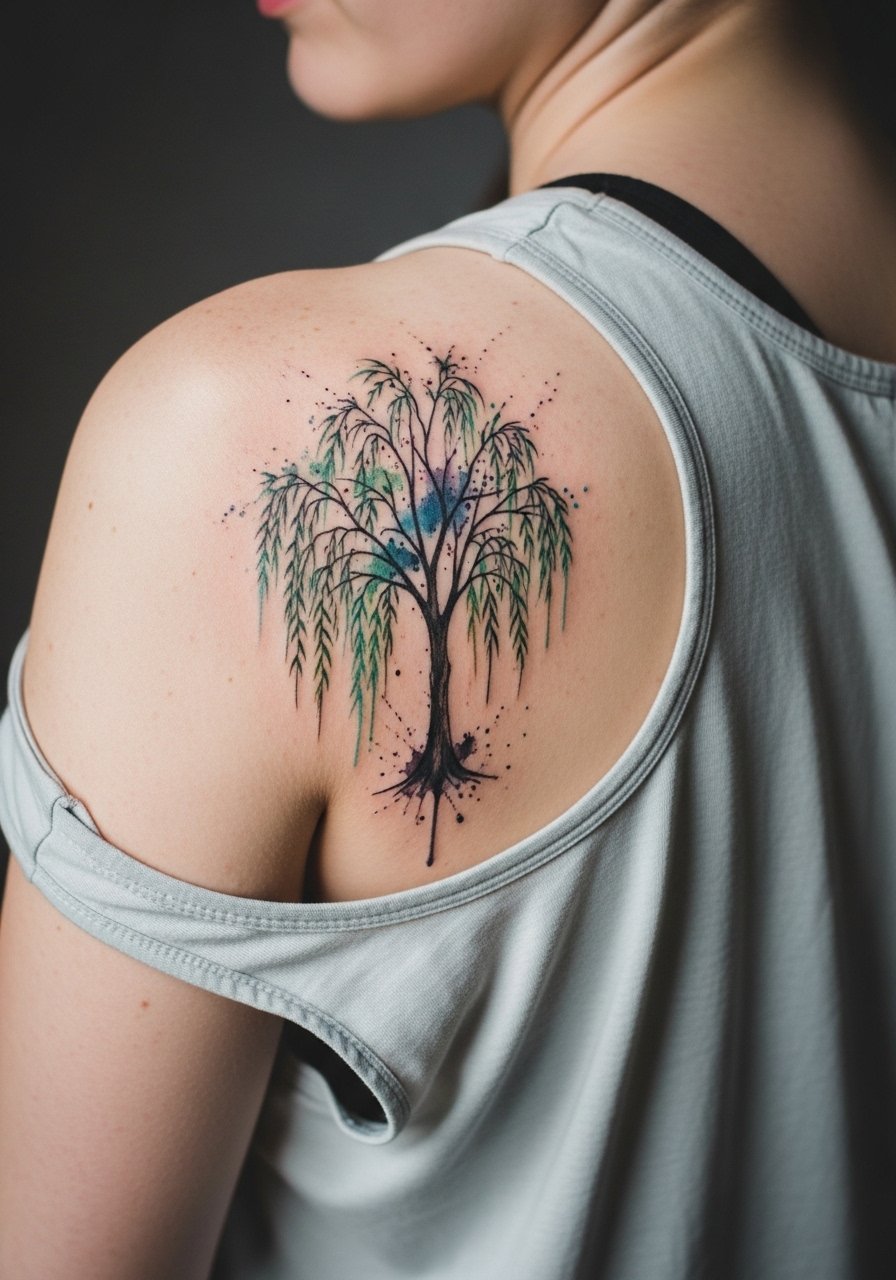
Watercolor willows give movement with saturated washes and soft branch edges. The usual aging issue is sun-driven desaturation, so pick darker pigment anchors inside the color fields. Shoulder blade work is moderate on pain, and most of these finish in two sessions. For showing it off, an evening top or a sleeveless halter tank frames the area without taking attention away from the colors. Bring references that show both the color saturation and the exact branch flow you want.
5. Neo-Traditional Willow with Roots on the Ribcage
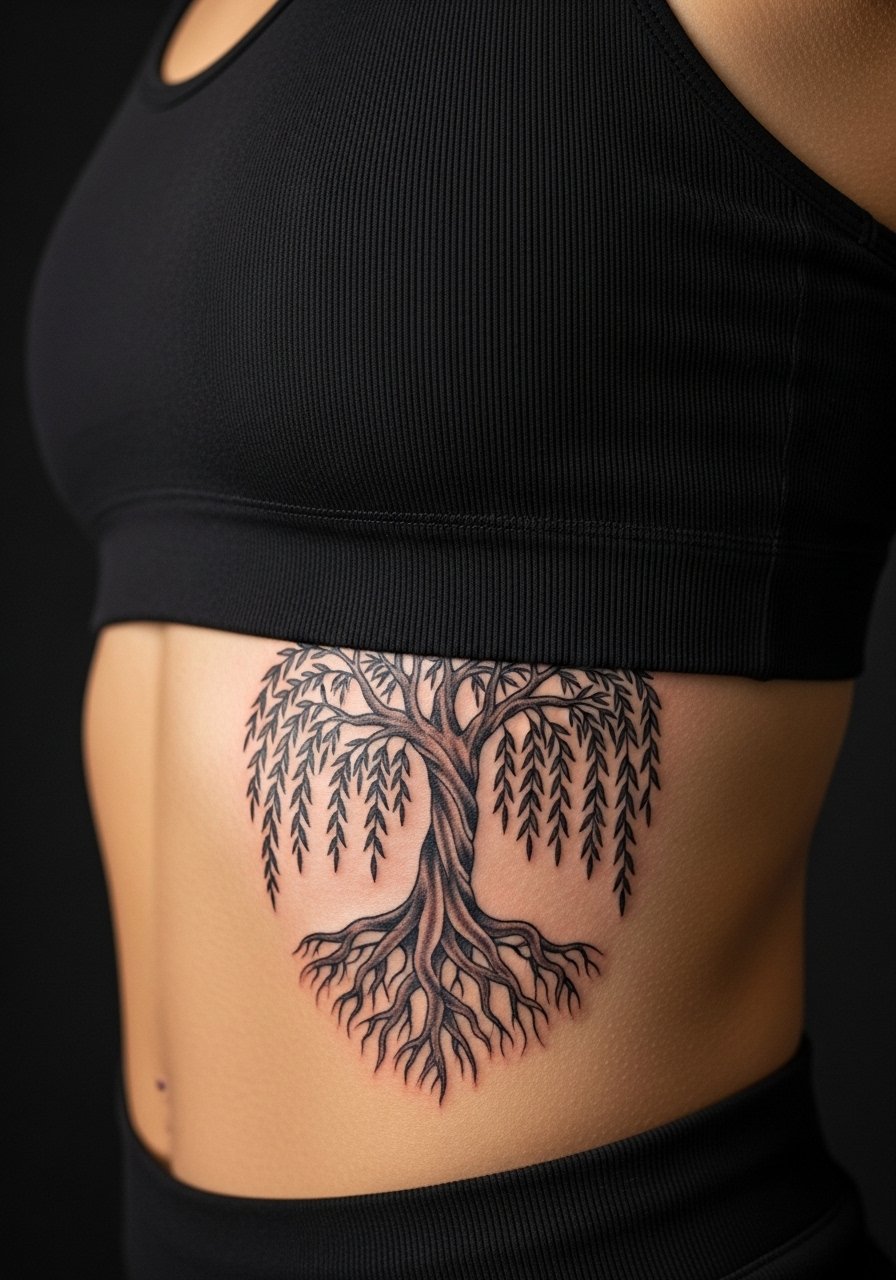
Fair warning, ribs rank high on pain charts. The advantage is that bold outlines and controlled shading here age predictably. If you like the roots motif, ask for stronger outlines near the base and softer shading up top. Artists are split on fine line on ribs. One camp argues the skin stretch blurs lines within two years. The other camp says correct depth and spacing let a careful fine line settle well. Ask your artist where they stand before booking. Wear a fitted sports bra to the session so the artist can shift fabric easily without exposing more than needed.
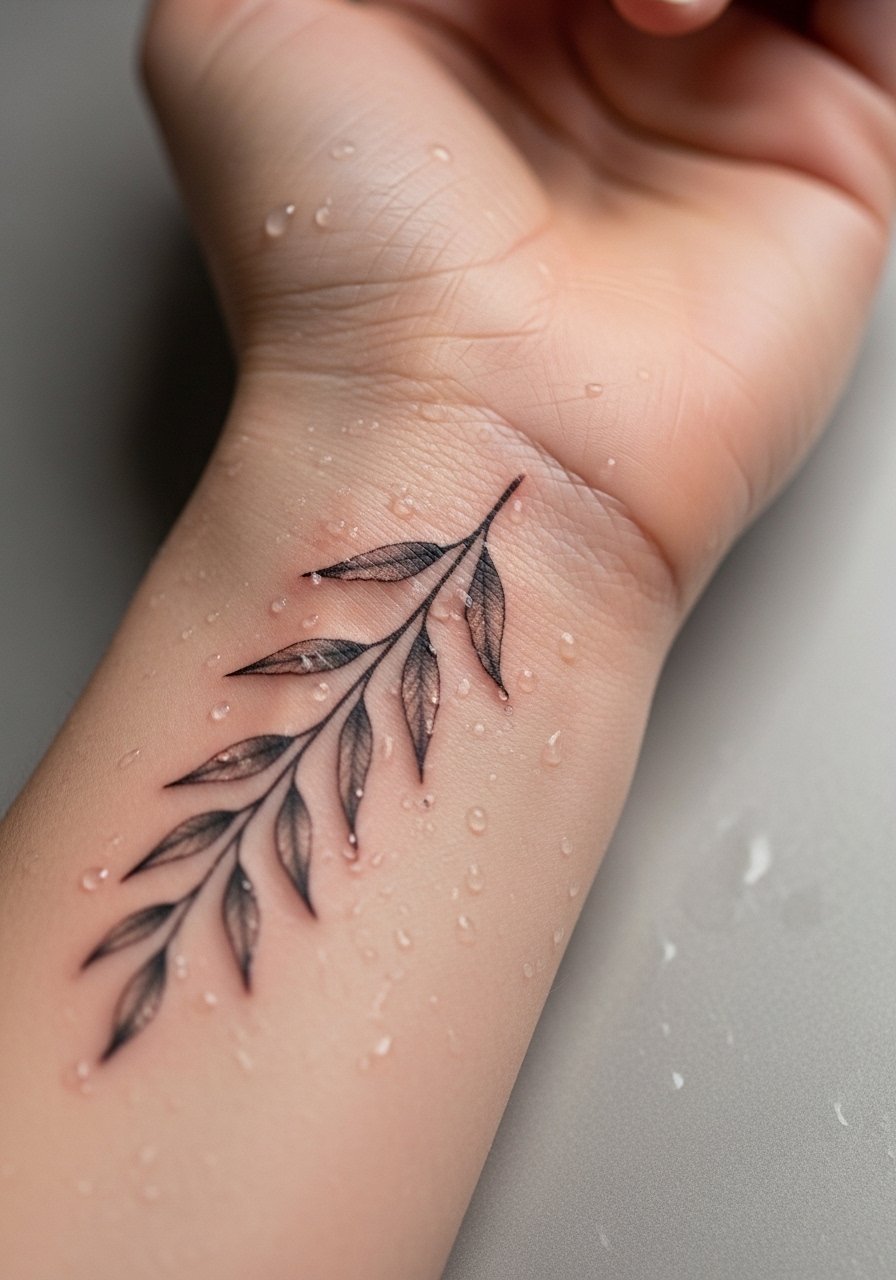
6. Single Branch with Droplets on the Inner Forearm
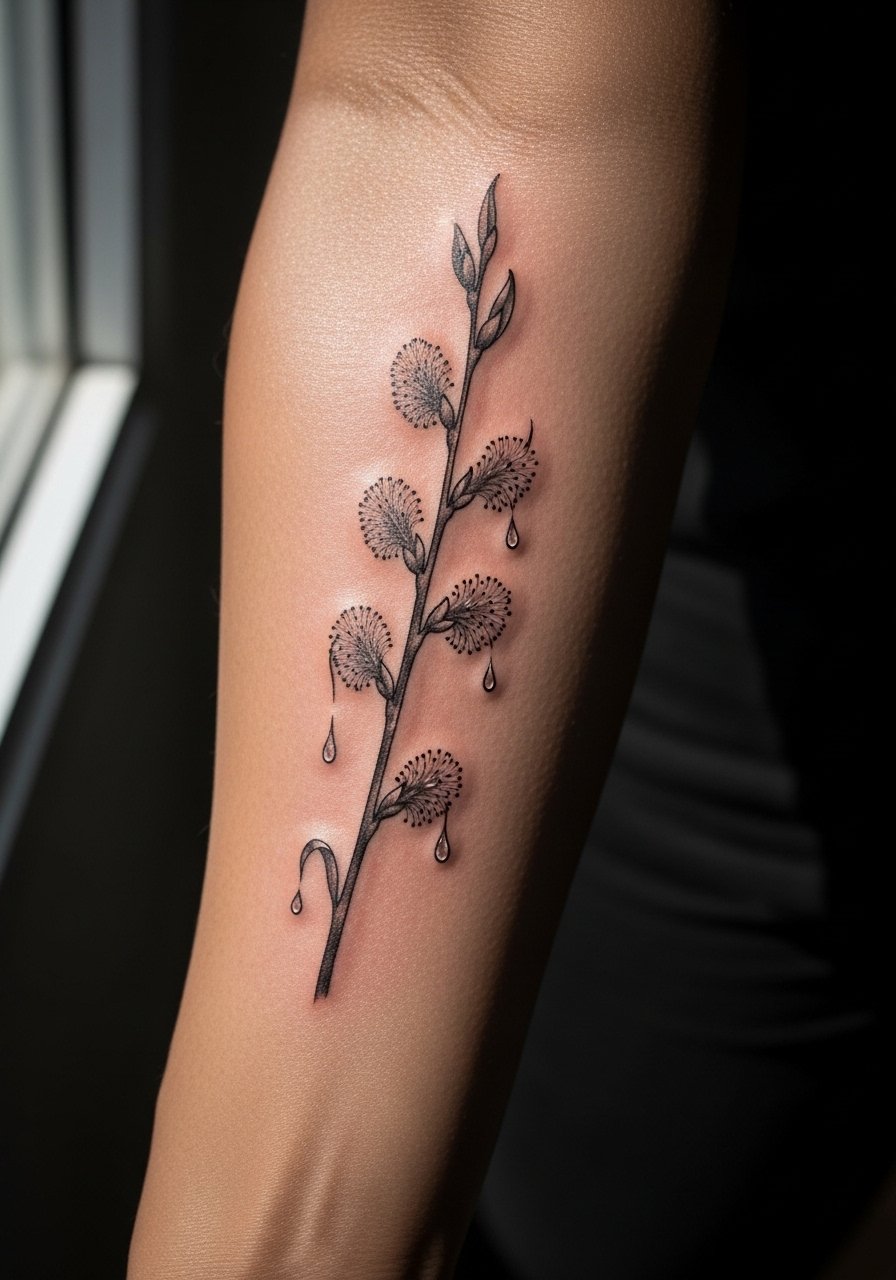
This micro-realism piece reads like a quiet mnemonic. The biggest mistake is packing tiny droplets too close together, which blurs as the skin heals. Ask for slightly larger droplet margins and subtle white highlights for contrast. Session time usually under an hour and pain is mild to moderate. For the day of, wear a sage green button down you can roll up, and bring a thin leather wrap bracelet to balance the opposite arm once healed.
Studio Day Picks
The six ideas above include wrists, forearms, ribs, shoulder blades, and collarbones, so a mix of access and sensitivity matters for prep.
-
Stencil transfer paper kit. Lets you preview how the willow's branch weight will sit on skin before ink starts, which helps with forearm and collarbone placements.
-
Disposable grip covers. Keeps the grip from shifting, useful in longer shoulder blade or rib sessions where repositioning is common.
-
Thin protective film roll. Shields wrist and finger work from friction during the first few days when linework is most vulnerable.
-
Fragrance-free body wash. Gentle cleansing for larger black and gray pieces like the ribcage and shoulder blade without stripping pigment.
-
Aquaphor healing ointment. Thin layers help lock moisture during the initial heal window for fine line work on forearms and wrists.
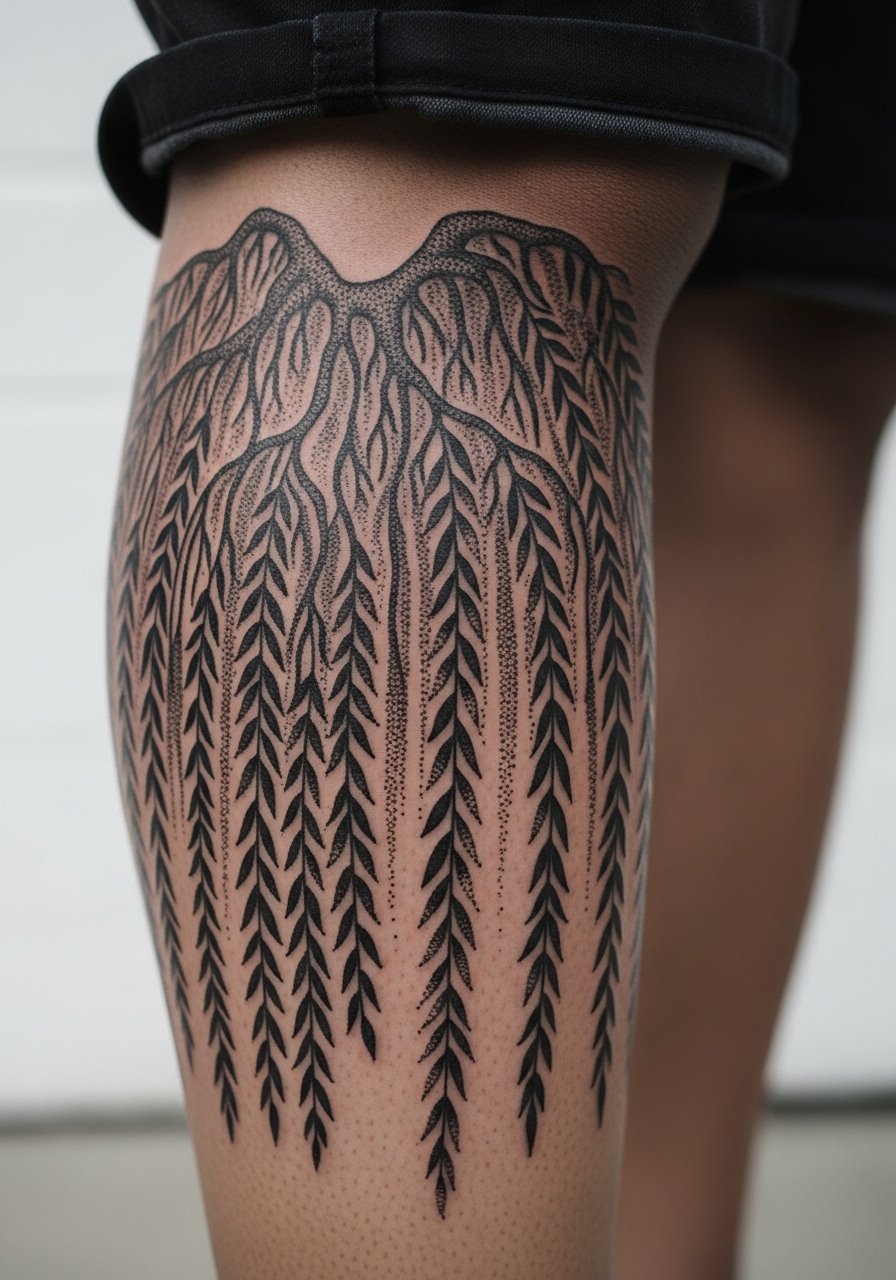
7. Blackwork Willow Canopy on the Calf
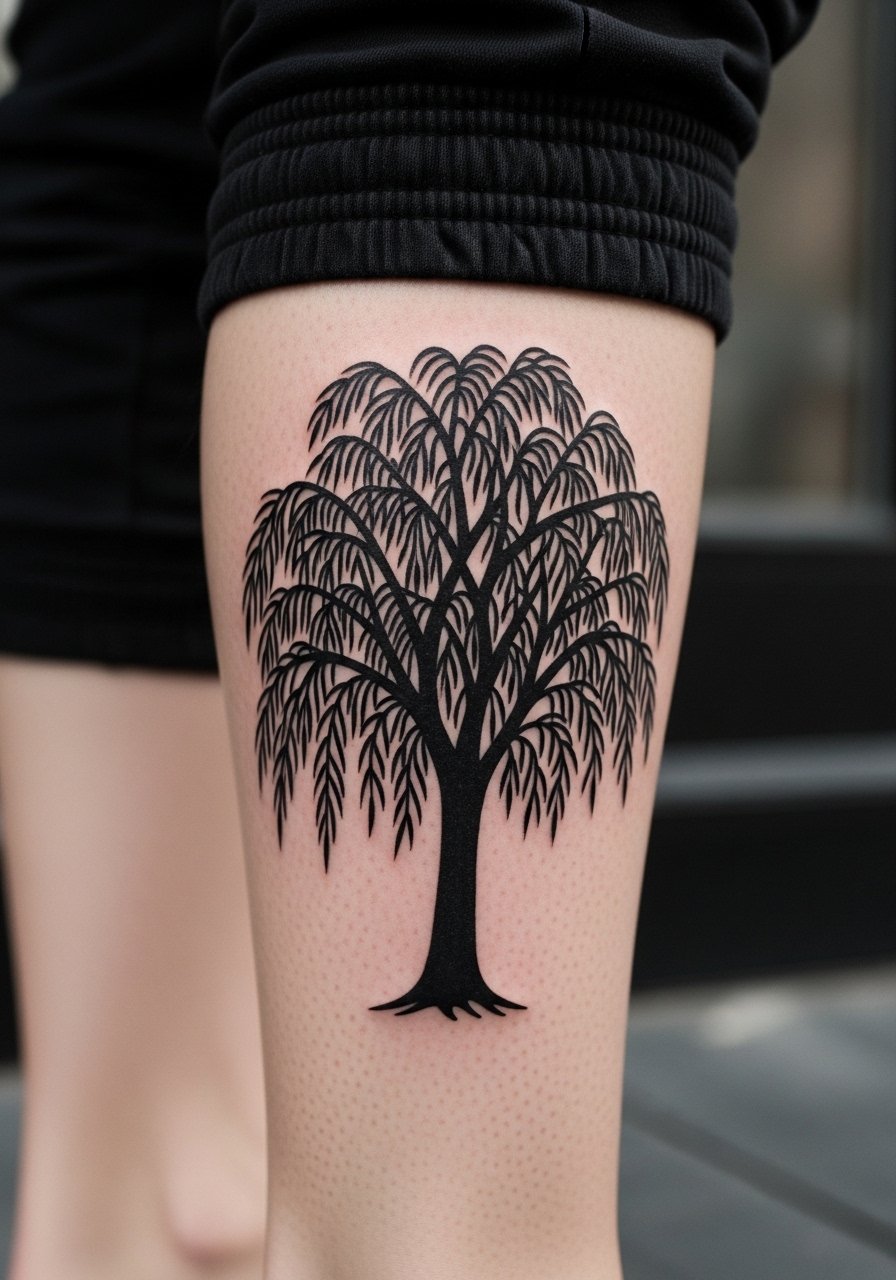
Blackwork canopies are bold and forgiving as they age. The common issue is overcomplicating negative space, which loses its rhythm when viewed at a distance. Calf work tolerates heavy saturation and usually finishes in two sessions. Pain is moderate and the artist may take breaks for filling. For casual showing, roll up your ankle bootcut jeans or throw on cropped joggers and canvas sneakers for summer visibility.
8. Ornamental Willow Frame for the Back
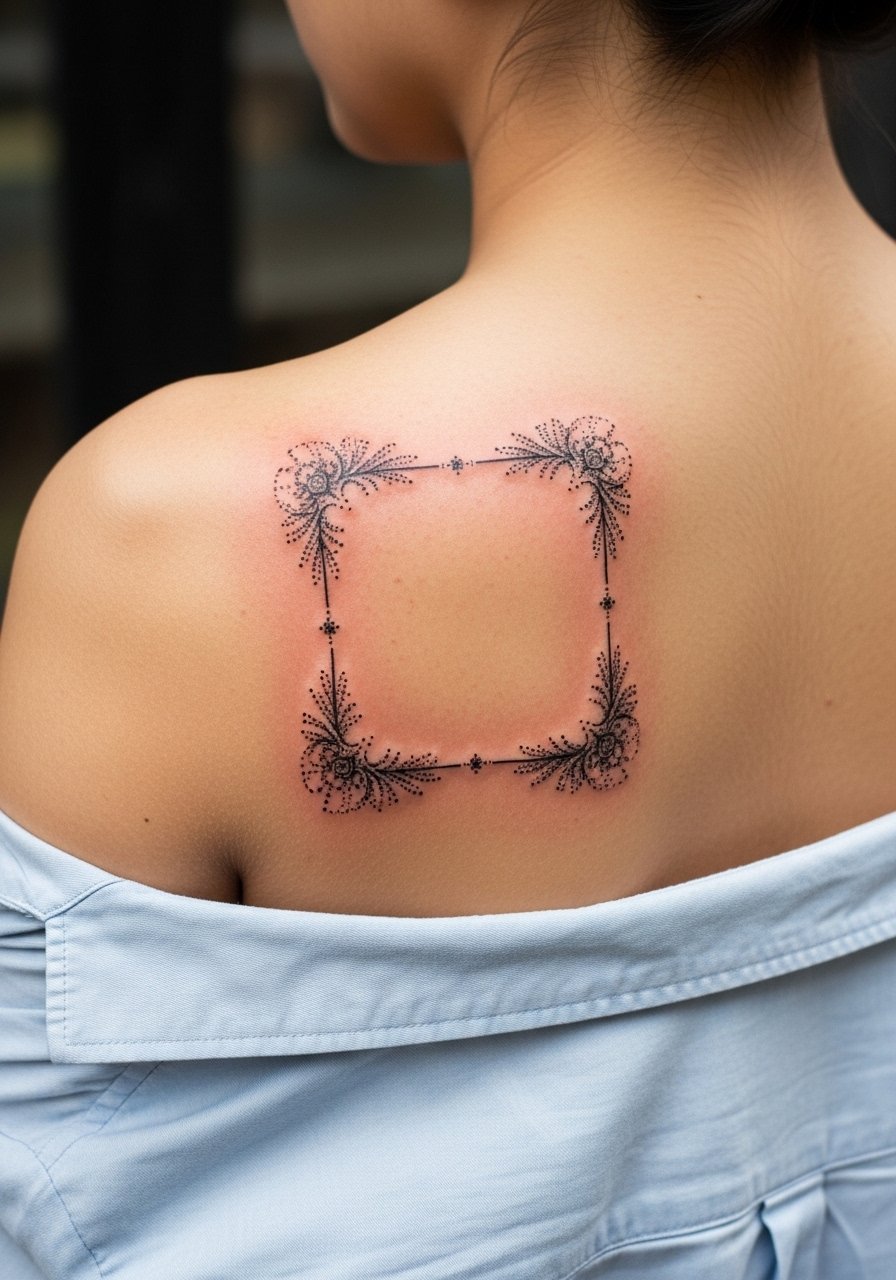
Intricate ornamental work on the back reads like jewelry. The mistake is packing too many dots into tight areas. Ask for breathing room between dot clusters and a hierarchy that favors bolder frame lines. Back pieces often span multiple sessions and feel like long periods of steady pressure more than sharp pain. For appointment wear, a loose button-down shirt you can pull aside keeps modesty while giving access.
9. Minimal Leaves Cluster for the Ankle
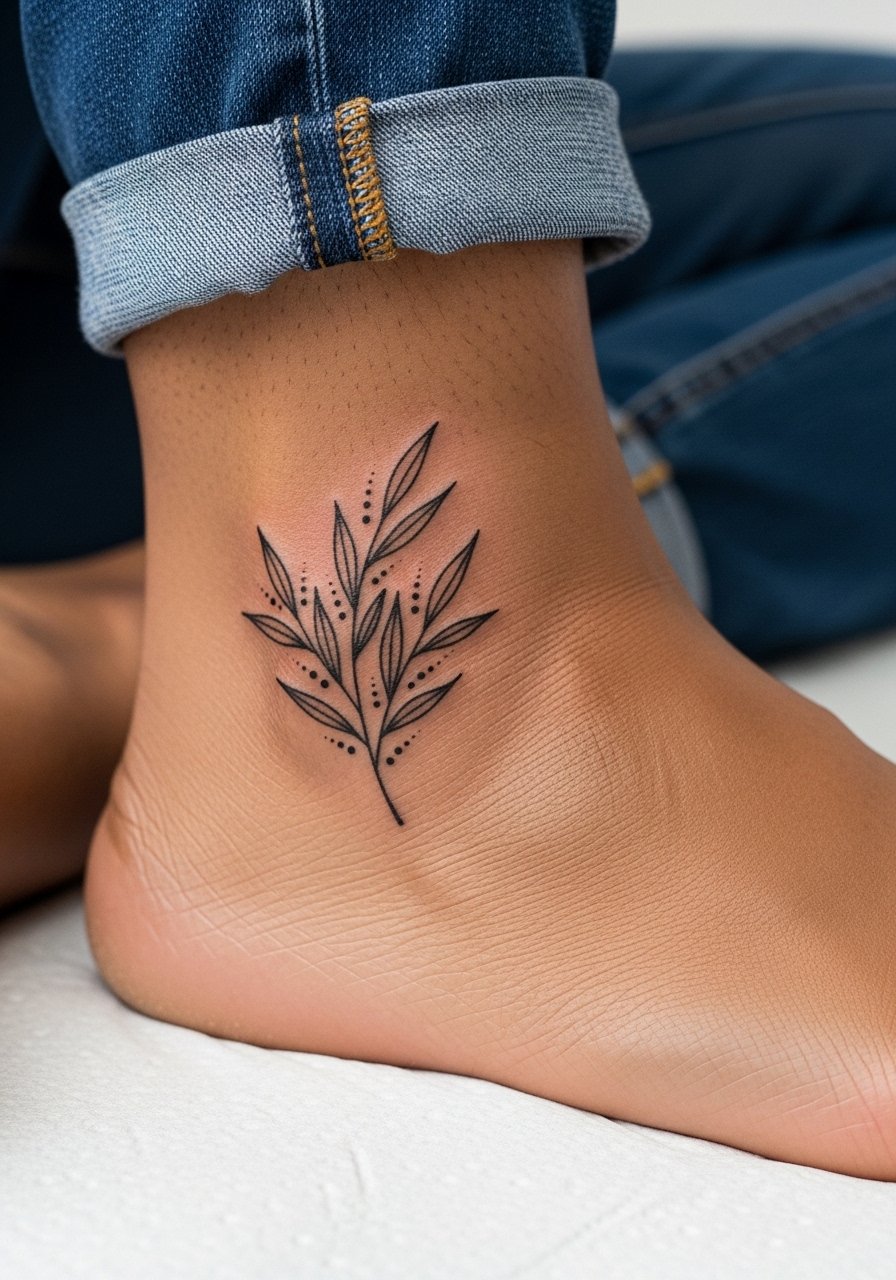
Ankle leaf clusters are low-commitment accents but they must be spaced to survive shoe friction. The usual blunder is placing leaves over an area that rubs against shoes. Ask your artist to position the cluster where socks and shoe seams will not constantly press. Sessions are short and pain is brief but sharp near the bone. For showing it off, roll your jeans or wear sandals. Pair the ankle with canvas low top sneakers for casual looks.
10. Fine Line Willow with Moon on the Inner Bicep
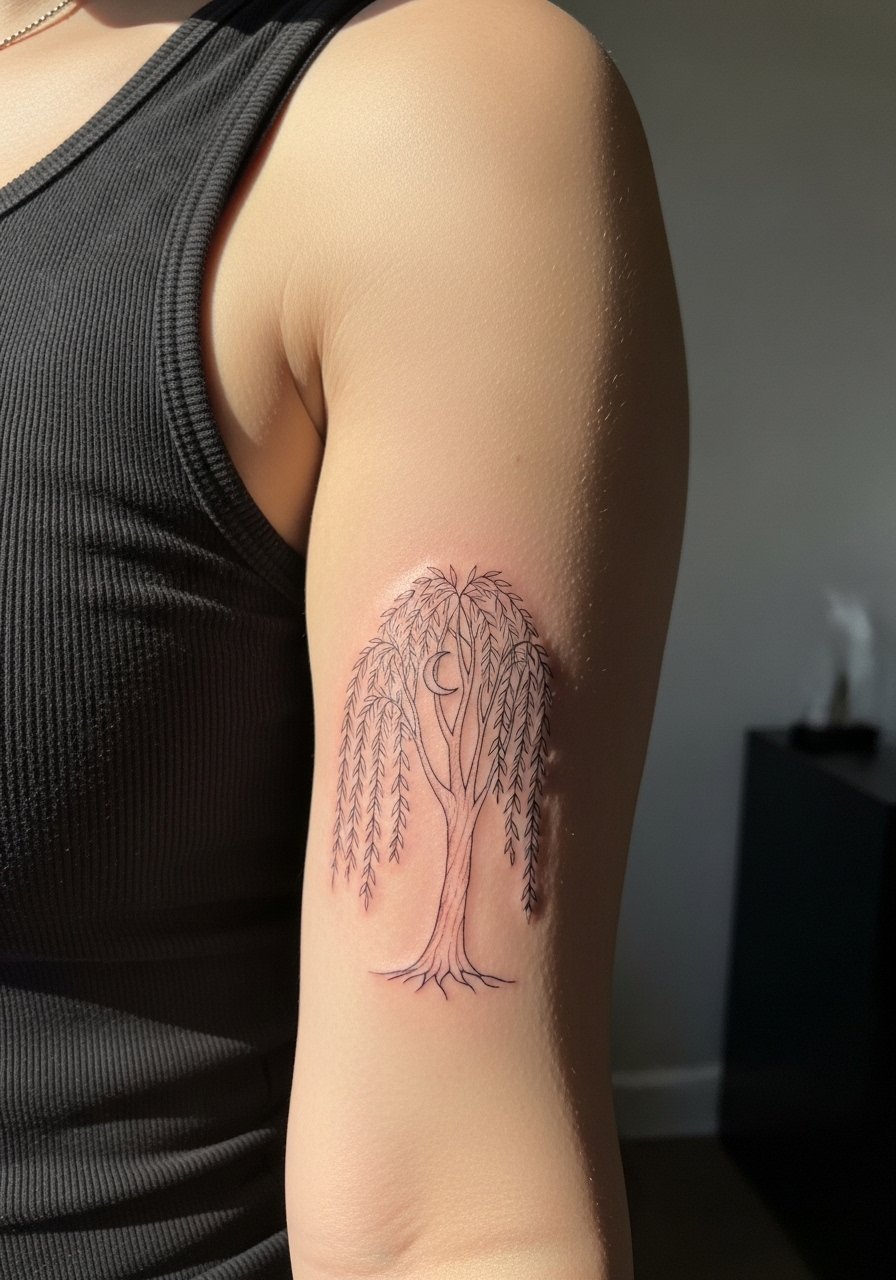
Inner bicep work sits in a soft skin pocket so fine line can look intimate and remain crisp if spaced correctly. The common aging problem is compressing lines into the fold, which blurs after movement. Ask for slightly larger spacing around the moon and a stronger anchor stroke along the trunk. Pain is moderate and the arm fatigue can set in during longer sessions. Wear a loose tank so the artist can access the area without shifting fabric.
11. Traditional Willow Outline on the Outer Forearm
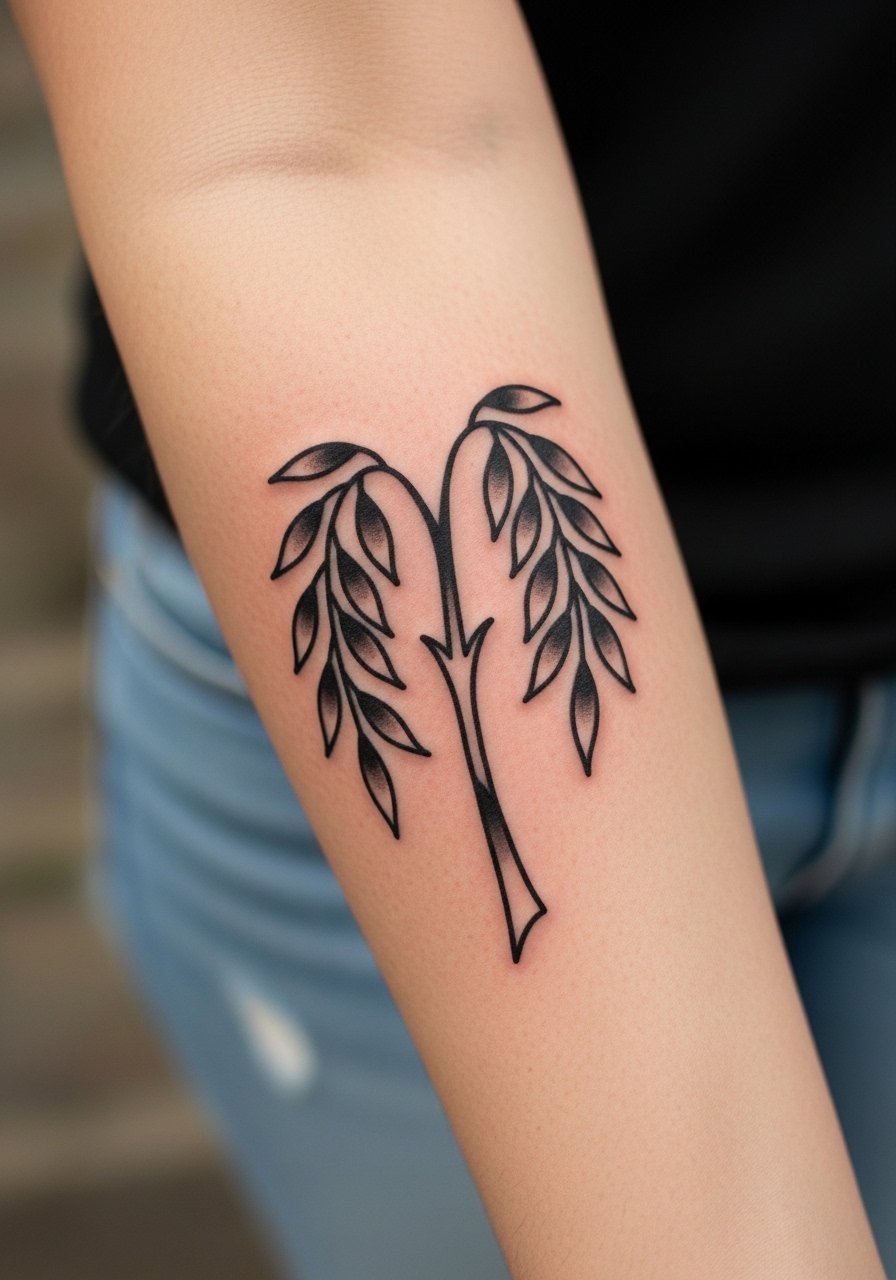
Traditional outlines are a safer bet for longevity because saturated linework survives more of the wear that fine detail does. A mistake here is adding tiny interior shading that will muddy with time. Request clean bold keys and leave interior negative space to age gracefully. Sessions often finish in one sitting under two hours. For a show-off look, roll sleeves and add a thin leather wrap bracelet on the opposite arm for balance.
12. Ignorant-Style Sketchy Willow on the Shoulder
Ignorant style embraces raw strokes and uneven linework. The key is letting it read loose without becoming accidental. Tell your artist you want deliberate scribbles and a few heavy anchor marks so the silhouette keeps presence. Shoulder sessions are comfortable for most people and often run two hours. Pair the finished piece with a sleeveless tee in olive or a sleeveless halter tank for easy summer wear.
13. Micro-Realism Droplet Branch on the Inner Wrist
Micro-realism needs deliberate negative space and slightly larger droplets than people request. Ask your artist for 20 to 30 percent larger droplet margins so the shapes survive the first two years. Wrist pieces heal quickly but suffer from frequent washing and friction. For session wear bring a sleeveless top and leave jewelry off. After it heals, wear a dainty chain on the other wrist rather than stacking metal directly next to the tattoo.
14. Stylized Willow Mandala for the Spine
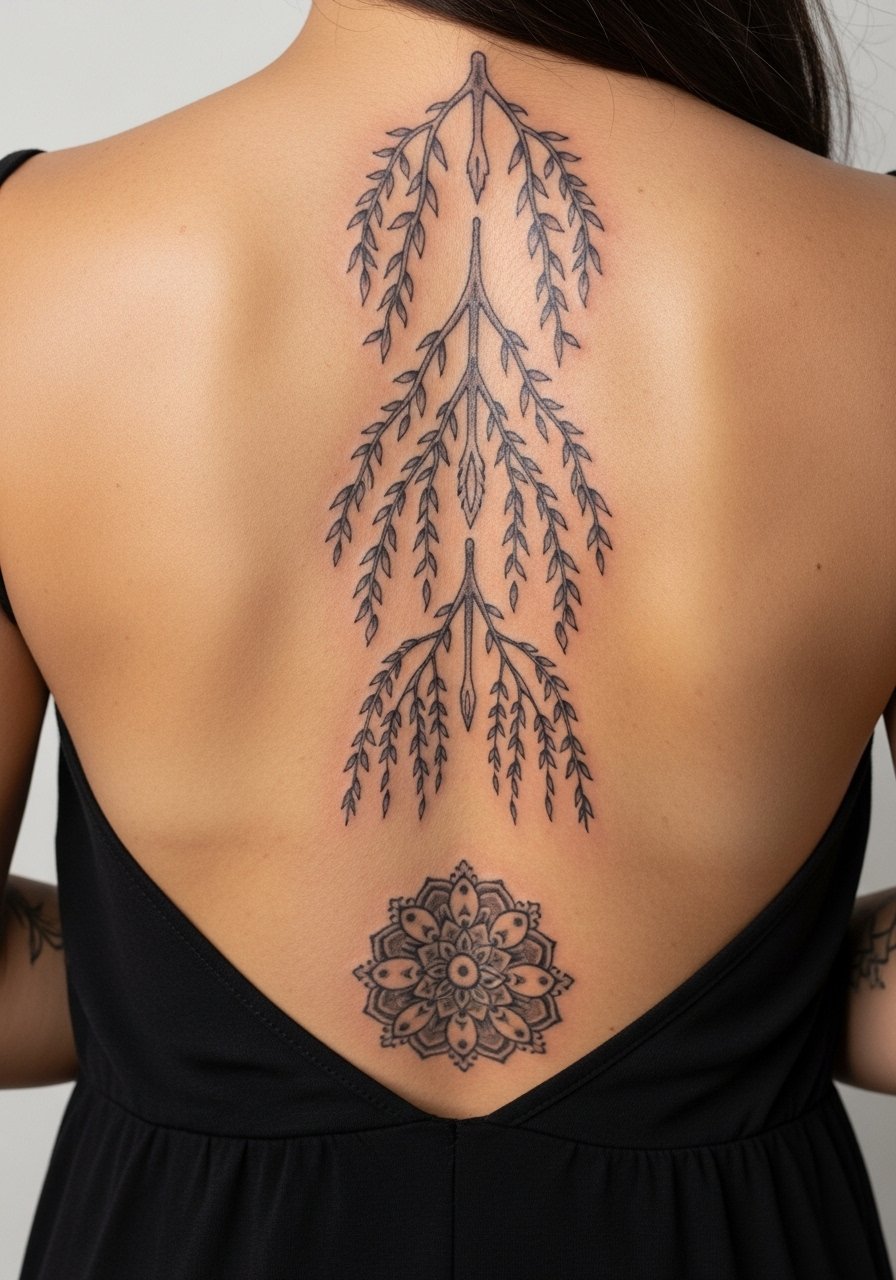
Spine work benefits from symmetry and careful spacing. The mistake is compressing dense mandala detail where the spine moves most. Ask for radial spacing that widens slightly toward the edges and for bolder outer lines. Spine sessions are longer and sensations vary by rib contact. For showing it off choose open-back garments and a fitted bandeau or cream strapless top to frame the center line.
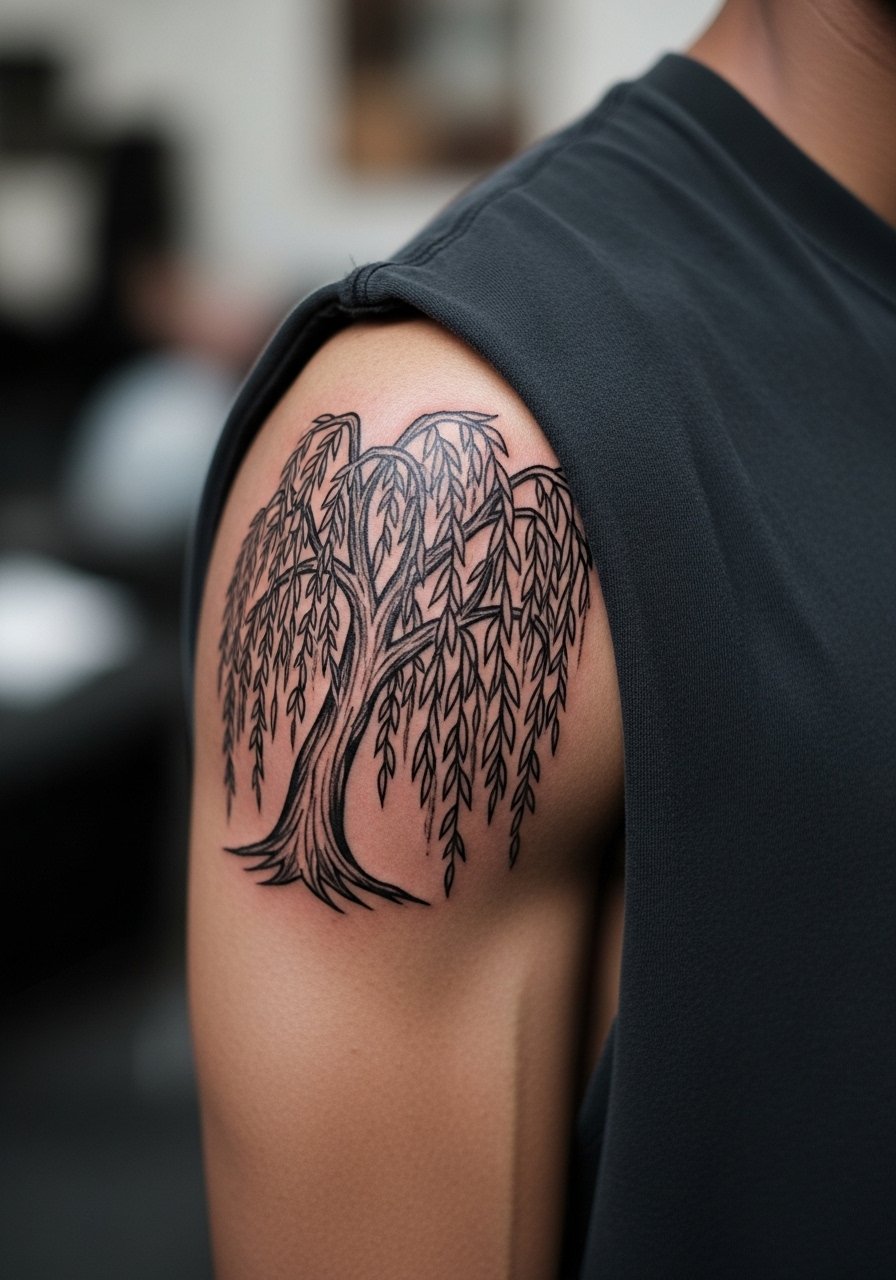
15. Rooted Knot Willow on the Upper Arm
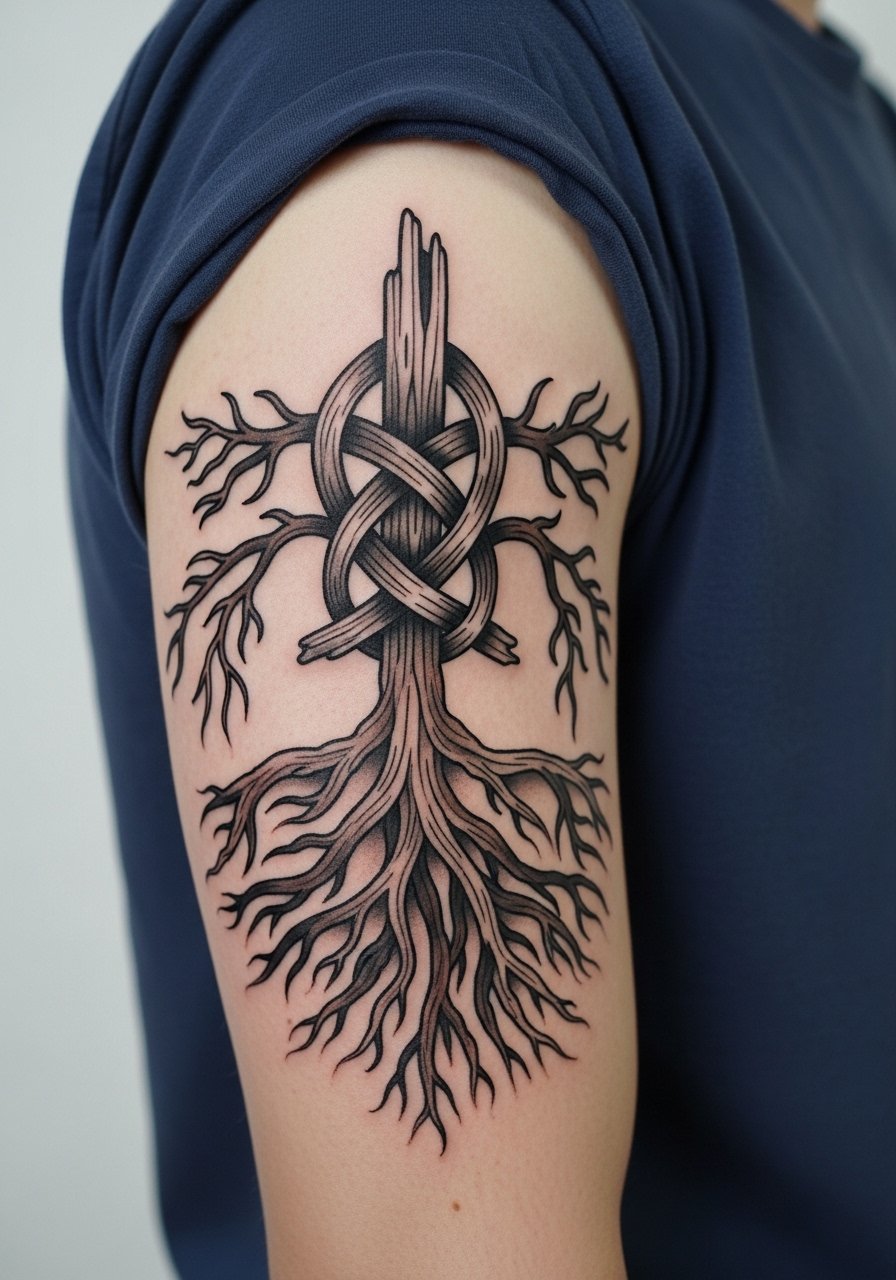
Upper arm pieces handle heavier saturation well and are forgiving for future cover or sleeve work. A common misstep is tight cross-hatching within root areas that can gray out unevenly. Request clear hierarchy between line, fill, and shadow so the roots read at a glance. Sessions are comfortable and usually multiple passes for shading. Wear a short-sleeve shirt you can roll up easily for access during the appointment.
16. Minimal Leaf Ring for a Finger
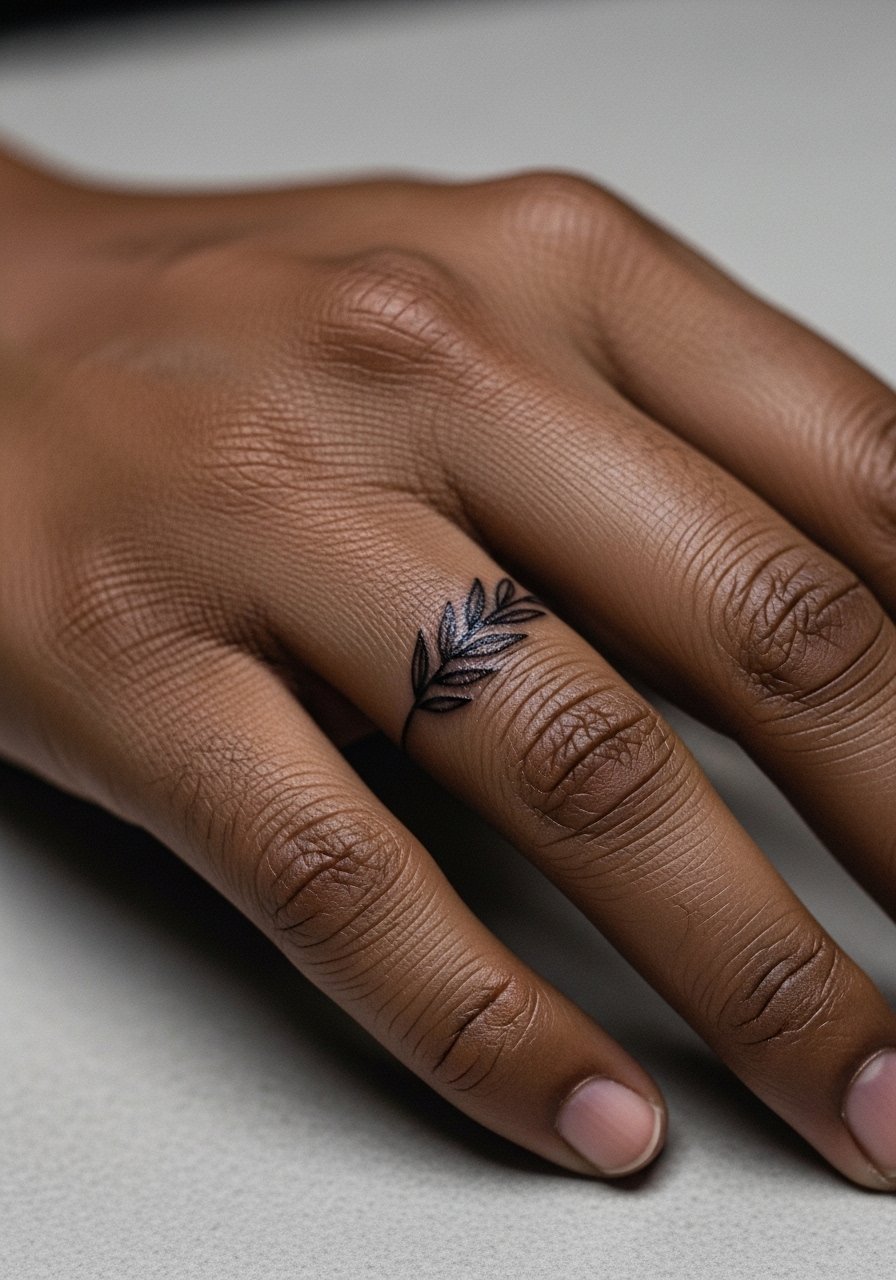
Finger tattoos face heavy wear and rapid fading. The typical mistake is dense detail in a tiny circumference. Ask for a minimal band with slight breaks so the ink has room to shift without collapsing. Expect touch-up within a year. Keep in mind some workplaces still react to visible hand ink. For a subtle presentation choose thin, open spacing over packed detail.
17. Willow Canopy Sleeve Start on the Forearm
If you plan a sleeve, start with stronger trunks and leave negative space for future elements. The common regret is overfilling early, which makes later additions fight for space. Forearm sleeves take multiple long sessions and feel like gradual pressure with intermittent sharp spots near the wrist. To stage sessions comfortably wear a loose long-sleeve button-up you can roll, such as a sage green button down.
18. Watercolor Branch on the Inner Thigh
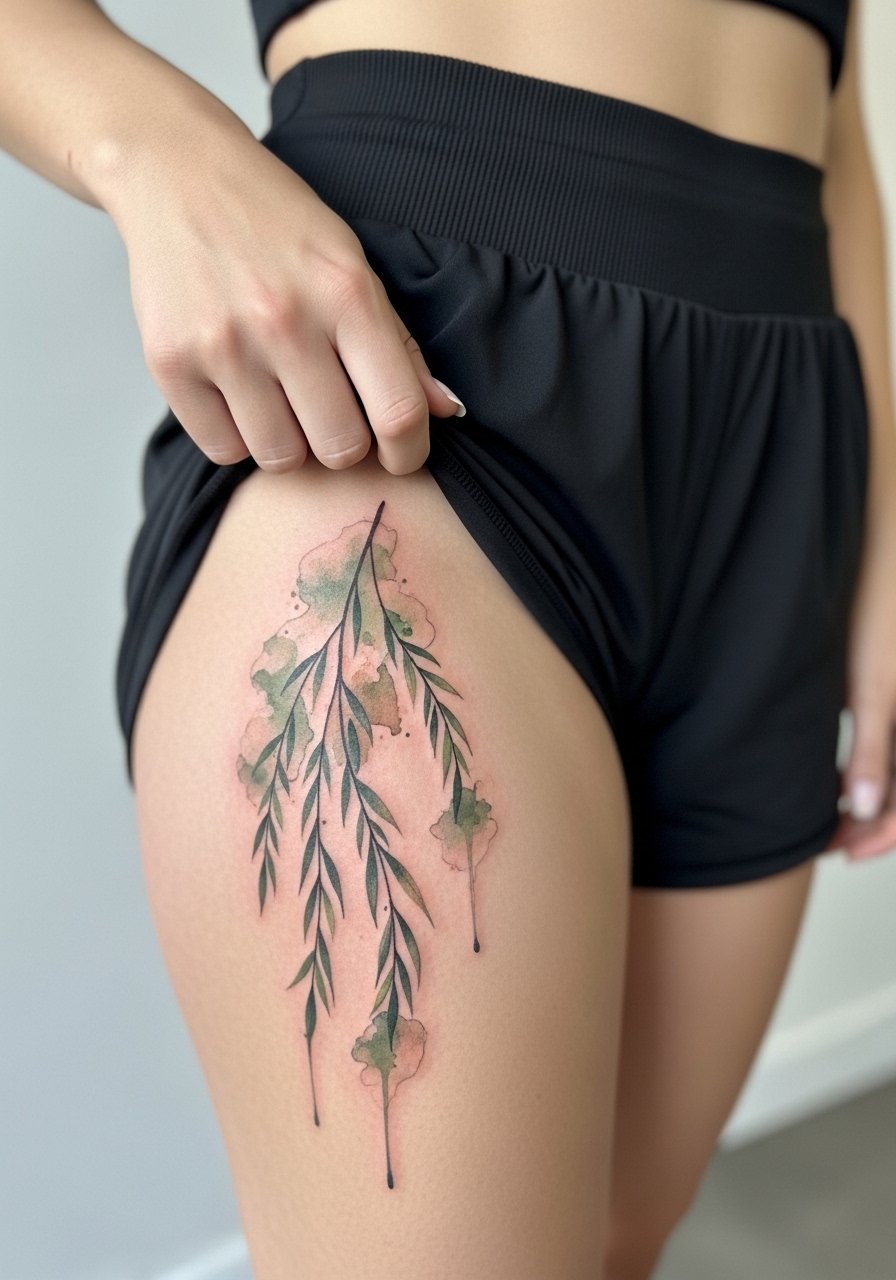
Inner thigh is intimate and good for bigger color washes that you do not want constantly exposed to sun. The error is pushing too many colors without anchor points, which can make the wash read muddy over time. Sessions often need two sittings. For the appointment wear loose shorts or a high waisted athletic shorts so the artist can access the area without excess fabric bunching.
19. Willow Roots Knuckle Micro on the Hand Edge
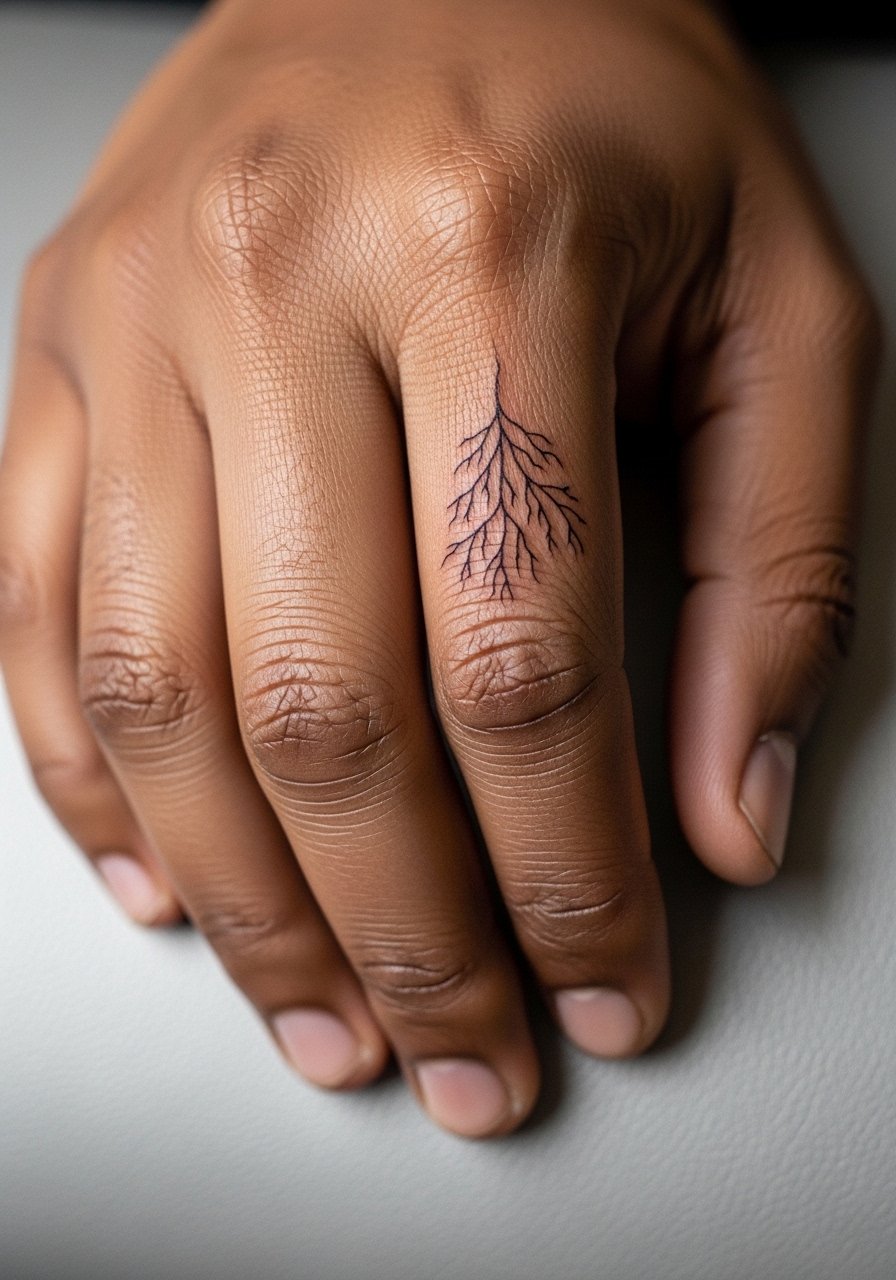
Hand-edge micro work is visible and vulnerable to wear. The usual mistake is placing tiny elements too close to creases that flex constantly. Ask for slightly thicker anchor lines and place the roots away from the highest flex zones. Expect frequent touch-ups. Also consider career implications since some workplaces still frown on visible hand tattoos.
20. Stylized Willow in Black and Gray on the Thigh
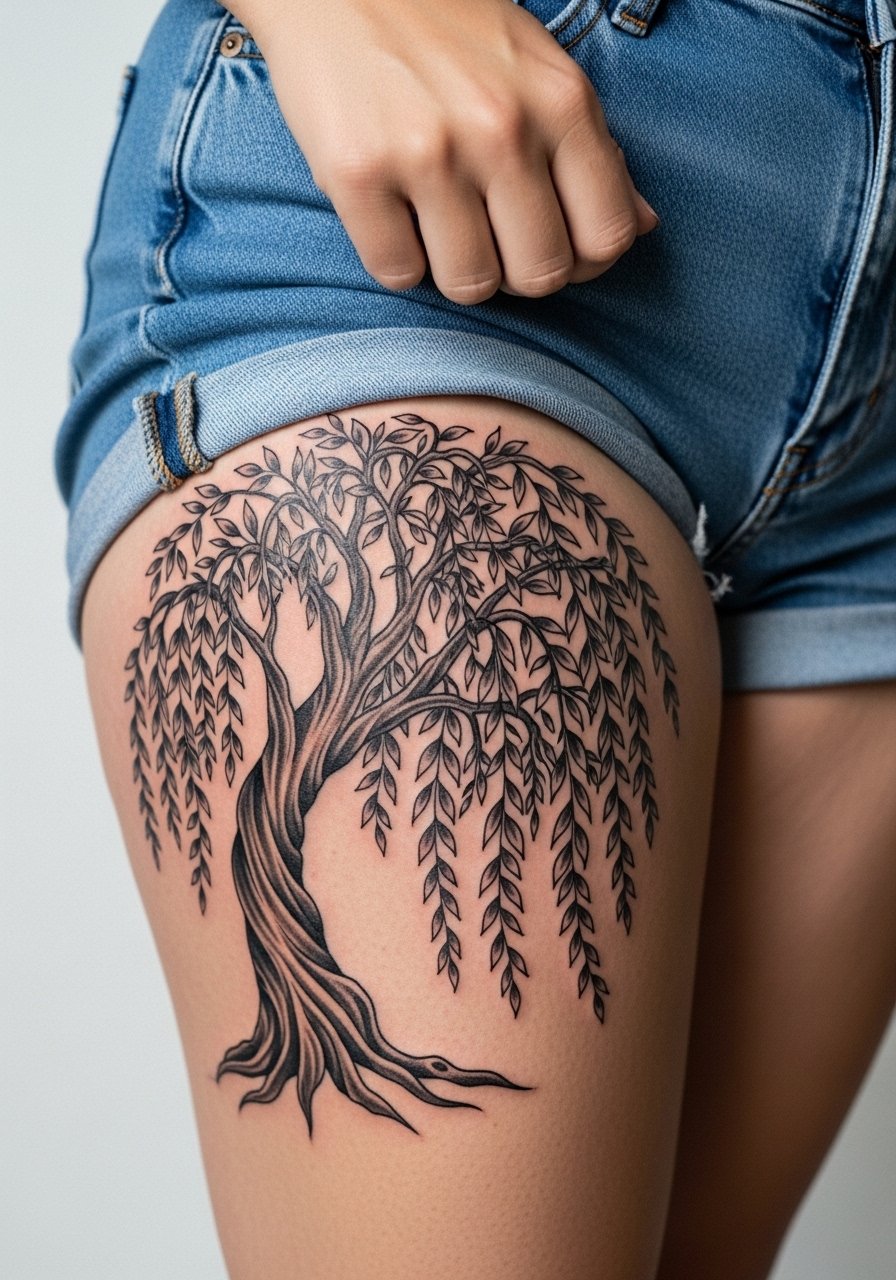
Thigh placement tolerates size and detail well, but weight changes can alter proportions. The common oversight is designing a tight central trunk that stretches oddly with body changes. Ask your artist to distribute branches and roots so the design breathes across a wider area. Sessions are comfortable for longer periods. For show-off looks choose high-waisted skirts or shorts and bring a loose flowy skirt for aftercare-friendly wear.
21. Single Needle Willow Accent Behind the Ear
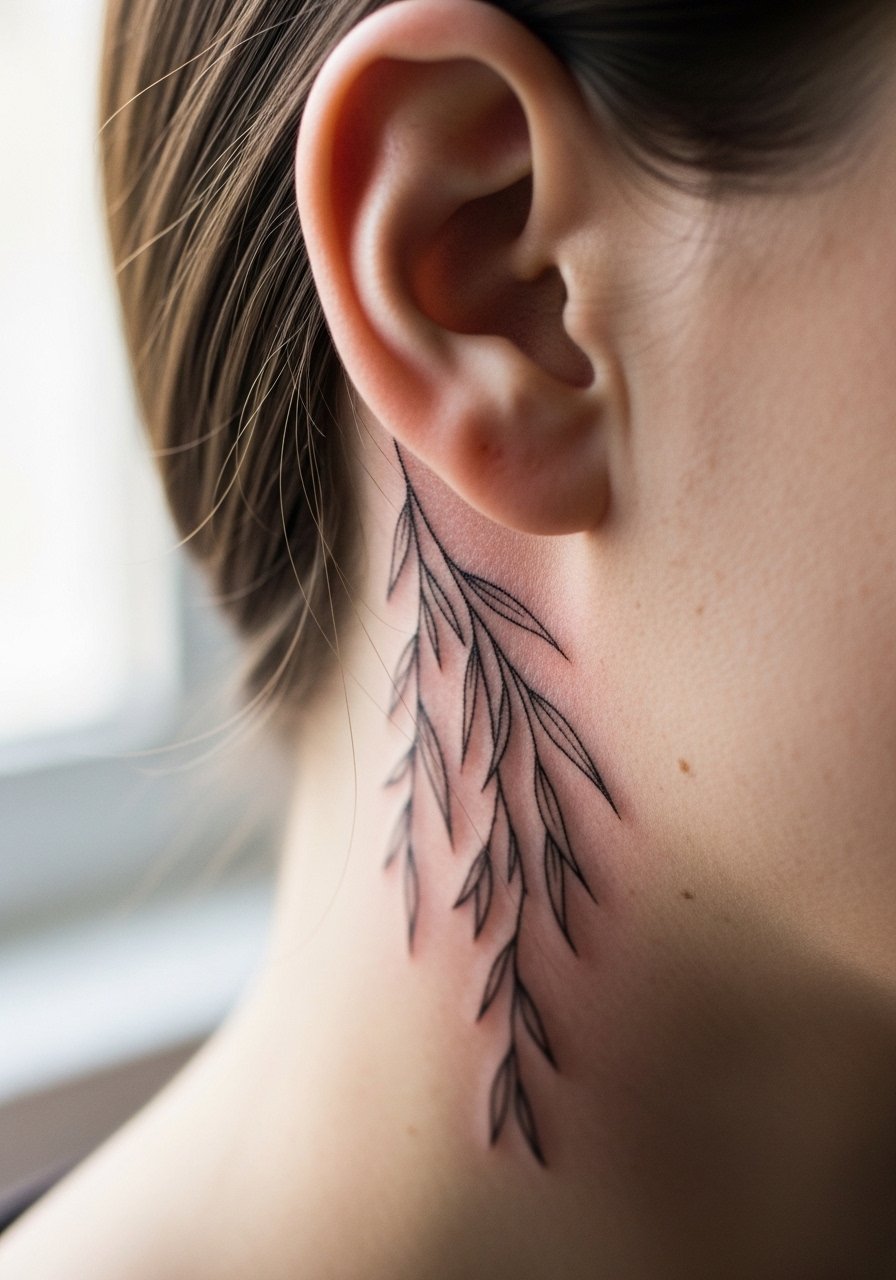
Behind-the-ear placements need precise scaling. Too many tiny leaves disappear under hair and movement. Ask for crisp single lines and limit detail to prevent loss. Pain is minor but the area is sensitive. For discovery of artists who do subtle neck work, search hashtags like #finelinewillow and check Tattoodo for local portfolios.
22. Willow with Moon Phases on the Upper Back
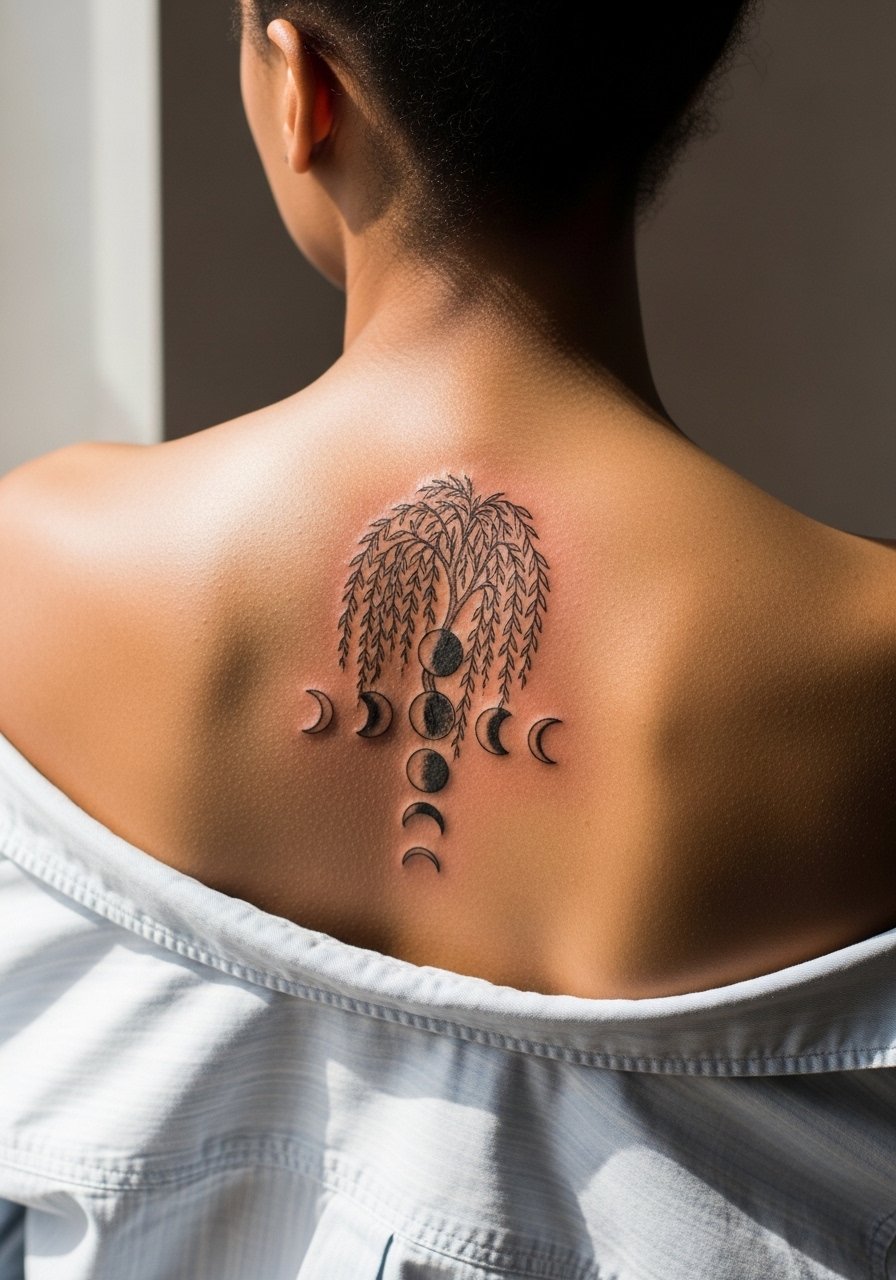
Pairing lunar phases adds narrative and spacing that can help timing across a chest or back. Avoid cramming small moons into tight arcs where shading can merge. Ask for clear spacing and a slightly heavier moon outline so the symbols remain legible from a distance. Sessions may span several hours. For after sessions, choose tops with lower backs and a delicate layered delicate necklace if the composition sits near the collarbones.
23. Willow Roots as a Thigh Band
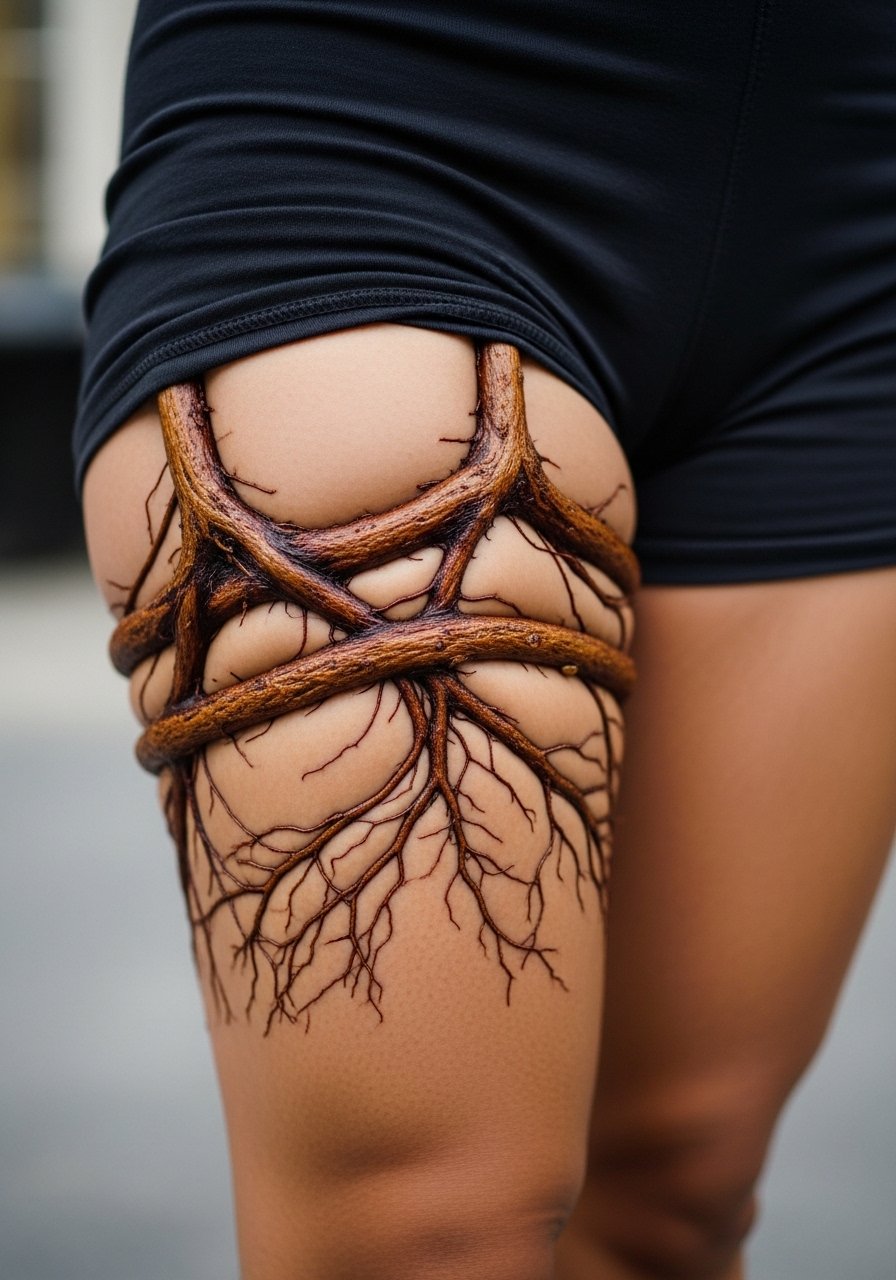
Bands around the thigh look intentional but can distort with weight fluctuation. The common error is placing the band too low where pants and waistlines rub. Design the band slightly higher and wider so it adapts as the body changes. Sessions are comfortable and may need two passes for consistent saturation. For the appointment, wear gym shorts women that allow the artist to lift fabric without exposure.
24. Dot-Work Willow Canopy on the Calf
Stipple shading builds texture but loses impact if dots are too dense. Ask for graduated dot density that leaves midtone space. Calf pieces handle this style well and wear evenly with minimal touch-up. Sessions are moderate and filling can feel like consistent tapping. For casual frames roll up bootcut jeans or wear cropped joggers so the dotted canopy shows.
25. Willow Knot Micro on the Sternum
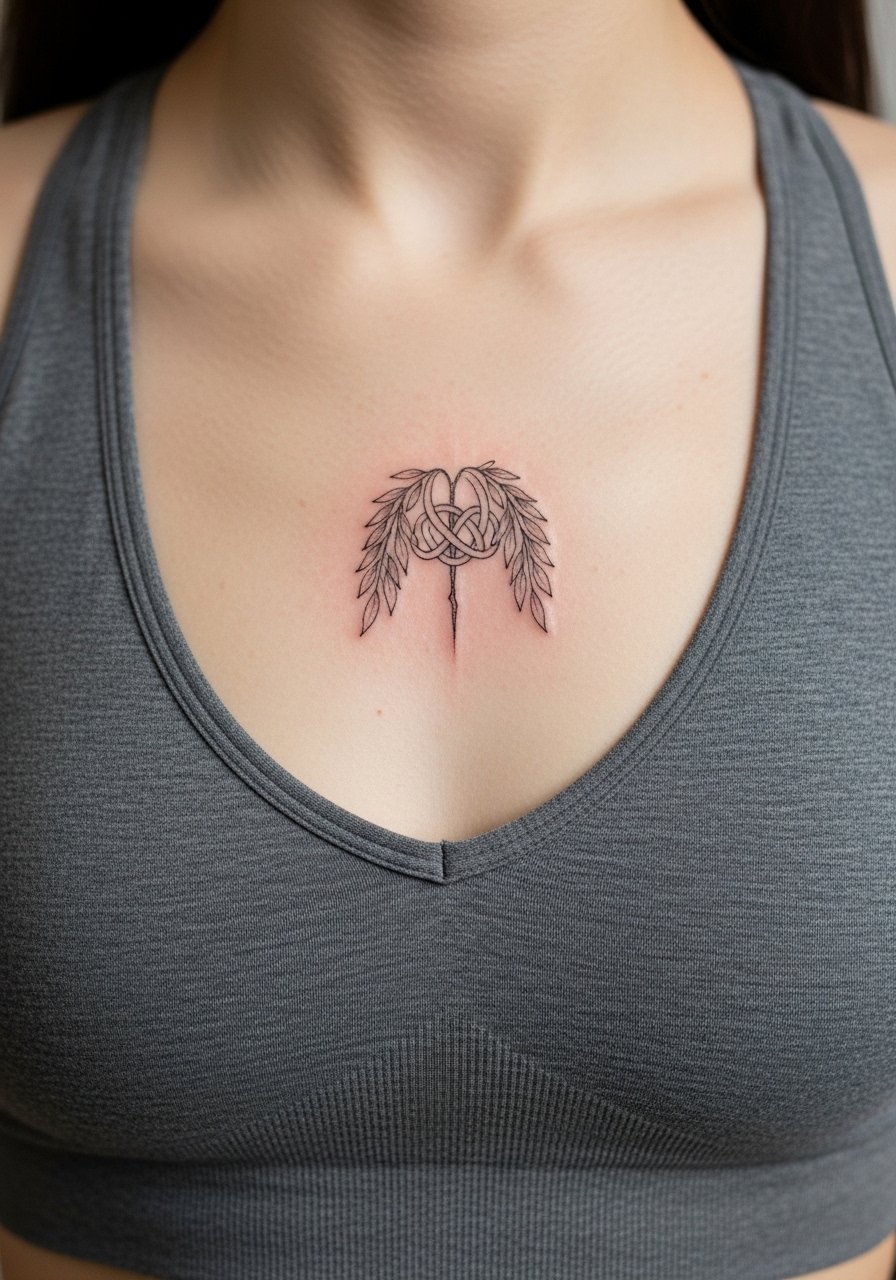
Sternum work is intimate and sensitive. The mistake is pushing very thin isolated lines where movement and pressure from clothing will fade them. Ask for slightly thicker anchor lines and avoid tiny isolated dots. Pain is significant for many people near the sternum but sessions often finish in manageable segments. Wear a fitted sports bra for the appointment and expect slower touch-up timelines if you sit on thin lines.
26. Hybrid Willow-Mandala on the Side Torso
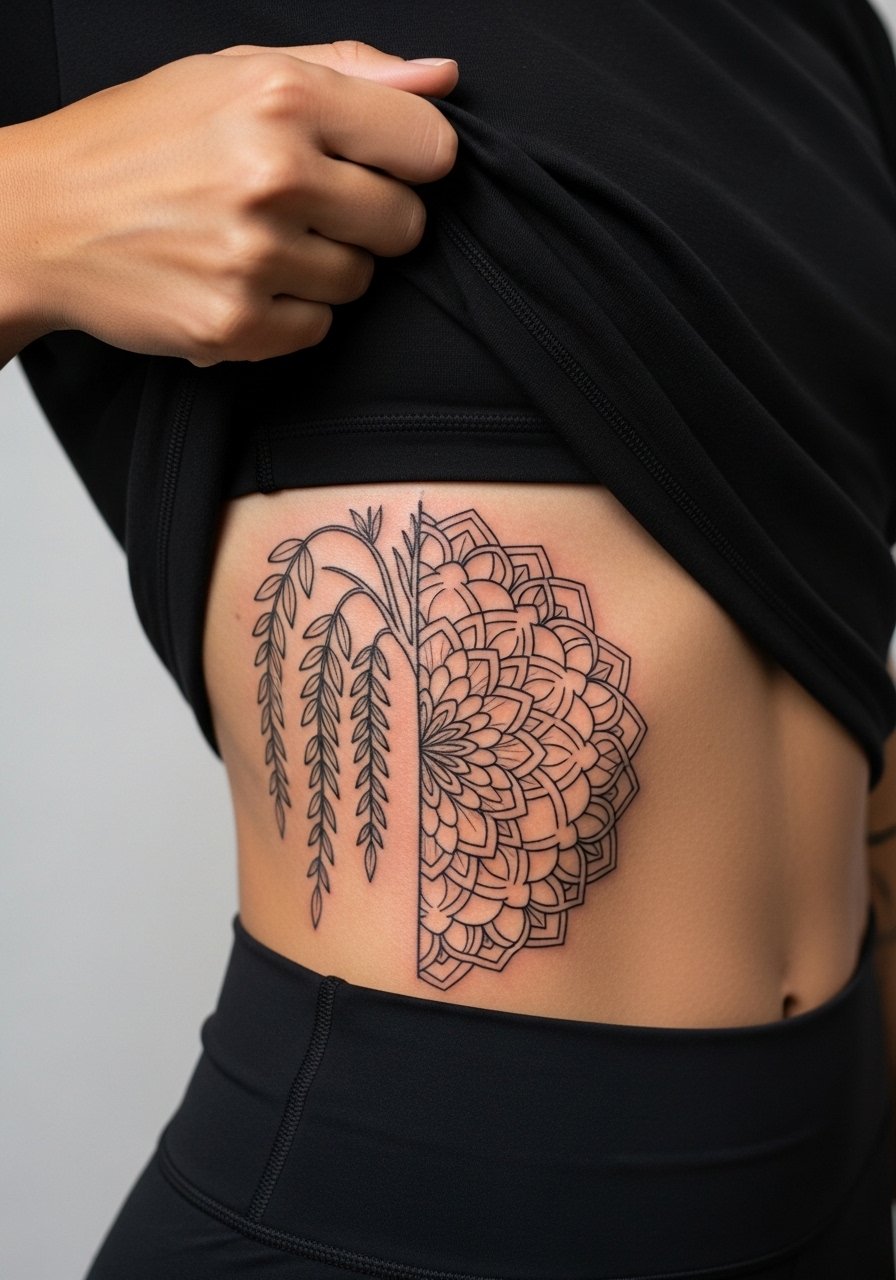
Combining mandala geometry with willow motifs creates meditative negative space, but crowded geometry collapses over time. Ask your artist to increase spacing between concentric patterns and to use the willow branches to punctuate, not fill, the circles. Side torso pieces need careful session planning and feel variable based on breathing. For session comfort choose a cropped top you can lift slightly without exposing more than the tattoo area.
27. Knotted Willow Roots on the Lower Back
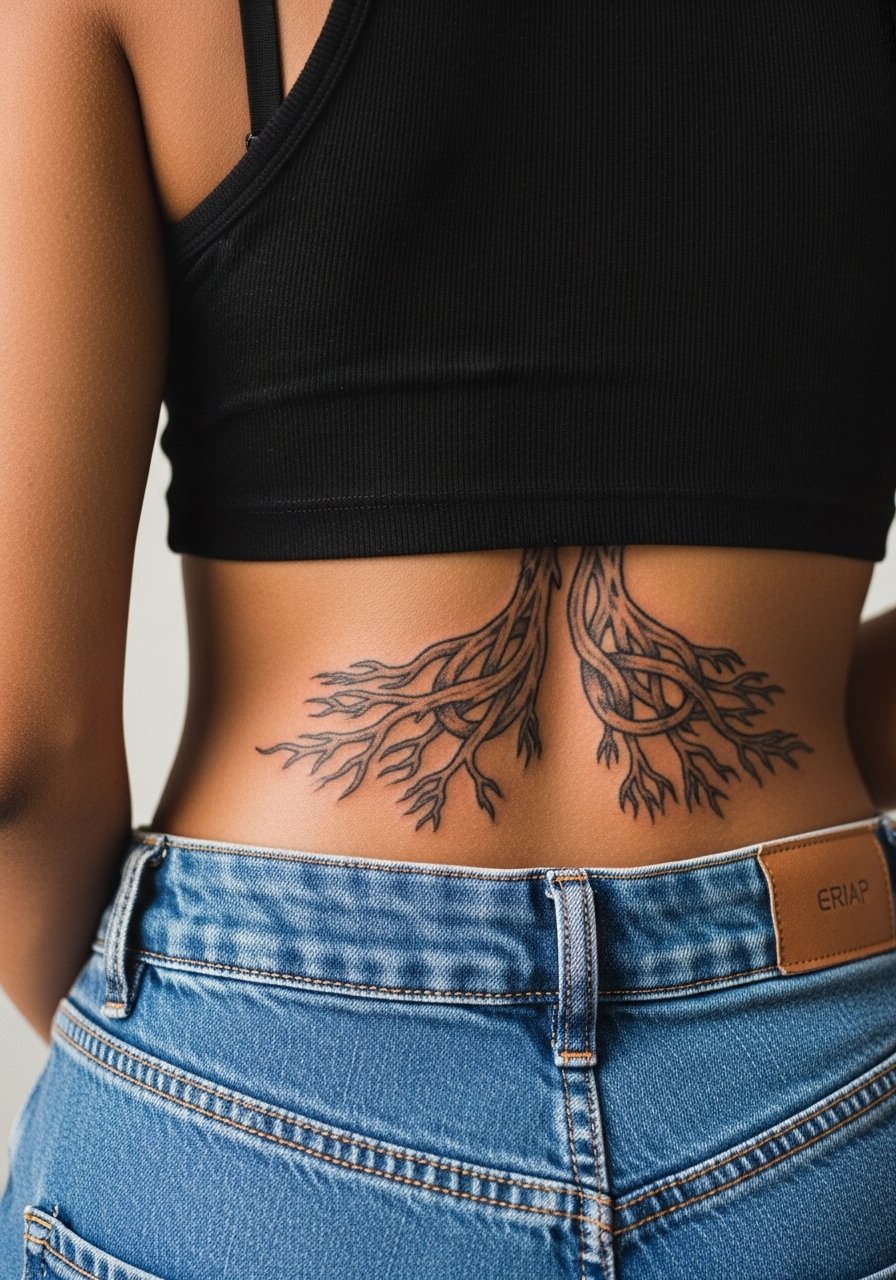
Lower back pieces work well as anchor points for future sleeves or hip work, but heavy central knots can sag visually if the design sits on stretch-prone zones. Ask for tapered roots that widen outward and for bolder outer lines to maintain shape. Sessions are usually comfortable. For modesty at the studio wear a tank top with high-waisted pants that the artist can lower slightly for targeted access.
Frequently Asked Questions
Q: Do fine line willow branches fade faster on wrists and hands?
A: Yes, they tend to fade faster in high-friction zones like wrists and hands. The fix is asking for slightly stronger anchor lines, planning a touch-up at year one to two, and protecting the area during the first weeks from soaps and constant rubbing.
Q: How should I choose between watercolor and blackwork for a shoulder willow?
A: Watercolor looks painterly on the shoulder but needs careful sun protection to keep color. Blackwork gives longevity and contrast. If you want both, ask for darker anchors inside the watercolor so the composition keeps structure as pigments soften.
Q: Will a thigh willow stretch weirdly if I gain weight?
A: It depends on where you place it. Centralized, tight trunks may distort with change. If you expect fluctuation, ask the artist to design broader distributions and avoid placing key focal lines exactly over the most elastic zones.
Q: Are there healing debates I should know about for willow tattoos?
A: Yes. One camp favors protective films like Saniderm for a sealed quick heal. The other camp worries about trapped bacteria and prefers open, dry healing with light ointment. Both approaches have valid points. Decide with your artist based on your skin type and the style's saturation.
Q: How can I find artists who specialize in willow tree linework without naming specific shops?
A: Use discovery pathways like #willowtreetattoo and #finelinewillow on Instagram, filter Tattoodo by city and the keyword "willow tree," and check Booksy for guest-spot alerts. Reddit forums and local convention portfolios also show who is regularly working in the style.
