
Fine line work and saturated traditional color both look great above the elbow, but they age differently than forearm pieces. What looks crisp on a fresh photo can soften in three to five years if the spacing and saturation are wrong. These 21 traditional above elbow tattoo ideas focus on what holds up, what to ask your artist during consultation, and small wardrobe choices that help you show the work off from day one.
1. Classic American Rose on the Upper Arm
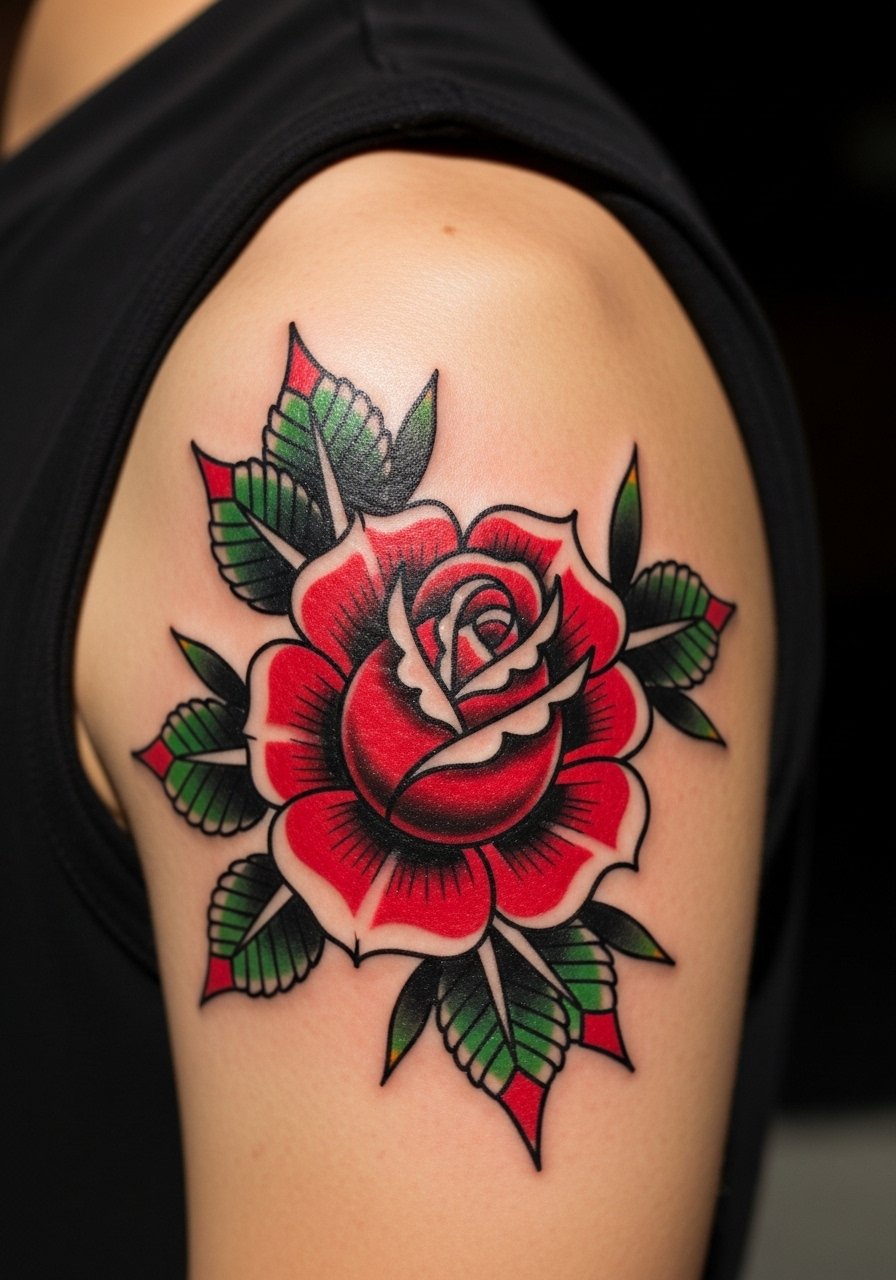
A saturated American rose reads like a blueprint for durability. I recommend this when you want color that will age into a clear silhouette rather than a soft smudge. Tell your artist to keep petals slightly open and to favor heavier linework at the outer edges so the design keeps contrast at year five. The upper arm is a forgiving spot for pain, usually a two or three out of ten, and a single session can often finish a mid-sized rose in under two hours. Common mistakes are shrinking the bloom too small or asking for ultra-fine inner lines that disappear over time. For showing it off, pair the piece with a rolled linen shirt or sleeveless tops that stop at the shoulder so the color sits in the negative space.
2. Bold Dagger Piercing a Banner on the Bicep
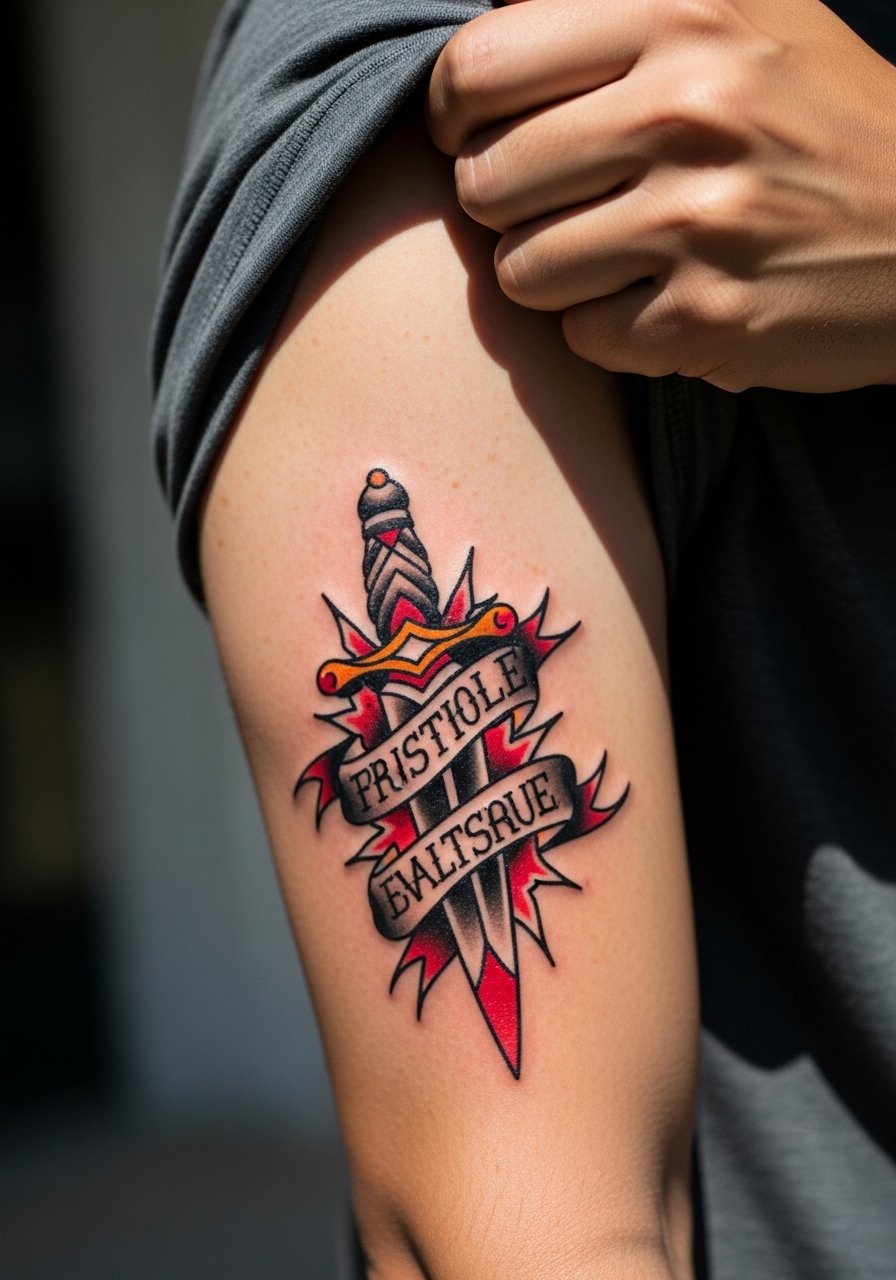
The dagger and banner is classic above the elbow because it follows the arm's curve and reads from across a room. Use this design when you want a narrative piece that still benefits from bold outlines and heavy saturation. In consultation, specify the banner's text weight so the script remains legible after settling. Expect moderate discomfort when the needle crosses muscle and tendon areas, and plan for a one to two hour session for a mid-sized composition. A common aging mistake is asking for tiny script inside the banner, which will blur. For evenings out, a short-sleeve button-down frames the bicep without hiding the central motif.
3. Sailor Ship Wrapped Around the Upper Arm
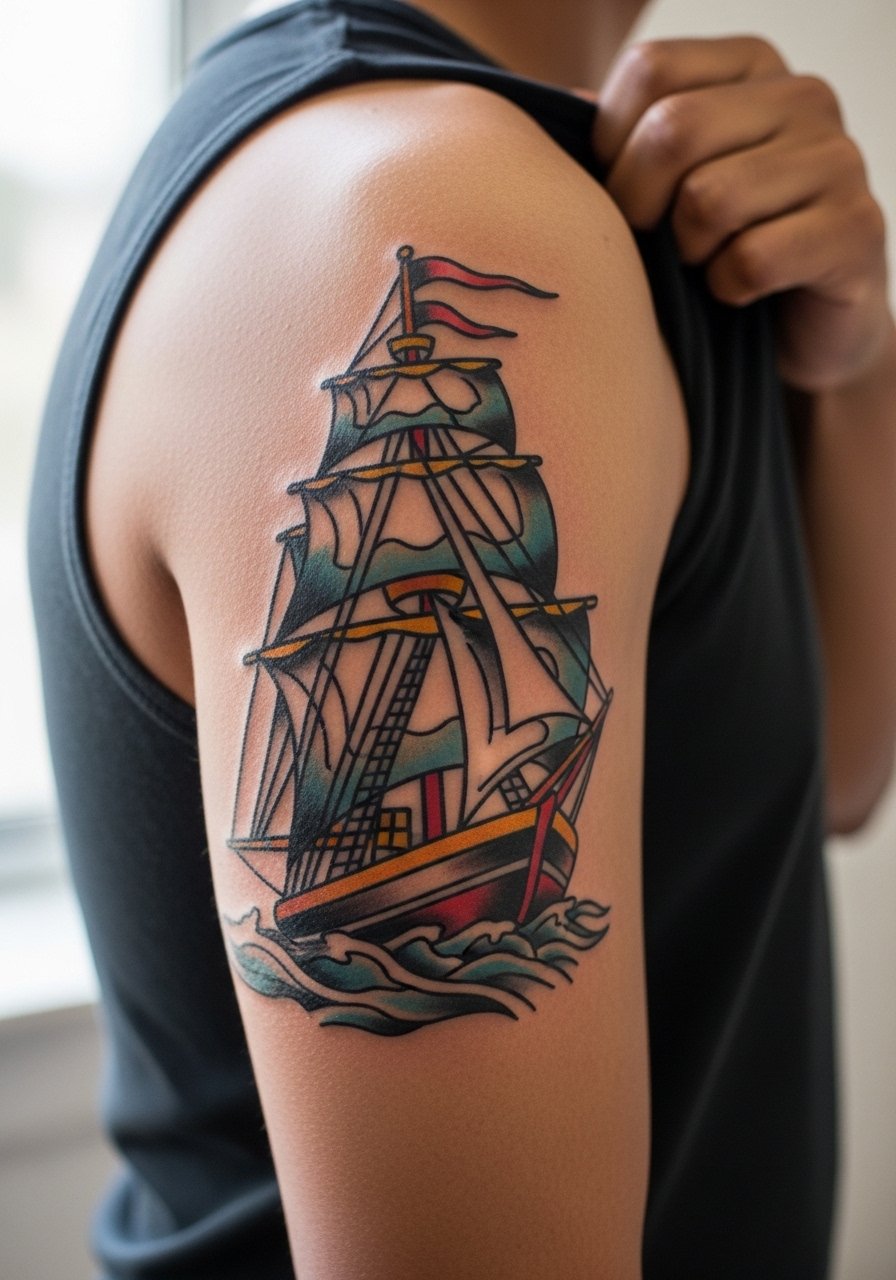
A wraparound ship makes the most of the above-elbow canvas and moves with the arm. I suggest this for anyone who wants a statement piece that can be expanded into a sleeve later. On consultation, ask the artist to plan where the mast will sit relative to muscle peaks so the mast line does not distort when you flex. The session runs longer than a single flash piece, often three to four hours depending on detail. Watch for the mistake of packing tiny waves and rope details too close together. Over time, bold sails and solid black shading keep the ship readable, while micro-detail often softens. For showing it off, wear a loose tank top so you can slide the strap and reveal the wrap without awkward tugging.
4. Panther Head on the Outer Bicep
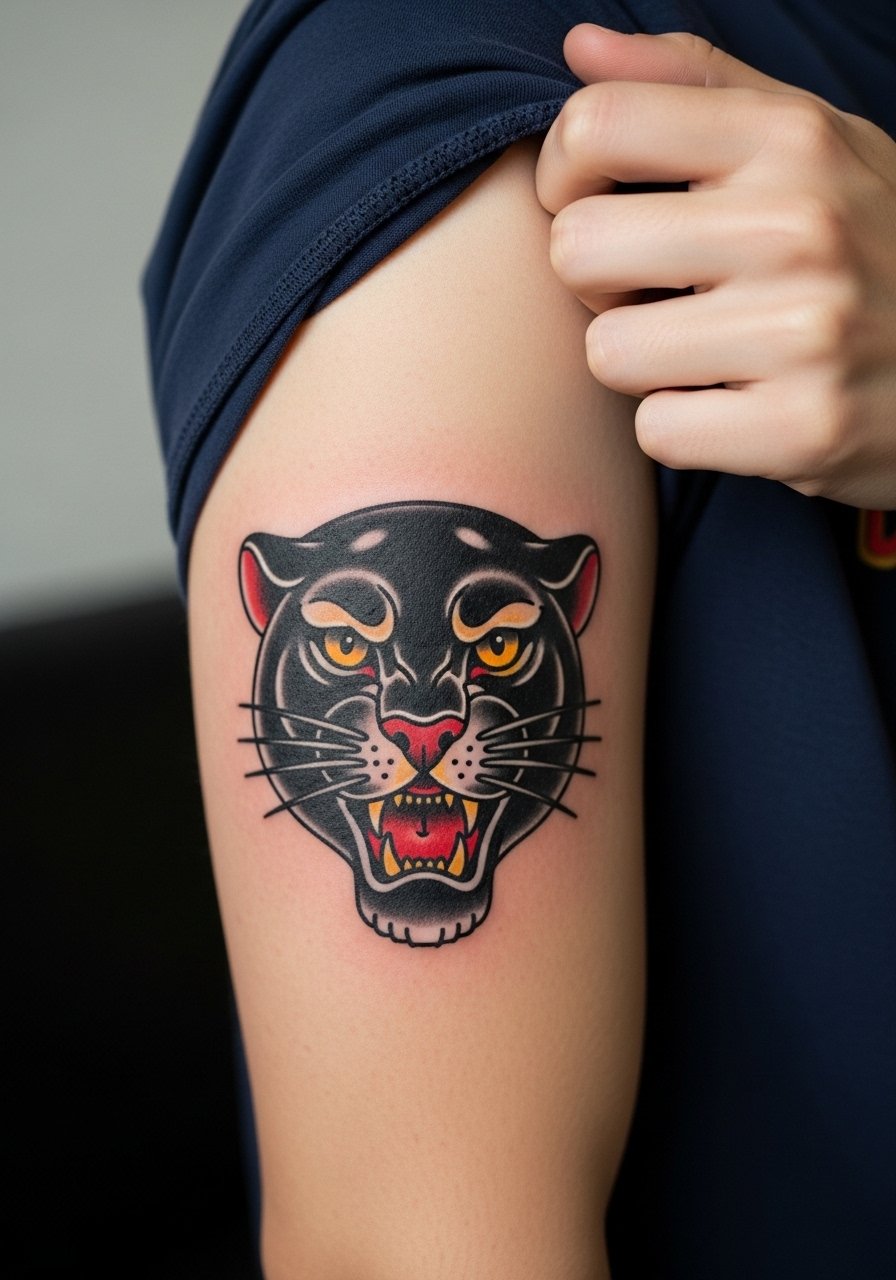
The panther is a visual punch that holds up because it relies on contrast and silhouette. This is my pick for someone who wants a classic motif that still reads at a distance. Tell your artist to prioritize solid black saturation and to keep the eye details bold rather than ultra-fine. Pain is low to moderate on the outer bicep, and a session under three hours often suffices for a medium-sized head. A common error is requesting tiny whisker strokes that blur into the black mass. For nights out, a rolled-up sleeve shirt places the head at the edge of visibility, letting it peek without dominating your outfit.
5. Nautical Star Near the Shoulder Cap
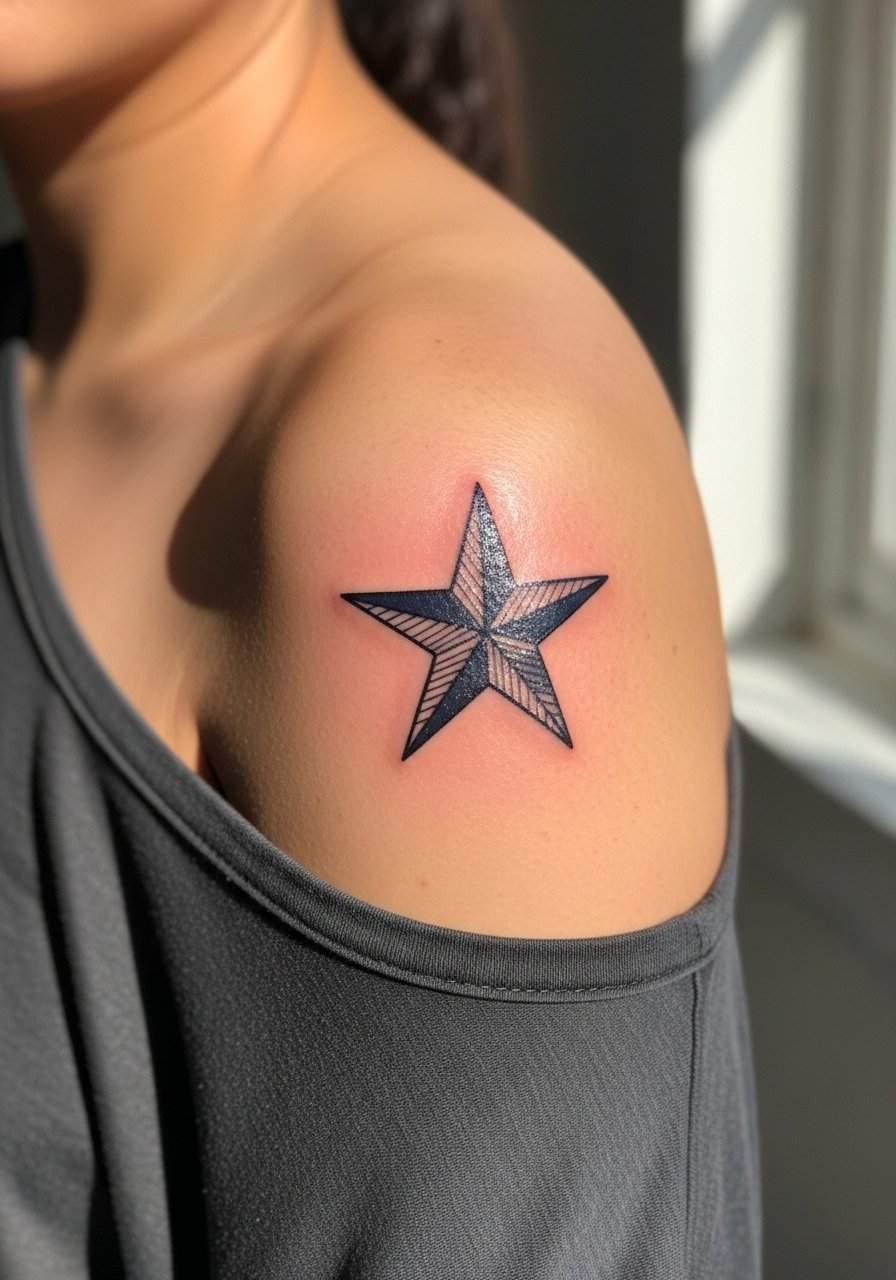
A nautical star is compact and ages well when kept bold. Choose this if you want a simple anchor point for future pieces or a tidy standalone mark. During consultation, say you want thicker outer points and clean negative-space wedges so the star keeps its crispness at two and five years. The shoulder cap is low on the pain scale and often done in a short session of under an hour. A frequent mistake is shrinking the star too small for the skin texture there. For relaxed show-off looks, an open-shoulder top frames the star without appearing deliberate.
6. Old-School Skull with Rose on the Inner Bicep
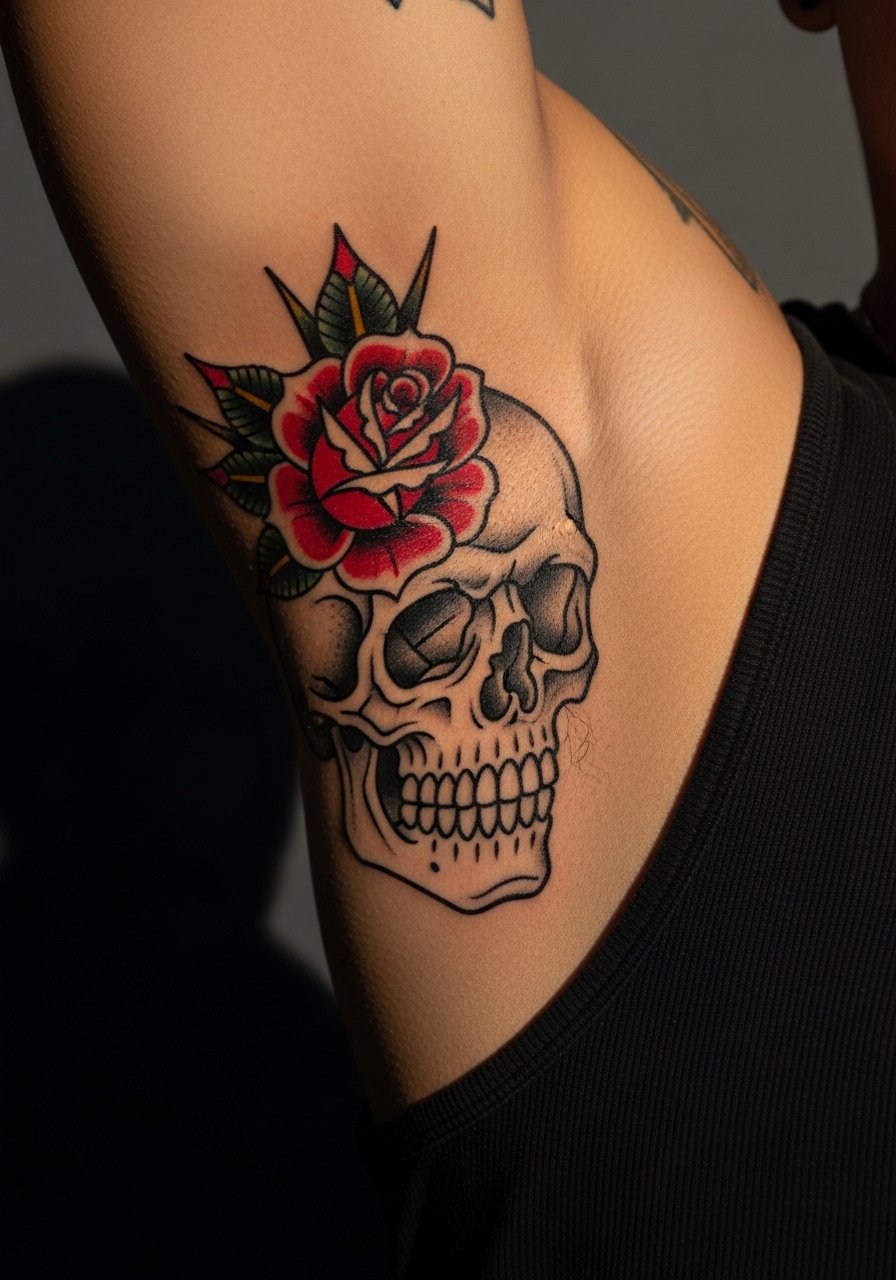
Fair warning, the inner bicep is more sensitive than the outer arm and reads as a five to seven on pain scales for many people. That sensitivity is why a skull and rose here carries a lot of personal weight. When you consult, ask the artist about spacing between the skull's teeth and the rose petals so fine areas do not merge later. Sessions for inner bicep pieces can be interrupted due to discomfort, so plan a shorter visit or breaks. The biggest mistake is asking for dense stipple shading too close to thin linework. For the session itself, wear a tank top you can lift so the artist has clean access while you stay modest and comfortable.
Pre-Session Essentials
The upper-arm and inner-bicep designs above need slightly different prep than forearm work, and a few small items smooth the chair day and the first week.
-
Stencil transfer paper kit. Lets you see exact placement on skin, which matters for wraparound ships and curved bicep pieces.
-
Topical numbing cream. Use as directed before inner bicep sessions if you are sensitive, and confirm with the artist first.
-
Thin protective film roll. Handy for keeping upper-arm tattoos clean under sleeves that rub during the first few days.
-
Fragrance free gentle body wash. Cleans the healing area without stripping saturation from traditional color.
-
Aquaphor healing ointment. Thin application in the first 48 hours protects bold black lines without clogging pores.
7. Script Banner Along the Inner Upper Arm
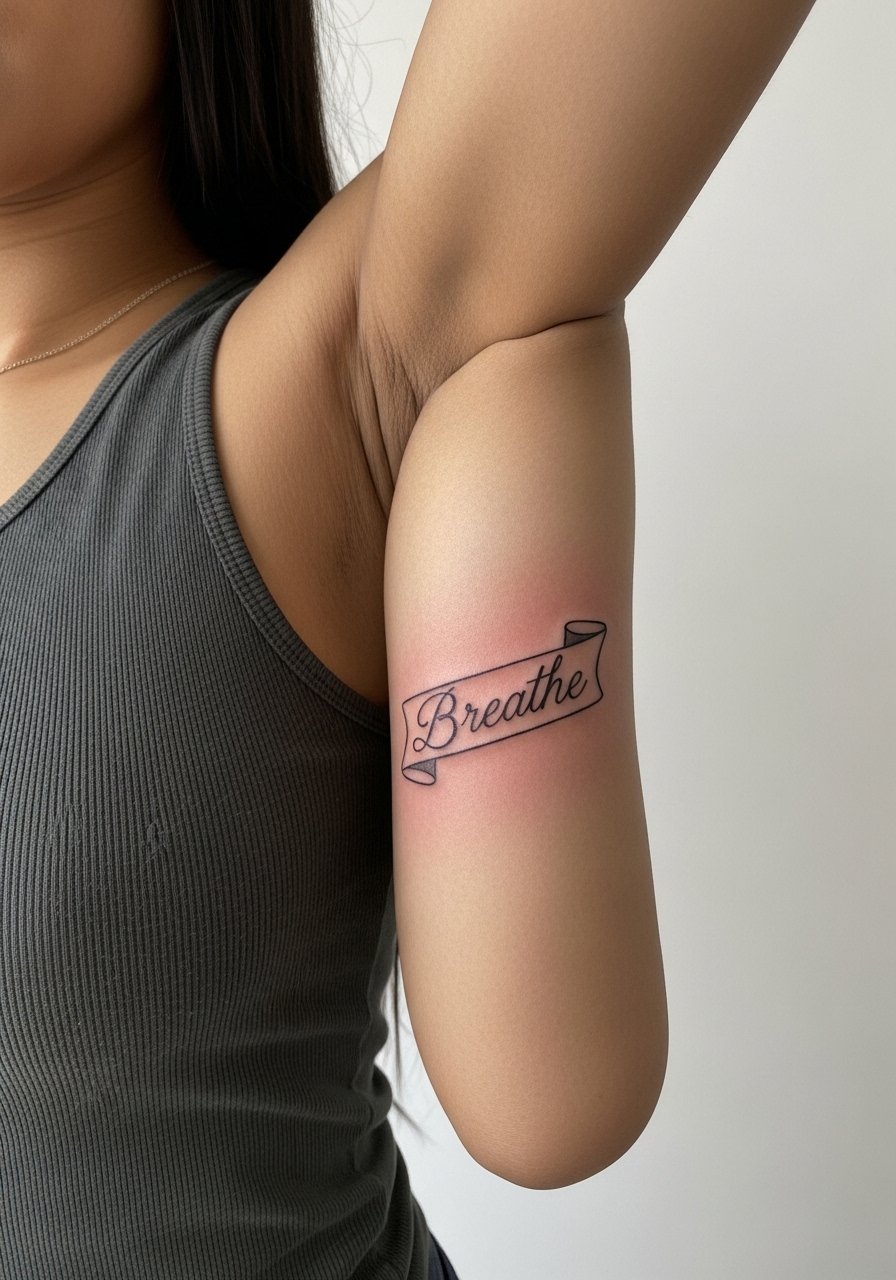
Script on the inner upper arm can be intimate and readable when sized correctly. I recommend this for names or short phrases you want close to the body. During consultation, show the artist examples of the exact script weight you like because tiny flourishes often disappear by year two. Expect a moderate pain level and a session that can finish in under ninety minutes for a two to three inch script. A common mistake is asking for very thin connecting strokes in a high-movement zone. For showing it off, a racerback tank or short-sleeve cut that exposes the inner arm keeps the script visible without baring too much.
8. Anchor with Rope Looping Around the Bicep
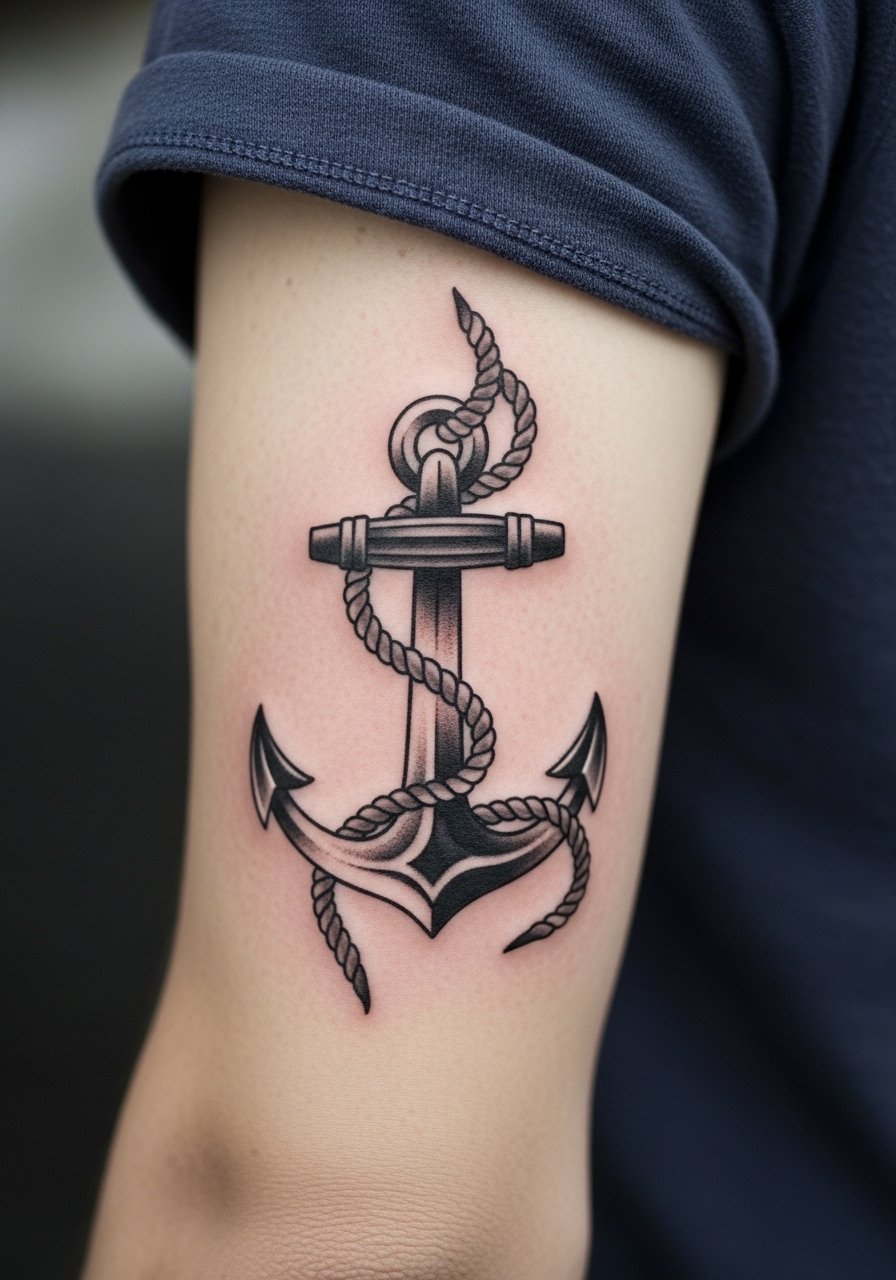
An anchor with a rope that loops around the bicep uses the arm's circumference for movement and flow. Choose this if you want a classic nautical look that also serves as a connector for future pieces. Tell your artist to keep the rope texture bold and the anchor's core area heavily saturated so the shape remains distinct as the skin ages. This placement is low on pain and typically handles a two-hour session well. Avoid requesting fine rope twine detail that competes with the anchor's silhouette. Wear a short-sleeve tee with sleeves you can roll to display the anchor casually.
9. Traditional Sparrow Pair Facing Each Other
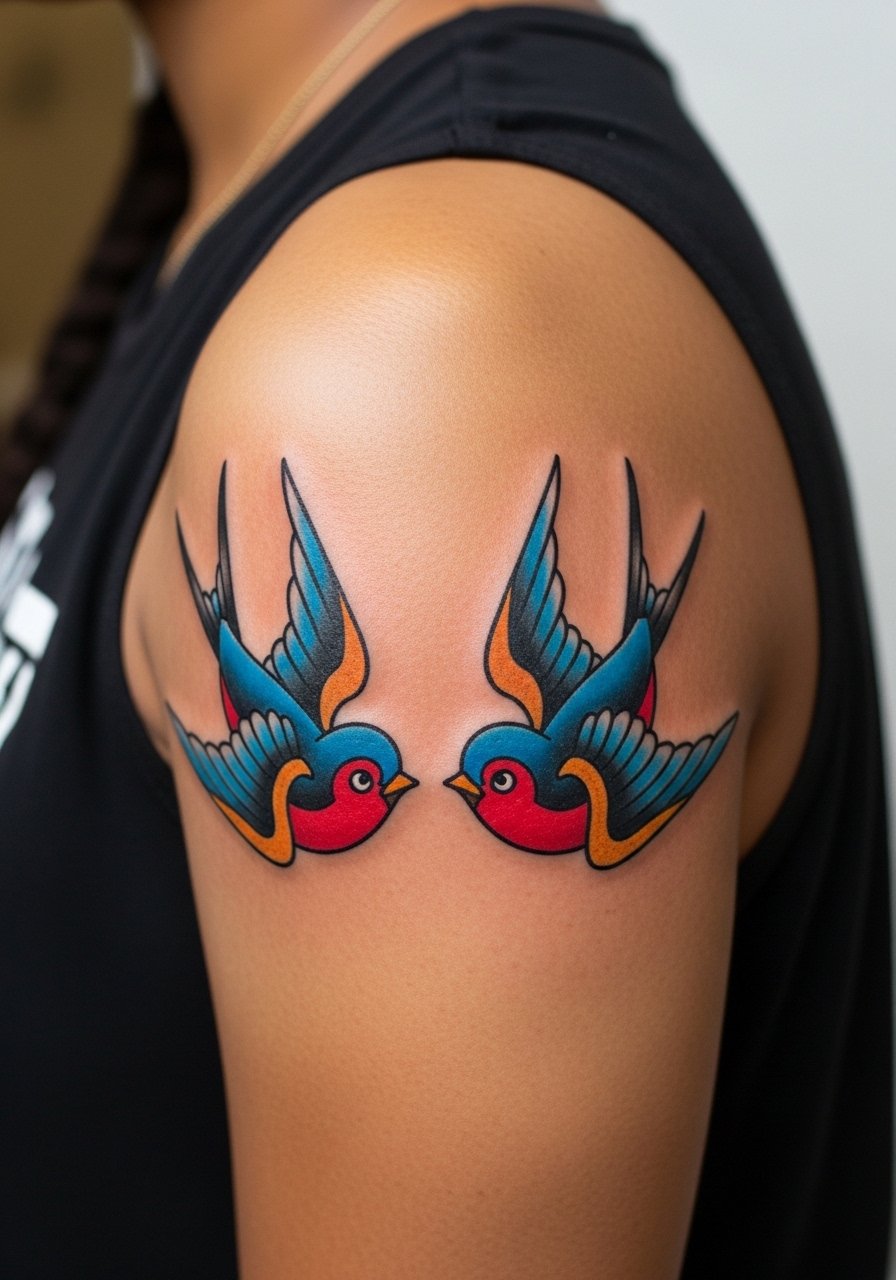
Paired sparrows look balanced on the upper arm and hold up because their shapes rely on clear contour and blocked color. Consider this when you want symmetry that can later tie into shoulder pieces or a sleeve. In consultation, ask where the birds will sit when your arm is relaxed so the faces do not end up on fold lines. Sessions for both birds may take two to three hours depending on color fill. The usual error is packing feathers with too much micro-detail that softens in a few years. For evening wear, a sleeveless blouse shows the pair without making the look feel overt.
10. Lighthouse on the Outer Upper Arm
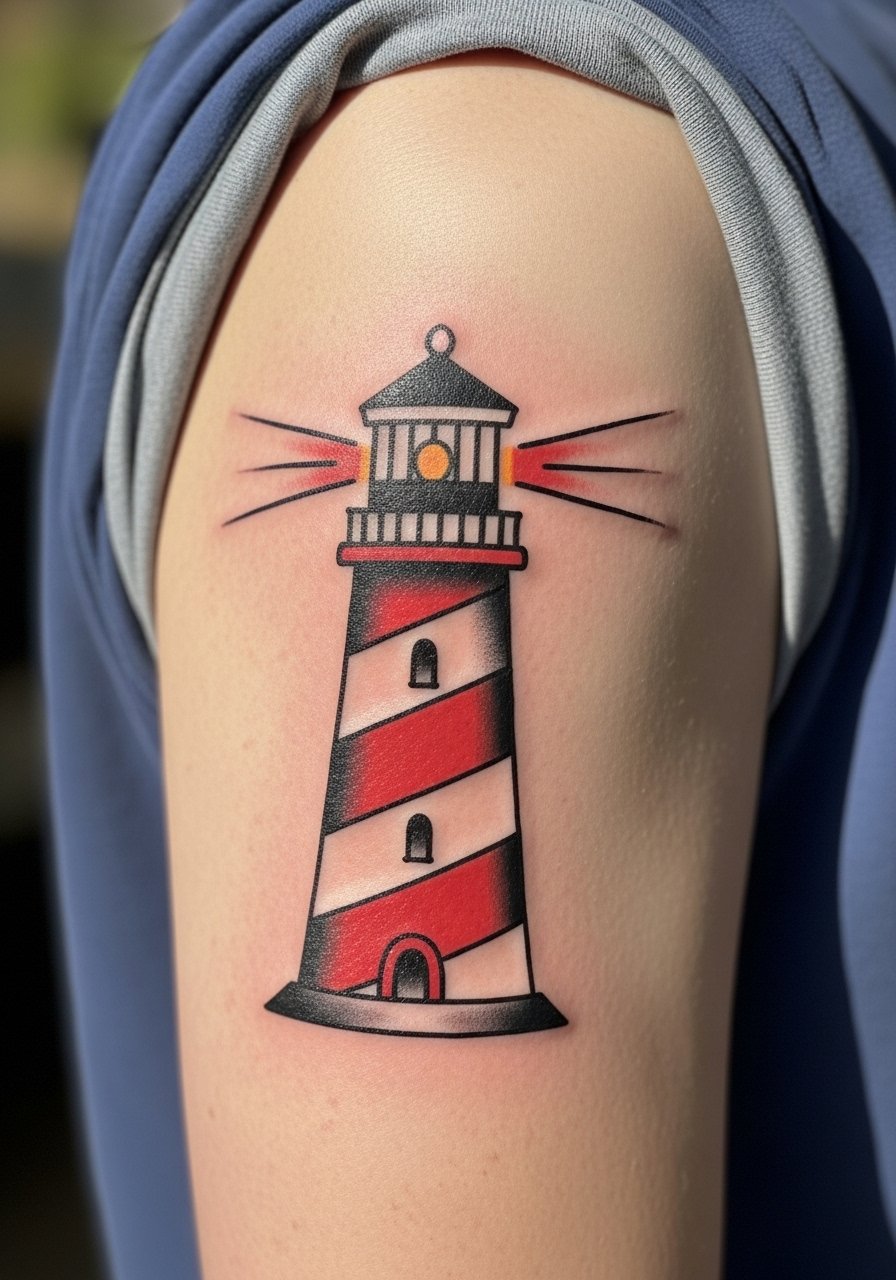
A lighthouse is a vertical motif that suits the long canvas above the elbow. This is a good choice when you want a narrative object with clear negative space. During consultation, request heavier outer outlines and minimal micro-patterns in the beam so it reads at a distance. Pain is mild on the outer arm and most mid-sized lighthouses fit into a two-hour session. People sometimes ask for tiny window details that look charming fresh but blur as the skin shifts. For a nautical date night look, pair the piece with a navy striped tee that echoes the lighthouse palette.
11. Traditional Snake Coiling Up the Bicep
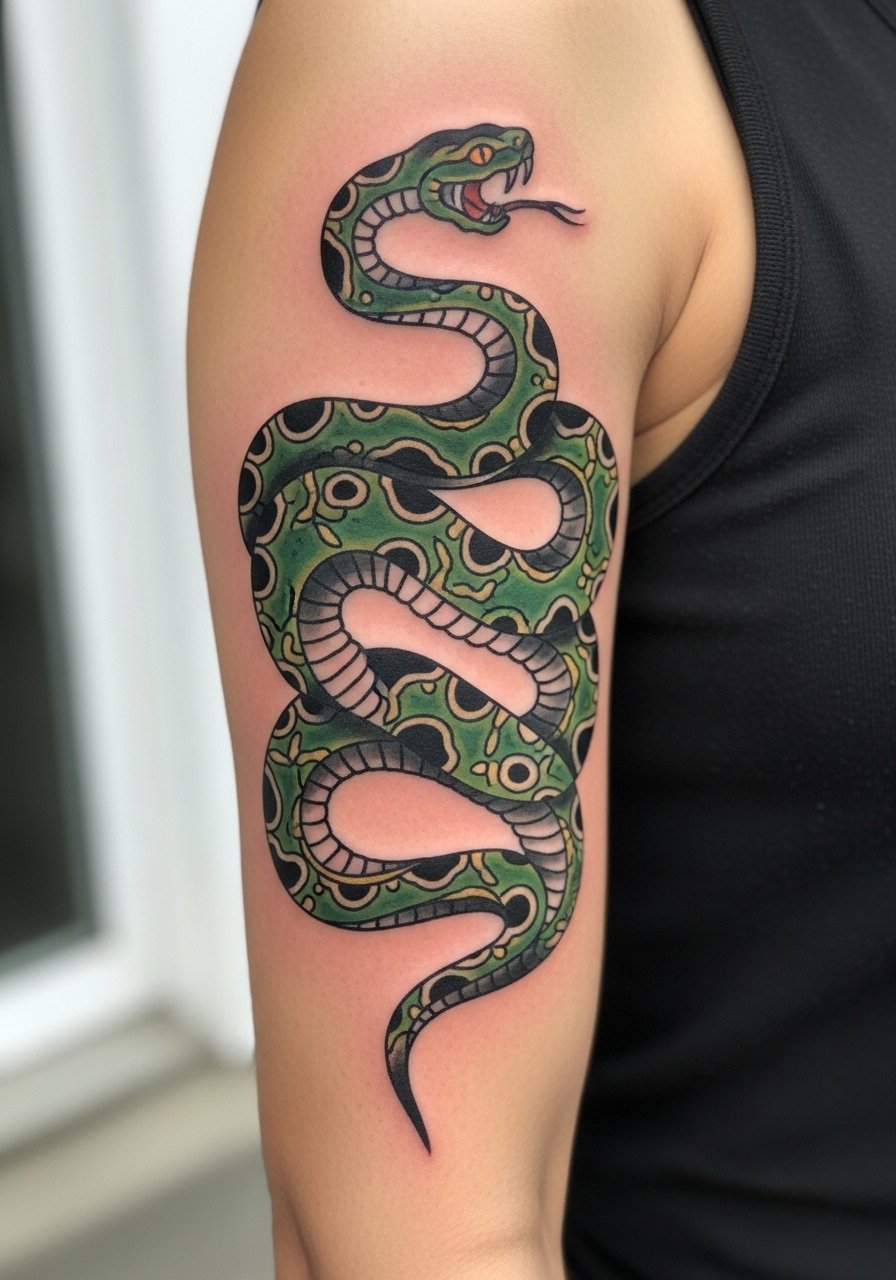
A coiling snake uses movement and negative space to stay legible. I suggest this for someone who wants a dynamic design that adapts if you later build a sleeve. Ask your artist to plan coils with deliberate spacing between loops so the body does not merge as it heals. The outer bicep is a forgiving place for this design and sessions often last two to three hours. A common mistake is wrapping the snake too tightly so that, once healed, the loops look like a single band. For casual show-off, a sleeveless denim vest frames the coils without competing.
12. Miniature Pin-Up Girl on the Upper Arm
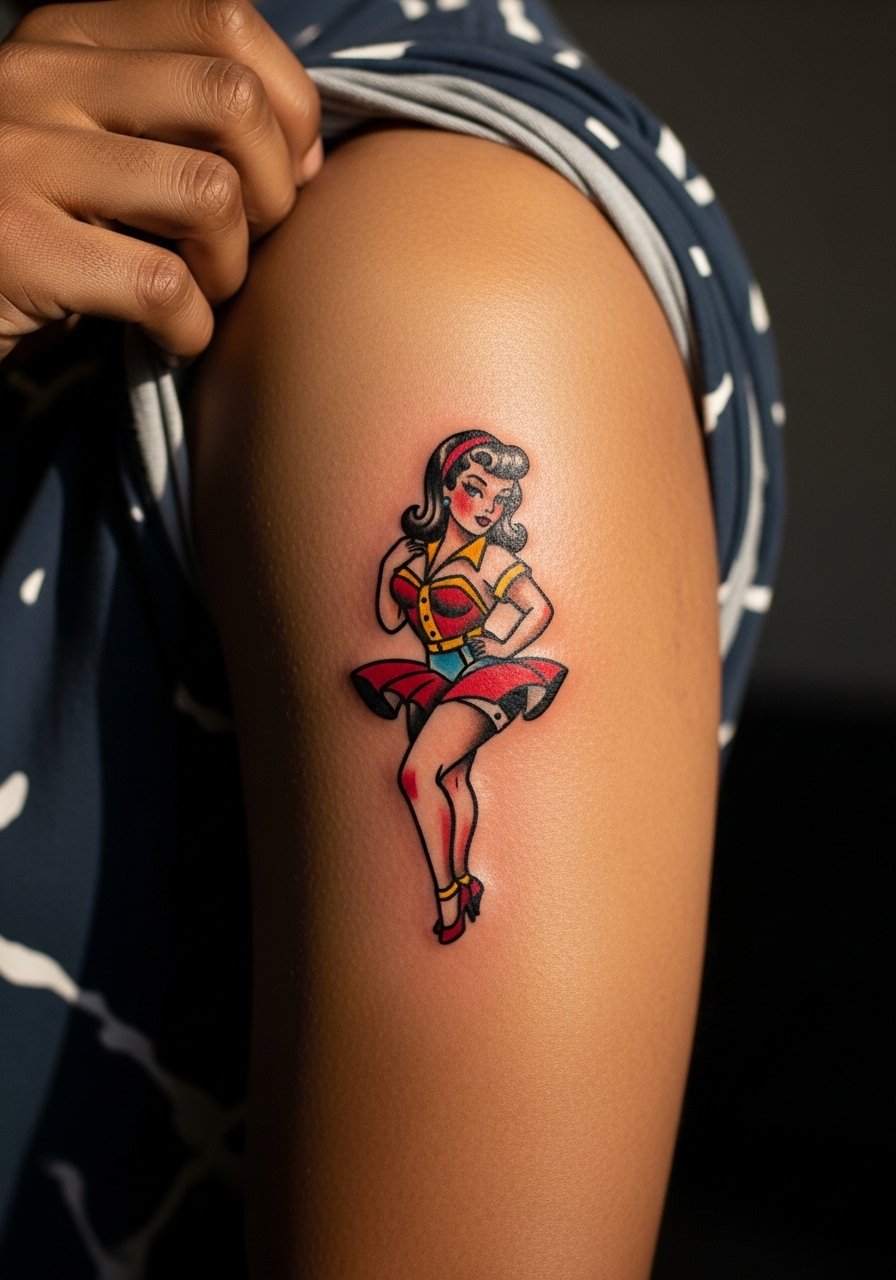
Micro pin-up pieces can look playful and age well when they rely on saturated color and clear silhouette rather than fine facial details. Ask your artist to keep facial features simplified and to avoid tiny eyelashes or micro-shading on cheeks. The upper arm tolerates this style in a one to two hour session. Skillful artists will size the figure so it keeps legibility at year five. The controversy here is about realism versus stylized flash. One camp says micro-realism shows more personality. The other camp favors simplified traditional flash because it lasts. Ask your artist which approach they prefer and why before booking. For a retro outfit, a vintage-style band tee lets the mini pin-up peek out without stealing focus.
13. Hourglass with Roses on the Inner Upper Arm
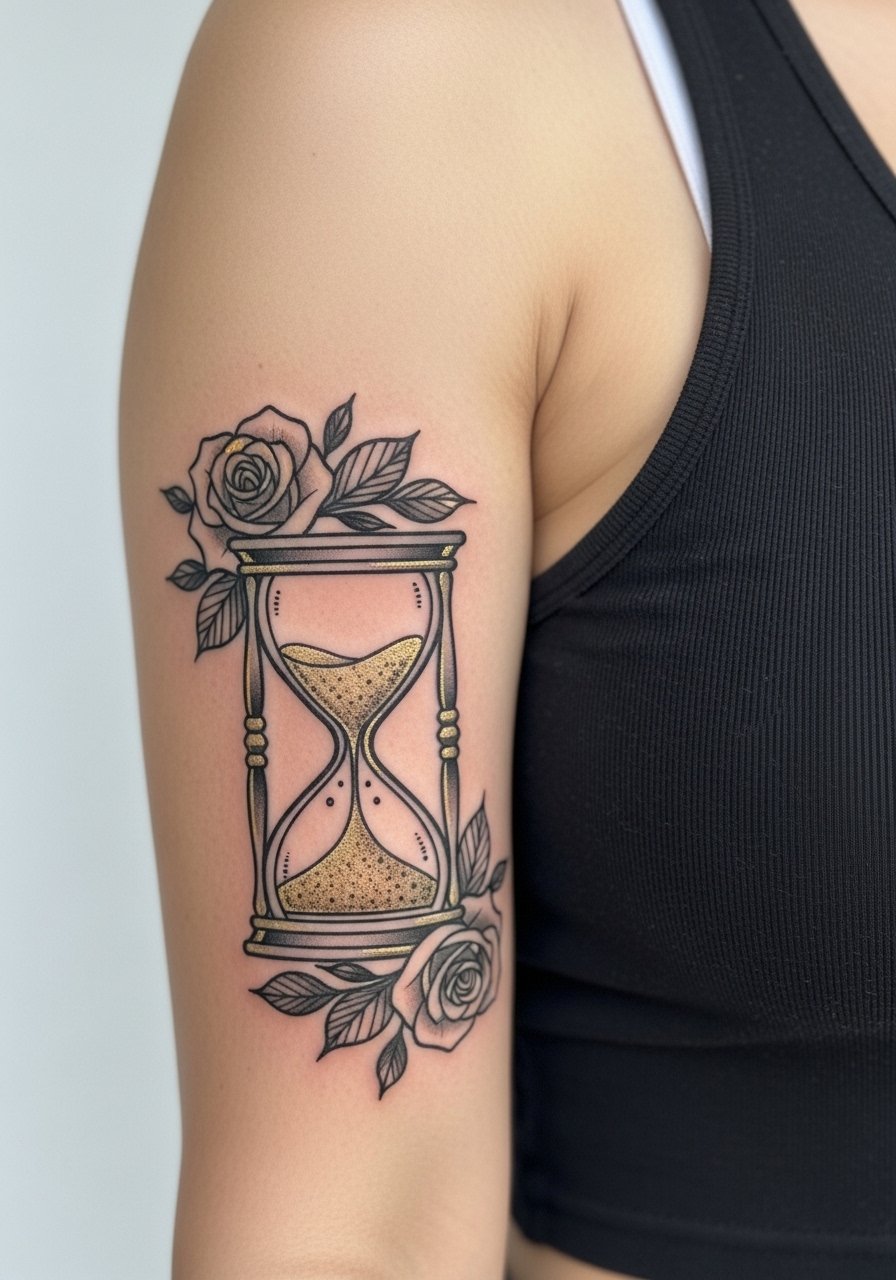
An hourglass nested in roses reads like a small story and suits the inner arm because of the intimacy. In consultation, mention how much negative space you want inside the hourglass so the sand remains legible after settling. Inner arm sessions can be more uncomfortable, so plan for breaks and possibly shorter sittings. A common error is overfilling the hourglass interior with micro dots that converge into a single tone later. For showing the piece without overexposure, wear a scoop-back top or a sleeve you can shift so the inner arm shows in motion.
14. Classic Anchor with Heart on the Bicep
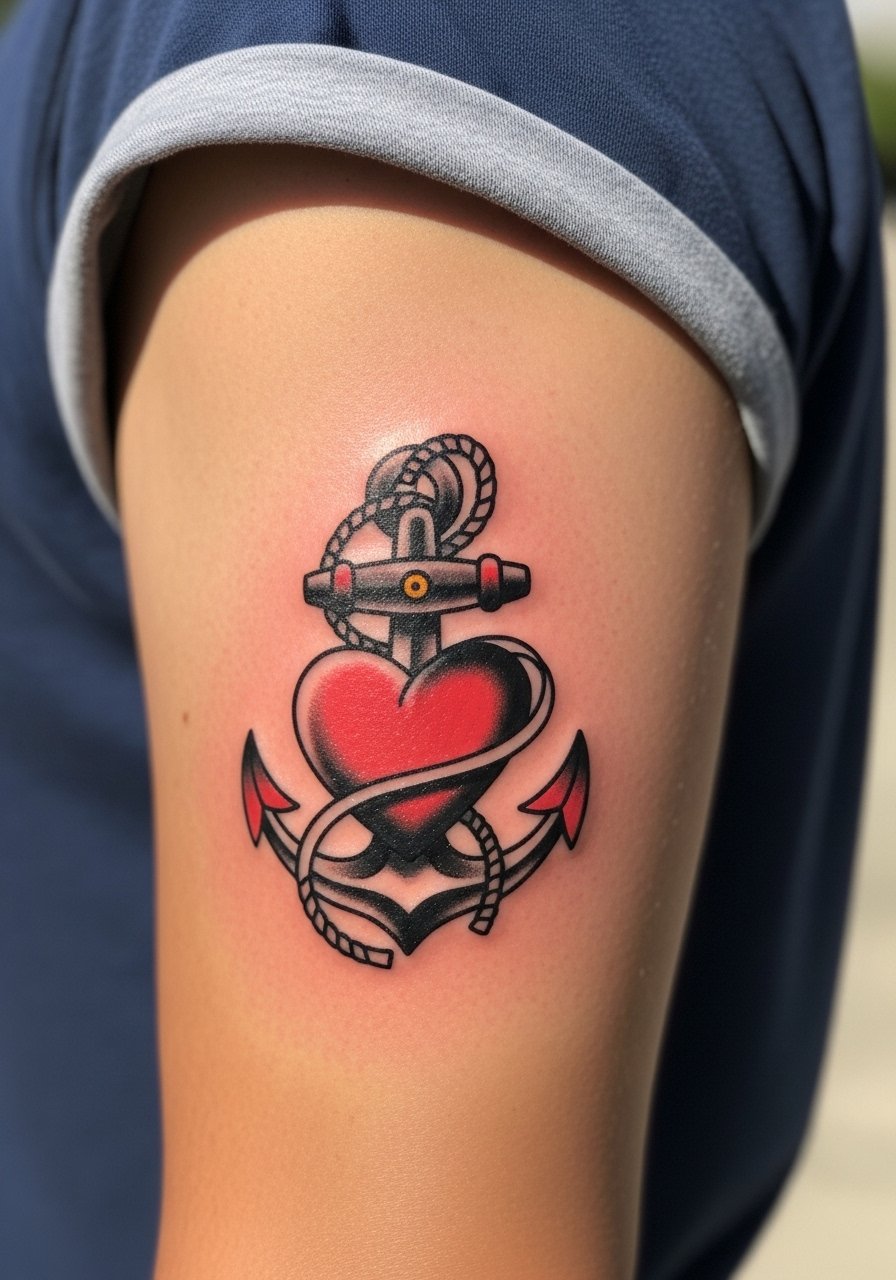
Merging an anchor with a small heart gives a sentimental twist to a durable motif. Ask the artist to maintain graphic weight around the heart so it does not vanish against the anchor's black. This placement is low on the pain scale and usually done in under two hours for small to medium sizes. The typical mistake is shrinking the heart to the point where its shape softens as the black and red touch. For date nights, a crisp white tee with rolled sleeves places the symbol front and center without feeling flashy.
15. Ship Wheel and Compass on the Outer Upper Arm
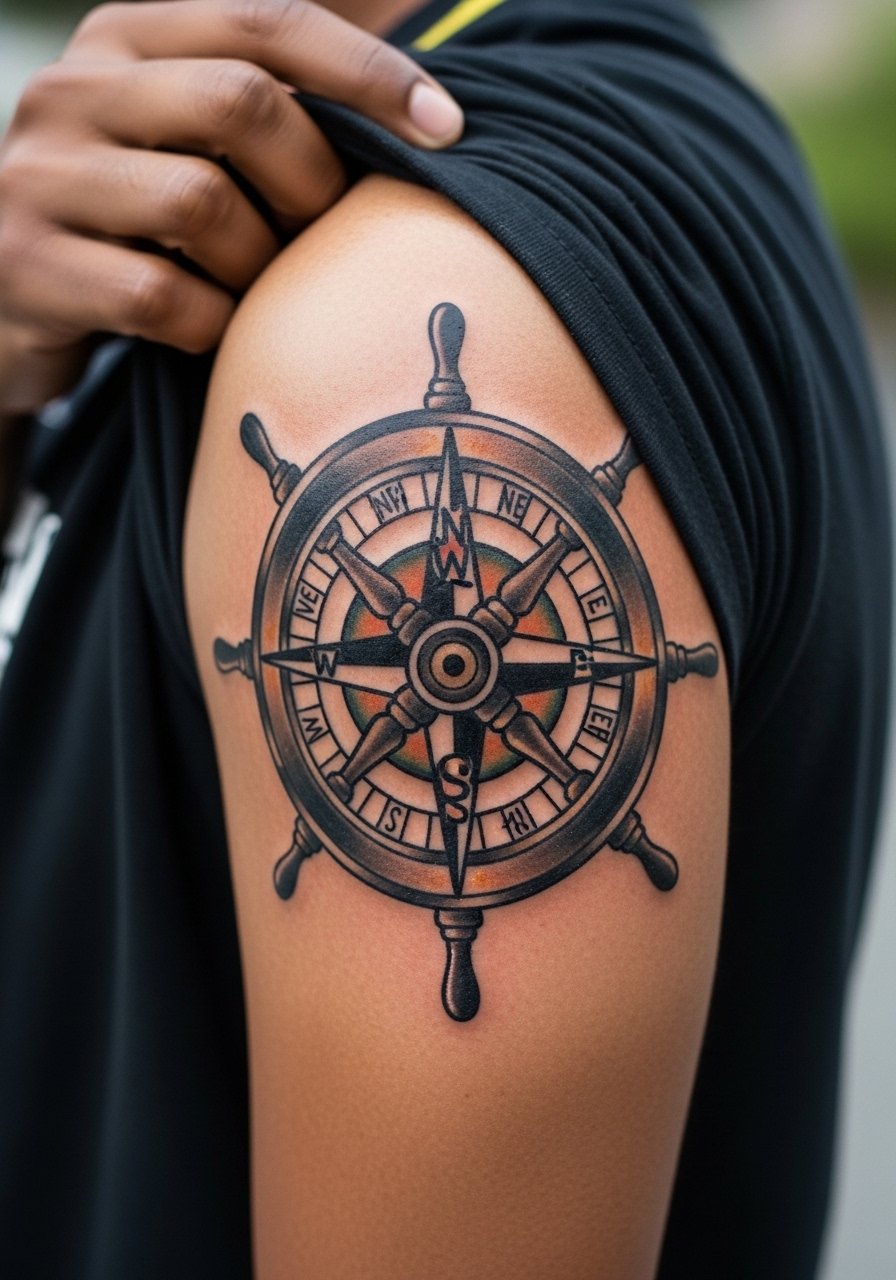
A ship wheel paired with a compass is a symmetry-friendly idea that reads well from multiple angles. Choose this when you want a navigational set piece that can anchor shoulder or back work later. Tell the artist you prefer a simplified compass face with thicker cardinal points so it remains clear over time. Sessions for both motifs together often run two to three hours. A common error is packing tiny directional ticks that blur into the compass face. For casual styling, a striped henley keeps the nautical theme coherent without overpowering the art.
16. Bold Rose and Dagger Across the Outer Bicep
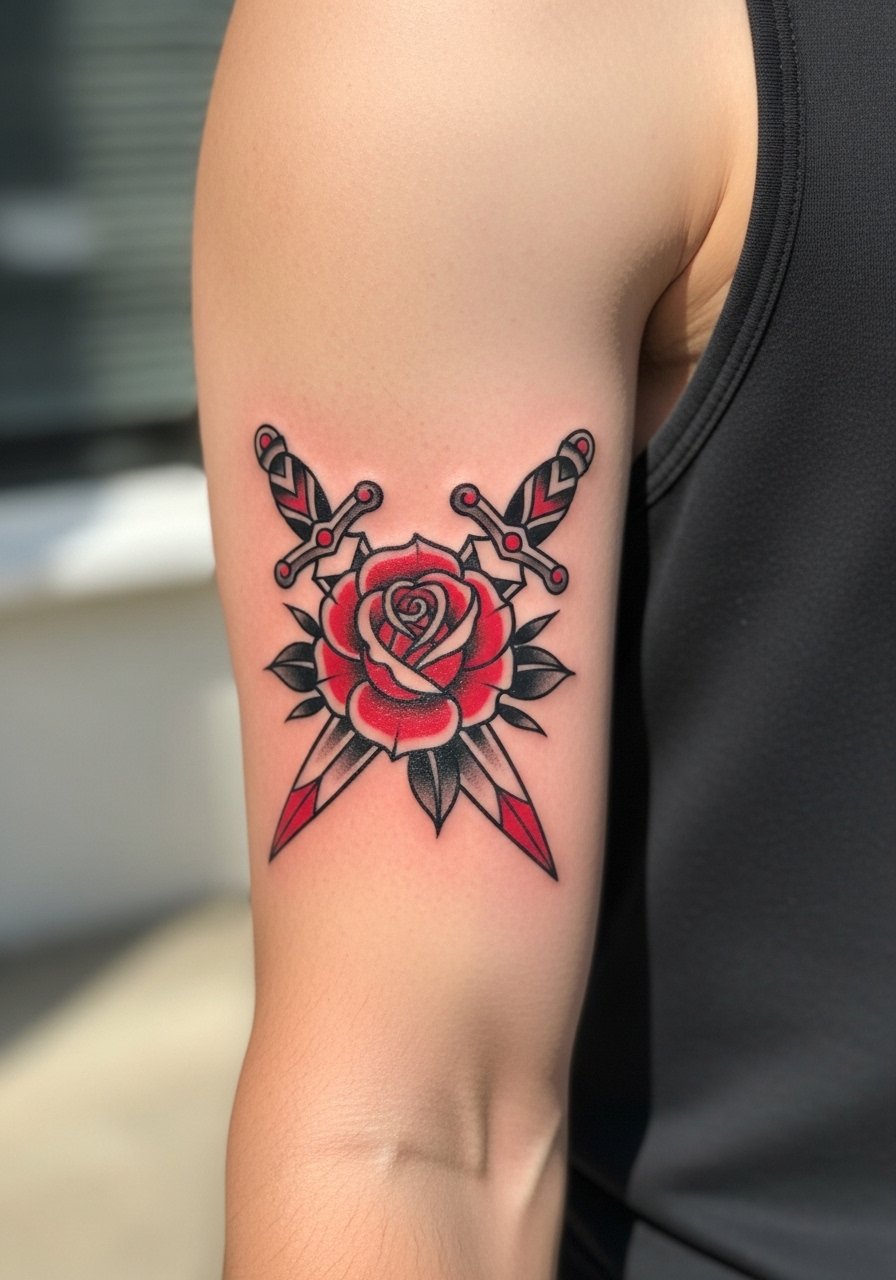
A rose pierced by a dagger is classic above the elbow because it uses bold shapes rather than micro-detail. I suggest this if you want a dramatic motif that still benefits from large negative spaces. Ask the artist to keep dagger lines thick at the tip so they hold through aging. Pain is moderate on the outer bicep, and a single session usually completes a medium piece. The frequent mistake is over-detailing the blade with tiny texture lines that later soften. For evening wear, pair it with a black tank top to make the reds and blacks pop.
17. Traditional Compass Rose Near the Shoulder
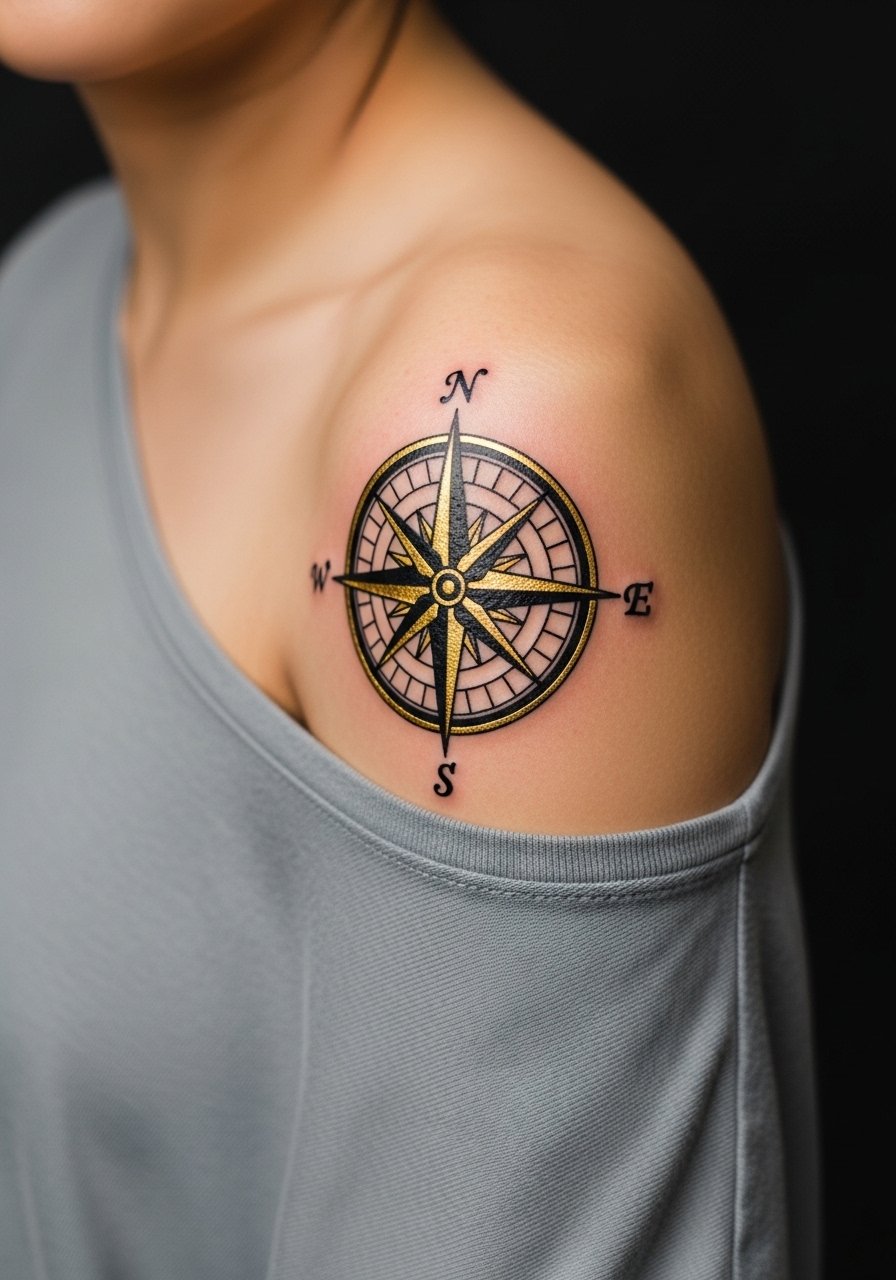
A compass rose placed near the shoulder is a stable, readable object that ages predictably. Choose this when you want a central motif that could later sit at the apex of a sleeve. In consultation, ask the artist to simplify internal markings so the main points remain dominant. Shoulder pain is low and sessions can wrap quickly for small to medium sizes. A mistake is requesting overly fine tick marks and lettering inside the compass. For a clean look, wear a wide-neck shirt that reveals the shoulder with ease.
18. Traditional Gypsy Head on the Upper Arm
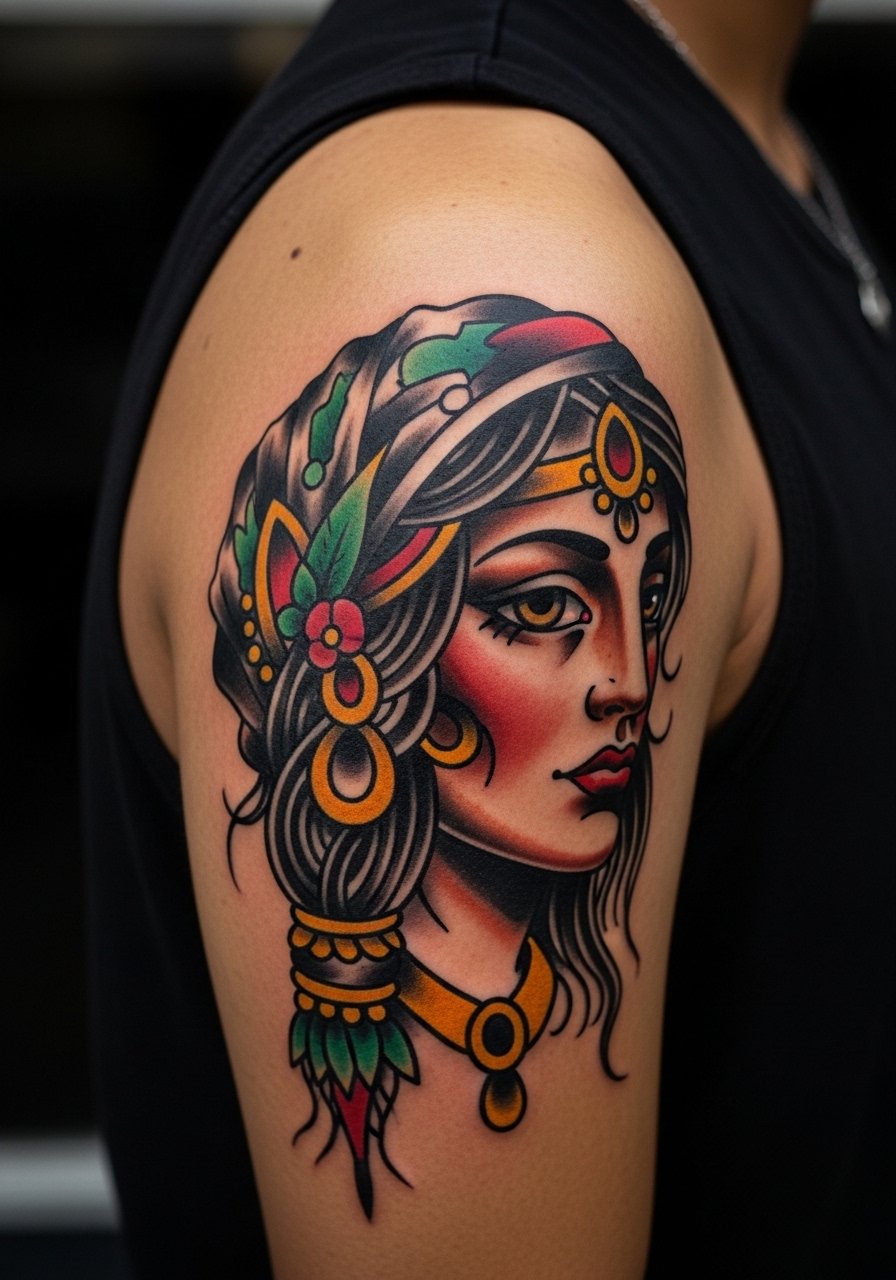
A traditional gypsy head gives classic portrait energy using simplified planes rather than micro-realism. This works well above the elbow where simplified facial planes maintain clarity. Ask your artist to avoid tiny hair strands and to focus on bold shadow blocks so the face keeps form as it ages. Expect a one to two hour session depending on size. A common error is wanting too much facial micro-detail that fades into soft shapes. For a vintage edge, a bandana accessory or retro tee pairs naturally with this portrait.
19. Black Cat with Crescent Moon on the Inner Bicep
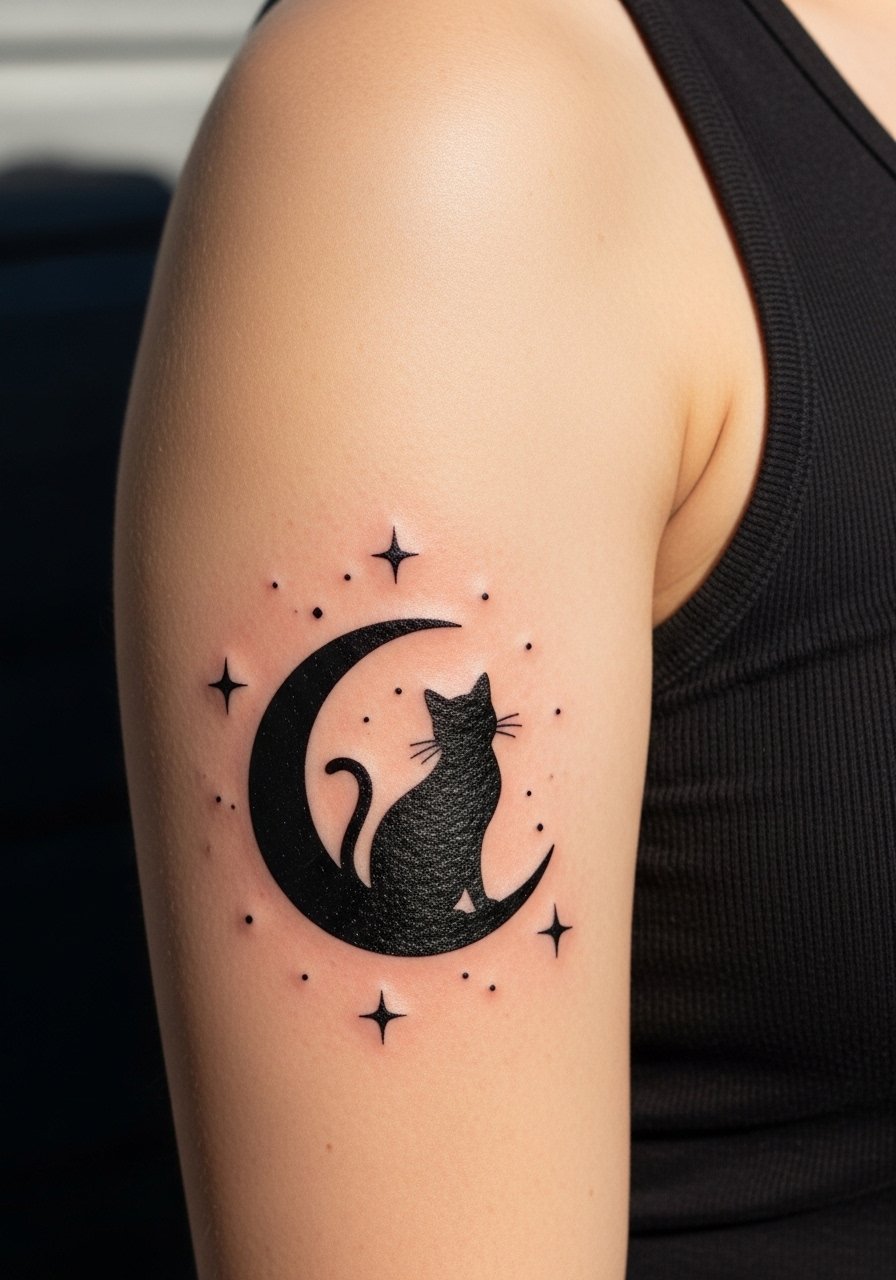
A black cat silhouette and crescent moon is a graphic option that performs well in intimate inner arm spaces. I recommend this for someone who likes symbolism without tiny detail. During consultation, confirm the moon's spacing relative to the cat so shadow edges do not merge. Inner bicep sensitivity is higher, so sessions may need breaks. The mistake to avoid is asking for internal fur texture inside a silhouette. For subtle show-off, wear a racerback top so the inner bicep reveals the motif with movement.
20. Traditional Compass and Rope on the Upper Arm
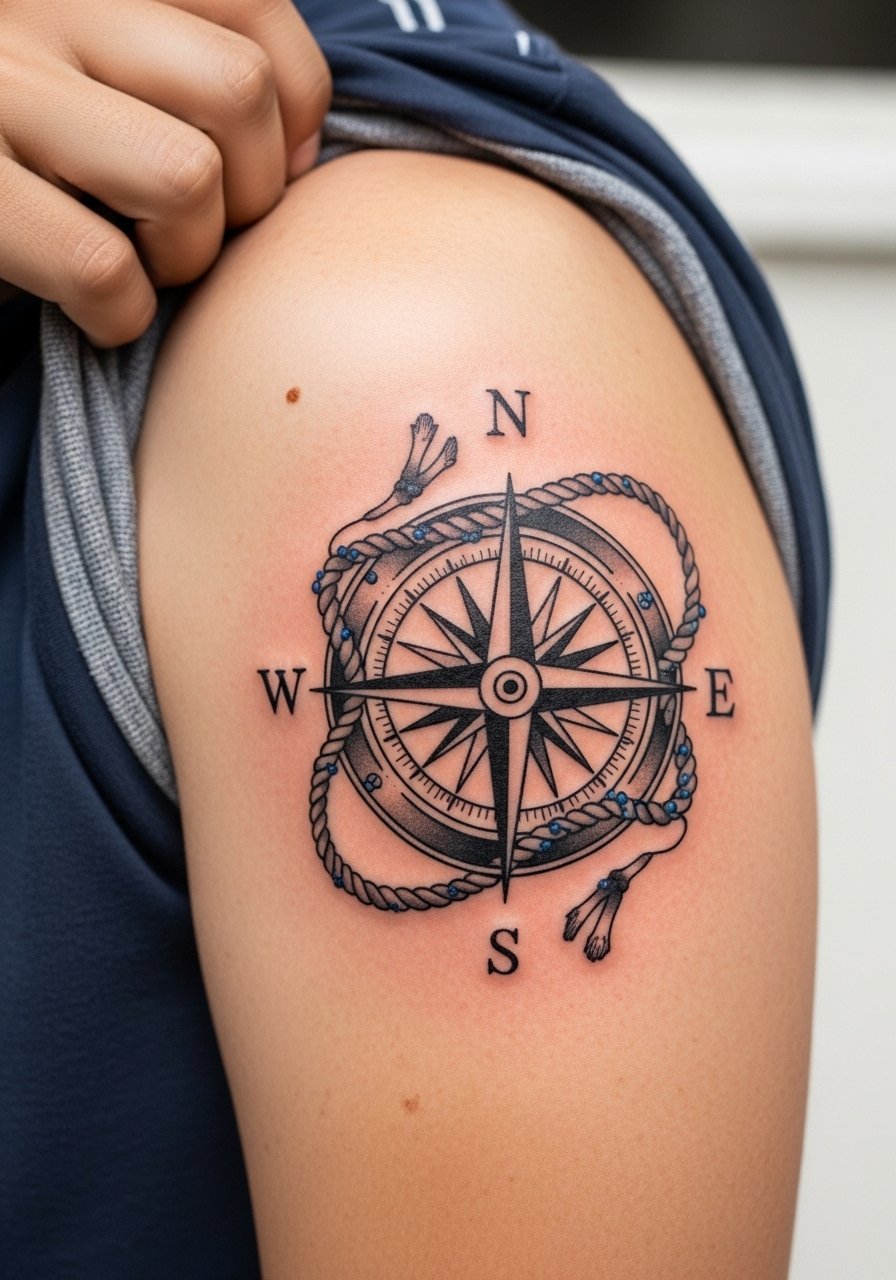
A compass wrapped in rope is another durable maritime variant that holds up due to strong outlines. Pick this if you want a piece that reads from multiple viewpoints. Ask your artist to keep the rope coils separated enough so the texture does not collapse into a single dark band after healing. This placement is comfortable and typically done in one to two hours. A common error is requesting too many tiny knots and frays that do not age well. For casual pairing, a navy polo complements the nautical theme without clashing.
21. Bold Traditional Falcon Perched on the Shoulder
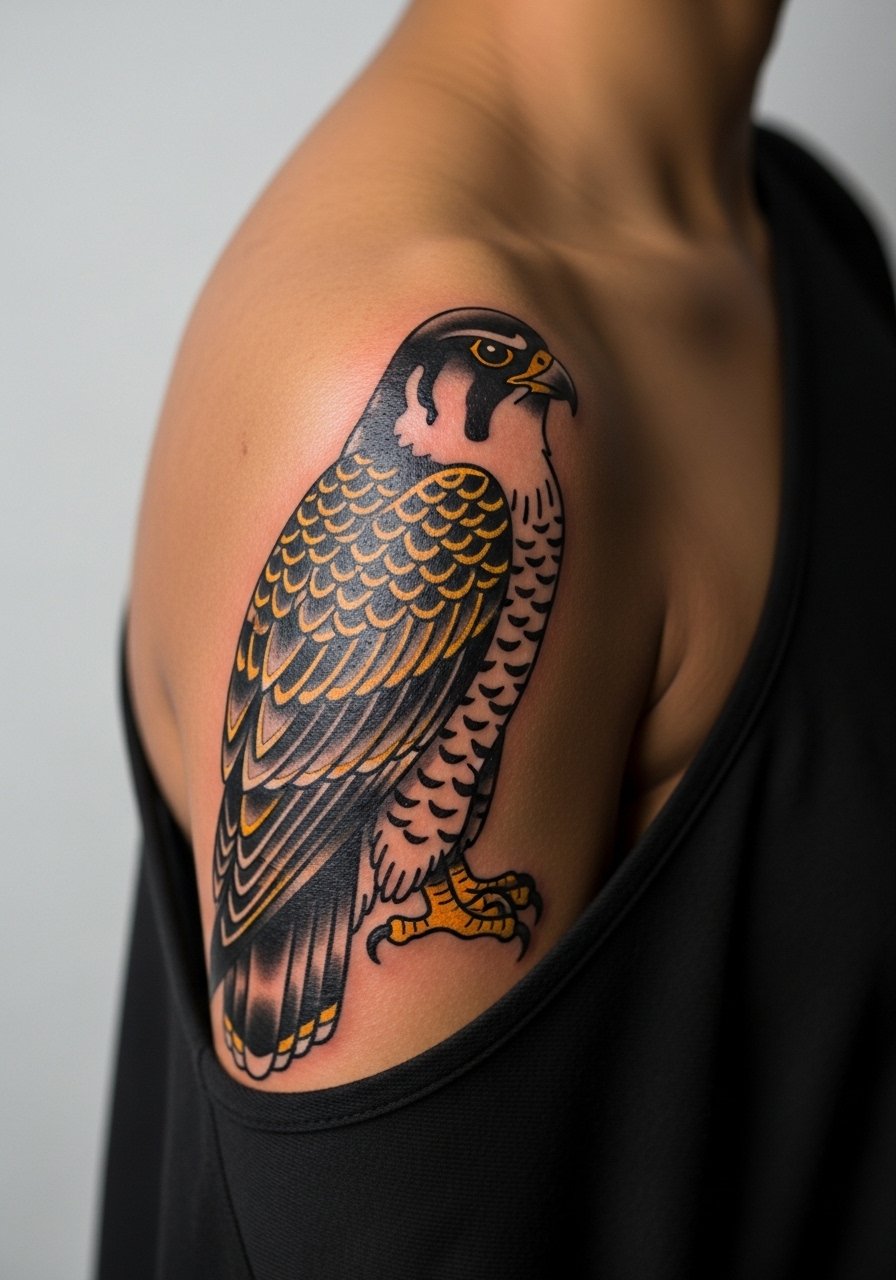
A perched falcon uses silhouette and negative space to remain readable even after years of wear. This is a strong finishing piece if you plan a partial sleeve that culminates at the shoulder. In consultation, ask for blocky feather shapes and limited micro-hatching so the bird keeps its form. Shoulder placement is low pain and a medium falcon often fits into a two to three hour session. The usual mistake is wanting micro-feather detail that blurs. For a clean evening look, a wide-neck shirt or a light jacket with rolled sleeves keeps the falcon visible without shouting.
Frequently Asked Questions
Q: Will bold traditional lines really last longer on the upper arm than fine line work?
A: From what I have seen, bold outlines and saturated fills generally hold up better on upper-arm skin than ultra-fine lines. The skin above the elbow moves and stretches less than forearms, but micro-weights still spread with time. If longevity is your priority, ask your artist for heavier outer lines and simplified interior detail.
Q: How often should I expect touch-ups for traditional color on the bicep versus the inner bicep?
A: Touch-up needs vary, but outer bicep color often needs less frequent work than inner bicep areas because of friction and thinner skin. For saturated traditional color, plan for a potential touch-up around year three to five depending on sun exposure and personal healing. Discuss the expected timeline with your artist during the consult.
Q: Are there workplace considerations for visible above-elbow tattoos like shoulder or outer arm pieces?
A: Many workplaces are more accepting of upper-arm tattoos than hand or neck tattoos, but industry standards still vary. If visibility matters, choose placements that can be covered with a short-sleeve shirt or a light layer. A short-sleeve button-down is an easy way to hide or show depending on the situation.
Q: Should I pick a custom design or pick a traditional flash piece for above-elbow work?
A: Both routes work. Flash designs offer proven silhouettes that age predictably. Custom work lets you place elements around your muscle and veins for better long-term readings. In either case, ask the artist to consider spacing and line weight for durability rather than tiny detail.
Q: Is the inner bicep a bad place for script or small portraits?
A: Inner bicep can be sensitive and it does cause some lines to blur faster if the script is too thin. Small portraits can work if the artist simplifies features into bold planes. Expect a slightly higher chance you'll need a touch-up there within a few years compared with outer arm placements.
