
Fine line and saturated color are having a moment, and a Creation of Adam motif gives both room to breathe while still making a statement. I write this after seeing variations that blurred fast, pieces that needed touch-ups, and ones that held crisp color for years. Expect questions about placement, fading, and how bold to go. Start with the first idea below to see what translates best to your body and daily wardrobe.
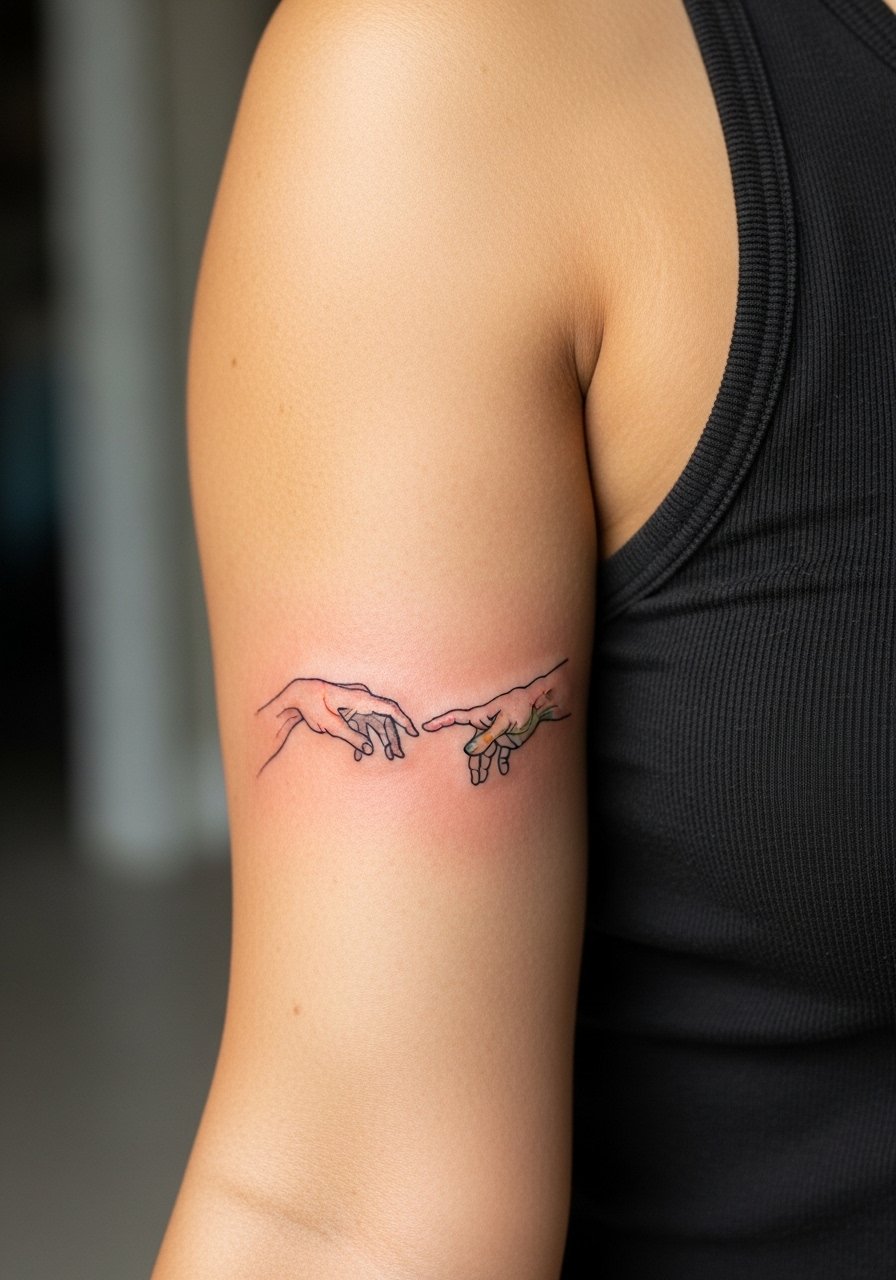
1. Micro Hands on the Inner Wrist
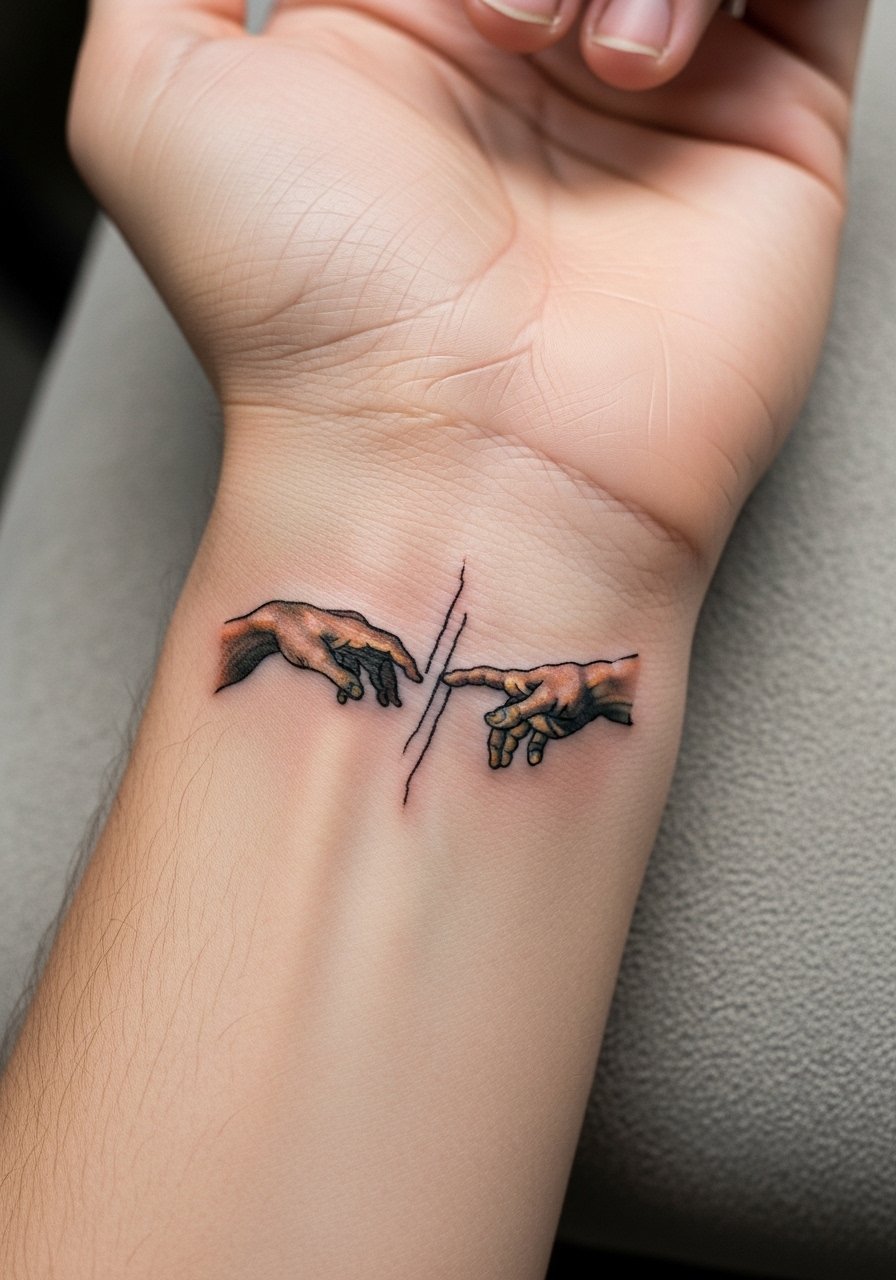
I've seen tiny hand pairs work best when they stay simple. For the inner wrist, expect a sharp sting for a few minutes and then steady vibration as the needle moves. Tell your artist you want the gap slightly wider than the reference so the negative space reads at year three. A common mistake is packing too much shading into a small area, which leads to blurring and loss of detail. For the session wear, pick a loose button-down shirt you can pull aside without stretching the wrist area. This placement ages faster with sun exposure, so plan touch-ups around year three if you want the color to stay bright.
2. Forearm Panel with Color Splash Background
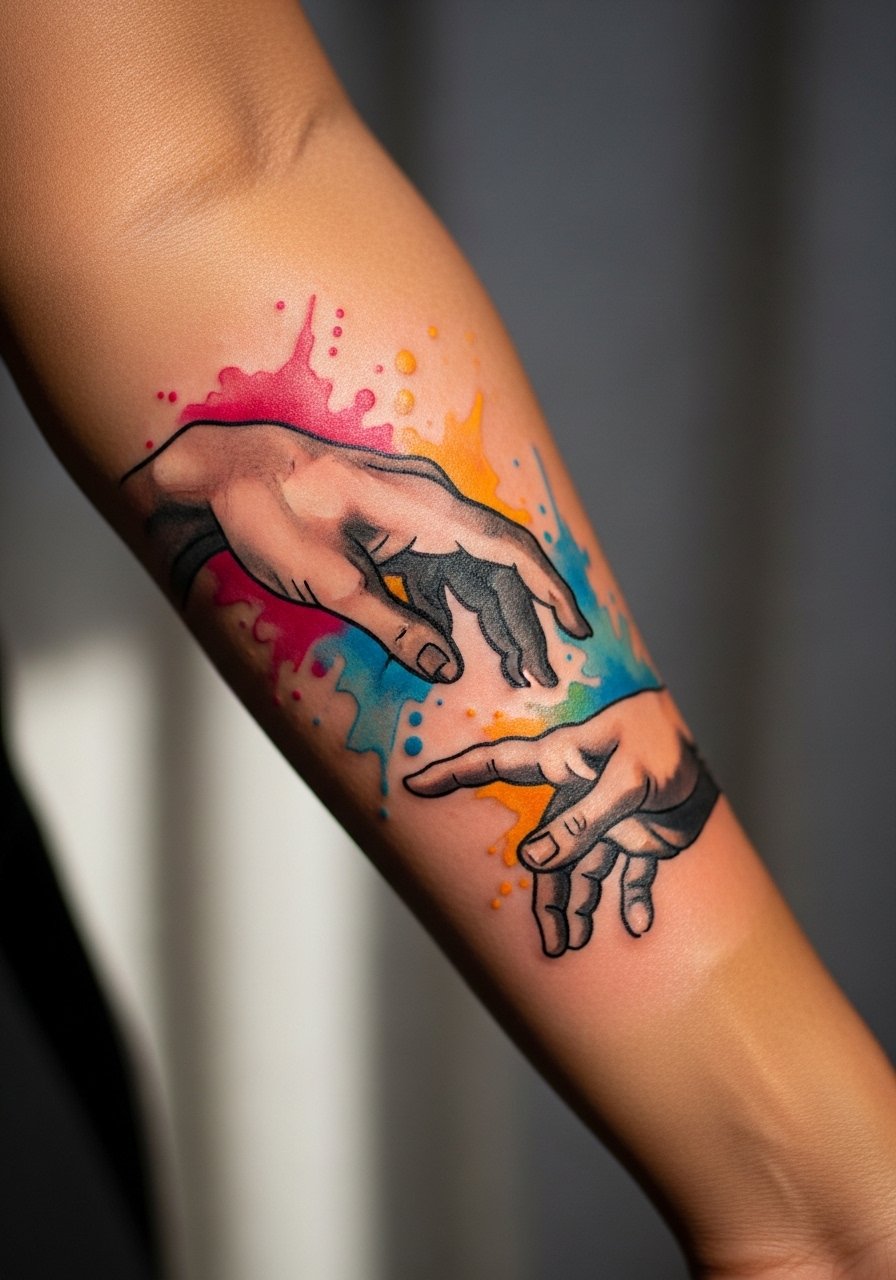
There is something about a saturated watercolor wash behind crisp hands that reads from a distance. Pain on the forearm is manageable which means you can sit for longer sessions to allow for deeper saturation. During consultation ask for layered color passes so saturation lasts longer instead of one heavy session that sits too shallow. Most mistakes here are trying to mimic a fresh watercolor bleed, which heals patchy unless saturation is layered. For showing this off, rolled sleeves and a racerback tank keep the forearm visible without competing with the tones. Expect a touch-up at year two to refresh the washes depending on sun exposure.
3. Miniature Hands Between the Knuckles
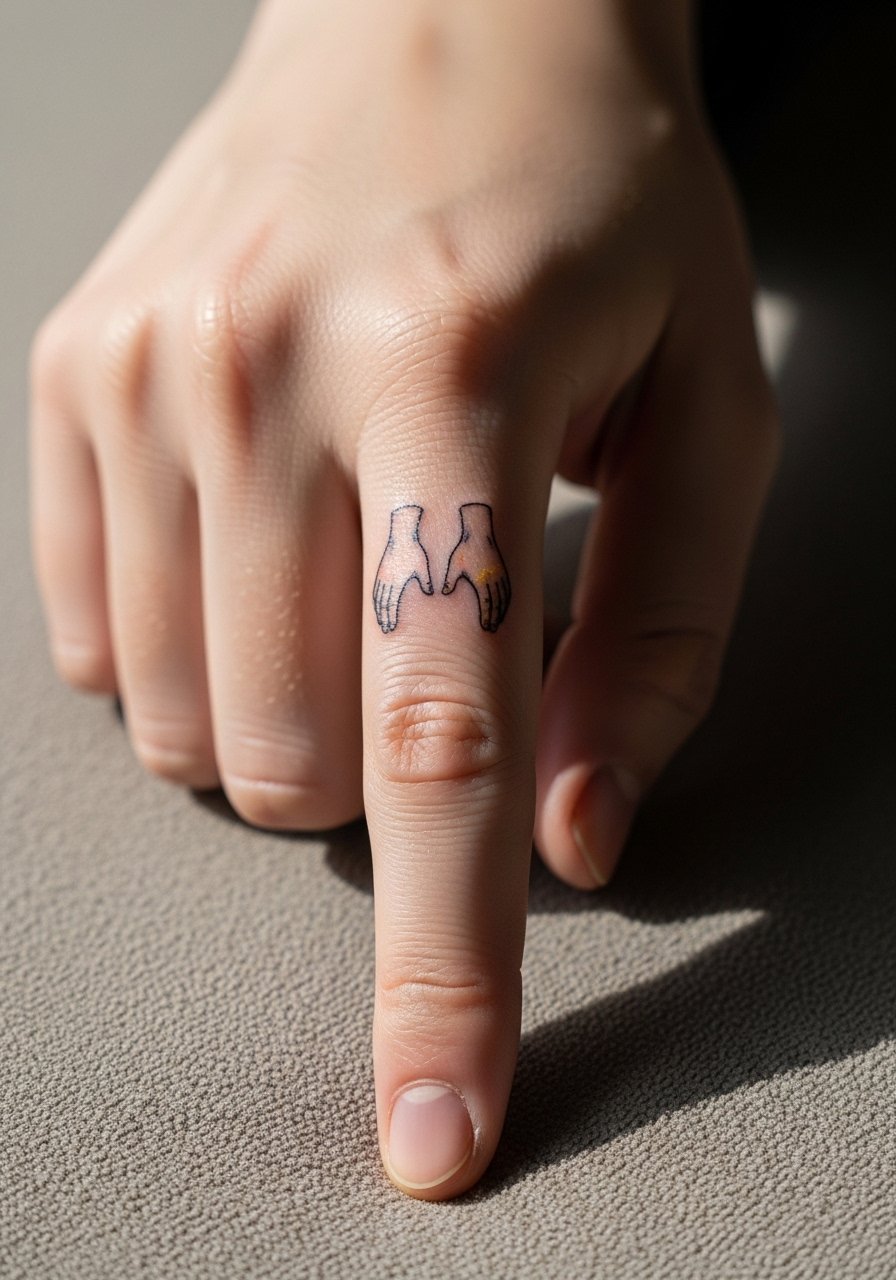
Fair warning, finger and knuckle skin is unforgiving. The biggest mistake is placing fine detail where the skin moves constantly. I recommend simplified silhouettes and bolder outlines for longevity. Sessions are short but painful and often need multiple small touch-ups. Ask your artist for slightly heavier linework and keep expectations realistic that fading and potential partial loss is common. Hand and finger tattoos can affect some job situations, so weigh visibility against lifestyle. For the session, wear clothing that does not rub the hands heavily right after, like looser sleeves in a soft cotton sweater.
4. Shoulder Blade Renaissance Panel
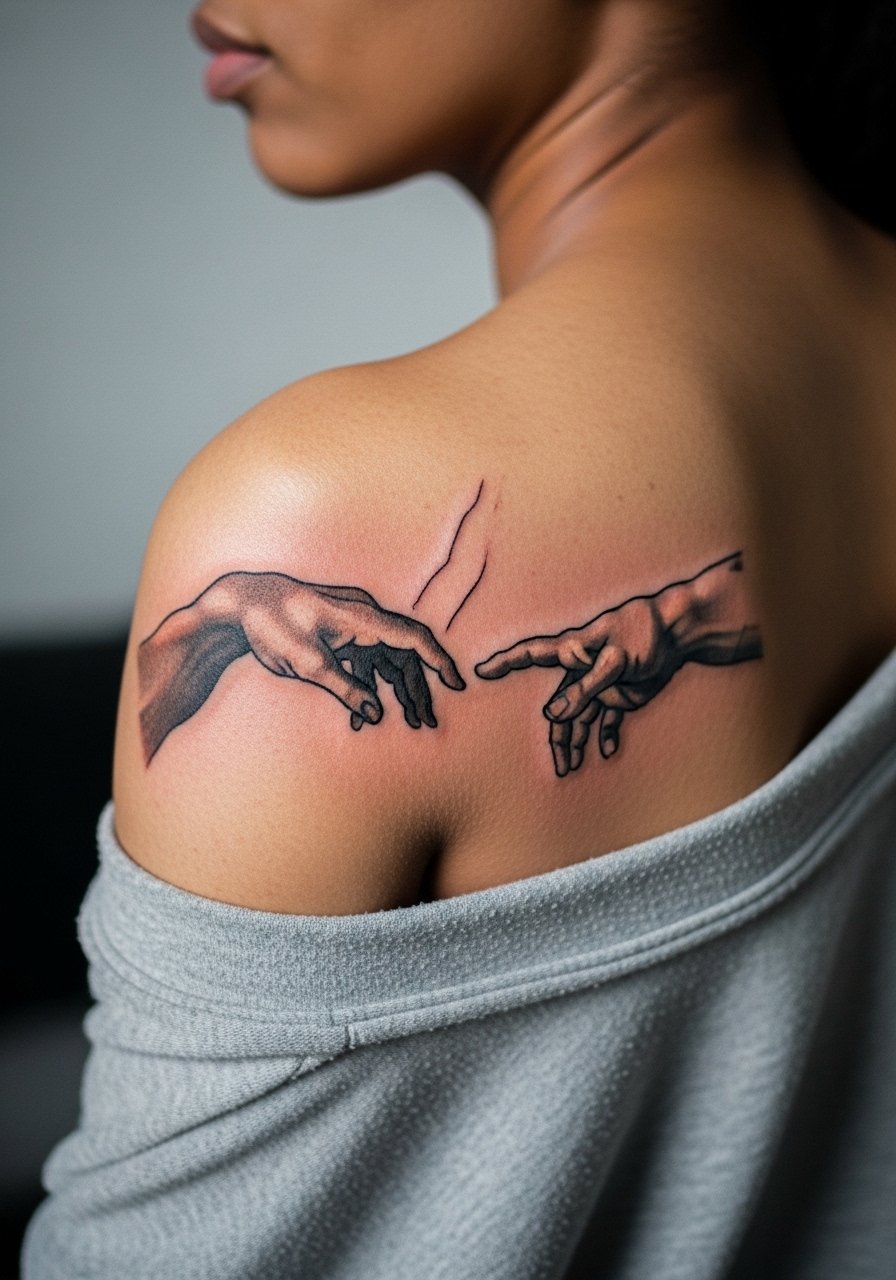
This placement reads like a small canvas and gives the artist room to play with color transitions. Expect a medium pain level when the needle hits the bone near the shoulder blade. A common version that ages poorly squeezes too much micro-detail into a panel that should breathe, which leads to muddied color after a few years. Tell your artist to keep spacing and saturation deliberate so the edges retain clarity. For evenings out this pairs well with an open-back midi dress that frames the panel and keeps attention on the composition.
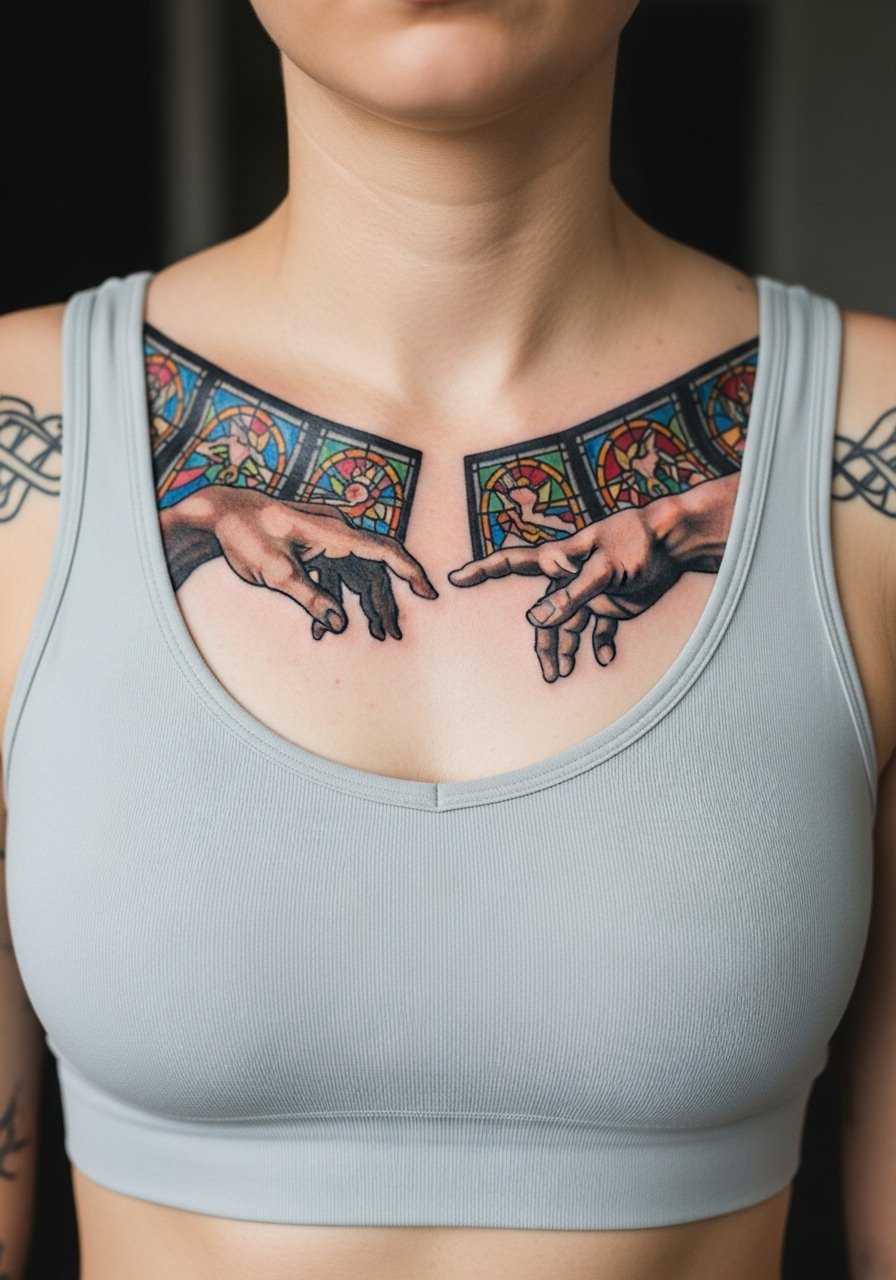
5. Collarbone Reach with Stained Glass Color
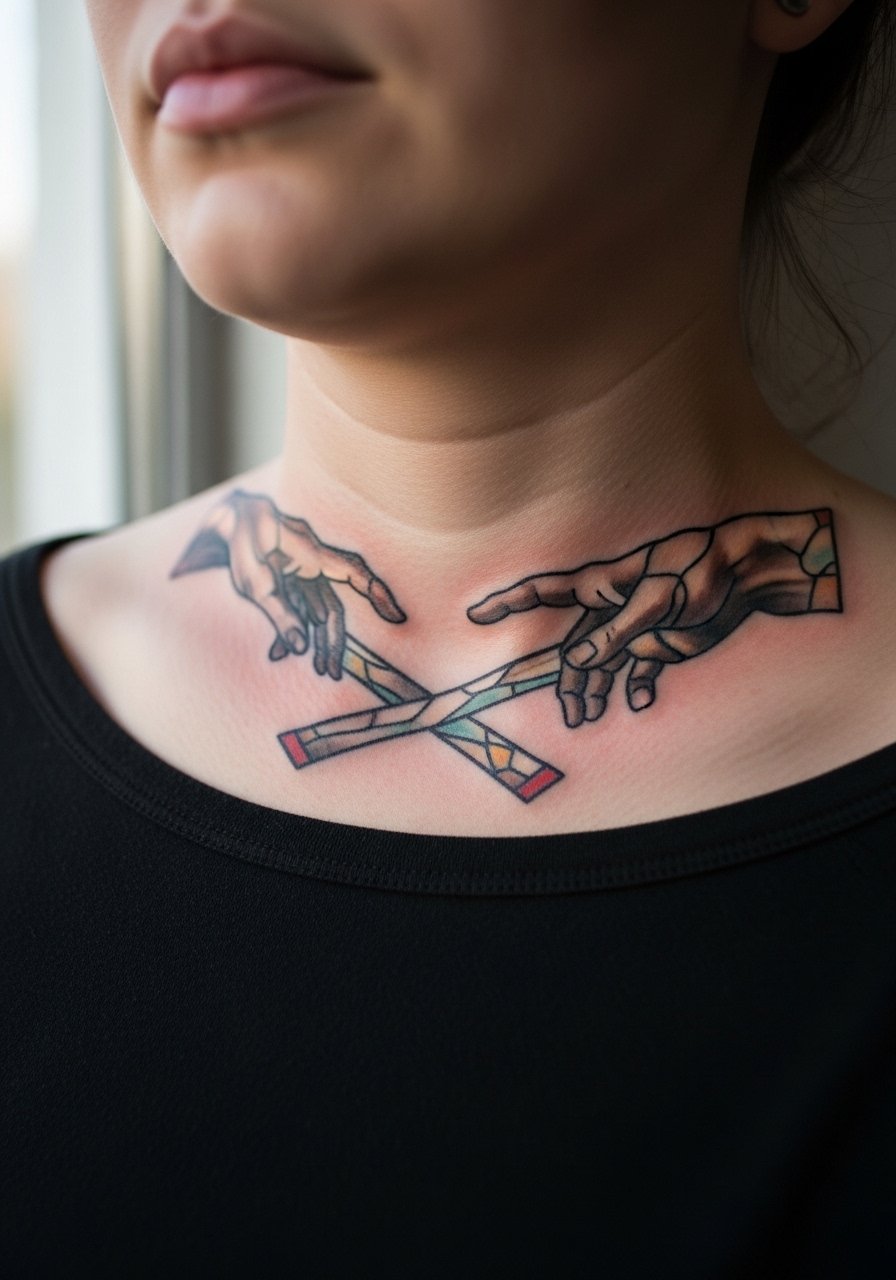
The collarbone gives a dramatic curve to the design but it is a high-movement zone. I advise wider spacing in the color panes so the stained-glass blocks do not merge over time. A mistake I see is overcomplicating the glass pattern with tiny facets that end up muddied. Session time is moderate and you will feel more tender when the needle crosses bone. For a subtle showing, pair this with a thin chain pendant necklace that sits above the script or image without competing.
6. Ribcage Vertical Hands with Cosmic Fill
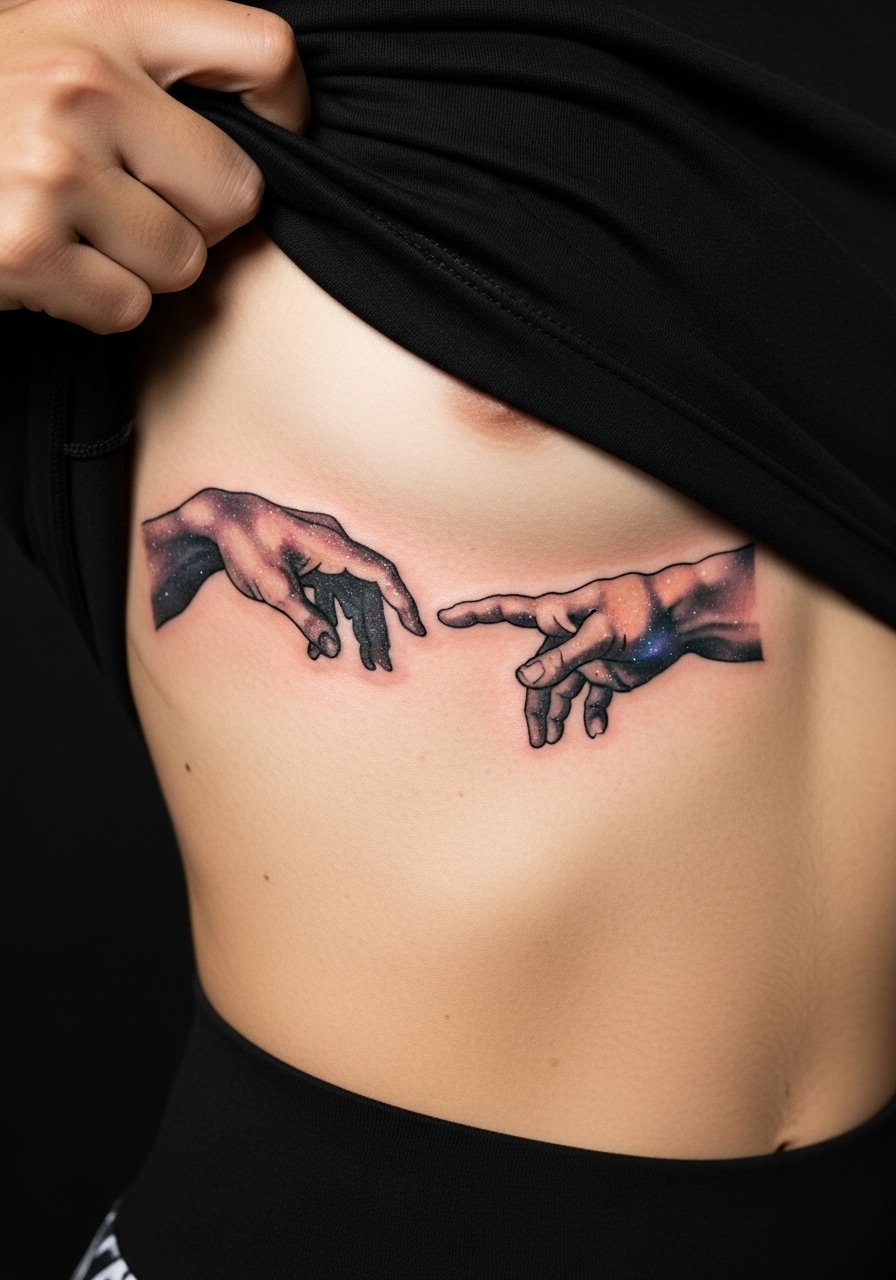
Fair warning, the ribcage rates high on most pain scales but it gives dramatic vertical space for a saturated cosmic background. Artists split on fine line here. One camp says the skin stretch blurs lines within two years. The other camp says with proper depth and spacing fine line settles fine on ribs. Ask where your artist stands and whether they prefer layered sessions. A mistake is asking for the tiniest details on this curve, which can smudge as skin moves. For the session wear a zip-up hoodie you can remove and replace without pulling at the rib area. Expect touch-ups at year two to three for saturated backgrounds.
Studio Day Picks
Those first six ideas include several high-friction zones and a ribcage piece that needs different prep. A few targeted items make the session and first week easier.
-
Stencil transfer paper kit. Lets you preview the line placement on skin before the needle, which matters for hand spacing and collarbone curvature.
-
Topical numbing cream. Useful for ribcage and inner wrist sensitivity when applied as your artist recommends.
-
Thin protective film roll. Helps keep small wrist and knuckle pieces cleaner during the first week of frequent washing.
-
Fragrance-free gentle body wash. A gentle wash prevents irritation around fresh color fields on forearms and shoulders.
-
Aquaphor healing ointment. A thin layer for the very first days locks in moisture for delicate linework without suffocating the area.
7. Tiny Hands on the Ankle with Pastel Halo

Ankle pieces are visible and intimate at the same time. Pain is localized and the skin here heals slower because shoes can rub the area. I recommend asking for a slightly simplified hand silhouette so the halo color remains the focus rather than tiny shading that fades first. The common mistake is placing the piece too close to the joint where movement distorts the lines. For the session wear shoes you can slip off easily and pants you can roll up without tight elastic. For show-off styling, pair it with sandals and cropped jeans so the pastel halo frames the shoe line.
8. Upper Arm Pop-Art Revival Hands
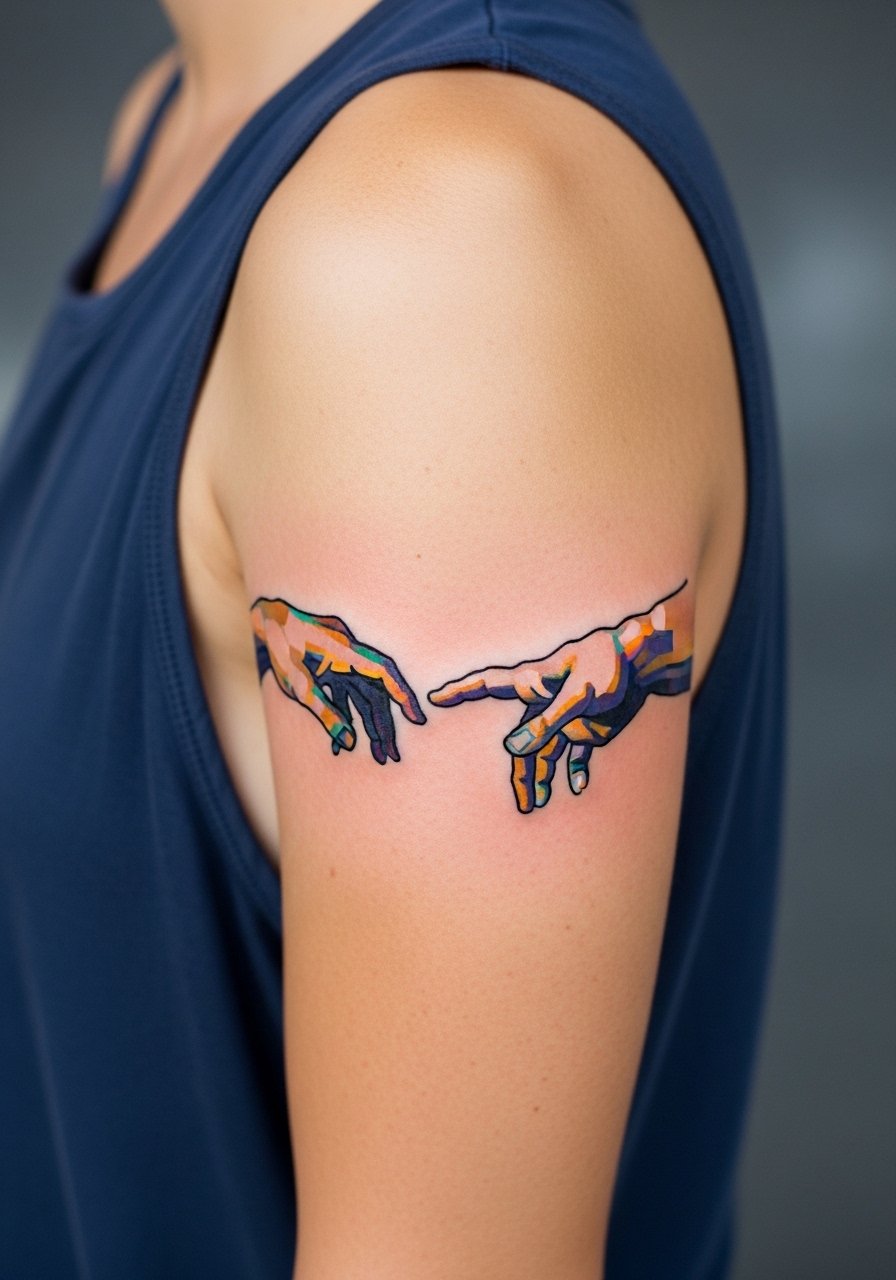
The upper arm is forgiving and lets bright color sing. Visual impact is high so balance bold outlines with saturated fills to reduce the need for early touch-ups. I tell clients to request contrast passes during the session rather than a single shallow pass. A typical mistake is thinking the upper arm will hide low saturation; it will not. For the session wear a loose tank top so the artist can access the area cleanly. This placement usually needs a refresh at year three depending on sun exposure.
9. Back Piece with Two-Hand Reach and Sky Gradient
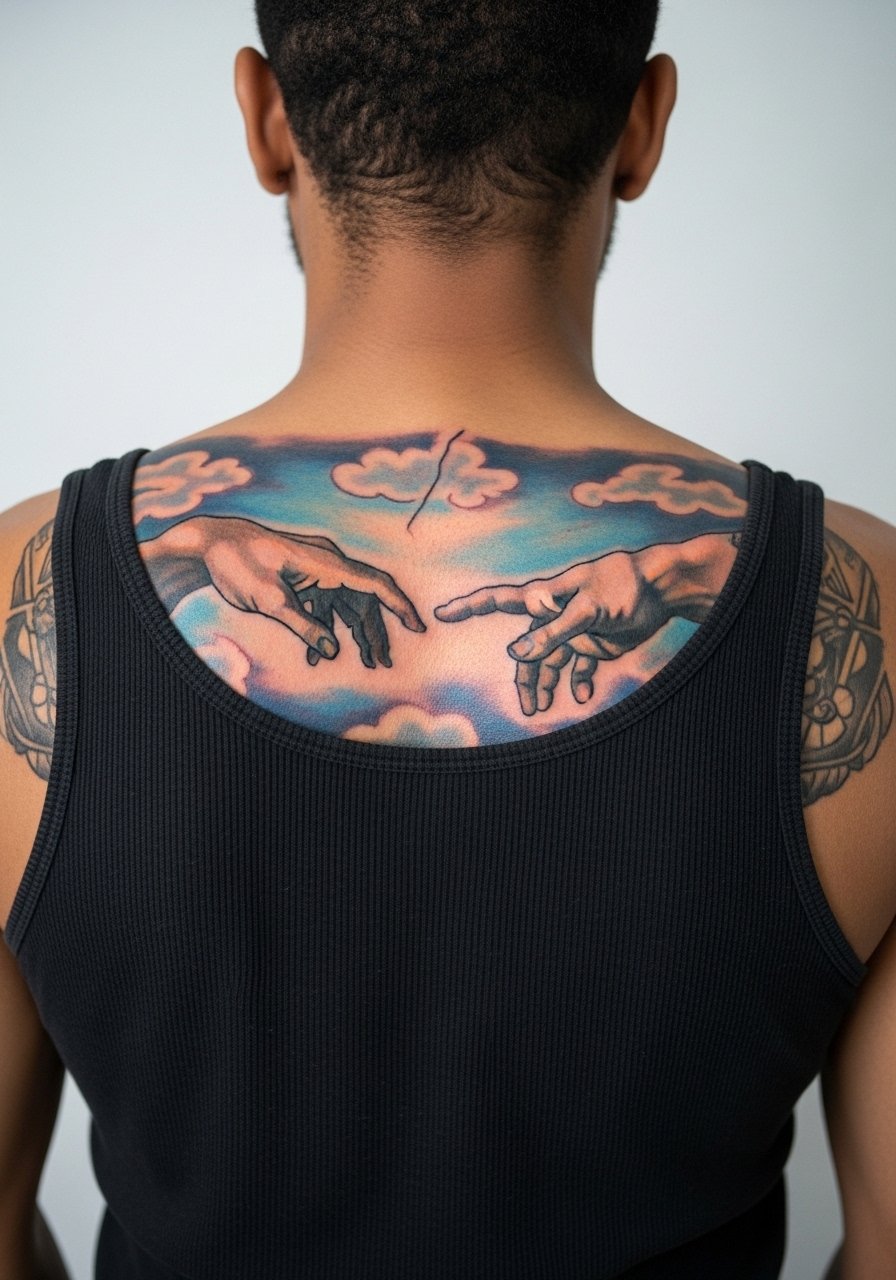
A back panel lets you expand the scene and add narrative elements like clouds or architectural hints. Sessions are long but you can build saturation across multiple appointments. A mistake is crowding the composition with too many small figures that vanish once healed. Tell your artist you want bold color blocks for long-term readability. For larger pieces, plan multiple sittings and factor in a slower healing rhythm for the skin on the back. Consider open-back dresses for showing the piece after it has fully healed.
10. Minimalist Line Pair on the Inner Bicep
The inner bicep takes color and line differently than the outer arm because of softer skin. Pain is higher near the underside but the placement can be private and personal. A common mistake is choosing ultra-fine single-pass lines that heal faint on this softer zone. Ask for slightly more saturation in the initial pass and expect a touch-up window at six months to a year. For session wear, a loose drawstring linen pant keeps you comfortable if the appointment runs long. This area also responds well to gentle stipple shading around the hands.
11. Stained Glass Collar to Sternum Transition
Sternum and underbust are sensitive so you will feel the needle more over bone. The visual payoff is high if you allow room between color blocks so they do not merge as the body moves. A mistake is requesting tiny glass facets placed tight to the sternum where healing shifts the edges. Discuss session pacing and whether the artist wants to split the piece into two sittings. This placement often feels tender for two weeks and requires careful clothing choices the first few days.
12. Neo-Traditional Adam Head with Bold Color on the Calf
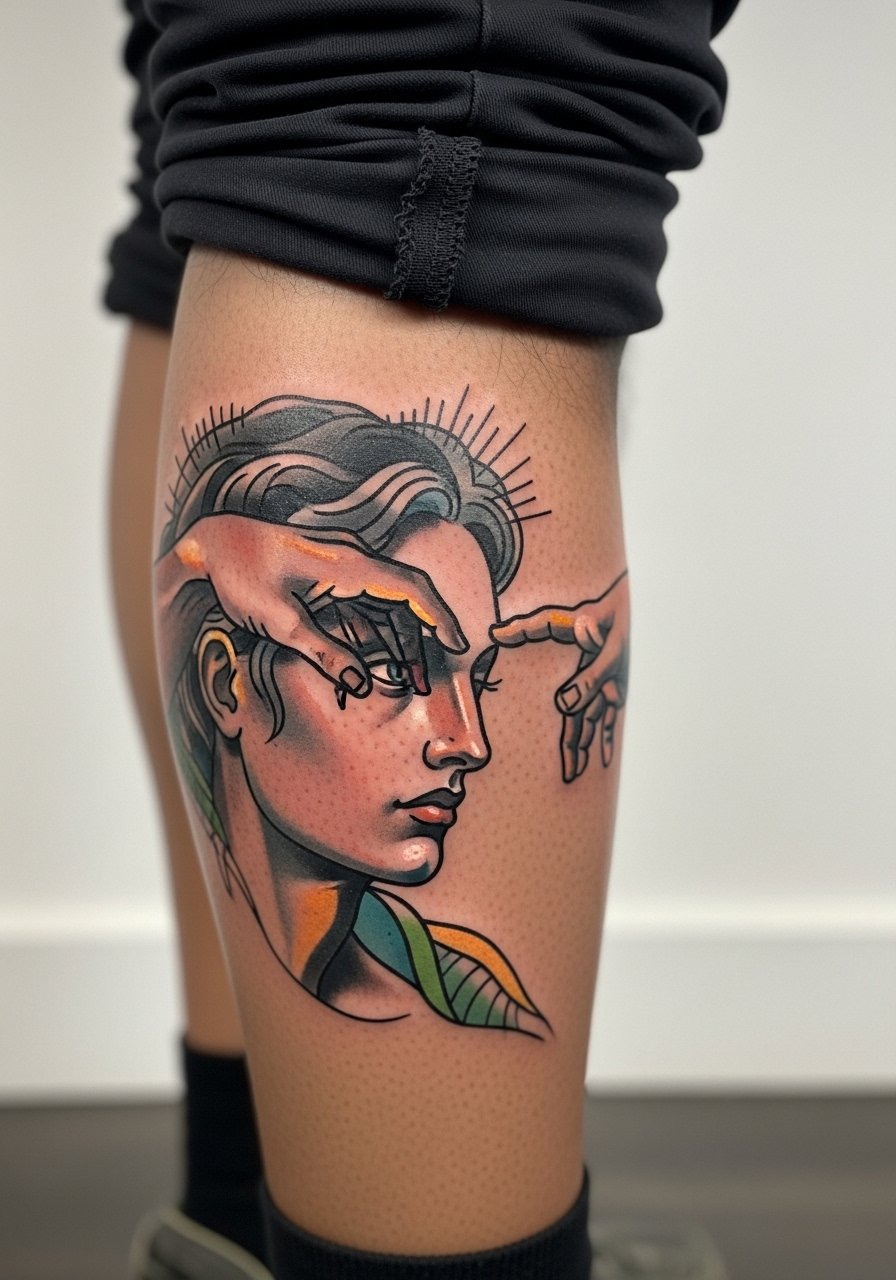
Calf pieces are visible and heal well because of lower friction in day-to-day life. The area tolerates heavier saturation which helps color last. A common mistake is over-detailing a face in a small calf panel which blurs over time. I recommend a neo-traditional approach with clear planes of color and confident outlines. For showing it off, cropped pants or a denim skirt work well and draw attention down the leg. Expect touch-ups at year three for vibrancy, less often if you avoid strong sun.
13. Micro-Realism Adam Eye on the Nape
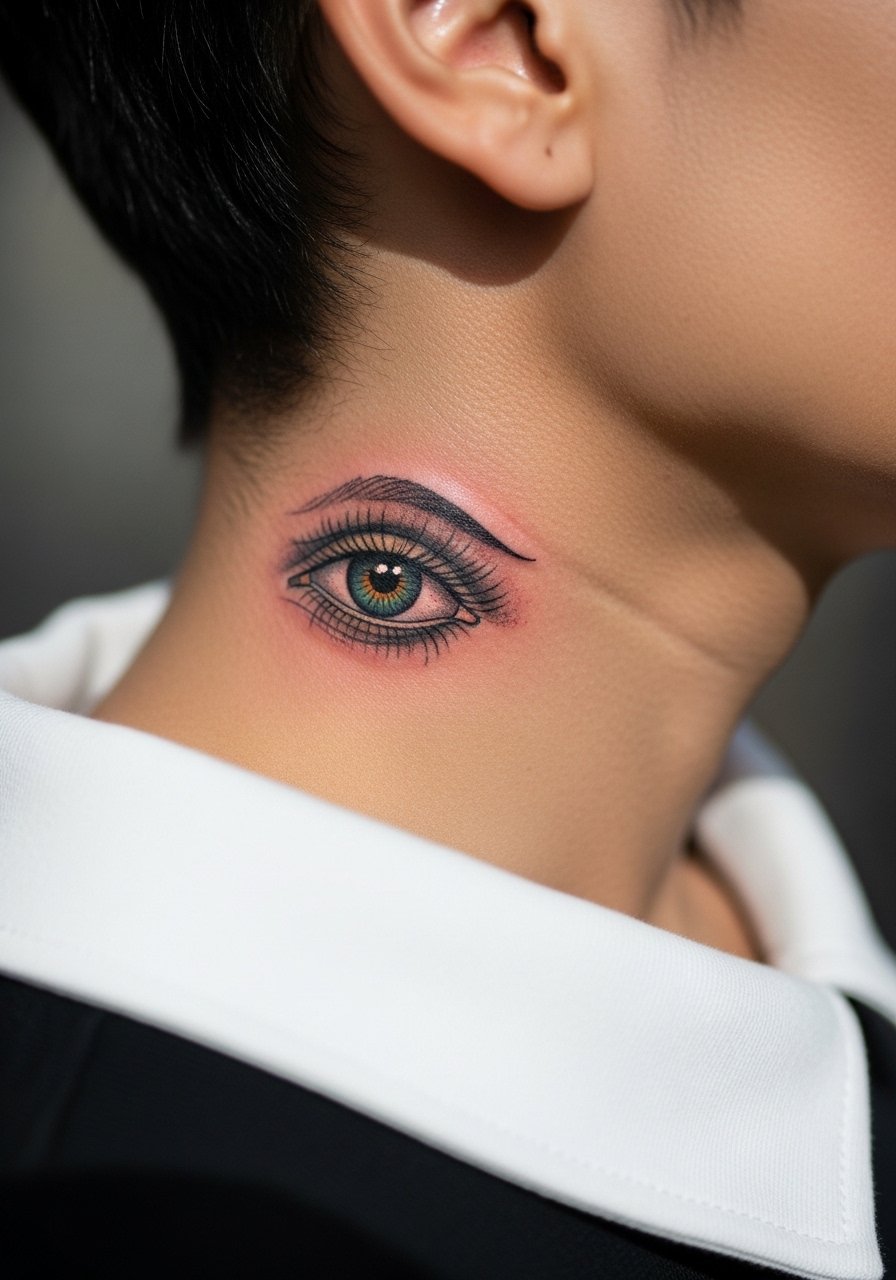
Neck tattoos are visible and not everyone wants that level of exposure. Pain is moderate and sessions are short. The real mistake is asking for ultra-fine micro-realism without giving the artist room to make the pupil and lashes clear. Ask for defined contrast between the iris and the surrounding color so the detail reads at six months. This placement may influence work settings so consider visibility carefully. A wide-neck shirt makes the session easier to access without pulling at clothing.
14. Mosaic Tile Sleeve Fragment

A sleeve fragment that borrows mosaic patterns allows the hands to sit within a graphic grid. Visual impact is strong and the skin on the upper arm tolerates dense color. The mistake is trying for micro-mosaic without bold separations which becomes a watercolor mess as the ink settles. Ask for negative space lines between tiles and stronger outlines around the hands. For show-off styling choose rolled-up sleeves and a casual blazer that keeps the arm visible without overcrowding the look. Expect periodic touch-ups to the outlines to maintain tile separation.
15. Watercolor Halo on the Lower Back
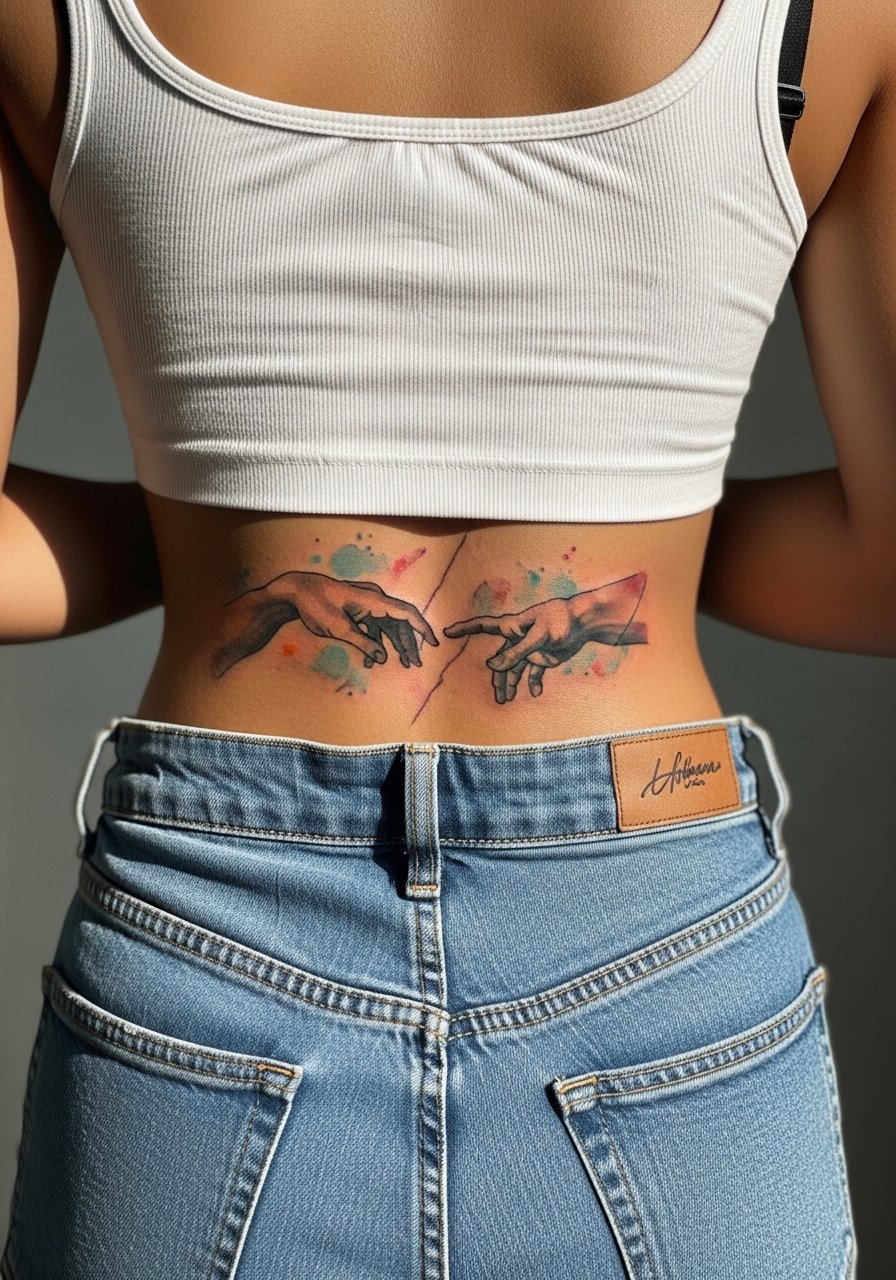
Lower back skin can take saturated color well, but clothing and waistbands can irritate a fresh piece. The common problem is placing the tattoo where belts and waistbands sit, leading to scabbing and patchy healing. Ask your artist to position the design slightly above the waistband and plan loose, high-waisted pants for the first week. This area ages reliably if kept out of constant friction and sun. For sleeping, avoid pressure directly on the piece while it settles.
16. Tiny Stipple Hands Behind the Ear with Color Dot Work
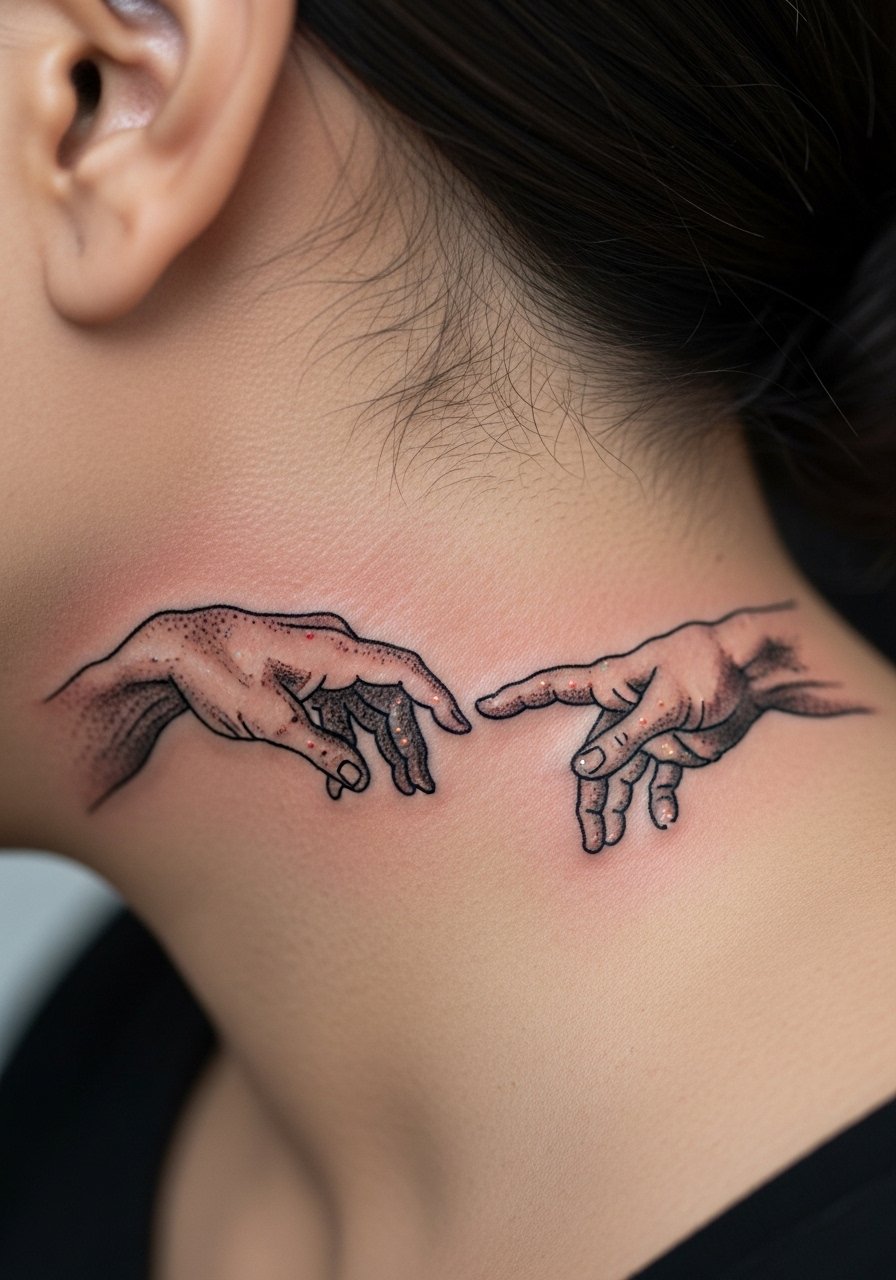
Behind-the-ear placements need careful framing. One camp sees these as expressive micro-places that read well tucked under hair. Another camp argues the location is too small to hold stipple shading long term. The truth depends on your hairline and how much scalp movement you have. Keep the design minimal and ask for stipple rather than layered shading to reduce blowout risk. For the session, plan a hairstyle you can pin back so the area is clean. This is a subtle spot that works when you want a hint of color rather than a bold statement.
17. Stained Glass Back of Hand Panel
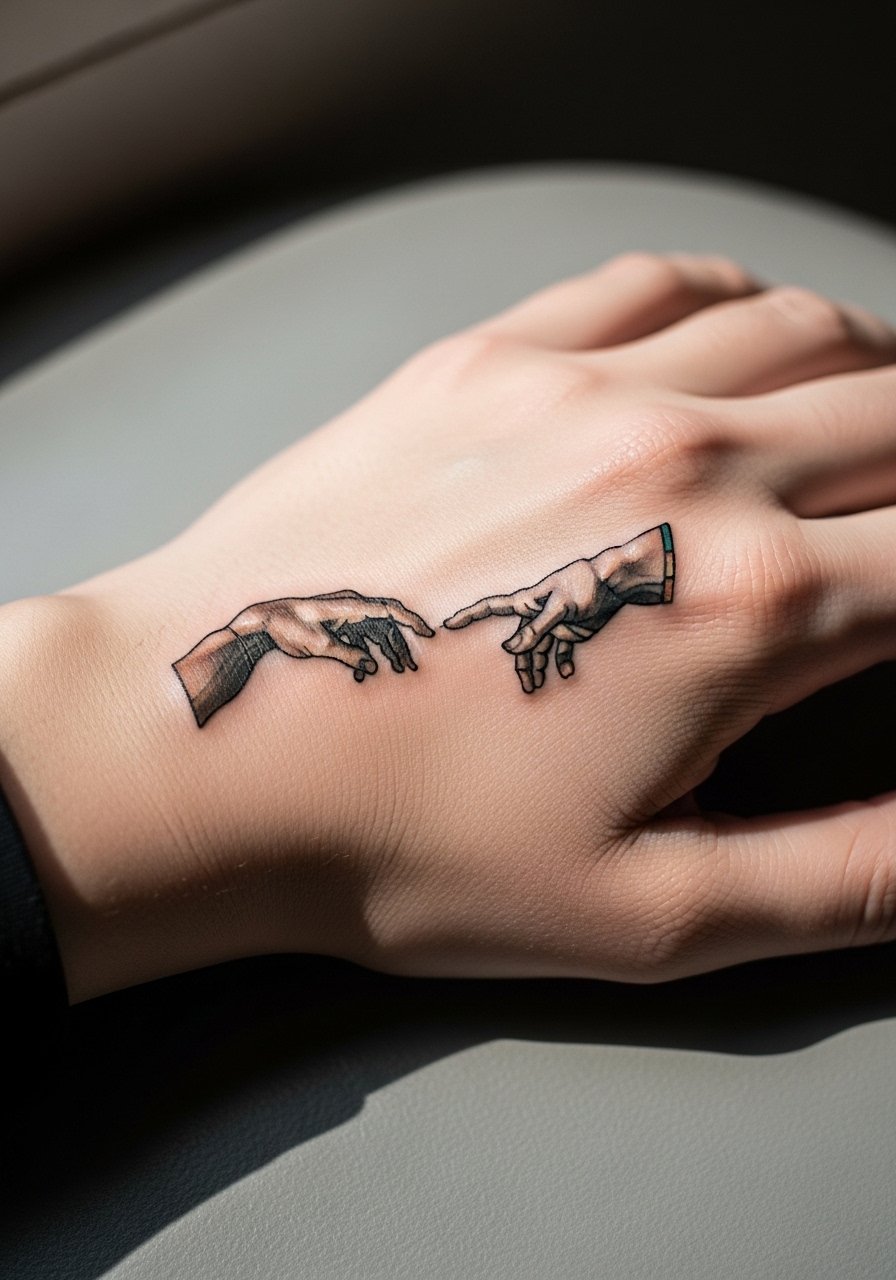
Back-of-hand work is highly visible and takes a beating from daily activities. Expect faster fading and more frequent touch-ups. The mistake is trying for photographic detail where the skin is thin and motion is constant. I recommend bold color panes with strong outlines and minimal micro-detail. The session is short but painful near the knuckles. Keep in mind that hand tattoos can impact certain industries, so consider longevity and career effects before committing. For after the session avoid heavy hand use for at least three days to cut down on scabbing.
Frequently Asked Questions
Q: Will a colorful Creation of Adam tattoo on the ribs blur faster than one on the forearm?
A: It often does. Ribs stretch and move with breathing which can make fine detail soften sooner. In my experience choosing slightly wider spacing and booking layered saturation sessions helps ribs hold color better than a single shallow pass.
Q: How should I prepare clothing-wise for a shoulder blade or upper back session?
A: Bring a loose button-down or a tank top you can remove easily so your artist can access the area without tugging. A zip-up or wide-neck option keeps the rest of your clothes clean and makes it simple to re-dress after a long session.
Q: Are stained-glass or mosaic versions respectful of the original imagery?
A: There are two camps. One sees modern reinterpretation as creative homage. The other warns against using sacred imagery without context. If you choose a religious motif, consider subtle variations and discuss cultural origin respectfully with your artist before booking.
Q: How long before a colorful forearm piece needs a touch-up?
A: From what I have seen, forearm pieces typically show a need for a touch-up around year two to three depending on sun exposure and skin type. Deeper saturation and regular sunscreen extend vibrancy.
Q: Is it realistic to get fine stipple shading behind the ear or on the inner bicep?
A: It depends on scale and artist technique. Stipple can work well when kept minimal and with good spacing. Ask your artist to show healed examples on similar placements and be prepared for a possible touch-up window at six months.
