
Fine line bow and arrow tattoos are all over feeds right now, and the reality is that what looks delicate in a photo can blur on skin if placement and spacing are off. The most resilient pieces balance crisp linework with modest scale, and the right placement changes everything. Below are realistic bow and arrow designs that consider aging, pain, session flow, and how to show them off.
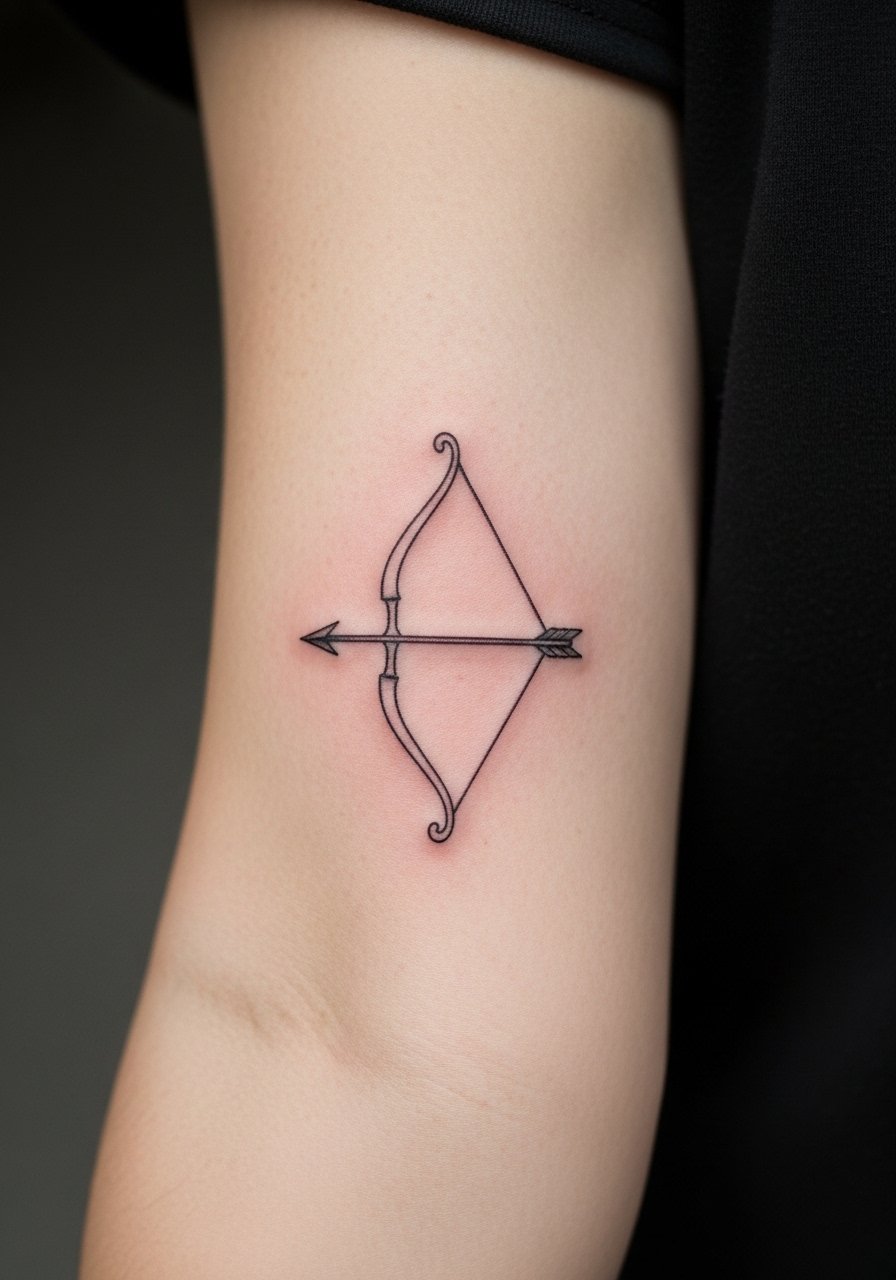
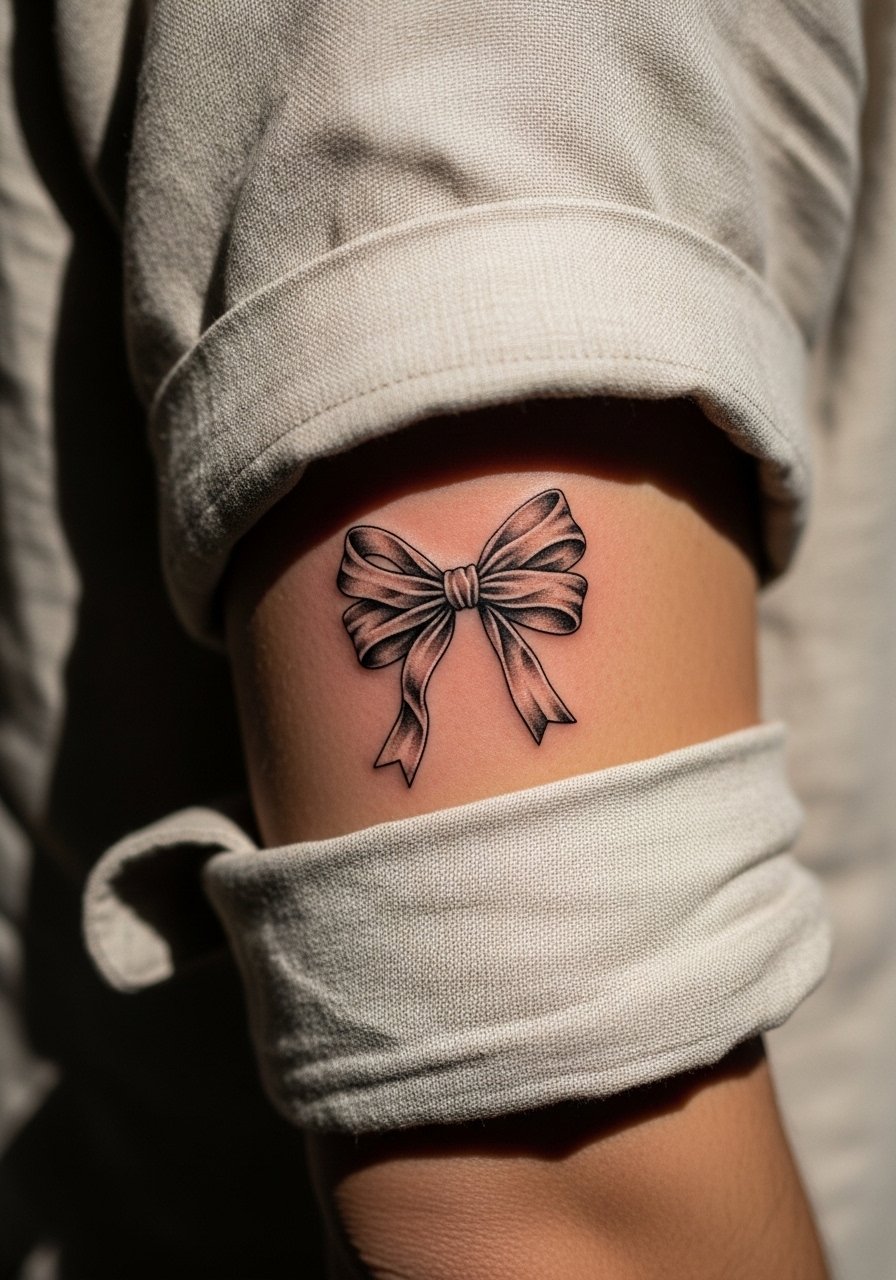
1. Fine Line Bow on Inner Forearm
This clean, single-bow design works well on the inner forearm because the skin is relatively flat and the artist can keep consistent linework. Tell your artist you want slightly heavier contour lines around the bow so the silhouette holds at year three. Expect a 1.5 to 2 hour session and mild to moderate discomfort. Common mistakes include making every detail micro-sized, which causes the string and feathering to blur. For the session wear, a loose button-down shirt lets the artist access the area without rubbing fabric on fresh ink, and rolled sleeves make showing it off effortless.
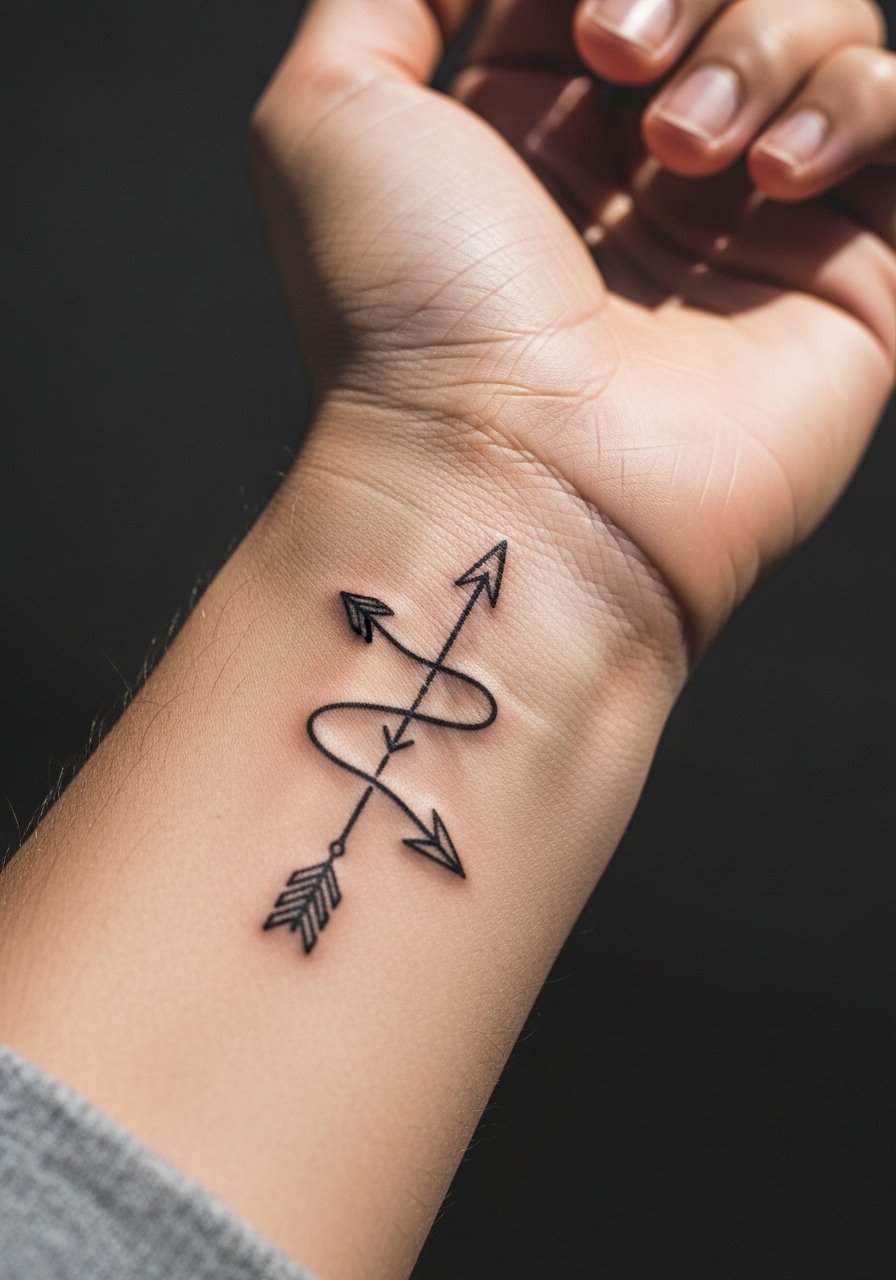
2. Tiny Arrow Wrap at the Wrist
A tiny arrow that wraps the wrist reads like jewelry when done with confident linework. The wrist is a high-friction zone so expect touch-ups sooner than on the forearm. Session time is short, often under an hour, but the pain is sharper because of thin skin and bone proximity. Avoid requesting ultra-thin lines that the skin cannot hold. During consultation, specify slightly bolder shaft lines and ask about spacing between the arrow and any bracelets you plan to wear. Pair this with a minimalist watch band that frames the arrow without crowding it when you show it off.
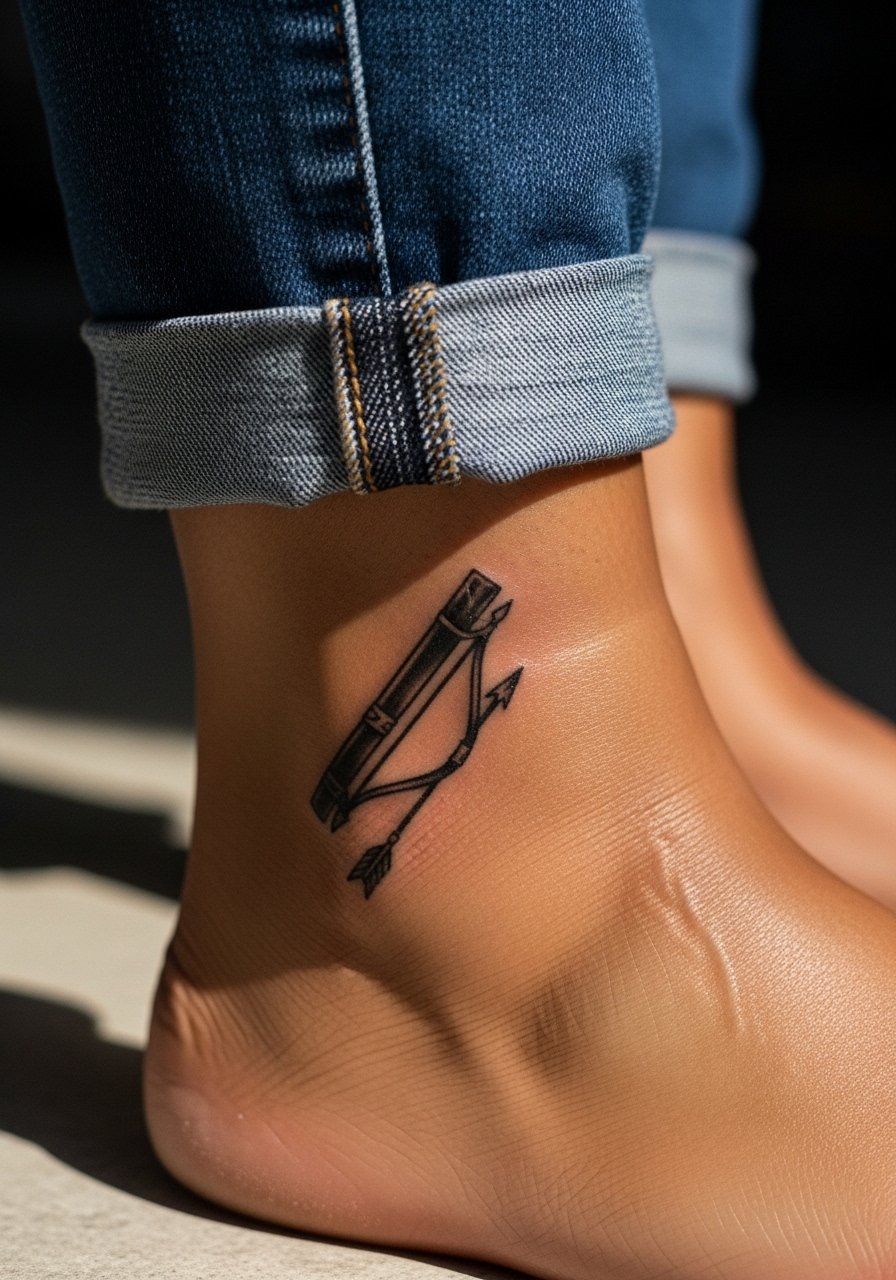
3. Ankle Quiver Accent
A small quiver with a single arrow along the ankle is playful and shows well during warm months. The ankle sees constant movement and shoe friction, which can soften delicate details, so go slightly bolder on shaft and feathering. Tell the artist you want a single-session piece under 90 minutes and expect a crisp look at six months, then softening by year two that likely needs a touch-up. Wear jeans rolled up to the appointment so the artist can access the area without a full outfit change, and opt for sandals on day two to avoid rubbing the fresh ink.
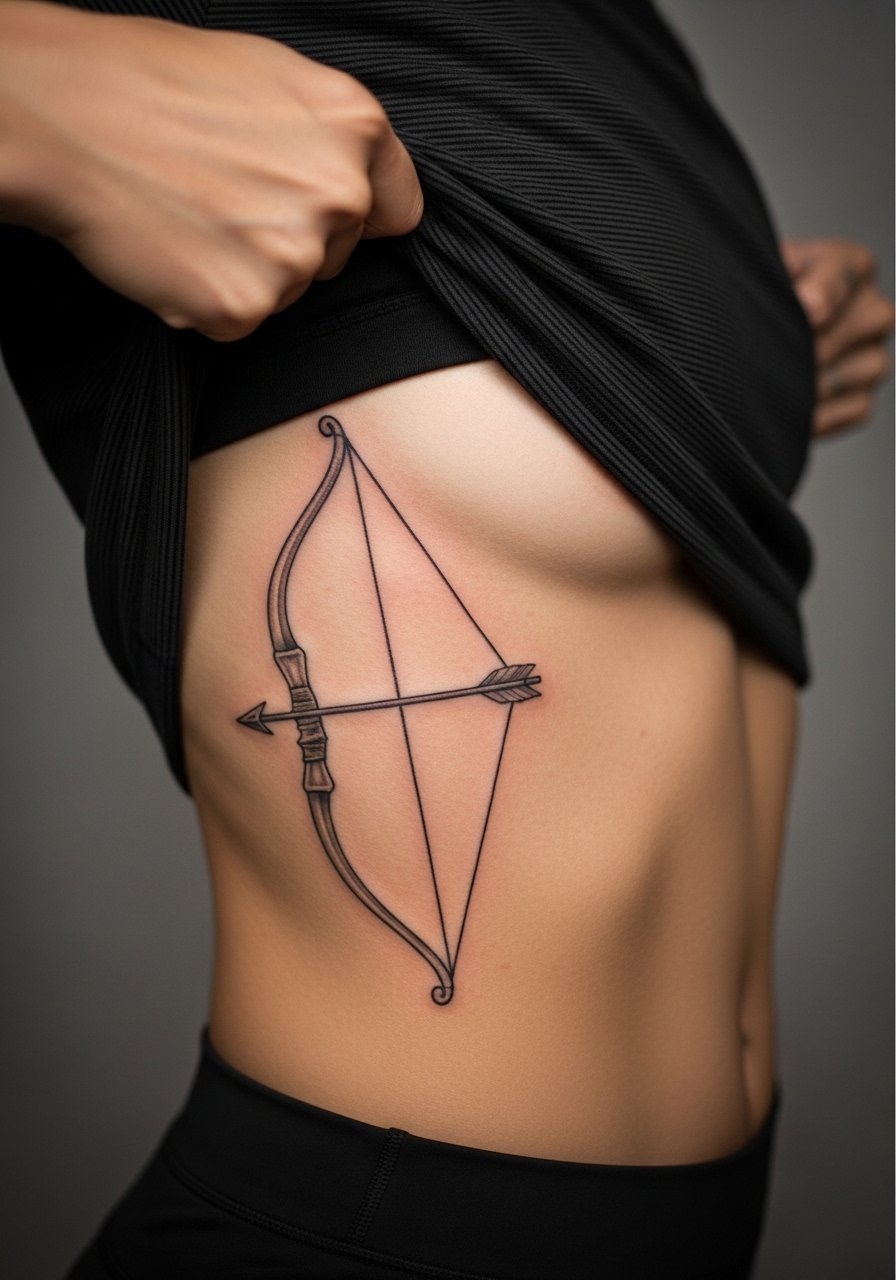
4. Ribcage Bow and Arrow Scene
A realistic bow and arrow across the ribcage gives room for shading and motion, but the placement is controversial. One camp says ribs stretch and fine line blurs within two years. The other camp insists that with proper needle depth and spacing, fine line can settle beautifully on ribs. Be explicit in consultation about spacing and ask your artist which camp they follow. Pain is higher here, expect multiple short breaks during a two to four hour session. Choose a slightly larger scale than the reference image to prevent crowding, and wear a cropped athletic top you can lift slightly to reveal only the work for the artist.
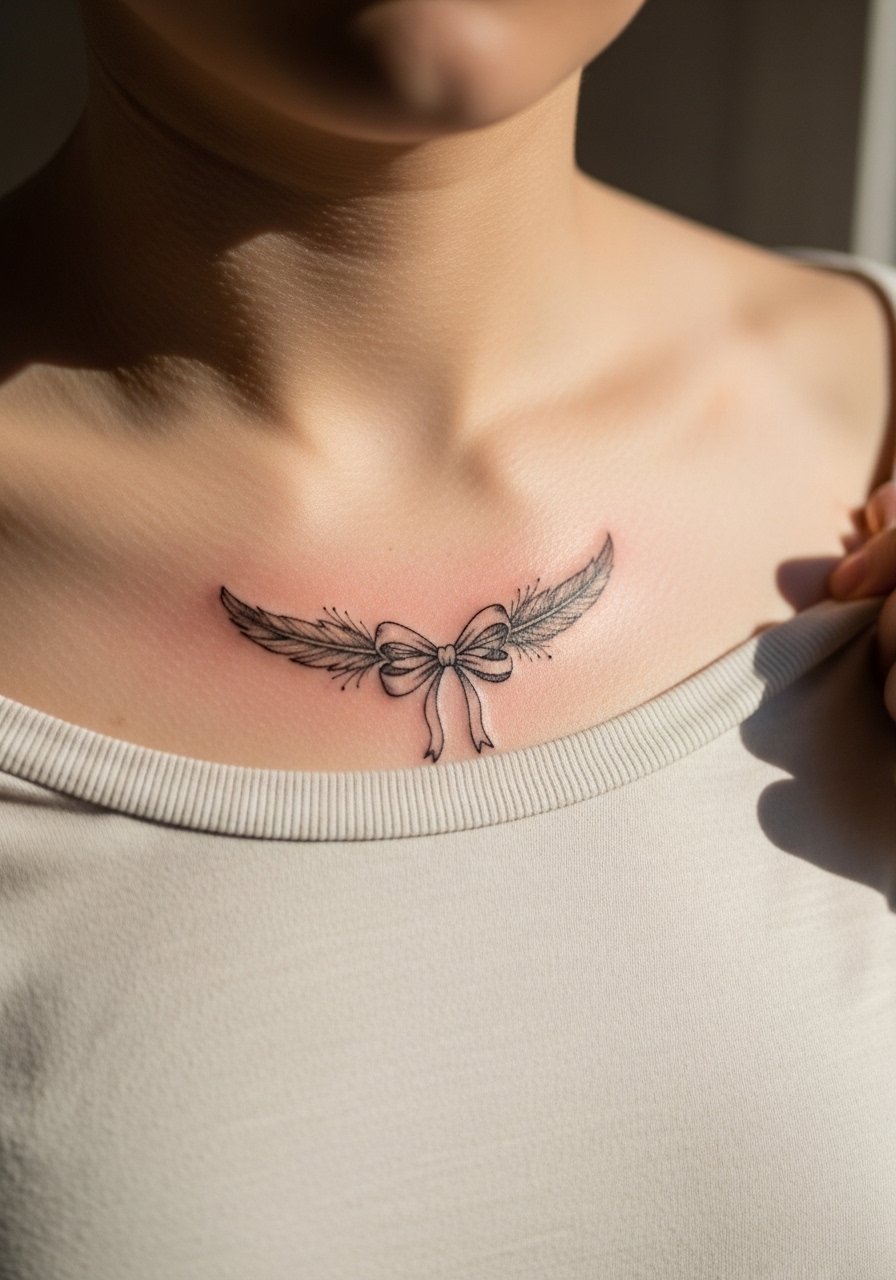
5. Collarbone Bow with Feather Detail
A bow resting along the collarbone looks elegant with a short feather trailing toward the shoulder. The collarbone area moves with breathing and clothing, so expect a gentle ache during the session and a session time around 90 minutes. The most common error is placing the feather too densely, which merges after healing. Ask for airy stipple shading and a slightly darker anchor line so the silhouette reads from a distance. For showing it off, a thin chain pendant necklace sits above the design without competing. The sensitive collarbone shot should be planned around outfits for the first week.
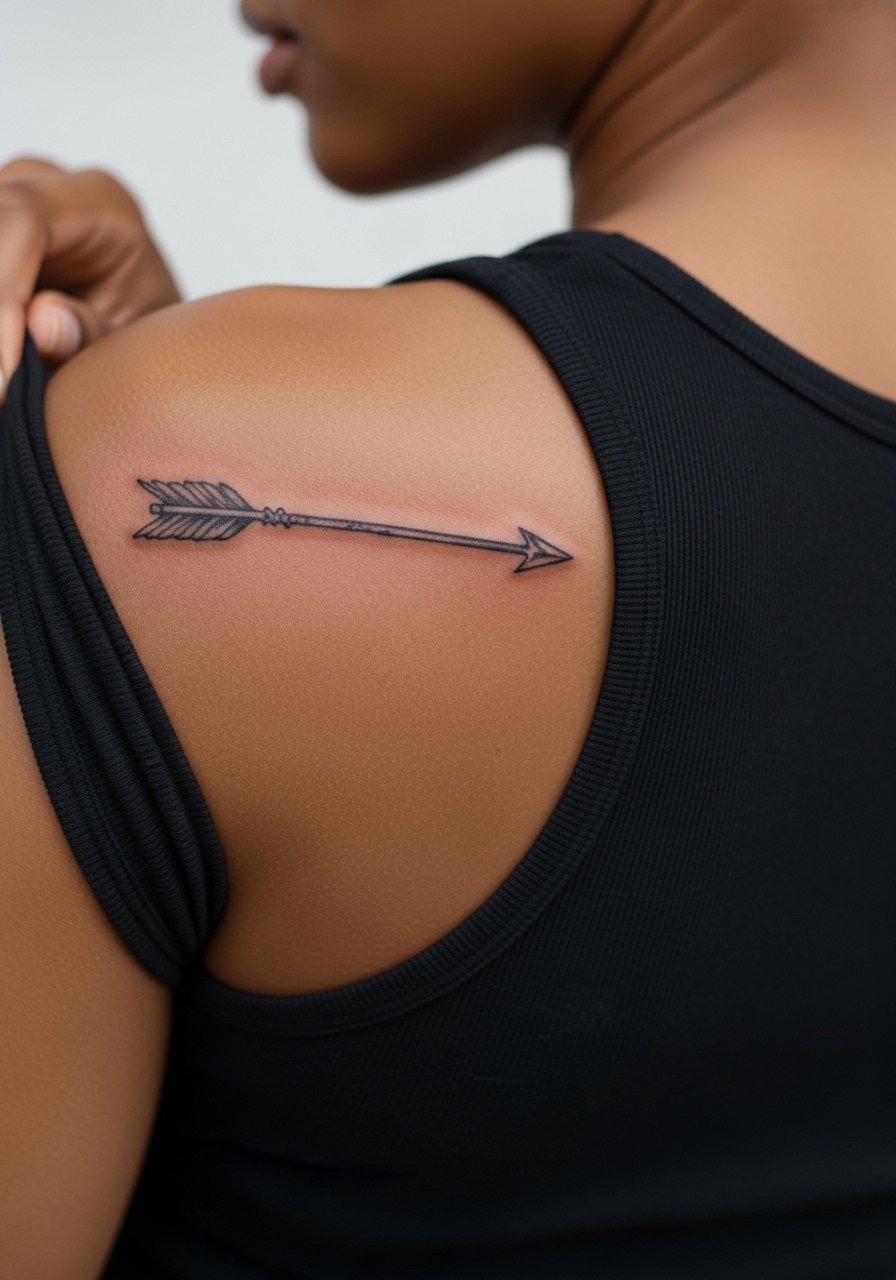
6. Shoulder-Blade Full Arrow
A full-length arrow running along the shoulder blade uses the canvas for elongated composition and looks striking under an open-back top. The area tolerates longer sessions with moderate pain and a two to three hour session is common for added detail. Common mistakes include cramming heavy shading into the fletching which can age poorly. Ask for whip shading and light stipple work to keep texture without saturation. For the session, wear a loose tank top you can pull aside so the artist has clear access without removing clothing.
Studio Day Picks
The shoulder and chest pieces above need different prep than wrist work, and a few session essentials smooth the appointment and first week.
-
Stencil transfer paper kit. Lets you preview precise placement, which is critical for collarbone and ribcage pieces.
-
Topical numbing cream. Applied according to instructions eases the first thirty to sixty minutes on sensitive ribs and sternum work.
-
Thin protective film roll. Useful for ankle and wrist pieces that face constant friction from clothing and shoes.
-
Fragrance-free gentle body wash. Cleans the area without irritating fine line work during showers.
-
Aquaphor healing ointment. Thin application helps lock in moisture early for fine line pieces without suffocating the skin.
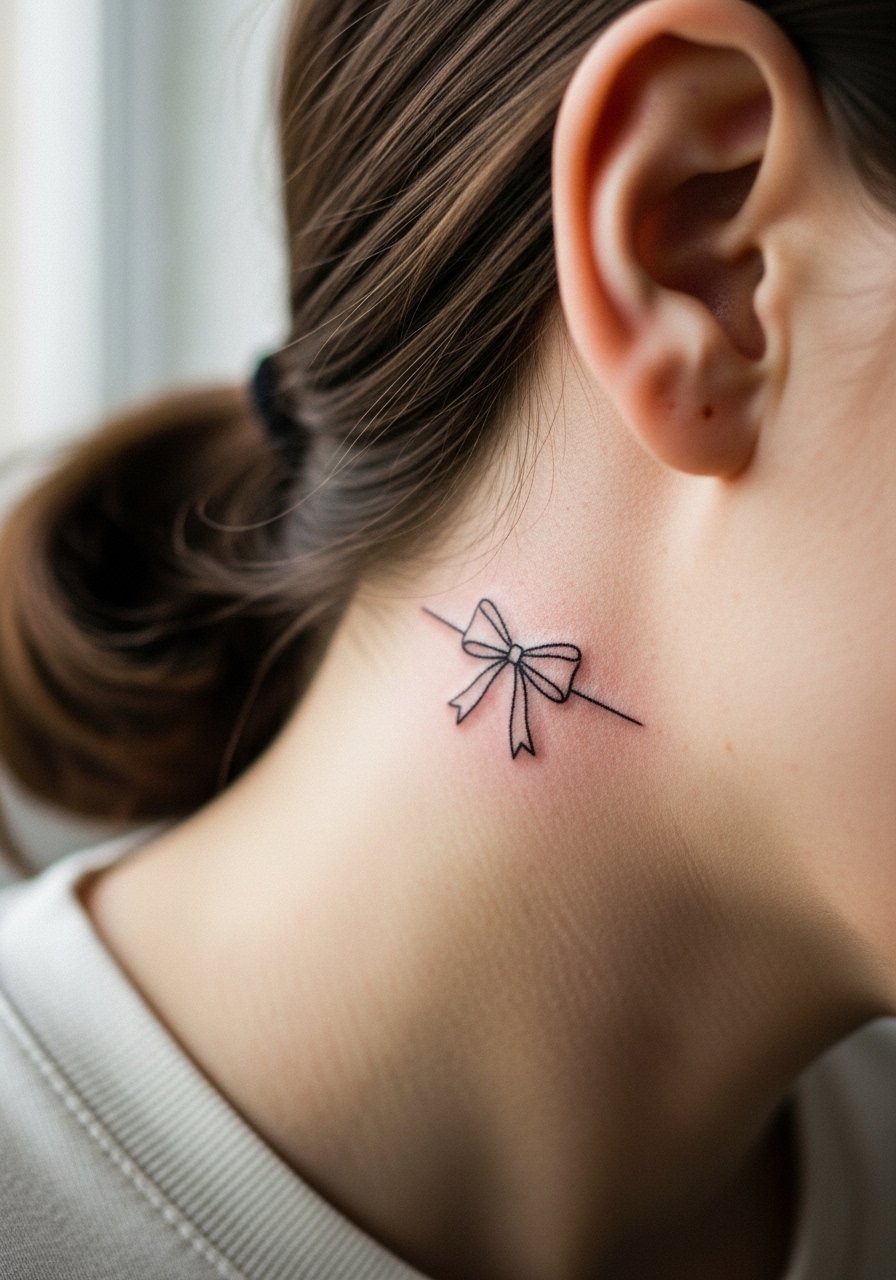
7. Mini Bow Behind the Ear
A tiny bow tucked just behind the ear reads like a secret detail. For image safety, the session requires precision and specialized placement skills. This spot requires a delicate touch and short session times, often under 45 minutes. Ask the artist for slightly bolder contouring so the curve holds, and expect natural softening by year two. Session wear should let you show the area without fully exposing the neck. Consider tucking hair back or wearing a wide-neck shirt pulled aside below the hairline so the artist can access the skin behind the ear.
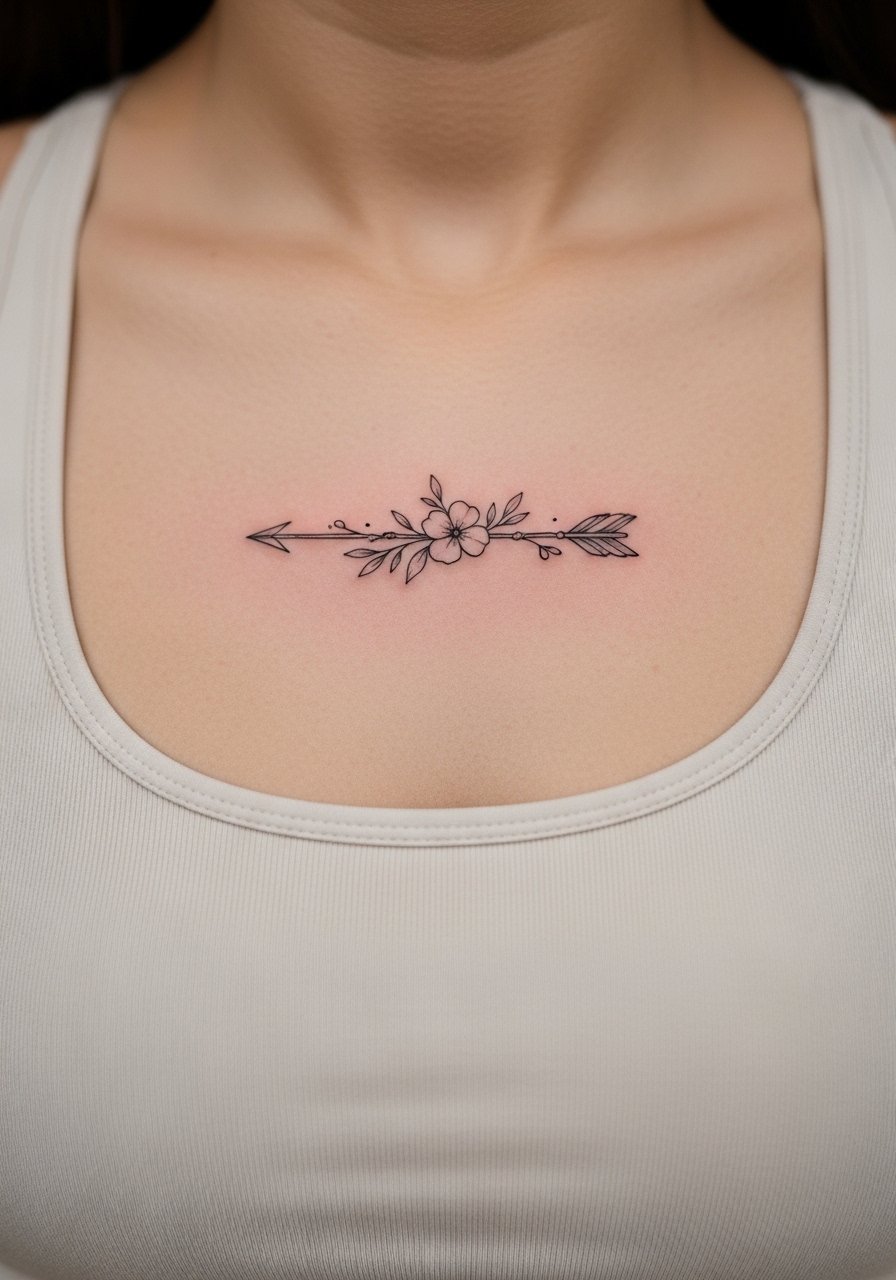
8. Sternum Arrow with Floral Anchor
A sternum arrow paired with small florals can be dramatic, but placement demands care. Sternum tattoos split artists into two camps. One group warns that the tight curvature and frequent movement blur delicate lines within a few years. The other group says that with robust linework and careful spacing, the design can remain crisp. Ask your artist where they stand and request a mock stencil at scale. Pain is high and session pacing matters. Wear a fitted sports bra so the artist sees only the sternum area when working and you can leave the studio dressed.
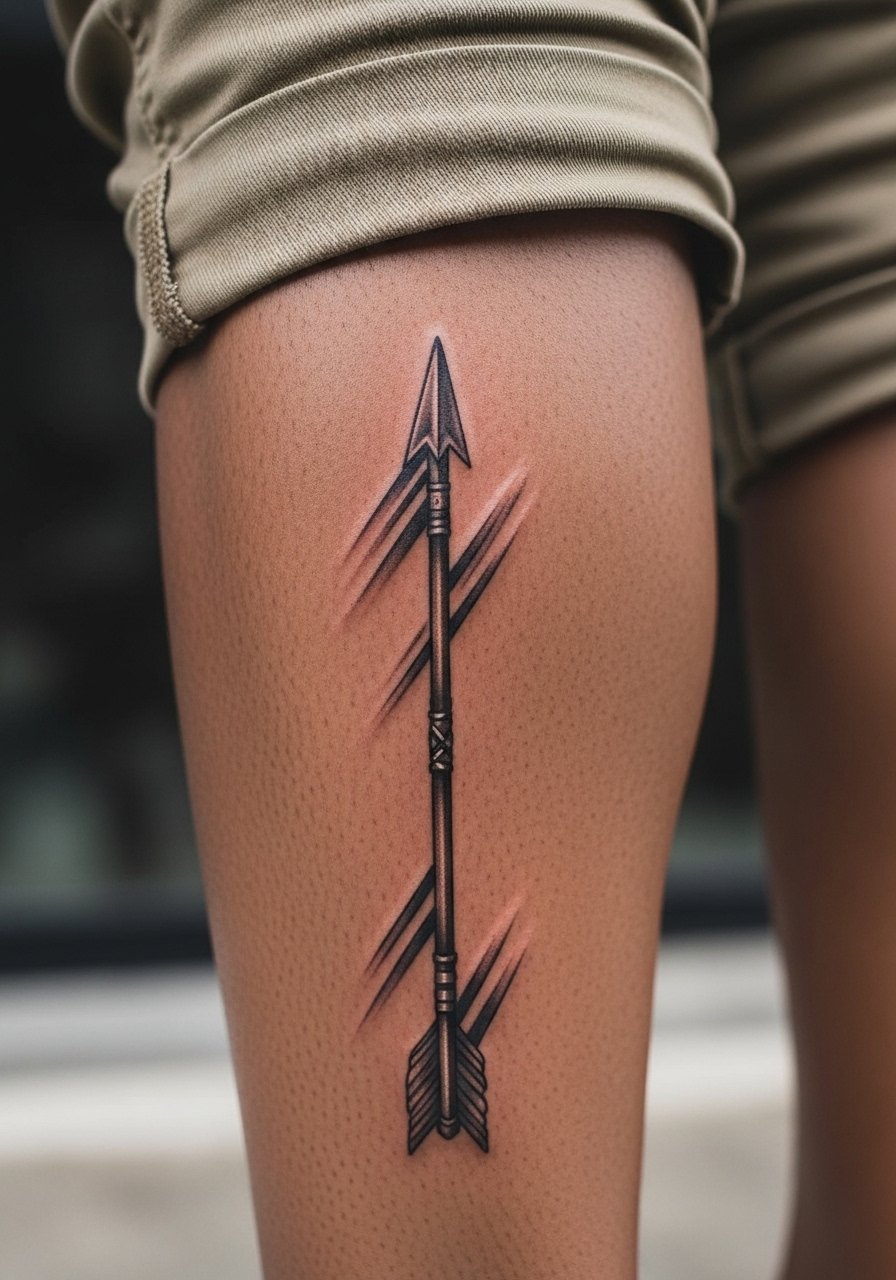
9. Calf Arrow with Motion Shading
An arrow down the calf benefits from motion in the shading to suggest movement while walking. The calf is forgiving for saturation and holds stipple and whip shading well. Sessions often run two hours for a fully detailed piece. Tell your artist you want the shaft to maintain negative space so the piece breathes at long distance. Common mistakes include over-saturating the fletching which can lose definition with heavy clothing. For show-off pairing, a pair of sandals or cropped pants frames the calf without covering the tattoo.
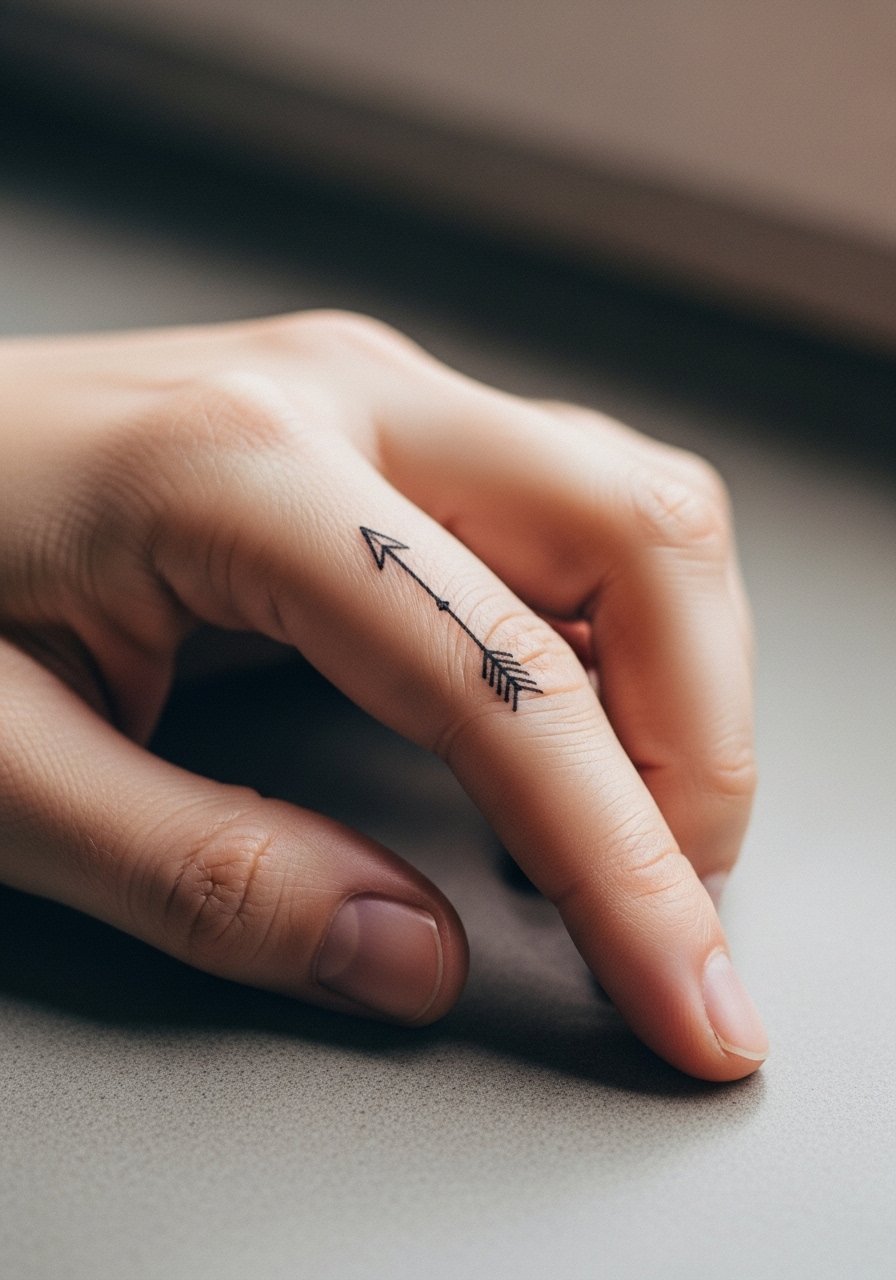
10. Tiny Finger Arrow
A tiny arrow along a finger is minimalist and reads like a subtle marker. Fingers heal unpredictably because of constant washing and thin skin. Expect the need for earlier touch-ups, sometimes within a year. Specify bolder barbs and slightly thicker shaft during consultation so the design remains legible. The session is quick but the pain is acute. For showing it off, stack with a delicate midi ring set that complements the scale without crowding the knuckle.
11. Upper Arm Micro-Realism Bow
A micro-realism bow on the outer upper arm allows for fine texture without risking blowout. The outer arm is forgiving and usually a low to moderate pain area. Ask for varied line weight and stipple shading to create the illusion of wood grain on the bow. Sessions can be two to three hours for higher detail. Avoid asking for photo-level tiny textures crammed into a small patch. This placement pairs well with rolled sleeves and a loose linen shirt when you want to reveal the artwork casually.
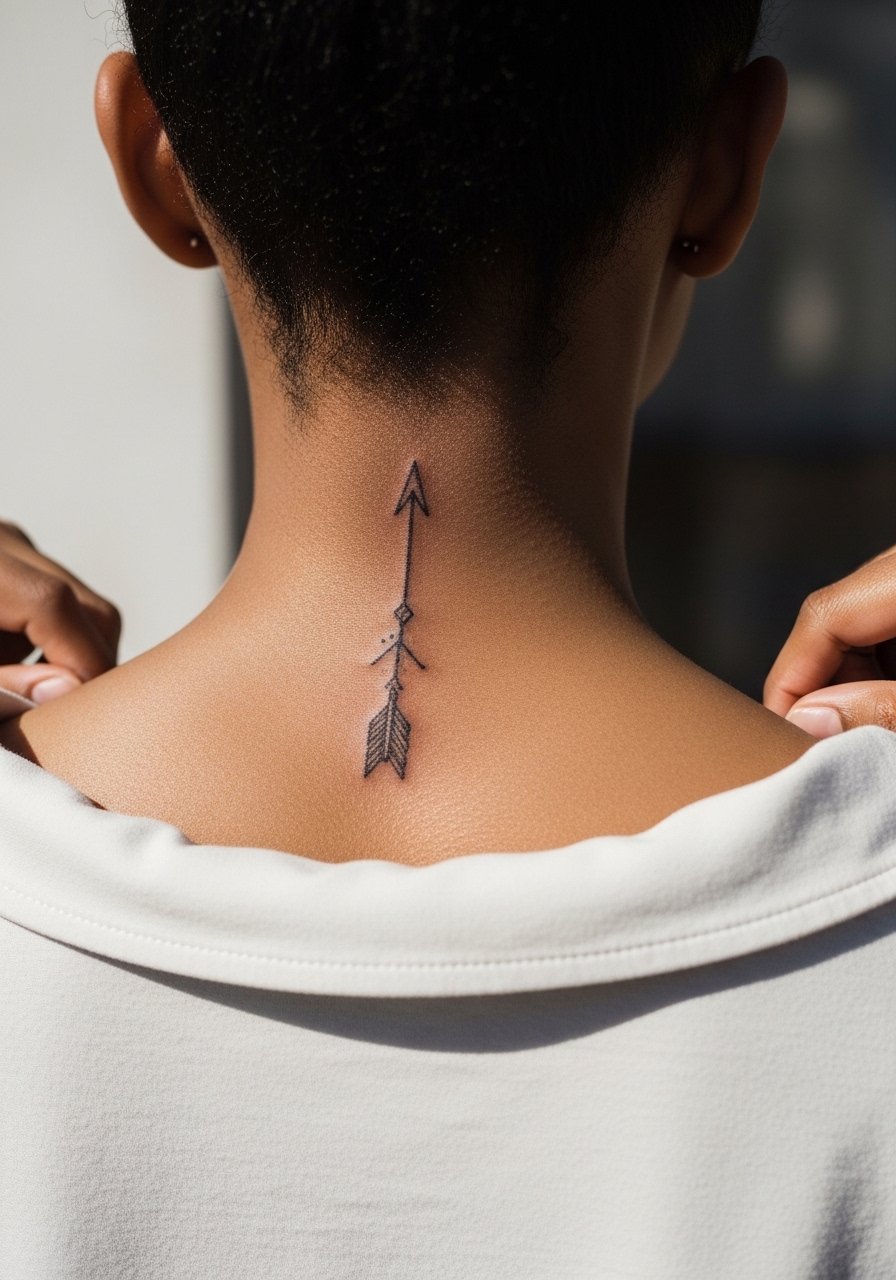
12. Back-Of-Neck Arrow Accent
A small arrow at the nape reads modern with short hair or a ponytail. The area needs a steady hand and intentional placement because of neck movement. Expect a single short session and moderate discomfort. Ask the artist for a slightly thicker spine line so it remains visible under hair growth and over time. For appointment access, wear a wide-neck shirt with the collar pulled slightly to one side so the tattooed area is framed but not exposed beyond the nape.
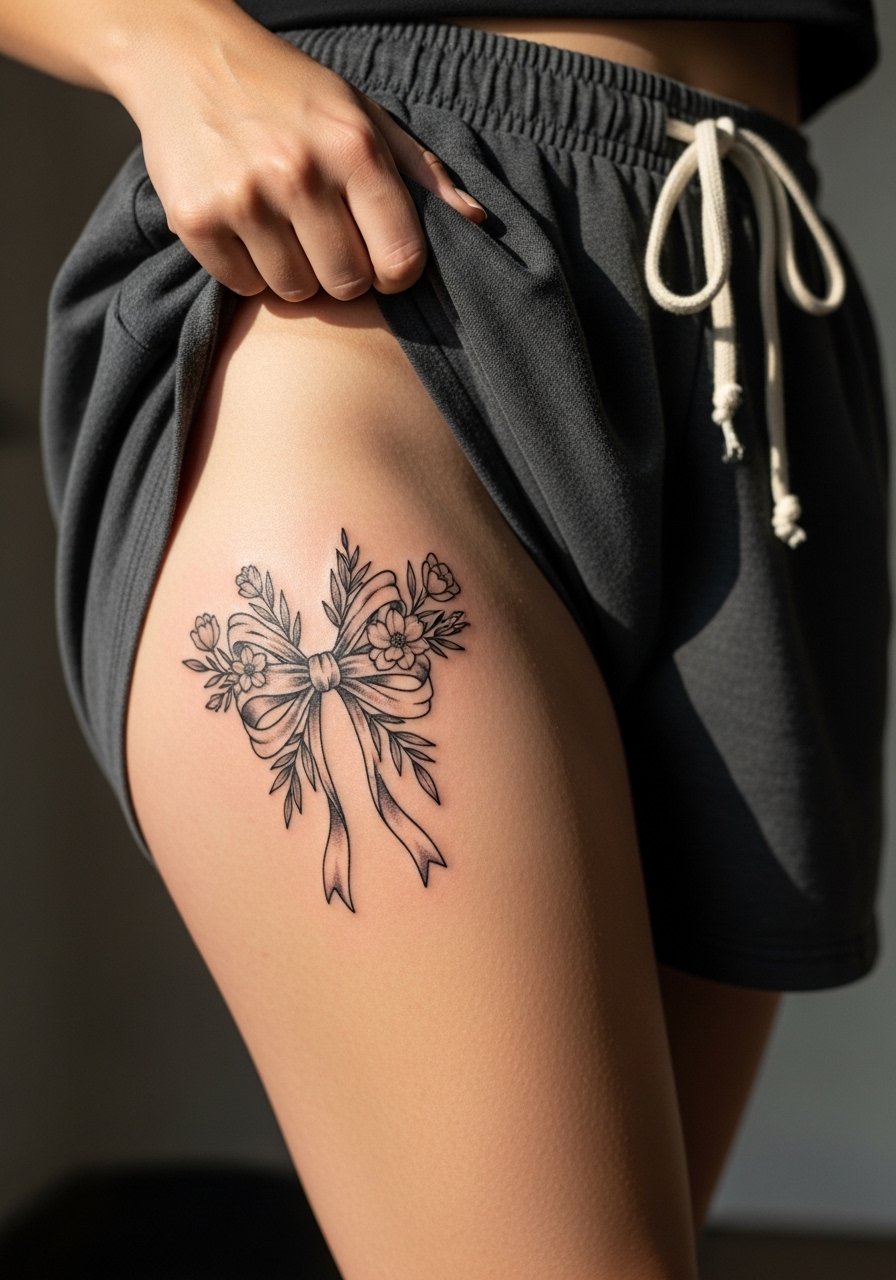
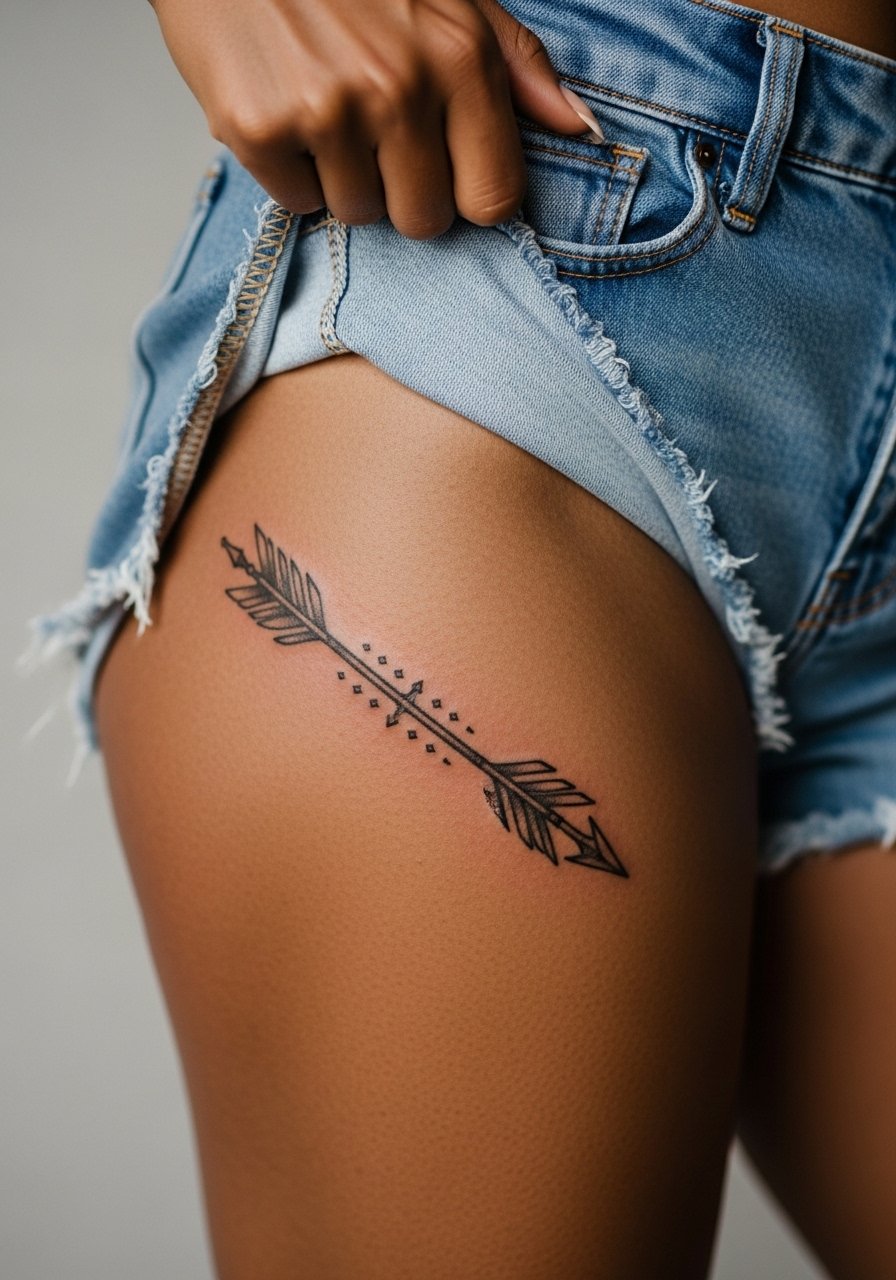
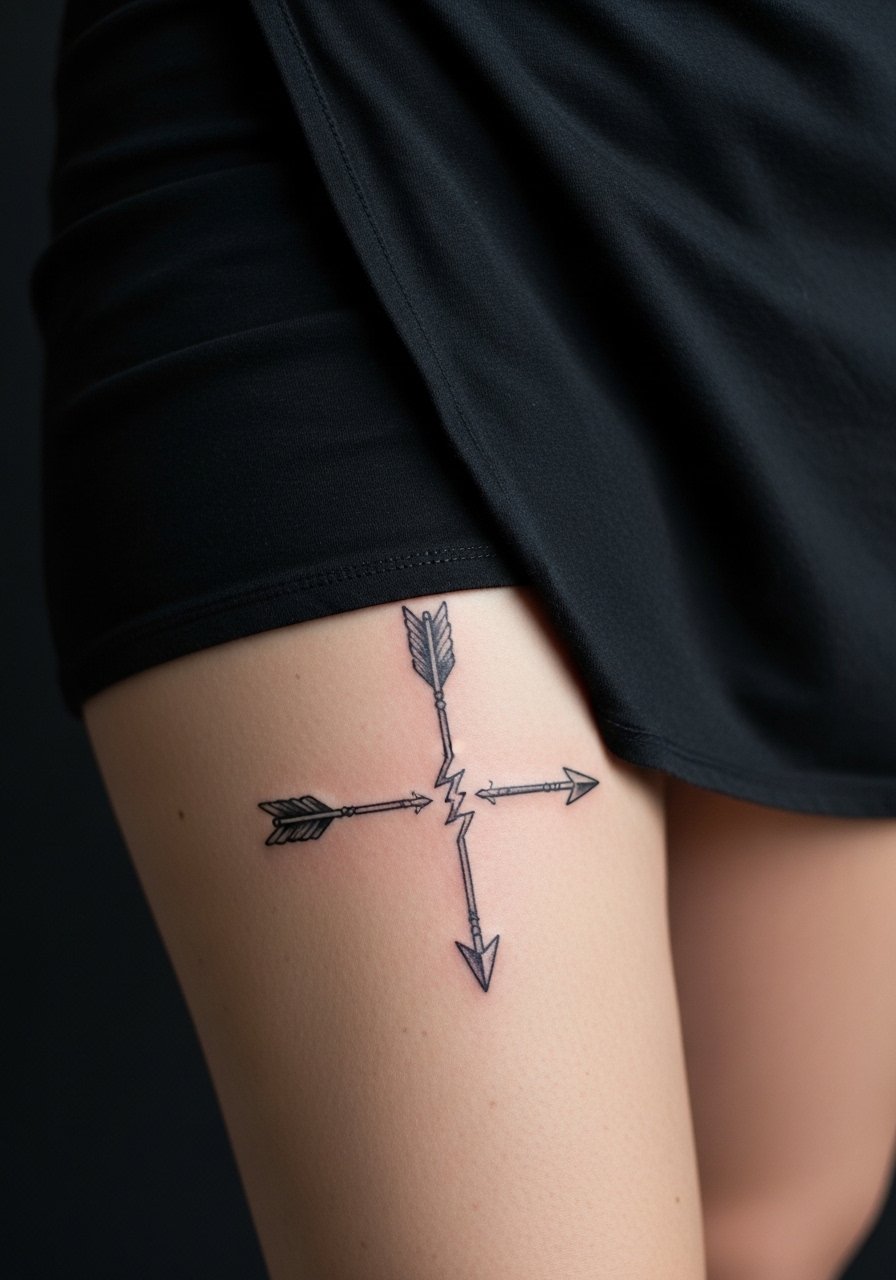
13. Thigh Bow with Botanical Motifs
A bow wrapping into a botanical cluster on the outer thigh gives space for detail and softer shading. Thigh skin holds saturation well so stipple and dot work age nicely here. Sessions can be longer, often two to four hours depending on coverage. Avoid overly tiny linework that will blur with friction from clothing. For session comfort, wear loose drawstring shorts so you can roll the leg without constriction.
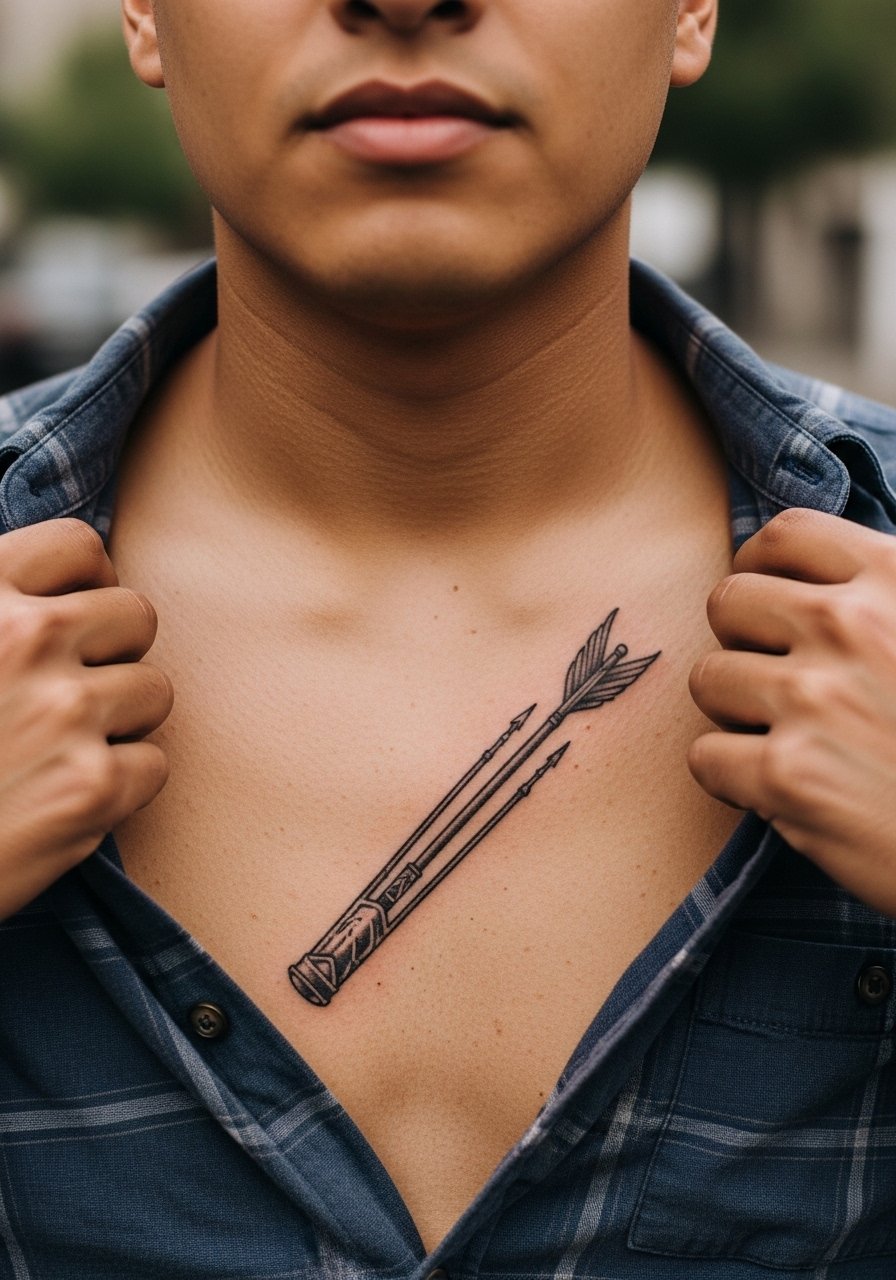
14. Chest Plate Quiver
A centered quiver across the upper chest reads bold and architectural when scaled to the sternum and collar area. This placement moves with breath, so controllers for spacing and heavier anchor lines help preserve the design. Sessions are medium to long and pain ranges from moderate to high. The common mistake is compressing too many small elements into a narrow chest plate. For showing it off, an open-collar shirt pulled aside slightly frames the work without full exposure.
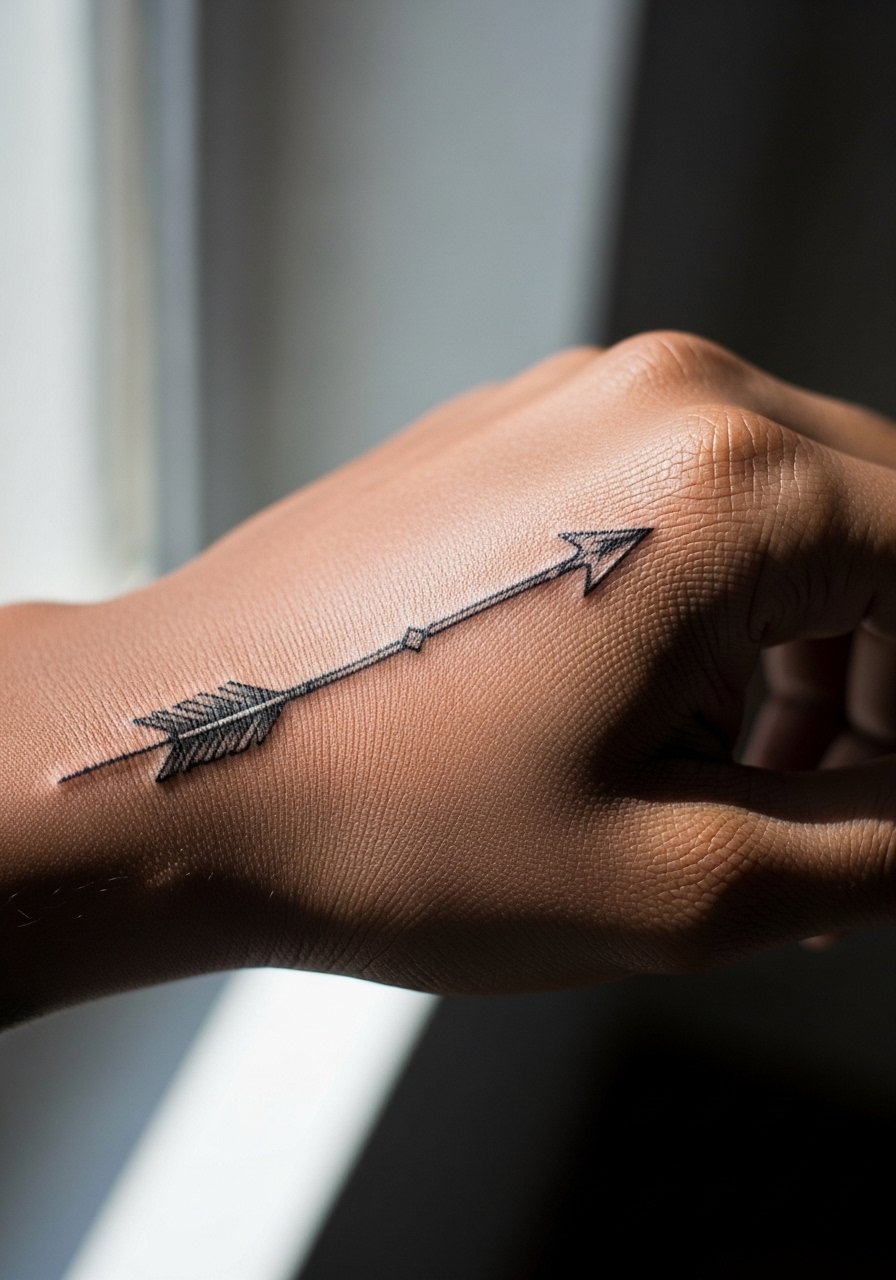
15. Palm-Edge Arrow Accent
An arrow along the palm edge is bold and intimate. Hand tattoos carry a higher fade rate because of constant washing and use. Expect touch-ups as part of the long-term plan and a short but intense session. Ask your artist about pigment depth because the hand skin reacts differently. Consider career implications since hands remain visible in many workplaces. The design pairs with a simple thin bracelet when you want to soften the hand visually.
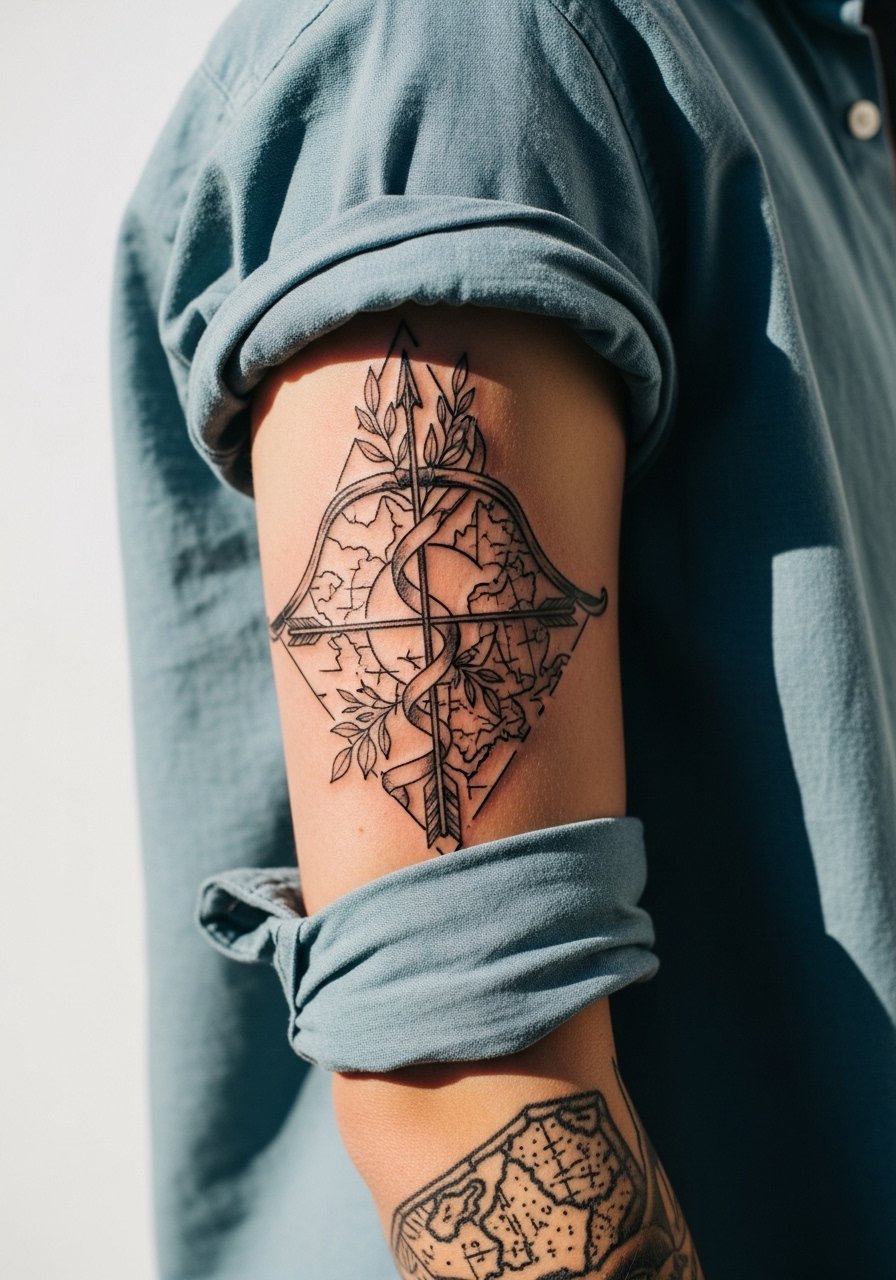
16. Full Sleeve Arrow Composition
A bow and arrow integrated into a sleeve can link nature, maps, and motion across the arm. Sleeve work requires planning over multiple sessions and consistent linework across panels. For longevity, request negative-space pathways that prevent dense areas from merging with time. Expect multiple long sessions and a staged touch-up plan at year one. Common mistakes include cramming too much fine detail near joints. Roll sleeves and wear a loose button-down to the appointment so the artist can work comfortably across the length of the arm.
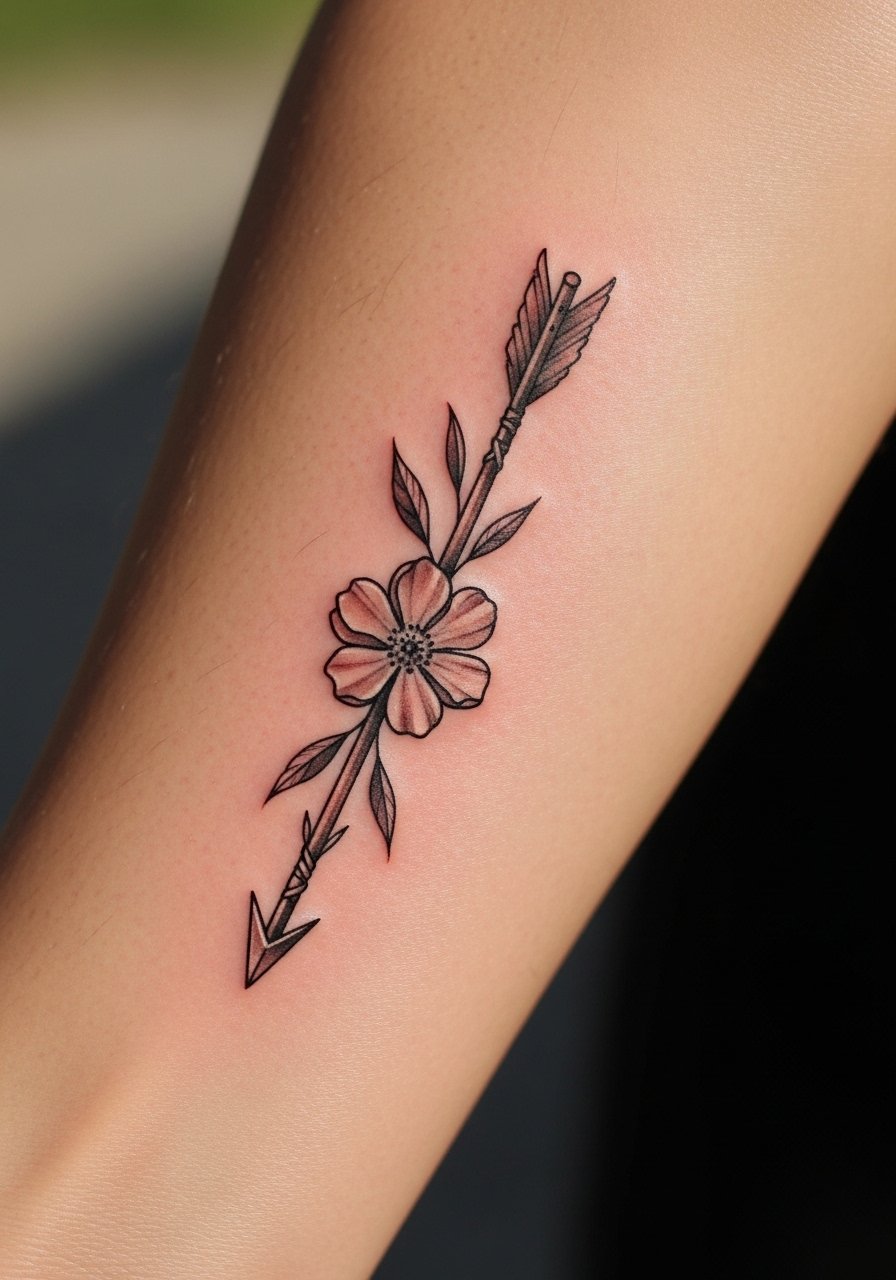
17. Arrow Through a Flower, Micro-Realism
A micro-realistic arrow piercing a small flower works on the forearm or calf and balances symbolism with lifespan. Micro-realism needs space and consistent saturation to avoid patchy healing. Sessions will vary but often sit around one to two hours for compact pieces. Tell the artist you want emphasis on negative space around the flower to keep the bloom readable at two years. For showing it off, a racerback tank frames forearm or shoulder placements without distraction.
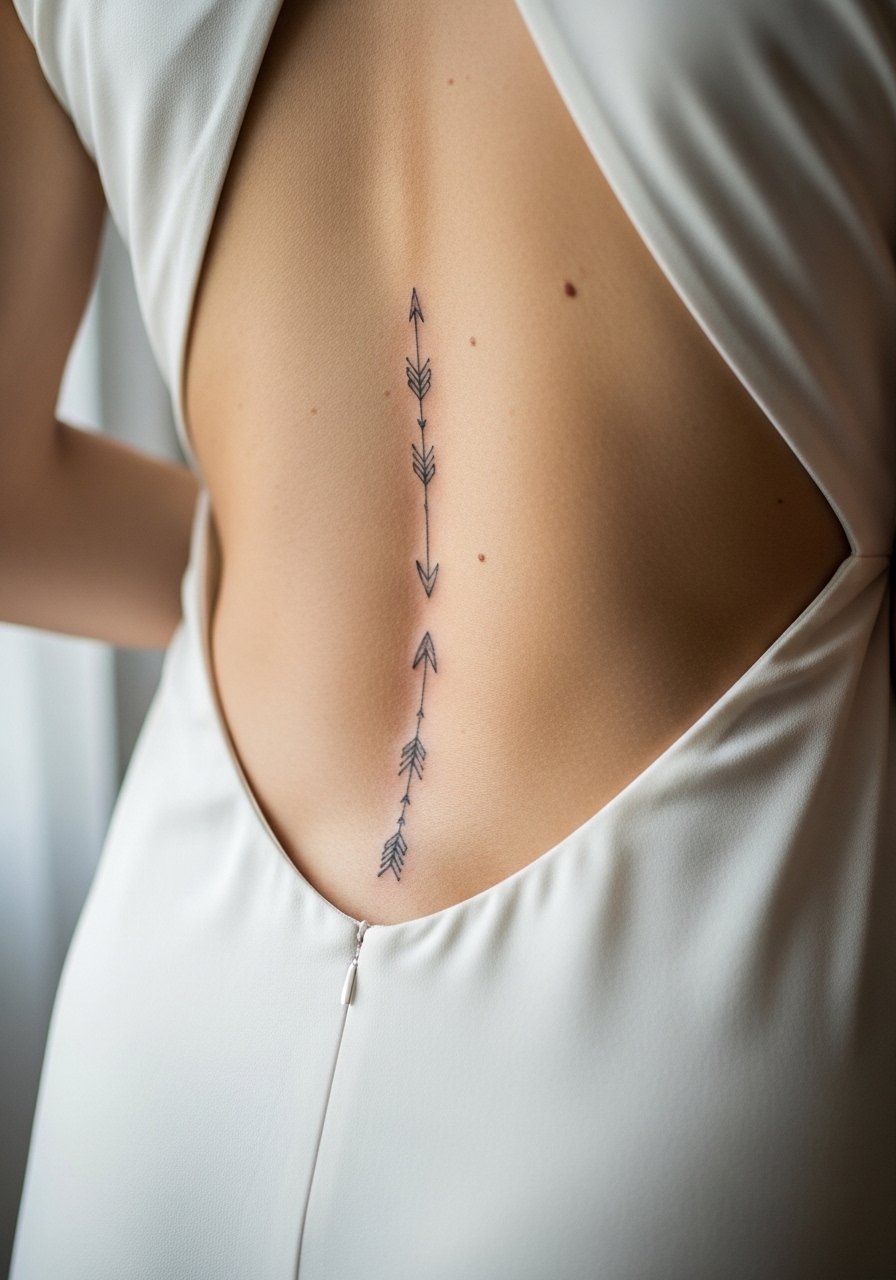
18. Spine-Aligned Arrow Cluster
A vertical cluster of small arrows aligned down the spine makes use of natural symmetry and back structure. Spine pieces require artists who work with the body curve and consider how aging and posture will affect linework. Sessions tend to be long and you should expect moderate to high discomfort. Ask for mirrored spacing and slightly thicker central anchors so lines do not merge. For showing it off, an open-back dress or halter top reveals the vertical flow without competing silhouettes.
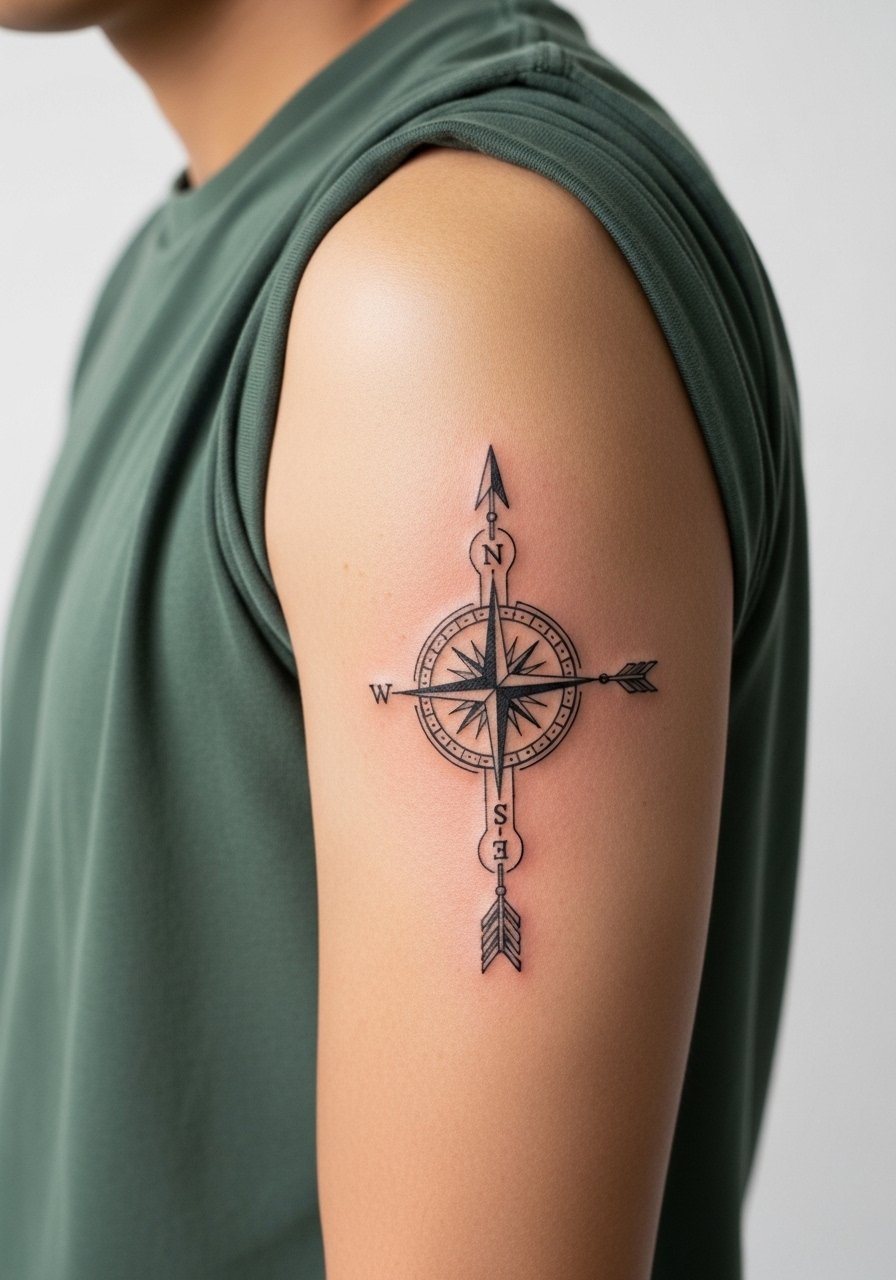
19. Compass Arrow Hybrid
Combining a compass with an arrow creates a travel-themed piece that fits the upper arm or chest. This design allows for mix of linework and slight shading to keep the compass readable as it ages. Sessions vary but plan for two hours if you want detail. Common mistakes include overcomplicating the compass face at a small scale. For a casual reveal, pair it with a simple crewneck tee rolled up at the sleeves that lets the upper arm design show.
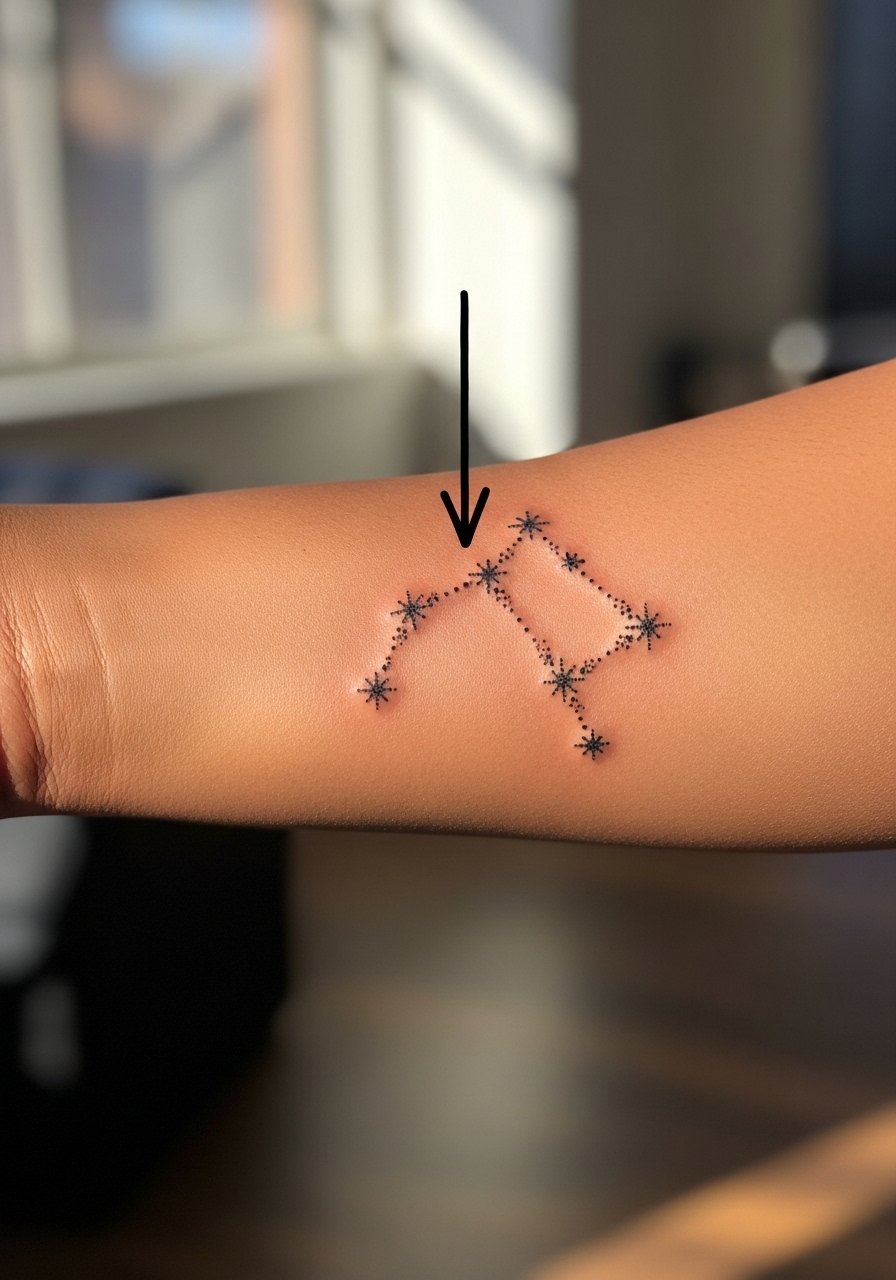
20. Arrow and Constellation Pairing
An arrow pointing toward a small constellation reads poetic on the forearm or shoulder. Fine dots and tiny stars can become indistinct if placed too close. Ask for slightly enlarged star spacing and dot work that uses stipple shading for longevity. Sessions are usually under two hours and the pain is mild to moderate. For showing it off, a short sleeve linen shirt keeps attention on the pairing without visual noise.
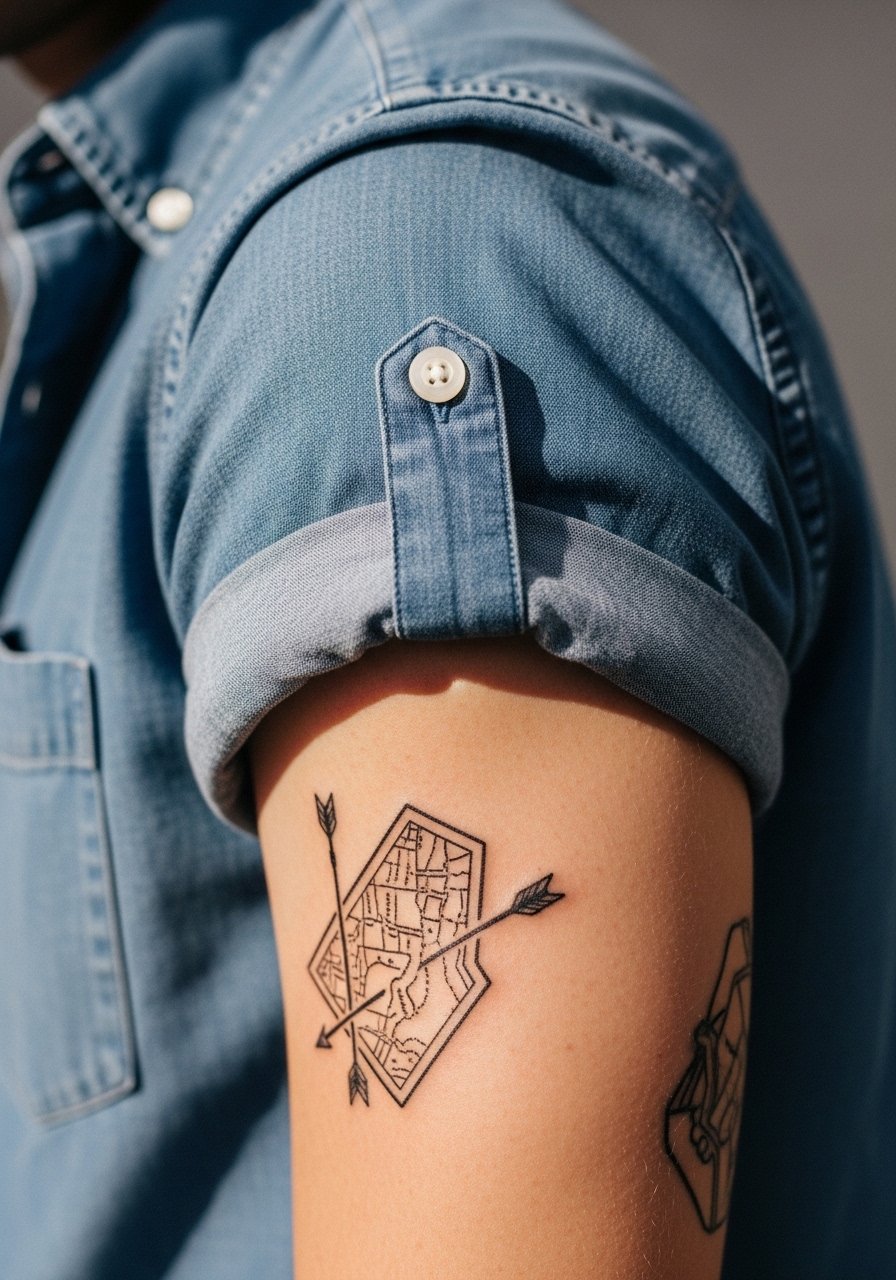
21. Arrow Through a Map Slice
An arrow overlaying a small map slice is a graphic option for the upper arm or chest. The design needs clean negative space for clarity over time, so ask your artist to simplify small labels and focus on major lines. Sessions usually run around two hours depending on detail. Avoid packing tiny text into the map which will blur. The piece pairs well with rolled sleeves or a button-down worn casually when you want to show travel roots without overstatement.
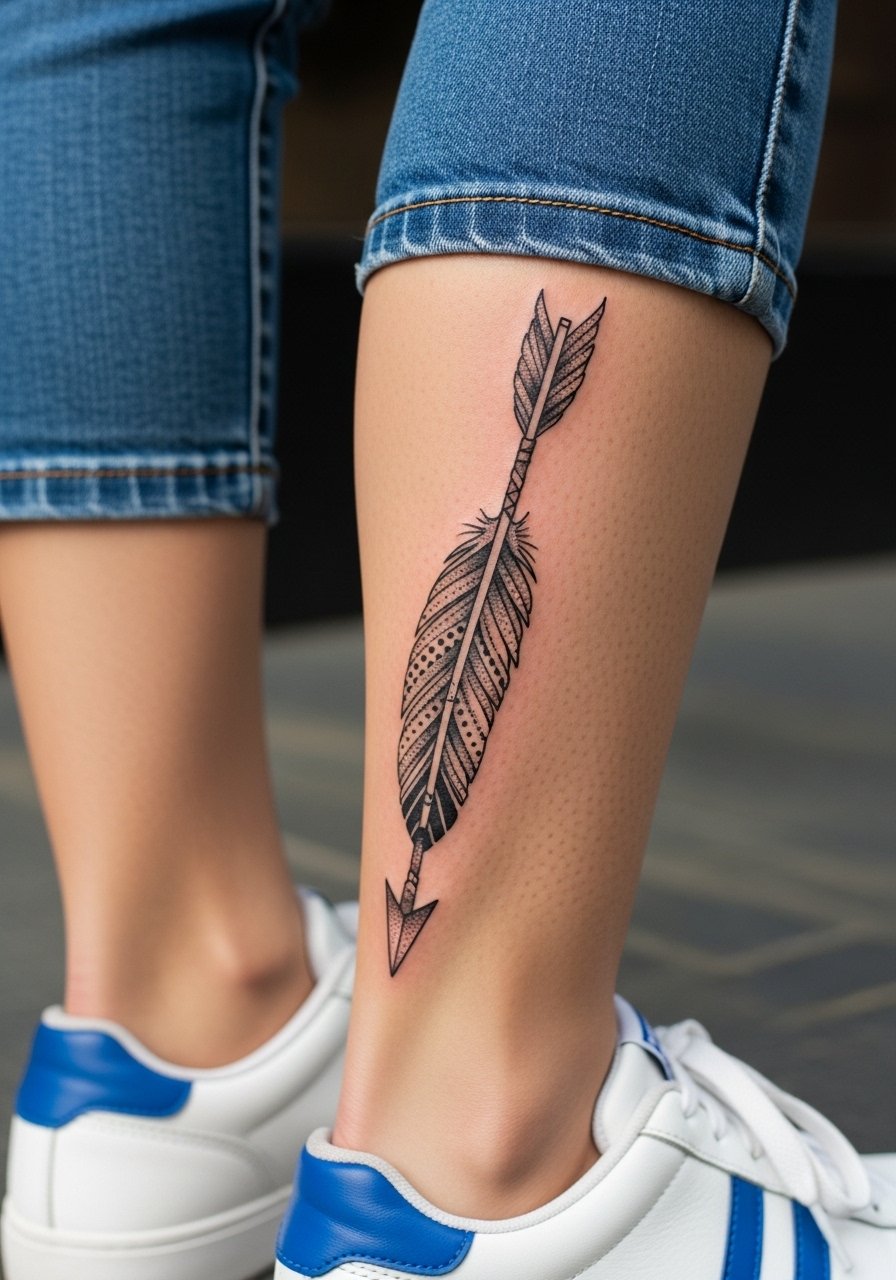
22. Feathered Arrow for the Calf Side
A feathered arrow on the outer calf with stipple shading in the fletching holds up because the skin there tolerates texture. Keep the feather spacing loose so the edges do not merge. Sessions are moderate length and comfortable compared with chest pieces. Common mistakes include over-detailing each barb which ages into a block of tone. For show-off styling, cropped jeans and a pair of low-profile sneakers keep the calf visible and balanced.
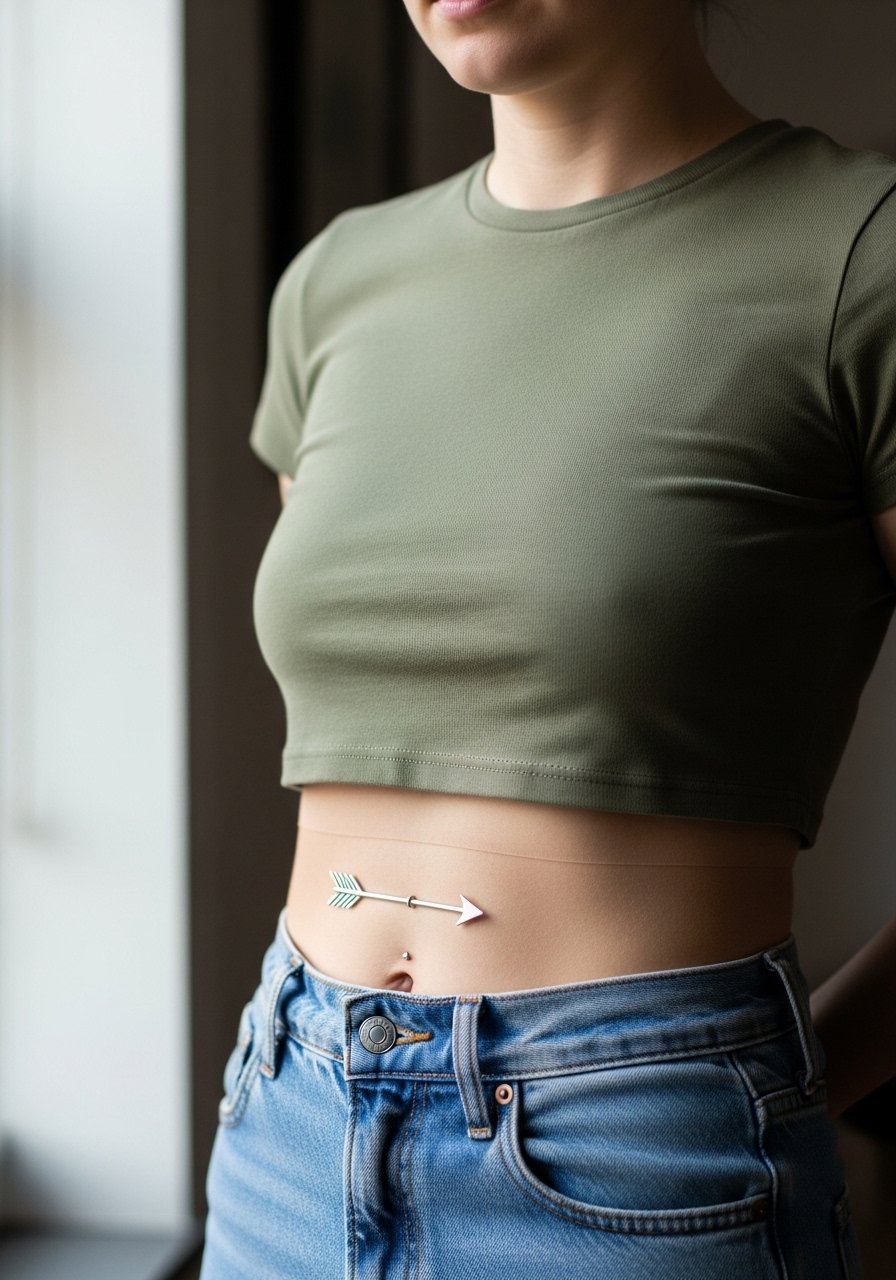
23. Arrow Ring Around the Navel
A small arrow forming a ring around the navel can be personal and delicate. Stomach skin moves and stretches so avoid ultra-fine details. Ask for a slightly bolder outline and soft internal shading so it holds through weight shifts and pregnancy. Sessions are short to moderate and discomfort varies by anatomy. For the appointment, a cropped tee and high-waisted bottoms reveal only the strip needed and maintain privacy.
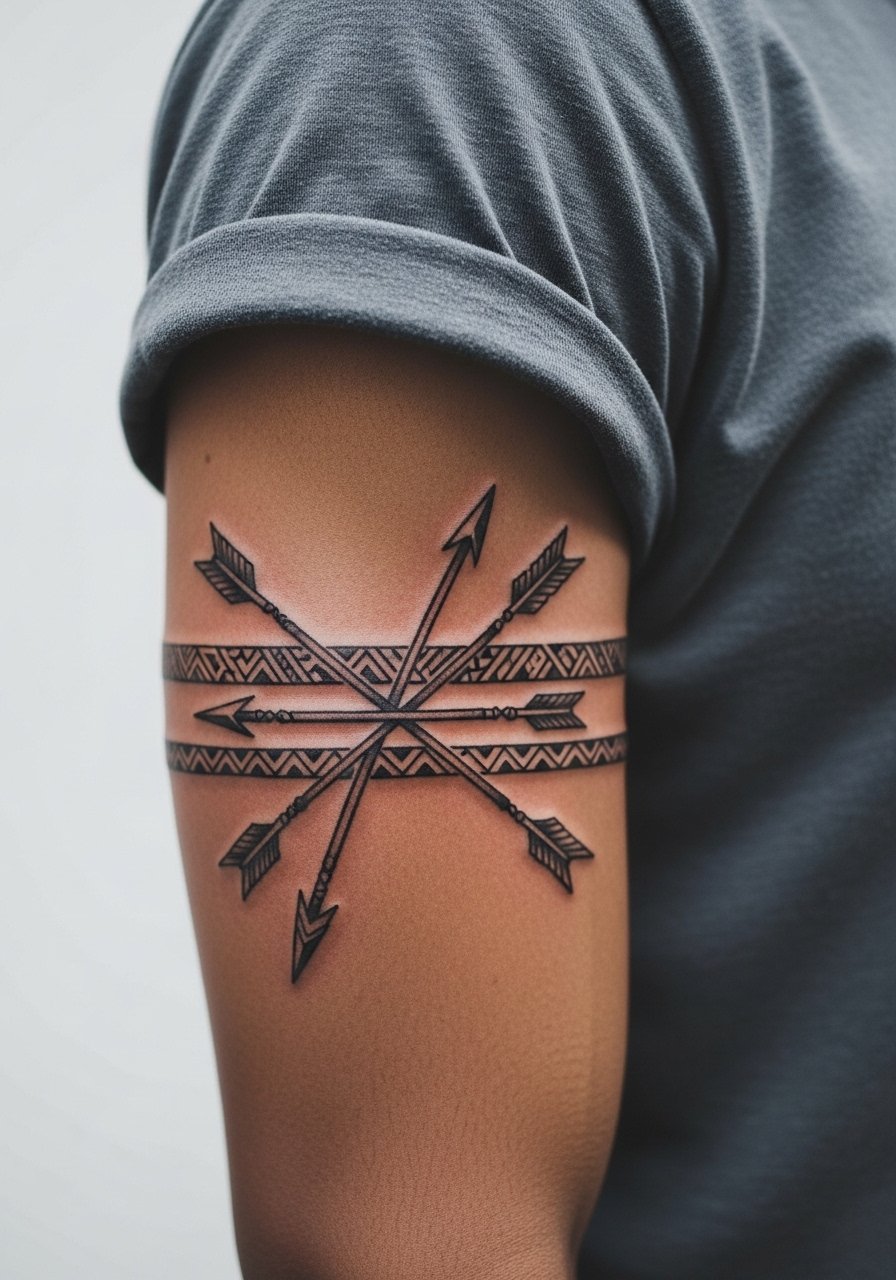
24. Tribal-Inspired Arrow Band
A band of arrows with tribal-inspired motifs can read bold across the bicep or wrist. Be mindful of cultural origin and avoid direct replication of sacred indigenous patterns. Consider adapting motifs with permission and respectful variation. Sessions vary by complexity and can be short for simple bands. Ask for clean, repeatable linework that allows breathing room between motifs to prevent merging. On showing it off, a rolled-sleeve tee frames the band without competing patterns.
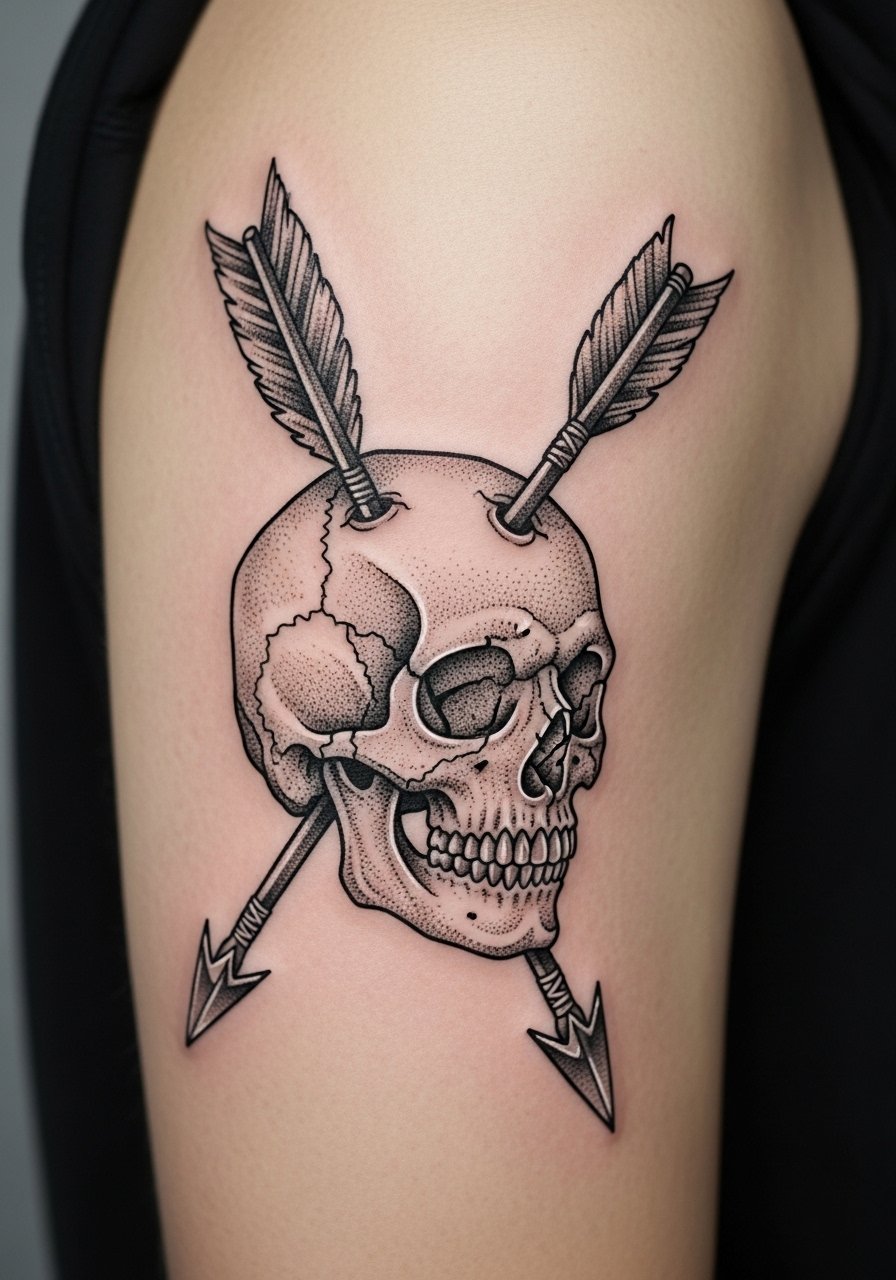
25. Arrow and Skull Micro-Realism
A micro-realistic arrow passing through a small skull is a darker, dramatic option best suited to upper arm or calf. Micro-realism benefits from slightly larger scale and careful stipple shading to maintain detail. Sessions may run longer due to shading, and pain is moderate. Avoid asking for ultra-small photoreal details that will not survive the skin environment. For a casual reveal, pair it with a black short-sleeve tee that lets contrast do the work.
26. Quiver on the Hip Edge
A quiver resting at the hip edge reads well with swimwear or high-waisted cuts. Hip shots need careful placement so seasonal body changes do not distort the composition. Sessions are medium length and can be managed in one sitting. Ask your artist for placement testing in standing and sitting poses so the quiver aligns with natural curves. For the session wear, choose high-cut shorts or a swimsuit bottom that lets the artist expose only the hip zone.
27. Broken Arrow Cover-Up Concept
Using a broken arrow as a small cover-up can rework an old scar or faded piece. The broken arrow silhouette provides negative space to blend with healed tissue while keeping a symbolic edge. Cover-ups need candid portfolio review and honest expectations about how much old ink will show. Sessions vary widely and sometimes require multiple passes. During consultation, bring photos of the existing work and discuss realistic outcomes. A loose wrap skirt is handy for thigh or hip cover-up sessions so you can shift fabric without disturbing the area.
Frequently Asked Questions
Q: How long will a fine line bow and arrow tattoo stay crisp on the forearm?
A: In my experience, a well-spaced fine line on the forearm often reads crisp for two to three years before noticeable softening. The key factors are initial line weight, sun exposure, and whether the design sits over joints. Expect a touch-up around year two to keep edges sharp if you want long-term crispness.
Q: Are ribcage bow designs worth the pain given the longevity concerns?
A: That depends on your tolerance and priorities. Some artists insist ribs blur quickly in fine line work while others report success when they use slightly heavier anchor lines and spacing. If longevity matters more than minimalism, ask for a slightly larger scale and plan for a touch-up at year two.
Q: Can I get a tiny arrow on my finger and avoid early fading?
A: You can reduce early fading by asking for a thicker shaft and cleaner negative space, but fingers still heal differently because of constant washing and abrasion. Expect earlier touch-ups than other placements, and consider a placement like the side of the hand if you want longer-lasting clarity.
Q: How do I find an artist who understands realistic bow shading without naming anyone?
A: Use targeted discovery: search local directories with "micro-realism bow tattoo" keywords, browse hashtag threads for recent healed photos, and filter portfolios by healed images rather than fresh photos. Ask studios for healed references from clients with similar skin tones.
Q: What should I wear to a sternum or chest session to make the appointment easier?
A: Wear a fitted sports bra or a wide-neck shirt you can pull aside so only the work area is exposed. That preserves privacy and speeds prep. For sternum work, bring layers you can re-dress in without rubbing the fresh tattoo.
Q: Any wardrobe tips to showcase a forearm bow and arrow without overwhelming it?
A: Roll your sleeves and choose neutral tones so the linework pops. A racerback tank or short-sleeve linen shirt works well to reveal forearm pieces while keeping the overall look relaxed.
