
Fine line red spider lily tattoos are everywhere on saved boards right now, but the pieces that still read crisp after five years are usually the ones that started with the right scale and spacing. Neo traditional color and weight give the lily its drama, but placement and spacing decide whether the petals stay distinct or blur. Below are 27 neo traditional red spider lily ideas, with exactly the notes you need for consultation, styling, and aging.
1. Single Stem Inner Forearm Bloom
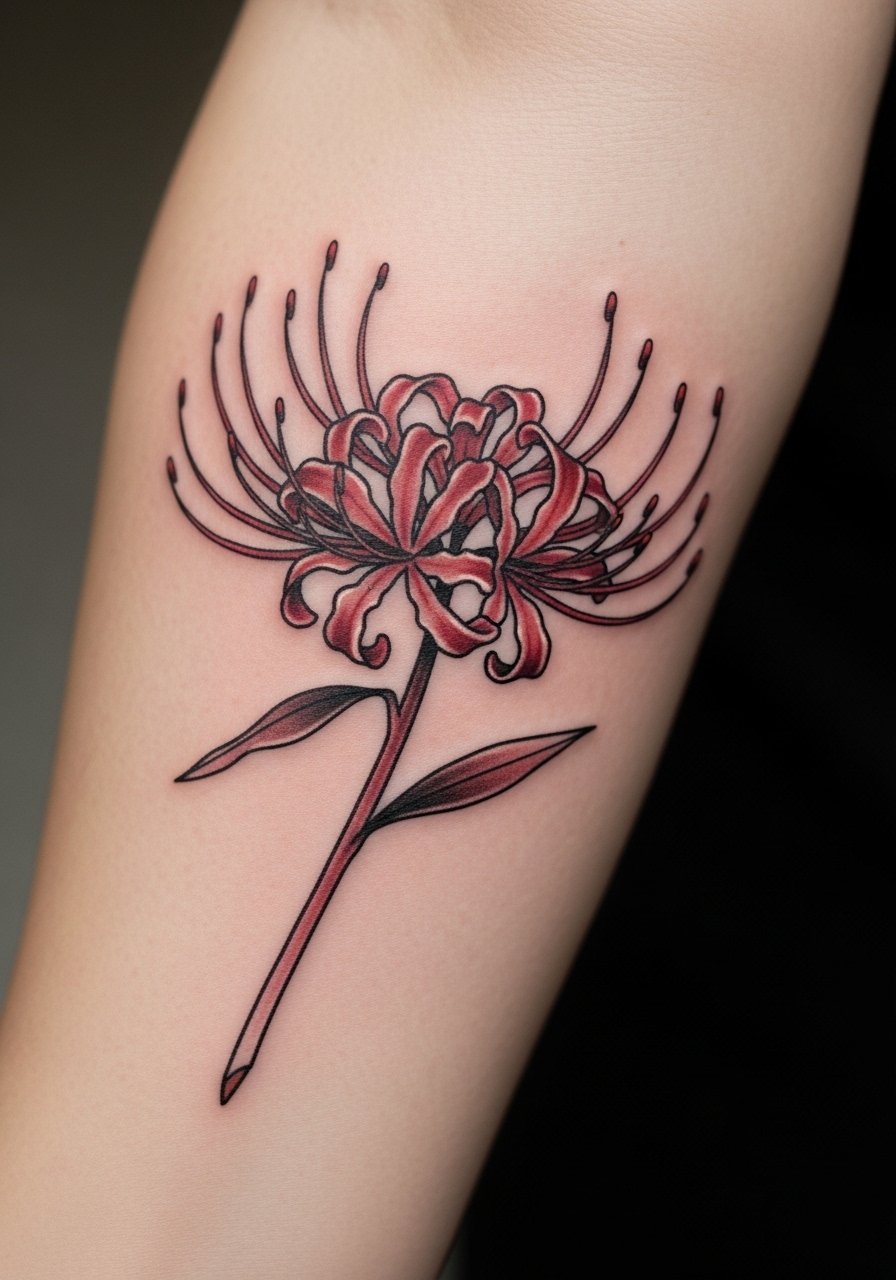
I recommend this when you want something readable from a sleeve roll up. Ask your artist for slightly heavier linework around the petal edges so the delicate spider filaments do not merge over time. Expect a three to four hour session and moderate pain on the inner forearm. Common mistake is shrinking the filaments too small, which leads to loss of definition by year three. For showing it off pair with a rolled cuff linen shirt that keeps attention on the forearm while letting the red read true under natural light.
2. Tiny Wrist Accent with Drop Petals
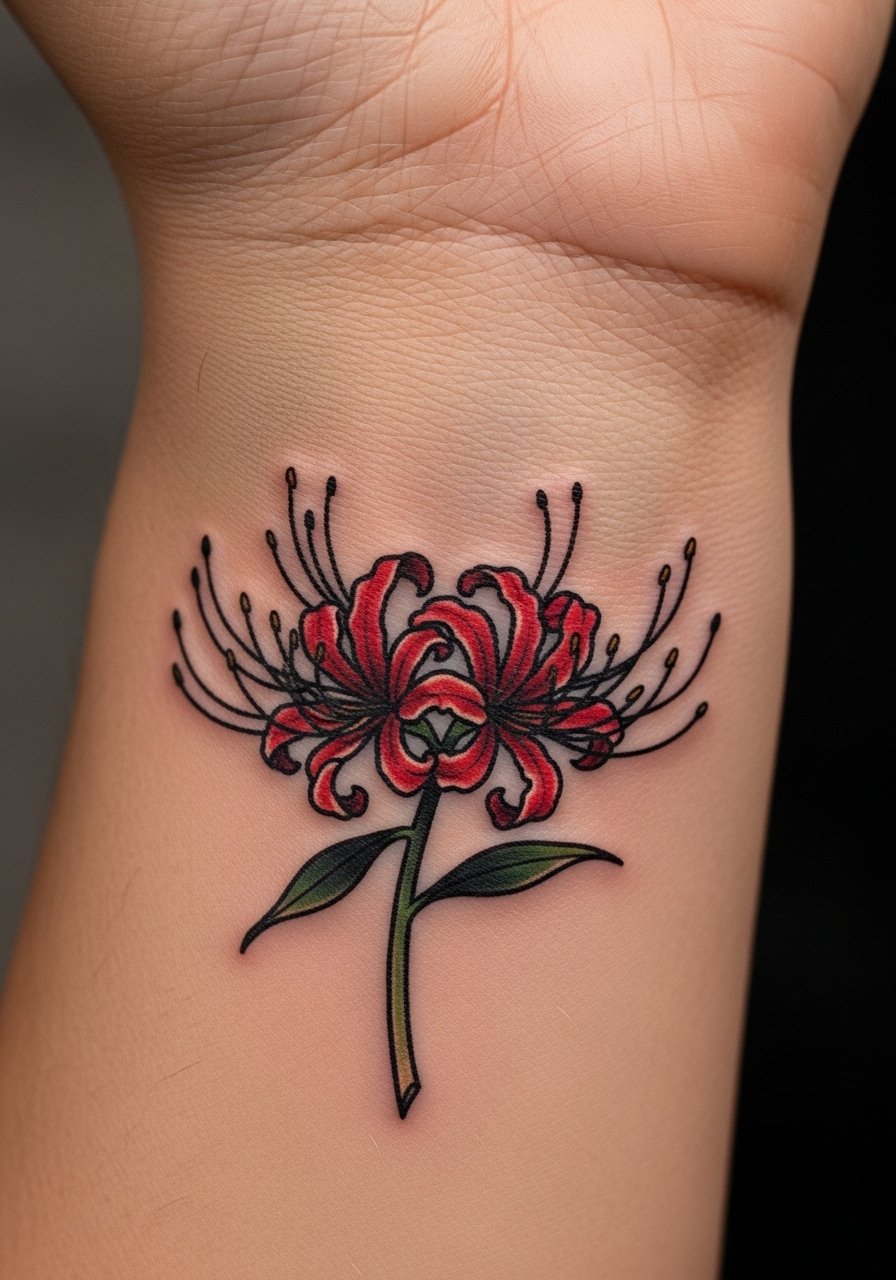
Wrist tattoos heal differently because of frequent washing and movement. For this piece ask for compact saturation rather than hair-thin filaments, and plan on a touch-up window around year two. Pain is a five out of ten for most people. A frequent mistake is asking for tiny filigree that becomes fuzzy from daily friction. Style it with a thin chain bracelet worn above the tattoo so the flower sits as the focal point rather than getting crowded.
3. Shoulder Cap Cluster with Leaves
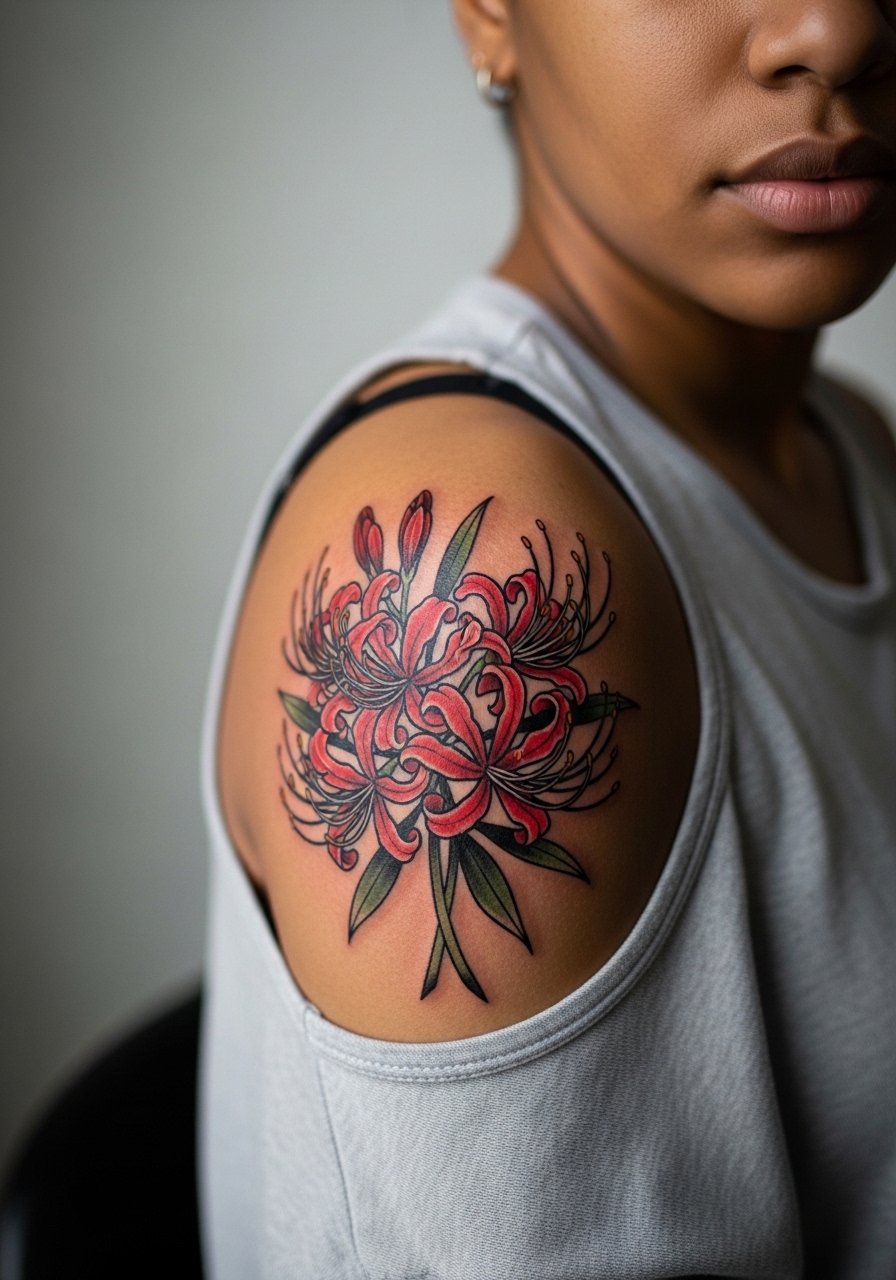
This placement is forgiving for bold color and larger filaments because the skin there holds saturation well. In consultation, request deeper saturation in the petals and a layered leaf palette so the reds pop without needing extra contrast lines. Session time is usually three to five hours if done as a cluster. Wear a loose tank top to your appointment so the artist can access the shoulder easily. The biggest mistake I see is squeezing the design too close to the collarbone where movement can blur the edges.
4. Ribcage Wrap That Flows with Breathing

Fair warning, the ribcage is a high-pain zone, often an eight out of ten. Artists split on fine line here. One camp says fine line blurs quickly because the skin stretches and moves. The other camp says properly spaced line weight and needle depth let fine details last. If you like filaments, ask the artist how they handle rib movement and plan for a potential touch-up at year two or three. For the session wear a cropped athletic top you can shift instead of removing for modesty and access. Expect longer healing and be gentle with side-sleeping.
5. Ankle Stem with Trailing Petals
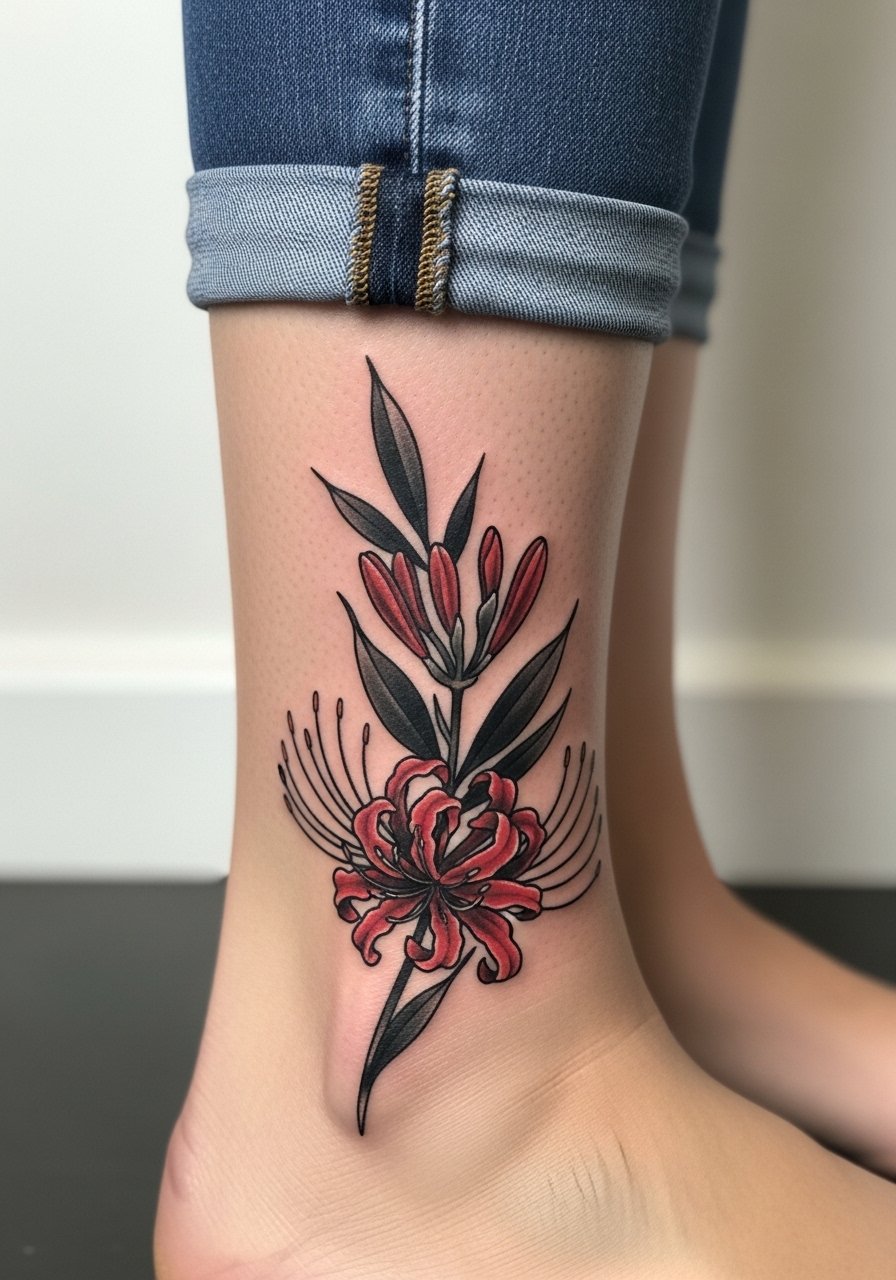
Ankle sessions are short but the area endures a lot of rubbing from shoes. Ask for slightly more space between the filament lines and a bit stronger black outline so the petals keep shape despite daily friction. Pain is lower, around a four, but swelling can be surprising. For showing it off, low-cut sneakers or strappy sandals frame the ankle without covering the design. Plan to avoid tight socks for the first week to reduce scabbing risk.
6. Sternum Cluster Anchored by a Bold Lily

Sternum pieces have a distinct aging profile because of stretch and sun exposure when wearing low tops. Artists debate fine line versus heavier neo traditional contours for this spot. One side favors bolder outlines to protect petals from blurring. The other prefers delicate work with more spacing. I suggest a middle ground: defined outer linework with delicate inner filament details. Wear a fitted sports bra to your appointment so the area is accessible without exposing too much skin. Expect a longer session and tenderness for several days.
Pre-Session Essentials
The small placements above, from wrist accents to sternum clusters, each ask for slightly different prep. These picks smooth the session and protect that saturated red in the first week.
-
Stencil transfer paper kit. Lets you preview how a lily stem and filaments sit on curved areas like the ribcage and inner forearm before the needle hits skin.
-
Topical numbing cream. Applied as directed eases the sharper moments on the ribs and sternum without dulling the artist's lines.
-
Thin protective film roll. Ideal for ankle and wrist pieces that face constant friction, it shields the fresh ink during the first days.
-
Fragrance free gentle body wash. Cleanses delicate healing areas like the inner forearm without stripping pigment or irritating scabs.
-
Aquaphor healing ointment. A thin layer in the early healing window keeps fine line lily filaments from drying into thick crusts that lift pigment.
7. Upper Arm Half-Sleeve with Multiple Lilies

A half-sleeve lets you play with composition and contrast across several lilies and foliage. During the consult bring references for petal spacing and ask for layered saturation so reds sit at different depths. Session time depends on coverage, often split across two to three appointments. A real mistake is crowding too many tiny filaments close together; give each blossom negative space to prevent merging. For outfit pairings, cuff a short-sleeve shirt or wear a loose button-down shirt with sleeves rolled to show the sleeve off without overexposure.
8. Small Finger Accent with Micro Filaments
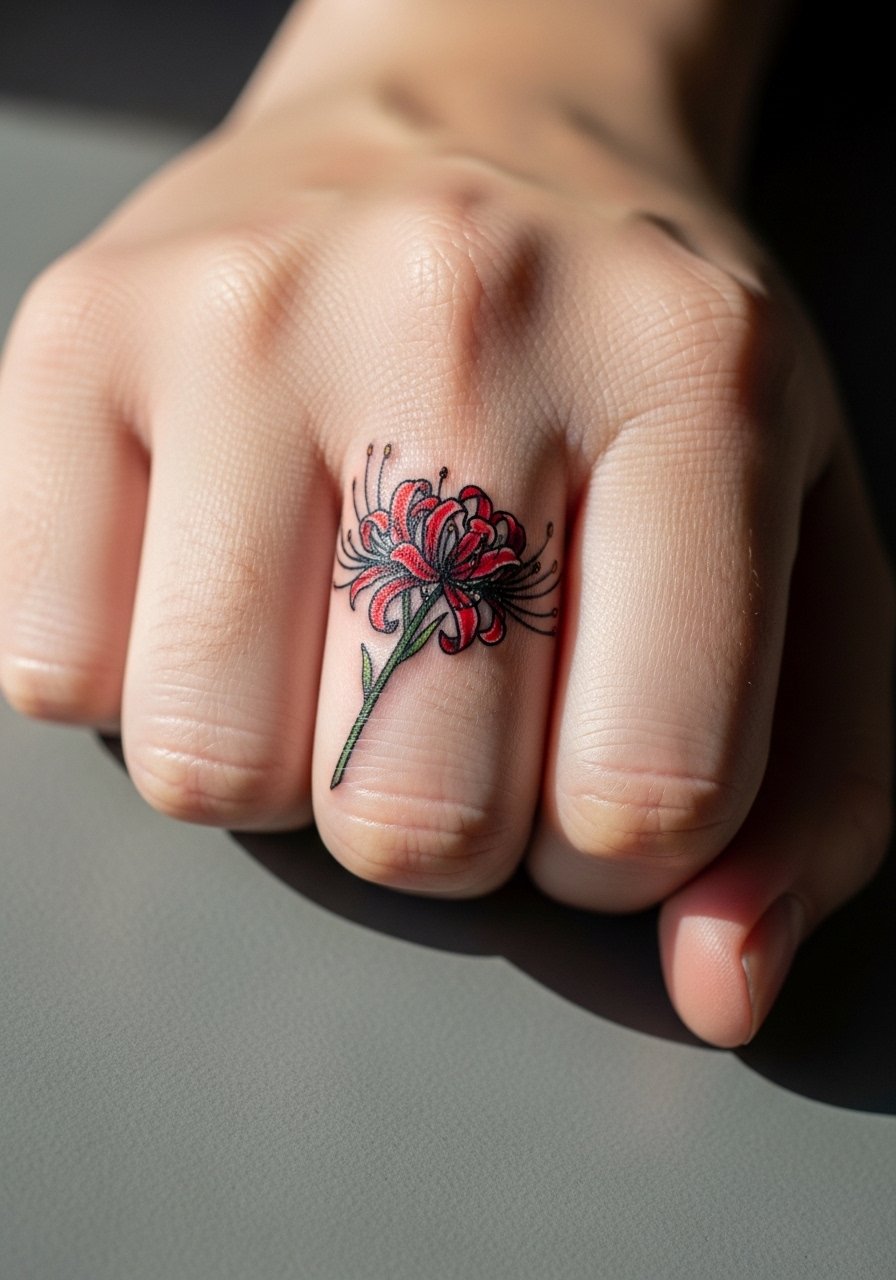
Finger tattoos are vulnerable to blowout and rapid fading because of constant use and thin skin. If you want a finger lily, ask for bold, simplified petals and thicker filaments rather than micro detail. Expect touch-ups at year one or two. Healing is quick but fragile; avoid heavy hand work in the first two weeks. Also consider career implications since hand tattoos are still visible in some workplaces. A common error is requesting ultra-fine detail that vanishes within months.
9. Collarbone Accent with Single Bloom
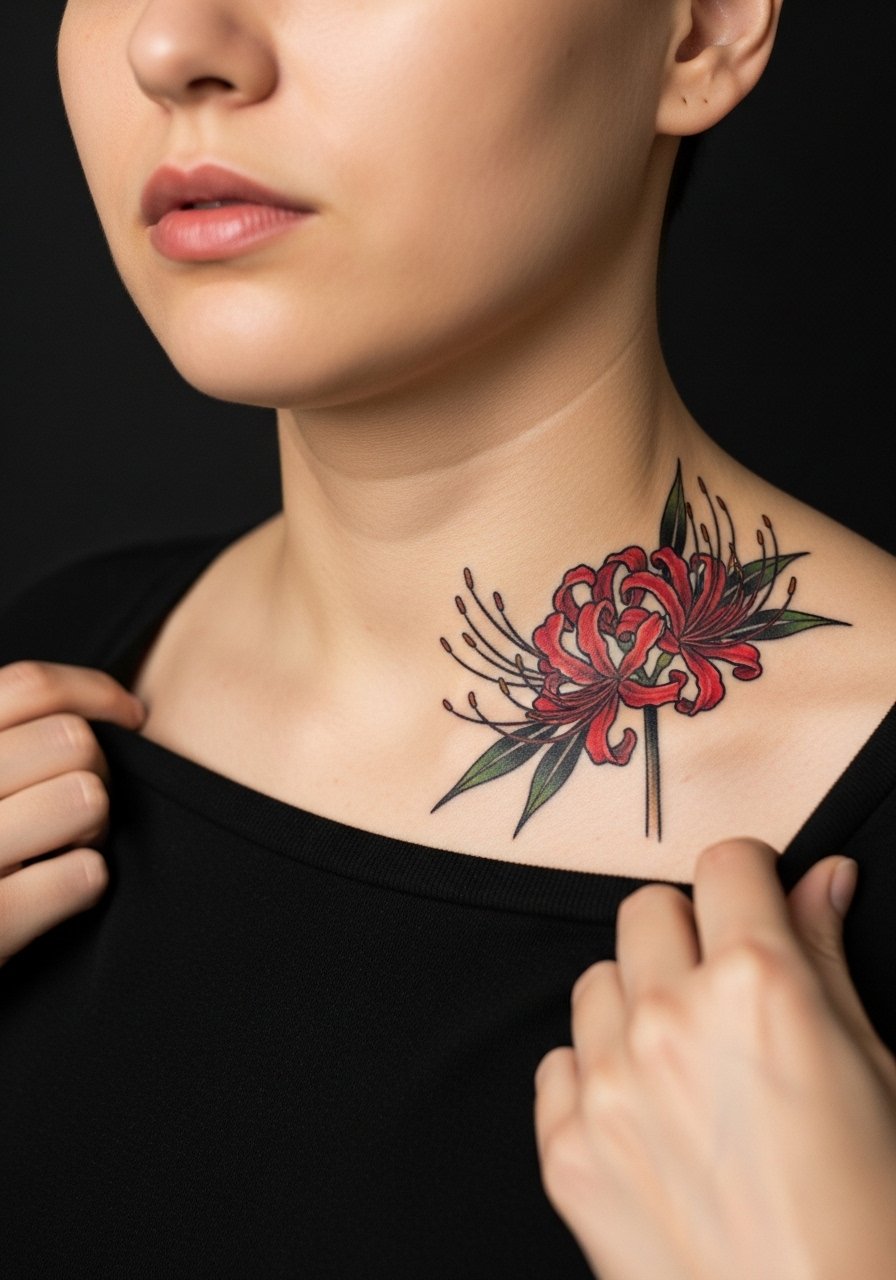
Collarbone placements read elegantly with a single lily because the bone frames the composition naturally. Ask your artist to orient the stem so petals follow the shoulder line rather than pointing straight down, which ages oddly with clothing rub. Session time is moderate and pain varies by proximity to bone. For showing it off, an open-neck blouse or wide-neck knit keeps the area visible and complements the floral silhouette.
10. Thigh Panel with Dramatic Petal Spread
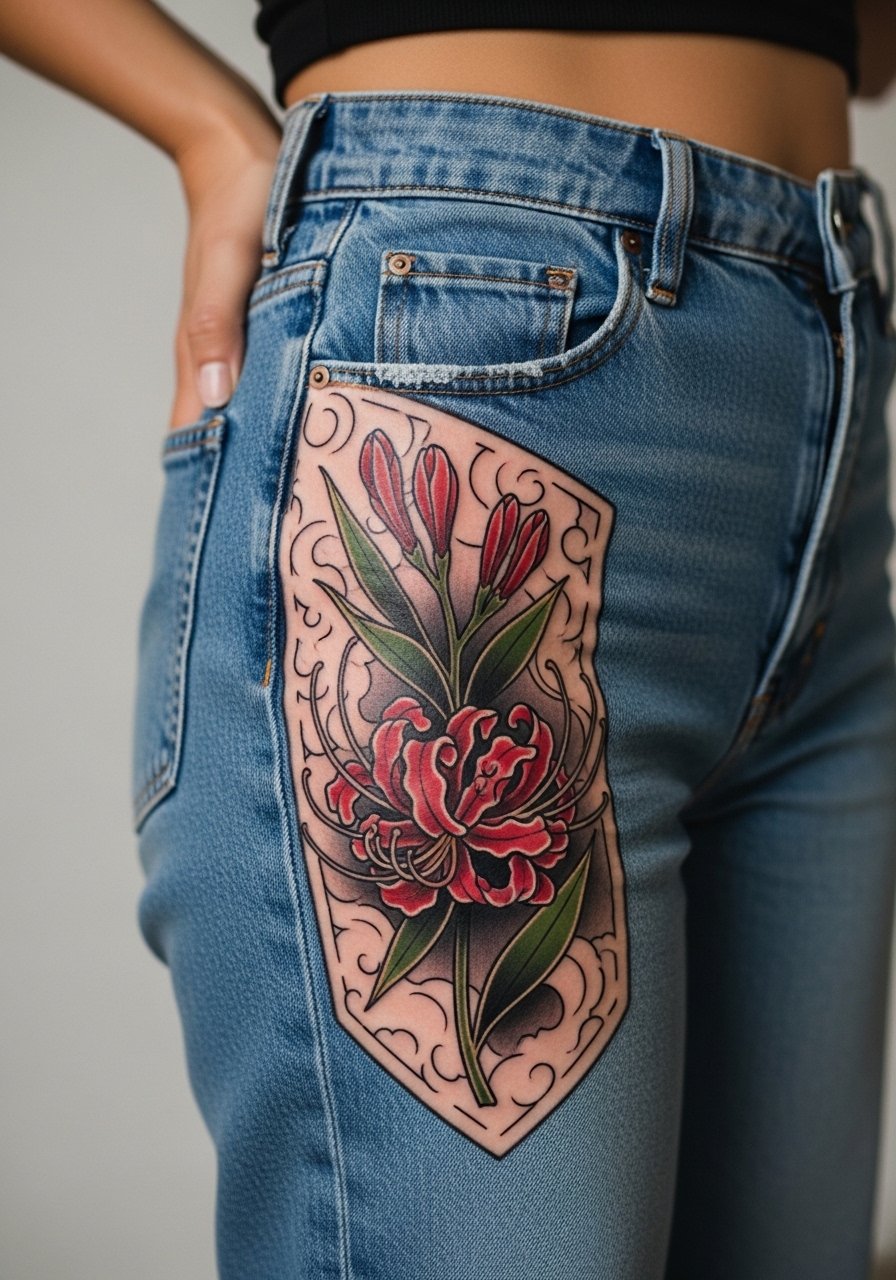
The thigh is a forgiving canvas for saturated neo traditional work. Larger filaments and layered petals hold well here because the skin stretches less from sun exposure. Consultation tip: request broader negative space between filaments so the petals maintain their spider-like identity over time. Pain is usually lower, around a three to five, and sessions can be longer. For the appointment, wear loose drawstring shorts or a skirt so the artist can access the outer thigh without discomfort.
11. Back of Neck Sprig for Subtle Red

Neck placements require a careful talk about visibility and longevity. The skin there can blur fine filaments if lines are too close. I advise a slightly heavier outer line and reduced interior detail for longevity. The session is short but healing may feel tender with clothing contact. Ask the artist how they approach hairline areas if your hair will cover the piece sometimes. This one works well as a quiet accent for a short necklace or open-collar shirts.
12. Calf Stem with Flowing Leaves
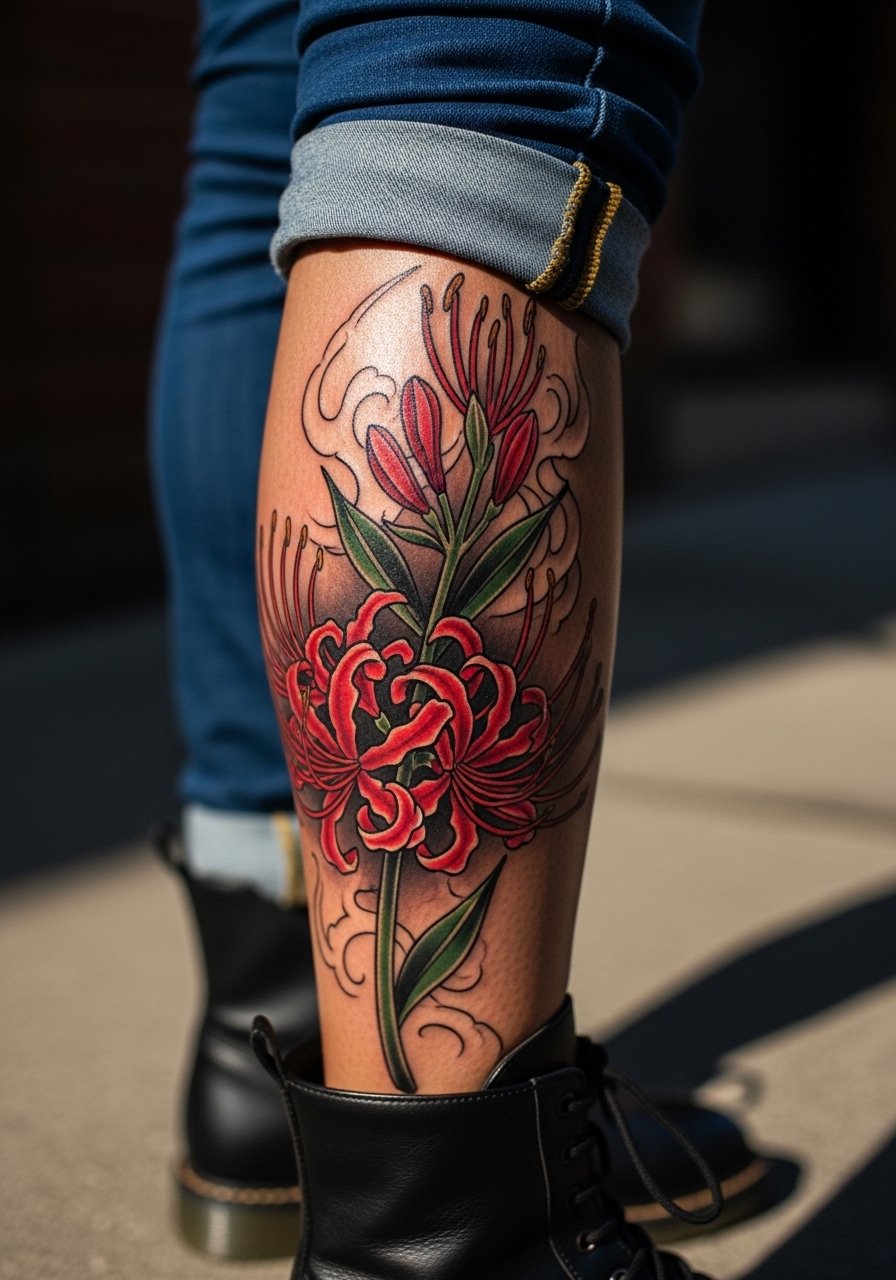
Calf tattoos age reliably because of thicker skin and lower sun exposure. For a long stem and several leaves, request varied saturation across petals to create depth without overworking the black outline. Session time is moderate and pain is usually manageable. A usual mistake is insisting on overly tight filaments that get lost when the calf relaxes. For showing the design, wear mid-calf boots or cropped trousers so the lily can peek out without competing with patterns.
13. Back Piece Axis with a Central Lily
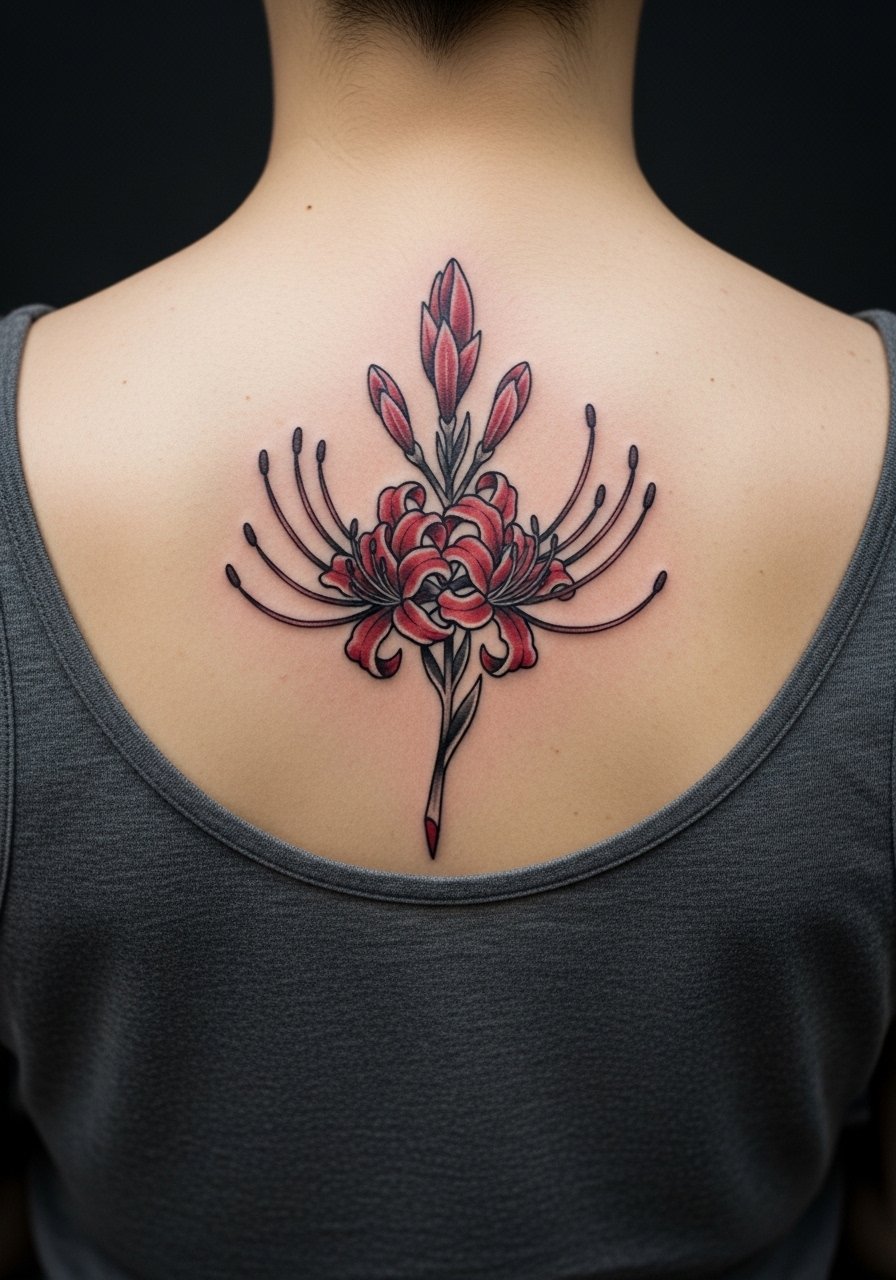
Centering a large lily along the spine creates a dramatic axis for a back piece. Tell your artist you want symmetry but not mirror-image repetition, so leaves alternate naturally. Sessions are long and often split across multiple days. Keep in mind touch-ups may be needed if you spend lots of time in sun. For clothing, an open-back dress frames the spine without covering it, perfect for evening wear that puts the lily on display.
14. Behind-the-Ear Tiny Bloom for a Quiet Accent

This delicate spot is subtle and personal. Because of the small space, simplify filaments and focus on one or two petals. The artist will need to work small and precise, and the session is short. A consideration is hair growth and accessories like glasses that might rub the area. This placement can read as a secret detail or peek out with a pulled-back hairstyle. Ask your artist about layering with later work if you plan a neck composition.
15. Half-Back Spread with Multiple Stems

A half-back allows more complex compositions and interplay between red lilies and darker leaves. In consult, request varied petal shapes so each bloom reads independently. Sessions are significant, so split into logical blocks that match your pain tolerance. Common mistake is compressing too many elements into one visit which leads to poor saturation. For showing it off, open-back tops or high-waisted skirts work best to reveal the lower spread without overexposure. Plan for sunscreen on the healed piece when exposed to sun.
16. Hip Curve Lily Peeking from Swimwear
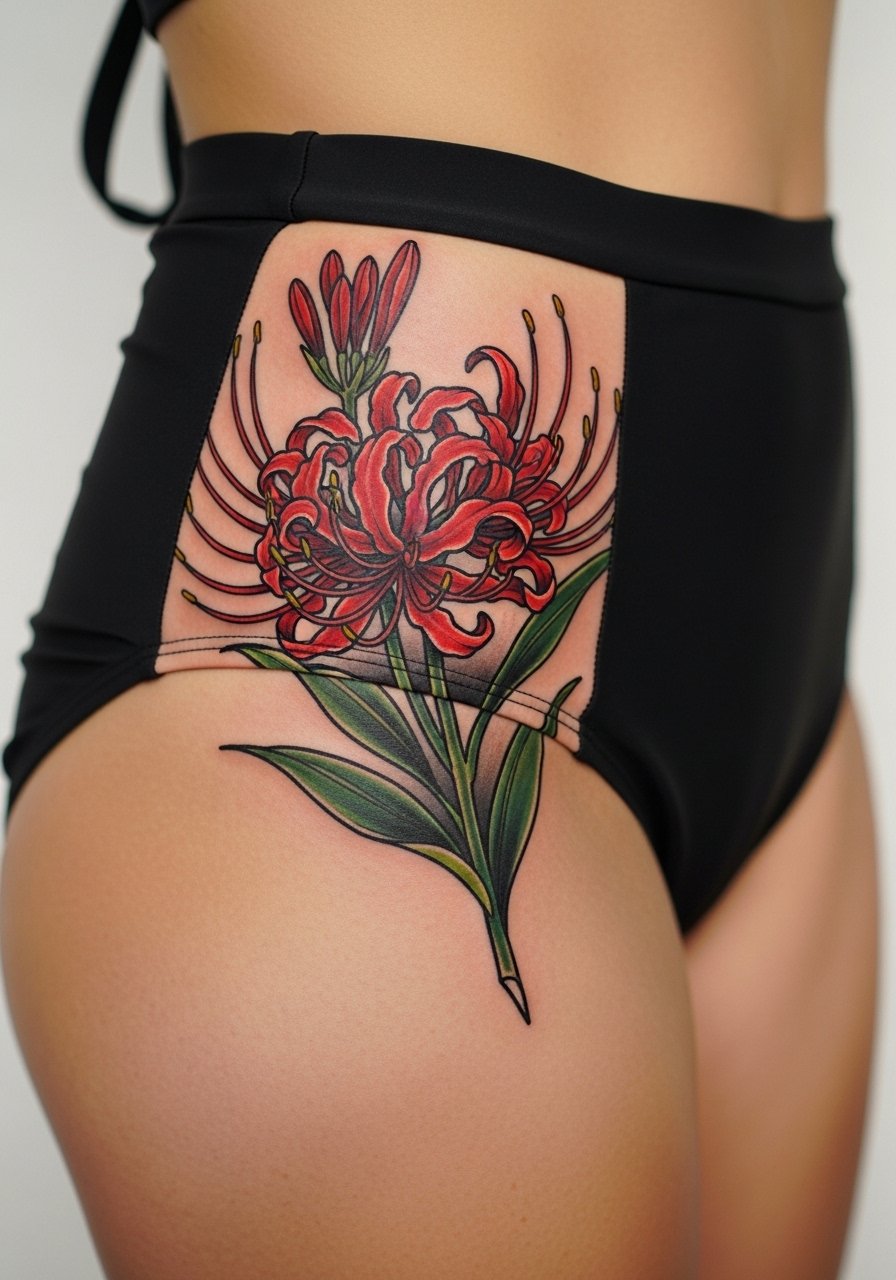
Hip tattoos sit on a rotating surface that moves with clothing and body position. Ask for a design that aligns with the hip bone so petals fall naturally with movement. Session time is moderate and pain is variable. A frequent error is placing text too close to the petals which complicates future placements. For beach looks, the lily pairs with high-cut swimwear. Bring a high-waisted swimsuit bottom to your appointment if you want to test how the piece sits under swimwear.
17. Sleeve Connector: Wrist to Elbow Stemwork

Connector pieces that run wrist to elbow help tie smaller lilies into a cohesive sleeve. Discuss transitional leaves and negative space with your artist so each bloom has breathing room. Expect multiple sessions and a longer touch-up timeline because of the area exposed to sun and friction. One mistake is over-detailing the connector bands which can distract from main flowers. For daily wear, roll up sleeves or choose short sleeves that let the forearm design be visible; a racerback tank complements the elongated flow when you want to show it off.
18. Micro Chest Bloom Beside a Nipple Line
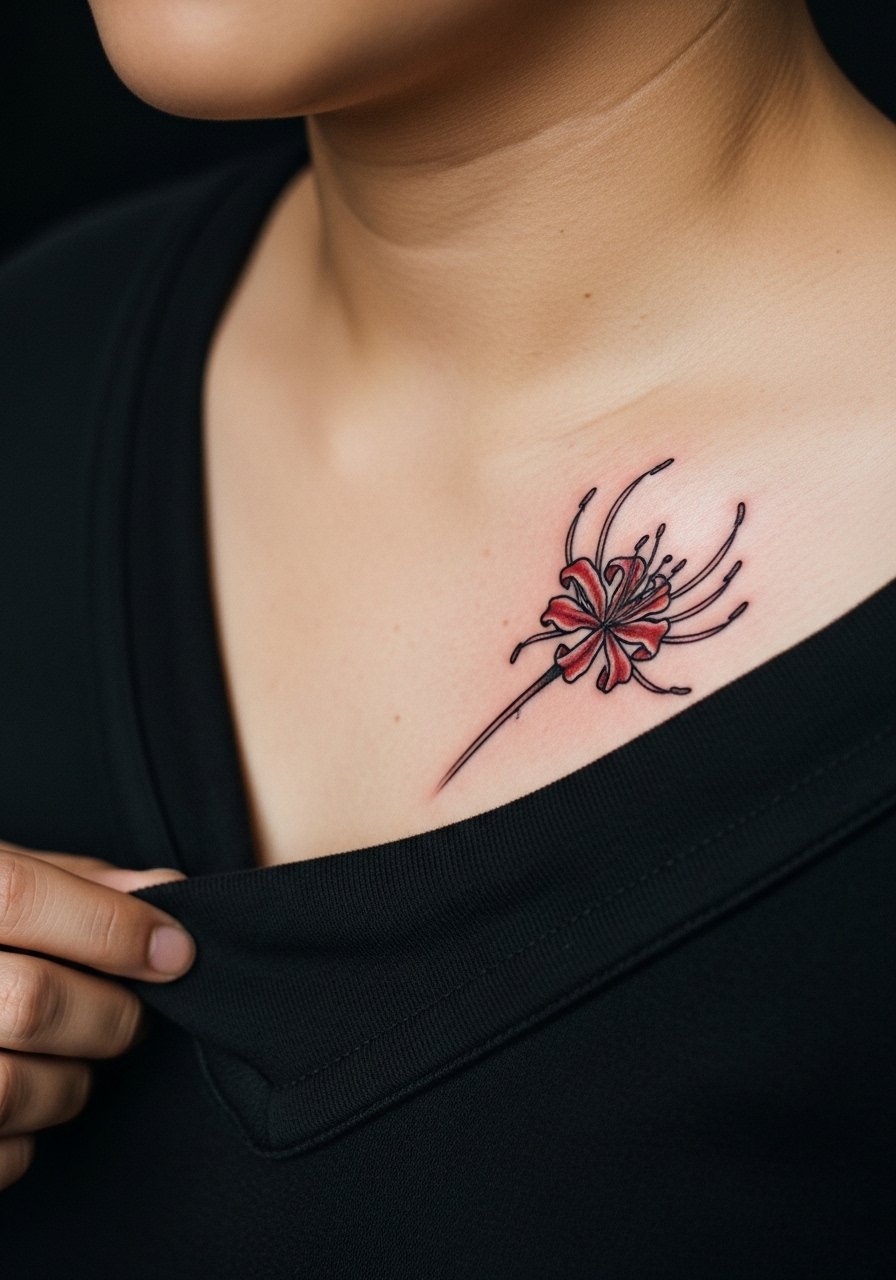
Chest micro pieces are intimate and sensitive to compression from bras. Ask for a placement test with stencil while standing and lying down to see how the flower rests. Pain can spike when close to the bone. A common oversight is ignoring how bra straps and underwire will interact with scabbing. If you plan to show it occasionally, a wide-neck top that can be shifted is helpful. Consider the future possibility of additional work around the bloom.
19. Geometric Backdrop with a Neo Traditional Lily
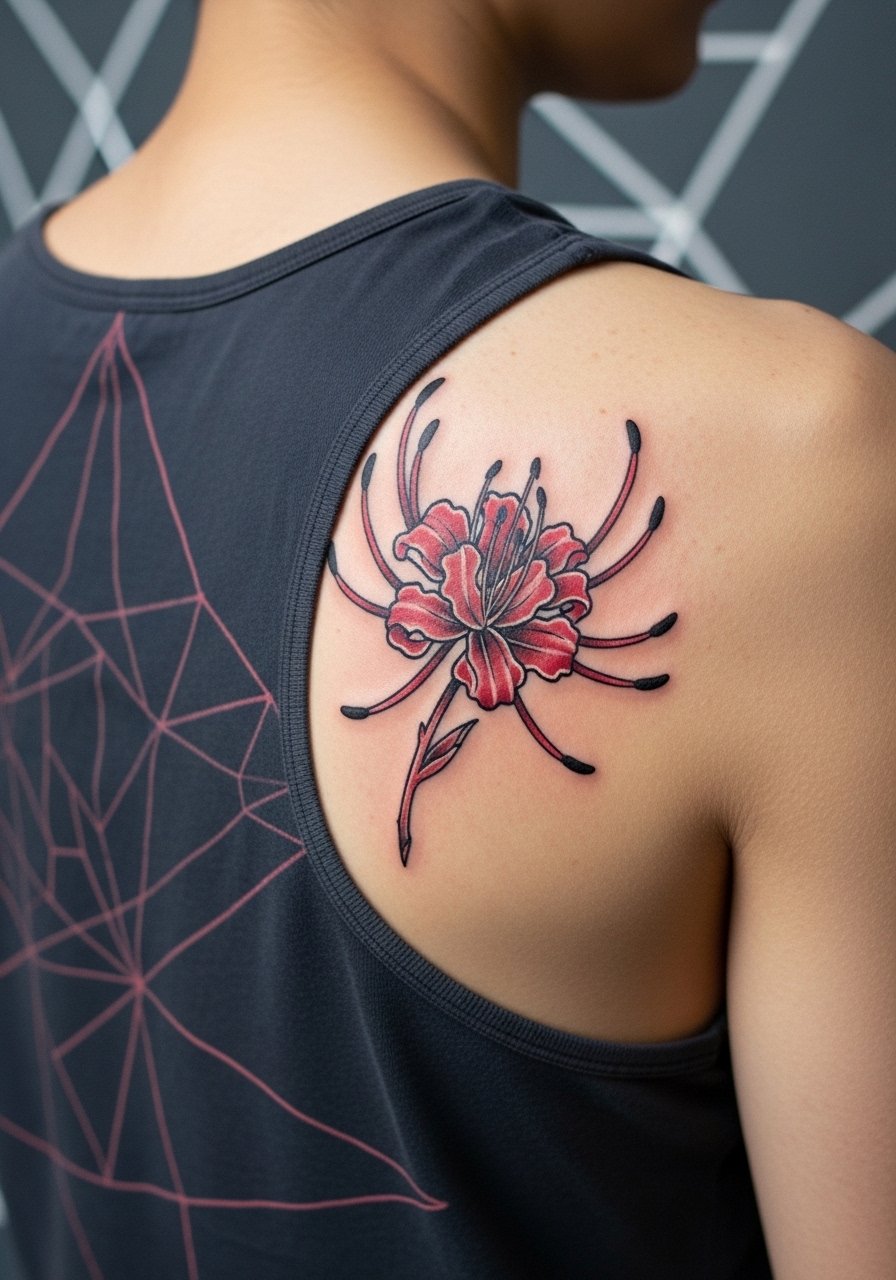
Combining neo traditional flora with geometric shapes adds contrast and modern lines that can keep the lily readable at distance. Tell your artist how bold you want the geometric lines relative to the floral outlines to avoid the geometry swallowing the petals. Sessions are layered; geometry first often helps with symmetry. For styling, open-back garments show both floral and structure, and an open-back midi dress can be a deliberate choice for nights out.
20. Calf-to-Ankle Vine That Wraps Elegantly

Wrapping vines across the lower leg work well if you want motion in the composition. The skin in this zone handles saturation, but ankles face scuff risk from shoes. Ask the artist to place leaves so they avoid high friction points. Sessions can be split between calf and ankle. To display it, sandals and cropped pants keep the vine visible. Beware of choosing too many micro details near the ankle; those fade fastest.
21. Sternum Ladder of Lilies for Symmetry
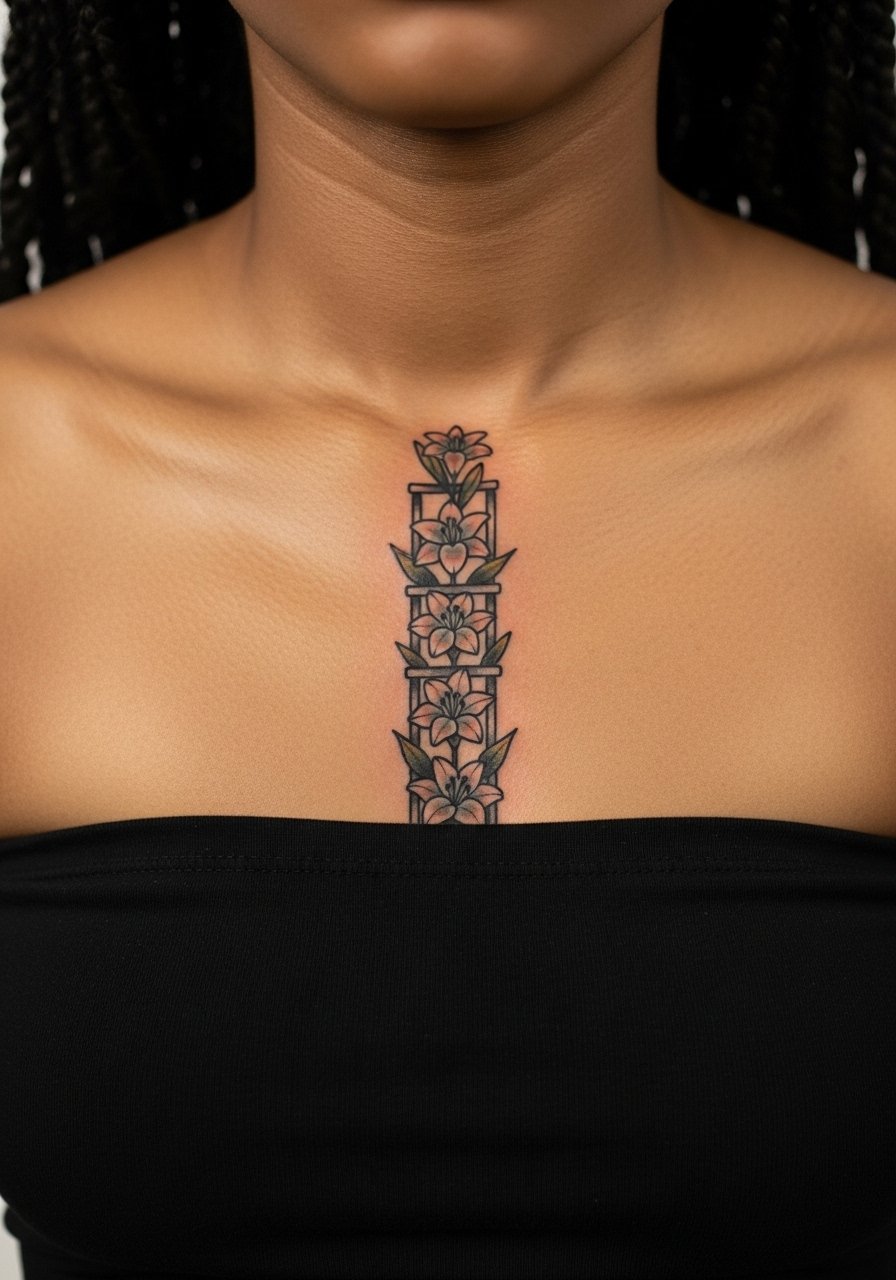
A vertical ladder of blooms demands careful symmetry and attention to breathing space between flowers. Sternum work sits central so movement, breathing, and clothing contact all matter for healing. Artists differ on how fine they go here; one camp favors slightly bolder outlines to protect detail and the other trusts tighter needlework with spacing. Ask where your chosen artist stands and what their touch-up rate is for sternum work. For appointments wear a bandeau or fitted top to reveal the area without exposing more skin than necessary.
22. Mini Bouquet Behind the Collarbone

This subtle placement is excellent for a cluster of miniature lilies and buds. Because the collarbone moves with neck tilt, ask for slightly bolder petal edges so the bouquet reads clearly when you turn. Session time is short and the pain level varies. The usual mistake is squeezing too many petals into a tiny canvas. For a discreet reveal, pair with simple necklaces that do not rub the tattoo.
23. Full Thigh Panel with Dense Petal Work

Dense petal work on the thigh looks stunning when the artist spaces darker and lighter reds to create depth. Larger areas let you preserve filament detail without risking blurring. Sessions are long, so break them into comfortable blocks. A common misstep is trying to finish a full panel in one marathon session which can compromise saturation and healing. For session comfort wear loose drawstring shorts so the artist can expose the thigh without tugging at clothing.
24. Finger Band of Tiny Petals Around the Knuckle
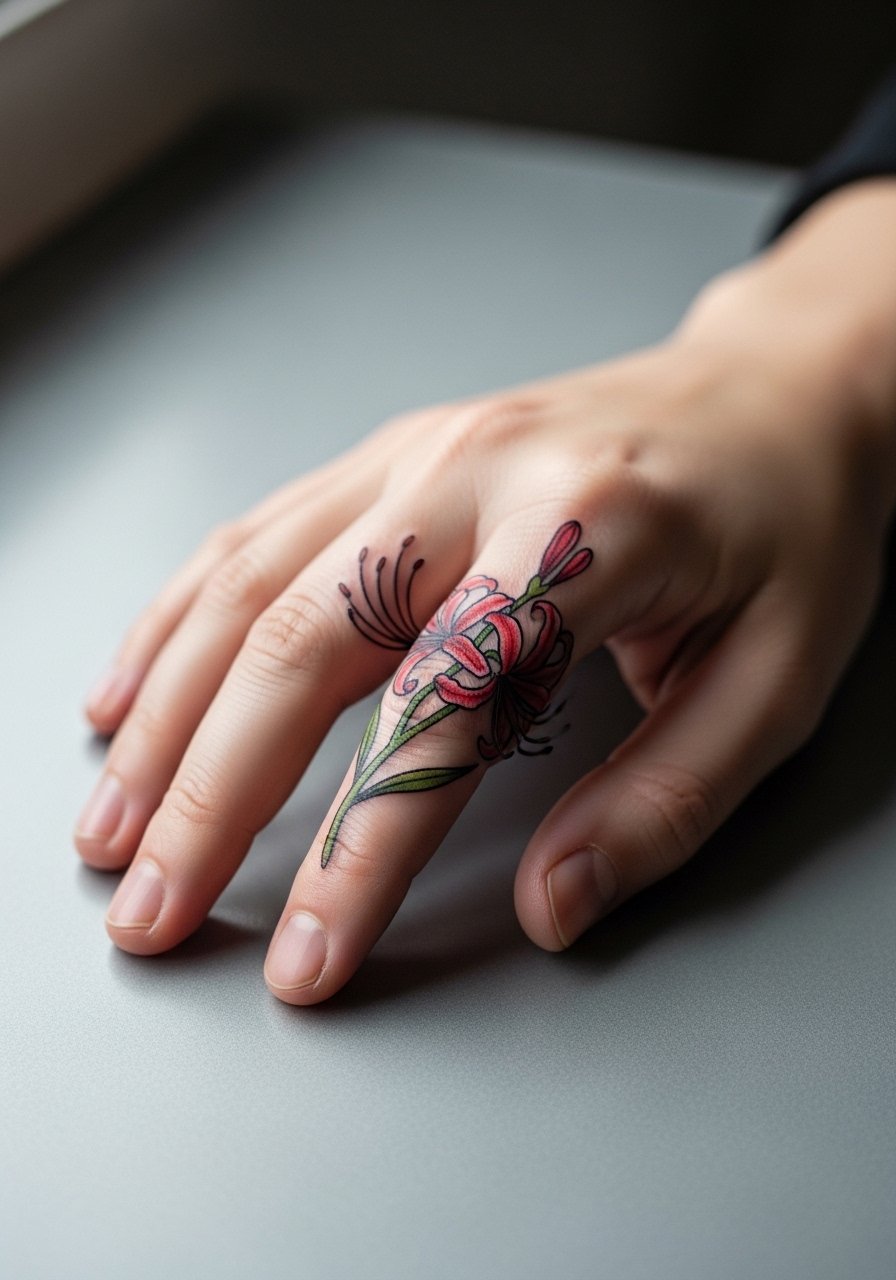
Knuckle placements age fast because skin there regenerates quickly and experiences heavy use. Keep the band simple and thicker in line weight to prolong legibility. Touch-ups are almost always needed by year two. Expect short sessions but prepare for possible color loss with time. Avoid wearing tight rings over a fresh knuckle tattoo since pressure can affect scabbing and pigment retention.
25. Lower Back Bloom Sitting Above the Waistline
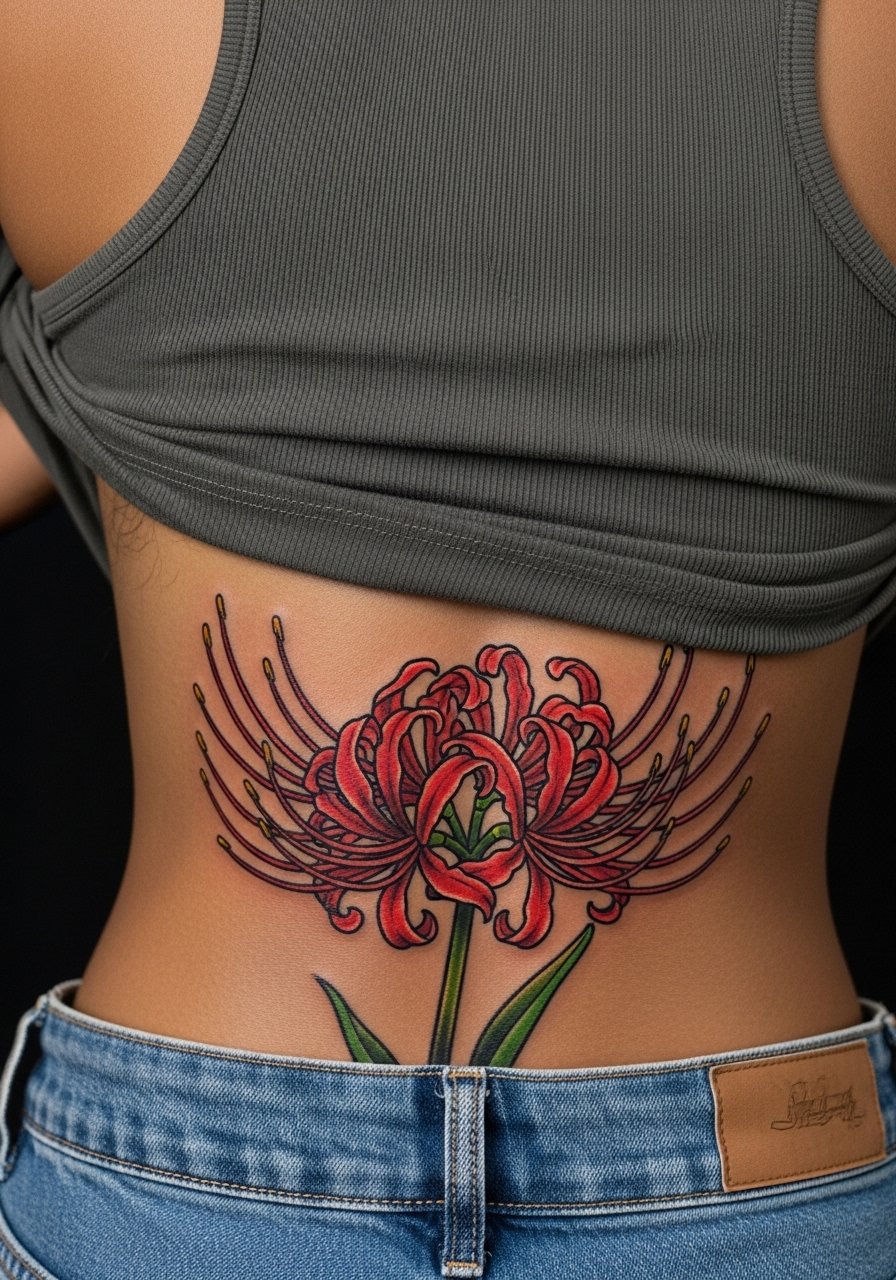
Lower back pieces can be sensuous without being showy if the composition follows the natural curve above the waist. Ask your artist to orient the stem so petals fall away from the spine center. Sessions are moderate in length and healing is usually straightforward. For display, low-rise waistlines or crop tops work well. Bring a low-rise pant or skirt to test how the piece sits under clothing.
26. Ear-Adjacent Tiny Lily for a Delicate Peek
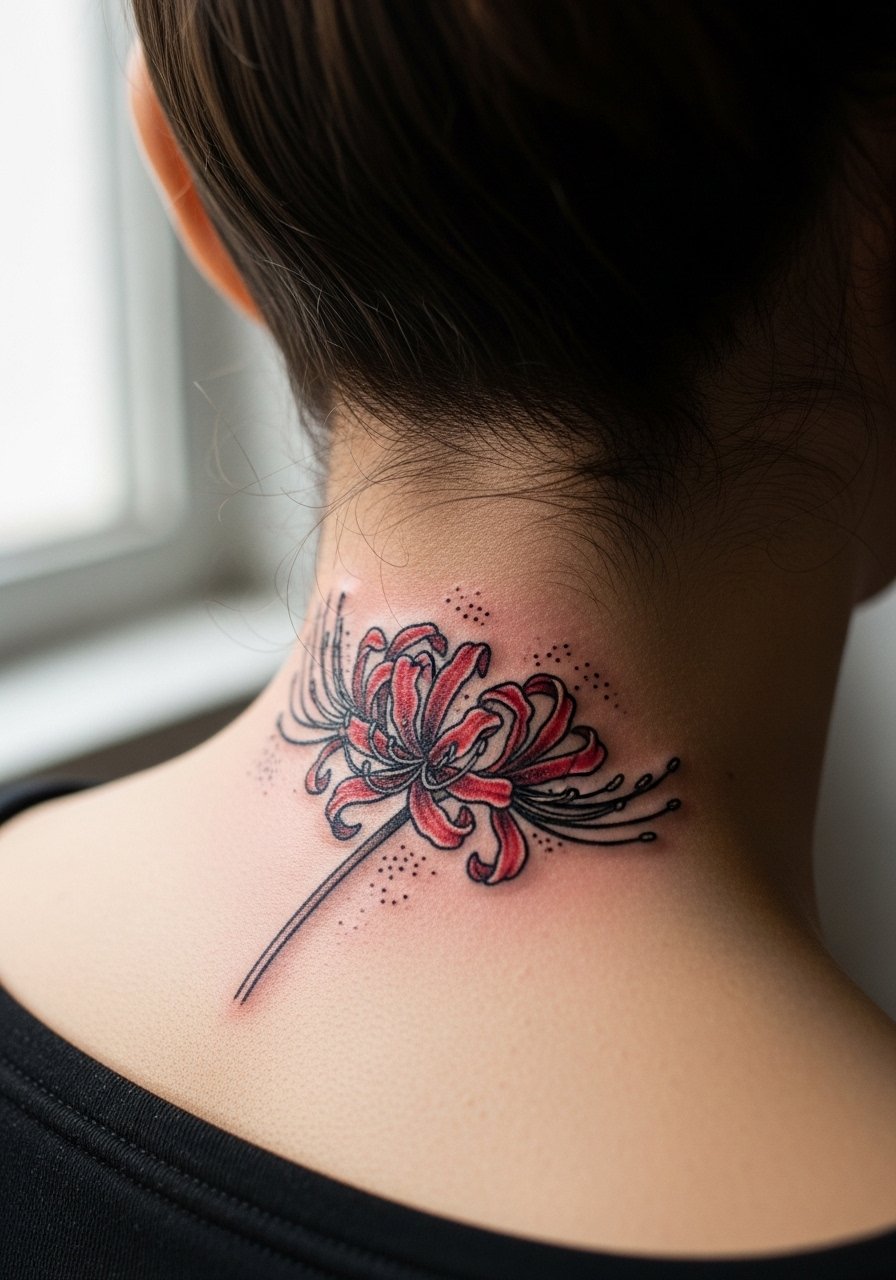
Small astronomy of petals behind the ear is a whisper of color. Because the area is tiny, prioritize simple shapes and a bold outline over micro filaments. The session is quick but the area is sensitive to earrings and hair products. If you wear heavy earrings often, mention that in consultation so placement avoids constant rubbing. This is a piece that reads nicely when hair is pulled back.
27. Custom Neo Traditional Sleeve Combining Lilies and Foliage
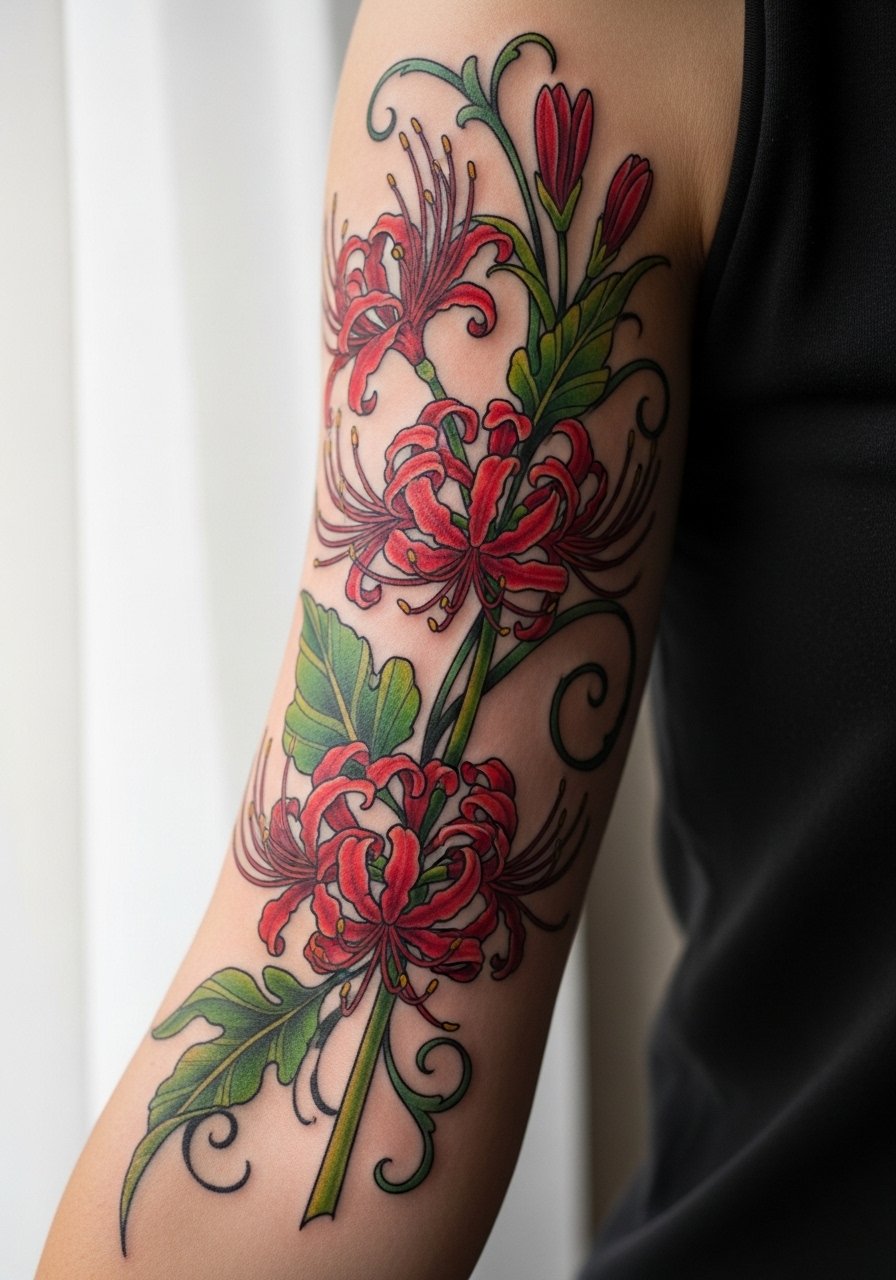
A full sleeve gives the most room to experiment with scale, layering, and negative space so each lily remains distinct. In consultation prioritize a narrative flow across the arm rather than a checklist of elements. Sessions span many appointments and touch-ups can be planned annually for saturation. A common mistake is importing too many unrelated references which breaks cohesion. For wardrobe, short sleeves or rolled cuffs display the sleeve harmoniously; a short-sleeve henley is a casual option that frames the artwork without covering it.
Frequently Asked Questions
Q: Will the fine filament details of a neo traditional red spider lily blur if I place it on my ribs or sternum?
A: It depends on spacing and line weight. Artists split into two camps. One says the stretch and motion of ribs and sternum blur fine filaments quickly. The other says proper needle depth and slightly heavier outer lines preserve detail. Ask your artist how they handle breathing areas and expect a possible touch-up around year two or three for delicate filaments.
Q: How long should I plan for sessions for a half-sleeve or full sleeve of lilies?
A: Plan multiple appointments. A half-sleeve often takes two to four sessions depending on saturation and detail. A full sleeve usually spans many sessions across months. Budget your time for layering color and an extra touch-up session several months after completion.
Q: Do neo traditional red spider lilies need special aftercare compared to other color tattoos?
A: The basics are the same, but saturated reds can show scabbing differently. Keep the area clean, avoid heavy friction, and protect healed work from sun. For the first week follow your artist's instructions and avoid tight clothing that rubs the tattoo.
Q: What should I wear to a ribcage or sternum session to make the artist's life easier?
A: Wear clothing that exposes the specific area without full undressing. For ribs a lifted cropped top or a shirt you can shift works well. For sternum a fitted sports bra or bandeau is practical. The goal is modest exposure with easy access.
Q: How often will a small wrist or finger lily need a touch-up compared to a thigh or back piece?
A: Smaller, high-friction spots like wrists and fingers typically need touch-ups sooner, often within one to three years. Thighs and backs usually retain saturation longer and need fewer early touch-ups. Your daily activities and sun exposure play a big role.
Q: Where can I find the right artist if I want the neo traditional red spider lily style but live outside major cities?
A: Use discovery pathways rather than single names. Search local studio directories, check region-specific hashtags, and look for artists posting healed images on community forums and Reddit. Also ask nearby shops about guest spots or conventions where neo traditional artists travel. Trust the portfolio that shows healed photos and similar saturation work rather than fresh photos alone.
